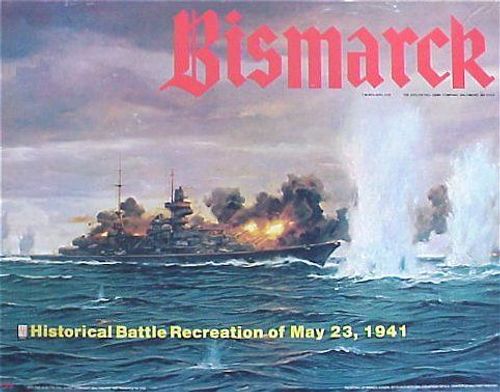
Bismarck (Second Edition)
Bismarck (Second Edition) Rulebook
Table of Contents
Table of Contents
- BASIC GAME
- INTERMEDIATE GAME
- 13.0 Introduction
- 14.0 Weather and Visibility Option 1
- 15.0 Fog
- 16.0 Fuel Expenditure
- 17.0 Refueling
- 18.0 Starting Locations in Naval Combat
- 19.0 Torpedoes in Naval Combat
- 20.0 Ammunition Expenditure in Naval Combat
- 21.0 Fuel Damage
- 22.0 Submarines
- 23.0 Destroyers
- 24.0 Convoys
- 25.0 Troop Convoy WS8B
- 26.0 Huff/Duff
- 27.0 Air Combat
- ADVANCED GAME
- 54.0 Introduction
- 55.0 Set-Up
- 56.0 Sequence of Play
- 57.0 Movement Procedure
- 58.0 Change of Speed
- 59.0 Collision
- 60.0 Gunnery Strength
- 61.0 Fire Designation
- 62.0 Gunfire Resolution
- 63.0 Damage
- 64.0 Record of Damage
- 65.0 Ammunition Expenditure
- 66.0 Withdrawal
- 67.0 Special Capabilities
- 68.0 Repairs
- 69.0 Torpedo Fire
- 70.0 Destroyers
- 71.0 Special Ship Fire Limitations
- 72.0 Conversions
- Terrain Effects Chart
BASIC GAME
1.2 Brief Synopsis of Play
The Basic Game is played in turns, each representing four hours of real time. In each turn, both players secretly move any or all ships and air units under their command on the search board. Each player may then call out zones in which he has searching ships and/or air units in an attempt to locate the opponent's ships. If an air unit locates an enemy ship in its zone, it may conduct an air strike. If opposing ships are discovered in the same zone, they may proceed to combat on the Battle Board. Ships fire simultaneously and damage is recorded on the Hit Record Pad. Play continues until the Bismarck returns to port, is sunk, or time runs out. The player who has acquired the most victory points wins the game.
2.0 Components
2.1 Parts Inventory
- Game Box and Lid
- Two Identical Search Boards
- One Battle Board
- One Sheet of Die-cut Counters
- One Set of 6 Player-Aid Cards
- Two Range Finders and Battle Maneuver Gauges
- Hit Record Pad
- Two Dice (one colored and one white)
- Rules Manual
2.2 Search Board
There are two identical search boards (one for each player) provided in the game. Each player uses a search board to maneuver his ships and air units in an attempt to locate opposing ships and convoys. All movement and location of units on the search board must be hidden from the view of the opponent. Players can either place a box-half upright between the two boards (placing one board over the box lid to hold it in place) or place each board in a different location in order to accomplish this.
Printed on each search board is a map of the North Atlantic over which the Bismarck operation occurred. The map has been divided into square zones. Each zone is approximately 90 statute miles in length. Ships may only enter or move through zones which contain a grid-coordinate (EXCEPTION: see Terrain Effects Chart). Air units may enter any zone either with or without a grid-coordinate. No unit can enter a portion of the map which does not contain a zone. Partial zones containing a grid-coordinate (and the Bordeaux air base) along the edge of the board and along some of the land borders are considered and used as normal zones. Partial zones without a grid-coordinate other than Bordeaux cannot be entered by any unit.
Each grid-coordinate is composed of one letter and one or two digits. It is used to identify that particular zone and to establish the zones which ships can enter. All significant features of the search board map are identified on the terrain effects chart found on the cover of this manual.
2.3 Battle Board
During search procedure, whenever opposing ships are discovered to be in the same zone on the search board, play may revert to the battle board, where ship to ship combat is resolved. At the start of any battle, the defending ships are placed in the center hexagon (hereafter referred to as hex). Any and all of the attacking ships are placed in any of the outermost hexes along any one edge randomly determined by a die roll.
2.4 Unit Counters and Markers
Included in the game is a sheet of die-cut counters which represent all of the major fighting ships and air units that participated in the campaign, plus some optional ships which could have been involved. Also included are different types of markers to be used as playing aids. Enough counters and markers have been provided to play the basic and advanced games. Several of the optional rules in the intermediate game require players to provide their own markers. Only those ship and air unit counters listed in each player's Basic Game Order of Appearance Chart and the markers described below are used in the basic game. All others should be placed aside. Their use will be explained in the appropriate game in which they are to be included.
2.41 Counter Identification
2.411 Search Board Ship and Air Counters. The search board counters include Ship Counters, Submarine Counters, Destroyer Flotilla counters, Long Range Reconnaissance (LR recon) Air Units, Level Bomber Air Units, Torpedo Bomber Air Units, Dive Bomber Air Units, and Fighter Air Units.
2.412 Tactical Board Ship Counters. NOTE: There are no Tactical Board Counters for submarines or destroyers.
2.413 Advanced Tactical Ship Counters (used in Advanced Game only). NOTE: All counters have a white stripe on a blue background. There are no Advanced Tactical Ship counters for submarines or destroyers.
2.414 Markers. Markers include the Task Force Number marker, the Convoy Escort quadrant marker, and the Air Unit Return to Base marker, among others described below.
2.42 Ship Counters
Each ship has a half-inch square counter that represents it on the search board. Printed on the counter is various information needed for play.
2.421 Nationality. Ship counters are printed in colors identifying nationality: Germany (white lettering on green background, front; green lettering on white background, back), Great Britain (white lettering on blue background, front; blue lettering on white background, back), France — not used in Basic Game (white lettering on red background, front; red lettering on white background, back), and United States — not used in Basic Game (gold lettering on black background, front; black lettering on gold background, back).
2.422 General Type of Ship.
- Battleship: BB — Battleship, BC — Battlecruiser, PB — Pocket Battleship (more accurately termed Armored Cruiser)
- Cruiser: CA — Heavy Cruiser, CL — Light Cruiser
- Aircraft Carrier: CV — Aircraft Carrier
- Destroyer: DD or CT — Destroyer (CT is an abbreviation for Contre-Torpilleur, a fast French destroyer) — not used in Basic Game
- Submarine: SS or UB — Submarine (UB is an abbreviation for U-Boat) — not used in Basic Game
2.423 Movement and Patrol Mode. When the front of the counter is face-up, the ship is in movement mode. When the back of the counter is face-up, the ship is in patrol mode. A ship in movement mode can move up to its maximum speed. A ship in patrol mode cannot move but has a greater search capability. Aircraft carriers do not have a patrol mode. They cannot patrol.
2.424 Search Strengths. The left-hand number indicates the ship's search capability during daylight turns. The right-hand number indicates the ship's search capability during night turns.
2.425 Name. The name of the ship.
2.426 Evasion Rating. The ship's maximum speed in knots. On the search board, the evasion rating is used to determine whether a ship can break away from a shadowing ship.
2.427 Maximum Speed. The greatest number of zones that a ship can move in one turn. No ship has a maximum speed greater than two.
The battle-board face of a ship counter also carries an anti-aircraft value, turrets, secondary armament, and the ship's name.
2.43 Air Unit Counters
There are two basic types of air unit counters used in the basic game: long range reconnaissance and bomber. The bomber air units are further divided into two sub-types, level bomber and torpedo bomber. The silhouette on the front side of the counter indicates the type of air unit that it represents.
2.431 Type. The silhouettes are: Land-Based Reconnaissance, Ship-Based Reconnaissance, Torpedo Bomber, Level Bomber, Dive Bomber, and Fighter.
2.432 All bomber air units used in the basic game have either the torpedo bomber or the level bomber silhouette on the front of the counter and either one of the reconnaissance silhouettes or nothing on the back.
2.433 All LR recon air units have the land-based reconnaissance silhouette with the word "Patrol" on the back.
2.434 Mode. All LR recon air units have a movement and patrol mode. When the front of the counter is face-up, the LR recon air unit is in movement mode. When the back of the counter is face-up, the LR recon air unit is in patrol mode. Like ship counters, an LR recon air unit in patrol mode has a reduced maximum speed but an increased search capability.
Bomber air units have an attack and reconnaissance mode (EXCEPTION: German level bomber air units do not have a reconnaissance mode). When the front of the counter is face-up, the bomber air unit is in attack mode. It can attack any located enemy ship in the same zone it is in. When the back of the counter is face-up, the bomber air unit is in reconnaissance mode. It has a greater endurance, speed and search capability, but it cannot launch an air attack. LR recon air units can never launch an air attack.
2.435 Search Strengths. Identical in function to ship's Search Strengths.
2.436 Endurance Rating. The number of turns that an air unit can remain in flight.
2.437 Maximum Speed. The maximum number of zones that an air unit can move in one turn.
2.438 Home Base. Location from which air unit operates (either aircraft carrier or land base).
2.439 # of Aircraft. This value is used only in the intermediate game and is ignored in the basic game.
2.5 Search Board Marker Information
These markers have been provided to aid in identifying location or mission of ships on the search board and are used only on the search board.
2.51 Convoy. Two British battleships are relegated to convoy escort at the start of play. A convoy marker is placed over each of the ships to identify their special assignment. The arrow indicates the direction the convoy is moving.
2.52 Task Force. Ships which are to move and have combat as a single force must be placed in a task force. A task force marker is used to identify the task force on the search board.
2.53 Shadow. A shadow marker is used to remind players which ships on the search board are being shadowed. One is placed in each zone that the shadowed ships occupy.
2.54 Location. These markers aid in tracking the position of enemy ships which have been located by search. The type symbol printed on the location counter indicates the type of ship located. Because of the great variety of ship types included in the game, only a limited number of location markers have been provided. If players need more location markers, they can either handmake them or commandeer other type markers used in the intermediate or advanced games. The number markers are especially suitable. Just write in the type symbol of the vessel being tracked on the marker.
2.6 Battle Board Ship Counter Information
Used only on the battle board. The counters have been designed to fit snugly into the battle board hexes.
2.61 Anti-Aircraft Value. Not used in the basic game.
2.62 Evasion Rating. Same value as on search board ship counter. On the battle board, the evasion rating determines the ability of the ship to withdraw from combat.
2.63 Name. Name of ship.
2.64 Turrets and Secondary Armament. Indicates the position of these gun sections on the ship counter.
2.7 Player Aid Marker Information
Used on the player aid card to keep track of time, air and ship endurance or visibility conditions.
2.8 Player Aid Materials
2.81 Each player receives a Player Aid Card corresponding to the nationality of the side he is playing. On the card is given the Order of Battle, Time Record Track, and the Visibility Tables. He also gets the Basic Game Tables card containing the Search and Shadow Tables. Optimum placement of the card is upright against the boxtop between the search boards.
2.82 Hit Record Pad. The Hit Record Pad is used to keep track of damage and salvoes available for each ship. Only one side of the hit record pad, labelled "Bismarck Hit Record Pad," is used in the basic game.
2.83 Range Finder and Battle Maneuver Gauge. These implements are used in the advanced game only.
3.0 Prepare for Play
Both players decide which game level to play. Players should become familiar with the basic game first before venturing into the more advanced games. Each player takes his player aid card with the "Basic Game" side up and places it in a convenient location out of the view of his opponent. The opponent should never be permitted to look at the player aid card at any time during the game. The players also put their basic game tables card in a convenient location. Both players punch out the ship and air unit counters that they will use and place them on the search board as detailed in the order of appearance. Only those ships and air units listed in the basic game order of appearance are used in the basic game. All of the remaining counters are reserved for the more advanced versions. A battle board counter for each battleship, cruiser and aircraft carrier is also punched out and set aside with the battle board to be used in naval or air combat. Each player takes one sheet from the hit record pad. Begin play.
4.0 Sequence of Play
BISMARCK is played in turns. Each turn is divided into several phases which must be performed in the sequence described below.
4.1 Unit Availability Phase. The British player places on the search board any ships which enter play in the current turn. Air units available from rest and refit in the current turn can be returned to their base.
4.2 Visibility Phase. The German player determines the visibility conditions for the current turn. Ships may enter into or break from task force or convoy during this phase.
4.3 Shadow Determination Phase. Either or both players may select one air unit or ship in the same zone as a located enemy ship to shadow that ship. The ship must have the same or greater evasion rating than the ship it is attempting to shadow. All ships designated for shadow must move in this phase. The Shadow Table is then utilized to determine the success of the shadow attempt.
4.4 Air Movement Phase. Any and all air units in play may move up to their maximum speed. Air units which must return to base are removed from the search board onto the Time Record Chart to be returned after a period of rest and refit.
4.5 Ship Movement Phase. Any and all ships in play which have not moved in the Shadow Determination Phase may move up to their maximum speed.
4.6 Search Phase. Each player may search every zone in which he has sufficient search capacity as determined by the visibility level for the current turn.
4.7 Air Attack Phase. An air unit in attack mode and in the same zone as a located enemy ship may launch an air attack against that ship. Air units which flew from base this turn and with remaining movement may return to base after all combat is resolved.
4.8 Naval Combat Phase. If both players have one or more located ships in the same zone, they may conduct combat between these ships on the battle board if either player wishes.
4.9 Chance Phase. The British player rolls two dice and consults the Chance Table to determine whether the Bismarck and/or Prinz Eugen locates a convoy or are themselves located by general search. At the conclusion of the chance phase, each player moves his time marker to the next turn on his time record track. This same sequence of phases is followed each turn.
5.0 Ship Activities on the Search Board
5.1 Ship Movement
5.11 A player can move all, some or none of his ship counters on the search board in a turn. A player is never required to move any of his ships in a turn.
5.12 A cruiser may move up to two zones each turn.
5.13 A battleship or aircraft carrier with a maximum speed of "2" may move two zones in non-consecutive turns. It must alternate each turn that it moves two zones with at least one turn in which it moves less than two zones.
5.14 A battleship with a maximum speed of "1" (either Rodney, Ramillies or Revenge) may move up to one zone each turn.
5.15 All movement made by battleships or aircraft carriers is subject to fuel limitations (see section 5.2). The maximum speed of any ship can be reduced due to battle damage.
5.16 A ship can move less than its maximum speed or not at all. It is never required to move.
5.17 When moving, each zone entered must be adjacent to the zone being exited. A ship counter cannot enter a zone which does not contain a grid-coordinate. There are several exceptions and they are enumerated in the Terrain Effects Key.
5.18 There are entry and exit restrictions at certain ports that prevent a ship from moving to certain adjacent zones. These restrictions are detailed in the Terrain Effects Key. German ships cannot enter a zone in the Irish Sea (these zones have black instead of white grid-coordinates), nor can German ships enter a zone containing a port in Great Britain. Otherwise, a ship can enter any zone with a grid-coordinate which is adjacent to the zone it occupies.
5.19 Any number of ships may enter and/or occupy the same zone without penalty. A ship cannot move off the search mapboard.
5.2 Battleship and Aircraft Carrier Fuel Allotment
5.21 In the basic game, cruisers are exempted from any fuel expenditure. They can move up to two zones each turn without penalty. A battleship or aircraft carrier with a maximum speed of "2" must expend one fuel factor of its fuel allotment each turn that it moves two zones.
5.22 As long as a battleship or aircraft carrier with a maximum speed of "2" has at least one unexpended fuel factor, it can move one zone each turn without any fuel expenditure.
5.23 When a battleship or aircraft carrier expends all of the fuel factors available to it, it can no longer move normally and must henceforth utilize emergency movement.
5.24 Ships in emergency movement can move up to one zone every second turn. These alternate turns are labelled "C" on the time record track. Ships in emergency movement cannot move in a turn which is not labelled "C."
5.25 A battleship with a maximum speed of "1" expends one fuel factor only if it moves one zone in a non-"C" turn. Once it expends all of its fuel factors, it can only move by emergency movement.
5.26 Each player records fuel expenditure by checking off one fuel box in the fuel section on the hit record sheet by the ship's name for each fuel factor expended. In order to insure that fast battleships and carriers do not expend fuel moving two zones in consecutive turns, it is suggested that players mark the turn number in the expended fuel box. Under no circumstance may a battleship or aircraft carrier move two zones in consecutive turns.
5.27 A ship whose speed is reduced due to battle damage still retains its original maximum speed when determining fuel expenditure. EXAMPLE: As a result of battle damage, the Bismarck's speed has been reduced to a maximum move of just one zone per turn. It does not have to expend a fuel factor every time it moves a zone in a non-"C" turn, as would the Rodney. For purposes of fuel expenditure, it is still considered to have a speed of "2," even though it can no longer move two zones in a turn.
5.28 German Breakout Bonus. In the first turn of play, each German ship may move three zones without expending any fuel, or each German ship may move four zones at a cost of one fuel factor, or each ship may move five zones at a cost of two fuel factors. Each turn thereafter they must move normally.
5.29 Aircraft carriers cannot move 2 zones in a turn that they launch air units.
5.3 Ship Patrol
5.31 All ships except aircraft carriers have the capability to patrol. Patrolling allows ships to use a higher search strength when searching for enemy ships. Patrolling also improves the chances that the Bismarck or Prinz Eugen will locate a convoy.
5.32 A ship may change to or from patrol mode each turn. Any change to or from patrol mode must be made before the ship moves (EXCEPTION: 8.24).
5.33 A ship cannot move at all while in patrol mode. It may only move when it is in movement mode.
5.34 A ship is in patrol mode only when the patrol mode side of its counter is face up.
5.4 Task Force
5.41 Either player can combine any two or more of his ships, if they occupy the same zone, into a task force in the visibility phase. There is no limit as to the number of ships which may be in the same task force.
5.42 Ships in a task force have an advantage in that they all can commence combat against enemy ships as a single group. If several ships are in the same zone with enemy ships, but are not in a task force, only one ship can initiate combat. The other ships in the zone may or may not join combat at a later time.
5.43 All ship counters that will operate in a task force are removed from the search board and replaced by a numbered task force counter. The ship counters are placed in the Task Force box on the appropriate player aid card corresponding to the number on the task force marker. There is no limit to the number of task forces the British player can organize. If he runs out of counters, he may use the ship RTB markers.
5.44 The task force marker is moved during the ship movement phase. The task force marker uses the maximum speed of the slowest ship in the task force. The task force marker's move constitutes the move for all ships in the task force. Fuel expenditure in a task force is determined independently for each ship. Ships may break from task force only during the visibility phase, before any ships begin their moves. A player has total liberty as to how he combines ships into task forces as long as they are in the same zone.
5.45 A task force can patrol at the search capability of any one ship in the task force. Flip the task force counter over to the blank side to indicate that it is on patrol.
6.0 Air Unit Activities on the Search Board
6.1 Air Unit Movement
6.11 Each player can move all, some or none of his air unit counters. An air unit can enter or pass through any zone on the map (EXCEPTION: 6.12).
6.12 No German air unit may move through two consecutive zones containing a part of Great Britain. German air units may fly over Eire.
6.13 In a turn, an air unit can move any number of consecutive zones in any direction or combination of directions up to the maximum speed printed on the side of the counter that is face up. The maximum speed of an air unit can change depending on the mode it is in.
6.14 Any number of air units may enter or pass through the same zone. The movement of air units has no effect on ship movement and vice versa. Air units cannot move off the search mapboard.
6.2 Air Endurance
6.21 Each air unit has an endurance rating which states the maximum number of turns that it may be airborne. An air unit may remain airborne for fewer turns than allowed by its endurance rating, but it may never remain airborne for more turns than allowed by its endurance rating. If an air unit cannot return to its home base by the conclusion of the last turn of its endurance, it is eliminated from play and the opponent is awarded two victory points for its loss. A player cannot elect to fly any air unit past its endurance even if he accepts the loss of victory points.
6.22 For endurance purposes, count the turn that an air unit leaves base and the turn that it returns to base as airborne turns. For example, an air unit with a maximum speed of "6" and an endurance of "2" may fly any number of zones up to six from its base in one turn but must return to that base in the next turn. Unused movement cannot be saved from one turn to the next.
6.23 Some air units have an endurance of one turn. These air units must take off and land in the same turn. Such an air unit must take off from its base in the air movement phase and return to base at the end of the air attack phase of the same turn. Its total movement in both phases cannot exceed its maximum speed. For example, a torpedo bomber air unit with a maximum speed of "5" and an endurance of "1," flies two zones from the Ark Royal during the air movement phase, launches a torpedo attack during the air attack phase and returns three zones to the Ark Royal, which has moved one zone away in its move, at conclusion of the air attack phase. Players also have the option to fly air units with an endurance greater than 1 for just one turn.
6.24 Air Unit Endurance markers have been included as an aid in tracking the number of turns that LR recon air units (these have great endurance) can remain airborne. When an LR recon air unit flies from its base, the corresponding "Return to Base" marker is placed on the time record track on the turn that the unit must return to base.
6.3 Reconnaissance and Patrol
6.31 British Bomber air units have both an attack and reconnaissance mode. Each time that a British bomber air unit takes off from its base, the British player must decide in which mode it will operate for its entire mission in the air. Once aloft, the mode of a British bomber unit cannot be changed. The mode in operation is indicated by putting that side of the counter face up. Only bomber air units in attack mode can launch an air attack. British bomber air units, in reconnaissance mode, have an improved search and speed capability but cannot launch an air attack.
6.32 LR recon air units can never launch an air attack. Instead of an attack mode, they have a patrol mode. Like ship patrol, an LR recon air unit can switch to or from patrol mode any or every turn it is in the air by placing the proper side of the counter face up. Any change to or from patrol mode must be made before the unit moves during that turn.
6.33 NOTE: While in patrol mode, the maximum speed of the LR recon air unit is reduced to "2," but its search capacity is increased.
6.4 Air Unit Rest and Refit
6.41 Every air unit which returns to base after completing its air mission must undergo a period of rest and refit before it can return to action.
6.42 An air unit that has been airborne and returns to its home base must remain out of play for the next turn for rest and refit. For example, an air unit returns to its home base during the "0800, May 23" turn. It must spend the "1200, May 23" turn in rest and refit. It can return to action on the "1600, May 23" turn. The controlling player removes the air unit from the search board and places it on the "1600, May 23" slot on his Time Record Track. During the Unit Availability Phase of the "1600, May 23" turn, the air unit is returned to its home base and can be flown that same turn.
6.43 An air unit may not take off or land at any other base other than its home base.
6.44 After rest and refit, an air unit must be returned to its home base.
6.45 Rather than keeping carrier-based air units physically with their home carrier, they are better placed in Spain or Greenland to reduce counter congestion. Just remember that their true location is with their home carrier.
7.0 Search
7.1 Visibility
7.11 Each turn during the visibility phase, the German player determines, by dice roll, the visibility level for that turn. This visibility level determines which zones can be searched for enemy ships.
7.12 On both player aid cards is printed a visibility track comprising nine levels of visibility. Each level is displayed as a square. The number in each square represents the minimum search strength able to search a zone at that visibility level. For example, during the visibility phase, the German player determines that the visibility level for that turn is "5." Both players can search only those zones in which they have ships and/or air units whose total combined search strength is "5" or higher.
7.13 At the start of the game, both players place a visibility marker on level "4" on their visibility track. The British player will have to use the blank marker. Hereafter, any change in weather is based upon the current position of the marker on the track.
7.14 During the visibility phase of each turn, excluding the first turn of the game, the German player rolls two dice, cross-indexing their sum on the Visibility Change Table and moves the visibility marker forward or back along the visibility track the number of boxes equal to and in the direction indicated by the result. The result is the visibility level for the turn in progress. On the first turn of play the visibility level is automatically level "4."
7.15 If the visibility change would force the visibility marker off the end of the visibility track, the visibility marker remains at the end box of the track and the excess is ignored.
7.16 Underneath several of the extreme visibility boxes are modifiers to the visibility change dice roll. If a visibility marker is in one of these boxes at the start of the visibility phase, the dice roll for visibility change for that turn is altered by that modification. For example, if the visibility marker is at level "7" at the start of the visibility phase and the German player rolls a "7" for his visibility change dice roll, the dice result is changed by +1 from "7" to "8."
7.17 Visibility level "x" means that no search can be made in the turn.
7.2 Search Procedure
7.21 During the search phase, the British player may call out any and all zone grid-coordinates in which he has ships, air units and/or coastal search capability whose total combined search strength equals or exceeds the visibility level.
7.22 After the British player has completed his search, the German player may call out any and all zones by grid-coordinate in which he has ships, air units and/or coastal search whose total combined search strength equals or exceeds the visibility level.
7.23 As each zone is called, the opposing player must state whether or not any ships (never air units) are in the zone in that turn. After the first turn, the German player only must also state whether any of his ships have passed through the zone in that turn. If ship(s) are located, the opponent must state the number and general type (either battleship, aircraft carrier or cruiser) of all ships in the zone. He must also reveal which types are in the same task force. For example, the German player searches a zone which contains the Hood and the Prince of Wales in task force and the Suffolk and Kenya on patrol. The British player states that there are two battleships in a task force and two cruisers in the zone.
7.24 If a search is successful, the searching player does not have to state the type of searching force which located it. He reveals nothing.
7.25 Search is voluntary. A player can waive any and all of his eligible searches.
7.26 When totalling search strength in a zone, the searching player must check whether the current turn is day or night. The left-hand search strength on the counter is used only in the day turns. The right hand strength on the counter is used only in the night turns. Never count the search strengths of ships in a task force. Use only the search strength on the task force counter. If the task force is on patrol use only the patrol search strength of one ship in the task force. The search strengths of all other ships in the task force must be ignored.
7.27 The British player has an inherent search strength of "4" search points in each of the zones occupied by the Faeroe Islands, Shetland Islands, the coast of Ireland, the coast of Great Britain and Hvalfiord. The German player has an inherent search strength of "4" search points in each of the zones occupied by the coast of Norway and France. All coastal search strengths are reduced to "3" at night.
7.28 An air unit can only search the zone that it occupies. It cannot search any of the zones through which it moves.
7.29 Ships in port cannot be located by sea search nor by a combination of air and sea search. They can be located by air search only.
7.3 Fog
7.31 When determining the visibility level each turn, both players check whether the visibility change dice roll, including any modification, will also result in fog. If there is fog, the visibility marker is adjusted normally, but neither player can conduct a search in any fog zone that turn. Search can be conducted normally in any and all non-fog zones.
7.32 Fog occurs automatically in the first turn of the game. Bergen, therefore, cannot be searched in the first turn.
7.33 No type of combat (naval or air) can occur in a zone in fog.
8.0 Shadowing
8.1 Shadow Determination
8.11 Only the British player has the ability to shadow opposing ships or task forces (never air units) located by search or shadow in the previous turn. A ship or task force that is selected for shadow must make its move (if any) before the shadow attempt is resolved and then reveal its new position if the shadow is successful. The opponent can then react to the shadowed ship's move with his air and ship movement.
8.12 To determine whether a ship can be shadowed each turn, a player must perform the following steps in the shadow determination phase:
a. Determine shadow assignment b. Determine evasion capability c. Determine contact maintenance
8.13 For each opposing ship or task force to be shadowed, the British player may assign one ship (excluding aircraft carriers), task force or air unit in the same zone as a shadow unit. There can never be more than one unit shadowing a single ship or task force. A shadowing unit cannot search in the same turn.
8.14 If the shadowing unit is a ship, its current evasion rating must be equal to or greater than the current evasion rating of the ship or the slowest ship in a task force to be shadowed. If it is not equal to or greater than the shadowed ship's evasion rating, the ship cannot shadow. If the shadowing ship is in a task force, all ships in the task force must be faster than the shadowed ship or task force. If it is not equal or greater than the shadowed ship or task force evasion rating, the ship or task force cannot shadow. The British player may then select another ship or task force in the same zone to shadow. Air units do not have to check evasion rating. The two conditions required to assign an air unit as a shadow is that it must be able to remain in the air during that turn and that it, alone, must be capable of conducting a search in the turn it is shadowing. For example, an LR recon air unit in patrol can only shadow in day turns when the visibility level is "6" or less, or night turns when the visibility is "3" or less.
8.15 Once the shadowing unit or task force has been selected, the ship to be shadowed makes its move for the turn, then either player rolls one die and cross-indexes the result with the shadowing unit's name on the shadow table. If the result is "Lost Contact" the shadow does not succeed. If the result is "Hold Contact," the unit is successfully being shadowed, and its new location must be revealed. The shadowing player does not have to reveal the names or types of ships conducting the shadow.
8.16 A player must reaffirm all shadow contacts each turn. Even if an opposing ship was successfully shadowed in a previous turn, the shadow table must still be consulted in the current turn to determine whether contact has been maintained. If a player requests to shadow a task force which has broken up in the visibility phase, the opponent must reveal which ships (by general type) have left the task force.
8.17 The current visibility can affect the Shadow Table die roll as explained in the Shadow Table.
8.18 If the controlling player has moved the ship or the task force being targeted for shadow through two zones, he must announce it before the Shadow Table is consulted. The Shadow Table die roll must then be reduced by "1" for that ship or task force.
8.19 A ship or air unit is not required to follow the ship it is shadowing in its movement phase.
8.2 High Speed Shadow
8.21 High speed shadow can occur only if a successful search is conducted by the British player in the first of two zones entered by an opposing ship or task force in its move. If, during the Search phase, the British player locates a ship which has passed through the zone he is searching, he may immediately attempt to shadow the ship or task force with one of the ships, task forces or air units that can qualify for shadow in the zone. The shadow can be attempted even if the ship or task force has been located in the other zone of its move.
8.22 The shadowing player uses the same procedure described in 8.15 to determine the success of the shadow. The ship to be shadowed still gains a "1" for the two zone move on the Shadow Table die roll.
8.23 If the shadow is successful, the shadowed ship or task force must reveal its final location, if not already known, and any and all British ships and air units in the search zone which have not utilized their maximum movement and which are not in emergency movement may move the one zone into the shadowed ship's zone. Fast battleships and aircraft carriers must be able to expend one fuel factor to enter the zone if this would be the second zone of their move.
8.24 A ship on patrol may immediately change to movement mode in order to follow the shadowed ship. If it is a battleship or aircraft carrier on patrol, then it must be able to expend one fuel factor to move.
9.0 Combat
9.1 Air Combat
9.11 Every bomber air unit has the ability to attack any of the ships located by search in the zone that it occupies. LR recon air units cannot perform air attacks.
9.12 Air units cannot attack enemy air units. Air units cannot be eliminated in combat. Air units are eliminated only if they are unable to return to base.
9.13 A bomber air unit can launch an air attack only if it has started its mission in the attack mode. If the bomber air unit has flown from base in reconnaissance mode, it cannot change to attack mode and cannot launch an air attack. Bomber air units cannot attack ships in enemy ports.
9.14 All air attacks are conducted during the air attack phase after all search has been completed, but before any naval combat is begun.
9.15 The British player conducts any and all air attacks that he wishes to make first. Then the German player does the same.
9.16 Each British bomber air unit is allowed to make two strikes each day turn. Each German bomber air unit is allowed to make one strike in a day turn. Air units are not allowed to make an air attack at night. A British bomber air unit can assign its two strikes to one ship or assign one strike each to two different ships of his choice.
9.17 To resolve air combat, the defending player places the battle counter of each of his ships in the zone under attack face down on the battle board. The attacking player assigns the strikes he has available in that zone in any manner he wishes. For each strike, he rolls two dice and consults the proper Bomber Table on the battle board for the result.
9.18 Any damage inflicted takes effect immediately and is recorded for that ship on the hit record sheet. If damage is inflicted, the name of the ship must be revealed to the attacking player so that he can maintain a record of damage on his hit record sheet. If no damage is inflicted, the name of the ship does not have to be revealed.
9.2 Naval Combat Determination and Set-Up
9.21 When opposing ships have been located in the same zone, naval combat may occur at the option of one or both of the players. More than one naval action can occur in the same zone in the same turn. Naval combat is voluntary. A ship or task force can only attack enemy ships in the same zone.
9.22 A player cannot initiate combat against an enemy ship or task force if his ships in the zone are not permitted to attack it.
9.221 Aircraft carriers may never attack enemy ships.
9.222 A ship or task force may not attack an enemy ship or task force if its current evasion level is less than that of the enemy unless the opponent accepts the combat. When a task force is attacking, its current evasion level is that of the fastest ship. The evasion level of a defending task force is that of the slowest ship contained.
9.223 A ship or task force cannot attack an enemy ship or task force if it has already been committed to another combat action.
9.224 A shadowing ship or task force may only attack the ship or task force it is shadowing.
9.23 A player may announce attacks against only those ships and task forces that he located that turn by search or shadow. The British player always announces his attacks first.
9.24 When announcing his intention to initiate naval combat, a player must attack each single opposing ship (i.e. not in task force) or task force separately. A single ship or task force cannot be involved in more than one naval combat in the same turn. Both players must also announce the current evasion levels involved. The names of the ships do not have to be revealed.
9.241 When a player has a choice of more than one enemy single ship, or task force to attack, he announces the general type of ship that he wishes to attack. Task forces are identified by the most powerful ship contained in the following order: battleship, cruiser and, lastly, aircraft carrier. If a check of evasion levels still permits a choice of target of the named type, the ship or task force to be attacked must be determined randomly (just pull the search counter out of a cup).
9.242 When a player has a choice of more than one single ship or task force with which to attack, he must state the type he wishes to use. If there is still more than one ship or task force of that type, he must select one randomly.
9.25 All other ships not involved in combat can enter combat at a later time as a reinforcement.
9.26 In the rare occasions where both the Bismarck and the Prinz Eugen are in the same zone but not in task force, there is a possibility that both can be involved in separate combat actions. If this occurs, assume that the separate actions are occurring simultaneously even though they are to be resolved sequentially. The ship or task force selected for one action cannot participate in the other. The first action selected must be the first action fought. The second combat action cannot be started until the first combat action is completed.
9.27 Ships cannot break from task force in the naval combat phase. When determining combat, task forces must be treated in single units. Once a task force has been committed to naval combat though, not all of the ships contained have to participate as explained below.
9.271 If a task force contains an aircraft carrier, the carrier does not have to participate in combat as long as at least one other ship in the task force does join in combat. The only way to guarantee attacking an aircraft carrier is to catch it alone.
9.272 If a task force contains one or more ships whose evasion levels are higher than those of all opposing ships, then any or all of those ships may avoid combat providing at least one ship whose evasion level is the same or higher than the fastest opposing ship remains to fight. The escaping ships may enter combat in a subsequent round at the controlling player's option. They must enter the battle board from the side opposite that entered by the enemy or (if part of the attacking force) along the side selected at the start of combat.
EXAMPLE — Combat Determination: The British player has successfully shadowed the Bismarck with the heavy cruiser Suffolk. He moves the Suffolk into the Bismarck's new location along with a task force containing the battleships Hood and Repulse, the cruisers Norfolk and Kenya, the aircraft carrier Victorious and a lone battleship King George V. The German player moves the Prinz Eugen and a couple of air units into the same zone. The visibility level is "6," so only the German player has sufficient strength to search. He calls out the zone and the British player announces that he has in that zone two battleships, two cruisers and an aircraft carrier in task force and a cruiser and battleship not in task force.
9.28 Naval combat is conducted in the naval combat phase on the battle board. The defending player always places his ships first in the center hex of the battle board. The attacking player then places his ships in any of the hexes of his choice along one edge of the battle board. The attacking player rolls one die to determine which edge of hexes he must use to set up.
9.281 No more than two friendly ships may be placed in one hex. If the defending player has more ships than can be placed in his starting hex, the additional ships may be placed in any hexes adjacent to his starting hex.
9.282 A ship must always be positioned throughout combat so that its bow points toward one of the six hex sides forming the hex it occupies. A ship may never point its bow toward a corner of the hex — that placement is illegal, and the opponent realigns the bow to point toward one of the two adjacent hex sides. All ships on the same side must point in the same direction at the start of combat.
EXAMPLE, continued: The British player chooses to attack the Bismarck, which he has successfully shadowed, with his battleships. (He is not allowed to attack the Bismarck with his aircraft carrier.) Since he has some battleships in task force and another battleship by itself, he must select randomly the ship or task force that will initiate combat against the Bismarck. Both may initiate combat since their evasion levels are identical to the Bismarck's. The British player blindly selects the King George V to initiate combat. Only that ship can start combat against the Bismarck. The Hood, Repulse, and cruisers can enter combat at a later time as a reinforcement if not attacked by the Prinz Eugen. Note that if the task force had been picked, both the Hood, the Repulse and any or all of the cruisers could have attacked the Bismarck.
The German player decides to attack with the Prinz Eugen. He can attack the remaining battleship (remember the task force is identified as "battleship" since that is the strongest type of ship it contained), or the cruiser. He chooses to attack the cruiser. As the British player has only one cruiser type available (the Suffolk) this ship must defend against the Prinz Eugen. Since the ships were selected for the Bismarck combat action before the Prinz Eugen combat action, the Bismarck battle must be conducted first.
9.3 Naval Combat Procedure
9.31 Naval Combat is conducted in rounds. In each round, any and all ships may move one or two hexes. Each ship moves within a specific sequence, starting with the ship with the lowest evasion rating and finishing with the ship with the highest evasion rating. If two or more ships have the same evasion rating, the attacking ships move first before the defending ships. After all movement has been completed, enemy ships may fire at one another. Upon completion of all fire, one or both sides may attempt or agree to disengage, after which withdrawing ships make a bonus withdrawal move. This completes one round.
9.32 Within one naval combat phase, players may fight any number of rounds. The naval combat phase is over only when all of one player's ships involved in naval combat have been sunk or have been successfully disengaged.
9.33 None of the survivors of a naval combat action can participate in any other action in the same turn. They must wait until the next turn to recommence combat.
9.4 Reinforcements
9.41 At the conclusion of the third round of battle, and every round thereafter, either or both players, if they have qualified ships in the zone available to enter combat, may roll for reinforcement. For each individual ship or task force to enter, the controlling player rolls one die. A result of "1" permits it to enter combat in the next round. For each subsequent attempt for that particular ship or task force an additional "1" can be subtracted from the die roll.
9.42 When reinforcements enter, the controlling player must roll a die to determine along which edge of hexes he may place the reinforcing ship or ships. All reinforcing ships from the same task force must point in the same direction. The reinforcing ships must be at least six hexes away from all enemy ships.
9.43 Only those ships that can attack at least one enemy ship in the naval action may enter as reinforcements.
9.44 A ship or task force which is able to enter as a reinforcement may delay its entry. It can enter in any subsequent combat round at the controlling player's option. A player is never required to bring reinforcing ships into battle.
9.45 If there are two separate naval actions occurring in the same zone, a player must record on paper each potential reinforcing ship and task force to either of the naval actions before any combat begins. A ship or task force which is committed to reinforce one naval action cannot reinforce the other naval action.
EXAMPLE: From the previous example, the British task force containing the battleships Hood and Repulse, the cruisers Kenya and Norfolk and the aircraft carrier Victorious can legally enter as a reinforcement into either the naval action against the Bismarck or the naval action against the Prinz Eugen. Before any combat begins, the British player must record which naval action the task force is to reinforce.
9.5 Naval Combat Movement
9.51 In each combat round, a ship may move two hexes, one hex or not at all depending upon its current evasion level.
9.52 Ships are also allowed to change the direction in which they are moving depending upon their current evasion level. A change of direction is defined as changing the direction of a ship's bow to point toward either one of the two hex sides adjacent to the one its bow is currently pointing.
9.53 The movement and turning capability of ships on the battle board are displayed in the Combat Movement Chart shown below. Note that at certain evasion levels, a ship has a choice of moves and turns that it can make. For example, a ship with an evasion level of 28 can move ahead two hexes and make up to one change of direction; or it can move just one hex and make up to two direction changes; or it can not move at all and make up to three direction changes.
Movement on Battle Board — Current Evasion Rating
| Evasion Rating | Movement and Direction-Change options (hexes moved / direction changes per round) |
|---|---|
| 0 | 0 hexes / 0 direction changes |
| 1-3 | 0 hexes / 1 direction change |
| 4-10 | 1 hex / 0 direction changes, or 0 hexes / 1 direction change |
| 11-17 | 0 hexes / 2 direction changes, or 1 hex / 1 direction change |
| 18-24 | 0 hexes / 2 direction changes, or 1 hex / 1 direction change, or 2 hexes / 0 direction changes |
| 25-29 | 0 hexes / 3 direction changes, or 1 hex / 2 direction changes, or 2 hexes / 1 direction change |
| 30+ | 1 hex / 3 direction changes, or 2 hexes / 2 direction changes |
9.54 A ship is never required to move or make any directional change. It may complete none or part of its move without penalty.
9.55 A ship may never move into a hex occupied by an enemy ship.
9.56 A player may physically move a ship counter off of the battle board or start reinforcing ships off the battle board. In this situation, all ships in play must be shifted the same number of hexes in the same direction to return the ship to the battle board. In those rare cases where it is impossible to fit all ships on the battle board, extend an imaginary field of hexes outward around the board. Position and move the ships in these imaginary hexes.
9.6 Naval Fire Designation and Resolution
9.61 In each round, after any and all movement, a ship may fire at any enemy ship within "A" or "B" range. A ship that is one, two or three hexes from a firing ship is in its "A" range. A ship that is four, five or six hexes from a firing ship is in its "B" range. A ship which is seven or more hexes from a firing ship is beyond its firing range and cannot be attacked by the ship.
9.62 Fire for each ship is resolved individually. A ship may fire at more than one enemy ship. A player must designate the number of salvoes each of his ships intends to fire at enemy ships before resolving any fire. The firing procedure for one ship must be completed before the designation and resolution of fire for another ship is begun. If a ship is sunk before all fire directed at it has been resolved, the remaining salvoes designated against it are lost. The defending ship(s) always fire after all attacking ships have completed their fire.
9.63 Every ship has four gun sections, each of which has a certain sector of hexes into which it can fire. The Sector Diagram illustrates each gun section and the hex sector into which it can fire. A gun section cannot fire any of its salvoes at a target that is not in its sector. The two secondary armament gun sections are further limited in that each section may only fire at a target in its sector in "A" range. It cannot fire at a target in "B" range. Only bow and stern turret gun sections can fire at targets within sector in "A" and "B" ranges.
9.64 To determine the total number of shots that a ship can fire at a specific target ship, a player first has to total the salvoes for each gun section that can fire at the target. In the log pad, four groups of gun boxes are printed beside each ship's name which correspond to, and are labelled by, gun section. In each box is a salvo number indicating the maximum number of salvoes that that gun section can fire. If there is a zero in a gun section box, that gun section has no fire power.
9.651 When a ship fires at an enemy ship more than one hex away, its total salvo count targeted for that ship must be halved (rounded DOWN). This is the number of shots that the ship can fire. For example, the Bismarck is firing all of its guns at a ship two hexes away. The number of shots the Bismarck can fire is eight (half its total salvo count of 17).
9.652 A ship does not halve its salvo count if firing at a target ship occupying the adjacent hex. In this case, the number of shots it can fire is equal to its salvo count.
9.66 For each shot fired, the attacking player rolls two dice and cross-indexes the result with the proper range and field of fire column on the battle board. The result is either a miss which causes no damage, or a hit which is directed at a specific gun section or at the ship's midships.
9.67 The correct field of fire column to be used is determined by selecting one of the diagrams that corresponds to the attitude of the firing ship to the target ship.
9.68 Naval Combat fire is never blocked by other ships. A ship can always fire at an enemy ship within range.
9.7 Damage
9.71 Record of Damage
9.711 All hits received are recorded on the Hit Record sheet in the proper section indicated in the damage results. Hits are always marked off from left to right so that the gun boxes with the highest salvo count are marked out first. Note that as gun hits are acquired, a ship's salvo count is reduced. As an example, the Bismarck has received two port secondary hits, two bow turret hits, and three midships hits after one round of combat, and marks these off on its Hit Record sheet accordingly. (The Bismarck's printed record shows separate box rows for port secondary armament, starboard secondary armament, stern turrets, bow turrets, a midships ammunition track of 14 boxes, and an evasion rating of 29.)
9.712 When a hit result states either "Consult Special Damage A" or "Consult Special Damage B" the attacking player rolls again for that shot on the appropriate Special Damage Table.
9.713 All Naval Combat fire is considered simultaneous. Damage does not take effect until all combat fire for the round has been resolved. For example, the Bismarck starts out with a bow turret salvo count of seven. If two bow turret hits are acquired in the first round, the Bismarck still may count seven salvoes for the bow turret in the first round; however, in the second round, the Bismarck would get only five salvoes for the bow turret.
9.714 A ship is not sunk until every midships box has been marked out. For example, it takes ten midships hits to sink the Bismarck, six midships hits to sink the Rodney, etc. If a ship is sunk before the combat round is over, it still rolls its full number of shots for that round. When a ship other than the Bismarck is sunk, it is removed from the game. When the Bismarck is sunk, the game is over.
9.715 To record damage without losing count of the available salvoes for the current round, the following system should be used. For damage received in the current round, mark a slash (/) in the appropriate gun section boxes. After all fire has been completed for the round, change each slash to an "X."
9.716 A port secondary box can only be hit by a ship firing on the target ship's port side. A starboard secondary box can only be hit by a ship firing on the target ship's starboard side. If a ship is firing directly into a target ship's bow or stern, both the port and starboard secondary box can be hit.
9.717 A hit scored on a gun section that has been completely knocked out is treated as a midships hit, instead. For example, the Hood has already received one hit to its port secondary box. The Bismarck, firing from the Hood's port side, gets another secondary hit. Since the hit cannot be recorded on the starboard secondary box and there are no unmarked boxes remaining for the port secondary gun section, the secondary hit must be recorded as a midships hit.
9.72 Damage to Evasion Rating
9.721 As a ship receives damage there is a possibility that it will also incur a reduction in its evasion rating. The reduction can be either temporary or permanent.
9.722 Anytime a ship receives a hit result either by air or naval combat which states "REDUCE EVASION LEVEL BY X AMOUNT," it must reduce its current evasion by the amount specified. This reduction is permanent and cannot be repaired.
9.723 For each midships hit that a ship receives, even if it also receives permanent evasion damage in the same result, the current evasion rating is reduced, depending upon type. This reduction is temporary and can be repaired.
9.724 The Bismarck reduces its evasion level by "1" for every midships hit received. All other battleships and aircraft carriers reduce their evasion level by "2" for every midships hit received.
9.725 The Prinz Eugen reduces its evasion level by "3" for every midships hit received.
9.726 All cruisers reduce their evasion level by "5" for every midships hit received.
9.727 There is space to keep a record of the current evasion level for each ship on the Hit Record sheet.
9.728 In any turn in which a ship moves either one zone or not at all on the search board, it may attempt to repair lost evasion rating factors by rolling one die on the Evasion Rating Repair Table. Repair can only be done immediately upon completion of all movement in the ship movement phase. Midship boxes are NEVER repaired.
Evasion Rating Repair Table
| Die Roll | Number of Evasion Factors Regained |
|---|---|
| 1 | 0 |
| 2 | 0 |
| 3 | 2 |
| 4 | 4 |
| 5 | 6 |
| 6 | 8 |
9.729 A ship whose current evasion level is between "16" and "24" inclusive, must utilize a maximum speed of "1" on the Search Board. A ship whose current evasion level is between "7" and "15" inclusive must move by emergency speed. A ship whose current evasion level is "6" or less cannot be moved. It may be towed by a battleship, by a ship of the same type, or any two ships. All ships involved in the tow must be placed in task force and must move at emergency speed.
9.8 Special Combat Fire Restrictions
9.81 The Rodney has no stern turrets. It does have a third bow turret, but it is positioned so that it can fire only into the port and starboard secondary armament sectors out to "B" range. On the Hit Record Pad, the third bow turret is located with the stern turrets. It is treated as a bow turret when taking damage. For each stern turret hit from broadside the Rodney receives, the British player rolls one die. A result of "1" or "2" converts the hit to a bow turret hit to either bow gun section. A result of "3," "4," "5" or "6" converts the hit to a bow hit that must be taken by the third turret. When firing at the Rodney's stern, all stern hits are treated as a secondary hit.
9.82 The Rodney must fire its stern turret at half strength (rounded down) if it also fires its main bow turret at a target in A range. The stern turret can always fire at least one shot.
9.83 In each round that the Prince of Wales or King George V fire their guns, there is a chance that one of the gun sections will be unable to fire. A die roll of "1," "2" or "3" results in no penalty to fire. A die roll of "4," "5" or "6" forces either the bow or stern turret gun section to reduce its salvo count to half strength (rounded down). If there is a strength reduction, second die roll of "1," "2" or "3" forces the bow turret to reduce its salvo count and a "4," "5" or "6" result forces the stern turret to reduce its salvo count.
9.84 Cruisers must always use Special Damage Table A when receiving special damage, regardless of the range. If the result is Special Damage "B," use Table A in the same manner as Hood, Repulse and Renown.
9.9 Withdrawal
9.91 Attempts to disengage and withdraw ships from combat can occur only at the end of a naval combat round after all combat fire for that round has been resolved.
9.92 If both players agree to withdraw all of the ships involved in combat, the naval combat phase is immediately over and the players proceed to the next phase.
9.93 If only one player wishes to withdraw, or if both wish to withdraw some of their ships, each may do so with any ship whose evasion level is higher than every opposing ship of the same or larger general type within six hexes of it, i.e., a cruiser cannot prevent a battleship within six hexes of it from withdrawing.
9.94 At the beginning of each round, including the first round, players state which of their ships intend to withdraw. Blank counters are placed on top of withdrawing ships. Those ships whose evasion levels are reduced below that of opposing ships within six hexes cease to be in withdrawal status and lose their blank counters.
9.95 At the end of each round, all ship counters with blank counters MUST move one additional hex after the conclusion of all combat. The bonus move is the same as a normal combat move except that the withdrawing ship cannot change its direction in the hex it exits. It may change its direction one hex side in the hex that it enters.
9.96 Both the normal combat move and the bonus move of a withdrawing ship must be made so that the ship never moves closer to an enemy ship than it presently is, unless it is impossible to do otherwise.
9.97 If, at the end of any bonus move, a withdrawing ship no longer has any enemy ship within six hexes of it, then it has successfully withdrawn from combat. Its counter is removed from the battle board and it cannot be involved in any other naval combat for the remainder of the turn.
9.98 While withdrawing, a ship has all of its shots for each gun section halved (rounded up). If a gun section has already been halved, halve (rounding up) whatever remains.
9.99 A ship may voluntarily withdraw but once in the process of withdrawal, a ship may NOT voluntarily disengage from the withdrawal effort.
10.0 Chance Phase
10.1 At the end of each turn, the British player must roll two dice for each German ship and consult the Chance Table. The first dice roll always applies to the Bismarck or to both German ships, if in task force. The second dice roll always applies to the Prinz Eugen when not in task force. Many times when the Prinz Eugen is in task force with the Bismarck, there may seem to be no need for the British player to make a second dice roll. It should be made anyway, so as not to reveal the Prinz Eugen's position in relation to the Bismarck.
10.2 There are three types of results that appear on the Chance Table: General Search; Huff-Duff; or Convoy Location.
10.21 If the result is a set of three numbers, the German ship must reveal its current position to General Search if the three conditions enumerated below are fulfilled:
10.211 The ship is in a zone in or east of the line of zones identified by a white circle and in, or south of, zone row E. This area is defined as the British patrol line.
10.212 The current visibility level is equal or less than the number to be applied.
10.213 The ship is not currently in a fog zone in a turn in which fog occurred.
10.214 Which of the three numbers applies depends upon the ship's location. If the ship is in or within two zones east of a white circle zone, the left-most number in column "A" is used. If the ship is within two zones of the coast of Great Britain, Eire, or the Shetland Islands, the right most number in Column "C" is used. If neither of these two cases apply, the center number in column "B" is used.
10.22 If the result is Huff-Duff, it is assumed that the ship in question has issued a radio message which the British have traced back to its source through its Huff-Duff radio tracking equipment. The German player must announce one zone grid-coordinate. This grid-coordinate must either be in the zone that the ship currently occupies or in one of the six zones adjacent to it.
10.23 When the result is a possible located convoy, the German player gets victory points for destroying the convoy if the ship or task force in question meets the following two requirements:
10.231 The ship or task force has been neither successfully shadowed nor located by search in the current turn.
10.232 The ship or task force is at the location and mode required to locate the convoy.
10.24 There are two lines emanating from Great Britain and labelled either Atlantic or Africa Convoy. If a ship is to be on route to locate a convoy, it must be in a zone containing one of these lines. If a ship is to be one zone from route to locate a convoy, it must be in a zone adjacent to one containing a convoy line. It cannot be on the route. If a ship is to be within two zones of a convoy route, it can be either on route, one zone from route or two zones from route.
10.25 If a German ship qualifies in locating a convoy, and the German player wishes to receive victory points for destroying it, he states the name of the ship or ships involved and their current location. The ship or ships cannot move on the search board in the next turn. If the German player does not wish to attack the convoy, he says nothing and play proceeds to the next turn.
10.26 Only one convoy can be destroyed each day.
11.0 Time
11.1 Night
11.11 Across the search board runs the 55° line. The "2000" turn in any zone south of the 55° line is a night turn. The "2000" turn in any zone north of the 55° line is a day turn. The "2400" turn is always a night turn.
11.12 Ships involved in naval combat during a night turn can only fire at opposing ships in their "A" range. They must use the "B" range combat tables for all combat fire during night turns. Air units cannot launch an attack at night.
11.13 When consulting the Chance Table for a ship in a night zone, only the Huff-Duff result is recognized. There can be no general search or convoy attacks in a night turn.
11.2 Time Record
11.21 Each player records the passage of each turn by moving his time marker to the next turn.
11.22 After all phases of a turn have been completed, the turn is over and the time marker is moved to the next turn.
11.23 In the Basic Game, time starts at the "1200 May 22" turn and must end upon the conclusion of the "1200 May 27" turn.
12.0 Victory Conditions
12.1 The Basic Game ends when one of the following five situations occur.
12.11 The Bismarck is sunk.
12.12 The Bismarck enters any one of the ports of Trondheim, Bergen, Brest or St. Nazaire.
12.13 The German player has accumulated more points than it is possible for the British player to score.
12.14 Play has reached the time limit.
12.2 At the end of play, both players total up the number of victory points gained as listed on the Victory Point Schedule. The player with the highest total is declared the winner. In the event that both players have the same amount of victory points, the game is a draw.
12.3 British Victory Point Schedule. The British player accumulates victory points for the following events as they occur.
12.31 Sinking the Bismarck — 30 points. Sinking the Prinz Eugen — 10 points.
12.32 Bismarck enters a friendly port with at least one midships hit — 6 points. Prinz Eugen enters a friendly port with at least one midships hit — 2 points.
12.33 Bismarck enters any friendly port on a May 22 turn, or has not left Bergen by the end of the 2000 May 22 turn — 14 points. Bismarck enters any friendly port on a May 23 turn — 12 points. Bismarck enters any friendly port on a May 24 turn — 10 points. Bismarck enters any friendly port on a May 25 turn — 8 points. Bismarck enters any friendly port on a May 26 turn — 6 points. Bismarck enters any friendly port on a May 27 turn — 4 points.
12.34 Bismarck is at sea at the end of the game with an evasion level of 21 or less — 6 points. Prinz Eugen is at sea at the end of the game with an evasion level of 21 or less — 2 points.
12.35 Each German air unit which is unable to return to base — 2 points.
12.36 No convoy has been sunk — 4 points.
12.4 German Victory Point Schedule. The German player accumulates victory points for the following events as they occur.
12.41 Sinking the Victorious — 24 points. Sinking the Ark Royal — 20 points. Sinking the King George V, Prince of Wales (each) — 16 points. Sinking the Hood — 14 points. Sinking the Rodney — 12 points. Sinking the Repulse, Renown (each) — 10 points. Sinking the Revenge, Ramillies (each) — 8 points. Each heavy cruiser sunk — 6 points. Each light cruiser sunk — 4 points.
12.42 British player mobilizes a ship on escort duty (see British order of appearance) — 1 point.
12.43 Each British air unit which is unable to return to base — 2 points.
12.44 German ship destroys first convoy — 6 points. German ship destroys second convoy — 6 points. German ship destroys third convoy — 8 points. German ship destroys fourth convoy — 10 points. German ship destroys fifth convoy — 12 points.
12.45 Bismarck is at sea with damage but with an evasion level of 22 or greater at the end of the game — 2 points.
12.46 Bismarck is at sea with no midships damage at the end of the game — 4 points. Prinz Eugen is at sea with no midships damage at the end of the game — 2 points.
12.5 Each player receives victory points for causing damage to enemy ships still afloat at the end of play. Each midships hit to battleships or aircraft carriers — 2 points. Each midships hit to cruisers — 1 point.
12.6 A German ship can never enter a non-friendly or neutral port.
12.7 If a German ship enters a friendly port, the game is not over until any and all combat is concluded. The Bismarck and/or Prinz Eugen can be attacked by ship and/or air in a port zone the turn either or both enter the port. Once the Prinz Eugen has spent a turn in port, it cannot be attacked by ship. It can be attacked once by air. If it leaves port and returns back to port, it can be air attacked again.
INTERMEDIATE GAME
13.0 Introduction
13.1 In truth, the heading "Intermediate Game" is a misnomer. A more accurate title would be "A Collection of Optional Rules." It is not required, nor is it possible to use all of the rules together. These rules have been organized into a single game for two reasons. Primarily, the rules are interrelated. Most work best when used together. Secondarily, this organization permits development of a single expanded Sequence of Play.
The addition of all of these rules into play may be more than the players wish to handle. If unwilling or unable to use all of the Intermediate rules, players may select any of the rules for inclusion into their game. For this reason, each rule in this section is presented to stand on its own.
Unless specifically stated otherwise in the optional rule, all Basic Game rules still apply. In many situations, the Basic Game rules will have to be expanded to encompass the additional ships provided in these optional rules. This can be done without problem.
13.2 Included for the Intermediate Game is a set of cards containing all tables that can be used plus an Intermediate Player Aid Sheet to be copied from the Rules Manual. When using the tables, players must make sure to read the die or dice result correctly. There are three methods to read dice. Which method to use is indicated on the table.
13.21 If the table states "Die Roll," one die is rolled and that result is used.
13.22 If the table states "Dice Sum," two dice are rolled and their sum is used (i.e., a result of 3 and 4 reads 7).
13.23 If the table states "Dice Roll," two dice are rolled and read as a two digit number. The result on the colored die is always the first digit. The result on the white die is always the second digit. For example, if a player rolls a 3 on the colored die and a 4 on the white die, the result is read as 34.
13.24 When modifying either die on "Dice Roll" tables, there is a possibility that there will be no corresponding result. For example, if a player rolls a 46 and is to add one to the white die, the new result of 47 is not available on the table. The dice are read using base 6 rather than the common base 10 system. In base 6, one can only count to six; all numbers ending in 7, 8, 9 or 0 are skipped. Once 6 is reached, one must skip to 11, 16 to 21, 26 to 31, and so on. The sum of 46 + 1 does not equal 47, but 51.
13.3 Henceforth when using the term ship, it only refers to surface ships that are named. The term ship never includes destroyers or submarines. Destroyers are referred to as either destroyers, flotillas, or destroyer flotillas. Submarines are referred to only as submarines.
14.0 Weather and Visibility Option 1
14.1 Rather than determine one visibility level for the entire Search Board, players must now determine visibility levels for two areas — one containing all zones north of the 55° line and the other containing all zones south of the 55° line. Use a second marker (a number marker is best) on the Visibility Track to keep record of the southern visibility level. This second marker starts at level 3. Change of visibility is determined independently for each area.
14.2 Players can also use the Weather System Variability Table on the Intermediate Tables card. This table is consulted at the start of the search phase for each area and increases or decreases the visibility by the amount indicated for that search phase only. It does not affect the position of the visibility marker.
14.3 Variability affects search only. It does not affect visibility in any other phase of the turn.
14.4 Level X visibility can be affected by variability. A "-1" variability reduces level X to level 8, "-2" to level 7, etc.
15.0 Fog
15.1 Fog is now determined independently of visibility. After rolling for visibility, roll one die and consult the Intermediate Fog Table to determine whether fog occurs in the fog zones.
15.2 Add one to the die roll. If the new value still results in fog, then fog also occurs in both the Shetland and Faeroe Island zones.
15.3 Fog is equivalent to X level visibility. Variability affects fog as well as it does visibility. For example, a -3 variability in a fog zone is reduced to level 6 visibility.
15.4 Naval combat still cannot be conducted in fog.
16.0 Fuel Expenditure
16.1 A warning must be inserted here. The endurance of ships at sea was of critical importance to the British admiralty and the basis by which they laid their strategic plan to stop the Bismarck. Maintaining a record of fuel costs for each and every ship can be very time-consuming and detract from game play. Players should use this rule only if they are willing to accept the extra bookkeeping required to implement it.
16.2 Cruisers no longer have total freedom of movement without any fuel costs. Each turn that a cruiser moves two zones, it must expend one fuel factor of its fuel allowance.
16.3 Once a ship counter has expended all of its fuel, not only is it limited to just emergency movement, but it must also return to the nearest friendly port by the shortest route. Place an RTB marker on the ship to indicate that it must return to port. Ships returning to port cannot patrol. The Repulse when out of fuel cannot return to a friendly port but must exit by the closest west board edge zone.
16.4 In any turn in which the visibility level is 5 or worse, each destroyer flotilla at sea that moves one or two zones automatically expends twice the amount normally expended. In any turn in which the visibility level is 7 or worse, each cruiser that moves automatically expends one additional fuel factor in addition to any normally expended. In any turn in which the visibility level is 8 or worse, each battleship that moves automatically expends one fuel factor in addition to any normally expended. Fog has no effect upon fuel expenditure.
16.5 When using the Intermediate Weather rule (33.0), the fuel costs described in 16.4 above, apply only if the ship enters at least one zone of the required visibility level in any part of its move. There is no penalty if it just leaves a zone of the required visibility level.
16.6 Once a ship out of fuel returns to port, it can no longer return to sea and is out of the game for the remainder of play. If using the "Refueling" option (17.0), ships may return to sea.
17.0 Refueling
17.1 Each turn that a British ship remains in a friendly port it may recover four fuel boxes of its fuel allotment. Any number of ships may refuel in the same port in the same turn.
17.2 A German ship may refuel in a friendly port in the same manner as British ships. It may also refuel at sea. Only German ships may refuel at sea.
17.3 German ships may refuel when occupying any of these zones along the Search Board edge: A11 to A16, G1 to Z20 and Z11 to Z16. Each complete turn that a German ship remains in any one of these zones, it may regain up to four fuel boxes.
17.4 Only one ship may refuel along any one board edge in a turn. As refueling is possible along three board edges up to three German ships may refuel at sea in the same turn, but each must be at a different board edge.
17.5 While refueling at sea, German ships cannot move, search or shadow.
17.6 Aircraft carriers in port can also reclaim two of their attack or flight boxes (see 31.0) each turn they remain in port. They may not launch aircraft while in port whether refueling or not.
17.7 No ship can reclaim more fuel, attack or flight boxes than it has initially.
18.0 Starting Locations in Naval Combat
18.1 At the beginning of naval combat, ships can set up at a closer range than prescribed in the Basic Game. Using the At Start Range Table, the attacking player determines how many hexes from the defending ship(s) he may place his attacking or reinforcing ships. This range also represents the maximum range of fire for all ships.
At Start Range Table — Visibility Level
| 0-3 | 4-6 | 7-8 | |
|---|---|---|---|
| Day | 6 | 5 | 4 |
| Night | 4 | 3 | 3 |
18.2 If at least one of the defending ships has radar (see Advanced Specifications Chart), the range for set-up is extended by one hex. The range of fire for radar equipped ships is also extended by one. All other ships must use the printed value as their maximum range.
18.3 If a ship enters at a closer range than six hexes, it must still be placed in one of the hexes along the new edge determined by a die roll. Refer to the diagram to determine the new boundaries. For example, the Bismarck is attacking the Hood during a day turn at visibility 6. A die roll determines that the Bismarck is to enter at edge 2. The Bismarck enters along this edge, but five hexes away from the center of the Battle Board as shown in the diagram.
18.4 This new range is also the range at which withdrawing ships are allowed to escape. For example, at visibility level 5 at night, a withdrawing ship four or more hexes from all enemy ships can escape.
19.0 Torpedoes in Naval Combat
19.1 Many ships have the ability to fire torpedoes. A ship with torpedoes may fire at any one ship one or two hexes away on the Battle Board.
19.2 Torpedo fire is announced and resolved at the same time as gunfire.
19.3 A ship is allowed to fire torpedoes once. Mark out the torpedo box on the Hit Record Pad when torpedoes have been fired. Torpedoes can be replenished in any turn that the ship is refueling.
19.4 To resolve torpedo fire, cross-index the strength of the torpedo salvo given to that ship in the Hit Record Pad with a dice roll on the Ship Torpedo Combat Table.
19.5 A ship to undergo a torpedo attack may announce that it intends to avoid the attack. In this case, the ship must move first and must make at least one change of direction in the next round. Avoiding ships acquire an advantageous modification to the torpedo attack as explained in the Ship Torpedo Combat Table.
19.6 Like gunfire, any damage due to torpedo attack does not take effect until all fire for the round is resolved.
20.0 Ammunition Expenditure in Naval Combat
20.1 On the Hit Record Pad is an ammunition value for each ship. In each round that a ship fires half or less of its available salvo count, it expends 1 factor.
20.2 In each round that a ship fires over half of its salvo count, it expends 2 factors (this can happen only when firing at a ship one hex away).
20.3 For each merchantman (see 24.0) that a German ship sinks, it expends 1 factor. If using the Chance Table, all ships involved expend a total of 5 factors for each convoy destroyed. The German player must divide these factors equally among all attacking ships.
20.4 For each defensive fire against a destroyer (see 24.0) in a destroyer flotilla, a ship expends 1 factor.
20.5 Once it has expended all of its ammunition, a ship can no longer fire.
20.6 A ship which is refueling may replenish its ammunition at a rate of eight factors per turn.
20.7 Aircraft carriers have unlimited ammunition. They do not have to maintain a record of ammunition expenditure.
21.0 Fuel Damage
Each time a ship receives a midships hit due to enemy gunfire or torpedo hits only, there is a possibility that it may lose some of its fuel allotment. For each hull hit received due to gunfire or torpedo, one die is rolled. On a result of 5 or 6, that ship loses one fuel factor.
22.0 Submarines
22.1 General Rules
22.11 Submarines can only be introduced into play in conjunction with Destroyers (23.0). Both vessel types must be used together.
22.12 At the start of play, the German player receives four submarine counters and the British player two submarine counters to place on the Search Board as indicated on the Intermediate Order of Battle on their respective Intermediate Tables Card. Each submarine counter represents three submarines.
22.13 All information printed on the Submarine counters is identical to that on the ship counters. Submarines do not have an evasion rating as it is not needed. The letter printed below the type symbol identifies that counter.
22.14 A submarine counter can move up to one zone per turn. It does not expend fuel to move. Submarines cannot join task forces or convoys.
22.15 Submarines can conduct two types of searches in the same turn. They may participate in the normal search process for enemy ships and convoys on the Search Board. If using the "Convoys" optional rule (24.0), they may also search for convoys not on the Search Board by utilizing the Off-Board Convoy Search Table. Submarines shadow convoys utilizing the Intermediate Shadow Table.
22.16 Submarines can be located by search only if at least one of the searching units is an air unit. The searching player need only state that he can search for submarines in the zone. It is not mandatory to state this if a player does not wish to.
22.17 Submarines cannot participate in naval combat. Submarines can never be attacked. Submarines can be eliminated but only by an unfavorable result in their torpedo attack resolution. All submarine losses are recorded on the Intermediate Player Aid Sheet.
22.18 Submarines cannot transfer from one counter to another.
22.19 A submarine counter with a loss of one submarine has all of its search ratings halved (rounded up). A submarine with two losses cannot patrol and has a search strength of 1-1.
22.2 Torpedo Attack
22.21 When using submarines and destroyers, a new phase, Torpedo Attack Phase, is introduced into the Sequence of Play. Immediately after the Air Attack Phase, but before any naval combat is begun, submarines (and destroyers) may conduct torpedo attacks against any ships, task forces, convoys or destroyer flotillas located in the same zone that turn by search or shadow. Each submarine counter may conduct one torpedo attack in a turn. The British player conducts any and all of his torpedo attacks first before the German player conducts his. A submarine counter may not conduct torpedo attacks in consecutive turns. After conducting a torpedo attack, a submarine counter must wait at least one turn before conducting another attack.
22.22 For each of his submarine counters conducting a torpedo attack, the attacking player selects one target, either single ship of a particular type, a task force, single destroyer flotilla or a convoy. If there is more than one single ship of the specified type, task force, flotilla or convoy in the same zone, the target must be selected randomly from the group chosen.
22.23 Once the target has been selected, the defending player determines its anti-submarine strength as explained in the Submarine Attack Table. LR recon air units in the zone can lend their anti-submarine strength to all ship, flotilla, convoy and task force counters in the zone. The anti-submarine strength of a task force or convoy includes the combined anti-submarine strength of all aircraft carriers and destroyers contained.
22.24 The anti-submarine strength of a destroyer flotilla counter is a function of the number of destroyers contained. Under the name of each flotilla counter is a small number. This number represents the actual number of destroyers in the flotilla. When determining the flotilla's anti-submarine strength, multiply the destroyer's anti-submarine strength (as found on the Submarine Attack Table) by the current number of destroyers in the flotilla. For example, a flotilla of six destroyers has an anti-submarine strength during the day turns of 6 x 2 = 12. During the night turns, it has an anti-submarine strength of 6 x 1 = 6.
22.25 For each torpedo attack, the attacking player rolls one die and cross-indexes the result with the target's total anti-submarine strength on the Submarine Attack Table to determine the number of effective torpedo salvoes the submarine counter can fire at the target.
22.26 If the target is an individual ship, all torpedo salvoes must be directed toward that ship. If the target is a convoy, all torpedoes must be directed toward the convoy. They cannot be directed toward a particular ship in the convoy.
22.27 If the target is a task force, the defending player places a tactical counter for each ship face down on the Battle Board or any open area. If the task force has one or more destroyer flotillas, he must also place one flotilla counter with the battle counters. The attacking player then allocates his torpedo salvoes in any manner he wishes to any ship or ships (including destroyers) in the task force. Any one torpedo salvo can be fired at no more than one ship counter. The counter for each ship under attack is then turned over.
22.28 For each torpedo salvo attack, the attacking player rolls one die and cross-indexes the result with the target ship's (or destroyer flotilla's) current evasion rating on the Torpedo Hit Table. This rating can be modified as explained in the Table. If the result is a miss, no damage occurs. If the result is a hit, the target receives damage or, if a destroyer flotilla or convoy, loses one destroyer or merchant ship.
22.281 For each hit received by a cruiser, aircraft carrier or battleship, the attacking player rolls one die and consults the Torpedo Damage Table for damage. All damage to the target is recorded immediately.
22.282 For each hit received by the destroyer flotilla, one destroyer is sunk. The British player marks in the Intermediate Player's Aid sheet the reduced strength of the flotilla. This reduction is permanent. If there is more than one flotilla in the task force, the defending player chooses which one absorbs the loss.
22.283 For each hit received by a convoy, either one merchant ship is sunk or an escort ship is damaged as explained in Torpedo Damage Table.
23.0 Destroyers
23.1 General Rules
23.11 Destroyers can only be introduced into play in conjunction with submarines. Both vessel types must be used together. Only the British player has destroyers.
23.12 At the start of play, the British player places his destroyer flotillas on the search board as indicated in his Intermediate Order of Battle.
23.13 Destroyers move and fight in flotillas. Each destroyer search counter represents one flotilla of a specific number of destroyers. The small number below the name indicates the number of destroyers in the flotilla.
23.14 Destroyers may be lost to combat. The British player must keep a record of the current strength of each flotilla on the Intermediate Player Aid sheet. Losing destroyers in no way affects the flotilla's search strength.
23.15 Destroyers cannot transfer from one flotilla to another.
23.16 Destroyers can move up to two zones each turn.
23.17 Destroyer flotillas can search and shadow. Destroyer flotillas can themselves be located by search. If alone (i.e., not part of a convoy or task force), a destroyer flotilla cannot be shadowed. All destroyer shadow attempts are resolved on the Intermediate Shadow Table. Destroyer flotillas cannot patrol.
23.2 Destroyer Fuel Expenditure
23.21 Every destroyer flotilla has a fuel allotment of 26 factors. Each turn that the destroyer flotilla is at sea, it expends one factor of its fuel allotment. Each turn it moves two zones, it expends three factors of its fuel allotment.
23.22 When a destroyer flotilla expends all of its fuel factors, it is immediately removed from play. This removal gives no victory points to the German player.
23.3 Torpedo Attack
23.31 Destroyers can initiate torpedo attacks against enemy ships in the same zone during the Torpedo Attack Phase.
23.32 Destroyer flotillas cannot participate in naval combat. They may be attacked by air or by submarine. They may also receive defensive fire by ships targeted for their torpedo attacks.
23.33 Destroyer flotillas may torpedo attack any single ship or task force located by search or shadow in the zone that it occupies. Any destroyer torpedo attacks are conducted after submarine torpedo attacks in the Torpedo Attack Phase.
23.34 Each destroyer flotilla may conduct only one torpedo attack in a turn. The maximum strength of the attack depends upon the number of destroyers currently in the flotilla.
23.35 For each destroyer flotilla that he wishes to conduct a torpedo attack, the British player selects one target, either a single ship of a particular type or a task force. If there is more than one single ship of the specified type or task force in the same zone, the ship or task force to be attacked is selected randomly from the group chosen.
23.36 If an attacking destroyer flotilla is part of a task force, the ships in that task force can only attack the same enemy ship or task force as the flotilla in the same turn. If there is more than one destroyer flotilla in the same task force committed to attack, they must all attack the same ship or task force.
23.4 Torpedo Salvoes
23.41 Each destroyer flotilla receives a number of torpedo salvoes equal to the number of destroyers contained. For example, a flotilla of five destroyers has five torpedo salvoes, a flotilla of three destroyers has three torpedo salvoes, etc.
23.42 Each destroyer in a flotilla has one torpedo salvo for the entire game. Once it expends its torpedo salvo, it can never fire a torpedo salvo again. The British player must keep track of the number of salvoes expended by each flotilla.
23.43 An attacking destroyer flotilla is not required to fire every salvo that it has. The number to be fired is up to the British player.
23.44 Once all of the salvoes of a destroyer flotilla have been expended, it can no longer make a torpedo attack.
23.45 If a destroyer loss as a result of air or submarine attack is to be taken from a flotilla which has expended some of its salvo allotment, the British player must determine whether it also loses an unexpended salvo along with the destroyer. The probability of loss is equivalent to proportion of unexpended salvoes to the number of destroyers currently in the flotilla. Use the Torpedo Loss Table on the Intermediate Player Aid sheet to determine if the torpedo salvo is lost.
Torpedo Loss Table. Cross-index the number of torpedo salvoes remaining with the number of destroyers remaining in the flotilla to get a salvo value. Roll two dice. If the roll is less than or equal to the salvo value, the torpedo salvo is lost with the destroyer. "A" means that the torpedo salvo is automatically lost.
| Salvos remaining \ Destroyers remaining | 1 | 2 | 3 | 4 | 5 | 6 |
|---|---|---|---|---|---|---|
| 1 | A | 36 | 26 | 23 | 21 | 16 |
| 2 | — | A | 46 | 36 | 32 | 26 |
| 3 | — | — | A | 53 | 43 | 36 |
| 4 | — | — | — | A | 55 | 46 |
| 5 | — | — | — | — | A | 56 |
| 6 | — | — | — | — | — | A |
23.46 If the destroyer flotilla has not expended any torpedo salvoes, then the loss of one of its destroyers automatically causes the loss of a salvo.
23.5 Torpedo Attack Resolution
23.51 If the target is an individual ship, all torpedo salvoes to be fired must be directed toward that ship.
23.52 If the target is a task force, the German player places a tactical counter for each ship face down on the battle board or any open area. The British player then allocates the torpedo salvoes he wishes to fire in any manner he wishes to any ship or ships in the task force. The British player cannot allocate any one torpedo salvo against more than one ship. The counter for each ship under attack is then turned over.
23.53 For each torpedo salvo, the British player rolls one die and cross-indexes the result with the target ship's current evasion rating on the Torpedo Hit Table. This rating can be modified as explained in the Torpedo Hit Table.
23.54 If the result is a miss, no damage occurs. If the result is a hit, the British player rolls one die and cross-indexes the result with the target ship's type on the Torpedo Damage Table to determine the damage received. All damage is recorded immediately.
23.6 Defensive Fire
23.61 Before any of the torpedo salvo attacks are resolved in a destroyer torpedo attack, the German player may conduct defensive fire. If the target is an individual ship, it may conduct one defensive fire for each torpedo salvo directed against it.
23.62 If the target is a task force, all ships in the task force may each conduct one defensive fire for each torpedo salvo directed against the task force.
23.63 To resolve each defensive fire, the German player rolls two dice. A sum of 2 through 6 in a day turn causes the attacking flotilla to lose one destroyer. A sum of 2 or 3 in a night turn causes the attacking flotilla to lose one destroyer. Any other result is a miss. Also for each destroyer lost, the German player determines whether it loses one of the torpedo salvoes being fired. A result of 1 through 4 and the salvo is lost. A result of 5 or 6 and the salvo attack can be resolved.
23.64 Any destroyer and salvo losses due to defensive fire take effect before the British player resolves the torpedo attacks.
24.0 Convoys
24.1 General Rules
24.11 There are two categories of convoys available in the game, those that are on the Search Board, termed on-board convoys, and those that are not, termed off-board convoys. Search for on-board convoys is conducted utilizing the normal search procedure. Search for off-board convoys is conducted utilizing a special procedure to be described below. If an off-board convoy is located, it is placed on the board and remains in play as an on-board convoy.
24.12 Any and all German ships and submarines can search for, shadow and attack convoys. Also, German air units (including LR recon) can search for, shadow and attack convoys. Search for off-board convoys is conducted upon conclusion of normal search. A German unit can either search or shadow in a turn. It cannot do both.
24.13 All German ships which participated in combat against enemy ships cannot participate in convoy attack unless the naval combat was against the target convoy's escort. If there is one German ship in a task force ineligible to attack a convoy, all ships in the task force are ineligible.
24.14 Off-board convoy search may be conducted during day turns only. German ships, air units and submarines can search for or shadow on-board convoys in any turn, day or night. Attacks against convoys can occur in any turn.
24.15 All zones west of, but not including, the British patrol line (see Terrain Key) and the zones on or adjacent to the convoy routes east of and including the British patrol line may be searched for off-board convoys. Off-board convoys cannot be located in any other zone. German units can make normal searches for on-board convoys in any search board zone.
24.16 When using this convoy rule, the Chance Table is no longer used and the Chance Phase is omitted from the sequence of play.
24.2 Off-Board Convoy Search Procedure
24.21 At the conclusion of normal search in the Search Phase, the German player may conduct one off-board convoy search for each legal zone (see 24.15) in which he has at least one unit eligible to search. Only those German units which did not shadow in the turn are eligible to conduct an off-board convoy search. German units which did not shadow can conduct both a normal search and an off-board convoy search in the same turn.
24.22 The German player is not required to make any off-board convoy search in a turn, nor, if he does conduct an off-board convoy search, must he search in every zone that he is eligible to search. Off-board convoy search is purely voluntary.
24.23 For each off-board convoy search that the German player wishes to make, he first must determine the off-board search strength of the German units in the zone to be searched. He refers to the Search Strength section of the Convoy Search Table, totals the search strengths of each searching unit in the zone, and states the total aloud to the British player. For example, one submarine counter not on patrol and one LR recon not on patrol are searching for a convoy in the same zone. The submarine has an off-board search strength of 1 and the LR recon has an off-board search strength of 1 for a total off-board convoy search strength of 2 in the zone.
24.24 The German player cross-indexes this search strength with the current number of convoys on the Search Board to arrive at a convoy location value.
24.25 The German player then rolls two dice and reads the result. This dice roll may be modified as indicated on the table. If the result plus all modifications is equal to or less than the convoy location value, then an off-board convoy has been located. If the result is greater than the convoy location value, then no convoy has been located.
24.26 When an off-board convoy is located, the German player announces the zone in which the search occurred. Both players then place the blank side of a ship RTB marker in the zone to mark the presence of the convoy. Once a convoy is on the search board, it remains there until it reaches zone J16 or until it moves off the board. The discovery of an off-board convoy immediately increases the number of on-board convoys on the Off-Board Convoy Search Table for all subsequent off-board convoy searches, including those yet to be resolved in the same turn.
24.27 At the start of play there may be up to three convoys already on the Search Board depending upon the scenario being played: Troop convoy WS8B, the convoy being escorted by Ramillies and the convoy (actually one ship, Britannic) escorted by Rodney.
24.3 Convoy Movement and Search
24.31 When a new off-board convoy is discovered, the British player must immediately determine its speed and destination. This is done by following the instructions given with the Convoy Speed and Destination Tables.
24.32 It is a useful aid to mark an arrow on the convoy marker and point it toward the convoy's destination. Also mark a C or S on the marker to indicate its speed. All three convoys that start play are fast convoys.
24.33 Fast convoys can move only on turns marked C. Slow convoys can move only on turns marked S. On-board convoys are not required to move toward their destination. They can move in any direction the British player desires. The British player must make a mark in the Convoy Evasions Section on the Intermediate Players Aid Sheet each time that a convoy moves in a direction which is not closer to its destination than its previous location. At the end of the game, the marks are totalled up. They can increase the German victory point total.
24.34 Search for and by on-board convoys is conducted like that for and by any other ship. All rules which apply to ship search apply to on-board convoy search. An on-board convoy has a search strength of 1, day or night. Merchant ships in convoy cannot participate in naval combat though their escorts can. Convoys cannot patrol or shadow.
24.35 Ships join or leave convoys in the same manner as task forces. Place ships in escort with a convoy under the convoy marker. Ships in the same zone as a convoy but not with it are placed on top of the convoy marker. Ships in escort have the same evasion level as the convoy being escorted, i.e., 8 for slow convoys, 12 for fast convoys. A ship with an evasion rating of less than 8 cannot join a slow convoy. A ship with an evasion rating of less than 12 cannot join a fast convoy.
24.36 Located convoys can be shadowed in the same manner as ships. German ships which are to shadow must have a current evasion level of 8 or higher if the convoy is slow or a current evasion level of 12 or higher if the convoy is fast. Submarines can always shadow convoys.
24.37 German air units may shadow convoys if not required to return to base that turn.
24.38 The German player can shadow convoys only. He must use the Intermediate Shadow Table to resolve shadow attempts. Like normal shadow, there can only be one shadow attempt per convoy per turn for ships and air units. However, any number of submarine counters may shadow the same convoy. Each submarine counter must successfully shadow by itself to be able to attack the convoy.
24.4 Convoy Attack Eligibility
24.41 Convoys located by normal search, off-board convoy search, or shadow can be attacked in the same turn. Attacks against convoys are resolved after all normal attacks in the phase have been completed.
24.42 Any German ship (with sufficient speed to shadow the convoy) or a German air unit may attack a convoy located in the same zone by search or shadow. A submarine counter can only attack a convoy it successfully shadowed. This means that it cannot attack a convoy in the turn it was located by search. A shadowing unit can only attack the convoy it is shadowing.
24.43 As in all other air attacks, the visibility level must be equal or less than 6 to permit a German air unit to attack a convoy. A German air unit cannot attack a convoy at night.
24.44 A German ship which was involved in naval combat against a convoy escort may also attack the convoy in the same turn at a reduced capability.
24.45 A German ship which was involved in combat against ships not in convoy escort cannot attack any convoy in the same turn.
24.46 When determining the target for attack, consider a convoy as a fourth category along with single ship, single flotilla and task force. If a convoy is the target selected, both the escort and merchant ships can be attacked. Any German ship can attack a convoy no matter what type of escort it contains.
24.5 Convoy Attack Procedure
24.51 Each unit's type determines its attack procedure.
24.52 For each ship which conducts an attack against a convoy, the German player consults the Ship/Convoy Attack Table. German ships cannot attack the merchant ships of a convoy until all ships escorting the convoy have been sunk or withdrawn from combat. If an escort ship withdraws from combat, it is no longer part of the convoy and must be immediately placed on top of the convoy counter in the Search Board.
24.53 Each German air unit utilizes the Air/Convoy Attack Table to determine the results of its attack. Ships in escort may add in their anti-aircraft strength to the convoy as explained in the table.
24.54 German submarines attack convoys utilizing the procedure outlined in 22.2.
24.6 Convoy Dispersal
24.61 At the conclusion of any naval combat phase in which one or more convoys or their escort were attacked by one or more German ships, the British player can declare that any or all of those convoys are in "dispersal." He should mark down on a piece of scratch paper or in the Intermediate Player's Aid Sheet which convoys are in "dispersal." Just mark the RTB I.D. number on the reverse side of the counter or the name of the counter, if given.
24.62 German ships have a reduced attack against "dispersed" convoys as explained in the Ship/Convoy Attack Table.
24.63 "Dispersed" convoys have their inherent anti-submarine strength and anti-aircraft strength halved (rounded down).
24.64 Convoys in "dispersal" can have no escort.
24.65 Once in "dispersal," the convoy must remain in "dispersal" for the remainder of the game or until it reaches its destination.
24.7 At Start Convoys
24.71 Technically, the Rodney is not escorting a convoy, but one ship, the Britannic. The Britannic cannot disperse.
24.72 The procedures for attacking convoys applies to attacking the Britannic.
24.73 If this convoy receives a hit, the German player receives 4 v.p. for sinking the Britannic and the convoy marker is immediately removed from play.
24.74 The Rodney and Ramillies convoys are no longer restricted to their Basic Game routes. The British player must still exit the Britannic at the west board edge and the Ramillies convoy at J16.
25.0 Troop Convoy WS8B
25.1 The British player has a search counter labelled convoy WS8B. This counter represents an important convoy of five ships containing British troops and equipment being sent to North Africa.
25.2 The troop convoy is placed on the Search Board at Clyde along with its escort as explained in the Intermediate Order of Battle.
25.3 The troop convoy is fast. It moves on C turns only. It must move toward the south edge of the board between Z17 and Z21 inclusive.
25.4 For each ship of the troop convoy sunk, the German player gains 8 v.p. If the German player gets five hits against the troop convoy, it is removed from play. The German player can never receive more than 40 v.p. for the troop convoy. For each ship of the convoy which is not sunk, the British player receives 2 v.p. at the end of play.
25.5 All rules which apply to convoys also apply to the troop convoy. Its only difference is its greater value.
25.6 Any time the troop convoy is included in play, the British player also is permitted to use the Exeter and Cairo. They start with the convoy as escorts.
26.0 Huff/Duff
When using the Convoy Optional Rule, at the beginning of each turn, the German player must consult the Huff/Duff Table. If the result names a ship currently at sea, he must reveal either the zone occupied by or any zone adjacent to the ship named in the table.
27.0 Air Combat
27.1 General Rules
27.11 To resolve air attacks against ships, destroyers and convoys, players no longer use the system and tables presented in the Basic Game. A more detailed system has been developed and presented herein to resolve these air attacks.
27.12 Air units cannot attack submarines.
27.13 An air unit can attack any one target, either a single ship, flotilla, task force or convoy that has been located by search or shadow in the zone that it occupies.
27.14 Air units cannot leave a base in fog or at a visibility level of 6 or worse.
27.15 No bomber unit can launch an attack in a zone containing, or adjacent to, an enemy coast unless using Land-Based Fighter rule (35.0).
27.2 Air Combat Determination
27.21 All air combat is resolved on the battle board.
27.22 During the air attack phase, either player announces any air attacks against single ships, flotillas, task forces and/or convoys, he wishes to initiate. The British player always resolves his attacks first.
27.23 If the attacking player has more than one air unit in the zone, he can split the air units to attack more than one target. Any one air unit can attack no more than one target in a turn.
27.24 If there is more than one target of the type named for attack, the target to be attacked is determined randomly.
27.25 No air attacks can occur at night, in fog or when the visibility is 7 or worse.
27.3 Air Combat Set-Up
27.31 For each air attack, the defending player places a tactical counter for each ship in the target under attack, face down on the battle board. Only one ship can be placed in any one hex. Placement of ships is important for anti-aircraft strength allocation. One destroyer flotilla counter is placed on the Battle Board to represent all of the flotillas in the target. The attacking player does not reveal the strength or the types of air units involved.
27.32 If German air units are attacking a convoy with escort, place the convoy marker with the ships in the escort on the battle board to represent the merchant ships of the convoy.
27.33 The attacking player determines his air attack strength and allocates it among any and all of the ships, the flotilla, and/or the convoy in the target as he desires. He must distinguish between land bomber attacks and dive or torpedo bomber attacks. He uses a number marker to show the strength of each attack. The number markers for land bomber attacks are placed on the target ship. The strength markers for torpedo or dive bombers are placed in the hex that the target ship occupies.
27.34 The attacking player may split the air strength of a bomber air unit against more than one ship in the target.
27.35 The air strength of carrier-based bomber air units is printed directly under the type symbol. This is the actual number of planes in the unit.
27.36 There is no set air strength for land-based bomber air units. Instead, on the counter is printed an asterisk. The strength of a land-based bomber air unit is determined by adding the current visibility level of the zone of attack with the range, in zones, of the air unit to its home base and, then, cross-indexing this sum with a dice roll on the Land-Based Strength Table.
27.37 The defending player then flips over his ship counters. He allocates the anti-aircraft strength (printed on the counter) of his ships to the attack(s) as explained in the next section.
27.38 Attacks directed against the convoy marker are resolved after any air attacks against the escort. The air attack against the convoy is resolved using the Air/Convoy Attack Table. All escort ships sunk by an air attack cannot add their anti-aircraft strength to the convoy in the same phase.
27.4 Anti-Aircraft Allocation
27.41 All land-based air attacks are resolved before torpedo or dive bomber attacks, if any, are resolved.
27.42 Against land-based bomber air attacks, a ship may use its full anti-aircraft strength against the attack directed toward itself. It can use half (rounded down) of its anti-aircraft strength against any land-based bomber attacks directed at ships in adjacent hexes. It cannot direct its anti-aircraft strength against land-based bomber attacks two or more hexes away.
27.43 A ship may divide its anti-aircraft strength against more than one land-based bomber air attack. Whatever is allocated to an attack adjacent to it must be halved, rounded down.
EXAMPLE: Two land-based bomber air units, each of which were determined to have 5 planes after consulting the Land-Based Bomber Strength Table, attack the Bismarck and Prinz Eugen in task force. The German player places both ships in hexes adjacent to one another on the battle board. The British player allocates eight planes to the Prinz Eugen and two planes to the Bismarck. The German player commits all of the Prinz Eugen's anti-aircraft strength of six to the air attack against itself. The German player splits the Bismarck's anti-aircraft strength of 8, committing six factors to the attack against the Prinz Eugen. This strength must be halved to three since the attack is being directed to an adjacent hex. The remaining two factors are committed to the air attack directed at itself. The total anti-aircraft strength directed at the air attack against the Prinz Eugen is nine and against the Bismarck is two.
27.44 After all of the land-based bomber air attacks are resolved, the defending player commits his anti-aircraft strength against any attacking dive or torpedo bombers using the same procedure as described for land-based bombers with one major difference.
27.45 If the attacking aircraft are torpedo bombers, the attacking player must also indicate a hex of approach. For each hex in which he has placed torpedo bombers, the attacking player must also announce one adjacent hex as the hex of approach. It cannot be either the hex toward which the target ship's bow points or the hex toward which the target ship's stern points.
27.46 A ship which is directing some or all of its anti-aircraft strength to an adjacent torpedo air attack has that anti-aircraft strength quartered (rounded down) rather than halved if it is not adjacent to the hex of approach. Its anti-aircraft strength is not modified whatsoever if it occupies the hex of approach or the hex of attack.
27.47 Anti-aircraft strength of the destroyer flotilla(s) is automatically two. It can apply it only against attacks directed toward itself. Other ships cannot direct their anti-aircraft strength to any air attack against the destroyer flotilla. A destroyer flotilla defends against air attacks as if it were by itself.
27.48 A ship which used its anti-aircraft strength against land-based bomber air units, and was not sunk, can use it again against dive or torpedo bomber attacks.
27.5 Air Attack Resolution
27.51 Attacks against different ships are resolved in the order designated by the attacking player.
27.52 Land-based bomber and carrier-based bomber attacks, or land-based bomber air units from different home bases, can never be combined; they must be resolved separately. If the total air strength of a bomber group attacking the same ship is greater than ten, the air strength must be broken into waves of 10 or less. The composition of each wave is up to the attacking player, as long as it does not exceed ten. It must be stated before any attacks are resolved.
27.53 The defending player determines the effect of his anti-aircraft attack against each wave attack. He rolls one die and consults the Air Penetration Table corresponding to the bomber type. The resulting decimal multiplied by the anti-aircraft strength (fractions rounded to nearest place) gives the number of aircraft in the wave unable to penetrate to deliver the attack. If it is equal to or greater than the number of aircraft in the wave, no aircraft may penetrate.
27.54 Each air strength point able to penetrate resolves its attack on the appropriate Bomber Hit Table if attacking ships or Air/Convoy Attack Table if attacking the convoy counter.
27.55 For each hit gained, its effect is determined using the Dive/Level Bomber Damage Table if from a dive or level bomber or Torpedo Damage Table if from a torpedo bomber.
27.56 All damage takes effect and is recorded as soon as it occurs.
EXAMPLE — Air Attack: The attacking player has 15 level bomber strength points (i.e., 15 aircraft) directed against a cruiser. The defending player has allocated a total of 8 anti-aircraft strength points to this attack. The attacking player must divide the air attack into at least two waves. He chooses to form one wave of 10 planes and the second wave of 5 planes. The defending player determines the effect of his anti-aircraft attack. Against the first wave, he rolls a 3 which results in .40. The anti-aircraft strength of 8 multiplied by .40 equals 3.2 which rounds to the nearest place of 3. The result of the attack against the second wave is .30 which results in 2.4 rounded off to 2. Five of the fifteen aircraft fail to penetrate due to anti-aircraft fire. The remaining ten aircraft individually conduct their attacks using the appropriate Bomber Hit Table. For the ten attacks, he gets two hits. On the Bomber Damage Table, he rolls a one and a five. The five result sinks the cruiser.
28.0 Fighter Air Units
28.1 Fighter air units can only be used if both players agree to employ the Intermediate Air Combat rule (27.0).
28.2 Aircraft carriers carry a special type of air unit called a fighter. It has no bombing capabilities. It can be flown in one of two modes, either reconnaissance or attack. When in reconnaissance mode, it operates as other air unit types in reconnaissance mode. In attack mode, it can prevent opposing bomber air units from penetrating to attack.
28.3 A Fighter unit in attack mode can be placed in CAP defending its home carrier and any and all ships in the same task force or convoy. It cannot defend any ship against an attack if not in task force or convoy with the carrier. Fighter air units on CAP must be placed in the home carrier's CAP box on the Intermediate Player Aid Card.
28.4 Fighter air units in attack mode can also be used as escorts. Fighter air units in escort must accompany bomber units launched from the same carrier or other carrier in same task force or convoy. Fighter air units in escort can only reduce the effect of enemy fighters upon accompanying bombers. They do not have any offensive power of their own.
28.5 Fighter air units not in escort or CAP can only search. They cannot have any effect on enemy air operations.
28.6 Fighter air units cannot escort land-based bombers.
28.7 Fighter air units have a combat strength similar to carrier-based bomber air units. The small number below the type symbol indicates the actual number of aircraft it contains.
28.8 When resolving air combat, players must add the following steps:
28.81 If both escorting and CAP fighters are over the same target, CAP fighter penetration must be determined. Escort fighters nullify one CAP fighter aircraft for each escort fighter aircraft.
28.82 All CAP fighter aircraft not stopped by escort fighters may attack enemy bombers. Each CAP fighter can prevent two bombers from penetrating to attack. If there is more than one type of bomber involved in the attack, randomly determine by die roll (1-3 dive or torpedo bomber; 4-6 level bomber) which type is stopped for each CAP fighter.
28.9 Those bombers unable to penetrate are deducted from the bombing strength before it is allocated to individual targets.
29.0 Air Unit Loss
29.1 When resolving air attacks in the Air Attack Phase, there is a possibility that individual aircraft will be eliminated due to anti-aircraft and/or enemy fighter action.
29.2 Each time a player determines the number of his planes which fail to penetrate, he must also determine which of these planes fail to penetrate because they were shot down as opposed to aborting the mission. Air loss is determined by one of the appropriate Air Loss Tables. Air loss can never exceed the number of planes which fail to penetrate.
29.3 If using the "Fighter Air Unit" rule (28.0), both players must determine air loss of their fighters when determining CAP fighter penetration. The attacking player must also determine air loss for those bombers which fail to penetrate due to CAP fighters.
29.4 Players must keep track of air losses by carrier. Each air loss must be deducted from one air unit of the appropriate type and from the carrier or carriers which launched the attack until its strength becomes ZERO, at which time it is permanently removed from play. Another unit is then selected to absorb losses and so on. Losses do not have to be absorbed by the air units involved in the actual attack.
29.5 Losses due to air combat do not take effect until the end of all air combat.
29.6 For each plane loss attached to an air unit, its patrol search is reduced by one. Its patrol search strength can never be less than two during the day or one at night.
29.7 Air losses do not affect land-based bomber strength. Players do not keep a record of loss to a land-based bomber unit. It is assumed that there is an inexhaustible supply of land-based bomber planes.
30.0 Air Navigation
Carrier-based air units in attack mode can become lost in flight. As each carrier-based air unit in attack mode completes its move, consult the Air Navigation Table. If the result is "lost," move the air unit back to the previous zone occupied in its move. If the air unit is on CAP or does not leave its base zone it cannot get lost. The lost air unit can search but not attack in the zone it occupies.
31.0 Aircraft Carrier Launch Capacity
31.1 Aircraft carriers have a limited service capability and ammunition supply. Each time that a carrier-based bomber air unit in attack mode flies from its carrier, the controlling player must mark one of the carrier's attack boxes on the Hit Record Pad. When all of the boxes have been marked that aircraft carrier is no longer able to launch bomber air units in attack mode.
31.2 Aircraft carriers are never penalized when launching air units in reconnaissance mode or fighter air units in attack mode. These can always be launched.
31.3 The Eagle is a special case. The Eagle cannot launch more than nine of its air units of any type and in any mode during the entire game.
31.4 If an aircraft carrier receives two or more midships hits, it is no longer capable of launching aircraft.
32.0 Aircraft Carrier Processing
32.1 The Intermediate Player Aid Card has a processing section for each carrier. Upon return from its mission, each carrier-based air unit must be placed in the Processing On-Deck box of its home carrier. From there, it can be moved either to the on-deck refit or hangar box and so on to the on-deck ready box which it must occupy to take off. Carrier-based air units no longer use Rest and Refit procedure described in the Basic Game.
32.2 All air units begin the game in the hangar refit box.
32.3 Each carrier has a processing capacity of 30 that is available to it each turn. For each plane that moves to one adjacent box, one processing factor is expended. A plane may process through more than one box at a rate of one factor per box. Taking off and landing do not expend processing factors. The on-deck section (which includes ready, processing and refit boxes) may never contain more than twenty planes at the same time.
EXAMPLE: The Ark Royal lands three air units of five planes each. The British player moves them from the on-deck box to the on-deck refit box, expending 15 processing factors and then to the ready on-deck box, expending another 15 processing factors for a total of 30 processing factors.
32.4 Any time an aircraft carrier receives damage due to a gun or bomb hit (never by torpedo) there is a possibility that air units in any or all of the three on-deck boxes are eliminated. For each hull hit, use the Air/Carrier Damage Table to determine air unit loss.
32.5 An air unit cannot land and then take off in the same turn.
32.6 Processing may occur continuously during the Air Movement Phase as long as processing factors are available. Planes may take off, additional planes then process into the on-deck ready box and take off in the same phase or planes may land, process out of the on-deck refit box and additional planes then land.
33.0 Weather and Visibility Option 2
33.1 General Rules
33.11 Both Britain and Germany had weather stations in the Greenland and Arctic regions from which they obtained advanced meteorological reports for weather fronts as they moved across the North Atlantic. The same structure of fronts is to form the basis for visibility determination.
33.12 Rather than using one or two visibility levels for the entire Search Board, players determine visibility for individual columns of zones which represent different components of fronts as they move across the Atlantic.
33.13 As in Weather and Visibility Option 1, the Search Board is divided by the 55° line into two areas. Visibility is determined independently for each area.
33.14 Players must first attach to the Search Board two weather tracks, one for each area, as indicated in the diagram.
33.15 Along each track runs a series of boxes. In each box will be placed a number marker indicating the visibility for those zones with the same numbered coordinate as printed in the box. For example, if a number marker with a strength of 4 is in box 12 on the northern track, all zones containing 12 in the grid-coordinate to row K have a visibility level of 4 (zones A12, B12, C12, D12, E12, F12, G12, H12, I12, J12, K12). Zones L12 to Z12 are affected by the number marker in box 12 of the southern track.
33.16 At the start of play, every box of both tracks will contain a number marker as given in the Intermediate Order of Appearance. Every zone on the Search Board, therefore, will be covered by a visibility level.
33.2 Weather Maintenance
33.21 At the start of each Visibility Phase except in the first turn of play, either player determines the movement of the number markers for each track by consulting the Weather Movement Table. Movement for each track is determined independently. All movement must be from west to east. For example, a die roll of one for the northern track causes all number markers to move eastward to the next box. The marker in box 12 moves to box 13, etc. The marker at the end of the track is removed from the Search Board.
33.22 If after weather movement, there is no longer any marker in either track's system start box, then, and only then, both players determine a new frontal weather system for that track using the Weather System Appearance Table.
33.23 A weather system is composed of a specific sequence of visibility levels. When a new weather frontal system has been determined, the number markers are stacked in the system start box in the same sequence as given in the table. The top marker corresponds to the rightmost visibility level of the weather frontal system.
33.24 When there is movement along the track, only the top marker in the stack is moved to the next box.
33.25 As in the Weather and Visibility Option 1, at the start of the Search Phase, the Weather System Variability Table is consulted for each area. The visibilities for each track are increased or decreased by the amount indicated.
33.26 Visibilities greater than 8 are treated as X. Visibilities less than 1 are treated as 1.
33.27 Variability affects search only. It does not affect visibility in any other phase of the turn.
33.3 Not enough number markers have been provided with the game to implement this rule. It is recommended that players wishing to utilize weather fronts purchase a Formation Marker Counter Set from the Gettysburg game. Price and purchasing instructions are included in the catalogue.
34.0 Variability Option 2
34.1 All of the methods so far used to determine the chance of locating enemy ships at sea have been compromises between playability and accuracy. The best but at the same time most unplayable method of determining the success of a search would be to check each zone being searched individually.
34.2 Rather than covering an entire area with one result when determining the variability of the visibility in either Weather Option 1 or 2, a player now checks variability for each zone he wishes to search. He can use either the Weather System Variability Table or the method described in 34.3.
34.3 Roll two dice. The red die is always positive; the white die is always negative. The sum constitutes the variability for the zone being searched. For example, a player rolls a +4 with the red die and a -2 with the white die, the visibility of the zone to be searched is increased by two. A player rolls a -6 with the white die and a +1 with the red die, the visibility of the zone to be searched is decreased by five.
35.0 Ferrol
35.1 A German ship or task force is permitted to enter the neutral Spanish port of Ferrol. Only a ship or a task force which contains a ship with at least one half of its midships hit or with insufficient fuel to reach a friendly port at maximum speed may enter Ferrol.
35.2 As soon as the first German ship or task force enters Ferrol, the German player immediately announces the names of all ships that are there and consults the Ferrol Entry Table. He may then finish movement of other ships that have yet to move in the turn.
Ferrol Entry Table
| Die Roll | Result |
|---|---|
| 1 | Spanish Non-Belligerency — German Ship or task force may remain in port indefinitely. Henceforth treat Ferrol as a friendly port. Award five victory points to German player for diplomatic victory. |
| 2 | Spanish Indecision — German ship or task force may remain in port indefinitely. If that ship or task force re-enters or any other German ship or task force enters Ferrol, consult table again for new result. Award German Player 2 victory points. |
| 3-5 | Geneva Convention — Spanish government conforms to Geneva Convention. German Ship or task force must leave Ferrol by the sixth turn (24 hours) of the turn of entry. Ships may refuel while in port. Award five victory points to British player for diplomatic victory. |
| 6 | Internment — German ship or task force interned by Spanish government. Ships may never leave Ferrol. Award victory point value of all ships interned plus ten additional victory points for the diplomatic victory to the British player. |
NOTES: 1. Only a German ship or task force which contains a ship with at least one half midships damage or insufficient fuel to reach a friendly port at maximum speed may enter Ferrol. 2. Except for result 2, "Spanish Indecision," any other result in the Ferrol Entry Table is permanent.
Spanish Reaction to British Raid Table (consulted if the British attack a German ship sheltering in Ferrol)
| Die Roll | Result |
|---|---|
| 1 | Spain Declares War on Britain — Award 75 victory points to German player. |
| 2-3 | Spain Strengthens Ties with Germany — Spain does not declare war against Britain but moves closer to a German alliance. Award 10 victory points to German player. |
| 4-6 | Spain Maintains Neutrality — Spain makes strong diplomatic protest but maintains its neutrality. No special award to either player. |
NOTE: All results except 4-6, "Spain Maintains Neutrality" are permanent. If the "Spain Maintains Neutrality" result occurs the following procedure is instituted. For each subsequent British attack on Ferrol, consult the table until a permanent result occurs. For each subsequent attack an additional one is subtracted from the die roll.
36.0 Land-Based Fighter
36.1 Each side has a certain number of land-based fighter strength points which can be used as CAP over friendly ships, flotillas, task forces, or convoys within two zones of a friendly coast zone.
36.2 The British player may use up to 10 land-based fighter planes total each day within two zones of any Great Britain coast zone.
36.3 The German player may use up to 10 land-based fighter planes total each day within two zones of any French coast zone and up to 5 land-based fighter planes total each day within two zones of the Norway coast zone.
36.4 A land-based fighter plane can only be used as CAP over friendly ships within range. Once a plane has been used it cannot be used again that day.
36.5 At the conclusion of the 2400 turn of each day, the player regains his land-based fighter allotment. Any planes not used in the previous 24 hour period are lost.
36.6 To use land-based fighter planes, just place a number marker equalling the number of planes committed to CAP in the zone being protected during the Unit Availability Phase. If the ships move out of range in the movement phase, the CAP is lost.
36.7 If there is more than one individual ship, flotilla, task force or convoy in the zone, the controlling player must write which ship, task force or convoy is being covered.
37.0 Ports
37.1 This rule should be used in conjunction with the Land-Based Fighter Rule. When using this rule, neither player is restricted in his bombing targets. All zones and ports are subject to bomb attacks.
37.2 Each port has an inherent anti-aircraft strength of 10 that can be added to any ship or ships in port. This strength can never be quartered or halved.
37.3 Since ships in port are stationary targets, subtract one from the die roll when using the Bomber Hit Table.
38.0 Sheffield Factor
38.1 As actually happened to the British cruiser, Sheffield, which was bombed by British bomber pilots who mistook it for the Bismarck, there is a possibility that planes can accidentally attack a friendly ship.
38.2 If a player announces an air attack against a single ship and if he has friendly single ships in the same zone, his target must be selected randomly among all single ships (friendly as well as unfriendly) in the zone. He cannot select a type of single ship to attack.
38.3 Both players place the search counters of the ships involved into a cup. The defending player pulls out one counter and places that ship's tactical counter face down on the Battle Board. The ship must then be attacked. After attack, if the ship was friendly, its identity is revealed whether it was damaged or not.
38.4 This rule is not implemented if the target ship is being shadowed.
38.5 A ship cannot be accidentally air attacked more than once each day. If a friendly ship was air attacked previously that day, it is no longer added to a target pool for friendly air attack for the remainder of the day.
38.6 The opposing player gains victory points for damage received by a ship accidentally air attacked.
39.0 Ship Breakdown
39.1 At the beginning of each turn, each player rolls two dice and consults the Ship Breakdown Table to determine if a ship breaks down at sea.
Ship Breakdown Table (read as a base-6 two-digit dice roll, see 13.24; the column named names the ship that breaks down, or "Miss" for no breakdown)
| Dice Roll | Germany | Britain | Britain | France | United States |
|---|---|---|---|---|---|
| 11 | Bismarck | Hood | Prince of Wales | Strasbourg | North Carolina |
| 12 | Tirpitz | Rodney | Nelson | Tourville | Augusta |
| 13 | Graf Zeppelin | Renown | King George V | Algerie | Miss |
| 14 | Gneisenau | Ramillies | Repulse | Dunkerque | Miss |
| 15 | Scharnhorst | Revenge | Victorious | Gloire | Miss |
| 16 | Scheer | Ark Royal | Eagle | Galissonniere | Miss |
| 21 | Hipper | Norfolk | Suffolk | CT | Miss |
| 22 | Prinz Eugen | Manchester | Kenya | CT | Miss |
| 23 | Koln | Birmingham | Aurora | DD | Miss |
| 24 | Nurnberg | Arethusa | Hermione | DD | Miss |
| 25 | Miss | Galatea | Sheffield | DD | Miss |
| 26 | Miss | London | Dorsetshire | DD | Miss |
| 31 | Miss | Edinburgh | Cairo | DD | Miss |
| 32 | Miss | Exeter | DD | DD | Miss |
| 33 | Miss | DD | DD | Miss | Miss |
| 34 | Miss | DD | DD | Miss | Miss |
| 35 | Miss | DD | DD | Miss | Miss |
| 36 | Miss | DD | DD | Miss | Miss |
"DD" indicates that a destroyer (chosen by the controlling player) breaks down rather than a named ship; "CT" indicates a French Contre-Torpilleur destroyer breaks down; "Miss" means no ship of that nationality breaks down on that roll.
39.2 A ship which breaks down must return to the closest friendly port at emergency speed. Unless using the Repair Rule (40.5), the ship cannot return to sea. If a destroyer is disabled, a die is rolled and the flotilla with the same number loses one destroyer. If it is no longer in play there is no loss.
39.3 The opposing player receives no victory points for breakdown.
40.0 Repairs at Sea
40.1 At the conclusion of the Ship Movement Phase of each turn, both players may attempt to repair damage received by all of their ships. Each player may attempt to repair only one damaged section per ship per turn.
40.2 For each damaged ship, the player announces the section he wishes to repair and consults the Repair At Sea Table to determine the success of the repair.
40.3 If repair is successful, the player may erase one or more marked boxes as indicated in the Repair Table from right to left. If the repair is unsuccessful, fill in solid all marked boxes in the section to indicate that those boxes can never be repaired while the ship is at sea.
40.4 A section can never be completely repaired at sea. The first box hit is unrepairable.
40.5 A damaged ship in port can automatically repair one midships box or two gun boxes each turn (never a combination of the two). If it was disabled due to breakdown (39.0), it cannot leave port until a 6 is rolled. This is checked once each turn for each applicable ship while determining repairs.
40.6 Ships which have moved two zones cannot attempt repairs.
41.0 Surprise Attack
41.1 At night or in bad weather, a slower ship sometimes got within firing range of a faster ship before it was aware of its presence. This subjected the faster ship to a few salvoes before it could get away.
41.2 A ship can attempt a surprise attack only in a zone at night or at a visibility of 5 or worse.
41.3 When a player announces his attacks in a zone where a surprise attack is possible, all defending ships and task forces of the type named must be included as targets no matter what their evasion rating. If the target selected has a higher evasion rating than the attacking ship or task force, then the attacking player rolls two dice and deducts the current visibility level from the sum. If the result is 1 or less, then the attack must occur. If the result is greater than 1, no attack can occur but another target can be selected. Treat night as visibility level 5 and level x as 9. For example, a battleship attempts to surprise attack a cruiser at night in a zone with a visibility of 4. He rolls an 8, deducts 9 (5 for night, +4 for visibility) and gets a result of -1. This is less than 1 and results in an attack.
41.4 Of course, once on the Battle Board, the defending ships may immediately attempt to disengage from battle by withdrawal but the attacking ship has at least one round of fire to attempt to damage the opposing ship.
41.5 If a ship is being shadowed, it can automatically attempt to surprise attack the ship or task force conducting the shadow. It does not have to go through a random process to select its target. If a shadowing ship or task force is surprise attacked and survives the combat, it does not gain its shadow bonus on the next turn's shadow attempt.
42.0 New Ships and Scenarios
Players can set up and play additional scenarios given below or they may invent any of their own.
43.0 Scenario 1 — Free French Participation
43.1 The British player may use the entire French fleet in play.
43.2 Each French ship may start play either at Scapa Flow or Gibraltar, at British player's choice.
43.3 French ships at Scapa Flow cannot move from port until the Scapa Flow fleet can leave. French ships at Gibraltar cannot move from port until Force H can leave.
43.4 The German player may start the Scheer with the Bismarck and the Prinz Eugen.
44.0 Scenario 2 — U.S. Declares War
44.1 The Augusta and the North Carolina enter under British control with the Revenge.
44.2 The German player may start the Scheer with the Bismarck and the Prinz Eugen.
45.0 Scenario 3 — Planned Rheinubung
45.1 The Scharnhorst and Gneisenau start the game in Brest.
45.2 London enters play on 2000 May 25 or later from south board edge anywhere between Z10 and Z17, inclusive, at British player's choice.
46.0 Scenario 4 — Germany Gains Control of French Navy
46.1 The entire French fleet starts in Brest under German control.
46.2 The Augusta and the North Carolina enter play under British control with the Revenge. All three ships may enter play seven turns after the turn it is discovered that one or more German ships have left Bergen.
47.0 Scenario 5 — Iceland Remains Neutral
47.1 Suffolk and Arethusa start play in G15.
47.2 The Hvalfiord LR recon air unit cannot be used. Hvalfiord cannot be used as a port or air base for either side.
47.3 The Norfolk starts play with two fuel factors already expended.
48.0 Scenario 6 — The Tirpitz
48.1 German high command decides to send out Tirpitz with Bismarck and Prinz Eugen even though it has not completed trials or fitting out. Tirpitz starts play at Bergen with Bismarck and Prinz Eugen.
48.2 The Tirpitz gets same advantages as Bismarck in combat except that there is a possibility of fire reduction. It must check for reduced fire power in the same manner as the Prince of Wales and King George V.
49.0 Scenario 7 — Total British Commitment
49.1 Extend the time of play to "2000 May 28."
49.2 British cruisers, Cairo and Exeter, start game in Clyde. They can be used as escort for convoy WS8B if in play. Otherwise, they may leave port only when Repulse can do so.
49.3 British ships, Eagle and Nelson, can enter play on "2000 May 27" turn or any turn thereafter, anywhere along south board edge between Z10 and Z17, inclusive.
49.4 British cruiser, London, can enter play on "2000 May 25" turn or any turn thereafter, anywhere along south board edge between Z10 and Z17, inclusive.
50.0 Scenario 8 — Climax in North Atlantic
50.1 German player can use every ship available for an all out attempt to wrest control of the North Atlantic from the British. Scharnhorst and Gneisenau start at Brest. Bismarck, Tirpitz, Prinz Eugen, Hipper, Koln, Scheer and Nurnberg start either at Bergen or at H22. The ships do not have to start together. Graf Zeppelin must start at H22.
50.2 Tirpitz has certain restrictions imposed upon it as explained in 48.2.
50.3 Time of play begins on "2400 May 22" turn and ends on "2000 May 28" turn.
50.4 British player gets all of the British fleet as explained in Scenario 7.
50.5 British player can use the Augusta and North Carolina. They enter with Revenge as explained in 46.2.
50.6 British player also may use the entire French Fleet. They may start play at Gibraltar and/or Scapa Flow. They may leave port at any time.
51.0 Special Scenario Rules
These rules apply to the Intermediate Scenarios.
51.1 Unless specifically stated otherwise in the scenario, the original Basic Game Order of Battle is used in all scenarios.
51.2 In those scenarios in which German ships begin in Brest, the British player may start any three cruisers (British and/or French) normally at Scapa Flow anywhere at sea from two to seven hexes (inclusive) of Brest. They must be placed on patrol.
51.3 German ships do not get any breakout bonus in scenarios starting 2400 May 22.
51.4 In scenarios which start 2400 May 22, all British ships not listed "on patrol" must start in port. Prince of Wales and Hood at Scapa Flow. The Arethusa at Hvalfiord.
51.5 The British player is allowed to move any number of ships from port (including Gibraltar) any turn after a German ship is discovered.
51.6 German ships can exit the Southern board edge from row Z. Any German ship which leaves play cannot reenter play. The German player receives victory points for ships which can exit the Search Board. This rule should also be used with the Basic Game scenario.
51.7 The Scheer is considered a battle-cruiser. The Scharnhorst, Gneisenau, and Scheer always take damage from A Special Damage Table in combat like the Hood, Repulse and Renown.
51.8 For all scenarios, the German player should get a second LR recon air unit based at Bordeaux. This counter and its Return to Base marker must be hand made.
51.9 When controlling many ships, it is sometimes difficult for the German player to keep track of the first hex of several two hex moves. It is suggested that markers with an arrow be used to mark the first hex. Players can either make their own or use ones included in the German counter sheet of the Tobruk game.
52.0 Intermediate Victory Conditions
52.1 In those scenarios in which the German player starts more than two ships, the game ends only at the conclusion of the last turn of play. Players ignore sections 12.32, 12.33, 12.34, 12.45 and 12.46 of the basic game victory conditions in these scenarios.
52.2 When using the "Convoys" rule (24.0), players ignore section 12.44 of the basic game victory conditions.
52.3 The following victory schedule covering new ships and intermediate game situations presented in 52.4 and 52.5 is in addition to the basic game schedule presented in 12.0 and in no way supersedes that schedule.
52.4 British Victory Point Schedule. The British player accumulates victory points for the following events at the end of play.
52.41 Sinking the Graf Zeppelin — 33 pts. Sinking the Tirpitz — 28 pts. Sinking the Scharnhorst and Gneisenau (each) — 20 pts. Sinking the Scheer — 10 pts. Sinking the Prinz Eugen and Hipper (each) — 8 pts. Sinking the Koln and Nurnberg (each) — 6 pts. Each German submarine sunk — 2 pts. Each German plane shot down or unable to return to base — ½ pt.
52.42 Each ship of convoy WS.8B which is not sunk — 2 pts.
52.43 Each German battleship, battle cruiser, or carrier at sea at the end of play with an evasion level of 21 or less — 4 pts. Each German cruiser at sea at the end of play with an evasion level of 21 or less — 2 pts.
52.5 German Victory Point Schedule
The German player accumulates victory points for the following events at the end of play.
52.51 Sinking the Eagle — 15 pts. Sinking the Nelson — 14 pts. Sinking the Exeter and London (each) — 8 pts. Sinking the Cairo — 4 pts. Sinking the North Carolina — 20 pts. Sinking the Augusta — 10 pts. Sinking the Dunkerque and Strasbourg (each) — 8 pts. Sinking the Algerie and Tourville (each) — 6 pts. Sinking the Gloire and Galissonniere (each) — 4 pts. Each Allied destroyer sunk — 2 pts. Each British submarine sunk — 2 pts. Each merchant ship sunk — ½ pt. Each British plane lost — ½ pt.
52.52 Each convoy evasion move — ¼ pt.
52.53 Each German ship which exits south board edge from row Z — 4 pts.
52.54 Each merchant ship of convoy WS.8B sunk — 8 pts. (maximum 40 points)
52.55 Each of the following ships which break from convoy escort: Rodney, Ramillies, Cairo and Exeter — 1 pt.
52.6 Repairs do affect damage victory points (12.5). Only that damage which is unrepaired at the end of play may be counted. This includes ships in port or off the board as well as at sea.
52.7 Victory points awarded to a player because of enemy carrier-based air loss are still counted even if the home carrier is sunk. Planes lost with the carrier are not counted.
53.0 French Ship Capture
53.1 If the German player controls the French ships, the British player receives their victory point value if sunk.
53.2 The British player receives double the French ship victory point value if captured.
53.3 French ships can be captured if they conform to the following conditions:
53.31 They are in naval combat.
53.32 The total number of the enemy's undamaged hull boxes exceeds their undamaged hull boxes.
53.33 There are no German ships in combat.
53.4 As soon as the above conditions are met, the British player immediately determines if the French ships involved in combat surrender by consulting the French Surrender Table.
53.5 French Surrender Table
| Die Roll | Result |
|---|---|
| 1-3 | All French ships whose evasion level is greater than the fastest British ship of the same or larger general type must immediately withdraw. All French ships unable to withdraw must surrender. |
| 4-6 | No Surrender. |
53.6 The surrender resolution is made only once in a combat action as soon as the conditions listed in 53.3 permit.
53.7 A French ship which does not surrender in one turn may surrender at a later turn.
53.8 French ships which surrender are immediately removed from play.
ADVANCED GAME
54.0 Introduction
In the advanced game, players exchange the combat system previously utilized for a more complex and much more technical miniatures style system. You now maneuver large counters representing individual ships on a large and open flat surface rather than on a mounted board. Movement and range measurement are determined by two ruled gauges. Many critical factors, such as range, gun size, armor, fire control, etc., affect the performance and gunfire accuracy of the ship. Experienced wargamers will notice a great similarity between this new system and the one employed in a previous Avalon Hill release, JUTLAND. If so desired players may abstain from the basic and intermediate games and set up actions just for the advanced game.
Components
54.1 Playing Surface. The battle board is not used in the advanced game. When players are required to have combat, they must conduct it on a flat open surface at least two feet square.
54.2 Hit Record Pad. Each player uses the back of his Hit Record sheet to record the information needed for each ship to fight a battle. The front of the Hit Record sheet is no longer used to record damage. At the start of play or when a ship first becomes involved in combat, the controlling player must transcribe the ship's specifications onto the Hit Record sheet exactly as presented in the Ship Specification Section.
54.3 Counters. Players no longer use the tactical board ship counters in naval combat. You now use the larger advanced tactical ship counters which can be identified by a white stripe running across the center. The information on these counters is identical to that on the tactical board ship counters. A special quadrant marker is also used. It is placed on a ship counter as illustrated below. It aids in determining ship attitude, field of fire, range and direction of entry.
54.4 Battle Maneuver Gauge and Range Finder. Each side gets one Battle Maneuver Gauge and one Range Finder. The Battle Maneuver Gauge is used to move and turn ships in combat. The Range Finder is used to determine the distance between two ships.
54.5 Advanced Game Combat Card. The tables on this card are used to resolve advanced game naval combat.
55.0 Set-Up
When contact has been made on the search board and the ships involved are to proceed to naval combat, the following procedure to set-up combat is used.
55.1 Ship Formation
55.11 If one or both players have more than one ship involved in combat, they must be organized into a formation before being placed into play. If either player demands it, both players must make a diagram or fill in the formation on a copy of the diagram form provided in these rules. Otherwise, ships can be placed directly into the playing area in any formation the player desires. Players are restricted by the organization of their formation as follows.
55.111 Ships in the same column will be placed from a minimum interval of 1000 yards to a maximum of 2000 yards apart. Overlapping of counters is permitted as long as the quadrant marker of the ships involved do not overlap.
55.112 The intervals between columns may be of varying length from side by side to 2,000 yards.
55.113 All ships in the formation must be pointing in the same direction.
55.114 The lead ships in each column do not have to be in line with one another. A lead ship of one column can be positioned up to 3,000 yards ahead or behind the lead ship of any other column.
55.12 Once combat begins, ships are no longer required to maintain their formation structure or distances. Each ship can be moved independently in any way that the controlling player wishes within its movement limitations.
55.2 Ship Placement
55.21 All defending ships are placed in the center of the playing surface first. The attacking ships are then placed on the playing surface at a prescribed distance and direction from the defending ships as explained in the Range and Direction Establishment Tables.
55.22 Range Establishment Table
| Die Roll | Range (yards) |
|---|---|
| 1 | 8,000 |
| 2 | 12,000 |
| 3 | 18,000 |
| 4 | 24,000 |
| 5 | 26,000 |
| 6 | 28,000 |
Die roll modifications to range:
- At night: -4.
- Visibility Level modifier — Visibility 1: +5; 2: +5; 3: +4; 4: +2; 5: 0; 6: -1; 7: -2; 8: -3; X: no attack.
- If at least one of the attacking ships has radar: +3.
55.23 Direction Establishment Table
55.231 If both defending and attacking ships entered the combat zone in the movement phase, the direction of attack is determined by the following procedure. The defending player states the adjacent zone occupied by the defending ship, task force or convoy escort before entering the zone of combat. This zone is counted as 1. From this zone the attacking player counts each zone clockwise around the zone of combat until he reaches the adjacent zone his attacking ships occupied. The direction of approach corresponds to the number the attacking player has counted as indicated in 55.232.
55.232 A count of 1 indicates the stern quadrant; 2 or 3 indicates the port broadside quadrant; 4 indicates the bow quadrant; 5 or 6 indicates the starboard broadside quadrant.
55.24 If either or both of the attacking or defending ships did not move in the movement phase, consult the table in this section: a die roll of 1 places the attack within the bow quadrant; 2 within the stern quadrant; 3-4 within the port broadside quadrant; 5-6 within the starboard broadside quadrant.
55.25 Shadowing ships must enter from the stern quadrant.
55.26 Once the range and direction have been determined, the attacking player places his ships at the correct range from the defending ship formation.
55.261 Range is measured from the two enemy ships that will be closest to each other. Place a quadrant marker on each of the ships so that the two white stripes coincide. Measure the range between the two quadrant markers with the range finder.
55.262 Direction is determined by the quadrant marker on the defending ship. The attacking ships must set up between the correct quadrant of the marker as illustrated.
55.27 The attacking ships may be faced in any one direction as long as all ships are within the required quadrant and no attacking ship is closer to a defending ship than prescribed by the correct range.
55.28 All ships start combat face down.
56.0 Sequence of Play
Advanced naval combat is conducted in rounds. The naval combat phase is over only when all of one player's ships involved have been sunk or successfully disengaged. Each round is divided into several phases which must be performed in the sequence described below.
56.1 Initial Movement Plot. Both players secretly write in the speed and move plot for each of their ships for segment 1 of the current round.
56.2 Initial Movement Resolution. Players move all of their ships as plotted for segment 1.
56.3 Initial Combat Designation. Players designate fire for each ship in the Fire Designation Section of the Hit Record sheet.
56.4 Initial Combat Resolution. Players resolve fire as designated. Damage received is marked on the Hit Record sheet.
56.5 Second Movement Plot. Players secretly write in the move for each of their ships for segment 2 of the current round. The total move for segment 1 and 2 cannot exceed the current speed.
56.6 Second Movement Resolution. Players move all of their ships as plotted for segment 2.
56.7 Second Combat Designation. Same as 56.3.
56.8 Second Combat Resolution. Same as 56.4.
57.0 Movement Procedure
57.1 Ships are moved individually with the use of the battle maneuver gauge. A ship can move any number of factors up to its current speed and within its acceleration or deceleration limit. Movement factors are marked on the battle maneuver gauge.
57.2 Each individual movement factor must be one of three types: straight, full turn, or short turn. Straight movement is measured along the straight edge of the gauge. Turns are measured along the curved edge of the gauge. All movement is conducted from the white stripe on the counter.
57.3 When executing a short turn, a ship is permitted to move less than the full factor.
57.4 A short turn can only be executed if it is the last factor of the move or if the next move is straight ahead.
57.5 Movement Plot
57.51 The Movement Plot section of the Hit Record sheet is divided into three columns. In the first column is put the ship's speed for each round. In the second column is put the ship's written move for the initial movement resolution phase. In the third column is put the ship's written move for the second movement resolution phase.
57.52 When plotting each move of his ships on the Hit Record sheet, a player must use the following notation.
57.521 The number of factors that a ship is to move straight ahead is written as a number.
57.522 Any turns made by the counter are written as an "R" for each right-hand or starboard turn factor or as an "L" for each left-hand or port turn factor.
57.523 A short turn is written as "r" for a right-hand turn or "l" for a left-hand turn.
57.53 All plot notations must be specific and written in the exact sequence in which it will be executed.
Examples of plot notation: "3L1" — the ship moves three factors straight, one factor to the left and a partial factor to the left. "LL1R1" — the ship moves two factors to the left, one factor straight ahead, one factor to the right and finally one more factor straight ahead.
57.6 Logs are open to inspection only at the conclusion of each segment. It cannot be checked during the segment.
57.7 If one or more ships in column are to follow the lead ship, it is sufficient to mark "follow" in the Hit Record sheet. In this case, the ship will follow the exact path of the ship in its immediate front.
58.0 Change of Speed
58.1 Each ship is given a movement factor (m.f.) which determines the maximum number of factors that ship can move in a round.
58.2 When plotting a ship's initial move each round, the controlling player must write in its speed. This speed cannot exceed the ship's movement factor. The movement factor can be reduced due to damage acquired.
58.3 The movement plot for the first movement segment must be half (rounded up) of the ship's speed. The movement plot for the second segment must complete the remainder of the ship's speed. For example, the Bismarck is to move at a maximum speed of 9 in round one. In the initial movement segment, the Bismarck must use exactly 5 factors of its speed. In the second movement segment, it must use exactly 4 factors of its speed.
58.4 A short turn expends a full movement factor.
58.5 A battleship, battle cruiser or aircraft carrier can increase or decrease its speed by no more than 7 m.f. from its previous round's speed. Destroyers and light cruisers are under no such restrictions and can change their speed by any amount.
58.6 If damage has forced a battleship, battle cruiser or aircraft carrier to reduce its movement factor by more than seven factors, it will take two turns for the ship to reduce its speed to its revised movement factor. It must reduce its speed to its new movement factor as soon as possible.
58.7 In the first round of combat, players can select any starting speed for their ships.
58.8 A ship which loses movement factors during an initial combat resolution phase that lowers its movement factor to less than its current speed must reduce its current speed and its second move for the round by half (rounded down) or to its current movement factor, whichever is less. The ship completes the movement loss (if any remains) in the next round.
59.0 Collision
59.1 If ship counters overlap at the end of their move, collision may occur. All ships involved in collision immediately have their current speed halved. As soon as the ship moves one complete round at that halved or slower speed, it may increase its speed up to its movement factor. The speed loss is only temporary.
59.2 Place a quadrant marker on the ships involved. If they also overlap there is a collision; if they do not overlap, there is no collision.
60.0 Gunnery Strength
60.1 Each ship has a certain number of guns as given in the Specification Chart. Guns are divided into two classes, main gun and secondary gun.
60.2 Main guns are grouped into turrets. These are labelled in the Hit Record sheet, main gun A, B, X and Y. Note that not all ships have four turrets. The number in the turret indicates the number of guns in the turret. This ranges from two to four guns per turret.
60.3 Secondary guns are also grouped into turrets. Each box represents one turret. Ships may contain from one to five turrets on each side of the ship. The number in the box indicates the number of guns in the turret. Ships which have a 0 turret, actually have no secondary armament. It is given a box for damage purposes only.
60.4 Also by each turret are several arrows. These arrows indicate into which quadrants that turret can fire. (The Hit Record sheet diagrams the ship from above — bow at top, stern at bottom — with main gun turrets A, B, X and Y and port/starboard secondary armament turrets marked around the superstructure, each with arrows showing its firing arc.)
60.5 A main gun turret can fire at any one enemy ship in one of the legal quadrants as illustrated below. Note that the quadrant marker must be used to determine the quadrants.
60.6 A secondary gun turret can fire at any one enemy ship in one of the legal quadrants as illustrated below. Note that most secondary turrets can never fire across the bow or stern of the ship.
61.0 Fire Designation
61.1 During each fire designation phase, players record each target ship and the number and type of guns directed at it for each firing ship in the Fire Designation Section of the Hit Record sheet.
61.2 A ship can fire at any number of ships up to the number of turrets that it has. A ship can never split the guns of a single turret between more than one ship. More than one turret can fire at the same ship.
61.3 To distinguish between the main gun and secondary guns; place the letter "m" by the number of main guns firing at the target and the letter "s" by the number of secondary guns firing at the target.
61.4 An enemy ship must be in a quadrant into which the turret can fire to be a target for that turret.
61.5 No enemy ship which is more than 28,000 yards from the firing ship can be a target for that ship's fire. Range is always measured from center of quadrant marker to center of quadrant marker.
61.6 If the identities of the enemy ships are unknown, the opposing player will give each ship an I.D. #, stating the number aloud and recording it by the ship's name on the Hit Record sheet. Number markers can be placed on the counter as a reminder.
61.7 The Fire Designation Section is not aligned with the round number of the Move Plot. A player can attack more than two targets in a round. As each attack is resolved, the attacking player should "X" out the designation to indicate that it has been executed.
62.0 Gunfire Resolution
62.1 Each ship's fire is resolved in two steps. Players first determine the number of hits a ship acquires on its targets. Then the damage for each hit is determined.
62.2 All gunfire in the same segment is considered to occur simultaneously. Damage does not take effect until all gunfire is resolved.
62.3 British ships resolve their gunfire first before German ships in any order the controlling player wishes.
62.4 Hit Determination
62.41 To determine the number of hits a ship gains on a target, the attacking player must first determine which range segment the target ship occupies as indicated on the Range Finder.
62.42 The attacking player then cross-indexes the range with the type of gun firing on the ship's Rate of Fire Chart. Main and secondary gun fire must be resolved separately. The result is called a gunfire multiplier.
62.43 The number of guns firing is multiplied by the gunfire multiplier and rounded to the closest whole number to get the ship's gunnery factor. For example, the Bismarck fires all eight of its main guns at the Hood which is 26,000 yards away in its starboard broadside quadrant. The Hood is at extreme range. The German player cross-indexes the range (extreme) with the main gun column to get a gunfire modifier of .3. This is multiplied by 8 and results in a gunnery factor of 2 (8 x .3 = 2.4, rounded to closest whole number of 2).
62.44 The attacking player rolls two dice, determines the modification to the roll and cross-indexes this result with the gunnery factor on the Advanced Hit Table to get the number of hits scored.
62.5 Hit Modifications
62.51 The most difficult part of gunfire resolution is determining the modification to the Advanced Hit Table dice roll. This is also an extremely important part of the system and a specific procedure has been developed to facilitate its implementation.
62.52 All modifications are cumulative.
62.53 If a ship is firing a gun type at a target at which it had not fired with the same gun type in the previous combat resolution phase of the battle, it must modify the dice roll with the Targeting Modifier on the Rate of Fire Chart. For example, if the Bismarck, firing its eight main guns at the Hood at extreme range, had not fired or had just fired its secondary guns at the Hood in the previous round, it would have to add 16 to the dice roll.
62.54 All other modifications are determined in the Hit Modification section of the Hit Record sheet. Certain of these modifications can be determined directly from the Hit Record sheet. Other modifications must be determined from one of the tables provided in the Advanced Tables Card.
62.55 The modifications have been organized into categories to ease the modification process. Players who follow the system outlined below will minimize the time that it takes to calculate the modification. Note that most of the modifications can be pre-determined in other phases of the round.
62.551 Modifications 1 and 2 are permanent. They never change throughout the entire battle. These modifications are identified by the prefix (P). These modifications should be entered at the start of combat.
62.552 Modifications 3, 4 and 5 are affected by damage to the firing ship and are identified by the prefix (D). These modifications should be checked when the ship receives damage. Be careful to make sure that a modification does not take effect until the next combat resolution phase.
62.553 Modifications 6 and 7 are affected by the ship's move and are identified by the prefix (M). During each movement plot phase, the controlling player should check whether either modification applies in the next combat phase.
62.554 Modifications 8, 9, 10, 11 and 12 are affected by target designation and are labelled by the prefix (F). These modifications should be checked during each fire designation phase.
62.555 The final four modifications 13, 14, 15 and 16 are the only modifications that need be checked when determining the modification. Note that in all modifications, "ship" refers to the firing ship and not the target ship.
62.6 Each modification should be entered in the space provided. When a modification is changed, mark out the previous modification and enter the new modification.
62.7 If the ship is firing at more than one target, modifications 8 through 16 may be different for each target ship. Players should take care to distinguish between the modifications for different targets.
62.8 In the modification section of the Hit Record sheet, sections (D)5 and 13 use the terms "turn" and "round." These terms must be changed to "segment."
63.0 Damage
63.1 Once the number of hits acquired on a target has been determined, the damage caused by the hits must be determined.
63.2 For each hit, the attacking player rolls two dice and consults the Advanced Damage Table. If the firing ship is in the target ship's bow or stern quadrant, the bow or stern section of the table is used. If the firing is in the target ship's port or starboard broadside quadrant, the broadside section of the table is used.
63.3 Damage as determined on the table may or may not take effect, depending upon armor penetration. By each result is a series of codes. Each code indicates a type of armor.
63.4 Players cross-index the range between the firing and target ship and the damage dice roll to determine the type of armor that must be penetrated. The defending player then consults the target ship's armor section and states aloud the thickness of the armor type selected.
63.5 The attacking player then states the gun type. He cross-indexes the type with the range in the Penetration Chart. If the resulting thickness is equal to or greater than the target ship's armor, the round penetrates and a hit is scored. If the resulting thickness is less than the target ship's armor, the round does not penetrate and no hit is scored.
63.6 Certain results have no armor to penetrate. Damage is automatically scored in this case.
63.7 Some results require the player to consult a special damage table. This is done in addition to any hit scored.
64.0 Record of Damage
64.1 A record of damage must be maintained for each ship on the Hit Record sheet.
64.2 The size of each hit varies according to the type of gun which is firing as indicated in the Damage Table.
64.3 As damage for a hit is determined, players mark out boxes in the appropriate hit location from left to right.
64.31 In all cases but one, a hit which fails to penetrate the required armor causes no damage. If a hit fails to penetrate the armor of a main gun turret, it still causes some damage.
64.32 If a hit penetrates the main gun or crown armor, the entire turret is destroyed. If the hit does not penetrate the armor, it scores damage as indicated by size of shell. When all of the boxes are completely marked out, the turret is destroyed anyway.
64.33 Some guns cause less than a full box worth of damage. Because of this, each box is divided into quarters. For example, if a type D gun scores two hits on the hull, a total of one and one half boxes are marked out.
64.34 No box or fraction of a box may be skipped when recording damage.
64.35 Gun size is ignored when recording secondary turret hits. A gun which penetrates secondary gun armor destroys the entire turret.
64.4 The exact location of turret damage is always determined randomly among the turrets involved. This must include turrets which have already been destroyed. It is possible for the same turret to be hit many times before another turret of the same type is hit.
64.41 Secondary turrets in the port secondary section of the ship can only be hit by a ship in the port quadrants of the target ship. Secondary turrets in the starboard secondary section of the ship can only be hit by a ship in the starboard quadrants of the target ship.
64.42 Bow main gun turrets are turrets with an arrow pointing to the bow quadrant. Stern main gun turrets are turrets with an arrow pointing to the stern quadrant.
64.43 In cases where a hit is scored on a turret which has already been destroyed, no damage occurs.
64.5 Once all superstructure boxes have been marked out, all subsequent damage to the superstructure is treated as hull damage. If they wish, players may automatically cause a ship to lose its radar as soon as it receives a superstructure hit. This reflects the flimsiness of the radar structure at this time. Players are not required to use this rule.
64.6 Note that the hull modification (D)3 is indicated in the hull section. The modification to be used is that in the left-most box of the hull with at least one quarter undamaged.
64.7 There are special targets that can be damaged.
64.71 If the MFC Dir (main fire control director) or Plot (plotting room) is damaged, the firing ship receives a permanent reduction to its fire modification. Only if the player gets a hit on the special damage table will damage occur even if the armor was penetrated. These are the only target locations where armor may be penetrated but no damage occurs.
64.72 If damage occurs in the control tower or rudder, the players consult the appropriate special damage table to see how it affects the ship's performance.
64.73 Rudder and conning tower damage can accumulate. Each time damage is acquired, the appropriate special damage table is consulted. Once the MFC Dir or Plot is destroyed, all subsequent damage to the same hit location is ignored.
64.8 Once all hull boxes have been completely marked out, the ship is sunk.
65.0 Ammunition Expenditure
65.1 Each gun of an Allied ship expends three ammunition factors when firing at a target in long or extreme ranges.
65.2 Each gun of a German ship expends four ammunition factors when firing at a target in long or extreme ranges.
65.3 Each gun of all ships expends six ammunition factors when firing at a target in point blank, short or medium ranges.
65.4 If the guns are also targeting, the ammunition expenditure is halved (rounded down).
65.5 Once all ammunition of the gun type has been expended, the ship can no longer fire those turrets.
65.6 If they wish, players may divide their ammunition supply equally among the turrets. Ammunition may not be transferred from turret to turret.
66.0 Withdrawal
If a ship spends more than three rounds outside of the starting range of all enemy ships as determined by the Range Establishment Table, it may withdraw from combat. The controlling player just removes the counter from the playing surface. Withdrawn ships cannot return to the battle.
67.0 Special Capabilities
67.1 Hidden Ships
67.11 Ships always start play face down with their identity hidden.
67.12 A ship is turned up in the combat resolution phase in which it fires its guns or in the movement resolution phase in which it moves to the next closer range segment (from extreme range to long high, from long low to medium high, etc.) whichever comes first.
67.2 Reduced Turn Arc
67.21 Included in the rules with the Intermediate Weather Tables are two turning arcs. These are attached to the battle maneuver gauges as indicated.
67.22 Battleships and aircraft carriers use the outer curved portion of the gauge. Cruisers use either the intermediate turn arc or the outside arc in its turn maneuver. Destroyers may use all three turn arcs when making its turns.
67.23 A ship which has a choice of more than one arc with which to make a turn, marks a "+" or "†" above the turn notation to indicate the wider arc. For example, a cruiser which makes a left turn on the battleship arc marks "L+". A destroyer which makes the same turn marks "L†". If it turns at the cruiser arc it marks "L+".
67.3 Ship Weaving and Salvo Chasing
67.31 In any movement phase in which a ship makes three or more turns, it is automatically considered to be weaving in the next combat resolution phase and gains the weaving modification.
67.32 In any movement phase in which a ship makes three or more turns of which at least one is in the opposite direction to the others and in which the note "C" appears in the movement plot, the ship is automatically considered to be salvo chasing in the next combat resolution phase and gains the salvo chasing modification.
67.33 A ship can be either weaving or salvo chasing, never both.
67.34 The controlling player must indicate that the ship intends to salvo chase in the movement plot. If there is no notation and the ship is making the correct turns it is considered to be weaving instead.
67.4 Reduced Rate of Fire
67.41 The attacking player can voluntarily reduce the number of guns firing in the combat resolution phase to conserve ammunition. For example, the Prince of Wales has been designated to fire its 4 gun A turret. The British player may choose to fire with either 3, 2 or 1 guns in order to conserve ammunition. In actuality the ship is still firing 4 guns but at a reduced rate of fire.
67.42 For each gun that does not fire, the attacking player can modify its fire dice roll by -1.
67.5 Blocked Line of Sight
67.51 If the target ship is in medium or closer range and a direct line from the firing ship's quadrant marker to the target ship's quadrant marker crosses over any part of another ship's counter, the line of sight is blocked.
67.52 If the target ship is in long or extreme range and a direct line from the firing ship's quadrant marker to the target ship's quadrant marker crosses over any part of another ship's counter within 4000 yards of the firing ship, the line of sight is blocked.
67.53 In any other situation, line of sight is not blocked.
67.54 A firing ship with its line of sight blocked must add 15 to its hit dice roll.
67.6 Smokescreen
67.61 There are two types of smokescreens which a ship may lay; one covering the ship itself and the other as a wall of smoke in its front.
67.62 A ship may lay smoke in an unlimited number of turns.
67.63 A smokescreen must be indicated in the movement plot. Mark "SC" for smoke cover or "SF" for smoke front.
67.64 When a ship plots smoke cover, all fire directed at it must be modified by +8 in the next combat resolution phase. All fire of the ship under smoke cover must be modified by +15.
67.65 When a ship plots a smoke front, it places a number marker at each end of its move in its next movement phase. The outer edge of each marker must be in line with the ship's white stripe at the beginning and the end of the move. The controlling player chooses which side of the ship the markers are placed.
67.651 A smoke front is positioned along an imaginary line running from outer end of marker to outer end of marker.
67.652 Any ship whose line of sight to the target ship crosses any part of the smoke front has its fire dice roll modified by +15.
67.653 The smoke front remains for two complete combat resolution phases then it is removed.
68.0 Repairs
68.1 Repair to the rudder may also be attempted when making repairs.
68.2 Repair procedure is the same as in the intermediate game with the following exceptions.
68.21 Main gun turrets which have been destroyed cannot be repaired.
68.22 Only one damaged main gun turret may be subject to repair in a turn.
68.23 Players must substitute the Secondary Repair Table in 68.3 for the one used in the intermediate game.
68.3 Rudder Repair Table
| Die Roll | Result |
|---|---|
| 1-4 | Rudder Repair |
| 5-6 | Unsuccessful |
Secondary Repair Table
| Die Roll | Result |
|---|---|
| 1 | 2 secondary turrets repaired |
| 2-4 | 1 secondary turret repaired |
| 5-6 | Unsuccessful |
69.0 Torpedo Fire
69.1 A ship with torpedoes may fire them at a ship in its line of sight within 8000 yards range.
69.2 Ships use the same tables when resolving torpedo fire as presented in the intermediate game.
69.3 When using those tables, ships within 4000 yards (inclusive) of target ship are in one hex range. Ships between 4001 and 8000 yards fire torpedoes in the two hex range.
69.4 The attacking player who intends to fire torpedoes must mark a "T" and the target in the Fire Designation Plot during the Movement Plot Phase. Torpedo fire designated against a target ship within 4000 yards is resolved in the next combat resolution phase. Torpedo fire between 4001 and 8000 yards is resolved in the second combat resolution phase after the torpedoes have been plotted to fire.
69.5 At the beginning of the movement resolution phase after the torpedo plot, the controlling player must place a number marker underneath the ship to mark the location of the torpedo launch. This marker remains in that position until the resolution of the torpedo fire.
69.6 If another ship happens to be in the line of sight between the target ship and launch position, it receives the torpedo fire instead of the original target. Otherwise the targeted ship receives the torpedo fire no matter where it is.
69.7 If the torpedo launch marker is in the target ship's bow or stern quadrant when resolving torpedo fire, or if the ship is weaving, or both, the hit dice roll is modified by -9 to the white die.
70.0 Destroyers
70.1 The British player may introduce destroyers into advanced combat.
70.2 Each destroyer has one hull box. It has no other type of hit box. Every hit scored against a destroyer on the Hit Table automatically damages this box. The Damage Table is never consulted. When the box is completely marked out, the destroyer sinks. As can be seen, one large shell hit is sufficient to sink a destroyer.
70.3 Every destroyer has a gun strength of 4 in the bow and stern quadrants and 8 in the broadside quadrants. The guns are type Z.
70.4 Each time a destroyer receives a fractional hit, its gunnery strength is reduced by the same fraction. A destroyer with half damage has its gunnery halved. A destroyer with three quarters damage has its gunnery reduced by three quarters and so on.
70.5 Each time a destroyer receives a fractional hit its movement factor is reduced in the same manner as gun strength.
70.6 Damage to destroyers is not repairable. If a destroyer survives combat with damage, it is removed from the flotilla roster and is no longer in play.
70.7 A destroyer in battle is represented by the back side of a basic game cruiser tactical ship counter.
71.0 Special Ship Fire Limitations
71.1 The Prince of Wales, King George V, and the Tirpitz have their fire modified by the tables presented in 71.3.
71.2 The tables are consulted at the beginning of each combat resolution phase for each of the above ships which fire. If the turret affected is not firing ignore the result.
71.3 Tirpitz
| Dice Roll | Result |
|---|---|
| 11 | 1 gun in A turret perm. jammed |
| 12 | 1 gun in B turret perm. jammed |
| 13 | 1 gun in X turret perm. jammed |
| 14 | 1 gun in Y turret perm. jammed |
| 15-16 | 1 gun in A turret jammed |
| 21-22 | 2 guns in A turret jammed |
| 23-24 | 1 gun in B turret jammed |
| 25-26 | 2 guns in B turret jammed |
| 31-32 | 1 gun in X turret jammed |
| 33-34 | 2 guns in X turret jammed |
| 35-36 | 1 gun in Y turret jammed |
| 41-42 | 2 guns in Y turret jammed |
| 43-66 | No Effect |
Prince of Wales and King George V
| Dice Roll | Result |
|---|---|
| 11 | 1 gun in A turret perm. jammed |
| 12 | 1 gun in B turret perm. jammed |
| 13 | 1 gun in X turret perm. jammed |
| 14-15 | 1 gun in A turret jammed |
| 16-21 | 1 gun in B turret jammed |
| 22-23 | 1 gun in X turret jammed |
| 24-25 | 2 guns in A turret jammed |
| 25-31 | 2 guns in B turret jammed |
| 32-33 | 2 guns in X turret jammed |
| 34-66 | No Effect |
71.4 Guns which are permanently jammed are so for the duration of the turn only. In any subsequent battles, the guns can fire.
71.5 Guns which are jammed are just jammed for that fire resolution only.
72.0 Conversions
72.1 When using the Advanced Tactical Game with the Basic and Intermediate games the following conversions must be made.
72.2
- 1 midships box = 1½ hull boxes
- 3 evasion factors = 1 m.f.
- 1 intermediate ammunition factor = 24 advanced ammunition factors
- 1 secondary hit = 1 secondary turret
- 1 bow or stern hit = ½ bow or stern turret
- 1 battle board hex = 0-4000 yards
- 2 battle board hexes = 4001-8000 yards
72.3 Anytime a conversion cannot be made evenly, round down.
Example of Advanced Combat
The Hood and Prince of Wales enter combat from the port broadside quadrant of the Bismarck and Prinz Eugen at a range of 26,000 yards. All ships move as plotted for the first segment. The British player designates all of Hood's bow guns to fire against the lead ship (Prinz Eugen) and he designates all of Prince of Wales' bow guns to fire against the trailing ship (Bismarck). The range is too great for secondary armament. The British stern turrets are unable to fire because the German ships are in both ships' bow quadrant. The German player does not designate any fire for his ships as the Prinz Eugen cannot fire to extreme range and he wants to conserve Bismarck's ammunition.
The British player calculates the Hood's gunnery factor by multiplying the number of guns firing (4) with the main gun multiplier at extreme range (.2). The result, .8, is rounded to the nearest whole number of 1. The Hood's fire dice modification is determined in the following manner:
Targeting: +18 (Hood did not fire at target in previous segment). (P)1: +0 (Hood has radar). (P)2: +0 (Visibility is at level 2). (D)3: +0 (No hull damage). (D)4: +0 (Neither MFC Dir nor Plot has been destroyed). (D)5: +0 (Hood was not hit in previous round). (M)6: +0 (Hood's speed is 9 which is one less than its full speed of 10). (M)7: +0 (Hood did not make any turns in its move). (F)8: +3 (Prinz Eugen is a cruiser). (F)9: +0 (Hood did not fire in previous turn). (F)10: +0 (British crew is fresh). (F)11: +0 (Hood is firing all of its guns at the same target). (F)12: +0 (Hood is only ship firing at Prinz Eugen). 13: -2 (Hood is not under fire). 14: +0 (The Prinz Eugen made no turns). 15: +0 (Prinz Eugen is moving at a speed of 9). 16: +1 (Hood is firing Bow to Broadside, column 1; speed difference is 0; cross-indexing +2 to -1 speed difference with column 1 results in a modification of +1).
The total modification is +18+3-2+1=20. The British player rolls a 12. The +20 modification is divided by 6 because, in the base six counting system, the ten place becomes the six place. The result of 3 remainder 2 is read as +32 for base six. The new dice roll is now 12+32=44, and results in a "miss." In fact, the Hood had no chance to score a hit. If it is too difficult to convert the modification from base ten to base six, just count the amount of the modification along the dice roll column on the Hit Table to arrive at the correct result.
The gunnery factor for the Prince of Wales is (6 guns) x (.2 multiplier) = 1.2 rounded to the nearest whole number of 1. The hit dice modification is determined next. Targeting: +17 (The Prince of Wales did not fire at Bismarck in previous segment). 13: -2 (The Prince of Wales is not under fire). 16: +1 (The Prince of Wales is in identical situation as Hood). All other modifications are +0.
The final modification of +17+1-2=+16 converts to +24 in base six (16 ÷ 6 = 2 remainder 4). Like the Hood, the Prince of Wales cannot possibly score a hit in column 1 of the Hit Table. The Hood expends 6 ammunition factors (4 guns x 3 factors per gun x ½ targeting modifier). The Prince of Wales expends 9 ammunition factors (6 guns x 3 factors per gun x ½ targeting modifier).
Terrain Effects Chart
The search board map is divided into zones of the following types:
- Sea Zone — Sea zones contain a number. Any unit may enter a sea zone. The following zones should have a grid-coordinate and are considered sea zones: F15, E19, O8, G18, L24, J18.
- Land Zone — Land zones do not contain a number. Only air units may enter a land zone.
- Coast Zone — May or may not contain a number. If it does, it is a sea zone. If it does not, it is a land zone. German ships cannot enter a Great Britain or Eire coast zone.
- Port Zone — Ships and certain air units may enter and base in a friendly port. If an arrow is present, a ship may enter or exit the port from the zone to which the arrow is pointing.
- Air Base — Certain air units may land and take off from a friendly air base. Ships cannot use it as a port.
- Island Zone — Generally decorative; the British player has an inherent search strength of 4 in the Faroe and Shetland Island zones.
- Fog Zone — Special weather conditions can occur in these zones.
- Irish Sea Zone — German ships cannot enter the Irish Sea zone.
- British Patrol Line — These zones mark the western limit for British General Air Search (see Chance Table) and Off-Board Convoy (24.15).
- Convoy Route — Certain British ships on convoy escort must follow convoy routes. German ships in or close to a convoy zone have the opportunity to locate a convoy.
British/Allied Countries & Islands: Great Britain, Eire, Iceland, Faroe Islands, Shetland Islands. Ports: Scapa Flow, Clyde, Hvalfiord, Plymouth, Gibraltar. Air Base: Eire.
German Countries: France, Norway. Ports: Trondheim, Bergen, Brest, St. Nazaire. Air Base: Bordeaux.
Neutral Countries and Islands: Spain, Greenland, Azores. Ports: Ferrol.