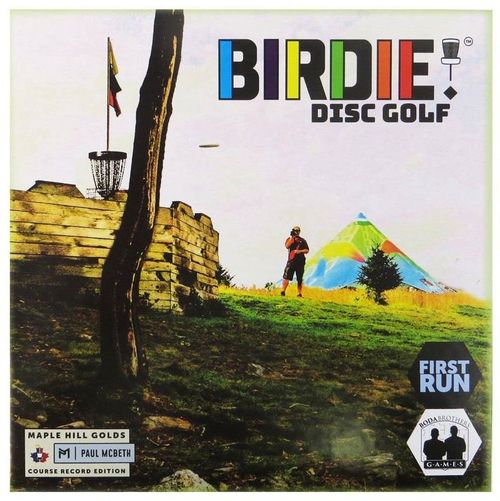
BIRDIE!: The Disc Golf Board Game
BIRDIE!: The Disc Golf Board Game Rulebook
Table of Contents
Table of Contents
Objective
If everyone playing is new, go to New Player Warmup Hole on page 15.
You stand on the tee of Maple Hill Golds, with glory or defeat in front of you. There can be only one Champion. Lowest score wins. Ties are broken by most remaining Skill Chips. Do you have the skills and karma and dice to be crowned champion? Scan the barcode for FAQs and video tutorials.
Overview
After building your player skills (distance, putting, driving, focus and karma), you roll the dice and move your disc down the fairway. The roll chart attached to the space you are on indicates where your disc flies, the higher the roll, the better the shot. For example, if you are in the Yellow Square space to the left and you roll an 8, you advance to the Blue Circle.
Note that some numbers are not in the roll charts. This is in order to present the info in a consistent and aesthetically pleasing way. Your disc advances as far as it can. If you are in the Yellow Square (to the left) and roll a 14, you advance to the best space that has a number of 14 or less. In this case, you advance to the Green Square since you can't quite reach the 15.
Use your Karma Cards and Skill Chips to add dice and improve your roll so you can make a better shot. No matter how many total dice you roll, you will always take your best three 6-sided dice or your best 20-sided die to determine where your disc lands.
When you get on the green, go ahead and putt out. Use the putting roll chart associated with your location on the green. Parked (black diamond under the pin) means you get it in on the next shot no matter what. If you hit Chains, refer to your player's Chains chart on your player card and roll 1d20 (one 20-sided die) to see if it stays in or chains out.
Lastly, remember to work towards your player's strengths and try to set other players up to have to perform shots that are outside their wheelhouse.
Take your time, be patient, take what the course gives you and avoid those double bogey blues. You've got this.
Setup
Player Prep
- Shuffle Player Cards and deal 2 Player Cards to each person.
- Each person reviews their 2 Players and chooses one to use during the round.
- Distribute Skill Chips and Karma Cards based on the Rookie (white backed) side of your Player Card. For example, Putta Parker would start with:
- 3 Karma Cards
- 2 Driving Chips
- 4 Putting Chips
- 2 Focus Chips
- If no one is Judge Jamie, roll to see who goes first.
First time playing? Remove Judge Jamie from the Player Cards. Deal one Player Card to each person. Using the Rookie (white background) side of your Player Card, distribute double the number of Karma Cards, and Skill Chips (Driving, Putting and Focus). Each player rolls 1d20. Highest roll goes first. Jump ahead to SCORE PAD PREP.
Warm Up Zone
Place the Warm Up Zone on the table. Place the Distance Chips face down next to their section of the board. Place the Putting, Focus, and Driving Skill Chips, as well as the shuffled Karma Cards off the board adjacent to their sections.
Set the warmup zone:
- Roll the red, blue, and green 6-sided dice.
- Place Driving (red), Focus (blue), and Putting (green) Skill Chips.
- 2A. If a 6 was rolled on the red die, put 6 Driving Skill Chips in the Driving section. Do the same with the blue and green dice and their corresponding spaces (namely, focus and putting).
- Place one Karma Card (face down) in its space.
- Place two Distance Chips (face up) in the Warm Up Zone.
Warm Up your Player:
The first player chooses ALL Chips or Cards OF ONE ATTRIBUTE in the Warm Up Zone. For example, if a 6 was rolled for the Focus Chips, the first player may take all 6 of the Focus Chips. Then the player to their left chooses to take all of the Chips or Cards in one of the remaining attributes. This continues until all players have taken an attribute or upgraded to pro (see Upgrade to PRO below).
Reset the Warm Up Zone, and repeat, until five rounds are completed.
- Distance Chips: If the Distance Chips were taken, put two new Distance Chips face up in the Warm Up Zone. If they were not taken, add one more Distance Chip (face up) to the Distance Chips pile.
- Karma Cards: Add one Karma Card (face down) to the Karma Card pile, whether it was taken or not.
- Driving, Putting, Focus Skill Chips: Remove any Skill Chips in the Warm Up Zone. Roll the red, blue, and green dice. Place Driving (red), Focus (blue), and Putting (green) Skill Chips into their respective areas.
Choosing first in the next round: If Judge Jamie is not playing, the first choice moves one position clockwise and choosing follows the standard clockwise progression. If Judge Jamie is playing, Judge Jamie chooses first. First choice among the other players moves one position clockwise then follows the standard progression.
Upgrade to PRO. During any build round, you may forego the Warm Up Zone options and upgrade your player from ROOKIE to PRO. If you decide to go PRO, flip your player card over and receive the additional Karma Cards and Skill Chips as indicated by the numbers to the right of each row. Your Distance may also increase.
Scorepad Prep
In the first row, starting with Judge Jamie or the first player, write the person's name. In the next two columns, indicate their Total Distance and the number of Karma Cards after the Warm Up rounds.
- Distance: Sum of Distance Chips selected during the warm-up and the Player Distance. If Distance is less than 450', take a TEE-1 reminder chip. If 600' or more take a TEE+1 chip.
- Karma Cards: Total Karma Cards to start the game.
First time playing? Using the Rookie side of your Player Card, write the number listed next to Karma under the KC column. Add 125' to Distance and write the total under DIST. Jump ahead to GAME BOARD PREP.
Modifier Board Prep
After warm up is completed, turn over the Warm Up Zone. Each player should place their Tee Distance modifier on their corresponding color. Leave at +0 if your distance is >425 and <600.
Place the BOB meeple on the player that is going last. This will move to whoever is going last on each hole.
Game Board Prep
Place the first game board on the table. Place the Karma Cards on the Draw pile. Place each person's disc on the tee, in the order of play, with the player teeing off first on top. On hole 1, teeing order goes clockwise.
Let's play some disc golf!
How to Play
On each hole, players will take turns throwing shots (rolling dice), trying to get their disc in the basket in the fewest throws.
3D6
Default roll is 3d6. Dice may be added/swapped (see Adding Dice on page 8). Roll the dice. Add up your best 3d6 (or 1d20). This is your roll.
Turn Order
Throws proceed with the player whose disc is farthest away from the basket throwing next. If two players are on the same spot, the top disc throws first. The one exception is PUTTING OUT (see page 7).
Move Your Disc
Using the Die Roll Chart next to the space your disc is on, determine where you land. Your disc progresses to the highest space it reaches.
Tee shot example: In these examples, the player is throwing from the Hole 9 Tee. The hole is a 420' Par 4. The hexes to the sides, along with the Roll Modifier Board are there to remind you to add/subtract based on your driving distance and if you are teeing last, to use your +1 DIE. The QR codes on the board link to drone flyovers and hole stats for each hole being played. Enjoy!
- If a 6 or 7 is rolled, advance to the Orange Circle.
- If an 8 or 9 is rolled, advance to the Yellow Diamond.
- If a 10 or 11 is rolled, advance to the Yellow Square.
Note: Red outlined spaces indicate the throw might go OB.
Play Karma Cards
Karma Cards can be played by you, or other players, as indicated on the card, Before, During or After the roll. They can only be played when the affected disc is located in a correct space as indicated by the colored hexes along the left edge of the card (see KARMA CARDS for more details).
Karma Cards must be resolved in the order they were played. For Determination Rolls, the first card played takes precedence. For Weather Cards (wind, rain, warm and sunny, no wind, no rain), the card played most recently takes precedence. Lastly, on each shot, no duplicate Karma Cards may be played and the second one played is returned to the card player's hand.
On Other People's Turn: Think about who is winning, where you are in the game and what holes are coming up. Play Karma Cards to affect the player rolling. Helping other players is allowed and can build your own Karma and/or Focus.
Putting Out
After landing on the Green, PUTT OUT. Utilize the Putting Chart at the top of the hole. While putting, you may add dice as normal. Before putting out, perform any necessary OB Determination Rolls.
In this example, from C1 (Green Circle), a roll of 8 or more is IN. A roll of 7 hits CHAINS (see Chains Determination Rolls) and a roll of 3 to 6 is PARKED, which means the next shot is automatically in.
From C2 (Green Square), a roll of 14 or more is IN, a 12 and 13 hit CHAINS, a 6 - 11 is PARKED, and a 5 or less goes to C1.
Lastly, From C3 (Green Diamond), a 17 or more is IN, a 15 or 16 hits CHAINS, a 10-14 is PARKED, and a 9 or less goes to C1.
After Putting Out, place your disc on the appropriate score at the top of the board. Your score is your total number of throws plus penalties. Note: Do not add Courtesy Violation penalties until the end of the game.
Using the Modifier Board
The Modifier Board serves as a quick reference for roll modifications. Karma Cards played during or after rolls do not need to be played on the Modifier Board.
- WEATHER: During each hole, place any rain or wind on their respective spaces. Additional rain or wind cards replace and remove the current rain or wind.
- KARMA: Place any BEFORE ROLL Karma Cards on the Karma spaces on the Modifier Board. More than four Karma cards may be played.
- BOB: After each hole, move the BOB meeple to the tee indicator of the last player to tee off.
After Each Hole
Mark everyone's score and cumulative score. Set the player discs on the next tee with the player teeing off first on top. Order on the tee is based on how well each player did on the previous hole, with the lower scores going first. Ties stay in the same order as the previous hole.
3-Hole Karma Reset
After every three holes are completed, Karma Cards are reset.
- DISCARD: Each player may keep one Karma Card and must discard all other Karma Cards.
- DEAL: New Karma Cards are dealt out to each player equal to the number of Karma Cards written on the Score Pad next to their name.
Adding Dice
Each roll starts with 3d6. Dice may be added/swapped in the following ways:
- Skill Chip: Add 1 die per chip.
- Karma Card: Add/Subtract dice as directed when played.
- Player Attributes: Add/switch dice as allowed by Player Card.
- BOB: Add 1 die when you are last to tee.
| If you add | You will roll |
|---|---|
| 0 dice | 3d6 |
| 1 die | 4d6 or 1d20 |
| 2 dice | 5d6 or 2d20 |
| 3 dice | 6d6 or 3d20 |
No matter how many dice you roll, pick the best 3d6, or 1d20 to determine your roll. Min dice: 3d6, 1d20 | Max dice: 6d6, 3d20.
- Best vs Highest: There may be times when you want to throw less far to avoid possibly going OB. You may choose the BEST dice roll combination. You do not need to select the highest roll combination.
- Minimum Dice: The minimum number of dice on any roll is 3d6 or 1d20. Karma Cards are not allowed to be played that bring the number of dice below this.
- Quick Rolling: Players may not roll quickly for the purpose of avoiding having Karma Cards played on them. If it is determined that this was done, the shot shall be rerolled.
Skill Chips
Skill Chips are played to add dice and/or change dice type. See ADDING DICE (above) for more details. Utilizing your Skill Chips strategically will put you in a position to birdie or save par. Use them wisely.
Skill Chips do not reset (unless you are playing the 18-hole version). Unless you earn some, this is all you get.
- Driving Chips: Use when on the tee or a Drop Zone.
- Putting Chips: Use when on the green.
- Focus Chips: Use on any space, including the tee and green.
Determination Rolls
All determination rolls (OB, Chains, Umbrella, Ankle, Provisional, Lost Mini, etc) are done with 1d20. Skill Chips may not be used on determination rolls. Only Karma Cards and Player Attributes that explicitly mention the determination roll they affect may be used on determination rolls.
Chains Determination Roll: When you land on the CHAINS space, the disc could be caught by the chains or it could hit chains and fall out. A Chains Determination Roll is needed to see if the disc is IN. In the above example, 12 or more is IN and 11 or less is PARKED. On shots that hit Chains and are PARKED, the player receives one Karma Card and automatically gets the disc in the basket on the next throw.
OB Determination Roll: Roll 1d20. A red hex attached to the space means the disc may be Out of Bounds and an OB Determination Roll is needed. In this example, 14+ is In Bounds, no penalty. 13- is OB, one stroke penalty.
Note: If the space from which the disc was thrown indicates that OB throws go to the Drop Zone and you go OB, then go to the Drop Zone.
RED OB HEXES: This space is always OB and the player should proceed to the Drop Zone. In Bounds Karma Cards may not be played. Lose a Karma Card: have another player randomly choose one of your Karma Cards to discard. If there are no Karma Cards to discard, take the Courtesy Violation Placeholder card.
Determination Roll Cards
PLAY BEFORE ROLL: IT'S WINDY! Roll -2 for everyone. Replaces wind / Additive to rain. Players with played umbrellas must roll 1d20. If 10-, lose umbrella.
- WHO: All Players. DURATION: ONE Hole.
- Any player that has played an Umbrella card will need to do an Umbrella Breaks Determination Roll. In this case, 10 or lower means it breaks.
PLAY AFTER OB DETERMINATION: PROVISIONAL. Keep until end of round. Provisional Determination Roll (1d20). 9- = +1 stroke, Out of Bounds. 10+ = No penalty, In Bounds.
- WHO: ONE Player. DURATION: Resolve after round.
- After the game, determine the outcome of provisional. If your disc goes OB, play this on yourself. If someone else's disc does NOT go OB, play it on them.
PLAY DURING ROLL: TWISTED ANKLE. ROLL -1. Every roll -1 until healed. After each hole, roll 1d20, 11+ is healed.
- WHO: ONE Player. DURATION: Until Healed.
- At the end of each hole, the player rolls 1d20 for their Healing Ankle Determination Roll. If the ankle is not healed, the effect continues.
Karma Cards
Karma Cards contain the following information: where the disc needs to be, when in the turn, card name, primary effect, secondary effect (if applicable), who is affected and the duration of the effect.
WHERE THE DISC NEEDS TO BE: The hexes along the left edge indicate where on the board the disc needs to be so the card can be played. If a card is played before or during the roll, the hexes indicate where the disc must start. If a card is played after the roll, the hexes indicate where the disc must have landed.
WHEN IN THE TURN: Defined in the oval at the top of the card. The four primary times to play a card are:
- PLAY BEFORE ROLL: To be played after the previous player's move and before roll motion has started.
- PLAY DURING ROLL: To be played after the roll AND before the numerical result has been determined.
- PLAY AFTER ROLL: To be played after the dice total is determined AND before the next roll starts.
- PLAY BEFORE DRIVES: To be played before anyone has teed off. It is possible it does not affect all players.
CARD NAME: In a Red font for cards designed to be played on other players. In a Blue font for cards designed to be played on yourself.
PRIMARY EFFECT: Explanatory text in the body of the card.
SECONDARY EFFECT: Smaller and below the primary effect or in bottom left corner. Some secondary effects are optional.
WHO IS AFFECTED: This is generally one player or all players. Karma Cards cannot be retroactively applied.
DURATION OF EFFECT: The duration is generally One roll, One hole, or Immediate. Karma Cards can stop the effect of other Karma Cards played previously.
Karma Cards are resolved in the order in which they were played. If one card removes a die and one card rerolls the lowest die, the order they are resolved matters. Resolve them, when possible, in the order they were played.
Karma Card Clarifications
General Clarifications:
- Two Cards with the same name cannot be played on one shot.
- FORWARD/BACKWARD ONE SPACE: Move forward/backward one space according to the Roll Chart next to the space from which the shot was thrown. A shot cannot do better or worse than indicated on the corresponding Roll Chart.
- META CARDS: These are cards that are performed outside the game. You must perform an action BEFORE playing this card.
- SHARE CARDS: May offer to share. +1 Focus for everyone that accepts (some cards require everyone to accept). Each person that accepts gets the effects of the card for the duration of the card. If player offers to some, but not to all, this could be a reason to play a Courtesy Violation.
- WEATHER CARDS: Rain cards replace rain cards and are added to wind cards. Wind cards replace wind cards and are added to rain cards. Weather cards are cleared from the Modifier Board after each hole.
Specific Karma Card Clarifications:
- ADRENALINE RUSH: OB does not count as a throw.
- BUG REPELLENT: See SHARE CARDS on page 10.
- COPY CAT: After the effect of a card played on you and all of its effects are completed, put the card in your hand. Copy Cat may be played on cards that affect multiple players and may NOT be played on Courtesy Violation.
- COURSE CLEANUP: See META CARDS on page 10.
- COURSE DESIGNER LOVE: See Forward / Backward One Space on page 10.
- COURTESY VIOLATION: First card played on someone is a warning. Each additional Courtesy Violation played on that player results in a one stroke penalty. Swearing, disparaging, taking too much time, playing out of order are sample reasons for playing. The card is kept in front of the person it was played on.
- CRACKED DISC: If disc lands off fairway, player playing the card randomly picks one card from thrower's hand and puts it in their own.
- CTP: Only the person that plays the card adds 2 to their roll. Drive that is closest to the pin gets 2 Focus Chips. 1d20 to break ties.
- DRY YO HANDS / WHALE SACS: See SHARE CARDS on page 10.
- FOOT FAULT: To second a foot fault, another player must play a foot fault card. If it is second-ed, a one stroke penalty is assessed. Mentioning that you have a Foot Fault card results in the card being discarded. If more than two Foot Fault cards are played, only one stroke is added.
Player Cards
Player Cards contain the following information: name, attribute, Chains Determination Roll, and Rookie/Pro info for Distance, Karma Cards, and Driving, Putting and Focus Skill Chips.
- NAME: Your moniker.
- ATTRIBUTE: Your special ability. This could adjust your strategy.
- CHAINS DETERMINATION: The lowest number to roll to get the disc in.
- ROOKIE Side: Your starting Skill and Karma levels.
- PRO Side: See Upgrade to Pro (page 4). Pro Skill and Karma levels.
Player Card Clarifications
General Clarifications:
- +1d: Adds one 6 or one 20-sided die.
- 1d20: Upgrade to 1 20-sided die.
- White Hex: Applies to all spaces.
- Colored Hex: Applies to spaces of that color.
- Colored Shape: Applies to spaces of that color and shape.
Specific Player Card Clarifications:
- Andee Aimer: May aim from the tee, drop zones, and fairways (Yellow). No matter how big the roll, the farthest the disc can go is the space being aimed at. If, with the roll addition, the space is not reached, the disc lands one space back from where it would have landed.
- Comeback Charlie: If behind by 3 (Rookie) or 2 (Pro) or more, add one die on all throws. More dice may also be added.
- Fair Frankie: Call any OB or Chains Determination Roll in as long as it is called before the roll is determined.
- Karma Quinn: Trade 1 Karma Card for 1 Driving AND 1 Putting Skill Chip at any time.
- Lucky Lane: 2d20 on all Determination Rolls, including Healed Ankle, Provisional, Out of Bounds, Chains, Broken Umbrella, and any others.
- Roller Randy: All shots on the Green advance forward one space. Shots into C1 are Parked. Parked and Chains shots are not on the "Green" spaces and therefore do not move forward one space.
- Risky Ryan: On any shot, upgrade to a 20-sided die without using a Skill Chip.
- Sawyer Streak: First birdie (or better) adds one die to the next tee shot. Two birdies adds two dice to the next tee shot. Three birdies adds three dice.
- Scrambla Shannon: Throws from Drop Zones count as Off Fairway (+3d) for the purposes of extra dice.
- Trader Terry: Can trade 2 Focus Chips to add three dice.
Go For It / Safe Shot Chips
You are in the lead on the last few holes. This is a critical drive. You've got to get at least an 8 to clear the pond or avoid a tragically bad tee shot or minimize the odds of going OB. You know people are going to attack you. It is time for a Safe Shot Chip.
There are times when you just want to play it safe. There are also times when you need to go for it and make it all or nothing. The Go For It / Safe Shot Chips create this option. Each player starts with the four Go For It / Safe Shot Chips of their color (one dot, two dots, three dots, and four dots).
- GO FOR IT! (1 dot): 10- | -2, 11+ | +2
- GO FOR IT! (2 dots): 11- | -2, 12+ | +2
- GO FOR IT! (3 dots): 12- | -2, 13+ | +2
- GO FOR IT! (4 dots): 13- | -2, 14+ | +2
- SAFE SHOT (1 dot): 13- | +2, 14+ | -2
- SAFE SHOT (2 dots): 12- | +2, 13+ | -2
- SAFE SHOT (3 dots): 11- | +2, 12+ | -2
- SAFE SHOT (4 dots): 10- | +2, 11+ | -2
One dot is the most likely to result in a beneficial outcome. Four dots is the least likely to have a beneficial outcome.
How They Are Used
Before the roll, place the chip on the game board with the side up that you are utilizing. Based on the roll total, the chip is then calculated in.
In general, Go For It makes good shots better and bad shots worse while Safe Shot makes bad shots better and good shots worse. Other Skill Chips, Player Attributes and Karma Cards can be used in conjunction with the Go For It / Safe Shot Chips.
This Go For It Chip (the one dot is easiest for success) shifts the roll total as follows: 10-: -2 and 11+: +2.
- For example, a roll of 5 --> 3 | 10 --> 8
- For example, a roll of 11 --> 9 | 15 --> 17
While this Safe Shot Chip (the one dot chip has the most positive outcomes) shifts the roll total this way: 13-: +2 and 14+: -2.
- For example, a roll of 5 --> 7 | 13 --> 15
- For example, a roll of 14 --> 12 | 18 --> 16
Each Go For It / Safe Shot chip can be used once. Discard each chip after it is used. They can be used in any order but it should be noted that the more dots, the harder it is to secure a positive effect.
Dictionary
- +1d: add one die
- +1d6: add one six sided die
- 1d20: one 20-sided die
- 2 Meter Rule: a rule that is sometimes in effect that says that if a disc ends in a tree more than 2M above the ground, it is OB
- 3d6: three 6-sided dice
- Basket: the target to throw your disc into
- BOB: Back of Box, the last person to tee
- Cali: Getting to rethrow one shot each hole
- Casual Relief: move around an obstacle that should not be in the way
- Chains Spit: a shot that hits the basket's chains but does not go in
- Chains Stick: a shot that hits chains and gets pulled into the basket
- CTP: Closest to the Pin, sometimes rewarded with a prize
- Disc Charger: Sharpied circle on a bench, also pseudo-vandalism
- Drive: tee shot, each person's first shot on each hole
Game Variations
New Player Warmup Hole
Give each player one disc and one player card, place it Rookie side up. Give each player the number of skill chips (Driving, Putting, Focus) indicated on their player card. Do not give out any Karma Cards. We are skipping them for this one hole warmup. Stack the discs on hole 7 tee of Maple Hill in any order. Let's play one hole, just to figure this out.
Teeing Off: The player whose disc is on top goes first and rolls three six-sided dice. Add up the dice. This is your roll. Use the roll chart next to the tee to determine which space your disc advances to. Move to the farthest space that the roll reaches (see page 6 for clarifications on how to read the roll chart). The next player, whose disc is now on top of the tee, goes next, again rolling three six-sided dice. Continue this until all players have teed off. This is the basic concept of the game.
Skill Chips: The player that is farthest from the pin goes next. On our second shots, we will use one Focus Chip. Turn in one Focus Chip to get an extra die. Take one extra die and roll four six-sided dice. Remove the lowest die rolled and add up the remaining (highest) three dice. This is your roll. Use the roll chart next to the space that your disc is on to determine where your disc lands. If you start your turn on the green, then putt out (keep rolling until your disc is in the basket). Repeat the process with the person farthest from the pin going next until all players have putted out. You have just completed your first hole of BIRDIE!
9 Hole Game
When playing a 9 hole game, no additional Skill Chips are distributed.
18 Hole Game
When playing an 18 hole game, Skill Chips are refreshed after nine holes. Each player receives the number of Skill Chips their player has in the Driving, Putting and Focus rows on their Player Card. If a player went Pro, use the number of Skill Chips on the Pro side of the card.
Solo Game Mode
Setup: Pick 2 player cards at random, choose 1 to use. Shuffle the Karma Cards and place them face down next to the game board. Give yourself the number of Karma Cards listed on the Rookie card and double the number of Skill Chips. Add 125' to your Rookie Distance. Note the number of Karma Cards and Distance on the Score Pad.
Play: Before each roll, turn over one Karma Card from the top of the deck. If it applies at any time during your throw, including Determination Rolls, apply the effect to your throw. The card effect should last as long as indicated. Play Skill Chips and Karma Cards to improve your opportunities as normal. Note: BOB does not apply.
How Low Can You Go?
| Solo Mode | Amateur | Rookie | Pro | Touring Pro | World Champ |
|---|---|---|---|---|---|
| Front 9 Score | >30 | 28-30 | 25-27 | 22-24 | <22 |
| Back 9 Score | >32 | 30-32 | 27-29 | 24-26 | <24 |
| Full 18 | >62 | 57-62 | 51-56 | 47-50 | <46 |