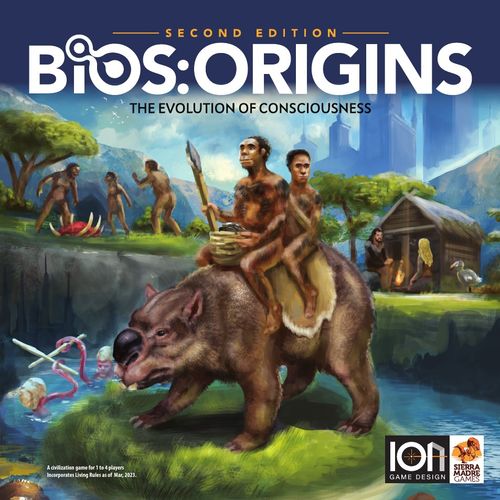
Bios: Origins (Second Edition)
Bios: Origins (Second Edition) Rulebook
Table of Contents
Table of Contents
- Victory
- The Bios: Trilogy
- Player Roles
- Metarules
- A. Sequence of Play
- B. Components & Anatomies
- C. Setup & Variants
- C1. Variant Choices
- C2. Setup (Landfolk Non-Campaign)
- C3. Setup (Merfolk Non-Campaign)
- C4. The Yrr Variant (Landfolk vs. Merfolk)
- C5. Custom-Craton Map Setup
- C6. Setup (Bios:Earth Campaign — Continued from Bios:Megafauna)
- C7. Solitaire Variant (Homo Habilis Non-Campaign)
- C8. Solo Campaign (Genesis-Megafauna-Origins Campaign)
- C9. The Cooperative Variant (Campaign or Non-Campaign)
- D. Arenas, Chaos, & Revolutions
- E. Challenge the Gods
- F. Activities Phase
- G. Activities List
- H. Footprint & Restore Market
- I. Game End & Final Scoring
- J. Advanced Game
- K. Experimental World Building
- L. Tips
- M. Transition to High Frontier
- N. Sample 2-Player Advanced Game (Petr Pospíšil - Pizin)
- Glossary
Victory
At the dawn of each new Epoch, accumulate victory chits according to how well your mysticism (Epoch II), urbanization (Epoch III), or diversity (Epoch IV) compares with those of your opponents'. These chits are added to your final endgame scoring in three categories: cultural (for which environment and mysticism are important), political (for which welfare and cities are important), or industrial (for which economy and diversity are important). You will normally be graded only on your highest score, so if you do well in all three disciplines (cultural, political, and industrial), you will lose to someone who does great in just one. However, a token on the map's philosophy track can, for all players, restrict which disciplines are scorable. So if you manage to change the global philosophy to shutdown your opponent's best score, you may win after all!
The Bios: Trilogy
This edition of Bios: Origins is an evolutionary descendant of Origins, but reworked to be the third game in a trilogy that starts with Bios: Genesis (origins of life on Earth), and continues either with Bios: Megafauna 2 (life gets big and invades the land) or Bios: Mesofauna (life stays small and invades the land). Play Bios: Origins either as an independent game or as the concluding part of a trilogy campaign, called Bios: Earth, covering the entirety of life on Earth, or even hypothetical histories of life on Mars or Venus (if you played with those variants in Bios: Megafauna 2 or Bios: Mesofauna). You can even extend the trilogy into space by adding a High Frontier game (see Part M).
Player Roles
Bios: Origins is unlike a typical civilization game that sets you into the role of a supreme dictator, whose task is to rule the world by commanding legions of obedient pawns. You are not going to build stadiums if your pawns are bored, or schools if they are ignorant. Instead, you are the pawns, and your goal is to advance your welfare, set your own goals, and suppress any dictator that may arise from your own people.
You start as an emotional, social, promiscuous, and communicative subspecies, but this player role changes with each new Epoch. As interbreeding makes the differences between the various subspecies unimportant, the players become distinguished by different languages in Epoch II. The interchange of ideas leads to different religions in Epoch III, and different ideologies in Epoch IV. These roles are integrated in the mechanics of the game, in particular the Ideas and Foundations. The game features two possible timelines: the first wave of Homo erectus who migrated out of Africa 2 million years ago, or the second wave of humans who migrated out of Africa around 100,000 years ago.
Metarules
- Terms being defined are listed in bold, or italicized if defined elsewhere. Capitalized terms or ALL CAPS (e.g. CONSEQUENT) are defined in the glossary. These terms are general ones that appear throughout the process-oriented rules.
- Sequential Processes are presented in the order listed in the sequence of play, and are introduced by a simple overview followed by specific bullet points.
- Variants. There is a merfolk (entirely marine) variant (C3) and a Yrr (landfolk versus merfolk) variant (C4). Variants for custom maps, marine realms, the advanced game, and the first dispersal long game and more are listed in C1.
- Solitaire, Cooperative and Map Alternatives. Mix and match solitaire variants (C7), a Bios: Earth solo campaign (C8), and a cooperative variant (C9).
- Advanced Game (C1). Text with a blue font is for the advanced game, which adds Emissaries (B4c), NEGOTIATION, inventions (J2), transactions (trade, preach, war, or enslave, see J3), morality (J4), Foundation requirements (B2a), Tableau Idea cards (B2b), Cull (G2b, G9f), Lore Deck (G2d), Milankovitch cycles (J1), MENOPAUSE, and elder actions (exogamy, racism, cold war, artisan, constitution, invent, science, or pseudoscience, see J5). These rules can be combined with the other variants.
- The Golden Rule. If these rules contradict a card, the card text has preference.
- Learning this Game. See www.ionsmg.com under the "Video" tab for the link to a YouTube video tutorial produced by Heavy Cardboard.
A. Sequence of Play
On your turn, perform the following 3 phases: challenge (A1), activities (A2), and footprint & restore market (A3).
Easily Missed. You must play all the Epochs (no early game end), and there is no player elimination.
- First Player. The player with the #1 crown number (C2i) takes the first turn. Then go to the next player clockwise, in round robin fashion, until a player claims the 4th and final Comet in the challenge deck, which ends the game immediately and triggers final scoring (I).
A1. Challenge (Part E)
To begin your turn, either skip this phase and go to A2, or choose one of these 3 options:
- Challenge the Gods? If no Comet is visible on the top of the Challenge deck, reveal the top Challenge Card and apply its event icons to all players, performed left to right per E1. Then auction (E2) the Challenge Card as a Foundation. Each player needs at least 1 Elder or 1 Emissary to participate in the auction. The player winning the auction receives the Eureka (an immediate perk) and, if they meet the tech requirements (E2f), places the Foundation into their Tableau.
- Claim Comet. If a Comet is visible, the challenger claims it without an Auction, performs its steps (E3), and then proceeds directly to their activities phase (A2). The challenger does not need an Elder or Emissary to participate.
- Globalization (E4). Discard a Bellwether and move the Philosophy 1 or 2 steps.
A2. Activities (Parts F & G)
Choose and perform up to one Action (G1–G4, G6, G7, J3, J5) or advancement (G9) visible on each card in the Ruling Class Column of your Tableau. Actions can be on Species, Idea or Foundation cards. You may skip cards, but Actions/advancements must be selected beginning with the bottom card up to the uppermost in the splayed Column.
- The Species Placard can't be shutdown, and has two rows. You can perform one Action in each row.
- Shutdown. A Foundation is shutdown and its Actions can't be used if its Rainbow is Occluded by a Dissident figure (F0b).
A3. Footprint & Restore Market (Part H)
To finish your turn, check all your tokens on the map (Migrants and Cities) and choose which ones to destroy if any Hex has more tokens than you have Footprint (H1). Migrants or Cities so destroyed create Chaos (D2). Then, if there are any Gaps in the Market, fill them per H2. You may also in this phase ask for other players to adjust their cubes in Diversity to accurately reflect the number of unoccluded Rainbows in their Tableau (H3).
B. Components & Anatomies
- 1 Mapboard (double-sided).
- 2 Sheets Punchouts. 32 Climate Chits (16 seas/ice, 16 deserts/jungles), 4 Crowns (numbered 1 to 4), 18 Victory Chits (double-sided), 26 Hex Chits.
- 206 cards. 4 Comets, 83 Challenge Cards, 119 Idea Cards.
- 4 Brain Placards. 1 each of the 4 player colors.
- 4 Species Placards. 1 each of the 4 player colors.
- 1 Player Aid — Process Flow.
- 28 Elder/Domain Pawns. 7 each of 4 player colors. Represents cognitive capacity and Elders.
- 48 Migrant Figures. Hunter-gatherers if on the map, and Dissidents if in a Tableau.
- 40 City Cuboids. 10 each of 4 player colors. Represents Cities.
- 29 Cubes. 7 each of the 4 player colors, plus 1 purple for Philosophy.
B1. Placards (8)
Each player starts with 2 Placards of their color: Brain and Species:
- a. Brain Placard. This is divided into 3 domains to store pawns as emotions, vocabulary, or Free Will. As shown, encephalize, abstraction, expend, artisan, specialize, art, and prayer move pawns between these domains, and to and from either the map's Mysticism pool (D1d), or the Market. See C2a.
- b. Species Placard. This organizes the three Columns comprising the Tableau of each player. This card is permanent and its Actions can't be shutdown. A crown-shaped chit on a player's Species Placard, called a Crown, indicates what their Ruling Class is. The Crown contains a Dissent icon which can hold one Dissident.
B2. Cards (207)
The 3 types of cards are Challenge (Foundation), Idea, and Comet:
- a. Challenge Cards. A Challenge Card appears during the challenge phase and can become a Foundation if bid upon. It is marked in the upper right as to what Epoch it is in (I, II, III, or IV). If the religious icon appears here, you can use mystical bid augmentation (E2b) to help win this card. Each also contains two events which occur when the card is challenged, and a "Eureka" which is awarded if you win the auction for the card. If an icon follows the "REQ.:", this is a requirement which must be met to take the card into your Tableau.
The Challenge/Foundation card anatomy shows: dissent (D2), events (E1f, E1g), religious (B2a), cultural activities (G9a, G9d, J3a), eureka advancement (G9d), industrial activities (G9b, G9d, J5b).
- b. Idea Cards. Ideas enter the game via the Market, and if you invent or copycat invent an Idea, you gain its Eureka advantage (G2b,c). Each Idea added to your Tableau as an Invention (G2, J2, J5g) adds more activity options. Unlike Foundations, which are fairly stable, ideas often get discarded from your Tableau as obsolete. The Idea card anatomy shows: cultural activities, preview of alternative orientation, eureka advancement (G2), requirements (J2b), interchangeable parts. Note: Animals with an earth icon are work animals, and with a mars icon are war animals. Some ideas require either a work or a war animal. War animals are further distinguished because they enable blitzkrieg (G6c).
- c. Comets. These four cards are placed into the challenge deck and indicate when the Epoch advances and comet scoring (E3d) occurs. After use, each one is awarded to the challenger as a Bellwether (E3e).
B3. World Map
The map is double-sided: the custom side features an archipelago and the classic side depicts the continents in their present configurations. Both sides have these features:
- a. Hex. The map is composed of Hexes (occasionally truncated to 4 or 5 corners). Each Hex can contain 1 City or 1 climate chit.
- b. Spots. Each of the corners of a Hex contain Spots, and each can hold 1 Migrant figure. There are 2 kinds of Spots: land (light brown) and water (wavy blue). Eight Spots have a colored backdrop to show the starting location for each player's Migrants (4 Spots are for the merfolk variant, 4 for the landfolk variant). Landfolk Migrants can cross water spots (with maritime technology) but cannot end their move on them.
- c. Catastrophe. Some Hexes contain a 20-pointed yellow star. This indicates a catastrophe (E1b). The roman number in the center indicates in which Epoch the catastrophe might strike.
- d. Climate Rings. A Hex containing a white, blue, orange, or green ring indicates that it can contain an ice, sea, desert, or jungle climate chit, respectively. If there are star icons on the ring, then the Hex may start with a climate chit during C2f.
- e. Resources. Each Habitable Hex contains one or two resource icons. If this icon is white, it is a horticulture or biofuel which can be exploited by a cultivate action (G7b). If this icon is brown, it is an animal which can be exploited by a domesticate action (G7a). If this icon is black, it is a mineral, luxury, oil, or uranium which can be exploited by a prospect action (see next bullet).
- f. Tech Requirements for Resources. You can prospect black resources with a prospect action (G7c), but only if you meet the tech requirements listed on the luxury, metal, oil, or uranium icon. For instance, you need metallurgy Stage 4 before you can prospect middle east oil.
- g. Ocean, Shelf, & Continent Hexes. Each Hex is either permanent ocean, shelf, or continental. A permanent ocean hex always contains a blue circle. A shelf hex always contains a blue ring, indicating that it can contain a sea climate chit if flooded. A continental hex is any other Hex, either with a white, orange, or green ring, or with no ring at all.
- h. Permanent Ice. Immediately north of the north row of Hexes is a row of white filled circles indicating permanent ice. These are not Habitable, and are shown because they can prohibit movement in the far north per G6h.
- i. Permanent Ocean. A Hex with a central blue-filled circle is a permanent ocean hex. No landfolk City is allowed in this Hex. A permanent ocean hex, like a permanent ice hex, behaves as if it contained a climate chit (B8a).
The map anatomy diagram labels: Epoch II catastrophe (B3c), land spot (B3b), water spot (B3b), permanent ice (B3h), metal resource with metallurgy precondition (B3f), shelf climate ring (B3g, B3d), permanent ocean (B3i), Player White starting spots (C2c).
B4. Pawns (28)
You start with 7 pawns of your color to represent the intelligentsia of your civilization. Depending upon location, they can be either Domain Pawns, Elders, or Emissaries:
- a. Domain Pawns are stored in the 3 domains on your Brain Placard. Those in Free Will may be specialized into Elders. Through prayer, the pawns in any domain are able to be transferred to the Mysticism pool on the map.
- b. Elders are located on Idea Cards in the Market.
- c. Emissaries are located on Ideas in an opponent's Tableau; imagine a foreign queen or a diplomat.
B5. Migrant Figures (48)
These represent migratory hunter-gatherers while on the map, or striker-protesters while on Dissents. Move them from your pool to the map during spread (G5). If lost from the map, return them either to your pool or (during Chaos) to one of your vacant Dissents in your Ruling Class as a Dissident. If you Quell a Dissident, return its Migrant figure from its Dissent to your pool and suffer a loss (see QUELL).
B6. City Cuboids (40)
These are stored along the Urbanization track of your color on the lower-center of the map. If you create a City (G7), move the leftmost cuboid in this track to the Hex where you have created the City, so as to cover the appropriate resource icon there. If one of your Cities is Destroyed, move it back to the rightmost empty square in your Urbanization track.
B7. Cubes (29)
Cubes are used on the 6 Tech tracks to track which Stage you are at, plus one on the Diversity track. A purple cube goes on the PHILOSOPHY.
B8. Punchout Chits (80)
- a. Climate Chits are placed on the map to indicate Hexes that are not Habitable due to climate. If the climate changes (E1c,d,e,f), choose one of these to move from the map, flip it to its other side, and place it in a new Hex with that color ring.
- b. Victory Chits are assigned during comet scoring (E3d).
- c. Crown Chits. One side determines which Discipline starts as your Ruling Class, and the #1 crown indicates who is the starting player in the first turn (C2i). During setup (C2i), flip it to its other side with a Dissent where one Dissident can be stored. The Crown is always in one of the 3 Columns of your Species Placard to indicate the Ruling Class.
- d. Hex Chits start on the hexsheet side of the map if using the custom map variant (C1b). Note that the spots in the 6 corners are either land or sea spots, and this supersedes whatever spot it partially covers printed on the hexsheet. A spot formed by 2 or more contradicting hex chits is considered land.
B9. Component Limits
All components are limited to what is supplied.
- a. Migrant Figures. If you run out of Migrants in your pool, you may still perform a transaction (J3). Imagine the figure created but vanishes after the transaction. Example: During your activities, you run out of Migrants in your pool. There is an enemy Migrant outside your city, and you are higher in metallurgy. You may attack the enemy, but after your victory you cannot place a victorious Migrant since you have no Migrant tokens available. If instead you were tied in metallurgy, both players lose and suffer Chaos, and no tokens would occupy the Spot.
- b. Idea Cards. If a draw deck for the Market runs out of ideas, simply stop refreshing that Market Column.
- c. City Cuboid. If you urbanize (G7) but have no more cuboids, you must take the cuboid from one of your established Cities (this is an Act of God). You are not allowed to siege, preach, or enslave a City (J3) if you have no cuboids.
C. Setup & Variants
C1. Variant Choices
- a. Basic or Advanced Game? The basic game ignores rules in blue font and icons with a thick border (recommended for your first game or if you want a shorter play time). The advanced game includes the blue font rules, including Part J (culling, Negotiation, Milankovitch cycles, inventions, transactions, morality, elder actions), and skips G8 which is basic game only.
- b. Classic, Custom, or Custom-Craton Map? Players decide if they wish to use the classic or the custom map. The classic map, depicting the continents in their present configuration, is the standard option. For the custom map, either use cratons per C5, or use the 26 hex chits arranged on the hexsheet found on the flip side of the classic map. Arrange either side of these hexes in any way the players choose. If using hex chits, each player starting with the player with the #1 crown number (C2i) chooses their starting spot among the visible orange, white, black, or green start spots. This defines the player color instead of C2a. For merfolk players, choose a water spot closest to a start spot.
- c. Land or Marine Realm? Decide if you jointly wish to play as landfolk (C2) or as merfolk (C3). This decision is the same for all players (exception: Yrr variant C4) and will restrict the entire game to being either on land or in the sea.
- d. Advanced Game is First or Second Dispersal? The standard advanced game starts with the second dispersal out of Africa 100,000 years ago. The longer advanced game begins far earlier, during the first dispersal out of Africa 2 million years ago. This long advanced game starts with more pawns in emotions (6 instead of 4, see C2b) and more cards in Epoch I (2 per player plus 2, see C2g). Historical: In the first dispersal variant, the players are: Player Black Sapiens = habilis, Player White Neanderthal = heidelbergensis, Player Orange Denisovans = erectus, and Player Green Hobbits = floresiensis.
- e. Solitaire or Cooperative? See setup exceptions in C7, C9.
- f. Campaign? If continuing from a Bios: Megafauna game, see C6 (multiplayer) or C8 (solitaire).
- g. Phasing Player Arrowhead. It can be helpful to pass around an artifact as a reminder whose turn it is.
C2. Setup (Landfolk Non-Campaign)
- a. Player Color. Each player is randomly assigned a color, and receives their color's 10 cuboids, 7 cubes, 12 migrant figures, and 7 pawns. He also places their color's Species Placard and Brain Placard in front of him, with the appropriate realm (land or sea) faceup. Next to these he places their Migrants into a pool. The 2-player game plays best either as sapiens vs. hobbit, or neanderthal vs. denisovan.
- b. Brain Placard Pawns. You start the game with all 7 pawns on this placard. In the Standard Game, 4 pawns start as emotions, 2 as vocabulary, and 1 as Free Will. First Dispersal Game. For this early variant (C1d), start 6 pawns as emotions and 1 as Free Will.
- c. Starting Migrant Figures. Each player places one of their Migrants on the land spot on the map marked with their player color. Land spots are brown in color. These land spots are Zimbabwe (Player Black Sapiens), Spain (Player White Neanderthal), China (Player Orange Denisovan), and Indonesia (Player Green Hobbit). Place the 11 remaining Migrants into your pool (next to Brain Placard).
- d. Technology, Diversity, & Urbanization Tokens. Place a cube for each player in the game on the first Stage in each of the 6 Tech tracks and in the number 1 spot of the Diversity track. Place the 10 cuboids for each player into the Urbanization track for their color on the map, in the squares numbered 1 to 10. The Mysticism pools start empty.
- e. Philosophy Cube. Place the purple cube in the center of the Philosophy track on the map, in the spot labeled "START PHILOSOPHY".
- f. Place Climate Chits. Some Hexes have climate rings (B3d) with star icons. On the center of each of these Hexes, place a climate chit of the same color as the ring (white, blue, orange, or green), as modified by the bullets below:
- 4-Player Game Setup. Place chits only on rings with 4 stars (16 total).
- 3-Player Game Setup. Place chits only on rings with 3 or 4 stars (20 total).
- 2-Player Game or Solitaire Setup. Place chits on all rings with stars (32 total).
- Example: The orange ring in California has 3 stars. Therefore, place an orange chit in California in a 2- or 3-player game, but not in a 4-player game.
- g. Form Challenge Deck. Sort the Challenge Cards into 4 decks by Epoch, and for each Epoch randomly select as many cards as shown in the table below, depending upon the number of players P. For example, there will be a total of 12 cards for a 3-player basic game (3 Challenge Cards from each of 4 Epochs). Stack these four decks facedown on top of each other, with Epoch I on top and put a Comet between each deck and on the bottom of the deck. Rotate each Comet to be 90 degrees with respect to the Challenge Cards. (This is so the players can see how soon before the next Comet arrives.)
| Number of Challenges (P = number of players) | Epoch I | Epoch II | Epoch III | Epoch IV |
|---|---|---|---|---|
| Basic Game | P | P (max 3) | P (max 3) | P (max 3) |
| Advanced Game (C1a) | 2P | P (max 3) | P (max 3) | P (max 3) |
| First Dispersal Game (C1d) | 2P + 2 | P (max 3) | P (max 3) | P (max 3) |
| Solitaire (C7c), Basic/Advanced/First Dispersal | 5/8/10 | 4/4/4 | 4/4/4 | 2/2/2 |
| 2-Player Coop (C9a), Basic/Advanced/First Dispersal | 4/6/8 | 3/3/3 | 3/3/3 | 2/2/2 |
| 3- or 4-Player Coop (C9a), Basic/Advanced/First Dispersal | 3/4/6 | 2/2/2 | 2/2/2 | 1/1/1 |
Example: In a 3-player basic game, the challenge deck will be (from the top down): 3 Epoch I cards, 1 Comet, 3 Epoch II cards, 1 Comet, 3 Epoch III cards, 1 Comet, 3 Epoch IV cards, and finally the final scoring card. If playing the advanced game, Epoch I will have 6 instead of 3 cards, and the other epochs will still have 3 each.
- h. Form Idea Market. Sort the Idea Cards in the 3 Disciplines — culture, politics and industry — and further divide into the 4 Epochs. This leaves you with 12 small piles. Shuffle each of the 12 piles facedown and place them in a 4 x 3 matrix (D1a), with the 3 draw decks of Epoch I in the left-to-right order: culture, politics and industry. Draw 3 cards from each of these decks and place them in a column below each draw deck. This forms a 3 x 3 matrix called the Market.
- i. Crown Chit. The Crowns are numbered 1 to 4. In a 2-player game, use only Crowns #1 and #2, in the 3-player game use Crowns #1, #2, and #3, and in a 4-player game use all 4 Crowns. Randomly assign each player one of the Crowns. Each has a Discipline color, and each player places the Crown on the Column with this color. Then all players flip their Crowns to the other side, so that its Dissent is visible. All Crowns remain on this side for the remainder of the game. The player who received the #1 Crown takes the first turn (A0a), then proceed clockwise.
- j. Knapping Perk. If you received the #4 Crown, which indicates you start with a Ruling Class in industry, immediately take one free encephalize action (G9a). This starts you with one less in emotions and one more in vocabulary, and simulates a 2 million year tradition in the knapping industry.
The setup diagram labels: Cultural Tableau, Political Tableau, Industrial Tableau, ignore unless basic game (G8), knowledge actions (G1, G2, G3, G4), Species Placard, Pool (C2a), Brain Placard Pawns, Challenge Deck (C2g), 4x3 Draw Decks / 3x3 Market (C2h), Starting Migrant (C2c), Philosophy Cube (C2e), Diversity Cubes (C2d), Crown Chit (C2i), Knapping Perk (C2j).
C3. Setup (Merfolk Non-Campaign)
Your starting species lives in the water, and although it is air-breathing, it requires vehicular technology to maneuver on land. You can use any of the 3 map configurations (C1b). Play with these exceptions to the rules:
- a. Starting Migrant (C2c). The merfolk setup puts their first Migrant on the water spot indicated with their color on the map (instead of the land spot in the same Hex).
- b. Spread (G6). The maximum number of land spots merfolk can cross is equal to their maritime Stage.
- c. Climate Chits. When spreading, if a merfolk Migrant enters one or more land spots (using maritime, see previous bullet), it has the same restrictions as Landfolk have (G6f). But if it spreads only on water spots, it is unrestricted from passing between two climate chits.
- d. Urbanize (G7). Merfolk create underwater Cities. Therefore, merfolk can only create their Cities in permanent oceans (B3i) or in a shelf (B3g) that contains a sea climate chit. A merfolk city on a shelf is destroyed if the water dries up during cooling (E1c). Easily Missed. Merfolk can build Cities only in a Hex with a permanent ocean, or in a blue-ring hex that has an ocean climate chit.
C4. The Yrr Variant (Landfolk vs. Merfolk)
This variant combines land and sea intelligences. Some species (landfolk) use the standard rules; others (merfolk) use rules C3a,b. If you use the custom-hex map setup (C1b), flip all Hexes to their blue-ring or white-ring side to maximize available city-sites. If using the classic map setup, players (beginning with merfolk) take turns placing chosen blue/white-ringed hex chits on any ocean or blue-ring on the main map in any alignment desired, provided the target location has exactly 6 spots. Stop placing when the 5th hex chit is placed.
- a. Static Climate. No climate chits are used in this variant, and thus there is no climate change. Ignore the events cooling (E1c), warming (E1d), deforestation (E1e), and forestation (E1f).
- b. Littoral Resources. This world only has resources in the shelf hexes (with blue-rings) the arctic hexes (with white rings). All resource icons in other Hexes, including green-ring, orange-ring, no ring, and permanent ocean, are ignored. Accordingly, Cities can only be built, by either landfolk or merfolk, using resources in shelf or arctic hexes.
- c. Transactions. Landfolk and merfolk can preach, trade, war, or enslave each other, or move to establish a city, as long as the number of land/sea spots entered does not exceed their maritime Stage. If after one of these transactions a landfolk migrant would be left on a water spot, or a merfolk migrant is left on a land spot, that Migrant is lost (without Chaos). Note: Exogamy (J5a) is allowed, but since the two species cannot interbreed, interpret this as an ambassadorship rather than marriage.
C5. Custom-Craton Map Setup
This variant requires access to a game of Bios: Megafauna 2 or Bios: Mesofauna. Populate the custom map (C1b) with the 4 Earth cratons that come with this game. If playing the landfolk non-campaign (C2), use all the cratons containing starting hexes of the player colors in the game to form one continent. Each player places a starting Migrant in their starting hex. Merfolk start in a water spot as close as possible to their starting hex. With the remaining cratons (if any), form a second continent to the west (called "America"). The starting player makes the arrangement, and then every other player may change the position of one craton of their choice, without switching between the two continents. Note that the cratons will not hereafter move in this game (no more continental drift). For setup using the craton map, use rules C5a-f, and during play use rule C5g.
- a. Latitude Strip. Take a random strip from the Megafauna game and place it over the latitude icon to the left of the hexfield. Alternately, skip this step and play with the default latitude strip (too cold) depicted on the map. Note that wind is not used.
- b. Place Climate Chits. Beginning with the starting player and going clockwise, each player places two climate chits on their starting craton. "America" starts without climate chits. White can only be in white latitudes (as marked with white dice), green can only be in green latitudes, blue only on craton seas, and orange only in latitudes 2 or 5.
- c. Warming or Cooling. As a first step during climate change (E1c,d), replace the latitude strip with one warmer or cooler, as appropriate. Then change ice to seas, or seas to ice as appropriate, per the previous bullet. If playing with Milankovitch Cycles (J1), instead of turning into Icehouse or Ice Age, move the climate strip two steps colder if Icehouse and two steps warmer if Ice Age.
- d. Swamp, Weed, & Sea Resources. All swamp hexes are biofuel, all weeds hexes are horticulture, and all sea hexes are metal hexes with a tech requirement (B3f) of metallurgy Stage 2. For each central craton hex, roll a dice and set it in the hex. This indicates a luxury hex with a tech requirement (B3f) of metallurgy Stage equal to the dice roll. Re-roll once if the result was 4-6.
- e. Domestication Creeples. On each craton, on two random non-central Hexes place one creeple of an unused color and/or shape to represent animals able to be domesticated. Use the dice-faces printed on each craton for this randomization. These two creeples are different shapes: one is armored (war animal) and the other archetype (work animal).
- f. Intersections. All intersections on the cratons (including on the craton perimeter) are land unless the intersection is depicted as entirely sea, in which case it is water. Offshores are not used.
- g. Climate Change Rules with the Craton Map. If an event changes the climate, invert and move an existing chit and place it according to the following rules. Always place the chit on land if possible, otherwise on a shelf. White chits must be placed in a white latitude, and green in a green latitude (as indicated by the colored dice on the latitude strip). Orange can only be in latitudes 2 or 5. Blue can only be on an island (blue-ring) hex on the map, or on a craton's sea hex.
C6. Setup (Bios:Earth Campaign — Continued from Bios:Megafauna)
Bios: Earth is the name of the campaign game that stretches from life's origins in Bios: Genesis, continues to Bios: Megafauna/Mesofauna, and, assuming that at least one species survived and no runaway greenhouse, concludes in Bios: Origins. Use a custom-craton map setup (C5). Players keep their same player color. When transitioning from Bios: Megafauna, (K1) is recommended. If transitioning from Bios: Mesofauna, (K2) is recommended. Observe these additional rules:
- a. Player Color (landfolk). Player Black becomes a chitinous sapiens, Player Orange becomes a molluscan denisovan, Player Green becomes a fungal-animal hobbit, and Player White becomes a vertebral neanderthal.
- b. Latitude Strip (Megafauna). Place the ending latitude strip from Megafauna over the latitude icon to the left of the hexfield. Note that wind is not used.
- c. Craton Arrangement. Arrange the cratons on the hexfield in the same relative positions as they were in the Megafauna/Mesofauna game. Maximize the distance between cratons while avoiding the edge and the Philosophy diagram.
- d. Climate Chits (Megafauna). First, discard any offshore disks, as these are not used. Then, for every climate disk on a craton in the ending game of Megafauna, swap out an Origins climate chit: white disk > white chit, green disk > green chit, black disk > orange chit. Furthermore, place a blue chit over every sea. Alternatively, see K1.
- e. Starting Metabolism (Megafauna). When at energy Stage 3, your spread reach (G6a) is equal to your action limit (gear icon) as listed on the Oxygen Reservoir (or Atmosphere Reservoir in the case of plants). As soon as you advance to energy Stage 4, your spread reach becomes 4 as per standard rules. For instance, at 5% oxygen, starting animal players are able to spread by one space only.
- f. Starting Encephalization. Each player starts with 6 pawns as emotions, and one pawn in the Free Will. For each emotion or pheromone that species achieved, move one pawn from emotions to vocabulary.
- g. Ecomorph Migrants. Keep your same color, and choose your creeple shape that developed language first or (if none has language) that has more emotions. You choose if tied. Use this number of creeples in place of the 12 Migrant figures (which means you play with fewer). On the map, each creeple has special abilities:
- Archetype. None
- Burrower. Start at immunology Stage 2.
- Armored. Wins ties in war and siege during Epoch I.
- Flyer. Start at maritime Stage 2.
- Swimmer. Start either as merfolk (C3) or optionally at maritime Stage 2.
- Any Tool. Start at information Stage 2.
- Hive Mind Penalty. Mesofauna need 1 (not 2) in emotions to achieve Menopause.
- h. Starting Creeple. Starting with the winner of Bios: Megafauna/Mesofauna, each player places one creeple on a spot in a hex that he occupied in the previous game. You cannot place your creeple in a hex that exceeds your Footprint.
- i. Mixed Terrestrial/Merfolk. In any game with players both on land and in the sea, allow merfolk with Maritime 2+ to end their move on a land spot (and vice versa for the terrestrials). It is recommended to use Yrr Variant rules (C4a,b,c).
C7. Solitaire Variant (Homo Habilis Non-Campaign)
Only one human subspecies (Homo habilis) starts as landfolk or merfolk Player Black. This advanced game (C1a) uses inventions (J2) but skips the advanced rules (J1, J3-J5). Setup is as per C2, with these exceptions:
- a. Map & Realm. Suggest using the classic map (C1b) in either the land or marine realms (C1c). However, you may use other maps (the Merfolk or custom maps, or the terrestrial, martian, or venusian maps) from Megafauna/Mesofauna.
- b. Dispersal Start. Use the first dispersal long start with 6 pawns in emotions and 1 in Free Will. Modify this per C6f if in a campaign.
- c. Challenge Deck Setup. See C2g.
- d. Special Climate Rule. Setup climate chits as per the 2-player game (C2f). Whenever you move a climate chit, you must destroy a City if you can.
- e. Act Of God Rule. Each destruction of a City or Migrant token by an Act of God causes a Chaos, just like an Act of Man.
- f. Relentless Challenge Rule. Skip the challenge phase for the first turn. Thereafter, you are not allowed to skip the challenge phase, which means you must either challenge the gods (A1a) or claim comet (A1b) each turn.
- g. Solitaire Auction Rule. To win an auction during a challenge, you must bid a number of Elders equal to the Epoch plus the number of your Dissidents. This is regardless of augmentation (E2b,c). Otherwise it only enacts its two events and is discarded. Dictators (E1j) are awarded to you without an auction.
- h. No Bellwether Rule. You as the phasing player claim a Comet as normal, but there is no comet scoring (E3d), and the Bellwether's power to move the Philosophy (I0b) is disabled.
- i. Victory Conditions. You must end with at least 13 victory points in each of the 3 Disciplines: cultural VPs (I1), political VPs (I2), and industrial VPs (I3). However, you do not have to count victory in a Discipline shutdown by Philosophy (I0b). For a decisive win, you must reach space (maritime Stage 8).
- j. Events. Whenever you have too much Urbanization during famine or pollution (E1g,h), additionally move your Footprint or energy up one, just like with immunology and diseases. You also suffer a Chaos after a famine or disease (C7e).
C8. Solo Campaign (Genesis-Megafauna-Origins Campaign)
You can string your solitaire games together in an epic campaign, trying to stay alive from protolife to language-based consciousness (in Bios: Origins). See C6 for your starting Bios: Origins characteristics. Play with the solitaire rules of C7. See C3 in the Bios: Megafauna/Mesofauna rules for transition rules from Bios Genesis. If using Mars or Venus cratons, see K3e.
- a. Victory Conditions. Win per C7i.
C9. The Cooperative Variant (Campaign or Non-Campaign)
This advanced game plays with 2 to 4 players on any map. Setup is normal except per C9a. Start with 4 pawns in emotions, 2 pawns in vocabulary, and 1 pawn in Free Will.
- a. Challenge Deck Setup. See C2g.
- b. Relentless Challenge Rule. This is the same as C7f, except that only the player with the #1 Crown (C2i) must challenge the gods (including the auction (E2)). During their turns, all other players must skip the challenge phase (A1).
- c. No Bellwether Rule. Bellwethers are not used, see C7h.
- d. Xenophobia. If during activities a player has the option to do a winning preach (J3b), war (J3c), or enslave (J3d) transaction, he must perform this option. Cities can be preached, sieged, or enslaved if within normal spread range without needing an adjacent Migrant.
- e. Victory Conditions. At least one player must end with at least 13 cultural VPs (I1a,b,c), the same or a different player must end with at least 13 political VPs (I2a,b,c), and the same or a different player must end with at least 13 industrial VPs (I3a,b,c). However, you do not have to count victory in a Discipline shutdown by Philosophy (I0b). For a decisive win, one player must reach space (maritime Stage 8).
Example: In a 3-player coop game, you suffer a televangelist dictator (#69) on its cultural Discipline. During activities, your options on this Foundation are: spread, war, or prayer with a preach Consequent. Another player has a City 2 spots distant from one of your Cities, and unfortunately this player is behind you both in metallurgy and Urbanization. Because of the xenophobia, you must choose either the war or the preach transaction to convert this City to your color. You choose the latter, because the preach does not add Chaos to your partner.
D. Arenas, Chaos, & Revolutions
D1. The Six Arenas of Play
- a. Market. This matrix has 3 columns and 3 rows. Thus there are (almost) always 9 Ideas visible in the Market. During your activities phase, use specialize (G1) to place Elders on the Ideas you are interested in. Alternatively, claim into your Tableau an Idea that has enough Elders on it, by using a knowledge action called invent (G2). The numbers in the illustration indicate the minimum number of Elders that must be on the card in order to claim it. The Market grid: rows numbered 3 / 2 / 1 (Elders required) under each of 3 draw decks: Culture Draw Deck, Politics Draw Deck, Industry Draw Deck.
- b. Map. Your Migrants represent hunter-gatherer tribes or transitory populations and are stored in your pool. Use Actions listed on your idea cards to place them on the map, move them from Spot to Spot (either land or water), or convert them into Cities in a Hex. Each Hex interior depicts the animal, mineral, and/or plant resources that can be urbanized to form Cities. When a City is built in a Hex, place it so it always covers the resource exploited to build the City. A Hex may only contain one City. Building a City increases your Urbanization by one, as shown on the track on the map.
- c. Technology. Each player marks their progress in six tech tracks on the map. These are Footprint (how many Migrants and Cities you can support in a Hex), energy (how many Spots your Migrants can spread), metallurgy (how powerful your Migrants are in war), immunology (your resistance to disease), maritime (how many Spots your Migrant can move across water), and information (how many Elders you can produce with a specialize action, also the maximum number of Ideas you can have in your Ruling Class Column). Note: Each track is divided into 6 numbered Stages, and you always advance forward on these tracks, never backwards.
- d. Victory Tracking. Your Mysticism pool, Urbanization track, and Diversity track are on the lower third of the map. Use them both during the game and for final scoring. The number of pawns in your Mysticism pool is your Mysticism, which can increase through prayer or decrease through art. The highest number revealed in your urbanization track is your Urbanization, which is also the number of your Cities. Each City built removes a cuboid from this track, and each City destroyed adds a cuboid. Each player uses a cube to track Diversity (number of rainbows) in the far right field.
- e. Tableau. This consists of your Species Placard plus three columns of cards, representing the cultural, political, and industrial sectors of your civilization. The cards are either Foundations (landscape orientation) or Ideas (portrait orientation). A ruling class chit indicates which column is active for your activities phase (F). Tip. Your Foundations are the most important elements of your Tableau, because they can be lost only by genocide or purge. Ideas are constantly getting discarded as obsolete. Ruling class = purple (POLITICS) with 1 Idea. Dissidents = 2, Diversity = 2. Your most recent foundation will always be at the bottom and first eligible for activities, while your most recent idea will always be at the top and last eligible. The Tableau diagram labels: RULING CLASS, Player White Emissary (on idea), Political activities (on five rows), Dissident (on crown chit), Species Placard, Dissident (on foundation), Foundations.
D2. Chaos
Chaos strikes during certain events or transactions. For each Chaos suffered, take a Migrant from either the map or your pool (D2b) and move it as a Dissident onto an empty Dissent space in your Ruling Class Column. If the Chaos generates more Dissidents than you have spaces for, then interrupt the game to resolve Quell and Revolution (D2d). Afterwards, if a chaotic revolution occurs during your activities phase, resolving the Revolution ends your turn. If you suffer Chaos, follow this procedure:
- a. Acts Of Man. Migrants and Cities destroyed by Acts of Man — war (J3c), enslave (J3d), and starvation (H1a) — generate Chaos, while those destroyed by Acts of God do not. See DESTROY (ACTS OF GOD), DESTROY (ACTS OF MAN).
- b. Source. Withdraw the required Dissident figures from the map (your choice, except you must choose destroyed Migrants or Refugees of destroyed Cities). If there are not enough figures on the map, take from your pool. If there are still not enough figures, then you must move all that you can. However, never take more figures than necessary to fill the number of Dissents in the Ruling Class.
- c. Dissents. Store all Chaos as Dissidents on empty Dissent icons on any Foundation of your choice in your Ruling Class Column. Your Crown also has a Dissent on which you can store 1 Dissident. You choose which Dissents in the Ruling Class to put Dissidents on.
- d. Quell & Revolution. If there are not enough Dissents, first store as many Dissidents in the Ruling Class as you can. Expend any remaining Migrants that were destroyed by Acts of Man, and leave others, including Refugees, on the map. Then Quell all your stored Dissidents per D3a, and finally suffer a chaotic revolution per D3b,c,d,e.
Example: In your Ruling Class you have 4 Dissidents, including one on your Crown, plus one empty Dissent on EARWORMS. Due to Acts of Man, you suffer 2 Chaos, so you fill the empty Dissent with 1 Dissident. Then quell all 5 Dissidents (D3a), undergo a Putsch (D3b), move the Crown (D3c), transfer one Idea (D3d), and discard the other Idea (D3e) since it had no industrial orientation.
D3. Revolution
A revolution is any change to your Ruling Class, moving your Crown to a new Column. There are 2 types of revolution: (1) quiet (a voluntary change of Ruling Class after either an election (G4) or a successful auction during the challenge of the gods) or (2) chaotic (an involuntary change of Ruling Class because you received more Chaos than Dissents in your Ruling Class Column, see D2d). The new Ruling Class Column is either chosen (E2g,i) if the revolution is quiet, or forced (D3b) if the revolution is chaotic. Follow this procedure:
- a. Quell Dissidents (Both Quiet & Chaotic Revolutions). You must Quell (violently suppress) each Dissident, which returns it to your pool. For each one quelled, you must choose one loss:
- Elder Loss. Expend one of your Elders or Emissaries.
- City Loss. Destroy one of your Cities (no Chaos). Easily Missed: If your City is DESTROYED, you must add a Refugee taken from the pool. If the pool is empty, take it from somewhere on the map.
- Migrant Loss. Expend one Migrant on the map. However, you cannot Expend a Migrant if you have any Cities or Elders to lose (previous bullets). Furthermore, your last Migrant on the map is sacrosanct per D4a.
- b. Putsch (Chaotic Revolution Only). If the revolution was chaotic, the lowermost (most recent) Foundation in the Ruling Class Column has revolted. Remove it from the Column, reorient it 180 degrees so that its other color is uppermost, and place it into the new Column corresponding with this other color, placed to half-cover the lowermost Foundation as shown. All other Foundations in the former Ruling Class remain in place. Easily Missed: In a Chaotic Revolution, transfer only the lowermost Foundation. All other Foundations remain in place.
- c. Crown. Move this chit from the former Ruling Class Column to the new one.
- d. Transfer Reoriented Ideas. Check all of your inventions. If any of them have an Orientation that includes the color of the new Ruling Class (indicated by a colored rectangle to the right), you must import them into this column, oriented so that the revolutionary discipline is visible. Maintain the same order of cards in the column. Any Emissaries remain in place.
- e. Obsolete Ideas. Any Ideas that do not have an Orientation of the new Ruling Class (see previous bullet) are discarded onto the top of the Lore Deck, which expends any Emissaries on them. Therefore, all ideas will be in your Ruling Class Column. Easily Missed. A quiet revolution never rotates or displaces any Foundations, while a chaotic revolution always rotates and displaces one Foundation, assuming there is a Foundation in the Ruling Class Column.
Example: You suffer 2 Chaos from an event, but with no empty Dissents in your Ruling Class, you must suffer chaotic revolution. As the first step, you must quell the 4 Dissidents that you had stored in your Tableau from previous turns. You choose to kill off both of your Elders and Destroy your only City, replaced with a Refugee. You still have one more loss, and since you don't have any more Elders or Cities, you choose to kill off the Refugee you just created. Then the Revolution changes your Ruling Class. Because both your Ideas don't fit the new Ruling Class, they get discarded into Lore. One has an Emissary, which gets returned to their owner.
- f. Resume Game. A revolution interrupts the game until it is resolved. If you have a chaotic revolution during your activities phase (A2), conclude the Action that caused the Chaos, including its Consequents, and then end the phase without being able to perform any further Actions.
D4. Diaspora
If your last map token is lost, destroyed either by an Act of God or removed as a Dissident by an Act of Man, instead of it being lost, spread it to an empty Spot on the map as a Migrant per below. You can also invoke 1 diaspora per spread action if all your map tokens are trapped, so they can neither move nor be spread from without entering starvation.
- a. Sacrosanct. To represent the acquired immunity of an active immune system, advance your immunology by one Stage (to its maximum of 10). Your last Migrant is immune to being taken as a loss during Quelling (D3a), Chaos or Acts of God (catastrophe or preach). If you have Cities but no Migrants, this applies if your last City spawns a Refugee.
- b. Emigrant Destination. If possible, spread to a Habitable Spot using spread rules (G6) but ignoring limits due to maritime, climate chits, and enemy Migrants. If not possible, take the closest empty and Habitable Spot. In addition to being Habitable, the spot chosen must not exceed your Footprint (H1a).
- c. Discouraged? Never give up! See L2 for tips on winning if suffering continuing diaspora.
Example: On the map, you have only one City in France and no Migrants remaining. This last City is attacked by a preacher and converted, and its Refugee cannot find a Habitable spot in the Hex. Diaspora occurs immediately. The two closest Habitable spots to the French Hex are Iceland or the Canary Islands, and you choose to send your Diaspora Migrant into the latter. Note that you are allowed to reach the Canaries even though your maritime is zero, and can't cross water. It is assumed that the desperation of the situation allows you to perform heroic deeds.
E. Challenge the Gods
During the first phase of your turn, you decide whether to make a challenge, claim comet, globalization, or skip this phase and proceed to your activities phase (F).
- a. Challenge. You may only do this if (1) the top card of the challenge deck is a Challenge Card and (2) you have at least 1 Elder or Emissary to bid with. If so, draw the card, apply its events to all players (E1), and auction the card itself as a Foundation (E2). See (Fa) for the advantages of acquiring a new Foundation.
- b. Claim Comet. You may only do this if the top card of the challenge deck is a Comet Card. If so, each player suffers Chaos, renovate and restore the Market (E3b,c), then award victory chits (E3d).
- c. Globalization. You may only do this if you have one or more Bellwethers (E3e). If so, discard one of them and move the Philosophy 1 or 2 steps (E4).
E1. Challenge: Events
Each Challenge Card lists two events (circular icons), which can be disease, catastrophe, cooling, warming, deforestation, forestation, pollution, famine, crisis, or dictator. Perform these from left to right as shown on the card. The events are global, affecting all players starting with the challenger and going clockwise. Lost Cities go to the victim's Urbanization; lost Migrants go to the pool (or to an empty Dissent if a Dissident); and lost Elders go to Free Will. All natural events, i.e. disease (E1a), catastrophe (E1b), climate change (E1c,d,e,f) and famine (E1h), are Acts of God and so do not generate Chaos. If you lose a City, you must place a REFUGEE.
- a. Disease. There are two kinds of disease: crowd and zoonotic. They both have the same effects (see below), but differing conditions for infection:
- Crowd Disease. A pandemic infects each player with an Urbanization greater than their immunology Stage.
- Zoonotic Disease. An animal-vector disease infects each player with a Footprint Stage greater than their immunology Stage.
- Effects. If infected due to low immunology, you must suffer a loss of half your Cities (no Chaos) plus half your Elders. Round all fractions in your favor. To represent the acquired immunity of an active immune system, advance your immunology by one Stage (to its maximum of 10).
Example: You have one Elder and one City and suffer zoonotic disease. You don't lose either of them because rounding is in your favor, yet you still advance one in immunology.
- b. Catastrophe. Locate the epicenter hex on the map with the same name as the catastrophe (it can be under a climate chit). It is indicated by a 20-pointed star icon. Destroy the City in this Hex (if any) plus any Migrants (other than Refugees) on its Spots. All losses are without Chaos.
- Catastrophe Climate Change. If the Hex of a catastrophe has a climate chit, the challenger removes it, inverts it to its other side, and adds it to another Hex with that color ring. Easily Missed. Unlike climate change (E1c, E1d, E1e, E1f), a catastrophe destroys both Migrants and Cities in its Hex.
- c. Cooling. The challenging player removes 1 blue (sea) chit from the map, inverts it to its white (ice) side, and places it on any Hex with the white climate ring that does not already have ice. This destroys (no Chaos) any City present. Important: If you run out of places to put a climate chit, or do not have enough chits of that color, see J1d,e. Note: If playing with the custom map, see C5g for placement options for climate chits.
- d. Warming. The challenging player removes 1 white (ice) chit, inverts it to its blue (sea) side, and places it on any Hex with the blue climate ring that does not already have a sea. This destroys (no Chaos) any City present.
- e. Deforestation. The challenging player removes 1 green (jungle) chit, inverts it to its orange (desert) side, and places it on any Hex with the yellow climate ring that does not already have a desert. This destroys (no Chaos) any City present.
- f. Forestation. The challenging player removes 1 yellow (desert) chit, inverts it to its green (jungle) side, and places it on any Hex with the green climate ring that does not already have a jungle. This destroys (no Chaos) any City present.
- g. Pollution. If your Urbanization is greater than your energy Stage, then suffer 1 Chaos (D2) plus either Expend 1 Elder or Destroy 1 City (no extra Chaos).
- h. Famine. If your Urbanization is greater than your Footprint Stage, you must suffer a loss of half your Cities (no Chaos) plus half your Elders. Round all fractions in your favor.
- i. Crisis. Check the icon shown in the current position of the Philosophy (C2e). This determines the nature of the crisis:
- Genocide. All players check to see if their number of Dissidents is greater than their Mysticism. If so, they must choose a Foundation (if they have any) in their Tableau to discard out of the game and Quell its Dissident (if any).
- Civil War. All players should first adjust their cube on the Diversity track to reflect the number of unoccluded Rainbows in their Tableau. Then any players with Dissidents greater than or equal to their Diversity suffer 2 Chaos (D2).
Example: You challenge, revealing the rightist dictator Napoleon (#79). After resolving the crisis event, you skip the auction and check to see who has the most Mysticism. You have 1 mystic, and so does one of your opponents. The others have none, and you are awarded Napoleon since you go first in the tiebreaker. You decide to place Napoleon on its white Orientation and purge the other Foundations in this column.
E2. Challenge: Auction
The Challenge Card is auctioned. Each player makes one bid for it or passes. Win the auction by having the highest bid, using Elders and Emissaries as the bid media. If you win, Expend the Elders and Emissaries that you bid. In certain cases, your bid is augmented by your Mysticism (E2b) and/or by 1 during favorable globalization (E2c). Regardless of augmentation, you must expend at least one pawn to win a bid. The winner gains the Challenge Card as a new Foundation. Follow this procedure:
Easily Missed. Winning an auction is the only way to gain a Foundation. Unlike inventions, which can become obsolete and get discarded, once a Foundation is gained, it can be lost only by purge or genocide.
- a. Once-Around Auction Procedure. Starting with the challenging player and proceeding clockwise (ending with the player on the challenger's right), each player may make one bid or pass. If making a bid, the minimum bid is one, and the bid must include at least one Elder or Emissary. Each bid must be higher than the last (including augmentation E2b,c). You may not bid more than you can afford to pay. The highest bid wins the auction. All players with at least 1 Elder may bid, regardless of the tech requirements of the Foundation being auctioned. Note: If nobody bids on a Challenge Card, discard it from the game. Easily Missed. The bidding proceeds for just one round, so everyone has only one chance to bid. Tip: If you have "deadwood" Elders or Emissaries sitting on an Idea which has become useless, you can recall them in one of three ways: (1) use them to bid with in auctions, (2) expend them using library or elect, or (3) sacrifice them during Quelling.
- b. Mystical Bid Augmentation. If the Challenge Card is religious (i.e. it has the religious icon in the corner, see B2a), then each player automatically adds their Mysticism to their bid (unless they pass). Example: You choose to make a challenge and the Challenge Card is "grave goods" (#9), a religious card. Your Mysticism is 2. You bid 1 Elder which is augmented by 2. Therefore, your opponent would need to bid 4 in order to claim the card.
- c. Globalization Bid Augmentation. If the Philosophy is off the center point, then each player with a Ruling Class equal to the Discipline favored by the position of the Philosophy automatically adds one to their bid (unless they pass). The favored Discipline is indicated by the color of the "+" icon on the Philosophy Diagram. Example: In the challenge of the previous example, the Philosophy is on "NATURAL LAW" which is one of the spots marked with a red "+". Your Ruling Class is industry, so this augments your bid by one. Since your bid is already augmented by 2 for your mysticism, your opponent would need to bid 5 in order to claim the card.
- d. Winning & Payment. If you have the highest bid in an Auction, you win and pay for your bid by expending all Elders or Emissaries used in your bid to your Free Will. You pay nothing for any augmentation (E2b,c) to your bid. If you lose the auction, pay nothing. Easily Missed. Pawns on your Brain Placard may never be used for bidding.
- e. Eureka. After winning and payment, you must make the "EUREKA" (G9) Advancement or Advancements listed on the card.
- f. Tech Requirement. If a card lists a tech Stage or brain requirement (e.g. REQ.:) listed which you have not achieved, then you can still take part in the auction. If you win, you still receive the Eureka benefit, but must discard the Challenge Card out of the game (instead of adding it to your Tableau). If you win the auction, and the Eureka on the card gives you its Tech Requirement, you now meet the requirement and must keep the Challenge instead of discarding it.
Example: You win a Challenge Card and choose an Orientation for it that is not your Ruling Class. You have one Dissident, which you Quell by expending an Elder not used in your bid. Then you place the new Foundation, shift your Crown, and continue to the activities phase of your turn.
E3. Claim Comet
There are 4 Comet cards (B2c) in the challenge deck, called Comet I, II, III, and IV. These are double-sided, and oriented differently, so all players will see when one is revealed as the next card in the challenge deck. If a Comet is the next card, the first to challenge it is automatically awarded the card (skipping the auction) and starts the next Epoch! Follow these steps (as listed on the card):
- a. Future Shock Chaos. Beginning with the claimant and going clockwise, each player suffers 1 Chaos (D2).
- b. Renovate Market. Discard out of the game (not into Lore Deck) all Market cards that have no Elders on them. Also discard out of the game all three market draw decks and replace them with new draw decks from the next Epoch.
- c. Restore Market. Restore the Market per H2. This fills Gaps caused by the previous bullet with cards from the next Epoch.
Example: You claim the first comet, ending Epoch I. Every player suffers a Chaos, and your opponent goes into chaotic revolution as a result. The game is interrupted to resolve this. Then you remove all the cards and draw decks that are Epoch I, excepting only one Market card that has a pair of elder pawns on it. This card is slid to the first row, and then the entire market is restored with Epoch II cards.
- d. Comet Scoring. Each player claims victory chits (B8b) as described on each Comet. For Comet I, which arrives at the end of Epoch I, each player compares their Mysticism with the other players and claims one victory chit for each opponent in the game with less Mysticism. They place these chits over the circle of their color labeled I on the map, in the "culture: final score". For Comet II, the procedure is the same except players compare Urbanization instead of Mysticism, and the chits go on the politics: final score. For Comet III, it is Diversity that is compared, and the results go into industry: final score. Each victory chit provides 1 victory point during the final scoring (I). Easily Missed. If someone challenges the final comet, the game ends without comet scoring. See Part I.
Example: As neanderthal in a 3-player game, during Comet I you have more Mysticism than either of your opponents. Therefore you claim 2 victory chits, which you stack over the white (neanderthal) circle in the lower left (cultural final scoring) region of the map.
- e. Bellwether. The challenger automatically receives the Comet Card, inverted to its Bellwether side. He keeps this card for possible use to globalize (E4).
Example: The first Comet is on top of the challenge deck, and you claim it in your challenge phase. Everyone suffers a Chaos. Your Ruling Class has a Foundation with an empty Dissent which accepts the Chaos. But Player Green has all Dissent filled and must go into chaotic revolution, changing his Foundation from culture to industry. The Market is flushed, replacing all draw decks with Epoch II draw decks and replacing all Market Cards without Elders with Epoch II cards. You have one Mystic, Player Green has three, but Player Black has none. Therefore, you claim 1 victory chit and Player Green claims 2 victory chits. You keep the Comet as a Bellwether.
E4. Globalization
As an alternative to making a Challenge, if you have one or more Bellwethers (E3e) you may discard one out of the game and move the Philosophy by 1 or 2 steps from one adjacent space to another.
F. Activities Phase
During this phase, you perform the activity icons listed on the visible colored portion of the cards in your Ruling Class Column. These Actions (G1-G8) and advancements (G9) are voluntary and applied to you only. You may skip a card row.
- a. Bottom To Top Order. Perform Actions and advancements in the order in which they appear in the Ruling Class Column, read from bottom card to top card. These cards include Foundations, Species Placard (one Action from each row in the Ruling Class), and invented Ideas.
Example: Refer to the Tableau with a political ruling class illustrated on page 10. It has two Foundations, a Species (2 rows), and finally one Idea. Performing your activities from the bottom up, you (1) perform art on the 1st foundation, (2) skip the 2nd foundation (because it is shutdown by the Dissident), (3) choose the invent on the lower row of your species card, (4) choose the spread on the upper row of your species card, and (5) advance your energy from Stage 3 to Stage 4. Player White gets a Negotiation because of his Emissary.
- b. Dissident Shutdown. A foundation is shutdown, and its Actions can't be used, if it has a Dissent icon which is Occluded by the presence of a Dissident. A Dissident on the Crown's Dissent has no effect on shutting down Actions.
- c. Conjunctions. Typically, a card will have several options, separated by the "/" icon. For instance, A / B / C is to be read as: you may choose activity A or activity B or activity C.
- d. Consequents. After certain Actions the symbol ">" appears followed by an Action, usually either an advancement icon or the Chaos icon. If you perform the Action, this advance must be awarded (or the Chaos suffered), which is applied after any other effects of the Action such as Negotiation or war losses. Actions that can have Consequents include prayer, urbanize, exogamy, war (regardless of outcome), or trade.
Example: You have the UNITED NATIONS (#67) foundation in the cultural ruling class. Its activity icons are: abstraction / exogamy > Footprint. During activities, you have a choice: either perform an abstraction, OR an exogamy. If you perform an exogamy, you increase your Footprint by a step as a Consequent.
- e. Revolution. If during your activities you suffer a chaotic revolution, then your activities phase abruptly ends after the Revolution (D3f).
- f. Emissary Negotiation. If during your activities you use a card that has an opponent's Emissary on it, then they gain a NEGOTIATION, immediately after you do the card's action but before you gain its Consequent.
- g. Diaspora. If you completely eliminate an opponent from the Map, he immediately performs diaspora (D4).
G. Activities List
Each Action has a specific icon. The four most important, found on the lower row of each Species card and sometimes as elder actions (J5) on Ideas and Foundations, are called knowledge actions (G1, G2, G3, G4). These move Elders to and from the Market.
G1. Specialize Action
This creates new Elders in the Market. Take a number of pawns from your Free Will and choose which Idea or Ideas in the Market to place them on. Once there, these pawns are called Elders. You may place on Ideas where you or opponents already have Elders. The maximum number of pawns you can place per specialize action is equal to your information Stage (D1c).
Easily Missed. Your information is not the maximum number of Market Elders, but rather the maximum number of Elders you can add to the Market during each specialize. There is no limit on pawns you may have in the Market.
Easily Missed. You may only specialize pawns from your Free Will. You may not specialize other pawns on your Brain Placard, nor Mystics, Emissaries or other Elders (they are already specialized in something else).
Example: Your information is 3 and you have 2 pawns in Free Will. You are allowed to specialize 3 pawns, but only have 2 to place. You decide to place both in the culture column, one in the 1 cost row and the other in the 2 cost row.
G2. Invent Action
Invent takes a Market Card on which you have at least one Elder and removes it from the Market, either to discard or to add to your Tableau. In either case, you claim its Eureka, and any opponents with an Elder on the card also copycat its Eureka. There are 4 steps to invent: (a) Expend Elders, (b) Eureka (an instant advancement, see G9), (c) Copycat Eureka (an opponent's instant advancement), and (d) discard the Idea. If playing the advanced game, instead of (d) the card goes into your Tableau as an invention (J2) if you meet its elder (G2a), menopause (J2a) or tech (J2b) requirement (if any) and the Idea has an Orientation that matches your Ruling Class.
- a. Expend Elders. To invent, the card must have at least as many Elders (of any color) as its matrix row number in the Market (D1a). Expend all Elders. Easily Missed. These Elders can be a mixture of yours and opponent's Elders, but at least one of the Elders must be yours.
- b. Eureka. As stated in the lower part of the card, invent always comes with an instant advancement (G9) called a Eureka. This bonus is mandatory and achieved whether or not you meet the listed tech requirements (J2b) and also whether or not you add the Idea to your Tableau as an invention (J2).
- Conjunctions. The + icon reads as a mandatory "and". For instance, the Eureka on the televangelists (#69, see page 9) requires both prayer and purge.
- Cull (I), (II), or (III). If a cull is stated as part of an Idea's Eureka, then you must discard from your Tableau onto top of the Lore Deck one of the stated Epoch or earlier. For instance, "CULL II" means that you must discard your choice of Ideas from among the Epoch I or Epoch II Ideas in your Tableau. This Expends any Emissaries on the card. Nothing happens if you do not have any Idea cards from those Epochs.
- c. Copycat Eureka. If one or more opponents have an Elder on the Idea, those players also get the Eureka bonus. If the Eureka is a demagogue (G9h) or invent (J5), the player to the left of the inventor goes first, then proceeds clockwise. Easily Missed. You get Eureka only once, even if you have multiple Elders.
- d. Discard/Invent. Discard the Idea on top of the Lore Deck unless J2 allows you to claim the Idea as an invention. If you have too many Ideas, see J2e.
Example: An Idea in the second row of the culture market column has one orange and one white pawn. As Player White, you invent the Idea. Both you and Player Orange receive the Eureka (abstraction). Both pawns get expended to their Free Wills. Then discard the Idea into the Lore Deck. If you meet the requirements J2a,b,c, orient the Idea to the color of your Ruling Class (purple), and place it half-under any existing Ideas.
G3. Library Action
Expend to your Free Will a number of Elders equal to your information Stage, and advance your information Stage by one step (to a maximum of 6).
Example: You are at information Stage 3 with 5 Elders in the Market. As a knowledge action, you return 3 of them to the Free Will, and advance to information Stage 4.
G4. Elect Action
If you have one or more Elders plus Emissaries, expend all of them to your Free Will, set your Ruling Class to any desired Discipline, and Quell all Dissidents (D3a). Each Dissident Quelled entails the loss of a City (or a Migrant if you have no Cities). If the Ruling Class is unchanged, continue your actions with the next row upwards.
- a. Class Dealignment. If your Ruling Class changes, all Ideas either transfer (D3d) or become obsolete (D3e). Continue in the new Ruling Class starting with the lower row of the Species Placard.
- b. President For Life. You are only allowed one elect action on your turn.
Example: Close to the scoring round at the end of Epoch III, to increase your diversity, you perform elect by expending your only Elder (of your 3 dissidents by losing 3 Cities, but decide not to change your ruling class.
G5. Migrant Actions
There are 3 kinds of migrant actions: spread (G6), urbanize (G7), or transactions (J3). These Actions either create a new Migrant and move it on the map, move an existing Migrant on the map, or replace a Migrant on the map with a City:
- a. Create Migrant. Take a Migrant from your pool (see B9a if the pool runs out) and place it on top of any existing map figure of your color (either Migrant or City). Then spread it according to the spread rules (G6).
- b. Move Existing Migrant. Instead of creating a New Migrant, you may move an existing Migrant who has not moved this turn. Spread it per the spread rules (G6).
- c. Replace a Migrant with a City. When you urbanize (G7), replace a Migrant (returning it to your pool) with a City, covering one of the resources in one of the 3 Hexes the Migrant was adjacent to.
G6. Spread Action
During a spread action, you move either (1) one new Migrant (G5a) or (2) one existing Migrant (G5b) from Spot to Spot following the white Hexsides. Your Cities can never move from one Spot to another.
- a. Spread Reach. A Migrant can spread up to as many Spots as your current energy Stage. If spreading off from a City, the first Spot must be one of the Spots that are part of that City's Hex. Except for merfolk, the last Spot moved to must be a land spot (B3b).
- b. Maritime. A Migrant can spread over as many water spots as your maritime Stage. At the game's start, you cannot cross any water. Note. It is possible for a Migrant to become trapped by climate change, surrounded by uninhabitable chits, unable to move until their technology increases or the climate changes again.
- c. The Blitzkrieg Rule. You are not allowed to spread from a Migrant that has already moved on your turn, or from a City that was formed this turn, unless you have either (1) a war animal city, (2) an oil city, or (3) a uranium city. You may use blitzkrieg during a transaction that uses spreading, but for preach, war, or enslave (J3) against a City, the Migrant must have started the action in the same hex as the targeted City. You are allowed to urbanize (G7) from a Migrant you have spread, even without blitzkrieg.
Example: You have no war animal city. You spread a Migrant to the elephant hex in India, and domesticate it in the same turn. You have one last spread action, and are allowed to spread from your new City since now you have a war animal city.
- d. Entering an Enemy Post. You are not allowed to enter a Spot occupied by an enemy Migrant without prior permission from the owner to pass unless performing a transaction (J3). The final Spot entered must be occupied by an opponent, see J3).
- e. Global Wrap. If you enter one of the named Spots on the far east of the map (Beringia, Musicians Seamounts, or Hawaii), you are also considered to be on the same Spot located on the far west of the map (and vice versa).
- f. Climate Chits refer to the colored chits on the map, added or subtracted during certain events (E1c,d,e,f). In general, a Migrant is not allowed to spread along a line that passes between 2 uninhabitable hexes (hex with climate chit, permanent ocean, or permanent ice). Spreading is allowed if passing between a Habitable and an uninhabitable Hex. See HABITABLE for exceptions if you have advanced more than once in Footprint, energy, immunology, or maritime.
Example: A hobbit migrant in Indonesia wishes to sail to Australia. However, northern Australia is covered by a jungle chit, and the Australian wombat hex is covered by a desert chit. The hobbit has energy 1, maritime 1, and immunology 3. He cannot take the route east then south, that would move between a permanent ocean and the jungle, two uninhabitable Hexes. But he can take the southern route. This also travels between 2 chits (a desert and a jungle), but his Footprint Stage of 3 allows travel between a desert and an uninhabitable Hex.
Easily Missed. In the above example, do not forget that permanent ocean is uninhabitable (e.g. the Carcharodon Hex), even though there is no climate chit there. Therefore moving along a coastline between ocean and uninhabitable land is disallowed without maritime 2 or higher.
- g. Shangri-La. A Migrant unable to move because it is surrounded by climate chits remains in isolation (until e.g. removed by Quelling or liberated by technology).
- h. Terra Incognita. The arctic area, north of the northernmost row of Hexes, is considered permanent ice (B3h). This impacts spread along the far north. For purposes of movement, consider all other areas outside of Hexes to be permanent ocean (B3i).
G7. Urbanize Actions
A City is created either by domesticate, cultivate, or prospect. Any of these 3 Actions converts a Migrant on a Spot of a Hex into a City in that Hex. Expend the Migrant, then remove the leftmost cuboid from your Urbanization and set it to cover the appropriate resource icon (B3e) in the Hex interior. Urbanize actions often have CONSEQUENTS.
Limit (per Hex). Each Hex can contain only 1 City. Many Hexes contain 2 resource icons, and if you urbanize a second City in a Hex, you must own the first City and use its cuboid to create the second. Therefore, you destroy one City (without Chaos) and use it as the Migrant to create the second.
Limit (per player). See B9c if you urbanize but already have 10 Cities.
Note. You can re-urbanize a Resource that you already have a City on, just to gain the Consequent. This does not consume a Migrant.
Example: During your activities you have a prospect > metallurgy action. This allows you to use a migrant in a metal resource hex to prospect the metal resource, consume itself to create a city, and advance your metallurgy by one Stage (to a maximum of metallurgy 3). Alternatively, if you already have a gold city that you conquered the previous turn, you can re-prospect it in order to advance towards metallurgy 3.
- a. Domesticate. This establishes a City on a Hex you occupy with at least one Migrant. The Hex must contain an uncovered animal icon (brown), and must be Habitable (i.e. not be permanent ocean/ice or contain a climate chit). If so, Expend the Migrant, then take the leftmost cuboid from your Urbanization track and put it into the center of the Hex, to cover the animal icon. This is your City.
- b. Cultivate. Establishes a City in a similar fashion to Domesticate, but instead of a brown (animal) resource, you establish a City on a Habitable Hex with a white (horticulture or biofuel) resource (see map legend).
- c. Prospect. Establishes a City in a similar fashion to Domesticate, but instead of a brown (animal) resource, you establish a City on a Habitable Hex with a black resource icon (luxury, metal, oil, or uranium). As an additional precondition, you must have the minimum Technology Stage listed on the icon.
- d. Prospect Luxury or Metal. There are 4 kinds of resources that can be prospected with the metal icon: luxury (quadrilateral), oil (drop), or uranium (atom). See map legend. However, prospecting with the metal icon can prospect only luxuries, and with the mineral icon can prospect only metals.
Example: During your activities, you have the following Actions in your Tableau, reading from bottom up: encephalize, abstraction, art, prospect > energy. You spread one Migrant to the Himalayan camel hex and a second to Saudi Arabia for its pearl diving luxury. You use the domesticate to convert the first Migrant into a camel City. Because you have the precondition for pearls (maritime Stage 1), you use the prospect to convert your second Migrant into a pearl city. The Consequent of the prospect action advances you from energy Stage 3 to energy Stage 4.
G8. Bonus Urbanize Option in the Basic Game
As indicated on the Species Placard, in the basic game (C1a), there is an extra urbanize option for each of the three Disciplines, which is not available if playing the advanced game:
- a. Culture has domesticate (G7a), with an extra tech requirement that your environment (the sum of your Footprint and energy Stages) must be at least 5.
- b. Politics has cultivate (G7b), with an extra tech requirement that your environment must be at least 6.
- c. Industry has prospect (G7c).
Example: Your Ruling Class is politics, and you have Footprint 2 and energy 3. During your activities you are unable to exploit your bonus urbanization of cultivate, because your environment is one short. However, you undergo a Revolution and change your Ruling Class to cultural. Now during your activities you are able to domesticate using your Species Placard.
G9. Advancements
Advancements either improve your brain, technology, or Philosophy, or trim your Tableau. They occur either as Eurekas (G2b,c) or as Actions during activities (F). There are 8 types:
- a. Encephalize moves one pawn from emotions into vocabulary. Visualize it as an evolutionary swelling of the cortical portions of the brain, as a hardware upgrade. Pawns in your vocabulary are not able to be used, but can be moved into Free Will via abstraction (next bullet).
- b. Abstraction moves one pawn from your vocabulary into your Free Will.
- c. Art moves a pawn from your Mysticism pool into your Free Will.
- d. Prayer moves one of your pawns from any domain on your Brain Placard into your Mysticism pool.
- e. Technology X increases your Stage on the named tech track by one step, to a maximum of X. For instance, if you are at Footprint Stage 2 and receive a Footprint 4 advancement, move your Stage one step to Stage 3, not Stage 4. If you are already at Stage 4 and receive a Footprint 4 advancement, nothing happens.
- Steam and Oil Energy Advance Bonuses. As stated on the energy tech track, if you advance into energy Stage 6 or 7, you gain a bonus of one free advance in any other tech track (other than energy) as a Consequent.
- f. Cull (I), (II), or (III). If a cull is stated as part of an Idea's Eureka, then you must discard from your Tableau onto the top of the Lore Deck one Idea of the stated Epoch or earlier. For instance, "CULL (II)" means that you must discard your choice of Ideas from among the Epoch I or Epoch II Ideas in your Tableau. Nothing happens if you do not have any cards in those Epochs.
- g. Purge. This Eureka is only found on dictators (E1j), and simulates their tendency to ruthlessly suppress all possible rivals. Placing the Dictator in a Column causes all other Foundations in that Column (but not the Species Placard, which is permanent) to be discarded out of the game. For each purged Foundation, Quell the Foundation's Dissident (if it has one) per D3a.
- h. Demagogue. Move the PHILOSOPHY by up to one step in any direction.
H. Footprint & Restore Market
H1. Footprint Check
Each Hex can support only so much population. If there are too many, the excess starves. Populations with low technology (such as hunter-gatherers) require more land than others, and so are at greater risk of starvation.
- a. Starvation. During this phase, first check for starvation for your Migrants and Cities in each Hex. Starvation occurs in a Hex you occupy if the total number of tokens (including Migrants, Cities, and other player's Migrants and Cities) is more than your current Footprint Stage.
Easily Missed. During your Footprint check, only your tokens can starve, never enemy tokens.
- b. Remove Tokens & Starvation Chaos. In all such Hexes with population greater than your Footprint Stage, remove Migrants or Cities of your color until there are just as many population as Footprint. You choose which of your Migrants or Cities to destroy. Each Destroyed Migrant is placed as a Dissident, or (if no Ruling Class Dissents are available) expended to the pool to start a chaotic revolution (D3). Each Destroyed City is added to Urbanization, and generates a Refugee (from the pool, or from the map if the pool is empty). This Refugee must be placed as a Dissident, or (if no Ruling Class Dissents available) remains on the map to start a chaotic revolution.
Example: The hobbit, with Footprint 3, has just created a city by domesticating the horse. You as Player Orange have Footprint 1, and during your turn your adjacent migrant is in danger of starvation. You use a spread to move him to safety. Other options: (1) assuming you have a higher Mysticism and a preach action, you can capture the migrant. However, your migrant would still starve during your footprint phase. (2) save your migrant by inventing an Idea that advances your Footprint to Stage 2. Note the arrows areas containing permanent ice are unbounded and thus not Hexes. Thus, your two northern migrants do not share a Hex (and don't starve).
Easily Missed. Cities count towards Footprint only for the Hex they are in. If a Refugee exceeds the Footprint (H1b), it doesn't starve until the starvation phase next turn (H1a).
H2. Restore Market
If there are any Gaps in the Market, slide cards downward (away from the draw deck) to fill the Gap. Then take cards from the draw deck (if any), and use them to fill each Gap with a faceup card. The end result should restore the Market to nine cards in a 3 x 3 matrix.
H3. Diversity Check
You may ask other player(s) to adjust their cubes in the Diversity Track to accurately reflect the number of unoccluded Rainbows in their Tableau. This is important in the endgame, because Diversity is used for Comet Scoring at the end of Epoch III and also for final scoring.
I. Game End & Final Scoring
If you challenge the last Comet card in Epoch IV, the game ends immediately (no Chaos, Market renovate, or comet scoring). Then each player calculates their cultural scoring (I1), political scoring (I2), and industrial scoring (I3), and the highest one is their final score.
- a. Determining The Winner. The player with the highest final score is the winner. If tied, compare the sum of all three scoring alternatives (even if philosophically shutdown) for each player. If still tied, players share victory or position.
- b. Philosophy. If the Philosophy is in the FREEDOM or ABOLITIONIST spots, no player can perform political scoring. If the Philosophy is in the EQUALITY or AGNOSTIC spots, no player can perform cultural scoring. If the Philosophy is in the UNITY or PACIFIST spots, no player can perform industrial scoring.
- c. Comet Endgame. If the last comet is visible for an entire player turn, continue for two full rounds around the table. Then, just before that player's turn, draw an unused Epoch IV challenge, perform its 2 events, and end the game. Score per the previous two bullets.
I1. Cultural Scoring
- a. Victory Chits. 1 VP for each victory chit on COMET I of your color, see E3d.
- b. Mysticism. VP equal to your current Mysticism (i.e. the number of pawns in your mysticism pool).
- c. Environment. VP equal to your Stages in the two environment tracks (Footprint plus energy).
I2. Political Scoring
- a. Victory Chits. 1 VP for each victory chit on COMET II of your color, see E3d.
- b. Urbanization. VP equal to your current Urbanization.
- c. Welfare. VP equal to your Stages in the two welfare tracks (metallurgy & immunology).
I3. Industrial Scoring
- a. Victory Chits. 1 VP for each victory chit on COMET III of your color, see E3d.
- b. Diversity. VP equal to your current number of unoccluded Rainbows in your entire Tableau.
- c. Economy. VP equal to your Stages in the 2 economy tracks (maritime & information).
Example: Your opponent takes the Comet IV card, so you do not bother to count your final score. Instead, you want to see which is higher, your political or industrial final score. In the middle column on the map, you have no Victory Chits, and Urbanization of 5, and a welfare of 3 + 4 = 7, for a total political score of 12. In the right column, you have an economy of 0 + 5 = 5, and an industrial score of 12. The tiebreaker is to combine all 3 scorings, and your opponent wins this.
J. Advanced Game
If playing the advanced game (C1a), add in all rules with a blue font. The advanced game icons have thick bulging borders. Additionally, the following rules supersede the rules in the basic game:
J1. Milankovitch Cycles (not for 1- or 2-player games)
In addition to their normal effects, global warming and global cooling shall plunge the world into icehouse (a really cold glacial maximum) or ice age (not so cold interglacial optimum). If during a challenge a cooling (E1c) is drawn, draw a second card of the same Epoch, taking the card from the top of the unused facedown challenge cards. If this is also a cooling, the world suddenly becomes icehouse. If not, resolve the cooling event as normal. If during a challenge a warming (E1d) is drawn, follow the same procedure except the world can suddenly become ice age if a second warming is drawn. In both cases, put the card into the bottom of the unused challenge cards.
- a. Icehouse. The challenger flips all existing seas (blue chits) in the game to their white side, and places them on ice hexes per E1c.
- b. Ice Age. The challenger flips all existing ice (white chits) in the game to their blue side, and places them on shelf hexes per E1d.
- c. Stalled Milankovitch. Do not draw a Milankovitch card during cooling if the world's blue chits are all already flipped to their white side. Do not draw a Milankovitch card during warming if the world's white chits are all already flipped to their blue side.
- d. Dry Icehouse. If you suffer cooling (E1c) but there are no more seas to freeze, or shelves to put the ice, suffer one deforestation (E1e) instead of drawing any cards. If you suffer deforestation but there are no more forests to turn into deserts, or no more places to put deserts, nothing happens.
- e. Wet Ice Age. If you suffer warming (E1d) but there is no more ice to melt, or shelves to put the melted ice, suffer one forestation instead. If you suffer forestation (E1f) but there are no more deserts to turn into forests, or no more places to put forests, nothing happens.
Example: A challenger draws a challenge card showing cooling, and so he draws a second card from the unused pile. This also shows cooling, so Earth suffers a Milankovitch icehouse that turns all of its blue disks to white ones.
J2. Inventions
An invention is an Idea that you add to your Tableau by using invent (G2), so that you can use its listed Actions and advancements during your activities phase (F). This addition moves the invented Idea from the Market to your Ruling Class Column half-under your uppermost card (Species Placard or Idea), oriented so its visible color matches the Ruling Class Column. Alternatively you may discard this card onto the top of the Lore Deck. In any case, Expend all Elders on the card. If you meet all listed requirements (see a, b, c, d below), otherwise discard the Idea onto the LORE DECK:
- a. Menopause listed as REQ. Your species develops Menopause once you have 2 or fewer emotion pawns on your Brain Placard. If an Idea has Menopause listed as "REQ.:" (requirement), then if you are not yet at Menopause you still claim its Eureka but will discard it on top of the Lore Deck instead of claiming it as an invention.
Example: With still 3 pawns in your emotions, you are not yet at Menopause. However, you invent an Idea with a Eureka of "encephalize". Because this reduces your pawns in emotions to 2, you can add this Idea into your Tableau as part of your invent action.
- b. Technology or City Type listed as REQ. If you have not attained the requirement you still claim its Eureka but will discard it onto the Lore Deck instead of claiming it as an invention. If there is a city requirement, you must have a City with that resource: any icon = any resource, work animal, war animal, biofuel, horticulture, metal, oil, or uranium (see map legend for icon key).
Example: You invent broadcasting (#178), with the requirement: biofuel / oil. This means that you need either a biofuel or an oil city to claim the invention into your Tableau.
- c. Orientation Requirement. In order to claim the card as an invention, one of its two Orientations must be able to match the color of your Ruling Class Column. Orient the card into this color when placing the card into your Tableau.
- d. Elder Precondition. See G2a.
- e. Obsolescence. You are limited in the number of Ideas (but not Foundations) that you may hold in your Tableau. This limit is equal to your information Stage. If this addition of a new invention exceeds this limit in your Ruling Class Column, you must choose one Idea to discard onto the Lore Deck.
J3. Transactions
You can transact with either an enemy Migrant or enemy City. Against a Migrant, spread (G6) to the Spot of the targeted Migrant. A preach, war, or enslave transaction may be affected by morality (J4). Then resolve the transaction as follows:
- a. Trade spreads a Migrant to an enemy map token (Migrant or Spot in a City Hex). For Cities, unlike preach, war, or enslave, you do not need the Migrant to have started adjacent to the City. Then follow this sequence:
- Expend your Migrant to your pool.
- Negotiation Benefits. First you, then the player you are trading with, choose a NEGOTIATION.
- Perform Consequent (if any CONSEQUENT listed).
Example: During your activities, you perform a trade > maritime action. So you spread your "trader" Migrant from your City to a nearby enemy City. Then you choose for your Negotiation to clear a Dissident. Since you are at Footprint Stage 3, your trade partner at Stage 1 chooses for their Negotiation to advance to Stage 2. Finally advance your maritime to Stage 2 and expend your trader.
- b. Preach is an Act of God that can be used only if your Mysticism is greater than that of your opponent. If so, use the preach action to spread to and then convert an enemy map token, either a City (you must spread from an adjacent Migrant, even if you have blitzkrieg (G6c)), or a Migrant (must be in normal spread range), and then attack it in one of 2 ways:
- Preach Migrant. The enemy Migrant is converted (i.e. Destroyed without Chaos, since this is an Act of God) and your Migrant remains.
- Preach Siege City. To preach a City, you must spread from a Migrant that has started the action adjacent to the City, which expends the spread Migrant. Then use a preach action which converts the City to your color. Destroy the enemy city (without Chaos since this is an Act of God) and replace it with a City of yours. Place the Refugee from the destroyed City on an adjacent Spot.
Example: Player Green has domesticated war rhinos and has metallurgy 2 than her opponent, Player Orange. She also has Footprint 2 and metallurgy 3 action. For her spread, she moves 1 migrant into a hex containing both an orange city and an orange migrant. She then uses her war action. She could capture the migrant, but since she has the city in siege, she decides instead to capture the city. She replaces the orange city with a green city, and advances to metallurgy 3. The lost orange city generates a Refugee, which is placed as a dissident in the orange ruling class.
- c. War spreads to an enemy map token, either a City (you must spread from an adjacent Migrant, even if you have blitzkrieg (G6c)), or a Migrant (must be in normal spread range), and then attack it in one of 4 ways:
- Attack Migrant. Compare your metallurgy Stage to that of your opponent. If yours is higher, their Migrant is destroyed and placed as a Dissident, where it might cause a chaotic revolution (D3) and your Migrant remains. If it is equal, both Migrants are destroyed and placed as Dissidents. If yours is less, only your Migrant is destroyed as a Dissident, and theirs remains.
- War Siege City. To siege a City, you must first have a higher metallurgy Stage than the defender and must spread from a Migrant that has started the action adjacent to the City, which expends the spread Migrant. Then use a war action which converts the City to your color. Destroy the enemy City (with Chaos, since this is an Act of Man) and replace it with a City of yours.
- Missile Bomb City/Migrant. If you have maritime Stage 8 and energy, your war action can Destroy any City or Migrant (with Chaos) anywhere on the map.
- Nuclear Bomb City/Migrant. If you have energy Stage 8, you may use your war action alternatively to Destroy a City or Migrant in the Hex you spread a Migrant into, with metallurgy requirements waived. Unless you use missiles (previous bullet), the Migrant must have started adjacent to the target. If you have both energy and maritime at their highest Stages (Stage 8), your war action can Destroy any City or Migrant (with Chaos) on the map without the need for adjacent Migrants or metallurgy superiority. (Energy 8 are tactical nukes waiving the requirement for higher metallurgy. Energy 8 + maritime 8 are ICBMs waiving the requirement for adjacency.)
Important: If the war has a CONSEQUENT (see glossary), you gain the Consequent no matter if you win, lose, or draw. This is a reason to attack even if defeat is certain.
Example: During your activities, you have a spread and prayer, then a preach action in your Ruling Class Column. Your domesticated horse can blitzkrieg. Your opponent also has Mysticism 1 and thus is immune to your preach. However, you first spread a Migrant next to one of his Cities, then a prayer to add 1 to your Mysticism, and finally your preach action which converts the City to your color. Your Urbanization rises, and his falls. You expend your Migrant, and add a Refugee in his color.
- d. Enslave can be used only if your Urbanization is greater than that of your opponent. If so, use the enslave action to spread to and convert either an enemy map token, either a City (you must spread from an adjacent even if you have blitzkrieg (G6c)), or a Migrant (must be in normal spread range), and then attack it in one of 2 ways:
- Enslave Migrant. The enemy Migrant is destroyed and placed as a Dissident, where it might cause a chaotic revolution (D3). Your Migrant remains.
- Enslave Siege City. To enslave a City, you must spread from a Migrant that has started the action adjacent to the City, which expends the spread Migrant. Then use an enslave action which converts the City to your color. Destroy the enemy City (with Chaos, since this is an Act of Man) and replace it with a City of yours.
Easily Missed. Performing a violent transaction (enslave, preach, or war) will cause you to suffer a Chaos if the Philosophy is in an unfavorable morality spot (J4).
J4. Morality
Some positions of the PHILOSOPHY add a Chaos Consequent to certain transactions:
- a. Abolitionist. If the Philosophy is in one of the two spaces indicated "+1 CHAOS IF ENSLAVE", then any player performing the enslave transaction suffers Chaos, effective after all other effects of the action are performed.
- b. Agnostic. If the Philosophy is in one of the two spaces indicated "+1 CHAOS IF PREACH", then any player performing the preach transaction suffers Chaos, effective after all other effects of the action are performed.
- c. Pacifist. If the Philosophy is in one of the two spaces indicated "+1 CHAOS IF WAR", then any player performing the war transaction suffers a Chaos, effective after all other effects of the action are performed.
J5. Elder Actions
There are nine actions that impact your Elders and/or Tableau instead of your population:
- a. Exogamy. Take a new pawn from your Free Will and place it as an Emissary on an Idea in the Tableau of any opponent. Each player is limited to one Emissary per Idea.
- b. Racism. Expend an opponent's Emissary out from your Tableau.
- c. Cold War. Expend one Elder or Emissary and cause a Chaos (D2) to one opponent with a welfare (metallurgy plus immunology) that is less than yours.
- d. Artisan. Take a pawn from your Free Will and place it on any card in the Market.
- e. Constitution. Reorient 1 Foundation and move it from its resident column to the bottom of its other column (removing its Dissidents without effect). This is not a Revolution and the Ruling Class is unchanged.
- f. Invent. When you invent (G2), instead of Discarding the Idea, you may add it to your Tableau if you meet the menopause and tech requirements (J2a, J2b).
- g. Library. See G3.
- h. Science. You may search through the LORE DECK and retrieve one Idea with a red Orientation. Add it as a new invention (G2d) to the bottom of the Ideas, just above the Species Placard, so as to become the oldest Idea of your Ruling Class Column (without gaining its Eureka). However, you must meet its requirements (J2a, J2b), if any.
- i. Pseudoscience. This is exactly the same as science (previous bullet) except the retrieved Orientation is white instead of red.
K. Experimental World Building
K1. Bios:Earth Campaign Map (from Bios:Megafauna, Ken Brown)
Most Bios: Megafauna games will end in the green climate range, often yielding forested wastelands no longer suitable for your creeples. The goal with this rule is to create a custom map for the Bios: Earth Campaign (C6) that is a reasonable facsimile of your continents in Bios: Megafauna. To do this, simply decide where your cratons would go per the regular Bios: Origins rules, then do the following:
- For every forest hex, place a random green tile.
- For every weeds hex, place a random blank tile (no circle), or a random white tile if blanks run out.
- For every mountain hex, place a random orange tile.
- For every swamp hex, place a random white tile.
- For every sea hex, place a random ocean tile.
- Place climate chits on spaces with stars.
- Place the climate strip that you ended with in Megafauna.
- For each ice chit in a green latitude, flip it to its blue side and move it to a blue circle hex in a green latitude. If no such hex exists, remove the chit.
- Perform the same step as 8, but turn ocean chits into ice for white latitudes.
- a. Insufficient Oceans. There are only 26 Bios: Origins tiles, but 28 hexes in Bios: Megafauna. To recreate the two cratons that have two sea hexes on each, do not place an ocean tile in one of the sea hexes.
- b. Proceed with the regular game; no need to add resources or domestic creeples. What you're left with should look like your world in Bios: Megafauna but play like an Bios: Origins game.
K2. Bios:Earth Campaign Map (from Bios:Mesofauna, Phil Eklund)
The center of each craton contains up to three icons. To replicate your ending craton arrangement in Bios: Mesofauna, find the tiles in Bios: Origins that match these icons. Arrange these tiles per C6e.
- Polar Regions. If any ocean tile is in either the southernmost row or northernmost row of the continents, flip it to its white side.
- Climate Chits. For each tile hex with a climate ring (B3d) (white, blue, orange, or green) that has 3 or 4 stars, place a climate chit of that color.
- Starting Meeple. Beginning with the first player, each player places their starting meeple on Spot in a hex that they occupied in the Mesofauna game, or on the Spot marked with their player color.
- Spots That Are Mixtures of Land & Sea. See B8d.
K3. Custom Setup Tips (Paweł Garycki)
Having read the existing setup rules for Cratons and hex chits as well as transition from Bios: Megafauna/Mesofauna, here are principles of world design:
- a. America. An uninhabited continent to the west is useful to reward exploration and maritime investment. America should be separated by permanent ocean and at least 3 water spots to recreate a Columbus voyage or island hopping passage. If continuing from the raindance Earth environment, follow Mars & Venus setup, however there will be no "America".
- b. Pangea. The more players are in the game, the more hex chits each one will need. They should start on the same continent (Pangea) to encourage early interaction.
- c. The Islands depicted on the map are often the only sources of uranium and oil and should be occluded. Note that those islands are initially land which may extend continents.
- d. World Wrap. Avoid placing hexes or cratons so that they touch the east or west border of the map, because of alignment issues. Touching the north or south edge or the Philosophy diagram is ok, and may be necessary to have enough room for craton placement.
- e. Venus or Mars Settings. To avoid the transition from Bios: Megafauna, follow the craton setup with both Mars/Venus forming the Old World continent and "America" forming another, regardless of player count. Cover "America" as usual with randomized hexes. As highlands may be transferred to either swamp or weeds, roll 1d6 dice twice and put a burrower creeple on those highlands which hit the rolls. As typical for Mars/Venus, the burrower indicates the biofuel resource while other highlands indicate horticulture. Distribute the animals and roll for luxuries in central hexes. Then, in player order, players choose their starting spot in the Old World on either of the 2 cratons. Finally, each player places only one climate chit in the Old World.
- f. Vassal Randomization. The Vassal module provides a way to randomize a starting world. It works both ways. First, propose the location of cratons or hexes with just one click. Repeat the click until you are satisfied with the placement if you have specific requirements. Then it is possible to populate the randomized craton or hex locations with actual cratons and hexes. Here, you can always undo the operation and try again. Then copy the result into your physical game. Vassal randomization could also be used for Mars/Venus starts and, if you are patient enough to wait for a continent distribution resembling the legacy one, transition the game from Bios: Origins.
K4. Setup Variations (Paweł Garycki)
These describe differences in setup between the Earth and Mars games:
- a. Archipelago. Add a bunch of hexes to the craton setup. For climate resolution, see Mars & Venus games climate chits handing.
- b. Fast & Easy Setup. First randomize craton locations, then cover cratons with hex chits. The 2 craton hexes not covered will be inland lakes or gulfs.
- c. Merfolk Waterworld. Leave the custom map entirely water, and randomize starting spots. Consider all islands covered in water climate chits so that new climate changes ever occur. Consider movement to be half a player's maritime Stage, rounded down, plus energy.
- d. Campaign Real-Earth Map. Transit cratons from Bios: Megafauna to the classic Earth map. Rotate continents-cratons 30 degrees to align with the lattice. Fill them with random land hex chits when craton land is placed on permanent ocean and random blue-ringed and white-ringed hex chits when craton sea is placed on non-blue-ringed land. Transit creeples and climate chits as per Bios: Earth campaign setup (C6) regardless if they land on correct circles. If you run out of climate chits, prioritize placement on Cratons rather than the map. Apply climate chits to the standard map circles according to the player count. Remove cratons from the map so that they don't occlude resources on the map. Don't put any new resources on the map. Climate strips are not used.
- e. Chimeraworld. Mix Mars, Venus and Earth cratons with hex chits. If done on the classic Earth Map, they represent recent resurfacing events.
K5. Green Mars or Venus (Paweł Garycki)
May also be used for Earth, if green meeples are used for vegetation.
- a. Alien Terrain Mars and Venus craton terrain is treated the following way:
- Basin is treated as sea.
- Highland is treated as a swamp if a green plant archetype is present (may place an unused burrower to further indicate this), or otherwise treated as weeds.
- b. Climate Chit Transformation. Replace the following on each raindance craton:
- Mountain (black disk) -> orange chit
- Sea (white disk) -> blue chit
- Tubers Forest (green burrower plant) -> green chit
- Wasteland (no green creeple and no disk) -> white chit
- c. Alien America. Add two additional Earth cratons as America to form a continent to the west of the Mars or Venus cratons. Cover Earth cratons entirely with random terrain chits and apply climate chits there according to the player count stars.
L. Tips
L1. Elder Action Tips
A heavy bidding strategy concentrating on Foundations and ignoring Ideas will make you weak in Advancements, Urbanization, artisans, and trade. Conversely, if you concentrate on Ideas, you will stifle your mental development and will be vulnerable to chaotic revolutions which often discard multiple Ideas. Here are further tips on what Ruling Class to be in, or if you should challenge or not, to achieve a specific Advancement:
- a. Break An Abstraction Logjam. In Epoch I you normally build up pawns in vocabulary or mysticism. Abstractions are rare, so do not expect to build up Free Will until Epoch II (the dawn of consciousness and volition). If you have a lot of pawns stuck in vocabulary, switch to a cultural Ruling Class and use a combination of prayer and art to break this mental logjam. But beware, art becomes more rare later in the game, so accumulated Mysticism may be hard to reverse.
- b. Clear Your Brain. If you do not win challenges, as the game goes on it becomes harder to move pawns out of your emotions, and your Free Will stagnates.
- c. Advance Your Information. You should achieve information 2 in Epoch II at the latest, which usually requires winning Ideas. If all else fails, use Library. Once at information 2, challenge the gods for further advances.
- d. Urbanize (domesticate or cultivate). There are 3 significant advantages to having Cities: (1) they provide VP during Epoch II scoring, also during political final scoring, (2) they enable or disable enslavement, and (3) they are tech requirements for many Ideas starting in Epoch II. In the early game, the best Ruling Class for city-building is white. A particularly valuable resource is biofuel.
- e. Urbanize (prospect). Later in the game, advance your metallurgy so that you can build Cities by prospecting. Oil and uranium are requirements to valuable cards in the endgame.
- f. Trade. Your Ruling Class should be in white or especially red to have the best chance for this invaluable action.
- g. Preach. Challenge if your rulers are purple or especially white in Epochs I, II, or III.
- h. War or Enslave. Challenge if your rulers are purple or (if Epoch IV) white.
L2. Diaspora Problem
Do not despair if, due to war, enslavement, or preaching in the advanced game, you are reduced to a single diaspora figure being hounded on the map and with no chance to urbanize. Here are some suggestions:
- a. Industrial. Attain this victory by using library to increase your information and winning challenges as much as possible. You will want to increase maritime, which often requires energy 4. Increasing Footprint may help keep the Cities necessary to hold many Epoch II cards from starvation (H1a).
- b. Cultural. For this victory bid strongly for religious challenges, and then use prayer and preach to launch a counterattack to damage your opponent's political score. Both prayer and preach are mainly found on Challenge Cards and Ideas in the white discipline. Library and Mysticism help dominate bidding.
M. Transition to High Frontier
The end state of a game of Bios: Origins can serve as the starting condition for a game of High Frontier 4 All. This combined game is described in the High Frontier appendix, see Bios: Earth (V7) or Bios: Venus, Bios: Mars (V8).
N. Sample 2-Player Advanced Game (Petr Pospíšil - Pizin)
Hobbits vs Sapiens Setup. The Sapiens draw Crown #1 (industrial ruling class red) and the Hobbits draw Crown #3 (cultural ruling class white). The number of Challenge Cards is 4 in Epoch I and 2 in Epoch II.
Executive Summary (spoiler alert!). Sapiens quickly invent "knife" which spearheads them into Europe and Asia. During their spread to Siberia, Hobbits gain awareness of mortality and bury their dead and gossip about the living. By the time they reach Alaska, they are whittling spears and symbols, and eventually are cooking and imaging their symbols in their minds. Sapiens own self-awareness allows them to give names to each other, an advantage in Mysticism. They also learn to recognize the paternity of children, and erect the first City in the Persian Gulf. This becomes a trading center for Hobbit wares. Sapiens wins Epoch I with a superior Mysticism, but her city is overrun by desertification and Hobbits are first to enter the bronze age. They nevertheless suffer starvation with the arrival of the diphtheria destroys half of them. Sapiens lose two wars in Siberia and they change to a political Ruling Class in a chaotic revolution. Hobbits build many Cities but it is too late to stop Hobbits from winning in Epoch II.
N1. Epoch I: 100 kya to 30 kya
First Sapiens Turn. The 3 cards in the first row: "skin boat", "whittling", "knife". Choose the "knife" to specialize, and then spread north from South Africa.
First Hobbit Turn. Also specialize in "knife", and spread north into Indonesia. Both players race to acquire menopause, and both the "knife" and "whittling" have the encephalization Eureka to help them do this. But the "knife" is superior.
Cutting Edge Sapiens. Sapiens decide not to challenge the gods yet. They invent the "knife", and thus gain encephalization (as do the Hobbits, who also have an Elder there). Since it has no requirement, Sapiens retain its commercial orientation. They spread as far north as Egypt. For their "knife" action, they advance to energy 4, since art is not an option.
Manchurian Hobbits. Specialize the "skin boat". A Hobbit migrant spreads to Manchuria.
Asian Sapiens. Joins the Hobbits in specializing in the "skin boat". Because of this increased energy they have a spread range of 4 spaces, enough to reach Central Asia on the east coast of the inner sea.
Busybody Hobbits. Challenge the gods: "groom & gossip". With their control of global cooling, they flip the sea chit in Beringia (creating a land bridge to America) and place an ice sheet in East Europe. (Milankovitch cycles are not used in 2-player game.) Famine event has no effect as there are no Cities yet. Hobbits bid 1 Elder and acquire the card (as Cassans cannot bid more). The Elder is returned to Free Will. They add the "groom & gossip" challenge card to their Tableau, retaining their priestly ruling class. Its encephalize Eureka confers menopause, and its action advances their immunology to Stage 2. They specialize on "whittling" and spread northwest to Siberia.
Og the Sapiens. Challenge the gods: "personal names". Cooling event dries up a Russian ice dam lake and ice freezes West Canada. Hiawatha impact in Greenland has no effect. Sapiens claim the challenge with a bid of one and gain its prayer Eureka - moving one pawn from emotions into Mysticism. But they don't have its requirement (information on Stage 2), and so must discard it. During knowledge, they specialize on "raft" as it is the only available Idea in the red industrial row.
They spread west but are blocked from Europe by water and ice. They spurn art since it will reduce the Mysticism needed for religious challenges and scoring at the end of Epoch I.
Whittling Hobbits. Hobbits decide against challenging because if it would be religious, Sapiens would win it. Their foundation "groom & gossip" gives no useful action. They gain encephalization and an advance to information Stage 2 with the invention of "whittling". During their spread towards America, they move a Migrant from Manchuria to north of Kamchatka (this movement rather than creating a new Migrant avoids unnecessary starvation).
Good Father Sapiens. Challenge the gods: "fatherhood". During forestation, they open up the Gobi Desert, and later exploit this gap to trade with the Hobbit. They also place a jungle on Papua New Guinea which temporarily prevents Hobbits from reaching Australia. Zoonotic disease affects nobody. Sapiens bid one and wins the prayer Eureka. They use the card to spread. Rather than create a new Migrant (which would create starvation), they move a Migrant in Asia two spaces south to Strait of Hormuz. During their other spread a new Migrant appears in Asia near Zamanshin impact. Finally, they specialize on "raft".
Sewing Hobbits. Hobbits specialize on "fitted clothes". (Information on Stage 2 allows specialization with two pawns from Free Will but unfortunately they have only one.) During spread, instead of creating a new Migrant, they move the Migrant from Kamchatka to Alaska, discovering the New World!
Swimming Sapiens. Sapiens decides not to challenge the gods. Instead they invent "raft" and its Eureka advances their maritime to Stage 1. But Sapiens information on Stage 1 so they can hold only one Idea card. So they discard the now useless "knife" into the lore deck. Instead of spread, they prospect luxury to convert a Migrant into the Strait of Hormuz into a pearl City (requirement = maritime Stage 1). He takes the far cuboid from left and Occludes the luxury icon with it. The Migrant is expended into Free Will. So the world's first City is erected in Arabia. Sapiens use "raft" Idea to the Hobbit Migrant in Siberia. Sapiens copy the Hobbit's information Stage 2, while their trade partner moves one pawn from emotions to Free Will. As their Consequence from trade, Sapiens advance again, now to Stage 2.
Revolutionary Hobbits. Challenge the gods: "semantic memory". During cooling they remove the sea token from Japan and create an Alpine icesheet. Disease affects nobody. Hobbits win the auction and gain an encephalization Eureka. They add this Foundation card with its purple political side up, moving their Crown in a quiet revolution. There is no Dissident to quell. The revolution reorients the "whittling" Idea to its purple side in the political column. But the foundation "groom & gossip" is frozen in the cultural column and cannot be used for now. Hobbits decide not to use abstraction on "semantic memory" as it is causes a Chaos and a second Chaos from the imminent Comet would start chaotic revolution. They specialize in "pit fired oven" in the second row with two pawns (due to their information Stage 2). Hobbits spread again to Manchuria. They use the purple side from "whittling" to advance their energy to Stage 4.
N2. Epoch II: 28,000 BCE to 3000 BCE
Sapiens Worshiper. Sapiens claim the first comet. They suffer one Chaos which moves a Migrant from central Africa to their Crown as Dissident. Hobbits also suffer Chaos which transfers a frozen Migrant from Siberia to their Crown. (Next Chaos will start a chaotic revolution for them.) All cards from Epoch I are removed from Market (except for the one with Hobbit's Elders) and it refreshes with new cards from Epoch II. Since there are two Sapiens pawns in Mysticism compared to no Hobbit pawns, Sapiens is awarded 1 VP and keep the Comet as a Bellwether. Sapiens spread into north Siberia on empty spot where a Hobbit was. They specialize in "swineherd". With trade from "raft" they move one pawn into Free Will, while the Hobbits quell one Dissident.
Hobbit Metallurgist. Hobbits know that they will likely win a challenge and reveal "barter reciprocity". Deforestation moves the jungle from India as a desert in South Arabia which destroys its pearl-diving city. This is considered an Act of God so it proceeds without Chaos and a Refugee flees to an adjacent spot. Influenza affects nobody. Hobbits bid one Elder and win. The abstraction Eureka moves one pawn from vocabulary into Free Will. The Foundation goes into active political column. Using prospect from "barter reciprocity" they convert a Migrant in Burma into a ruby city (requirement = Stage 2 immunology). As the Consequence from prospect, they advance their maritime by one step (they cannot skip directly to Stage 2). Next, the abstraction from "semantic memory" moves another pawn into Free Will. Its Consequence is Chaos so they take a Migrant from Alaska as a Dissident on their Crown. Next they invent "pit fired oven" and advance to metallurgy Stage 2. This becomes their top Idea. Hobbits start a war and spread a new Migrant from Manchuria to Sapien's Migrant in north Siberia. With higher metallurgy, they take over the loser's spot and the defeated Migrant moves to the Foundation "fatherhood" as a Dissident. From their new card "pit fired oven" Hobbits prospect metals to build tin City in Malaysia (requirement = metallurgy Stage 2) and as the Consequence advance their metallurgy to Stage 3.
Sapiens Farmer. Sapiens could challenge the gods but instead favor inventing. The "fatherhood" Foundation is disabled by a Dissident. They invent "swineherd" to advance their Footprint to Stage 2. They spread into India, which threatens the Indian Hobbit City with hunger. They trade and advance their metallurgy to Stage 2 (still not enough to save them in warfare). Hobbits advance their Footprint to Stage 2 to prevent hunger. Sapiens cultivate from "swineherd" and urbanize one Migrant in Iran into a wheat City. This advances their Footprint to Stage 3 by Consequence.
Hobbit Warrior. Hobbits prospect to convert the Migrant in Manchuria to an iron City. This advances their maritime to Stage 2 by Consequence. They decide not to use abstraction with its Consequence of Chaos. Taking advantage of their information Stage 2, they specialize one Elder on "mead brewing" and another on "acrophony" in the first Market row. Now they attack with their superior metallurgy, killing a Migrant in Western Siberia. With no free Dissents to place for a Dissident, the vanquished Migrant is expended to the pool and Sapiens suffers chaotic revolution. Two Dissidents must be Quelled — for the first Sapiens destroy their last City (a Refugee flees to a spot northeast from ruins), and for the second (since Sapiens have no more Cities or Elders) they expend a Migrant from Ural. Their one Foundation converts to politics and moves it into that column together with the Crown. All the Ideas are reoriented and moved as well, except that "swineherd" has no politics side so it is discarded into Lore Deck. Finally, Hobbits use artisan from "pit fired oven" to place an Elder on "outrigger" in the second Market row.
Sapiens Sanctum. Sapiens place an artisan on "ceramics kilns" and immediately invents them. They spread to North Siberia where the presence of a third Migrant can starve out Hobbit. Skip "raft". Prospect metal from "pit fired oven" to build gold City in South Africa and so advance their metallurgy to Stage 3. At least for a while, the war menace subsides.
Diseased Hobbits. Hobbits have the advantage of two more Cities and want to end Epoch II quickly. So they challenge: "syllabary". During forestation they remove the desert token from Australia and place it as jungle into East Africa. The second event is crowd disease "diphtheria". This infects the Hobbit because their Urbanization (3 cities) than their immunology (Stage 2). Half their Cities and Elders are lost (rounded down). They expend one Elder from "outrigger" and destroy one City in Japan. The Japanese Refugee moves into Manchuria but it does not cause Chaos. The silver lining: Hobbits' immunology advances by one Stage. They are the only one who could win the auction but decide not to do that as it would force a change in Ruling Class. Prospect to rebuild City in Japan. Invent "acrophony", which advances their information to Stage 3 but the Cull(I) discards one Idea from Epoch I ("whittling") to Lore Deck. To prevent starvation in West Siberia, they spread their Migrant there to Eastern Europe. Advance their energy to Stage 5 and information to Stage 4.
Sapiens Futurist. Sapiens have three fewer Cities than Hobbit, and have limited options to build more. So they decide to claim the Comet, along with the Bellwether. This gives them access to the newest ideas. They suffer a Chaos, moving a Migrant from Siberia as Dissident on their Crown. Hobbits also suffer a Chaos and move a Migrant from Siberia as Dissident on "barter reciprocity". Hobbits gain 1 VP for having the higher Urbanization. So ends Epoch II.
N3. Epoch III: 3000 BCE to 1500 CE
Hobbits enter Epoch III with superior information storage and immunology, but their agriculture is outdated. They spread through the jungles into Australia.
Sapiens has a better Footprint, allowing more Migrants and Cities. Together with a stronger Mysticism, they preach with the sword, and launch a voyage to South America.
Glossary
- Acts of God. If a token is destroyed (see Destroy (Acts of God)) by a natural event or preaching, then no Chaos is generated. In the case of preaching, the affected Migrant or City should not be imagined as slaughtered but merely proselytized into another player's belief.
- Acts of Man. See Destroy (Acts of Man).
- Action. One of the game processes you can perform each turn during your activities phase (F), as listed on Species, Foundation and Idea cards according to their Orientation in your Tableau. You cannot perform an action unless it is listed on a card in your Tableau. Your action may have a Consequent and/or a Negotiation. If so, follow this sequence: action, your Negotiation, your trade partner's Negotiation, Consequent. Actions include specialize (G1), invent (G2), library (G3), elect (G4), spread (G6), domesticate (G7a), cultivate (G7b), prospect (G7c,d), advancements (G9), trade (J3a), preach (J3b), war (J3c), enslave (J3d), exogamy (J5a), racism (J5b), cold war (J5c), artisan (J5d), constitution (J5e), science (J5h), and pseudoscience (J5i).
- Bellwether (E3e). This represents a predictor or harbinger of future advances, and is found on the other side of each Comet. If you claim this card during your challenge phase, you may employ a future challenge phase to discard that card out of the game to move the Philosophy by 1 or 2 steps. Otherwise, it has no use.
- Brain Placard. See B1a, D1f.
- Challenge Card. Together with Comets, these cards form the challenge deck and one is auctioned each time any player challenges the gods during phase A1a with no Comet visible. They are separated into the 4 Epochs. Each Challenge Card generates events and such as catastrophes, diseases, and dictators, and then the card itself is auctioned as a Foundation (E2).
- Chaos (D2). An event or Consequent that removes Migrants from the map (or from your pool if cannot be removed from the map) and adds them to Dissents in your Ruling Class. In general, the owners of Migrants or Cities suffer Chaos if destroyed by Acts of Man (D2a) and no chaos if destroyed by Acts of God. Other sources of chaos include pollution (E1g), civil war (E1i), future shock (E3a), morality (J4), and some Consequents (F0d). Chaos suffered is added to the Ruling Class Column, which lowers your Diversity and shuts down Foundations as Dissidents.