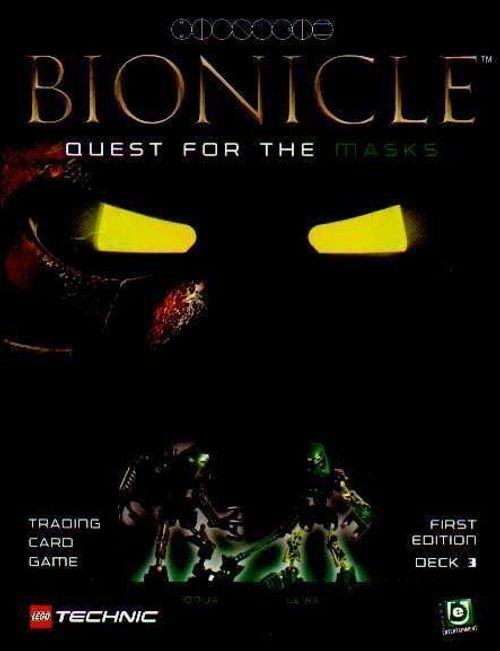
Bionicle: Quest For The Masks CCG
Bionicle: Quest For The Masks CCG Rulebook
Table of Contents
Table of Contents
Contents
This Starter Deck contains everything two players need to immediately start playing:
- 80 game cards, including:
- 2 Toa Cards
- 6 Great Mask Challenge Cards
- 6 Turaga Cards
- 12 Great Mask Cards
- 14 Mission Cards
- 40 Game Action Cards
- 1 Rule Book
- 1 Legend of Mata Nui Book
- 1 Ancient Map of Mata Nui Game Map
- 2 Toa Great Mask Markers
Object of the Game
To win Bionicle, you must collect your Toa’s six Great Mask Cards. The first player to collect all six Great Masks wins the game.
Cards
Toa Cards
Each player chooses the Toa Card they will use during the game. Each Toa has a list of six skills and a numerical ranking for each skill from 100 to 1000, with 1000 being the highest.
Great Mask Challenge Cards
The Great Mask Challenge Cards tell the players what skill their Toa will use during the Challenge.
Mission Cards
Mission Cards give the players a new mission they must complete before they can continue to search for Great Masks.
Great Mask/Turaga Cards
To win the game, you must collect all six of your Toa’s Great Mask Cards. Both the Great Mask and Turaga Cards give your Toa bonuses.
Game Action Cards
Game Action Cards do a variety of things. In general, they are played to either help you or hinder your opponent.
Demo Round
If this is the first time you’ve played, follow this demo round to see how the game plays.
Identify your Theme Deck and follow its Demo Round.
The printed layout diagram of the play area (draw pile, discard pile and card locations for Player 1 and Player 2) is not reproduced here.
Theme Deck One - Demo Round
If you have Theme Deck One, then you are playing with POHATU and GALI.
Give the Pohatu Card (Card #81) and Pohatu Mask to Player 1. Give the Gali Card (Card #91) and Gali Mask to Player 2.
Turn the game map to side Ⓐ (see diagram) and place it between the players.
Player 1 places the Pohatu Mask on the Start Space to the West. Player 2 places the Gali Mask on the Start Space to the East.
Place Card #15 face down in the Mission Card draw pile.
Place Card #1 face down in the Great Mask Challenge Card draw pile. Place Card #4 face down in the Great Mask Challenge Card draw pile (on top of Card #1).
Place Pohatu - Kanohi Hau (Card #86) face down in Player 1’s Great Mask/Turaga Card draw pile. In this demo, Player 2 won’t need any cards in his Great Mask/Turaga Card draw pile.
Place Reward (Card #27) face down in Player 1’s Game Action Card draw pile. Place Infected Mask (Card #21) face down in Player 2’s Tohunga Card draw pile. [Sic: printed as “Tohunga Card draw pile”; the Theme Deck Two and Three demos say Game Action Card draw pile, which is what is meant.]
Player 1 moves the Pohatu Mask one space to the West. Player 2 moves the Gali Mask one space to the East.
Player 1 moves the Pohatu Mask one space to the North. Player 2 moves the Gali Mask one space to the East.
Player 1 moves the Pohatu Mask one space to the North. Player 1 lands on a Game Action Space: this means he gets to draw one card from his Game Action pile of cards. In our example, this is Card #27 (Reward). He holds this card in his hand.
Player 2 moves the Gali Mask one space to the North. Player 2 lands on a Game Action Space: this means he gets to draw one card from his Game Action pile of cards. In our example, this is Card #21 (Infected Mask). He holds this card in his hand.
Player 1 moves the Pohatu Mask one space to the East. Player 2 moves the Gali Mask one space to the South.
Player 1 moves the Pohatu Mask one space to the North. Player 2 moves the Gali Mask one space to the East.
Player 1 moves the Pohatu Mask one space to the East. Player 1 lands on a Challenge Space: this means he gets to attempt a Great Mask Challenge. He flips over the top card in the Great Mask Challenge draw pile to reveal Card #4. This Great Mask Challenge Card uses Strength. Both players check their Toa’s Strength score. Player 1 discovers that Pohatu has a Strength of 800, and Player 2 sees that Gali has a Strength of 500. Pohatu has a higher score and has won the Great Mask Challenge. Card #4 is placed face up in the Great Mask Challenge Card discard pile.
Because Player 1 won the Great Mask Challenge, he gets to draw a card from the top of his Great Mask/Turaga Card pile. He does this and reveals Pohatu - Kanohi Hau (Card #86). Player 1 decides to equip his Toa with this mask and indicates this by placing the Pohatu - Kanohi Hau Card underneath the Pohatu Card (the only part of the card that should be seen is the text box that reads “Add 100 points to Shielding”). If Player 1 had more than one mask, he would have to decide which mask to give his Toa (Toas can only wear one mask at a time). Because Player 1 now wears the Kanohi Hau mask, he can add 100 points to his Shielding score.
Player 2 decides to play the Game Action Card in his hand, Infected Mask (card #21). This card reads “You can give up your turn and move your opponent’s Toa Mask one space. Discard after use.” Player 2 moves Player 1’s Pohatu Mask one space to the North. Card #21 is placed face up in Player 2’s Game Action Card discard pile.
Player 1 has now been forced into a Mission Space: this means he must complete a Mission. Player 1 flips over the top card in the Mission pile of cards. He reveals card #15. This card reads “You must move three spaces to the East. If you reach a map’s edge before moving three spaces, stop in the furthest space and the Mission is completed.” Player 1 must move the Pohatu Mask three spaces to the East. He has completed the Mission. Card #15 is placed faced up in the Mission Card discard pile.
Because Player 2 used his turn to move Player 1’s Toa Mask, it’s now Player 1’s turn to move.
Player 1 moves the Pohatu Mask one space to the West. Player 2 moves the Gali Mask one space to the East.
Player 2 lands on a Challenge Space: this means he gets to attempt a Great Mask Challenge. He flips over the top card in the Challege pile to reveal Card #2. This Great Mask Challenge Card uses Shielding. Both players check their Toa’s Shielding score. Player 1 sees that Pohatu has a Shielding of 800. Player 2 discovers that Gali has a Shielding of 600. Pohatu has a higher score and has stopped Gali from winning the Great Mask Challenge.
Pohatu does not get a Great Mask Card. You only get Great Mask Cards if your Toa lands on a Challenge Space AND you win the Great Mask Challenge. Card #1 is placed faced up in the Great Mask Challenge Card discard pile.
Play continues in this manner until one player has all six of his Toa’s Great Mask cards. The first player to collect all of his Toa’s Great Mask cards wins the game.
Theme Deck Two - Demo Round
If you have Theme Deck Two, then you are playing with TAHU and KOPAKA.
Give the Tahu Card (Card #41) and Tahu Mask to Player I. Give the Kopaka Card (Card #51) and Kopaka Mask to Player 2.
Turn the game map to side Ⓐ (see diagram) and place it between the players.
Player 1 places the Tahu Mask on the Start Space to the West. Player 2 places the Kopaka Mask on the Start Space to the East.
Place Card #15 face down in the Mission Card draw pile.
Place Card #4 face down in the Great Mask Challenge Card draw pile. Place Card #2 face down in the Great Mask Challenge Card draw pile (on top of Card #4).
Place Tahu - Kanohi Hau (Card #46) face down in Player 1’s Great Mask/Turaga Card draw pile. In this demo, Player 2 won’t need any cards in his Great Mask/Turaga Card draw pile.
Place Reward (Card #27) face down in Player 1’s Game Action Card draw pile. Place Infected Mask (Card #21) face down in Player 2’s Game Action Card draw pile.
Player 1 moves the Tahu Mask one space to the West. Player 2 moves the Kopaka Mask one space to the East.
Player 1 moves the Tahu Mask one space to the North. Player 2 moves the Kopaka Mask one space to the East.
Player 1 moves the Tahu Mask one space to the North. Player 1 lands on a Game Action Space: this means he gets to draw one card from his Game Action pile of cards. In our example, this is Card #27 (Reward). He holds this card in his hand.
Player 2 moves the Kopaka Mask one space to the North. Player 2 lands on a Game Action Space: this means he gets to draw one card from his Game Action pile of cards. In our example, this is Card #21 (Infected Mask). He holds this card in his hand.
Player 1 moves the Tahu Mask one space to the East. Player 2 moves the Kopaka Mask one space to the South.
Player 1 moves the Tahu Mask one space to the North. Player 2 moves the Kopaka Mask one space to the East.
Player 1 moves the Tahu Mask one space to the East. Player 1 lands on a Challenge Space: this means he gets to attempt a Great Mask Challenge. He flips over the top card in the Great Mask Challenge draw pile to reveal Card #1. This Great Mask Challenge Card uses Flight. Both players check their Toa’s Flight score. Player 1 discovers that Tahu has a Flight of 500, and Player 2 sees that Kopaka has a Flight of 400. Tahu has a higher score and has won the Great Mask Challenge. Card #2 is placed face up in the Great Mask Challenge Card discard pile.
Because Player 1 won the Great Mask Challenge, he gets to draw a card from the top of his Great Mask/Turaga Card pile. He does this and reveals Tahu - Kanohi Hau (Card #46). Player decides to equip his Toa with this mask and indicates this by placing the Tahu - Kanohi Hau Card underneath the Tahu Card (the only part of the card that should be seen is the text box that reads “Add 100 points to Shielding”). If Player 1 had more than one mask, he would have to decide which mask to give his Toa (Toas can only wear one mask at a time). Because Player 1 now wears the Kanohi Hau mask, he can add 100 points to his Shielding score.
Player 2 decides to play the Game Action Card in his hand, Infected Mask (card #21). This card reads “You can give up your turn and move your opponent’s Toa Mask one space. Discard after use.” Player 2 moves Player 1’s Tahu Mask one space to the North. Card #21 is placed face up in Player 2’s Game Action Card discard pile.
Player 1 has now been forced into a Mission Space: this means he must complete a Mission. Player 1 flips over the top card in the Mission pile of cards. He reveals card #15. This card reads “You must move three spaces to the East. If you reach a map’s edge before moving three spaces, stop in the furthest space and the Mission is completed.” Player 1 must move the Tahu Mask three spaces to the East. He has completed the Mission. Card #15 is placed faced up in the Mission Card discard pile.
Because Player 2 used his turn to move Player 1’s Toa Mask, it’s now Player 1’s turn to move.
Player 1 moves the Tahu Mask one space to the West. Player 2 moves the Kopaka Mask one space to the East.
Player 2 lands on a Challenge Space: this means he gets to attempt a Great Mask Challenge. He flips over the top card in the Challenge pile to reveal Card #4. This Great Mask Challenge Card uses Strength. Both players check their Toa’s Strength score. Player 1 sees that Tahu has a Strength of 800. Player 2 discovers that Kopaka has a Strength of 700. Tahu has a higher score and has stopped Kopaka from winning the Great Mask Challenge.
Tahu does not get a Great Mask Card. You only get Great Mask Cards if your Toa lands on a Challenge Space AND you win the Great Mask Challenge. Card #4 is placed faced up in the Great Mask Challenge Card discard pile.
Play continues in this manner until one player has all six of his Toa’s Great Mask cards. The first player to collect all of his Toa’s Great Mask cards wins the game.
Theme Deck Three - Demo Round
If you have Theme Deck Three, then you are playing with ONUA and LEWA.
Give the Onua Card (Card #61) and Onua Mask to Player 1. Give the Lewa Card (Card #71) and Lewa Mask to Player 2.
Turn the game map to side Ⓐ (see diagram) and place it between the players.
Player 1 places the Onua Mask on the Start Space to the West. Player 2 places the Lewa Mask on the Start Space to the East.
Place Card #15 face down in the Mission Card draw pile.
Place Card #5 face down in the Great Mask Challenge Card draw pile. Place Card #4 face down in the Great Mask Challenge Card draw pile (on top of Card #5).
Place Onua - Kanohi Hau (Card #66) face down in Player 1’s Great Mask/Turaga Card draw pile. In this demo, Player 2 won’t need any cards in his Great Mask/Turaga Card draw pile.
Place Reward (Card #27) face down in Player 1’s Game Action Card draw pile. Place Infected Mask (Card #21) face down in Player 2’s Game Action Card draw pile.
Player 1 moves the Onua Mask one space to the West. Player 2 moves the Lewa Mask one space to the East.
Player 1 moves the Onua Mask one space to the North. Player 2 moves the Lewa Mask one space to the East.
Player 1 moves the Onua Mask one space to the North. Player 1 lands on a Game Action Space: this means he gets to draw one card from his Game Action pile of cards. In our example, this is Card #27 (Reward). He holds this card in his hand.
Player 2 moves the Lewa Mask one space to the North. Player 2 lands on a Game Action Space: this means he gets to draw one card from his Game Action pile of cards. In our example, this is Card #21 (Infected Mask). He holds this card in his hand.
Player 1 moves the Onua Mask one space to the East. Player 2 moves the Lewa Mask one space to the South.
Player 1 moves the Onua Mask one space to the North. Player 2 moves the Lewa Mask one space to the East.
Player 1 moves the Onua Mask one space to the East. Player 1 lands on a Challenge Space: this means he gets to attempt a Great Mask Challenge. He flips over the top card in the Great Mask Challenge draw pile to reveal Card #4. This Great Mask Challenge Card uses Strength. Both players check their Toa’s Strength score. Player 1 discovers that Onua has a Strength of 900, and Player 2 sees that Lewa has a Strength of 700. Onua has a higher score and has won the Great Mask Challenge. Card #4 is placed face up in the Great Mask Challenge Card discard pile.
Because Player 1 won the Great Mask Challenge, he gets to draw a card from the top of his Great Mask/Turaga Card pile. He does this and reveals Onua - Kanohi Hau (Card #66). Player 1 decides to equip his Toa with this mask and indicates this by placing the Onua - Kanohi Hau Card underneath the Onua Card (the only part of the card that should be seen is the text box that reads “Add 100 points to Shielding”). If Player 1 had more than one mask, he would have to decide which mask to give his Toa (Toas can only wear one mask at a time). Because Player 1 now wears the Kanohi Hau mask, he can add 100 points to his Shielding score.
Player 2 decides to play the Game Action Card in his hand, Infected Mask (card #21). This card reads “You can give up your turn and move your opponent’s Toa Mask one space. Discard after use.” Player 2 moves Player 1’s Onua Mask one space to the North. Card #21 is placed face up in Player 2’s Game Action Card discard pile.
Player 1 has now been forced into a Mission Space: this means he must complete a Mission. Player 1 flips over the top card in the Mission pile of cards. He reveals card #15. This card reads “You must move three spaces to the East. If you reach a stopping point before moving three spaces, stop in the furthest space and the Mission is completed.” Player 1 must move the Onua Mask three spaces to the East. He has completed the Mission. Card #15 is placed faced up in the Mission Card discard pile.
Because Player 2 used his turn to move Player 1’s Toa Mask, it’s now Player 1’s turn to move.
Player 1 moves the Onua Mask one space to the West. Player 2 moves the Lewa Mask one space to the East.
Player 2 lands on a Challenge Space: this means he gets to attempt a Great Mask Challenge. He flips over the top card in the Challege pile to reveal Card #5. This Great Mask Challenge Card uses Swimming. Both players check their Toa’s Swimming score. Player 1 sees that Onua has a Swimming of 500. Player 2 discovers that Lewa has a Swimming of 400. Onua has a higher score and has stopped Lewa from winning the Great Mask Challenge.
Onua does not get a Great Mask Card. You only get Great Mask Cards if your Toa lands on a Challenge Space AND you win the Great Mask Challenge. Card #5 is placed faced up in the Great Mask Challenge Card discard pile.
Play continues in this manner until one player has all six of his Toa’s Great Mask cards. The first player to collect all of his Toa’s Great Mask cards wins the game.
Set-up
Place the Game Map
Place the game map between both players. You can use either side. If you have two theme decks, you can put two mats together to show the entire Mata Nui Island.
Separate the Cards
Separate the Toa, Great Mask Challenge, Mission, Great Mask/Turaga, and Game Action Cards into separate piles.
Choose Your Toa & Distribute the Great Mask/Turaga Cards
You and your opponent each choose one Toa. This is who you’ll be playing during the game. Split up the Great Mask/Turaga Cards so that you have your Toa’s Great Mask/Turaga Cards.
- TAHU (card #41) gets Great Mask/Turaga cards #’d 42 to 50
- KOPAKA (card #51) gets Great Mask/Turaga cards #’d 52 to 60
- ONUA (card #61) gets Great Mask/Turaga cards #’d 62 to 70
- LEWA (card #71) gets Great Mask/Turaga cards #’d 72 to 80
- POHATU (card #81) gets Great Mask/Turaga cards #’d 82 to 90
- GALI (card #91) gets Great Mask/Turaga cards #’d 92 to 100
Each player shuffles their Great Mask/Turaga cards and sets the pile of cards in front of them to the right. Each player will draw only from their own pile of Great Mask/Turaga cards.
Distribute the Game Action Cards
Each player gets a complete set of Game Action Cards (cards #’d 21 to 40). Each player shuffles their cards and sets the pile in front of them to the left. Each player will draw only from their own pile of Game Action Cards.
Set up the Great Mask Challenge and Mission Cards
One player shuffles the Great Mask Challenge Cards (cards #’d 1 to 6) and places them face down in the Great Mask Challenge Card draw pile. The other player shuffles the Mission Cards (cards #’d 7 to 20) and places them face down in the Mission Card draw pile. Both players will draw from the same Challenge and Mission piles of cards.
Place your Toa Great Mask
Each player gets the Toa Mask that matches their Toa Card. Play Rock-Paper-Scissors to determine who goes first. Player 1 places his Toa Mask in the Start Space to the West. Player 2 places his Toa Mask in the Start Space to the East.
The printed layout diagram of the play area is not reproduced here.
How to Play
Moving Your Toa
Player 1 goes first and can move his Toa Mask one space in any direction. You cannot move the Toa Mask diagonally - the Toa Mask can be moved forward, backward, left, or right. The results of the move are determined by the icon in the space you enter.
Landing on a Mission Space — Mission Cards
If you enter a Mission space, your Toa must accept a new Mission. Flip over the top card in the Mission pile. The card will tell you what you must do. This mission must be completed before you can enter a Great Mask Challenge space. It’s a good idea to avoid the Mission spaces.
For example, a Mission Card may read, “You must give up one Game Action card.” If you have any Game Action cards in your hand, you must discard one card before play continues. If you do not have any Game Action cards, you must start to move towards the nearest Game Action space and collect a card that can be discarded. You still only move one space at a time and do not immediately move your marker to the Game Action space. You must work your Toa Mask to the space in the normal fashion.
If you end up with multiple missions, you complete them in the order that you collected them.
After a mission is completed, the Mission Card is placed face up in the Mission Card discard pile.
If the Mission Card draw pile is depleted, shuffle the Mission Card discard pile and place the cards face down to start a new draw pile.
Landing on a Challenge Space — Great Mask Challenge Cards
If you enter a Challenge space, your Toa competes in a Great Mask Challenge. Flip over the top card in the Great Mask Challenge pile. The card will list one of the six skills found on the Toa cards.
You and your opponent both check your Toa cards (and any cards that add points to your skills). If you have a higher score than your opponent, you win a Great Mask/Turaga Card. Flip over the top card in your Great Mask/Turaga pile and place it next to your Toa.
It’s important to remember that you can only win a Great Mask/Turaga Card if you land on the Challenge space AND win the Great Mask Challenge. You DO NOT get a Great Mask/Turaga Card if you won the challenge but did not land on the Challenge space — you have only stopped your opponent from getting a Great Mask/Turaga Card.
In the case of a tie, the person who landed on the Challenge space wins and gets to collect a Great Mask/Turaga Card.
You cannot go to the same Challenge space twice in a row. You must make a Great Mask Challenge attempt at a different Challenge space before you can go back.
If the Great Mask Challenge Card draw pile is depleted, shuffle the Great Mask Challenge Card discard pile and place the cards face down to start a new draw pile.
Landing on a Game Action Space — Game Action Cards
If you enter a Game Action space, you can draw the top card from your pile of Game Action Cards. The Game Action Cards are your game hand. Don’t let your opponent see what cards you have.
You can have a maximum of five cards in your hand. If you have five cards in your hand, you must play one before you can draw a new card. If you land on a Game Action space while having five cards in your hand, you do not pick up another Game Action Card.
Unless the card says otherwise, Game Action cards can be played at any time. Game Action Cards are immediately discarded after they are played. For example, a Game Action card may read, “Draw two Game Action Cards.” This card can be played at any time and when played, it is immediately discarded. In this case, you would discard the card and then draw two new cards.
You cannot go to the same Game Action space twice in a row. You must go to a different Game Action space or make a Great Mask Challenge attempt before you can go back.
If your Game Action Card draw pile is depleted, shuffle the Game Action Card discard pile and place the cards face down to start a new draw pile.
Landing on a Portal Space — Portal
If you enter a Portal space, you must jump to a different Portal space on the game map.
Double Spaces
If you land on an icon with two circles, you double the results. On a Game Action space, you draw two cards and on a Challenge space, you attempt two Great Mask Challenges.
Using your Great Mask/Turaga Cards
After you have won a Great Mask or Turaga card you can attach it to your Toa. Your Toa can have one Great Mask Card and one Turaga Card attached to it at any one time.
Great Mask Cards are placed beneath your Toa card (only the Great Mask text box should be revealed). Turaga Cards are placed to the right of your Toa Card. Any Great Mask Cards or Turaga Cards that aren’t attached are placed below your Toa card.
If you have more than one Great Mask Card you must decide which one you will attach to your Toa. You must decide which Great Mask Card will be attached before you move your Toa. If you have more than one Turaga Card, you must decide which one you will attach to your Toa. You must decide which Turaga Card will be attached before you move your Toa. You only gain bonuses from the Great Mask/Turaga Cards that are attached to your Toa.
You do not have to attach Great Mask or Turaga Cards but if they are not attached, you cannot use their bonuses.
Great Mask and Turaga Cards are never discarded.
The printed diagram labelling the “ATTACHED” and “UNATTACHED” card placement is not reproduced here; the placement is described in the text above.
Playing a Shorter Game
If you’d like to play a shorter game, you can play so the first person to collect three Great Masks wins the game.
Questions
Have you started to play and have a question? Check here first. This section covers the common questions that occur while learning how to play. If you have a question that isn’t covered, check www.upperdeck.com/bionicle for even more questions and answers.
The Start Spaces
Q: Can I move back into one of the start spaces?
A: Yes. After the start of the game, the start spaces are considered to be blank spaces.
My Opponent’s In My Way
Q: What if my opponent’s Toa is in the space I want to enter?
A: You cannot move into the space occupied by another Toa. If you want to enter that space, you will have to wait for your opponent to move.
Skip A Move?
Q: Can I choose not to move my Toa Mask at the start of my turn?
A: No. You must always move your Toa Mask one space (unless you are forced to skip a move because of a Mission Card or Game Action Card).
Moving Through A Space
Q: I have a Game Action Card that allows me to move two spaces. I’m going to move through a Mission space to land on a Challenge space. Do I have to take a Mission Card before I can do the Challenge Card?
A: No. The only space that counts is the one you end up on.
Make sure to check out www.upperdeck.com/bionicle for a video demonstration of how to play Bionicle™, more FAQs, complete card lists, and lots more! Visit www.bionicle.com to learn more about the exciting world of Bionicle.
Checklist
Cards are listed in printed numeric order. Cards 41–60 are Theme Deck Two, cards 61–80 are Theme Deck Three, and cards 81–100 are Theme Deck One.
| # | Card Name | Card Type |
|---|---|---|
| 1 | Great Mask Challenge | Great Mask Challenge |
| 2 | Great Mask Challenge | Great Mask Challenge |
| 3 | Great Mask Challenge | Great Mask Challenge |
| 4 | Great Mask Challenge | Great Mask Challenge |
| 5 | Great Mask Challenge | Great Mask Challenge |
| 6 | Great Mask Challenge | Great Mask Challenge |
| 7 | Mission | Mission |
| 8 | Mission | Mission |
| 9 | Mission | Mission |
| 10 | Mission | Mission |
| 11 | Mission | Mission |
| 12 | Mission | Mission |
| 13 | Mission | Mission |
| 14 | Mission | Mission |
| 15 | Mission | Mission |
| 16 | Mission | Mission |
| 17 | Mission | Mission |
| 18 | Mission | Mission |
| 19 | Mission | Mission |
| 20 | Mission | Mission |
| 21 | Infected Mask | Game Action |
| 22 | Infected Mask | Game Action |
| 23 | Infected Mask | Game Action |
| 24 | Infected Mask | Game Action |
| 25 | Infected Mask | Game Action |
| 26 | Infected Mask | Game Action |
| 27 | Reward | Game Action |
| 28 | Reward | Game Action |
| 29 | Reward | Game Action |
| 30 | Reward | Game Action |
| 31 | Reward | Game Action |
| 32 | Reward | Game Action |
| 33 | Bonus | Game Action |
| 34 | Bonus | Game Action |
| 35 | Bonus | Game Action |
| 36 | Bonus | Game Action |
| 37 | Penalty | Game Action |
| 38 | Penalty | Game Action |
| 39 | Penalty | Game Action |
| 40 | Penalty | Game Action |
| 41 | Tahu | Toa |
| 42 | Tahu - Kanohi Kakama | Great Mask |
| 43 | Tahu - Kanohi Pakari | Great Mask |
| 44 | Tahu - Kanohi Kaukau | Great Mask |
| 45 | Tahu - Kanohi Miru | Great Mask |
| 46 | Tahu - Kanohi Hau | Great Mask |
| 47 | Tahu - Kanohi Akaku | Great Mask |
| 48 | Vakama | Turaga |
| 49 | Vakama - Firestaff | Turaga |
| 50 | Vakama - Kanohi Huna | Turaga |
| 51 | Kopaka | Toa |
| 52 | Kopaka - Kanohi Kakama | Great Mask |
| 53 | Kopaka - Kanohi Pakari | Great Mask |
| 54 | Kopaka - Kanohi Kaukau | Great Mask |
| 55 | Kopaka - Kanohi Miru | Great Mask |
| 56 | Kopaka - Kanohi Hau | Great Mask |
| 57 | Kopaka - Kanohi Akaku | Great Mask |
| 58 | Nuju | Turaga |
| 59 | Nuju - Ice Pick | Turaga |
| 60 | Nuju - Kanohi Matatu | Turaga |
| 61 | Onua | Toa |
| 62 | Onua - Kanohi Kakama | Great Mask |
| 63 | Onua - Kanohi Pakari | Great Mask |
| 64 | Onua - Kanohi Kaukau | Great Mask |
| 65 | Onua - Kanohi Miru | Great Mask |
| 66 | Onua - Kanohi Hau | Great Mask |
| 67 | Onua - Kanohi Akaku | Great Mask |
| 68 | Whenua | Turaga |
| 69 | Whenua - Drill of Onua | Turaga |
| 70 | Whenua - Kanohi Ruru | Turaga |
| 71 | Lewa | Toa |
| 72 | Lewa - Kanohi Kakama | Great Mask |
| 73 | Lewa - Kanohi Pakari | Great Mask |
| 74 | Lewa - Kanohi Kaukau | Great Mask |
| 75 | Lewa - Kanohi Miru | Great Mask |
| 76 | Lewa - Kanohi Hau | Great Mask |
| 77 | Lewa - Kanohi Akaku | Great Mask |
| 78 | Matau | Turaga |
| 79 | Matau - Kau Kau Staff | Turaga |
| 80 | Matau - Kanohi Mahiki | Turaga |
| 81 | Pohatu | Toa |
| 82 | Pohatu - Kanohi Kakama | Great Mask |
| 83 | Pohatu - Kanohi Pakari | Great Mask |
| 84 | Pohatu - Kanohi Kaukau | Great Mask |
| 85 | Pohatu - Kanohi Miru | Great Mask |
| 86 | Pohatu - Kanohi Hau | Great Mask |
| 87 | Pohatu - Kanohi Akaku | Great Mask |
| 88 | Onewa | Turaga |
| 89 | Onewa - Stone Hammer | Turaga |
| 90 | Onewa - Kanohi Komau | Turaga |
| 91 | Gali | Toa |
| 92 | Gali - Kanohi Kakama | Great Mask |
| 93 | Gali - Kanohi Pakari | Great Mask |
| 94 | Gali - Kanohi Kaukau | Great Mask |
| 95 | Gali - Kanohi Miru | Great Mask |
| 96 | Gali - Kanohi Hau | Great Mask |
| 97 | Gali - Kanohi Akaku | Great Mask |
| 98 | Nokama | Turaga |
| 99 | Nokama - Fork-Shaped Staff | Turaga |
| 100 | Nokama - Kanohi Rau | Turaga |