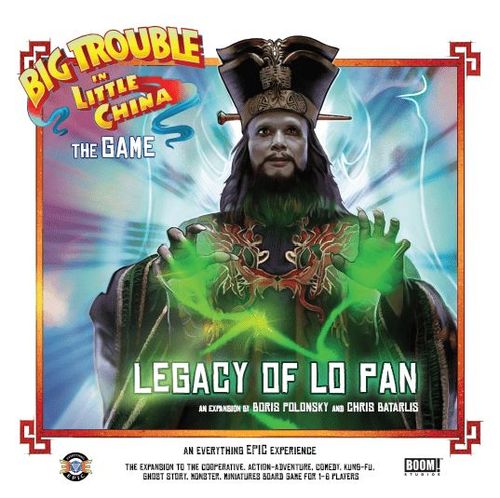
Big Trouble in Little China: The Game – Legacy of Lo Pan
Big Trouble in Little China: The Game – Legacy of Lo Pan Rulebook
Table of Contents
Table of Contents
- Campaign Overview
- Legacy of Lo Pan Campaign Setup
- Hourglass Track
- Timeline Track
- Quests in the Legacy of Lo Pan Campaign
- Death and Dying in the Legacy of Lo Pan
- Rules for 5 and 6 Players
- Quest 1.0: 1986 – A New Beginning
- Quest 2.0: 1906 – Big Trouble in Time
- Quest 3.0: 2018 – The Far Future
- Quest 4.0: 1962 – Chinese Wing Kong Crisis
- Quest 5.0: 1852 – Big Tombstone in Little China
- Quest 6.0: 1939 – Blitzkrieg Wing Kong
- Quest 7.0: 1000 B.C. – Little Trouble in Big China
Campaign Overview
Legacy of Lo Pan is a campaign-style quest that is included with the 5-6 player expansion to the core game. Instead of using Quests from the Main Quest Deck, players will resolve Quests triggered by advancing along the Timeline Track.
In this campaign, the heroes lost against Lo Pan during the final showdown and barely escaped with their lives. They will now use a magical hourglass to travel through time to change the outcome of the story and defeat Lo Pan while learning more about Chinatown's history and Lo Pan's past. During this journey, the heroes will have a chance to collect powerful artifacts that will provide the edge they need to put an end to Lo Pan once and for all.
Components
- 10 Action Dice
- 5 Pegs (2 blue "Chi", 2 red "Health", 1 black "Boss Health")
- 6 Reward Cards
- 10 Hell Cards
- Lo Pan: Sorcerer Boss Board
- 5-6 player Act II Showdown Card
- 11 Side Quest Cards
- 1 Hourglass Track Overlay
- 7 Hourglass Tokens
- 1 Quest Token
- 1 Time Token
- 2 Special Ability Tokens
Legacy of Lo Pan Campaign Setup
Place all Heroes on Egg Foo Young Tours (1) to begin the campaign.
Instead of being played over two Acts, and instead of using the Big Trouble deck, this campaign follows the storyline told in the new Legacy of Lo Pan Campaign Book. Players will keep track of how the campaign progresses by following the Timeline Track, and they will track rounds by using the Hourglass Track. Additionally, the new Campaign Book will have instructions on all enemy spawns and board conditions.
In the campaign, a game round consists of the Hero Phase followed by the Enemy Phase, with the Time Token advancing at the end of the Enemy Phase to end the round. No Quest cards (Main, Side, or Showdown), or Big Trouble cards are used in this campaign.
We recommend playing the core game before attempting this campaign. Already know the Core Game? See what's changed and the steps for setup below:
- Set up the game board including shop items and heroes as you would normally.
- In the campaign the Casting Bones Shop Item has the same abilities as the Lucky Coin. Discard at any time during your turn to re-roll any number of dice, including unspent Fate Dice, and your unspent Action Dice.
- Leave Main Quests, Side Quests, Big Trouble, and Showdown cards in the box, you will not use them in this campaign.
- Place the campaign Reward Cards next to the game board. Instead of using the Reward Cards cards from the core game use the reward cards that came with Legacy of Lo Pan. They are marked with the Hourglass image on the back and the Legacy of Lo Pan icon on the front.
- Place the Hourglass Track Overlay on top of the game board on the Chinatown side, covering the Big Trouble Track.
- Place the Time Token on the Hourglass Track space that corresponds to the number of players in the game.
- Place a number of Hourglass Tokens on the Hourglass space (image of the large hourglass on the Hourglass Track Overlay) as dictated below.
| Number of Players | 6 | 5 | 4 | 3 | 2 | 1 |
|---|---|---|---|---|---|---|
| Hourglass Tokens, Normal | 0 | 1 | 2 | 3 | 3 | 4 |
| Hourglass Tokens, Story Mode | 2 | 3 | 4 | 5 | 5 | 6 |
If you would like to play a much easier version of the campaign use the Story Mode of the table to determine how many Hourglass tokens to start the game with. You should also select one of you Hero's Quest Reward Cards (from the core game) to start the game with, in addition to the Upgrade Card(s) you would start with.
- Place a red Event Clip on Quest 1.0 on the Timeline Track.
How to win the campaign
Unlike the core game, this campaign does not have an Act I and Act II structure. There is still a Showdown that happens on the back of the game board, but you will be instructed on how to set it up when you get to Quest 7.
In this campaign, you will be directed by the campaign book on which quest to progress to depending on how quickly you complete your quest events. You will either progress to the next quest in sequence OR you will skip a quest in sequence and go to the next quest. (For example, you could either go from Quest 3 to Quest 4 OR Quest 3 to Quest 5).
NOTE: You should not expect to be able to play through all 7 quests in a single playthrough. Although you can hold back the progress of the Threat Token by using Hourglass Tokens, you should still expect to run out of time on one or more Quests. This is intended to make the Legacy of Lo Pan Campaign challenging and also adds replayability increasing the possibility of experiencing parts that you previously might have skipped.
Hourglass Track
The hourglass is the magical item that allows the heroes to move through time. In the Legacy of Lo Pan campaign, the Hourglass Track replaces the Big Trouble Track on the Chinatown side of the game board, and it represents the number of rounds you have left to complete the current quest. If players complete the current quest before the Time Token reaches the Out of Time space on the track, they gain the quest reward and then they are sent to a different time. Otherwise they are still sent to a different time, but without gaining any reward.
Important: In this campaign, at the end of each Enemy Phase, players will advance the Time Token one space towards the Out of Time space on the Hourglass Track. Additionally, each time a Hero dies, players will also move the Time Token one space closer to the Out of Time space.
If the Time Token ever advances to the Out of Time space, immediately go to the Quest Event that is marked "Out of Time" in your current quest on the Timeline Track. The Out of Time Quest Event can always be found as the last event in your current quest. This Event will instruct you on which Quest to proceed to, and which space the Threat Token should be reset to on the Hourglass Track.
Hourglass Tokens
In addition to jumping our heroes through time, the hourglass has two other special abilities that can prove very useful during the campaign. These abilities are listed below, and can be activated by any player by removing one of the Hourglass Tokens from the hourglass space (if there are any Hourglass Tokens on the space). There are tokens available at the start of the game (based on number of players), and additional tokens can be earned through quest rewards. These may be used anytime during the game.
Hourglass tokens represent the magical sands within the Tardisian Hourglass. The players can collectively choose to discard them to do the following powerful special abilities:
- Rewind Time: Prevent any hero's death. If a hero would take lethal damage, discard an Hourglass Token instead, to prevent that damage.
- Add Time: Discard an Hourglass Token to move the Threat Token on the Hourglass Track BACK one space. For each token spent, players gain an additional round to complete the current quest (limited by the number of spaces on the hourglass track).
Timeline Track
The Timeline Track represents the progress of the heroes as they adventure through time during the campaign. Unlike the core game and its Main Quests (where you can play each quest in any order), in this campaign you must start at Quest 1.0 for every game and you must follow the path described in the Quest Book. As you go from quest event to quest event, you will track them on this timeline just like you would on a Main Quest card from the core game.
After completing a quest, you will directly proceed to the next quest in the book, and on the timeline. But whenever the Threat Token reaches the OUT OF TIME! space on the Hourglass Track, you will immediately progress to the OUT OF TIME! event in your current quest. This will often lead you to jump forward on the timeline, to a different Quest. Be sure to pay close attention to where the Legacy of Lo Pan quest book tells you to go in each quest conclusion instruction.
Each time you complete a Quest Event, you will also be instructed (like with the core Main Quest Cards) to move the Event Clip to the next quest event. Be sure to do this so that you can easily track your progress.
Quests in the Legacy of Lo Pan Campaign
In this campaign, quests are slightly different. They are not based around a hero, but instead are all part of a larger storyline. Each quest has its own unique setup and minion spawns that are described during its quest events. At the end of each Quest, whether you completed it or were Out of Time, remember to clear the entire board of all enemies (bosses and minions), and Special Effect Tokens, but leave the shop items on the board before moving to the next Quest.
Death and Dying in the Legacy of Lo Pan
If a hero dies, just like in the core game, they would gain a Hell Card. But instead of advancing the Threat Token on the Big Trouble Track (which is no longer used in the Legacy of Lo Pan campaign), you will advance the Time Token one space towards the Out of Time space on the Hourglass track, thus getting closer to failing the current quest of the campaign.
Legacy of Lo Pan also comes with 10 additional Hell Cards. These cards have a more social feel and can be mixed into the normal Hell Deck when playing. These cards are marked with the Lo Pan icon in the lower left for easy sorting.
Rules for 5 and 6 Players
In addition to adding a whole new campaign to the game, this expansion also allows you to play both the core game and the Legacy of Lo Pan campaign with 5-6 players. There are special setup rules below with instructions on how to set up the core game Act I and Act II for a 5-6 player game. Aside from setup, all other game rules are the same.
Act I setup: When creating the minion deck in a 5-6 player game use the following number of hard vs normal minions:
- 5 players: 4 hard and 2 normal minions.
- 6 players: All hard.
Audacity starts on the START space for both 5 and 6 players.
Act II setup: Use the 5-6 Player Act II Showdown Setup Card (included in this expansion), instead of the regular Act II Showdown Setup Card when setting up the enemies in the Central Arena.
The number of keys needed to unlock the Central Arena are always one less than the number of players, so in a 6-player game you will need 5 keys, and in a 5-player game you will need 4 keys.
Quest 1.0: 1986 – A New Beginning
- Place Event Clip on 1.0 on the Timeline
- Heroes start on Egg Foo Young Tours (1).
NOTE: If the Time Token reaches the Out of Time! space at any point during Quest 1 immediately stop all current actions and continue reading event 1.4.
Opening narrative omitted.
COMBAT: Spawn 1 Wildman on Egg Foo Young Tours (2).
STOP READING! Once defeated continue to read 1.1.
1.1: Wild Thing
- Slide Event Clip down to 1.1 on the Timeline.
- Reward: +1 AUDACITY
Narrative omitted.
COMBAT: Spawn 2 Wing Kong Hatchet Man on Egg Foo Young Tours (2).
STOP READING! Once defeated continue to read.
Narrative omitted.
- Place the Quest Token on Streets (S10). Once triggered, read 1.2.
1.2: West Side Story
- Slide Event Clip down to 1.2 on the Timeline.
Narrative omitted.
- Spawn 4 Lords of Death on Streets (S7) and 4 Lords of Death on Streets (S10). Continue reading.
- Place Fire Tokens (represented by lava tokens) on Egg Foo Young Tours (1 and 2). Anytime a Hero begins their turn or moves into a space with a Fire token, that hero takes 2 damage.
- Place the Quest Token at the Buddha Shrine (2). Once triggered, read 1.3.
1.3: Buddha Bless You
- Slide Event Clip down to 1.3 on the Timeline.
Narrative omitted.
COMBAT: Spawn 1 Wing Kong Hatchet Man on Buddha Shrine (1).
Place a Side Quest Token under this enemy to indicate that it requires two hits to defeat. Once a hit is scored, remove that Side Quest Token and gain the Chi reward. This Hatchet Man also activates twice during each Enemy Phase and deals double damage on Strikeback.
STOP READING! Once defeated continue to read.
Narrative omitted.
- Reward: +2 AUDACITY, +1 HOURGLASS TOKEN, ANY HERO GAINS "HATCHET MAN'S CLEAVERS" REWARD CARD.
- Immediately move all Heroes to the Dragon of the Black Pool (3).
- Remove all enemies from the board. Place the Quest Token on Dragon of the Black Pool (3). Once triggered, read 2.0.
1.4: Out of Time!
- Slide Event Clip to 1.4 on the Timeline.
Narrative omitted.
- Reset the Hourglass Track based on number of players.
- Immediately move all Heroes to the Dragon of the Black Pool (3). Remove all enemies and Special Effect Tokens from the game board. Place the Quest Token on Dragon of the Black Pool (3). Once triggered, read 2.0.
Quest 2.0: 1906 – Big Trouble in Time
- Slide Event Clip down to 2.0 on the Timeline.
NOTE: If the Time Token reaches the Out of Time! space at any point during Quest 2 immediately stop all current actions and continue reading 2.5.
Narrative omitted.
MAKE A CHOICE.
CHOICE A: Look upstairs to gain some clues about what's going on.
TASK ACTION: hand icon, hand icon, yin-yang icon.
STOP READING! Continue to read once task is complete.
Upstairs, you use your sleuthing skills to find out from a diner that the current date is April 17, 1906. Maybe this is crazy, maybe not, but the restaurant does look different. And the way the diners are dressed - something strange is going on here. Could it be true? Are we time travelers? Now that you know the hourglass worked, it's time to get down to business.
Reward: +1 HOURGLASS TOKEN
Continue to read EVENT CONCLUSION.
CHOICE B: Attempt to try the spell again, to get the hourglass to work.
STOP READING! Continue to read once choice is made.
Egg takes his time and performs all the right incantations, but once again, before he can finish things go sideways.
Continue to read 2.5.
EVENT CONCLUSION (Choice A)
Narrative omitted.
- Reward: +1 AUDACITY
- Place a Quest Token on Streets (S17). Once triggered, read 2.1.
2.1: Take It to the Streets
- Slide Event Clip to 2.1 on the Timeline.
Narrative omitted.
MAKE A CHOICE.
CHOICE A: Use the front door and act like you own the place.
TASK ACTION: hand icon, scroll icon, scroll icon.
STOP READING! Continue to read once task is complete.
- Place Quest Token on Wing Kong Trading Co. (8). Once triggered, slide Event Clip to 2.2 and read 2.2.
CHOICE B: Go into stealth mode and find a less conspicuous entrance.
TASK ACTION: hand icon, yin-yang icon, yin-yang icon.
STOP READING! Continue to read once task is complete.
- Place Quest Token on Wing Kong Trading Co. (6). Once triggered, slide Event Clip to 2.3 and read 2.3.
2.2: Tong Wars
- Slide Event Clip to 2.2 on the Timeline.
Narrative omitted.
COMBAT: Spawn 2 Wing Kong Six Shooters (8) and 1 Wing Kong Hatchet Man (8).
STOP READING! Once defeated continue to read.
Narrative omitted.
- Place a Quest Token on Wing Kong Trading Co. (5). Once triggered, read 2.3.
2.3: What's Behind Door Number One
- Slide Event Clip to 2.3 on the Timeline.
Narrative omitted.
SKILL CHECK 4
STOP READING! Continue to read once resolved.
PASS: The door may look great, but it's nothing compared to the wonders of a modern lock-picking kit. You make short work of the old door and soon find yourself in a veritable treasure room filled with crates, statues, and more. Something is not quite right about those statues. Did you ever get the feeling that you're being watched?
Reward: +1 AUDACITY
Once complete, continue reading 2.4.
FAIL: You work on the lock, but you just can't seem to crack it. It seems that a supernatural force is keeping the door closed. As you try to figure out another way to get inside you feel a very unsettling tremor under your feet.
Continue to read 2.5.
2.4: Follow the Spirit Path
- Slide Event Clip to 2.4 on the Timeline.
Narrative omitted.
COMBAT: Spawn 2 Spirit Path Warriors (6) and 1 Spirit Path Warrior (5).
Take 1 Lo Pan's Curse crate and 2 Chinese Fireworks crates. Shuffle them, and place them face down under each Spirit Path Warrior.
These Spirit Path Warriors don't move. However, their Strikeback ability is resolved also on Ranged attacks. When you defeat one of these Spirit Path Warriors, immediately gain the item token under his base.
When you gain the Lo Pan crate, do not take damage from Lo Pan's Curse item.
Continue reading.
Narrative omitted.
- Reward: +2 AUDACITY, +1 HOURGLASS TOKEN, ANY PLAYER GAINS "LO PAN'S HEADDRESS" REWARD CARD.
- Remove all enemies from the board. Immediately move all Heroes to the National Orient Bank (2) and read 3.0.
2.5: Out of Time!
- Slide Event Clip to 2.5 on the Timeline.
Narrative omitted.
- Reset the Hourglass Track based on number of players.
- Remove all enemies and Special Effect Tokens from the game board. Immediately move all heroes to the Streets (S2) and read 4.0.
Quest 3.0: 2018 – The Far Future
- Slide Event Clip down to 3.0 on the Timeline.
NOTE: If the Time Token reaches the Out of Time! space at any point during Quest 3 immediately stop all current actions and continue reading event 3.3.
Narrative omitted.
- Reward: ANY HERO GAINS "RAIN'S TIGER CLAWS" REWARD CARD.
Narrative omitted.
MAKE A CHOICE.
CHOICE A: Go outside to see what's going on.
TASK ACTION: scroll icon.
STOP READING! Continue to read once resolved.
You're no sooner in the street than you see the drastic differences of the surroundings are clear. This isn't the past but rather the future and the Chinatown you knew is now a techno wasteland. The streets are lined with people crowding around a podium and behind barricades. It begins to rain, as everyone looks to the skies.
- Place a Quest Token token in the Streets (S3). Once the token is activated, read 3.1.
CHOICE B: Keep watching the futuristic TVs to try to figure out what's going on.
TASK ACTION: scroll icon, scroll icon, yin-yang icon.
STOP READING! Continue to read once resolved.
Thinking it may be wiser to first learn the lay of the land before making your presence known, you settle in in front of the wall of TVs and start to scan. It doesn't take long to see that this is some twisted future. You for sure thought 2018 would have flying cars and look more like sci-fi than the post apocalyptic.
The noise outside gets louder, and you've put off heading outside long enough.
- Reward: +1 HOURGLASS TOKEN
- Place a Quest Token token in the Streets (S3). Once the token is activated, read 3.1.
3.1: Where Are All the Flying Cars?
- Slide Event Clip to 3.1 on the Timeline.
Narrative omitted.
TASK ACTION: Chat up the denizens to get the talk of Chinatown.
scroll icon, scroll icon, hand icon, yin-yang icon.
STOP READING! Continue to read once task is completed.
Narrative omitted.
- Spawn: 2 Security Guards on Streets (S7 and S14), 2 Wing Kong Six Shooters on Streets (S13 and S16), 1 Lord of Death on Back Alleys (2), Rain on Streets (S18). Rain does not move off of S18.
- Place Rubble tokens on entrances to the Black Market on (1, and 3), Streets (S10), and the entrance to Back Alleys on (3). Heroes may NOT move through Rubble Tokens in them.
- Place a Quest Token on Streets (S18). Once triggered, read 3.2.
3.2: Winner Winner... Chicken Dinner!
- Slide Event Clip to 3.2 on the Timeline.
Narrative omitted.
- Reward: +2 AUDACITY, +1 HOURGLASS TOKEN
- Remove all enemies from the board. Immediately move all heroes to the Dragon of the Black Pool (1) and read 4.0.
3.3: Out of Time!
- Slide Event Clip to 3.3 on the Timeline.
Narrative omitted.
- Discard and return Rain's Tiger Claws reward to the box.
- Remove all enemies and Special Effect Tokens from the game board. Immediately move all heroes to Wing Kong Trading Co. (5) and continue reading 5.0.
Quest 4.0: 1962 – Chinese Wing Kong Crisis
- Slide Event Clip down to 4.0 on the Timeline.
NOTE: If the Time Token reaches the Out of Time! space at any point during Quest 4 immediately stop all current actions and continue reading event 4.4.
Narrative omitted.
MAKE A CHOICE.
CHOICE A: Go upstairs and see if the Dragon of the Black Pool is the same.
TASK ACTION: scroll icon.
STOP READING! Continue to read once resolved.
CHOICE B: Skip the restaurant and head out to investigate in the streets.
TASK ACTION: scroll icon, scroll icon, yin-yang icon.
STOP READING! Continue to read once resolved.
Choice A outcome narrative omitted (the Dragon of the Black Pool; Uncle Chu reading a newspaper).
- Reward: +1 HOURGLASS TOKEN
- Place a Quest Token in the Streets (S7). Once triggered, read 4.1.
Choice B outcome narrative omitted (the streets of 1962).
- Reward: +1 AUDACITY
- Place a Quest Token on Streets (S11). Once triggered, read 4.2.
4.1: Red-Faced Red Scare
- Slide Event Clip to 4.1 on the Timeline.
Narrative omitted.
MAKE A CHOICE.
CHOICE A: Talk your way out.
SKILL CHECK 4
STOP READING! Continue to read once resolved.
- PASS: You're able to convince the men that you forgot your documents in your other jeans. They ask for a bribe to look the other way. You chuckle to yourself and pay the men 20 bucks. They seem extremely happy with that amount and begin walking off. You follow them, and you notice they are entering a nearby dive bar called the Jade Panda.
- Reward: +2 CHI, +1 HOURGLASS TOKEN
- Place a Quest Token on Jade Panda (2). Once triggered, read 4.3.
- FAIL: They don't buy your story and they try to arrest you! You can't be taken alive! Fight these suits.
- COMBAT: Spawn 2 Security Guards on Streets (S11).
- STOP READING! Continue to read EVENT CONCLUSION once defeated.
CHOICE B: Fight through these men.
STOP READING! Continue to read once choice is made.
They asked for papers. So you hold up one of the newspapers you were looking at earlier and show the man. He looks confused as you punch him in the face through the paper and start a brawl.
- COMBAT: Spawn 3 Security Guards on Streets (S11).
- STOP READING! Continue to read once defeated.
- Reward: +1 AUDACITY, +1 HOURGLASS TOKEN
- Continue to read EVENT CONCLUSION.
EVENT CONCLUSION (4.1)
Nobody on the street pays any attention to you fighting these men. They all mind their own business. You check their pockets and find a pack of matches that reads "Jade Panda". You think this may be a great place to check out next!
- Place a Quest Token on Jade Panda 2. Once triggered, read 4.2.
4.2: Mama Told Me Not to Come
- Slide Event Clip to 4.2 on the Timeline.
Narrative omitted.
TASK ACTION: Wake up this "Dead Head."
scroll icon, hand icon, yin-yang icon.
STOP READING! Continue to read once task complete.
EVENT CONCLUSION (4.2)
Narrative omitted.
- Place a Quest Token on Black Market (2). Once triggered, read 4.3.
4.3: Seeing Red
- Slide Event Clip to 4.3 on the Timeline.
Narrative omitted.
COMBAT: Disarm the bomb and take down Thunder.
Spawn Thunder on Black Market (3).
To defuse the bomb complete a task action of X Mind (X = number of players). While in the Black Market any Hero may spend a Mind to help stop the bomb. Track each time a Mind result is spent by means of "pass" tokens.
STOP READING! Once defused and Thunder is defeated read EVENT CONCLUSION.
EVENT CONCLUSION (4.3)
Narrative omitted.
- Reward: +2 AUDACITY, +1 HOURGLASS TOKEN, ANY HERO GAINS "THUNDER'S DEMON BELT" REWARD CARD.
- Remove all enemies from the board. Immediately move all heroes to the Wing Kong Trading Co. (5) and read 5.0.
4.4: Out of Time!
- Slide Event Clip to 4.4 on the Timeline.
Narrative omitted.
- Remove all enemies and Special Effect Tokens from the game board. Immediately move all heroes to the Back Alleys (2) and read 6.0.
Quest 5.0: 1852 – Big Tombstone in Little China
- Slide Event Clip to 5.0 on the Timeline.
NOTE: If the Time Token reaches the Out of Time! space at any point during Quest 5 immediately stop all current actions and continue reading event 5.4.
Narrative omitted.
MAKE A CHOICE.
CHOICE A: Quick! Hide!
SKILL CHECK 4
STOP READING! Continue to read once choice is made.
- PASS: Not a moment too soon you manage to get behind some boxes in the corner, as two Wing Kong gang members enter the room. "Gotcha!" screams one of them as he scans the room for intruders. "Well I'll be, there's no one in here. Maybe I'm just extra jumpy before the heist. The boss seems really keen on this one going off without a hitch, and I'm not looking to be the one who gives him any reason to be mad." You overhear the gang's plans to rob the bank.
- Reward: +1 HOURGLASS TOKEN, +3 CHI
- Continue to read EVENT CONCLUSION.
- FAIL: You scramble for cover as two Wing Kong gang members enter the room. The pillar you hid behind might not have been the wisest choice because they are both looking right at you. "Come on out fella, or are you yellow?" They open fire before you even have a chance to respond.
- Reward: EACH HERO LOSES 2 HEALTH. +2 CHI
- Continue to read EVENT CONCLUSION.
CHOICE B: Time to fight!
- COMBAT: Spawn 2 Wing Kong Hatchet Man on Wing Kong Trading Co. (5).
- STOP READING! Continue to read EVENT CONCLUSION.
EVENT CONCLUSION (5.0)
Narrative omitted.
Win the duel with the Six Shooter to proceed.
To win the duel the active player rolls 3 normal Skill Dice for his hero and another player rolls the same for the Six Shooter. The higher roll wins the draw and shoots first. You may spend one Hourglass token to slow time and automatically win the duel. If you win the duel read "PASS", and read "FAIL" if you lose. In a tie read lose.
- PASS: Wowee, who knew you had that in you. You get off a shot before the Six Shooter even raises his guns. The shot hits him in the left shoulder, but it's only a flesh wound. "You got lucky that time varmint, but next time things will go down differently." Gerry the Kid runs off.
- Reward: +2 AUDACITY.
- Continue to read EVENT CONCLUSION 2.
- FAIL: You were quick but not quick enough. Before you can level your gun at the Six Shooter he gets off a shot that sends you backwards. "Lights out varmint!" Gerry and his Wing Kong Gang hoots and hollers as they run out the door.
- ACTIVE HERO DIES.
- Continue to read EVENT CONCLUSION 2.
EVENT CONCLUSION 2 (5.0)
Narrative omitted.
- Place a Quest Token token in the Streets (S1). Once triggered, read 5.1.
5.1: The Quick and the Egg
- Slide Event Clip to 5.1 on the Timeline.
Narrative omitted.
MAKE A CHOICE.
CHOICE A: Try to stop the robbery and save the girl.
SKILL CHECK 5
STOP READING! Continue to read once resolved.
- PASS: You jump out into the street right in front of the gang. "Hold it right there you lousy no good, yellow belly...." Jack scratched his head. "...bastards? I don't know I was trying to think of something an Old West sheriff might say." Jack's performance has stunned the robbers long enough for the bank's security guards to pick up their guns and run into the street. "You let madam Toy go this instant, and we'll go easy on you." The Wing Kong Gang sees they are outnumbered and decide to make a run for it.
- Reward: +2 AUDACITY
- Continue to read EVENT CONCLUSION.
- FAIL: You jump out in front of the charging gang, but they don't seem to be slowing down. You practically get trampled as the gang makes off with the cash but thankfully they leave the girl.
- Reward: ALL HEROES LOSE 2 HEALTH
- Continue to read EVENT CONCLUSION.
CHOICE B: Hang back and let them make off with Lo Pan's cash.
STOP READING! Continue to read once choice is made.
You follow them around the corner and once again come face to face with the menacing Gerry the Kid. "You want some more of my lead?" Once again you're in a face-off duel.
To win the duel the active player rolls 3 normal skill dice for his hero and another player rolls the same for the Six Shooter. The higher roll wins the draw and gets out a shot. You may spend one Hourglass token to slow time and automatically win the duel. If you win the duel read "PASS", and read "FAIL" if you lose. In a tie read lose.
- PASS: You manage to wing his right shoulder. His gang provides cover fire as they get away, but at least the woman they were using as a hostage seems safe.
- Reward: +3 CHI, +1 AUDACITY
- Continue to read EVENT CONCLUSION.
- FAIL: Light fades as you see the laughing Gerry the Kid standing over you. "You don't know when to quit, do ya?" The guards from the bank round the corner and open fire. You might not have won the duel, but you gave the guards time to catch up and caused the gang to leave without their hostage.
- ACTIVE HERO DIES.
- Continue to read EVENT CONCLUSION.
EVENT CONCLUSION (5.1)
Narrative omitted.
- Place a Quest Token token at the White Tiger (4). Once triggered, read 5.2.
5.2: Playing with Ah Toy
- Slide Event Clip to 5.2 on the Timeline.
Narrative omitted.
MAKE A CHOICE.
CHOICE A: Go get the drop on the Wing Kong Gang.
STOP READING! Continue to read choice is made.
- Place Quest Token in space Back Alleys (1). Once triggered, read 5.3.
CHOICE B: Stay here and get more info on Lo Pan from Madam Ah Toy.
TASK ACTION: scroll icon, scroll icon, scroll icon.
STOP READING! Continue to read once resolved.
Narrative omitted.
- Reward: +1 HOURGLASS TOKEN
- Place Quest Token in space Back Alleys (1). Once triggered read 5.3.
5.3: The Good, the Bad, and the Girl with Green Eyes
- Slide Event Clip to 5.3 on the Timeline.
Narrative omitted.
COMBAT: Spawn 3 Wing Kong Hatchet men in Back Alleys (3).
STOP READING! Continue to read once defeated.
Narrative omitted.
- Spawn 1 Wing Kong Six Shooter, representing Gerry the Kid, in Back Alleys (2). Place one Side Quest Token under the mini to indicate that he takes two hits to defeat. Gerry immediately attacks when spawned. Each Hero in line of sight of Gerry must do a Defense check against an attack of 5. Gerry also attacks at the beginning of each Hero's turn. Gerry then attacks again during the Enemy Phase, following the normal rules for minion activation.
- STOP READING! Continue to read EVENT CONCLUSION once defeated.
EVENT CONCLUSION (5.3)
Narrative omitted.
- Reward: +1 AUDACITY, +1 HOURGLASS TOKEN, ANY HERO GAINS "GOLDEN SIX SHOOTER" REWARD CARD.
- Remove all enemies from the board. Immediately move all Heroes to the Dragon of the Black Pool (3) and read 6.0.
5.4: Out of Time!
- Slide Event Clip to 5.4 on the Timeline.
Narrative omitted.
- Continue to read 7.0.
Quest 6.0: 1939 – Blitzkrieg Wing Kong
- Slide Event Clip to 6.0 on the Timeline.
NOTE: If the Time Token reaches the Out of Time! space at any point during Quest 6 immediately stop all current actions and continue reading event 6.5.
Narrative omitted.
Each Hero must now make a choice and resolve the listed Defense check, before continuing with the active Hero's turn.
CHOICE A: Try to grab onto a Black Root.
Damage 6 (Roll Defense to block damage).
After each Hero has rolled their Defense check, continue reading.
Narrative omitted.
- Reward: +5 CHI
- Immediately move the active Hero to Underground (U4).
- Continue to read EVENT CONCLUSION.
CHOICE B: Aim for that big log!
Damage 3 (Roll Defense to block damage).
After each Hero has rolled their Defense check, continue reading.
Narrative omitted.
- Reward: +1 CHI
- Immediately move the active Hero to Underground (U2).
- Continue to read EVENT CONCLUSION.
EVENT CONCLUSION (6.0)
Narrative omitted.
- Place a Quest Token on U5. Once triggered, read 6.1.
6.1: It's Alive!
- Slide Event Clip to 6.1 on the Timeline.
Narrative omitted.
COMBAT: Spawn Lightning and spawn 1 Spirit Path Warrior (1-2 players) OR 2 Spirit Path Warriors (3-4 players) OR 3 Spirit Path Warriors (5-6 players) on U5.
The Spirit Path Warriors are reanimated from the dead using occult magic! They activate and attack as normal. However, they cannot be defeated, only stunned (see Stunned rules on pg. 36 of the rule book).
STOP READING! Continue to read once Lightning is defeated.
EVENT CONCLUSION (6.1)
Narrative omitted.
- Reward: +2 AUDACITY, +1 HOURGLASS TOKEN
ALL HEROES MAKE A CHOICE TOGETHER.
CHOICE A: Rush into the portal after him.
STOP READING! Continue to read choice is made.
- Immediately move all Heroes to Wing Kong Trading Co. (2) and read 6.2.
CHOICE B: Look around the ritual site first.
STOP READING! Continue to read choice is made.
- Read 6.3.
6.2: Quantum Sliders
- Slide Event Clip to 6.2 on the Timeline.
Narrative omitted.
Attempt to disrupt the spell.
SKILL CHECK 6
STOP READING! Continue to read once resolved.
- PASS: You think fast and throw a large piece of debris at him, breaking his concentration. He shouts angrily and curses you in another tongue as he runs out of the room. You go to chase him, but some Hatchet Men get in your way.
- Reward: +5 CHI TO EACH HERO
- COMBAT: Spawn 2 Wing Kong Hatchet Men on Wing Kong Trading Co. (2).
- STOP READING! Continue to read once defeated.
- Place a Quest Token in Wing Kong Trading Co. (6) and read 6.4.
- FAIL: You don't know what to do to stop him, you try to lift a nearby crate, but it's far too heavy. As you pull something in your back, Lightning finishes his spell. A portal opens and a familiar grotesque monstrosity lumbers out as Lightning leaves the room.
- COMBAT: Spawn the Wildman on Wing Kong Trading Co. (2).
- STOP READING! Continue to read once defeated.
- Reward: +1 HOURGLASS TOKEN
- Place a Quest Token in Wing Kong Trading Co. (6) and read 6.4.
6.3: Treasure Hunt
- Slide Event Clip to 6.3 on the Timeline.
Narrative omitted.
- Reward: GAIN 2 CHINESE FIREWORKS AND +1 CASTING BONES AND +1 DRAGON SPELL.
Narrative omitted.
COMBAT: Spawn 1 Security Guard per Hero in the Underground.
STOP READING! Continue to read once defeated.
Narrative omitted.
- Immediately move all Heroes to Wing Kong Trading Co. (7) and place a Quest Token on Wing Kong Trading Company (6). Once triggered, read 6.4.
6.4: Lightning in a Bottle
- Slide Event Clip to 6.4 on the Timeline.
Narrative omitted.
- Each Hero rolls a Defense check. Each Hero scoring less than 4 successes immediately loses half of their remaining health (rounded down).
COMBAT: Spawn Lightning Wing Kong Trading Company (6).
STOP READING! Continue to read once defeated.
Narrative omitted.
- Reward: +2 AUDACITY, +1 HOURGLASS TOKEN, ANY HERO GAINS "LIGHTNING'S STRAW HAT" REWARD CARD.
- Continue to read 7.0.
6.5: Out of Time!
- Slide Event Clip to 6.5 on the Timeline.
Narrative omitted.
- Continue to read 7.0.
Quest 7.0: 1000 B.C. – Little Trouble in Big China
- Slide Event Clip to 7.0 on the Timeline.
Narrative omitted.
- Remove all enemies from the board. Flip the board to the Lo Pan's Lair side.
- Spawn heroes on Level 1 (1L-1).
- Place the Time Token on Big Trouble track on space 9.
- Gain an additional number of Hourglass Tokens based on table below:
| Number of Players | 6 | 5 | 4 | 3 | 2 | 1 |
|---|---|---|---|---|---|---|
| Hourglass Tokens, Normal | 0 | 1 | 2 | 3 | 3 | 4 |
| Hourglass Tokens, Story Mode | 2 | 3 | 4 | 5 | 5 | 6 |
- If the Heroes don't stop Lo Pan by the time the Big Trouble track runs out read 7.4.
- Place Quest Token on Level One (1L-11). Once triggered, read 7.1.
7.1: Level 1 – Game of Death
- Slide Event Clip to 7.1 on the Timeline.
Narrative omitted.
- Heroes cannot move to Level 2 or 3 while doors are sealed.
- Spawn: Wildman (1L-12), Spawn 3 Guardians (1L-5, 1L-6, 1L-20). These Guardians do not use their special ability or strikeback, but they protect the Wildman instead. While any Guardians are still alive the Wildman can't be attacked.
- Once the Wildman, is defeated place a Quest Token on space (1L-22). Once triggered read 7.2.
7.2: Level 2 – Mortal Combat
- Slide Event Clip to 7.2 on the Timeline.
Narrative omitted.
- Heroes may not move to Level 1 or 3 while doors are sealed.
- Move heroes to space (2L-8). Spawn Lighting (2L-10), Thunder (2L-1), and Rain on (2L-6). The doors are again sealed. [Printed as "Lighting"; Lightning is meant.]
- Once defeated, place Quest Token on Level Two (2L-1). Once activated continue reading 7.3.
7.3: Level 3 – Deja Vu
- Slide Event Clip to 7.3 on the Timeline.
Narrative omitted.
- Immediately move heroes to space 3L-4. Spawn Lo Pan on (3L-7). For this fight use the David Lo Pan "Sorcerer" Boss board. Set his starting health to 3 + number of players (7 health max).
Narrative omitted.
- Defeat Lo Pan to regain the hourglass.
- Heroes may not move to Level 1 or 2 while doors are sealed.
- When Lo Pan is defeated continue reading EVENT CONCLUSION.
EVENT CONCLUSION (7.3)
Narrative omitted.
CONGRATULATIONS. YOU HAVE COMPLETED THE LEGACY OF LO PAN CAMPAIGN.
7.4: Out of Time! – Game Over
- Slide Event Clip to 7.4 on the Timeline.
Narrative omitted.
GAME OVER. BETTER LUCK NEXT TIME!