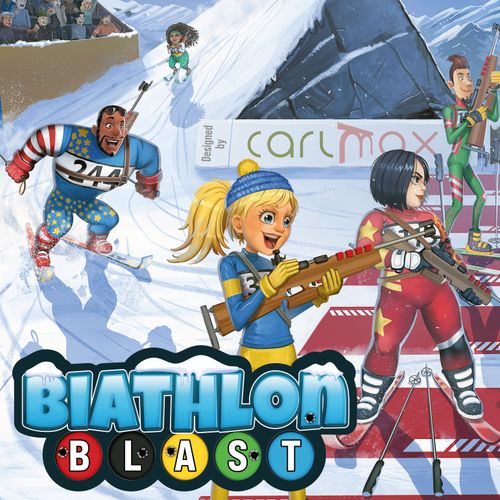
Biathlon Blast
Biathlon Blast Rulebook
Table of Contents
Table of Contents
Components
- 1 Insert
- 1 Venue Board
- 1 Shooting Barrier
- 1 Cloud
- 6 Ski Pairs
- 6 Player Boards
- 6 Pulse Markers
- 19 Bullets
- 14 Ski Wax
- 9 Tuck Boxes (1 per Biathlete + 1 for Motivation Cards)
- 8 Biathlete Standees
- 8 Accuracy Tiles
- 100 Skiing Cards (9 per Biathlete + 28 Motivation Cards)
- 1 Biathlete Profile Map
- 5 Shooting Dice
Game Overview
In Biathlon Blast, you take on the role of a competitive biathlete, using a personal deck of Skiing Cards to navigate snow-covered terrain and stop for two high-stakes shooting sessions. You'll need to manage your pulse, time your moves, and make the most of your limited supply of Bullets and Ski Wax.
The race takes place on one of four courses, each with its own distinct challenges. Every biathlete has unique strengths that shape how they move and shoot. To win, you must adapt your strategy to the terrain, the wind, and your opponents. That might mean powering through climbs, saving energy for a final sprint, or landing the perfect shot under pressure.
Before You Play
Use the 4 pre-punched insert pieces with biathletes to build a frame inside the box, lining them up with the matching ones on the box sides. Place the 5th piece with the Biathlon Blast logo in the middle to divide the box into two parts.
Punch out the cardboard pieces and sort the decks:
- 9 Skiing Cards for each biathlete
- 28 Motivation Cards (no portrait)
Place each biathlete's Standee, Accuracy Tile, and Skiing Cards into their Tuck Box, then lay the boxes on their sides between the Insert and the box walls.
Setup
1. Set the Course
- Flip the Venue Board to either side, then choose the Short or Long trail. For your first game, we recommend the Bad Wolfsheim - Kurz (Short) trail.
- Attach the Shooting Barrier to the Shooting Range.
- Lay the Cloud on the Windstill icon near the Shooting Range.
2. Get Your Gear
Each player randomly draws a Ski Pair (2 skis of the same color). Then take the Player Board and Pulse Marker in your ski color, along with 3 Bullets.
Take the correct amount of Ski Wax for your color: black: 2, yellow: 3, green: 4, blue: 3, white: 2.
The Red player doesn't get any Ski Wax, but starts with 4 Bullets instead.
Place your Pulse Marker next to the number 0 on your Player Board. Then place your Bullets and Ski Wax into the matching holes.
3. Choose Your Biathlete
Next, players choose biathletes in order, based on their ski colors: 1 Red, 2 Black, 3 Yellow, 4 Green, 5 Blue, 6 White.
So Red chooses first, then Black, and so on. This is called ski color order, and it's used to break ties throughout the game.
Take your Biathlete's Tuck Box, which contains:
- 1 Biathlete Standee
- 1 Accuracy Tile
- 9 Skiing Cards
Place the Accuracy Tile into the slot on your Player Board, and attach your Biathlete Standee to your skis. Take the Skiing Cards into your hand.
The six colors used in the game each represent a different skill:
- Red: Accuracy & Initiative
- Black: uphill skiing
- Yellow: flat skiing
- Green: downhill skiing
- Blue: pulse control
- White: wind control
You can easily view and compare how each biathlete performs in these areas using the Biathlete Profile Map when making your choice.
Note! Some cards use icons instead of numbers: a colored die icon means the value shown on the die of that color (don't roll); a double die icon means double the shown value.
4. Gather the Crowd
Open the Motivation Card Tuck Box and take out the 28 Motivation Cards. Shuffle the deck and place the top 2 cards face-up on the Venue Board. Leave the rest of the deck face-down in the third slot.
5. Ready the Range
Roll all 5 Shooting Dice at the Shooting Range. This sets their initial values, which are referenced by certain cards. The dice won't be rolled again until someone shoots.
6. Get in Position
Each player randomly draws 1 of their 9 cards and places it face-up to the left of their Player Board. This becomes the first card in your Discard Pile, where it stays until you pick all your cards back up (explained later).
Place the biathletes in the grid slots behind the Start Line, using the initiative value (the red number in the top-left corner on the discarded card). The player with the highest initiative places their biathlete first, followed by the next highest, and so on. Ties are broken by ski color order.
All set? Let the race begin!
Gameplay
Your goal is to balance high-speed skiing and accurate shooting over 3 laps of the course.
In your first 2 laps, you'll ski to the Shooting Range, take your shots, and then finish the lap with a short stretch. On your 3rd and final lap, you head straight to the Finish Line.
Start by skiing in the direction of the start arrow. When you reach the trail sign, follow the Short or Long route chosen during setup. After your second shooting, follow the Finish sign, which points the way to the Finish Line.
The first player to cross the Finish Line wins, ending the race immediately.
Round Overview
The game is played in rounds, with all players choosing a Skiing Card at the same time, then taking turns one by one:
- ALL PLAYERS:
- Choose Cards
- Determine Turn Order
- PLAYER BY PLAYER:
- Choose Action
- Perform Action: Move, Adjust Pulse, Change Wind
- Discard or Remove Card
Spend Bullets and Ski Wax to improve your performance:
- Bullets help you pick up your Discard Pile or hit more targets when shooting
- Ski Wax boosts your Action by adding extra movement, lowering your pulse, or letting you change the wind, depending on its color.
You can spend more than one at a time, but each is single-use, so make them count.
Skiing Card Anatomy
- Initiative: Determines who goes first each round.
- Top Action: One of the two Actions you can choose. It shows how far you can move, how it affects your pulse, whether you can change the wind, and what happens after use (background).
- Bottom Action: The other Action you can choose. Structured the same way as the top.
- Circle Icon: Black circle: 4 Cards, the same for all players. Gold circle: 5 Cards, unique to your biathlete. No circle: Motivation Cards, gained in the race.
1. All Players
1a. Choose Cards
At the start of a round, you choose a card from your hand and place it face-down just below your Player Board, where the cutout indicates.
Everyone chooses at the same time. If timing ever becomes an issue, use ski color order to determine who chooses first.
Once everyone is ready, reveal the cards together.
If your hand is empty at the start of a round, pick up your Discard Pile, then choose a card to play. If your Discard Pile is also empty, you're eliminated from the race.
Red Bullet: Spend 1 Bullet if your hand isn't empty at the start of a round to pick up your Discard Pile, before choosing a card to play.
1b. Determine Turn Order
The player with the highest initiative (red number in top-left corner) performs their full Action. Then the next highest goes, and so on, until all players have taken their turn. If there's a tie, use ski color order to determine who goes first.
Example: In a two-player game, the Yellow player chooses the Virtuoso card with an initiative of 9, while the Blue player chooses the Offset card, which has an initiative of double the red die. Since the red die shows 3, the Blue player's initiative becomes 2 × 3 = 6. So the Yellow player takes their turn first.
Note! Dice are only rolled during setup and shooting. If a player shoots, you might need to check the remaining turn order again, since the values of the dice may have changed.
2. Player by Player
2a. Choose Action
Choose either the top or bottom Action on your card.
2b. Perform Action
After choosing your Action, carry it out. Each Action has 3 parts, done in order: Move, Adjust Pulse, Change Wind.
Move
The first part of each Action shows how many steps you can take and which terrain types they apply to. Steps can also be used on easier terrain.
- Steps for black uphill terrain. Also usable on yellow flat and green downhill.
- Steps for yellow flat terrain. Also usable on green downhill.
- Steps for green downhill terrain only.
Spend your steps in any order, freely mixing uphill, flat, and downhill steps as you move.
You can stop at any time, even if you haven't used them all.
Black Wax: +1 uphill step. Yellow Wax: +1 flat step. Green Wax: +1 downhill step.
Spend Wax to increase your Action's available steps. The steps can be used on easier terrain as usual.
Trail spaces on the venue, aside from their terrain, come in two forms:
- Single-lane spaces hold 1 biathlete.
- Double-lane spaces hold 1 in each lane, separated by a dashed line.
(The Shooting Range is an exception and can hold all 6 biathletes.)
You can move through spaces occupied by other biathletes, but you must end your move in a space that can hold you. Once you stop, turn your biathlete to face the next space. If you cross the Finish Line, leave them facing forward.
Note! You have to stop at the Shooting Range. Place your biathlete on the shooting mat of the lowest-numbered free lane and turn them to face the targets.
Example: Wei evaluates what to do with the available steps (5 downhill, 1 uphill):
- Space 1 is uphill, so she needs to spend 1 uphill step to enter it.
- Spaces 2, 3, and 4 are downhill. She can use 3 of her 5 downhill steps to move through them.
- Space 5 is flat. Her 2 remaining downhill steps can't be used here, but she still has 1 uphill step, which works on any terrain, so she can use it to move into this space.
- Space 6 is uphill again, but with no uphill steps left, she can't reach it.
She can stop at any time. In this case, she can end her move on spaces 1 to 5, or stay where she is.
Crossing the Start Line
When you cross the Start Line, take 1 of the 2 face-up Motivation Cards, or draw the top card from the deck. If you take a face-up card, refill the empty slot with a new one.
Since you only gain 3 Motivation Cards during the race, choose wisely. Your first will likely arrive on turn 1, so don't forget to grab some extra motivation from the cheering crowd!
Adjust Pulse
After moving, adjust your pulse by moving the Pulse Marker on your Player Board. Your total pulse change is the sum of:
- Action cost: shown on the Action you chose
- Drafting: -1 if you end your move directly behind another player
- Wind: Headwind: +1 | Tailwind: -1
Your pulse can't go below 0. If your pulse goes over 10, you're eliminated from the race.
Action Cost
If the Action has a pulse cost, it is shown next to the pulse icon.
- A positive cost raises your pulse
- A negative cost lowers your pulse
Blue Wax: -1 to your Action cost. Spend blue Wax to reduce your Action cost.
Drafting
Drafting lowers your pulse by -1. You're drafting if you end your move 1 space directly behind another player. You're not directly behind if you're diagonally behind on double-lane spaces.
Note! You're not drafting if both of you are on the Shooting Range, since you're on the same space.
Wind
Headwind raises your pulse by +1, while tailwind lowers it by -1.
- HEADWIND: You're facing into the wind, and you're not drafting another player.
- TAILWIND: You're facing away from the wind, and no other player is directly behind you (blocking the tailwind).
Example: Fischer (Red) is 3 spaces behind Wei (Black) and facing a wind blowing from the North. He chooses the top Action of the Prime Time card, which here lets him move up to 10 spaces at an Action cost of 2. However, his total pulse change also depends on where he finishes, since drafting and wind effects vary by position.
If Fischer ends in the right lane directly behind Wei, his Action cost adjustment is -1 (drafting, no wind effect). In the left lane, it's +1 (no drafting, headwind). Similarly, stopping behind Olsson (Yellow) gives -2 (drafting, tailwind), while ending just ahead of her means no adjustment (no drafting, no wind effect).
Depending on where Fischer finishes, his Action cost adjustment ranges from -2 to +1. This means the total pulse change, including the Action cost, ranges from 0 to 3.
Change Wind
After adjusting your pulse, if your Action shows the wind symbol, you can change the wind direction.
White Wax: Spend 1 white Wax to treat your Action as if it had the wind symbol.
To change the wind direction, place the Cloud next to the Venue Board at one of the cardinal points (North, East, South, or West) to show where the wind is coming from. To make it windstill, lay the Cloud on the Windstill icon near the Shooting Range.
2c. Discard or Remove Card
When you finish an Action, the card is either discarded or removed from the game.
If the Action has a light, snowy background, place the card in your Discard Pile to the left of your Player Board. You can get these cards back when your hand is empty or by spending 1 Bullet.
If the Action has a darker, icy background, remove the card from the game. Set it aside. You won't use it again.
At the Shooting Range
When you start your turn on a shooting mat at the Shooting Range, things work a little differently. You still play a Skiing Card but only for its initiative. You don't use its Actions at all.
Instead, when it's your turn, you choose one of the two Shooting Range Actions shown on the Venue Board:
- Wait (A), and stay on the shooting mat (standard blue background)
- Shoot (B), and leave the shooting mat (red background)
Then perform the Action and discard or remove your card, as specified by the chosen Shooting Range Action. This, for example, means you may use Ski Wax to boost your Action, and you must account for drafting and wind effects.
Wait
When you choose the Wait Action, you stay on the shooting mat without firing. Blue and white Wax can still be used, but other Ski Wax colors are wasted since you remain in place.
Shoot
When you choose the Shoot Action, you attempt to hit 5 targets by rolling 5 dice. Unlike real-life biathlon, where missed shots lead to penalties, in Biathlon Blast you're rewarded for each hit. The more targets you hit, the stronger your Action becomes, turning precision into a more powerful turn.
First, carry out a short shooting sequence to see how strong your Action will be:
- Roll the Dice
- Count your hits
- Each die that meets your Accuracy gives +1
- Crosswind: -1 | Windstill: +1
- Spend Bullets for extra hits
- Use your hits to power the Shoot Action
Roll the Dice
Roll all 5 Shooting Dice inside the Shooting Barrier. Other than during setup, this is the only time the dice are rolled in the game.
Count your Hits
Your Accuracy is shown on your Player Board, just above the Pulse Marker. It gets worse as your pulse goes up. There are three Accuracy levels, depending on whether your pulse is low (0-2), medium (3-6), or high (7-10).
Each Shooting Die (from 0 to 5) gives +1 hit if it meets your Accuracy.
For example, an Accuracy of 1+ means you hit on rolls of 1 through 5, missing only on 0. An Accuracy of 2+ means you hit on rolls of 2 through 5, missing on 0 and 1.
After counting your hits, adjust the total based on the wind. Crosswind gives -1 (minimum 0), while windstill gives +1 (maximum 5).
- CROSSWIND: The wind is blowing from your left or right.
- WINDSTILL: The Cloud is lying on the Windstill icon.
Red Bullet: +1 hit. Spend Bullets after rolling and applying wind, up to 5 hits in total.
Use your Hits
Once your number of hits is final, you use it to power your Shoot Action.
The double-hits symbol found on Shoot Actions means twice your number of hits, so it gives you 2 uphill steps per hit. For 0-5 hits, that's 0, 2, 4, 6, 8 or 10 uphill steps.
Then perform the Action as you would a regular one. However, even if you don't advance, you must still leave the shooting mat and turn to face the next space instead of the targets.
Example: Pinto is at the Shooting Range on Port Rock and plays the Carnival card. On her turn, she chooses the red-background Shoot Action from the Venue Board and rolls the dice. With a pulse of 5, her Accuracy is 3+, meaning she hits on all dice showing 3 or more. Pinto rolls 2 hits (black and blue), and the windstill condition gives +1, for a total of 3 hits. She could spend Bullets to gain even more hits, but chooses not to. The number of available uphill steps is twice the number of hits. So Pinto has 6 uphill steps at no Action cost. However, because the Shoot Action has a darker, icy background, her Carnival card will be removed from the game.
Coach Zones
Coach Zones are marked spots on the course where coaches give a boost to players who end their move there.
You don't gain tokens, but you receive the shown effect (Bullets or Ski Wax) as if you had them.
You must use the boost on the first turn it can apply, meaning:
- Blue and white boosts are used on the same turn, before you finish your Action.
- Red, black, yellow and green boosts are used on your next turn.
Any player can use any Coach Zone, regardless of ski color. The number of icons in a Coach Zone shows how many Bullets or how much Ski Wax the boost is worth.
Note! If you ended your move in a red Coach Zone on the last turn, you can either spend the Bullet to pick up your Discard Pile, or to gain +1 hit after shooting.
Note! If you end your move in a white Coach Zone, treat your Action as if it had the wind symbol.
Example: On his last turn, Owens ended his move in a yellow Coach Zone with 3 icons. As a result, he receives the effect of 3 yellow Wax this turn, which provide extra steps usable on flat and downhill terrain. So if he chooses the bottom Action of the Rush More card, instead of only reaching space 1, he can move all the way to space 2.
Example: On his turn, Owens ends his move in a blue Coach Zone with 2 icons. The top Action cost of the Offset is 1, but he receives the effect of 2 blue Wax, which lower the cost by -2. So the total pulse change becomes -1.
Victory
The game ends when the first player crosses the Finish Line with a pulse of 10 or less. If it goes over 10 because of the Action, they're eliminated instead, and the race continues.
When a winner is declared, the round ends immediately, even if other players haven't taken their turns. Remaining players are ranked by their distance to the Finish Line, with ties broken by ski color order.
World Cup
In the World Cup, you'll compete in a series of 4 exhilarating races to crown the ultimate Biathlon Blast champion. Each race follows the same setup as a regular game, but with a rewarding twist that favors strong performances.
In the 1st race, players are randomly assigned ski colors, just like in a standard game. Starting with the 2nd race, players instead choose ski colors in finish order from the previous race: the winner chooses first, then 2nd place, and so on. Since ski color determines the order in which players choose biathletes, going with the Red skis, for example, puts you first in line.
Scoring: 1st place earns 1 point, 2nd place earns 2 points, and so on, up to 6th place. Players eliminated before the winner finishes are ranked last among those remaining. For example, in a 4-player race, if a player is eliminated first, they're placed 4th. If another player is eliminated later, they're placed 3rd, and so on.
World Cup Winner: After 4 races, the player with the lowest score claims the World Cup title. If there's a tie, the player with the better finish in the final race wins.
The road to glory begins at the Bad Wolfsheim venue, where 2 vastly different trails await. However, both share a very short final lap that makes hitting your targets crucial for success.
- Race 1 - The Lang Trail (Bad Wolfsheim): A grueling start with steep climbs, sharp turns, and relentless rhythm. This trail pushes your strength and endurance to the limit.
- Race 2 - The Kurz Trail (Bad Wolfsheim): A lightning-fast course where speed is everything. Keep your pulse steady, or risk missing those critical shots at the worst moment!
The competition now heads to Port Rock, a venue known for its brutal, narrow final climb, where every step toward the Finish Line is a battle for position.
- Race 3 - The Short Trail (Port Rock): A tough route with varied terrain. The long final lap lets you recover missed shots, but shifting winds can make it unforgiving.
- Race 4 - The Long Trail (Port Rock): A final showdown with two brutal uphill climbs. You'll need every ounce of stamina and strategy, but the last ascent decides the champion!
Victory Lap (Bonus Tips)
These details aren't required to play the game, but they add a bit of extra flavor and can help you appreciate each biathlete more.
Hit the Sweet Spot
Every Action has a place on at least one trail where it fits perfectly. When played there, the Action's steps match the terrain ahead, making it especially effective. These ideal spots can be tricky to reach, but they might be the difference between a solid finish and taking the win.
Flag Colors = Skill Ratings
Those colorful flags are more than decoration. They highlight each biathlete's strengths and weaknesses. The more of a color in a biathlete's flag, the stronger they are in that skill. If a color is missing, they're below average in that area.
For example, the Swedish biathlete Olsson excels in blue and yellow, with exceptional pulse control and flat skiing, but the crowd might want to take cover when she reaches the Shooting Range.
Note that a strong red rating means the biathlete is skilled in Accuracy, Initiative, or both. Since the balance between these skills varies from one to another, the next tip will come in handy when you need to spot their Accuracy at a glance.
Bib Numbers = Accuracy
The biathletes' bib numbers aren't just for show either. They tell you how accurate each biathlete is at hitting targets. The bib number matches their Accuracy at low, normal, and high pulse. So Owens' 244 means he hits on rolls of 2 or higher with a low pulse, and 4 or higher with a medium or high pulse.
Owens has plenty of red on his flag. For him, that means blistering initiative, so while his accuracy sometimes suffers, he leaves everyone behind when it counts.
Reference
Round Overview
- ALL PLAYERS: a. Choose Cards; b. Determine Turn Order
- PLAYER BY PLAYER: a. Choose Action; b. Perform Action (Move, Adjust pulse, Change Wind); c. Discard or Remove Card
- CROSSWIND: -1 hit | WINDSTILL: +1 hit
- Black / Yellow / Green Wax: +1 step
- DRAFTING: -1 pulse | HEADWIND: +1 | TAILWIND: -1
- Blue Wax: -1 Action cost
Ability Icons
| Ability | Color | Tiebreaker |
|---|---|---|
| Accuracy & Initiative | Red | 1 |
| Uphill Skiing | Black | 2 |
| Flat Skiing | Yellow | 3 |
| Downhill Skiing | Green | 4 |
| Pulse Control | Blue | 5 |
| Wind Control | White | 6 |
- Accuracy icon (e.g. 1+, 3): Number of Hits
- Uphill steps icon: Number of Hits ×2
- Die icon: Shown Die Value*
- Double die icon: Shown Die Value* ×2
- * Use the value currently shown. Don't roll.