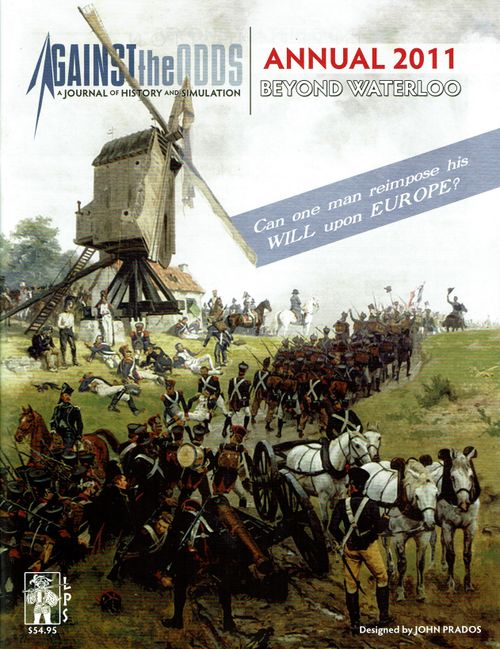
Beyond Waterloo
Beyond Waterloo Rulebook
Table of Contents
Table of Contents
- 1.0 INTRODUCTION
- 2.0 COMPONENTS
- The Combat and Basic Games
- 3.0 TROOP RULES
- 4.0 LEADERS
- 5.0 FORMATIONS
- 6.0 COMBAT
- 7.0 THE GAME TURN
- 8.0 STRATEGIC ACTIVITY
- 9.0 ATTRITION
- 10.0 WAR CHEST
- 11.0 FIELD MAINTENANCE
- 12.0 FORCE POOLS
- 13.0 ORGANIZATION/REORGANIZATION OF FORMATIONS
- 14.0 REBUILDING TROOP UNITS
- 15.0 OFF-BOARD MOVEMENT
- 16.0 SUPPLY
- 17.0 OPERATIONS PHASE
- 18.0 MOVEMENT
- 19.0 FORTRESSES
- 20.0 VICTORY
- The Advanced Game
- 21.0 DIPLOMACY
- 22.0 DIPLOMATIC LEVEL RESTRICTIONS
- 23.0 MINOR ALLIES
- 24.0 MODIFICATIONS TO TRAINING AND FORMING GUARDS UNITS
- 25.0 ITALIAN OPERATIONS
- 26.0 MODIFICATIONS TO THE ADMINISTRATION PHASE
- 27.0 SCENARIOS
1.0 INTRODUCTION
A. Beyond Waterloo is a two-player strategic level simulation of the Napoléonic Campaign of 1815. Players take the sides of France or its opponents, a coalition of Allies. In its long form, the game opens with Napoléon's arrival at Paris following his return from Elba. It encompasses his efforts to restore France to a war footing, the Allies' struggle to revive their anti-French coalition, and the military operations that ensue.
B. Beyond Waterloo is played on a map that includes France plus relevant portions of the Low Countries, Germany, Switzerland, and Italy. Where most games on this period focus in on the famous Battle of Waterloo, Beyond Waterloo takes in the full scope of the politico-military possibilities inherent in the 1815 situation. The Allies must again defeat Napoléon. The French must avoid that outcome. The game also provides scenarios for a Bourbon restoration attempt (Louis XVIII's Dream) and an optimal imperial approach (Napoléon's Dream).
C. Beyond Waterloo is a full strategic simulation encompassing military, economic, and diplomatic developments. It also introduces new design concepts for a game of this nature. Because of the complexities involved, these rules adopt a layered approach. Initially, the Combat Game introduces only the Battle Development Sequence, which affords a way to conduct combat in a strategic game that is nuanced for the Napoléonic era. This level of rules enables the player to learn the combat system using a scenario that covers only the Battle of Waterloo itself.
D. At the next level, the Basic Game rules introduce the full movement and administrative systems for a Napoléonic campaign. The scenario replicates the military action, economic factors, and force mobilization in this last Napoléonic War.
E. The Advanced Game adds diplomacy, strategy and political action, and emphasizes the mobilization for war. In this long-form the game begins with Napoléon's return to Paris and both sides must prepare for war before conducting it.
F. Beyond Waterloo is played on a map subdivided into areas that regulate the movement of game forces. Pieces represent prominent commanders on all sides, and formations, corps, and divisions. Players organize and move their pieces across the map to further their strategy. The players accumulate Resource Points (RPs) and Victory Points (VPs) as the game progresses. RPs procure fresh forces. The VPs influence events in the Campaign of 1815 as well as determining the winner of the game. In the Advanced Game, players also engage in diplomatic and political activity intended to prepare for war or shape the conditions affecting the campaign.
1.1 Important Terms
Administration Points: These are provided by the formation's commanding leader and are used to perform different activities within the game.
Battle Marker: This contains a crossed swords symbol and is placed on the board in the area where combat is currently to be resolved.
Brigaded: This means that the formation is attached to a higher command. So division and corps units can be brigaded to a formation. A formation of the same nationality with a non-superior commander (fewer than four stars on its counter) can be brigaded to another formation which has a superior commander (4 stars). The forces of a brigaded formation act in all respects as if they are under direct command of the superior Leader. The term unbrigaded refers to formations not attached to a senior leader, or to single units not belonging to any formation.
Combat Strength Factor: The large lower left number on a troop counter.
Deployment Mode: The player's formations have Deployment Modes that optimize them for specific Grand Tactics (6.4). Deployment Mode is a key determinant, along with tactics, of the strength and effectiveness of a player's forces in a battle. In certain Deployment Modes the player may not use some Grand Tactics. In other modes, the strength of the player's units may be halved or doubled. Consult the formation Deployment Chart for details. The Deployment Mode of a formation is indicated by its formation marker or via an additional marker (for Echeloned or Concentrated modes). A formation can change Deployment Mode during Movement or Battle (5.3).
Initiative: Throughout the game at designated times, players compare their VP scores to determine who has the initiative. The player with the highest VP score is considered to be the Initiative Player at that point. In case of a tie, the French have the initiative. This can change many times within a turn.
Movement Allowance: The maximum number of MPs (Movement Points) a formation or unit can expend in its Operations Phase.
Resource Points: These are used to purchase new troops and pay for formation upkeep during the game.
Victory Points: These are accumulated during the game to determine the winner.
1.2 Abbreviations
| Abbr | Explanation |
|---|---|
| AP | Administrative Point |
| CF | Combat Strength Factor |
| DDC | Diplomatic Developments Chart |
| DRM | Die Roll Modifier |
| FERT | Fire Exchange Result Table |
| LOS | Line of Supply |
| MA | Movement Allowance |
| OOS | Out of Supply |
| OPs Phase | Operations Phase |
| PAC | Player's Aid Charts |
| RP | Resource Point |
| VP | Victory Point |
2.0 COMPONENTS
A. The game contains:
- One 22" x 34" map with Battle Board
- Two counter sheets totaling 420 counters
- 24 Battle Tactics cards, numbered A1-12, F1-12 (12 per side)
- One Army Organizational Display with the Turn Sequence Wheel, the Game Turn Track, and the Diplomatic Status of the major Allied nations opposing Napoléon
- Three Player Aid Charts printed with game charts and tables
- One 4-page Expanded Sequence of Play printed in the center of these rules
- These rules
B. Two different colored six-sided dice must be supplied.
2.1 The Map
A. The map is marked off into areas and also represents terrain features. The area's terrain and its borders have tactical importance in play. The map covers the region from northern Italy to western Germany, from beyond the Rhine River to the Atlantic Ocean, and from northern Spain to southern Belgium, including all of France. Offboard movement of forces in Austria, Italy, Spain/Portugal, Britain, and Prussia/Russia is represented on displays with movement tracks. Also printed on the map board is a Battle Board display used to resolve game combats.
B. Around the borders of the map is an alpha (west to east) numeric (north to south) grid pattern to aid players in locating areas. For example, the listing for Ligny shows J2. Follow the alpha border divisions to J and then the numeric border divisions to 2. The intersection within the map of these two map border divisions is the location where the area of Ligny is.
2.1.1 Off-Board Movement Track Displays
Several belligerents have forces that do not start the game on the main map. In addition, new Allied units entering the game come from off-board in the Advanced Game. The movement and arrival of those forces is regulated by Off-Board displays printed on the map. These are marked off into boxes representing general geographic regions. In the Advanced Game, movement through them is regulated by Diplomatic Status as well as specific rules. The only Off-Board boxes where the French can enter and where combat can occur is within the Italy Off-Board Movement display boxes.
2.1.2 Entry Zone Boxes
These are for the nationalities which appear along the edges of the board and have an E in them. Forces enter here from the Off-Board movement tracks or deploy into them (all nations in the Basic Game and only the Spanish in the Advanced Game) and then move normally across the board from their arrival zones.
2.1.3 International Borders
Each nation (and the areas they control) is defined by a different color on the main map. In the advanced game, Allied nations are not permitted to cross into another nation until they have begun war (Active Hostilities) with France. This does not apply to the Off-Board Movement track Displays (so Russian forces can move through Prussian boxes on the track there).
2.1.4 Battle Display
The Battle Display (printed on the map) is used to resolve battles in the game (6.0). This enables the strategic game to resolve battles with the texture and feel of Grand Tactical engagements. Two markers are used in connection with the Display, plus number markers to indicate losses at each stage of the fight. One marker is the Battle Marker, which is placed in the area the battle is being fought. The Display comprises areas for each side separated by a Battle Sequence Track. The section for each player is subdivided into areas for a marker demonstrating the player's selection of Grand Tactics, one for the player's Lead formation or unit, one for cavalry units on screening duty, and one for supporting formations/units. In the middle between the two opposing forces is the Battle Sequence Track that designates the successive rounds of the battle. The Battle Initiative Marker is used here to indicate the round in progress, as well as which player has the Initiative. This marker changes faces depending on shifts in Initiative during the game.
Game Play Note: Some sections of the Battle Display (like Battle Conditions and Supporting Cavalry Screens) are only used in future expansions of Beyond Waterloo.
2.1.5 Holding Boxes and Tracks
Each side has holding boxes and tracks printed on the map, used to monitor various activities. These include holding boxes for various different available forces (Leader, Division, and Force Pool), and a Troops Training Track. Each side has an Eliminated box in which corps sized units that are not available to be recruited yet or are eliminated on the map are placed. Each side also has a War Chest Track on the map to record RP and VP levels.
2.2 The Counters
2.2.1 Leaders
These pieces depict actual military commanders who in general command a formation (army). Each leader counter has certain information. The front represents the commander in his fully capable status; the back denotes the leader's reduced capacities when wounded. Information on the counter includes the name of the leader, his rank (the number of stars a leader has represents his rank; leaders with four stars are Superior Commanders), Administrative Points Capacity (first number), Battle Ability (second number), and his Reaction Range (third number or "•" which means 0).
2.2.2 Troop Units
Troop units are generally infantry or cavalry.
A. Each unit is printed with a combat strength and morale value.
B. The front of the counter represents the unit at full strength; the back is the unit at reduced strength. These full and reduced strengths are called steps.
C. The units are represented at corps (XXX) and division (XX) strength. A corps is considered to have four steps of strength. If a reduced corps takes a step loss, the piece is replaced by a division counter. A division has two steps of value and is eliminated if it is reduced and is then obliged to incur another loss.
D. The French have National Guard troop units which only show a combat strength.
2.2.3 Formations
These pieces are markers that represent groupings of troop units (which are actually placed in their formations box on the map for French and on the Allied Organization Display for the Allies; see Module 5.0 for further details).
2.2.4 Grand Tactic Chits
Players select from among a set of Grand Tactics to frame their overall strategy for an engagement.
2.2.5 Markers
Markers represent various conditions in the game and are explained in the rules pertaining to various game functions.
2.3 Battle Tactics Cards
Players select up to four Battle Tactics Cards to denote specific actions they possibly will take in a battle. After chosen, they are placed face down (hidden from an opponent) in front of their owner until used in a battle round.
2.4 Army Organization Display
A. Both sides use the separate Army Organizational Display to manage their forces. For ease of play, set the Display up next to the western map edge. The sheet contains Formation Displays, boxes corresponding to the formations that maneuver on the map as well.
B. Each Formation Display box has a number track below it that records its current Morale level and APs available. A smaller interior box is used to place its leader plus any markers that reflect conditions which may influence the formation's game performance (box with L in it), and two boxes (Effective and Broken) for the actual troop units that make up the formation. Scenario at start troop units or when they form/join a formation are placed in the Effective Area (left side) of the box if the unit's morale value is less than or equal to the formation's current morale, and move back and forth between that and the Broken (right side) region as the formation's morale level fluctuates against the Troop unit's morale rating.
2.4.1 Game Turn Track
Also printed on the Display is the Game Turn Track. The game is played in full turns that represent one month of real time. The Game Turn Marker (calendar) designates which turn is in progress.
2.4.2 Turn Sequence Display
A. Also printed on the Display is the Turn Sequence Display (double circle) which reflects the two levels of play (two concentric circles) in a game turn. The Turn Phase Marker (clock) designates the phase of the game turn the players are currently involved in. The outer circle represents Strategic Activity Phases. Only some of these occur in the Basic Game, along with the inner circle of Operational Activity Phases.
B. The black line printed on and between the two circles indicates when play action moves from one level to the other. In the Advanced Game there is an additional Strategic Activity Phase of Diplomacy.
C. Turn play proceeds along the green line and moves to Operational Activity (and the black line) by triggering events (red line used if triggered).
D. In the Combat Game all action takes place within the same portion of a single phase of Operational Activity.
2.4.3 Diplomatic Track
A. This is used only in the Advanced Game, and is printed on the Display. At any given moment in the Advanced Game there is a prevailing condition in regard to the relations between one of the nations of the coalition of Allied Powers and France. This ranges from Peace to Active Hostilities and is reflected by their nation markers on the Diplomatic Track (see map).
B. The current Diplomatic Condition of an Allied Power determines what actions it may perform during a turn in the Advanced Game. Advanced Game events will change the Diplomatic Condition, and players may act to alter those conditions themselves. Each component country of the Allied player's alliance has its own independent Diplomatic Status Marker.
2.5 Players Aid Charts and Expanded Sequence of Play
A. Included with the game are three separate cardstock sheets containing the game charts and tables. For the Combat Game they include the Grand Tactics Matrix and Battle Deployment Matrix, the Fire Exchange Results Table, and the formation Deployment Chart.
B. The Basic Game adds the Terrain Effects Chart, the Resource Point Acquisition Chart, the Resource Points Costs Chart, the Attrition Table, and the French Recruitment Authorization Table. In the Advanced Game the various Diplomatic Charts are added. The Expanded Sequence of Play printed in the center for the rules list all the phases and steps that can take place during the Combat and Basic game, plus the Advanced game. Players should remove it before play and can use it to execute operations and battle sequences and routines correctly.
The Combat and Basic Games
A. This section is intended to familiarize players with the units and the combat system alone. The Combat Game scenario depicts only the Battle of Waterloo itself, and only its climactic moment at Mont St. Jean. The action of this game takes place on just three map areas near the northern edge of the board (the areas of Waterloo (I2), Wavre (J2), and Ligny (J2), and on the Battle Display. In the Combat Game players only need to familiarize themselves with the rules below that have a blue left margin line. The setup rules are provided in the Scenario section of these rules (27.1). The duration of the game is just one full Battle Sequence.
B. The Basic Game layers onto the combat system the remaining elements necessary for the full strategic game. These include the complete turn sequence and all associated game subsystems. Among the elements are levels of Strategic and Operational Activity, mobilization, the Operations Phase (OPs Phase), movement, formations and leaders, troop rules, and administrative functions. The Basic Game scenario incorporates the full panoply of the 1815 campaign,
with all troops and functions represented. The action picks up in June 1815, the month of Waterloo, and continues through the campaign season as the sides seek a result. The setup instructions are in Section 27.2.
3.0 TROOP RULES
3.1 Troop Counters
A. There are two basic types in the game: Infantry and Cavalry.
B. They come in two basic sizes: corps (XXX) and divisions (XX).
C. In general, a corps represents two divisions.
D. Troop counters are marked with two values. The first represents its combat strength factor (CF). The second measures the unit's quality, or Morale (5.2).
E. Combat units that are not brigaded to a formation are always considered to be in Line of Battle mode. Exception: Unbrigaded troops in a pass (18.3.10.D).
F. Morale values printed on troop units have no effect in combat unless the troop units are brigaded to a formation.
3.2 Cavalry
Cavalry units have some special capabilities. These include screening other troops and, in battle, the Cavalry Charge, and Cavalry Superiority.
3.2.1 Cavalry Screen
A. During movement, cavalry units can prevent the adversary from observing friendly forces and thus determining their identity and status. Actual units must be assigned this function, and placed atop a stack or formation. If combat occurs the screening cavalry unit/s are placed in the corresponding box on the Battle Display printed on the map.
B. Only non-broken cavalry can perform the screening mission.
C. Cavalry units are paired with Cavalry Screen Markers. To screen a formation, place the cavalry unit on top of the small box on the formation display (containing the leader and other status markers), and place a Cavalry Screen Marker on top of the formation counter on the map. In battle, the screening cavalry units are placed in a Screening box on the Battle Display. They may prevent the intervention of outside enemy formations (through Reaction Movement, 6.13). Screening cavalry do not count in determining Cavalry Superiority (6.8.1, 6.8.2) and cannot be used for Battle Tactics (6.5).
3.2.2 Cavalry Charge
A. In Battle, the player may use one or more cavalry units to make an all-cavalry assault, or charge. The Charge is a Battle Tactic. To make a Charge the player must have posted one or more cavalry units to the Cavalry Charge box on the Battle Display, and play the Cavalry Charge Battle Tactic card. The Cavalry Charge may be executed during either round of combat or during the Battle Adjustment Round. All units posted to the Charge Box on the Battle Display must participate when the Battle Tactic is played. The Charge is resolved using the procedure laid out in the Cavalry Charge Combat Subroutine (Battle Tactic).
B. If the Cavalry Charge is executed during a Battle Adjustment Round, its target must be the opposing Cavalry Screen. Those are the cavalry CFs checked in resolution. An opponent with cavalry units in its own Charge box on the Battle Display may decide to intervene in the cavalry battle, adding these CFs to its own total for resolution.
C. A Cavalry Charge executed during a combat round is targeted against the opponent's Lead Formation. In this case the CFs of the charging cavalry units are doubled. If the opposing formation has no cavalry, no cavalry battle is fought. Instead the enhanced cavalry CFs add to the player's total for FERT resolution, unless the opponent plays the Infantry Squares Battle Tactic. That tactic cancels the effect of the Cavalry Charge.
3.2.3 Cavalry Superiority
A. In battle, the general preponderance of cavalry on both sides establishes which side has Cavalry Superiority (6.8.1, 6.8.2), which provides an advantage in combat resolution. Only units in the Lead Formation Box of the Battle Display count in calculating cavalry CFs for superiority. Units in both the Cavalry Charge and Cavalry Screen Boxes do not count for superiority.
B. In combat, the side with superiority gains a dice roll advantage (6.8.1) and the side with fewer cavalry factors gets a negative modifier (6.8.2).
3.3 Guards
A. Both sides enjoy the benefits of elite Guards units.
B. Because Guards units are typically selected from the most experienced soldiers, if a Guards unit is in the Force Pool to be recruited, it does not require Training (12.2) and is immediately placed in the Deployable Box of the Training Track when Recruited.
C. The French possess several divisions of the Imperial Guard, Napoléon's most loyal troops.
- Units of the Imperial Guard are deployed per the scenario set ups.
- The unit marked Old Guard should remain with Napoléon as long as he is in play. If it is deployed elsewhere by the scenario, and Napoléon is in the same area with the Old Guard, that unit should be brigaded with his formation. If Napoléon is eliminated, there is no further restriction on Old Guard deployment. Other Guard units may be attached to different formations.
- For the Allies, the Russian and Prussians both possess corps of Guards. The British have a smaller force of elite Guard units embodied in its I Corps. Like the French Imperial Guard, each of these corps is marked as Guards on the counter.
- The presence of a Guards unit in a formation enables its owner to select the Guards Assault Battle Tactic card in combat (6.5).
3.4 French National Guard
The French used troops of their militia, called the National Guard, which had less experience and training, and hoped ultimately to integrate them into their field forces.
A. The French may purchase National Guards with War Chest RPs, placing them directly on friendly fortresses or depots on the map during the Mobilization Phase.
B. A fortress or depot can have no more than two National Guard units.
C. These pieces cannot move once placed, except that they can be brigaded into a formation.
D. The National Guard comes in two sizes with different RP costs, the larger of which has two steps of strength.
E. National Guards may be Recombined (14.3.5) into regular units under specified conditions.
F. The presence of each National Guard unit in a formation causes a negative DRM in Combat (6.8.5).
G. The French are limited in the extent to which they can remove National Guard units as combat losses (6.10.5).
3.5 Minor Allies
A. Minor Allied forces are active in the game.
B. Generally, these troops are permanently removed from the game when eliminated.
3.6 Unit Steps
A. Unit staying power is not the same thing as its CF in this game. Strength appears as a number printed on the piece. Combat endurance is measured in steps of strength.
B. Units are printed on both sides of the counter, with the back representing lower values.
C. All losses in the game are expressed as steps.
D. A division has two steps, while a corps has four.
E. Each player has a Divisions Pool box for division-size counters that are used for replacing corps that take a second step loss, Corps Breakdown (3.7), or for Replacements (14.2).
F. The game setup provides for a number of these divisions to be placed here at start. These pieces are used as substitutes.
G. If a corps unit incurs a second loss it is removed from the board and replaced by a division-sized unit from the Divisions Pool Box or Eliminated pile (French) of the same type under the following guidelines:
- The replacing division's CF must be less than the corps' current CF.
- The division's morale value must be greater than or equal to the corps unit it is replacing.
- If no replacement division-sized unit is available that meets the above two criteria, then the corps is eliminated.
H. Losses can be mitigated by Replacements (14.2) and Recombination (14.3).
3.7 Corps Breakdown
A. Only corps units can be broken down during the Organization/Reorganization Segment of the Mobilization Phase (13.0).
B. Exchange a corps piece for two same nationality division counters from the Divisions Pool Box.
C. The two divisions cannot have morale values lower than the corps' morale value.
D. The combined combat factor total of the two divisions cannot exceed the CF of the corps.
E. A reduced division can be chosen to facilitate the breakdown to not violate the above rule.
F. A corps can break down only if there are enough appropriate divisions to do so.
G. It costs one of the leader's APs to perform this action.
3.8 Corps Buildup
A. During the Organization/Reorganization Segment of the Mobilization Phase, players can combine two divisions in a formation to form a corps.
B. Two full strength divisions brigaded in the same formation may be combined to form a corps.
C. There must be a corps unit available in the Force Pool (Allies) or in the Eliminated Box (France) to do so.
D. The corps unit chosen must have the lowest available CF available at this point.
E. The corps unit can only have a morale value one lower than the highest morale value of either of the divisions it is replacing.
F. Remove the two divisions from the formation's box and place them in the Divisions Box. Take the corps unit and place it into the formation's Organizational Display Box.
G. The formation must be in supply to perform this action.
H. It costs one of the leader's APs to perform this action.
Editor's note: in the source this line is printed at the top of the following column, separated from its item letter; it is placed here as the next item after 3.8 G because its subject matches 3.7 G and 3.8 G and its position is the only free slot. Please check against the printed PDF.
4.0 LEADERS
Napoléon and Wellington showcase the important effect of great leaders throughout this era. Leaders have a central role in the game. They command formations, react to battle, supervise Reorganization, and facilitate the accumulation of Resource Points. Leader counters on the front represent the officer with his full attributes. The back shows the leader with impaired facilities as a result of war wounds.
4.1 General Rules
A. Each leader counter contains a rank expressed in stars. Senior leaders have four stars and other leaders have three.
B. The values on their counters from left to right are: Administrative Points (APs), Battle Ability, and Reaction Range.
C. A leader's capabilities govern all activities of the formation under his command.
D. Leaders also have nationality. They can command only troops of their own nation plus minor allies (thus the Duke of Wellington cannot command Prussian troops).
E. All leaders begin the game with their stronger values on the front side.
4.2 Leaders and Administration
A. The first number on a leader counter is his AP rating.
B. This is used in conjunction with a marker on his formation's box on the formation Organization Display.
C. Leaders expend APs throughout the turn. They are reset at the start of each turn's Administration Segment.
D. A leader expends 1 AP each time he:
- Brigades or unbrigades a formation (senior leader) or unit (all leaders). This charge for Reorganization (13.1) must be expended by the senior leader present (for a formation) or the leader of a formation or stack (for a unit).
- Attempts a Reaction Movement (6.13).
- Reorganizes a unit under his command (3.7 and 3.8).
- Engages in Combat when his formation did not start in the battle area at the beginning of their OPs Phase (not if he Reaction moved into area).
- Incorporates a Replacement (14.2)
E. Only the senior leader's formation (4.3) expends the AP for 4.2.D.2, 4.2.D.3, and 4.2.D.4 when other formations are brigaded to his formation.
F. Adjust the AP Marker on the track below the leader's formation box to reflect the expenditure.
G. When a leader has no APs remaining, he cannot perform any of the activities listed above. If action is forced on a leader by the opponent's play (combat, for example), apply a -1 DRM the next time the player needs to roll dice for this leader.
H. The formation's AP level is reset to its current leader's AP value during the AP Reset Segment of the Mobilization and Administration Phases.
I. When a formation receives a new leader, its AP level remains unchanged until the next AP Reset Segment.
4.3 Senior Leaders
A. Only senior leaders (those with four stars) can be selected as War Minister (4.4), or when rolling for RPs on the Resource Acquisition Chart (10.2).
B. If no senior leaders are available on the map or as French War Minister, this dice roll benefit is lost.
C. Only senior leaders can command formations brigaded together. If no senior leaders are available, formations cannot be brigaded.
4.4 War Minister
Some historical accounts of 1815 postulate that inefficiency in the French war effort played a key role in Napoléon's defeat in the campaign. To reflect this the player on the French designate a specific official to serve as War Minister.
A. The War Minister must be a senior leader (4.3).
B. In the Mobilization Phase, he helps the French determine the number of fresh units that can be recruited each turn (12.3) and for both players in the Administration Phase to help decide how many RPs they acquire for their War Chest (10.2).
C. The Allies may choose any one of their senior leaders to be the War Minister for their cause for that turn.
D. The French War Minister is appointed and changed under standard limits and rules for leader replacement (4.5).
E. If Paris becomes a battle area and no French formation (with leader) is present to fight for it, the War Minister functions as an ad hoc formation leader who commands all French troops in the Paris map area.
4.5 Leader Pool
A. Basic and Advanced setups specify a number of leaders who are unemployed at the start of play and are placed in their respective Leader Pools.
B. A player can appoint any appropriate available leader from the Leader Pool when creating a new formation (13.2).
C. During the Leader Segment of the Mobilization Phase either side can replace one leader commanding a formation with one leader that started the segment in the Leader Pool or exchange the leaders of two formations who are in the same area.
D. During the Leader Segment of the Administration Phase, either side can:
- Replace two leaders commanding formations with leaders that started the phase in the Leader Pool.
- Replace one leader commanding a formation with a leader that started the phase in the Leader Pool and exchange leaders of two formations that are in the same area.
- Exchange the leaders of one or two pairs of formations in which each pair of formations started the phase in the same area.
E. Replaced leaders are returned to the Leader Pool.
F. When appointing a leader from the Leader Pool, move his counter to the formation's Leader Box.
G. Leaders cannot be transferred into the pool from a formation and reappointed to another formation during the same phase.
H. There cannot be more leaders in play than the counter mix provides, and limitations on the number the player may bring in from the pool may dictate that a formation go without a leader.
4.6 Leader Losses
A. Leaders may be killed or wounded in combat with certain dice roll results.
B. They occur to an opponent if a player rolls an unmodified (raw) FERT result of 12.
C. If this result occurs, the opponent must roll 1D6 for each of its leaders involved in the battle on the Leader Casualty Table.
D. If the Battle Tactic card of Leader Rallies Troops was used this round, it will cause a +1 DRM to each leader's casualty roll.
E. Each following Leader Segment of the Mobilization and Administration Phases, the leader may attempt to recover from his wounds by making a 1D6 on the Leader Wound Recovery Table and applying the result.
F. Wounded leaders function normally with their formations, except with reduced abilities as reflected with their lower values.
G. The player may replace a formation's wounded leaders under standard provisions (4.5).
H. Wounded leaders evacuated to the Leader Pool may continue to check for healing while in the pool.
I. The player must replace a killed formation leader from the Leader Pool if possible before substituting a leader from another formation.
5.0 FORMATIONS
A. Troop units are grouped together into a larger force (formation) to obtain advantages for movement, combat, and to enjoy the benefits of command by a leader. Each formation corresponds to a box printed on the Organization Display (Allied) or map (French), and is paired with a particular formation marker, which maneuvers on the map and indicates its location.
B. Formation pieces have Deployment Modes (5.3) that affect their movement and combat capabilities.
C. Each side has generic formations labeled Troops.
D. Formations are created (activated) during the Organization/Reorganization Segment of the turn (13.2.1).
E. Formations may be subordinated (brigaded) with other formations that have a senior leader in command.
5.1 Formation Displays
A. Each Formation Display consists of a small square for leaders, screening cavalry and other markers, a large rectangle divided into two areas respectively for formations and effective units, and one for broken units. A number track at the bottom records the current status of Morale Level and Administrative Points (APs).
B. For each formation, place the counter for the leader commanding it in the small box (marked L) in the upper right corner.
C. Place counters for brigaded formations and troop units (whose morale value is less than or equal to the formation's morale value) in the Effective Box of the formation's display.
D. Place troop units brigaded to a formation whose morale value is greater than the formation's morale value in the Broken Box of the formation's display.
E. The formation has a number track at the bottom to keep record of its Morale (5.2) and AP levels (4.2) by markers.
F. Place all screening cavalry (3.2.1) on top of the leader and all other markers covering them in that box.
G. A troop unit may be brigaded or unbrigaded from a formation in any OPs or Mobilization Phase but consumes 1 AP of a leader's total to do this.
H. Take a detached troop unit from its Formation Display, placing it in the map area the formation is in. Units that are reassigned are placed in their new, different formation boxes. Take a troop unit brigaded from the area with the formation from the map area, placing them on the formation's Organization Display.
I. If all units in a formation have been detached, reassigned, or destroyed, and the formation is left without units, it is deactivated. The leader returns to the Leader Pool. The formation marker is placed on its empty space on the organization display, ready to be reactivated.
5.2 Formation Morale
A. Individual troop units are effective as long as their printed morale value is less than or equal to the formation's morale recorded on its formation's number track. This can change at the end of any Battle Round.
B. When a unit's printed morale value exceeds the formation's current morale level, the unit is said to be Broken and the counter is moved from the Effective (left side) to the Broken (right side) section of the formation's box.
C. In combat, each unit that has been broken in the Lead Formation will have a negative influence on battle results (6.7.5).
D. When initially formed, a formation's morale level is 3.
E. A formation's morale value can increase or decrease due to battle, but never more than value of 9 or less than a value of 0.
F. Whenever a formation is in a battle in which its side causes fewer casualties than the opponent's side in the First Combat Round (6.3), decrease its Morale Value by 1 at the end of the round.
G. All formations of the losing side of a battle (6.16) decrease their morale by 1.
H. All formations of the winning side of a battle (6.16) increase their morale by 1.
I. Whenever a formation that has a morale value of less than 3 does not perform any actions (movement or combat) during an OPs Phase, it can increase its morale by 1, to a maximum of 3, at the end of the OPs Phase.
J. Optional Rule: Instead of having a guaranteed increase of morale for the formations as detailed in 5.2.L, the owner instead rolls 1D6. If the result is equal to or less than the formation's leader's Battle Ability, the formation's morale increases. Otherwise it does not. Brigaded formations can choose to use the superior leader's value instead of their leader's for this roll.
Editor's note: the printed cross-reference "5.2.L" in item J does not exist in this document; the guaranteed morale increase it refers to is item 5.2.I. Transcribed as printed.
5.3 Formation Deployment Mode
A. The Deployment Mode of a formation changes throughout the game and is a key concept. There are four possible Deployment Modes.
B. Formations have varied Movement and Combat capabilities depending on their Deployment Mode. Consult the formation Deployment Chart on the PAC.
C. Specific effects of a Deployment Mode are explained in the formation Deployment Chart plus the Movement (18.0) and Combat (6.0) rules.
D. Brigaded formations always have the same Deployment Mode as that of the Senior Leader's formation.
E. The formation marker's faces show two modes: March Order (front) and Line of Battle (back).
F. Echelon or Concentrated modes are indicated by the faces of a separate marker that is placed in the Leader's box of the formation's display.
Play Note: Be sure to keep the marker on the Organization Display so as not to reveal to the opponent, that a formation has assumed one of the deployment modes indicated by the marker.
G. Unbrigaded troops on the map are always regarded as in Line of Battle mode. Exception: Unbrigaded troops in a pass (18.3.10.D).
H. Formations can change Deployment Mode once at the beginning or end of their Movement in an OPs Phase at a cost of 1 MP.
I. A formation's MA for an OPs Phase is based on the Mode it starts the OPs Phase.
J. Formations can also change Deployment Mode during the Adjustment Round of battles (6.14) and after the battle has concluded (6.16).
K. Restrictions apply in terms of the order of modes to which formations may change, and are detailed in the Formation Deployment Chart. Thus two successive mode changes are required before a force in March Order can attain Concentrated mode.
5.4 Nationalities and Formations
A. The Allies may not mix units of different major allies in their formations.
B. Both sides may brigade units of minor allies (Naples, King's German Legion, Dutch-Belgian, Bavarian, Saxon) into their formations.
C. The Swiss have some special restrictions in the Basic Game (27.2) and Advanced Game (23.0).
D. In addition, the Allies may not brigade formations of different major allies under a senior leader of another nation.
Example: The Duke of Wellington may not lead a brigaded command that contains both British and Prussian formations.
E. In a battle where formations of different nationalities are in the Lead and Supporting boxes of the Battle Display, there is a -2 DRM (6.8.5).
6.0 COMBAT
Resolving a battle is mandatory in any area in which both players have units at the end of movement during an Operations Phase. Battles are extended sequences of combat interspersed with reaction movement and adjustment, then renewed combat. These steps are resolved sequentially.
6.1 General Rules
A. The Initiative player chooses the first battle to be resolved that Combat Segment of the OPs Phase.
B. Players will then alternate choosing battles to resolve during the rest of the Combat Segment of the OPs Phase.
C. Each battle must be fully resolved before selecting the next battle to be resolved.
D. There is no limit to the number of formations or units that may be present in an area where a battle is to be resolved.
E. Each combat is resolved through the Battle Sequence (6.3), noting the location on the board with the Battle Location Marker while Posting the Battle Display (6.2) and then resolving the battle.
F. A troop unit fights with the CF and morale ratings it shows at the instant of combat resolution.
6.2 Posting the Battle Display
A. The Battle Display map enables players to resolve battles with the texture and feel of a Grand Tactical engagement. Using it is integral to working through the combat sequence.
B. The Display represents a conceptual battlefield that permits players to keep track of all battle functions.
C. A key step in resolving Combat is to arrange the Battle Display so as to reflect the player's intentions for the forthcoming engagement.
D. The Cavalry Screen box contains any Cavalry unit/s the formation has on screening duty.
E. Posting cavalry unit(s) in the Cavalry Charge box affords certain tactical opportunities during battle.
Play Note: Disregard the Battle Conditions box in the Display, as well as the Supporting Cavalry Screens box, which are used only in the expansion modules for Beyond Waterloo Game.
6.2.1 The Battle Track
6.2.1.1 In General
The Battle Track on the Battle Display along with the Initiative Marker is used to indicate which segment of the Battle is occurring. It is divided into three boxes: First Combat Round, Battle Adjustment, and Second Combat Round. Step losses inflicted in the individual rounds are recorded by numbered loss markers being placed in the Battle Round box they occur in, and will facilitate in determining the winner at the end of the battle.
6.2.1.2 The Initiative Marker
The marker is printed on both sides, red (Allied) on one side and blue (French) on the other, to denote which player possesses the initiative at that point in the battle.
A. The marker should be initially set so that the appropriate side is up indicating who has initiative currently.
B. The marker is flipped at any time initiative is determined during the battle. This is vital because the initiative side reveals its Grand and Battle Tactical choices first.
C. The Initiative Marker moves from First Combat Round to Adjustments Round to Second Combat Round as the engagement is resolved.
6.2.2 Lead and Support Formations
When either player has multiple formations in a single battle, important limitations apply.
A. The player must select one formation among those participating as the Lead Formation. This formation's counter is removed from the map area the battle is being fought in and placed in the Lead formation box of the player's side of the Battle Display. If a player has only one formation involved, it is placed there.
B. If only unbrigaded troop units are in a battle area, then one of them can be the Lead Formation.
C. Move any screening cavalry (3.2.1) in the Lead Formation's Display box to the Cavalry Screen box of the display.
D. All other unbrigaded formations or troop units in the battle area are placed in the Supporting Formations Box.
6.2.3 Other Requirements
A. The Deployment Mode of the Lead Formation is used for the combat resolution (6.4.7). It fights at a combat strength as adjusted for its Deployment Mode.
B. Battle Tactics cards (6.5) that involve certain types of units can only be played if that type is in the Lead Formation.
C. Step losses must be extracted from units of the Lead formation first before troops in the Supporting Formations Box.
D. If the Lead Formation and other participating forces are of different nationalities (not counting Minor Allies), apply a -2 DRM.
E. Morale effects apply to all Lead and Supporting Formations.
F. Place the chosen Grand Tactics chit in the Grand Tactics Box on the player's side of the Battle Display.
6.3 The Battle Sequence
The term Battle Sequence is used to describe the full spectrum of actions that occur from the onset of an engagement through to its end. In case of any discrepancy, the details in the pertinent rules supersede anything in this list. Initiative may change during the Battle Adjustment Round as a result of the First Combat Round. Combat may be resolved twice in a battle (in the First Combat Round, then again in the Second Combat Round). Players follow these steps for each battle to be resolved:
6.3.1 Step 1
A. Players post the Battle Display (6.2). Each chooses a Grand Tactic chit (6.4) and places it on the Battle Display in its box.
B. Then each selects up to four Battle Tactics Cards (6.5) to use for the entire battle, placing them text side down.
C. Initiative is then determined for the First Combat Round.
First Combat Round
6.3.2 Step 2
A. Both players reveal their Grand Tactic choices and compare them with their opponent's choice using the Grand Tactics Matrix, generating possible FERT shifts (6.4.3).
B. If both players chose Retreat, no Battle will be fought and both players must move all their forces out of the area (Initiative player first).
C. If both players chose Hold Grand Tactics, no combat is resolved this round.
- If this is the First Combat Round, proceed to the Battle Adjustment Round.
- If this is the Second Combat Round, proceed to Step 11.
6.3.3 Step 3
Each player compares their Grand Tactic with the opponent's Deployment Mode on the Battle Deployment Chart, generating possible FERT DRMs (6.4.5).
6.3.4 Step 4
A. The Initiative Player reveals any Battle Tactics to be expended this round.
B. The opponent then reveals his/her own choices.
C. Determine the interactions of these cards and perform the Cavalry Charge subroutine if required.
6.3.5 Step 5
Both players check for any additional FERT DRMs: Leader Battle Value, Terrain Effects Chart, Cavalry Superiority, Fortresses, Nationalities (except Minor Allies), French National Guard, Broken Units, and/or Out of Supply (OOS). Use all applicable elements to calculate the final net DRM.
6.3.6 Step 6
A. Each player determines their final FERT Column by tallying all involved CFs, modified by Support status, Force March, or OOS conditions for base starting column.
B. Then adjust the column right or left per Steps 2 and 4, and from a comparison of both players' formations' morale (higher morale gets one column shift to right).
6.3.7 Step 7
A. Perform Final Resolution (6.9): each player rolls 2D6, applying the applicable net DRM to the roll.
B. Cross-reference the modified roll with the adjusted Combat Strength column on the FERT to find and apply the result to their opponent's engaged forces.
C. Place Loss Number Markers on the current Battle Round's box of the Display. The side with more casualties in (only) the First Combat Round reduces all of its participating formations' Morale levels down by one.
D. Tally the losses and adjust the VP scores.
E. If one player chose the Retreat Grand Tactic this round, or if all eligible fighting units of one side are eliminated, proceed to Battle Winner Determination (Step 11).
F. At the end of the First Combat Round, discard the Battle Tactics Cards that were played, so they become unavailable for the Second Combat Round of the Battle.
Battle Adjustment Round
6.3.8 Step 8: Reaction Movement Segment
A. (Refer to 6.13.) The Initiative side performs this first.
B. All leaders with a Reaction Rating and are within range of the battle area may move into, around, or toward the battle to the limit of their reaction radius.
C. Cavalry Screens may block entry to formations attempting Reaction Movement.
6.3.9 Step 9: Adjustments Segment
A. (Refer to 6.14.) First determine initiative and flip the marker if needed.
B. Then make battle adjustments: change formation Deployment Mode, change Lead Formation, senior leaders may brigade other formations in the battle area.
C. Each player selects a new Grand Tactic for the Second Combat Round.
D. If deciding to destroy a fortification, pay 3 RPs now for Siege Equipment.
Second Combat Round
6.3.10 Step 10
This round is performed by repeating Steps 2 to 7 (above) in order again.
6.3.11 Step 11 Battle Winner Determination
A. (Refer to 6.16.) If one side withdrew, or all of its combat units were eliminated, its opponent is the winner.
B. If both sides retreated, there is no winner.
C. Otherwise, each side adds together all losses from the battle (First and Second Rounds).
D. The player who has caused more casualties in the battle is the winner.
E. The loser must now Withdraw (6.11) from the area.
F. If both players caused the same amount of casualties, there is no winner, and the player with fewer CFs remaining must Withdraw from the area.
G. Change Deployment Mode if desired.
H. After resolution of the Second Combat Round, proceed to the next battle to be resolved.
Game Play Note: This sequence is replicated on the Expanded Sequence of Play for player reference.
6.4 Grand Tactics Chits
6.4.1 In General
A. Players have chits to indicate Grand Tactics, which represents the commander's overall battle strategy for that Battle round. They are broad approaches (e.g. General Advance or Right Flank Attack). The Grand Tactic selected is compared to the opponent's Grand Tactic to generate possible FERT column shifts, and to the opponent's Deployment Mode to determine potential FERT DRMs.
B. Grand Tactics also adjust the combat value of the player's participating forces, depending upon their current Deployment Mode.
C. A Grand Tactic selection applies solely to the current round of Combat.
D. A new selection is made for the Second Combat Round during the Battle Adjustment Round.
E. If both players have revealed Retreat Grand Tactics chits, no battle will be fought, and both players must Withdraw (6.11), Initiative player first.
F. If both players reveal Hold Grand Tactics chits, no combat is resolved in this round.
- If this is the First Combat Round, proceed immediately to the Battle Adjustment Round.
- If this is the Second Combat Round, the battle is over. Proceed to determining the winner (6.16).
6.4.2 Grand Tactics Matrix
Each side simultaneously reveals the Grand Tactic chit selected in Step 2 of the Battle Sequence.
A. Using the Grand Tactics Matrix Table, each side correlates its Grand Tactic with that of its opponent.
B. The matrix lists the player's possible choices down the left column of the table, and the opponent's selection across the column's title row.
C. The cross-section of these Grand Tactics on the Matrix yields a modifier for the FERT consisting of column shifts left (L) or right (R) to determine the final resolution column on the FERT.
Example: Player 1 selected Left Flank Attack, and Player 2 has General Advance. For Player 1, this comparison yields a 1R column modifier for the FERT. Player 2 also obtains a 1R column shift for the FERT.
6.4.3 Battle Deployment Matrix
A. Cross reference the Grand Tactic selection to the opponent's force's Deployment Mode on the Battle Deployment Matrix.
B. The Grand Tactics are ranged down the far left of the table, while the opponent's Deployment Mode is across the top of the columns on the table.
C. The cross-referenced result yields a DRM to be applied to the 2D6 roll on the FERT.
Example: Continuing the previous example, assume that Player 1 is in Echelon mode and Player 2 is in Line of Battle. When Player 1 takes Left Flank Attack and compares it to the opponent's Line of Battle disposition, the result is a +2 DRM. Player 2 takes the General Advance against the opponent in Echelon and derives a -1 DRM.)
6.4.4 Deployment Mode and Grand Tactics
Formations in certain Deployment Modes are not permitted to use some Grand Tactics. The player's force's combat strengths can be doubled or halved when using a given Grand Tactic per the Formation Deployment Chart.
6.5 Battle Tactics Cards
A. These cards represent individual battle actions the commander may take during the battle.
B. There are 12 possible Battle Tactics, but each player selects up to four to use for the entire battle, placing them facedown in front before resolution of the combat begins.
Game Play Note: The player may deceive the opponent as to Battle Tactics selections by placing Battle Tactics cards in front and never using them.
C. These Battle Tactics cards are used only once and during one battle round for the entire battle.
D. Some Battle Tactics require the presence of certain types of forces (Guards, cavalry), Deployment Modes, RP expenditures, or they introduce combat subroutines.
E. After having determined the Grand Tactic's conditions applicable to the First Combat Round, each player decides which Battle Tactics Cards to use for the entire battle.
F. Players may expend none, one, or up to all their Battle Tactics in either round of the battle.
G. The Initiative player reveals Battle Tactics first, by flipping the cards up to play this round.
H. The non-Initiative player then does the same.
I. Both sides' Battle Tactics Cards are implemented after all cards both players will use for a battle round have been revealed. In determining the impact of the Battle Tactics, first check which card effects cancel the opponent's Battle Matrix effects, then cards the opponent has played.
J. Battle Tactics remaining and unchallenged create DRMs or affect strength points or columns used on the FERT. After the combat dice roll, apply any card effects that change FERT results, including losses.
K. Either player may have made card selections s/he subsequently chooses not to employ during the battle. If so, they are not revealed in a round.
L. The Grand Battery special tactic may be used only once per OPs Phase regardless of how many battles take place.
M. All other Battle Tactics Cards may be reused in every new battle.
6.6 Additional Combat Strength Modifications
A. All Supporting Formations or individual troop units participate with only half of their combat strength.
B. Any formation that Force Marched (18.4) has its total CF halved.
C. A formation that is OOS has its total CF halved (16.5.5).
D. Round up any fractions.
E. These effects are cumulative.
Example: A formation in Movement Order that also Force Marched may use only one quarter of its strength.
6.7 Morale in Battle
A. Players compare the current morale value of their Lead Formations.
B. The side with the higher morale receives a 1 right (R) column shift in its favor on the FERT.
C. In battle comparisons, a formation always has Morale Superiority over an unbrigaded combat unit that is the opponent's Lead formation.
D. Morale Superiority does not apply against an opponent holding a fortress in the battle area.
E. Also, each unit that is Broken (Troop unit's morale value is higher than their formation's morale level) in a player's Lead Formation (only) incurs a -1 DRM when resolving the FERT roll.
Editor's note: in the source, item B of 6.7 is printed after item E; it is placed here in its lettered position.
6.8 Additional DRMs to FERT
A. The side which has more total cavalry CFs involved in the battle, not including screening cavalry units, receives a +2 DRM to its FERT DR.
B. The side with fewer total cavalry CFs involved in the battle, not including screening cavalry units, receives a -1 DRM to its FERT DR.
C. Each side adds its leader's Battle Ability as a DRM to its FERT DR.
D. The French apply a -1 DRM per National Guard unit participating in the battle.
E. If the Allies have more than one Major Nation involved in the battle, apply a -2 DRM.
F. An area's terrain or the border terrain a player crossed to enter, and the player's Formation Modes, can also cause a DRM.
6.9 Final Resolution
A. Each side finds the column reflecting the adjusted combat value of all of its participating forces.
B. Modify the column for all column shift adjustments (Morale Levels and Grand Tactics comparisons).
C. Each side calculates all DRMs to derive its net DRM to apply to its roll from the DRMs listed below the FERT.
D. Roll 2D6 and apply the net DRM.
E. Cross-reference the modified 2D6 roll on the modified column on the FERT.
F. The result indicates the number of step losses inflicted on the enemy (6.10).
G. Apply the losses per 6.10.
6.10 Combat Losses
6.10.1 In General
A. Once both sides have resolved their FERT rolls, each distributes the requisite number of step losses received.
B. The owner chooses the troop units from the Lead formation first to extract the losses, and determines how many steps to take from each troop unit.
C. Corps-size units may be reduced to divisions (3.6.4).
Editor's note: the printed cross-reference "3.6.4" does not exist in this document; the corps-to-division rule is in 3.6 (items D and G). Transcribed as printed.
D. Use of the Cavalry Charge or Guard Assault Battle Tactics requires that the first loss must be extracted from that type of unit.
6.10.2 French National Guard
When National Guards are present with other units, the French must extract two step losses from regular units before they may apply a single step loss against a National Guard unit.
6.10.3 Other Requirements
A. Players can experience Formation Morale Consequences from their losses (5.2).
B. Players score 1 VP per loss indicated on their opponent by the FERT result (even if the opponent does not have enough steps to accommodate that loss level).
C. Place a numbered loss marker (or markers) equal to the result's value on the Battle Display in the current round box to record each player's loss. These are used to determine morale adjustments and the winner of the battle at the end of the battle.
6.11 Withdrawal
A. If either side selects the Retreat Grand Tactic, then all its forces in the area must withdraw (leave) from the area.
Game Play Note: In the Combat Game, the battle ends at the conclusion of the round this occurs.
B. The withdrawing side suffers one step loss. Mark it in the current round box on the Battle Display.
C. If both sides withdraw, the Initiative side withdraws first, next the opponent, and then both sides incur a step loss.
D. The forces that entered the area to instigate the battle or if they Reaction moved into the area (6.13) must withdraw into the area they entered from if possible.
E. Otherwise, formations and units that withdraw must enter an area free of opposing units and into which they would be able to move in their current Deployment Mode.
F. They must retreat into an area in which they still would be in supply (16.0) if possible.
G. If OOS, they must also withdraw into an area that is closer to their nearest supply source or magazine.
H. If unable to withdraw within these guidelines, the formation suffers an extra step loss and the opponent scores 1 VP.
I. In battles where neither side has chosen the Retreat Grand Tactic, the loser of the battle must withdraw from the area (using the above guidelines) at the end of the battle, but does not suffer the step loss for withdrawing as described above.
6.12 Battle Adjustment Round
A. No Battle Adjustment Round occurs if all forces on one side are eliminated in the First Combat Round or if one side retreats from the battle area.
B. The Battle Adjustment Round consists of two segments:
-
Reaction Movement Segment (6.13)
-
Adjustments Segment (6.14)
C. After both sides have completed their adjustments, play proceeds to the Second Combat Round.
6.13 Reaction Movement
6.13.1 In General
A. The round begins with a check on Initiative (1.1). The player with greater VPs, including those just awarded for combat, possesses the Initiative. That player moves first, followed by the opponent. The players begin by checking the Reaction Movement ratings of their Leaders.
B. All leaders have a Reaction Movement rating printed on their counter (their last number or •).
C. Leaders with a • rating, formations without leaders, and unbrigaded combat units are unable to perform Reaction Movement.
D. Leaders in an area where opposing troops are also present cannot make Reaction Moves.
E. A formation can move a number of areas corresponding to its leader's Reaction Movement value.
F. An eligible leader whose formation is within that distance in areas (exclusive of his area, inclusive of the battle area) from the battle area may move his formation.
G. A Reaction Move must always be directly toward or into the battle area.
H. Reaction Movement must be over permissible terrain, but it is not regular movement (18.0) and does not require MPs.
6.13.2 Interference with Reaction Movement
Formations moving just adjacent to or towards the battle area are not subject to Cavalry Screen interference. Formations reacting into the battle area may be blocked by the opponent's Cavalry Screen (3.2.1). If either or both sides possess screening cavalry, Reaction Movement becomes subject to a check.
A. Compare the screening cavalry's CFs of the formation attempting Reaction Movement with those of the opponent's Lead formation in the battle area. Either player may employ the Cavalry Charge Battle Tactic card to affect this comparison. The charge (3.2.3) will trigger a separate engagement between assaulting and screening cavalry that will generate its own losses and affect the Cavalry Screen comparison.
B. If both sides' Cavalry Screens have the same total CFs, then Reaction Movement is not impeded. If the player has a larger Cavalry Screen CF, there is also no impediment to Reaction Movement.
C. If the Reaction moving side has a lower Cavalry Screen CF, subtract its CF total from their opponent's cavalry screening CF total. The result becomes a +DRM value.
D. The Reaction Moving side rolls 1D6, applying the DRM from 6.13.2.C, then consults the Reaction Move Table.
E. Mark any losses in the Adjustment Round box on the Battle Track and award VPs for those losses.
6.14 Adjustments Segment
A. Both sides select a new Grand Tactic for use in the Second Combat Round.
B. Each side may at this time:
- Alter the Deployment Mode of its Lead Formation in the area.
- Brigade eligible formations under a senior leader in the area for a 1 AP cost.
- Change the designated Lead Formation in a multi-formation battle zone, by changing marker locations to reflect the changes.
6.15 Second Combat Round
A. Combat proceeds exactly as in the First Combat Round with noted exceptions.
B. No Battle Tactics cards are chosen. Players may play only what they have remaining unrevealed in front of them after the First Combat Round's play.
6.16 Battle Winner Determination
A. The victor of a battle is determined in one of four ways:
- If one side's participating combat units are completely eliminated, the opponent is the winner.
- If one side has chosen the Retreat Grand Tactic, the opponent is the winner of the battle.
- If neither player chose to retreat, the winner of the battle is the player who inflicted the most step losses in the battle.
- If both players caused the same amount of casualties, there is no winner, and the player with less CFs remaining must Withdraw from the area.
B. If both sides chose to retreat in the same round, there is no winner of the battle (no matter how many losses were inflicted).
C. The winner receives 1 VP.
D. All the winner's participating formations (even if brigaded) increase their morale by 1.
E. All the loser's participating formations (even if brigaded) reduce their morale by 1.
F. The loser of the battle must Withdraw (6.11).
G. Return all units, leaders, and markers to their formation's box.
H. Players may change participating formation's mode (after the battle has been resolved).
I. After the Battle Winner Determination Segment, play proceeds to the next as-yet unresolved battle, selected by the player who did not select this battle.
J. In Basic and Advanced level play, once the last battle is resolved the OPs Phase is complete. Play moves to the next Phase as indicated by the Turn Sequence Display.
7.0 THE GAME TURN
Play of Beyond Waterloo proceeds by game turns (hereafter referred to as turns), each of which corresponds to one month of calendar time. Within these complete turns a variety of actions occur at different levels of activity. All actions occur at given places in the Turn Sequence and at given Activity Levels. The players keep time with a pair of markers and two map displays. The Turn Track records the current game turn. Place the marker printed with a calendar here and move it forward at the end of each complete turn. The Turn Sequence Display records the specific phase of the turn underway. Use the marker with an analog clock face to denote this. Move the Clock Marker forward as phases are completed. Each time the marker reaches the red end space, a complete turn has passed. These rules explain differences between the levels of activity and detail the actions which take place in each phase of the turn.
7.1 The Turn Sequence Display
A. The Turn Sequence Display on the map has an inner and an outer circle, each divided into sections, and both connected at various points by a black line track with directional arrows indicating where the turn marker should proceed to next.
Game Play Note: The green and red lines are used only in the Advanced Game.
B. The outer circle represents Strategic Activities and includes functions related to the overall force postures of the sides.
C. The inner circle focuses on Operational Activities and comprises functions related to movement and combat.
D. The Turn Sequence Marker (Clock) will migrate between Strategic and Operational Activity and moves forward around the circular display as the turn progresses as indicated by the black line and directional arrow at its start.
7.2 Changing Activity Levels
A. The black line shifts up and down between circles from one level to another.
B. The red stop boxes on the circles are a reminder to move the marker to the other circle level to carry on the turn.
Exception: Advanced Game where no Allied nation has reached Active Hostilities with France.
C. The Start Turn box shows where the new game turn begins.
Game Play Note: In the Basic Game, the turn opens with the Mobilization Segment (of Strategic Activity), shifts to execution of two successive OPs Phases, returns to Strategic Activity for the Administration Phase, and then to the back to Operational level for OPs Phase 3. Play then proceeds to the next game turn. Be sure to complete all segments in a given phase before continuing to the next phase. The Advanced Game introduces a refinement to this sequence accommodating diplomatic play.
8.0 STRATEGIC ACTIVITY
At the Basic Game level, the players do things that create the overall context for the war. These include marshalling resources for the War Chest, procuring new troop units, putting them in training, changing leaders, and much more.
8.1 General Rules
A. During Strategic Activity both players execute most of these functions simultaneously unless otherwise stated.
B. In the Basic Game only the Mobilization Phase and an Administration Phase are used at Strategic Level.
C. The Mobilization Phase occurs at the beginning of each game turn.
D. The Administration Phase occurs in between Operations Phases 2 and 3.
8.2 Mobilization Phase
A. During the Mobilization Phase both players simultaneously use Resource Points (RPs) in their War Chests to prepare for hostilities and maintain formations.
B. Both players will perform activities in the following order:
- AP Reset Segment: Reset the APs for each formation to the commanding leader's value (4.2.7).
- Autonomous Diplomatic Segment: (Advanced Game, 21.3)
- Spanish/Portuguese Segment (Advanced Game, 21.7)
- Attrition Segment (9.0)
- Field Maintenance Segment (11.0)
- Leader Segment: Each player may replace one or exchange one pair of leaders (4.5.3) and perform Leader Wound recovery (4.6.3).
- Training Segment: Advance the Training status of units already undergoing training (12.2).
- Purchase Segment: Purchase Wagons (16.3.3) and recruit new combat units and put them in Training (12.2).
- French Recruitment Authorization Segment: The French (only) determine the number of units available to be placed into their Force Pool (12.3).
- Organize/Reorganize Segment (13.0)
- Rebuild Troop Units Segment (14.0)
- Off-Board Movement Segment: (Allied player only in the Basic Game) (15.0)
C. Upon completion of the Mobilization Segment play proceeds to OPs Phase 1 in the Basic Game.
8.3 Administration Phase
A. The final Strategic Activity of the turn is taking care of administration. This phase occurs no matter whether the turn reverts from Operational Activity (OPs Phase 2) or there has been a progression from the Diplomatic Phase (in the Advanced Game).
B. After resolving these, play in the Basic Game continues to OPs Phase 3 of the game turn.
C. Both sides perform the following activities in this order:
- AP Reset Segment: Reset the APs for each formation to the leader's value (4.2.7).
- Autonomous Diplomatic Segment (Advanced Game, 21.3)
- Supply Segment: Both sides convert wagons to magazines first (16.3.4). Both players examine the supply status (16.0) of their formations and mark any that may be affected by Out of Supply Markers.
- Attrition Segment: Both sides determine whether Attrition (9.0) is necessary and resolve it. At the end of this segment, remove all Force March Markers from formations (18.4).
- Political Actions Segment (Advanced Game, 26.0)
- Vendée Revolt Segment (Advanced Game, 26.4)
- Accumulate RP Segment (10.2)
- Off Board Movement Segment (15.0)
- Training Segment: Advance the Training status of units already undergoing training (12.2).
- Leader Segment: Each side may replace or exchange leaders (4.5.3) and attempt Leader
Wound Recovery (4.6.3).
D. Play then moves to the next phase.
9.0 ATTRITION
A. Attrition checks are made during the Mobilization Phase and again during the Administration Phase.
B. An attrition check must be performed for a formation once per segment if it falls under any one or more the following circumstances at that point:
- In any area containing more than one formation,
- The formation is marked with a Force Marched Marker (18.4),
- The formation is OOS (16.0).
C. Roll a die, modifying it as detailed below, then cross-reference the modified result with the total CF value of the formation on the Attrition Table.
D. The result on the Attrition Table can be no effect or a number of steps that the formation must lose from its troop units.
E. The owner chooses how to distribute its losses.
F. Screening cavalry (3.2.1) are the last troop units that can be chosen for attrition losses.
G. The opponent is awarded 1 VP per step lost due to Attrition.
H. The AP rating (4.2) of the formation's leader (or senior leader, if the formation is brigaded) is used as a negative DRM.
I. If attrition eliminates the last combat unit of a formation, it is removed from the board to its display box and the leader is moved to the Leader Force Pool.
J. Once Attrition has been resolved for a formation with a Force Marched Marker during the Administration Phase, remove the marker.
10.0 WAR CHEST
The War Chest Track is used to record the treasury of stockpiled money (RPs) and prestige (VPs).
10.1 General Rules
A. RPs and VPs are indicated by markers on the War Chest Trac. The markers are continually adjusted to reflect events.
B. Most RPs are awarded during the Accumulate RP Segment of the Administration Phase from taxation and government profits.
C. VPs are awarded for battle gains/losses and other events listed on the VP schedule (20.3).
D. Neither side may not expend RPs or VPs it does not possess.
E. RPs are used to maintain formations (11.0), recruit new troops (12.2), rebuild troops on the board (14.2) or purchase supply capacity (16.3.3.A).
Game Play Note: Additional RP expenditures are added with the Advanced Game's Diplomacy actions.
F. VPs are used to help determine RP accumulation (10.2), and by the French to help with Force Pool unit availability (12.3).
G. A comparison between the VPs that players have in their War Chests determines the initiative player and possibly, at the game's end, who has won (20.0).
10.2 RP Accumulation
A. During the Accumulate RP Segment of the Administration Phase, players replenish their War Chests with new RPs. The procedure differs slightly for the two sides.
B. Each performs this activity by rolling 2D6, applying any modifiers (per below), and then cross-referencing the modified result with the appropriate column on the RP Acquisition Chart.
C. The column used is determined by calculating the difference between the two sides VP scores at that point.
D. The French modify their roll with the French War Minister's AP rating as a positive DRM (4.2).
E. The Allies choose any one of their leaders in play on the map and uses that officer's AP rating as a positive DRM.
F. A player may also spend 1 VP (maximum) for an additional +4 DRM.
G. The cross-referenced numerical result (modified roll and column) is the RP income for the player that turn.
H. Increase the accumulated RP value on the player's War Chest track by adjusting the RP Markers to reflect this new income.
Game Play Note: The French have additional modifiers added to this resolution in the Advanced Game (26.0).
11.0 FIELD MAINTENANCE
A. Keeping formations in the field requires constant upkeep. Players expend RPs to do so.
B. During the Maintenance Segment of the Mobilization Phase, each side pays an RP cost per active formation on the map and Off-Board Movement displays for maintenance.
C. Count the number of formation boxes with troop units in them and expend the number of RPs per formation as listed on the Resource Points Cost Chart. Adjust the RP Markers on the War Chest Track to reflect the expenditure.
D. If either side does not have enough RPs to maintain all of its formations on the map, then it must immediately disband formations until able to pay for those that remain on the board.
E. When a formation is disbanded, place the formation's leader in the Leader Pool Box. Take the individual units in the formation's organizational Box and place them in the area where the Formation Marker is located and put the Formation Marker into its Organizational Box.
F. Brigaded formations must be paid for on top of the senior leader's formation.
12.0 FORCE POOLS
12.1 General Rules
A. Each player has a stock of unused combat units at the start of play.
B. The forces available in the Force Pool and Divisions boxes will be augmented as the game proceeds by the addition of units lost in battle. Exception: French Recruitment Authorization (12.3).
C. The Allies place their losses directly into the either box as appropriate.
D. The French need to determine how much can be placed into the Force Pool box after they have recruited their units for the turn (12.3).
E. All new units are recruited from either the Force Pool or Divisions Pool.
F. All Allied Nations units form part of the Allied Force Pool and Divisions Pool.
12.2 Recruiting and Training
A. The Allies may recruit (purchase) new available pieces from their Force or Divisions Pool at an RP cost from the Resource Points Costs Table during the Purchase Segment of the Mobilization Phase.
B. The French may only recruit from their Force Pool. If they wish to recruit divisions, they will have to have moved them from their Divisions Pool to the Force Pool box after rolling on the FRAT (12.3).
C. An Allied RP expenditure may purchase an available unit of any nationality (player's choice).
D. Once recruited, a unit must be trained before it becomes available. Exceptions: Guards units (3.3.1), French National Guards (3.4), and Wagons (16.3.3).
E. Each side has a Unit Training Chart that consists of a series of boxes that represent stages of its training.
F. When recruited, a troop unit is placed in the Stage 1 box of that side's Unit Training Track.
G. During each Training Segment of the Administration and Mobilization Phases (not including the one in which it is recruited), a unit moves to the next higher stage of training until it reaches the Deployable Box.
H. Troop units that are in the Deployable Box at the start of the Training Segment are deployed to the map.
I. French units are placed at any friendly-controlled Supply Depot (16.2) on the map.
J. In the Basic Game, Allied units in the Deployable Box appear at the Entry Zone box for their nationality (marked with an E and connecting to an Off-Board Movement Track box with their nation's name).
K. Dutch-Belgian, Hanoverian, Nassau, and King's German Legion units arrive at the British Entry Zone box directly from the Deployable stage of training.
L. Swiss troops that are deployable appear in the Zurich area (N6).
Game Play Note: In the Advanced Game, Allied Recruitment and Training is restricted, and placement of trained troops is different.
12.3 French Recruitment Authorization Table (FRAT)
The French must go through an additional procedure for determining available new units to recruit.
Historical Note: On the French side, Napoléon's raising of additional forces faced special difficulties due to the instability of his political situation as well as the diminution of French war industry that had begun with his fall in 1814. Napoléon's prospects for success were also a factor in the willingness of Frenchmen to answer his call to arms.
A. During the French Recruitment Authorization Segment of the Mobilization Phase, the French roll 2D6 on the FRAT to determine how many new units from their Eliminated or Divisions Pool they can add to the Force Pool. These units can be recruited the next turn.
B. Find the column that corresponds to the current French VP differential between the French and the Allies (French VPs minus Allied VPs).
C. Roll 2D6, applying the AP rating of the French War Minister (4.4) as a positive DRM.
D. Prior to rolling, France may also spend 1 VP to have an additional +1 DRM. If used, reduce the VP total in the French War Chest Track.
E. The cross-referenced result (modified roll and VP differential column) is the total number of new division-sized troop units France may add to its Force Pool now.
F. For the purpose of choosing units, one corps (XXX) is the equivalent of two divisions (XX), and two National Guard units are the equivalent of one division.
G. There is no difference between infantry and cavalry units for these selections to the French Force Pool.
Game Play Note: Due to the differences in RP costs for units of various types as well as the ability to deploy National Guards without prior Training, the French would be wise to include a mixture of different types and sizes of units in the selections they add to the Force Pool.
13.0 ORGANIZATION/REORGANIZATION OF FORMATIONS
During the Organize/Reorganization Segment of the Mobilization Phase, redistribute, break down (3.7) or recombine (3.8) troop units within and among formations that occupy the same area on the map. New formations can be organized in this segment.
13.1 Reorganization
A. When redistributing troop units, shift the pieces around on the Organization Display (Allied) or map (French) from one formation to another.
B. Each troop unit moved, brigaded, unbrigaded, broken down (3.7), or built up (3.8) expends one AP of the formation's leader's APs available (4.2).
C. The ability to reorganize is limited by the formation's remaining APs and the specific units in the formation.
D. Units to be built up (3.8) must be in supply and in a formation with a leader.
13.2 Creating a New Formation
A. During the Organization/Reorganization Segment, a player can create a new formation if one is available (not currently on the map).
B. At least two units must be available to form a new formation and they must be in the same area or Off-Board Movement Track box.
C. Troop units that are in one formation can be shifted to another formation in the same area at no AP cost to the original formation, abiding by the formation composition rules (5.4).
D. Creating a new formation costs 2 RPs, which are immediately extracted from the player's War Chest.
E. Upon creation, the owner takes a leader from the Leader Pool (which began there at the start of the Mobilization Phase) and assigns him to command this new formation.
F. Set the Administration Marker to the AP Level of the leader appointed to command the formation.
G. The morale value of the new formation is set to 3.
14.0 REBUILDING TROOP UNITS
The players may strengthen units in the game to return them to full capability during the Rebuild Units Segment of the Mobilization Phase.
14.1 General Rules
A. To be rebuilt, the unit must be in a formation that is in supply (16.0).
B. Each rebuild costs 1 AP of a leader's AP rating (4.2.3).
C. There are two ways to rebuild units: Replacements
(14.2) and Recombination (14.3).
14.2 Replacements
A. Each side may replace a maximum of two steps of strength in a Rebuild Units Segment.
B. Each Allied nationality (British, Prussian, Russian, Austrian, and Spanish/Portuguese) may account for no more than one of these replacements.
C. Minor Allied units may not absorb replacements.
D. To perform a replacement, pay the RP cost (and flip the unit to its higher strength face.
14.3 Recombination
A. Only units brigaded in the same formation can be recombined.
B. A full strength division can replace one step of the strength of a corps. Remove the division to the Divisions Pool box and flip over the reduced corps troop unit to its full strength side. This procedure cannot be used to build up a division (that had been placed due to step losses applied to a corps) to become a reduced corps.
C. Two reduced-strength corps can combine into one full-strength corps. Place the lower morale value corps in the owner's Available Force Pool box (Allied) or Eliminated Box (French).
D. Two reduced-strength divisions can combine into one full strength division. Place the lower morale value Division in the owner's Divisions Pool box.
E. For the French, two full-strength National Guard units may restore one step of the strength of an Infantry division. Place the National Guard units in the French Eliminated box.
F. Reduced-strength divisions and National Guard units cannot combine with any corps.
15.0 OFF-BOARD MOVEMENT
A. Off-Board Movement occurs during Off-Board Movement Segments of the Mobilization and Administration Phases.
B. There are a series of Off-Board Movement displays that correspond to the Russo-Prussian route to northern Germany, the Austrian route to southern Germany and Italy, and the British route to Belgium.
C. Each track has an Entry Zone box (marked with an E) at the edge of the map. Exception: The British Entry Zone box is in the Channel Sea and the Spanish box is in mainland Spain.
D. In each Off-Board Movement Segment of the Mobilization or Administration Phases the player may move all Off-Board units or formations to one connected box on its display.
E. Units and formations that are in the last box of the Off-Board tracks can be moved into the connected map Entry Zone box.
F. Formations and units in an Entry Zone box will be able to move onto the map into the areas that the Entry Zone box lines lead to by paying the area's MP cost (see TEC) in the next OPs Phase of the turn.
G. In the Basic Game no troops or formations may enter the Off-Board Movement Track displays from the map.
Game Play Note: These rules are modified with some additions in the Advanced Game.
16.0 SUPPLY
Forces must be adequately supplied to exert their full potential.
16.1 General Rules
A. Supply status is determined during the Supply Segment of the Administration Phase (8.3).
B. To be in supply, a force must be within range of a Supply Source or else at the end of a Line of Supply (LOS) that starts at a valid supply source.
C. The LOS can be comprised of a chain of Magazines that link with the nation's Supply Source.
D. Automatic Supply: Formations in areas with undestroyed friendly fortresses (19.0) and individual combat units on the map are considered automatically in supply.
E. A formation's supply status remains in effect until the next turn's Supply Segment of the Administration Phase.
16.2 Supply Sources
A. Each Allied power traces supply of its formations to their map edge Entry Zone box (marked with and E and connecting back to an Off-Board Movement Track box with their nation's name).
B. For purposes of supply, the Russian and Prussian forces (which share the same Entry Zone) can share the Supply Source, but must each trace its own LOS.
C. The British Entry Zone is printed in the sea but should be considered adjacent to the two areas the arrows point to from its box.
D. French supply sources are the Depot symbols printed on the map.
E. The Austrians have two Entry Zones, both of which are their supply sources.
F. Swiss forces may always use Zurich (N6) as a supply source if friendly-controlled.
- They may use an Austrian supply source when an Allied Minor.
- They may use a French supply source if they switch sides to the French (Advanced Game, 23.2.5).
16.3 Supply Range
16.3.1 In General
A. Formations that are not physically present with their Supply Source must be within its range or connected by an LOS (16.4) to be in supply.
B. A supply source has a range of eight connected areas. Count the destination area but not the source area or zone.
C. The LOS may not cross an impassable border.
16.3.2 Wagons
The wagon counter is the basic building block part of the LOS. The wagon essentially conveys a quantity of supplies to a place where a magazine will be created.
A. Wagons are purchased with RPs during the Purchase Segment of the Mobilization Phase.
B. They are placed on the map in any area that is a current and functional link in an LOS.
Game Play Note: Thus a wagon does not need to be placed at the furthest-forward supply point or right at the Supply Source.
C. In wagon mode, it moves like other units and has an automatic MA of 2 MPs.
D. A wagon can be attached to a formation and then moves at the formation's speed.
E. The wagon is not a supply link and has no supply radius.
F. It may be expended (removed from the board) during the Supply Segment of the Administration Phase to provide supply for one formation in its area.
G. A wagon may be purchased immediately in the Purchase Segment in which a magazine was dismantled to make the counter available.
H. Whenever a wagon is in an area with opposing forces and with no friendly troop units, the wagon is captured. The opponent may replace the wagon with one of its wagons from a Force Pool belonging to any of the nations in the area. Remove the captured wagon from the map, placing it in the owner's Force Pool.
16.3.3 Magazines
Magazines are the intermediate to end links of an LOS, which extends the range of an original Supply Source.
A. Magazines are created by converting a wagon. Spend the required RPs and flip it to its reverse side.
B. Wagons can be converted to magazines during any Supply Segment of an Administration Phase (8.3.1), a Movement Segment of an OPs Phase (18.0), or during the Purchase Segment of the Mobilization Phase (16.3.3.A).
C. Once in place, a magazine cannot move.
D. A magazine has a supply range of four areas (measured inclusive of destination area, but not the area the magazine is in).
E. A magazine located in an area with a friendly fortress (including a destroyed fortress) has a range of six areas.
F. A player can remove a friendly magazine during the start of either the Movement Segment of an OPs Phase or the Purchase Segment of the Mobilization Phase to have a wagon available to build.
G. Whenever a magazine is in an area with opposing forces and with no friendly troop units, the magazine is captured. The opponent may replace the magazine with one of its magazines from a force pool belonging to any of the nations in the area. Remove the captured magazine from the map, placing it in the owner's Force Pool.
16.4 Line of Supply
A. Supply range extends beyond the radius of the Source by means of an LOS, made up of the original Supply Source plus a chain of magazine links.
B. The LOS is a series of contiguous areas, not occupied by enemy units, connecting a Supply Source to the formation in need of supply.
C. The LOS may not cross impassable terrain borders (Exception: Through a Pass, 18.3.4.), but is otherwise unaffected by terrain type.
D. A chain of Magazines, each within range of the next link, makes a Line of Supply.
16.5 Out of Supply
A. A formation that is found to be OOS automatically loses one step from a unit in it (owner's choice), and the opponent is awarded 1 VP.
B. While OOS the formation must undergo Attrition (9.0) during each Attrition Segment it is OOS.
C. An OOS formation may only move one area during the Movement Segment of the OPs Phase.
D. OOS formations may not Force March or perform any Organization/Reorganization actions.
E. If engaged in battle, the units of an OOS formation fight at half their total CFs (fractions rounded up).
F. Place an OOS Marker on an OOS formation until it is determined to be back in supply.
17.0 OPERATIONS PHASE
Most on-board movement and combat occurs at the Operational Activity level. In Operational Activity the players maneuver their forces on the map and engage in combat following the rules for Movement (18.0) and for Combat (6.0). Each Operations Phase is the equivalent of about ten days' time. Up to three Operations Phases occur in a game turn.
17.1 General Rules
In the Basic Game, there are three OPs Phases per turn. Each OPs Phase consists of the following segments:
17.2 Movement Segment
A. Both sides first flip all Force Marched Markers to their front. Then the Initiative side (1.1) may move any, all, or none of its formations and unbrigaded units that are on the map per the rules for Movement (18.0). Then the non-Initiative side conducts its own movements.
B. Once both sides have completed Movement play continues to the Combat Segment.
17.3 Combat Segment
All areas of the map that are occupied by forces of both players are considered to be mandatory battle areas and a Battle Sequence (6.3) must be resolved for each of these areas (6.0). The player with Initiative chooses the first battle to wage and then players alternate choosing Battles to resolve until all combats have been completed.
17.4 End of Phase
With the completion of the last battle to be resolved, the phase ends and play continues into the next phase as indicated on the Turn Sequence Display (see map).
Upon completion of OPs Phase 3, the turn ends, the Turn Record Marker moves ahead, and play continues with a new turn.
18.0 MOVEMENT
18.1 General Rules
A. All on-map movement takes place during OPs Phases by players moving any, all, or none of their formations, independent Wagons, and unbrigaded troop units.
B. Movement is always voluntary.
C. Magazines can never move.
D. French National Guards units can move only when they are part of a formation.
E. Within each OPs Phase, the Initiative side (1.1) moves all of its forces first and then the non-Initiative side does the same.
F. Movement is from one area to an adjacent area.
G. If two areas only meet at a border vertex, movement is not permitted between those areas.
Example: Units or formations may not move in either direction from La Pausse (H8) to Aurillac (H9) or from Firminy (I9) to Cruese (G8).
H. Area or border Terrain types have different MP costs to enter or cross and may prohibit crossing (18.3).
I. As a formation or unit moves, keep a running tally of MPs spent.
J. A moving formation or unit may not expend more MPs than its MA for that Movement Segment (Exception Force March, Section 18.4).
K. OOS formations (16.5.3) can move only one area and not across prohibited borders. Exception: Passes (18.3.4).
L. MPs cannot be transferred from one unit to another.
M. A formation's movement ends immediately and no further MPs may be expended when it enters an area containing enemy units.
N. Unbrigaded units may not move into an area with opposing units.
O. The non-Initiative side (moving second), whose forces begin their move in an area the Initiative side has entered (with units or formations), may exit only under specified conditions. The second side may Withdraw (6.11) if the Initiative side has no cavalry, no cavalry CFs on screen, or if the second side has more Cavalry CFs on screen than the opponent. If cavalry screens are equal, the second side may withdraw if its leader in command has more remaining APs than the opponent. Lone cavalry units may withdraw automatically, lone infantry cannot withdraw. In all situations the second side may not move its forces directly into the adjacent area(s) from which the Initiative side entered. No forces may move into Luxembourg. (This is noted on the map.)
Game Play Note: There is some limited normal map movement during the Off-Board Movement Segments in the Advanced Game.
Editor's note: the source prints a lettered item "P." with no text after item O; it is omitted here.
18.2 Movement Allowance and Deployment Mode
A. Each formation has an MA expressed as the maximum number of MPs that it can expend during a Movement Segment, depending upon its Deployment Mode at the start of the Movement Segment.
B. The MA a formation in a particular mode has for the Movement Segment is noted on the formation Deployment Chart.
C. Formations may change Deployment Mode at a cost of 1 MP during the Movement Segment.
D. The formation is permitted only one mode change, either at the beginning or end of its movement, in any Movement Segment.
Game Play Note: During C=combat a formation will have two additional opportunities to change Deployment Mode: during Battle Adjustment (6.14.2) and after a battle has finished (6.16.8).
E. Unbrigaded troop and wagon units have an MA of 2.
F. Brigaded wagons move at the rate of the formation they accompany.
G. Formations in a gray Pass box cannot change mode.
18.3 Movement and Terrain
18.3.1 In General
A. Each area has a given terrain type (clear, swamp, or highland) with MP cost to enter specified on the TEC (see the last page of these rules).
B. There may also be border terrain, such as rivers or highland, which impose an additional terrain cost to cross. Exception If entering a highland terrain area across a highland border, do not pay the additional highland border cost.
C. These MP costs are cumulative.
Example: Movement from Plombiéres (K5) to Epinal (K5) would consume 4 MPs (2 MPs to enter Highlands and +2 MPs to cross a Major River.)
D. A moving unit or formation may not enter an area unless they have enough MPs remaining to spend on the cost to enter.
E. A unit or formation that is in supply can always move to the next adjacent clear terrain area except where blocked by prohibited border terrain (18.3.9 or 18.1.15).
F. There is no additional MP cost to enter for areas containing fortresses or depots.
G. Units entering the map from an entry zone pay the area's terrain MP cost to enter it.
H. There is no MP cost for formations attaching or detaching individual troop units during movement.
18.3.2 Restricted Terrain
A. Only formations in March Order can enter an area that is Highland or Swamp terrain, although they may change Deployment Mode once they are in this type of terrain.
Game Play Note: This means that if entering one of these types of areas containing opposing units (as per 18.1.M, the moving formation's movement ends immediately), they cannot change mode before battle is started.
B. Formations can cross a Highland border (brown), but they may suffer additional adverse DRMs in the First Battle Round.
C. Formations can cross a River border, but they suffer additional adverse DRMs in the First Combat Round.
18.3.3 Prohibited Terrain
Pieces may not cross black area boundaries except via a Pass (18.3.4).
Examples: Movement between the following two areas is prohibited: Epinal (K5) to Colmar (L5), Calvados (E4) to Havre (F3), Bordeaux (D10) to either Charente (D9) or Saintes (D9), It-2 (L8) to It-3 (M8).
18.3.4 Passes
A. A Pass has a start and end point indicated by small white circles connected by a line through an impassable border on the map.
B. Some Passes on the map go through an entire mountainous area to exit in another area. A gray Pass box is printed on the map to allow the formation to end its movement in that area while it is still in the Pass.
C. A formation must be in March Order Deployment Mode to enter a Pass and must remain that way while in the Pass.
D. Unbrigaded troop units are assumed to be in March Order while in a Pass.
18.4 Force March
A. Formations that are in March Order (only) can Force March during any Movement Segment.
B. A formation that Force Marches may move an extra MP.
C. The owner simply states the decision to Force March and uses the additional MP.
D. Formations may not use the Force March benefit when they start, end, or move through a Pass.
E. Mark the formation with a Force March Marker (skull side up).
F. A formation may continue to Force March during subsequent OPs Phases.
G. A formation that Force Marches during the turn may use only half its CF in battle (fractions rounded up) during the OPs Phase in which it Force Marches. The skull face side (back) of this marker is a indicator of this.
H. Formations that Force Marched must undergo attrition during the Attrition Segments of the Mobilization and Administration Phases.
I. Remove the Force March Marker after Attrition has been performed in the Administration Phase.
Game Play Note: Formations that Force March in the third OPs Phase do not have the marker removed until the following turn's Administration Phase.
J. Flip the marker to its front side at the start of the next OPs Phase to reflect that its CF will not be halved this OPs' Combat Segment.
K. If Force Marching again in that OPs Phase's Movement Segment, flip the marker back over to its skull side to indicate the Combat Factor modification.
19.0 FORTRESSES
Fortresses are printed on the map. They are defensive works of great strength built over a long period. Historically, fortresses exercised great effect on operations, but during the Napoléonic era the number of extended sieges that occurred was small, perhaps fewer than two dozen (or about one per year). Fortresses have special properties but they are vulnerable.
A. Troop units and formations in a non-destroyed fortress are always considered to be in supply.
B. To obtain the fortress benefit, select the Hold Grand Tactic.
C. The Grand Tactics Matrix is skipped in the First Combat Round.
D. Cavalry (6.8) and Morale Superiority (6.7) are not effective against fortresses.
E. In addition to any DRM from the Battle Deployment Matrix, the opponent's units attacking a fortress incur a -5 DRM and a shift left of one column on the FERT.
F. These effects apply only for the First Combat Round. They are suspended in the Second Combat Round.
G. All these effects are lost if the fortress is destroyed.
H. Destroys an opponent's fortress by paying a premium of 3 RPs during the Battle Adjustment Round to include siege operations during the Second Combat Round.
I. The fortress is automatically destroyed and a marker is placed to indicate this.
J. Fortress benefits accrue only to the side occupying the area when the opponent enters to perform battle.
K. If the fortress is unoccupied and both sides enter the area during the same Operations Phase, there is no fortress effect.
20.0 VICTORY
20.1 War Termination (Game End)
The game can end in one of three ways:
A. It ends with the passage of one complete turn after any turn in which Paris became controlled by the Allies and they retain control.
B. The game ends with fulfillment of Catastrophic Failure as detailed in the scenario's special rules.
C. Otherwise, the game ends at the end of the December 1815 turn. The player with the most VPs wins.
20.2 Victory Points
A. VPs represent the prestige and stature gained by the belligerents in conflict with each other. They are awarded for various developments as listed in 20.3. However, unlike other simulations, VPs are not just measures of winning; they are instrumental to the game.
B. VPs are recorded on the players' War Chest Tracks.
C. VPs may be expended to get DRMs for French Recruiting Authorization and for the RP Acquisition Chart.
D. In the Advanced Game, VPs may also be used on the Diplomatic Developments Chart, for Allied Political Manipulation, French Police Activity, and in diplomatic agreements.
20.3 VP Awards
This list is also shown on page 3 of the Expanded Sequence of Play.
| VPs | Side | Event/Condition | Combat Game (superscript C) |
|---|---|---|---|
| 5 | Allies | Awarded in the Administration Segment of the turn a formation of a Major Allied Power first enters an area of France. | Yes |
| 5 | Allies | The French suffer Catastrophic Failure in any battle. | |
| 5 | Allies | Napoléon is killed. | Yes |
| 5 | Both | Control Paris at the end of the game. | |
| 3 | Both | Capture an enemy depot. | |
| 2 | Both | per enemy leader killed | Yes |
* This award is for VPs for steps the opponent loses by FERT result, even if the enemy lacks sufficient steps to satisfy the result (6.10.7).
When playing the Combat Game Scenario (27.1), use only the awards with a superscript C.
The Advanced Game
The Advanced Game layers onto the system the remaining rules necessary to include the prelude to war, in which all the involved nations struggled to prepare themselves to wage a new military campaign. Strategic play proceeds with strategic activity without interruption until diplomatic and/or other conditions result in Active Hostilities, which activates operational activity (OPs Phases). That is, to occur at all, the Operational Activity must be triggered. If triggered, the number of OPs Phases in that turn may be foreshortened depending upon the Strategic Phase during which war is triggered. If, on the other hand, play continues through all Strategic Phases without triggering operations, the Game Turn ends and players move on to the next game turn. A glance at the Turn Sequence Display shows how this works. The Advanced Game adds additional activities during the Administration and Mobilization Phases, as well as adding an entirely new phase, the Diplomatic Phase. The Advanced Game scenario starts in March 1815 (the moment when Napoléon reached Paris and regained control over the French state) and has the same end point as the Basic Game.
21.0 DIPLOMACY
21.1 Diplomatic Status
Each participant in the former coalition against Napoléon had certain interests and some issues with other partners. For his part, Napoléon had hopes of avoiding war with each of the Allied powers that ranged from zero (Great Britain), to limited (Austria), to fair prospects (Switzerland). Since Napoléon himself was obliged to fight to protect his control of France against any enemy, France's own diplomatic situation is not tracked.
21.1.1 In General
A. The various Major Allied Nations separately measure their Diplomatic Status vis a vis France using a marker on the Diplomatic Status Track.
B. Activities of the forces of nations that are at levels short of Active Hostilities are restricted (22.0).
C. Diplomatic Status changes as the Allied player advances the markers of her/his nations during the various Segments of the Strategic Phases of game turns.
D. The forces of each Major Allied Nation and their Minor Allies are subject to their current Diplomatic Status, and remain unaffected by the status of any other Major Allied Nation.
E. When a Major Allied Nation is at the Active Hostilities level at the end of a Strategic Phase, it are at war with France (21.6).
21.1.2 Automatic War
A. If the French advance French forces into an area containing forces of an Major Allied Nation with whom it are not yet at war, the Diplomatic Status of that nation automatically advances to Active Hostilities (since combat is mandatory) and it are at war with France.
B. Because this situation can only occur when a state of war already exists with at least one other Major Allied Nation, this development will not affect the progress of play or the number of the current OPs Phases.
C. Battle will be resolved normally.
21.1.3 Diplomacy and the War
A. Chest Both RPs and VPs will be awarded for certain results from the Diplomatic Developments Chart (21.5).
B. In addition to the Basic Game functions of the War Chest, during the Advanced Game these will be used for modifications on the DDC (21.5), for Political Actions (26.1) as modified by Allied Spy Networks (26.2) and Police Activity (26.3), and by the Allies to support the Revolt in the Vendée (26.4).
21.2 Allied Move to War
21.2.1 In General
A. There are five levels of Diplomatic Status for a Major Allied Nation. In increasing order they are: Peace, Opposition, Military Preparations, Armed Belligerence, and Active Hostilities.
B. Each of the Major Allied Nations records its status with its own marker on the Diplomacy Track.
C. At the start of the Advanced Game, all Major Allied Nations' Political Markers are set at the Peace level.
D. During the Strategic Phases of each game turn the Allies advance the Diplomatic Status of their Major Allied Nations by two main methods: use of the Autonomous Diplomatic Development (21.3) and the roll results from the DDC (21.5).
E. Major Allied Nations and their Minor Allies are restricted in what activities they perform during a Strategic Phase as detailed in Module 22.0.
F. Only the Major Allied Nations and any of their Minor Allies at war with France participate in OPs Phases (17.0).
21.2.2 Momentum of Action
Because Diplomatic events can reduce the level of a Major Allied Nation's Diplomatic Status closer to Peace, it is possible that the player has already begin Recruiting and Training forces, or moving on the Off-Board Tracks, only to find out that the Major Allied Nation's status has fallen below the level required for the particular activity (22.0).
A. If so, the activity is frozen until the Major Allied Nation regains its higher-level status.
B. Training or Movement that has already occurred is not taken back and formations/units abide by the restrictions of the current diplomatic status level they are at (22.2).
21.3 Autonomous Diplomatic Developments
The Allies were determined to fight France regardless of any serendipitous events such as provided in the Diplomatic Developments Chart.
A. An Autonomous Diplomatic Segment is added to the Mobilization Phase so that the Allies may move the Diplomatic Status of one nation toward or into Active Hostilities by one level at this time.
B. An Autonomous Diplomatic Segment is also added to the Administration Phase of the turn so that the Allies may advance the Diplomatic Status of one nation by two levels, or two nations by one level each, towards or into Active Hostilities.
C. Certain DDC events (21.5) may freeze the status of one or another Major Allied Nation for the turn. These prohibitions apply to the Autonomous Diplomatic Developments as well.
D. These autonomous level increases continue to occur for Major Allied Nations not at war with France even after one Major Allied Nation is at war with France, and only stop for the nation if they at war with France.
21.4 Diplomatic Phase
At the outset of the 1815 Campaign, Napoléon has just restored his control over France, and the coalition of Allied Powers, which had been set against him a year previously, has been bickering over territorial and political issues at the Congress of Vienna. None is prepared for war, nor is France itself. Developments along the path to war will have an impact upon its course and outcome. To model this situation, a diplomatic aspect is necessary in this game. The following rules attempt to capture aspects of these political matters.
A. The Diplomatic Phase consists of the following Segments:
- Negotiations Segment (21.8)
- Diplomatic Developments Events Segment (21.5)
B. Certain of these results may drive Major Allied Nations further toward war. If one or more Major Allied nation reach the Active Hostilities Level at the end of this Phase, play proceeds to OPs Phase 2. Otherwise play continues to the Administration Phase.
21.5 Diplomatic Developments Chart (DDC)
A. Each turn during the Diplomatic Developments Events Segment of the Diplomatic Phase, both sides roll on the DDC to ascertain a special event that affects the game status.
B. Since each side rolls for a diplomatic event, up to two events may occur each turn.
C. The Initiative side (1.1) resolves its Diplomatic Event roll first and then the non-Initiative side.
D. Toll with 2D6 of different colors, using one die as the tens digit, the other die as the ones digit, to derive a two-digit number result.
Example: Player declares the first colored die as tens and the second colored die as ones. A 3 is rolled for the first and a 4 for the second. This is read as 34.
E. Cross-reference the roll's modified result on the DDC and implement its result's text immediately.
F. Results will include instructions regarding Diplomatic Status plus awards or subtractions of VPs and/or RPs.
G. The first result may affect the second.
Example: If the first result provides that Prussian Diplomatic Status may not change this turn, and the second would modify the Prussian status, that portion of the second result is canceled.
H. Players may decide to create a DRM for this roll by spending up to 5 VPs prior to rolling the dice.
I. Each VP creates a positive or negative 1 DRM (player decides whether positive or negative after the roll) which is added to the ones die.
J. Since this is a base 6 DR, if the positive DRM takes the ones value higher than 6, increase the tens value by one and take the remaining amount above 6 as the new 1s value. Or if used as a negative DRM and the ones value goes below 1, decrease the tens value by one and subtract the remaining amount from 6 to get the new ones value.
Example: The Allies spend 4 VPs for a DRM. The roll result is 33. Either add 4 to this result for a modified result of 41, or subtract 4, which would modify the result to a 25.
21.6 Entering Operational Activity
As a result of Diplomatic activities, the Major Allied Nations will enter the war at different times in the game. This has specific consequences.
A. When the Diplomatic Status of any Major Allied Nation reaches the level of Active Hostilities and remains there at the end of the phase, it is at war with France.
B. If a Diplomatic Status Marker reaches the Active Hostilities level and another Diplomatic event occurs during that same phase which reduces it to below that level, war has not begun.
C. If any Major Allied Nation reaches the diplomatic status of Active Hostilities with France:
- At the end of the Mobilization Phase, play will proceed to OPs Phase 1.
- At the end of the Diplomacy Phase, play will proceed to OPs Phase 2.
- At the end of the Administration Phase, play will proceed to OPs Phase 3.
D. If not, the turn continues on to the next Phase of Strategic Level Activity.
E. Once Active Hostilities has begun with one Major Allied Nation, from that point forward, there is no longer a Diplomatic Phase, and each turn opens with the Mobilization Phase, proceeds to OPs Phases 1 and 2, then reverts to the Administration Phase, and ends with OPs Phase 3 (see Turn Sequence Display printed on the map).
Game Play Note: Typically, one Major Allied Nation will reach Active Hostilities before the others, leaving the other Major Allied Nations at various stages of their moves toward war.
F. The Diplomatic Status of the Major Allied Nations not at Active Hostilities will continue to advance toward that level as a result of Autonomous Diplomatic Developments (21.3). In the meantime, those Major Allied Nations conduct activities permitted by their current Diplomatic Status level (22.2).
21.7 Spain and Portugal
While ostensibly enlisted among the Allied powers, Spain and Portugal were reluctant to assemble their forces and actually enter the war. The Advanced Game scenario deployment actually represents the Spanish/Portuguese forces already concentrated.
A. To recreate the underlying paralysis, Spanish/Portuguese entry into hostilities will be the subject of a 1D6 roll made during the Spanish/Portuguese Segment of the Mobilization Phase if both of these conditions are valid:
- The Allied player may not begin these entry attempts until the Mobilization Phase following the turn in which the Spanish Diplomatic Status reaches Armed Belligerence.
- The Allied player must also be ahead in VPs for this roll to take place.
B. The Allies roll 1D6, applies any applicable DRMs as listed, and implements the result on the Spanish/Portuguese Paralysis Table.
21.8 Negotiations
Although the advent of war was a nearly forgone conclusion, on both sides there were other considerations of timing and war preparations that might improve their prospects in the larger situation. It is highly recommended that players become familiar with the Advanced Game before adding this to their game play.
A. Players may negotiate whatever agreements they wish during the Negotiations Segment, with any appropriate terms, as long as there are not against the rules.
B. Due to negotiations, an Allied Nation's Diplomatic Status can never be altered by more than one level in either direction.
Example: The players could reach agreement for one or both to pass up using the DDC, negate Swiss Neutrality Diplomatic events, or not move certain formations for this and/or subsequent turns, based upon some consideration one way or the other (e.g., grants of RPs or VPs).
22.0 DIPLOMATIC LEVEL RESTRICTIONS
22.1 French Rules
The French may always participate in all mobilization activities with the following adjustments:
A. The French may move one unit or formation on the main map, using an MA of 6, during the Off-Board Movement Segment of the Mobilization and Administration Phases.
B. This force may not move across an international border (2.1.7).
C. This limited map movement ends for the French once they are at war (Active Hostilities) with a Major Allied Nation (they will be moving their formations and units during the OPs Phases).
22.2 Allied Rules
A. A Major Allied Nation (with its Minor Allies) may participate only in certain activities when its nation's Diplomatic Status has reached a noted level as detailed below.
B. Prior to reaching the levels listed below, Major Allied Nations and their Minor Allies may only participate in Diplomatic activities: the two Autonomous Diplomatic Segments and all the Diplomatic Phase Segments.
C. When a Major Allied Nation reaches the War Preparations level it may begin performing the activities listed below:
- Recruit and Train troop units (12.2).
- Move one troop unit or formation and all wagons on their Off-Board Movement Track during the Off-Board Movement Segments.
D. When a Major Allied Nation reaches the Armed Belligerence level it may perform these activities:
- Begin moving all its forces on its Off-Board Movement Track during the Off-Board Movement Segments.
- On the map, it may move one unbrigaded troop unit or a formation up to 6 MPs during each Off-Board Movement Segment following all standard rules for Movement (18.0) except for determining a formation's MA based on its Deployment Mode. a. Units moved cannot enter areas containing enemy units, even if those areas also contain friendly forces. b. Allied formations and troop units moved cannot cross international borders (2.1.7).
- Units that have arrived at their Off-Board Movement Track Entry Zone box remain there until their nation reaches the Active Hostilities level or the player chooses one of his/her formation or Troop units located in the Entry Zone Box to be the moving on-board force (22.2.3b).
E. Limited map movement (22.2.3b) ends for an Allied Nation once it is at Active Hostilities with France and it is moving in its OPs Phases.
22.3 Louis XVIII and the French Royalists
King Louis XVIII escaped across the border into Belgium as Napoléon assumed power. The French Royalists did not simply disappear from the face of Europe; rather they planned and plotted King Louis' return and began recruiting troops for a Royalist army. By virtue of that Louis XVIII's Court became an obvious target for the resurgent Napoléon.
A. This rule includes several counters to incorporate the interplay of these interests. One represents King Louis' Court; the others are Royalist army units.
B. These forces are considered as minor allies to all Coalition nations and thus can be brigaded to any Coalition formation.
22.3.1 The Royal Court
A. Set p the counter for the Royal Court at Ostend (H-1).
B. The Royal Court must be on the map for Royalist troops to enter the game.
C. This unit may not move by itself, but it may accompany other units of the Coalition.
D. It can be brigaded with any Coalition formation.
E. If by itself in an area that French forces enter, the Court is captured and eliminated. The French receive 5 VPs.
F. If accompanying Coalition forces, the Royal Court is protected by them and is affected by any combat results they suffer.
G. If the Royal Court is unbrigaded but with other combat units in a battle, it functions as a Leader with a Battle Ability of 1.
22.3.2 The Duc de Berry Unit
A. This is the first of the Royalist forces, consisting of Louis XVIII's household troops of the Maison du Roi, plus those other early to rally to the Royalist cause. It has minimal combat factors (½) but very good morale (0).
B. The Berry unit appears at Ostend (H-1) during the Mobilization Phase of the June turn.
C. The Berry unit does not appear if the Royal Court is not in play.
22.3.3 The Royalist Corps
A. The Royalists planned to mobilize a much larger force by the fall of 1815, which is represented by the variant 3-3 Infantry Corps (its poor Morale reflecting the vagaries of impressment plus the diminution of Royalist sentiment over an extended campaign in which Napoléon had yet to be bested).
B. The Royalist Corps appears at Ostend (H-1) during the Mobilization Phase of the September 1815 turn.
C. The corps does not appear if the Royal Court is not in play.
23.0 MINOR ALLIES
All the Minor Allied nationalities included with the game may participate in the Advanced Game.
23.1 General Rules
A. Bavarian, Baden, and Württemberg units may be recruited and arrive at the Baden/Bavaria Box (only). Whenever Austrian Leader Schwarzenberg's formation reaches the Baden/Bavaria box of the Austrian Off-Board Movement Track, the Minor Allied Infantry Corps of Baden, Bavaria, and Württemberg automatically brigade with the formation at no AP cost.
B. The Sardinian Infantry Corps is not placed into the Allied Force Pool to be recruited until after all of Murat's (Naples) forces have been eliminated or Murat is killed. When built and trained, it must appear in the Genoa area on the map.
C. There are two Minor Allied Infantry Divisions in the Allied Divisions Pool. These units may never be recruited. They are there for the purpose of replacing Minor Allied Corps that are reduced by combat.
D. If both unnamed Allied Infantry Divisions are on the board and another Minor Allied Corps needs to be replaced due to losses, that corps is eliminated instead.
E. When Dutch-Belgian and Hanover units are recruited and trained, they appear directly in the Brussels area.
F. Allied forces may not move into Switzerland, and Swiss forces on the map may not move, until Switzerland enters the war (DDC event 26).
G. See the Italian Option (25.0) for Naples special rules.
H. When trained, the Saxon unit deploys directly into the Prussian formation under Blücher's command.
I. Minor Allied troop units, once eliminated, are removed permanently from the game.
23.2 Minor Allies and Diplomacy
A. The deployment of these Minor Allied forces can be affected by Diplomatic Events.
B. Saxon troops are permanently removed from the game with a DDC event 43 result.
C. Polish forces enter play only by DDC Event 15, if not already in the game. The Polish unit appears on the Poland box of the Russo-Prussian Off-Board Movement Track.
D. DDC Event 26 has the Swiss enter the war and negates the 23.1.6 restriction. They will be free to cross the border and to brigade with Austrian forces.
E. DDC Event 54 confirms the restriction of 23.1.6.
F. DDC Event 62, if rolled a second time, makes the Swiss a French Minor ally. Subsequent DDC results can continue to alter the status of the Swiss.
G. If Swiss units are in the same area as Allied forces when this occurs, they must immediately withdraw into an area that is vacant or French-occupied and closer to a Supply Source they can now trace to (16.2.6).
24.0 MODIFICATIONS TO TRAINING AND FORMING GUARDS UNITS
24.1 Training Changes
Allied units from the Deployable box of the player's Training Track in the Advanced Game deploy to the Off-Board Movement Track box that has that Allied nation's Supply Source symbol, detailed below:
A. Austria: Austria Box B. England: Britain Box C. Prussia: West Prussia Box D. Russia: Russia Box E. Spain/Portugal: Spain Entry box
24.2 Creation of Additional Guards Units
A. This rule provides a procedure for increasing the number of elite Guards units for the British, French, Prussian, and Russian armies. Guards units typically have greater combat value and better Morale ratings than regular troops.
B. This promotion procedure is separate from and in addition to the process for rebuilding Guards units that are already in play.
24.2.1 Eligibility
A. A nation's additional Guards counters are not available to use until they are at war with another Major Nation. The counter mix supplied is a hard limit on the number of overall Guards units available.
B. The selection of an eligible unit and its promotion to Guards status occurs during the Training Segment of the Administration Phase (8.3).
C. Only one infantry division (French or British) or corps (Prussian or Russian) unit may be promoted per turn per side. Thus, the Coalition can only promote one unit from any one of its three eligible nationalities.
D. The regular unit to be promoted to Guards status must have been brigaded to the same formation, one that has increased its Morale Value in both Operations Phases 1 and 2 of a turn. Battlefield performance during Operations Phase 3 of a turn does not qualify a unit for Guards status.
24.2.2 Costs
A. Promotion to Guards status requires the formation's Leader to expend 1 AP.
B. Promotion also requires the expenditure of 2 RPs for a Division sized unit or 3 RPs for a Corps sized unit.
C. The AP or RPs are a precondition to promote the unit.
D. If an eligible unit of the required size is not available, no promotion occurs.
24.2.3 Procedure
A. Pay the costs and replace the counter being promoted with the corresponding Guard unit.
B. Return the counter being replaced to its Recruitment Pool (French) or the Force Pool (Coalition).
C. The newly promoted Guard unit must remain brigaded with the formation it was promoted in.
25.0 ITALIAN OPERATIONS
The Italian Off-Board Movement Track is a special Off-Board Display. It is the only Off-Board Movement Display where French forces are permitted to enter.
25.1 General Rules
A. During any Off-Board Movement Segment, the French can decide to have the Kingdom of Naples (Murat and the Naples' Troop units, alternately called Neapolitans) move and perform combat on the Italian Off-Board Movement Display.
B. If DDC event 36 occurs, Murat and the Neapolitans must move and attack the Austrians on the Italian Off-Board Movement track or on the Italian areas of the map. The Austrians may then also move and fight against the Neapolitans, even if they are not at Active Hostilities against France.
C. If Murat's Naples infantry become Broken or Murat is killed in combat, the French must check for defection.
- On a 1-3, the Neapolitan formation defects to the Austrians, the Naples troop units come under the control of the Allies, and the Murat leader counter is removed from the game.
- On a 4-6, they do not defect and continue to oppose the Allies.
D. During any Off-Board Movement Segment's special on map move (22.1.A) or OPs Phase, the French may pay 1MP to move forces into the Italian Off-Board Movement Track by having them enter the Entry Zone Box from either of the two map areas connected to it. These forces will then move during the Off-Board Movement Segments while in the Italian Display.
E. Neapolitan forces cannot enter the Austrian Off-Board Movement Track Display.
25.2 Combat
A. Neapolitan Forces can enter the main map, but they must move through the Italian Off-Board Movement Track to the Austrian Entry Zone Box in northern Italy to do so. Because one or more boxes of this Display may be occupied by Austrian forces, the Neapolitan formation will likely conduct combat to reach the board.
B. Any combat is performed during the Off-Board Movement Segment.
C. Off Board Movement Track combat is resolved using all normal combat rules with the following adjustments:
- There is no Reaction Movement during the Combat Sequence.
- A withdrawing force must move to a connected area or box.
D. If the French operate their own forces on the Italian Off-Board Movement Track, those forces' movement and combat occurs during the Off-Board Movement Segment (same as the Neapolitans).
E. Austrian forces in the Italian Off-Board Display may start moving by Off-Board Movement and enter a box containing Neapolitan units to perform combat with any of their forces located on that display as soon as the Neapolitans have attacked them on the display.
25.3 Supply
A. The Neapolitan forces supply source is the Naples box. They may also trace supply to any in-range French LOS if able to.
B. If any Neapolitan or French forces occupy the Italian Display Entry Zone box, Austria may not use this as a supply source.
C. Neapolitan movement may be required by a DDC event (21.5), or the French may initiate it voluntarily.
D. Combat with Naples does not affect Austrian Diplomatic Status versus France unless it is mandated by the DDC.
26.0 MODIFICATIONS TO THE ADMINISTRATION PHASE
26.1 Political Actions
Napoléon's prosecution of his war effort was critically dependent on the continued support of the French. If the people rejected his leadership, it would become more difficult both to attract recruits to the colors and to accumulate the resources to arm the troops and wage war. A simple way to model this is to use a dice roll to reflect French political conditions. Modifiers represent the evolving war situation plus Allied intervention.
The Allies may attempt to meddle in Napoléon's internal affairs, causing difficulties for the French war effort and direct military problems by means of fomenting revolt. The French may endeavor to avoid these eventualities. Certain outcomes may lead to additional belligerents entering a state of Active Hostilities. These types of activities are represented very generally by mechanics that affect French Mobilization and Movement.
A. At the start of the Political Actions Segment of the Administration Phase, the Allies roll 2D6, modifying the result as detailed below.
B. The modified roll is be the number of RPs that must be subtracted from those the French receive during the RP Acquisition Segment.
C. If the Allied VP total is higher than France's, apply a +1 DRM to the roll per VP the Allies have more the French.
D. The final total of RPs to be deducted can be influenced by Allied Spy Networks (26.2) and French Police Activity (26.3).
E. If the dice roll is a doubles (number on both dice the same), the Allies may immediately move one Major Allied Nation's Diplomatic Status Marker one box closer t into Active Hostilities (or into it, if the marker is at Armed Belligerence).
26.2 Allied Spy Networks
The Allies had important intelligence penetrations inside France, in part because of the swiftness of Napoléon's overthrow of King Louis XVIII. For example, the French police chief Fouché, and the key diplomat Caulaincourt, were both holdovers from Louis XVIII's administration and, before that, Napoléon's First Empire.
A. The Allies may activate Spy Networks by spending VPs.
B. The Allies must declare whether Spy Networks will be used before making the Political Actions 2D6 roll (26.1).
C. The Allies may spend up to 3 VPs on this.
D. For each VP spent, the French add 5 to the number of RPs they subtract from the Political Action roll result.
E. After the Allies announce how many VPs they are spending for this, the French announces if they are using Police Activity (26.3) to counteract some of this.
F. VPs spent are expended immediately from the Allied player's War Chest.
26.3 French Police Activity
The French may counteract a portion of Allied Spy Network activity.
A. Immediately after the Allies have activated Spy Networks and stated the amount of VPs they are expending, but before the Political Actions roll resolution, the French must choose whether to increase Police Activity.
B. If doing so, they may spend up to 2 VPs to reduce the effectiveness of the Allied Spy Network.
C. Each VP spent cancels the effect (not expenditure) of 1 Allied VP spent.
D. VPs spent are expended immediately from the French War Chest.
26.4 Revolt in the Vendée
The Allied player may also complicate Napoléon's problems by fomenting revolt. An ongoing revolt of royalists favoring Louis XVIII is in progress in the Vendée. Napoléon intervened against the revolt by deploying the Armée de l'Ouest formation in this area to suppress this revolt. The effect of the revolt was, like Political Action, to reduce French resources.
A. The French Armée de l'Ouest formation starts set up in the Vendée area, and may not move until it is attacked by an Allied force.
B. During the Vendée Revolt Segment of the Administration Phase, the Allies roll a number of dice (as determined below) for Vendée RP reductions.
C. The base amount is two dice for this roll.
D. The Allies may choose to aid the Vendée revolt by expending up to three packages of 1 VP plus 2 RPs each. For each package purchased, add one to the number of dice rolled for this turn to determine the Vendée RP reduction.
E. After the Allies determine how many dice to roll, and prior to making the roll, the French roll 1D6 per combat unit in the Armée de l'Ouest's formation. For each 6 rolled, reduce the number of dice rolled for the Vendée by one this turn.
F. The Allies then roll the remaining number of dice and total their values. This total is the amount that the French must also reduce during their RP Acquisition Segment (in addition to the Political Action amount).
G. Each time that at least one pair of the dice rolled are the same number, the Armée de l'Ouest formation incurs one step loss.
H. The Allies must commit to aid the revolt before the Armée de l'Ouest formation rolls for its effort to reduce the impact of the revolt.
27.0 SCENARIOS
A. The following listings specify the location on the map where forces appear, a formation, and what it is composed of (the leader and the type and number of units). In any case where a formation is named, place the leader and units in that formation's Organization Display box, putting only the formation marker on the map. For the French, some areas will contain both troop units and garrisons.
B. French listings appear first, followed by those for the Allies. The French category for the Eliminated Box represents troops that have to be admitted into the Force Pool through use of the FRAT procedure. The Allies are listed by their various nationalities, but all units of all nationalities designated for the Allied Force Pool and all leaders listed for the Leader Pool belong to one single Allied pool of that type. All Allied units are procured by RP expenditures from one overall Allied War Chest.
C. Each player's listings (except the Combat Game) begin with notations for RPs and VPs available at start, and those markers are set to those levels on the player's War Chest track. The Morale number is the level at which every formation begins. Any formations not listed should have their formation marker placed in the formation's Display box, to be placed on the map whenever that formation is activated.
D. Troop units are denominated by their strength (e.g. a "5 CF Corps") or type (e.g. a "Cav Corps"). If it is by type, the player should randomly pick a unit of that type and troop size (division or corps) without reference to its printed morale value.
E. Some scenario special rules appear at the end of the force listings.
Scenario force listing abbreviations
| Abbr | Name | Abbr | Name |
|---|---|---|---|
| B-N | Brunswick-Nassau | Inf | Infantry |
| Cav | Cavalry | KGL | King's German Legion |
| D-B | Dutch-Belgian | MA | Minor Ally/Allied/Allies |
| Div | Division(s) | N | Nassau |
| Gds | Guards | NG | National Guard |
| Han | Hanoverian | OG | Old Guard |
| IG |
27.1 Combat Game Scenario (Waterloo, June 18, 1815)
For purposes of conceptualizing how this scenario might fit within the full game, the Battle of Waterloo takes place on OPs Phase 2 of the June 1815 turn. Place the Battle Marker in the Waterloo area on the board.
27.1.1 Items Required for Play
A. To use the Combat Game players will require a small number of pieces from their sides' units and leaders.
B. The French only need to use three Formation Displays and the Allies just two Formation Displays. The Battle Display will be the major focus of game activity.
C. Forces in play will be located on just three areas on the map.
D. The Battle Round Marker is used in conjunction with the Battle Display, plus other numbered Loss Markers to record step losses.
E. The players will need the following tables and charts on the PAC: Fire Exchange Results Table (FERT), Grand Tactics Matrix, Battle Deployment Matrix, formation Deployment Chart, and Battle Development Sequence Checklist.
F. Since terrain is not a factor in this battle, the TEC will not need to be used in this scenario.
G. Only the second (battle rating) and third (reaction range) numbers of leaders play roles.
H. The battle rating of the commander of the Lead Formation is a DRM in resolving battle.
I. The Reaction Range enables unengaged formations in a map area near the battle (in this scenario, Prussian and French formations in the areas Wavre and Ligny) to attempt to enter the combat.
J. Both players begin with zero VPs. Use only the specially marked VP awards per 20.3.
K. All unused division units are available for casualty breakdown in this scenario.
Battle Round Marker: French Initiative side up for the start of the Battle.
Waterloo (I1): Place the Battle Location Marker.
27.1.2 French Setup Listings
Ligny (J2): Right Wing Formation Marker (in Line of Battle mode).
27.1.2.1 On the Battle Display
| Box | Contents |
|---|---|
| Lead Formation | Left Wing Formation Marker (in Line of Battle mode) |
| Supporting Formations | Armée du Nord Formation Marker (in Line of Battle mode) |
| Cavalry Screen | 1 x 2CF Cav Corps |
27.1.2.2 On the Formation's Displays
Set formation Morale of all formations to 3.
| Formation | Contents |
|---|---|
| Left Wing | Ney, 2 x 6CF Inf Corps, 1 x 3CF Cav Corps, 1 x 2CF Cav Corps |
| Armée du Nord | Napoléon, 1 x 4CF Inf Corps, 1 x 3CF Imp OG Inf Div, 1 x 2CF Imperial Young Guard Division, 1 x 2CF Imperial Guard Cavalry |
| Right Wing | Grouchy, 2 x 5 CF Infantry Corps, 1 x 4 CF Infantry Corps, 1 x 2 CF Cavalry Corps |
27.1.3 Allied Setup Listings
Wavre (J1): Prussian Army of Lower Rhine Formation Marker (in Line of Battle mode).
27.1.3.1 On the Battle Display
| Location | Contents |
|---|---|
| Lead formation | Anglo-Dutch-Belgian Formation Marker (in Line of Battle mode) |
| Cavalry Screen | 1 x KGL Cav Div |
27.1.3.2 On the Formation Displays
Set formation Morale of all formations to 3.
| Formation | Contents |
|---|---|
| Army of Lower Rhine | Blücher, 3 x 5CF Inf Corps, 1 x 4CF Inf Corps, 2 x 3CF Cavy Corps |
| Anglo-Dutch Belgian Army | Wellington with these British units: 1 x 5CF Gds Inf Corps, 1 x 5CF Inf Corps, 1 x 3CF Cavy Corps; and MA: 1 x Hanover Inf Corps, 1 x D-B (Dutch-Belg) Inf Corps, 1 x B-N (Brun-Nass) Inf Div, 1 x KGL Inf Div |
27.2 Special Rules
27.2.1 Catastrophic Failure
The 1815 Campaign was about the return of Napoléon to the head of France, and French combat performance depended critically upon the actions of the formation which Napoléon led. The Imperial Guard was closely associated with the Emperor.
A. To reflect this, the French player may suffer Catastrophic Failure in the case of setbacks to Napoléon or to the Imperial Guard.
B. If Napoléon is wounded, roll one die for additional Morale losses. On a 1-2, his formation incurs an additional Morale loss. The Allies also score 3 additional VPs for this.
C. If Napoléon is killed, there is an automatic 2-level Morale loss.
D. If the formation led by Napoléon reaches zero morale, the game ends instantly and VP scores are compared to determine the winner.
27.2.2 Grand Batteries
Ignore the rules provision that requires an RP expenditure for use of the Grand Battery Battle Tactic card (6.5).
27.2.3 Deployment Mode
During the limited timeframe of this scenario, each formation may change Deployment mode only once (during the Battle Adjustment Round). All formations initially set up in Line of Battle Deployment Mode.
27.2.4 Brigading Troop Units
There are no unbrigaded units in this scenario.
27.2.5 Screening Cavalry
A. The Troop Listings specify for some Cavalry units to be placed in the screen role. Place these units in the Cavalry Screen box of the Battle Display.
B. While a Cavalry Screen has additional functions in higher-level play, their principal role in the Combat Game is to impede the opponent's Reaction Movement (6.13).
Play Note: Screening Cavalry can be brought back from their mission during the battle's Adjustment Segment (6.14.5).
27.2.6 Winning the Game
If the game does not end by Catastrophic Failure, the winner is the player with the most VPs at the end.
Editor's note: the source prints both the Combat Game special rules and the Basic Game setup under the same 27.2.x numbering. The two blocks are kept in printed order, with the Basic Game setup following.
27.2 Basic Game Scenario
A. This Scenario begin on the June 1815 turn (Turn 4) and normally ends on December 1815 (Turn 10).
B. Each formation sets up its AP Marker at the AP value of its leader on the formation's lower track.
| Side | RPs | VPs | Morale Level |
|---|---|---|---|
| French | 85 | 10 | 3* |
| Allies | 195 | 10 | 3* |
* all formations at this level
27.2.1 French Setup
War Minister: Davout
27.2.1.1 On Map
| Location | Units |
|---|---|
| Paris (G5) or Laon (H3) | Napoléon, 3 x IG (2 x Inf Div, 1 x Cav Div), 1 x 4CF Corps; 1 x 1CF Inf Div, 1 x 1CF NG unit, 1 x Wagon |
| Doullens (H2) | Left Wing: Ney, 2 x 6CF Inf Corps, 3 x Cav Corps |
| Chalons (I4) | Right Wing: Grouchy, 2 x 5CF Inf Corps; 1 x 4CF Inf Corps; 1 x Cav Corps |
| Strasbourg (L5) | Armée du Rhin: Rapp, 1 x 5CF Inf Corps, 1 x 2CF Inf Div, 1 x ½CF NG unit, 1 x Cav Corps |
| Sâone (I7) | Armée du Jura: Lecourbe, 2 x 1CF Inf Div, 1 x 1CF NG |
| Lyons (I8) | Armée des Alpes: Suchet, 1 x 4CF Inf Corps, 1 x 1CF Inf Div, 1 x 1CF NG, 1 x Cav Div |
| Ventoux (I11) | Armée du Var: Brune. 2 x 1CF Inf Div |
| Perpignan (G13) | Armée des Pyrenées Orientale: Decaen, 2 x 1CF Inf Div |
| Bayonne (D12) | Armée des Pyrenées Occidentale: Clausel, 2 x 1CF Inf Div |
| Vendée (C7) |
27.2.1.2 French NG Garrisons
Take 5 x 1CF and 6 x ½CF NG units and place them one per area in the following fortress areas: Bayonne (D12), Perpignan (G13), Toulon, Grenoble, Lyons (I8), Besançon, Strasbourg (L5), Metz, Mezières, Maubeuge, and Lille.
27.2.1.3 French Div Pool
5 x 2CF Inf Div, 4 x 1CF Inf Div, 2 x Cav Div
27.2.1.4 In Training (Stage 1 box)
1 x 5CF Inf Corps, 1 x 3CF Inf Corps, 1 x 1CF Inf Div
27.2.1.5 French Force Pool
1 x 4CF Inf Corps, 2 x 3CF Inf Corps, 2 x 1CF Inf Div, 2 x Cav Div, 3 x 1CF or ½CF NG Units, 1 x Wagon
27.2.1.6 French Eliminated Box
2 x 5CF Inf Corps, 1 x 4CF Corps, 2 x 3CF Inf Corps, 1 x Cav Corps, 4 remaining NG units
27.2.1.7 French Leader Pool
Gérard, Jourdan, Lefebvre, Massena, Préval, Soult
27.2.2 Allied Setup
27.2.2.1 Spanish/Portuguese Setup
27.2.2.1.1 On Map
May not move until July 1815 turn.
| Location | Units |
|---|---|
| Basque Country (C12) or Catalonia (G13)* | Spanish Army: Castaños, 5 x 4CF Inf Corps, 1 x Wagon |
* Allied player's choice
27.2.2.2.2 Allied Division Pool
2 x 1CF Inf Div
27.2.2.2.3 Allied Force Pool
3 x Wagons
27.2.2.3 Austrian Setup
27.2.2.3.1 On Map
| Location | Units |
|---|---|
| Zurich (N6) | 1 Army*: Bachmann, 2 x Swiss Corps |
| Milan (N9) | 1 x 1CF Inf Div |
| Turin (L9) | 1 x 1CF Inf Div |
| Genoa (N10) | 1 x 1CF Inf Div |
* Army of Switzerland
27.2.2.3.2 Austrian Off-Board Movement Display
| Box | Units |
|---|---|
| Bavaria/Baden | Army of the Rhine: Schwarzenberg, 3 x 5CF Inf Corps, 1 x Baden MA Corps, 1 x Württemburg MA Corps, 1 x Bavarian MA Corps, 2 x Cav Corps, 1 x Wagon |
| Vienna Box | 1 x 5CF Inf Corps, 1 x Wagon |
| Italy Entry Zone | Army of Italy: Frimont, 2 x 4CF Inf Corps, 1 x Sardinian MA Inf Corps, 1 x Cav Corps, 1 x Wagon |
27.2.2.3.3 Italy Off-Board Movement Track
| Location | Units |
|---|---|
| Quadrilateral Box | Army of Lower Italy: Bianchi, 1 x 4CF Inf Corps, 1 x Neapolitan MA Corps |
27.2.2.3.4 Allied Division Pool
3 x 1CF Inf Div, 2 x MA Div*
** to serve for all MA forces of all nationalities
27.2.2.3.5 Allied Force Pool
1 x 5-Inf Corps, 1 x 4CF Inf Corps, 1 x Cav Corps, 2 x Wagons
27.2.2.3.6 Allied Leader Pool
Charles, Hiller
27.2.2.4 Prussian Setup
27.2.2.4.1 On Map
| Location | Units |
|---|---|
| Namur (J2) | 1 x Magazine |
| Liège (J1) | Army of the Lower Rhine: Blücher, 3 x 5CF Inf Corps, 1 x 4CF Inf Corps, 1 x Saxon Corps, 2 x Cav Corps |
| In any of Ciney (P7), Eifel (P17) or Marche (P18) | Army of North Germany: Kleist, 1 x 1CF Inf Div, 1 x North German MA Corps, 1 x Hesse MA Div, 1 x Wagon |
27.2.2.4.2 Prussian/Russian Off-Board Movement Display
| Location | Units |
|---|---|
| Prussia Box | 1 x 6CF Guards Inf Corps, 2 x 4CF Inf Corps |
| Mayence (L3) | 1 x Inf Div, 1 x Magazine |
27.2.2.4.3 Allied Division Pool
4 x Inf Div
27.2.2.4.4 Allied Force Pool
1 x Wagon
27.2.2.4.5 Allied Leader Pool
Von Hake, Yorck
27.2.2.5 British Setup
27.2.2.5.1 On Map
| Location | Units |
|---|---|
| Ostend (H1) | 1 x 1CF Inf Div |
| Brussels (I1) | Anglo-Dutch-Belgian formation: Wellington, 1 x 5CF Gds Inf Corps, 1 x 5CF Inf Corps, 1 x Hanoverian MA Corps, 1 x D-B MA Corps, 1 x B-N MA Div, 1 x KGL Inf Div, 1 x KGL Cav Div, 1 x Cav Corps |
27.2.2.5.2 British Off-Board Movement Track
| Box | Units |
|---|---|
| Britain | 2 x 1CF Inf Div, 1 x Wagon |
27.2.2.5.3 Allied Division Pool
4 x 1CF Inf Div
27.2.2.5.4 Allied Force Pool
1 x Wagon
27.2.2.5.5 Allied Leader Pool
Byng, Hill, Orange
27.2.2.6 Russian Setup
27.2.2.6.1 Prussian-Russian Off-Board Movement Display
| Box | Units |
|---|---|
| Over the Rhine West | Army of the West: Barclay, 5 x 6CF Inf Corps, 2 x Cav Corps, 1 x Cossack Cav Corps, 1 x Wagon |
| Prussia | Army of Poland: Winzingerode, 1 x 6CF Inf Corps, 2 x 1CF Inf Div, 1 x Cav Corps, 1 x Wagon |
| Russia | Reserve Formation: Doctorov, 1 x 8CF Guards Inf Corps, 2 x 6CF Inf Corps, 2 x 1CF Inf Div, 1 x Wagon |
27.2.2.6.2 Allied Division Pool
5 x 1CF Inf Div
27.2.2.6.3 Allied Force Pool
1 x Cav Corps, 1 x Wagon
27.2.2.6.4 Allied Leader Pool
Volkonsky, Rayevsky
27.2.3 Special Rules
27.2.3.1 Catastrophic Failure
(This rule is modified from the Combat Game.)
The 1815 Campaign was about the return of Napoléon to the head of France, and French combat performance depended critically upon the actions of the formation which Napoléon led. The IG was closely associated with the Emperor. To reflect this, the French player may suffer Catastrophic Failure in the case of setbacks to Napoléon or to the IG.
A. If a formation led by Napoléon or one containing units of the IG retreats from an area, the French roll 1D6. On a 1-2, that it incurs an extra 1 level morale loss.
B. If a Guards unit of any nation incurs a combat loss, roll 1D6. On a 1, the formation it is with incurs an additional 1 level Morale reduction.
C. If a formation led by Napoléon reaches zero Morale, the game ends and VP scores are compared to determine the winner.
27.2.3.2 Optional House Rule
The morale terms of the special rule are set with an eye toward enabling the French to conduct an extended 1815 campaign. Players may hold a different view of the reliability of the IG or the flexibility of Napoléon himself. Feel free to adopt a House Rule that sets the bar higher depending upon your view. Morale loss on 1-4, for example, would betoken a view that Napoléon's leadership was flawed and IG reliability low. Alternatively, players may want to continue the game and disregard the provision that introduces "sudden death" into the game.
27.2.3.3 The Swiss Formation
Switzerland was a nominal Austrian ally but was politically divided, with elements favoring the French, and very reluctant to join the war.
A. To reflect this, the Allies control the Swiss but cannot cross the international border with Swiss forces unless or until French forces enter Switzerland or no French formation is within four areas of the Swiss border.
B. The Swiss cannot brigade with the Austrian force.
27.2.3.4 Minor Allied Regrouping
British loss of their Supply Sources, Brussels and Ostend, and the port of Antwerp, triggers significant regrouping and defection.
A. Wellington, KGL (two units), Hessian, and Hanoverian troops reappear the following turn, in England.
B. Dutch-Belgian troops reappear the following turn at either Liege or Namur, if not French-occupied, or with the nearest Prussian formation, if it is within four areas of their previous location.
C. All other MA troops, and the Dutch-Belgians if they are unable to meet the regrouping criteria, leave the game.
27.3 Advanced Game Scenario 1: The Hundred Days Campaign
Below are listed the forces and capability settings at the start of the Advanced Game. Remember that these correspond to the peacetime situation, not to the force status that existed in June 1815, when the Battle of Waterloo was fought. Consequently, at the opening of the game most troop units remain to be recruited. Listings are presented in the same format as those in the Basic Game scenario.
A. This Scenario begins on March 1815 (Turn 1) and normally ends on December 1815 (Turn 10).
B. Each formation should have its AP Marker setup at the AP value of its on the formation's lower track.
| Side | RPs | VPs | Morale Level |
|---|---|---|---|
| French | 85 | 10 | 3* |
| Allies | 185 | 0 | 3* |
* all formations at this level
27.3.1 French Setup Listing
War Minister: Davout
27.3.1.1 On Map
| Location | Units |
|---|---|
| Saarlouis (L4) | Armée du Rhin: Rapp, 1 x 5CF Inf Corps, 1 x 4CF Inf Corps, 1 x Cav Corps |
| Lyons (I8) | 1 x 5CF Inf Corps, 1 x Cav Corps |
| Angoulême (F6) | Armée de l'Ouest: Lamarque, 3 x 1CF Inf Div |
| Bayonne (D12) | Armée des Pyrenées Occidentales: Clausel, 2 x 1CF Inf Div |
| Perpignan (G13) | Armée des Pyrenées Orientales: Decaen, 2 x 1CF Inf Div |
| Haut Provence | Armée du Var: Brune, 2 x 1CF Inf Div |
| Paris (G5) | Napoléon, Armée du Nord: 2 x 6CF Corps, 1 x 1CF Div, 1 x 3CF Cav Corps |
27.3.1.2 Italy Off-Board Movement Track
| Location | Units |
|---|---|
| Naples Box | Troops 1 Formation: Murat, 2 x Naples Inf Corps, 1 x Naples Cav Corps |
27.3.1.3 Garrisons
4 x 1CF NG, 3 x ½CF NG, one each in Paris (G5), Lyons (I8), Grenoble (K10), Toulon (K12), Perpignan (G13), Bayonne (D12). The remaining 1 NG unit may be placed at any other Fortress in France.
27.3.1.4 French Div Pool
6 x 2CF Inf Div, 9 x 1CF Inf Div, 4 x Cav Div
27.3.1.5 French Force Pool
3 units of IG (2 Inf, 1 Cav), 1 x 5CF Inf Corps, 1 x 4CF Inf Corps, 1 x 1CF Inf Div, 1 x Cav Div, 2 x Wagons
27.3.1.6 French Eliminated Box
3 x 5CF Inf Corps, 3 x 4CF Inf Corps, 5 x 3CF Inf Corps, 8 remaining NGs, 3 x Cav Corps
27.3.1.7 French Leader Pool
Gérard, Grouchy, Jourdan, Lecoube, Lefebre, Massena, Préval, Soult, Suchet
27.3.2 Allied Setup
27.3.2.1 Russian Setup
27.3.2.1.1 Prussian/Russian Off-Board Movement Track
| Location | Units |
|---|---|
| Poland Box | Army of the West: Barclay, 5 x 6CF Corps, 2 x Cav Corps, 1 x Cossack Cav Corps, 1 x Wagon; Army of Poland: Doctorov, 1 x 6CF Corps, 1 x Inf Div, 1 x Cav Corps, 1 x Wagon |
27.3.2.1.2 Allied Division Pool
8 x Inf Div
27.3.2.1.3 Allied Force Pool
1 x 8CF Guards Inf Corps, 2 x 6CF Inf Corps, 1 x Cav Corps, 2 x Wagons
27.3.2.1.4 Allied Leader Pool
Rayevsky, Volkonsky, Winzingerode
27.3.2.2 Prussian Setup
27.3.2.2.1 On Map
| Location | Units |
|---|---|
| Mayence (L3) | Army of the Lower Rhine: Blücher, 3 x 5CF Inf Corps, 1 x 4CF Inf Corps, 2 x Cav Corps; 1 x Magazine |
| Prussian Entry Zone Box | Army of North Germany: Kleist, 1 x 1CF Inf Div, 1 x North German MA Inf Corps, 1 x Hesse MA Inf Div |
27.3.2.2.2 Prussian/Russian Off-Board Movement Track
| Location | Units |
|---|---|
| Prussia Box | 1 x 6CF Guards Inf Corps, 1 x Inf Corps |
| Baden and Bavarian Box | 1 x Baden MA Corps, 1 x Bavarian MA Corp, 1 x Württemburg AM Corps. |
27.3.2.2.3 Allied Division Pool
5 x Inf Div
27.3.2.2.4 Allied Force Pool
1 x 4CF Inf Corps, 1 x Saxon Corps, 3 x Wagons
27.3.2.2.5 Allied Leader Pool
Von Hake and Yorck
27.3.2.3 Austrian Setup
27.3.2.3.1 On Map
| Location | Units |
|---|---|
| Zurich (N6) | Troops 1 Army: MA Bachmann, 2 x 3CF Swiss Inf Corps |
| Milan (N9) | 1 x 1CF Inf Div |
| Turin (L9) | 1 x 1CF Inf Div |
| Genoa (N10) | 1 x 1CF Inf Div |
* Army of Switzerland
27.3.2.3.2 Austrian Off-Board Movement Track
| Box | Units |
|---|---|
| Vienna | Army of the Rhine: the Schwarzenberg, 3 x 5CF Inf Corps, 2 x Cav Corps, 1 x Wagon; 1 x unbrigaded 4CF Inf Corps |
| Any* | Army of Italy: Frimont, 1 x Wagon and one of the following**: 2 x 4CF Inf Corps, 1 x Inf Div, 1 x Cav Corps |
* other than Naples
** The other troop units deploy per 27.3.3.2.
27.3.2.3.3 Allied Division Pool
2 x 1CF Inf Div, 2 x MA Inf Div (to serve for all MA forces of all nationalities)
27.3.2.3.4 Allied Force Pool
2 x 5CF Inf Corps, 1 x 4CF Inf Corps, 1 x Cav Corps, 3 x Wagons
27.3.2.3.5 Allied Leader Pool
Charles, Bianchi, Hiller
27.3.2.4 British Setup
27.3.2.4.1 On Map
| Location | Units |
|---|---|
| Brussels (I1) | 1 x British Inf Div, 1 x KGL Inf, 1 x KGL Cav Div |
| Ostend (H1) | 1 x British Inf Div |
| Liége (J1) | 1 x N Inf Div |
27.3.2.4.2 Britain Off-Board Movement Box
1 x 5CF Guards Inf Corps
27.3.2.4.3 Allied Division Pool
5 x Inf Div
27.3.2.4.4 Allied Force Pool
1 x 5CF Inf Corps, 2 x Wagons, all British Cav, all D-B and Han Inf
27.3.2.4.5 Allied Leader Pool
Wellington, Hill, Byng, Orange
27.3.2.5 Spanish Setup
27.3.2.5.1 On Map
| Location | Units |
|---|---|
| Coastal area* | Spanish Army: Castaños, 4 x Inf Corps, 1 x Wagon |
| Coastal area* | 1 x Inf Corps |
* Each group must set up in a different Spanish coastal area.
27.3.2.5.2 Allied Division Pool
2 x Inf Div
27.3.2.5.3 Allied Force Pool
3 x Wagons
27.3.3 Special Rules
27.3.3.1 Enthusiasm for Napoléon
To reflect the initial impact of the Emperor returning, use the following.
A. On the French Unit Availability Segment of the March 1815 turn, whatever result the French derive on the FRAT is tripled.
B. During the Resource Acquisition Segment of the Administration Phase, the French receive an automatic +2 DRM over and above any other applicable DRMs.
C. In addition, the French Resource Acquisition Chart result is augmented by a one-time supplement of 40 RPs, representing donations from French citizens plus the discovery of a secret fund held by the French Treasury.
D. If the French neglect these benefits on the March 1815 turn, they are lost.
27.3.3.2 Austrians in Italy
A. In deploying Austrian units on the Italy Off-Board Movement Track Display, the Allies must place at least one unit in every box that is not occupied by Murat's Neapolitans.
B. Murat must fight his way past the Austrians to reach the map.
27.3.3.3 Catastrophic Failure
Use 27.2.3.1.
27.3.3.4 Minor Allied Regrouping
Use 27.2.3.4.
27.3.3.5 Victory
Use the victory conditions from 20.0.
27.4 Advanced Game Scenario 2: "Napoléon's Dream"
A. This scenario represents what Napoléon undoubtedly considered his main chance. It is based on the following assumptions (in order of importance):
- The Marie Louise Gambit: Napoléon's wife, the Empress Marie Louise, daughter of Austrian Emperor Francis, sides with Napoléon and implores her father not to make war on France. (Our judgment is that Austrian state interests ultimately prevail, and Metternich convinces the Emperor to join the conflict, but a delay occurs to work out these issues, plus a less-advanced Austrian force posture.)
- Bavaria: Having an interest in preserving their gains from the wars, they were reluctant to return to Austria the lands that Napoléon had awarded them, and the compensations of German territories they might have to cede. But they also were quite aware of Austria's locally superior military power. This scenario proposes that Bavaria will unite with the side that seems stronger rather than aligning itself with the Austrians.
- Switzerland is torn between political factions, and stymied in its efforts to regain territories now controlled by Austria, as well as uniting Geneva to the rest of the country by cession of territory recently appropriated by Bourbon France. We suppose that Napoléon offers to make them whole and they throw in their lot with France. (Thus Switzerland becomes an active French minor ally.)
- King Louis XVIII was a better custodian of French finances and more interested in revitalizing the French army.
B. This scenario begins in April 1815 (Turn 2) and ends in December 1815 (Turn 10).
C. Each formation should have its AP Marker set at the AP value of the on the formation's lower track.
| Side | RPs | VPs | Morale Level |
|---|---|---|---|
| French | 85 | 10 | 3* |
| Allies | 185 | 0 | 3* |
* all formations at this level
27.4.1 French Setup
War Minister: Davout
27.4.1.1 On Map
| Location | Units |
|---|---|
| Saarlouis (L4) | Armée du Rhin: Soult, 1 x 5 CF Inf Corps, 1 x 4 CF Inf Corps, 1 Cav Corps |
| Lyons (I8) | 1 x 5 CF Inf Corps, 1 x Cav Corps |
| Angoulême (F6) | Armée de l'Ouest: Lamarque, 3 x 1 CF Inf Div |
| Bayonne (D12) | Armée des Pyrenées Occidentales: Clausel, 2 x 1 CF Inf Div |
| Perpignan (G13) | Armée des Pyrenées Orientales: Decaen, 2 x 1 CF Inf Div |
| Haut Provence (K11) | Armée du Var: Brune, 2 x 1 CF Inf Div |
| Paris (G5) | Napoléon, Left Wing: Ney, 2 x 6 CF Inf Corps, 1 x 1 CF Inf Div, 1 x 3 CF Cav Corps |
| Italy Entry Box (N10/11) | Neapolitan Army: Murat, 2 x Neapolitan Inf Corps, 1x Neapolitan Cav Div |
| Switzerland* | Bachmann, 2 x 3 CF Swiss Inf Corps |
* S-3, S-4, or Zurich
27.4.1.2 Garrisons
4 x 1 CF NG, 3 x ½ CF NG; one each in Paris (G5), Lyons (I8), Grenoble (K10), Toulon (K12), Perpignan (G13), and Bayonne (D12). The remaining NG unit may be placed at any other fortress in France.
27.4.1.3 French Div Pool
4 x 2 CF Inf Div, 8 x 1 CF Inf Div, 3 x Cav Div
27.4.1.4 French Force Pool
3 units of IG (two Inf, one Cav), 1 x 5CF Inf Corps, 1 x 4 CF Inf Corps, 1 x 2 CF Inf Div, 2 x 1 CF Inf Div, 2 x Cav Div, 2 x Wagons
27.4.1.5 In Training
Stage 1: 1 x 4 CF Inf Corps, 1 x 1 CF Inf Div, 1 x Cav Corps
Stage 2: 1 x 3 CF Inf Corps, 1 x 2 CF Inf Div
27.4.1.6 French Eliminated Box
3 x 5 CF Inf Corps, 2 x 4 CF Inf Corps, 4 x 3 CF Inf Corps, 2 x Cav Corps, 15 remaining NGs
27.4.1.7 French Leader Pool
Gérard, Grouchy, Jourdan, Lecourbe, Lefebvre, Massena, Préval, Rapp, Suchet.
27.4.2 Allied Setup
27.4.2.1 Russian Setup
27.4.2.1.1 Prussian/Russian Off-Board Movement Track
| Box | Units |
|---|---|
| Poland | Army of the West: Barclay, 5 x 6 CF Inf Corps, 2 x Cav Corps, 1 x Cossack Cav Corps, 1 x Wagon; Army of Poland: Doctorov, 1 x 6 CF Inf Corps, 1 x Inf Div, 1 x Cav Corps, 1 x Wagon |
27.4.2.1.2 Allied Division Pool
8 x Inf Div
27.4.2.1.3 Allied Force Pool
1 x 8 CF Guards Inf Corps, 2 x 6 CF Inf Corps, 1 x Cav Corps, 2 x Wagons
27.4.2.1.4 Allied Leader Pool
Rayevsky, Volkonsky, Winzingerode
27.4.2.2 Prussian Setup
27.4.2.2.1 On Map
| Location | Units |
|---|---|
| Mayence (L3) | Army of the Lower Rhine: Blücher, 3 x 5 CF Inf Corps, 1 x 4 CF Inf Corps, 2 x Cav Corps, 1 x Magazine |
27.4.2.2.2 Prussian Entry Zone Box
Army of North Germany: Kleist, 1 x 1 CF Inf Div, 1 x North German MA Inf Corps, 1 x Hesse MA Inf Div
27.4.2.2.3 Prussian/Russian Off-Board Movement Track
| Box | Units |
|---|---|
| Prussia | 1 x 6 CF Guards Inf Corps, 1 x 4 CF Inf Corps |
27.4.2.2.4 Allied Division Pool
5 x Inf Div
27.4.2.2.5 Allied Force Pool
1 x 4 CF Inf Corps, 1 x Saxon MA Corps, 3 x Wagons
27.4.2.2.6 Allied Leader Pool
Von Hake, Yorck
27.4.2.3 Austrian Setup
27.4.2.3.1 Austrian Off Board Movement Track
| Box | Units |
|---|---|
| Baden & Bavaria* | 1 x Baden MA Inf Corps, 1 x Württemburg MA Inf Corps |
| Vienna | Army of the Rhine: Schwarzenberg, 3 x 5 CF Inf Corps, 2 x Cav Corps, 1 x Wagon; 1 x unbrigaded 4 CF Inf Corps |
* The Baden and Württemburg units are the forces-in-being of those minor allies, thus start on the board.
27.4.2.3.2 Italy Off Board Movement Track
| Box | Units |
|---|---|
| Quadrilateral or Venice* | Army of Italy: Frimont, 1 x 4 CF Inf Corps, 3 x Inf Div, 1 x Cav Corps, 1 x Wagon |
* Place a at least one unit in each of these off-board boxes.
27.4.2.3.3 Allied Division Pool
3 x 1 CF Inf Div, 2 x MA Inf Div (These MA Divisions serve as loss substitutes for all MA corps. They may not be used for corps breakdowns or recruited as reinforcements.)
27.4.2.3.4 Allied Force Pool
2 x 5 CF Inf Corps, 2 x 4 CF Inf Corps, 1 x Cav Corps, 3 x Wagons
27.4.2.3.5 Allied Leader Pool
Charles, Bianchi, Hiller
27.4.2.4 British Setup
27.4.2.4.1 On Map
| Location | Units |
|---|---|
| Brussels (I1) | Hill, 1 x British Inf Div, 1 x KGL Inf Div, 1 x KGL Cav Div |
| Ostend (H1) | 1 x British Inf Div |
| Liége (J1) | 1 x B-N Inf Div |
27.4.2.4.2 British Off Board Movement Track
| Box | Units |
|---|---|
| Britain Box | 1 x 5 CF Guards Inf Corps |
27.4.2.4.3 In Training
Stage 1: 1 x 5 CF Inf Corps
27.4.2.4.4 Allied Division Pool
5 x British Inf Div
27.4.2.4.5 Allied Force Pool
1 x 3-0 Cav Corps, 2 x Wagons, all D-B and Han Inf units
27.4.2.4.6 Allied Leader Pool
Wellington, Byng, Orange
27.4.2.5 Spanish Setup
27.4.2.5.1 On Map
| Location | Units |
|---|---|
| Coastal area* | Spanish Army: Castaños, 4 x Inf Corps, 1 x Wagon |
| Coastal area* | 1 x Inf Corps |
* Each group must set up in a different Spanish coastal area.
27.4.2.5.2 Allied Division Pool
2 x Spanish Inf Div
27.4.2.5.3 Allied Force Pool
3 x Wagons
27.4.3 Special Rules
27.4.3.1 Enthusiasm for Napoléon
Use rule 27.3.3.1.
27.4.3.2 Catastrophic Failure
Use rule 27.3.3.3.
27.4.3.3 The Marie Louise Gambit
Marie Louise's representations have made her father hesitate. Prince Metternich spends April convincing Emperor Francis to join the war.
A. On the April turn of play, Diplomatic Events that would normally affect Austria are ignored.
B. From May onward, the first Diplomatic Event that occurs which increases the Austrian Diplomatic Status, changes it by two levels. All other provisions of the diplomatic rules remain the same.
27.4.3.4 The Bavarian Ally
Austrian machinations have inclined Bavaria against allying with Austria. Bavarian rulers are nevertheless not convinced that an alliance with France will serve their interests. Therefore Bavaria is in an anomalous position. It may go with either side.
A. Bavaria's MA Inf Corps will function as a full ally of the first side to occupy both the P-40 and P-44 areas on the map.
B. When the above occurs, the corps immediately appears in either of those areas.
C. If Bavaria sides with Austria, its troops participate fully in the Allied Force Pool.
D. If Bavaria joins with France, its Inf Corps can only be rebuilt as long as France continues to occupy either P-40 or P-44.
27.4.3.5 British Mediterranean Action
If the Sardinian minor ally has not been activated by Diplomacy, on the turn after Britain reaches a state of Active Hostilities with France, the Sardinian Inf Corps appears in Naples. This unit may operate freely as a MA force alongside Austrian formations.
27.4.3.6 Victory Conditions
Use the victory conditions per 20.0.
27.5 Advanced Game Scenario 3: "Louis XVIII's Dream: King of La Vendée"
This scenario represents what King Louis XVIII of France might have done had he withdrawn in front of Napoléon to the west, to the strongly royalist area of the Vendée. It is based on assumptions different from the historical events. The most important is that King Louis XVIII made an early and determined decision to leave Paris ahead of Napoléon's arrival and rally French monarchists in defense of the Crown, against Napoléon. This course of action was actually proposed to the king by his adviser, Baron Eugene de Vitrolles. Louis XVIII withdraws to southwest France, the most royalist of all areas, with some remaining troops plus Vendéeans, whom he organizes into new units. The Royalists have long had a British connection, so London can choose whether to send forces to fight with Louis or to their concentration areas in Belgium. The resistance poses problems for Napoléon. A British army coming from the west opens up a front he must cover. At the same time, the Royalist resistance affords political cover for Frenchmen who are less than enthusiastic about his return. The resistance also accelerates the gathering of the Powers against Napoléon. A second assumption concerns Bavaria, which was reluctant to return to Austria lands that Napoléon had awarded it, and which demanded compensation in Germany for territory it might cede. Bavaria had an interest in preserving its gains from the wars, but was also aware of Austria's locally superior military power. (This scenario proposes that Bavaria will unite with the side that seems stronger.) The third assumption is about Switzerland, torn between political factions and stymied in its efforts to regain territories now controlled by Austria, as well as uniting Geneva to the rest of the country by cession of territory recently appropriated by Bourbon France. (Here we suppose that Napoléon offers to make the Swiss whole and they decide to throw in their lot with France. Thus Switzerland becomes an active French minor ally.) The final assumption is that King Louis XVIII was a better custodian of French finances and more interested in revitalizing the French army.
A. This scenario begins in March 1815 (Turn 2) and ends in December 1815 (Turn 10).
B. Each formation should have its AP Marker set at the AP value of the Leader on the formation's lower track.
| Side | RPs | VPs | Morale Level |
|---|---|---|---|
| French | 85 | 10 | 3* |
| Allies | 205 | 5 | 3* |
* all formations at this level
27.5.1 French Imperial Player Setup Listing
War Minister: Davout
27.5.1.1 On Map
| Location | Units |
|---|---|
| Saarlouis (L4) | Armée du Rhin: Soult, 1 x 5 CF Inf Corps, 1 x 4 CF Inf Corps, 1 Cav Corps |
| Lyons (I8) | 1 x 5 CF Inf Corps, 1 x Cav Corps |
| Lusignan (F8) | Armée de l'Ouest: Lamarque, 3 x 1 CF Inf Div |
| Bayonne (D12) | Armée des Pyrenées Occidentales: Claussel, 2 x 1 CF Inf Div |
| Perpignan (G13) | Armée des Pyrenées Orientales: Decaen, 2 x 1 CF Inf Div |
| Haut Provence (K11) | Armée du Var: Brune, 2 x 1 CF Inf Div |
| Paris | (G5) Napoléon, Left Wing: Ney, 2 x 6 CF Inf Corps, 1 x 1 CF Inf Div, 1 x 3 CF Cav Corps |
| Italy Entry Box (N10/11) | Neapolitan Army (Leader Murat, 2 x Neapolitan Inf Corps, 1 x Neapolitan Cav Corps) |
27.5.1.2 Garrisons
4 x 1 CF NG, 3 x ½ CF NG; one each in Paris (G5), Lyons (I8), Grenoble (K10), Toulon (K12), Perpignan (G13), and Bayonne (D12). The remaining NG unit may be placed at any other fortress in France.
27.5.1.3 French Div Pool
4 x 2 CF Inf Div, 7 x 1 CF Inf Div, 3 x Cav Div
27.5.1.4 French Force Pool
3 x IG units (2 x Inf, 1 x Cav), 1 x 5CF Inf Corps, 1 x 4 CF Inf Corps, 1 x 2 CF Inf Div, 2 x 1 CF Inf Div, 2 x Cav Div, 2 x Wagons
27.5.1.5 In Training
Stage 1: 1 x 4 CF Inf Corps, 1 x 1 CF Inf Div, 1 x Cav Corps
Stage 2: 1 x 3 CF Inf Corps, 1 x 2 CF Inf Div
27.5.1.6 French Eliminated Box
4 x 5 CF Inf Corps, 2 x 4 CF Inf Corps, 4 x 3 CF Inf Corps, 4 x Cav Corps, 15 remaining NGs
27.5.1.7 French Leader Pool
Gérard, Grouchy, Jourdan, Lecourbe, Lefebre, Massena, Préval, Rapp, Suchet
27.5.2 Allied Setup
| Diplomatic Status | Nation |
|---|---|
| Active Hostilities | Royalist France |
| Armed Belligerence | Britain, Prussia |
| Military Preparations | Austria, Russia |
| Opposition | Spain |
27.5.2.1 Royalist France Setup
27.5.2.1.1 On Map
1 x 1 CF Inf Div in each of Charente (D9), Fontenay (D8), Vendée (D7), and St. Nazaire (D6).
27.5.2.1.2 Entry Point/Base of Operations
The Allies choose Charente (D9, representing La Rochelle) or St. Nazaire (D6), placing the Magazine there. The place selected serves as both a Supply Source and an Entry Point. British troops deploying to Europe may disembark at the Royalist Entry Point or destinations in Belgium.
27.5.2.1.3 Royalist Army
Field forces consist of the Royal Court, Roche (3-1-*) (actually Louis de la Rochejaquelein), 1 x 3 CF Inf Corps, and a ½ CF Cav Bde. The army may set up in any area with an Inf Div at the start of the game. The Royalist Army uses the Troops 1 or 2 Formation Box.
27.5.2.1.4 Corps Losses
A Royalist Corps required to absorb a third loss (i.e., reduced below corps counter strength) reverts to a Royalist division counter from the Division Pool. If none is available, a division may be taken from the Force Pool. If no division-size piece is available in either place, eliminate the corps.
27.5.2.1.5 Div Pool
Royalist divisions eliminated on the board are placed in the Division Pool for replacements until two divisions are located here. Divisions in excess of two move on to the Force Pool.
27.5.2.1.6 Royalist Force Pool
1 x 3 CF Inf Corps, 3 x ½ CF Royalist NGs. The corps may deploy as a result of French political instability. The NG units replace Imperial NG ½ CF units that defect. See Rule 27.5.3.
27.5.2.2 Russian Setup
27.5.2.2.1 Prussian/Russian Off-Board Movement Track
| Box | Units |
|---|---|
| Poland | Army of the West: Barclay, 5 x 6 CF Inf Corps, 2 x Cav Corps, 1 x Cossack Cav Corps, 1 x Wagon; Army of Poland: Doctorov, 1 x 6 CF Inf Corps, 1 x Inf Div, 1 x Cav Corps, 1 x Wagon |
27.5.2.2.2 Allied Division Pool
8 x Inf Div.
27.5.2.2.3 Allied Force Pool
1 x 8 CF Guards Inf Corps, 2 x 6 CF Inf Corps, 1 x Cav Corps, 2 x Wagons
27.5.2.2.4 Allied Leader Pool
Rayevsky, Volkonsky, Winzingerode
27.5.2.3 Prussian Setup
27.5.2.3.1 On Map
| Location | Units |
|---|---|
| Mayence (L3) | Army of the Lower Rhine: Blücher, 3 x 5 CF Inf Corps, 1 x 4 CF Inf Corps, 2 x Cav Corps, 1 x Magazine |
27.5.2.3.2 Prussian Entry Zone Box
Army of North Germany: Kleist, 1 x 1 CF Inf Div, 1 x North German MA Inf Corps, 1 x Hesse MA Inf Div
27.5.2.3.3 Prussian/Russian Off Board Movement Track
| Box | Units |
|---|---|
| Prussia | 1 x 6 CF Guards Inf Corps, 1 x 4 CF Inf Corps |
27.5.2.3.4 Allied Division Pool
5 x Inf Div
27.5.2.3.5 Allied Force Pool
1 x 4 CF Inf Corps, 1 x Saxon MA Corps, 3 x Wagons
27.5.2.3.6 Allied Leader Pool
Von Hake, Yorck
27.5.2.4 Austrian Setup
27.5.2.4.1 Austrian Off Board Movement Track
| Box | Units |
|---|---|
| Baden & Bavaria* | 1 x Baden MA Inf Corps, 1 x Württemburg MA Inf Corps |
| Vienna | Army of the Rhine: Schwarzenberg, 3 x 5 CF Inf Corps, 2 x Cav Corps, 1 x Wagon; 1 x unbrigaded 4 CF Inf Corps |
* The Baden and Württemburg units are the forces-in-being of those minor allies, thus start on the board.
27.5.2.4.2 Austrian Off Board Movement Track
| Box | Units |
|---|---|
| Vienna | Army of the Rhine: Schwarzenberg, 3 x 5 CF Inf Corps, 2 x Cav Corps, 1 x Wagon; 1 x 4 CF Inf Corps (unbrigaded) |
27.5.2.4.3 Italy Off Board Movement Track
| Box | Units |
|---|---|
| Quadrilateral or Venice* | Army of Italy: Frimont, 1 x 4 CF Inf Corps, 3 x Inf Div, 1 x Cav Corps, 1 x Wagon |
* Place a at least one unit in each of these off-board boxes.
27.5.2.4.4 Allied Division Pool
3 x 1 CF Inf Div, 2 x MA Inf Div (These MA Divisions serve as loss substitutes for all MA corps. They may not be used for corps breakdowns or recruited as reinforcements.)
27.5.2.4.5 Allied Force Pool
2 x 5 CF Inf Corps, 2 x 4 CF Inf Corps, 1 x Cav Corps, 3 x Wagons
27.5.2.5 British Setup
27.5.2.5.1 On Map
| Location | Units |
|---|---|
| Brussels (I1) | Hill, 1 x British Inf Div, 1 x KGL Inf Div, 1 x KGL Cav Div |
| Ostend (H1) | 1 x British Inf Div |
| Liége (J1) | 1 x Nassau (N) Inf Div |
27.5.2.5.2 British Off Board Movement Track
| Box | Units |
|---|---|
| Britain | 1 x 5 CF Inf Corps |
| Arrivals* | 1 x 1 Inf Div |
* The Allies choose whether to land this unit at the Belgian entry points or at the French Royalist Magazine per 27.5.3.
27.5.2.5.3 In Training
Stage 1: 1 x 5 CF Inf Corps
27.5.2.5.4 Allied Division Pool
4 x British Inf Div
27.5.2.5.5 Allied Force Pool
1 x 3-0 Cav Corps, 2 x Wagons, all D-B and Han Inf units
27.5.2.5.6 Allied Leader Pool
Wellington, Byng
27.5.2.6 Spanish Setup
27.5.2.6.1 On Map
| Location | Units |
|---|---|
| Coastal area* | Spanish Army: Castaños, 4 x Inf Corps, 1 x Wagon |
| Coastal area* | 1 x Inf Corps |
* Each group must set up in a different Spanish coastal area.
27.5.2.6.2 Allied Division Pool
2 x Spanish Inf Div
27.5.2.6.3 Allied Force Pool
2 x Wagons
27.5.3 Special Rules
27.5.3.1 Catastrophic Failure
Use the rule from 27.2.1.
27.5.3.2 Diplomatic Development Event 55
This is inactive for this scenario. If it is the result of any event dice roll, roll again.
27.5.3.3 The British Gambit
A. Great Britain is in the process of deploying a field army onto the continent of Europe. Part of this deployment (a 1 CF Infantry Division) is ready to be made on Turn 1. The Allies may choose to send this and subsequent British forces and Leaders entering to board to the Belgian Entry Points printed on the mapboard or to the Entry Point of the French Royalists, wherever they have located it. The British may divide their deployments in any combination between the two fronts.
B. In addition, because the British have long acted in concert with French Royalists, and Louis XVIII is already at war with Napoléon, the British automatically increase their Diplomatic Status level by one step each turn. Diplomacy Chart effects can reduce the status level, but the automatic increases continue.
27.5.3.4 British-Royalist Alliance
A. The British are recognized as the senior partner in the alliance. French Royalist troops function as Minor Allies (5.4.2) for purposes of brigading in formations. In any brigaded formation, the British leader will exercise overall command. However, individual British units may be brigaded in Royalist formations and serve under the Royalist leader.
B. For purposes of Supply, British units and formations may freely use the Royalist Entry Point/Supply Source to trace their LOS. This is in addition to 16.2.3.
27.5.3.5 Spanish-Royalist Cooperation
The Spanish are considered the senior partner in the alliance. French Royalist troops function as Minor Allies (5.4.2) for purposes of brigading in formations. In a brigaded formation the Spanish leader will exercise overall command. However, individual Spanish units may be brigaded in Royalist formations and serve under the Royalist leader.
27.5.3.6 The Royal Court
The Royal Court must be on the map for Royalist troops to enter the game. The Court may not move by itself but may accompany other Royalist or Coalition units. It may be brigaded with any Coalition formation. If brigaded, the Court has no combat capability. The Court is affected by any combat result suffered by a formation with which it is brigaded. If unbrigaded but accompanied by a combat unit, the Court functions as a leader with a battle ability of 1. The Court is captured if combat forces with it, whether brigaded or not, are eliminated. Capture of the Court awards the French Imperial side 5 VPs.
27.5.3.7 French Political Instability
King Louis XVIII has become a focal point for everyone uncomfortable with the return of the Emperor Napoléon.
A. Rule 27.3.3.1 is inactive in this game.
B. Instability poses fewer problems for formations led directly by Napoléon's senior commanders, but to civilians called to the National Guard and to minor formations, especially those in the vicinity of Royalist forces, defection is a greater danger. The scenario models this with a loyalty test.
- Upon setup, conduct a loyalty test by rolling 1D6 for each National Guard unit, wherever it may be located. On a 6, the unit suffers a 1 step loss.
- If the step loss eliminates the unit, remove it from the board and replace it with a Royalist National Guard unit. This represents those troops changing sides.
C. Regular troops positioned in Lusignan (F8), Bayonne (D12) and Perpignan (G13) also test their loyalty. A 6 on a 1D6 requires a 1 step loss by the unit.
D. Defections from the Imperial forces can raise Royalist troop levels. If the number of loyalty failures, including both National Guard and Regular troops, equals five or more, those defections activate the 3 CF Royalist Infantry Corps that resides in the Force Pool.
27.5.3.8 The Bavarian Ally
Austrian machinations have inclined Bavaria against allying with Austria. Bavarian rulers are nevertheless not convinced that an alliance with France will serve their interests. Therefore Bavaria is in an anomalous position. It may go with either side.
A. Bavaria's MA Inf Corps will function as a full ally of the first side to occupy both the P-40 and P-44 areas on the map.
B. When the above occurs, the corps immediately appears in either of those areas.
C. If Bavaria sides with Austria, its troops participate fully in the Allied Force Pool.
27.5.3.9 British Mediterranean Action
If the Sardinian minor ally has not been activated by Diplomacy, on the next turn after Britain reaches a state of Active Hostilities with France, the Sardinian Inf Corps appears in Naples. This unit may operate freely as a MA force alongside Austrian formations.
27.5.3.10 Victory Conditions
Use the victory conditions per 20.0.