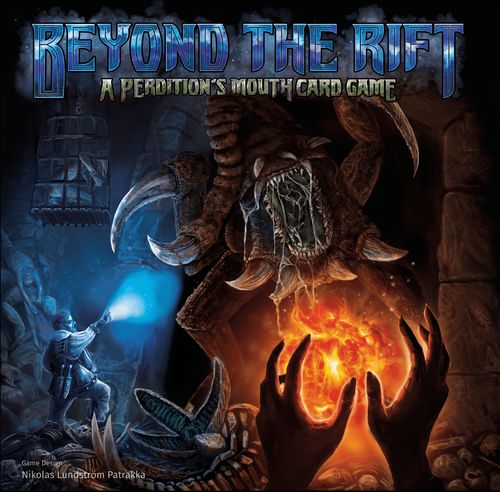
Beyond the Rift: A Perdition's Mouth Card Game
Beyond the Rift: A Perdition's Mouth Card Game Rulebook
Table of Contents
Table of Contents
Components
- 156 Hero cards (26 for each hero)
- 26 Item selection cards
- 42 Response cards
- 74 Enemy cards
- 12 Fatigue cards
- 4 universal dual-layer Hero Sheets and 6 pairs of hero specific tiles
- 87 Item cards
- 27 Terrain cards
- 1 Threat Sheet
- 18 Wound cards
- 8 Wooden cubes
- 1 Scenario Book
Gameplay and Goals
In Beyond the Rift, players take on the roles of 1-4 heroes in a series of short campaigns, each focused around one of the heroes from Perdition's Mouth: Abyssal Rift.
The game is cooperative so all players win or lose as a team. Each scenario can be played with different players playing different heroes. Each scenario has its own specific Win and Lose condition, but whenever a hero dies all heroes Lose the scenario.
You are free to replay scenarios you've lost (or if you're unhappy with the end result), without resetting the campaign to its start.
Players should start with the tutorial scenario Out Through the Side Entrance and once they feel comfortable with the basics of the game continue with the campaign Old Friends. Each campaign comes with its own specific set of item cards, described in the campaign setup. Players will draw rewards for winning scenarios (see Campaign Play and Equipping Items) from these cards.
The Golden Rules
If the text of a card directly contradicts the rulebook, the text of the card takes precedence.
If the text of a scenario contradicts the rules or the text of a card, the scenario text takes precedence.
If a card or effect tells you to discard a card, you can only discard non-Wound and non-Fatigue cards unless otherwise specified.
Whenever there are several numbers listed in the following manner A/B/C/D (e.g. 7/6/5/4), which number to use is dependent on the number of heroes participating (respectively 1/2/3/4 Heroes).
Whenever comparing two values because of an Attack or an action where spent Action Points are compared to an action-specific value, the attacker or the hero spending the Action Points is unsuccessful in case of a tie.
Setup
The adjacent image shows the setup for a game of 2 players.
- Choose a scenario (if you fulfill its requirements).
- Create, shuffle and place the Enemy Deck and the Terrain Deck according to the scenario setup instructions.
- Shuffle and place the Wound Deck.
- Place the Fatigue Deck.
- Place the Threat Sheet. Set the current Threat level according to the scenario setup instructions by placing a wooden cube on the corresponding space of the Threat track.
- Shuffle and place the Response Deck.
- Each player chooses a hero and takes the corresponding Hero Board, the Hero Deck, a wooden cube in the matching color and then shuffles and places their Hero Deck. All Hero Boards start on their standard sides. The alternate sides can be unlocked during the campaigns and are depicted by a red glow of the name/globe of the hero.
- Each hero sets their Action Points to their starting value on their Hero Board by placing the wooden cube on the according space of the Action Point track.
- Reserve some space for each player's Hero Area, the Quest Area and individual Discard Piles for each deck.
- Then each hero draws cards from their Hero Deck equal to their hand size (7/6/5/4).
- Follow all other scenario setup instructions, if there are any.
Terms and Key Concepts
Hero Area
The space right in front of each hero represents the hero's immediate vicinity. Enemies engaged with the hero are placed here and are at range 1 (1 Range) from the hero.
Quest Area
The space in the middle of the table where all enemies start the game if not otherwise stated. Enemies in the Quest Area are never engaged with a hero and are at 2 Range from each hero.
Discard Pile
Except for the Enemy and the Terrain Deck, each deck has its own discard pile. All cards played or explicitly discarded go into the respective discard pile. Enemy and Terrain cards are removed from the game whenever defeated.
If a hero ever needs to draw cards from their Hero Deck, but the Hero Deck is empty, two Fatigue cards are drawn from the Fatigue Deck, shuffled into the hero's current discard pile and used to form his new Hero Deck.
If the Wound or Fatigue Deck ever run empty, their respective discard pile is shuffled to form a new draw pile.
Other decks are not reshuffled.
Hand Size
The amount of cards heroes draw in the draw phase and the amount of cards heroes have to discard down to after drawing. The Draw Phase is the only phase where the hand size is enforced, therefore you may have more cards in your hand at other times.
| Players | Hand size |
|---|---|
| 1 player | 7 cards |
| 2 players | 6 cards |
| 3 players | 5 cards |
| 4 players | 4 cards |
Action Points
Points a hero can spend to play cards and perform other actions each round. A hero's Action Points are reset each round and are tracked on the Hero Board using the numbered spaces of the Action Points track.
Each hero has an individual Action Points starting value (see the Hero Board) that they can spend to play cards, draw cards, engage or disengage enemies, increase their defense in the Enemy Phase or do scenario-specific actions. A hero may spend Action Points without playing cards during the Hero Phase or in the Enemy Phase.
A hero can never exceed 20 Action Points.
Allies
Some Persistent cards are Allies. Allies stay in the target hero's Hero Area and will have stats at the bottom just like an enemy would. If they take Wounds or Fatigue, attach that card to the ally just like it would be attached to an enemy.
Whenever a hero with an ally in their Hero Area is attacked or targeted by a Poison or Intimidate effect the player may have it target the ally.
Attachments
These are cards that are put underneath an enemy or ally which modifies their stats. Wound and Fatigue cards are considered Attachments.
Multiple Attachments can be placed under a card to form a stack, which leaves the modifiers of each Attachment visible.
All modifiers of the Attachments of a card are offset against the stats of the card.
If Range, Attack, Defense and/or Wound of an Attachment show no value, then it has no modifier for this stat. Range can't drop below 1, all other stats can never drop below 0.
Some Persistent cards can have other cards attached to them. These cards are not regular Attachments and should be put face down under that card. These cards will be discarded with the card they are attached to into their respective discard pile.
Revealing
When revealing cards, a hero draws the number of cards specified from the top of their Hero Deck. The card or scenario effect will specify what to do with these cards.
After performing all of the effects, discard all cards revealed. If there aren't enough cards in your Hero Deck to reveal, reveal as many as possible and perform the rest of the action. Revealing cards does not lead to a Hero Deck being reshuffled.
Spawning
Whenever a scenario tells you to spawn X Enemies/Terrain, take the top X cards from the Enemy/Terrain Deck and put them in the Area described.
Threat
The current Threat Level is tracked on the Threat Sheet. Each scenario uses the Threat in a different way.
In Play
A card is In Play when it is in any Hero Area or Quest Area. A card is not In Play when it is in the Enemy, Terrain or Hero Deck or outside of the game.
Round Structure
In each round, perform the following five phases in order:
- Hero Phase
- Enemy Phase
- Quest Phase
- Draw Phase
- End Phase
Hero Phase
Heroes may perform the following actions in any order, any number of times. After each action, any hero (even the same hero) may perform the next action. An action has to be fully resolved before a new action is initiated.
- Make an attack by playing a card with an Attack action type.
- Gain Action Points by playing a card with an Action Points action type.
- Perform a special action by playing a card with a Special action type.
- Pay X Action Points to draw one card from their Hero Deck (see the Hero Board).
- Pay X Action Points to discard one or more non-Wound/-Fatigue cards in their hand and draw that many cards from their Hero Deck (see the Hero Board). This does not count as playing a card.
- Discard one non-Wound/-Fatigue card in their hand to gain X Action Points. This does not count as playing a card (see the Hero Board).
- Pay the Action Points cost of an enemy (bottom left corner of the card) to engage that enemy and move that enemy from any area into their Hero Area or disengage an enemy and move it from their Hero Area into the Quest Area. This is not limited by range.
- Potential scenario-specific action.
- Potential hero-specific action.
Heroes are able to support each other's actions through aiding (more on this later).
Enemy Phase
If there are any enemies in play, draw one Response card. Resolve all actions in the enemy activation section (found in the scenario) from top to bottom in the column with that number. Heroes may play Defense cards or spend Action Points to increase their defense before an enemy attack. Other cards and actions may only be performed if the card or action specifically says so.
Quest Phase
Perform all effects as specified by the scenario, like spawning enemies and terrain. If there is no scenario description or if there are no Enemy and/or Terrain cards left in the Enemy and/or Terrain Deck, do not spawn any enemies/terrain. The number of enemies spawned will mostly depend on the Threat Level.
Draw Phase
Each hero sets their Action Points to their starting value plus one for each card they still hold from the previous round. Then each hero draws cards equal to their hand size and discards down to their hand size.
Heroes may not discard Wound/Fatigue cards this way. If a hero has only Wound/Fatigue cards in hand after discarding, that hero is dead and all heroes have lost the scenario and must replay it.
If there are not enough cards in the Hero Deck, add two Fatigue cards to the discard pile and shuffle the discard pile to make a new Hero Deck.
End Phase
Resolve any End Phase effects specified by the scenario or by the cards in play. All Hero Card effects are resolved after any scenario specific effects in an order of heroes' choice.
Playing Cards
During the Hero Phase heroes may play cards from their hands and perform its action(s) by paying the Action Points cost.
Action Points costs are paid by reducing the hero's Action Points track on their individual Hero Board.
If a hero does not have enough Action Points to pay the Action Points cost, that action cannot be performed.
As soon as their effects have been dealt, cards are put on the hero's discard pile.
A card is laid out with a Card Name, Card Type, Range, Secondary Cost, Action Type, (Primary) Cost, Card Effects and Body Part.
A cost of 0 means that an action has no cost, but can still only be played according to its rules.
Range
This icon shows a card's range. Only targets within range can be affected by a card's effect. Range has one of two possible values: 1 or 2.
A hero is always within 1 Range of them self and can therefore always play cards benefiting themselves. The same goes for enemies that are in a hero's own Hero Area.
This is why heroes can always perform an Attack action to attack an enemy in front of them. They can also always gain Action Points from their own actions and defend themselves performing their own Defense actions.
All other heroes, enemies and allies in other heroes' Hero Areas and all enemies in the Quest Area have 2 Range.
Card Type
Each card's type (e.g. Hero, Enemy, Item, Wound, Terrain) is depicted by a unique symbol and color.
Action Type
There are 5 different types of actions: Attack, Action Points, Defense, Special and Reaction. Their effect is described in the card effects of each card.
The action types are relevant because some card effects may refer to cards of a specific action type. Their icons also serve to make it easier to identify the cards.
If there are 2 action types on a card, this card provides 2 different effects. If those effects are divided horizontally, the heroes must choose one of the two presented actions.
Once the chosen action has been resolved, all cards involved in that action are discarded.
Attack
Attack actions will have a Primary (red) and/or a Secondary (blue) Cost.
The Primary Cost must be paid to initiate an attack. It must be the first Attack action played.
The Secondary Cost must be paid, if a hero wants to add the effect of this card to an attack that was initiated with another card.
An Attack action without a Primary Cost (e.g. Elisa's Fire Spell) cannot be used to initiate an attack and therefore cannot be played alone. It must be played in addition to another card with an Attack action that has a Primary Cost.
An Attack action without a Secondary Cost cannot be added to the first Attack action played.
The Primary Cost must be paid for all Attack actions when used for aiding.
Once a hero has played all Attack actions they wish to play, the Attack values of all cards played are added up to determine the hero's total Attack value.
If a Response Card symbol is shown instead of/in addition to a number, draw a Response card to determine its value after all cards for that Attack have been played but before determining the enemy defense.
All enemies have a Defense value printed on their cards. This value might be further modified by special effects or Wound/Fatigue cards (see section Wounds, Fatigue and Taking Damage).
All enemies always receive an additional Response card. Its value is added to the total Defense value of the enemy.
The hero's total Attack value will now be compared to the enemy's total Defense value. If the hero's total Attack value is higher than the enemy's total Defense value, the enemy receives 1 Wound card (see section Wounds, Fatigue and Taking Damage). If an Attack is aided, the enemy still only receives the damage from the hero that initiated the Attack.
If any of the Attack actions have Bonus effects, these effects are resolved after the attack has been fully resolved.
Defense
Defense actions can usually be played right before enemy attacks during the Enemy Phase.
Heroes have a base Defense value of 0. The Defense values of all played Defense actions are added up to determine the hero's total Defense value.
Heroes may pay any amount of Action Points to further increase their total Defense value. The Action Points costs and Defense benefits of this action can be found on the individual Hero Board.
Regarding an enemy attack, all Defense actions have to be played and all Action Points have to be spent before the Response card for said enemy attack is drawn.
Special
Special actions have a unique effect described on the card. Heroes must pay the cost depicted on the card to perform this action.
Action Points
Some cards can earn the heroes Action Points. Heroes will have to pay the indicated cost to have the targeted hero receive the amount of Action Points indicated on the card. Only heroes can receive Action Points. 2 Range or more is necessary to target another hero.
Reaction
Reaction actions can usually be played at unusual times (e.g. an Attack action that can be played during the Enemy Phase or a Special action that can be played during the Quest Phase). The card will explicitly specify when it is playable.
Card Effects
This area describes the card's effects. If those effects are divided horizontally, the heroes must choose one of the two presented actions.
Some effects may include one of the following highlighted keywords.
Persistent
Unless the card specifies otherwise, all Persistent card effects require the card to be played into a Hero Area.
A Persistent card effect with 1 Range can only be played into that hero's own Hero Area. A Persistent card effect with 2 Range can be played into any hero's Hero Area.
The effect of the card will specify when a card must be discarded. A Persistent Ally is discarded once it has reached 0 Health.
If a Persistent card is neither a Persistent Ally nor does it specify when it must be discarded, it stays in the Hero Area where it was played until the end of the scenario.
Bonus
Some Attack and Defense card effects provide bonuses. All Bonus effects are explicitly marked as such in the cards' effect text. All Bonus effects are resolved after the main action has been fully resolved.
A card is never considered to be in the hero's hand while it is being resolved.
Body Part
Some cards are associated with a specific body part. There are a total of five different body parts, which are indicated by a unique symbol (head, torso, left arm, right arm, legs).
Over the course of a campaign, additional cards can be obtained. When a hero adds them to their Hero Deck, they must first remove all cards that are associated with the same body part (same icon) as the cards he would like to equip.
Enemies
Enemies are divided into various types, which are indicated by their unique color and card type: Cultists, Insectoids or Orcs. They will activate in the Enemy Phase.
A card is laid out with an Enemy Name, Enemy Type, Damage, Stats, Engagement Cost, Range, Attack, Defense and Health.
Engagement Cost is the amount of Action Points a hero has to pay to either move the enemy from the Quest Area into their Hero Area or vice versa.
Range is the attack range of an enemy. Enemies with 1 Range can only attack or target heroes they are engaged with, meaning they are located in their Hero Area. Enemies with 2 Range can also attack or target other heroes, even if they are not engaged with them.
Attack is the base value with which enemies attack heroes.
Defense is the base value with which enemies defend against hero attacks.
Health shows how much health an enemy has, respectively how much damage a hero has to deal to destroy an enemy. If an enemy's health ever reaches 0 (or below), the enemy dies. It is put on the appropriate discard pile and thus removed from the game.
Enemy Activation
In the Enemy Phase enemies will activate and thereby perform actions.
At the beginning of the Enemy Phase a Response Card is drawn to determine what the enemies will do.
After this the players must refer to the enemy activation section (found in the scenario) activating all enemies (from top to bottom) having them perform the actions in the column corresponding to the number on the drawn Response Card. If several actions are listed, they are performed in the written order.
Whenever enemies attack or defend, they add a Response Card to their Attack or Defense value.
If an enemy is unable to perform an action as described, it performs the alternate action (the action after the "/" character) on the enemy activation section. If unable to do so or there is no alternate action, the enemy does nothing.
An enemy is considered unable to perform an action when performing it wouldn't lead to a changed board state.
Example: An Orc Huntmaster and an Orc Archer are in the Quest Area. The Orc Huntmaster is supposed to perform the actions "Support Orc Archers and all Orc Archers disengage". Since neither action would have any enemy change position the Orc Huntmaster is unable to perform this action and will perform its alternate action instead.
Enemy Actions
Attack — The enemy attacks a hero within range. If there are several valid targets the enemy will choose one according to the Target Priority (see Target Priority) unless the action itself specifies another priority. An engaged enemy might attack another hero than the one it is engaged with.
Engage — If the enemy is in the Quest Area, it will engage a hero (move into their Hero Area). If there are several valid targets the enemy will choose one according to the Target Priority unless the action itself specifies another priority.
Disengage — If the enemy is engaged with a hero, it will move into the Quest Area.
Re-engage — The enemy will engage a hero (move into their Hero Area). If there are several valid targets the enemy will choose one according to the Target Priority. This can be the hero the enemy is currently engaged with.
Summon X — Add an enemy of the type specified by the action to the area the activated enemy is in. Spawn only enemies from outside of the game, not from the Enemy Deck.
Support X — The enemy will move into the area with the most other enemies of type X (ex. Support Guard, Support Boneworm). If there are several areas that the enemy can move to, choose a Hero Area according to the Target Priority. If there are no enemies of that type, the Support action cannot be performed.
Cultist/Insectoid/Orc/Dwarf/Human X — Have all other enemies of the mentioned type (Cultist, Insectoid, Orc, Dwarf or Human) in the same area as the activated enemy, perform the action specified (e.g. Attack, Disengage...) If there are no enemies of that type, the action cannot be performed.
Poison — The enemy puts a Fatigue card on top of target hero's deck. Use Target Priority unless the action itself specifies another priority. This counts as a Special Ability. If an Ally is targeted by this effect, Attach a Wound to it.
Intimidate X — Target Hero in range must discard X cards from their Hand and/or Persistent cards in their Hero Area. If there are several viable targets, choose according to Target Priority unless the action itself specifies another priority. This counts as a Special Ability.
Obstruct X — A target hero in range loses X Action Points (or as many as able). If there are several viable targets choose according to Target Priority. Allies cannot be targeted by this ability. This counts as a Special Ability.
Heal X Y — Remove one attachment (Wound, Fatigue or Attachment Hero Card - prioritize in that order) from Y amount of enemy type X in the activated enemies area (e.g. Heal Archer 2: this heals one Wound/Fatigue from two Archers in that area). If there are less than Y amount of enemies of that type, only heal as many as able. If there are more than Y amount, players choose which enemy is healed.
Enemy Attacks
Whenever an enemy attacks, the hero must first decide whether they wish to play cards or spend Action Points to increase their Defense (all heroes have a base value of 0). After that, the enemy's Attack value is determined by modifying its Attack value with the number on the Response Card. If the enemy's Attack value is higher than the hero's Defense value, the hero receives Wound and/or Fatigue cards equal to the enemy's damage value.
Any cards played and any Action Points spent only increase the Defense value for one single enemy Attack.
Target Priority
If an enemy ever is about to attack or engage a hero but has several valid targets, choose the target according to these priorities:
- The hero with the fewest enemies in their Hero Area.
- The hero with the least cards in their hand.
- The hero with the most Wound cards in their hand.
- If it is still not clear who the target priority is, the players choose.
Target priority is chosen before an enemy performs its first action and does not change during that enemy's activation.
Wounds, Fatigue and Taking Damage
All damage in the game is represented by Wound and/or Fatigue cards. Wound and Fatigue cards will have different effects depending on whether a hero or an enemy has received them.
Every time an enemy has been hit by an attack, attach a number of Wound and/or Fatigue cards, equal to the damage value of the attack, to it. A hero's damage value can be found on their Hero Board and is usually 1 Wound.
Example: Bastian has performed an attack of 7 against a boneworm with a final defense of 4. Bastian's attack value is higher than the boneworm's defense value and so his attack is successful. Bastian has a damage value of one Wound, so he takes the top Wound card from the Wound Deck and attaches it to the boneworm. Note that the difference between Bastian's attack value and the boneworm's defense value is not relevant for the amount of damage dealt. If Bastian's attack value is higher than the boneworm's defense value, he deals one Wound.
The bottom part of the card will be used when an enemy receives a Wound. To attach a card to an enemy, place the Wound card under the enemy card so that only the bottom of the card is visible. This will now show how the enemy stats will be modified (see Attachments). Engagement costs, Attack and Defense can never sink below 0, Range never below 1 and if an enemy's health ever drops below 1 it is dead and removed from the game.
Whenever a hero is hit by an enemy attack, they receive an amount of Wound and/or Fatigue cards equal to that enemy's damage value. All Wound and Fatigue cards received go straight into the hero's hand.
Wound cards can be played just like any normal hero card and if played will be discarded to the hero's discard pile.
The card description of Wound and Fatigue cards is for the heroes only. A hero may play the card anytime to modify an action by the corresponding value (often negative). An Action Point card can be played on its own to reduce that amount of Action Points. If a hero is unable to subtract that many Action Points from their total, they may not play the card.
An attack or defense card may only be played as part of an attack or defense action. The final attack or defense value may not be less than 1.
Fatigue cards work just like Wound cards with a few exceptions.
If a hero plays a Fatigue card, it must be put onto the Fatigue discard pile instead of into their own discard pile.
If a player is supposed to receive and/or place a Fatigue card but is unable to do so due to running out of Fatigue cards, they receive a Wound instead. If a player is supposed to attach a Fatigue card to an enemy but is unable to do so due to running out of Fatigue cards, they do not attach a Wound card.
If a player is supposed to receive or place a Wound card or is supposed to attach one to an enemy but is unable to do so due to running out of Wound cards, the heroes lose the game.
If a hero dies, the heroes have lost the scenario and have to replay it.
Aiding
Heroes may play cards not only to allow themselves to perform actions but also to support each other. To aid another hero, a hero must play a card (paying its Action Point cost) and add the value of that card to another hero's action.
When aiding an attack, always pay the Primary cost of the attack card. If the attack card doesn't have a Primary cost, it can't be used for aiding.
The target being attacked must be within range of that card for the card/cards being used to aid. When using a Defense/Special/Action Points card targeting another Hero or Ally in another hero's Hero Area, the card needs at least 2 Range.
Terrain Cards
Cards from the terrain deck can be interacted with, if so specified by the rules, if they are in the Quest Area, by any hero not engaged with an enemy. Whenever a Terrain card is removed from play, remove it from the game.
Doors and Portcullises
The Door and Portcullis Terrain cards can be removed from play in two ways, by spending Action Points or by Attacking the door or portcullis. Any hero that is not engaged with an enemy may try to open a Door or Portcullis by spending Action Points.
Once the hero has spent as many Action Points as they wish the total spent is compared to the Action Points value of the card as it is described in the scenario. The Response cards are drawn after the hero has spent their Action Points.
If the hero spent more Action Points than the final Action Points value of the Door/Portcullis, they have successfully opened it and the Door/Portcullis is removed from play.
Any hero may attack a Door/Portcullis as if within 1 Range if they have no enemies in their Hero Area or as if within 2 Range if they have one or more enemies in their Hero Area.
This attack is performed normally with the exception that the Door/Portcullis is always the only target of the attack and the Defense value of the card is the one described in the scenario. The Response cards are drawn after the hero has determined their attack value.
A Door/Portcullis is not considered an enemy.
Campaign Play and Equipping Items
The scenario "Out Through the Side Entrance" is recommended to start to learn the game, the meat of the Beyond the Rift experience comes through the campaigns though.
When starting a campaign, start by checking if you fulfill the campaign requirements. If you do, you can perform the Campaign Set-up instructions (if any). You may now choose a scenario from this campaign to play.
When choosing a scenario, start by checking if you fulfill the scenario requirements. If you do, you can start by reading the story segment and then setting up the scenario according to the set-up instructions.
The Rules section will explain what rules exceptions are in place for this scenario. If a certain phase is not mentioned in the scenario description, nothing happens in this phase.
Effects are always resolved from top to bottom and from left to right.
If the Win condition has been met, you should read the Aftermath section of the scenario and receive the rewards.
As part of the reward for winning a scenario, the heroes might receive items that are drawn from the campaign specific item deck.
On each hero's Hero Board you can see the character's name, class and alignment. Each item will tell you which of these are required to equip it.
When equipping an item, first see what body part it is equipped to (e.g. right arm, legs, torso, etc.) Then remove all cards from the Hero Deck associated with that body part and then replace them with the cards of that item. You may unequip any equipped items between scenarios.
As part of the reward for winning a scenario or as part of a scenario's setup, the alternate side of a Hero Board might get unlocked. If so, players may choose to play with the alternate side of their Hero Board from this point onward. It is depicted by a red glow of the name/globe of the hero.
Which items the heroes might receive or which hero's alternate Hero Board side might be unlocked is noted in the campaign sheet section.