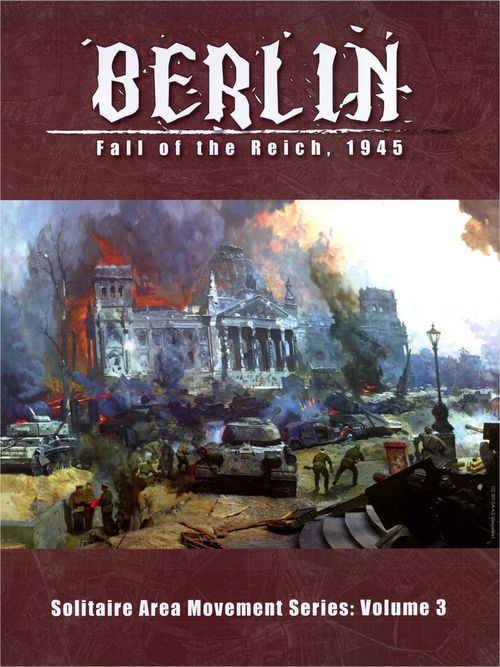
Berlin: Fall of the Reich, 1945
Berlin: Fall of the Reich, 1945 Rulebook
Table of Contents
Table of Contents
- Learning to Play the Game
- 1.0 Introduction
- 2.0 Components
- 3.0 The Map
- 4.0 Playing Pieces
- 5.0 Prepare for Play
- 6.0 Sequence of Play
- 7.0 Stacking and Control
- 8.0 Movement
- 9.0 Combat
- 10.0 Victory Conditions
- 11.0 Optional Rules
- 13.0 Example of Play
- 15.0 Game Strategy
- 16.0 Index and Glossary
- German Opening Setup (5.4)
Learning to Play the Game
Begin by familiarizing yourself with all of the components listed for this game. Then skim through the charts and rules, reading all of the titles and subtitles.
Set up the game and play a trial game. During this trial game, try referring to the rules only when you have a question and remember the numbering system it employs makes it easy to look up rules when you do. While a trial game may take you an hour or two, it is the quickest and most pleasant way to learn how to play (short of having an experienced friend teach you).
Learning all of the rules, word for word, is not recommended - learning all the details of any game is an effort few can achieve. The rules have been written so as to be as comprehensive as possible but are not meant to be memorized. Gradually absorbing the rules in the process of playing is the best approach to mastering this game.
1.0 Introduction
Berlin: Fall of the Reich, 1945 is a solitaire game simulating the campaign by portions of the Soviet Union's 1st Byelorussian Front and 1st Ukrainian Front to capture the capital of Hitler's Third Reich between April 24 and May 2, 1945. The battle for Berlin was the culminating phase of Operation Berlin which had been launched on April 16. The player commands the attacking Soviet forces and the game rules handle the defending German forces.
In reading these rules, if any capitalized term or abbreviation confuses you, refer to the index and glossary at the end of this rulebook. The numerical references found therein and throughout these rules should be ignored during first reading and used only later to refer to related sections for greater clarity.
2.0 Components
Berlin: Fall of the Reich, 1945 includes the following components:
- One 22" by 34" mounted map
- One full sheet of 5/8" die-cut counters
- Two player aid cards
- This rule booklet
- Eight six-sided dice (4 red and 4 black)
2.1 Dice
Throughout the rules "1d6" signifies the roll of a single die, while "2d6" signifies the sum of two dice rolled together, "3d6" signifies the sum of three dice rolled together, and "4d6" signifies the sum of four dice rolled together.
3.0 The Map
The map sheet depicts the portion of Germany where combat took place between April 24 and May 2, 1945. The scale is approximately 1 inch = 0.7 miles.
3.1 Map Areas and Zones
The map is divided into 51 numbered locations hereafter called Areas. Two Areas are Adjacent to each other if they share a common boundary thus enabling units to move directly from one to another (see 8.3 for movement restrictions). The map also contains 14 Zones labeled "A" to "N". Zones are considered the equivalent of Areas in every respect unless stated otherwise (see 8.4). All other rules pertaining to Areas apply equally to Zones.
3.1.1 Identifiers. Each Area and Zone on the map contains an Identifier divided into two halves. The top half contains a number for identification purposes (from 1 to 51 for Areas, from A to N for Zones). The geometric shape of the Identifier (circle, triangle, square, or pentagon) is used for initial placement of German units (5.4). Design Note: Areas with a circle Identifier represent both airfields and less densely populated towns and villages.
3.1.2 Area Terrain Type. The bottom half of each Identifier contains that Area's Terrain Effects Modifier (TEM): Suburban (+1); Forest (+2); Light Urban (+2); Heavy Urban (+3) and Zitadelle (+4). The TEM is used when resolving attacks against German units in that Area (9.5.3B).
3.1.3 Area Boundaries. Areas are separated by solid black and blue lines. Black lines are land boundaries. Blue lines are water boundaries and movement across them is prohibited (8.3.3). For Zones see 8.4.
3.1.4 Airfields. Zone I and Areas 6, 24, and 50 are Airfields.
3.2 Turn Track
The Turn Track printed on the map is used to note the game's current Turn. At the end of each Turn, advance the Turn marker one space to the next sequential Turn on the Turn Track.
3.3 Supply Track
The Supply Track is used to keep track of any Supply Points not allocated by the Soviet player during the Supply Phase. These "banked" Supply Points may be allocated in any future Supply Phase.
3.4 German Morale Track
This track is used to record the morale of the German defenders. See the player aid card for the list of Morale modifiers.
3.5 Stalin Approval Track
This track is used to record the state of Stalin's approval of the player's progress. See the player aid card for the list of Approval modifiers.
3.6 Available Support Units Box
The Available Support Units Box holds Air and Artillery markers available to the Soviet player.
3.7 Used Support Units Box
The Used Support Units Box holds Air and Artillery markers not currently available to the Soviet player.
3.8 Out of Action Box
The Out of Action Box holds Soviet units that were selected for loss during the Combat Phase (6.3). They are eligible to return to play through the expenditure of Supply Points.
4.0 Playing Pieces
Included with the game are die-cut playing pieces called units, representing the various military formations that fought in the campaign, as well as markers that assist in game play.
4.1 Unit Coloring
Soviet units are brown with black text. German units are color-coded (4.4) except for the units of 9th Army which are gray with black text (Optional Rule 11.4).
4.2 Soviet Unit Types
There are two basic types of Soviet units: Armor and Infantry. During play Soviet units will have either their colored (Fresh) or white (Spent) sides facing up.
4.2.1 Armor. Armor units may be distinguished from Infantry units by their vehicle illustration. An Armor unit is required for a Soviet attack to earn the Combined Arms Bonus (9.5.2D).
4.2.2 Infantry. An Infantry unit is required for a Soviet attack to earn the Combined Arms Bonus (9.5.2D).
4.3 Soviet Unit Information
Soviet units have information printed on them to identify the unit and indicate its strength as well as its movement capability. The setup location is also included on each unit.
4.3.1 Strength Factors. On its Fresh side each Soviet unit has two values below its unit ID. The first is the unit's Attack Factor and the second is the unit's Movement Factor. There are no values on a Soviet unit's Spent side since a Spent unit may not move or attack.
4.3.2 Parent Organization. Units of the 1st Byelorussian Front, including their setup Zone, are color-coded orange (north wing) or tan (east wing), and units of the 1st Ukrainian Front are color-coded light blue. Distinguishing between these three groups of units becomes important when rolling certain Random Events (see player aid), returning units to action (6.2), and unit activation (Optional Rule 11.3).
4.3.3 Unit Size. Soviet units are corps sized but each corps has attached Armor units that are either brigade (4-6 and 3-6) or regiment (2-6) sized.
4.4 German Unit Information
Each German unit is associated with one Area Terrain Type (3.1.2). There are 8 Forest, 32 Light Urban, 24 Heavy Urban, 24 Suburban, and 8 Zitadelle units. Only the Terrain Type is visible on the front (Unrevealed) side. Design Note: The game includes extra German units of each Terrain Type to prevent the player from being able to predetermine the exact German Defense Strategy in an Area based on already Revealed German units.
On the back (Revealed) side is the unit's Defense Factor and Defense Strategy (9.4). The Defense Strategy effect is applied only once, during the Action Phase the unit is first Revealed. Once Revealed, a German unit remains Revealed and only its Defense Factor is used until it is eliminated. German units may not move.
4.5 Markers
Markers represent support units and non-combat units used to record various types of game information.
4.5.1 Turn. This marker is used to track the game's current Turn. Design Note: The Turn marker includes a portrait of Georgy Zhukov, commander of the 1st Byelorussian Front.
4.5.2 German Morale. These markers are used to track the current German Morale level. If German Morale is 19 or less on the German Morale Track at any time, German Morale is considered shaken (9.5.3D). To indicate this, flip the markers to their "Shaken" side.
4.5.3 Stalin Approval. These markers are used to track Stalin's approval of the player's handing of Operation Berlin.
4.5.4 Supply. These markers are used to record Soviet Supply Points not yet expended.
4.5.5 Artillery Support. Artillery Support markers may be purchased with Supply Points during the Supply Phase.
4.5.6 Air Support. Air Support markers may be purchased with Supply Points during the Supply Phase.
4.5.7 Bloody Streets. If the result of a Combat Resolution (9.5.5) is a Stalemate, a Bloody Streets marker is placed into the Area (6.3.1).
5.0 Prepare for Play
5.1 Game Length
The game is nine turns long and covers the battle of Berlin from April 24 to May 2, 1945. Each Turn represents one day of combat.
5.2 Marker Placement
Place the Turn marker in the "1" (April 24) space on the Turn Track.
Place the German Morale x1 marker in the "0" space on the German Morale Track and the German Morale x10 marker in the "5" space on the German Morale Track. Place the Stalin Approval x1 marker in the "9" space of the Stalin Approval Track and the Stalin Approval x10 marker in the "1" space on the Stalin Approval Track. Note: treat German Morale and Stalin Approval less than 0 as 0.
Place the Supply x1 and Supply x10 markers in the "0" space on the Supply Track.
Place all of the Air and Artillery Support markers in the Used Support Units Box printed on the map (3.7).
5.3 Soviet Unit Setup
All Soviet units begin play Fresh side face up.
5.3.1 Soviet Setup. Soviet units are placed on the map at the start of play. The starting location of each unit is printed on the unit as well as on the player aid card.
5.4 German Unit Setup
Sort the German units into the five Terrain Types they may occupy. Shuffle the counters of each Terrain Type and then randomly place one counter, Unrevealed side up, in each Area/Zone whose Identifier corresponds to its Terrain Type: round for Suburban, triangle for Forest, square for Light Urban, black pentagon for Heavy Urban, and red pentagon for Zitadelle. Exception: place German counters Revealed side up in Zones containing Soviet units (A, B, D, E, F, L, M, and N). After setup is complete, excess German unit counters should be removed from play without being examined.
6.0 Sequence of Play
Each Turn represents one full day of combat and comprises four Phases. The sequence of play is conducted in the following order: Random Event Phase, Supply Phase, Combat Phase, and End Phase.
6.1 Random Event Phase
During the Random Event Phase, the player makes a 3d6 roll and consults the Random Event Chart on the player aid card. Place the random event marker on the chart printed on the player aid card as a reminder.
6.1.1 No Result. Treat a "Zhukov Pause" or "Konev Pause" Random Event result on Turn 1 and Turn 9 as "no result."
6.2 Supply Phase
At the beginning of each Supply Phase, the Soviet player rolls 4d6 for Supply Points and may then spend Supply Points to gain certain game benefits. Supply Points are recorded on the Supply Track with the game's two Supply markers. Supply Points may be expended to move Support markers from the Used Support Units Box to the Available Support Units Box or to return units in the Out of Action Box to the map. Costs are listed below. A unit in the Out of Action Box that returns to play must be placed in an Area containing at least one unit of the same Parent Formation (4.3.2) or the unit's original setup Zone (5.3.1). Placement may be made even if a German unit is present in that Zone.
Supply Costs
| Marker Type | Combat Effect | Cost |
|---|---|---|
| Air Support | See 9.5.3E | 2 each |
| Artillery | +2 Soviet AV | 2 each |
| Unit Type | Strength | Cost |
|---|---|---|
| Guards Infantry Corps* | 7-4 | 5 each |
| Guards Armored Corps | 8-6 | 4 each |
| Armor Corps | 6-6, 5-6 | 3 each |
| Infantry Corps* | 5-4 | 2 each |
| Armor Brigade/Regiment | 4-6, 3-6, 2-6 | 1 each |
* May not return to the map if that Turn's Random Event was Infantry Shortages.
6.2.1 Unspent Supply. Supply Points may accumulate from Turn to Turn. These "banked" Supply Points may be used in any future Supply Phase.
6.3 Combat Phase
6.3.1 Bloody Streets. At the start of the Combat Phase, the player rolls 1d6 for each Light Urban, Heavy Urban, or Zitadelle Area containing at least one Soviet unit that also contains a German unit (Contested Area, 7.3).
| Roll | Effect |
|---|---|
| 1 | Flip the Soviet unit(s) to their Spent side AND reduce Stalin Approval -1 |
| 2 | Reduce Stalin Approval -1 |
| 3 | Place one Soviet unit in the Out of Action Box (player's choice) |
| 4-6 | No Result |
6.3.2 Phone Call to Stalin. Once per Turn, at the start of the Combat Phase, the player may roll 1d6. This roll is optional and the player may always decline to make it.
| Roll | Effect |
|---|---|
| 1 | Decrease Stalin Approval -2 |
| 2 | Decrease Stalin Approval -1 |
| 3 | No Result |
| 4 | No Result |
| 5 | Increase Stalin Approval +1 |
| 6 | Increase Stalin Approval +2 |
Modifiers: +1 if Berlin is surrounded (see note below). +1 if German Morale is Shaken (4.5.2).
Note: Berlin is considered surrounded when the Soviet player controls Zones A, B, D, E, F, H, I, J, K, L, M, and N. Treat results greater than "6" as a "6".
6.3.3 Soviet Action Rounds. The Combat Phase is made up of individual Action Rounds. During each Action Round, the Soviet player may activate one Area on the map containing Fresh units to move (8.0) and/or attack (9.0). A maximum of one Area may be activated each Action Round.
6.3.4 Becoming Spent. After completing its activation, a unit is flipped to its Spent side. The Combat Phase ends when all Soviet units are Spent or the player declines to activate additional Areas.
6.4 End Phase
6.4.1 German Morale/Stalin Approval. German Morale decreases by one each End Phase and continues to be reduced by one every End Phase for the duration of the game. Stalin Approval decreases by one each End Phase and continues to be reduced by one every End Phase until the Reichstag (Area 50) is Soviet Controlled.
6.4.2 Victory Determination. Determine if an Automatic Victory has been achieved (10.1). If the player has not achieved an Automatic Victory, flip all Spent Soviet units back to their Fresh side. Remove the Random Event marker from the Random Event Chart (see player aid). Advance the Turn marker to the next space on the Turn Track. Any Support markers still present in the Available Support Units Box remain there and continue to be available.
6.4.3 End of Game. If the player has not achieved an Automatic Victory by the end of Turn 9 (May 2), a final victory check (10.2) is made.
7.0 Stacking and Control
7.1 Stacking
A maximum of four Soviet units may occupy a single Area. Exception: Zones (see 8.4.2). Soviet Support markers (Air and Artillery) do not count against stacking limits. A maximum of one German unit may be stacked in an Area at any given time. Exception: German 9th Army (see 11.4). Soviet units may not move into, attack into, or end a retreat in an Area already stacked to the maximum. They may, however, retreat through a fully stacked Area.
Although most Areas are large enough to display all of the Soviet units therein, stacking all of a player's Fresh and Spent units in separate piles may be done to conserve space.
7.2 Control
Each Area is always Controlled by either the attacking Soviet player or the defending German side. Important: An Area containing a German Unit is always German Controlled. An Area lacking a German unit is always Soviet Controlled.
7.3 Contested
An Area is considered Contested if it contains units of both sides. Contesting an Area that is Controlled by the Germans does not alter control of that Area. Soviet units within a Contested Area may only attack the German unit within that Contested Area.
7.4 Vacant
An Area is Vacant if it contains no German units, regardless of the presence of Soviet units. Note: A Vacant Area is always Soviet Controlled.
8.0 Movement
8.1 Mechanics of Movement
During an Action Round, the Soviet player may select a single Area for activation. This is called the Active Area. An Area must contain at least one Fresh Soviet unit in order to activate. The player may activate any number of Fresh units in the activated Area.
Units move one at a time. A unit may move from an Area to an Adjacent Area, the number of Areas entered during movement being limited by the printed Movement Factor (MF) on the moving unit. After movement and/or combat is completed, a unit is flipped to its Spent side.
If the Active Area contains a German unit at the moment of activation the Soviet player may attack that German unit with their activated units (9.2). If Soviet units enter an Area with only a German unit, the Soviet player must attack (9.1) that German unit with their activated units. If a Soviet unit enters an Area with a German unit and non-activated Soviet units, the Soviet player may attack that German unit with their activated units (9.2).
8.1.1 Area Activation. All of the Fresh units in an Area may move and/or attack if the Soviet player has chosen that Area to be their Active Area. Units in the activated Area may move and/or attack until there are no units left to perform an action.
8.1.2 German Units. German units never move. Exception: 11.4. An Unrevealed German unit is Revealed (9.4) after all Soviet movement into its Area.
8.2 Movement Costs
Only Fresh units may move. Movement requires the expenditure of Movement Factors (MF). A unit may continue either to move into Adjacent Areas until it lacks enough MF to enter another Area or it enters an Area occupied by a German unit, where it must stop. Movement into an Area incurs one of the following MF costs (units must expend the highest applicable cost):
| Cost | Move |
|---|---|
| 1 MF | Enter a Vacant Area not Adjacent to any German unit |
| 2 MF | Enter a Vacant Area Adjacent to any German unit |
| 3 MF | Enter an Area containing a Revealed German unit |
| 4 MF | Enter an Area containing an Unrevealed German unit |
| ALL MF | Attack within a Contested Area or Zone |
| ALL MF | Enter a Zone |
If the Active Area is Contested at the moment of activation, Soviet units may attack or exit the Area at normal MF costs, subject to Contested Area exit restrictions (8.3.2).
8.2.1 Multiple Area Destinations. Units starting in an Active Area may move into and/or attack into different Areas. Attacks made into different Areas do not have to be designated in advance. The Soviet player may wait for the results of a move/attack before announcing a later move/attack into another Area by other units starting in the Active Area. Once an Area is attacked, additional units may not move into that Area during the same activation. Units that begin movement in the same Area do not have to end their movement in the same Area. Nor do all units moving have to move simultaneously.
8.3 Movement Restrictions
The following four situations restrict movement:
8.3.1 Overstacking. Units may not enter a fully stacked Area (7.1).
8.3.2 Exiting a Contested Area. Soviet units within a Contested Area must first move to a Vacant Area before again entering an Area containing a German unit.
8.3.3 Bodies of Water. Soviet units may not move across a blue Area boundary (3.1.3) during movement or when retreating as a result of combat.
8.3.4 Zitadelle. Soviet units may not attack Area 50 (Reichstag) and Area 51 (Chancellery) until German Morale is less than 20.
8.4 Zones
Surrounding the map of the city of Berlin are a number of perimeter Zones labeled A through N. A Zone may only be entered during an Action Round by a unit starting that Action Round in an Adjacent Area or Zone, and the unit must end movement upon entry of that Zone. A unit beginning its Action Round in a Zone may move to an Area normally, paying the entrance costs of that Area and may continue movement to other Areas if sufficient MFs are available. Friendly units moving Adjacent to a Zone may ignore enemy units in that Zone for movement purposes.
8.4.1 Entry Restrictions. Soviet units may never enter Zone C (Halbe) or Zone G (Brandenburg). Historical Note: The German 9th Army was encircled around Halbe and the German 12th Army was defending along the Elbe in the Brandenburg region.
8.4.2 Stacking Limits. An unlimited number of Soviet units may occupy a Zone.
8.4.3 Retreat. A unit may retreat into a friendly-Controlled Zone even if this would violate normal retreat priorities (9.5.7).
8.4.4 Overruns. Overruns may not occur in Zones.
9.0 Combat
Only units in the Area chosen to be the Active Area may attack. An attack incurs no additional MF cost beyond that for entering a German-occupied Area. If the Active Area was already Contested at the moment of activation, the units within that Contested Area may either exit the Area, attack, or some combination of the two.
An attack is resolved only after all units have entered the attacked Area. Other units starting in the Active Area not involved in the attack may move, but no additional units may enter the Area being attacked once combat is resolved.
9.1 Mandatory Attacks
Soviet units must make a Mandatory Attack whenever they enter a German-occupied Area that was not Contested at the moment the Active Area was selected. If a Mandatory Attack results in a Repulse (9.5.5), all attacking units must retreat (9.5.7).
9.2 Optional Attacks
Unless required to conduct a Mandatory Attack, the Soviet player may attack with all, some, or none of their units that entered the Area. If they choose to attack, at least one unit must attack.
9.3 Contested Area
If the Active Area is already Contested at the moment of activation, all, some, or none of the Soviet units starting in that Area may attack. If the Soviet player loses the attack, the attacking units do not retreat and must remain within the Active Area. Note: if Soviet units enter a Contested Area containing other Soviet units, they may not join with those units to make a single combined attack.
9.4 Reveal German Unit
If the German unit in the Area is Unrevealed, it is flipped to its Revealed side. German units are Revealed after movement into the Area is complete but prior to combat including the allocation of Support markers. The German unit's Defense Strategy is applied during the Combat Resolution that follows. Important: A Defense Strategy is applied only once, when the German unit is first Revealed. See the player aid card.
9.5 Combat Resolution
Attacks are resolved by comparing the Attack Value of the attacking Soviet unit(s) plus a 2d6 roll (the Attack Total or AT) against the Defense Value of the defending German unit plus a 2d6 roll (the Defense Total or DT). Combat is resolved in the following order:
A. Soviet player designates the Lead Attacking Unit B. Soviet player places Artillery and Air Support markers into the Area (9.5.4) C. Tabulate the final Attack Value (AV) and Defense Value (DV) D. Roll dice (9.5.1) and compute results (9.5.5) E. Soviet Support markers are removed from the Area and placed in the Used Support Units Box printed on the map (9.5.8).
9.5.1 Dice. When resolving combat roll two dice (2d6) for each side. Exception: Elite German units (see player aid).
Note: two markers and a chart printed on the map have been supplied for players who wish to keep track of their AV and DV before rolling dice. Their use is optional.
9.5.2 Attack Value (AV). The AV is equal to the sum of:
A. The Attack Factor of any one attacking Soviet unit of the player's choice (the Lead Attacking Unit), B. +1 Each additional unit participating in the attack, C. +2 Each Artillery Support marker placed in the Area, D. +1 Combined Arms Bonus: if an attack by at least one Infantry and at least one Armor unit is supported by at least one Artillery marker. Attacks into Heavy Urban and Zitadelle Areas may not receive this bonus.
9.5.3 Defense Value (DV). The DV is equal to the sum of:
A. The Defense Factor of the Revealed German unit, B. +? For the Area TEM: +1 Suburban; +2 Forest and Light Urban; +3 Heavy Urban; and +4 Zitadelle, C. +? German Armor*: +1 Panther, +2 Tiger, +3 King Tiger, D. -1 German Morale is Shaken (19 or less on the German Morale Track)** E. -1d6 Soviet Air Marker***
* Only applied during the first Combat Resolution after the German unit is Revealed. ** German Elite and Hitlerjugend units ignore the effects of Shaken Morale during the first Combat Resolution after they are Revealed. *** Treat any German Defense Value of less than 0 as 0.
9.5.4 Support Limits. A maximum of three Artillery Support markers may be allocated to any single Combat Resolution. In addition the number of Artillery Support markers may not exceed the number of attacking Soviet units. A maximum of one Soviet Air Support marker may participate in any single Combat Resolution.
9.5.5 Computing Results. The result of the attack depends on the difference between the Attack Total (AT) and the Defense Total (DT).
- Repulse: If the AT < DT, the Soviet attack has been repulsed and there is no effect on the German unit. The Lead Attacking Unit is removed from the Area and is placed in the Out of Action Box. All of the remaining attacking units are flipped to their Spent side. Retreat is required in cases of a failed Mandatory Attack (9.1). Retreat must follow Soviet retreat procedure (9.5.7). Reduce Stalin Approval -1.
- Stalemate: If the AT = DT, the Soviet attack has suffered a Stalemate. There is no effect on the German unit. Attacking units are flipped to their Spent side. Place a "Bloody Streets" marker into the Area (4.5.7).
- Success: If the AT > DT, the Soviet attack has achieved a Success. The German unit is eliminated and removed from the map. German Morale may decrease (see the player aid card). Attacking units are flipped to their Spent side. Exception: if the Revealed German Defense Strategy was Ambush (see player aid), the Soviet player must still eliminate the Lead Attacking Unit.
- Overrun: If the attack is a Success and the difference between the AT and DT is greater than the Defense Factor of the Revealed German unit, an Overrun has been achieved. The German unit is eliminated and removed from the map. German Morale may decrease (see the player aid card). All attacking units remain Fresh and may be activated again in a future Action Round. An Overrun also cancels the effect of the Fanatic German Defense Strategy. Overruns may not occur in Heavy Urban and Zitadelle Areas as well as Zones (8.4.4).
9.5.6 Ambush Area Change. If the combat result is a Success or an Overrun, but the Lead Attacking Unit is eliminated due to the German Ambush Defense Strategy (see player aid), and the Lead Attacking Unit was the only Soviet unit, remove both the Soviet unit and the German unit. The Soviet player gains control of the Area (7.2).
9.5.7 Soviet Retreat Procedure. Attacking units may only retreat into the Area from which they entered the attacked Area. Units must retreat one at a time to determine if the Area becomes fully stacked. If it does, subsequent units must continue their retreat to another Area that is not fully stacked. Note: Soviet units that retreat as a result of a German Kill Zone (see player aid) follow this procedure also.
9.5.8 Support Marker Removal. Support markers used in Combat Resolution should be removed from the Area they were placed in and relocated to the Used Support Units Box printed on the map. They are unavailable until purchased in a future Supply Phase.
10.0 Victory Conditions
10.1 Automatic Victory
10.1.1 Automatic Player Victory. The Soviet player wins an immediate Automatic Victory when at any moment they control Area 50 (Reichstag) and Area 51 (Chancellery) and German Morale is zero (0). Design Note: This signifies the city has surrendered. Historically these conditions were fulfilled on May 2.
10.1.2 Automatic Player Defeat. The game ends immediately and the player has lost if at the end of any Turn Stalin Approval is zero (0). Design Note: Berlin will eventually be conquered but the player will not share in the glory.
10.2 Final Victory Check
If an Automatic Victory has not been achieved by the end of Turn 9, the game's final Turn, the Soviet player wins if they control Area 50 (Reichstag), Area 51 (Chancellery), Zone H (Potsdam) all four airfields (3.1.4), and German Morale is less than five. If they fail to do so, the player has lost the game.
11.0 Optional Rules
These rules may be incorporated for greater historical realism and play balance.
11.1 Limited Air Power
Air Support markers may not be placed in Heavy Urban or Zitadelle Areas that were already Contested at the beginning of the Action Round. In addition, Air Support markers placed in Heavy Urban and Zitadelle Areas have their die roll reduced by -2. Treat results of less than "1" as "1".
11.2 Early Lead Unit Declaration
As an additional challenge during Combat Resolution the player must select their Lead Attacking Unit before an Unrevealed German unit in the Area is flipped to its Revealed side (9.4).
11.3 Zhukov/Konev Rivalry
Units of the 1st Byelorussian Front (orange and/or tan) and 1st Ukrainian Front (light blue) may not activate in the same Action Round.
11.4 German 9th Army
At the start of play place the three German 9th Army units into Zone C (Halbe). Initially ordered by Hitler to hold their position the army was given permission to advance west and link up with 12th Army, then holding positions on the Elbe River.
11.4.1 Army Activation. At the start of the End Phase of Turn 2 the player rolls 1d6. On a "5" or a "6" the 9th Army units are activated, otherwise there is no result. If activation did not occur on Turn 2, the player again rolls 1d6 at the start of the End Phase of Turn 3. On a "3", "4" "5" or "6" the 9th Army units are activated, otherwise there is no result. If activation did not occur on Turn 2 or Turn 3, the 9th Army units automatically activate on Turn 4.
11.4.2 Army Movement. When activated for the first time each 9th Army unit may attempt to advance from Zone C to Zone D (Sperenberg). If Zone D does not contain at least one Soviet unit, all three 9th Army units may remain in Zone D. If Zone D contains at least one Soviet unit, each 9th Army unit must make a 1d6 die roll to determine if they may Contest the Zone. If the die roll result is greater than the number of Soviet units, that 9th Army unit remains in Zone D. If the die roll is equal to the number of Soviet units in Zone D, that 9th Army unit must retreat back to Zone C. If the die roll is less than the number of Soviet Units in Zone D, that 9th Army unit is eliminated and removed from play.
11.4.3 Reaching the Elbe. German 9th Army units still in play activate at the start of each End Phase for the rest of the game until they reach the safety of Zone G (Brandenburg). They may activate whether or not they are in the same Zone. Attempts to move always proceed directly west from Zone C to Zone D, Zone D to Zone E, Zone E to Zone F and Zone F to Zone G. German 9th Army units may only advance one Zone per activation. If a Soviet unit or units is present in the Zone that the German 9th Army unit is attempting to enter, a movement die roll is always made.
11.4.4 Special Movement Rules. German 9th Army units may never enter a numbered Area on the map. If they successfully exit Zone F into Zone G, they cease moving for the rest of the game. German 9th Army units within a Contested Zone may ignore the presence of any Soviet units in that Zone and exit it to another Zone, even another Zone with a Soviet unit. If the movement dr (11.4.2) results in a retreat, the 9th Army unit may retreat back into the starting Contested Zone.
11.4.5 Reaching Zone G. Each German 9th Army unit that reaches Zone G (Brandenburg) increases German Morale by +1.
11.4.6 Link-up with 12th Army. If as a result of the Wenck Attacks Random Event there is a German unit in Zone F, units of 9th Army attempting to move from Zone E to Zone F receive a +1 modifier to their movement die roll.
11.4.7 Attacking 9th Army. The Soviet player may attack 9th Army units, which are treated as Revealed German units with no strategy. If there is more than one unit of 9th Army defending, combine their Defense Factor into a single Defense Value. A Success result eliminates the German 9th Army unit with the weakest Defense Factor; an Overrun eliminates all German units. German 9th Army units never retreat as a result of combat. If there is a German unit from the opening setup in Zones D or E, or if there is a German unit in Zone F as a result of the Wenck Attacks Random Event, these units add +1 to the Defense Value, not their full Defense Factor.
11.5 Reduced Supply Luck
When the Soviet player rolls dice during the Supply Phase any result of "1" is re-rolled until the result is "2" or greater.
11.6 Soviet Tank Reserves
Once per game, during the Supply Phase, the Soviet player may return all of the 2-6 and 3-6 Armor units in the Out of Action Box to play for a single Supply Point.
11.7 Heavier Air Commitment
One Air Support marker is placed in the Available Support Units Box each Supply Phase at no cost. Random Events do not prevent this. The other Air Support marker must be purchased.
13.0 Example of Play
Optional Rules are not used in this example of play.
13.1 Initial Situation
It is Turn 4. On the map the German Morale total is 25, the Stalin Approval total is 15, and the Supply total is 4 (indicating there are four Supply Points saved).
13.2 Random Event Phase
The player rolls 3d6 and the result is an "11". The player consults the Random Event Chart on the player aid card for the result and sees "Konev Pause." The Random Event marker is placed in the "Konev Pause" event box printed on the player aid card. In the upcoming Combat Phase units with Setup Locations D, E, and F may move, but may not attack.
13.3 Supply Phase
The player rolls 4d6 and the result is "17". Combined with the 4 points marked on the Supply Track the Soviet side now has 21 Supply Points available. The Supply markers on the Supply Track are now adjusted, placing the "Supply x1" marker in the "1" box and the "Supply x10" in the "2" box. The player may now spend Supply Points for the upcoming Turn. They return 5 Artillery markers to play (10 points), purchase one Air marker (2 points), one 7-4 strength Infantry unit (5 points) and one 8-6 strength Armor unit (4 points). The Artillery and Air markers are placed in the Available Support Units Box and the ground units are placed on the map. Both the "Supply x1" and "Supply x10" markers are moved to the "0" box on the Supply Track.
After activating Area 14 (Weissensee) four Soviet units move to Area 15 (Prenzlauer Berg). The German unit is flipped to its Revealed side, support is allocated by the player, and then combat is resolved.
13.4 Combat Phase
The player chooses Area 14 (Weissensee) to be the Active Area. The four units of the 3rd Shock Army move to Area 15 (Prenzlauer Berg) at a cost of 4 Movement Points due to the presence of an Unrevealed German Unit (8.2) and conduct a Mandatory Attack (9.1). With movement finished play proceeds to Combat Resolution. The German Unit is flipped to its Revealed side which indicates a Fanatic Defense Strategy (see player aid) with a Defense Factor of 8.
The player decides the 3S/12G will be the Lead Attacking Unit and places one Artillery Support marker in Area 15. The final Soviet Attack Value (AV) is "7" (the Attack Factor of the Lead Attacking Unit) +3 (three additional attacking units) +2 (Artillery Support) = 12. The German Defense Value is 8 (the Defense Factor of the Revealed Unit) +3 (Heavy Urban Terrain) = 11. The player rolls 2d6 for the attacking Soviet side and rolls a "8" which is added to the Soviet Attack Value to yield a final Attack Total of 20. The player rolls 2d6 and rolls a "8" for the defending German side which is added to the German Defense Value to yield a final Defense Total of 19.
The result is a Success (9.5.5), and normally the German unit would be eliminated, but the Fanatic Defense Strategy changes the combat result from a Success to a Stalemate. The four Soviet units are flipped to their Spent sides. The German unit is unaffected. A "Bloody Streets" marker is placed in Area 15. Note: The Defense Strategy of a German unit is applied only when it is initially flipped to its Revealed side. If the Soviet player attacks Area 15 again, the Fanatic Defense Strategy will NOT be in effect.
The first Soviet attack on Area 15 leaves the Area Contested by both sides and still under German control.
13.5 End Phase
After moving and attacking with all of the Soviet units they wished to activate during the Turn the player decides to proceed to the End Phase. The player did not win an Automatic Victory during the Combat Phase, so they flip all Spent Soviet units back to their Fresh side, decrease German Morale from "25" to "24" and Stalin Approval from "15" to "14", remove the event marker on the player aid card, and advance the Turn marker from the "4" space to the "5" space on the Turn Track. Play proceeds to Turn 5.
15.0 Game Strategy
15.1 Dealing with Random Events
Random Events are meant to slow Soviet progress and to give the player a sense of the challenges Soviet commanders faced dealing with logistical and military variables both inside and outside the city of Berlin during the battle. The results are designed in the form of a bell curve. The most common results will be shortages of Infantry and either Zhukov or Konev pausing their forces. The most extreme results are suicide air attacks by the Luftwaffe on the Oder River bridges supplying Soviet forces and Hitler having a change of mind and trying to leave Berlin to continue the war in the Bavarian Alps.
15.2 Spending Supply Points
As the Soviet player you have well-trained and well-balanced forces at your command. The supplies arriving each day can vary. Managing what supplies you receive is a game-within-a-game and must be done with care or you will find yourself without the support you need at crucial moments. You can spend all of your Supply Points in a given Supply Phase, trusting you will roll well during the next Supply Phase, or you can keep a few points saved to offset a potentially poor roll the following Turn. An armored regiment (2-6) or brigade (3-6, 4-6) is the least expensive unit to return to the map from the Out of Action Box; conversely bringing a Guards Infantry Corps (7-4) or Guards Armored Corps (8-6) back into action is the most expensive.
15.3 German Defense Strategies and Combat
German Defense Strategies represent actions by German units inside the city of Berlin that could frustrate Soviet progress. Volkssturm are the weakest opposition, easily brushed aside in most cases. Next in strength is the Ambush, which can chip away at Soviet unit strength. More powerful is the Kill Zone. If there are little or no Soviet units in the Out of Action Box, it is probably worth placing a unit out of action to keep the advance moving. But if a number of units have already been lost, it is probably better to forgo additional losses and retreat from the Kill Zone to fight another day. Similar to the Kill Zone the Fanatic Defense Strategy represents the on-going stubbornness of the German defenders in Berlin and the enormous resources the Soviet side had to spend to defeat them. The most likely result of a Fanatic defense is changing what would have been a Success in combat into a Stalemate, with the Area merely Contested and the player forced to attack the Area a second time. Last and perhaps most powerful is the Elite defense. These units possess the capacity to Repulse a Soviet attack unless it is very well-supported.
15.4 Achieving a Soviet Victory
Stalin wanted to capture the Reichstag by May Day and until this happens his approval will decrease. The sooner German Morale can be Shaken, the better. Surrounding the city and capturing Heavy Urban Areas are especially useful in this regard. Strong German defenses should be by-passed when possible; the player does not need to capture every Area on the map to win. The player should keep a garrison in any Zone that can be subjected to attack by a Random Event (or Optional Rule 11.4). If Stalin's approval is low the player may attempt a phone call to explain themselves, but unless German Morale is Shaken and Berlin is surrounded, the call may do them more harm than good!
16.0 Index and Glossary
- 1d6 (die roll): A roll of a single six-sided die.
- 2d6 (dice roll): A roll of two six-sided dice added together to form one combined result. Used during the Combat Phase.
- 3d6 (dice roll): A roll of three six-sided dice added together to form one combined result. Used during the Random Event Phase.
- 4d6 (dice roll): A roll of four six-sided dice added together to form one combined result. Used during the Supply Phase.
- Action Rounds: 6.3.3.
- Active Area: The Area the player has chosen to activate to conduct unit Movement and/or Combat Resolution.
- Adjacent: Areas that share a common boundary are adjacent.
- Air: A Soviet Support marker; 4.5.6. Optional Rule: 11.7.
- Airfield: 3.1.4, 10.2.
- Area: Any of the 51 spaces on the map, used to regulate movement and combat; 3.1.
- Area Boundaries: 3.1.3.
- Armor: Any unit with a vehicle illustration; 4.2.1.
- Artillery: A Soviet Support marker; 4.5.5.
German Opening Setup (5.4)
Unit checklist as printed in the rulebook. (The printed list contains no Zitadelle rows.)
| Terrain Type | Defense Value | Defense Strategy |
|---|---|---|
| Suburban | 3 | Hetzer |
| Suburban | 3 | Volkssturm |
| Suburban | 4 | Hetzer |
| Suburban | 4 | Volkssturm |
| Suburban | 4 | Panther |
| Suburban | 5 | Hetzer |
| Suburban | 5 | Wirbelwind |
| Suburban | 5 | Panther |
| Suburban |