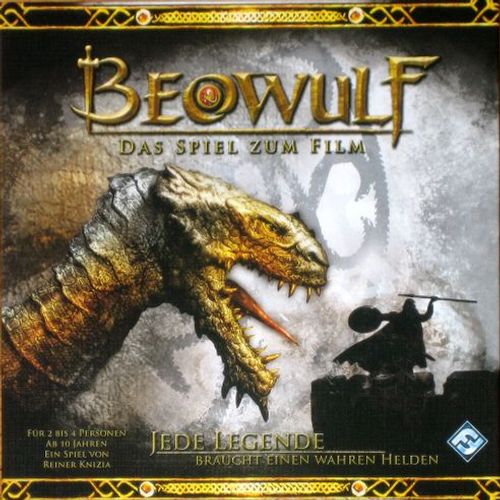
Beowulf: The Movie Board Game
Beowulf: The Movie Board Game Rulebook
Table of Contents
Table of Contents
Overview
In Beowulf: The Movie Board Game, each player tries to tell the most epic version of the Beowulf saga. To do this, each player takes command of Beowulf himself, guiding the hero and his companions to chronicle the tale in the most exciting way possible. As they play, players try to score as many saga points as they can. Players' saga points are earned by placing their figures in rows and columns that contain benefits, while avoiding rows and columns cursed by perils. The game is divided into three acts. Each act revolves around one of Beowulf's enemies: the murderous Grendel, Grendel's treacherous mother, and the mighty dragon. Each act is played on a different board. As the game progresses, options and opportunities multiply — as do the dangers. After all three acts are completed, the player with the most saga points wins.
Components
The sections below describe the components of Beowulf: The Movie Board Game.
Game Board
The game is played on three different panels, one for each act. Each board has a grid of spaces where figures and tiles are placed during the game. Note that the graphic elements on the boards — except for the throat icons on the Act II board — are purely decorative.
Figures
Players place their plastic figures on the spaces to score points. Each figure has a number of diamonds on its base. The more diamonds it has, the greater its potential to score, for good or ill, depending on whether the figure lines up with benefits or perils.
Every player has the same set of figures: one Beowulf figure with 4 diamonds, two Thane figures with 3 diamonds, three Heorot Castle figures with 2 diamonds, and four Drakkar (ship) figures with 1 diamond.
Tiles
Tiles represent the blessings and dangers of Beowulf's saga. They depict his allies and enemies, as well as other benefits and risks.
Benefit tiles have positive values printed on them, while peril tiles have negative values. Special tiles have special abilities, shown by special-ability icons. See "Special Abilities" below for more on these powers, which are also summarized on the player aid sheets. Special tiles can also be benefits or perils — that is, a tile with a special-ability icon can also have a positive or negative value printed on it. A special tile with no printed value is treated as having a value of zero.
Each tile shows: the act it belongs to; a value; a special-ability icon, if any; and whether it is a benefit tile or a peril tile.
Saga Point Counters
These counters are used to track each player's saga point total from act to act. The number printed on each counter shows how many points it is worth. Players may freely make change among themselves at any time.
Player Aid Sheets
Four sheets — one per player — detail the abilities of the special tiles, to make them easier to remember during play.
Setup
First, place the game board so that the side marked "Act I" faces up.
Next, each player chooses a color of plastic figures and takes all the figures of that color, placing them in front of themselves on the table. Then, each player takes 50 saga points. Gather the remaining saga points into a pile near the game board.
Then, divide the tiles into three groups by act. The tiles for each act have a different colored back, as well as a Roman numeral on their face corresponding to the act. Stack the Act II and Act III piles separately and set them aside. They will be used later, in Acts II and III. Turn all the Act I tiles face down and shuffle them. These form the draw pile that will be used during Act I of the game.
Finally, each player draws two tiles from the draw pile, forming that player's starting hand.
Play
The youngest player starts the game. When they finish their turn, the player to their left plays next. Play continues in this way around the table until the act ends. (See "End of an Act" below.)
Turn Sequence
On a player's turn, they must choose one of the following two options:
- Place a figure. The player places a figure on a free space on the board.
- Draw a tile and play a tile. The player first draws a tile at random from the draw pile and adds it to their hand. Then they choose a tile from their hand and play it. Most tiles are played by being placed on an empty space on the board, but some tiles with special abilities are played in another way, as described by their particular abilities.
A player cannot draw a tile and then place a figure instead of playing a tile. In other words, once a player draws a tile, they are obliged to play a tile rather than place a figure.
By placing figures and tiles on the board, players try to arrange the game pieces so that their figures line up in the rows and columns with the highest score, with positive benefit tiles, while guarding against lining up with negative peril tiles.
If the tile draw pile is exhausted, players may still choose the "draw a tile and play a tile" turn option; they simply do not draw a new tile before playing a tile from their hand.
In the unlikely event that a player has no tile in hand and no figure in front of them when it is their turn, they pass their turn.
In the very unlikely event that no player has tiles in hand and figures in front of them, the act ends (see "End of an Act" below).
End of an Act
Players keep playing until the last space on the board is filled. When that happens, the act ends immediately and the following steps are carried out:
-
Score the figures. To score a figure, add up the values of all the tiles in its row and column. You may need to take into account the special abilities of any special tiles that appear in the figure's row or column (see "Special Abilities" below).
Once the row and column have been added together, multiply the sum by the number of diamonds on the figure's base. That is, you multiply by 1 for a Drakkar, 2 for a Castle, 3 for a Thane, or 4 for Beowulf. The figure's owner scores a number of saga points equal to the result, taking saga points from the central pile (or returning saga points to the pile if the figure's total is negative), and then removes the figure from the game board. Drakkars are returned to their owner's supply once they have scored, and can be reused in future acts. Castles, Thanes, and Beowulf, on the other hand, are removed from the game permanently once they have scored and are put back in the box. Every figure on the board scores in this way. It does not matter in what order the figures are scored.
-
Remove the tiles. After every figure on the board has scored, remove all the tiles from the board and return them to the box. Also return to the box any tiles that were never drawn from the draw pile. None of these tiles will be used in later acts.
Special Abilities
Some tiles have special abilities. Tiles with special abilities are identified by the unique icons printed on them. Each special ability is described below, and summarized on the player aid sheets.
Temptation: After a player has placed a tile with the special Temptation ability on the board, they may choose a Courage tile already in play and remove it from the game (returning it to the box); the player is not required to do so.
Courage: After a player has placed a tile with the special Courage ability on the board, they may choose a Temptation tile already in play and remove it from the game (returning it to the box); the player is not required to do so.
Treasure: Tiles with the special Treasure ability can be played in two different ways; the choice must be made when the tile is played. The first option is to place the tile on the board as a normal tile. The second option is to return the tile to the box (removing it from the game) and immediately score a number of saga points equal to the treasure's value on the tile (which is printed in a small circle on the Treasure icon).
Drunkenness: Tiles with the special Drunkenness ability can be played in two different ways; the choice must be made when the tile is played. The first option is to place the tile on the board as a normal peril. The second option is to replace a Beer tile that is already placed on the board. A Beer tile that is replaced this way is returned to the box (removed from the game).
Beer: Tiles with the special Beer ability are benefit tiles that are liable to be converted into Drunkenness tiles (see "Drunkenness" above).
Golden Statue: After a player has placed a tile with the special Golden Statue ability on the board, they may immediately swap the positions of any two other tiles already on the board. Figures, however, cannot be moved this way.
Good Counsel: A tile with the special Good Counsel ability lets a player make a limited move of a figure — Beowulf, a Thane, a Castle, or a Drakkar — that they have already placed on the game board. By playing Good Counsel, the player identifies one of their figures on the game board and moves it to an adjacent empty space (that is, not diagonally); then the player places the Good Counsel tile in the space (the now-empty space) where their figure used to be. The Good Counsel tile cannot be used to move a figure if there is no empty space adjacent to it; another of the player's figures must be chosen instead in that case, or Good Counsel cannot be played.
Royal Dragon Horn: A tile with the special Royal Dragon Horn icon adds one diamond, for scoring purposes, to every figure in the row and column where the Royal Dragon Horn tile is placed. So a Drakkar figure in the same row or column as the Royal Dragon Horn multiplies its points by 2 instead of 1, a Castle figure in the same row or column multiplies its score by 3 instead of 2, and so on. The Royal Dragon Horn does not affect the values of other tiles in its row and column. Note: several tiles with the Royal Dragon Horn icon can affect the same figure, each tile adding one diamond for scoring purposes.
Betrayal: A tile with the special Betrayal icon cancels the values of all positive tiles in its row and column. It does not, however, affect the values of negative tiles. When the last figure or tile of an act is placed, but before scoring the figures for that act, turn face down all positive tiles in the row and column of a tile with the Betrayal icon; these face-down tiles now have a value of zero.
Throat: A tile with the special Throat icon splits its row and column into two parts, which are scored as if they were an entirely separate row and column. (See the full scoring example under "End of an Act" above.)
Important: Each part of a row or column split this way is entirely separate from the other part for all effects. For example, a tile with the Royal Dragon Horn icon in one part does not affect figures in the other part. Likewise, a tile with the Betrayal icon in one of the parts does not cancel the values of positive tiles in the other part.
Note: There are three Throat tiles pre-printed on the Act II board. They work the same way as Throat tiles that are placed on the game board by players.
Beginning Acts II and III
When Act I ends, Act II begins. When Act II ends, Act III begins. After Act III, saga points are counted and compared and the game ends. See "Final Scoring" below.
To begin Acts II and III, flip the game board over so that the appropriate act title faces up. Note that Act III uses the entire surface of a double board, and is twice as large as the boards for Acts I and II.
Once the board is properly oriented, place the tiles for the new act face down and shuffle them randomly to form the new draw pile from which players will draw tiles in the new act. Players whose hands were reduced to fewer than two tiles in the previous act may immediately refill their hands at random so that their hands are once again completed to two tiles.
Note that players do not discard the tiles in their hands between acts. That is, tiles that were in their hands at the end of the previous act can be played in the next act. This is the only way for tiles from earlier acts to be played in later acts. (Note that the backs of the tiles in all players' hands are open information that all players are allowed to see. So, because tiles from different acts have different colored backs, if a player has tiles from an earlier act in their hand during a later act, the other players will be able to tell.)
In Acts II and III, the first turn is taken by the player who would have had the next turn in the previous act, had it not ended.
Final Scoring
After Act III ends, players count up the saga points they have accumulated during Acts I, II, and III. The player with the highest total is the winner!
If several players are tied, the tiebreaker is whoever has the greatest total number of diamonds on the bases of their unused figures. Players who remain tied after that share the victory.
Full Scoring Example at the End of an Act
- Figure A (brown Drakkar): 1 + (-1) + (-1) + 4 + (-4) + (-1) = -2, diamonds ×1 = -2 points
- Figure B (green Drakkar): 1 + (-1) + (-1) + 6 + 3 + 3 = 11, diamonds ×1 = 11 points
- Figure C (brown Beowulf): 6 + 4 + (-4) + (-1) = 5, diamonds ×4 = 20 points (note that this figure does not score the +5 tile, nor gain the benefit of the Royal Dragon Horn, because the Throat splits this figure's row into two separate parts, and this figure is in the left-hand part of the row)
- Figure D (green Thane): 4 + 3 + (-6) + 1 + (-1) + 5 + (-2) + 5 = 9, diamonds ×3 = 27 points
- Figure E (brown Drakkar): 6 + 3 + 3 + (-4) + (-2) + 2 = 8, diamonds ×1 = 8 points
- Figure F (gray Castle): (-4) + (-2) + 2 + (-6) + 0 = -10, diamonds ×2 = -20 points (note that this figure does not score the 1-point tile in the upper column with the Treasure icon, because the Throat splits the figure's column into two separate parts, and this figure is in the lower part of the column. Note also that the Good Counsel tile provides no points to the figure, since it is a +0 tile, even though it has a special ability)
- Figure G (gray Thane): (-1) + 3 + 0 + 5 + (-1) + 1 + 2 = 9, ×(3 + 1) diamonds = 36 points (note that the Royal Dragon Horn present in this figure's column increases this figure's diamond count by 1, so for this figure the sum of the row and column is multiplied by 4 rather than 3 to determine its final points)