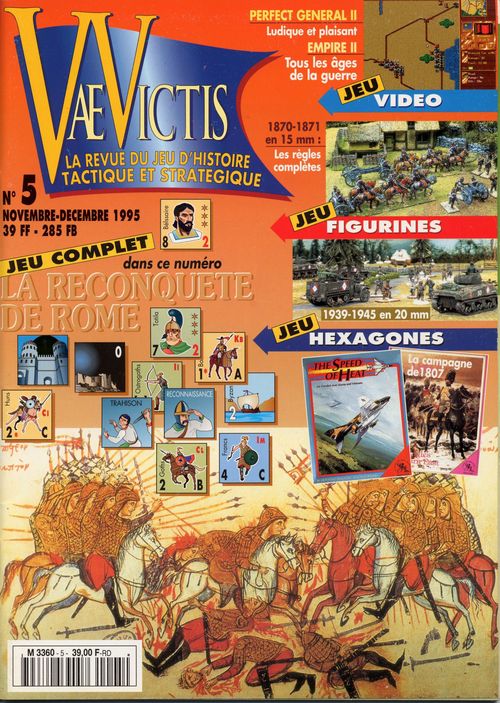
Bélisaire, la gloire de Byzance
Bélisaire, la gloire de Byzance Rulebook
Table of Contents
Table of Contents
- 0. General Information
- 1. Playing Pieces
- 2. Sequence of Play
- 3. Actions
- 4. Leaders and Activation
- 5. Land Movement
- 6. Interception
- 7. Combat
- 8. City Siege
- 9. Naval Operations
- 10. Supply
- 11. Special Markers
- 12. Scorched Earth Operations
- 13. Reinforcements
- 14. Random Events
- Scenarios
- Operations Example
- RANDOM EVENTS
0. General Information
0.1 One turn is equal to one season (3 months), and 1 cm on the map equals 30 km. Each combat point represents 500-1000 men. One naval point represents 10-20 ships (combat or naval).
0.2 The map, which covers Italy and North Africa, is divided into land zones, representing a province or part of a province, and naval zones. These zones regulate movement. For game purposes, there is no difference in entry costs between historical Roman provinces (solid line) and dotted boundaries.
The cities and ports are situated within zones. The ports are cities with harbour capacity.
0.3 There are no stacking restrictions in either zones or cities.
0.4 Fractions are rounded up.
1. Playing Pieces
1.1 Leaders (see diagram p. 23). These represent historical commanders.
1.2 Combat units (see diagram p. 24). Use these like money, extracting losses by reducing unit values.
1.3 Action point markers. The action point markers represent the capacity for action of each side. Place them in an opaque container, which serves as the stock. They are drawn by chance before each operations phase. Depending on which side drew the marker, the AP value is different (Byzantine are sand coloured, barbarians green).
2. Sequence of Play
Belisarius consists of a series of game turns, each of which is made up of several phases. All phases are completed simultaneously, except the operations phase where players alternate action segments.
- Random events phase (summer and winter only).
- Supply phase: each player checks his units' supply status.
- Reinforcement phase: each player may receive new units (spring only).
- Operations phase.
AP draw: The Byzantine player, then the barbarian player, draw a marker at random from the container. If a Stratagem marker is drawn, the player keeps it, without revealing its exact nature, and immediately draws another marker, before his opponent.
Each player adds the value of the AP marker to the Strategic rating of the CinC or King to obtain the total number of APs available for use this turn. This number is kept secret from the other player.
First player: Determine the first player. Each player throws 1d6 to add to the Strategic rating of his CinC. The higher scorer has first go. If the scores are equal, throw the dice again.
Operations phase: The first player may pass on his first segment, if he wishes. The second player then takes a segment. If he then passes, the phase is over.
Player A segment: Player A activates one of his leaders, and carries out a number of actions of his choice, from his supply of APs. One chief can use all or some of the APs available. Once a chief has carried out the desired action, the player may activate another leader or pass. If he has no APs left, or passes, Player B then takes over.
Player B segment: as above.
The players alternate segments until both are out of APs or both pass consecutively. The operations phase is then over.
-
Siege phase: resolve sieges.
-
Turn end. Each player reveals his AP marker. Advance the turn marker (season and year as needed).
3. Actions
After drawing the AP marker, add the value to the CinC Strategic rating, and out of sight of the opponent, mark the available action point total on the Table of Organisation. As each leader carries out an action, deduct the necessary APs from the track (see p. 30).
4. Leaders and Activation
Leaders represent generals and kings of each army. Leaders are placed on the map face down, and are only revealed (temporarily), in combat.
Each leader has a corresponding box on the Table of Organisation, in which to place accompanying units.
4.1 Leader activation. Each leader engages in actions alone when activated (Exception: Interception 6.0). Combat units may not operate alone.
A leader may only be activated once per phase, and the activation of a leader must finish before another leader is activated (to indicate a leader is finished, place his marker head down). Units accompanying a leader may only move once per phase (exception: Interception 6.0).
4.2 When several leaders are in the same zone, a leader may be activated with a higher ranked leader. The leader, and its accompanying forces, are therefore subordinate to the higher ranked leader, and the dispensed APs for an action are for the higher ranked leader, not the lower ranked leader, but the lower ranked leader loses the chance of independent activation later. He uses the ratings of the higher ranked leader for all purposes (combat, interception etc.).
If two leaders are of equal rank in the same zone, each must be activated separately.
4.3 Reorganisation of forces. Leaders in the same zone (including cities) may freely reorganise the distribution of units at the start of the operation phase. This reorganisation does not need APs, but it must be carried out before the start of operations.
4.4 Leader death. A leader is killed when all units with it are eliminated in combat, if he is in a city which is reduced through siege or treason, or he is alone and intercepted. The order of succession for the CinC is noted on the table of organisation.
5. Land Movement
5.1 General rules. Each leader carries out land movement. Combat units are not stacked with leader. Place them on the Table of Organisation.
Movement is from adjacent zone to adjacent zone and finishes as the player wishes, or at the sixth zone entered by the leader.
Each force may travel a maximum of six zones per turn (retreat from combat excepted). Movement may be interrupted temporarily for siege or interception resolution, but the leader may resume after a victorious combat or assault. If the combat or siege is lost, the chief is obliged to finish.
5.2 Unit movement. A leader may pick up or drop off any unit or inferior leader as he moves. Similarly, the leader may pick up units or inferior leaders of zones it traverses, but he may not continue his movement or combat with these new units, if these units have already been activated this phase.
When a leader finishes movement in a zone with a vacant city, he may share out his combat units between city and zone, and places himself either in the city or in the zone. Movement from city to zone and vice-versa does not cost APs.
5.3 Attrition after movement. At the end of each move, or at the time of a temporary halt, and before all combat, the player consults the attrition table, adjusted by the number of zones moved. The result is a percentage of the force (measured in combat points) eliminated from the leader's force. These losses must come from the units moved with that leader.
6. Interception
Interception is the only action a non active player may undertake. It is also the only way to engage an enemy force who moves into the same zone. Whether the active or inactive player carries out the action, the cost is 1 AP. Interception is possible with a leader that has already been activated.
6.1 Procedure. A leader of the inactive player attempts activation when an enemy leader enters the zone that he occupies. If the inactive player declines interception, or the attempt fails, the enemy leader may either continue movement, or attempt an interception of his own. After all interception is successful, combat is carried out immediately.
A force may try several interceptions in a turn, but it may only try once against the same enemy force. If both players desire combat, but neither succeeds in interception, nevertheless, by common consent, the players may decide to engage in the line of battle.
6.2 Resolution. Take the difference between the strategic values of the two leaders, then throw one die and consult the Interception Table. If successful, the type of battle will be stated.
Subtract 1 from the die if in a mountain zone.
6.3 Multiple interceptions. If several interceptions are possible in the same hex, the intercepting player may decide to do one of the following:
- have one attempt with all forces under the highest ranked leader;
- have successive attempts and combat by each force;
- a combination of the two previous methods.
The player must also designate a single enemy force as the target of interception before the die roll.
6.4 Interception on leaving a city. When a leader is in a city when a force enters his zone, he has two options:
- Decline interception and remain in the city. That leader in turn may then not attempt interception, but may declare a siege, or continue movement.
- He may attempt interception: if both leaders fail, that leader may then retreat back to the city. If interception occurs, by one side or the other, and the engagement is line of battle, the leader may retreat back to the city (if he loses or breaks off combat). In contrast, if he is ambushed, he must retreat to an adjacent area.
7. Combat
A battle may not occur without an interception (exception: common accord, 6.1). Each player deploys his units that accompany the leader on the Tactical Display, situated on the game map.
The engagement consists of a series of 'passages of arms', each of which consists of a missile phase followed by melee. The battle is finished, at the end of a 'passage':
- when one of the players decides to break off combat (exposing himself to pursuit);
- when one of the forces is destroyed;
- by mutual agreement.
7.1 Procedure. The type of battle is determined by the Interception Table (see 6.2); line of battle or ambush. The specific rules of ambush are set out in para. 7.7.
During each 'passage', each player carries out the following phases:
- Missile fire: units of both players who can fire, do so, and results are applied simultaneously.
- Melee: the units of both players undertake melee, and again results are applied simultaneously.
If one of the sides then decides to break off, the other side then has one extra phase, and one only, of pursuit (7.6). The battle is then finished.
7.2 Resolving combat. Fire: Sum the combat factors of all missile units. Throw 1d6, and consult the combat table. Apply results immediately and simultaneously.
Melee: The procedure is identical, but with all combat units (and who survived fire).
Certain units have a bonus multiplication in combat rating.
- cataphracts: x3
- heavy cavalry: x2
Fire and melee modifiers are below:
-
- tactical rating of a leader
- +1 if one or more units have Morale A
- -1 if the battle is taking place in mountains
7.3 Combat results. 10, 25, 50, 75: a percentage of the non modified combat factors (rounding up) are eliminated. The losses are apportioned by the owning player, but with 50% losses or higher, half of them should be taken from cavalry units.
T, T1, T2: Morale check (standard or modified, by 1 or 2). The player throws 2d6 for each of his units. The morale check is carried out after losses are apportioned.
7.4 Morale Check and Rally. To pass a morale check, a unit needs to throw a minimum number, according to his morale rating, on 2d6. (A=5, B=6, C=7, D=8). On a T1 or T2, 1 or 2 is subtracted from the dice.
A unit that fails is disordered. It may not fight, and is placed in the Disordered Unit box. Disordered units remain there for the duration of the battle. They do not contribute to combat factors for fire or melee, nor are they assessed for losses.
In contrast, during pursuit all units are subject to pursuit, including disordered units, which are included in loss calculations.
7.5 Leaders and combat. Leaders use their tactical rating, which modifies the die roll, during combat and for morale checks. If several leaders are present, the highest ranked leader is used. A leader has no effect on combat if all of his units are eliminated. In that case, one or all leaders present are eliminated too.
7.6 Pursuit and retreat. The pursuit phase occurs only when a side decides to break off combat. All cavalry units of the pursuing player are totaled, with the following modifiers:
- Heavy cavalry and cataphract A (?KB): x1
- Medium cavalry and cataphract C (?KP): x2
- Light cavalry: x3
Morale checks are ignored. Apply loss results to all retreating units.
After pursuit, the retreating force is placed in an adjacent zone (outside a city), or in a city controlled by that player, in the combat zone.
Note: if an enemy force is in the zone the force retreats into, it may be subject to interception.
7.7 Ambush resolution. Ambush is resolved in the same way as a battle line, but there are only 2 passage of arms phases, followed by the ambusher pursuing the ambushee.
Apply the following modifiers:
Combat table: +2 columns for ambusher; -1 for ambushee.
Morale checks: +1 for ambusher; -1 for ambushee.
8. City Siege
8.0 When a force enters an area with a city, it may decide to lay siege or assault. All cities, even those without enemy forces, have a militia. In order to take an enemy city, it is necessary to undertake a siege.
8.1 Procedure. On the map, each city has two boxes. To lay siege to a city, place the leader in the empty box and declare a siege (starting a siege costs 1 AP). A duration marker is placed on the city at level 1.
A force without a leader may withstand a siege, but it may not either start one, or launch an assault.
8.2 Defence rating. Each city has two ratings, which represent militia and fortifications.
Militia: these are civilian levies who aid the city defence. They are represented by a militia marker, to the value of the rating marked in red on each city. During a siege these points may be adjusted. If a city is seized, the marker is inverted to indicate who controls the town. Militia points may satisfy combat losses, but after the city falls, returns to full value.
Fortifications: this rating, in black on the map, represents inherent fortifications. This factor modifies the assault combat. It may be augmented by the work of the defence, or reduced to zero by destruction (8.9).
8.3 Siege duration. Place a marker (value 1) at the start of the siege. At each following turn, during the siege phase, increase it by 1. When the marker is at 4, the city automatically falls, and all occupants are killed/eliminated.
8.4 City assault. If a besieger is not happy with a passive investment, he may also undertake an assault:
- at the time he declares a siege;
- on subsequent turns, by activating a leader by paying 1 AP.
Assault procedure. A ratio of points (attacker/defender) unmodified is worked out. Round in favour of the defender. The besieger throws 2d6, modified by defence works, fortifications, siege works, leaders etc. (see table p. 30). The result is a percentage of losses, plus whether the town falls or not. If the city falls, leaders and units within are all destroyed.
8.5 Sortie from siege. A besieged force may attempt to sortie out of the town. It engages in combat with those units it uses (militia may not be used), or chooses, and consists of a single melee phase (no fire phase). The besieger responds with the same number of non modified combat points. Combat values are assessed as per normal. Ignore morale checks, and all losses are taken from units that took part.
8.6 Attempts to disengage. If the besieger is assaulted by a force attempting to lift the siege (interception in this case is automatic), he cannot use all his forces in that battle. He must leave a force equal to the besieged force (including militia), if he wants to maintain the siege. If he uses all his units, the siege is lifted. (see 8.7)
If as a result of the battle the besieger is defeated (retreats to an adjacent zone), the besieged troops may join the victorious army.
Several sorties or relief attempts may be made during the same turn, but each is resolved separately.
8.7 Siege end. A siege is finished when:
- a city is taken;
- a city falls due to assault;
- the besieger retires voluntarily or as a result of battle.
Remove siegeworks and duration markers. Keep defence works in place at the discretion of the victor (8.9).
If the place is a port, besieged troops may embark on ships, in whole or in part, subject to transport capacity. Militia may not do this, but are returned at full strength.
8.8 Attrition during siege. Besieged units are automatically out of supply, and the player consults the attrition chart, during the resupply phase. Again, losses are expressed as a %, and may include militia.
8.9 Works (defence and siege).
Siegeworks: The besieging force may construct siege equipment to aid the assault on the city, by spending the required APs. These works are marked with the appropriate piece. The number of works is restricted to 2 for each leader present, and modifies the dice in an assault.
Defence works: A player may reinforce a city's walls, by spending the necessary APs. The maximum defence rating of a city is 5 (including inherent fortifications).
Destroying fortifications: A player may decide to destroy the extra defences of a city, and similarly reduce the inherent fortifications to 0. The destruction is at the discretion of the player, and he pays 1 AP no matter how much is destroyed.
9. Naval Operations
9.0 Like land units, naval units are activated in order to carry out actions for a number of APs. Unlike land units, they do not require a leader. They are not therefore activated and may act several times in a turn, in a nonlinear manner.
Each naval piece represents a number of naval points (PN). Units may be freely grouped together in fleets. For each corresponding fleet, place the naval pieces on the table of organisation.
9.1 Naval movement and attrition. Naval units or fleets are moved from sea zone to sea zone, for a maximum of 6 spaces. It costs 1 AP to move a single naval unit or 2 AP for a fleet (irrespective of numbers).
In order to be moved as a fleet, units must be stacked on the Table of Organisation, and marked with a fleet marker.
A fleet is free to pick up and drop naval units as it moves, similarly if these units have already been activated.
At the end of movement, and before combat, the player throws 1d6 on the Naval Attrition table, for each fleet or unit moved. Apply the result immediately. All transported units on an eliminated naval unit are also destroyed. A player may temporarily stop movement, and start again later in the turn, but must count up all zones moved that turn for attrition purposes.
9.2 Naval interception. When a fleet or ship enters a zone, it is subject to interception, just like a land force. If it fails, the moving force may continue. An interception succeeds on 7 or more on 2d6 (add leader tactical rating, if present).
9.3 Naval combat. Each player subtracts the enemy strength from his, and throws one 1d6. Losses are extracted immediately. The players continue until one side is destroyed or retires to an adjacent zone. A naval battle always has at least one passage of arms.
Modifiers:
-
- tactical rating;
- +1 for every 3 CP embarked (unmodified).
9.4 Troop transport. A naval force may embark or offload either at a port or coast (the latter costs more). Embarkation, transport and offloading may occur in the same phase if the player uses the necessary APs.
In order to load or unload, units must be with a leader. A naval point can load 2 infantry or 1 cavalry point. Leaders do not count towards this.
9.5 Naval blockade and resupply. A port is automatically blockaded if the sea zone is controlled by the player who is besieging it. This blockade intervenes only as an adjunct to a land siege and it allows one to increase the risk of attrition of the siege (the siege die roll is adjusted by 1). In contrast, one or more naval units who control a sea zone adjacent to a land siege reduce the attrition roll by 1.
A sea zone is controlled (and friendly) if the player is the only owner of naval units in the zone.
9.6 Naval support of a siege. A fleet or naval units may take part in the assault on a port (cost, 1 AP), and adjust the combat dice by +1 for every 3 naval points in support.
9.7 Sanctuary. A fleet besieged in a port may not be intercepted (and therefore attacked). They may not be engaged unless they quit the port for the adjacent sea zone. By contrast, if in the course of a joint naval and land siege, the port falls into enemy hands, the naval points are salvaged by the new owner of the port. A fleet taking refuge in a port is placed in the port box.
10. Supply
During the supply phase, the players assess whether their units are in supply. If a force is not supplied, the player throws 1d6 on the attrition table, modified by the geographical location, and applies the result immediately.
A unit, of any nationality, is automatically supplied in the following situations:
- it is situated in a coastal land zone (in a city not under siege or in open country), including those with a 'scorched earth marker', is free of enemy units and the adjacent sea zone contains only friendly naval units;
- it is in a non coastal zone (in a city not under siege or in open country), including those with a 'scorched earth marker', is free of enemy units and adjacent to a coastal zone which fulfils the previous criteria;
- it is in a zone that does not meet the two previous criteria (enemy units in the zone or sea zone), except for zones with scorched earth marker, and it does not have more than 4 combat points.
An enemy force under siege does not prevent or interdict supply. Those (besieged) units themselves are out of supply.
In all other cases, the force is unsupplied (siege, see 8.8).
Exception: Ostrogoth units are always in supply, irrespective of enemy forces, in the following zones: Flaminia, Venetia, Aemilia, Liguria, except in a zone with a scorched earth marker (normal rules apply). Ostrogoth units are resupplied in zones free of enemy units if they are adjacent to the four other zones.
Byzantine forces that can trace a line of controlled zones to Praevatilana are automatically in supply.
11. Special Markers
11.1 Decoy markers. Decoy markers represent false leaders and fleets to provide strategic uncertainty. Decoy markers are placed like genuine markers and pay AP costs. Decoy markers may not carry out actions.
If a blank marker is intercepted and that interception succeeds it is removed from play. A blank marker out of play may return to play at the start of operations, and is placed with a leader or fleet on the map.
A decoy leader marker (blank face) has a strategic value of 3, which is used for interception. A fleet decoy marker (clear sea) does not have any particular values.
11.2 Stratagem markers. Stratagem markers are mixed with the AP markers in the draw cup, as detailed in the scenario rules. Some markers may start with a player at the start of the scenario.
Once played, a stratagem marker is out of play.
The stratagem markers are:
- Treachery: this marker, played during a siege, allows the taking of the city on a throw of 2-8 with 2d6. On 9 or more, there is no effect. The leader who played this marker can modify the throw with his tactical rating.
- Reconnaissance: the marker allows an enemy force to be automatically revealed (land or sea), and a decoy unit is considered intercepted, or to get a 2 column right shift on the interception table, during an interception.
- Frankish intervention: this marker is identical to the event of the same name, but the player playing the marker subtracts 1 if he controls the Goths, and adds 1 if he is Byzantine.
12. Scorched Earth Operations
A player may decide to devastate a zone occupied by units and a leader of his side. After paying the APs needed, a scorched earth marker is placed in that zone. The effects are as follows:
- one or more units in such a zone and not supplied in accord with rule 10 must consult the attrition table at the moment they enter the zone, according to their numbers. Modifications are cumulative.
- the Goths may not raise troops in such a zone.
13. Reinforcements
All reinforcements are acquired only in spring, during the reinforcement phase, and they are placed in a zone controlled by that player.
- Ostrogoths: the player throws 2d6 and divides the result by 2, rounding up, and adds 1 for each multiple of 5 which they control. The final total may be used to buy new units (subject to the counter mix): 3 1A, 2 1B, 1 1C and 1/2 [1] D.
- Vandals do not get reinforcements.
- Byzantine reinforcements are indicated in each scenario.
- Zone control. A zone is controlled by a player if he is the only one to have units in that zone (either in a city or open country), or if the player was the last to have units pass through that zone. In that case, use the control markers. In any other case the zone is not controlled.
A zone is controlled if the city is occupied by enemy units which are under siege. If an enemy unit enters a controlled zone, that control marker is removed.
Scorched earth zones are controlled purely for victory purposes.
14. Random Events
Twice a year, in summer and winter, the players throw 2d6 and consult the event table to find the random event. Events in red occur once only.
Scenarios
For each scenario, the CinC is indicated in black. If he dies, the order of succession is given on the table of organisation.
1) The reconquest of Africa
Duration: 3 turns Start: Autumn 533 Finish: Spring 534
The Vandals control North Africa, Sardinia and Corsica. The Byzantines unload in the north zone of Byzacium.
Vandals
- Sardinia: Zano, 4 x 2B, 1 fleet (8 NPs), 1 decoy fleet
- Carthage: Ammata, Gibarner, 1 decoy fleet, 4 x 2B, 2 x 4C
- Byzacium: Gelimer, 4 x 2B, 1 x 4C
- Stratagems: 1 reconnaissance
Byzantines
All land forces start in the north zone of Byzacium, naval forces in the adjacent zone.
- Leaders: Belisarius, Jean, Bessas, Ildiger, 2 decoys
- Cataphracts: 4 x 1A, 2 x 2C, 2 x 1*C
- Cavalry: heavy 2 1B, light 2 1C
- Infantry: 4 1C, 4 2*C, 4 [1]*C
- Marine: 2 fleets (15 NPs), 2 decoys
- Stratagems: 1 treason, 1 recon.
Special rules
Byzantine infantry can only move one zone. There is only one random event throw which occurs on the first turn, and the only event possible is event H. There are no reinforcements. One recon. marker only is placed with the AP chits.
Victory: The Byzantine player needs to take Carthage, Hadrumetum and Hippo Regius, plus control 4 zones and have destroyed at least 12 Vandal combat points.
The first reconquest of Italy
Duration: 20 turns. Start: summer 535. Finish: spring 540.
The Ostrogoths control Italy, parts of Sicily and Dalmatia. The Byzantines control Africa, Sardinia, Corsica, Syracuse and its zone.
Ostrogoths
- Ravenna: Théodahab, Totila, Aligern, 1 decoy, 1x(1A), 3x(2B), 2x([2]*D).
- Salona: Vraïas, 1 decoy, 3x(2B), 2x(2C), 3x([2]*D).
- Ticinum: Vitiges, 1 decoy, 3x(2B), 2x(2C), 2x([2]*D).
- Roma: Teia, 2x(2B), 1x(2C), 1x([2]*D).
- Neapolis: Victiger, 1x(2C), 1x([2]*D).
- Panormus: 1x(2B), 1x([2]*D).
- Marine: 2 fleets (8 PN), 1 decoy, placed as the player wants.
- Stratagem: 1 x Intervention franque.
Byzantines
- Syracuse: Bélisaire, Jean, Bessas, Constantin, Perane, Ikliger, 3 decoys.
- Cataphracts: 4x(1A), 2x(2C), 2x(1*C).
- Heavy cavalry: 1x(1*B), 1x(2B).
- Light cavalry: 2x(1*C).
- Infantry: 4x(2*C), 2x([1]*C).
- Praevatilana (Imperium Romanum): Mundus. Cataphracts: 1x(2C), 1x(1C). Heavy cavalry: 1x(2B). Infantry: 2x(1C), 2x(2*C).
- Marine: 2 fleets (12 PN), 2 decoys, placed as the player wants.
- Stratagems: 1x Reconnaissance, 1x treason.
Special rules
All the other stratagems start with the AP chits. All random events except C & H may occur (no event if these are rolled).
The Ostrogoths must keep King Theodahab until the end of turn 3, when he is retired and replaced by Vitiges.
Byzantine reinforcements:
- 536: in Dalmatia. Cataphracts: 2 x (2C); infantry: 2x(2C), 2x(1C).
- 537: in Italy. Heavy cavalry: 3x(1B); light cavalry: 2x(2C).
- 538: Narsès. 1 decoy. 1 fleet (5 PN). Cataphracts: 2x(1A), 2x(2C); heavy cavalry: 1x(2B); infantry: 2x(2*C), 2x(1C), 2x([1]*C).
Victory conditions: The Byzantine gains control of Ravenna, Salona, Pola, Neapolis, Roma, Genua, Mediolanum and at least 5 other Italian or Sicilian cities in Italy and Sicily, plus 15 zones.
The Goths counterattack
Duration: 12 turns. Start: spring 541. Finish: winter 543.
The Ostrogoths control Ticinum and Verona and their zones, from where they counterattack. The Byzantines control the rest of Italy, Sicily, Histria, Dalmatia, Sardinia and Corsica.
Ostrogoths
- Pavia: Teia, Aligern, 1 decoy, 3x(2C), 5x(2B), 5x([2]*D).
- Verona: Totila*, Vraias, Victiger, 2 decoys, 2x(1A), 5x(2B), 3x(2C), 5x([2]*D).
- Marine: 2 fleets (8 PN), 1 decoy.
- Stratagems: 2x Reconnaissance, 1x Treason.
Byzantines
The Byzantines are free to deploy in Italy but they must have some troops in Roma and Ravenna.
- Leaders: Jean, Bessas, Constantin, Perane, Ildiger, Mundus*, 2 decoys.
- Cataphracts: 1x(1A), 3x(2C), 3x(1*C).
- Heavy cavalry: 1x(2B), 3x(1*B).
- Light cavalry: 2x(2C), 2x(1C).
- Infantry: 4x(1C), 4x([1]C), 3x(2C).
- Marine: 2 fleets (10 PN), 1 decoy.
Special rules
The Byzantines do not have a CinC. To determine the total APs each turn, add 6 to the chit drawn. Place with the AP chits the following markers: 2 x Recon., 2 x Treason, 1 x Intervention franque. The only random events possible are L, M, N and O. There are no Byzantine reinforcements.
Victory conditions: the Ostrogoths win if they control Neapolis, Mediolanum, Genua, Ancona and 8 other cities (except in Africa), and 15 zones.
The final defeat of the Ostrogoths
Duration: 7 turns. Start: autumn 551. End: spring 553.
The Ostrogoths control Italy, Sardinia and Corsica. The Byzantines control Sicily, Dalmatia, Histria and Ravenna.
Ostrogoths
- Liguria: Teia, Vraias, 1 decoy, Théodebert (Franks), 4x(4C), 3x(2B), 3x(2C), 3x([2]*D).
- Rome: Totila, 1 decoy, 1x(1A), 4x(2B), 3x(2C), 5x([2]*D).
- Campania: Aligern, 1 decoy, 2x(2B), 2x(2C), 2x([2]*D).
- Ariminum: Victiger, 4x(1B).
- Marine: 2 fleets (6 PN), 1 decoy.
- Stratagem: 1x Reconnaissance.
Byzantines
- Salona: Narsès, all leaders (except Bélisaire and Perane), 3 decoys.
- Cataphracts: 4x(1A), 4x(2C).
- Heavy cavalry: 2x(2B), 3x(1*B).
- Light cavalry: 2x(2*C).
- Infantry: 6x(2*C), 2x(1C).
- Sicily: Perane, 1 decoy, cataphracts: 1x(2C), 2x(1C); heavy cavalry: 1x(1*B), 1x(2B); infantry: 2x(1C), 2x([1]*C).
- Marine: 3 fleets (15 PN), 2 decoys.
- Stratagems: 1x Recon., 1x Treason.
Special rules
The Franks remain four turns of game only and are the allies of the Goths during this period. Place with the AP chits: 2 x Reconnaissance, 2 x Trahison. The only random events possible are L, M, N and O.
There are no reinforcements for either side.
Victory conditions: the Byzantine player must gain control of 10 Italian cities, including Ravenna, Roma and Neapolis, and a total of 35 zones.
A complete campaign of the reconquest of Africa and Italy, with some additional counters, will be proposed in a subsequent issue of Vae Victis.
Operations Example
At the beginning of the phase of operations, the Byzantine player draws a marker of 8 PA and adds to it the strategic value of his commander in chief (Bélisaire, at 8), for 16 PA this turn.
The Goth draws a chit for 3 PA for himself, which is added to the strategic value of his king (Vitigès at 6), to give 9 PA for this turn.
The two players throw 1d6 in order to determine the one that will play first: the Byzantine gets 2 on the die (+ 8 for Bélisaire), a total of 10. The Goth gets 3 on the die (+ 6 Vitigès), for a total of 9. The Byzantine player is the first player of the operations phase.
Movement and interception. For his first segment of operations the Byzantine player decides to move one of his forces, Fb 1. He announces that he activates the leader of Fb 1 and expends 6 PA in order to move Fb 1 three mountainous zones (2 PA per zone). A Gothic force Fg1 is in the last zone, in a city, but the player prefers not to attempt interception. The Byzantine doesn't attempt interception on his turn since the opposing force is in a city.
Fb1 continues his movement then: the Byzantine player expends 1 PA in order to advance into a plain zone, in which there is one second Gothic force, Fg 2. The Gothic player decides to attempt interception: he expends 1 PA but fails. The Byzantine decides to attempt interception on his turn: he expends 1 PA and succeeds, a battle is inevitable. Before the battle, the Byzantine player must make an attrition roll by fact of his movement: Fb 1 travelled through four zones in total, the player throws the die and gets 4. He loses 10% of his strength.
After the battle (which he lost), the Byzantine player decides to continue to play. He therefore activates another chief and his Fb2 force, that he moves one mountainous zone and one plain zone (total 3 PA). A Goth force Fg 3, situated in the city of the last zone (Neapolis), decides to leave it in order to attempt interception (1 PA), which it succeeds. A new battle ensues.
The Byzantine player has expended 11 PA of his total, so he has 5 PA left, that he could use in order to continue the actions of this leader in case of victory, in order to activate another chief or some fleets, or in order to attempt some interceptions during the segments of opposing player. If, after the second battle, the Byzantine player passes, the Goth takes the hand and disposes of 7 PA.
RANDOM EVENTS
- A. End of the peace treaty signed with the Persians. Bélisaire is withdrawn from the game and replaced by Narsès on the following turn, if he was not already present on the map. Bélisaire can return four turns after his departure (one complete year), on a throw of 5 or 6, in any zone controlled by Byzance. Until the return of Bélisaire, the Byzantine player doesn't get any reinforcements.
- B. Unrest in Africa. This event cannot take place when Byzance has reconquered Africa. Bélisaire plus six combat points (minimum of three points of cavalry) withdraw from the game for two whole turns (including the turn the chit is pulled), the leader of highest remaining rank replaces him then. Their return is automatic and they are placed in Sicily (or in the most southern harbour of Italy if Sicily is controlled by the Goths).
- C. Alliance between the Goths and Vandals (possible only if the Vandals have not surrendered). Each nationality keeps its respective leaders but the combat units may be mixed. When several leaders are involved in one battle, throw 2d6. From 2 to 8, one applies the leader rules. Above 8, it is necessary to use the leader with the worst factor.
- D. Slave Incursions in the Empire. The Byzantine doesn't receive any reinforcement the following spring (this year if drawn in winter, the following year if summer draw). These possible reinforcements are delayed until the next year.
- E. Revolts in Constantinople. The highest ranked leader is withdrawn from the game for two turns (turn of draw included). His return is automatic and he is placed in any zone controlled by the Byzantine player.
- F. Replacement of Bélisaire. By order of Justinien, Bélisaire is replaced by Narsès and retired from the game. One throws 2d6 then every six months after this event, adding 1 to the dice for each additional period of six months. On a throw of 11 or 12, Bélisaire returns to Italy as commander in chief, in any zone controlled by Byzance.
- G. Frankish Intervention. The Frankish king and four units of medium infantry 4C are placed in the zone indicated on the map, in Liguria. They fight on the side of the Goths on a throw of 1 or 2, on the side of the Byzantines on a throw of 6, and against the first troops which they meet on a throw of 3, 4 or 5.
Use of the Franks. If the Franks fight on the side of either player, one applies the restrictions as for event C. Otherwise, they move two zones per turn, heading for the nearest land force (Goth or Byzantine) (draw at random in case of choice) which they attempt to intercept. When the Franks fight the Ostrogoths, the Byzantine player controls them, and vice versa. The Franks take control of all zones that they cross and place a Scorched Earth marker on the last zone they enter. Their intervention lasts a maximum of four turns but they could appear several times in the game.
- H. The Vandals at Carthage. The forces and naval expedition of the Vandals (Zano, his warriors and the fleet) are not in Sardinia at the beginning of the scenario, but at Carthage. This event could not occur other than on the first turn of the game.
- I. The Vandal fleet is placed at the service of the Ostrogoths. All the Vandal ships appear on the side of the Goths.
- J. Tensions between Bélisaire and Narsès. If the two generals are in the game together, the PA of the drawn counter is divided by two, rounded up (lasts: this turn of the game).
- K. Rebellion amongst the officers of Bélisaire. The final PA (drawn PA + strategic value of Bélisaire) is divided by two, rounded up (lasts: the current turn).
- L. Bad harvest. Add 1 to the die on the resupply table for both players, siege included (lasts: one turn if summer turn, two turns if winter turn).
- M. Excellent harvest. Subtract 1 from the die on the resupply table for both players, siege included (lasts: one turn if summer turn, two turns if winter turn).
- N. Storms. Add 2 to the die on the naval attrition table (lasts: this turn).
- O. Heavy storms. No naval actions possible this turn. All the ships are placed in the nearest friendly harbour, at the choice of the player.