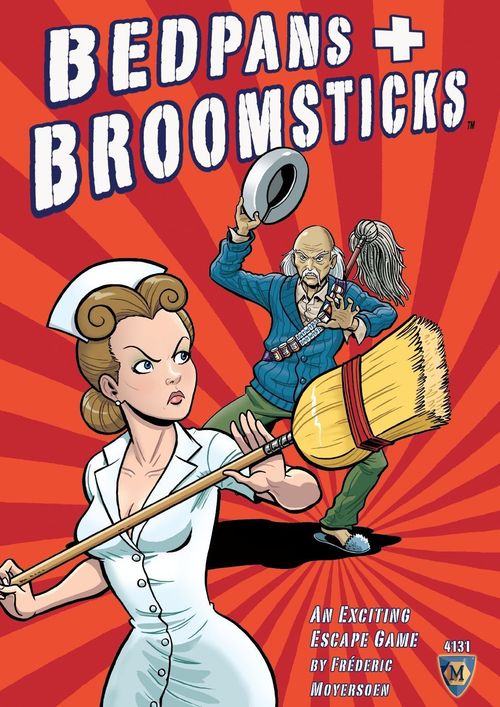
Bedpans & Broomsticks
Bedpans & Broomsticks Rulebook
Table of Contents
Table of Contents
Overview
In Bedpans & Broomsticks™, all but one of the players are the Elders of the Shady Grove Village retirement home. You are all trying to get to one of the 3 exits from the building. Another player controls the Staff of doctors, nurses, and orderlies who are trying to stop you.
Each round you move your pieces on a layout consisting of room-tiles that represent the layout of the Village. You start on a single tile, but you can't remember the rest of the layout. So you place a new tile each time you look through an open, exterior corridor onto a room tile that you have not seen before. Along the way you can pick up and use Stuff-markers that you find.
This movement and exploration continues until enough of the Elders are captured or neutralized by the Staff, or until one or more of the Elders reaches an exit and escapes.
How to Win
Staff-player – Neutralize (capture) Elders equal to the number of Elder-players.
Elder-player – Be the first Elder to reach an exit before the Staff wins.
Using These Rules
The base rules of play are presented on pages 3-8 in normal, unboxed text and diagrams. You should be able to start play and handle most game situations using those rules.
Rules for more complicated situations are detailed in the "Special" boxed sections like this one.
Components
Resident-tokens (16, in 4 colors) – Each player only uses 2: one with a dot and one without. Fronts show the resident's face, in 4 colors. Backs (for red) are plain red for the Decoy and red with a black dot for the Elder.
Stuff-markers (48) – Also called "Stuff." Stuff-markers come in a variety of kinds (see Stuff Notes below).
Elder-displays (4) – Each has a "Base" side and a "Variant" side.
Status-markers (25+) – Used to track effects on the layout.
Door-markers (8)
Dice (3) – Numbered 1 to 3, two white and one red.
Staff-figures (6, or Staffers) – 1 Doctor and 5 Nurses. Place them in the slotted, plastic stands.
Room-tiles (21, or tiles) – Including 4 Elevator tiles, 3 Exit tiles and a start tile (the tile with 4 beds).
Extra Components
In addition to the base components required to play, this product includes:
- 8 extra Round Resident-tokens.
- 8 extra smaller, square Resident-tokens.
- 8 extra Resident-tokens to be used with the slotted, plastic stands.
Special – Backup Resident-tokens
It is important that the other players are not able to distinguish between your Elder and your Decoy. To this end, extra Resident-tokens are included so that you can vary your token mix and replace damaged tokens. Do NOT use more than 2 tokens for each player in a given game.
Special – Resident-figures
The game uses slotted, plastic stands for the Staffers. Stands are also included for the Residents. However, to use them, you must:
- Slide each Resident-figure you would normally use into one of the stands.
- Use a marking pen to put a dot on the bottom of your Elder's stand.
- Use these figures instead of the Resident-tokens.
Eight Resident-figures (in 4 colors) are included, to be placed in slotted, plastic stands.
Characters
The pieces that a player moves on the Village layout are called Characters. The Characters include the Residents (Elders & Decoys) and the Staffers (Doctor & Nurses).
An Elder-player has 2 Resident-tokens. One represents the Elder and the other is a "Decoy." The Decoy represents other guests at the Village who are confusing the Staffers in order to help the Elders escape. Resident tokens look the same on the top, but an Elder has a dot on its bottom, while a Decoy does not.
The Staff-player has 6 Staffers: 1 Doctor and 5 Nurses (nurses & orderlies). Each Staffer has a tile figure that is placed in a slotted, plastic stand.
Special – Your Decoy
- At the start of your turn, you may move your Decoy to the space with your Elder or to a space containing a bed that matches your color.
- At any time, a Decoy in the same space as a Staffer is removed from the layout. Thus, if you move your Decoy as detailed in the paragraph above, it is immediately removed.
- You may examine the bottoms of your Residents any time.
- Whenever your Elder and Decoy are in the same space, you may shuffle them.
Special – Start Tiles
Normally, the start Room-tile is the tile with 4 beds. However, if you are playing with 3 players, you may start with any of the 3 bed tiles or the 4 bed tile.
Similarly, you may start with one of the 2 bed tiles in a 2-player game.
Setting Up
Choose a Staff-player that everyone can agree on. Otherwise, each player rolls 2 dice (reroll ties). The high roller is the Staff-player. Proceeding clockwise, each other player chooses an Elder to play. To set up:
- Place the start tile (the tile with 4 beds) face-up in the middle of the table. It forms the initial layout.
- For each color, place an Elder and a Decoy on the bed of the matching color.
- Place a Stuff-marker as shown.
- You and each other Elder-player take a Door-marker and your Elder-display. Place your display with the side up that has "Base Turn Sequence" at the top of the 2nd column.
- The Staff-player should place each Nurse and the Doctor into the slotted plastic stands. Then set them aside.
- Shuffle the Stuff-markers and place them in a facedown pile on the table. You and each other Elder-player takes 1 Stuff-marker. Keep it secret—it is part of your hand.
- Place the 3 Exit tiles and the 4 Elevator tiles aside. Shuffle the rest of the Room-tiles and place them next to the layout in a facedown stack.
Sequence of Play
The game is played in a series of rounds. During a round, each player takes a turn—starting with the player to the left of the Staff-player and continuing to the left. After the Staff-player takes a turn, the round ends.
You are the active player while resolving your turn.
Elder-player Turn Sequence
If you are an Elder, your turn consists of:
- You may place your decoy in the space with your Elder (or in a space with a bed of your color).
- You play Stuff-markers first. Then, proceeding clockwise, each of the other players plays Stuff-markers.
- Choose your Elder or Decoy. Roll the 3 dice. Move your chosen Elder/Decoy using the sum of the 2 lowest die results.
- Roll 2 dice. Move your other Elder/Decoy using the sum of the 2 lowest die results.
- You play Stuff-markers first, then each of the other players play in clockwise order.
Staff-player Turn Sequence
If you are the Staff, resolve each step as detailed above. Your turn consists of:
- Play Stuff-markers.
- Roll 3 dice and move a chosen Staffer—use the sum of the lowest 2 die results.
- Roll 3 dice and move a second Staffer, as 2 above.
- Roll 3 dice and move a third Staffer, as 2 above.
- Play Stuff-markers.
Example: Lee (red player) moves his Decoy first. He rolls 2, 1, 3. The sum of the lowest 2 results is 3. He moves his Decoy 1 space south, A. Then, he rolls 3, 2, 2 for his Elder: a result of 3 (2+2). He moves his Elder 1 space north, 1, and 1 space east, 2. He could move further north 3, but he decides not to because it would trigger the placement of 2 new tiles—which could contain Staffers.
Emma (blue) uses her 1st roll of 1, 1, 2 => 2 (1+1) to move her Elder 1 space north, A, and 1 space east, B. Then, she rolls and moves her Decoy token 2 spaces east, 1 2, to block the Doctor in the space to the south.
Movement
During your turn, you may move your Characters from space to space. To move a Character:
- Roll the dice.
- Move to an adjacent space.
- Place new Room-tile(s) if required (see Placing New Tiles).
- You may repeat steps 2 & 3 until you have moved spaces equal to the die result.
Special – Movement
- When moving the first Nurse, you must use the sum of the 2 highest die results.
- When using the Doctor, you must use the sum of the red die result and the lower of the 2 white die results.
- In a 2-player game, the Staff-player may only move 2 Staffers.
- You can move orthogonally (horizontally and vertically), but never diagonally.
- You may not move through walls.
- A Staffer must end its movement when entering a space containing a Resident.
- An Elder must end its movement when entering a space containing a Staffer.
- For rules for Elevators and Stairs, see Using an Elevator Space and Using Stairs below.
Placing New Tiles
Whenever you (an Elder-player) enter a space with a straight line view through an open edge of a tile, your movement is delayed until new tile(s) are placed. The Staff-player draws a new tile from the top of the stack and places it adjacent to the active Elder's tile—connecting that tile with an open edge on the new tile.
After placing a new tile, you may also have to place:
- Up to 2 Stuff
- Up to 2 Staffer-figures
- 1 pair of Elevator tiles
- 1 Exit tile
Green arrows = open edges.
Special – Limited Surface
- If there is room for any of the legal placements of a new tile on the surface, the new tile must be placed without shifting existing tiles.
- If there is not room for a legal placement, shift the tiles so that there is room for the new tile—maintaining the tiles' relative positions.
Special – Placing New Tiles
- In the case of multiple open edges that need tiles, the Staffer must announce which open edge the tile will be placed in, draw that tile, resolve placement, and then continue the process until all open tiles are legally filled.
- Two tiles may not overlap each other, but you may leave gaps between two tiles.
- As the eyes of the Elders are bad, the view to open edges is limited to 3 spaces from the Elder.
- When there is no space to place a new tile, you do not have to place a tile.
- When there are no spare tiles to place anymore, place an Exit tile instead (if any remaining).
- If a tile does not fit, draw a new one and shuffle the other tile back in the stack.
- Once two Elevator tiles have been discovered and placed, you only add tiles to the ground floor and not on the floor above— even if there are more open edges that would normally be connected that turn.
- When all 3 Exit tiles have been placed, do not add anymore tiles.
- The movement of the Staffers can never trigger the placement of a new tile.
Example: When Lee (red) moves his token from the red bed to its current position, the Staffer places tiles at 1 and 2. He cannot see the edge marked with an X—a door is in the way.
Alex (yellow) moves from 2 to his current position. As he moves, he cannot see the edge, marked with an X, due to the door. At his current position, he can see the open edge at A. So, the Staffers place a tile there.
Emma (blue) has moved to her current position. The Staffers can place tiles at 1 and 2. But they cannot place a tile at 3—the tile does not fit.
Placing Exit Sign Tiles
Some tiles contain an Exit sign. When such a tile is played, you may have to place a second new tile.
- 1st Exit Sign Tile – No additional tile is played.
- 2nd Exit Sign Tile – No additional tile is played.
- 3rd Exit Sign Tile – The Staff-player randomly draws one of the 4 Elevator tiles. Place it adjacent to an open edge on the tile with the Exit sign that was just placed. Follow the procedure used for new tiles (see Placing New Tiles). Also, place the matching elevator beside the layout in order to start a new layout on the ground floor. This elevator tile is "above" the tile just drawn.
- 4th Exit Sign Tile – The Staff-player places the remaining pair of Elevator tiles as he did for the first pair of Elevator tiles (next to the tile just placed).
- 5th Exit Sign Tile – The Staff-player randomly draws one of the 3 Exit tiles. Place it adjacent to an open edge on the tile just placed. Follow the procedure used for new tiles (see Placing New Tiles).
- 6th Exit Sign Tile – The Staff-player places a 2nd Exit tile just as he placed the 1st (next to the tile just placed).
- 7th Exit Sign Tile – The Staff-player places a 3rd Exit tile just as he placed the 1st and 2nd (next to the tile just placed).
Example: Lee (Red) starts on the start tile and moves to tile 2 as shown below by the red arrow—this takes several turns. Along the way, tile A and two Exit Sign tiles, 1 and 2, have been placed. When he enters the last space, he sees 2 open edges and Sue (the Staff-player) must place 2 tiles. She places tile 3 first. It is the 3rd Exit Sign tile, so she also places elevator tile X as shown and its matching tile X. Next she places tile 4. It is the 4th Exit Sign tile, so she also places Elevator tile Y as shown and its matching tile Y. Since the 2nd elevator has been played, tiles may only be added to the new (ground floor) tile groups. If tile 5 is played next (another Exit Sign tile), an Exit tile Z is also played.
Special – Placing Exit Sign Tiles
- There are 4 Elevator tiles. Each tile corresponds with a similar tile on a different floor.
- After placing the 2nd pair of Elevator tiles, you no longer place new tiles on the upper floor.
- The use of the stairs and elevators gives you access to the ground floor, where the exits can be found.
- The 2 groups of ground floor tiles are not connected on the ground floor.
- When placing an elevator tile on the upper floor, also place the corresponding Elevator tile in a different group facing. Do not place Staffers until a Resident enters one of the stair or Elevator spaces corresponding to the tile. Place one Stuff-tile anywhere on the tile (Staff-player's choice).
- In the rare case that the 4th Exit sign tile is placed on the ground floor, the Staff-player places the remaining pair of Elevator tiles so that the initial Elevator tile is placed adjacent to any non-Elevator, upper floor tile.
- When you place the 2nd Elevator tile on the upper floor, place the corresponding tile in the same manner as you placed the 1st Elevator tile.
- The "Exit" space may not be placed adjacent to an edge of another tile.
- You may place only 2 Exits in the group of tiles on the ground floor connected to one of the Elevator tiles. The 3rd Exit must be placed in the group connected to the other Elevator tile.
Example: Lee (red) has a "2" for movement. He moves into the elevator on the upper floor 1. Then, he moves to the corresponding space 2 on the ground floor (Emma is already in the upper elevator space so she moves too). Since Lee is still in the elevator on the ground floor, Alex (yellow) may not enter the elevator space. So he takes the stairs and moves A, B, C down to the ground floor.
Special – Using an Elevator Space
- Each Elevator space on the upper floor has a corresponding space on the ground floor (a shaft). Both spaces of an Elevator shaft may not be occupied at the same time. When Characters occupy an Elevator space, the other, corresponding space may not be entered.
- A Character in an Elevator space may use 1 space of movement to move to the corresponding elevator space. Any Characters in the same space also move.
Special – Using Stairs
- Each Elevator tile has 2 Stairs spaces, one of which is in a corner space. Each corner Stairs space on the upper floor has a corresponding corner Stairs space on the ground floor.
- A Character in a corner Stairs space may use 1 space of movement to move to the corresponding corner Stairs space.
Placing Staffers
If there is a white station on a new tile, place a white Nurse Staffer-figure on it. When there is a black station, place the black Doctor Staffer-figure on it.
Example: In the graphic, Xs show where Staff is placed—a nurse on the white station upper-right tile. The Doctor is placed on the other space with a station.
Special – Placing Staffers
- If there are no unplaced Staffers of the type required, the Staff-player may displace a Staffer/Doctor from another tile to the new location.
Placing Stuff
After placing a new tile, place Stuff on each of the corner spaces opposite the open edge just connected.
Special – Placing Stuff
- Do not place Stuff on a space containing a Staff station.
- When a new tile has an elevator or an exit, the Staff-player places only 1 Stuff. It may be placed in any space that does not contain a Staff station, an elevator, or stairs.
- If there are no Stuff left to place, you must use one Stuff from the most distant tile to the new location.
Example: In the example, red arrows show where Stuff is placed. No Stuff is placed at the lower-left—the space marked with an X contains a Doctor's station.
Stuff
When you move into a space containing a Stuff-marker (Stuff), you may take it into your hand.
Special – Stuff
- You expend 1 extra space of movement if you take a second Stuff on your turn.
- If you have 3 Stuff and you draw a 4th, you must immediately discard until you only have 3.
- At the end of a turn, you may discard 2 Stuff and draw 1 new Stuff.
- Discard Stuff as indicated: at end of a turn (T), at end of a round (R), after applying results (X), as indicated on the Stuff (P).
- Some Stuff requires Status-markers to be placed on the layout (see Stuff Notes).
- Decoys may move onto and take Stuff.
- Most Stuff can be used by both Elders and Staffers. However, some Stuff might be useless for Elders or Staffers.
- Keep your Stuff hidden from the other players, but you must let them know how many Stuff-markers you have.
Door-markers
When you play a Door-marker, place it on the non-open edge between 2 tiles. This creates an open edge that can be moved through.
Special – Door-Markers
- You may not place a Door-marker on an edge adjacent to an Elevator, Stairs or an Exit space.
- Each Elder-player starts the game with a Door-marker.
- A Door-marker is played as if it were a Stuff-marker for the purposes of timing.
Example: A Door-marker can be placed at either of the 2 positions marked with a circle at the right.
Neutralizing Elders & Staffers
At any time, a Resident in the same space as 2+ Staffers is neutralized and removed from the layout. Similarly, a Resident in the same space as the Doctor is neutralized and removed from the layout.
Special – Neutralizing
- You can use the Status-markers provided to keep track of the Elders you have neutralized.
- After your Elder is neutralized, move a nurse Staffer involved in the neutralization to the nearest nurse's station. If the Doctor was involved, move the Doctor to the nearest doctor's station.
- After your Elder is neutralized, discard all of your Stuff-markers, and draw 1 Stuff-marker in exchange.
- At the beginning of the neutralized Elder's next turn, place your Elder and Decoy on a bed matching the Elder's color—your choice.
- A Staffer can only be neutralized by playing a Stuff-marker such as Laughing Gas. A neutralized Staffer is removed from the layout and is available to be placed again.
Note: Normally, one Staffer cannot neutralize an Elder. A nurse needs assistance from a second Staffer. However, there is Stuff that can let a nurse neutralize alone.
End of the Game
The game ends when:
- One Elder leaves the retirement home by entering an "exit" space. That player wins the game.
- The Staff-player has neutralized (captured) as many Elders (not Decoys) as there are Elder-players. The Staff-player wins the game.
Special – Ending the Game
- The Staff-player only needs to neutralize 1 Elder for each Elder-player in the game (i.e., 1 less than the number of players).
- The neutralized Elders do not have to be different—you can neutralize a given Elder more than once.
Elder-player Interaction
You and the other Elder-players start out together and agree that it's a good day for an outing. However, as soon as you split up, it's every person for him/her self. After all, with your failing memory, out of sight is out of mind. It's not that you don't want the others to get out—but you have your eyes on the prize.
To reflect this situation, you should only communicate on game details if the Elders involved are in the same space. Suggestions for actual movement should be in the form of "follow me," "run," "watch out for xxx," "block the door if you can," etc.
You should also refrain from making deals that require cooperation lasting more than 1 round.
Stuff Key
Stuff-marker entries use these symbols as printed. The rules use "Stuff" and "Stuff-marker" to mean the same thing.
- All – Place marker if required.
- Instant (printed X) – Resolve & discard.
- Remove at end of round (printed R).
- Remove at end of turn (printed T).
- Remove as stated (printed P).
Stuff header color:
- Orange/brown dot – Affects all Characters.
- White dot – Affects Staffers only.
- Blue/grey dot – Affects Residents only.
Stuff Notes
Each Stuff-marker entry gives: Name (# in game, effect duration): Effect.
General Stuff
Affects Elders & Staffers.
- Bed Bump (2, Remove as stated): Place this Stuff in front of you, and place the corresponding Status-marker on a space adjacent to 1 of your Characters that already has a Status-marker. You may move all Characters already in that space to the same adjacent space. From then on, any Character entering that space must end its movement.
- Door Code (2, Remove as stated): Place this Stuff-marker in front of you, and place the 1, 2, 3 Status-markers in any order, facedown in a stack on the door that does not already have a Status-marker. That door is blocked. To unblock the door, you must have a Character in a space adjacent to that door. Then you use 1 space of movement and guess the order of those markers from top to bottom. If you succeed, the door is unblocked—discard the markers.
- Flying Bedpan (2, Remove at end of turn): Choose a Character within 3 spaces of 1 of your Characters—there may not be intervening doors or walls (the path may "go around a corner"). That Character may not move this turn.
- Hurry Up (2, Remove at end of turn): Choose a Staffer or an Elder & Decoy. Those Characters' movement die results are each increased by 1 for this turn.
- Jammed Door (2, Remove as stated): Place this Stuff in front of you, and place the corresponding Status-marker on a door adjacent to one of your Residents that does not already have a Status-marker. That door is blocked. To unblock the door, you must have a Character in a space adjacent to that door. Then you use 1 space of movement and roll 2 dice. If the result is doubles, the door is unblocked and you discard the markers.
- Just Cleaned (2, Remove at end of round): Place this Stuff in front of you, and place the corresponding Status-marker on a space that does not already have a Status-marker. No one may enter that space. Discard markers at the end of the round. You may also discard 1 Puddle anywhere on the layout.
- Laughing Gas (2, Instant): Choose a space containing one of your Characters and another Character. That other Character is neutralized.
Elder/Decoy Only Stuff
Affects only Elders & Decoys.
- Bingo on TV (2, Remove at end of turn): Choose an Elder and its Decoy. This turn, that Elder may not move so that it is further from its closest bed.
- Detector (2, Remove at end of turn): Choose an Elder & Decoy. Each of their movement die results are changed to "1"s.
- Disguise (2, Remove at end of turn): Choose an Elder and its Decoy. Choose a space. This turn, that Elder/Decoy pair may move as if that space had no Staffers in it.
- Lost Teeth (2, Instant): Choose an Elder and its Decoy. Each must move so that it is 2 spaces closer to its closest bed. If 2+ beds are closest, the Elder-player chooses one. If the closest bed is 1 space away, the Elder/Decoy still moves 1 space.
- Plans! (2, Remove at end of round): Place this Stuff in front of you. For the rest of the round, you place new Room-tiles instead of the Staff-player. Discard marker at the end of the round.
- Power-Chair (2, Instant): Choose an Elder and its Decoy. Move each of them up to 2 spaces in any direction.
- My Plants! (2, Instant): Each Elder and Decoy must move 1 space closer to its closest bed. If 2+ beds are closest, the Elder-player chooses one.
- Walker (2, Remove as stated): Place this marker in front of you. Your Elder and Decoy may either move normally or each may use a die result of 2 to move this turn.
Staff Only Stuff
Affects only Staffers.
- Coffee Break (2, Remove at end of turn): Only 1 Staffer may move this turn.
- Head Nurse (1, Instant): If the Doctor Staffer is not on the layout, replace a nurse Staffer with the Doctor Staffer. If the Doctor Staffer is already on the layout, exchange the two.
- Nurse Call (2, Instant): Move a Staffer 1 space closer to its closest bed.
- New Shift (2, Remove at end of turn): When the next new tile is placed during this turn, you may place either 1 or 2 nurse Staffers at each new nurse's station.
- Staffers on Strike (2, Remove at end of turn): Do not place any Staffers on the next room-tile with at least 1 station.
- Steroids! (1, Instant): Choose an Elder in a space with a Staffer. That Elder is neutralized.
Special – Closest Bed
The distance to a "closest bed" is measured in a series of connected spaces.
- Two connected spaces may not have a wall between them.
- Two connected spaces may have a door between them even if that door is blocked.
- The top and bottom elevator spaces are connected.
- The presence of Status-markers in spaces has no effect on "closest bed" status.
Variations
If all players agree, you may use any or all of these optional rules. You can use them to balance the game if one side is more experienced. Each is marked as favors Elders, favors Staff, or Neutral.
Roll Movement Dice & Assign – When using this variant, you roll the dice before choosing which of your Characters to move. This process is summarized on the side of the Displays that say "Variant Turn Sequence."
Elder Abilities – Each Elder has a special ability that is detailed on the side of the Displays that does not say "Base Turn Sequence."
An ability is resolved as if it were Stuff. You may use your ability twice—place an used square, Resident status-marker in the appropriate space on your display each time you use your ability.
If this variation is used, the Staff-player starts with 2 Stuff instead of 1.
Staff Experience [favors Elders] – To win, the Staff-player must neutralize a number of Elders equal to the number of players in the game (instead of the number of Elders in the game).
Co-op Victory [neutral] – All Elders that reach an Exit space for the first time on the same round are co-winners.
All or Nothing [favors Staff] – Each Elder must reach an Exit space before the Staff-player neutralizes the required number of Elders. Otherwise, the Staff-player wins. When you exit, discard all of your tiles, your decoy, and your Elder. After the 1st Elder leaves, the Staff-player may only move 2 Staffers each round.
No Recovery [favors Staff] – When an Elder is neutralized, he/she is out of the game. The Staff-player wins when all of the Elders are neutralized.
Door-markers [favors Elders] – A Door-marker may be used on any wall except those bordering stairs and/or elevators.
Limited Occupancy [neutral] – If there are 5+ Characters in a space at the end of a turn, remove all decoys in the space.
1st Do No Harm [favors Elders] – An Elder may ignore the effects of a T or an X Stuff-marker played by another Elder. This also applies to Elder abilities.
Example: Alex wants to use a Bedpan to stop Emma. Emma says "no way" and that's that. However, Alex plays Puddle to slow her up.
Stuff is Stuff [favors Elders] – If you discard Stuff without using it, it remains in play in the space in which it is discarded. Such Stuff may later be picked up by any character. If using this rule, you use 1 extra space of movement for each Stuff you pick up.
Tile Placement [favors Elders] – When a tile is placed, it must be placed so that 2 doors match if possible. This is a rule of thumb to help avoid extreme tile placement.