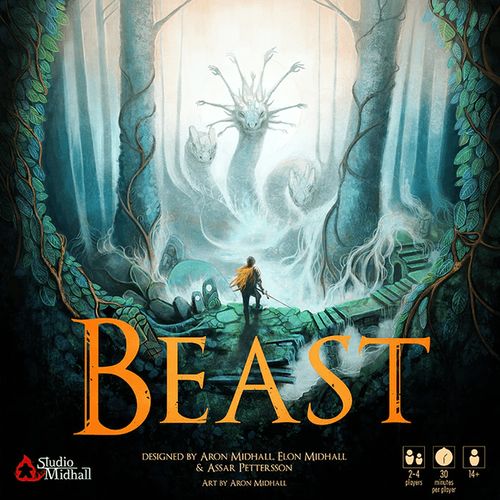
Beast
Beast Rulebook
Table of Contents
Table of Contents
One vs Many
One player takes the role of the Beast, facing the others, who form a team of hunters. The Beast wins when a certain number of settlers are dead, while the hunters win either when the Beast is dead or enough days (rounds) have passed and reinforcements arrive.
- The Beast wins when enough settlers are dead.
- The hunters win when the Beast is dead or when enough days have passed.
If this is your first time playing Beast, we recommend that the person who has the most knowledge about the rules plays as the Beast.
Components
- 6 Beast & 6 hunter character mats
- 6 Beast & 6 hunter character standees
- 16 Action cards
- 18 Hunter ability cards
- 24 Beast ability cards
- 15 Summons
- 18 Grudges (Six 3s & twelve 1s)
- 27 Habitat tokens
- 18 Upgrade tokens
- 3 Ancient power tokens
- 6 Watchtower tokens
- 12 Wound tokens (Six 3s & six 1s)
- 48 Beast movement cards
- 30 Trail tokens
- 25 Item cards
- 25 Beastly talent cards
- 1 Double-sided map
- 2 Double-sided contracts
- 1 Minimap, screen & location token
- 7 Settlers (Farmers)
- 7 Settlers (Nobles)
- 28 Sheep
- 19 Boars
- 4 Bears
Setup
Global components
- Supply. Place all habitat, wound tokens, grudges, upgrade tokens, watchtowers, and ancient power tokens in an easy to reach location for all players.
- Contract & map. Choose a contract and place the corresponding side of the map face up. The south side of the map should face the Beast player.
- Animals & Settlers. Place animals and settlers on all locations on the map with their corresponding symbol.
- Beastly Talents. Shuffle the beastly talents deck, and place 3 cards face up, next to the deck.
- Items. Shuffle the item deck, and place 3 cards face up, next to the deck.
- Action Cards. Shuffle the action card deck.
Contract & Map. The map section of the contract indicates which map to play on. There is a symbol with the two different settlers merged together. This symbol represents either one of them. If this is your first game, we recommend that you play either "The Great Cleansing" or "Attack on the Northern Settlements", depending on your player count. The settler symbol can be found on contracts, cards and upgrades.
Animals & Settlers. Place animals and settlers on all locations on the map unless stated otherwise in the setup section of the contract.
Player setup
A. Beast. One player chooses a Beast and takes the corresponding character mat, standee and summons and places all in front of him or her.
B. Hunter. Each remaining player picks a hunter and takes the corresponding character mat and standee, and places all in front of them. In a 2 player game, the hunter player picks two hunters and takes both hunter mats and standees.
C. Abilities. All players receive the ability cards belonging to their hunter or Beast. You'll find the name of these abilities on your character mat and who they belong to on the backside of the ability card.
D. Grudges and Trails. Take grudges according to the setup in the contract. Place the trail tokens in front of the Beast player.
E. Movement Cards. Place the movement cards next to the Beast player. The Beast also has the option to take the minimap, screen and location token to place next to him or her.
Seating. The Beast should be seated in such a way that (N)orth is up and (S)outh is down. Place the Beast standee at the Beast starting location (see Playing the game). Hunters should be seated in such a way that each hunter can easily check their teammates' cards.
Card types and Discard
The game features several types of cards. On your turn, you can play up to two cards. You play and resolve each card individually, then discard it before playing your next card or ending your turn.
Ability cards. Beasts and hunters start with different abilities bound to their character. When a Beast ability card is discarded, put the card next to your character mat. When a hunter ability card is discarded, put the card in your "ability discard" found on your character mat.
Action cards. Acquired during the draft at the dawn phase. Both hunters and the Beast can play action cards. Hunters always utilize the top effect of the cards, while the Beast always uses the bottom. Both the Beast and the hunters discard into a common discard pile, accessible to all players.
Beast movement cards. These cards aren't dealt, drawn, or part of any player's hand. Instead, the Beast uses these cards to indicate movement. The Beast (and only the Beast) may look at the deck of movement cards at any time. When discarded, put the card back into the deck.
Beastly talents. Special cards acquired during the game that only the Beast can play. When discarded, put face down next to the deck.
Hunter items. Special cards acquired during the game that only the hunters can play. When discarded, put face down next to the deck.
Game Mechanics
Actions
Every action, from moving to attacking to searching and placing summons is done by playing a card. On your turn, you may play up to one card with the "any card" symbol, and up to one card with the "ability card" symbol. You may play them in any order. You may play one of each on your turn and in any order.
Beast movement
When the Beast moves, you do not move the Beast standee. Instead, for each step the Beast moves, the Beast player selects a movement card and places it face down on the Active movement section of the map. The Beast standee is considered the "Beast's last known location", while the Beast's actual location is the place that the face down movement cards lead to.
Example Beast movement. By playing the action card "Rush", the Beast may move up to three steps. The Beast player does so by choosing three movement cards from the Beast movement deck, and then placing them face down in the active movement section of the map. (The Beast may only use the bottom effect of an action card.) Beast movement cards are placed face down and in order in this section. For example: the first card is No Movement, then East and finally North. The Beast's actual location is now two steps away — the first movement card causes the Beast to remain on its current location, the second moves the Beast one step East, and the third moves the Beast one step North, but the standee does not move until revealed. The X marks where the Beast's actual location is. The Beast standee is where the Beast's last known location is.
Minimap
There is an optional double-sided minimap for the Beast to help keep track of its actual location. If you decide to use it, place the movement deck to the right on the minimap. Whenever the Beast moves, do as explained in the section above and then put the location token in the slot of the minimap matching your actual location.
Hunter movement & trails
When hunters move, they simply move their character standee that many steps in any direction, one step at a time. Whenever a hunter moves over a location where the Beast has been or currently is (i.e. the hunter's location matches one of the Beast's active movement cards), the Beast must place a trail token over that location. If there are several active movement cards that match the same location, place a trail for each match.
The only exception is the "No Movement" card (see example above). These cards do not generate trails. Note that "No Movement" isn't an option if the Beast shares a location with a hunter or settler. The Beast standee counts as part of the Beast's trail. This is important for cards like the hunters' ability called "Track".
Each Beast has their unique trail token (Fangrir, Hogbad, Bolgin, Raaga, Esmeria, Mara), but all trails work the same way.
Example hunter movement. By playing the action card "Rush", the hunter may move up to two steps. The hunter moves one step to the right. The Beast places a trail token on that location since it matches one of the cards in the active movement section. The hunter chooses to move one more step to the right. The Beast places a trail token on that location because it also matches a movement card. (The hunter utilizes the top effect of the card. You cannot move 1 step, play another card, then continue your movement.)
If the Beast moves over any location with a settler or hunter on it, the Beast places a trail token on the location with the settler or hunter after all movement has been made.
Revealing
The Beast is revealed whenever it attacks or when a hunter successfully searches its location (see Searching). When the Beast is revealed, it shows all of its active movement cards to the other players, then discards the movement cards and all trail tokens on the map. The Beast moves its standee to that location.
The Beast is considered revealed as long as there are no cards in the active movement section. Discarded movement cards are returned to the movement deck.
Searching
When a hunter plays a card with a search effect, the Beast must reveal itself if the searched location matches the Beast's actual location. If the hunter searches the wrong location, the Beast remains hidden. It is only when the Beast is revealed that it can be attacked and damaged.
Example Search and Reveal. It is the hunter Iona's turn, and she played the action card "Rush", which has an "any card" symbol. She can still choose to play a card with an "ability card" symbol if she wants to before her turn ends. She chooses to do so and plays "Hunt". Because she played the card while she was on the Beast's actual location and successfully searched, the Beast must reveal itself. The card also has an attack effect, so the revealed Beast receives one wound token. Trails and active movement cards are removed.
Attacking
To attack, you'll need to play a card on your turn that has the word "Attack" on it. Every attack deals 1 base damage. When a player is damaged, that player takes a wound token and places it on their character mat. Whenever an animal, settler or summon is attacked, place a wound beneath it. As soon as a Beast, hunter, settler or animal has a number of wounds equal to their starting health, that character is dead and removed from the map.
Hunters can only attack summons and a revealed Beast. Summons can attack animals, settlers, hunters and watchtowers. However, in order to gain grudges for the kill, it has to be the Beast that strikes the final attack.
Remember that the Beast will be revealed whenever it attacks (see Revealing).
Wound tokens come in values of 3 and 1.
Ancient Powers
Ancient powers are gained from contract rewards, items, beastly talents and certain upgrades. The Ancient power gives one attack of your choice 1 more damage. If you gain an Ancient power, place it next to your character mat. Before you use an attack, state that you will be using one (or more) Ancient power to increase that attack's damage.
Summons cannot use Ancient powers. Ancient power tokens are discarded after they have been used.
Grudges
Grudges are resources in the game. These represent the scars of ancient conflicts in the northern forests, swamps and caverns, the memory of which now awakens ancient hatred within the characters.
Grudges are used to upgrade your character and are required to play some items and beastly talent cards.
Hunters gain grudges by completing contract rewards and by playing certain action or item cards. The Beast can also gain grudges by completing contract rewards, but primarily receives them by killing animals, settlers or hunters.
Grudge tokens come in values of 3 and 1. Animal and settler health is shown on the map along with the grudge reward the Beast receives for a killing blow (Sheep, Boar, Bear, Settler (Farmer), Settler (Noble)).
Player Death
Beast. When the Beast dies, the game immediately ends and the hunters win unless otherwise specified in the Contract.
Hunter. When a hunter dies their item cards and grudges are discarded. That hunter then removes their standee from the map. If it was an attack from the Beast that killed the hunter, the Beast gains 1 grudge and randomly picks one of that hunter's action cards to add to the Beast's hand. A dead hunter will not receive any rewards during the first step of the night (see Phase 3: Night). At the third step of the night, the hunter returns their standee to any settlement on the map and continues to play.
Nearby
Whenever the word "nearby" is used, it means that this effect applies to both your actual location and each adjacent location connected by a road. Many cards use this keyword, so keep in mind that it includes your actual location.
Example: Iona plays Silver Arrow and chooses to first move 1 step west (left), then attacks the nearby Wolf.
Watchtowers
When a hunter is allowed to place a watchtower, place it on their location unless stated otherwise. As long as a hunter is standing in the same location as a watchtower, any trails from nearby locations are placed on the map. A watchtower doesn't reveal the Beast, it merely puts trails on nearby locations.
Watchtowers can be attacked by the Beast and its summons, and when damage is dealt, remove that watchtower from the map. If all watchtowers are currently on the map and a player is allowed to place another, he or she may move an existing watchtower to its new location. A destroyed watchtower can be placed again.
Example Watchtower. Iona plays the item card "Outpost" and places a watchtower on her location. The Beast places two trails on the map since two of its three active movement cards are nearby the watchtower, and Iona is in the same location as the watchtower.
Playing the game
The game is played over a series of rounds determined by the Contract chosen during setup. Each round consists of three phases: "dawn", "day", and "night". Dawn starts the round as a preparation phase. The day is the core of the game, and during the night you may receive rewards and upgrade your character before dawn breaks again.
Player starting positions. The Beast starts by placing its standee at the "Beast starting position", which is at the center of the map. The Beast then gets to move up two steps by playing two movement cards. After the Beast has moved, each hunter places their character standee in any of the settlements on the map. Two or more hunters may choose the same settlement.
Phase 1: Dawn
During dawn, all players participate in a draft in which they gain action cards for the upcoming day phase.
Drafting. Shuffle the action card deck, then deal the number of cards indicated below to each player. Players then select one card to keep and pass the rest of the cards clockwise. This continues until all cards have been chosen. Players cannot pass cards they previously kept. This process will be referred to as "drafting".
2 player draft. Deal 6 action cards to each player. During the draft the hunter player selects two action cards instead of one. After the draft, the hunter assigns all the action cards evenly between the two hunter characters. For the rest of the game the hunter player controls two hunters at once, with two separate hands. Play the hunters as if played by two different players.
3 player draft. Deal 4 action cards to each player.
4 player draft. At the start of a 4 player draft, randomly set aside one card for the Beast. Once the draft is complete, add it to the Beast's hand. The Beast may look at that action card during the draft. Then deal 3 action cards to each player.
Phase 2: Day
Each day, the Beast player starts, followed by the other players in clockwise order. Players take turns in doing day actions. During a turn a player can do one of the following actions:
- Play cards: Play up to one card of any type with an "any card" symbol, and up to one card of any type with an "ability card" symbol.
- The symbols can be played in any order and you can also choose to play only one card.
- You have the option to ignore one or more effects on the card you played, unless they meet either of the requirements "if", or "then".
- Pass: You can only pass if there are no other players with fewer action cards in hand than you.
- If you pass your turn but at least one other player doesn't, you play your next turn as normal.
- The day phase is over when all players have passed consecutively.
- Items, beastly talents and abilities are not counted when determining if a player can pass.
- Flee: Discard 1 card of any type to move 1 step. You cannot combine this with playing a card.
Playing Cards
Card rules:
- In any order — Resolve in any order. Effects that have "in any order" above them mean you choose in which order these effects will occur.
- Choose one effect — Choose which effect to resolve. Cards that have "Choose one effect" mean you choose ONE of the effects and disregard the others.
- if — A requirement needs to be fulfilled. In order to be able to play cards with an "if", you need to fulfill the requirement that comes after the "if".
- then — Resolve in a specific order. Some cards need to be resolved in a specific order. These cards have their effects divided by a "then".
- Copy — play the effect that copy targets. The effect you copy will be played on your turn. The card that was copied will not be discarded because of the "copy" effect.
Grudge prerequisites. Some of the beastly talents and item cards cost grudges to play. In order to play a card with a cost, you have to pay the specified number of grudges, which is found next to the symbol. If the card doesn't have a grudge symbol, it's free.
Habitat prerequisites. Some ability cards require that your character is on a certain habitat when you play the card. Habitats are the different location types on the map (Settlement, Forest, Swamp, Cave). The Beast starting location counts as all habitat types except the settlement.
Example: In order for Fangrir to play her ability card "Gather the Pack", the Beast's actual location must be a location with a forest habitat. Because the card must match the Beast's actual location, hunters will gain information about the Beast's whereabouts.
Zone prerequisites. The map "Northern Expanse" is divided into four zones and the map "Drenched Lands" is divided into two zones. Borders between zones are marked with a white line. Zones are a prerequisite for some cards, including the item cards called "traps" (see Traps). Whenever you play a card that has the word zone on it, the effects on that card are bound within the zone you are in at the time the card is played. The center location is included in the three adjacent zones. An example of a zone prerequisite is the Beast action on the action card "Rush", which allows the Beast to move 3 steps within its current zone.
Phase 3: Night
After all players have consecutively passed, the day is over and the night begins. The night consists of the following steps, resolved in order:
1. Check Contract rewards. Each contract has a separate column for the Beast and the hunters. The Beast is to the left side and the hunters to the right. Each side consists of requirements and rewards. In order to gain your reward, you must fulfill the requirements. If both sides have fulfilled their requirements, start with the Beast to resolve the rewards.
During the first night, all players check the requirements and rewards for the first night. During your second night, you check to see if you have, at any time during the game, fulfilled your requirement for the second night and so on as the game continues.
If a requirement has a white line dividing its demands, one of them is enough to complete the requirement and gain the reward. If a reward doesn't mention how many players in your team will gain the reward, all of them receive it.
2. Discard and reset.
- Action cards: Discard from hand if any left.
- Items: Discard the face up and add three new.
- Beastly talents: Discard the face up and add three new.
- Abilities: Return all to hand.
(See Summons, Traps & Reactions for more information about items and beastly talents.)
3. Restore health. Remove wounds from all animals, settlers, and watchtowers. If a hunter has died during the day, restore that hunter to full health in any settlement of their choice. See Player Death for more information on the death of a player.
4. Upgrade. Each night, the Beast and hunters may unlock upgrades. Each Beast has a damage upgrade and unique upgrades. The hunters each have four unique upgrades. You will find the cost to each upgrade and if the upgrade lasts for the rest of the game or if it happens immediately within the slots of your character mat.
Most upgrades are passive effects that last the rest of the game. Yellow upgrades, however, are one time effects that resolve only once and immediately after they are unlocked. Both red and yellow upgrades are paid for with grudges. If an upgrade has a cost of 0, it still needs to be unlocked.
The damage upgrade: All attacks deal 1 damage until upgraded. When upgraded, they deal 2 damage. In the upgrade slots, for example, "Hunting Grounds" is yellow and happens immediately (it costs 1 grudge to upgrade), while "Bloodlust" is red and lasts for the rest of the game (it costs 2 grudges to upgrade). When unlocked, place an "Upgrade token" in the upgrade slot.
The Beast always gets to upgrade first. You can unlock as many upgrades as you wish, as long as you can afford them. Whenever you upgrade, discard grudges equal to that upgrade's cost, and place an "Upgrade token" in the slot of the upgrade you just paid for. Once you've unlocked an upgrade, it cannot be unlocked again.
The night is now complete and dawn begins yet again.
Summons, Traps & Reactions
Summons
All Beasts have summons to aid them. Summons are placed and controlled by the summon symbol. When played, you may choose to either place a new summon or have each of your summons take one action.
Place a summon. Place the summon up to two steps away from your actual location. However, all summons have to be placed on a specific habitat, unless stated otherwise. If all summons are currently on the map and the Beast is allowed to place another, move an existing summon to its new location. A killed summon can be placed again.
Example place a summon. Fangrir's actual location is up to one step away from its last known location. Fangrir plays its ability card "Summon Wolf", and summons the Wolf up to two steps away from its actual location. Fangrir summons the Wolf and places it on its preferred habitat. (Wolves can only be placed on forests as indicated on the Beast mat.)
Summon actions. The different actions summons can take are:
- Move 1 step
- Attack for 1 damage
- Use their unique ability
You'll find the summons' unique ability on the Beast mat. All summons have 1 starting health.
If you have more than 1 summon on the map when you play an effect that lets you take an action with all your summons, you choose in which order the summons will take their action. They do not have to take the same action. Remember that if a summon does the killing blow, the Beast doesn't gain any grudges for that kill.
Gain item
Whenever a hunter plays an effect that states to gain an item, that hunter chooses one of the face up items or takes the top card of the deck. Items are one-time use. Items in hand at night are not discarded.
Gain beastly talent
Whenever the Beast plays an effect that states to gain beastly talents, the Beast chooses one of the face up beastly talents or takes the top card of the deck. Beastly talents are one-time use. Beastly talents in hand at night are not discarded.
Do not replace a chosen face up item/beastly talent card until the night phase.
Traps
Moving, searching and attacking are not the only tools in the hunters' arsenal. In the hunters' item deck, there is a special type of card called traps. Although traps count as an item, they behave slightly differently than other cards.
After you pay the cost of the card, you choose any zone on the map, and then pick a habitat token and show that token to the other hunters. Place the trap card face down at the trap section of that zone, with the habitat token placed under the trap card. Note that the Beast should not know the chosen habitat or trap card until they are triggered. Traps will remain in play until they are triggered.
When the Beast is revealed in a zone with a trap, and the Beast's location matches the habitat token beneath the trap card, that trap is triggered. Show the trap and the habitat token to the Beast, resolve the trap immediately, then discard it. If the Beast is revealed because it played an attack, the trap is triggered before the attack is actually performed.
Example Trap. Earlier in the game, hunters placed a "Fire Trap" in a zone with a forest habitat beneath it. On the Beast's turn, the Beast plays the ability card "Prey Upon" and attacks, which reveals the Beast on a forest. Because the Beast reveals on a forest in the trapped zone, the trap activates (flip the trap face up) and the Beast receives a wound token.
Traps do not trigger if played when a Beast is already revealed. There is a limit to 3 traps per zone.
Transforming locations
You can alter the map to be more beneficial for you by transforming habitats on the map's locations. When the Beast transforms a location, place a habitat token of your Beast's type on that location, as indicated on the Beast mat. If a hunter plays an effect that transforms a location, place a settlement token on that location.
Example Transform. Fangrir is two steps away from its last known location. On its turn, Fangrir plays "Insidious Growth" and transforms each nearby location into forests. Remember that "nearby" can affect your actual location. (Fangrir can only transform to forests as indicated on the Beast mat.)
Reactions
Reactions are cards that you play on your opponents' turn. They are ways to counter specific plays. Each reaction has a prerequisite specifying when you are allowed to play it. Reactions happen before the card that triggered them. Remember to pay the grudge cost when the reaction is being played.
Example Reaction. There is one active movement card. It is the hunter Iona's turn, and she is on a location with a trail token. She plays her ability card "Hunt", and as a reaction the Beast plays the beastly talent "Intuition" on Iona's turn. As reactions happen before the card that triggered them, the Beast moves 1 step first, and Iona will no longer discover the Beast when she searches. (Fangrir will move 1 step before "Hunt" is played.)
Beginner's Advice
We designed Beast to be a game for you to slowly master over time, learning new interactions, synergies and strategies each time you play. This, however, means that the first time you play can be a bit challenging.
Shared advice
Turn The Tide. Don't give up too early if things look grim. The tides can easily turn in your favor.
Action cards. Even though you can only use your half of a card, you still want to pay attention to the other effect! Passing a card during the draft that's not very useful to you but extremely useful for the opponent could be a devastating mistake.
Sculpt your hand. More cards means that you have more ways to ensure your win. Cards from the beastly talents or the item deck could provide you with useful opportunities, while the action cards "Animate" and "Dark dealings" could be just the effect you need.
Hunter
- Start planning before the game even begins! Who should sit where? Perhaps Helga should be the first hunter with her "Seer" ability?
- Try to corner the Beast to restrict its movement.
- Unsure if the trail you're on is the right one? Frequently count the active movement deck.
- Teamwork starts at dawn. If you already have a good movement card, why not send the next one to your companion?
- Communication is the key to a successful hunt.
Beast
- Try to avoid ending your turn revealed.
- As the Beast, it's dangerous to be the first one out of actions.
- Make your kill before you run out of movement so that you have a sure escape.
- Be cautious about passing your very first action. Hunters will then often play action cards like "Ensnare" or team-benefiting action cards, giving them a headstart over you.
- Summons are a great way to put pressure on different settlements! Even if the summon doesn't manage to snatch a settler, it separates the hunters and draws out attack cards that could hit you instead.
First Time Playing?
We recommend that you choose the contract "The Great Cleansing" if you are 2-3 players, or "Attack on the Northern Settlements" if you are 4 players. Then skip the drafting part of the first dawn phase, and play with the action cards and characters listed below.
2 - 3 Players
- Player 1 (Beast) — Recommended Beast: Fangrir. Starting action cards: Charge, Dash, Pursuit, Dark Dealings.
- Player 2 (hunter) — Recommended hunter: Helga. Starting action cards: Incite, Rush, Prowl, Hidden Passage.
- Player 3 (hunter) — Recommended hunter: Assar. Starting action cards: Adapt, Bolster, Haste, Avarice.
4 Players
- Player 1 (Beast) — Recommended Beast: Fangrir. Starting action cards: Charge, Dash, Pursuit, Dark Dealings.
- Player 2 (hunter) — Recommended hunter: Helga. Starting action cards: Incite, Rush, Hidden Passage.
- Player 3 (hunter) — Recommended hunter: Varja. Starting action cards: Adapt, Haste, Avarice.
- Player 4 (hunter) — Recommended hunter: Iona. Starting action cards: Bolster, Prowl, Dark Rituals.