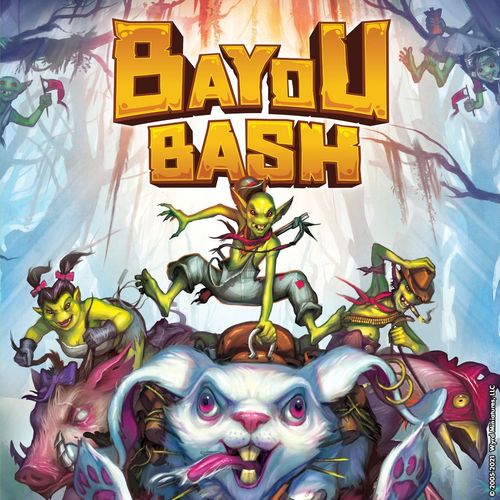
Bayou Bash
Bayou Bash Rulebook
Table of Contents
Table of Contents
Object of the Game
Gremlins are short, belligerent creatures that live in the swamp. In Bayou Bash, you take control of one of these gremlin racers to help them win the infamous Bayou Bash on one of their somewhat-uncontrollable mounts.
The winner of a Bayou Bash isn't the racer who crossed the finish line first, but rather the one who gained the most fans through a combination of speed, cunning, and over-the-top antics.
You will need every trick and tool that you can muster to gain as many fans as possible because once someone crosses the finish line, the racer with the most fans wins.
In This Box
- 4 Racer Meeples: Rooster, Rabbit, Pig, Waldgeist
- 14 Track Pieces (double-sided): 1 Starting Track Piece, 1 Finish Line Track Piece, 8 Straight Track Pieces, 4 Turn Track Pieces
- 4 Racer Cards
- 3 Nimble Dice
- 3 Swift Dice
- 3 Dashing Dice
- 1 Stagger Die
- 15 Event Cards
- 30 Jockey Cards
- 12 Gold Carrot Tokens
- 12 Stagger Tokens
- 10 Barrels
- 4 Skull Markers
- 60 Gremlin Fans (15 of each color)
Basic Concepts
Racer Card
Every Racer has a matching Racer Card. This card explains the Abilities the Racer can use during the game.
- Name: The name of the Racer.
- Racer Abilities: Each Racer has three unique Abilities. Each Ability may only be used once per Turn and only by discarding the number of Gold Carrots to the right of the Ability's name.
- Skull Marker: The image on the Skull Marker the Racer uses.
- Racer Color: The background of the Racer Card indicates the Racer's color.
Movement Dice
If Jockey Cards represent the jockey's commands, the Movement Dice represent the unruly mount's attempts to follow those instructions.
There are three types of Movement Dice in the game: Nimble, Swift, and Dashing.
- Nimble Dice are 4-sided dice that are numbered from 1-2. When reading the die, use the value on the bottom of the die. These dice are slow but give the Racer a lot of control over their movement.
- Swift Dice are 6-sided dice that are numbered from 1-3. Some faces of these dice have Stagger icons (lightning bolt). These dice give a good balance between speed and control.
- Dashing Dice are 8-sided dice that are numbered from 3-5. Some faces of these dice have Stagger icons (lightning bolt). These dice are incredibly fast but give very little control.
Stagger Die
The Stagger Die represents the loss of control a Racer suffers from going too fast, hitting things, or the mount disobeying their jockey. It is a 10-sided die with arrows on each side. These arrows indicate the direction a Racer Staggers.
To read the Stagger Die, orient it so that the "point" of the die is facing forward, toward the Finish Line. The arrow then indicates which direction you move, relative to the Finish Line.
One result on the Stagger die shows a Fan icon. In this case, the Racer wouldn't move at all (instead they would gain a Fan, see page 16).
Movement
The Track
A Track is made up of a number of Track Pieces like the one pictured to the right. Each Track Piece is comprised of multiple spaces.
Some spaces have Terrain on them, which cause special effects to occur if a Racer moves onto them. For more information on Terrain effects, see page 14.
If a space does not have Terrain, an object, or a Racer on it, it is called an Open space.
The Finish Line (X) is part of the last Track Piece and is placed at the end of the Track. The Start Line (Y) is part of the Starting Track Piece. You can see where they would be placed in the example in the bottom right of this page.
Moving on the Track
There are six movement directions in Bayou Bash: straight forward, forward-left, forward-right, straight backward, backward-left, and backward-right.
For the purposes of movement, "forward" is always considered to be moving toward the Finish Line, while "backwards" is away from it.
Movement effects may only move a Racer or token in one direction per effect, and it must move the full distance allowed; you cannot choose to move something fewer spaces than indicated. This movement may cause the Racer or token to fall off the Track.
This means that an effect that causes a Racer to move three spaces will cause that Racer to move a full three spaces in one direction - even if they fall off the Track (see Falling off the Track on page 14).
Some rare effects allow a Racer to change direction. When this happens, the Racer's movement stops moving in one direction and finishes moving in a new direction.
On occasion, a Racer is placed on a new space. In this case, the Racer is simply placed in the appropriate space, ignoring all intervening spaces. Objects may not be placed off the Track, but may cause Rams when being placed (see page 12).
Position
Some game effects will refer to a Racer's position on the Track relative to other objects. Most commonly, positioning is used to determine Turn Order (see below), but other effects reference it as well.
A Racer is always ahead of or behind something; they are never neck and neck. A Racer is ahead of something if:
- They are on a Track Piece closer to the Finish Line, or
- They are on a Column of the same Track Piece that is closer to the Finish Line, or
- They are in a Lane further to the right, from the perspective of behind the Racers, on the same Column of the same Track Piece.
Turn Order
Turn Order is determined by each Racer's position on the Track. Turn Order begins with the Racer furthest from the Finish Line. It proceeds to the next furthest Racer and so on until finally reaching the Racer closest to the Finish Line.
If an effect impacts multiple players or Racers at once, they resolve that effect in Turn Order, with each Racer only be impacted once.
Some game effects may refer to the Frontrunner or Rearender. The Frontrunner is the Racer that is closest to the Finish Line, while the Rearender is the Racer that is the furthest from the Finish Line.
Example: On the Track Piece above, the Waldgeist (A) is the furthest ahead (rightmost Lane and furthest Column). This makes it the Frontrunner. It is followed by the Pig (B), which is followed by the Rooster (C). The Rabbit (D) is the furthest behind, and is therefore considered to be the Rearender. For this example, the Turn Order would be Rabbit (D), Rooster (C), Pig (B), Waldgeist (A).
Setup
- Build the Track following steps A-D below. Tracks should generally be between 8 to 12 Track Pieces for a good game length. Alternatively, see pages 18-21 for Track Examples!
- A. Place the Starting Track Piece near the table's edge.
- B. Choose a Track Piece and attach it to the Starting Track Piece. Track Pieces can be positioned in any way as long as at least three Lanes line up with the previous Track Piece.
- C. Add the next Track Piece, building off the previously placed piece. Try to pay attention to the Terrain on the Track Pieces; the more varied their positioning, the more interesting the race will be!
- D. Keep adding Track Pieces until you're satisfied with the length of your Track. Once you're done adding Track Pieces to your Track, attach the last piece: the Finish Line Track Piece.
- Each player rolls two Swift Dice and adds their results together. Starting with the player with the highest result and proceeding in descending order (reroll any ties), each player chooses a Racer and takes its corresponding Racer Meeple, Racer Card, and all the Fans matching its color. Each player then places their Racer anywhere on the Starting Track piece that doesn't already contain another Racer.
- Shuffle the Jockey Cards together and place them face down near the Track to form the Jockey Deck.
- Set aside the Gunshot Event Card and shuffle the remaining Event cards together to form the Event Deck, which should be placed face down near the players. Place the Gunshot Event on top of the Event Deck.
- Let the race begin!
Double-Sided Tracks: Each Track Piece is double-sided. The grassy side (Side A) is easier, while the muddy side (Side B) is more challenging. Try out a bunch of different combinations for added difficulty and fun!
Playing the Game
Bayou Bash is played across a series of Rounds. Each Round is divided up into three phases: Events, Racing, and Fans. Rounds are repeated until one Racer crosses the Finish Line (see "Winning the Game" on page 16), at the which point the player with the most Fans wins the game!
Event Phase
The Bayou is a dangerous and unpredictable place, and a crowd of gremlins makes it even more so. Event Cards represent the unexpected occurrences that may suddenly impact racing conditions.
Place the top card of the Event Deck face up on top of the Active Event Card pile adjacent to the Event Deck. Resolve any of the effects listed on the card in Turn Order. If an Event Card says Ongoing, it means that the effects listed on the card last the entire Round.
Example (Event Phase): The Gunshot! Event Card reads: "Get ready! Get set! Didn't you hear that shotgun? Get movin'!" Its effects are: "Each Racer gains 1 Fan." and "Ongoing: Racers cannot be Rammed onto Terrain or off the Track, and Rams do not gain Fans for Racers."
- A. One of the players places the top card of the Event Deck on the Active Event Card pile. She reads the Story and the effects of the card. If she happens to read it in a goofy voice, so much the better.
- B. The Event Card's effects impact the way the Round is played. In this case, the text on Gunshot reads as follows: "Each Racer gains 1 Fan." "Ongoing: Racers cannot be Rammed onto Terrain or off the Track, and Rams do not gain Fans for Racers."
Each Racer will gain one Fan, in Turn Order. The other effect is Ongoing, so it will last for the entire Round.
Racing Phase
The Racing Phase is the heart of Bayou Bash. In it, players will battle for position and the love of the Fans, pitting themselves against the other Racers.
There are two parts of the Racing Phase: Drafting Jockey Cards and Movement Turns.
Drafting Jockey Cards
To draft Jockey Cards, one player places a number of Jockey Cards equal to the number of players plus one face-up on the table. The Rearender then discards a Jockey Card.
Going in Turn Order (see page 6), each player takes one face-up Jockey Card into their hand. This card is what they will use during their Movement Turn to race and fight other Racers.
Example (Racing Phase):
- A. There are four players in this example, so one of the players draws the top five cards of the Jockey Deck and places them face-up near the Track so that every player can read them. The Rooster is furthest from the Finish Line, so that player discards one Jockey Card.
- B. Starting with the player furthest from the Finish Line and moving forward, each player draws one of the face-up Jockey Cards into their hand.
- C. With that complete, the players move on to the Movement Turns (see page 10).
Movement Turns
In Turn Order (page 6), a Racer with a Jockey Card takes their Movement Turn consisting of the following steps:
- Use Jockey Card
- Roll & Resolve Movement
- Stagger
- End of the Movement Turn
A breakdown of these steps can be found on the next page.
Shuffling Decks: If you go to place a card from any deck and the deck is empty, just reshuffle the discarded cards to create a new deck.
Movement Turn Steps
1. Use Jockey Card: At the start of a player's Movement Turn, they discard a Jockey Card from their hand to gain tokens, objects, and Movement Dice based on the icons on the Jockey Card.
- If a player's Jockey Card includes Barrel icons, they place that many Barrels onto any Open Spaces within 2 spaces of their Racer or one of their Fans before resolving Movement Dice.
- If a player's Jockey Card includes Gold Carrot icons, the player gains that many Gold Carrot tokens and places them on their Racer Card (to a max of 3).
- If a player's Jockey Card includes Stagger icons, the player gains that many Stagger tokens and places them on their Racer Card (to a max of 3).
- Players gain all the Movement Dice based on what dice are shown on their Jockey Card. Most often, this is some combination of three dice.
2. Roll & Resolve Movement: If a player wants to Showboat, they announce that now, which impacts the way they roll and resolve their Movement Dice (see page 12 for how to Showboat).
In this step, a player rolls all of their Movement Dice. The player gains a number of Stagger tokens equal to the number of Stagger icons (lightning bolt) rolled. The player then resolves their Movement Dice one at a time in any order.
To resolve a Movement Die, the player moves their Racer a number of spaces equal to the value on the die in any of the forward directions (as explained on page 5) and then discards the die. A Racer can only move in a single direction with each Movement Die, but they can choose a different direction for each Movement Die they resolve.
If a Racer moves onto a space with another Racer or token, they follow the Ramming rules on page 12. If they move onto a space with Terrain or fall off the Track, then refer to the rules on page 14.
3. Stagger: Once all of a player's Movement Dice are resolved, the player discards all their Stagger tokens and rolls the Stagger Die. Their Racer moves in the direction indicated on the die a number of spaces equal to the number of Stagger tokens discarded. If a player has no Stagger tokens, they skip this step.
Staggering may cause a Ram (see page 12). If a Racer Staggers into Terrain or off the Track, the Stagger ends without the Racer moving further.
If the player rolls the Fan icon on the Stagger Die, then their Racer does not move and gains a single Fan (see page 16).
Resolving a Stagger: If a Racer is told to Stagger, they follow Step 3, Stagger, as if it was their Movement Turn.
4. End of the Movement Turn: A player's Movement Turn usually ends after all dice and Staggers are resolved, but some game effects (like Terrain) may cause it to end sooner.
When a player's Turn ends, they discard any unresolved Movement Dice. The Racer's tokens (such as Staggers and Gold Carrots) are not discarded.
Remember: Each of a Racer's Abilities can only be used once per Turn.
Fan Phase
After all Racers have taken a Movement Turn, the Racer closest to the Finish Line gains 2 Fans. If that Racer is off the Track, the closest Racer to the Finish Line that is not off the Track gains the Fans instead.
Example (Movement Turn):
- A. The Rooster player is the furthest from the Finish Line, so she is up first. She uses her Jockey Card and takes 1 Barrel, 1 Dashing Die, 1 Nimble Die, and 1 Swift Die, based on the icons on the card. She then discards the Jockey Card.
- B. The Rooster first places her Barrel within two spaces of herself. She's hoping to create some difficult choices for her opponents during their Turns.
- C. The Rooster rolls her Movement Dice. She rolls a 1 on her Nimble Die, a 3 on a Swift Die, and a 4 on the Dashing Die. She collects a Stagger token because of the lightning bolt on the Swift Die.
- D. After using her Swift Die, the Rooster player sees that there's Water Terrain a few spaces in front of her, so she uses her Nimble Die roll to move forward-right 1 space in order to avoid it.
- E. She then has a straightaway in that Lane, so she uses her Dashing Die to move forward 4 spaces. If she used her remaining Swift Die to move forward-left or forward-right, she'd move off the Track, so she moves straight forward again.
- F. Now that she is done with resolving her dice, she discards her 1 Stagger token. This means she will only need to Stagger 1 space. She rolls the Stagger Die. It resolves as a Forward-Left. Whew! That wasn't so bad!
Ramming
A Ram occurs when a Racer or object enters the same space as another Racer or object. The player controlling the moving object is the Ramming Player.
In a Ram, the Rammed object is always affected following the rules for objects found in the next Column.
During their Turn, a Racer may not enter the same Racer's space twice (but they could still enter another Racer's space). If they would, their Turn instead ends.
At the end of a Movement Turn (or Phase, if it's not during a Movement Turn), a Ramming Player gains one Fan for every different Racer they Rammed that Turn.
Chain Reactions
Sometimes an object being moved from a Ram results in another Ram. In these cases, the Ramming Player does not change through the entire Chain Reaction.
Objects
Objects on the Track may move and/or be Rammed. A moving object stops moving if it hits another object (which is a Ram) or Terrain. Objects are discarded if they move off the Track (Racers follow special rules found on page 14).
There are three types of objects in the game, and every object has a special rule it follows when it is Rammed.
- Racer: Racers are considered objects. When a Racer is Rammed, it moves one space in any direction of the Ramming player's choice.
- Fans: When a Fan is Rammed, it is discarded (it does not move).
- Barrels: When a Barrel is Rammed, it moves 5 spaces in any one direction of the Ramming Player's choosing. If it hits an object or Terrain, it is discarded after resolving the Ram.
If it was the Ramming Player's Racer that moved into the space with a Barrel, that Racer's remaining movement on their current Movement Die is reduced to 0 (if it was already 0, there is no effect).
Example (Ramming):
- A. The Rabbit player is planning on using a Barrel previously placed to her advantage. She uses the 2 from her Swift Die to move directly forward 1 space and Rams the Barrel!
- B. Ramming the Barrel causes the Swift Die to be reduced to 0 (she can move no further with it). She decides to move the Barrel forward 5 spaces. It stops when it moves into the space with a Racer (the Pig), which it Rams. The Barrel is discarded because it hit a Racer.
- C. Hitting the Pig with a Barrel creates a Chain Reaction! The Rabbit player moves the Pig back left 1 space, which is where a Fan is hanging out on Rock Terrain. The Fan, having been Rammed, is discarded.
- D. The Ram is complete. The Rabbit will gain a Fan because she Rammed another Racer (via the Barrel). She then continues with her Movement Turn by resolving the rest of her Movement Dice.
Racer Abilities
Every Racer has unique Abilities listed on its Racer Card. These Abilities can be used throughout the race to gain an advantage over one's opponents.
A player may only use an Ability during their Racer's Movement Turn, and each Ability can only be used once per Turn. If an Ability has one or more Gold Carrot symbols next to it, the Racer must discard that many Gold Carrots to use the Ability.
Some Abilities last for the entirety of a Racer's Turn, in which case they will say "this Turn."
A player who uses an Ability that causes a Ram is considered the Ramming Player.
Showboating
Showboating adds a "risk vs. reward" element to the game. Before rolling their Movement Dice during their Turn, a Racer may choose to Showboat. All they have to do is announce to the rest of the players that they are Showboating.
The player must then roll and resolve each Movement Die one at a time (resolving one before moving on to the next Movement Die). If, at the end of the Racer's turn, they did not enter a space with Terrain, fall off the Track, or use a Racer Ability, that Racer gains a Gold Carrot.
Terrain
When a Racer moves onto a space containing Terrain, first resolve any Ram that may have occurred (and any effects resulting from the Ram), then resolve the Terrain's rules, as listed below:
- Water: Gain a Stagger token. Any movement remaining on your current Movement Die (if any) is reduced to 0.
- Rocks: If it is your Movement Turn, your Movement Turn ends (even if you are currently Staggering).
Example (Terrain):
- A. The Pig player has only one die remaining: a 2. He has no choice but to move onto Terrain. If he moves straight forward or forward-right, he will move into Rocks. This would end his Turn.
- B. He decides to move forward-left onto the Water. This reduces the value of his current Die to 0, so his movement stops, and he gains a Stagger token. He now has two Stagger tokens and must resolve a Stagger.
Falling Off the Track
When a Racer falls off the Track, their Racer is removed from the Track and their Skull Marker is placed on the space from which they fell off the Track (on top of any other Skull Markers in that space if applicable). The Racer then gains a Stagger token and loses a Fan. If a Racer falls off the Track during their Movement Turn, their Movement Turn ends.
When a Racer that is off the Track starts their Movement Turn, they remove the Skull Marker and place their Racer on the space it occupied, ignoring all Terrain, objects, tokens, and other Racers in that space (they do not cause any Rams for entering that space).
Racers are considered to be in the location of their Skull Marker for the purposes of Turn Order.
If there are multiple Skull Markers in a space, the bottom Skull Marker is always considered closest to the Finish Line, and then the next lowest, and so on.
A Racer on the same space as one or more Skull Markers is considered to be further from the Finish Line than any of the Skull Markers on that space.
Example (Falling Off the Track):
- A. The Pig player is just about finished with his Movement Turn, but he has two Stagger tokens, so he will need to roll and resolve the Stagger Die before he is done. He discards his 2 Stagger tokens.
- B. The Stagger Die rolls a forward-left arrow. Oh no! Because he discarded 2 Stagger tokens, this means that he has to move forward-left 2 spaces, which sends his Racer off the Track.
- C. He places his Skull Marker on the last space his Racer was on before falling off the Track. He then loses one of his Fans and gains a Stagger token. Now his Movement Turn is over.
- D. The Waldgeist player Staggered 2 spaces at the end of her Movement Turn, which moved her Racer onto the space with the Pig's Skull Marker.
- E. During the Fan Phase, despite being technically in first, the Pig player does not gain Fans because his Racer is off the Track. In this case, the Waldgeist is the closest that is still on the Track and gains the Fans.
- F. Because the Pig is considered ahead, however, the Waldgeist will move first this Round, allowing her to move out of the Pig's way. On the Pig's Turn, the player removes his Skull Marker and places his Racer on that space.
Tokens
Tokens are used to track certain game effects. A Racer can never have more than 3 of a single token (any additional tokens are discarded) on their Racer card.
If a token is placed on the Track and a Racer moves onto its space, that Racer gains the token, removing it from the Track and placing it on their Racer card.
There are two kinds of tokens in the game: Gold Carrots, which let Racers use certain Racer Abilities (see page 12), and Staggers, which cause Racers to Stagger (see page 10).
Gaining Fans
Gaining Fans commonly occurs from Ramming (see page 12) or from the Fan Phase (see page 10).
When a player gains one or more Fans, they must place them on any space at least one Track Piece ahead of them, so long as the space doesn't have an object or Racer on it. Fans cannot be placed on the Finish Line itself, but may be placed on the Finish Line Track Piece. If a Racer cannot place Fans normally (due to lack of space, for example), they may place the Fan(s) anywhere on the Track.
If a Fan is discarded from a game effect, the Fan is removed from anywhere on the Track (unless the game effect states otherwise). If they have no Fans, the discard effect is ignored.
Winning the Game
When a Racer moves onto the Finish Line, they have finished the race. Their Movement Turn immediately ends, and they remove their Racer from the Track and add 3 Fans anywhere on the Track.
Gameplay continues until the Racing Phase is completed, at which point the game ends. Then, each players adds up the total number of Fans they have on the Track.
The player with the highest total number of Fans wins the game! If there is a tie, any Racer that moved onto the Finish Line gains an extra Fan. If there is still a tie, the Racer with the most Fans who took their Turn most recently wins.
Alternate Game Modes
There are many ways for Gremlins to hold a Bash. For a different take on Bayou Bash, use one of the alternative game modes listed below.
Circuit
Build a looped Track so that the last Track Piece connects to the bottom of the Starting Track Piece (there is no Finish Line piece). Instead of ending a Race when a Racer crosses the Finish Line, the race continues until a Racer finishes a certain number of laps and then moves onto the Start Line (checked spaces) on the Starting Track Piece.
In a Circuit, Fans must be placed in front of the Racer, but not past the Starting Track Piece. When a Racer completes a lap, they remove all of their Fans from the Track and score that many Race Points.
Once a Racer completes their last lap, the game ends at the end of the Round. Each Racer that completed all of their laps scores an additional 3 Race Points. The Racer with the most Race Points wins the game!
Destruction Derby
In this variant, the Fan Phase is skipped, so the only reliable way to gain Fans is by Ramming other Racers.
Stubborn Jockeys
In this alternative game mode, each player is dealt six Jockey Cards at the beginning of the game. No Jockey Cards are dealt during the Racing Phase.
Players may choose one of the Jockey Cards in their hand each turn, discarding it to their own discard piles afterwards. When a player is down to one Jockey Card (or fewer), they return all of their discarded Jockey Cards to their hand.
Time Trial
Time Trial is a one-player variant where the Racer is trying to beat their top score. Build a Track however you'd like. The goal is to reach the Finish Line as quickly as possible.
Do not use Event Cards and skip the Fan Phase. Whenever you discard a Jockey Card from your hand, set it aside and do not return it to the Jockey Deck. Cards discarded during drafting are still discarded as normal. If you run out of Jockey Cards, your mount falls asleep and the race immediately ends.
When your Racer crosses the Finish Line, you score two points for each straight Track Piece and three points for each curved Track piece. Then, you subtract one point for each Jockey Card you used. You score no points at all if your mount fell asleep!
How high can you get your score?
Night Race
In a Night Race, players build the track as they race down it. First, the players must agree on the number of Track Pieces in the Track. Put aside the Starting Track and Finish Line pieces, shuffle the rest of the Track Pieces, and place them in a stack. Then put the Rulebook on top of the stack to avoid spoiling the next Track Piece.
Only one Track Piece is added to the Starting Track at the beginning of a Race. When a Racer would cross into a new Track Piece, they connect the next Track Piece in the stack to the Track from before moving onto it. Track Pieces placed in this way must connect to at least 3 Lanes.
Continue in this fashion until the agreed upon number of Track Pieces have been placed, then place the Finish Line at the end of the last Track Piece.
Example Tracks
The track diagrams are not reproduced here; each track's difficulty and required pieces (with the Side A/B face) are transcribed below.
Grassy Glenway (Circuit Game Mode): Take a few light 'n easy right turns til you come up the winner (or end up in the murky end of the marsh!). This track uses the Circuit Game Mode.
- Difficulty: Easy
- You will need: 1 Starting Track Piece (Side A), 3 Straight Pieces (Side A), 4 Turn Pieces (Side A)
Silverstone Swamp: You feelin' a little squirrelly? This track'll make your head spin! Make sure to use the Circuit Game Mode rules here!
- Difficulty: Hard
- You will need: 1 Starting Track Piece (Side A), 3 Straight Pieces (Side A), 4 Turn Pieces (Side B)
Snake's Pass: Careful for snakes in the grass! This slithering track will make you wish you brought your anti-venom!
- Difficulty: Easy
- You will need: 1 Starting Track Piece (Side A), 1 Finish Line Track Piece (Side A), 5 Straight Pieces (Side A), 4 Turn Pieces (Side A)
The Mucky Muck: Some say there's a castle made of clouds above this mud track, but all I see is more mud! Careful, this one's a doozy!
- Difficulty: Hard
- You will need: 1 Starting Track Piece (Side B), 1 Finish Line Track Piece (Side B), 5 Straight Pieces (Side B), 4 Turn Pieces (Side B)
Broken Donut: This track starts off nice and easy, but the second you get around the first turn, you'll find yourself face-first in the mud!
- Difficulty: Intermediate
- You will need: 1 Starting Track Piece (Side A), 1 Finish Line Track Piece (Side A), 3 Straight Pieces (Side A), 2 Straight Pieces (Side B), 2 Turn Pieces (Side A), 2 Turn Pieces (Side B)
"U" Got What I Need: Make your way from one end of the swamp to the other with the simple and mostly painless path of this race!
- Difficulty: Easy
- You will need: 1 Starting Track Piece (Side A), 1 Finish Line Track Piece (Side A), 6 Straight Pieces (Side A), 4 Turn Pieces (Side A)
Going the Distance: This scenic route will take you through just about everything our lovely marsh has to offer, including cliff edges, spiky stones, and mile-deep pond water. You'll be fiiiine.
- Difficulty: Intermediate
- You will need: 1 Starting Track Piece (Side A), 1 Finish Line Track Piece (Side B), 3 Straight Pieces (Side A), 3 Straight Pieces (Side B), 2 Turn Pieces (Side A), 2 Turn Pieces (Side B)
Mad Patch Prix: Goin' back and forth from mud to grass in this lengthy race will put your racer through the ringer!
- Difficulty: Hard
- You will need: 1 Starting Track Piece (Side B), 1 Finish Line Track Piece (Side B), 4 Straight Pieces (Side A), 3 Straight Pieces (Side B), 2 Turn Pieces (Side A), 2 Turn Pieces (Side B)
Racer Abilities Detailed
Each Racer Ability can only be used once per Turn. Below is a breakdown of each of their Abilities with a longer description of how some function.
Pig
- Hogwash Slosh: If you move onto a Water space, do not gain a Stagger token (though it still ends your die). If you Rammed an object on that space, gain a Gold Carrot.
- Untame Tusk Toss: Ram an object in an adjacent space, and you may place it within two spaces. Fans are placed and can cause Rams, but are then discarded.
- Pork Roast Rodeo: Before rolling dice, gain a Swift Die. This Turn, you may change directions any number of times while resolving Movement Dice.
Rabbit
- No Cause Fur Alarm: Once during your Movement Turn, you may have any one adjacent Racer gain a Stagger token.
- Eat My Dust Bunny: Place your Racer on any Open Space within 2 spaces.
- Carrot Cake Quake: Move all Racers and Fans within 3 spaces of your Racer one space in any direction. Each movement may be in a different direction, potentially resulting in Ramming other objects moved by this Ability.
Waldgeist
- Complete Disbe-leaf: After rolling the Stagger die, you may reroll it. If you do, gain a Stagger token. This Stagger token will apply on the following Turn.
- Sticks on Stones: If you just moved into a Rock space, do not end your Turn, and you may add up to 2 to the value of one of your Movement Dice.
- Pollen Your Leg: Place all Racers ahead of you on the Track onto any space within 3 spaces of their current location.
Rooster
- The Pecking Order: You may move one space in any direction after Ramming a Racer.
- Without Feather Ado: Increase your current die's value by your number of Stagger tokens. You may change direction once during this die.
- No Harm, No Fowl: Before rolling dice, gain up to two Stagger tokens and the same number of dice of your choice. You may gain different types of dice with this Ability.
FAQ
-
What do I do when two effects tell me to do something at the same time? If it is your Turn, then you get to choose the order in which those effects occur.
-
I just landed on Water Terrain, but don't have any dice to discard. I still have Staggers to resolve. Do I resolve those Staggers or do I end my turn? You would resolve any Staggers left before your turn ends. Conversely, if you were on Rock Terrain instead (or any effect that immediately ends your turn), you would not resolve any Staggers, as your turn has ended.
-
Can I use Racer Abilities in between Movement Dice? How about in the middle of resolving a Movement Die? Yes to both. If you are in between dice and hit a Barrel or Water, you don't have a current die to end!
-
If I gain a Stagger while Staggering, what happens? You'd gain the token for the next Turn. This happens most often when Staggering into Water or off the Track.
-
If no Racers are on the Track, who gains the Fans during the Fan Phase? No one!
-
Are Fans discarded if they Ram something? No. They are only discarded if they are Rammed.
-
Some spaces on the curved Track Pieces make it difficult to tell where I can move. In the example below, where can the Waldgeist move? Forward-left (A), straight forward (B), forward-right (C), back-left (A), straight backward (E), or back-right (D). (As printed: the answer lists "(A)" for both forward-left and back-left.)