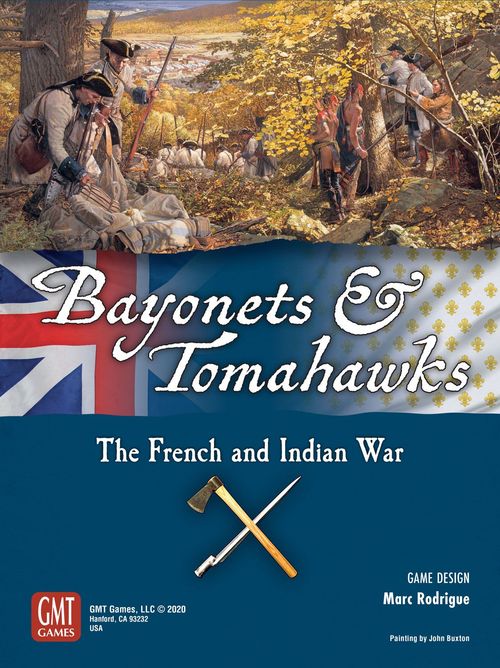
Bayonets & Tomahawks
Bayonets & Tomahawks Rulebook
Table of Contents
Table of Contents
- 1.0 Introduction
- 2.0 Game Map
- 3.0 Units
- 4.0 Sequence of Play
- 5.0 Setup
- 6.0 Cards
- 7.0 Action Rounds (ARs)
- 8.0 Indian Nations
- 9.0 Raid
- 10.0 Movement
- 11.0 Marshal Troops
- 12.0 Construction
- 13.0 Battle
- 14.0 End of Action Round
- 15.0 Fleets Arrive LR
- 16.0 Colonials Enlist LR
- 17.0 Winter Quarters LR
- 18.0 Victory Conditions
- Unit and Militia Reference
- Connection, Hit Check, Raid, and Action Reference
- Easily Forgotten Rules
1.0 Introduction
1.1 Overview of Play
Depending on the scenario, Bayonets & Tomahawks can last one or more in-game Years. Each Year contains nine Action Rounds as well as three administrative Logistics Rounds. During Action Rounds, players play cards to perform Actions and historical Events. Victory Points, accumulated by capturing and Raiding enemy spaces, determine victory.
1.1.1 Factions
Each player commands one of two factions: the British, represented by a crown; and the French, represented by a fleur-de-lis. A faction's own units, markers, and controlled spaces are friendly; the other faction's units, markers, and controlled spaces are enemy.
1.2 Game Components
A complete set of Bayonets & Tomahawks includes:
- 22" x 34" mounted map
- 54 cards: 21 British, 21 French and 12 Indian
- 135 unit counters: 54 British, 21 Colonial British, 44 French and 16 Indian
- 8 Commanders: 4 French and 4 British
- 17 Vagaries of War tokens
- 1 small fabric bag
- 6 custom dice
- 1 sheet of markers
- 1 Player Aid sheet
- 4 Scenario Information sheets
- 1 Indian Setup sheet
- Rulebook and playbook
1.3 Dice
The game includes six custom dice, used for Raid (9.0), Battle (13.0), Commander Casualty (13.5.1), and Rally (14.2).
Die faces: Flag (2 faces); Hit Triangle/circle; Hit Square/circle; B&T (see 13.5.1); Miss (Crescent).
2.0 Game Map
The game is played on a 22" x 34" period map of the northeastern section of North America, an area ranging from the Upper Mississippi to the Gulf of Saint Lawrence and to South Carolina along the Atlantic Seaboard. The map is point-to-point; each point is a space, which has a name and can be occupied by units.
Eighteenth-century French, British, and Indian place names often differ from modern ones; corresponding contemporary names are indicated in the playbook for each of these spaces. The map also contains the various tracks, boxes and placeholders used during play: the Raid Track, Victory Track, Battle & Commander Rerolls Tracks, Sail Box, 2 Sea Zones, 2 French Fortress Spaces, Year and Round Tracks, 8 Colonies (gray/red), British Base, Path, Highway, Victory Spaces (yellow), 2 Losses Boxes, Disbanded Colonials Box, and 2 Indian Nation Territories.
2.1 Spaces
2.1.1 Home Spaces
A red space with a crown symbol is a British Home Space; a blue space with a fleur-de-lis symbol is a French Home Space.
2.1.2 Space Control
A space may either be controlled by a faction or neutral. Each faction controls its own Home Spaces by default. All other spaces are neutral by default. A British or French control marker on a space indicates control by the British or French, respectively.
If units of one faction solely occupy an enemy space, the space is captured and changes control; place a control marker of the appropriate faction. Remove the control marker if the Home faction's units or Militia solely occupies the space. Every time a Victory Space (2.1.9) changes control, the newly controlling faction gains Victory Points (VPs) equal to the space's value.
If all enemy units leave a captured Settled space, control reverts to its Home faction.
Control markers may never be placed on Bases or Wilderness Spaces.
2.1.3 Wilderness Spaces
A small white circular space is a Wilderness Space.
2.1.4 Outpost
A small circular Home Space is an Outpost. Each Outpost has a Raid value of 1.
2.1.5 Settled Spaces
A large circular Home Space is a Settled Space. Each Settled Space bears a number indicating its value for Raid and Winter Quarters. Silhouettes beside the space show the Militia friendly to that space (13.2.1).
2.1.6 Coastal Spaces
Any space bordering a Sea Zone (2.3) is a Coastal Space, in addition to its other characteristics. A Coastal Space is considered adjacent to the Sea Zone it borders.
2.1.7 British Bases
A red square space with a crown symbol is a British Base. All Bases are Coastal spaces. French units may not enter a Base.
2.1.8 Indian Villages
There are two types of Indian Villages: Indian Village spaces (green circular Space with a leaf symbol); and Indian Villages located on a faction's Home Space (leaf symbol beside the space).
Each Indian Village has an Indian unit (3.1.1) or Nation (8.0) linked to it. The unit's or Indian Nation's name is noted in green capital letters next to that space.
2.1.9 Victory Spaces
A British or French Outpost, Settled Space, or Fortress with a thick yellow outline is a Victory Space. When a Victory Space changes control, the newly controlling faction gains VPs equal to its value.
2.1.10 French Fortress Spaces
A French Settled Space surrounded by a star-shaped outline is a Fortress. Each Fortress begins with two Bastions (3.4) on placeholders beside it.
To take control of a Fortress Space, both of its Bastions must be eliminated (13.9). After that, it is only a Settled Space (2.1.5) for the remainder of the game: it may change control normally (Defender Retreat is not cancelled anymore) and Fort Construction (12.0) is allowed on the space.
2.2 Connections
Units move between spaces via Connections (Fleets: see 2.2.4 Coastal Connections). There are three types of Connections: Highways, Paths, and Roads. Each type has specific limits (10.1-10.2).
2.2.1 Highways
A thick solid line is a Highway. Any units may move along Highways.
2.2.2 Paths
A narrow dotted line is a Path. Only Light units may move along Paths. In addition, Fleets may move along Coastal Paths (2.2.4). Dark grey Paths connect spaces to Villages of Indian Nations (8.0).
2.2.3 Roads
A Road marker may be added to a Path by performing Construction (12.0). A Path with a Road marker on it is a Road for all purposes. Road markers are permanent.
2.2.4 Coastal Connections
A Path or Highway bordering a Sea Zone is a Coastal Connection. It has a blue outline (instead of black). Coastal Connections are treated like regular Paths or Highways, but in addition Fleets may move along them as part of an Army Movement action.
2.3 Sea Zones (SZs) and Sail Box
The map includes two Sea Zones (SZs): the Atlantic Ocean and the Gulf of Saint Lawrence. SZs are set apart from other cosmetic water features by their lighter color and concentric outline. A darker blue line between the Newfoundland and Louisbourg spaces indicates the border between the two SZs, as does the gap of darker blue color between the two SZs just above Nova Scotia. The Gulf of Saint Lawrence SZ terminates in the west at the Québec space. The Atlantic Ocean SZ terminates in the south at the Charles Town space.
The Sail Box in the top right area of the board is used by units performing a Sail movement (10.6). All of a faction's units on the Sail box are treated as one stack (3.0.3).
2.4 Colonies
A land area shaded red (British) or grey (French) is a Colony. Each Colony belongs to a faction and has a name. Home Spaces (2.1.1) are located on Colonies, except some Outposts (2.1.4). There are five British Colonies: New England, New York & New Jersey, Pennsylvania & Delaware, Virginia & South, and Nova Scotia. Nova Scotia includes the Newfoundland space. There are three French Colonies: Acadie, Canada, and Pays d'en Haut. Acadie includes the Port la Joye, Port Dauphin and Louisbourg spaces.
2.5 Indian Nation Territories
A land area shaded dark green is an Indian Nation's territory, which contains its Indian Villages. All spaces in an Indian Nation territory are neutral at game start (8.0).
3.0 Units
A unit is a game counter that can move or take part in Battle. The British player controls the red British and the brown Colonial British units. The French player controls the light grey French units. Units come in three shapes: triangle, square and circle. Exception: Commanders (3.7). Unit shapes have an important impact on gameplay. See page 22 of this rule book for a summary of unit capabilities.
A unit type may move unless stated otherwise (table 10.2).
3.0.1 Unit Types
Each shape includes various unit types described below. Unit types are used for Hit check (13.3.4), Hit application (13.4), return from Losses box (17.2 #8), and Reduced unit combination (13.2.2). Other game aspects also refer to a particular unit type (e.g. Construction, Raid, etc.).
3.0.2 Full and Reduced units
Most units have two faces: Full; and Reduced (blood spatter). Each unit begins on its Full face. When a Hit is applied to a Full unit, flip it to its Reduced face. Exception: Indian unit (3.1.1). When a Reduced unit receives a Hit, eliminate it (13.4.1). Except where noted, treat Full and Reduced units the same.
Units always enter play as Full, including units brought back from the Losses box by card event, or Disbanded Colonial Brigades.
3.0.3 Stacks
A stack of units refers to all units from a faction in the same space, or all units currently performing an Action (this can be a single unit).
3.1 Light Units
Light units are triangular and come in two types:
- Indian: British or French, with green stripe.
- Non-Indian: British, Colonial British and French.
Raids (9.0) may only be performed by Light Units.
Non-Indian Light units come in three colors: British, Colonial British, French. Color difference between British non-Indian Light units is relevant to pools setup (5.2), Vagaries of War tokens (15.2.1, 16.2.1), and unit placement (15.3, 16.3) only.
3.1.1 Indian Units
Indian units are always controlled by a faction when they are on the map. They have no Reduced face and are eliminated after receiving one Hit (13.4.1). Each Indian unit is linked to an Indian Village (2.1.8).
3.1.2 Indian Nation Units
An Indian unit with a leaf symbol belongs to one of the two Indian Nations (8.0). These units are double-sided to represent possible control by either faction (red face for British control and light grey face for French control). They have no Reduced face.
3.2 Brigades
Brigade units are square and come in two types:
- Metropolitan: British (crown icon); and French (fleur-de-lis icon). These units trigger a War in Europe (WIE) chit draw (18.3.1) when eliminated. Some Metropolitan Brigades bear a golden crescent allowing a Commander to come into play (15.2.2).
- Non-Metropolitan: Colonial British with name of corresponding Colony; and French "Canadiens."
Construction (12.0) can only be performed by Brigades.
Metropolitan Brigades: British, French. Non-Metropolitan Brigades: Colonial British, French Canadiens.
3.2.1 Highland Brigades
British Highland Brigades (with letter "H") are considered Metropolitan Brigades for all game purposes. In addition, they have a reroll (13.5) capability. They perform their Battle roll before other Metropolitan Brigades (13.3.3). During a Battle, the first Hit scored on a Metropolitan Brigade is applied in priority to a Highland Brigade (13.3.4).
3.3 Artillery
Artillery are circular units. They are the only units that can Hit Bastions (13.3.4). They have limited Road access (10.1) and are eliminated first in a Rout (13.8).
3.4 Bastions
Circular French units with a dark blue stripe are Bastions. They roll in Battle like other units but may not move. Two Bastions are placed next to each Fortress at game start (they may never be replaced or repaired). They prevent Overwhelm (10.3.2). As long as a Bastion is still present at the end of a Battle, it prevents the defender from retreating (13.9).
3.5 Forts
Forts are circular units. They roll in Battle like other units but may not move. There may only be one Fort per space. Forts may be constructed/flipped back to Full (12.0) except on a Fortress Space (2.1.10). They prevent Overwhelm (10.3.2). When battling an enemy Fort, a stack without an Artillery unit gets one or two Battle Penalties (13.3.2). A Wilderness Space with a Fort is worth 1 Raid point.
3.6 Fleets
Fleets are circular units. They may only occupy Coastal Spaces or the Sail box. Sail Movement (10.6) may only be performed by Fleets and transported units. When using Army Movement, Fleets may only move along Coastal Connections (2.2.4).
3.7 Commanders
Commanders are smaller counters and have no shape for game purposes. Commanders begin the game on the map or enter play with friendly Brigades (15.2.2).
Each Commander has a rating of 1-3 on its front face for Battle rerolls (13.5) and Rally (14.2), along with one or both reroll shapes (triangle and/or square). A Commander unit must always be stacked with at least one friendly non-Commander unit at the end of: its faction's Action Phase (7.2) or Reaction (7.3.6), Battle (13.4.2), Fleets Arrive LR (15.0), and Return to Colonies (17.3). Otherwise it is removed from play. Commanders don't roll in Battle and cannot be Hit.
4.0 Sequence of Play
4.1 Game Year
A game of Bayonets & Tomahawks is measured in Years; a scenario may last one or more Years. Each Year is composed of nine Action Rounds (ARs) and three Logistics Rounds (LRs). The game board contains a Year track and a Round track, with corresponding markers. On the Round track, ARs are yellow (Buildup) and white (Campaign), and LRs are grey.
4.2 Action Rounds (ARs)
During an AR, players draw and play cards and perform Actions. Resulting Battles are then resolved. The first three ARs in a Year constitute the Buildup Season, in which players receive cards with limited Action Points (APs). The remaining six ARs constitute the Campaign Season, in which players receive cards with more APs.
4.3 Logistics Rounds (LRs)
There are three LRs in a Year; each takes place at a set time during the Year and includes various procedures:
- Fleets Arrive (after AR2): Fleets as well as British and French reinforcements are drawn and placed onto the map (15.0).
- Colonials Enlist (after AR3): Draw Colonial reinforcements and put Disbanded Colonial Brigades back in play (16.0).
- Winter Quarters (after AR9): Victory Check to determine if a player has won. Units return to friendly Colonies and Indian Villages. Perform end-of-Year administrative tasks (17.0).
5.0 Setup
Players should sit with the game board horizontally between them, with the British player near the Atlantic Ocean SZ and the French player near the Canada Colony.
5.1 Units and Markers
Each player places his units and markers according to the Scenario Information sheet for the chosen scenario. Note that all Scenarios use the Indian Setup sheet in addition to the scenario-specific French and British sheets.
5.2 Pools
Consulting the Scenario Information sheet for the number and type of units and tokens, form the following pools and set them up:
Common pools:
- Neutral Indians: Cherokee and Iroquois Indian Nation units (3.1.2)
- Fleets: Fleets from both factions and circular Vagaries of War (VoW) token (15.2.1) if indicated
British:
- Metropolitan Brigades (including Highland if indicated), square VoW tokens (15.2.1)
- Colonial Brigades and Colonial VoW tokens (16.2.1)
- Colonial Light units
- Artillery
- Forts
- Commanders, facedown
- All British War in Europe chits (18.3), facedown
If indicated:
- VoW Bonus Colonial Brigades (17.5)
- Light units
French:
- Metropolitan Brigades and square VoW tokens (15.2.1)
- Artillery
- Forts
- Commanders, facedown
- All French War in Europe chits (18.3), facedown
Markers used at setup include the Victory marker (reverse: +10) and unit pool / card deck positions on each player's side of the board: Buildup Deck, Campaign Decks (used starting at AR4), the common pools (Neutral Indian Units, Fleets + circle VoW Token — not used in all scenarios), Metropolitan Brigades + VoW Tokens, Colonial Brigades + Colonial VoW Tokens, Artillery, Colonial Light Artillery, Forts, Commanders (facedown), and 12 WIE Chits (facedown) on each side, plus other pools if indicated: VoW Bonus Colonial Brigades, British Light units (red).
5.3 Tracks and Card Decks Preparation
- On the Year track, place the Year marker according to the starting Year of the chosen scenario.
- On the Round track, place the Round marker at the Action 1 position (for AR1).
- Place the Victory marker on the Victory track as indicated by the Scenario Information sheet.
- Place each faction's Raid Point marker at 0 on the Raid track.
- Place the Open Seas marker (10.6.2), French side up, on its placeholder located on the Sail box (2.3).
- Prepare five card (6.0) decks, using only the cards indicated by the Scenario Information sheet. Form the Indian Deck from all Indian cards. Form the British and French Buildup Decks from their cards with a Buildup tag. Form the British and French Campaign Decks from their remaining cards. Shuffle each deck. Place the Buildup Decks and the Indian Deck in front of the relevant players and the Campaign Decks near the board's top edge.
- Follow the Action Round Procedure (7.1) for AR1.
6.0 Cards
There are three types of cards: British (red), French (blue) and Indian (green). Cards allow units to perform Actions and execute Events during ARs.
Cards include:
- Faction Icon: British (crown), French (fleur-de-lis), or Indian (leaf).
- Action Point(s): one or more AP symbols (7.3), except Indian card #54.
- Initiative Value: a printed face of a standard six-sided die at the bottom center of British and French cards, used to determine initiative in each AR.
- Card Number: at the bottom right, for reference purposes only.
Some cards may include:
- Event: a historical Event title (center top) and the instructions to be followed when the Event is played.
- "AR Start" Event Tag: when present above the event's instructions, it indicates that particular Event takes place before either player performs his Action phase (7.1 #5).
- Buildup Deck Tag: Identifies cards as belonging to the Buildup Deck used in AR1-AR3. Cards with no such tag are part of the Campaign Deck used in AR4-AR9.
- Year(s) Tag(s): Indicate the card is used only in specific Year(s). Cards with no such tag are used every Year. Each scenario setup sheet indicates which cards are used.
Card layout: Faction icon (top left); Event title (top center); AR Start Event tag (above event instructions); Buildup Deck tag, or no tag for a Campaign Deck card (below Action Points); Event instructions (card body); Card number (bottom right); Years in use, or no Year tag meaning always in use (bottom left area); Initiative Value (bottom center); Action Points (left side).
6.0.1 Reserve Card
Each player gets a single Reserve card at the beginning of each Year (7.1, before performing AR1 steps). It may be replaced by the card drawn in any AR (7.1 #2). A player can only have one Reserve card at any time. Each player discards his Reserve card during the Winter Quarters LR (17.4).
7.0 Action Rounds (ARs)
During an AR, each player plays a card of his faction, uses its APs to perform Actions, and executes its Event (if applicable). The French do so with an Indian card also.
7.1 AR Procedure
Before step 1 of the first AR of the Year only (AR1): Each player draws two cards from his Buildup deck, chooses one as his Reserve, and discards the other without disclosing it. No Indian card is drawn at this time.
Steps of each AR (including AR1):
- Each player draws one card from his faction deck (from his Buildup Deck in AR1-AR3 or his Campaign Deck in AR4-AR9). The French player also draws one Indian card. Players may look at cards they draw but do not otherwise reveal them.
- Each player chooses either his Reserve or his newly drawn card to play and puts the chosen card face-down on the board. The other card becomes his Reserve for the next AR. The French player places the drawn Indian card face-down alongside his French card.
- Reveal all three cards in play (British, French, and Indian).
- The faction with the highest Initiative value (printed die face) on its card gains Initiative for the current AR. If tied, the French gain Initiative. The player with Initiative chooses who will be First Player for this AR. The other player is Second Player.
- Resolve "AR Start" card Events (First Player, followed by Second Player).
- First Player performs his Action Phase (7.2).
- Second Player performs his Action Phase (7.2).
- First Player may then use a Reaction AP (7.3.6), if applicable.
- Resolve Battles (13.0).
- Perform end-of-AR steps (14.0).
7.2 Action Phase Procedure
Steps performed by the active faction:
- All friendly units currently on the Sail box must perform a Landing (10.6.1).
- If French, use APs on the Indian card for Actions by French-controlled Indian units only.
- If First Player, decide whether to hold an AP for Reaction. If so, choose an AP on the faction card in play and place a Reaction marker on it (7.3.6).
- Carry out Actions with remaining APs on the faction card in play, executing the card's Event when and if applicable.
7.2.1 Spent
Place a Spent marker on all units which perform an Action or Land during the Action Phase as a reminder they cannot take part in another Action in the current AR (7.3).
7.3 Action Points (APs)
A faction may perform as many Actions as there are Action Points (APs) on its played card (plus APs on the Indian card if French). APs need not be used in the order listed on the card, and all APs are optional. Any AP of cards in play not used in the current AR is lost.
Each AP activates one stack (3.0.3), allowing it to perform one Action. Various Actions have restrictions on the number and type of units allowed to perform them. Each unit participating in the Action must be eligible to perform it, and each unit may only perform one Action per AR. British and French APs may activate Indians under their control, subject to standard restrictions based on AP type. Indian APs may only activate Indian units.
7.3.1 Basic Action Point Types
There are two basic types of APs:
- Army AP (square): may activate one stack composed of any unit types.
- Light AP (triangle): May activate one stack composed of Light units only, with possibly the addition of a single Commander (10.5). The activated units may be chosen from any one stack, including one that also contains non-Light units. Only a Light AP allows a Light unit to perform a Raid (9.0).
7.3.2 Indian AP
A Light AP variant (outline shape) that may activate a single Indian unit; or a stack of units from the same Indian Nation (8.0). Allows Raid (9.0).
7.3.3 Sail/Army AP
An Army AP variant (anchor symbol) that allows Sail Movement (10.6). May also be used as a standard Army AP.
7.3.4 Double Movement AP ("2x")
Any AP that is tagged "2x" doubles the movement capacity of the units it activates. Thus, a stack activated by a "2x" AP may:
- Move up to twice its Movement Point Limit (10.2).
- Raid at up to twice the distance (9.1) if Light or Indian AP.
- Sail (10.6) and Land in the same AR if Sail AP.
Alternatively, a "2x" AP may be used as a normal AP of its type without additional benefits.
7.3.5 French Light/Army AP
May be used either as a Light AP or an Army AP.
7.3.6 Reaction AP
The First Player may elect to save an AP on his faction card for Reaction (not an Indian AP). When he does so, he places a Reaction marker with the same symbol as the chosen AP over the AP being saved for Reaction. A Reaction AP is allowed even if there is only one AP on the player's card.
When the Second Player has completed his Action Phase (7.2), the First Player may use his Reaction AP for a final Action. Then remove the Reaction marker from the card.
7.3.7 Actions Allowed for Each AP Type
| AP Type | Actions Allowed |
|---|---|
| Light AP / Indian AP | Raid (9.0); Light Movement (10.5) |
| Army AP | Army Movement (10.4); Marshal Troops (11.0); Construction (12.0) |
| Sail/Army AP | Army Movement (10.4); Sail Movement (10.6); Marshal Troops (11.0); Construction (12.0) |
7.4 Card Events
When applicable, a card's Event is resolved in addition to the card's APs.
An Event that has an "AR Start" tag must be resolved at step #5 of the AR procedure (7.1). The First Player resolves his "AR Start" event first, followed by the Second Player.
Other Events may be resolved during relevant Actions (7.2 Action Phase), or during Battles.
Unless otherwise specified, the card owner makes all calls during event resolution.
8.0 Indian Nations
The game includes two Indian Nations: Cherokee and Iroquois Confederacy. Indian Nations are neutral at game start and their Indian units (3.1.2) do not begin on the map.
An Indian Nation joins a faction when:
- An Indian Diplomacy Event's conditions are fulfilled (cards #13, 19, 29, or 38). If the Indian Nation is neutral, the faction specified in the Event gains control of it (perform Indian Nation Control Procedure).
- A stack enters a neutral Indian Nation's Village (via a dark grey Path). The stack must stop. The opposing faction immediately gains control of that Indian Nation (Indian Nation Control Procedure adds an Indian unit to all Villages of that Nation). The Indian unit is considered to have been on the space since the start of the AR and unless it is Overwhelmed (10.3.2), a Battle will take place at AR step 9.
8.1 Indian Nation Control Procedure
Place the controlling faction's control marker on the "Neutral" placeholder in the Indian Nation Territory (not on the Villages). Add a single Indian unit from that Nation on each of its Villages with the controlling faction's color face-up.
Each Village and unit of this Indian Nation is considered friendly to the controlling faction until the end of the game. If some or all of that Nation's Villages become enemy-controlled, the control marker on the "Neutral" placeholder remains (it is permanent once placed).
9.0 Raid
A Light or Indian AP is required for each Raid, activating a single non-Routed Light unit. The Raid target may be:
- An enemy Home Space (2.1.1), even if friendly-controlled.
- A Wilderness Space with an enemy Fort.
A space may only be successfully raided once per Year. Raid attempts on a space may continue until one is successful. A successful Raid awards Raid Points (9.3). Raids don't affect control of target spaces or spaces moved through. Raids do not count toward Connection Limits (10.1).
No Hits (13.4) may result from Interception and Raid die rolls.
9.1 Raid Procedure
To perform a Raid:
- Activate a single Light unit as allowed by the Light AP type used (7.3.1, 7.3.2).
- Move that unit up to its 3 Movement Point Limit (10.2) to the target space, checking for Interception (9.2) on each space, including the starting space. "2x" Light AP / "2x" Indian AP (7.3.4): doubles the Movement Point Limit of the raiding unit.
- Resolve Raid (9.3).
9.2 Interception
An Interception roll may occur on all enemy-occupied spaces the raiding unit finds itself on during its Raid, including its starting space and the target space. Roll for Interception against a raiding unit only on its way to the target space (never on the way back). Spent units may Intercept.
For each space where an Interception may occur, the opponent rolls one die:
| Enemy on Space Includes | Raiding Unit Intercepted On |
|---|---|
| At least one Light unit | Flag, Hit (Triangle/Circle), or B&T |
| Non-Light unit(s) | Flag |
| No units or Militia only | No Interception roll possible |
If intercepted, the Raid attempt fails and the raiding unit goes back to its starting space. Place a Spent marker on the raiding unit. If not intercepted, the raiding unit moves on to the next space towards its target (if applicable, roll for Interception on it).
An Intercepting unit does not become Spent. It may roll again for Interception if another raiding unit enters its space.
9.3 Raid Resolution
If the raiding unit is not intercepted in the target space, the raiding player rolls one die:
The Raid is successful on: Flag, Hit (Triangle/Circle), or B&T.
If the Raid fails, the raiding unit goes back to its starting space. Place a Spent marker on that unit.
If the Raid succeeds and the raiding unit is non-Indian, it also goes back to its starting space. Place a Spent marker on that unit. If it is an Indian unit, it is placed on the friendly Losses Box (design note: the raiders go home with their plunder). Place a Raided marker of the appropriate faction on the successfully raided target space. Raid Points equal to the space's value are awarded to the raiding faction. A Wilderness Space with a Fort is worth one Raid Point.
The raiding faction scores Raid Points by moving its marker forward on the Raid track. A faction whose marker reaches the end of the Raid track immediately scores one VP on the Victory track. Then its marker returns to 0 on the Raid track and can begin advancing again with remaining Raid Points.
10.0 Movement
During its Action Phase (or Reaction), a stack may perform one of these Actions to move from one space to another: Army Movement (10.4), Light Movement (10.5), or Sail Movement (10.6). The chosen Action must be allowed by the type of AP used (7.3.7).
Movement takes place on Connections or the Sail box. Movement on Connections is subject to Connection Limits (10.1), Movement Point Limit/Connection type (10.2), and movement restrictions (10.2.1).
10.1 Connection Limits
There is a maximum number of units a single faction may move along each Connection during an AR.
| Maximum Number of Units on: | |
|---|---|
| Path | 4 |
| Road | 8 (may include at most one Artillery) |
| Highway | 16 |
Do not count Commanders, Fleets, Raiding units (9.0), or units of the opposing faction that have already moved.
10.2 Movement Along Connections
Movement along Connections (2.2) represents inland and coastal movement. It is measured in Movement Points (MPs); each MP allows a stack to travel along one Connection to an adjacent space.
Each unit type in a stack may move up to its MP Limit. A unit need not use all its MPs.
| Unit Type | MP Limit | Connection Type Allowed |
|---|---|---|
| Artillery, Brigades, and Commanders | 2 | Roads and Highways |
| Fleets using Army Movement | 2 | Coastal Connections (2.2.4) |
| Light units | 3 | Any |
| Forts and Bastions | 0 | — |
To move a stack 1 MP, place it on a space on the other side of a Connection adjacent to its starting space. A moving stack immediately takes control of any empty enemy-controlled Outpost or Indian Village it moves into or through. Place a control marker (2.1.2) of the moving faction on the space. If all units on a captured Settled Space leave it, immediately remove the control marker from the space (2.1.2). The moving faction also loses VPs equal to the space's value if it is a Victory Space.
If there is enemy units/Militia in the space a stack enters, it must stop to attack (10.7) — exception: Overwhelm (10.3.2).
10.2.1 Movement Restrictions
- A stack with enemy unit(s) on its space may not move. However, if the stack Outnumbers the enemy (10.3.1), some or all of its units are allowed to Sail (10.6), or to move — Exception: A British stack on an enemy Fortress space may move without Outnumbering the enemy. If all the faction's units move out of the space, remove the Battle marker (10.7).
- A stack activated for movement may never split to use different Connections from the same space with the same AP.
- A moving stack may drop off and/or pick up friendly units on each space it enters. However, a non-Light unit may never be added to a stack activated for movement by a Light AP (10.5). With an Indian AP (7.3.2), only a unit or units from the same Indian Nation (8.0) may be picked up.
- For units picked up during movement, MPs are counted from the starting space of the stack that picked them up.
10.3 Outnumber and Overwhelm
10.3.1 Outnumber
Units of a faction Outnumber the enemy units on their space if the ratio of units exceeds 3:1 (Commanders not counted). Treat each Militia (13.2) as a unit for this calculation. Battle Penalty markers (13.3.2) and Reduced state do not affect the count.
10.3.2 Overwhelm
A stack Overwhelms an enemy stack when, by entering a space, it causes all friendly units on the space to Outnumber enemy units (10.3.1). An enemy Bastion or Fort prevents Overwhelm.
When an enemy stack is Overwhelmed, it must retreat immediately (13.9) from its space (adjust control if applicable). The moving stack (or part of it) may continue moving normally and may attack the stack that just retreated, potentially causing another Overwhelm.
10.4 Army Movement
An Army AP may be used to activate for movement a stack composed of any unit types. A Fleet taking part in Army Movement (via Coastal Connections) cannot transport units.
If the activated stack includes Commanders only, it may move only through friendly spaces free of enemy units, and the destination must be an enemy-free space with a friendly stack. These restrictions apply until the stack picks up other unit types.
Place a Spent marker on any moved units.
10.5 Light Movement
A Light or Indian AP may be used to activate for movement a stack composed exclusively of Light units. Other unit types on the same space cannot be activated, except Commander.
With a Light AP (not Indian AP), a single Commander may accompany a stack during Light Movement on Highways/Roads only and within its 2 MP Limit (10.2). It cannot be dropped off (10.2) on a space without friendly units.
Place a Spent marker on any moved units.
10.6 Sail Movement
A Sail/Army AP may move Fleets in the same stack, each transporting up to four units except Bastion/Fort and any number of Commanders, to the Sail Box (2.3). A Fleet may transport units only when it Sails or Lands.
This stack will Land as a mandatory action in the next AR.
10.6.1 Landing
As the first step of its Action Phase (7.2 #1), a faction automatically Lands all friendly units currently on the Sail Box (2.3). Landing costs no AP.
All Landing units are placed on a single Coastal Space of a friendly SZ (10.6.2).
Place a Spent marker on the Landing stack, and also a Landing marker. If a Battle occurs in the Landing space, the Landing faction gets a Battle Penalty (13.3.2).
10.6.2 Open Seas
The Open Seas marker indicates if all SZs are friendly only for the French or for both factions (fleur-de-lis or both icons on marker). At game start, the Open Seas marker is on its French face (only that faction may Land in any SZ). Until the marker is flipped, only the Atlantic Ocean SZ is friendly for the British, limiting that faction to Coastal Spaces of that SZ when Landing. Louisbourg and Newfoundland border both SZs. Both factions may always Land in them.
The first time Louisbourg becomes British-controlled, flip permanently the Open Seas marker to its British & French face (with both faction icons). From now on, all SZs are friendly for the British as well. Recapture of Louisbourg by the French does not affect the Open Seas marker.
10.7 Attack Following Movement
An attack occurs when a stack enters a space with enemy units or Militia (13.2) that cannot be Overwhelmed (10.3.2). If a faction has only Militia on a space that was enemy-controlled at AR start, no Battle takes place against occupying enemy units or any additional enemy units that enter that space.
If an attack occurs, the stack must immediately stop moving. Place a Battle marker on the space (13.0). Resolve the Battle in AR step 9.
A Routed stack (13.8) may not attack.
11.0 Marshal Troops
An Army AP may be used to Marshal Troops on a target space containing a non-Routed friendly stack that is not composed entirely of Light units. Marshal Troops may be performed even when there are enemy units on the target space.
Steps of Marshal Troops:
- Activate a non-Light unit on the target space (Artillery, Bastion, Brigade, Commander, Fleet, or Fort).
- Move to the target space as many friendly units as desired that are on spaces adjacent to the target space. Marshaled units may come from different spaces. Connection Limits and Connection type restrictions (10.1) apply.
Place a Spent marker on the activated non-Light unit and the Marshaled units.
Place a Marshal Troops marker on the space. All friendly units on it will have a Battle Penalty (13.3.2).
12.0 Construction
An Army AP is required for each Construction action, activating a single non-Routed, in-Supply Brigade who may then perform Construction.
The space on which Construction takes place must be friendly and exempt of enemy units. Exception: if the enemy units are Outnumbered (10.3.1), Construction may take place.
Choose and resolve one of the following options (one Brigade required):
- Place a Fort Construction marker if the space has no Fort or Fort Construction marker. Not allowed on a Fortress space, unless it has lost all its Bastions.
- Replace a Fort Construction marker placed in a previous AR with a friendly Fort.
- Repair a friendly Reduced Fort by flipping it to its Full face. (Bastions cannot be repaired or rebuilt.)
- Remove a Fort Construction marker or remove from play a friendly Fort. (Road Construction markers and Roads can never be removed.)
- Place a Road Construction marker on a Path connected to the activated Brigade's space. Not allowed if it already contains a Road Construction marker.
- Flip to its Road face a Road Construction marker placed in a previous AR on a Path connected to the activated Brigade's space. The Path is subsequently treated as a Road (2.2.3) for all purposes. If on a Coastal Path, Fleets may continue to use it. Immediately after flipping the Road Construction marker: the activated Brigade must move to the adjacent space connected by the completed Road. Non-Spent units from the same stack as the activated Brigade may join it. This movement does not use further APs but must comply with Connection Limits (10.1). Place a Spent marker on the activated Brigade and any units moved with it.
13.0 Battle
A Battle occurs on all spaces marked with a Battle marker (10.7). Resolve Battles in ascending number of attacking Units. Ties are broken by the First Player.
13.1 Determine the Defender
The defender for the Battle is, in priority order:
- The faction that had units on the space at the beginning of the AR.
- The faction that has Militia on the space.
- The faction that moved to the space first during the AR.
The faction opposing the defender is the attacker.
13.2 Stack Preparation for Battle
13.2.1 Militia
Each combatant silhouette printed next to a Settled Space (2.1.5) is one Militia. Blue Militia always fight for the French and red Militia always fight for the British. One Militia marker per silhouette is placed on a space at the start of Battle. If there is an enemy control marker on the space, take one less Militia marker. Militia cannot defend against a Raid.
Militia on an uncaptured Settled Space battle enemy units entering their space even if no friendly units are present (on the other hand, Militia cannot attack without friendly units when their space is enemy-controlled). Militia are not units: in Battle, they never take Hits and only their Flag rolls count. They cannot reroll (13.5).
In Battle, each B&T rolled by a Brigade removes one opposing Militia marker (13.3.3) for the current Battle only.
13.2.2 Combine Reduced Units
Each faction combines its Reduced units of the same type into Full units as much as possible: eliminate one of the Reduced units (owner's choice) and flip the other Reduced unit to Full. When combining British non-Indian Light units, disregard counter color (red, brown).
13.3 Battle Procedure
13.3.1 Battle Track and Commander Rerolls Track
The top row of the Battle track corresponds to the attacker, and the bottom row corresponds to the defender. The Commander Rerolls track is to the right of the Battle track.
The Battle Victory markers show the Attacker's Battle Victory Marker on the top row and the Defender's Battle Victory Marker on the bottom row; each has a reverse "+10" face. Hit is not applied when a marker advances to -4, -3, -2, -1, or 0.
Track Setup for Battle. Each player:
- Places his Battle Victory marker at 0 on the Battle track.
- Moves it back 1 position (negative) for each Battle Penalty on his stack (13.3.2).
- If applicable, selects one Commander from his stack to use in the Battle, and places it on the Commander Rerolls track at the position corresponding to its rating (1, 2 or 3).
When a faction's Battle Victory marker exceeds '10' on the track during Battle rolls (13.3.3), flip it to the "+10" face and restart from position 1 to keep advancing it (1+10=11, and so on).
13.3.2 Battle Penalties
Each Battle Penalty moves the Battle Victory marker of a faction one or two positions backward on the Battle track. Before each Battle begins (13.3.1), cumulate the penalties for each faction and adjust its marker accordingly.
A stack receives one Battle Penalty for each of these instances:
- It has a Landing marker (10.6.1)
- It has a Marshal Troops marker (11.0)
- It has a Rout marker (13.7)
- It has an Out of Supply marker (14.1.1); this penalty is doubled for a stack of 8 units or more (Commanders not counted)
- It attacks an Enemy Fort (3.5); this penalty is doubled if the attacking stack includes no Artillery.
13.3.3 Battle Rolls
Each unit in a Battle rolls one die, except Commanders. Eliminated defending units still roll before going to the Losses box or being removed from play (13.4.1). After all units have completed their rolls, a Battle roll is made by each Militia counter not removed by an opposing Brigade's B&T roll.
Roll order:
- Attacker's units
- Defender's units, including eliminated units.
- Non-removed Militia (attacker or defender).
Each faction groups its rolls by unit type (3.0.1), and follows the Unit Battle Roll Sequence.
Rolls and relevant rerolls (13.5) for a unit type are performed. Then the effects of all rolls by that unit type are applied. Follow the priority order indicated by the Battle Roll Table (1st: Hit Checks, 2nd: B&Ts, 3rd: Flags, 4th: Misses).
Move on to the next unit type's rolls, until all units of the faction have performed their rolls.
Unit Battle Roll Sequence (each faction):
Triangle units:
- Non-Indian Light
- Indian
Square units: 3. Highland Brigades 4. Metropolitan Brigades 5. Non-Metropolitan Brigades
Circle units: 6. Fleets 7. Bastions or Fort 8. Artillery
Battle Roll Table:
| Battle Roll | Effect for Rolling Player (in priority order) |
|---|---|
| Triangle/Circle Hit OR Square/Circle Hit | Perform a Hit Check (13.3.4). If a Hit is scored: (1) Advance the Battle Victory marker one position. (2) If the Battle Victory marker is above zero, apply the Hit (13.4). |
| B&T — vs. Metropolitan Brigade | Remove 1 enemy Militia (13.2.1). If enemy Brigade can receive a Hit: (1) Advance the Battle Victory marker one position. (2) If the Battle Victory marker is above zero: apply a Hit (13.4) to one enemy Brigade (prioritize Metropolitan). |
| B&T — vs. Other Brigade | Remove 1 enemy Militia (13.2.1). |
| B&T — vs. Artillery, Fort or Bastion | If enemy Brigade can receive a Hit: (1) Advance the Battle Victory marker one position. (2) If the Battle Victory marker is above zero: apply a Hit (13.4) to one enemy Brigade (prioritize Metropolitan). |
| B&T — vs. Fleet | May move a non-eliminated friendly Fleet to a friendly Coastal Home Space without a Battle marker (follow 13.9.2 priorities). |
| B&T — vs. Light Unit or Militia | No effect. |
| Flag | Advance the Battle Victory marker one position. |
| Miss | No effect. If during Commander reroll: Check for Commander Casualty (13.5.1). |
13.3.4 Hit Check
In Battle, Hit faces (1.3) are potential Hits when rolled.
A Hit is scored if:
- The rolling unit shape matches one of the shapes on the die face (triangle, square or circle).
- An enemy unit of the same shape as the rolling unit can receive a Hit (overflow Hits do not count as scored Hits).
Both conditions must be met in order to score a Hit. Otherwise the roll has no effect.
A scored Hit moves the rolling faction's Battle Victory marker one position forward. If the marker ends up above zero, the Hit is applied (13.4) in order of priority to:
- the same unit type (3.0.1) as the rolling unit; or
- another unit type of the same shape.
Summary of scored Hit possibilities:
| Rolling Unit Type | Hit Face Rolled | Enemy Unit Hit (in priority order) |
|---|---|---|
| Non-Indian Light | Triangle/circle | 1. Non-Indian Light; 2. Indian |
| Indian | Triangle/circle | 1. Indian; 2. Non-Indian Light |
| Metropolitan Brigade | Square/circle | 1. Metropolitan Brigade (first Hit to Highland, 13.4); 2. Non-Metropolitan Brigade |
| Non-Metropolitan Brigade | Square/circle | 1. Non-Metropolitan Brigade; 2. Metropolitan Brigade (first Hit to Highland, 13.4) |
| Fleet | Triangle/circle OR Square/circle | 1. Fleet; 2. Artillery; 3. Fort |
| Bastion or Fort | Triangle/circle OR Square/circle | 1. Artillery; 2. Fleet |
| Artillery | Triangle/circle OR Square/circle | 1. Artillery; 2. Bastion or Fort; 3. Fleet |
13.4 Hit Application
Each player chooses how to apply enemy Hits to his units in accordance with table 13.3.4. If a Hit may be applied to either a Full or Reduced unit of a given type, apply it to a Reduced unit.
- Hit on Full unit: flip it to Reduced or eliminate it if it has no Reduced face (Indian unit).
- Hit on Reduced unit: eliminate it.
13.4.1 Unit Elimination
- Place eliminated Light units (including Indians), Brigades, and Artillery in their faction's Losses box.
- Return eliminated Fleets to their pool.
- Permanently remove eliminated Bastions, and Forts from play.
13.4.2 Hit and Elimination Restrictions
- A Battle's first Hit scored on a Metropolitan Brigade (not B&T Hit) must be applied to a Highland Brigade if present.
- Bastions may receive Hits only from Artillery.
- A Commander is removed from play if all non-Commander units in its stack are eliminated.
13.4.3 Eliminated Metropolitan Brigade
A faction draws one War in Europe chit (18.3) each time an opposing Metropolitan Brigade is eliminated (no chit is drawn for a non-Metropolitan Brigade).
13.5 Battle Rerolls
A unit that did not roll a Flag or score a Hit may reroll if:
- It is a Highland Brigade (3.2.1).
- A card's Event allows a reroll.
- A friendly Commander is present and a symbol on the Commander's marker matches the unit's shape (rolling player chooses which legal units get to reroll). Commander rerolls are performed one at a time: move the Commander one position lower (to the right of the Battle track) and reroll one unit's die. When the Commander's marker reaches 0, it may not grant further rerolls in the current Battle.
A unit may reroll once for each of these reasons (e.g. a unit cannot use more than one of a Commander's or card Event's rerolls). A card Event's reroll need not be declared prior to the initial die roll, unless otherwise noted on the card.
13.5.1 Commander Casualty
If any reroll granted by a Commander yields a Miss result, roll the die again to check for Commander Casualty; if another Miss result is rolled, the Commander is removed from play (forfeit that Commander's remaining rerolls). Ignore any other die result on a Commander Casualty roll.
| If Commander Reroll Is: | Roll Again |
|---|---|
| Miss | Miss = Commander removed from play |
| Miss | Any other roll = No effect |
The small crescent symbol on the Miss face of the die serves as a reminder to check for Commander casualty when using a Commander reroll.
During Battle, a Commander of the same stack may replace the removed Commander. Place it on the position of the Commander Rerolls track corresponding to the remaining rerolls of the removed Commander, or to the new Commander's rating if lower. Remaining reroll(s) may be used during the Battle.
13.6 Battle Outcome
After all Battle rolls, the attacker wins if his Battle Victory marker is at a higher position on the Battle track than the defender's marker. Otherwise, the defender wins. Check if the defeated stack is Routed (13.8).
A stack automatically loses a Battle if it has no units left, regardless of the Battle track. If both stacks are eliminated, the defender wins.
13.7 Post-Battle Procedure
- Apply Rout penalties (13.8).
- Retreat defeated force (13.9).
- Update Battle space's control as applicable (2.1.2).
- Adjust VPs (18.1) if a Victory Space (2.1.9) changes control.
- Flip the Open Seas marker (10.6.2) if applicable.
- Remove Battle marker, unless defeated defender on Fortress remains on the space.
- Remove Militia, Landing, and Marshal markers.
- Remove Commanders from the Commander Rerolls track and place them with their respective stack.
- Remove Battle Victory markers from the Battle track (keep them near that track).
13.7.1 Indian Desertion
Indian Desertion is triggered when Indian units are part of an attacking stack that wins a Battle against an enemy Fort or an enemy Settled Space. In either of these instances, one random Indian unit of the victorious stack is sent to its faction's Losses box.
13.8 Rout
A stack is Routed if:
- It loses a Battle and its Battle Victory marker is three or more positions below the opponent's marker.
- It loses a Battle as the defender and the last Bastion of a Fortress was eliminated during the Battle.
Should a defending stack satisfy both these conditions, all of its non-Light units are eliminated (13.4.1), and Light units suffer Rout penalties before retreating.
Place a Rout marker on a stack when it is Routed (marker shows "-1" and Battle/Rout icons). It immediately suffers the following penalties, in order:
Rout Penalties
- One of the Routed units is eliminated (owning player's choice). It must be an Artillery unit if possible. Indian unit as last resort only. Fort cannot be chosen.
- No Overwhelm during Retreat (13.9.4) is allowed.
- Friendly Fort must be replaced by an enemy Fort from the opponent's pool (Reduced if the defeated Fort is Reduced). The defeated Fort is removed from play.
If the stack already had a Rout marker, no additional Rout marker is added, but apply the Rout penalties as normal. As long as a stack has a Rout marker, it may not attack, Raid, Marshall Troops or perform a Construction action. It may move on an enemy Home Space only if friendly controlled. It also receives a Battle Penalty in subsequent battles. Combined Routed stacks keep a single Rout marker; units that split from a Routed stack get their own Rout marker.
A Rout marker is removed from a stack when it successfully Rallies at the end of an AR (14.2) or at the moment it is joined with a friendly non-Routed stack.
13.9 Retreat
The defeated units must retreat before another Battle is resolved. Units must comply with Connection restrictions (10.2) but can ignore Connection Limits (10.1) and Fleet Transport capacity (10.6).
A defender on a Fortress (2.1.10) does not retreat as long as a Bastion remains. Leave the Battle marker in the space. Attacker victory is cancelled, but if a Rout occurs, penalties are applied.
13.9.1 Retreat Priorities
Follow the Retreat Priorities listed below to determine the space to which the units will retreat. All retreating units must retreat together to a single space. If there are multiple Retreat spaces of the same Priority available, the retreating player chooses. If a stack cannot comply with any Retreat Priority, all non-Light Units from the stack are eliminated.
If Light units remain, go through the same Priorities once more to determine if they are allowed to retreat using Paths. If not, they are also eliminated.
Attacker's Retreat Priorities
- If Fleets are part of the retreating units, follow Fleet Retreat Priorities (13.9.2).
- Retreat to an adjacent space from which a friendly stack entered the Battle space via movement along Connections this AR. The space must be friendly and without enemy units.
- Follow Adjacent Space Priorities (13.9.3).
Defender's Retreat Priorities
- If Fleets are part of the retreating units, follow Fleet Retreat Priorities (13.9.2).
- Follow Adjacent Space Priorities (13.9.3). The defender can retreat only to a space from which no enemy stack entered the Battle space this AR. Follow the Adjacent Space Priorities list until a legal space is found.
13.9.2 Fleet Retreat Priorities
Units go to a Coastal Space free of enemy units:
- Friendly Coastal Home Space.
- Friendly Coastal Space of a friendly SZ (10.6.2).
- Wilderness Coastal Space of a friendly SZ (10.6.2).
If no legal Coastal Space:
- Units go to the Sail Box (2.3).
13.9.3 Adjacent Space Priorities
Adjacent Retreat Space May Be:
- A friendly Home Space without enemy units.
- A friendly space without enemy units.
- A Wilderness Space or friendly Indian Nation Village without enemy units.
- An enemy-controlled space or enemy Indian Nation Village without enemy units or Militia (adjust control of the space).
- If the retreating stack is non-Routed:
- A. An enemy space with the fewest enemy units and Militia combined that the retreating stack Outnumbers (10.3.1). Proceed to Overwhelm During Retreat (13.9.4). The space may be a Village of a Neutral Indian Nation as a last resort (perform 8.1 Indian Nation control before Overwhelm).
- B. An unresolved Battle space with the fewest enemy units and Militia combined. Retreated units do not take part in that Battle (should other friendly units lose the Battle, they retreat again with them).
13.9.4 Overwhelm During Retreat
Possible with Adjacent Space Priority 5A only.
If a non-Routed retreating stack can Overwhelm (10.3.2) the enemy stack in the Retreat space, eliminate retreating units equal to the number of enemy units and Militia on the space (opponent's choice), and eliminate all enemy units on the space. Adjust control of the space if necessary (2.1.2). If there is a Battle marker, remove it (no Battle takes place).
13.9.5 Fort Elimination
If he lost the Battle and his stack was not Routed, the defending player may choose to eliminate a friendly Fort from the Battle space (remove it from play). If the Fort is not eliminated, it is replaced by a Fort from the enemy's pool (Reduced if the defeated Fort was Reduced). The defeated Fort is removed from play.
14.0 End of Action Round
End-of-AR Procedure
- Discard played cards facedown.
- Remove Spent markers, as well as any remaining Landing and Marshal markers.
- Supply Check (14.1).
- Rally (14.2).
- Advance Round marker and begin the next Round (7.1).
14.1 Supply Check
Friendly Colony Home Spaces (2.4) or spaces with friendly Fleet(s) are Supply sources. A stack is in Supply if it is located on a Supply source, or if all its units can use the same Connections to trace to a Supply source.
A stack may trace Supply using:
- Highways and Roads
- Paths if the stack is entirely composed of Light units (dark grey Paths of Neutral Indian Nation cannot be used)
- Friendly spaces
- Tracing faction's enemy-controlled Outposts (2.1.4) that contain no enemy unit
- Wilderness Spaces that contain no enemy units
Connection Limits (10.1) are disregarded for Supply tracing. There is no limit to the number of Connections used by a stack to trace supply.
14.1.1 Out of Supply (OOS)
Place an OOS marker on each stack that is not in Supply. An OOS stack may not perform Construction (12.0) and has a Battle Penalty (13.3.2). Combined OOS stacks keep a single OOS marker; units that split from an OOS stack get their own OOS marker. Remove a stack's OOS marker the moment it joins a friendly non-OOS stack, or if it is in Supply during a subsequent Supply Check. Note: Players who want a more realistic OOS can use the variant suggested on p.42 of the playbook.
14.2 Rally
Each Routed stack (13.8) attempts to Rally by rolling one die plus bonus dice equal to the rating of any one Commander stacked with it. Disregard Commander's triangle and/or square reroll shape(s). A successful Rally roll removes the Rout marker.
| Stack Composition | Rallies On: |
|---|---|
| Light units only (may also include a Fort and/or Commanders) | Flag or B&T |
| Any other unit combination | Flag |
15.0 Fleets Arrive LR
15.1 Fleets Arrive LR Procedure
- Draw reinforcements (15.2).
- Place drawn units onto the map (15.3).
15.2 Draw Reinforcements
Draw units and tokens from three pools:
- Fleets (both factions combined), may include VoW token
- British Metropolitan Brigades + VoW tokens
- French Metropolitan Brigades + VoW tokens
For each draw, put all pieces from the specified pool into the fabric bag, and draw the number of pieces indicated for the current Year on the Scenario Information sheet. All pieces remaining in the bag return to their pool before proceeding to the next draw. If a pool is ever empty, the draws remaining for a faction are forfeited.
15.2.1 Vagaries of War (VoW)
Vagaries of War (VoW) tokens included in unit pools, as indicated in the Scenario Information sheet, add variability to unit draws. Even those that have no effect count toward a faction's allotted number of draws. Remove a token from play after its effect is resolved unless it instructs otherwise; in that case, return it to the pool after all draws are complete. The tokens potentially drawn in Fleets Arrive LR are:
| VoW Token | Effect |
|---|---|
| French Navy Losses (put token back in pool) | Permanently remove a French Fleet from the pool AND put the marker back in the Fleets pool. |
| Fewer Troops (x2) | No effect |
| Fewer Troops (put token back in pool) x2 | No effect. Put the token back in the Brigades pool. |
| Pick 2 Artillery units / Pick 1 Artillery unit / Pick 2 Artillery OR 2 British Light units / Pick 2 Artillery OR 2 British Light units OR 1 of each | Pick the indicated unit(s) from the Artillery pool, and/or the Light units pool (if British) for placement on the map (15.3). If a single unit is available to pick: forfeit second unit. If no unit is available to pick: draw one additional piece from the bag. |
15.2.2 Commander Draw
Drawing a Metropolitan Brigade with an officer gorget symbol (golden crescent) triggers the draw of one Commander from the faction's Commanders pool (5.2). It enters play on the same space as the Brigade.
15.3 Unit Placement
The British player places his drawn units onto the map, followed by the French player. Reinforcements must be placed on a friendly Coastal Home Space or a captured enemy Coastal Home Space of a friendly SZ (10.6.2). If not possible, follow Fleet Retreat Priorities (13.9.2) to determine where to place reinforcements. Start by placing each Fleet. Other units may only be placed on spaces where Fleets have been placed this LR. There is no limit to the number of units placed with a Fleet. If no friendly Fleets have been placed, all reinforcements are placed on a single legal space.
16.0 Colonials Enlist LR
16.1 Colonials Enlist LR Procedure
- Draw Colonial reinforcements (16.2).
- Colonial units are placed on their Colonies (16.3), including those on the Disbanded Colonial Brigades box.
- Switch to Campaign Deck (16.4).
16.2 Draw Colonial Reinforcements
Put all pieces from the Colonial Brigades + Colonial VoW tokens pool into the fabric bag (make sure the bag is empty first), draw the number of pieces indicated for the current Year on the Scenario Information sheet, and remove all pieces from the bag after all VoW tokens have been resolved. All drawn units are placed onto the map (16.3). If the Colonial Brigades + Colonial VoW tokens pool is ever empty, the remaining draws are forfeited.
16.2.1 Colonial Vagaries of War
Colonial Vagaries of War tokens have the same purpose and are used like British and French VoW tokens (15.2.1). The tokens potentially drawn in Colonials Enlist LR are:
| VoW Token | Effect |
|---|---|
| Fewer Troops | No effect |
| Fewer Troops (put token back in pool) | No effect. Put the token back in the Colonial Brigades pool. |
| Pick 1 Colonial Light unit / Pick 1 Colonial Light unit (put token back in pool) | Pick one unit from the Colonial Light units pool for placement on the map (16.3). If there is no unit left in that pool: pick one Colonial Light unit from the Losses box. If not possible, draw one additional piece from the bag. "Put token back in pool": that token goes back in the Colonial Brigades pool unless that pool and the Colonial Light units pool are both empty. |
| Pennsylvania Musters (Bonus Units: 2 Penn. & Del.) / Pitt Subsidies (Bonus Units: 2 New England, 1 N.York & N.J., 1 Virginia & S.) | Take the indicated units from the VoW Bonus pool (17.5) for placement on the map (16.3). |
16.3 Colonial Unit Placement
The British player takes the Brigades currently on the Disbanded Colonial Brigades box as well as the Colonial units he has drawn and places them on the map. All Disbanded Colonial Brigades reenter play with their Full face up. Place a Colonial Brigade unit on any friendly space in its corresponding Colony. A Colonial Light unit is placed on any friendly Colony Home Space (2.4).
16.4 Switch to Campaign Deck
Each player keeps his current Reserve card and discards the last card of his Buildup Deck facedown. For the remainder of the Year, cards are drawn from the Campaign Deck. The Indian Deck is unaffected.
17.0 Winter Quarters LR
17.1 Game End Check
Before performing Winter Quarters:
- Perform a Victory Check (18.2).
- If no faction has achieved its Victory Threshold, proceed to the Winter Quarters LR Procedure (17.2).
17.2 Winter Quarters Procedure
Each step is resolved first by the British player if applicable.
- Remove all Raided markers on the map (the Raid track is unaffected).
- Remove all Rout and OOS markers from the map.
- Move any stack currently on the Sail box to a friendly Coastal Home Space. If not possible, follow Fleet Retreat Priorities (13.9.2).
- Indian units, including those in the Losses box, are placed on their linked Village (2.1.8). If a Village is enemy-controlled, place or keep its linked Indian unit in the Losses box. Place or keep one Indian Nation's unit on the Losses box for each enemy-controlled Village of that Nation. Remaining Indian Nation's unit(s) are placed on other Villages of their Nation (one per Village). See 17.3 #3 for any Commander left alone by Indian units.
- Move Colonial Brigades to the Disbanded Colonial Brigades box, except those on the Losses box. Disbanded Colonial Brigades retain their Reduced status for Reduced unit combination (17.3 #4). Some Colonial Brigades currently on a Fort or a captured Settled Space may remain on it (17.3.1).
- Return to Colonies (17.3).
- Return all Fleets on the map to the Fleets pool.
- For each Losses box, one out of three same type non-Indian units (rounded down) is placed on any friendly Settled Home Space, or in the Disbanded Colonial Brigades box if Colonial Brigade. Maximum of one Highland Brigade each Year.
- Reset cards (17.4); Scenario 4 only: add units to pools (17.5).
- Advance the Year marker to the next Year. Move the Round marker to AR1 and start the first AR (7.1).
17.3 Return to Colonies
Both factions must perform Return to Colonies for each of their stacks that is not currently on a friendly Colony Home Space (2.4). As non-mobile units, Forts do not take part in Return to Colonies.
Return to Colonies does not require APs. Units must comply with Connection type restrictions (10.2) but enemy units, enemy-controlled spaces, Connection Limits, Fleet transport capacity, and MP Limits are ignored.
Steps of Return to Colonies:
-
Move the stack to the nearest of these two options:
- A space with a friendly Fleet. If the stack already includes a Fleet, it stays in place until step 2.
- A friendly Colony Home Space (2.4).
Compute the nearest space by counting the number of legal Connections (10.2) to the target space. Owner's choice if multiple options possible.
A stack on a Coastal Space that has no legal Connection to reach a Fleet or a friendly Colony Home Space remains on its space until step 2.
-
Each stack that is still currently on a non-Home Coastal Space must now go to a friendly Coastal Home Space of a friendly Colony (it may be a stack that reached a Fleet in step 1). If no such space is available, go through Fleet Retreat Priorities (13.9.2).
-
Each Commander may be redeployed to a stack on a friendly Colony Home Space. Mandatory for Commanders not stacked with another unit type.
-
Combine Reduced units (13.2.2) on all spaces, and on the Disbanded Colonial Brigades box (should any odd Reduced Colonial Brigade remain on that box, flip it back to Full).
17.3.1 Winter Garrisons
During steps 1 and 2 of Return to Colonies, units may be left on the stack's starting space or any space the stack moves through, provided that one of these conditions is fulfilled:
- It is a non-Settled Space with a friendly Fort. A maximum of one unit (of any type) may remain there.
- It is a friendly controlled enemy Settled Space. A number of Brigades up to the space's value may remain there. In addition, any number of units of other types may remain there.
17.4 Reset Cards
Each player discards his Reserve card. If playing multi-Year scenarios 4 or 4B (the whole French & Indian War), remove any cards whose Year(s) do not match the next Year, and add cards whose Year(s) match the upcoming Year (e.g. at the end of 1757, replace "1757" cards by "1758-1759" cards). Played, discarded, and newly added cards are shuffled together in their respective decks (5.3). Shuffle each deck separately.
17.5 Add Units to Pools
If playing multi-Year scenario 4 (The French & Indian War), add units to pools as per each faction's Scenario Information sheet. When adding Colonial Brigades for a VoW Bonus (yellow box), keep these units in a separate VoW Bonus pool.
18.0 Victory Conditions
18.1 Victory Points (VPs) and Track
Game victory is determined by the position of the Victory marker on the Victory track. The marker's position is adjusted as Victory Points (VPs) are gained by either faction. It moves left for each VP scored by the French and right for each VP scored by the British.
If a faction exceeds 10 at its end of the track: Flip the Victory marker to the "+10" face and place it on position 1 on the same side of the track (1+10=11). Keep advancing the marker from that position if more VPs are gained by that faction. If VP loss causes that faction to be at 10 VP or less, flip back the marker to the face without the "+10", and place it at position 10 or less to correspond to the faction's current VPs.
| A Faction May Gain VPs By: | VPs Awarded |
|---|---|
| Gaining control of Victory Spaces | VPs equal to each space's Value (2.1.9) |
| Reaching the end of the Raid track | 1 VP each time 8 Raid Points is reached (9.3) |
| Scoring Scenario Bonus VPs at Year end by achieving specific objectives | Bonus VPs for current Year of scenario (18.2.1 #1) |
| Having a WIE chit of greater value than the opponent's at Year end | Bonus VPs equal to the difference between both chits (18.3.2) |
18.2 Victory Check
Each Scenario Sheet lists possible Scenario Bonus VPs for the relevant faction as well as that faction's Victory Threshold(s). Thus, it is possible in certain scenarios to win before the last Year.
18.2.1 Victory Check Procedure
At the start of the Winter Quarters LR (17.1):
- Each faction adjusts the Victory track according to their respective Scenario Bonuses for that Year (a Bonus may only be scored in the indicated Year).
- The Victory track is adjusted for the WIE Bonus for that Year (18.3.2). WIE Chits go back to their respective pools afterwards.
- If the Victory marker is at a position that equals or exceeds a faction's Victory Threshold for the current Year, that faction wins the game.
18.3 War in Europe Chits (WIE)
There are 12 French (blue) and 12 British (red) War in Europe (WIE) chits with a value of 0, 1, or 2. WIE chits are a potential source of additional VPs.
18.3.1 WIE Chit Draw
A faction draws one War in Europe chit each time an opposing Metropolitan Brigade is eliminated. (WIE chits simulate randomly the influence of the European war on the North American conflict. See playbook for more.)
Each time he draws a WIE chit from his pool (5.2), the player inspects it and places it face-down on his WIE placeholder (near his end of the Victory track). A player may not have more than one WIE chit on it. If there is already a WIE chit, the player may replace it with the chit he drew. The unused or replaced chit is returned face-down to the pool. A player may inspect the chit on his WIE placeholder at any time.
18.3.2 WIE Chit Year End Scoring
During the Victory check (17.1, 18.2.1) of the Winter Quarters LR of each Year, the chits on WIE placeholders are revealed and their values compared (a player who has no chit is considered to have a value of 0). The faction with the highest valued WIE chit gains bonus VPs equal to the difference between its chit and that of the opponent (maximum 2 VPs per Year). Adjust the Victory track accordingly and put the revealed WIE chits back in their respective WIE chit pool (facedown).
Unit and Militia Reference
| Unit Type | Specific Rules |
|---|---|
| Non-Indian Light (3.1) | May be activated by Light AP (7.3.1) or any other AP type. Goes back to starting space after Raid roll (9.0). Rallies also with B&T roll if stack includes no Artillery/Bastion/Brigade/Fleet (14.2). |
| Indian (3.1.1) — No Reduced face | In addition to Non-Indian Light unit characteristics: Indian AP (7.3.2) is limited to a single Indian unit or same Indian Nation (8.0) stack. Goes to Losses Box: after successful Raid (9.0) / receiving first Hit (13.4) / winning attack against enemy Fort/Settled Space (13.7.1). Rout: chosen as last resort for elimination (13.8 #1). Winter Quarters LR (17.2 #4): placed on its Village (to Losses box if enemy-occupied). |
| Metropolitan Brigade (3.2) — Crown or fleur-de-lis | Hit in priority by Artillery/Brigade/Fort/Bastion B&T roll (13.3.3). If golden crescent icon (top right): triggers Commander draw (15.2.2). |
| Highland Brigade (3.2.1) — Crown and 'H' | In addition to Metropolitan Brigade characteristics: Battle reroll capability (13.5). Receives Battle's first Hit scored on Metropolitan Brigade (13.4). Limit of one Highland Brigade from the Losses box each Year (17.2 #8). |
| Non-Metropolitan Brigade (3.2) | Winter Quarters LR: Colonial British to Disbanded Colonial Brigades box (17.2 #5). Colonials Enlist LR: Colonial British enters/re-enters play on its Colony (16.3). |
| Artillery (3.3) | On Road: single Artillery unit limit (10.1). Rout: chosen in priority for elimination (13.8 #1). |
Connection, Hit Check, Raid, and Action Reference
Legend: "may trigger Action" = the unit type may activate/perform this Action; "may be activated" = the unit type may take part in the Action once triggered by another unit, without itself triggering it (see relevant rule).
| MP (10.2) | Connection Types Allowed (10.2) | Hit Check Trigger Roll (13.3.3) | B&T Battle Roll | Raid (9.0) | Army Movement (10.4) | Light Movement (10.5) | Sail Movement (10.6) | Marshal Troops (11.0) | Construction (12.0) |
|---|---|---|---|---|---|---|---|---|---|
| 3 (Light units) | Any | Triangle/Circle | No effect | May trigger: Single unit. Raid/Intercept successful on Flag, Hit (Triangle/Circle), or B&T | May trigger | May trigger | Transported (may be activated) | May be activated | May be activated — Road |
| 2 (Brigades, in Battle) | Highway; Path with a Road | Square/Circle | Metropolitan Brigade: Removes 1 Militia + Potential Hit to 1 Brigade (table 13.3.3). Other Brigade: Removes 1 Militia | Intercept successful on Flag only | May trigger |
Easily Forgotten Rules
Movement
| Rule | Reminder |
|---|---|
| Stack enters a neutral Indian Nation's Territory (2.5, 8.1) | Control of that Indian Nation goes to the opponent. |
| Connection Limits (table 10.1) | Respect maximum number of units for each faction during Action Phase (Commanders/Raiding units not counted). |
| Commander Movement | Never on Paths (10.2, 10.5). |
| British units on Fortress space (10.2.1, 1st bullet) | Can leave the space without Outnumbering (10.3.1) the opponent. |
| Units activated for Movement | Cannot split in different directions with the same AP (10.2.1, 2nd bullet). |
| Unit picked up by a stack (10.2.1, 4th bullet) | Count MPs from the starting space of the stack it joined. |
| Bastion/Fort | Prevents Overwhelm (10.3.2). |
| All friendly units on Sail Box (10.6.1) | Must land at the beginning of its Action Phase (7.2 #1) on a single Coastal Space of a friendly SZ (10.6.2). Costs no AP. |
Battle
| Rule | Reminder |
|---|---|
| Militia Battle rolls (13.3.3) | Take place after both factions' units rolls. |
| To score a Hit (13.3.4) | The Hit must be applicable to a legal unit. Overflow Hits are not scored. |
| Battle Victory marker below zero | Scored Hit is not applied (13.3.4) but the Battle Victory marker advances. |
| Battle Rerolls (13.5) | A unit may use one reroll of each category (Highland/Event/Commander). |
| Miss roll during Commander reroll | Triggers a Commander Casualty check (13.5.1). |
| Bastion remaining after attacker victory (13.9) | Defender does not Retreat. Leave Battle marker in place. |
| Last Bastion eliminated (13.8) | Defender Routed. If a Battle track-induced Rout of the defender also occurs in the same AR: all non-Light units are eliminated. |
| British capture of Louisbourg (13.7) | Flip Open Seas marker permanently to "British & French" face (10.6.2). |
| Metropolitan Brigade eliminated (18.3) | Triggers WIE chit draw (18.3.1). |
Other
| Rule | Reminder |
|---|---|
| Raid by Indian unit successful (9.3) | Eliminate the Indian unit. |
| Wilderness Space (2.1.3) | Cannot be controlled. Friendly to a faction if enemy-free. |
| Wilderness Space with a Fort (9.3) | 1 Raid Point value. |
| Empty enemy-controlled Outpost (2.1.4) | Usable by both factions for Supply trace (14.1). |
| Disbanded Colonial Brigades (17.2) | Enter play on their Full face at Colonials Enlist LR. (16.3). |
| Enemy-controlled Indian Village (17.2 #4) | Corresponding Indian unit goes to/remains on Losses box at Winter Quarters LR. |
| Brigades coming back from Losses box (17.2 #8) | May include a maximum of one Highland Brigade (each Year). |