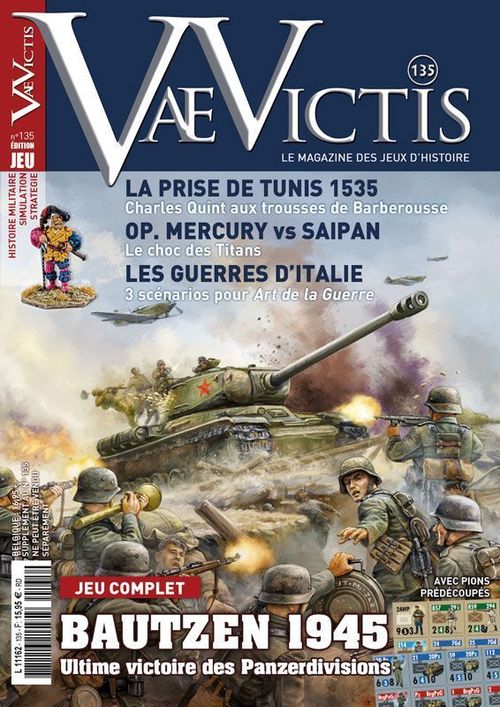
Bautzen 1945
Bautzen 1945 Rulebook
Table of Contents
Table of Contents
- 1 - In General
- 2 - Sequence of Play
- 3 - Zone of Control
- 4 - Movement
- 5 - Stacking
- 6 - Unit Command
- 7 - Supply
- Combat Result Table
- Terrain Effects Table
- Allied Reinforcements Table
- 8 - Combat
- 9 - Headquarters
- 10 - Air Support
- 10 - Dominant Position
- 11 - Reinforcements
- 12 - Set-up
- 13 - Victory Conditions
1 - In General
1.1 - Scales
Units represent regiments and brigades. HQs represent Divisional, Corps and Army headquarters and their attached combat units. The distance separating the centre of two hexagons is approximately 1500 metres. Each game turn represents a day of real time. There are six turns in the game. Game play requires a six-sided die (d6).
1.2 - Counters
Counters primarily represent combat units: infantry, armoured, artillery or formation HQ, and give the following information. The terms "value" and "factor" are interchangeable.
Diagram omitted: sample counters showing name and colour of formation, NATO symbol and size, attack and defence factors, movement allowance, antitank, artillery support factor, HQ support factor, command range, fire range, and nationality.
-
Attack Factor: the combat value used by the attacking unit in a ground combat.
-
Defence Factor: the combat value used by the defender in a ground combat.
-
Movement Allowance: the number of movement points (MP) a unit may spend each turn to move about the map.
-
Command range: the distance at which a HQ can furnish support to a unit he commands in attack or in defence.
-
Fire range: the distance at which an artillery unit may furnish support to a unit engaged in a combat in attack or in defence.
Note: these distances are calculated including the concerned unit's hex but excluding that of the HQ or artillery unit.
-
Support Factor: the value used by a HQ or artillery to furnish support.
-
Anti-tank unit: this type of unit has a combat value that is the same in attack and in defence and is added to the combat value of the units with which it is stacked in attack or defence. If it is attacked while alone in a hex, it defends itself with a combat value of 1.
-
Supply column: these counters represent the supply that a player can spend during a combat to give a positive modifier (see 7.2). They move like motorised units and have 4 movement points.
Unit size symbols: III = regiment; X = brigade; XX = division; XXX = corps.
1.3 - Reduction of Units
Units possess one or two strength steps. When a unit suffers a step loss, it is turned over to its verso. A second loss eliminates it. A unit with only one strength step is eliminated after the first loss it suffers.
1.4 - Abbreviations
- HG: Herman Göring
- Brg: Brandenburg
- GD: Grossdeutschland
- KG: Kampfgruppe
- DP: Dywizje Piechoty: infantry division
- GRD: Fusiliers Division of the Guard
- GMC: Mechanised corps of the guard
- GTC: Tank corps of the guard
- KP: Polish Tank corps
2 - Sequence of Play
The game sequence for each turn is as follows:
A - German phase
- Supply sequence. Starting with turn 3, the German player rolls a die to determine if he receives a support column (see 7.2).
- Movement segment. The German player checks the supply of his units then moves all or some of them.
- Combat segment. The German player checks the supply of his units. Then, the German player's units can engage in combat against adjacent enemies. The HQ and artillery units of the two camps can provide support during this phase.
B - Allied phase
- Supply and reinforcements segment. The Allied player receives a maximum of four supply columns. Starting with turn 2, the Allied player tests to see if he receives reinforcements (see 11).
- Movement segment. The Allied player checks the supply of his units, then moves all or part of his units.
- Combat segment. The Allied player checks the supply of his units. Then the Allied player's units may engage in combat against adjacent enemy units. HQ and artillery units of the two camps can provide their support during this phase.
C - End of turn phase
The turn marker is advanced one space. If this is the last turn of the game, check the victory conditions.
3 - Zone of Control
All combat units, including the HQ, exert a Zone of Control (ZoC) on the six hexagons surrounding them.
A unit that penetrates an enemy ZoC stops its movement.
A unit that begins its movement in an enemy ZoC must pay +1 Movement Point to leave it.
A unit may not move directly from one enemy ZoC to another enemy ZoC.
It is possible to move through an enemy ZoC in the special case of retreat movement toward the friendly edge of the map (see 4.3).
4 - Movement
4.1 - Overview
During each movement segment, the player may move all or some of his units, respecting the ZoC rules (see 3) and the stacking rules at the end of the movement (see 5). The movement of a unit must be finished before the player may move another unit.
A unit may never enter a hexagon occupied by an enemy unit.
A unit moves by spending its movement points (MP). Entering a hexagon or crossing certain sides of a hex has a price which is indicated on the Terrain Table.
A unit is not required to spend all its MP during a single movement segment, but unused MP cannot be used during the following segment. A unit may not transfer its MP to another unit.
4.2 - Movement by Road or Railway
Movement along a road or railway only costs 1/2 MP per hex crossed for all units.
A unit that moves along a road may neither begin nor end its movement in an enemy ZoC.
Note: it is possible to move normally and along a road in the same segment.
4.3 - Movement through an Enemy ZoC
In general, a unit may not cross an enemy ZoC.
Nevertheless, a unit may move through an enemy ZoC if this movement is in the direction of a friendly source of supply. For each unit moving in this way, roll 1d6 per enemy ZoC that is crossed. On a roll of 1 or 2, the unit loses one strength step. If the unit has only one strength step, it is eliminated.
Units moving in this way must spend their entire movement value to move toward the closest friendly source of supply.
5 - Stacking
5.1 - Overview
Each type of unit has a stacking factor expressed in stacking points (SP). This factor is as follows:
- Supply Column = 1 SP
- Regiment = 2 SP
- Brigade = 3 SP
- 1 KP = 3 SP
- Soviet division HQ or armoured or mechanised corps = 3 SP
- Soviet army HQ or German corps = 4 SP
5.2 - Stacking Limits
It is possible to stack 6 SP in clear or urban terrain and 4 SP in forest or difficult terrain.
The stacking rules must be respected at the end of the movement segment and at the end of the combat segment.
5.3 - Consequences
The attack and defence values of all units in a hex that exceeds its stacking limit are divided by two (rounded down to the nearest whole number).
5.4 - "Divisional" Integrity
All units that are part of the same formation (coloured stripe) may stack with:
- Other units of the same formation
- The HQ of the formation
- One unit maximum from another formation.
5.5 - Independent Units
An independent unit may stack with any friendly unit of the same nationality regardless of its formation.
The independent units are:
- German
- 732 and 777 artillery brigades
- 72 KG
- Polish
- 2 x anti-tank brigades (95 and 145)
- 3 x artillery brigades (6L, 7H, 8C)
- 1 x armoured brigades (145)
- 1 x tank corps (1KP)
5.6 - Corps and Army HQ
German Corps HQ and the Polish Army HQ can stack with any unit of the same nationality.
6 - Unit Command
6.1 - Line of Command
A unit is in command if it is within command range of its formation's HQ or the HQ of a corps or army of its nationality. This line may pass through any type of terrain, a hexagon containing an enemy unit or an enemy zone of control.
Command is checked at the moment a support column is used (see 7.2).
Out of command units may not use support columns during combat.
7 - Supply
7.1 - Overview
A unit is considered in supply if it is able to trace a line of supply (LoS) of any length toward a source of friendly supply.
Supply is checked for each player in their respective phase before movement and combat.
7.1.1 - Sources of Supply
The sources of supply are hexagons marked as such on the map. They are found on the southern and western edges for the German player and the northern and eastern edges for the Allied player.
If an enemy unit occupies a supply hex, the hex is no longer a valid source of supply.
7.1.2 - Line of Supply
A line of supply may not pass through:
- a hex containing an enemy unit.
- a hex located in an enemy Zone of Control, unless this hex is occupied by a friendly unit.
A LoS may be affected by the presence of a dominant position (see 10).
During its movement, a unit may not enter a hex that would cause it to be Out of Supply (see also retreat after combat 8.5.2).
7.2 - Supply Columns
Supply columns (SC) move like motorised units. They have a movement value of 4 MP. Their stacking value is 1. They enter the map as reinforcements.
The Allied player receives 4 each turn during the reinforcements segment.
The German player must roll 1d6 to determine the number of SC he has during the reinforcements segment:
- 1-3 = 0
- 4-5 = 1 x SC
- 6 = 2 x SC
7.2.1 - Use of SC
A supply column may be used in the following ways:
- In attack: if a player has a SC stacked with one or more friendly units, or units that are adjacent to friendly units, and that attack, he may decide to spend this supply column on the attack; it benefits from a shift of one column to the right on the Combat Results Table (e.g. a 2:1 attack becomes a 3:1 attack).
- In defence: if a player has a SC stacked with one or more friendly units or units adjacent to them that combat in defence, he can decide to spend it and the attack will suffer from a shift of one column to the left on the Combat Results Table (e.g. a 3:1 attack becomes a 2:1 attack).
After the combat, the SC is removed from the map until it might return during a reinforcements segment.
7.2.2 - Rules for Usage
To use a SC:
- At least one of the units belonging to the formation and participating in the combat must be within command range of its formation HQ.
- An independent unit must be within command range of a formation HQ or an army corps HQ.
Several SC may be used for the same combat but the total modifier must not exceed + or - 3 columns (see combat, 8).
7.2.2 - Availability
There may never be more than 4 SC of the same camp on the map at the same time.
If one camp receives a Supply Column when it already has 4 on the map, the new Supply Column cannot be received and is considered lost.
7-3 - Lack of Supply
An out of supply unit suffers the following effects:
- Infantry: Attack value divided by two and rounded down to the nearest whole number (e.g. 5 divided by two = 2.5, rounded to 2). Its defence and movement values remain the same.
- Armoured, motorised and mechanised infantry, heavy engineers and HQ: Attack value divided by two and rounded down to the nearest whole number (e.g. 5 divided by two = 2.5, rounded to 2). Defence value divided by two and rounded up to the nearest whole number (e.g. 5 divided by two = 2.5, rounded to 3). Movement value divided by two and rounded down to the nearest whole number.
A HQ and an artillery unit may not provide support to a unit that is out of supply.
A unit that is out of supply but in command may nevertheless use a SC in a combat.
Combat Result Table
Column headings are strength ratios (attacker:defender). The die roll is modified by the DRMs below.
| Die | 1/2- | 1/1 | 2/1 | 3/1 | 4/1 | 5/1 | 6/1 | 7/1+ |
|---|---|---|---|---|---|---|---|---|
| 1 | 3/0 | 2/0 | 1/0 | 1/0 | 1/1 | 1/1 | 0/1 | 0/2 |
| 2 | 3/0 | 2/0 | 1/0 | 1/0 | 1/1 | 0/1 | 0/1 | 0/2 |
| 3 | 3/0 | 1/0 | 1/0 | 1/1 |
Results
- A/D: result for the Attacker/Defender, in step loss.
- 0, 1, ..., 6: number of step losses for the Attacker/Defender.
- Strength ratios over 7/1 are treated as 7/1.
- Strength ratios under 1/2 are treated as 1/2.
Modifiers (DRM and column shifts)
- +1 DRM if all surviving units of the same formation are attacking the same hex (including the HQ), limited to +1 per combat.
- +1 DRM if at least one of the attacked units is out of supply.
- +1 column for a concentric attack.
- -1 DRM when attacking a difficult terrain.
- -1 DRM when attacking across a river.
- -1 column when attacking a dominant position.
- -1 column when attacking a defender with a SC, or +1 column when attacking with a SC (maximum 3 columns left or right).
- +/-1 column per plane marker (maximum 2 columns).
Terrain Effects Table
| Terrain | Cost in MP | Effects on combat |
|---|---|---|
| Clear | 1 MP | Stacking: 6 SP |
| Difficult | Infantry: 1 MP; Other: 2 MP | -1 DRM (in favour of defender); Stacking: 4 SP |
| Dominant Position | Infantry: 2 MP; Other: only via road or rail | -1 column (in favour of defender) (support factor of HQ: +2); Stacking: as terrain in hex |
| Road/Rail | Movement allowance x 2 | As terrain in hex |
| River | +1 MP | -1 DRM (in favour of defender) if at least one attacking unit is on the other side |
| Town | 1 MP | -1 DRM (in favour of defender); Stacking: as terrain in hex |
| City | 1 MP | -1 column (in favour of defender); Stacking: 6 SP |
| Woods |
Note: Effects of terrain on combat are cumulative, e.g. a difficult hex + woods count as a -2 DRM. Effects of terrain on combat are not [cumulative], choose the worth. (The second sentence is printed without "cumulative"; the bracketed word is supplied from the sense of the note.)
Allied Reinforcements Table
| Die | Reinforcements |
|---|---|
| 1 | - |
| 2 | - |
| 3 | 14 or 15 GRD |
| 4 | 14 or 15 GRD |
| 5 | 95 GRD |
| 6 | 95 GRD, 1 x Plane |
| 7 | 4 GTC, 1 x Plane |
DRM
- -2 in turns 2 and 3.
- +1 if at least one Bautzen hex. is in German control.
- +2 if at least one Bautzen hex. and Weissenberg (hex. 3713) are in German control.
Source note: the printed table gives Weissenberg as hex 3713 here, while the victory conditions and set-up give Weissenberg as hex 1910. Both are reproduced as printed.
14 or 15 GRD: one of these two divisions can move south to XX05.
If the unit is already in play, consider the result as "no effect" and play the next segment of the Sequence of play.
Errata: the counter 667/615 is not the right size; this is not a division (XX) but a regiment (III).
Designer and test credits printed on this page are omitted.
8 - Combat
8.1 - Overview
Combat takes place between adjacent enemy units.
Combat is never obligatory.
A unit may only attack once per combat segment.
An enemy unit may be attacked several times per combat segment.
A unit is not required to attack all the adjacent units.
A unit that attacks a hex must attack all the units in that hex.
A hex can be attacked by units located in several adjacent hexes. These units may belong to different formations.
Several units stacked in the same hex can attack different hexes.
8.1.1 - Concentric Attack
When the defender's unit is totally surrounded by the attacking units and their ZoC, the attacker benefits from a +1 column bonus.
Diagrams omitted: examples of valid and not valid concentric attacks.
8.2 - Resolution
The attacker designates the hexagon he will attack and the units that will participate in the attack.
- The attacker and the defender decide if they will use Supply Columns for this combat and they note it secretly. The Allied player decides if he will use air support and secretly notes the number of supports.
- The attacker and the defender announce how many SC and aircraft will participate in the combat.
- The attacker and the defender add up the attack and defence values of the units engaged, including the support of the HQ and artillery units.
- The attacker and the defender announce the total of the factors engaged in the combat. Divide the attacker's total by the defender's total to get a ratio in the form n:1, rounded down to the nearest whole number.
- Apply to this ratio all the column modifiers (number of SC, aviation, terrain, concentric attack, etc.) to obtain the final strength ratio.
- The attacker rolls 1d6, applies the die roll modifiers and reads the combat result at the intersection of the result and the final strength ratio column on the Combat Result Table (CRT). The result is expressed in the number of strength steps lost by the attacker and the defender and/or in retreat hexagons for the defender.
- The defender may exchange step losses for retreat hexagons.
- The attacker may advance into the hex that the defender left vacant after taking his losses.
8.3 - Combat Effects
When a combat unit suffers a step loss, it is turned over to its verso. If it only has one strength step or it has already lost one, it is eliminated.
Losses must be distributed equally among the units that participated in the combat.
A unit may not suffer step losses if at least one of the participating units suffered fewer step losses.
Exception: no unit may suffer a step loss that would destroy it if at least one other unit could absorb this loss without being eliminated.
8.4 - Advance After Combat
If after a combat the defender's hexagon becomes vacant, the attacker may advance into this hex with all or some of the units that participated in the combat after having suffered the losses indicated on the CRT and respecting the stacking rules.
Exception: HQ, artillery, AT units and SC may never advance after the combat.
Note: the attacker never retreats.
8.5 - Retreat After Combat
8.5.1 - Overview
A unit or stack of units that suffers a combat result may exchange step losses for retreat hexagons.
Example: a unit that suffers 2 step losses may lose a strength step and retreat one hex, or retreat two hexes.
Restriction: the units of a stack that retreats must retreat to the same hex.
A unit can retreat to a hex in EZoC if occupied by a friendly unit.
A unit or stack of units that retreats to a hexagon already occupied by friendly units cannot be over-stacked.
The direction of retreat is toward the nearest friendly supply source.
8.5.2 - Inability to Retreat
A unit or stack of units unable to retreat (because they can enter no hex: entering an enemy ZoC (if there is no friendly unit in it) or becoming over-stacked) must remain in its hex. Each unit of the stack loses an additional strength step.
In the same way, a unit that becomes out of supply following a retreat loses an additional strength step.
8.5.2 - Re-attacked Units
(The source prints 8.5.2 twice; reproduced as printed.)
Note the units that have retreated (by turning them a quarter turn for example). If they are re-attacked by other enemy units during the same combat segment and they suffer at least one step loss, they are eliminated.
8.6 - HQ, Artillery and SC in Combat
8.6.1 - HQ and Combat
A HQ combats like a combat unit if it is alone in its hex. It uses half its support value rounded up as a defence value.
If stacked with other units, HQ use their full support value in attack and defence.
8.6.2 - Artillery and Combat
An artillery unit has a supply factor that is added to the combat value of units in firing range in attack or in defence (see 9.2). Artillery support may not be divided among several units.
An artillery brigade alone in a hex and attacked by an enemy unit combats with a defence value of 1.
8.6.3 - SC and Combat
SC alone in their hex and engaged in a combat do not combat normally. The attacking player rolls 1d6:
- 1-3 = the SC is destroyed.
- 4-6 = the SC is captured; turn it over to its new owner's colour. Be sure to respect rule 7.2.2.
9 - Headquarters
A HQ represents the general staff of a formation and its supporting elements (engineering, transportation, artillery, armoured units, etc.) at the division, corps or army level.
9.1 - Support
A HQ can provide its support in attack and in defence. In order to do so, the unit must be within command range of the HQ of its formation or the HQ of the army corps providing support.
A HQ can support a unit in attack during the combat segment, then in defence during the enemy combat segment.
Support cannot be divided among several combats.
This support is added to the attack or defence value of the units that participate in the combat.
Diagram omitted: the map position of the combat example below.
Combat Example
On the first turn, the Soviet regiment 861/294 defends the city of Weissenberg (1910). There is a SC in hex 1909 and the HQ of the fusiliers division is at Groditz (hex. 1808).
The German player decides to attack Weissenberg with the 20 Pz. Division at full strength; the HQ of the 57 PzK provides support.
21/20 and 59/20 attack from hex 1810, and 112/20, the HQ of the 20 Pz, from 1911.
The HQ of the 57 PzK is in hex 1912 and within support range of the attacking units.
Each player decides in secret if he will use a SC.
The Soviet player announces he will use the SC in hex 1909 (the attacked unit is adjacent to the SC and within command range of its HQ = 3 hex.).
Each player calculates the number of combat factors implicated.
Soviet = 4 (861/294) + 2 (Divisional HQ) = 6
German = 6 + 4 + 4 (combat units) = 14 + 6 + 6 (support of two HQ) = 12 which is less than 14 (see 9.2) for a total of 26
The players reveal their respective totals then calculate the combat ratio: 26/6 = 4.
The strength ratio is therefore 4:1, reduced to 3:1 due to use of the Allied SC.
The German player rolls 1d6 and gets 5, +1 because all units of 20 Pz participate, for a result of 1/2.
The 112/20Pz loses a strength step and is turned over.
The 861/294 retreats 2 hex. toward Groditz.
The German player may advance into the newly vacated hex.
If one of the German units had been in 2009 for example, the attack would have been concentric and the Russian unit unable to retreat would have been destroyed.
9.2 - Support Limits
A unit that belongs to a formation may only receive support from the HQ of its formation and/or the corps HQ (German) or army HQ (Polish).
The total number of support points used during an attack may not be greater than the total of the attack factors of the units engaged in the attack. The rest of the support is lost.
Attention! Artillery support must be included in this total.
Example: units that attack with a combined attack value of 8 cannot use more than 8 support points.
HQ support may not be divided among several units.
Note: independent units can get support from an HQ at command range if of the same nationality.
9.3 - HQ and ZoC
HQ exert a ZoC like combat units.
10 - Air Support
The Allied player begins the game with an air support marker and can receive two more in reinforcements (see 11).
During the combat, the Allied player can use one or more air supports in attack or in defence.
Each marker may only be used once per turn in attack or in defence.
Each air support marker provides a modifier of +1 column to the right in attack and -1 column in defence.
Several aircraft may be used for the same combat but the final modifier must not exceed + or - 2 columns.
10 - Dominant Position
Hexagons marked with a triangle are dominant position hexagons.
10.1 - Effects on Combat
A unit located in a dominant position defends itself with a -1 column bonus.
Example: a combat of 4:1 becomes a 3:1 combat.
10.2 - Effects on Support
A HQ that supports a unit in a dominant position, or in a radius of two hexes around a dominant position that is occupied by a friendly unit or under friendly control (see 13), benefits from a +2 modifier.
Example: a support factor of 6 becomes a support factor of 8.
10.3 - Effects on Stacking
A stack of enemy units located in a hex adjacent to a dominant position occupied by a friendly unit may be freely inspected at any time.
Important! Otherwise, no stack may be inspected by the enemy player.
10.4 - Effects on Supply
A unit may only trace a LoS through a hex located two hexes from a dominant position occupied by an enemy unit if this hex is occupied by a friendly unit.
11 - Reinforcements
Only the Allied player receives reinforcements.
During the Allied reinforcement and supply segment, the player determines if he receives reinforcements and which ones.
11.1 - Request for Reinforcements
The Allied player rolls 1d6 and consults the reinforcements table.
11.2 - Entry of Reinforcements
Ground reinforcements enter by one of the Allied player's supply source hexes. They can move and combat normally during the turn they enter.
Air reinforcements are added to the Allied air capacity.
11.3 - Units in Reinforcement
Reinforcements represent units liberated by the Allied high command, the 1st Ukrainian Front: 4 GTC (4 x units) and 95 GRD (4 units).
The 14 and 15 GRD begin the game on the map but may not operate south of row XX05 (including the row) until the Allied player tests the Reinforcements Table.
12 - Set-up
The Allied player positions himself first, respecting the stacking rules. The German player goes second.
12.1 - Allied Set-up
- At Niesky (2206) and/or two hexes away: 214 RD
- At Weissenberg (1910) and/or one hex away: 294 RD
- At Bautzen and/or three hexes away (1410-1511): 254 RD, 7 GMC
- Hex. 2003 and/or one hex away: 7 DP
- Hex. 1902 and/or one hex away: 10 DP
- Hex. 1702 and/or one hex away: 14 GRD
- Hex. 0902 and/or one hex away: 15 GRD
- Hex. 1607 and/or one hex away: 5 DP, QG 2 AWP
- Hex. 0909 and/or one hex away: 9 DP
- Hex. 0511 and/or one hex away: 8 DP
The independent Polish units deploy as they wish on the map, adjacent to or stacked with other Polish units.
12.1 - German Set-up
The German player may deploy his units to hexes free of Allied units. He may deploy them adjacent to Allied units.
- Anywhere south of row XX12 and/or west of column 04XX (including the row and column): 20 Pz, HG1, HG2, BrGPzG, QG 57 PzK, QG GD PzK, Artillery Brigade 777.
- Hex. 2209 and/or one hex away: KG 72, 17 ID.
- In Reichswalde (1905) and/or one hex away: 464 ID.
- Hex. 1502 and/or one hex away: 546 VGD, artillery brigade 732.
- In Boxberg (1704) and/or one hex away: 615 ID.
Set-up option (advantage the German player):
- 1 BrGPzG in Boxberg (1704) and/or one hex away with 615 ID.
- Rest of BrGPzG (4 x units) in Spreefurt (1504) and/or one hex away.
Historical note: sources place Brandenburg PzG in different locations at the start of the counter-offensive.
13 - Victory Conditions
At the end of the game (end of turn 6), the victor is determined as follows.
The German player wins if:
- He controls or surrounds the two Bautzen hexagons (1410 and 1511).
- He controls at least two of the following towns: Weissenberg (1910); Diehsa (2108); Niesky (2206); Leutwitz (1009); Pulsnitz (0510).
- And Dresden is not controlled by the Allied player.
Any other result constitutes a victory for the Allies.
Control: a player controls a hexagon if one of his units occupies it or if he was the last one to occupy it.