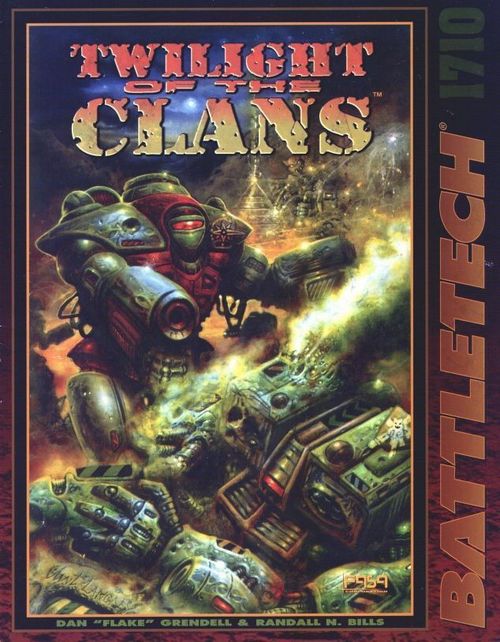
BattleTech: Twilight Of The Clans
BattleTech: Twilight Of The Clans Rulebook
Table of Contents
Table of Contents
- How to Use This Book
- Special Campaign Rules
- Scenario 1: Trafalgar
- Scenario 2: And in the Darkness Bind Them
- Scenario 3: Strike at the Heart
- Scenario 4: An Unpleasant Surprise
- Scenario 5: The Boggarts Unmasked
- Scenario 6: After the Smoke Clears
- Scenario 7: Taming the Lions
- Scenario 8: Ground of Contention
- Scenario 9: The Final Stand
- Scenario 10: The Great Refusal
- Campaign: Huntress
- Conquest of Huntress
How to Use This Book
Twilight of the Clans is a scenario pack for use with the BattleTech, BattleSpace and BattleForce 2 game systems. Most of the scenarios in this book use the standard BattleTech rules as published in the BattleTech Master Rules (BMR). To run the scenarios, players will need BattleTech Map Sets 2, 3, 4 and 5, as well as miniatures or other markers to represent the 'Mechs and other units on the game board. For some scenarios, players may want to use the building counters from CityTech, 2nd Edition.
Complete record sheets for all the BattleMechs and vehicles used in the scenarios appear in BattleTech Record Sheets 3025 & 3026, 3050, 3055 & 3058 and 3060, and the BattleTech Field Manuals Draconis Combine, Free Worlds League and Crusader Clans. Game statistics and illustrations for most of these units appear in the various Technical Readouts, though the record sheets contain all the information needed to play. Scenarios that involve aerospace fighters and DropShips may be played using the AeroBattle rules in BattleSpace, or the rules in the out-of-print AeroTech boxed set if players happen to own it. Game statistics for spacecraft used in these scenarios appear in Technical Readout 3057.
Each scenario in Twilight of the Clans re-creates one of the battles fought between the forces of Task Force Serpent and those Clans they encountered on their mission to conquer Huntress. The rules for each scenario provide all the information needed to play out the battle. Each scenario begins with a personal account of battle and a brief historical background of the engagement. The individual scenarios also include sections titled Game Set-Up, Attacker and Defender, Victory Conditions and Special Rules.
Game Set-Up provides specific information needed to play the scenarios, including instructions on laying out mapsheets, directions for special terrain features and suggestions on appropriate BattleTech rules to use.
The Attacker and Defender sections contain details of the scenario combatants. These sections also provide directions for deployment and guidelines for running the scenarios as self-contained games. Assume that all conventional vehicles listed in these sections are standard models unless the text specifically states that they are upgraded or refitted versions. Each pilot's name is followed by his or her skills in parenthesis, with Piloting Skill before the slash and Gunnery Skill after the slash. For example, (4/3) represents Piloting Skill 4 and Gunnery Skill 3. Units that have only Gunnery Skill, such as infantry, have only a single number listed in parenthesis. The descriptions of some vehicle and spacecraft crews have crew quality descriptions rather than individual combatant skills. When playing BattleSpace scenarios, refer to page 62 of the BattleSpace Rulebook to determine the effects of crew quality.
Victory Conditions determine the outcome of the battle; these vary from scenario to scenario. Combat in a scenario rarely continues until one side is obliterated; in some cases, both sides may claim victory if they achieve their tactical objectives. Victory Conditions simulates this by listing specific objectives for one or both forces.
Finally, Special Rules lists any rules for the scenario that are not covered in the BattleTech Master Rules.
Special Campaign Rules
The Special Rules section of each scenario indicates which of the following rules, if any, apply in that scenario.
Clan Honor
The Clan codes of honor, also known as "rules of engagement," are not part of the published BattleTech game rules. However, these codes can be used to enhance the roleplaying aspect of BattleTech, creating a richer game experience more closely linked to the fictional BattleTech universe.
Honor Levels
Clan honor codes fall into four categories, each dealing with a different part of combat: batchall, zellbrigen, physical attacks and retreat. Because the batchall takes place before the scenario begins, guidelines for its use appear in Creating Scenarios (page 97, BMR). Within each of the other three categories, a number from 1 to 4 represents the level of commitment to Clan honor required from the troops involved. Honor Level 1 means strict conformity to the Clan codes; Levels 2 and 3 require conformity only under certain circumstances; and Level 4 throws Clan honor out the airlock.
Normally, a fighting force's overall commitment to Clan honor is rated at Level 1, 2, 3 or 4. However, some scenarios may include more than one Honor Level; for example, Honor Level 1 may apply to physical attacks and retreat, while Honor Level 2 applies to zellbrigen. Each Honor Level is determined by the circumstances of the scenario and the particular Clan fighting in it.
Clan dueling rules and restrictions on physical attacks apply only to enemy 'Mechs. Clan MechWarriors may attack conventional vehicles and unarmored infantry targets without reference to Clan honor. Likewise, Clan unarmored infantry and vehicles need not follow the rules of engagement. However, each Elemental Point does follow the code of zellbrigen; each Point is considered a single unit for the purposes of dueling. In addition, each ProtoMech Point is considered a single unit for the purposes of dueling.
Zellbrigen (Dueling)
Under the rules for ritual dueling, or zellbrigen, Clan players must declare a target for each of their dueling 'Mechs. A typical declaration might sound something like, "I am MechWarrior Seth of Clan Steel Viper. I pilot the sole Summoner in Alpha Star. I hereby invoke the ritual of zellbrigen and challenge the pilot of the Orion adorned with the unit designation eleven to a duel of warriors. In this solemn matter, let no one interfere!"
During a duel, no other Clan warrior may attack either of the dueling 'Mechs. If a third Inner Sphere unit interferes with a duel, the dueling Clan warrior may attack the interfering unit, provided that another Clan 'Mech has not already challenged the interloper to a duel. A duel ends when one combatant is destroyed, disabled or retreats from the battlefield.
At Honor Level 1, the Clan warrior upholds all the rules of dueling regardless of his opponent's actions. At Honor Level 2, the Clan warrior follows the rules of dueling until the Inner Sphere side takes an action that violates the Clan honor code (a third party interfering, a unit involved in one duel firing on a 'Mech involved in another duel, and so on). If this happens, the duel immediately degenerates into a free-for-all. During the Weapon Attack Phase, if a player declares that his unit will fire on a target already involved in a duel, any Clan player whose declaration of zellbrigen follows the Inner Sphere player's "dishonorable attack" may attack that Inner Sphere 'Mech without regard for honor rules. Only the violator may be attacked in this way.
At Honor Level 3, any infringement of Clan honor in the dueling rules renders the entire ritual of zellbrigen null and void, leaving the Clan 'Mechs free to attack any enemy unit without restraint for the remainder of the game. At Honor Level 4, dueling rules do not apply.
Using zellbrigen in a game requires a certain degree of cooperation between players. A crafty Inner Sphere player can exploit the rules of engagement to deny the Clan player any targets at all. For example, a fast Inner Sphere 'Mech could challenge a slow Clan 'Mech and then run and hide, leaving the Clan 'Mech without an opponent and honor-bound not to aid other dueling Clan units. To give players some options in such situations, use the following guidelines to adjudicate the use of zellbrigen in game play.
1. Making the Challenge: One of the most important parts of the duel is the actual challenge. This takes place during the Weapon Attack Phase, when attacks are declared. When a Clan unit declares an attack on a unit that it has not attacked before, it is effectively announcing its intention to duel—the Clan player should verbally issue his challenge at this time. Dueling makes Initiative even more important, as Initiative also determines the order of attack declaration and challenges.
If the Inner Sphere side outnumbers the Clan side, it is considered bold (but acceptable) for a single Clan 'Mech to challenge more than one opponent at the same time. All of a single 'Mech's opponents are considered part of the same duel and may fire on the lone challenger. However, at least one target must be left for each 'Mech on the Clan side. This tradition does not apply to non-'Mech Clan units. In fact, Clan MechWarriors greedy for battlefield glory may force their own armored vehicles, infantry units, or even Elementals out of combat in this way.
Though a single Clan 'Mech may challenge more than one Inner Sphere 'Mech, additional Inner Sphere 'Mechs cannot invite themselves into a duel even if the Clans outnumber their side. Such an action is a breach of zellbrigen.
2. Refusing a Challenge: A Clan warrior need not accept a challenge issued by an Inner Sphere warrior, especially if he suspects the challenge is simply a ploy to abuse the ritual of zellbrigen and achieve victory through deceit. As a general rule, a Clan warrior can refuse a challenge from a 'Mech of a different weight class than his own, as long as he issues a challenge against another Inner Sphere 'Mech instead.
Also, though Inner Sphere warriors are not expected to accept or refuse challenges, the Inner Sphere side must abide by Clan honor when Honor Levels 2 or 3 are in effect or else risk touching off a melee. In these cases, the Inner Sphere player is also allowed to refuse challenges from Clan 'Mechs outside the challenged 'Mech's weight class as long as an alternate challenge is made.
If a warrior's challenge is refused for an alternate, the warrior who issued the challenge is free to issue a new challenge against any available targets.
Finally, any challenge must be accepted by Clan 'Mechs if there are no alternate targets in play.
3. Declaring a Duel Void: Certain situations may make a duel void, even if strict adherence to the rules of engagement (Honor Level 1) is in force. In these cases the judgment of the players must prevail; however, the players can use the following simple penalty system to judge these situations. The penalty system is intended to enforce the idea that dueling 'Mechs must actively fight one another for the duel to be valid. Because Clan warriors call people without honor dezgra, the penalties are referred to as Dezgra Points.
Each of the infractions listed below earns the violator a Dezgra Point, unless the violator's opponent declines the penalty (which he might do if he decides that the action was tactically appropriate). If a dueling 'Mech accumulates 3 Dezgra Points, it is clear that the duel is dishonorable, and so it becomes void in the End Phase of the turn in which the third point was earned. No dueling 'Mech can earn more than 1 Dezgra Point per End Phase.
If a dueling unit intentionally ends its movement out of its opponent's line of sight, the unit earns 1 Dezgra Point.
If a dueling unit has line of sight to its opponent but intentionally fails to fire at the enemy, the unit earns 1 Dezgra Point. (This guideline assumes that at least one shot must be possible, meaning that the enemy unit is within the firing arc and range of the weapon being fired.)
If a dueling unit ends its movement out of the firing range of all its weapons, the unit earns 1 Dezgra Point.
If the unit earns no Dezgra Points in a turn, it may remove 1 Dezgra Point in the End Phase of that turn. A unit may not, however, eliminate all its Dezgra Points (reduce them to zero) in this way.
Once a unit has accumulated 3 Dezgra Points, any Clan unit may freely fire on it for the remainder of the scenario without violating the dueling rules.
Physical Attacks
Unlike the formal ritual of dueling, the Clans' dislike of physical attacks in 'Mech combat is an informal, if widespread, custom. No explanation has yet been given for this distaste, though some experts suspect that Nicholas Kerensky chose to encourage a long-range fighting style among the Clans.
At Honor Level 1, a Clan warrior never makes physical attacks in 'Mech combat. At Honor Level 2, a Clan warrior may make a physical attack only if an enemy unit makes one first. During the Physical Attack Phase, if the Inner Sphere player declares a physical attack, any Clan unit whose declaration follows that violation of Clan honor may freely engage that 'Mech in physical combat.
At Honor Level 3, a single physical attack by an Inner Sphere 'Mech allows all Clan warriors to retaliate in kind against all enemy units for the remainder of the game. At Honor Level 4, the taboo against physical attacks no longer applies.
Retreat
Clan MechWarriors despise their Inner Sphere counterparts because they consider Inner Sphere armies dishonorable warriors fighting in inferior 'Mechs. Therefore, Clan warriors consider retreating from Inner Sphere opponents a disgrace almost beyond redemption. When allowed by the scenario rules to choose whether or not to flee a losing battle, many Clan warriors prefer to fight to the death.
At Honor Level 1, a Clan warrior never retreats. At Honor Level 2, Clan warriors may retreat from enemy 'Mechs that are using advanced technology, but never from 'Mechs, armor or infantry units using 3025 (Level 1) technology.
At Honor Level 3, Clan warriors may retreat from any vintage of enemy 'Mech, but will not retreat from armor or infantry units. At Honor Level 4, Clan warriors may retreat at will.
Forced Withdrawal
Under the Forced Withdrawal rule, units must retreat off the battlefield when they are crippled (when damage has rendered them useless or in imminent danger of being destroyed; see Crippling Damage). A unit making a forced withdrawal must move as quickly as possible toward the edge of the map designated in the Special Rules for the scenario. A unit equipped with MASC does not have to engage that system when forced to withdraw.
Withdrawing units may not make physical attacks against enemy units. However, Inner Sphere units may fire at enemy units that lie within their forward firing arcs and are between the retreating unit and its designated withdrawal edge. Withdrawing Clan units may fire only if fired upon and must obey the same restrictions as Inner Sphere units. Withdrawing units may not torso twist.
Crippling Damage
Any unit that suffers crippling damage must withdraw from the map (Clan units must follow any Clan honor rules that apply). Unless otherwise stated in the Special Rules section of a scenario, crippling damage is defined as follows. Note that the term "weapons" in the following definitions refers to offensive systems. Defensive systems and non-combat (e.g., anti-missile and NARC) systems are not considered weapons. Any ammunition-fed weapon is considered destroyed if its ammunition is depleted.
- A BattleMech or OmniMech is considered crippled when: a side torso location is destroyed, the 'Mech takes 2 engine critical hits, it takes 4 or more pilot hits, or all of its weapons are destroyed. If all of a 'Mech's weapons are destroyed and it can no longer move, it is considered destroyed. (The pilot of a destroyed 'Mech may eject normally.)
- A ProtoMech is considered crippled if all of its weapons are destroyed or it takes 4 or more pilot hits. A ProtoMech Point will not begin to withdraw until three or more of its component ProtoMechs are either crippled or destroyed, at which point the entire Point must withdraw.
- A vehicle is considered crippled if it loses all of its armor in a single location or all of its weapons are destroyed.
- An aerospace fighter is considered crippled if it takes a critical hit to its engine or fuel tank, all of its weapons are destroyed or it takes 4 pilot hits.
- An infantry platoon is considered crippled if it loses 21 or more troops (16 for jump platoons).
- An Elemental or battle armor unit (Point or squad) is considered crippled if it loses one-half or more of its members.
Scenario 1: Trafalgar
Unnamed Star System, Deep Periphery. 15 December 3059.
Game Set-Up
Lay out the BattleSpace maps as shown on page 18.
Attacker
The attacker consists of elements of the naval assets of Task Force Serpent.
- ISS Invisible Truth, Cameron class WarShip (Veteran crew)
- Iron Wings II-Pi: 2 HCT-213 Hellcats, 4 GTHA-500 Gothas
- Sanctity Above All II-Pi: 2 THK-63 Tomahawks, 4 RPR-100 Rapiers
- Harmonious One II-Pi: 2 HMR-HD Hammerheads, 2 AHB-443 Ahabs, 2 RPR-100 Rapiers
- Haruna, Kyushu class WarShip (Regular crew)
- Ichi Flight: 2 F-700A Rievers, 2 SL-17R Shilones, 2 SL-21 Sholagars
- Ni Flight: 2 SL-21L Sholagars, 4 SPR-H5K Sparrowhawks
- San Flight: 6 SL-15R Slayers
- Dojo, Avenger class DropShip (Regular crew, updated version)
- Hainan, Avenger class DropShip (Regular crew, updated version)
- Bisan, Achilles class DropShip (Veteran crew, updated version)
- Ichi Lance: 2 SL-15R Slayers, 2 NL-42 Battle Taxies (cargo: 20 DEST troops in Kage battle armor)
- Antrim, Fox class WarShip (Regular crew)
- Alpha Squadron: 2 SYD Z4 Seydlitzes, 2 SYD Z3A Seydlitzes, 2 SPR-6D Sparrowhawks
- Beta Squadron: 4 CSR-V20 Corsairs, 2 STU-D6 Stukas
- Ranger, Lola III class WarShip (Regular crew)
- Might of Valor II-Pi: 2 TRN-3T Tridents, 4 Centurions
Defender
The defender consists of a Ghost Bear naval convoy.
- Shining Claw, Congress class WarShip (Veteran crew)
- Slashing Star: 4 Visigoths (Prime configuration), 2 Visigoths (Configuration A), 4 Kirghiz (Configuration B)
- Ice Storm, Union-C class DropShip (Veteran crew)
- Sanguine Rime, Union-C DropShip (Veteran crew)
- Fire Fang, Whirlwind class WarShip (Veteran crew)
- Paw Star: 2 Scythas (Configuration A), 2 Jengiz (Configuration A), 4 Jengiz (Configuration C), 2 Sabutais (Configuration B)
- Ursus, Whirlwind class WarShip (Veteran crew)
- Alpha Star: 2 Sullas (Configuration A), 2 Sullas (Configuration B), 2 Turks (Configuration B), 4 Turks (Configuration C)
- Starlight, Essex class WarShip (Regular crew)
- Falcon Plucking II-Pi: 2 Sabres, 2 SPD-502 Spads, 2 SW-606 Swifts
- Emerald, Essex class WarShip (Regular crew)
- White Bear Maulers II-Pi: 2 ZRO-114 Zeros, 4 THK-53 Tomahawks
Deployment
The attacker enters via the right map edge during the Movement Phase of Turn 1. The attacking units have a starting Velocity of 3.
The defender deploys first and may place his units anywhere within 3 hexes of the left map edge, with a starting Velocity of 0.
Victory Conditions
The scenario ends when the Winter Wind jumps out of system or in the End Phase of the turn in which she is boarded or destroyed. Though unlikely, the scenario also ends if all the attacker's WarShips are destroyed.
The defender's JumpShip, the Winter Wind, is attempting to quick-charge its drives and rapidly jump out of system in the hope of bringing news of the Inner Sphere force back to the Clans. The exact time it will jump is unknown. Beginning in the End Phase of Turn 10, the Clan player rolls 1D6, showing the result to his opponent. If the result is a 6, the Winter Wind has completed charging its drive and will jump at the end of the following turn. Any other result means the engines are still charging. During the End Phase of each subsequent turn, the target number is reduced by 1. In Turn 15, the engines are completely charged and the ship will jump at the end of Turn 16.
To determine the victory level, calculate each side's total points and consult the Victory Level Table. The Winter Wind is considered disabled if its K-F drive is destroyed or if it suffers critical damage to its field initiator, drive coil or drive controller.
Victory Points
| Action | Points |
|---|---|
| Each Defender WarShip destroyed | +10 |
| Each Defender DropShip destroyed | +3 |
| Each Defender fighter Star destroyed | +2 |
| Winter Wind destroyed | +0 |
| Winter Wind disabled | +5 |
| Winter Wind boarded | +25 |
| Each Attacker WarShip destroyed | -5 |
| Each Attacker DropShip destroyed | -2 |
| Each Attacker fighter squadron or small craft destroyed | -1 |
| Winter Wind escapes | -25 |
Victory Level Table
| Total Points | Results |
|---|---|
| 55 or higher | Decisive Inner Sphere victory |
| 32 to 54 | Substantial Inner Sphere victory |
| 9 to 31 | Marginal Inner Sphere victory |
| -8 to 8 | Draw |
| -31 to -9 | Marginal Clan victory |
| -54 to -32 | Substantial Clan victory |
| -55 or lower | Decisive Clan victory |
Special Rules
The rules for crew quality (p. 62, BattleSpace rulebook) and boarding actions (pp. 36-37 and p. 40, BattleSpace) apply in this scenario.
DropShips/Aerospace Fighters
All fighters start the scenario aboard their parent DropShips or WarShips. They are launched according to the Launching/Recovering Small Craft rules (p. 50, BattleSpace). In addition, all DropShips start the scenario docked with their parent WarShip or JumpShip (see Docking, pp. 49-50, BattleSpace).
Overburn
Under the Overburn rule, aerospace fighters may temporarily generate Heat Points that exceed their heat sink limits, a practice known as overburning. Any time a fighter overburns, however, the stress of the excess heat reduces the effectiveness of other systems on the fighter and may even destroy the craft.
To simulate this phenomenon, calculate the overburn of a fighter unit during the End Phase of each turn using the following formula:
Heat Points - Number of heat sinks = Overburn
Consult the Overburn Effects Table. All overburn effects begin at the start of the following turn and remain in effect until the overburn level changes or is reduced to 0.
No fighter may overburn by more than 15 Heat Points. Additionally, any Heat Points that a fighter does not dissipate are carried forward to the next turn. As in BattleTech, unused heat-dissipation capacity cannot be carried forward into the next turn.
A Lightning (equipped with 12 heat sinks) generates 26 Heat Points during a turn. During the End Phase of the turn, the gamemaster calculates its Overburn at 14. The Lightning suffers the appropriate penalties during the following turn (+3 target modifier on Control and To-Hit Rolls), but the fighter generates no additional Heat Points, and so its heat sinks reduce its Overburn to 2 during the End Phase of the second turn. During the third turn, the fighter receives a +1 target modifier on Control and To-Hit Rolls. By the fourth turn, the fighter's heat sinks have reduced its Overburn to 0, so it suffers no overburn effects.
Overburn Effects Table
| Overburn | Effect |
|---|---|
| 1 | None |
| 2-4 | +1 Target Modifier on Control and To-Hit Rolls. |
| 5-7 | +2 Target Modifier on Control and To-Hit Rolls. |
| 8-10 | +2 Target Modifier on Control and To-Hit Rolls. Roll 1D6; fighter unit shuts down on a result of 6.* |
| 11-13 | +3 Target Modifier on Control and To-Hit Rolls. Roll 1D6; fighter unit shuts down on a result of 5 or 6.* |
| 14-15 | +3 Target Modifier on Control and To-Hit Rolls. Roll 1D6; fighter shuts down on a result of 4 or 5. On a result of 6, 1 fighter is destroyed (cross off one Armor line on record sheet, determined randomly) and remaining fighters in unit shut down.* |
* A "shut down" fighter unit may not fire weapons or expend Thrust Points (heat sinks continue to operate, however). The fighter unit remains shut down until its Overburn drops to 0.
Scenario 1 DropShip and JumpShip listing (page 19 side panel)
- Winter Wind, Invader class JumpShip (Veteran crew)
- Arctic Frost, Union-C class DropShip (Veteran crew)
- Blue Kodiak, Union-C class DropShip (Veteran crew)
- Ice Dart, Broadsword class DropShip (Regular crew)
Scenario 2: And in the Darkness Bind Them
Jaguar Command Center, Huntress, Kerensky Cluster, Clan Space. 2 March 3060.
Attacker
The attacker consists of all three teams of DEST assigned to Task Force Serpent. Unlike standard DCMS deployment for battle armor, each battle armor squad of the DEST is a unit consisting of five Kage battle armor troopers. Each trooper is armed with a standard small laser.
Draconis Elite Strike Teams
- Team 6
- Sho-sa Michael Ryan (2), Kage Squad A
- Kashira Raiko (2), Kage Squad B
- Team 5
- Tai-i Ju Akida (2), Kage Squad C
- Kashira Wu Takeda (2), Kage Squad D
- Team 4
- Tai-i Keji Tetsunaba (2), Kage Squad E
- Kashira Omi Blaine (2), Kage Squad F
Defender
The defender consists of four Points of Smoke Jaguar Elementals. Each Elemental Point consists of five Elementals with small lasers. Because of the risk of setting off a cave-in, none of the Elementals are equipped with SRMs.
Smoke Jaguar Command Center Elemental Star
- Star Commander Joan (3)
- Elemental Point 1
- Point Commander Jatik (4)
- Elemental Point 2
- Point Commander Suth (4)
- Elemental Point 3
- Point Commander Lynx (4)
- Elemental Point 4
Game Set-Up
Place one BattleTech mapsheet face-down as shown. Draw the walls indicated directly on the map, or use slips of construction paper or poster board to represent the walls and corridors of the Jaguar command center.
Deployment
The attacker enters the command center door during the Movement Phase of Turn 1.
The defender deploys first, using the Hidden Units rules (see Special Rules) before the beginning of the game.
Victory Conditions
The scenario ends when all of the attacking or defending units have been destroyed, or when the attackers achieve their objective. The attacker wins by destroying the command center. The defender wins by destroying all the attacking units.
The attacker wins a Decisive Victory if he destroys the equipment in hexes A, B and C and loses less than 25 percent of his force. He wins a Marginal Victory if he destroys the equipment in hexes A, B and C.
The defender can only win a Decisive Victory, and does so by destroying all the attacking units.
Special Rules
The following special rules apply during this scenario.
Smoke Jaguar Command Center
The letters A, B and C on the command center map indicate the three most vital computer consoles for the entire complex. To destroy the equipment in each hex, an attacking unit must begin its turn adjacent to the hex and spend the entire turn destroying the equipment—it may not move or make weapons attacks in that turn. During the Movement Phase of the following turn, the unit may move and attack normally.
Hidden Units
At the start of the game, the Smoke Jaguar player secretly hides his four Points of Elementals in any Clear hex on the map. He should write down the number of each hex in which a unit is hidden.
The hidden units will remain hidden until they attack or move, or until the attacking player moves a unit into their hex, attempts to move into their hex or ends his movement adjacent to their hex.
When the attacking player moves a unit into or ends a unit's movement adjacent to a hex occupied by a defending unit, the hidden unit may immediately fire a pointblank shot. The attack is resolved normally, but because they are surprised by the hidden unit, the attacking unit may not return fire until the following turn. In other words, in this situation each Point of Elementals of the defending player gets one "free" round of fire before the attacker can return fire on that unit.
Honor Level
The Smoke Jaguars need not adhere to the rules of Clan honor in this scenario (use Honor Level 4).
Variations
For those players who wish to make this battle a little more interesting, you can play using the MechWarrior rules for personal combat found on pp. 52-59 of MechWarrior, 2nd Edition and pp. 39-41 of the MechWarrior Companion.
Scenario 3: Strike at the Heart
Field of Heroes, Huntress, Kerensky Cluster, Clan Space. 12 March 3060.
Attacker
The attacker consists of elements of the Eridani Light Horse Seventy-first Light Horse Regiment, Seventeenth Recon Battalion. The Fourteenth Recon Platoon is equipped with lasers and is trained in anti-'Mech maneuvers.
Battalion Command Lance
- Major Josephine Maresso (3/2), MTR-5K Maelstrom
- Captain Chas Hook (3/3), CTS-6Y Cestus
- Lieutenant Ronald Boice (4/3), PTR-4D Penetrator
- Lieutenant Edwin Dahm (4/3), CES-3R Caesar
Command Lance, 14th Recon Company
- Captain Gladys Muller (5/3), TDR-9SE Thunderbolt
- Lieutenant Russell Andrey (4/4), NGS-4S Nightsky
- Paul Fiset (5/3), CN9-D Centurion
- Mike Kaplan (5/4), DV-7D Dervish
Strike Lance, 14th Recon Company
- Lieutenant Michael Gau (4/4), BH-305 Battle Hawk
- Paul Cukie (4/4), BJ-2 Blackjack
- Donald Dyehouse (5/4), ENF-5D Enforcer
- Helen Balles (5/4), WLF-2 Wolfhound
Recon Platoon, 14th Recon Company
- Motorized Infantry Platoon (4)
Defender
The defender consists of two Stars from the Iron Guard Galaxy's Thirty-third Assault Cluster, Trinary Battle and the Genetics Defense Elemental Star. Each Elemental Point is a unit consisting of five Elementals with machine guns.
Alpha Battle Star
- Star Captain Glenn Kotare (3/3), Rifleman IIC
- MechWarrior Arkady (3/3), Hunchback IIC
- MechWarrior Dominic (3/2), Griffin IIC
- MechWarrior Nikolai (4/3), Galahad
- MechWarrior Patrick (3/2), Jenner IIC
Bravo Battle Star
- Star Commander Claudio (3/3), HTM-27T Hatamoto-chi
- MechWarrior Marcus (4/3), DRG-5K Grand Dragon
- MechWarrior Keith (4/4), PNT-10K Panther
- MechWarrior Lori (4/3), JR7-K Jenner
- MechWarrior David (3/3), SDR-7M Spider
Genetics Defense Elemental Star
- Star Commander Jeremy (3)
- Elemental Point 1
- Point Commander Rod (4)
- Elemental Point 2
- Point Commander Barbara (4)
- Elemental Point 3
- Point Commander Gail (4)
- Elemental Point 4
- Point Commander Wayne (4)
- Elemental Point 5
Game Set-Up
Lay out the BattleTech mapsheets as shown. Use the City Street Grid/Park #2 map from BattleTech Map Set 4, and both Open Terrain maps from BattleTech Map Set 5. Treat the following hexes on the City Street Grid/Park #2 map as statues (see Statues, below): 0205, 0212, 0302, 0316, 0506, 0512, 0602, 0615, 0806, 0811, 0903, 0915, 1107, 1111, 1203, 1214, 1407, 1410, 1501, 1504, 1514, 1517. Use Building counters from CityTech, 2nd Edition or any other appropriate markers to represent the statues.
Deployment
The attackers enter from the west map edge during the Movement Phase of Turn 1.
The defenders deploy first and begin the scenario anywhere on the City Street Grid/Park #2 map, with any facing (see also Statues, below).
Victory Conditions
The scenario ends when one side has been destroyed or (in the case of the Eridani Light Horse) has withdrawn.
The SLDF player wins a Decisive Victory if all Jaguar units are destroyed with the loss of no more than 5 Light Horse units, a Substantial Victory if they lose no more than 8 units, and a Marginal Victory if at least one SLDF unit remains functional at the end of the battle.
The Clan player wins a Decisive Victory if all SLDF units are destroyed or forced to withdraw, a Substantial Victory by destroying or forcing the withdrawal of more than 8 SLDF units, and a Marginal Victory for destroying or forcing the withdrawal of more than 4 units.
Due to the fanatical nature of both the attack and the defense, this encounter cannot end in a Draw.
Victory levels for each side are calculated separately and both sides may claim victory.
Special Rules
The following special rules apply during this scenario.
Forced Withdrawal
The Forced Withdrawal rule is in effect for the Eridani Light Horse only (see Forced Withdrawal, p. 7). The Smoke Jaguars are defending the genetic legacies of their Clan and so will not withdraw for any reason. The SLDF force must withdraw from the west map edge.
Honor Level
The Smoke Jaguars must adhere to Honor Level 3 rules for this scenario (see Clan Honor, p. 5).
Statues
Rows of stone statues depicting famous Smoke Jaguar warriors and BattleMechs radiate out from the genetic repository onto the Field of Heroes. Treat statue hexes like Light Woods hexes for purposes of attack modifiers and LOS. For stacking purposes, statue hexes are treated as if already occupied by one BattleMech.
Statue hexes may be targeted with weapons fire or physical attacks by Inner Sphere forces only. They are considered immobile targets, and each statue can sustain 20 points of damage before collapsing. Hexes containing collapsed statues are considered Rubble.
Scenario 4: An Unpleasant Surprise
Shikari Jungle, Huntress, Kerensky Cluster, Clan Space. 12 March 3060.
Attacker
The attacker consists of elements of the Iron Guard Galaxy, Thirty-third Assault Cluster.
Trinary Command, Bravo Command Star
- Star Captain Dani Wimmer (2/2), Vulture
- MechWarrior Jas Furey (2/3), Black Hawk
- MechWarrior Renata (3/3), Black Hawk-A
- MechWarrior Alexi (2/3), Ryoken
- MechWarrior Darius (3/2), Koshi
Binary ProtoMech, Alpha Star
- Point 1 (3), 2 Harpies, Gorgon, 2 Minotaurs
- Point 2 (3), 2 Centaurs, Roc, 2 Gorgons
- Point 3 (2), 5 Rocs
- Point 4 (4), 2 Hydras, 2 Rocs, Gorgon
- Point 5 (3), 3 Sirens, 2 Satyrs
Defender
The defender consists of the Second Company, Second Battalion of the First Knights of the Inner Sphere.
Alpha Lance
- Captain Dame Annalise Proctor (3/2), P1B Perseus
- Lieutenant Sir Charles Murray (3/2), ALB-3U Albatross
- Sir Harry Bertram (4/2), WVR-7M Wolverine
- Dame Lydia Chachor (3/2), MON-66 Mongoose
Bravo Lance
- Lieutenant Sir Carl Ostenson (2/3), AWS-9M Awesome
- Sir John Lorek (4/2), ALB-3U Albatross
- Dame Marcie Kane (2/2), FS9-OB Firestarter
- Sir Ralph Murdock (3/2), HER-5S Hermes II
Charlie Lance
- Lieutenant Dame Donna Carr (3/2), MAD-5M Marauder
- Sir Robert Holmes (4/3), GLT-5M Guillotine
- Sir Austin Boyle (3/3), BJ2-OC Blackjack
- Sir Jarvis Muto (3/3), THE-N Thorn
Game Set-Up
Lay out the BattleTech maps as shown. Use the Heavy Forest #2 and River Delta/Drainage Basin #2 maps from BattleTech Map Set 4.
Deployment
The attacker sets up first and may begin the scenario deployed anywhere within 10 hexes of the east map edge. Any number of ProtoMechs may be set up before the game begins using the Hidden Units rules (p. 77, BMR).
The Knights of the Inner Sphere enter from the west map edge during the Movement Phase of Turn 1.
Victory Conditions
The scenario ends when one side has been destroyed or forced to withdraw, or when the last remaining SLDF 'Mech exits the east map edge. When either of these occurs, total the points for the damage done by the Smoke Jaguar force and consult the Victory Level Table.
| Action | Victory Points |
|---|---|
| Per Inner Sphere 'Mech destroyed | 10 |
| Per Inner Sphere 'Mech forced to withdraw | 6 |
Victory Level Table
| Total Points | Results |
|---|---|
| 100 or higher | Decisive Clan victory |
| 86 to 99 | Substantial Clan victory |
| 75 to 85 | Marginal Clan victory |
| 60 to 74 | Draw |
| 45 to 59 | Marginal Inner Sphere victory |
| 21 to 44 | Substantial Inner Sphere victory |
| 20 or lower | Decisive Inner Sphere victory |
Special Rules
The following special rules apply during this scenario.
Forced Withdrawal
The Forced Withdrawal rule is in effect (see Forced Withdrawal, p. 7). The SLDF force must withdraw from the west edge of the map. The Smoke Jaguars must withdraw from the east map edge.
Honor Level
The Smoke Jaguars must adhere to Honor Level 3 rules for this scenario (see Clan Honor, p. 5). Note that all ProtoMechs in a Point are considered by honor rules to be part of the same group, much like Elementals, and so all five members of the Point may fire on the same target.
Surprise
The Inner Sphere units are unaware of the existence of ProtoMechs, and so are utterly surprised when they first encounter them. To simulate this, for 4 turns following the first turn in which a ProtoMech is spotted by the SLDF troops (LOS is established) the defenders suffer a -2 penalty to their Initiative roll. In the fifth and subsequent turns they recover from their shock and fight normally.
Scenario 5: The Boggarts Unmasked
Factory complex near Pahn City, Huntress, Kerensky Cluster, Clan Space. 12 March 3060.
Attacker
The attacker consists of the Royal Black Watch Company.
Command Lance
- Captain Neil Campbell (3/2), HGN-732 Highlander
- Sergeant Geoff Dundee (3/3), BL-6-KNT Black Knight
- Sergeant James Caldwell (4/3), CRB-27 Crab
- Private Annette McHenry (4/4), CRB-27 Crab
Assault Lance
- Master Sergeant Julien Franks (2/3), WVE-5N Wyvern
- Private Kensie Gray (3/3), THG-11E Thug
- Sergeant William Jameson (4/3), BL-6-KNT Black Knight
- Sergeant Darwin Adtikson (4/3), ARC-4M Archer
Pursuit Lance
- Master Sergeant Tim McCaniheigh (3/3), CN9-D Centurion
- Sergeant Juels Martin (3/3), CRB-27 Crab
- Private Daniel Cobbs (4/3), HER-1S Hermes
- Sergeant Brian Hayes (3/3), MON-66 Mongoose
Defender
The defender consists of elements of the Watchman Galaxy, Forty-eighth Battle Cluster.
48th Battle Cluster, Trinary Battle Alpha Battle Star
- Star Colonel Cara (3/2), Ryoken B
- MechWarrior Jif (4/3), Hellhound
- MechWarrior Jon (4/4), Rifleman IIC
- MechWarrior Rill (5/4), Rifleman IIC
- MechWarrior Belna (4/3), Peregrine
Reinforcements
Binary ProtoMech, Bravo Star
- Point 1 (3), 2 Harpies, Hydra, Gorgon, Minotaur
- Point 2 (2), 3 Sirens, 2 Satyrs
- Point 3 (3), 3 Centaurs, Gorgon, Roc
- Point 4 (2), 5 Rocs
- Point 5 (3), 3 Hydras, 2 Deltas
Game Set-Up
Lay out the BattleTech maps as shown. Use both Rolling Hills maps from BattleTech Map Set 3.
Deployment
The attacker enters via the west map edge during the Movement Phase of Turn 1.
The defender enters via the east map edge during the Movement Phase of Turn 1.
Beginning on Turn 5, the defender receives reinforcements as the ProtoMechs arrive on the battlefield. At the beginning of the Movement Phase of Turn 5, the defender moves the five Points of ProtoMechs onto the mapsheet through the east map edge. For purposes of counting units to decide whether a side outnumbers the other, at the beginning of Turn 5 the ProtoMechs are considered to be a part of the defending forces and count toward the defender's unit total.
Victory Conditions
The scenario ends when either the attacker's or defender's units are destroyed or withdrawn from the map.
The attacker wins by keeping the defending units on the map long enough to destroy them. The defender wins by destroying as many attacking units as possible while withdrawing as many units as possible (see Special Rules). To determine the level of victory, calculate each side's total points and consult the Victory Table.
| Action | Victory Points |
|---|---|
| Per Clan 'Mech destroyed | 20 |
| Per ProtoMech destroyed | 3 |
| Per Inner Sphere 'Mech destroyed | -10 |
| Per Clan 'Mech withdrawn | -5 |
| Per Clan ProtoMech withdrawn | -1 |
Victory Level Table
| Total Points | Results |
|---|---|
| 145 or higher | Decisive Inner Sphere victory |
| 75 to 144 | Substantial Inner Sphere victory |
| 20 to 74 | Marginal Inner Sphere victory |
| -15 to 19 | Draw |
| -60 to -16 | Marginal Clan victory |
| -120 to -61 | Substantial Clan victory |
| -121 or less | Decisive Clan victory |
Special Rules
The following special rules apply during this scenario.
When the defending Smoke Jaguars first encounter the 'Mechs bearing the emblem of the Royal Black Watch, their fury at what they consider the highest blasphemy knows no bounds. They immediately charge relentlessly but recklessly into battle. To simulate this, for the first four turns the defender suffers a -2 modifier to his Initiative roll, but adds an additional -1 to-hit modifier when calculating all to-hit numbers. In the fifth and subsequent turns, the defender no longer receives these modifiers.
Defender Withdraw
During the battle, the defending forces begin to realize that they are being pinned down and that a flanking force is slipping past them to attack the factory complex they are supposed to defend. At the beginning of Turn 8, the defending player rolls D6. On a result of 1, he may immediately begin to withdraw his forces via the east map edge. If he does not roll a 1, the scenario continues. At the beginning of each subsequent turn, the defending player rolls D6, adding 1 to the target number from the preceding turn, until Turn 13, when he may automatically begin to withdraw his forces.
Honor Level
The Smoke Jaguars, considering the Inner Sphere troops arrayed against them to be dezgra, use Honor Level 4 for this scenario.
Surprise
The Inner Sphere units have never seen ProtoMechs before, and are utterly surprised when they first encounter them. To simulate this, the four turns following the first turn in which a ProtoMech is spotted by the SLDF troops (LOS is established), the attackers suffer a -2 penalty to their Initiative roll. In the fifth and subsequent turns, they no longer suffer this penalty.
Scenario 6: After the Smoke Clears
Lootera Plains, Huntress, Kerensky Cluster, Clan Space. 26 March 3060.
Attacker
The attacking force consists of elements from Alpha Cluster, Trinary Striker and Trinary Elemental of the Smoke Jaguars' Provisional Galaxy. Each Elemental Point is a unit consisting of five Elementals with small lasers, except where otherwise noted.
Alpha Striker Star
- Star Captain Aldo Wirth (2/2), Masakari A
- MechWarrior Gina (4/4), Vulture Prime
- MechWarrior Stanislaw (4/3), Ryoken B
- MechWarrior Karel (3/3), Vulture B
- MechWarrior Arden (2/3), Man O' War A
Bravo Striker Star
- Star Commander Corley Kotare (3/2), Shadow Cat Prime
- MechWarrior Jerome (1/4), Puma Prime
- MechWarrior Michael (4/3), Hankyu C
- MechWarrior Kyung (4/3), Fenris Prime
- MechWarrior Marc (2/4), Koshi Prime
Charlie Striker Star
- Star Commander Perry Wimmer (2/2), Cauldron-Born A
- MechWarrior Cordin (3/3), Ryoken Prime
- MechWarrior Dale (3/4), Vulture C
- MechWarrior Paulus (3/2), Ryoken D
- MechWarrior Jac (2/3), Black Hawk B
Alpha Star
- Star Commander Emil Perez (3)
- Elemental Point 1
- Point Commander Saul (4)
- Elemental Point 2
- Point Commander Haeger (4)
- Elemental Point 3
- Point Commander Rand (4)
- Elemental Point 4 (Machine Guns)
- Point Commander Wayne (4)
- Elemental Point 5 (Machine Guns)
Bravo Star
- Star Commander Oleg Nevversan (4)
- Elemental Point 6
- Point Commander Joseph (4)
- Elemental Point 7
- Point Commander Smitty (4)
- Elemental Point 8 (Flamers)
- Point Commander Karl (4)
- Elemental Point 9 (Flamers)
Charlie Star
- Star Commander Brenda (4)
- Elemental Point 10
- Point Commander Steven (4)
- Elemental Point 11
- Point Commander Marty (4)
- Elemental Point 12
- Point Commander Seth (4)
- Elemental Point 13
Defender
The defenders consist of two companies of the Eridani Light Horse Twenty-first Striker Regiment, Seventh Striker Battalion.
11th Company, Red Seven Lance
- Major Frank Bleeker (3/3), AWS-9M Awesome
- Lieutenant Marianne Winsor (5/4), FLC-8R Falconer
- Deidre Sain (4/3), TDR-9SE Thunderbolt
- John Oerter (4/3), HBK-5M Hunchback
11th Company, Blue Seven Lance
- Lieutenant Porter Cormany (4/3), CN9-D Centurion
- Joe Weems (4/3), HCT-5S Hatchetman
- Alan Avery (5/4), SCP-10 Scorpion
- Bernard Mallins (4/4), BZK-F3 Hollander
11th Company, Gold Seven Lance
- Lieutenant Emma Snyder (5/3), JR7-K Jenner
- Paul Jonic (4/4), BH-305 Battle Hawk
- Dani Zehr (5/4), SCB-9A Scarabus
- Andrew Gailey (4/3), NTK-2Q Night Hawk
12th Company, Silver Lance
- Captain Mary Saint-John (2/3), DGR-3F Dragon Fire
- Lieutenant Teresa Panico (4/4), MR-V2 Cerberus
- Alexander Jordan (4/3), ON1-M Orion
- John Germaine (5/4), HRC-LS-9000 Hercules
12th Company, Black Lance
- Lieutenant Richard Aicher (3/3), PPR-5S Salamander
- Jas Eilert (4/4), MDG-1A Rakshasa
- Alexander Kokic (4/3), LGB-7V Longbow
- Frank McAuley (3/4), TBT-7M Trebuchet
12th Company, Purple Lance
- Lieutenant Manuel Tagadar (4/4), PLG-3Z Pillager
- John Hides (5/3), MAD-5D Marauder
- Teri Mazza (5/4), HGN-732 Highlander
- Arthur Black (4/4), STK-5M Stalker
Game Set-Up
Lay out the BattleTech mapsheets as shown. Use both Open Terrain maps from BattleTech Map Set 5, the Rolling Hills #2 map from BattleTech Map Set 3, the Desert Hills and Scattered Woods maps from BattleTech Map Set 2 and the BattleTech map from BattleTech Map Set 2 or the BattleTech boxed set. Treat all Water hexes as Clear.
Deployment
The attackers enter the map from the north map edge during the Movement Phase of Turn 1.
The defending player sets up first. He may deploy his forces anywhere on the Desert Hills and Rolling Hills #2 maps.
Victory Conditions
The battle continues until one side is destroyed.
The SLDF player wins a Decisive victory if he cripples or destroys all Jaguar 'Mechs and Elemental Points with the loss of no more than twelve SLDF units, a Substantial victory if they lose no more than sixteen units, and a Marginal victory if at least one SLDF 'Mech remains functional at the end of the battle.
The Clan player wins a Decisive victory if he cripples or destroys all SLDF 'Mechs with the loss of no more than ten 'Mechs and/or Elementals, and a Marginal victory if at least one Clan unit remains functional at the end of the battle. The Clan player cannot earn a Substantial victory.
Special Rules
The following special rules apply during this scenario.
Random Damage
The Smoke Jaguar forces were bombarded with artillery just prior to this battle. To reflect this, apply 10 points of damage in 5-point groups to each Clan 'Mech using the Front/Back column of the BattleMech Hit Location Table, applying damage to the front. Apply critical hits resulting from this damage as normal, except for the following: third engine hit, second gyro hit, cockpit hit, second hip hit, any result that indicates the destruction of a leg or head, ammunition hit and any result that indicates the destruction of the center torso. All Elementals begin the game with each member of the Point having taken 3 points of damage.
Honor Levels
Infuriated by the Inner Sphere's use of artillery, the Smoke Jaguar forces do not obey Clan honor rules for this scenario (Honor Level 4). They may make physical attacks, and need not follow the dueling rules.
Elemental Transport
The Elementals entered the battle mounted on OmniMechs, then dropped off for combat. To represent this, the Elemental points of Alpha, Bravo, and Charlie Elemental Stars begin the game mounted on the OmniMechs of Alpha, Bravo and Charlie Supernova Stars, respectively, per the Mechanized Battle Armor rules (p. 59, BMR).
Special Abilities
Driven berserk by the SLDF's use of "barbarian" tactics, all Smoke Jaguar 'Mechs gain a -2 bonus to the to-hit number of any physical attack. Because of the chaos caused among the Jaguars by the artillery-launched smoke rounds, the SLDF forces add +1 to their Initiative rolls for the first 8 turns of the game, after which the Jaguars return order to their ranks.
Scenario 7: Taming the Lions
Dhuan Mountains, Huntress, Kerensky Cluster, Clan Space. 26 March 3060.
Attacker
The attacking force is the Shroud Keshik's Charlie Command Star and one Point of Delta Command Star. The Elemental Point consists of five Elementals armed with small lasers.
Charlie Command Star
- Star Commander Dahl Hildenrath (2/1), Daishi B
- MechWarrior Ronald Montizima (2/2), Man O' War A
- MechWarrior Steven Showers (3/2), Mad Cat Prime
- MechWarrior David Osis (2/2), Cauldron-Born A
- MechWarrior Jason Kotare (1/3), Night Gyr B (the source prints "MechWarror"; corrected here)
Delta Command Star Detachment
- Point Commander Reuel Perez (2)
- Elemental Point
Defender
The defender consists of elements of the First Kathil Uhlans, First Battalion, Third Company.
Bravo Lance
- Leftenant Peter Kocol (4/3), CES-3R Caesar
- Sergeant Dan Sheldon (3/3), STK-5S Stalker
- Kelly Wickman (4/4), VTR-9K Victor
- Melvyn Both (5/4), WR-DG-02FC War Dog
Charlie Lance
- Leftenant Hugh Muncy (4/4), MDG-1A Rakshasa
- Madeleine Geiger (2/3), CN9-D Centurion
- Glen Culley (5/4), BJ2-OC Blackjack
- Gerald Frake (5/4), BSW-X1 Bushwacker
Game Set-Up
Lay out the BattleTech maps as shown. Use the BattleTech map from BattleTech Map Set 2 or the BattleTech boxed set, and the Scattered Woods map from BattleTech Map Set 2.
Deployment
The attacker enters from the south mapsheet edge during the Movement Phase of Turn 1.
The defender deploys first and begins the scenario within 10 hexes of the southern map edge, facing that edge.
Victory Conditions
The scenario ends when one side has been destroyed, withdrawn or otherwise left the map. As soon as one of these conditions is fulfilled, calculate each side's point total and consult the Victory Level Table.
- +20 points per Inner Sphere 'Mech destroyed
- -15 points per each Clan 'Mech destroyed
- -10 points per each Clan 'Mech forced to withdraw
- -5 points per Elemental Point destroyed
- -1 point per Elemental Point forced to withdraw
- -15 points per Inner Sphere 'Mech exiting the north map edge
Victory Level Table
| Total Points | Results |
|---|---|
| 100 or higher | Decisive Clan victory |
| 46 to 99 | Substantial Clan victory |
| 11 to 45 | Marginal Clan victory |
| -5 to 10 | Draw |
| -49 to -6 | Marginal Inner Sphere victory |
| -99 to -50 | Substantial Inner Sphere victory |
| -100 or lower | Decisive Inner Sphere victory |
Special Rules
The following special rules apply during this scenario.
Forced Withdrawal
The Forced Withdrawal rule is in effect (see Forced Withdrawal, p. 7). The Uhlans must withdraw from the north edge of the map. The Smoke Jaguars must withdraw from the south map edge.
Honor Level
The Smoke Jaguar units are not bound by Clan honor rules because of Inner Sphere actions earlier in the battle (Honor Level 4 Dueling and Retreat). The Smoke Jaguar 'Mechs still may not make physical attacks (Honor Level 2 Physical Attacks).
Ammunition Expenditure
The Inner Sphere units have had little time to re-arm since their earlier battles. To simulate this ammunition shortage, roll 1D6 for every ammunition slot in each Inner Sphere 'Mech when filling out the BattleMech record sheets. Subtract the result from the number of rounds normally carried in that slot to determine the number of rounds available during this scenario. For example, if the Inner Sphere player achieves a result of 5 for an LB-10X autocannon ammo slot (normal ammo capacity per slot 10), the LB-10X slot has 5 rounds (10 - 5 = 5) rather than 10. Single-shot (OS) weapons are not affected by this rule.
The Clan 'Mechs begin the scenario with a full ammo load.
Random Damage
To reflect damage sustained in Clan Smoke Jaguar's constant attacks, the Inner Sphere units in this scenario begin with pre-existing damage. Roll 2D6 for each Inner Sphere unit. Divide each result into 5-point groups and apply the points as damage using the Front/Back column of the BattleMech Hit Location Table (p. 33, BMR). All damage is applied to the Front. Apply any critical hits that result from this damage, except for the following: third engine hit, second gyro hit, ammunition explosion, cockpit hit, second hip hit, any result that indicates the destruction of a leg or head and any result that indicates the destruction of the center torso or side torso for 'Mechs equipped with XL engines.
The Clan forces begin the scenario undamaged.
Scenario 8: Ground of Contention
Lootera, Huntress, Kerensky Cluster, Clan Space. 27 March 3060.
Attacker
The attacker consists of elements of the Smoke Jaguar Provisional Galaxy, Charlie Cluster, Trinary Battle.
Alpha Battle Star
- Star Captain Jas Wimmer (3/3), Ryoken Prime*
- MechWarrior Devon (4/3), Vulture Prime*
- MechWarrior Erin (5/3), Ryoken A*
- MechWarrior Coleman (4/3), Fenris D*
- MechWarrior Troy (4/4), Mad Cat A*
Bravo Battle Star
- Star Captain Cleary (4/4), Hellhound
- MechWarrior Wu (4/3), Griffin IIC
- MechWarrior Barret (5/3), Shadow Hawk IIC
- MechWarrior Leon (5/4), Jenner IIC
- MechWarrior Thomas (4/4), Hunchback IIC
Defender
The defenders consist of elements of the Com Guard Second Division, Living Word III-Delta. All vehicles are the upgraded versions found in Technical Readout: 3058.
Orderly Ranks II-Alpha
- Adept Epsilon-XII Raymond Jonser (4/3), AV1-0A Avatar
- Adept Epsilon-IV Brian O'Hara (4/4), KGC-001 King Crab
- Adept Epsilon-IV Agnes Skinner (4/4), BL-9-KNT Black Knight*
- Adept Epsilon-III David Zardzin (4/3), FLS-8K Flashman
- Adept Epsilon-III Chloe Barret (5/4), EXC-C1 Excalibur
- Adept Epsilon-VI David Hughs (4/4), RJN101-A Raijin*
Sword of Justice II-Delta
- Adept Epsilon-IX Mimi Ozaki (4/3), BL-6-KNT Black Knight*
- Adept Epsilon-III Mark Renn (5/4), CRK-5003-1 Crockett
- Acolyte Epsilon-VI Barry Binder (5/4), ST-8A Shootist*
- Acolyte Epsilon-II James Fields (5/4), GRM-R-PR29 Grim Reaper
- Ontos Heavy Tank* (4/3), Refit
- SRM Carrier* (3/2), Refit
* Searchlight-equipped unit. See Night Combat (p. 81, BMR).
Game Set-Up
Lay out the BattleTech maps as shown. Use the CityTech map from the CityTech boxed set or BattleTech Map Set 2, and the City Street Grid/Park #2 map from BattleTech Map Set 4.
The defending player should place the following buildings in any hexes desired on the City Street Grid/Park #2 map: four Level 1 Heavy, four Level 2 Heavy, two Level 1 Hardened, two Level 2 Hardened, six Level 2 Medium, two Level 4 Medium.
Deployment
The attackers enter from the west map edge during the Movement Phase of Turn 1.
The defenders deploy first and begin the scenario anywhere on the City Street Grid/Park #2 map. Each member of each Com Guard unit must be within 3 hexes of at least one other member of that Level II unit. For example, each member of the Orderly Ranks must be within 3 hexes of at least one other member of the Orderly Ranks unit.
Victory Conditions
The end of the battle is determined by the special rule Turn Limit, below. When the battle ends, calculate the total points for each side and consult the Victory Level Table.
| Action | Victory Points |
|---|---|
| Per Com Guard 'Mech destroyed | +15 |
| Per Com Guard vehicle destroyed | +8 |
| Per Com Guard 'Mech crippled/forced to withdraw | +8 |
| Per Com Guard vehicle crippled/forced to withdraw | +4 |
| Per Smoke Jaguar 'Mech destroyed | -20 |
| Per Smoke Jaguar 'Mech crippled/forced to withdraw | -12 |
Victory Level Table
| Total Points | Results |
|---|---|
| 100 or higher | Decisive Clan victory |
| 70 to 99 | Substantial Clan victory |
| 45 to 69 | Marginal Clan victory |
| 44 to 10 | Draw |
| -30 to 9 | Marginal Inner Sphere victory |
| -60 to -31 | Substantial Inner Sphere victory |
| -61 or lower | Decisive Inner Sphere victory |
Special Rules
The following special rules apply during this scenario.
BattleTech Special Case Rules
Night-combat rules (p. 81, BMR) are in effect throughout this scenario.
Forced Withdrawal
The Forced Withdrawal rule is in effect (see Forced Withdrawal, p. 7). The Com Guard must withdraw from the east edge of the map. The Smoke Jaguars must withdraw from the west map edge.
Honor Level
The Smoke Jaguars must adhere to Honor Level 3 rules for this scenario (see Clan Honor, p. 5). Targeting a searchlight on a unit is considered declaring an attack on that unit for the purposes of dueling.
Turn Limit
Because the Eridani Light Horse 151st Regiment is en route to reinforce the Com Guard, the Smoke Jaguars have a limited amount of time to accomplish their objective. To reflect this, the scenario will end when all units on one side are destroyed or crippled, or when Turn 15 ends, whichever comes first.
Scenario 9: The Final Stand
Jaguar's Fangs, Huntress, Kerensky Cluster, Clan Space. 30 March 3060.
Attacker
The attacker consists of elements of the Jaguar's Den and the forces that fled from the Smoke Jaguar Occupation Zone in the Inner Sphere.
- Star Captain Devlin (3/2), Thor Prime
- MechWarrior Fitz (3/3), Nobori-nin A
- Star Commander Joha (3/2), Masakari A
- MechWarrior Mel (3/3), Daishi Prime
Defender
The defender consists of elements of the Eridani Light Horse, the Com Guard and St. Ives Lancers.
Eridani Light Horse
- General Ariana Winston (3/3), CP-11-C Cyclops
- Lieutenant James Finch (4/3), HRC-LS-9000 Hercules
- Captain Julie Marshal (4/4), STK-5M Stalker
- Lieutenant Geoff Smith (3/3), GHR-5J Grasshopper
Com Guards
- Adept Epsilon-VI Sharon Till (3/2), RJN101-A Raijin
- Adept Epsilon-X Timothy Niles (3/3), CRK-5003-1 Crockett
2nd St. Ives Lancers
- Captain Justin Chung (3/3), VTR-9K Victor
Game Set-Up
Lay out the BattleTech mapsheet as shown. Use the Deep Canyon #2 map from BattleTech Map Set 5.
Deployment
The attacker enters via the north map edge during the Movement Phase of Turn 1.
The defender sets up first, anywhere on the map.
Victory Conditions
The scenario ends when one side has been destroyed.
The defender wins a Decisive victory if he has destroyed the attacking forces and General Ariana Winston's 'Mech is still operational. He wins a Marginal victory if he destroys the attacking forces.
The attacker wins a Decisive victory if he destroys all the defending units. He wins a Marginal victory if he destroys the Cyclops of General Ariana Winston.
Special Rules
The following special rules apply during this scenario.
Forced Withdrawal
The Smoke Jaguars are in a frenzy of blood lust and the Task Force Serpent units can no longer retreat. Both sides will fight until they are completely destroyed.
Random Damage
To reflect damage sustained in earlier engagements, all units in this scenario begin with pre-existing damage. Roll 1D6 + 3 for each defending unit and 2D6 - 1 for each attacking unit. The dice roll represents the number of 5-point groups of damage taken by each unit during previous battles. Apply the damage as a series of 5-point attacks using the Front column of the BattleMech Hit Location Table. Apply any critical hits that result from this damage, except for the following: third engine hit, second gyro hit, cockpit hit, second hip hit, any result that indicates the destruction of a leg or head and any result that indicates the destruction of the center torso (or side torso for Inner Sphere 'Mechs equipped with extralight engines).
Ammunition Expenditure
Neither the attacking or defending units in this scenario have had time to rearm since their previous battle. To simulate this ammunition shortage, all units are carrying only half the usual load of ammo. Divide the number of shots held in each ammunition critical slot by 2, rounding down.
Honor Rules
The Smoke Jaguars have completely done away with Clan honor by this point in the campaign and are operating at Honor Level 4.
Scenario 10: The Great Refusal
Strana Mechty, Kerensky Cluster, Clan Space. 23 April 3060.
Attacker
The attackers consist of elements of units drawn from nations and independent groups across the entire Inner Sphere. Each pair of units is representative of the full company that took part in each battle.
Battle 1
Federated Commonwealth
- Archon-Prince Victor Steiner-Davion (4/2), Daishi A
- Danai Centrella (4/3), FLC-8R Falconer
Battle 2
St. Ives Compact
- Duke Kai Allard-Liao (0/0), Ryoken B
- Colonel Adele Tsang (3/3), PLG-3Z Pillager
Battle 3
Draconis Combine
- Tai-sa Hohiro Kurita (3/2), Daishi Prime
- Chu-sa Takasuima Nerii (3/2), NDA-1K No-Dachi
Battle 4
ComStar
- Precentor VII Harris Harvison (3/2), BL-6-KNT Black Knight
- Demi-Precentor Julius Havanna (4/2), ST-8A Shootist
Battle 5
Free Worlds League
- Colonel Dana Briggs (3/2), P1B Perseus
- Force Commander Nisa Geller (4/2), MR-5M Cerberus
Battle 6
Capellan Confederation
- Colonel Andre Elias (3/2), EMP-6A Emperor
- Major Chu Duk-Lo (3/3), THR-1L Thunder
Battle 7
Free Rasalhague Republic
- Överste Joan Dahlstrom (3/3), SPT-N2 Spartan
- Överste-Löjtnant Stephan Igursson (3/3), FLS-8K Flashman
Battle 8
Clan Nova Cat
- Khan Severen Leroux (3/2), Scytha A
- saKhan Lucien Carns (2/2), Shadow Cat Prime
Defender
The defender consists of elements from the eight Crusader Clans. Each pair of units is representative of the full Binary that took part in each battle.
Battle 1
Clan Smoke Jaguar
- IlKhan Lincoln Osis (2), Elemental Point w/Small Lasers
- Star Colonel Kit Furey (2/1), Masakari C
Battle 2
Clan Wolf
- Khan Vladimir Ward (2/1), Mad Cat Prime
- saKhan Marialle Radick (3/2), Man O' War A
Battle 3
Clan Blood Spirit
- Khan Karianna Schmitt (1/0), Blood Kite
- saKhan Troy Boques (2/1), Battle Cobra B
Battle 4
Clan Jade Falcon
- Khan Marthe Pryde (2/2), Thor Prime
- saKhan Samantha Clees (2/2), Black Hawk Prime
Battle 5
Clan Star Adder
- Khan Cassius N'Buta (3/2), Kingfisher D
- saKhan Tabitha Paik (2/1), Cauldron-Born Prime
Battle 6
Clan Fire Mandrill
- Khan Amanda Carrol (2/2), Masakari A
- saKhan Garret Sainze (3/2), Man O' War C
Battle 7
Clan Hell's Horses
- Khan Malavai Fletcher (2), Gnome Battle Armor Point
- saKhan Tanya Delaurel (3/2), Man O' War C
Battle 8
Clan Ice Hellion
- Khan Asa Taney (2/2), Visigoth Prime
- saKhan Sellen Cage (3/2), Linebacker Prime
Game Set-Up
Each of the eight battles will use a separate BattleTech map.
- Battle 1, Desert Mountain #2 map from BattleTech Map Set 3.
- Battle 2, Open Terrain #1 map from BattleTech Map Set 5.
- Battle 3, Deep Canyon #2 map from BattleTech Map Set 5.
- Battle 4, Mountain Lake map from BattleTech Map Set 2.
- Battle 5, River Delta/Drainage Basin #2 map from BattleTech Map Set 4.
- Battle 6, Rolling Hills #1 map from BattleTech Map Set 3.
- Battle 7, Desert Hills map from BattleTech Map Set 2.
- Battle 8, standard BattleTech map (from the BattleTech box set or BattleTech Map Set 2).
Deployment
For each battle, the attacker enters via any map edge during the Movement Phase of Turn 1.
For each battle, the defender deploys first, placing his units anywhere on the map before the beginning of the game.
Victory Conditions
Each battle is over when one side has been destroyed. The side with a functioning unit left on the map when the battle has ended is the winner. If both sides are destroyed simultaneously, the battle is considered a draw. Once all eight battles have been fought, tally up the number of wins and losses to determine whether the Inner Sphere or the Clans have won the Great Refusal. In the event of a tie, the winning side is the one that scored more total kills.
Special Rules
Each of the eight battles of this scenario are fought separately. Because the order in which they are fought is irrelevant, players may simply choose one of the battles or roll randomly to determine which battle they will play first. Once a battle has been chosen, lay out the appropriate map and begin play.
Battle Armor
When deploying the defending forces, the Point of Elementals of the Smoke Jaguars and the Hell's Horses Point in Gnome armor may be placed either in a separate hex or riding the appropriate OmniMech.
Honor Level
Both sides acknowledge the grave importance of this Trial. The Clan side must abide by Honor Level 2, and it is in the Inner Sphere side's best interest to not break the rules of honor. Not only does a melee situation reduce their chances of winning, but the Grand Council is less likely to honor the result if the battles are not fought according to Clan traditions.
Battle 4
During the battle, saKhan Clees' Black Hawk suffered malfunctions in the right arm. To simulate this in the game, all attacks made with weapons in the Black Hawk's right arm suffer an additional +2 to-hit modifier.
Battle 8 Aerospace
Players may use either AeroBattle from BattleSpace or the out-of-print AeroTech to resolve the aerospace portion of Battle 8. If using the AeroBattle rules from BattleSpace, both aerospace fighters begin the game at Level 3 with a Velocity of 5 (see p. 83, BattleSpace). In AeroTech, the fighters begin play on the Low Altitude Map. In either case, play the BattleTech portion separately, and use the results of the air and ground battles to determine the overall winner. If one side won both the ground and air battles, that side won Battle 8. If the victories were split, the battle is a draw.
Campaign: Huntress
This section and the following two sections (Conquest of Huntress and the BattleForce Roster Lists) form a massive campaign that uses all aspects of the BattleForce 2 (BF2) game system, recreating the entire invasion from the moment the first WarShips and JumpShips of Task Force Serpent arrive in-system until the last shots ring out.
This section provides an overview and includes rules for expanding the planetary assault scenario, Conquest of Huntress, into a full-blown campaign. This section also offers rules for playing any battle in the campaign as a single encounter.
The Conquest of Huntress scenario (p. 43) recreates the invasion of Huntress as a large-scale planetary assault game. Use the Planetary Assault Map: Huntress 3060 (page 64) as a guide to create the required map on the back of your standard planetary assault maps.
The BattleForce Roster Lists (p. 46) provide players with the ability to take the invasion of Huntress to a new level, by providing a comprehensive BF2 list of every unit that fought on both the Inner Sphere and the Smoke Jaguar sides. This allows players to play out each engagement of units in the Conquest of Huntress scenario as BattleForce engagements. See p. 104 of the BattleForce 2 rulebook for rules on how to integrate the planetary assault and BattleForce 2 games. The Selecting Mapsheets section provides players with easy map generation tables for every BattleForce engagement.
Selecting Mapsheets
Once battle is engaged in the planetary assault scenario and players want to then move their game to a standard set of BattleTech maps to engage in standard BattleForce 2 game play, determine the terrain for the battle by selecting mapsheets.
Before selecting mapsheets, determine how many mapsheets you want to use. For most BattleForce 2 play, one mapsheet for every five total units works best. For example, a scenario that pits one company of attackers against one company of defenders (six units total) will work best with two mapsheets. A scenario that pits one battalion of attackers against a battalion of defenders (twenty total units) will work best with four mapsheets.
The overall terrain found in the planetary assault hex in which the battle is taking place will have an impact on which maps you use for the BattleForce battle. Consult the Terrain Conversion Table to determine which table to use when selecting maps. To generate the specific mapsheets used, follow the Selecting Mapsheets rules in BattleTech Master Rules, pp. 100-102.
Individual BattleForce Engagements
Players may not wish to play out the entire campaign for Huntress using the integrated system of the Planetary Assault and BattleForce 2 games. This section provides a list of most of the individual engagements that occurred on Huntress. Players can choose from the list to play a single BattleForce 2 game from within the conflict. The list shows the units that fought in each engagement. The exact composition of those units appears in the BattleForce Roster Lists, starting on page 46.
Unlike most military engagements, where forces fight until a specific goal is reached, all of the combat that occurred on Huntress was to the last man. This equates to the Stand-up Fight scenario (see p. 52 of the BattleForce 2 rulebook). However, players may instead choose to roll randomly on the Scenario Type Table (p. 52, BF2) to help add diversity to their game, or they may simply choose a scenario type.
The majority of the battles fought on Huntress were large-scale conflicts that pitted whole regiments and Galaxies against one another. In addition, several times in the battle for Huntress, the sides were weighted heavily in one direction or the other. Players should feel free to modify the size of any engagement or balance the forces on each side using the Point System on page 62 of the BattleForce 2 rulebook.
Finally, use the appropriate Terrain Tables to randomly generate maps.
Terrain Conversion Table
| Planetary Assault Hex | Specific Map Table |
|---|---|
| Plains | Table 2: Hill Terrain |
| Woods | Table 6: Wooded Terrain |
| Mountains | Table 3: Mountain Terrain |
| Water* | Table 5: Wetlands Terrain |
| Desert | Table 4: Badlands Terrain |
| Arctic | Table 1: Flatlands Terrain |
* This does not apply to Ocean hexes.
MechWarrior Training Facility
- Inner Sphere: Eridani Light Horse (151st Light Horse Regiment, 21st Striker Regiment)
- Clan: Iron Guard Galaxy (Galaxy Command Trinary, 12th Solahma Cluster); The Watchmen Galaxy (44th Solahma Cluster, Trinary Fighter)
- Terrain Table: Table 2: Hill Terrain
Smoke Jaguar Genetic Repository
- Inner Sphere: Eridani Light Horse (71st Light Horse Regiment)
- Clan: The Watchmen Galaxy (Galaxy Command Trinary, 44th Solahma Cluster)
- Terrain Table: Table 2: Hill Terrain
New Andery Training Base
- Inner Sphere: 1st Knights of the Inner Sphere; Kingston's Legionnaires
- Clan: Iron Guard Galaxy (33rd Assault Cluster)
- Terrain Table: Table 6: Wooded Terrain
Pahn City Factory Complex
- Inner Sphere: McLeod's Regiment, Northwind Highlanders
- Clan: The Watchmen Galaxy (48th Battle Cluster)
- Terrain Table: Table 2: Hill Terrain
Bagera Training Facility
- Inner Sphere: 11th Lyran Guards
- Clan: Iron Guard Galaxy (77th Solahma)
- Terrain Table: Table 6: Wooded Terrain
Lootera Plains
- Inner Sphere: Eridani Light Horse (All 3 Regiments); 2nd St. Ives Lancers; Com Guard 2nd Division
- Clan: Smoke Jaguar Provisional Galaxy
- Terrain Table: Table 1: Flatlands Terrain
Dhuan Swamp
- Inner Sphere: 1st Kathil Uhlans; 1st Knights of the Inner Sphere; McLeod's Regiment, Northwind Highlanders
- Clan: Shroud Keshik Command Trinary; The Jaguar's Heart; The Jaguar's Den
- Terrain Table: Table 4: Badlands
Conquest of Huntress
Huntress Planetary System, Kerensky Cluster, Clan Space. 5 March 3060.
The following planetary assault scenario recreates the conquest of Huntress by Task Force Serpent, the titanic struggle by Inner Sphere forces to annihilate Clan Smoke Jaguar and conquer their home planet.
Game Set-Up
Place both planetary assault mapsheets face down, as shown. Draw the planet of Huntress directly on the maps (see p. 64 for the Planetary Assault Map). The planet Huntress itself is located in Hex 0803 of the System Diagram.
The scenario begins on 5 March. This planetary assault scenario is played on the larger scale (see page 94, BF2). Treat Huntress as a Major World for purposes of determining control of hexes.
This scenario does not use bases; instead, base counters represent cities, while city counters represent fortresses. Two training facilities are represented by Objective counters.
Place cities and fortresses as follows. Use Base counters to represent the following cities: Lootera, Hex G23; New Andery, Hex K20.
Use City counters to represent the following fortresses: Mount Szabo (Veteran), Hex G22; Bagera (Veteran), Hex H23; Pahn City (Veteran), Hex J19; Myer (Regular), Hex I18.
Use Objective counters to represent the following bases: New Andery Training Facility, Hex L20; Abysmal Training Facility, Hex J08.
Deployment
The Smoke Jaguar player deploys first.
The Iron Guard Galaxy is deployed as follows: Thirty-third Assault Cluster within one hex of New Andery (Hex K20), Twelfth Solahma Cluster within one hex of Lootera (Hex G23), and Seventy-seventh Solahma Cluster within one hex of Bagera (Hex H23).
The Watchmen Galaxy is deployed as follows: Forty-eighth Battle Cluster within one hex of Pahn City (Hex J19), Sixty-third Solahma Cluster within one hex of Myer (Hex I18), Forty-fourth Solahma Cluster within one hex of Mount Szabo (G22), and Trinary Fighter in Lootera (Hex G23).
The Huntress Security Fleet is deployed in Huntress's orbit, in any desired Orbit Zone.
The Task Force Serpent player deploys second. The Task Force Serpent fleet has already arrived at the Zenith jump point at the beginning of Turn 1. The Task Force Serpent player should assign units to DropShips before beginning the game.
Victory Conditions
The scenario can be won by either the attacker or defender at any point after the fourth turn following the turn in which an attacking unit lands on Huntress. If one side controls all objective settlements in the End Phase of a turn, that side wins. The Objective settlements consist of every city and fortress, plus the Abysmal Training Facility in Hex J08. The scenario automatically ends after the End Phase of the tenth turn following the turn in which an attacking unit lands on Huntress. To determine the winner and level of victory, consult the Victory Table.
Victory Table
| Action | Result |
|---|---|
| Smoke Jaguar forces are eliminated within 4 turns after the first attacking unit lands on Huntress | Decisive Task Force Serpent victory |
| All Objective settlements seized by Turn 4 | Substantial Task Force Serpent victory |
| All Objective settlements seized by Turn 7 | Marginal Task Force Serpent victory |
| All Objective settlements seized by Turn 10 | Draw |
| At least 1 Objective settlement remains under Smoke Jaguar control in Turn 10 | Marginal Smoke Jaguar victory |
| At least 3 Objective settlements remain under Smoke Jaguar control in Turn 10 | Substantial Smoke Jaguar victory |
| More than 5 Objective settlements remain under Smoke Jaguar control in Turn 10 or all Task Force Serpent forces eliminated | Decisive Smoke Jaguar victory |
Special Rules
The following special rules apply to this scenario.
Orbital Bombardment
Task Force Serpent held firmly to its determination that arbitrary orbital bombardment not be used against the Jaguars. They did use their WarShips to make several support strikes, but these were directed by ground-based observers. To simulate this, the attackers may not use orbital bombardment until at least one attacking ground unit has landed on the planet. Furthermore, the target of any orbital bombardment must be in a hex with an attacking unit, or in a hex adjacent to an attacking unit.
Defenders of Huntress
The Jaguars are defending their homeworld, so they may not attack any of their own settlements. Further, they were not anticipating an attack, and so they are low on supplies. To simulate this, the defenders may generate no more than one supply convoy per turn, even if they are in possession of a City.
Smoke Jaguar Reinforcements
The Smoke Jaguar reinforcements arrive via JumpShip in the End Phase of the turn in which an attacking unit lands on Huntress. The Provisional Galaxy arrives at the Zenith point, while the rest of the reinforcements arrive in Hex 0703 on the Planetary System Map. The Smoke Jaguar player should assign units to DropShips before they arrive.
Use the following counters to represent the DropShips of the Smoke Jaguar reinforcements. For large transports (Lg Trans), use the naval transport (NT) counters.
Khan's Reinforcements
- Space Craft Group (Medium WarShip/Elite) WM3
- DropShip Group (Lg Trans/Elite) NT4
- Khan's Cluster: Assault 'Mech Lg Nova Cluster (C1/Elite) MA4
- Fighter Cluster: Heavy Fighter Trinary (C1/Elite) FH3
Provisional Galaxy
- Space Craft Group (Medium WarShips/Veteran) WM4
- DropShip Fleet (Lg Trans/Veteran) NT5
- DropShip Fleet (Assault/Veteran) DA2
- Alpha Cluster: Heavy 'Mech Sm Nova Cluster (C1/Elite) MH13
- Bravo Cluster: Heavy 'Mech Lg Cluster (C2/Veteran) MH14
- Charlie Cluster: Heavy 'Mech Sm Nova Cluster (C1/Veteran) MH15
- Delta Cluster: Heavy 'Mech Lg Cluster (C2/Veteran) MH16
- Echo Cluster: Heavy 'Mech Lg Nova Cluster (C1/Veteran) MH17
- Fighter Trinary: Heavy Fighter Trinary (C1/Elite) FH4
- Fighter Binary: Light Fighter Trinary (C1/Veteran) FL3
Forces
Defender: Smoke Jaguar Huntress Garrison
The defenders are the Smoke Jaguars' Huntress garrison, comprising The Iron Guard and The Watchmen Galaxies, as well as various ad hoc units.
The Iron Guard Galaxy
- 33rd Assault Cluster: Heavy 'Mech Sm Nova Cluster (C1/Veteran) MH10
- 12th Solahma Cluster: Heavy 'Mech Lg Cluster (IU/Veteran) MH11
- 77th Solahma Cluster: Medium 'Mech Lg Cluster (IU/Regular) MM14
The Watchmen Galaxy
- 48th Battle Cluster: Heavy 'Mech Sm Nova Cluster (C1/Veteran) MH12
- 63rd Solahma Cluster: Light 'Mech Lg Cluster (IU/Regular) ML10
- 44th Solahma Cluster: Medium 'Mech Lg Cluster (C2/Regular) MM16
- Trinary Fighter: Heavy Fighter Trinary (IU/Veteran) FM4
Huntress Security Fleet
- Pouncing Fury: Space Craft Group (Large WarShip/Veteran) WH2
Attacker: Task Force Serpent
Task Force Serpent Fleet
- Space Craft Group (Large WarShip/Veteran) WH1
- 2 Space Craft Groups (Small WarShips/Veteran) WM1, WM2
- 4 DropShip Fleets (Lg Trans/Veteran) DH1, DH2, DH3, DH4
- 4 DropShip Fleets (Med Trans/Veteran) DM1, DM2, DM3, DM4
- DropShip Fleet (Assault/Veteran) DA1
- 2 DropShip Fleets (Sm Trans/Veteran) DL1, DL2
1st Knights of the Inner Sphere
- 1st Battalion: Heavy 'Mech Bn (IU/Elite) MH1
- 2nd Battalion: Heavy 'Mech Bn (IU/Elite) MH2
- 3rd Battalion: Heavy 'Mech Bn (IU/Elite) MH3
- 1st Wing: Heavy Fighter Wing (IU/Elite) FH1
11th Lyran Guards
- 1st Battalion: Medium 'Mech Bn (IU/Elite) MM1
- 2nd Battalion: Assault 'Mech Bn (IU/Elite) MA1
- 3rd Battalion: Heavy 'Mech Bn (IU/Elite) MH4
Kingston's Legionnaires
- 1st Battalion: Medium 'Mech Bn (IU/Regular) MM2
- 2nd Battalion: Medium 'Mech Bn (IU/Regular) MM3
- 3rd Battalion: Infantry Bn (Regular) IN1
2nd St. Ives Lancers
- 1st Battalion: Heavy 'Mech Bn (IU/Veteran) MH5
4th Drakons
- 1st Battalion: Medium 'Mech Bn (IU/Veteran) MM4
1st Kathil Uhlans
- 1st Battalion: Heavy 'Mech Bn (IU/Veteran) MH6
- 2nd Battalion: Medium 'Mech Bn (IU/Veteran) MM5
- 3rd Battalion: Heavy Vehicle Bn (Veteran) GH1
McLeod's Regiment, Northwind Highlanders
- 1st Battalion: Medium 'Mech Bn (IU/Veteran) MM6
- 2nd Battalion: Heavy 'Mech Bn (IU/Veteran) MH7
- 3rd Battalion: Medium 'Mech Bn (IU/Veteran) MM7
1st Gurkhas
- 1st Battalion: Infantry Regiment (Elite) IN2
Com Guards 2nd Division (The Falconeers IV-Epsilon)
- Living Word III-Delta: Assault 'Mech Bn (IU/Elite) MA2
- Hidden Hand III-Kappa: Assault Vehicle Bn (Elite) GA1
- Dark Regret III-Beta: Medium 'Mech Bn (IU/Elite) MM8
71st Light Horse Regiment, Eridani Light Horse
- 11th Recon Battalion: Medium 'Mech Bn (IU/Regular) MM9
- 17th Recon Battalion: Medium 'Mech Bn (IU/Regular) MM10
- 82nd Heavy Cavalry: Infantry Regiment (Regular) IN3
- 1st Wing: Medium Fighter Wing (Veteran) FM1
151st Light Horse Regiment, Eridani Light Horse
- 15th Heavy Cavalry Battalion: Light 'Mech Bn (IU/Elite) ML1
- 8th Recon Battalion: Light 'Mech Bn (IU/Elite) ML2
- 6th Recon Battalion: Medium 'Mech Bn (IU/Elite) MM11
- 2nd Wing: Medium Fighter Wing (Elite) FM2
21st Striker Regiment, Eridani Light Horse
- 3rd Striker Battalion: Heavy 'Mech Bn (IU/Veteran) MH8
- 5th Striker Battalion: Light 'Mech Bn (IU/Veteran) ML3
- 7th Striker Battalion: Heavy 'Mech Bn (IU/Veteran) MH9
- 1st Armored Infantry Battalion: Battle Armor Bn (IS/Veteran) IB1
- 3rd Wing: Medium Fighter Wing (Veteran) FM3