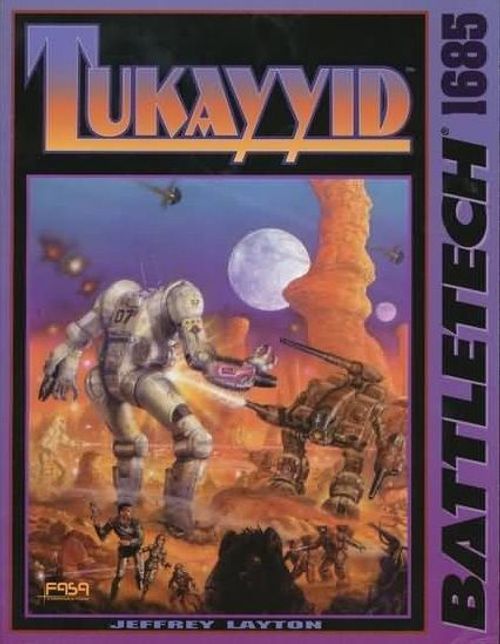
BattleTech: Tukayyid
BattleTech: Tukayyid Rulebook
Table of Contents
Table of Contents
Introduction
Tukayyid is a scenario pack for use with the BattleTech game system. Each scenario in this book recreates one of the major conflicts fought during the battle of Tukayyid. These scenarios can be played as separate, self-contained battles or as a larger campaign. The campaign allows players to simulate either the efforts of a particular Clan or the entire battle of Tukayyid. Because each Clan fought its battles alone, never asking aid from any other, each Clan's campaign appears in a separate section. When fighting a single Clan's battles, simply turn to the appropriate section in this book and play that Clan's scenarios in the order given (which is the actual order in which they occurred). If playing the entire Tukayyid campaign, run the scenarios in the order in which they are numbered. This places each battle roughly within the actual chronological order of the historical action. Before beginning the game, players should decide which scenarios to play and determine who will take the parts of the Com Guards and the Clans.
The Tukayyid scenario pack offers a unique system for choosing forces that gives both players more control over the number and configuration of troops they will commit to each scenario. The unit acquisition system (see p. 18) allows players to experiment with forces as well as strategy to create a unique version of a historical battle. The published outcome of a battle need not be the most likely outcome, and by choosing different troops each time, players can reuse these scenarios, each battle offering an uncertain outcome.
As with all BattleTech games, multiple players may play each side. However, if the Clan players choose to use the rules for batchall, the bidding rules provide a system for determining which Clan player serves as the overall commander for the battle. See Choosing Forces, p. 20 in Unit Acquisition.
Historically, both the Clans and the Com Guards used aerospace support in the battle of Tukayyid. However, the scenarios in this pack provide a simplified version of the events on Tukayyid, focusing on the ground actions rather than exploring the full scope of the battle. For purposes of this campaign, assume most aerospace actions took place between ground battles with the intention of disrupting supply lines and other, similar missions. However, because aerospace played such an important role in the Wolf Clan assault against the Com Guards in the Pozoristu Mountains, the Clan player may deploy air assets in two Wolf scenarios.
All of the scenarios use the BattleTech rules presented in the BattleTech Compendium. Game statistics for all the BattleMechs and vehicles used in the scenarios appear in BattleTech Technical Readouts 3025, 3026, 2750, and 3050. To run the scenarios, players will need BattleTech Map Sets 2, 3, and 4. A selection of Ral Partha BattleTech miniatures or other markers to represent the units on the mapsheets may also prove useful.
The rules included in each scenario provide the information needed to play out and determine the winner of the encounter. Each scenario begins with a first-person account of the engagement and a brief historical framework for the battle. Each scenario also includes sections entitled Game Set-Up, Attacker, Defender, Victory Conditions, and Special Rules.
Game Set-Up provides specific information needed to play the scenarios, including instructions on laying out mapsheets, directions for placing special terrain features, and suggestions of appropriate BattleTech rules to use. Some scenarios also include game set-up information to be used only when playing a campaign that continues from one scenario to another.
The Attacker and Defender sections provide details on the scenario's combatants and directions for deploying forces, and indicate the status of each side's units. A unit's status represents the relative quality of its troops, reflecting their experience and training, and determines each soldier's Gunnery and Piloting Skill unless otherwise noted. Troops are rated as green, regular, veteran, or elite. To find the appropriate skill levels for each rating, consult the Status Table.
Status Table
| Unit Status | Inner Sphere (Gunnery/Piloting) | Clan (Gunnery/Piloting) |
|---|---|---|
| Green | 5/6 | — |
| Regular | 4/5 | 3/4 |
| Veteran | 3/4 | 2/3 |
| Elite | 2/3 | 1/2 |
Victory Conditions. Players use the Victory Conditions to determine the outcome of the encounter. These vary from scenario to scenario. In combat, an action rarely continues until one side is obliterated. Both sides often claim victory if they achieve their tactical objectives. Victory Conditions simulates this fact of warfare by creating specific objectives one or both opponents may seek to achieve by their actions in a scenario.
Special Rules lists any rules needed to play the scenario that are not part of the standard BattleTech rules. A subsection entitled Honor Levels describes restrictions to Clan actions based on Clan honor that apply to Clan units in each scenario (see Playing the Clans, p. 7 of this book, for more information).
Three sections, entitled Playing the Clans, Playing the Com Guards, and Unit Acquisition, precede the scenarios. Playing the Clans and Playing the Com Guards provide special rules and notes and any unique 'Mechs needed for playing each of the two sides involved in the Tukayyid conflict. Unit Acquisition presents guidelines and tables for determining the exact forces each side will use. This section is particularly important when using Clan bidding rules.
Clans Jade Falcon and Wolf forbade their commanders to engage in the traditional practice of batchall, which allows commanders to bid for the right to engage the enemy. Because of this prohibition, most of the units fielded by the Jade Falcons and Wolves were chosen before the battle, and so the Falcon and Wolf scenarios include lists of specific units that fought in each engagement. The remaining Clans did use batchall, and so for the scenarios involving the Steel Vipers, Ghost Bears, Smoke Jaguars, Nova Cats, and Diamond Sharks, both Clan and Com Guards players must choose units from the Unit Acquisition Tables, which list those units available to each Clan and to the Com Guards.
Hidden Unit Set-Up and Gamemasters
Because much of the action on Tukayyid involved ambushes and attacks that succeeded only through the element of surprise, the scenarios in this book work best if they are set up by a non-player gamemaster. Players may take turns acting as gamemaster, provided that the gamemaster chosen for each scenario to be played reads only the information in that scenario. The gamemaster tells the player representing the Com Guards and those representing the Clans what information is available at the start of each scenario.
If the players choose not to use a gamemaster, then the player(s) taking the role of the Com Guards should read the chosen scenarios. He then sets up the battle and tells the Clan players what they would know about the scenario before it begins.
Before beginning play, the Com Guard players must write down the location of all of ComStar's hidden units and give this list to the gamemaster or seal a copy of the list in an envelope and give the envelope to the Clan players. As the Com Guard units are revealed, the Clan players may note each unit's starting location and compare it with the list after the game ends. This system will reduce the temptation for the Com Guard player to, in mid-game, place hidden units wherever such units might gain him the greatest advantage.
Because so many of the scenarios presented in this book involve hidden units, the rules for hidden units appear below for convenience. These rules clarify and expand upon those published in the BattleTech Compendium. They supersede other previously published rules regarding hidden units.
Hidden Units
At the start of a game, each side may secretly hide on the map a number of units determined by the scenario being played, or agreed to by all players. Players should write down the number of each hex in which a unit is hidden and designate the unit's facing.
BattleMechs cannot be hidden in Clear or Paved hexes. Hidden units will remain hidden until they attack or move, or until an enemy unit moves into their hex, attempts to move into their hex, or ends its movement adjacent to their hex.
If a unit attempts to enter a hex containing a hidden unit, and if doing so would violate the stacking rules (see Stacking, p. 17 of the BattleTech Compendium), the unit immediately ends its movement, and the hidden unit is revealed.
Hidden units cannot make physical attacks.
Pointblank Shots
When an enemy unit moves into or ends its movement adjacent to a hex occupied by a hidden unit, the hidden unit may immediately fire a pointblank shot, but only if the unit was placed on the map as part of the game set-up and has not yet moved or fired. The unit may only fire weapons with a valid firing arc to the target, using a Range of 1. However, the hidden unit may immediately torso twist or rotate its turret in order to bring its weapons to bear against the target. Do not modify the base to-hit number for movement or terrain. Any damage takes effect immediately during the Movement Phase, and the results may affect the actions of the target unit for the rest of the phase. A unit attacking with a pointblank shot may not move, fire again, or perform any other action during that turn.
Playing the Clans
Editor's note: the in-world message from ilKhan Ulric Kerensky that opens this section and the historical account of each Clan's conduct on Tukayyid are narrative and are omitted here. The rules below are transcribed in full.
Clan Honor
More than any other factor, the Clans' rigid code of honor allowed the armies of the Inner Sphere to effectively resist them. On the battlefield, most Clan warriors follow three conventions that weaken their fighting ability: the practice of dueling, refusal to engage in physical attacks during 'Mech combat, and reluctance to flee from a losing battle.
Unfortunately, as their advance on Terra stalled in the face of "treacherous" tactics used against them by Inner Sphere commanders, the Clans learned how to abandon their code of conduct when necessary. Most Clan MechWarriors continued to abide by Clan conventions of battle, refusing to lower themselves to their enemy's level by breaking their own code of honor. Others gave the enemy the benefit of the doubt, fighting in the Clan manner until the enemy behaved dishonorably. At that point, the Clan MechWarriors no longer considered themselves bound by their rules of battle and fought without regard for Clan honor.
Game Use
To help represent each battle's actual historical context, each scenario can be played using one of four honor levels described below and listed in the scenario. Because conformity to the code of honor severely limits the Clans' actions in battle, raising or lowering the suggested honor level can handicap the scenarios for the benefit of less-experienced players or change the scenarios to suit desired circumstances. The honor levels are simply suggestions and should be used only if all players agree to do so. Honor Level 1 means strict conformity to the Clan code; Levels 2 and 3 require conformity only under certain circumstances; and Level 4 throws the Clan code of honor out the airlock.
Note that dueling rules and restrictions on physical attacks apply only to enemy 'Mechs. Clan MechWarriors may attack armored and other infantry targets with no honor restrictions. Because Clan Wolf ignored Clan conventions of honor in all of its battles, the Wolf Clan scenarios have no honor levels listed; players may assume that Honor Level 4 applies to all Wolf Clan units.
Dueling Rules
Under the rules for ritual dueling, or zellbrigen, Clan players must declare a target for each of their dueling 'Mechs. A typical declaration might sound something like, "I am MechWarrior Seth of Clan Steel Viper. I pilot the sole Summoner in Alpha Star. I hereby invoke the ritual of zellbrigen and challenge the pilot of the Marauder adorned with the unit designation eleven to a duel of warriors. In this solemn matter, let no one interfere!"
During a duel, no other Clan warrior may attack either of the dueling 'Mechs. If a third Com Guard unit interferes with a duel, the dueling Clan warrior may attack that unit, provided that another Clan 'Mech has not already challenged the interloper to a duel. A duel ends when one combatant is destroyed, disabled, or retreats from the battlefield.
The zellbrigen honor levels are as follows. At Level 1, the Clan warrior upholds all the rules of dueling regardless of his opponent's actions. At Level 2, the Clan warrior follows the rules of dueling unless and until the Com Guard unit takes action that violates the Clan honor code (a third party interfering, a unit involved in one duel firing on a 'Mech involved in another duel, and so on). The duel immediately degenerates into a free-for-all. During the Weapon Attack Phase, if a player declares that his unit will fire on a target already involved in a duel, any Clan player whose declaration of zellbrigen follows the Com Guards declaration of a "dishonorable attack" may attack the 'Mech that declared the dishonorable attack without regard for honor rules. At Level 3, any infringement of Clan honor in the dueling rules renders the entire ritual of zellbrigen null and void, leaving the Clan 'Mechs free to attack any enemy unit without restraint for the remainder of the game. At Level 4, dueling rules do not apply.
Physical Attacks
Unlike the formal ritual used to govern dueling, the Clans' dislike of physical attacks in 'Mech combat is simply an informal, if widespread, custom. No explanation has ever been given for this. It may be that Nicholas Kerensky made a deliberate choice to encourage a long-range fighting style.
The four levels of restriction against physical attacks are as follows. At Level 1, a Clan warrior never makes physical attacks in 'Mech combat. At Level 2, a Clan warrior may only make a physical attack if an enemy unit makes one first. During the Physical Attack Phase, if a ComStar player declares a physical attack, any Clan player whose declaration follows that violation may freely engage that 'Mech in physical combat. At Level 3, a single physical attack by a ComStar 'Mech allows all Clan warriors to retaliate in kind against all enemy units for the remainder of the game. At Level 4, the Clans ignore the taboo against physical attacks.
Retreating from Battle
Clan MechWarriors despise their Inner Sphere counterparts because they consider Inner Sphere nothing but a bunch of dirty freebirths fighting in inferior 'Mechs. Unless ordered to do so by a superior officer, retreating from a battle with such an inferior opponent disgraces a Clan warrior almost beyond redemption. When allowed to choose whether or not to flee a losing battle, many prefer to fight to the death.
The four levels of refusal to flee are as follows. At Level 1, a Clan warrior never retreats. At Level 2, Clan warriors may retreat from enemy 'Mechs of Star League quality or better but never from 'Mechs, armor, or infantry units of 3025 technology. At Level 3, Clan warriors may retreat from any vintage of enemy 'Mech but not from armor or infantry units. At Level 4, Clan warriors may retreat at will.
Batchall Rules
The Clan practice of batchall, or bidding for the right to engage the enemy, is a fine art. Bid too much, and you earn your enemies' scorn when they easily outbid you and gain glory in a battle that you can only sit and watch. Bid too little, and your forces risk defeat or even death at enemy hands. Ideally, every Clan commander wants to bid just enough to assure himself both victory and honor, while pushing his opponent to take foolish risks for honor's sake.
Though the winning bidder enters the field with the forces named in his final bid, after the battle begins he may call in reinforcements to build up a force equal to the last bid before the winning bid. Such use of reinforcements causes little or no loss of face among fellow Clansmen. A commander may also bring in reinforcements up to the strength of his opening bid, thereby losing considerable honor, but some Clansmen consider a loss of face preferable to suffering an especially devastating loss.
Every battle has a cutdown, the point at which the attacking and defending forces are theoretically equal. Bidders who can push their opponents into making a bid below the cutdown are considered clever. Commanders who win with a force less than the cutdown earn great honor.
Because the invading Clans either practiced batchall consistently on Tukayyid or forbade it entirely, the batchall rules have no honor levels. For additional information about using batchall in this scenario pack, see Unit Acquisition, p. 18.
Clan 'Mechs
All Clan MechWarriors pilot one of the OmniMechs listed in the Unit Acquisition Tables, p. 22, with the exception of Star Commander Phelan Wolf (later Ward) of Clan Wolf. Phelan pilots a Clan-modified version of the Wolfhound, designated the Wolfhound IIC. When playing Clan Wolf scenarios involving Phelan Ward, use the game statistics given below for his 'Mech.
Wolfhound IIC
- Mass: 35 tons
- Chassis: Endo Steel
- Power Plant: 210 XL
- Cruising Speed: 64 kph
- Maximum Speed: 95 kph
- Jump Jets: None
- Jump Capacity: None
- Armor: Ferro-Fibrous
- Armament:
- 1 ER Large Laser
- 3 Medium Pulse Lasers
- 1 ER Medium Laser
- Manufacturer: Unknown
- Communications System: Unknown
- Targeting and Tracking System: Unknown, with enhanced ECM suite
- Type: Wolfhound IIC
| Equipment | Mass |
|---|---|
| Internal Structure: Endo Steel | 1.75 |
| Engine: 210 XL | 4.5 |
| Walking MP: 6 | |
| Running MP: 9 | |
| Jumping MP: 0 | |
| Heat Sinks: 14 (28) | 4 |
| Gyro | 3 |
| Cockpit | 3 |
| Armor Factor: 119 | 6.5 |
| Location | Internal Structure | Armor Value |
|---|---|---|
| Head | 3 | 9 |
| Center Torso | 11 | 16 |
| Center Torso (rear) | — | 6 |
| R/L Torso | 8 | 11 |
| R/L Torso (rear) | — | 5 |
| R/L Arm | 6 | 12 |
| R/L Leg | 8 | 16 |
| Weapons and Ammo | Location | Critical | Tonnage |
|---|---|---|---|
| ER Large Laser | RA | 1 | 4 |
| Medium Pulse Laser | CT | 1 | 2 |
| Medium Pulse Laser | RT | 1 | 2 |
| Medium Pulse Laser | LT | 1 | 2 |
| ER Medium Laser | CT (R) | 1 | 1 |
| ECM Suite | H | 1 | 1 |
Playing the Com Guards
Editor's note: the address Precentor Martial Anastasius Focht gave his troops before landing on Tukayyid is in-world narrative and is omitted here.
Using the Tamo Bunker
Precentor Martial Anastasius Focht directed his forces from a hidden command bunker carved from the heart of Mount Kline in the Tamo mountain range. The Tamo bunker was a fully functional Star League strategic command post, equipped with an interactive, virtual-reality construct that allowed the Precentor Martial to coordinate every move in the battle as it raged across Tukayyid from this single, central location. The holotanks aboard Clan combat JumpShips employed a more advanced version of the same technology to coordinate planetary attacks, but because each Clan on Tukayyid fought as a distinct unit, while the Com Guards fought as a unified army, this particular aspect of the Clan's superior technology did not work to their advantage.
For game purposes, as long as Focht commands his troops from the bunker, the Com Guards player or players gain a +2 modifier to their Initiative rolls. If playing the Battle for Tamo Bunker scenario (p. 37) as part of a campaign, players may be forced to reduce this modifier. For specific reductions, see p. 38.
Com Guard 'Mechs
Knowing that his MechWarriors would face an enemy with vastly superior technology, Precentor Martial Anastasius Focht issued specifications for the field modification of several Com Guard 'Mechs. Even the Com Guards' Star League-era 'Mechs could not match the power of the Clan OmniMechs without design alterations. Precentor Martial Focht ordered ComStar techs to draft design upgrades based on existing plans for weapons developed during the final years of the Star League that would allow his warriors to use the full potential of those devices.
In addition, ComStar "appropriated" blueprints for a number of new 'Mechs produced in 3051 and early 3052 by the Successor States that took into account Inner Sphere developments based on their understanding of Clan OmniMech technology. ComStar techs incorporated only those design alterations involving the limited swap of easily replaced components in the months prior to the battle, but the Com Guard force benefited overall from a huge cache of Vlar 300XL engines discovered on Terra.
The Com Guards fielded the following post-Star League-era 'Mechs: the UM-R63 UrbanMech, OTT-7K Ostscout, ASN-23 Assassin, CLNT-2-3U Clint, WTH-2 Whitworth, BJ-2 Blackjack, HBK-5M Hunchback, SCP-10 Scorpion, OSR-2D Ostroc, OTL-5M Ostsol, CPLT-C3 Catapult, TDR-7M Thunderbolt, WHM-7M Warhammer, MAD-5M Marauder, ON1-M Orion, BLR-3M BattleMaster, STK-5M Stalker, CP 11-A Cyclops, and AS7-K Atlas. They also fielded upgraded versions of the Star League-era 'Mechs listed on the following pages.
The MechWarriors chosen to pilot the refitted 'Mechs informally christened the new machines the "Clanbusters."
BL9-KNT Black Knight
- Mass: 75 tons
- Chassis: Technicron 1L
- Power Plant: Vlar 300 XL
- Cruising Speed: 43 kph
- Maximum Speed: 65 kph
- Jump Jets: None
- Jump Capacity: None
- Armor: Numall Durabond
- Armament:
- 1 Magna Sunspot Extended Range Particle Projector Cannon
- 1 Aberdovey Large Pulse Laser
- 2 McCorkel Large Lasers
- 4 Aberdovey Medium Pulse Lasers
- Manufacturer: Kong Interstellar Corporation
- Communications System: TransCom Alpha
- Targeting and Tracking System: Dalban HiRez
Type: BL9-KNT Black Knight
| Equipment | Mass |
|---|---|
| Internal Structure: Endo Steel II | 3.75 |
| Engine: Vlar 300 XL | 9.5 |
| Walking MP: 4 | |
| Running MP: 6 | |
| Jumping MP: 0 | |
| Heat Sinks: 15 (30) | 5 |
| Gyro | 3 |
| Cockpit | 3 |
| Armor Factor: 216 | 13.5 |
| Location | Internal Structure | Armor Value |
|---|---|---|
| Head | 3 | 9 |
| Center Torso | 23 | 35 |
| Center Torso (rear) | — | 10 |
| R/L Torso | 16 | 24 |
| R/L Torso (rear) | — | 8 |
| R/L Arm | 12 | 24 |
| R/L Leg | 16 | 25 |
| Weapons and Ammo | Location | Critical | Tonnage |
|---|---|---|---|
| ER PPC | RA | 3 | 7 |
| Large Pulse Laser | CT | 2 | 7 |
| Large Laser | RT | 2 | 5 |
| Large Laser | LT | 2 | 5 |
| Medium Pulse Laser | RT | 1 | 2 |
| Medium Pulse Laser | LT | 1 | 2 |
| Medium Pulse Laser |
Overview
Despite a persistent problem with heat buildup, the Black Knight had served the Com Guards well for hundreds of years. Modern-day weapons technology, however, eventually outstripped the Black Knight's capabilities. For the upgrade, ComStar techs replaced the Magna Hellstar PPC with an extended-range Magna Sunspot PPC that could target enemy units at extreme ranges, retained the twin McCorkel large lasers for medium-range fighting, and upgraded the medium lasers with pulse technology for close-quarters fighting. To give the new Black Knight additional short-to-medium-range firepower, the techs sacrificed the original machine's Beagle probe and small laser.
In addition, recognizing the success of Federated Commonwealth 'Mechs in using ax- and hatchet-wielding 'Mechs against the Clans, the techs designed a long-bladed, sword-like hatchet for the Knight's left hand.
Capabilities
Despite its use of double heat sinks, the revamped Black Knight remains prone to overheating. To avoid this hazard, MechWarriors are advised to use the Black Knight's weapons only at the ranges for which they are designed.
The Black Knight proved tremendously successful on the battlegrounds of Tukayyid, able to wear down the enemy at long range with its ER PPC and large lasers until it could close to administer the coup de grace with its pulse lasers and hatchet. After the ComStar Reformation, Word of Blake dissenters took several of these 'Mechs into the Free Worlds League.
CHP-3N Champion
- Mass: 60 tons
- Chassis: Bergan XI
- Power Plant: Vlar 300 XL
- Cruising Speed: 54 kph
- Maximum Speed: 86 kph
- Jump Jets: None
- Jump Capacity: None
- Armor: 2/Star Slab Ferro-Fibrous
- Armament:
- 1 Lubalin LB 10-X Autocannon
- 1 Harpoon-6 SRM Launcher
- 2 Nightwind Large Lasers
- 2 Magna Mk II Medium Lasers
- 2 Martell Small Lasers
- Manufacturer: Bergan Industries
- Communications System: Garret T-11C
- Targeting and Tracking System: Mercury-IV plus Artemis IV FCS
Type: CHP-3N Champion
| Equipment | Mass |
|---|---|
| Internal Structure: Endo Steel II | 6 |
| Engine: Vlar 300 XL | 9.5 |
| Walking MP: 5 | |
| Running MP: 8 | |
| Jumping MP: 0 | |
| Heat Sinks: 10 (20) | 0 |
| Gyro | 3 |
| Cockpit | 3 |
| Armor Factor: 134 | 7.5 |
| Location | Internal Structure | Armor Value |
|---|---|---|
| Head | 3 | 9 |
| Center Torso | 20 | 21 |
| Center Torso (rear) | — | 6 |
| R/L Torso | 14 | 15 |
| R/L Torso (rear) | — | 7 |
| R/L Arm | 10 | 12 |
| R/L Leg | 14 | 15 |
| Weapons and Ammo | Location | Critical | Tonnage |
|---|---|---|---|
| 1 Large Laser | RA | 2 | 5 |
| 1 LB 10-X | RT | 6 | 11 |
| Ammo (LB 10-X) 20 | RT | 2 | 1 |
| Small Laser | CT | 1 | 0.5 |
| Small Laser | CT | 1 | 0.5 |
| SRM 6 | LT | 2 | 3 |
| Ammo (SRM) 15 | LT |
Overview
Responding to complaints that the Champion was undergunned, ComStar techs added two Nightwind large lasers to the 'Mech's arsenal, neatly making use of the surplus Nightwinds dropped from the refitted WVE-9N Wyvern. The massive lasers fit easily into the Champion's unoccupied arms. To handle the extra heat created by the lasers, the 'Mech's heat sinks were replaced with double-efficiency models.
Capabilities
The new Champion's speed and upgraded medium- to long-range weapons made it one of the most effective 'Mechs used in the battle of Tukayyid.
HSR 400-D Hussar
- Mass: 30 tons
- Chassis: Benztrov 40
- Power Plant: GM 240-XL
- Cruising Speed: 86 kph
- Maximum Speed: 130 kph
- Jump Jets: None
- Jump Capacity: None
- Armor: Victory Anchor 2 Ferro-Fibrous
- Armament: 1 Lubalin LB 10-X Autocannon
- Manufacturer: Newhart Industries
- Communications System: Field Ranger Sightseer
- Targeting and Tracking System: Ranger LAF Model 2
Type: HSR 400-D Hussar
| Equipment | Mass |
|---|---|
| Internal Structure | 3 |
| Engine: GM 240XL | 5.75 |
| Walking MP: 8 | |
| Running MP: 12 | |
| Jumping MP: 0 | |
| Heat Sinks: 10 | 0 |
| Gyro | 3 |
| Cockpit | 3 |
| Armor Factor: 54 | 3 |
| Location | Internal Structure | Armor Value |
|---|---|---|
| Head | 3 | 9 |
| Center Torso | 10 | 11 |
| Center Torso (rear) | — | 2 |
| R/L Torso | 7 | 8 |
| R/L Torso (rear) | — | 1 |
| R/L Arm | 5 | 2 |
| R/L Leg | 7 | 5 |
| Weapons and Ammo | Location | Critical | Tonnage |
|---|---|---|---|
| LB 10-X AC | LT | 6 | 11 |
| Ammo (LB 10-X) 10 | CT | 1 | 1 |
Overview
Of all the ComStar 'Mechs that received refits, the Hussar proved the most difficult to modify. With a mere 1.5 tons of armor spread paper-thin across the 'Mech, additional protection seemed vital, but the required tonnage for additional armor could only be gained by replacing the massive GM 270-A engine with the extremely rare XL version. ComStar had several GM 240XL engines, but those models included outdated heat sinks and allowed no room for a retrofit of the bulkier double-efficiency sinks.
Ultimately, the ComStar techs chose to use the 240XL and replace the Newhart ER laser with the more heat-efficient Lubalin LB 10-X Autocannon. These changes freed up enough tonnage to add an additional 1.5 tons of armor to the revamped Hussar.
Capabilities
The HSR 400-D has firepower equivalent to that of the 200-D and twice as much armor as its parent design. Though the smaller engine cuts the 'Mech's top speed by 21 kph, the Hussar is still a fast machine by any standard. In the battle of Tukayyid, the HSR 400-D performed well. Though the Clans' surprise at encountering the new design undoubtedly contributed to the 'Mech's success, the Hussar's speed and the accuracy of its long-range fire have made it popular among Com Guards MechWarriors.
KGC-001 King Crab
- Mass: 100 tons
- Chassis: Hollis Mark II
- Power Plant: Vlar 300 XL
- Cruising Speed: 32 kph
- Maximum Speed: 54 kph
- Jump Jets: None
- Jump Capacity: None
- Armor: Aldis X Ferro-Fibrous, with CASE
- Armament:
- 2 M-7 Gauss Rifles
- 1 Simpson-15 LRM Launcher
- 1 Tronel XIII Large Pulse Laser
- 3 Hovertec Streak-2 SRM Launchers
- Manufacturer: Cosara Weaponries
- Communications System: Dalban Commline
- Targeting and Tracking System: Dalban Hirez-B
Type: KGC-001 King Crab
| Equipment | Mass |
|---|---|
| Internal Structure | 10 |
| Engine: Vlar 300 XL | 9.5 |
| Walking MP: 3 | |
| Running MP: 5 | |
| Jumping MP: 0 | |
| Heat Sinks: 13 | 3 |
| Gyro | 3 |
| Cockpit | 3 |
| Armor Factor: 296 | 16.5 |
| Location | Internal Structure | Armor Value |
|---|---|---|
| Head | 3 | 9 |
| Center Torso | 31 | 44 |
| Center Torso (rear) | — | 15 |
| R/L Torso | 21 | 30 |
| R/L Torso (rear) | — | 10 |
| R/L Arm | 17 | 34 |
| R/L Leg | 21 | 40 |
| Weapons and Ammo | Location | Critical | Tonnage |
|---|---|---|---|
| Gauss Rifle | LA | 7 | 15 |
| Ammo (Gauss) 16 | LA | 2 | 2 |
| Gauss Rifle | RA | 7 | 15 |
| Ammo (Gauss) 16 | RA | 2 | 2 |
| LRM 15 | LT | 3 | 7 |
| Ammo (LRM) 8 | CT | 1 | 1 |
| Large Pulse Laser | RT |
Source note: the armament list above names three Hovertec Streak-2 SRM launchers, while the weapons table and the overview show two. Both are transcribed as printed.
Overview
After consulting with MechWarriors who piloted the King Crab, ComStar techs learned that the faster Clan OmniMechs never gave the lumbering King Crab a chance to close to the short range it needed to effectively use its massive autocannon. To solve this problem, the techs replaced the Deathgiver autocannon with M-7 Gauss rifles, the only Inner Sphere weapon able to match the range and damage inflicted by Clan weapons. The new design also includes two Hovertec SRM-2 Streak launchers for close-quarters fighting. Because the upgraded King Crab's weapons are heat-efficient, the new 'Mech retains the old design's single heat sinks.
Capabilities
The King Crab's upgraded weapons have made this 'Mech a terrifying foe, capable of slugging it out with any 'Mech in the armies of the Successor States or the Clans. It served as the backbone of the Com Guards assault units on Tukayyid, and it will continue to serve that function in Com Guards forces throughout the Inner Sphere.
WVE-9N Wyvern
- Mass: 45 tons
- Chassis: Ost Endo Steel
- Power Plant: GM 180
- Cruising Speed: 43 kph
- Maximum Speed: 65 kph
- Jump Jets: Northrup 750
- Jump Capacity: 120 meters
- Armor: Kilosh Ferro-Fibrous 1000, with CASE
- Armament:
- 1 Jackson Dart-10 LRM Launcher
- 1 Tronel XIII Large Pulse Laser
- 2 Tronel XII Medium Pulse Lasers
- 1 Hovertec Streak-2 SRM Launcher
- Manufacturer: Maltex Corporation
- Communications System: Ostmann AMB
- Targeting and Tracking System: Scrambler-7 Series
Type: WVE-9N Wyvern
| Equipment | Mass |
|---|---|
| Internal Structure: Endo Steel II | 2.25 |
| Engine: GM 180 | 7 |
| Walking MP: 4 | |
| Running MP: 6 | |
| Jumping MP: 4 | |
| Heat Sinks: 10 (20) | 0 |
| Gyro | 2 |
| Cockpit | 3 |
| Armor Factor: 112 | 8 |
| Location | Internal Structure | Armor Value |
|---|---|---|
| Head | 3 | 9 |
| Center Torso | 14 | 20 |
| Center Torso (rear) | — | 5 |
| R/L Torso | 11 | 15 |
| R/L Torso (rear) | — | 5 |
| R/L Arm | 7 | 10 |
| R/L Leg | 11 | 17 |
| Weapons and Ammo | Location | Critical | Tonnage |
|---|---|---|---|
| LRM 10 | CT | 2 | 5 |
| Ammo (LRM) 12 | LT | 1 | 1 |
| CASE | LT | 1 | 0.5 |
| Large Pulse Laser | RA | 2 | 7 |
| Medium Pulse Laser | RA | 1 | 2 |
| Medium Pulse Laser | RA | 1 | 2 |
| SRM 2 Streak | RT |
Overview
For the upgraded Wyvern, double heat sinks replaced the single heat sinks, and pulse lasers replaced standard lasers. To obtain the tonnage required for the double heat sinks, ComStar techs eliminated two single heat sinks, reduced the Wyvern's armor protection by 1.5 tons, and replaced its SRM-6 with an SRM-2 Streak rack.
Capabilities
Though the use of pulse technology severely limits the effective range of the WVE-9N's lasers, the new Wyvern's intended function as a close-quarters fighting machine makes this loss of no concern. If caught in a long-range battle, the pilot can defend himself with the 'Mech's LRM-10.
Unit Acquisition
Most of the Tukayyid scenarios are written so that players can use forces of various size and tailor each scenario to their available time and resources using the Unit Acquisition Tables (pp. 23–27). These tables also provide a system under which the Clan players can engage in the practice of batchall. This section discusses each side's standard deployment practices, offers guidelines for choosing and balancing forces, provides rules for Clan bidding, and explains how to use the Unit Acquisition Tables.
Deployment
The Com Guards, Clans, and Successor States all organize their troops for deployment in different ways. The Successor States armies deploy in detachments of three, with some variance among their smallest detachments. With the exception of aerospace support for 'Mech detachments and the Federated Commonwealth's Regimental Combat Teams (RCTs), the Successor States do not use combined-arms units.
The Com Guards organize in detachments of six. An individual unit or an infantry platoon equals one Level I detachment, six Level I detachments equal a Level II detachment, six IIs a Level III, and so on. At Level III or higher, all Com Guards forces are combined-arms detachments, consisting of 'Mechs, fighters, armored vehicles, and infantry. A Level IV detachment (equivalent to a division) is made up of a combination of different units that adds up to 216, unlike a Successor States division, which contains 216 'Mechs. Such a division might include two IIIs of 'Mechs (72 units), one III of aerospace fighters (36 units), two IIIs of tanks (72 units), and one III of infantry (4 battalions, or 252 men).
The Clans deploy in detachments of five, said to represent the five points of a stylized star. The Clans attach great importance to the star symbol.
Successor States Deployment
| Unit Type | Composition |
|---|---|
| Squad | 7 infantrymen |
| Lance | 4 'Mechs or armored vehicles |
| Platoon | 4 standard infantry squads or 3 jump infantry squads |
| Air Lance | 2 aerospace fighters |
| Company | 3 lances or platoons (12 units) |
| Battalion | 3 companies (36 units), usually with attached command lance |
| Regiment | 3 to 5 battalions |
| RCT | 1 regiment 'Mechs, 3 armored vehicle regiments, 5 infantry regiments (1 jump, 2 mechanized, 2 standard), 1 artillery battalion, and 2 aerospace fighter wings (20 fighters total) |
Com Guards Deployment
| Unit Type | Composition |
|---|---|
| I | 1 'Mech, armored vehicle, fighter, or infantry platoon |
| II | 6 individual units |
| III | Battalion (36 individual units) |
| IV | Division (216 individual units) |
| V | Army (1,296 individual units) |
Determining Point Values
To make selecting forces and Clan bidding easier, players may use the following point system. If both sides in a battle are worth an equal number of points under this system, they should have equal chances of winning. Keep in mind, however, that such factors as pilot skill, terrain, and so on can alter this balance. The Victory Conditions in the scenarios account for these variables.
If players want to use the point system offered in this scenario pack to play out other battles, they should account for terrain, skill, and other factors when determining the forces for each side.
To find the total point value of a given detachment, the player must choose the detachment's weight class, type, size, and level of technology. For example, he may choose a Medium Lance (4 units) made up of 2750-technology 'Mechs. The player then consults the Point Value Tables on the following pages. The medium lance of 2750-technology 'Mechs is listed as worth 140 points.
The following Point Value Tables give the total point values for ComStar, Successor States, and Clan 'Mech, vehicle, and infantry detachments of varying weight classes, sizes, and levels of technological sophistication. The final table provides point values for artillery pieces.
Clan Deployment
| Unit | Composition |
|---|---|
| Point | 1 OmniMech or BattleMech, or 5 Elementals |
| Star | 5 Points of either 'Mechs or Elementals |
| Nova | 1 Star of 'Mechs, 1 Star of Elementals |
| Binary | 2 Stars (10 units of the same type) |
| Trinary | 3 Stars (15 units of the same type) |
| Supernova | 2 or 3 Novas |
| Cluster | 3 to 5 Binaries, Trinaries, or Supernovas |
| Galaxy | 3 to 5 Clusters |
Choosing Forces
When choosing forces for a scenario, players must first determine the total point value of the Com Guards force. Because the Com Guards use combined-arms deployment in all detachments larger than Level II (6 units), the Com Guards player must determine the number of 'Mechs, armored vehicles, and infantry in each Com Guards detachment and find the point values for each unit or detachment type in order to determine his forces' total point value.
Before beginning play, the players agree that the Com Guards will begin the scenario with a Level III force, and so the Com Guards player must choose a combined-arms force. He decides that the following six Level II detachments will compose his Level III force: two Heavy 'Mech IIs, a Light 'Mech II, two Medium Vehicle IIs and a II of infantry. The Com Guards player also decides that all of his units make use of 3050 technology. These choices give his Level III force a total point value of 1,068 points (300 + 300 + 120 + 150 + 150 + 48 = 1,068).
Choosing the Clan force depends on two factors: the size of the Com Guards force and the number of players playing the Clans. In most of the scenarios, the size of the Clan force is given as a percentage of the Com Guards force (see individual scenarios). If only one player is portraying the Clans, that player chooses a force of an appropriate size without bidding. Note that a Clan player may choose to use less than the total force to which he is entitled, but may not choose to use more. If two or more players are playing the Clans, they may engage in bidding (see Bidding Rules, following).
In the chosen scenario, the Clan player may field a force whose total point value is no greater than 75 percent of that fielded by his opponent. The Com Guard player has fielded a force worth 1,068 points, and so the Clan player may use forces worth up to 801 points (1068 x .75 = 801). The Clan player chooses a Heavy Supernova Binary, worth 800 points.
Point Value Tables
Inner Sphere 'Mech Detachments (2750/3050 'Mechs)
| Size | Light | Medium | Heavy | Assault |
|---|---|---|---|---|
| Level I / Unit | 20 | 35 | 50 | 70 |
| Lance | 80 | 140 | 200 | 280 |
| Level II | 120 | 210 | 300 | 420 |
| Company | 240 | 420 | 600 | 840 |
| Level III / Battalion* | 720 | 1,260 | 1,800 | 2,520 |
*Even though a Com Guards Level III detachment is equivalent to a Successor States battalion, Level IIIs are combined-arms units and so have a total point value based on the Level I and II detachments within the Level III.
Inner Sphere 'Mech/Vehicle Detachments (3025 'Mechs, 2750/3050 Vehicles)
| Size | Light | Medium | Heavy | Assault |
|---|---|---|---|---|
| Level I / Unit | 15 | 25 | 35 | 45 |
| Lance | 10 | 100 | 140 | 180 |
| Level II | 90 | 150 | 210 | 270 |
| Company | 180 | 300 | 420 | 540 |
| Level III / Battalion | 540 | 900 | 1,260 | 1,620 |
Source note: the Lance Light value is printed as 10 in the source, which does not match four Level I Light units at 15 points each (60). Transcribed as printed; the value may be a printing error.
Inner Sphere Vehicle Detachments (3025 Vehicles)
| Size | Light | Medium | Heavy | Assault |
|---|---|---|---|---|
| Level I / Unit | 10 | 15 | 20 | 25 |
| Lance | 40 | 60 | 80 | 100 |
| Level II | 60 | 90 | 100 | 150 |
| Company | 120 | 180 | 200 | 300 |
| Level III / Battalion | 360 | 540 | 600 | 900 |
Clan 'Mech Detachments
| Size | Light | Medium | Heavy | Assault |
|---|---|---|---|---|
| Point | 25 | 50 | 70 | 90 |
| Star | 125 | 250 | 350 | 450 |
| Nova | 175 | 300 | 400 | 500 |
| Binary | 250 | 500 | 700 | 900 |
| Trinary | 375 | 750 | 1,050 | 1,350 |
Inner Sphere Infantry Detachments
| Size | Point Value |
|---|---|
| Level I / Platoon | 8 |
| Company | 24 |
| Level II / 2 companies | 48 |
| Battalion | 72 |
| Level III / 4 battalions | 288 |
Clan Elemental Table
| Size | Point Value |
|---|---|
| Point | 10 |
| Star | 50 |
| Binary | 100 |
| Trinary | 150 |
Artillery Pieces
| Size | Point Value |
|---|---|
| Thumper | 20 |
| Sniper | 35 |
| Long Tom | 50 |
Bidding Rules
If two or more players are commanding Clan units in a given scenario, they may engage in batchall to determine which of them will lead the Clan forces for the duration of the scenario. Note that Clan Wolf and Clan Jade Falcon players may not bid, as both these Clans forbade the practice. The cutdown for bidding is determined by the size of the Com Guards forces, noted in each scenario. If he is feeling particularly lucky, a Clan player may bid below the cutdown point, though such a move may cripple his side's fighting ability. Should he achieve victory, of course, that particular Clan commander will earn great honor among his peers.
As soon as the Clan players agree on the configuration of their side's initial forces, those players may then bid between themselves to determine who will have overall command of the forces for the scenario. Based on the initial force, each player states how many of those forces he would use to fight the scenario (makes his bid). The bidding continues until no player is willing to reduce the available forces beyond the last bid declared. The player who made that bid becomes the leader of the Clan forces for that scenario. He delegates command of portions of the Clan force to the other players, but throughout the scenario they must yield to orders given by the Clan commander.
Clan commanders usually begin batchall with Supernova Trinaries at their disposal. For the sake of convenience, the following list includes the individual detachments that normally make up each Supernova Trinary weight class, as well as their point values.
Light Supernova Trinary
- 2 Stars of light 'Mechs (125 points/Star)
- 1 Star of medium 'Mechs (250 points)
- 3 Stars of Elementals (50 points/Star)
Medium Supernova Trinary
- 1 Star of light 'Mechs (125 points)
- 1 Star of medium 'Mechs (250 points)
- 1 Star of heavy 'Mechs (350 points)
- 3 Stars of Elementals (50 points/Star)
Heavy Supernova Trinary
- 1 Star of medium 'Mechs (250 points)
- 1 Star of heavy 'Mechs (350 points)
- 1 Star of assault 'Mechs (450 points)
- 3 Stars of Elementals (50 points/Star)
Assault Supernova Trinary
- 1 Star of heavy 'Mechs (350 points)
- 2 Stars of assault 'Mechs (450 points/Star)
- 3 Stars of Elementals (50 points/Star)
Once the players have determined the size of both forces, they should consult the Unit Acquisition Tables, following, to determine the specific, individual units within each fighting detachment.
Using Unit Acquisition Tables
Having determined the total point values of their respective forces, the players must now use the Unit Acquisition Tables to choose the specific units that make up those forces. The tables list the units available to each Clan and the Com Guards during the battle of Tukayyid, and they reflect the fact that most of the Clan OmniMechs used ammunition-dependent weapons configurations. Players should use the Unit Acquisition Tables for every scenario in which detachments are listed for each combatant but specific individual units are not. The freedom to choose individual 'Mechs and/or vehicles for their forces in each scenario allows the players to not follow the "historical" battle fight for fight.
To choose specific units, players must first determine the total tonnage of their detachments. To find the total tonnage of a given detachment, find the weight class of the detachment on the Average Tonnage Table, then multiply the number of units in the detachment by the average tonnage per unit shown in the table. The result is that detachment's total tonnage. For example, a Star of medium 'Mechs consists of 5 units averaging 50 tons each, for a total weight of 250 tons.
Note that every unit in a detachment need not have the same weight. Because the weight class reflects average tonnage, a Star of medium 'Mechs might consist of five 50-ton units, or it might consist of a 20-ton unit, two 35-ton units, a 70-ton unit, and a 90-ton unit (20 + 35 + 35 + 70 + 90 = 250 tons).
Average Tonnage Table
| Weight Class | Average Tonnage per Unit |
|---|---|
| Light | 25 |
| Medium | 50 |
| Heavy | 70 |
| Assault | 90 |
Each player now chooses a number of units whose combined tonnage equals the total tonnage of the detachment. For example, a player with a Level II detachment of heavy 'Mechs (total tonnage 70 x 6 = 420) must now choose six 'Mechs (the number of 'Mechs in a Level II detachment) from the available 'Mechs and vehicles listed on the Unit Acquisition Tables whose weight adds up to no more than 420 tons.
The Unit Acquisition Tables show two types of units. For those common to the appropriate force, players may simply choose the units desired up to the tonnage limit for each detachment. For units that are more difficult to acquire, the unit name is followed by a number in parentheses. To acquire one of these units, a player must roll 2D6 with a result equal to or greater than the number given. If the result is less than the number given, the player must choose another unit and roll 2D6. If that result is less than the number given, the player chooses another unit and rolls 2D6, continuing until the die roll result equals or exceeds the number given for the unit chosen. Repeat this procedure for each unit desired (in the example above, until the player has chosen six 'Mechs).
Vehicles are always available, and do not require a 2D6 roll.
Depending on the dice roll results, using the Unit Acquisition Tables may give the players less than the maximum tonnage available to them for any given scenario.
The Ghost Bear players are choosing 'Mechs for the scenario Holth: A Forest Inferno. They have decided to field one Nova of medium OmniMechs (250 total tons, 250 points). They first attempt to acquire a Thor-A, which requires a 2D6 roll of 12 or better. The players roll a 6, which means they fail to acquire the Thor-A. Still attempting to acquire the first 'Mech for their Nova, they try for the primary, C, and D Thor models, all of which require a die roll result of 12 or better. All of these rolls are unsuccessful. The players decide to try for a Vulture-C, requiring a result of 8 or better. They roll an 11, acquiring the 60-ton 'Mech.
Determined to add a Thor-A to their Nova, the players make another set of dice rolls for the Thor-A, C, D, and primary models. Again, all the rolls are unsuccessful. They choose to try for the Ryoken primary and are unsuccessful, then choose a Ryoken-C, which they acquire on a successful result of 8. This 55-ton 'Mech allows them to choose 3 more units weighing no more than 135 tons altogether.
The players make a third attempt to acquire the Thor-A, succeeding this time with a result of 12. They must still choose two 'Mechs, whose total tonnage cannot exceed 65 tons.
The players now choose to roll for a 25-ton Koshi-B, deciding to fill out their maximum tonnage with a 40-ton Dragonfly-B or C (which requires no roll) if necessary. The roll for the Koshi is successful. Emboldened by their luck, the players try for a Dragonfly primary, which requires a result of 8 or better. This roll also succeeds, giving the players their five 'Mechs.
Because the Com Guards have access to a huge cache of Star League-era 'Mechs, the Com Guard players may simply choose any of the standard Star League 'Mech designs listed without making a dice roll. To acquire certain modified and upgraded units, however, they must make a successful 2D6 roll for the number listed after the 'Mech name.
The Clan Unit Acquisition Tables list units by their Clan designations. The Inner Sphere name for each Clan designation appears below.
| Inner Sphere Name | Clan Name |
|---|---|
| Baboon | Howler |
| Black Hawk | Nova |
| Behemoth | Stone Rhino |
| Daishi | Dire Wolf |
| Dasher | Fire Moth |
| Dragonfly | Viper |
| Fenris | Ice Ferret |
| Galahad | Glass Spider |
| Gladiator | Executioner |
| Goshawk | Vapor Eagle |
| Hellhound | Conjurer |
| Koshi | Mist Lynx |
Unit Acquisition Tables
Because some Clans use unique 'Mechs, and because some of the Clans favored configurations that used more energy or ballistic weapons, each Clan has a separate 'Mech Acquisition Table showing the OmniMechs and second-line 'Mechs available for that Clan by weight. The acquisition numbers reflect how common a given 'Mech is to a Clan, and the main configurations fielded at Tukayyid. A single Second-Line 'Mechs table shows the second-line 'Mechs available to all Clans. The Com Guards 'Mech Acquisition Table shows Star League-era, 3025, 3050, and Star League-refit 'Mechs available to the ComStar players. A separate table shows the vehicles available to ComStar players.
Ghost Bear 'Mechs
| Tons | OmniMechs | Second-Line 'Mechs |
|---|---|---|
| 20 | Fire Moth B, D (no roll); Fire Moth primary, A, C (8+) | — |
| 25 | Ice Ferret B, C, D (8+); Ice Ferret primary, A (12) | Locust IIC (6+) |
| 30 | Kit Fox primary, B, C (8+); Kit Fox A, D (12) | — |
| 35 | Adder primary, B (8+); Adder A, C, D (12) | Horned Owl (no roll); Jenner IIC (6+) |
| 40 | Viper B, C (no roll); Viper primary, A, D (8+) | — |
| 45 | Mist Lynx primary, A, B, D (12) | — |
| 50 | Nova primary, A, B, D (12) | — |
| 55 | Stormcrow primary, C (8+); Stormcrow A, B, D (12) |
Nova Cat 'Mechs
| Tons | OmniMechs | Second-Line 'Mechs |
|---|---|---|
| 20 | Fire Moth all models (12) | — |
| 25 | Ice Ferret/Koshi primary, A, B (8+); Ice Ferret C, D (12) | Locust IIC (6+) |
| 30 | Kit Fox all models (8+) | — |
| 35 | Adder A, C, D (no roll); Adder primary, B (8+) | Jenner IIC (no roll); Horned Owl (6+) |
| 40 | Viper primary, A, D (8+); Viper B, C (12) | — |
| 45 | Mist Lynx primary, C (8+); Mist Lynx A, B, D (12) | — |
| 50 | Nova C, D (8+); Nova primary, A, B (12) | — |
| 55 | Stormcrow A, B, D (8+); Stormcrow primary, C (12) |
Jade Falcon 'Mechs
| Tons | OmniMechs | Second-Line 'Mechs |
|---|---|---|
| 20 | Fire Moth primary, A, C (12) | Howler (no roll) |
| 25 | Ice Ferret primary, A, B, D (8+); Ice Ferret C (12) | Locust IIC (no roll) |
| 30 | Kit Fox primary, A, B, D (no roll); Kit Fox C (8+) | Incubus (4+) |
| 35 | Adder A, C, D (8+); Adder primary, B (12) | Jenner IIC, Peregrine (6+) |
| 40 | Viper primary, A, D (8+); Viper B, C (12) | — |
| 45 | Mist Lynx primary, A, B, C (8+); Mist Lynx D (12) | — |
| 50 | Nova B, C, D (8+); Nova primary, A (12) | Conjurer (no roll) |
| 55 | Stormcrow A, B, C, D (8+); Stormcrow primary (12) |
Smoke Jaguar 'Mechs
| Tons | OmniMechs | Second-Line 'Mechs |
|---|---|---|
| 20 | Fire Moth all models (12) | — |
| 25 | Ice Ferret all models (no roll) | Locust IIC (no roll) |
| 30 | Kit Fox all models (8+) | — |
| 35 | Adder A, C, D (8+); Adder primary, B (12) | Horned Owl (no roll); Jenner IIC (6+) |
| 40 | Viper all models (12) | — |
| 45 | Mist Lynx all models (12) | — |
| 50 | Nova B, C, D (8+); Nova primary, A (12) | — |
| 55 | Stormcrow A, B, C, D (no roll); Stormcrow primary (8+) | Vapor Eagle (10+) |
Diamond Shark 'Mechs
| Tons | OmniMechs | Second-Line 'Mechs |
|---|---|---|
| 20 | Fire Moth primary, A, B, C (8+); Fire Moth D (12) | — |
| 25 | Ice Ferret primary, A, B, D (8+); Ice Ferret C (12) | Locust IIC (6+) |
| 30 | Kit Fox all models (12) | — |
| 35 | Adder A, C, D (no roll); Adder primary, B (8+) | Jenner IIC (no roll); Horned Owl (6+) |
| 40 | Viper all models (8+) | — |
| 45 | Mist Lynx all models (12) | — |
| 50 | Nova B, C, D (no roll); Nova primary, A (8+) | — |
| 55 | Stormcrow A, B, C, D (8+); Stormcrow primary (12) |
Steel Viper 'Mechs
| Tons | OmniMechs | Second-Line 'Mechs |
|---|---|---|
| 20 | Fire Moth primary, A, C (12) | — |
| 25 | Ice Ferret primary, A, B, D (8+); Ice Ferret C (12) | Locust IIC (6+) |
| 30 | Kit Fox primary, A, B, D (8+); Kit Fox C (12) | — |
| 35 | Adder A, D (no roll); Adder B, C (8+); Adder primary (12) | Jenner IIC, Horned Owl (6+) |
| 40 | Viper primary, A, D (8+); Viper B, C (12) | — |
| 45 | Mist Lynx primary, C (8+); Mist Lynx A, B, D (12) | — |
| 50 | Nova B, C, D (8+); Nova primary, A (12) | Conjurer (10+) |
| 55 | Stormcrow A, B, C, D (8+); Stormcrow primary (12) |
Wulf 'Mechs
| Tons | OmniMechs | Second-Line 'Mechs |
|---|---|---|
| 20 | Fire Moth B, D (12) | — |
| 25 | Ice Ferret B, C, D (8+); Ice Ferret A (12) | Locust IIC (no roll) |
| 30 | Kit Fox primary, C (8+); Kit Fox A, B (12) | — |
| 35 | Adder primary, B (no roll); Adder C, D (8+); Adder A (12) | Jenner IIC, Horned Owl (6+) |
| 40 | Viper B, C (12) | — |
| 45 | Mist Lynx primary, A, B, D (no roll); Mist Lynx C (12) | — |
| 50 | Nova primary, A, B (8+) | Conjurer (10+) |
| 55 | Stormcrow primary (8+); Stormcrow A, B, C (12) |
Second-Line 'Mechs (All Clans)
| Tons | 'Mech |
|---|---|
| 40 | Griffin IIC |
| 45 | Shadow Hawk IIC |
| 55 | Shadow Hawk-C |
| 60 | Rifleman-C |
| 65 | Rifleman IIC, Thunderbolt-C |
| 70 | Archer-C, Warhammer-C |
| 75 | Marauder-C |
| 80 | Warhammer IIC, Victor-C |
| 85 | Marauder IIC |
| 100 | Atlas-C, Behemoth |
*No dice rolls required.
Com Guards Vehicles
| Tons | Vehicle |
|---|---|
| 5 | Gabriel |
| 10 | Wheeled, Track, Hover APC, Ripper |
| 15 | Beagle |
| 20 | Rotunda |
| 25 | J. Edgar, Nightshade |
| 30 | Galleon Cyrano, Karnov |
| 35 | Lightning |
| 40 | Zephyr |
| 45 | Goblin |
| 50 | Kanga, Chaparral, Vedette |
| 60 | Demon, LRM/SRM Carrier, Pike |
| 70 | Magi |
*No dice rolls required.
Com Guards 'Mechs
The Com Guards 'Mech Acquisition Table is printed in four columns: Star League, Refits*, 3025, and 3050*. The Star League and Refit entries are keyed to tonnage below.
| Tons | Star League | Refits* |
|---|---|---|
| 20 | MCY-97, -99 Mercury; THE-N Thorn | — |
| 25 | MON-66 Mongoose | — |
| 30 | HER-1S Hermes | — |
| 35 | HSR 200-D Hussar | HSR 400-D Hussar |
| 40 | STN-3L Sentinel | — |
| 45 | WVE-5N Wyvern | WVE-9N Wyvern |
| 50 | CRB-27 Crab | — |
| 55 | KTO-19 Kintaro | — |
| 60 |
3025 'Mechs (transcribed in printed order):
- LCT-1V Locust; WSP-1A Wasp; STG-3R Stinger
- SDR-5V Spider; UM-R60 UrbanMech; FS9-H, -M Firestarter; OTT-7J Ostscout; PNTF-8Z Panther
- ASN-21 Assassin; CDA-2A Cicada; CLNT0-2-3T Clint; WTH-1 Whitworth
- BJ-1 Blackjack; PXH-1 Phoenix Hawk
- HBK-4G Hunchback; DV-6M Dervish; GRF-1N Griffin; SHD-2H Shadow Hawk; SCP-1N Scorpion; WVR-6R Wolverine
- OSR-2C Ostroc; OTL-4D Ostsol; RFL-3N Rifleman
- CPLT-C1 Catapult; CRD-3R Crusader; TDR-5S Thunderbolt; ARC-2R Archer; WHM-6R Warhammer; MAD-3R Marauder; ON1-K Orion; AWS-8Q Awesome; CGR-1A1 Charger; GOL-1H Goliath; VTR-9B Victor
- BLR-1G BattleMaster; STK-3F Stalker; CP 10-Z Cyclops; BNC-3E Banshee; AS7-D Atlas
3050 'Mechs* (transcribed in printed order):
- UM-R63 UrbanMech; OTT-7K Ostscout; ASN-23 Assassin; CLNT-2-3U Clint; WTH-2 Whitworth; BJ-2 Blackjack; HBK-5M Hunchback; SCP-10 Scorpion
- OSR-2D Ostroc; CPLT-C3 Catapult; TDR-7M Thunderbolt; WHM-7M Warhammer; MAD-5M Marauder; ON1-M Orion
- BLR-2C, -3M BattleMaster; STK-5M Stalker; CP 11-A Cyclops; AS7-K Atlas
Source note: in the scan, the 3025 and 3050 columns are not row-aligned with the tonnage column, so this transcription does not assign a tonnage to each 3025 or 3050 entry. Players should confirm each unit's tonnage against the BattleTech Technical Readouts before using these entries under the Average Tonnage rules.
Star League and 3025 'Mechs require no dice rolls; Star League refits and 3050 'Mechs require a 2D6 roll with a result of 8+.
Scenarios
Each scenario begins with a first-person account and historical framework. Those narrative passages are omitted here; the Game Set-Up, Attacker, Defender, Victory Conditions, Special Rules, and Honor Levels of each scenario are transcribed in full. Map diagrams are referenced by their printed names but not reproduced.
Clan Smoke Jaguar
The following four scenarios re-create the major battles fought by Clan Smoke Jaguar on Tukayyid. These scenarios can be played as a self-contained campaign or as part of the overall struggle on Tukayyid. The numbers following each scenario indicate the order in which they should be played as part of the overall battle on Tukayyid.
Rain of Fire (1)
Game Set-Up: Lay out the BattleTech mapsheet as shown (City Ruins). Treat all Road and Paved hexes as Clear terrain.
Attacker: The Smoke Jaguars represent members of the Sixth Jaguar Dragoons, a veteran fighting force. The Dragoons' total point value should be no greater than 75 percent of the force fielded by the Com Guards.
Deployment: The Attacker sets up second, playing out the Smoke Jaguars' drop (see pp. 102–103, BattleTech Compendium). To land each Star of the Dragoons, the Smoke Jaguar player should place the Star on its target hex and then make a Piloting Skill Roll for each unit in the Star, applying the result as normal. All Piloting Skill Rolls for a Star must be made before landing another Star.
Defender: The Com Guards represent members of the green 50th Division (Uncluttered Speech).
Deployment: The Com Guards player sets up first, placing all of his forces on the map in any location he desires.
Victory Conditions:
- The Smoke Jaguars win a decisive victory if they destroy or drive off all of the Com Guards units within 12 turns. They win a marginal victory if they destroy or drive off all of the Com Guards units in 13 or more turns.
- The Com Guards win a decisive victory if they destroy all of the Smoke Jaguar units. They win a marginal victory if at least one Com Guards unit survives and stays on the map for 13 or more turns.
Special Rules:
- The Smoke Jaguar's landing is considered the end of the Movement Phase of Turn 1. Com Guards units that fire at the landed forces must add a +1 target movement modifier.
- The Com Guards may retreat off any edge of the mapsheet.
Honor Levels:
- Dueling: Level 1
- Physical Attacks: Level 1
- Retreating: Level 1
Battle in the Delta (2)
Game Set-Up: Lay out the BattleTech mapsheets as shown (River Delta/Drainage Basin #1 and River Delta/Drainage Basin #2). Treat all Woods hexes as Light Woods and all river hexes as Depth 1 water. In addition, all Clear hexes are considered swampy (see Swamp, p. 59, BattleTech Compendium).
Attacker: The Com Guards represent members of the 367th Division (Spoken Ideas), a regular division. The 367th should include both 'Mechs and hovercraft.
Deployment: The Com Guards player sets up first, placing his 'Mechs in Water hexes as hidden units. Before beginning play, the Com Guards player must note in writing the location of all of his forces (see Hidden Unit Set-up and Gamemasters, p. 6 of the Introduction). The Com Guards armor units enter from the south edge of the mapsheet.
Defender: The Smoke Jaguars represent members of the 267th Battle Cluster, a veteran group. The Smoke Jaguar force should have a point total equal to that fielded by the Com Guards.
Deployment: The Smoke Jaguar units set up second, anywhere within 3 hexes of the center row joining the two mapsheets.
Victory Conditions:
- The Smoke Jaguars win a decisive victory if they destroy or drive off all of the Com Guards units.
- The Com Guards win a decisive victory if they destroy all of the Clan units. They win a marginal victory if they destroy at least 60 percent of the Clan units.
Special Rules:
- Clan 'Mechs may enter the water to search for Com Guard 'Mechs. The brackish water's high silt concentration, however, limits line of sight for underwater units to 2 hexes.
- Any hovercraft over a Depth 1 or 2 Water hex that suffers a critical hit to its airskirt severe enough to immobilize it is considered destroyed.
- The Com Guards may not retreat off the north edge of the mapsheets.
Honor Levels:
- Dueling: Level 2
- Physical Attacks: Level 2
- Retreating: Level 1
Ambush at the Dinju Pass (7)
Game Set-Up: Lay out the BattleTech mapsheet as shown (Rolling Hills #2).
Attacker: The Attacker represents the elements of the Com Guards veteran 299th and 323rd Divisions. Precentor Mari Rennery leads the 323rd in her Guillotine. All of the Com Guard 'Mechs must be jump capable, and none of them may have movement rates faster than Walking MP 4, Running MP 6, and Jumping MP 4. The Com Guards may not use vehicles in this scenario.
Deployment: The Com Guards set up first, beginning the scenario with their forces hidden (see Hidden Unit Set-Up and Gamemasters, p. 6 of the Introduction). Precentor Rennery's Guillotine must be deployed closer to the north edge of the mapsheet than any other Com Guards unit, and at least half of the Com Guards force must be deployed on the southern half of the mapsheet.
Defender: The Defender comprises elements of the veteran Jaguar Grenadiers and Sixth Jaguar Dragoons. The Grenadiers include Star Captain Brau Showers, piloting an Adder with Piloting Skill 2, and Star Colonel Brandon Howell, piloting a Timber Wolf with Gunnery Skill 1 and Piloting Skill 2. If players have not played the Rain of Fire scenario (p. 30) or if the Clan player of that scenario won a marginal victory, the Smoke Jaguar force should have a total point value approximately equal to 50 percent of that fielded by the Com Guards. If the Jaguars won a decisive victory in Rain of Fire, they may field a force equal to 60 percent of the Com Guards force. If they lost, they may field a force equal to only 40 percent of the Com Guards.
Deployment: The Smoke Jaguars enter the mapsheet from the south edge.
Victory Conditions:
- The Smoke Jaguars win a decisive victory if 80 percent or more of their units successfully exit the north edge of the mapsheet. They win a marginal victory if at least 40 percent of their units exit the north edge of the mapsheet.
- The Com Guards win a decisive victory if they destroy more than 80 percent of the Clan force. They win a marginal victory if they destroy more than 40 percent of the Clan force.
Special Rules:
- In Turn 1, the Com Guard 'Mechs may not move but may make attacks as usual. The Com Guards may exit off any edge of the mapsheet except the south edge.
- Because the Clan force's objective is to bypass the Com Guards ambush by exiting off the north edge of the mapsheet, the Clan units may not exit the mapsheet at any other edge. Clan units that exit the mapsheet at the north edge are considered to have successfully advanced toward their objective, rather than retreated.
Honor Levels:
- Dueling: Level 3
- Physical Attacks: Level 3
- Retreating: Level 1
Battle for Tamo Bunker (9)
Game Set-Up: Lay out the BattleTech mapsheets as shown (Rolling Hills #1 and Rolling Hills #2).
Attacker: The Attacker is made up of elements of the Smoke Jaguars' veteran 122nd Striker Cluster. The total Clan force consists of a light Star and two light Trinaries.
Deployment: The Smoke Jaguars enter from the north edge of the mapsheet.
Defender: The Defender includes Precentor Martial Anastasius Focht and his elite honor guard. The honor guard comprises Focht's Atlas, twelve Star League-era assault 'Mechs, and two platoons of foot infantry. The Precentor Martial has Gunnery Skill 1 and Piloting Skill 2.
Deployment: The Com Guards enter from the south edge of the mapsheet.
Victory Conditions:
- The Smoke Jaguars win a decisive victory if the Precentor Martial is killed. They win a marginal victory if they destroy nine or more Com Guard 'Mechs.
- The Com Guards win a decisive victory if they destroy all of the Clan units and the Precentor Martial survives the battle. They win a marginal victory if they destroy all of the Clan units but the Precentor Martial is killed.
Special Rules:
- During this scenario, the Com Guards must adhere strictly to the conventions of Clan honor. If they violate those conventions, the Smoke Jaguars will immediately attack the Precentor Martial en masse. For the purpose of issuing challenges under the ritual of zellbrigen (dueling), each of the two platoons is considered a single target.
- As long as Focht commands his troops from this bunker, the Com Guards player adds a +2 modifier to all Initiative rolls. If and when the Precentor Martial personally participates in battle during this scenario rather than commanding from the bunker, the Com Guards player may no longer use the +2 Initiative modifier.
- If the Smoke Jaguars achieve any level of victory in this scenario, reduce the modifier by 1 to reflect collateral damage to the bunker's delicate virtual-reality equipment. If Focht is killed, reduce the modifier by 2. These reductions are cumulative; if the Jaguars win by killing the Precentor Martial, the loss of Focht (-2) plus the damage to the bunker (-1) results in a -1 modifier to all Com Guards Initiative rolls. This penalty represents the breakdown in command caused by such a devastating blow to the Com Guards.
Honor Levels:
- Dueling: Level 1
- Physical Attacks: Level 2
- Retreating: Level 1
Clan Nova Cat
Battle in the Suburbs (3)
Game Set-Up: Lay out the BattleTech mapsheet as shown (City (Hills/Residential) #2). Place Medium Buildings in hexes 1015, 1103, 1106, and 1209. Place Light Buildings in hexes 0215, 0309, 0505, 0812, 0910, 1303, 1313, and 1406.
Attacker: The Nova Cats represent members of the elite Second Nova Cat Guards.
The Clan's intelligence reports indicate that only 'Mechs hold the city. If there is more than one Clan player, the players should engage in batchall for the right to command the attacking force. The bidding begins with a medium Supernova Trinary. If one player is controlling the Clan forces, he may only choose a force with a total point value equal to the Com Guard 'Mechs (not the rest of the force).
Deployment: The Clan 'Mechs enter the mapsheet from the north edge.
Defender: The Com Guards represent members of the veteran Ninth Division (Bountiful Words). The Com Guards have a Level II detachment of 'Mechs, a Level II of armor, and a Level I of infantry.
Deployment: The Com Guards forces begin the game as hidden units in prepared positions (see Hidden Unit Set-Up and Gamemasters, p. 6 of the Introduction).
Victory Conditions:
- The Nova Cats win a decisive victory if they destroy or drive off all of the Com Guards units.
- The Com Guards win a decisive victory if they destroy all of the Clan units.
Honor Levels:
- Dueling: Level 1
- Physical Attacks: Level 1
- Retreating: Level 1
Ambush from the Depths (10)
Game Set-Up: Lay out the BattleTech mapsheet as shown. The river on the map, as well as the row of hexes from 1006 North to 1001, constitute the shore of the lake. Treat these as Depth 1 Water hexes. The entire area to the west of the shore is also under water; treat Clear hexes as Depth 1, Light Woods hexes as Depth 2, and all Heavy Woods and Hill hexes as Depth 3.
On the area of the mapsheet east of the shore, consider all Light Woods hexes as Rough terrain and treat all Heavy Woods hexes as Light Woods.
Attacker: The Nova Cats represent members of the veteran First Nova Cat Lancers. The Attacker's force should have a point total no greater than that fielded by the Com Guards. The Clans may not use Elementals in this scenario.
Deployment: The Clan units begin the game hidden in any Depth 2 or deeper Water hexes. The Clan player sets up only after the Com Guards player has placed all of his units.
Defender: The Com Guards represent members of the regular 244th Division (Peace Through Words) and the green 467th Division (the Whirlwinds). The green soldiers have Gunnery Skill 4 and Piloting Skill 5, while the regular troops have Gunnery Skill 5 and Piloting Skill 6. At least half the pilots of both 'Mechs and armored vehicles must be green.
Deployment: The Com Guards player sets up first, placing all of his units on Clear hexes and determining their facings randomly. To determine each unit's facing, roll 1D6 and consult the Facing after a Fall Table on p. 19 of the BattleTech Compendium.
Victory Conditions:
- The Nova Cats win a decisive victory if they destroy or drive off more than half of the Com Guards units within 15 turns. They win a marginal victory if they destroy or drive off all of the Com Guards units after 15 turns.
- The Com Guards win a decisive victory if they destroy all of the Clan units. They win a marginal victory if they destroy more than half of the Clan units.
Special Rules:
- At this point in their campaign, the Nova Cats have almost completely run out of supplies. To reflect this fact, all Clan 'Mechs used in the scenario begin play without ammunition. Before the Clan players choose their 'Mechs for the scenario, the gamemaster (or Com Guards player) should read aloud the scenario summary for Ambush from the Depths. The summary notes that the Clans' supplies are running low; the gamemaster need not give the Clan players any additional warning about this complication.
- Because the Clan force has the advantage of surprise (for once), the Clan player may attack the Com Guards without fear of counterattack for one turn. During Turn 1, the Com Guards units may neither move nor fire weapons.
Honor Levels:
- Dueling: Level 1
- Physical Attacks: Level 1
- Retreating: Level 1
ComStar Counterattack (11)
Game Set-Up: Lay out the BattleTech mapsheet as described in Ambush from the Depths, p. 44.
Attacker: The Com Guards represent members of the veteran 417th Division (Major Trouble). The Com Guards force consists only of 'Mechs with movement of at least Walking MP 5 and Running MP 8.
Deployment: The Com Guards enter the mapsheet from the eastern edge. During Turn 1, all 'Mechs run.
Defender: The Nova Cats represent members of the veteran Twelfth Nova Cat Cavaliers. The size of the Nova Cat force depends on the outcome of the two previous Nova Cat scenarios. If the Com Guards failed to win a victory in either of the previous scenarios, the Nova Cats may start with a total point value equaling up to 60 percent of the Com Guards' total point value. If the Com Guards earned victory in one of the preceding scenarios, the Nova Cat force's point total should be no greater than 50 percent of the Com Guards' total. If the Com Guards won both of the previous scenarios, the Cats may field a force equal to up to 40 percent of the Com Guards force, but none of their 'Mechs have ammunition.
Deployment: The Clan player sets up first, placing his 'Mechs anywhere on the mapsheet.
Victory Conditions:
- The Nova Cats win a decisive victory if they destroy or drive off all of the Com Guards units. They win a marginal victory if they successfully retreat more than half their forces off the mapsheet.
- The Com Guards win a decisive victory if they destroy all of the Clan units. They win a marginal victory if they destroy more than half of the Clan units.
Special Rules:
- The Nova Cats did not have time to rearm all of their 'Mechs before the Com Guards attacked, and so only a fifth of the Clan 'Mechs have full ammo loads. The remaining OmniMechs have none. The Clan player must determine which 'Mechs have ammo and which do not randomly.
- The Nova Cats may not retreat until the end of Turn 6. At the beginning of Turn 7, Khan Garr orders them to retreat. They may only retreat off the north or west edges of the mapsheet.
- Nova Cats units may not move during Turn 1.
Honor Levels:
- Dueling: Level 1
- Physical Attacks: Level 1
- Retreating: Level 2
Clan Ghost Bear
Pummeling the Polar Bears (4)
Game Set-Up: Lay out the BattleTech mapsheet as shown (Rolling Hills #1).
Attacker: The Com Guards represent members of the veteran 91st Division. One of the Com Guards' 'Mechs is piloted by Precentor Dann Brockton, the 91st's commanding officer. Brockton has Gunnery Skill 2 and Piloting Skill 3.
Deployment: The Com Guards forces begin the scenario hidden anywhere on the mapsheet (see Hidden Unit Set-up and Gamemasters, p. 6).
Defender: The Ghost Bears represent members of the elite 20th Polar Bear Attack Cluster. The Ghost Bears force should have a point total no greater than 75 percent of that fielded by the Com Guards.
Deployment: The Ghost Bear 'Mechs and Elementals are marching along Hex Rows 07xx, 08xx, and 09xx. The Clan player or players may place units anywhere in these hex rows, as long as they remain in formation (no more than one unoccupied hex between units).
Victory Conditions:
- The Ghost Bears win a decisive victory if they destroy or drive off all of the Com Guards units and more than half of their own force survives the battle. They win a marginal victory if they destroy or drive off all of the Com Guards units but lose more than half of their own units in the process.
- The Com Guards win a decisive victory if they destroy or drive off all of the Clan units. They win a marginal victory if they destroy or drive off 60 percent or more of the Clan units.
Special Rules:
- If a Clan unit starts the game on a hex containing a hidden Com Guards unit, that unit is automatically revealed. If the hidden unit is a 'Mech, it may immediately attempt to punch or kick the Ghost Bear unit placed in its hex, after which the Com Guard player must move his unit to any adjacent hex.
- The scenario begins with at least three Com Guards units bursting from their hidden positions and firing upon the Ghost Bears. During Turn 1, the Clan units may neither move nor fire; the attacking Com Guards units add a +1 target movement modifier to all to-hit rolls.
Honor Levels:
- Dueling: Level 1
- Physical Attacks: Level 1
- Retreating: Level 2
Forest Inferno (14)
Game Set-Up: Lay out the BattleTech mapsheet as shown.
Attacker: The Ghost Bears represent members of the veteran Seventh Bear Guards, led by Star Captain Mert Foster in his Black Hawk. All of the Seventh's MechWarriors are exhausted from racing through the woods ahead of the forest fire for several hours, and so all Ghost Bear pilots have Gunnery Skill 4 and Piloting Skill 5 except for Star Captain Mert Foster. He has Gunnery Skill 3 and Piloting Skill 4. The Ghost Bear force should have a total point value no greater than that of the force fielded by the Com Guards.
Deployment: The Clan forces enter at the west edge of the mapsheet.
Defender: The Com Guards represent members of the veteran Twelfth Division (Pure Waveforms), led by Adept Shintaro Datsin in his Lancelot.
Deployment: The Com Guards player sets up first, placing his units anywhere on the Rolling Hills mapsheet. Up to half of the Com Guards units may begin play as hidden units (see Hidden Unit Set-up and Gamemasters, p. 6).
Victory Conditions:
- The Ghost Bears win a decisive victory if they destroy or drive off all of the Com Guards units, and more than half of their own forces survive the battle. They win a marginal victory if they destroy or drive off all of the Com Guards units, but lose more than half of their own units in the process.
- The Com Guards win a decisive victory if they destroy all of the Clan units. They win a marginal victory if they destroy 60 percent or more of the Clan units.
Special Rules:
- The rules for fire (p. 53, BattleTech Compendium) apply in this scenario.
- The Clan OmniMechs begin play with a Heat Level of 8. All of the Woods hexes on the west half of the Heavy Woods mapsheet are on fire at the start of the game, and the wind is blowing toward the east. Fire cannot spread to Clear hexes.
- Units may not move into the half-hexes on the edges of the mapsheets. Any unit entering such a hex is considered to have retreated.
Honor Levels:
- Dueling: Level 2
- Physical Attacks: Level 1
- Retreating: Level 1
Spanac: City under Siege (15)
Game Set-Up: Lay out the BattleTech mapsheets as shown. The Com Guards player should place 5 Light Buildings and 5 Medium Buildings on the City Hills mapsheet, and 5 Light, 5 Medium, and 10 Heavy Buildings on the City Street Grid mapsheet. In addition, the Com Guards player should place one Hardened Building, representing the supply depot, in any hex on the east edge of the mapsheet. Keeping in mind these guidelines, any building may be placed in any hex save for a Road hex.
Attacker: The Ghost Bears represent members of the veteran First Bear Guards. The unit commander has Gunnery Skill 1 and Piloting Skill 2.
The Ghost Bears' aerospace recon run has given them an accurate assessment of the defenders' strength, and so the Ghost Bear players (if more than one) should engage in batchall for the right to take the supply depot. The bidding begins with a Cluster comprised of one medium, one heavy, and one assault Supernova Trinary. If only one player is controlling the Clans, his force should have a total point value no greater than that fielded by the Com Guards.
Deployment: The Ghost Bear forces enter at the west edge of the map.
Defender: The Com Guards represent members of the veteran 91st Division.
Deployment: The Com Guards forces begin the game within 10 hexes of the supply depot.
Victory Conditions:
- The Ghost Bears win a decisive victory if they destroy or drive off all of the Com Guards units or if they capture the supply depot. The depot is considered captured if one or more Ghost Bear units stays within 8 hexes of the depot's Building counter for at least 4 turns without any Com Guards units spending at least 2 full turns inside that 8-hex radius.
- The Com Guards win a decisive victory if they destroy or drive off all of the Clan units. They win a marginal victory if they must destroy the supply depot to keep it from falling to enemy forces.
Special Rules:
- Beginning in Turn 11, the Com Guards player may choose to destroy the depot in order to prevent it from falling into enemy hands. To accomplish this, Com Guards units must attack the Hardened Building until its Construction Factor is reduced to 0.
- The game set-up for Spanac: City under Siege should also be used in the scenario Luarca's Revenge (p. 55). During Spanac: City under Siege, the players or the gamemaster should keep track of damaged or rubbled buildings.
Honor Levels:
- Dueling: Level 3
- Physical Attacks: Level 2
- Retreating: Level 3
Luarca's Revenge (24)
Game Set-Up: Lay out the BattleTech mapsheets as described in Spanac: City under Siege (p. 53).
Attacker: The Com Guards represent members of the veteran 103rd Division (Truth in Communication). The unit commander, Precentor Katherine Luarca, has Gunnery Skill 2 and Piloting Skill 3, and she pilots a Flashman. The Com Guards force should have a total point value no greater than that of the Clan force, and all Com Guard 'Mechs must have movement of at least Walking MP 5, Running MP 8. If the Com Guards force includes vehicles, they must be hovercraft or VTOLs.
Deployment: The Com Guards forces enter at the west edge of the map.
Defender: The Ghost Bears represent members of the regular Reserve Trinary Echo Four. Star Captain Lee, the unit commander, has Gunnery Skill 2 and Piloting Skill 3, and he pilots a Rifleman IIC. Reserve Trinary Echo Four is comprised of one light, one medium, and one heavy Star of second-line Clan 'Mechs.
Fifty percent of the Clan units begin the scenario with half their standard ammo loads, and 50 percent begin with no ammo. The Clan player should not learn of this shortage until he has chosen all of his forces, at which point he may randomly determine which 'Mechs have no ammo.
Deployment: The Clan forces begin the game within 10 hexes of the supply depot.
Victory Conditions:
- The Ghost Bears win a decisive victory if they destroy or drive off all of the Com Guards units and keep the supply depot intact. They win a marginal victory if they destroy or drive off all of the Com Guards units but destroy the depot.
- The Com Guards win a decisive victory if they destroy or drive off all of the Clan units. They win a marginal victory if they destroy the supply depot.
Special Rules:
- All buildings damaged or reduced to rubble by the end of Spanac: City under Siege should remain damaged during this scenario, but any fire and smoke from that damage has burned out or drifted away. Therefore, any fire or smoke rules used in the previous scenario no longer apply.
- Any unit that exits the mapsheet is out of the game.
- If the Com Guards achieved a victory in Spanac: City under Siege, the Clan units in this scenario defend their own supply cache rather than one captured from the Com Guards. In this case, use the mapsheets shown in the source (not reproduced here). The Clan player should place a single Level 1 Light Building at the east edge of the map to represent the Ghost Bears' makeshift depot.
Honor Levels:
- Dueling: Level 4
- Physical Attacks: Level 4
- Retreating: Level 4
Clan Jade Falcon
Hit and Run on the Prezno Plain (5)
Game Set-Up: Lay out the BattleTech mapsheet as shown. Treat all Water hexes as Clear terrain, and all wooded hexes as Light Woods.
Attacker: The Com Guards represent members of the veteran 394th Division (White Lions). Each Com Guards unit consists of a BMB-12D Bombardier, CN9-A Centurion, THG-11E Thug, and a STN-3L Sentinel.
Deployment: The Com Guard 'Mechs begin the scenario as hidden units, anywhere on the mapsheet (see Hidden Unit Set-up and Gamemasters, p. 6).
Defender: The Jade Falcons represent the following Falcon Guards Star, commanded by Star Captain Joanna.
Trinary Alpha Star
- Star Captain Joanna (Piloting 3, Gunnery 2), Mad Dog
- MechWarrior Diana (Piloting 2, Gunnery 3), Warhawk
- MechWarrior Khastis (Piloting 4, Gunnery 3), Hellbringer
- MechWarrior Faulk (Piloting 4, Gunnery 3), Gargoyle
- MechWarrior Leema (Piloting 4, Gunnery 3), Stormcrow
Deployment: The Jade Falcon OmniMechs must set up within 3 hexes of Hex 0809, all facing the eastern edge of the mapsheet.
Victory Conditions:
- The Jade Falcons win a decisive victory if they destroy or disable all of the Com Guards units. They win a marginal victory if they destroy or disable 2 or more Com Guards units.
- The Com Guards win a decisive victory if they destroy all of the Clan units or if they destroy 2 or more Clan units and escape with all of their units still functional. They win a marginal victory if they destroy or disable one or more of the Clan units and exit the mapsheet with at least 3 functional units.
Special Rules:
- This scenario begins with one or more Com Guard 'Mechs leaving its hiding place and attacking. During Turn 1, the Com Guards player must reveal at least one of his units, and the Clan units may not move or fire. Beginning with Turn 2, play proceeds normally.
Honor Levels:
- Dueling: Level 4
- Physical Attacks: Level 4
- Retreating: Level 4
Assault on Robyn's Crossing (18)
Game Set-Up: Lay out the BattleTech mapsheets with the Mountain Stream mapsheet overlapping the City Ruins mapsheet as shown. The City Ruins mapsheet, called Map 1, represents the Prezno Plain. Treat all Paved and Road hexes on Map 1 as Clear terrain. The 08xx row of hexes where the mapsheets join represents the cliff face leading down to the river. Treat every hex west of this line as a Level 4 hex. The Mountain Stream mapsheet, called Map 2, represents the Prezno River and river bank. Treat all hexes on Map 2 as Level 0 terrain except for the stream and all hexes to the east of it; treat these as Depth 3 Water hexes. There is a one-level drop from the surrounding terrain to the water's surface, and all Woods hexes on Map 2 are considered Clear terrain. The Robyn's Crossing bridge begins at Hex 0612 and extends eastward all the way off the map through Hexes 0512, 0412, 0312, 0212 and 0112. Treat the bridge as Hardened, with a CF of 100.
Attacker: The Jade Falcons represent the following elements of the Twelfth Falcon Regulars and the Falcon Guards.
Falcon Guards Command Star
- Star Colonel Aidan Pryde (Piloting 2, Gunnery 1), Timber Wolf*
- MechWarrior Horse (Piloting 3, Gunnery 2), Viper-A
- MechWarrior Margo (Piloting 3, Gunnery 2), Mist Lynx
12th Falcon Regulars Command Star
- Star Colonel Senza Oriega (Piloting 3, Gunnery 2), Executioner-B
- MechWarrior Karoline Buhallin (Piloting 3, Gunnery 2), Summoner-A
- MechWarrior Jansen (Piloting 3, Gunnery 2), Executioner
- MechWarrior Winston (Piloting 3, Gunnery 2), Gargoyle
- MechWarrior Stanton (Piloting 3, Gunnery 2), Summoner
*See Special Rule 4.
Deployment: The Twelfth Falcon Regulars Command Star sets up on Map 2, in any land hexes south of Hex 1109. The three Falcon Guards 'Mechs begin the game at the western edge of Map 1.
Defender: The Com Guards represent members of the 388th Division (the White Banshees). Three Level II units of 'Mechs, worth 900 total points, make up the Com Guards force.
Deployment: One Level II unit of 'Mechs must begin the game on the bridge. The Com Guards player may set up his remaining unit anywhere within 5 hexes of the bridge landing (Hex 0612).
Victory Conditions:
- The Jade Falcons win a decisive victory if they destroy or drive off all of the Com Guards units. They win a marginal victory if they capture the bridge. The bridge is considered captured if one or more Falcon 'Mechs stays on the bridge and no Com Guards units are on the bridge or within 3 hexes of the landing (Hex 0612) for four or more consecutive turns.
- The Com Guards win a decisive victory if they destroy all of the Clan units. They win a marginal victory if they prevent the Falcons from capturing the bridge until after Turn 12.
Special Rules:
- The Com Guards may only retreat by crossing the bridge (exiting off the east edge of the map).
- Because of the Prezno River's fierce currents, any unit that enters the water is swept away and considered destroyed for the purposes of this scenario. If the controlling player of any unit on the bridge has made an unsuccessful Piloting Skill Roll, he must immediately make a second Piloting Skill Roll. If the second roll is also unsuccessful, the unit falls into the river and is lost. If Star Colonel Pryde enters the river, determine damage normally for the fall, but do not halve the damage as usual. This move takes him out of this scenario, though Aidan will return in Pryde's Pride, p. 66.
- The Com Guards have rigged the bridge with explosives, but the Clan players should not know this. The Com Guards player may choose to set off the hidden explosives during any turn's End Phase, destroying the bridge instantly. All units on the bridge when it explodes are destroyed. However, if a 'Mech with at least one functioning hand is standing in Hex 0612 when the bridge explodes, that 'Mech may make a desperate grab for the edge of the bridge landing. For this tactic to succeed, the player must make a successful Piloting Skill Roll modified by +4. Shrapnel from the exploding bridge inflicts 20 points of damage to the 'Mech; divide this damage into 5-point clusters and apply it using the Rear column of the Hit Location Table (p. 27, BattleTech Compendium). During the following turn, the 'Mech may take no action except to climb into Hex 0712 or Hex 0713 and stand up. If both of these hexes are occupied, the 'Mech must simply hang from the edge until one of the hexes is empty.
- Star Colonel Pryde's Timber Wolf has been fitted with jump jet pods. To make room for the pods, his techs removed the 'Mech's torso-mounted lasers and machine guns. Aidan's 'Mech has a Jumping MP of 4 (see the Timber Wolf record sheet at the end of the book).
- If the Com Guards score a decisive victory in this scenario, they halt the Falcon offensive before it has a chance to begin. In that case, the Falcons' Tukayyid campaign ends with this scenario.
Honor Levels:
- Dueling: Level 4
- Physical Attacks: Level 4
- Retreating: Level 1
Olalla, City of Death (19)
Game Set-Up: Lay out the BattleTech mapsheet as shown. Before beginning play, the Com Guards player should place 10 Light Buildings on the map in any Clear hexes of his choice.
Attacker: The Com Guards force represents members of the veteran 77th Division (the White Monsters), and should consist of three Level II units of 'Mechs worth 900 total points.
Deployment: The Com Guard 'Mechs begin the scenario by erupting from their hidden bunkers. The Com Guards may begin anywhere on the mapsheet except within 3 hexes of Hex 0809.
Defender: The Jade Falcons represent the elite Falcon Guards' Alpha Heavy Star.
Alpha Heavy Star
- Star Commander Jula Huddock (Piloting 3, Gunnery 1), Executioner-A
- MechWarrior Alyn (Piloting 3, Gunnery 2), Summoner-A
- MechWarrior Crocco (Piloting 4, Gunnery 2), Summoner-C
- MechWarrior Eleny (Piloting 4, Gunnery 3), Hellbringer-B
- MechWarrior Lan (Piloting 4, Gunnery 3), Mad Dog
Deployment: The Jade Falcon force begins the scenario in the center of the mapsheet. All Falcon 'Mechs must be within 3 hexes of Hex 0809 at the start of the game.
Victory Conditions:
- The Jade Falcons win a decisive victory if they destroy or drive off all of the Com Guards units. They win a marginal victory if they destroy or drive off at least 9 Com Guards units, or if 3 or more units manage to escape off the mapsheet.
- The Com Guards win a decisive victory if they destroy all of the Clan units. They win a marginal victory if they manage to destroy 3 or more of the Clan units.
Special Rules:
- The Falcon Guards may only retreat off the south edge of the mapsheet. The Com Guards may retreat off any edge of the mapsheet except the south edge.
Honor Levels:
- Dueling: Level 4
- Physical Attacks: Level 4
- Retreating: Level 4
Pryde's Pride (20)
Game Set-Up: Lay out the BattleTech mapsheet as shown. Treat all Paved and Road hexes as Clear terrain.
Attacker: The Com Guards force represents members of the green 104th Division, and it should consist of three light Level IIs of 3025-technology 'Mechs.
Deployment: The Com Guards player sets up first anywhere on the mapsheet, provided that his forces begin the game at least 6 hexes away from Hex 0809.
Defender: The Jade Falcon force consists of Star Colonel Aidan Pryde in his modified Timber Wolf (see Timber Wolf record sheet at the end of the book). Star Colonel Pryde has Gunnery Skill 1 and Piloting Skill 2.
Deployment: Star Colonel Pryde begins the scenario in the center of the mapsheet at Hex 0809. His 'Mech may face in any direction.
Victory Conditions:
- The Jade Falcon player wins a decisive victory if he destroys or drives off 12 or more Com Guards units. He wins a marginal victory if he destroys or drives off 6 or more Com Guards units.
- The Com Guards win a decisive victory if they destroy the Star Colonel's 'Mech without losing more than 5 of their own 'Mechs. They win a marginal victory if they destroy the enemy OmniMech but lose 6 or more of their own 'Mechs in the process.
Special Rules:
- The combination of the elements in Tukayyid's thick atmosphere, the smoke from the battlefield, and the exhaust from the DropShips has made it difficult for the Com Guards to target their enemy effectively, and so all attacking Com Guards add a +2 to-hit modifier. Aidan Pryde has a superior targeting computer, an innate knack for predicting enemy movements, and aid from Kael Pershaw (spotting for him from overhead in a Spector class aerospace fighter) and so does not suffer this handicap.
- Aidan begins this scenario with the damage level and ammo that he had at the end of Assault on Robyn's Crossing, p. 61. If Star Colonel Pryde was killed in that scenario, players should skip this scenario.
Honor Levels:
- Dueling: Level 4
- Physical Attacks: Level 4
- Retreating: Level 1
Clan Diamond Shark
Battle in the Foothills (6)
Game Set-Up: Lay out the BattleTech mapsheet as shown (Desert Hills).
Attacker: The Diamond Sharks represent members of the elite 39th Striker Cluster. The Diamond Shark force should have a total point value no greater than 75 percent of that fielded by the Com Guards.
Deployment: The Clan 'Mechs enter the mapsheets from the north edge at a walk.
Defender: The Com Guards represent members of the veteran 31st Division (the Static Hurlers). The Com Guards player should choose at least two of his 'Mechs from the five Star League refit designs described in Playing the Com Guards, pp. 11–17.
Deployment: The Com Guards player may set up anywhere on the mapsheet, but at least 3 of his 'Mechs must begin the game in the Level 0 hexes at the center of the pass.
Victory Conditions:
- The Diamond Sharks win a decisive victory if they destroy or drive off all of the Com Guards units.
- The Com Guards win a decisive victory if they destroy all of the Clan units.
Special Rules:
- Taking into account the element of surprise, the Com Guards may fire at the end of the Movement Phase of the first turn in which line of sight exists between the two forces. The Clan players must wait until the following turn to return fire.
- The east and west edges of the map represent the walls of the Kozice Valley pass. Because the north edge is the Clan offensive line, Com Guards units may only retreat off the south edge of the mapsheet.
Honor Levels:
- Dueling: Level 1
- Physical Attacks: Level 1
- Retreating: Level 1
Death of the 85th (8)
Game Set-Up: Lay out the BattleTech mapsheet as shown (Desert Hills).
Attacker: The Diamond Sharks represent members of the veteran 222nd Assault Cluster (the Rippers). The Clan force should have a total point value no greater than 75 percent of that fielded by the Com Guards.
Defender: The Com Guards represent members of the green 85th Division (Lions of the Periphery).
Deployment: The Com Guards and Clan players each roll a die; the player with the highest result chooses the edge of the mapsheet from which his forces will enter. The enemy force enters from the opposite edge of the mapsheet.
Victory Conditions:
- The Diamond Sharks win a decisive victory if they destroy or drive off all of the Com Guards units within 15 turns. They win a marginal victory if they destroy or drive off the enemy after 15 turns have elapsed.
- The Com Guards win a decisive victory if they destroy or drive off all the Clan units. They win a marginal victory if an operational Com Guards unit remains on the mapsheet after 15 turns have elapsed.
Special Rules:
- Units may only retreat off the mapsheet across the edge from which they entered.
Honor Levels:
- Dueling: Level 1
- Physical Attacks: Level 1
- Retreating: Level 1
In the Net (16)
Game Set-Up: Lay out the BattleTech mapsheet as shown.
Attacker: The Com Guards represent members of the regular 301st Division (the White Sharks). If the Diamond Sharks won decisive victories in both of their preceding scenarios, the Com Guards force should have a total point value no greater than 75 percent of that fielded by the Sharks.
Deployment: The Com Guards enter from the west edge of the mapsheet.
Defender: The Diamond Sharks represent members of the veteran 369th Striker Cluster (the Hammerheads). If the Diamond Sharks did not win decisive victories in both of their preceding scenarios, then the Clan force should have a total point value no greater than that fielded by the Com Guards. In addition, each of the OmniMechs carries only 25 percent of a full ammo load. If the Sharks won two decisive victories, the Clan force's total point value may exceed that of the Com Guards by 25 percent, and their 'Mechs carry half a full ammo load.
Deployment: The Diamond Sharks enter from the east edge of the mapsheet.
Victory Conditions:
- The Diamond Sharks win a decisive victory if they destroy or drive off all the Com Guards units.
- The Com Guards win a decisive victory if they destroy or drive off all the Clan units.
Special Rules:
- The gamemaster (or Com Guards player) should read to the Clan players the scenario overview noting the Sharks' low ammo reserves, but he need not give the Clan players any additional warning about their ammunition shortage before selecting forces.
Honor Levels:
- Dueling: Level 2
- Physical Attacks: Level 2
- Retreating: Level 2
Omega's Last Stand (17)
Game Set-Up: Lay out the BattleTech mapsheet as shown.
Attacker: The Com Guards represent members of the regular 79th Division (Straight Words).
Deployment: The Com Guards enter on the south edge of the mapsheet.
Defender: The Diamond Sharks represent members of the Third Shark Regulars, a regular unit. The Clan force should have a total point value no greater than that fielded by the Com Guards, and is comprised entirely of second-line 'Mechs.
Deployment: The Clan forces enter on the north edge of the map.
Victory Conditions:
- The Diamond Sharks win a decisive victory if they destroy or drive off all of the Com Guards units. They win a marginal victory if they prevent more than half of the Com Guards units from breaking through Clan lines (exit off the north edge of the mapsheet).
- The Com Guards win a decisive victory if they destroy or drive off all of the Clan units. They win a marginal victory if more than half of their units break through the Diamond Shark lines (exit off the north edge of the mapsheet).
Special Rules:
- The Com Guards may retreat off any edge of the map. Only units that exit off the north edge are considered to have broken through enemy lines and so count toward marginal victory.
Honor Levels:
- Dueling: Level 4
- Physical Attacks: Level 4
- Retreating: Level 1
Campaign Notes: If the Diamond Sharks achieved decisive victories in all three of their previous scenarios, their retreat from Tukayyid in this scenario takes place under somewhat less dire conditions than if they achieved marginal or no victories. To reflect this situation, add another mapsheet when setting up (as shown in the source, not reproduced here). All other facets of this scenario remain unchanged.
Clan Steel Viper
Devil's Bath (12)
Game Set-Up: Lay out the BattleTech mapsheet as shown (River Delta/Drainage Basin #2). Treat all River hexes as Clear terrain. The wooded hexes represent the towering granite columns of the Bath. Terrain groupings of Light Woods hexes are considered Level 4 terrain, while groupings containing one or more Heavy Woods hexes are considered Level 6 terrain.
Attacker: The Steel Vipers represent members of the elite First Viper Guards. The Steel Viper force should have a total point value no greater than that fielded by the Com Guards.
Deployment: The Clan units enter on the west edge of the mapsheet.
Defender: The Com Guards represent members of the green Sixth Division (Alert Words).
Deployment: The Com Guards player may set up his units anywhere on the map, and any number of his units may begin the game hidden (see Hidden Unit Set-up and Gamemasters, p. 6).
Victory Conditions:
- The Clans win a decisive victory if they destroy all of the Com Guards units.
- The Com Guards win a decisive victory if they destroy all of the Clan units.
Special Rules:
- Before beginning play, the gamemaster (or Com Guards player) should randomly place 12 "mudpots" (hidden pools of boiling mud) on the mapsheet. If the gamemaster places them, he should inform the Com Guards player of their location. To randomly place a mudpot on the map, roll 1D6 twice and consult the Mudpot Placement Table. The first roll determines the hex column, the second roll the hex row.
- After each pair of die rolls, designate any of the Clear hexes within the columns and rows given on the table as a mudpot and note the location on a piece of paper. The Clan players should not know that these mudpots exist.
- The Com Guards player rolls a 2 and a 4. According to the Mudpot Placement Table, the mudpot may be placed in any of the following hexes: 0409, 0410, 0411, 0509, 0510, or 0511. Hex 0409, however, contains a Level 6 granite column, and therefore may not contain a mudpot.
- Any Clan unit entering a hex containing a mudpot at any time before the Clan players have discovered their existence automatically falls in. Once the Clan players know about the mudpots, a walking OmniMech that enters a hex with a mudpot may avoid falling in if the Clan player makes a successful Piloting Skill Roll. Jumping or running Clan units that enter a Mudpot hex, however, automatically fall in. If a Com Guards unit enters a Mudpot hex during the heat of battle, it also automatically falls in.
- Any vehicle or infantry unit that falls into a mudpot is destroyed. A 'Mech that falls in immediately sinks to its waist. For combat purposes, treat the 'Mech as if it were standing in Depth 1 water. During the End Phase of the turn in which it fell, the 'Mech sinks completely beneath the surface and is destroyed.
- Once the Clans know the mudpots exist, Clan units equipped with active probes may attempt to detect them. The detecting unit may not move or fire during the turn in which it is searching for mudpots. During that turn's Weapon Attack Phase, the player controlling the probe unit rolls 2D6. On a result of 6 or better, the gamemaster (or Com Guards player) must reveal the location of the closest mudpot within 5 hexes (the unit's scanning range). On a result of 8 or better, the unit detects all mudpots within scanning range. If a unit runs or jumps into a mudpot located in this fashion, it avoids falling in on a successful Piloting Skill Roll. Walking units automatically avoid a located mudpot.
- Units without active probes may use standard 'Mech sensors to search for any mudpots in the 6 hexes adjacent to their positions, but only succeed on a result of 12. If playing with a gamemaster, the gamemaster should make these dice rolls. On a result of 2 the player "detects" a mudpot where none actually exist. To determine which of the surrounding hexes supposedly contains a mudpot, see the Facing after a Fall rules (p. 19, BattleTech Compendium).
Mudpot Placement Table
| Die Roll 1 | Hex Columns | Die Roll 2 | Hex Rows |
|---|---|---|---|
| 1 | 01–03 | 1 | 01–02 |
| 2 | 04–05 | 2 | 03–05 |
| 3 | 06–08 | 3 | 06–08 |
| 4 | 09–10 | 4 | 09–11 |
| 5 | 11–13 | 5 | 12–14 |
| 6 | 14–15 | 6 | 15–17 |
Honor Levels:
- Dueling: Level 1
- Physical Attacks: Level 1
- Retreating: Level 1
Caravan Carnage (13)
Game Set-Up: Lay out the BattleTech mapsheet as shown (CityTech). Treat all Paved hexes as Clear terrain.
Attacker: The Com Guards represent members of the elite First Division of the Sixth Army.
Deployment: The Com Guards enter on the west edge of the mapsheet.
Defender: The Steel Vipers represent members of the regular Second Fang PGC. The Steel Viper force should have a total point value no greater than that fielded by the Com Guards and should contain at least one Goshawk and one Viper. The Clan players must also control the five J-27 Ordnance Transports that the Second Fang is guarding.
Deployment: The Steel Viper 'Mechs enter on the north edge of the mapsheet.
Victory Conditions:
- The Com Guards win a decisive victory if they destroy or drive off all of the Clan 'Mechs and prevent any of the J-27s from reaching the south edge of the mapsheet. They win a marginal victory if they succeed in accomplishing either one of the above two goals.
- The Steel Vipers win a decisive victory if they destroy or drive off all of the Com Guards 'Mechs and succeed in exiting at least one of their transports off the south edge of the mapsheet. They win a marginal victory if they accomplish only one of the above two goals.
Special Rules:
- Any unit may retreat off any edge of the mapsheet. If the J-27s exit by any edge other than the south one, however, the exiting unit does not count toward the Clan players' victory conditions.
Honor Levels:
- Dueling: Level 4
- Physical Attacks: Level 4
- Retreating: Level 4
Annihilation of the Sixth (22)
Game Set-Up: Lay out the BattleTech mapsheet as described in Devil's Bath (p. 80). The map shown is River Delta/Drainage Basin #2.
Attacker: The Steel Vipers represent members of the veteran Fourth Viper Guards of Alpha Galaxy. The Steel Viper force should have a total point value no greater than 75 percent of that fielded by the Com Guards, and it should include at least 2 units equipped with active probes.
Deployment: The Steel Viper force sets up on the west edge of the map.
Defender: The Com Guards represent members of the green Sixth Division (Alert Words).
Deployment: The Com Guards begin the game anywhere within 4 hexes of Hex 0808. The units may not be hidden.
Victory Conditions:
- The Steel Vipers win a decisive victory if they destroy all of the Com Guards units. They win a marginal victory if they destroy at least half of the Com Guards force while allowing some of the remaining Com Guards units to exit off the mapsheet.
- The Com Guards win a decisive victory if they destroy all of the Clan units. They win a marginal victory if any of their units manage to exit off the mapsheet.
Special Rules:
- In this scenario, the Viper force is watching for mudpots, and it is using extensive aerospace reconnaissance runs as well as active probes to detect them. Therefore, though this scenario uses the same map as Devil's Bath, do not place mudpots on the map.
- At this point, the Vipers are running very low on ammunition. Unless the Vipers managed to exit at least one transport off the map in Cutting Off Supplies (p. 83), all Clan units begin play with half their standard ammo loads. The Clan players should learn of the shortage after selecting their forces. If the Clan players succeeded in exiting a transport off the map, the Clan units begin the game with full ammo loads.
- The Com Guards may only exit off the west edge of the map to escape. Any Com Guards units that retreat off the other edges are considered destroyed.
Honor Levels:
- Dueling: Level 4
- Physical Attacks: Level 4
- Retreating: Level 4
Halting the Vipers (23)
Game Set-Up: Lay out the BattleTech mapsheet as shown (Desert Hills).
Attacker: The Com Guards represent members of the veteran 321st Division (Pure Duty).
Deployment: The Com Guards enter on the north edge of the mapsheet.
Defender: The Steel Vipers represent members of the regular 71st Phalanx of Zeta Galaxy. The Steel Viper force should have a total point value no greater than that fielded by the Com Guards and be comprised entirely of second-line 'Mechs.
Deployment: The Clan units set up first, anywhere on the mapsheet.
Victory Conditions:
- The Steel Vipers win a decisive victory if they destroy or drive off all of the Com Guards units. They win a marginal victory if they prevent the Com Guards from exiting more than 25 percent of their units off the south edge of the mapsheet.
- The Com Guards win a decisive victory if they destroy or drive off all of the Clan units. They win a marginal victory if they exit more than 25 percent of their units off the south edge of the mapsheet.
Special Rules:
- The Com Guards units may retreat off any edge of the mapsheet, but only those units exiting off the south edge count toward the Com Guards' victory conditions.
- Steel Viper units may only exit off the south edge of the mapsheet.
Honor Levels:
- Dueling: Level 4
- Physical Attacks: Level 4
- Retreating: Level 4
Clan Wolf
The Wolf campaign introduction (p. 90) and the battle narratives are omitted here. Clan Wolf scenarios print no Honor Levels; see the note under Playing the Clans.
Battle in the Trenches (21)
Game Set-Up: Lay out the BattleTech mapsheet as shown (Desert Hills).
Attacker: The Wolves represent the recon Nova of the elite Thirteenth Wolf Guards (Wolf Spiders).
Ax Star
- Star Commander Phelan Ward (Piloting 1, Gunnery 1), Wolfhound IIC
- MechWarrior Thea (Piloting 3, Gunnery 1), Summoner-B
- MechWarrior Ace (Piloting 2, Gunnery 2), Viper-B
- MechWarrior Lee (Piloting 3, Gunnery 2), Nova-D
- MechWarrior Dimitria (Piloting 3, Gunnery 3), Mist Lynx-D
Hatchet Star
- Star Commander Evantha Fetladral, 5 Points of Elementals
Quarrel Flight
- Flight Commander Carew (Piloting 1, Gunnery 1), Visigoth-A
- Pilot Virgil (Piloting 3, Gunnery 2), Visigoth-A
- Pilot Dane (Piloting 3, Gunnery 2), Jagatai
- Pilot Stella (Piloting 3, Gunnery 3), Jagatai
- Pilot Treece (Piloting 4, Gunnery 3), Sulla-C
Deployment: The Clan units set up first, along the south edge of the map.
Defender: The Com Guards represent members of the green 138th Division (Bandits' Bane), led by Precentor Jernberg. The Precentor has Gunnery Skill 3 and Piloting Skill 4. The Com Guards force comprises two heavy Level IIs of 2750/3050 'Mechs, one of which is Precentor Jernberg's Exterminator.
Deployment: The Com Guards player sets up second and may place his units anywhere on the north half of the mapsheet. The Precentor's Exterminator must be placed further south on the mapsheet than any other Com Guards unit. Because the Com Guard 'Mechs are uncovered by an aerospace fighter strafing run at the start of the scenario, the rules for hidden units do not apply.
Victory Conditions:
- The Wolves win a decisive victory if they destroy or drive off all of the Com Guards units. They win a marginal victory if they destroy Precentor Jernberg's Exterminator and at least 3 Wolf Clan 'Mechs manage to exit off the mapsheet.
- The Com Guards win a decisive victory if they destroy or drive off all of the Clan units. They win a marginal victory if they manage to destroy at least 3 of the Clan 'Mechs and Precentor Jernberg's Exterminator exits off the mapsheet.
Special Rules:
- The scenario begins with the fighters of Quarrel Flight making a strafing run against the Com Guards units. The Com Guards may not return fire, and the fighters drop out of the scenario after the initial run. Resolve the fighters' attacks, then begin play normally.
- Com Guards units may only exit the mapsheet off the north edge. Clan units may exit off any map edge, but only those units exiting off the north edge count toward the Clan Wolf marginal victory conditions.
Bloody Basin Pass (25)
Game Set-Up: Lay out the BattleTech mapsheet as shown (Rolling Hills #1).
Attacker: The Wolves represent the following elements of the recon Nova of the elite Thirteenth Wolf Guards (Wolf Spiders).
Ax Star
- Star Commander Phelan Ward (Piloting 1, Gunnery 1), Wolfhound IIC
- MechWarrior Thea (Piloting 3, Gunnery 1), Summoner-B
- MechWarrior Ace (Piloting 2, Gunnery 2), Viper-B
- MechWarrior Lee (Piloting 3, Gunnery 2), Nova-D
- MechWarrior Dimitria (Piloting 3, Gunnery 3), Mist Lynx-D
Hatchet Star
- Star Commander Evantha Fetladral, 5 Points of Elementals
Quarrel Flight
- Flight Commander Carew (Piloting 1, Gunnery 1), Visigoth-A
- Pilot Virgil (Piloting 3, Gunnery 2), Visigoth-A
Deployment: The Wolves enter at the south edge of the mapsheet.
Defender: The Com Guards represent members of the regular 366th Division (ComStar Lancers), comprising one heavy Level II of armored vehicles: three Burkes, two Furies, and a Rhino.
Deployment: The Com Guards player sets up first, placing his units on any Level 0 hexes on the north half of the mapsheet.
Victory Conditions:
- The Wolves win a decisive victory if they destroy or drive off all of the Com Guards units without losing more than 2 of their 'Mechs. They win a marginal victory if they destroy or drive off all of the Com Guards units but lose 3 or more 'Mechs in the process.
- The Com Guards win a decisive victory if they destroy or drive off all of the Clan units. They win a marginal victory if they destroy at least 3 Clan 'Mechs.
Special Rules:
- The scenario begins with the fighters of Quarrel Flight making a strafing run against the Com Guards units. The Com Guards may not return fire, and the fighters drop out of the scenario after making their strafing run. Resolve the fighters' attacks, then begin play normally.
- The Com Guards units begin the game dug in, and so all units firing at them must add a +2 to-hit modifier. Also, these units cannot take track and drive damage (see Ground Vehicle Hit Location Table, p. 41, BattleTech Compendium) unless the Com Guard units move from their original hexes.
- Clan units may only retreat off the south edge of the map. Com Guards units may only retreat off the north edge.
Campaign Notes: All damage inflicted on the Clan units during the previous scenario, Battle in the Trenches, applies at the start of this scenario. If the Com Guards scored a decisive victory in Battle in the Trenches, the Clan player may add enough reinforcements to his Nova to bring its total point value equal to that of the Com Guards force (not counting the Clan aerospace units). All reinforcement 'Mechs are piloted by regular MechWarriors.
Skirmish in the Mountains (26)
Game Set-Up: Lay out the BattleTech mapsheets as shown (Desert Mountain #1 and Desert Mountain #2).
Attacker: The Wolves represent elements of the recon Nova of the elite Thirteenth Wolf Guards (Wolf Spiders).
Ax Star
- Star Commander Phelan Ward (Piloting 1, Gunnery 1), Wolfhound IIC
- MechWarrior Thea (Piloting 3, Gunnery 1), Summoner-B
- MechWarrior Ace (Piloting 2, Gunnery 2), Viper-B
- MechWarrior Lee (Piloting 3, Gunnery 2), Nova-D
- MechWarrior Dimitria (Piloting 3, Gunnery 2), Ice Ferret-B
Deployment: Phelan's 'Mech begins the scenario on Map 2 by dropping from Hex 0408 to Hex 0308, causing 4 points of damage to each leg's armor. The rest of Ax Star begins the scenario on the south edge of Map 2.
Defender: The Com Guards represent members of the regular 222nd Division (Banished Thoughts). The Com Guards force is a Level III detachment: one heavy Level II of armored vehicles, two medium Level IIs of 2750/3050 'Mechs, and three Level IIs of infantry. At least one of the infantry platoons must be equipped with SRM inferno launchers.
Deployment: The Com Guards player sets up his 'Mechs and armor units in the Level 0 hexes at the base of the pass, placing the armored vehicles closer to the north edge of the mapsheet than the 'Mechs. At least 2 of the vehicles must be placed so that Phelan's 'Mech has line of sight to them from Hex 0308.
The Com Guards infantry units begin the scenario on the southern hill shown on Map 2. The Com Guards player must place at least 1 platoon armed with SRM infernos in Hex 0309.
Victory Conditions:
- The Wolves win a decisive victory if all of their units survive for 10 turns. They win a marginal victory if 3 or more Clan units survive for 10 turns.
- The Com Guards win a decisive victory if they destroy all of the Clan units within 10 turns. They win a marginal victory if they destroy 3 or more Clan units within 10 turns.
Special Rules:
- At the beginning of the scenario, Phelan's 'Mech is struck by an inferno round fired by nearby infantry. During this scenario only, Phelan may use Com Guards vehicles as Level 1 terrain in order to gain partial cover.
- The scenario takes place in a downpour, and so all 'Mechs disperse 2 extra Heat Points per turn. Inferno rounds are also less effective; increase the heat of any 'Mech struck by one by +4 rather than +6. To reflect the reduced visibility caused by the rain, add a +1 to-hit modifier.
- This scenario lasts for 10 turns.
Campaign Notes: All damage inflicted on the Clan units during the scenario Bloody Basin Pass (p. 93) applies at the start of this scenario. If the Com Guards scored a decisive victory in Bloody Basin Pass, the Clan player may add enough reinforcements to his Nova to bring his forces' total point value up to 35 percent of that fielded by the Com Guards. All reinforcement 'Mechs are piloted by regular MechWarriors.
Wolf Triumphant (27)
Game Set-Up: Lay out the BattleTech mapsheets as shown (Desert Mountain #1 and Desert Mountain #2).
Attacker: The Wolves represent the Command Star and other elements of the elite Thirteenth Wolf Guards (Wolf Spiders).
Command Star
- Khan Natasha Kerensky (Piloting 0, Gunnery 0), Dire Wolf
- Star Captain Ranna (Piloting 1, Gunnery 1), Warhawk-C
- MechWarrior Norton (Piloting 3, Gunnery 2), Dire Wolf-A
- MechWarrior Thuvia (Piloting 3, Gunnery 2), Executioner-C
- MechWarrior Douglas (Piloting 3, Gunnery 2), Gargoyle-B
Ax Star
- Star Commander Phelan Ward (Piloting 1, Gunnery 1), Wolfhound IIC
- MechWarrior Thea (Piloting 3, Gunnery 1), Summoner-B
- MechWarrior Ace (Piloting 2, Gunnery 2), Viper-B
- MechWarrior Lee (Piloting 3, Gunnery 2), Nova-D
- MechWarrior Dimitria (Piloting 3, Gunnery 2), Ice Ferret-B
Deployment: All Ax Star units remain in the positions they assumed at the end of Turn 10 of Skirmish in the Mountains, p. 94. The Wolf Spiders' Command Star enters on the west edge of Map 1 in Turn 1.
Defender: The Com Guards represent members of the regular 222nd Division.
Deployment: The Com Guards units should begin this scenario in the positions they assumed at the end of Skirmish in the Mountains.
Victory Conditions:
- The Wolves win a decisive victory if they destroy all of the Com Guards units. They win a marginal victory if they destroy 50 percent or more of the Com Guards units and force the rest to retreat.
- The Com Guards win a decisive victory if they destroy or drive off all of the Clan units. They win a marginal victory if they destroy or drive off any of the Clan units and manage to exit the mapsheet with more than half their units still functional.
Special Rules:
- Any damage and/or losses suffered by Ax Star and the Com Guards units in Skirmish in the Mountains still applies. The downpour has let up, and so the modifiers mentioned in the Special Rules for Skirmish in the Mountains no longer apply.
- The Com Guards units may only retreat off the south edge of the mapsheet. The Clan units may only retreat off the east or west edges of the mapsheet.
Record Sheets
The Timber Wolf record sheet below is the one referenced by Special Rule 4 of Assault on Robyn's Crossing and by Pryde's Pride. The other unit entries above are transcribed from the book's unit descriptions and statistics.
Timber Wolf (Pryde)
- Type: Timber Wolf (Pryde)
- Tonnage: 75
- Movement Points: Walking 5, Running 8, Jumping 4
- Pod Space: 28 tons
- Combat Value: 6058
- Pilot: Aidan Pryde (Gunnery 1, Piloting 2)
Weapons Inventory
| # | Type | Location |
|---|---|---|
| 1 | ER Large Laser | RA |
| 1 | ER Large Laser | LA |
| 1 | ER Medium Laser | RA |
| 1 | ER Medium Laser | LA |
| 1 | LRM 20 | RT |
| 1 | LRM 20 | LT |
Ammo: LRM 20 (6), LRM 20 (6)
Source note: the Timber Wolf (Pryde) entry lists the weapons inventory and ammunition as printed on the record sheet; its heat sink and critical-slot layout are not transcribed here.