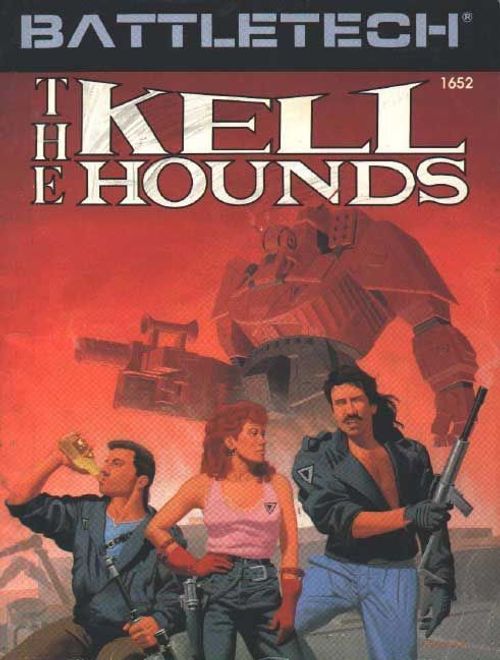
BattleTech: The Kell Hounds
BattleTech: The Kell Hounds Rulebook
Table of Contents
Table of Contents
- How to Use the Scenarios
- Lowering the Boom
- To Save a Prince
- A Little Knowledge
- Death of the Legion
- Dragon of a Different Color
- Special Party
- Trick with Time
- Phantom 'Mechs
- To the Last Man
- Salt Flats Shootout
- Canyon of Revenge
- BattleForce Scenario 1: A Royal Tragedy
- BattleForce Scenario 2: The Fox, the Hound, and the Dragon
- MechWarrior Scenario 1: Delta Romeo
- MechWarrior Scenario 2: Warriors of the Night
- Phantom 'Mech Skill
How to Use the Scenarios
Each of the scenarios in this book re-creates a battle or encounter in which the Kell Hounds mercenary unit participated. Several of the scenarios are interrelated, representing various phases of a single, larger campaign.
The scenario rules include all information necessary to understand and play the game situation. Each scenario begins with a personal account of the engagement and ends with a brief historical framework for the battle.
The Game Set-Up sections provide special game information needed to play the scenarios, including instructions on how to lay out the mapsheets, directions for special terrain features, and suggestions on the appropriate BattleTech rules to use. In some cases, there are also suggestions for using CityTech and/or AeroTech rules to make play more exciting or challenging.
Attacker and Defender forces for each scenario are described in detail. This information includes damage, problems, or special abilities of any 'Mechs or forces at the start of the battle. Also noted is each 'Mech's starting position on the map, or where and when it enters if the 'Mech arrives after the battle has already begun.
Several scenarios include ground forces for one or both sides. Some rules may allow the player to choose a mix of vehicles and/or troops, up to a stated number of tons.
The Victory Conditions are described next. These determine the outcome of the encounter, and vary from scenario to scenario. In combat, it is rare that an action continues until one side is obliterated. For this reason, the Victory Conditions usually list special objectives for one or both opponents. As in actual combat, both sides may claim victory in some engagements, based solely on whether or not tactical objectives were won.
Finally, if the scenario uses rules not covered in the general BattleTech rules, they are discussed as Special Rules.
The Modified Skill Roll Targets for the Gunnery and Piloting skills of each member of the Kell Hounds are the base targets for any combat rolls. These can be further modified by range, terrain, and action, depending on the combat situation. The full range of MechWarrior skills can be used to help determine the outcome of any encounter involving this unit.
All other MechWarriors in the scenarios have regular BattleTech Gunnery and Piloting Skill Levels, which are used normally in the game. If specific skill levels are not given, assume a Piloting Skill Level of 5 and a Gunnery Skill Level of 4.
Two scenarios in this set use BattleForce rules, and two use MechWarrior rules. Players should familiarize themselves with the respective game systems before attempting to play these scenarios. The format for these scenarios is similar to those for the BattleTech scenarios.
Lowering the Boom
Situation: Castor, 15 June 3012. The Kell Hounds raid the Marik world of Castor to destroy a cache of illegal atomic weapons. Colonel Nage breaks away with his command company toward the atomics depot, and the Relentless Wolves are sent in pursuit.
Game Set-Up
Lay out the BattleTech maps as shown. Use basic BattleTech rules, with no Optional Rules.
[Map diagram: two BattleTech mapsheets, the BattleTech map on the upper (north) sheet and the second mapsheet below it, with the arrow marked NORTH. The map layout is shown on the printed page and is reproduced here as a diagram note only.]
Attacker
The Attacker consists of elements of the First Company (Relentless Wolves), First Battalion of the Kell Hounds Regiment. Skill Levels are those listed in the character profiles for the year 3016. Skill levels for those not listed are Gunnery 4 and Piloting 4.
- Lee Kennedy, Shadow Hawk
- Sarah Jette, Jenner
- Nathan Mack, Phoenix Hawk
- Stuart O'Grady, Phoenix Hawk
- Salome Ward, Wolverine
- Brian Martell, Dervish (8 shots remaining for LRM)
- Judith Nesmith, Trebuchet
Defender
The Defender is the First Company, First Battalion of the Thirtieth Marik Militia. Skills Levels are Gunnery 4, Piloting 4, unless stated otherwise.
- Colonel Oliver Nage, Thunderbolt (2 points of armor remaining on left torso, 10 shots remaining for LRMs, 15 points of armor remaining on center torso), Gunnery 5, Piloting 5.
- Major Abraham Morrison, Griffin (no armor remaining on left torso, 10 points internal structure remaining on left torso, LRM destroyed).
- Lieutenant Alicia Devon, Hunchback (6 shots remaining for AC/20, 5 points of head armor remaining, 10 points of armor remaining on right leg).
- Sergeant Jonathan Taylor, Centurion (8 shots remaining for AC/10, 12 points of armor remaining on center torso).
- Samantha Blaustein, Hermes II (no damage).
- Deborah Ryan, Javelin (no damage).
Deployment
Defender sets up on South map as follows: Nage, Hex 0506; Morrison, Hex 0803; Devon, Hex 0108; Taylor, Hex 0304; Blaustein, Hex 1104; and Ryan, Hex 1405.
Attacker: Kennedy, Jette, Mack, and O'Grady set up along the south edge of the map. Ward, Martell, and Nesmith deploy on the south edge on Turn 2.
Victory Conditions
The Marik Defender must exit as many of his forces as possible off the north edge of the map. The Kell Hounds must destroy as many Marik 'Mechs as possible. Victory Levels are as follows:
- Five or more Marik 'Mechs exit the field: Decisive Marik Victory.
- Four Marik 'Mechs exit the field: Marginal Marik Victory.
- Three Marik 'Mechs exit the field: Draw.
- Two Marik 'Mechs exit the field: Marginal Kell Hounds Victory.
- Zero or one Marik 'Mechs exit the field: Decisive Kell Hounds Victory.
Special Rules
All Woods are considered Heavy Woods. All Water is Level 3.
To Save a Prince
Game Set-Up
Lay out the BattleTech maps as shown. Use the Expert BattleTech rules in this scenario.
[Map diagram: two BattleTech mapsheets, the upper sheet and the lower sheet stacked, with the arrow marked NORTH.]
Defender
The Defender is the First Company, Second Battalion, of the Kell Hounds Mercenary Regiment. All 'Mechs are in good condition, with no damage.
Assault Lance
- Captain Carroll O'Cathain, Veteran, Crusader
- Michael Kiltartan, Regular, Warhammer
- Rich O'Hare, Regular, JagerMech
- Hypatia Donahue, Veteran, Catapult
Fire Lance
- Lieutenant Jane Neary, Regular, Clint
- Julian Goodrich, Regular, Vulcan
- Robert Cross, Veteran, Enforcer
- Robin Buckley, Regular, Dervish
Recon Lance
- Lieutenant Jim Morrell, Veteran, Jenner
- Kevin Connor, Regular, Valkyrie
- Estyn Burns, Regular, UrbanMech
- Erin Finney, Veteran, Javelin
Deployment
Deploy the Recon Lance anywhere on the southern edge of the South map. The Assault and Fire Lances arrive on that map edge on Turn 2. The Defender deploys first.
Attacker
The Attacker is Zakahashi's Zombies of the Second Sword of Light Regiment.
Assault Lance
- Tai-i Tendoru Zakahashi, BattleMaster (Good condition), Gunnery 3, Piloting 3
- Anson McMurphy, Marauder (Autocannon jammed. Roll each turn to clear on 10 or more), Gunnery 4, Piloting 4
- Franco "Frito" Jones, Grasshopper (Good condition), Gunnery 5, Piloting 4
- Art Shrett, Ostsol (+1 to all Piloting Skill Rolls), Gunnery 5, Piloting 3
Support Lance
- Chu-i Susie Elgin, Orion (Good condition), Gunnery 4, Piloting 3
- Cletus Palmer, Rifleman (Left-arm autocannon inoperative. No armor left on rear right torso), Gunnery 3, Piloting 4
- Tom "Hands" Meyer, Dervish (Armor down to 10 points on center torso, Jump Jets out), Gunnery 5, Piloting 4
- Charlie Adams, Enforcer (AC/10 generates 2 additional heat points plus desert modification), Gunnery 4, Piloting 4
Light Lance
- Chu-i "Texas Bob" Crenshaw, Javelin (Good condition), Gunnery 5, Piloting 4
- John "Wrinkles" Parthan, Stinger (Jump Jets produce 1 additional heat point every turn used), Gunnery 3, Piloting 5
- Chuck "Bossman" Stork, Locust (Medium laser misfires on a roll of 7+), Gunnery 5, Piloting 5
- Jack "Hun Killer" Brockman, Locust (Good condition), Gunnery 5, Piloting 4
Deployment
Set up anywhere on the North map north of the hex row 0014.
Victory Conditions
The Attacker must exit at least half of his force off the southern edge of the map by Turn 15 or the Defender wins.
Special Rules
Because of the heat of this desert area, all 'Mechs will generate 2 additional points of heat per turn unless they perform no action whatsoever.
A Little Knowledge
Game Set-Up
Lay out the BattleTech maps as shown, using the reverse side. All areas of the map are considered Pavement. Use all CityTech rules, including Limited Intelligence and Hidden Movement if possible. Arrange the Buildings along streets as in a small city. Building elevation is random, as is Building type. If necessary, Attacker and Defender may alternately place Buildings until all are on the map. Use 20 Heavy Buildings, 30 Medium Buildings, and 25 Light Buildings.
[Map diagram: one BattleTech mapsheet, reverse side, with the BattleTech mark at the lower right.]
Defender
The Defender is the Command Lance of the Second Company, First Battalion of the Thirty-sixth Dieron Regulars. All are in excellent condition. The Shadow Hawk is carrying the book crate, and so it can perform no hand-to-hand combat.
- Tai-i Mike Eon, Catapult (Gunnery 4, Piloting 3)
- Chu-i Jim Wagner, JagerMech (Gunnery 3, Piloting 4)
- Sharleen Daniels, Ostroc (Gunnery 4, Piloting 4)
- Jay Lee Summeralt, Shadow Hawk (Gunnery 5, Piloting 4)
Deployment
The Defender sets up first, anywhere in the city.
Attacker
The Attacker is the Strike Lance, Second Company, First Battalion of the Kell Hounds, with attached Jump Infantry of the Third Battalion. Missing is Lieutenant Caitlin Shaw's Shadow Hawk, which is attacking the DropShips.
- Carl Oakes, Enforcer (Gunnery 3, Piloting 3)
- Stephen Patton, Hunchback (Gunnery 3, Piloting 4)
- Laurel Quinn, Griffin (Gunnery 4, Piloting 4)
- Two Jump Infantry Platoons (SRM)
- Two Jump Infantry Platoons (Laser)
Deployment
The Attacker enters the city from the north edge of the map.
Victory Conditions
The Attacker must retrieve the book crate by Turn 15. This can be accomplished by forcing the Shadow Hawk to drop it (which will occur if it is attacked hand-to-hand) and using another 'Mech with hands to carry it off, or by destroying three other supporting 'Mechs while still having at least two 'Mechs operational (in which case the Shadow Hawk pilot will surrender). No one is allowed to leave the board for any reason (the rest of the Kell Hounds First Battalion is strung out on the city perimeter to ensure that no one escapes.)
Special Rules
Any shots at the crate-carrying Shadow Hawk have a chance of destroying the Star League book treasure. Roll 1D6 each time the Shadow Hawk is hit. A result of 6 means that the books have been hit and the game is considered an immediate draw.
Death of the Legion
Game Set-Up
Lay out the BattleTech mapboards as shown. Use all Expert BattleTech rules for this scenario.
[Map diagram: two BattleTech mapboards, the upper board and the lower board stacked, with the arrow marked NORTH.]
Defender
The Defender is the pirate unit known as the Legion of Honor.
Leader Lance
- Gorman Toth, Marauder (left PPC out, 15 armor points remaining on left arm), Gunnery 4, Piloting 3
- Major Adolf Rillan, JagerMech (Head armor down to 5 points), Gunnery 4, Piloting 4
- Joe "Blackjack" Toomb, Centurion (LRM jams on a roll of 8 or more), Gunnery 4, Piloting 5
- "Slippery Pete" Manheim, Assassin (Good condition), Gunnery 4, Piloting 4
Attack Lance
- Dan Glory, Orion (AC/10 jams on die roll of 9 or more), Gunnery 4, Piloting 4
- Sandra Fitzsimmons, Rifleman (Large laser out in right arm, 12 armor points left in center torso), Gunnery 5, Piloting 4
- Marcus Worrus, Scorpion (Must roll Piloting Skill +1 during every turn of running), Gunnery 4, Piloting 4
- Zeke "Zippo" Smuthers, Firestarter (Good condition), Gunnery 3, Piloting 5
Probe Lance
- Roxanne Devers, Valkyrie (Jump jets misfire and take double heat buildup on a die roll of 7 or more), Gunnery 4, Piloting 4
- Lancelot Smith, Spider (Good condition), Gunnery 5, Piloting 4
- Dorothy Gail, Stinger (Both machine guns inoperative), Gunnery 5, Piloting 5
- Sam Norgales, Locust (Good condition), Gunnery 4, Piloting 4
Deployment
Set up first, anywhere on the South map, but in a single-file line of march with no more than two hexes between 'Mechs in line.
Attacker
The Attacker is the 'Mech Company of the Kell Hounds Mercenary Battalion.
Command Lance
- Lieutenant Colonel Patrick M. Kell, Elite, Thunderbolt
- Lieutenant Anne Finn, Veteran, Orion
- Sergeant Clarence "Cat" Wilson, Elite, Marauder
- Bethany Connor, Regular, Crusader
Assault Lance
- Major Salome Ward, Elite, Wolverine
- Lieutenant Mike Fitzhugh, Veteran, Catapult
- Sergeant Diane McWilliams, Veteran, Trebuchet
- Mary Lasker, Regular, Rifleman
Scout Lance
- Captain Daniel W. Allard, Veteran, Valkyrie
- Lieutenant Austin Brand, Veteran, Commando
- Sergeant Meg Lang, Regular, Wasp
- Eddie Baker, Regular, Jenner
Deployment
Enter the north edge of the map on Turn 1.
Victory Conditions
The Attacker wins by destroying or disabling all enemy 'Mechs. The Defender wins by destroying or disabling the Attacker.
Dragon of a Different Color
Game Set-Up
Lay out the BattleTech maps as shown. Use standard BattleTech rules with no Optional Rules.
[Map diagram: two BattleTech mapsheets side by side, the West map on the left and the East map on the right, with the arrow marked NORTH.]
Defender
The Defender consists of elements of the Kell Hounds Battalion and Davion militia forces. (Skill Levels for the Kell Hounds are those listed when the unit was at battalion strength.)
- Lieutenant Colonel Patrick Kell, Thunderbolt
- Sergeant Clarence "Cat" Wilson, Marauder
- Sergeant Diane McWilliams, Trebuchet (Gunnery 6, Piloting 5)
- Captain Alistair Ordway, Davion BattleMech Liaison, Crusader (Gunnery 4, Piloting 4)
Deployment
Defenders deploy in the following hexes: Kell, Hex 0106, West map; Wilson, Hex 0207, West map; McWilliams, Hex 0307, West map; Ordway, Hex 0406, West map. Place vehicle counters in Hexes 0204, 0305, and 0306, West map.
Attacker
The Attacker consists of a Fire Lance. (All 'Mechs are in good condition, skills are Gunnery 4, Piloting 4.)
- Marauder
- Warhammer
- Thunderbolt
- Hunchback
Deployment
Attackers deploy on the east edge of the map between Hexes 1901 and 1907.
Victory Conditions
The Vehicle Counters represent the field-reactivation personnel. On Turn 1, they will begin moving toward the west edge of the map at two hexes per turn. If attacked, these units take damage as infantry platoons. The Kell Hounds get one Victory Point for each Kurita 'Mech destroyed and one for each Vehicle Counter that exits off the West map edge. The Kuritas get one Victory Point for each enemy 'Mech or Vehicle Counter destroyed. A difference of one Victory Point is a Draw, two is a Marginal Victory, and three or more is a Substantial Victory.
Special Party
Game Set-Up
Lay out the BattleTech maps as shown. Use Advanced BattleTech rules.
[Map diagram: two BattleTech mapsheets stacked, the upper sheet and the lower sheet, with the arrow marked NORTH.]
Defender
The Defender is the 'Mech Company of the Kell Hounds Battalion.
Command Lance
- Lieutenant Colonel Patrick Kell, Thunderbolt
- Lieutenant Anne Finn, Orion
- Sergeant Clarence "Cat" Wilson, Marauder
- Bethany Connor, Crusader
Assault Lance
- Major Salome Ward, Wolverine
- Lieutenant Mike Fitzhugh, Catapult
- Sergeant Diane McWilliams, Trebuchet
- Mary Lasker, Rifleman
Scout Lance
- Captain Daniel W. Allard, Valkyrie
- Lieutenant Austin Brand, Commando
- Sergeant Meg Lang, Wasp
- Eddie Baker, Jenner
Esteemed Guests
- Hauptmann-General Sarah Joss, Warhammer (Gunnery 1, Piloting 3)
- Colonel Ardan Sortek, Victor (Gunnery 1, Piloting 2)
- Lieutenant Andrew Redburn, Hunchback (Gunnery 3, Piloting 4)
Deployment
The Defender starts the game in Hidden Positions (see Special Rules).
Attacker
The Attacker consists of elements of the First Battalion, Second Sword of Light Regiment.
Torinaga's Company
- Tai-i Ikia Torinaga, Panther (Gunnery 2, Piloting 3)
- Jerry Holub, Panther (Gunnery 3, Piloting 4)
- Vincent Cheslik, Panther (Gunnery 4, Piloting 5)
- Bret Weitzell, Panther (Gunnery 4, Piloting 5)
- Chu-i Noshia Toshiba, Panther (Gunnery 3, Piloting 4)
- Robert Schnell, Panther (Gunnery 4, Piloting 5)
- Clint Allen, Panther (Gunnery 4, Piloting 6)
- Alton Homan, Panther (Gunnery 4, Piloting 5)
- Chu-i Katuzi Noritoga, Panther (Gunnery 3, Piloting 3)
- P.K. Normandin, Panther (Gunnery 4, Piloting 5)
- S. Spegal, Panther (Gunnery 4, Piloting 4)
- Phil Jakus, Panther (Gunnery 5, Piloting 6)
Yoshogi's Support Lance
- Chu-i Akido Yoshogi, Griffin (Gunnery 2, Piloting 4)
- Sergeant Tatnaga Shiro, Griffin (Gunnery 4, Piloting 4)
- Sergeant Uinga Kadnaski, Shadow Hawk (Gunnery 4, Piloting 5)
- Sergeant Haratu Yanoto, Shadow Hawk (Gunnery 4, Piloting 5)
[Both Shadow Hawks are the Kurita SHD-2K version, armed with a PPC instead of the AC-5.]
Miscellaneous 'Mechs
- Chu-i Mitsu Kuranchi, Grand Dragon (Gunnery 4, Piloting 3). [The Grand Dragon is a normal Dragon 'Mech, with a PPC in the right arm and a third medium laser in the right torso.]
- Sho-sa Tigna Zatka, Awesome (Gunnery 2, Piloting 2)
Deployment
The Attacker enters from the north edge of the North map on Turn 1. The Awesome enters from the north edge of the North map any time after Turn 3.
Victory Conditions
The Attacker scores 5 points for each Kell Hound 'Mech destroyed. Score 3 points for destroying Lieutenant Redburn, 6 points for General Joss, and 10 points for Colonel Sortek.
The Defender scores 5 points for each destroyed Kurita 'Mech and 2 points for each damaged 'Mech (over 25 percent armor destroyed and at least 5 internals) or 'Mech that exits off the northern edge of the map.
The Attacker may disengage only from the northern edge of the North map. The Defender may disengage from any other map edge.
Special Rules
All Defenders begin the game in Hidden Positions (they are using scanner baffles to conceal their presence). Write on a piece of paper the 'Mech and hex number, but do not put the counters on the map until one of the following occurs:
- The 'Mech moves.
- The 'Mech fires.
- The Attacker has at least one 'Mech with a clear line-of-sight to the defending 'Mech. Trees and hills will block line-of-sight.
After the 'Mech has been spotted, put the appropriate counter on the map in the appropriate hex and continue play normally.
Any Kurita 'Mech disengaging along the north edge of the North map is considered under the protective fire of the DropShip and is assumed to have escaped. Kurita 'Mechs exiting any other map side are considered destroyed.
Trick with Time
Game Set-Up
Lay out the BattleTech maps as shown. Use Advanced BattleTech and CityTech rules.
[Map diagram: two BattleTech mapsheets stacked, the upper sheet and the lower sheet, with the arrow marked NORTH.]
Defender
The Defender is the Kell Hounds Battalion.
Command Lance
- Lieutenant Colonel Patrick Kell, Thunderbolt
- Lieutenant Anne Finn, Orion
- Sergeant Cat Wilson, Marauder
- Bethany Connor, Crusader
Assault Lance
- Major Salome Ward, Wolverine
- Lieutenant Mike Fitzhugh, Catapult
- Sergeant Diane McWilliams, Trebuchet
- Mary Lasker, Rifleman
Scout Lance
- Captain Daniel W. Allard, Valkyrie
- Lieutenant Austin Brand, Commando
- Sergeant Meg Lang, Wasp
- Eddie Baker, Jenner
Kell Hounds Infantry Company
- 1st platoon: Jump Infantry, Laser
- 2nd platoon: Jump Infantry, SRMs
- 3rd platoon: Mechanized Infantry, Machine Guns
- 4th Platoon: Mechanized Infantry, Lasers
Deployment
The Kell Hounds 'Mech Company may start anywhere within three hexes of the base. The Kell Hounds Infantry Company starts the game hidden on either of the two map boards. The Attacker sets up first, followed by the Defender.
Attacker
The Attacker is Kamekura's Company, First Battalion, Second Sword of Light Regiment.
Command Lance
- Sho-sa Taki Kamekura, Panther (Gunnery 2, Piloting 3)
- S.D. Overton, Panther (Gunnery 4, Piloting 5)
- Jack Boyt, Panther (Gunnery 4, Piloting 5)
- Bill Hanson, Panther (Gunnery 4, Piloting 4)
Fire Lance
- Chu-i Hiagu Oguchi, Panther (Gunnery 3, Piloting 4)
- Dave Lawson, Panther (Gunnery 4, Piloting 5)
- A.B. Whitcomb, Panther (Gunnery 4, Piloting 5)
- Dean Towers, Panther (Gunnery 5, Piloting 5)
Recon Lance
- Chu-i Iwagi Nahira, Panther (Gunnery 4, Piloting 4)
- Robert Schnell, Panther (Gunnery 4, Piloting 5)
- Andrew Chun, Panther (Gunnery 4, Piloting 5)
- Tim Eagen, Panther (Gunnery 5, Piloting 5)
Deployment
The Attacker sets up anywhere on the South map. Units may not set up closer than six hexes to the north edge of the South map.
Victory Conditions
The Attacker scores 5 points for every Kell Hounds 'Mech that is destroyed and scores 1 point for killing infantry. The Defender scores 3 points for every Kurita 'Mech killed or captured.
When one side has no forces remaining, the side with the most points wins.
Special Rules
The Defender may not leave the map because any units fleeing would be too far from their DropShips and would be destroyed by the Kurita reinforcements.
The Attacker may leave only by the north edge of the North map. 'Mechs may not return to the map after leaving.
The Kell Hounds Infantry Company starts the game hidden. Record the hex number of the infantry unit on a piece of paper. Place the units on the map when they have been discovered. 'Mechs sight infantry at a range of five hexes or less if the infantry is in the open and at a range of one hex when the infantry is in the Woods. Infantry that moves or fires is spotted instantly. Once infantry is spotted, place the counter or counters on the map and proceed normally. Infantry may carry inferno rounds for SRMs.
If playing this scenario in conjunction with MechWarrior Scenario 2, use the surviving MechWarriors from that scenario to pilot the 'Mechs in this scenario.
The Kell Hounds base is a six-hex Hardened Building, located in the following Hexes: 0207, 0208, 0209, 0308, 0309, 0310.
Phantom 'Mechs
Game Set-Up
Lay out one BattleTech map as shown, using the reverse side. This approximates the dimensions of the Styx Complex DropShip Bay. Use all Expert BattleTech rules in addition to the Phantom 'Mech rules described on page 12. The Silver Eagle is assumed to be berthed in Hexes 1507, 1508, 1509, and all partial hexes leading off the map.
[Map diagram: one BattleTech mapsheet, reverse side, the DropShip bay.]
Defender
The Defender is the Genyosha unit of the Draconis Combine.
Kaji Lance
- Tai-sa Yorinaga Kurita, Warhammer with Phantom 'Mech ability (Gunnery 3, Piloting 2)
- Chu-i Minoru Akiri, Crusader (Gunnery 3, Piloting 3)
- Chu-sa Sam Gunther, Panther (Gunnery 4, Piloting 3)
- Chu-sa Seschuie Omata, Panther (Gunnery 4, Piloting 5)
Korasu Lance
- Sho-sa Niiro Tarukito, Panther (Gunnery 4, Piloting 3)
- Chu-i Asagawa Colloden, Panther (Gunnery 3, Piloting 3)
- Chu-sa Milo Fedders, Panther (Gunnery 4, Piloting 3)
- Chu-sa Ichiban Norosama, Panther (Gunnery 4, Piloting 4)
Denko Lance
- Chu-i Dalechi Kemmasama, Panther (Gunnery 3, Piloting 3)
- Chu-sa Orinaga Tomachi, Panther (Gunnery 4, Piloting 3)
- Chu-sa Hierichi Torasu, Panther (Gunnery 4, Piloting 3)
- Chu-sa Dan Wagner, Panther (Gunnery 4, Piloting 5)
Deployment
The Defender sets up first, anywhere on the northern half of the map.
Attacker
The Attacker is the 'Mech Company of the Kell Hounds Battalion, with the following changes in 'Mech type.
Command Lance
- Lieutenant Colonel Patrick Kell, Victor with Phantom 'Mech ability
- Lieutenant Anne Finn, Orion
- Sergeant Clarence "Cat" Wilson, Panther
- Sergeant Bethany Connor, Panther
Assault Lance
- Major Salome Ward, Wolverine
- Lieutenant Mike Fitzhugh, Catapult
- Sergeant Diane McWilliams, Panther
- Mary Lasker, Panther
Scout Lance
- Captain Daniel Allard, Valkyrie
- Lieutenant Austin Brand, Panther
- Sergeant Meg Lang, Wasp
- Eddie Baker, Jenner
Deployment
All but the Victor enter the South map on Turn 1. The Victor appears on Turn 1 in Hex 0901 behind the units of the Genyosha.
Victory Conditions
The Defender wins if he can destroy or disable the Victor 'Mech and prevent six of the Kell Hounds from embarking on the Silver Eagle (through Hexes 1507, 1508, or 1509). The Attacker wins if he destroys more than half of the enemy 'Mechs and gets at least seven of his eleven 'Mechs onto the Silver Eagle. Any other result is a Draw.
Special Rules
Yorinaga Kurita's Warhammer must engage Lieutenant Colonel Patrick Kell's Victor. It cannot engage any other 'Mech until the Victor is destroyed.
To the Last Man
Game Set-Up
Set-up the BattleTech maps as shown. Use all Expert BattleTech and CityTech rules. Use the Optional Rules for limited intelligence if possible.
[Map diagram: two BattleTech mapsheets stacked, the North and South boards, with the arrow marked NORTH.]
Defender
The Defender is Bradley's Bravos, First Company, Third Battalion, Kell Hounds Regiment. All 'Mechs are in good condition. All Warriors have Gunnery 3, Piloting 3.
Command Lance
- Major Scott Bradley, Cyclops
- Lieutenant Peter Watson, Marauder
- Kino Hanson, Dragon
- Matilda "Mattie" Drayton, Stalker
Attack Lance
- Lieutenant Tomas Rochefort, Enforcer
- Trey Kerin, Vulcan
- Phillipa Ietsu, Cicada
- Booth Steffins, Assassin
Scout Lance
- Lieutenant Carrie Payen, Panther
- Stuart Skeat, Spider
- Ayesha Aitkin, Javelin
- Howard Fraser, Stinger
Deployment
Set up anywhere on the South map, including the lake.
Attacker
The Attacker is the Genyosha of the Draconis Combine. Yorinaga Kurita possesses the Phantom 'Mech Skill.
Kaji Lance
- Tai-sa Yorinaga Kurita, Warhammer (Gunnery 3, Piloting 2)
- Chu-sa Akira Brahe, Orion (Gunnery 4, Piloting 3)
- Jiro Thorvald, Marauder (Gunnery 4, Piloting 3)
- Tomasu Riuch, Panther (Gunnery 3, Piloting 4)
Korasu Lance
- Chu-i Per Andersen, Vindicator (Gunnery 4, Piloting 3)
- Jase Varuna, Griffin (Gunnery 4, Piloting 4)
- Kami Sandoval, Panther (Gunnery 4, Piloting 3)
- Isoru Wakazashi, Panther (Gunnery 4, Piloting 3)
Denko Lance
- Chu-i Jack Seaborg, Crusader (Gunnery 4, Piloting 3)
- Amal Yoshiro, Rifleman (Gunnery 3, Piloting 3)
- Ten Matherson, Panther (Gunnery 4, Piloting 3)
- Diromo Parker, Panther (Gunnery 4, Piloting 3)
Deployment
Enter on the north side of the North mapboard.
Victory Conditions
The Attacker must exit off of the southern edge of the mapboard and keep his losses less than the Defender's. The Defender wins by inflicting more damage on the Attacker than he sustains himself.
Salt Flats Shootout
Game Set-Up
Lay out the BattleTech maps as shown. Use Advanced BattleTech rules.
[Map diagram: two BattleTech mapsheets stacked, the North and South boards, with the arrow marked NORTH.]
WLF-1 Wolfhound
- Mass: 35 tons
- Chassis: Arc-Royal KH/3
- Power Plant: GM 210
- Cruising Speed: 64 kph
- Maximum Speed: 95 kph
- Armor: Duralex Medium
- Armament: 1 Setanta Heavy Laser; 4 Defiance B3M Medium Lasers
- Manufacturer: TharHes Industries
- Communications System: O/P COM-22/H47
- Targeting and Tracking System: Digital Scanlok 347
Type: Wolfhound WLF-1
| Component | Tons | Tons (Item) |
|---|---|---|
| Tonnage | 35 | 35 |
| Internal Structure | 3.5 | |
| Engine (210 GM) | 9 | |
| Walking MP | 6 | |
| Running MP | 9 | |
| Heat Sinks (10) | 0 | |
| Gyro | 3 | |
| Cockpit | 3 | |
| Armor Factor | 120 |
| Location | Internal Structure | Armor Value |
|---|---|---|
| Head | 3 | 9 |
| Center Torso | 11 | 16/6 |
| Right/Left Torso | 8 | 11/5 |
| Right/Left Arm | 6 | 12 |
| Right/Left Leg | 8 | 16 |
Weapons and Ammo
| Type | Location | Critical | Tons |
|---|---|---|---|
| Large Laser | RA | 2 | 5 |
| Medium Laser | CT | 1 | 1 |
| Medium Laser | CT (R) | 1 | 1 |
| Medium Laser | RT | 1 | 1 |
| Medium Laser | LT | 1 | 1 |
Defender
The Defender is the Recon Lance, and other elements of the Third Company, Second 'Mech Battalion, of the Third Dieron Regulars.
- Chu-i Len Namura, Panther (Gunnery 3, Piloting 3)
- H.C. Parham, Stinger (Gunnery 4, Piloting 4)
- John Ritzman, Commando (Gunnery 4, Piloting 5)
- Dennis Laws, Wasp (Gunnery 4, Piloting 6)
- D. Decklever, Locust (Gunnery 4, Piloting 4)
- Allen Hook, Panther (Gunnery 5, Piloting 6)
Deployment
Enter along the south edge of South map on Turn 1.
Attacker
The Attacker is the Recon Lance, First Company, First 'Mech Battalion of the Kell Hounds Regiment.
- Captain Daniel Allard, Wolfhound
- Meredith Devlin, Jenner
- Paul O'Clare, Panther
- Amber Brennan, Panther
Deployment
Start using Hidden Positions (see Special Rules) anywhere on the South map. Write the hex number on a piece of paper.
Victory Conditions
The Scout Lance must harass and slow down the Kurita forces as much as possible, giving the rest of the Kell Hounds time to organize their defense. For every destroyed Kurita 'Mech, score 5 points. If the Attacker stays on the board for 10 turns or more, score another 5 points.
Defender must reach his DropShips as soon as possible, before the enemy can find them and drive them off. Score 5 points for every destroyed enemy 'Mech and 3 points for every enemy 'Mech driven off the map. If the Defender's forces exit the north edge of the North map by Turn 5, score 10 points; by turn 9, score 5 points.
Special Rules
All hexes on the maps are considered to be under Level 1 Water (waist-high on a 'Mech). Use all appropriate rules. In addition, all Tree Hexes are impassable, due to the danger of becoming entangled and stuck. The Kell Hounds start the game in hidden positions. Do not place the counters on the map. Instead, write the units and their hex numbers on a piece of paper. A unit is located and its counter is placed on the map, when any one of the following happens:
- The unit moves.
- The unit fires.
- An enemy unit moves into any adjacent hex.
Canyon of Revenge
Game Set-Up
Lay out the BattleTech maps as shown. Use Advanced BattleTech rules.
[Map diagram: two BattleTech mapsheets stacked, the North and South boards, with the arrow marked NORTH.]
Defender
The Defender is the Second Company, First Battalion of the Kell Hounds Regiment.
Battalion Command Lance
- Major Salome Ward, Wolverine
- Lieutenant Mike Fitzhugh, Catapult
- Clint Murphy, Quickdraw
- Brendan O'Reilly, Centurion
Assault Lance
- Lieutenant Anne Finn, Orion
- Brigit O'Leary, Marauder
- Roe Dolan, Crusader
- Mark Flanagan, Rifleman
Recon Lance
- Lieutenant Harrold O'Ryan, Jenner
- William Duffy, Javelin
- Dell Thompson, Commando
- Michael Horan, Firestarter
Deployment
The Defender may set up anywhere on the North map.
Attacker
The Attacker is the Third Company, Second Battalion, of the Third Dieron Regulars.
Command Lance
- Tai-sho Sen Ti Ch'uan, Warhammer (Gunnery 2, Piloting 3)
- Bart McCann, Shadow Hawk (Gunnery 4, Piloting 4)
- Eugene Rodruck, Rifleman (Gunnery 4, Piloting 5)
- A. Vancannti, Centurion (Gunnery 4, Piloting 5)
Assault Lance
- Tai-sa Hiro Akuta, Crusader (Gunnery 3, Piloting 4)
- Al Paris, Hunchback (Gunnery 4, Piloting 5)
- Dennis Heldenbrand, Dragon (Gunnery 4, Piloting 5)
- Bill Dixon, Griffin (Gunnery 4, Piloting 5)
Recon Lance
- Chu-i Robert Lawrie, Panther (Gunnery 4, Piloting 4)
- Curt Reed, Stinger (Gunnery 4, Piloting 5)
- Larry Anderson, Jenner (Gunnery 4, Piloting 5)
- Otto Tennant, Stinger (Gunnery 4, Piloting 6)
Deployment
The Attacker enters from the south edge of the South map on Turn 1.
Victory Conditions
The Attacker scores 5 points for every Kell Hounds 'Mech destroyed. Score 3 points for every Kell Hounds 'Mech that leaves the map. The Defender scores 5 points for every Kurita 'Mech destroyed.
The game ends when only one side remains on the map.
Special Rules
No 'Mechs may disengage from the east or west sides of the maps. This is because the walls of the canyon are too steep for a 'Mech to climb and too high to use jump jets. The Attacker may not leave the map to the south because the remainder of the Kell Hounds would finish them off. The Kell Hounds will not honor any offers of surrender by the Kurita forces.
BattleForce Scenario 1: A Royal Tragedy
Game Set-Up
Lay out the BattleForce maps as shown. Use all BattleForce rules.
[Map diagram: one BattleForce map, with the arrow marked NORTH.]
Defender
The Defender is the Kell Hounds Regiment.
1st Company, 1st Battalion
- Fire Lance, M-Type 2, Regular
- Assault Lance, M-Type 3, Regular
- Scout Lance, L-Type 1, Green
2nd Company, 1st Battalion
- Command Lance, M-Type 2, Veteran
- Scout Lance, M-Type 4, Green
- Strike Lance, M-Type 2, Veteran
3rd Company, 1st Battalion
- Heavy Assault Lance, H-Type 5, Veteran
- Fire Lance, M-Type 3, Regular
- Assault Lance, M-Type 6, Regular
1st Company, 2nd Battalion
- Assault Lance, H-Type 5, Regular
- Fire Lance, M-Type 3, Regular
- Recon Lance, L-Type 2, Regular
2nd Company, 2nd Battalion
- Command Lance, H-Type 4, Regular
- Fire Lance, M-Type 6, Green
- Assault Lance, M-Type 6, Regular
3rd Company, 2nd Battalion
- LRRP Lance, L-Type 3, Regular
- Assault Lance, A-Type 3, Regular
- Recon Lance, M-Type 4, Regular
Deployment
The Defender may set up his units along or south of Hex row 19. The Defender has the Initiative and moves first.
Attacker
The Attacker is the Draconis Combine Second Sword of Light Regiment.
1st Company, 1st Battalion
- Command Lance, M-Type 2, Veteran, Step 1 Damage
- Fire Lance, M-Type 6, Regular, Step 2 Damage
- Light Lance, L-Type 2, Regular
2nd Company, 1st Battalion
- Assault Lance, H-Type 5, Veteran
- Fire Lance, M-Type 4, Veteran, Step 2 Damage
- Recon Lance, M-Type 3, Regular
3rd Company, 1st Battalion
- Fire Lance, H-Type 3, Elite, Step 1 Damage
- Strike Lance, M-Type 2, Regular, Step 1 Damage
- Scout Lance, L-Type 4, Regular
1st Company, 2nd Battalion
- Command Lance, A-Type 3, Veteran
- Fire Lance, M-Type 6, Regular, Step 1 Damage
- Light Lance, L-Type 2, Regular
2nd Company, 2nd Battalion
- Assault Lance, M-Type 3, Regular
- Fire Lance, M-Type 2, Regular
- Scout Lance, L-Type 2, Green, Step 2 Damage
3rd Company, 2nd Battalion
- Assault Lance, A-Type 1, Veteran
- Fire Lance, M-Type 3, Regular, Step 2 Damage
- Medium Lance, M-Type 4, Regular
1st Company, 3rd Battalion
- Assault Lance, A-Type 3, Regular, Step 1 Damage
- Heavy Lance, H-Type 4, Veteran
- Fire Lance, M-Type 6, Regular
2nd Company, 3rd Battalion
- Command Lance, H-Type 5, Veteran, Step 1 Damage
- Medium Lance, M-Type 2, Veteran, Step 2 Damage
- Light Lance, L-Type 3, Regular, Step 2 Damage
3rd Company, 3rd Battalion
- Assault Lance, H-Type 2, Regular, Step 2 Damage
- Fire Lance, M-Type 1, Regular, Step 1 Damage
- Light Lance, L-Type 3, Regular, Step 1 Damage
Deployment
The Attacker sets up anywhere along or north of hex row 08.
Victory Conditions
The Defender must hold the hex containing the Prince's body (see Special Rules) for five consecutive turns and then withdraw off the south edge of the map without losing more than half of his forces, counted by steps. The Attacker wins if the Defender fails to meet his Victory Conditions.
The game lasts until there are no defending units remaining on the map.
Special Rules
The body of Prince Ian Davion is in Hex 1510. Hex 1510 has no other bearing on play.
BattleForce Scenario 2: The Fox, the Hound, and the Dragon
Game Set-Up
Lay out the BattleForce maps as shown. Use BattleForce rules, along with artillery and AeroSpace Fighter special units.
[Map diagram: two BattleForce maps stacked, with the arrow marked NORTH.]
Defender
The Defender is the First Battalion, Fifth Sword of Light Regiment.
- Death Knell Company Command Lance, H-Type 2, Elite
- Death Knell Company Fire Lance, H-Type 3, Regular
- Death Knell Company Recon Lance, M-Type 5, Regular
- Thunderstrike Company Command Lance, H-Type 2, Veteran
- Thunderstrike Company Fire Lance, M-Type 4, Regular
- Thunderstrike Company Recon Lance, L-Type 2, Green
- Demonblade Company Command Lance, M-Type 6, Regular
- Demonblade Company Fire Lance, M-Type 5, Green
- Demonblade Company Recon Lance, L-Type 2, Green
Deployment
The Defender deploys no closer than seven hexes to the south edge of the map and no closer than three hexes to any infantry position.
Attacker
The Attacker consists of Kell Hounds Battalion and the 143rd Davion Combined Arms Regiment. The Kell Hounds' numbers are listed for players who want to make their own counters, and substitutes are given for those who do not.
BattleForce Values
| Unit | RA | CA | D | R | MP | Quality |
|---|---|---|---|---|---|---|
| Command Lance | 13 | 17 | 10 | 3 | 4 (M-Type 6) | Elite |
| Assault Lance | 12 | 13 | 8 | 3 | 4 (M-Type 3, no jump) | Elite |
| Scout Lance | 6 | 8 | 5 | 2 | 5 (L-Type 1) | Veteran |
| Aerofighter Lance | 7 | 13 |
Substitute units (listed without a heading in the source)
- Heavy Infantry, Regular
- Heavy Infantry, Regular
- Heavy Infantry, Regular
- Motorized Infantry, Green
- Motorized Infantry, Green
- Type 3 Vehicle, Regular
- Type 5 Vehicle, Green
- Type 5 Vehicle, Green
Deployment
The Kell Hounds deploy on the south edge of the map, and the Davion militia units deploy on the north edge.
Victory Conditions
The Kurita player wins if he destroys more Kell Hounds than he has taken in losses by Turn 10.
The Kell Hounds player wins if he can inflict more than 50 percent casualties on the Kurita player by Turn 10. If the Kurita player reaches 50 percent losses, he must retreat off the north side of the map.
Special Rules
The Kell Hounds player receives his aerofighter unit on Turn 3. This unit does not have bombs but may make strafing attacks.
The Kell Hounds player controls the Davion militia units. He may move them as he wishes, with the following restrictions. A militia unit must move to engage the nearest 'Mech within range. It will attack the nearest 'Mech unit, whether Kell Hound or not, unless the 'Mech can be positively identified. Positive ID range is one hex.
The Kell Hounds player receives four Long Tom units at the beginning of the game. They are placed along the east edge of the map for range purposes. Only the Davion militia may spot for these units, and the Kurita player may not attack these units.
MechWarrior Scenario 1: Delta Romeo
Game Set-Up
Use standard MechWarrior rules, the maps provided, and no Optional Rules. This MechWarrior scenario is designed for one to four players, plus a moderating gamemaster. The gamemaster controls all the Marik Militia forces and security robots.
Defender
The Defender is the Second Platoon of the Fifteenth Marik Militia. For details and deployment, refer to Special Rules and Map Notes.
Attacker
The Attacker is the Recon Lance, First Company (Relentless Wolves), First Battalion of the Kell Hounds Regiment. The lance carries the following equipment: two rifles with four clips of ammunition each, one gyro jet rifle with two clips of ammunition, four laser pistols, 8 meters of rope, one medical kit, and four suits of body armor (20 points of protection for each location).
- Lieutenant Kent Murphy, applicable statistics: BODY 9, DEX 8; applicable skills: Brawling 2, Leadership 2, Pistol 2, Technician 3.
- Sally Kristi, applicable statistics: BODY 8, DEX 8; applicable skills: Brawling 1, Mechanical 1, Rifle 2, Technician 2.
- Tia Forsythe, applicable statistics: BODY 8, DEX 8; applicable skills: Rifle 1, Stealth 1, Tech 2.
- Sarah Jette, applicable statistics: BODY 6, DEX 10; applicable skills: Medical/First Aid 1, Pistol 3, Rogue: Listen/Eavesdrop 1, Stealth 2.
Deployment
The Attacker begins the scenario anywhere outside the bunker.
Victory Conditions
The Kell Hounds must locate the atomic weapons to win.
Special Rules
Militia Morale
The defending militia in the bunker are shell-shocked and traumatized by the fact that their security system has turned against them. When each of these units is engaged, the gamemaster should roll 2D6. On a roll of 8 or more, the Marik units will flee. If unable to flee, they will continue to fight.
Basic Marik Statistics
Marik militiamen have the following applicable statistics and skills: BODY 7, DEX 8, Bow/Blade 1, Brawling 1, Rifle 2. Their equipment includes a rifle with three clips of ammunition, bayonet, and body armor.
Complex Security Systems
Stun pods are built into the ceilings of certain corridors (see Map). When a weapon is fired in the shaded corridor areas, the stun pods will activate, affecting everyone within the shaded area as a sonic stunner would. Some pods are always active (see Map). Each pod can absorb 12 points of damage before being destroyed.
Security robots were designed to guard the fusion plant and the atomic vault. The air raid has jumbled their programming such that they will fire their machine guns at anyone they meet. The robots move two meters per turn. They have 30 points of armor front and back, and 15 points on their arms and legs. Each has two machine guns, with 100 rounds of ammunition each. The security robot can move, fight, and make physical attacks as a light 'Mech. Punch/Kick damage is 4D6. Use a DEX of 12 and Skill Levels of Gunnery 6 and Piloting 6.
Map Notes
[Map diagram: Bunker Map, Upper Level, rooms numbered 1 through 42, with the arrow marked NORTH. The room numbers and descriptions are given below.]
Outside the Complex
After climbing a service road to a cratered, rocky shelf, the recon team sees the bunker. A large bomb has blown open the bunker's heavy double doors. Three large gun ports line the wall left of the doorway, and two to its right. No life can be seen.
When the recon team approaches to within 18 meters of the bunker, a scream of static and a polite female voice fills the air: "Attention, unauthorized personnel. You are trespassing on Free Worlds League military property. Automated defense systems are tracking you now. Remain where you are, and wait for the arrival of proper military authorities."
Any character who makes a successful Saving Roll against his LRN score can identify the voice as a recording. After 30 seconds, the message will repeat.
Main Door
As the recon team approaches the bunker's main entrance, any character who makes a successful Saving Roll against his LRN score will notice that the doorway is six meters wide and has a ramp to admit supply trucks. Looking beyond the collapsed doors, the team can see a wide corridor, dimly lit by red emergency lights. From the gunport nearest the right side of the door comes an ominous clicking noise.
(1) Main Corridor
This is the main vehicle-access to the supply bins. Like all the rooms within the bunker, this area is dimly lit by red emergency lights. A catwalk runs along the eastern wall of the corridor, and another crosses the corridor, both about four meters above the floor. There are no stairs to the catwalks. The other end of the corridor is closed off by large double doors. The doors are too heavy to be penetrated by weapons fire, and they cannot be opened normally because the electricity is out. One militiaman is on the cross catwalk. When the recon team enters the corridor, he will fire a wild burst (-4 To Hit), and then run through rooms 19-21 to the Control Room (Room 22).
(2) Gun Position
This is a gun position covering the approach to the bunker. An automated AC/5, out of ammunition, fires ceaselessly, making a loud clicking sound. A small ammunition elevator is in the eastern corner of the room. It has no power and cannot function. No one is in the room.
(3) Gun Position
This is also a gun position, identical to Room 2. The AC/5 is apparently inoperable due to battle damage.
(4) Gun Position
This room has no ammo elevator, only a set of heavy cables protruding from the floor. There is a bracket in the center of the floor. Any character who makes a successful Saving Roll against his Mechanical skill will know that the bracket will fit a modern weapon. There is no one in the room, and in fact, it looks as though no one has been in it in months.
(5) Armory
This room is empty, its locker wide open. No one is in the room.
(6) Break Room
There is no one in this room. Food and drink lie here and there on the tables, and a microwave beeps on a countertop.
(7) Restrooms
These rooms are empty.
(8) Cargo Handler's Office
Papers cover the desk in this room. There are three filing cabinets along the south wall of the room. All are locked. At the bottom of the second cabinet are a series of manifests detailing the storage of three atomic bombs in the storage vault on Level Two.
(9) Broom Closet
This small, dark room is empty.
(10, 11) Locker Rooms
These rooms contain cargo-handler uniforms. Both are empty.
(12) Secondary Medical
This is a fully stocked medical room. Three militiamen are here, tending their own wounds.
(13) Backup Generator Room
One militiaman is tending an ancient, cranky generator in this room. If the generator is damaged in any fighting, that quadrant of the bunker will be without power.
(14) Medical Storage
This is a dark storeroom piled with medical supplies. No one is in here.
(15) Storeroom A
This is a cavernous room, with a heavy chain-link fence (wall) separating a loading area from a storage area. The wide door to the storage area stands ajar. There are three elevators in the room, a heavy cargo elevator, and two personnel elevators. All are without power. A small room in the north corner of the storeroom has cradles for two industrial exoskeletons.
This room has no power, either. (The guard shut off power to the cargo elevator to keep the security robots from reaching the second level. The other elevators and the main door are on the same breaker switch, controlled in Room 24.) There is a flatbed supply truck in this area, and a heavy glass window looks out on the room from the Control Room (Room 22). Crates of all sizes and types are stacked around the room, but the atomic weapons are not to be found. Six militiamen have set up a fortification made of crates in the north corner of the room. They are prepared to make a last stand here.
(16, 17, 18) Gun Positions
These are the same as Room 2, except that their weapons have been removed.
(19, 20, 21) Decontamination Rooms
These are radiation decontamination rooms for cargo handlers. There are two militiamen in the first room. When the party enters, they will fire a few shots and retreat, shutting the door behind them. At that point, the room will begin a 60-second decontamination cycle, and then the doors will unlock. When the party advances into the other room, the militia will repeat the procedure. If the militiamen make it out of Room 21, they will fall back to Room 22.
(22) Control Room
This is the bunker's nerve center. Four militiamen are here, including the platoon commander, monitoring the security cameras and attempting to call for help. These men will fight to the last.
(23) Armory
This small armory contains five laser rifles. Two of the Control Room personnel will obtain laser rifles when the party enters.
(24) Backup Generator Room
This is the same as Room 13, except that any character making a successful Saving Roll against his LRN score will notice that someone has tampered with the breaker switches in the room. Anyone making a successful Saving Roll against his Technician skill can reactivate the elevators from here.
(25, 26, 27, 28) Bunk Rooms
These rooms are lined with bunks and lockers to accommodate twelve men each. These rooms are empty.
(29, 30) Restrooms
These rooms are empty.
(31) Storage Closet
This room contains only mops and brooms.
(32) Cafeteria
There are three militiamen eating here. If fighting occurs outside the room, they will lie in wait, hoping to ambush whoever enters the room.
(33) Kitchen
There is no one here.
(34) Food Storage
This storage room is empty of personnel.
(35, 36, 37) Decontamination Support Rooms
These rooms house the machinery that operates the decontamination rooms. These rooms are empty.
(38) Fusion Monitoring Room
This is the control room that monitors the bunker's fusion plant. Because the plant is shut down, the room is empty.
(39) Medical
Same as Room 12.
(40) Medical Storage
This storage room is empty of personnel.
(41) Generator Room
Same as Room 13.
(42) Armory
Same as Room 5.
Level Two
[Map diagram: Bunker Map, Lower Level, rooms numbered 1 through 10, with the arrow marked NORTH.]
(1) Storeroom B
This is another large storeroom. Two small electric carts are parked in one corner of the room, and crates are stacked to the ceiling. Twenty bodies litter the floor, one in a shot-up industrial exoskeleton. Security Robot 1 is lurking behind the crates across the room. If the robot hears voices or detects movement in the room, it will move to attack the team.
(2) Fusion Room
The bunker's fusion plant lies behind two powered sets of blast doors. No one is in the room.
(3) Robot Maintenance Room
This is the recharge and repair room for the security robots. Security Robot 2 is here, active and resting in its cradle. If it detects any movement outside the room, it will move to investigate.
(4) Atomics Vault
This is a heavy, lead-lined vault. Three militiamen are here, hiding from the robots.
(5) Ammunition Room
This is a securely locked room with the words "Ammo Dump" painted on the door. Anyone foolish enough to try shooting his way into the room risks setting off four tons of AC/5 ammo (on a roll of 5 or more on 2D6).
(6, 7, 8) Ammo Rooms
These rooms supply ammo for the gun positions above them. They are empty.
(9, 10) Ammo Rooms
These rooms are just like Rooms 6-8, except that they have crates of AC/5 ammo in them. Any stray shots in these rooms risk setting off the ammo on a roll of 6 or more on 2D6.
MechWarrior Scenario 2: Warriors of the Night
Game Set-Up
Use the map provided and standard MechWarrior rules. This scenario can be played with one to twelve players plus a gamemaster.
Defender
The Defender is the Kell Hounds Battalion. Unless listed otherwise in the character profiles, each has one knife and one laser pistol.
- Patrick Kell
- Anne Finn, applicable statistics: BODY 8, DEX 10; applicable skills: Bow/Blade 3, Pistol 4, Stealth 2
- Cat Wilson
- Bethany Connor, applicable statistics: BODY 9, DEX 9; applicable skills: Brawling 1, Pistol 3, Rifle 2
- Salome Ward
- Mike Fitzhugh, applicable statistics: BODY 10, DEX 10; applicable skills: Brawling 1, Pistol 3, Rifle 2
- Diane McWilliams, applicable statistics: BODY 9, DEX 11; applicable skills: Medical/First Aid 2, Pistol 4
- Mary Lasker, applicable statistics: BODY 8, DEX 9; applicable skills: Pistol 2, Rifle 1, Stealth 1
- Daniel Allard
- Austin Brand
- Meg Lang, applicable statistics: BODY 8, DEX 8; applicable skills: Bow/Blade 1, Pistol 2
- Eddie Baker, applicable statistics: BODY 8, DEX 9; applicable skills: Brawling 2, Pistol 2
Deployment
Unless specified in the Map Notes below, the Kell Hounds are asleep in their own quarters. On Turn 1, each must make a Saving Roll against their BODY score to awaken. If the roll fails, that MechWarrior remains asleep unless awakened by another character or until the alarm is sounded.
At the beginning of the scenario, Daniel Allard and Cat Wilson are not in the building. They will arrive on Turn 5 by way of the hangar-access tunnel. Both are in combat armor. Allard is carrying an autoloading shotgun; Wilson has an SMG.
Attacker
The Attacker is the Kurita ISF Unit Ten, the Dragon's Hidden Hand. The force consists of 24 commandos. Their applicable statistics are BODY 10, DEX 11. Applicable skills are Bow/Blade 3, Brawling 4, Pistol 3, Hide in Cover 4, and Stealth 3. Each has a laser pistol, sword, and light body armor (absorbs 10 points of damage in any area).
Deployment
Four commandos begin in Room 7, six commandos in Room 1, one commando in Room 6, and one commando in Room 11.
Victory Conditions
The Kurita player's objective is to kill as many Kell Hounds as possible. The Attacker receives Victory Points as follows: Patrick Kell, 20 points; any other Command Lance member, 15 points; any other MechWarrior, 10 points.
For every commando killed, the Defender receives 10 points. The player with the most points wins.
Special Rules
The Kell Hounds should have full knowledge of the building layout. The commandos should have only limited knowledge and must search every room they enter before proceeding.
Map Notes
[Map diagram: building floor plan, rooms numbered 1 through 31, with the room names given below.]
(1) Reception Room
This room has a desk for a receptionist. There is a small slugthrower in the bottom drawer of the desk.
(2) Conference Room A
(3) Master Technician's Office
(4) Radar Room
The door is locked.
(5) Master Sergeant's Office
There is a katana leaning against a coat rack on one side of the door. There is a helmet on the coat rack.
(6) Executive Officer's Office
(7) Commanding Officer's Office
There is a small slugthrower in the desk and two dueling swords on the wall.
(8) Conference Room B
(9) Communications Room
The door is locked.
(10) Break Room
(11) Kitchen
Salome Ward is here, with one commando. There is an unlimited supply of knives and pans (clubs) in the room.
(12) Sensitive Materials Room
The door is locked.
(13) Intelligence Office
There is a slugthrower here in a file cabinet, along with four thermite grenades.
(14) Commanding Officer's Quarters
Patrick Kell is here.
(15) Executive Officer's Quarters
Anne Finn is here.
(16) Master Sergeant's Quarters
(17) Salome Ward's Quarters
(18) Mike Fitzhugh's Quarters
(19) Diane McWilliams' Quarters
(20) Mary Lasker's Quarters
(21) Security
The alarm can be sounded here.
(22) Armory
The Armory contains the following: five stun sticks, one vibrasword, three SMGs, and two shotguns. The door is locked. Salome Ward has the only key.
(23, 24) Washrooms and Showers
(25) Field Locker
(26) Lounge/Ready Room
(27) Eddie Baker's Quarters
(28) Meg Lang's Quarters
(29) Austin Brand's Quarters
(30) Daniel Allard's Quarters
(31) Bethany Connor's Quarters
Phantom 'Mech Skill
Source: the boxed Phantom 'Mech Skill rules on page 12 of this book. The Phantom 'Mech scenario and Special Party rules refer to them.
Morgan and Patrick Kell and Yorinaga Kurita possess a special combination of genetics, training, and philosophy that gives them an ability known as Phantom 'Mech Skill. Though little understood, this ability has allowed all three men to somehow block reception of their 'Mechs by the targeting computers or sensors of both foe and friend alike.
In all three cases, the computer image simply disappeared after the warrior perceived himself as virtually dead in combat.
For targeting purposes in a game, a pilot with Phantom 'Mech ability should be treated as though he were at double range and had moved ten or more hexes. These modifiers do not affect his ability to hit targets. The pilot also gets a +2 To-Hit Bonus. This bonus can be used in targeting or as a modifier on the Hit Location Table, but only to modify results so that the fire hits an arm or leg instead of the head or torso.
The Phantom 'Mech ability should be difficult to obtain. First, determine genetic predisposition. Total your character's starting attributes and divide by 5, rounding down. For example, the total of a Warrior's BODY, DEX, LRN, and CHA score is 24. Divide by 5 to get 4.8, then round down to 4. Roll that number of dice. If the result is greater than the total of the Warrior's initial attributes, he has the genetic predisposition for this ability. The roll is made only once, at the time the character is created.
Next, the player must determine if the power kicks in. Phantom 'Mech skill will activate only if a character is holding off an overwhelming force to save his compatriots. First, add up the following:
- Points of damage or HTK taken divided by 10
- 'Mech Piloting Skill
- Leadership Skill
- CHA
- LRN
Roll 2D6. If the total is more than 38, the power kicks in. If this attempt fails, the power will never work for this character. If the character does get the ability, the psychological effects will be staggering (as evidenced by Yorinaga and Morgan's long periods of retreat from normal society). A player should retire such a character for either an extended period or permanently.