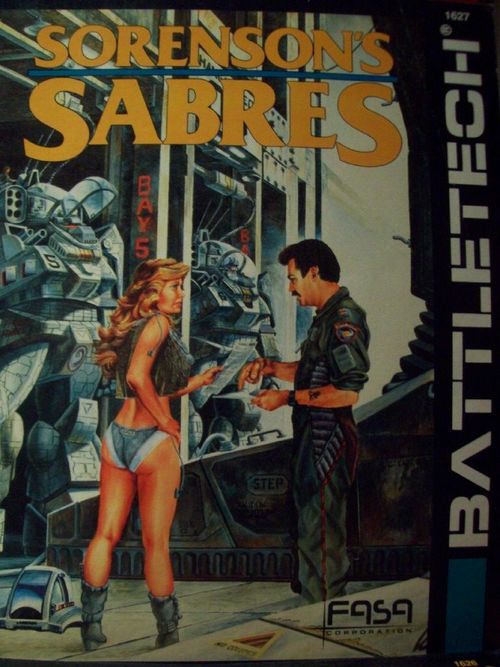
BattleTech: Sorenson's Sabres
BattleTech: Sorenson's Sabres Rulebook
Table of Contents
Table of Contents
- How to Use the Scenarios
- Company Composition
- Sorenson's Sabres Personnel
- Scenario: The Red Forest
- Scenario: Raid on Hell
- Scenario: The Valley of Tears
- Scenario: Pawns of Crystal, Board of Stone
- Scenario: Fragile Is the House of Cards
- The Ozawa Campaign
- Scenario: The Protector
- Scenario: A Train to Catch
- Scenario: After the Big Boys (A Long Battle)
- Bitter Pursuit
- Scenario: Devastating Encounter
- Scenario: The Ranger Surprise
How to Use the Scenarios
Each of the scenarios in this book recreates battles or encounters in which Sorenson's Sabres of the 5th Sword of Light took part. Several of the scenarios are interrelated, representing various phases of a single, continuous battle or campaign. If desired, players may keep track of battle damage taken by the various 'Mechs, LAMs, or fighters from one engagement to another, with the damage and losses suffered earlier in the campaign affecting the condition and make-up of the forces engaged at the end. The Special Rules for each scenario describe what repairs, if any, are possible between engagements.
The Game Set-Up sections provide special game information needed to play the scenarios, including instructions on how to lay out the mapsheets, directions for special terrain features encountered, and suggestions on the appropriate BattleTech and/or AeroTech rules to use. In some cases, there are also suggestions for using CityTech and/or AeroTech rules to make play more exciting or challenging. (A number of scenarios require both CityTech and BattleTech maps. When using the maps together, players can simply lay them out side by side.)
Attacker and Defender forces for each scenario are described in detail. This information includes damage, problems, or special abilities of any 'Mechs or forces at the start of the battle. Also noted is each 'Mech's starting position on the map, or where and when it enters if the 'Mech arrives after the battle has already begun.
Several scenarios include ground forces for one or both sides. The rules generally allow the player to choose his own mix of vehicles and/or troops up to a certain, stated number of tons. See CityTech for the rules for creating and using both vehicles and troops.
The Victory Conditions are described next. These determine the outcome of the encounter, and vary from scenario to scenario. It is very rare in actual combat that an action continues to the point where one side or the other is completely obliterated. For this reason, the Victory Conditions usually list special objectives for one or both opponents. As in actual combat, both sides may claim victory in some engagements, based solely on whether or not tactical objectives were won.
Finally, if the scenario requires rules not covered in the general BattleTech rules, they are discussed as Special Rules. Tips on winning the battle are sometimes included here as well.
The Modified Skill Roll Targets for the Gunnery and Piloting skills of each member of Sorenson's Sabres are the base targets for any combat rolls. These can be further modified by range, terrain, and action, depending on the combat situation, The full range of MechWarrior skills can be used to help determine the outcome of any encounter involving this elite company of the 5th Sword of Light.
All other 'Mechs in the scenarios have regular BattleTech Gunnery and Piloting skills and should be used normally. If specific skill levels are not given, assume a Piloting Skill Level of 5 and a Gunnery Skill Level of 4.
Company Composition
Clearly, the composition of Sorenson's Sabres is quite different from that of most BattleMech companies, or even from other companies in the 5th Swords. The unit operates several fairly uncommon 'Mech models, and has neither a Recon Lance nor an Air Lance with two AeroSpace Fighters attached.
Instead, the company contains a Land-Air 'Mech integrated directly into one of its lances, and an AeroSpace Fighter replaces a 'Mech in a second lance. This reduces the overall unit complement to twelve combatants (rather than 14) and makes the lances somewhat "lighter." It increases the flexibility of the lances, however, and ensures organic (i.e., directly attached) air support for the company.
Sorenson's Sabres Personnel
The Gunnery and Piloting Modified Skill Roll Targets printed for each MechWarrior and AeroSpace Pilot are listed below with the skill tables. Biographies and portraits are omitted.
Command Lance
Captain Daniel Sorenson
Pilot: Captain Daniel Sorenson. BattleMech: MAD-3R Marauder.
BattleMech Status Report: Daniel's Marauder, painted in standard colors, suffered heavy damage to its left torso. As a result, the autocannon ammo bin is badly mangled and can store only 10 rounds (instead of the customary 20). Also, anytime the AC/5 is fired, roll 2D6 before making the To-Hit Roll. The weapon misfires and jams on a result of 9+, rendering it useless for the remainder of the battle (it can be repaired temporarily between battles). Finally, the 'Mech is missing six of its heat sinks, shot away during various actions.
| Skill | Skill Level | Attribute Target | Modified Skill Roll Target |
|---|---|---|---|
| Bow/Blade | 2 | 8 | 6 |
| Gunnery/Mech | 5 | 8 | 3 |
| Leadership | 6 | 8 | 2 |
| Piloting/Mech | 4 | 8 | 4 |
| Pistol | 3 | 8 | 5 |
| Rogue | 3 | ||
| Listen/Eaves | 1 |
Contacts: Subhash Indrahar. Notes: Right-handed; attended Rasalhague Military Academy; controls holdings equivalent to barony.
MechWarrior Shytel "Guts" Gutowski
Pilot: MechWarrior Shytel "Guts" Gutowski. BattleMech: WHM-6R Warhammer.
BattleMech Status Report: Shytel's Warhammer is in perfect condition and is brightly painted with long, vertical stripes of blue and gold.
| Skill | Skill Level | Attribute Target | Modified Skill Roll Target |
|---|---|---|---|
| Gunnery/Arty | 3 | 9 | 6 |
| Gunnery/Mech | 4 | 8 | 4 |
| Interrogation | 1 | 8 | 7 |
| Land Management | 3 | 9 | 6 |
| Piloting/Mech | 3 | 9 | 6 |
| Streetwise | 3 | 8 | 5 |
Contacts: One useful contact; two informants. Notes: Right-handed; thick skin; sixth sense; controls holdings equivalent to knightdom.
Elden "The Shark" Berardinelli
Pilot: Elden "The Shark" Berardinelli. AeroSpace Fighter: SL-25 Samurai.
AeroSpace Fighter Status Report: Elden's Samurai is in perfect condition. It has been painted white with red polka-dots, and bears a crudely drawn shark's mouth on the sides of the nose.
| Skill | Skill Level | Attribute Target | Modified Skill Roll Target |
|---|---|---|---|
| Athletics | 2 | ||
| Acrobatics | 1 | 8 | 7 |
| Climbing | 2 | 8 | 6 |
| Equestrian | 1 | 8 | 7 |
| Running | 1 | 8 | 7 |
| Swimming | 1 | 8 | 7 |
| Computer |
Contacts: One informant. Notes: Ambidextrous/both; sixth sense; controls holdings equivalent to baronetcy.
MechWarrior Izora "Izzy" Soderstrom
Pilot: MechWarrior Izora "Izzy" Soderstrom. BattleMech: PHX-1K Phoenix Hawk.
BattleMech Status Report: Izora's Phoenix Hawk is heavily scarred by laser fire and missile near-misses. Despite its battered appearance (and desperate need of a paint job), it is in perfect condition. Note that this is the Draconis Combine's PHX-1K variant, without jump jets but with more armor and additional heat sinks. Its statistics are identical to the standard PHX-1, with the following changes:
- Jumping MP: 0
- Heat Sinks: 13
- Armor Factor: 152
- Armor Value: Head 8; Center Torso 23/5; Right/Left Torso 18/4; Right/Left Arm 14; Right/Left Leg 22
- Weapons and Ammo: Large Laser (RA); Medium Laser (RA); Medium Laser (LA); Small Laser (CT)
| Skill | Skill Level | Attribute Target | Modified Skill Roll Target |
|---|---|---|---|
| Computer | 3 | 7 | 4 |
| Driver | 3 | 8 | 5 |
| Gunnery/Arty | 1 | 7 | 6 |
| Gunnery/Mech | 8 | 8 | 0 |
| JumpShip Navig/Pilot | 4 | 7 | 3 |
| Land Management | 3 | 7 | 4 |
| Piloting/Mech |
Contacts: Four prominent contacts; two useful contacts; one informant. Notes: Naturally left-handed; controls holdings equivalent to knightdom.
Medium Lance
Lieutenant Cedrick Sveinson
Pilot: Lieutenant Cedrick Sveinson. BattleMech: LGB-0W Longbow.
BattleMech Status Report: Cedrick's Longbow, painted in standard colors, is missing two heat sinks, and the 'Mech's left arm will support only 9 points of armor instead of the normal 13. (The Longbow's record sheet is a standard BattleMech record with handwritten corrections in its armor column; it is not transcribed here.)
| Skill | Skill Level | Attribute Target | Modified Skill Roll Target |
|---|---|---|---|
| Driver | 2 | 7 | 5 |
| Gunnery/Arty | 4 | 8 | 4 |
| Gunnery/Mech | 7 | 7 | 0 |
| Land Management | 3 | 8 | 5 |
| Mechanical | 3 | 8 | 5 |
| Piloting/Aerosp. | 4 | 7 | 3 |
| Piloting/Mech | 6 |
Contacts: Four informants. Notes: Right-handed; controls holdings equivalent to barony.
MechWarrior Emory Wilk
Pilot: MechWarrior Emory Wilk. BattleMech: RFL-3N Rifleman.
BattleMech Status Report: Emory's Rifleman is suffering from a variety of breakdowns. The rear center torso no longer supports any armor, creating a severe Achilles' heel. The Magna Mk III heavy laser on the right arm overheats, producing 3 additional heat points whenever fired. Finally, the upper arm actuator in the left arm has been destroyed, adding a modifier of +1 to the To-Hit Number for all weapons mounted there.
| Skill | Skill Level | Attribute Target | Modified Skill Roll Target |
|---|---|---|---|
| Gunnery/Mech | 6 | 7 | 1 |
| Leadership | 2 | 8 | 6 |
| Piloting/Mech | 3 | 8 | 5 |
| Pistol | 2 | 7 | 5 |
| Survival | 3 | 8 | 5 |
| Technician | 2 | 9 | 7 |
Contacts: None. Notes: Right-handed; attended Sun Zhang MechWarrior Academy; peripheral vision; sixth sense; family feud with Nakamura clan.
MechWarrior Sharron Burgoz
Pilot: MechWarrior Sharron Burgoz. BattleMech: TBT-7K Trebuchet.
BattleMech Status Report: Sharron's Trebuchet variant, painted in camouflage colors, is in perfect condition. Only its weapons systems differ from the traditional TBT-5N model.
| Type | Location | Critical | Tons |
|---|---|---|---|
| PPC | RT | 3 | 7 |
| Ammo (AC/5) 20 | RT | 1 | 1 |
| AC/5 | LT | 4 | 8 |
| SRM 2 | RA | 1 | 1 |
| Ammo (SRM 2) 50 | RA | 1 | 1 |
| Skill | Skill Level | Attribute Target | Modified Skill Roll Target |
|---|---|---|---|
| Gunnery/Mech | 5 | 7 | 2 |
| Interrogation | 8 | 9 | 1 |
| Leadership | 4 | 9 | 5 |
| Piloting/Mech | 3 | 8 | 5 |
| Pistol | 4 | 7 | 3 |
| Survival | 1 | 8 | 7 |
| Technician | 3 |
Contacts: Two informants. Notes: Right-handed; attended Sun Zhang MechWarrior Academy; ISF informant; family feud with Willcox clan; controls holdings equivalent to barony.
MechWarrior Albert "Gunner" Benton
Pilot: MechWarrior Albert "Gunner" Benton. BattleMech: STG-3R Stinger.
BattleMech Status Report: Albert's Stinger is in perfect condition and bears a prominent sun-and-sword insignia on its right arm.
| Skill | Skill Level | Attribute Target | Modified Skill Roll Target |
|---|---|---|---|
| Brawling | 4 | 8 | 4 |
| Engineering | 3 | 8 | 5 |
| Gunnery/Aerosp. | 2 | 8 | 6 |
| Gunnery/Arty | 4 | 8 | 4 |
| Gunnery/Mech | 8 | 8 | 0 |
| Interrogation | 3 | 8 | 5 |
| Piloting/Mech | 7 |
Contacts: None. Notes: Ambidextrous/either; controls holdings equivalent to barony.
Pursuit Lance
Lieutenant Dana Utsonomiya
Pilot: Lieutenant Dana Utsonomiya. BattleMech: ARC-2K Archer.
BattleMech Status Report: Dana's Archer is in perfect condition and has been painted a dull silver. Note that this is the Draconis Combine's ARC-2K variant, with fewer but larger lasers, smaller LRM batteries, less armor and more heat sinks. Its statistics are identical to the standard ARC-2R with the following changes:
- Heat Sinks: 12
- Armor Factor: 176
- Armor Value: Head 9; Center Torso 29/8; Right/Left Torso 20/5; Right/Left Arm 18; Right/Left Leg 22
- Weapons and Ammo: LRM 15 (RT); LRM 15 (LT); Ammo (LRM) 16 (RT); Ammo (LRM) 16 (LT); Large Laser (RA); Large Laser (LA)
| Skill | Skill Level | Attribute Target | Modified Skill Roll Target |
|---|---|---|---|
| Gunnery/Mech | 5 | 8 | 3 |
| JumpShip Navig/Pilot | 2 | 10 | 8 |
| Piloting/Mech | 4 | 9 | 5 |
| Rogue | 4 | ||
| Hide in Cover | 2 | 9 | 7 |
| Listen/Eaves | 3 | 9 | 6 |
| Stealth |
Contacts: None. Notes: Right-handed; thick skin; peripheral vision; family friend of Conti clan; controls holdings equivalent to barony.
MechWarrior Clay Moretti
Pilot: MechWarrior Clay Moretti. BattleMech: PHX-HK2 Phoenix Hawk LAM.
BattleMech Status Report: Clay's Phoenix Hawk LAM, painted white on the top surfaces and grayish-blue elsewhere, is operating fine except for a defective gyro. For all purposes, treat the defect as a critical hit, including a +3 modifier to all Piloting skill rolls. If the gyro takes any combat damage, treat it as destroyed.
| Skill | Skill Level | Attribute Target | Modified Skill Roll Target |
|---|---|---|---|
| Gunnery/Mech | 7 | 8 | 1 |
| Leadership | 1 | 8 | 7 |
| Piloting/Aerosp. | 3 | 8 | 5 |
| Piloting/Mech | 7 | 8 | 1 |
| Pistol | 2 | 8 | 6 |
| Survival | 2 | 8 | 6 |
| Technician | 5 |
Contacts: Three informants. Notes: Left-handed; attended Sun Zhang MechWarrior Academy; family feud with Rogers clan.
MechWarrior Eleanor Rubach
Pilot: MechWarrior Eleanor Rubach. BattleMech: HER-4K Hermes III (ost).
BattleMech Status Report: Eleanor's Hermes variant, painted in desert colors, is in perfect condition. Its stats are identical to the standard HER-2S model, with the following changes:
- Heat Sinks: 11
- Weapons and Ammo: Large Laser (LT), critical 2, 5 tons; Large Laser (RT), critical 2, 5 tons
| Skill | Skill Level | Attribute Target | Modified Skill Roll Target |
|---|---|---|---|
| Bow/Blade | 1 | 7 | 6 |
| Driver | 1 | 7 | 6 |
| Gunnery/Aerosp. | 1 | 8 | 7 |
| Gunnery/Mech | 5 | 7 | 2 |
| JumpShip Navig/Pilot | 3 | 8 | 5 |
| Piloting/Mech | 4 | 8 | 4 |
| Pistol | 1 |
Contacts: None. Notes: Right-handed; glass jaw.
MechWarrior Vernon Marrone
Pilot: MechWarrior Vernon Marrone. BattleMech: WSP-1K Wasp.
BattleMech Status Report: Vernon's Wasp is in perfect condition and is painted a solid, dark brown. Note that this is the Draconis Combine's WSP-1K variant, which carries more armor and substitutes a machine gun and ammo for the short-range missile system. Its statistics are identical to the standard WSP-1A with the following changes:
- Armor Factor: 56
- Armor Value: Head 5; Center Torso 7/4; Right/Left Torso 7/2; Right/Left Arm 5; Right/Left Leg 6
- Weapons and Ammo: Medium Laser (RA); Machine Gun (LT); Ammo (MG) 200 (LT)
| Skill | Skill Level | Attribute Target | Modified Skill Roll Target |
|---|---|---|---|
| Engineering | 6 | 7 | 1 |
| Gunnery/Mech | 2 | 7 | 5 |
| Interrogation | 2 | 8 | 6 |
| JumpShip Navig/Pilot | 2 | 7 | 5 |
| Land Management | 1 | 7 | 6 |
| Leadership | 3 | 8 | 5 |
| Piloting/Mech |
Contacts: None. Notes: Right-handed; attended Sun Zhang MechWarrior Academy; controls holdings equivalent to barony.
Scenario: The Red Forest
Game Set-Up
This scenario uses Expert BattleTech and CityTech infantry rules. Set up the BattleTech board. The entire board is considered to be covered with heavy woods hexes. Ignore water hexes.
Defender
The Defender sets up first.
- 4 Platoons foot infantry (rifle)
- 4 Platoons foot infantry (MG)
- 2 Platoons foot infantry (flamer)
- 2 Platoons foot infantry (laser)
Deployment
The Defender deploys his infantry anywhere on the board, noting the location of each platoon on a piece of paper. The infantry may move secretly; a unit's location is revealed only when it opens fire.
The Defender notes ten hexes as broken ground. Any 'Mech entering a broken hex must make a +3 piloting roll or fall.
Attacker
The Attacker is Lieutenant Sveinson's Medium Lance of Sorenson's Sabres. 'Mech conditions are described under BattleMech Status Report, plus any additional damage sustained in the crash.
- Lieutenant Sveinson's Longbow (each leg missing 4 points of armor)
- Wilk's Rifleman (minor gyro damage; +1 to piloting rolls)
- Burgoz's Trebuchet-7K (SRM 2 jams on 9+ and is not cleared during the game)
- Benton's Stinger (no additional damage)
Deployment
The Sabres deploy within 2 hexes of the south map edge.
Victory Conditions
Lieutenant Sveinson must lead the Sabres through the forest with minimal casualties. At the end of eight turns, determine the number of 'Mechs exited off the north map edge. The Sabres are victorious if three or four 'Mechs exit. The Davions are victorious if no more than two exit.
Special Rules
As outlined in Expert BattleTech, 'Mech and infantry weapons start fires.
The unique nature of the local plant life causes the Sabres numerous problems, interfering with their delicate tracking and acquisition systems. When a Davion infantry unit declares fire, place its counter on the board. The Sabres attack on the turn it fired.
The counter remains on the board if the infantry moves from its hex on a subsequent turn, but any Sabre 'Mech firing on it makes a +2 Gunnery skill roll to retain its targeting lock-on. A failing roll breaks the lock-on and the attacking 'Mech may not fire on that infantry unit.
Unsuccessful lock-on rolls on a particular infantry unit remove the counter from the board and allows the unit to move secretly.
Scenario: Raid on Hell
Game Set-Up
Set up the BattleTech board as shown. Place light building counters in hexes 0910, 0911, 0711, 0709 and 0609. Ignore vegetation and water hexes.
This scenario uses Expert BattleTech rules and AeroTech LAM rules.
Defender
Captain Pauling defends the base with a large light lance.
- Captain Pauling's Locust
- Becker's Stinger
- Wasp (Medium Laser functions only on a roll of 8+)
- Ostscout (+1 to piloting rolls)
- Casepir's Valkyrie
Deployment
The Defenders deploy first, anywhere within one hex of a building.
Attacker
The Sabres' Pursuit Lance consists of:
- Lieutenant Utsonomiya's Archer
- Moretti's Phoenix Hawk LAM
- Rubach's Hermes-III
- Marrone's Wasp
Deployment
The Sabres deploy second, within two hexes of any map edge.
Victory Conditions
The Sabres receive one victory point for each enemy 'Mech destroyed and for each building hex captured intact. The last side to occupy its hex captures a building. Any building not reduced to rubble is considered intact. At the end of eight turns, base victory assessments on the following table.
| Victory Points | Results |
|---|---|
| 9–10 | Attacker Substantial Victory |
| 7–8 | Attacker Marginal Victory |
| 5–6 | Draw |
| 3–4 | Defender Marginal Victory |
| 0–2 | Defender Substantial Victory |
Special Rules
Hell's special environment causes potentially dangerous effects.
- All heat costs are doubled for light 'Mechs, and tripled for medium and heavy 'Mechs.
- A 'Mech takes two extra heat points each turn, whether it took any action or not.
- MechWarrior Moretti's Phoenix Hawk LAM converts only to LAM mode, not fighter mode. On a roll of 10+ when conversion is made, the equipment jams and Moretti remains in that mode for the rest of the game.
Scenario: The Valley of Tears
Game Set-Up
Arrange the BattleTech board as shown. All hexes south of the bottom line are Elevation 2, all hexes between the top and bottom line are Elevation 1, and all hexes north of the top line are Elevation 0. Ignore water hexes.
Play this scenario using Expert BattleTech and AeroTech rules.
Defender
Sorenson's Sabres' Command and Medium Lances defend the valley against Swann's Cavaliers and include the following:
- Command Lance
- Captain Sorenson's Marauder
- Gutowski's Warhammer
- Berardinelli's Samurai (deploys in flight)
- Soderstrom's Phoenix Hawk
- Medium Lance
- Lieutenant Sveinson's Longbow
- Wilk's Rifleman
- Burgoz's Trebuchet-7K
- Benton's Stinger
Deployment
The Sabres deploy anywhere in the Elevation 2 area. Berardinelli's fighter is airborne and may engage in strafing attacks on turns 1–3, but must be removed from the board thereafter due to darkness.
Attacker
Martin's Company, Swann's Cavaliers, returns from a decoy action to attack the Sabres.
- First Lance
- 1 Wolverine (Movement causes +2 heat)
- 2 Locusts
- 1 Stinger (Machine Guns jam on 9+)
- Second Lance
- 1 Archer (Lt. Martin) (18 LRM rounds remaining)
- 1 Crusader (One SRM launcher inoperative)
- 1 Shadow Hawk
- 1 Rifleman
- Third Lance
- 1 Thunderbolt (SRM launcher inoperative)
- 1 Scorpion (8 points of damage to CT)
- 1 Ostroc
- 1 Warhammer (Both small lasers inoperative)
Deployment
The Cavaliers deploy second, within two hexes of the south map edge.
Victory Conditions
Driven by revenge, the Cavaliers believe the Sabres massacred their families. They must break through the Sabres' position to attack the 36th Dieron Regulars, who continue their murderous task further down the valley. Their two tasks must balance during the game.
The Cavaliers receive victory points for destroying enemy 'Mechs. To encourage this, victory points increase based on the following schedule. (The printed heading over this table reads "Victory Points" above a "Turn of Exit" column. The second table below is headed "'Mech Exited/Victory Points".)
| Turn of Exit | Light | Medium | Heavy |
|---|---|---|---|
| 1–2 | 0 | 1 | 2 |
| 3–4 | 1 | 2 | 3 |
| 5–6 | 2 | 3 | 4 |
| 7–8 | 3 | 4 | 5 |
The Cavaliers also receive victory points for exiting their 'Mechs off the north edge of the board to attack the 36th Dieron Regulars. Unlike the previous schedule, however, the longer the Cavaliers delay, the fewer the victory points.
| Turn of Exit | Light | Medium | Heavy |
|---|---|---|---|
| 2–3 | 3 | 4 | 5 |
| 4–5 | 2 | 3 | 4 |
| 6–7 | 1 | 2 | 3 |
| 8 | 0 | 1 | 2 |
If the Cavaliers remain in the valley to attack the Sabres, the 36th Dieron will complete its murderous task and escape. Prudent players will carefully consider their options before committing to a final battle plan.
At the end of eight turns, Victory Points are added and victory is determined based on the following table:
| Victory Points | Outcome |
|---|---|
| 61+ | Attacker Decisive Victory |
| 51–60 | Attacker Substantial Victory |
| 41–50 | Attacker Marginal Victory |
| 31–40 | Draw |
| 21–30 | Defender Marginal Victory |
| 11–20 | Defender Substantial Victory |
| 10 or less | Defender Decisive Victory |
Special Rules
Berardinelli's fighter may freely engage in strafing attacks the first three turns of the game before darkness forces him to return to base.
The first two turns are fought in the late afternoon/early evening.
Turns three through five are fought during dusk. All To-Hit rolls are at +1.
Turns six through eight are fought at night. All To-Hit rolls are at +2.
Scenario: Pawns of Crystal, Board of Stone
Game Set-Up
Lay out the CityTech map as shown. Fill hex 0908 with one-hex counters or tokens representing supplies, the original goal of the Sabres.
Defender
The Defender's force consists of the Medium Lance of Sorenson's Sabres.
- Lieutenant Sveinson's Longbow
- Wilk's Rifleman
- Burgoz' Trebuchet-7K (AC/5 ammo reduced to 10 rounds)
- Benton's Stinger
Deployment
The Sabres set up first, anywhere within the black border.
Attacker
The Attackers are elements of Kurtland's Company, 3rd, Ceti Hussars.
- Command Lance
- Kurtland's Warhammer
- 1 Rifleman (+1 on Piloting skill rolls)
- 1 Archer
- Medium Lance
- 1 Phoenix Hawk
- 1 Rifleman (RT Med. Laser produces double heat)
- 1 Wolverine (-1 movement)
- 1 Wasp
Deployment
The Attacker deploys second and anywhere within 2 hexes of the north and/or south map edge.
Victory Conditions
The Sabres must escape off either the north or the south map edge with as many supply counters as possible. One Victory Point is awarded for each 'Mech exited, as well as each supply counter carried off. Victory is determined at the end of eight turns based on the following table:
| Victory Points | Results |
|---|---|
| 9–10 | Defender Substantial Victory |
| 7–8 | Defender Marginal Victory |
| 5–6 | Draw |
| 3–4 | Attacker Marginal Victory |
| 0–2 | Attacker Substantial Victory |
Special Rules
Each 'Mech with hands (i.e., all but the Rifleman) may carry one supply counter for each functional arm. It costs 2 MP to pick up a supply counter, and a 'Mech carrying a supply counter may not engage in hand-to-hand combat using that arm or fire any weapons mounted on that arm. A counter can be dropped and retrieved later at no cost.
Obviously, the Attacker must maintain strong forces on both map edges, since the direction the Defender will attempt to break out is unknown. The Defender's job is to grab supplies quickly, then move out of the city, using local superiority to punch through the encirclement and escape.
Scenario: Fragile Is the House of Cards
Game Set-Up
Set up the two CityTech maps as shown. Hexes within the heavy solid lines are considered city hexes. Players arrange building counters within the city area; buildings should not occupy more than 50 hexes. If using aerospace fighters, set up the low altitude AeroTech board.
This scenario uses the Expert BattleTech, CityTech and, optional AeroTech rules. The Defender deploys first.
Defender
Defender forces consist of a ragtag assortment of rebel infantry, armor and a few 'Mechs. To determine the Defender's precise forces, use the following procedure:
- Defender secretly rolls one die and adds the number obtained to twelve. The defender receives this number of units.
- To determine the type of unit, the defender rolls secretly on the following tables:
Unit Type Table (2D6)
| Die Roll | Type |
|---|---|
| 2 | Special (Roll on Special Chart) |
| 3 | Wheeled Scout |
| 4 | Condor Class Tank |
| 5 | Vedette Class Tank |
| 6 | Infantry Platoon* |
| 7 | Infantry Platoon* |
| 8 | Infantry Platoon* |
| 9 | Hunter Class Tank |
| 10 | 20-ton 'Mech |
| 11 | 35-ton 'Mech |
| 12 | Special |
*Roll again to determine any infantry platoon's armament and type.
Infantry Armament
The scan's header reads "Die Roll (1D6)", but the ranges run from 2 to 12; the ranges are transcribed as printed.
| Die Roll | Type |
|---|---|
| 2–3 | Flamer |
| 4–6 | MG |
| 7–9 | Rifle |
| 10–11 | Laser |
| 12 | SRM |
Infantry Type
| Die Roll (1D6) | Transport |
|---|---|
| 1–3 | Foot |
| 4–5 | Motorized |
| 6 | Jump |
Special Chart
| Die Roll (1D6) | Type |
|---|---|
| 1 | Demolisher Class Tank |
| 2 | 50-ton 'Mech |
| 3 | 75-ton 'Mech |
| 4 | 25-ton AeroSpace Fighter |
| 5 | 50-ton AeroSpace Fighter |
| 6 | Roll additional unit |
The Defender also receives eight vibrabombs, which may be concealed anywhere within the city.
Attacker
Sorenson's entire company is the attacking force.
- Command Lance
- Captain Sorenson's Marauder
- Gutowski's Warhammer
- Berardinelli's Samurai (deployed on AeroTech board; see below)
- Soderstrom's Phoenix Hawk
- Medium Lance
- Lieutenant Sveinson's Longbow
- Wilk's Rifleman
- Burgoz's Trebuchet-7K
- Benton's Stinger
- Pursuit Lance
- Lieutenant Utsonomiya's Archer
- Moretti's Phoenix Hawk LAM (may deploy on CityTech board or AeroTech board; see below)
- Rubach's Hermes-III
- Marrone's Wasp
Deployment
The Defender secretly deploys all non-'Mech ground units and vibrabombs within the city area and notes their location on a piece of paper. The Defender's 'Mechs are then placed on the board within the city area; fighters are placed at low altitude on the AeroTech board.
The Attacker deploys the Sabres' 'Mechs anywhere within two hexes of the south map edge. Berardinelli's Samurai fighter is deployed on the AeroTech board at low altitude. Moretti's Phoenix Hawk LAM may also be deployed in fighter mode on the AeroTech board.
Victory Conditions
The Attacker gains Victory Points by capturing city hexes and undestroyed buildings. A hex or building is considered captured by the player whose units last occupied it. The Attacker receives 1 VP for each city hex captured. The buildings contain important records and documents, and so the Sabres also receive 1 VP for each building hex captured intact. Any building counter not reduced to rubble is considered intact.
The Defender receives VP for destroying enemy 'Mechs and for holding undestroyed hexes, based on the following:
- 5 points for each light 'Mech destroyed.
- 8 points for each medium 'Mech destroyed.
- 12 points for each heavy 'Mech destroyed.
- 15 points for each LAM/AeroSpace Fighter destroyed.
- 1 point for each intact building hex not captured by the Sabres.
The Defender's VP are subtracted from the Attacker's at the end of ten turns, and victory is assessed as follows:
| Victory Points | Results |
|---|---|
| 50+ | Attacker Decisive Victory |
| 30 to 49 | Attacker Substantial Victory |
| 10 to 29 | Attacker Marginal Victory |
| -10 to 9 | Draw |
| -11 to -29 | Defender Marginal Victory |
| -30 to -49 | Defender Substantial Victory |
| -50 or less | Defender Decisive Victory |
Special Rules
Aerospace combat takes place at low altitude on the AeroTech board before the 'Mech battle is resolved. Any surviving AeroSpace Fighters may then move onto the CityTech board and perform strafing and ground attacks according to AeroTech rules. If AeroTech is not available, assume that Berardinelli's fighter is occupied at high altitude and may not participate in the battle.
Optionally, if the Defender does not receive any AeroSpace Fighters and the players feel that this will unbalance the game, Berardinelli's fighter may be excluded from the scenario entirely.
The Ozawa Campaign
The following three scenarios describe the actions of Sorenson's Sabres during the Combine's attack on the planet Ozawa. Each scenario may be played separately, or all three may be played together.
Scenario 1: Day of the Dragon
Game Set-Up
This scenario uses Expert BattleTech rules, the gun emplacement rules from CityTech, and the strafing rules from AeroTech. Set up the BattleTech board as shown. Ignore elevations, the entire board is considered Elevation 0. Ignore water hexes. The entire board reflects the industrial sector that became the battle sites. Place the following building counters in an opaque container:
- 8 Light Buildings
- 20 Medium Buildings
- 20 Heavy Buildings
- 12 Hardened Buildings
The Defender randomly draws one counter, placing it anywhere on the board. The Attacker then draws one counter and places it. The players alternate drawing and placing all remaining counters.
Defender
Lieutenant Drake's Urban Defense Lance, the remnants of several destroyed 'Mech units under Lieutenant Thorgil, and a pair of turreted autocannon defend the area against the Sabres.
- Drake's Lance
- Drake's Phoenix Hawk
- 3 Urban Mechs (With 6, 8, and 10 points of damage respectively, distributed as the Defender wishes)
- Thorgil's Lance
- Thorgil's Stalker (15 points of damage distributed as the Defender wishes; LRMs and SRMs have 1/2 normal ammo)
- 1 Warhammer (Left arm gone, 8 points of damage distributed as Defender wishes, 10 SRM rounds left)
- 1 Griffin
In addition, the Defender receives 2 AC/10s in turrets with 20 points of armor and 12 rounds of ammunition each.
Deployment
The Defender deploys first, setting 'Mechs anywhere on the board. The two autocannon may be placed secretly in any building. Their location remains hidden until they fire.
Attacker
The Attacker consists of Sorenson's entire company, with its 'Mechs in the condition described under BattleMech Status Report.
Deployment
The Attacker deploys second and anywhere within two hexes of south map edge.
Berardinelli's fighter, on combat air patrol, deploys anywhere on the board and performs strafing attacks (explained under Special Rules).
Victory Conditions
The Sabres' mission involves securing the area and eliminating hostile resistance. Base their victory points on the following schedule:
- 1 for each light 'Mech destroyed.
- 2 for each medium 'Mech or gun emplacement destroyed.
- 3 for each heavy or assault 'Mech destroyed.
At the end of ten turns, count the Sabres' victory points and assess them on the following table:
| Victory Points | Results |
|---|---|
| 14–15 | Attacker Substantial Victory |
| 10–13 | Attacker Marginal Victory |
| 7–9 | Draw |
| 3–6 | Defender Marginal Victory |
| 0–2 | Defender Substantial Victory |
Special Rules
Berardinelli's fighter may perform strafing attacks on the city as described in AeroTech. Each turn, however, the attacker rolls one die; if less than or equal to the current turn number, Berardinelli must fight enemy air units elsewhere, unable to participate in the rest of the battle. Alternately, Berardinelli and his fighter may not enter the scenario at all.
Any gun emplacements undestroyed at the end of turn ten are considered captured and usable by the Sabres in the following scenario.
Retain the mapboard at the end of the game with appropriately placed rubble counters and buildings. Use it in the second scenario.
Scenario 2: Swift Vengeance
Game Set-Up
Retain the mapboard from the previous scenario with buildings and rubble counters placed as they were at the end of that game. Use the same rules as in the previous scenario.
Defender
The Sabres are now the Defenders. Their 'Mechs are in the same condition as at the end of the previous scenario, with the exception of repaired armor hits and replenished ammo. Critical hits, lost limbs, and so on, are not repaired.
In addition, the Sabres may use gun emplacements captured in the last scenario. Each now has 12 rounds of ammunition.
Deployment
The Sabres deploy first, anywhere within the city. The gun emplacements remain where originally deployed.
Attacker
The Attackers consist of three lances for the Crucis Lancers, along with their supporting armored units.
- Red Lance
- 1 Stalker (One Large Laser missing)
- 1 Warhammer (Left Arm PPC produces +2 heat)
- 2 Archers (Each carries only 20 LRM rounds)
- Blue Lance
- 1 Thunderbolt (+1 to Piloting skill rolls)
- 1 Rifleman
- 1 Crusader
- 1 Wolverine (10 points armor on center torso)
- White Lance
- 1 Locust
- 2 Stingers (One Stinger jumps only 4 hexes)
- Sharp's Dragoons (Armored Platoon)
- 2 Vedette Class tanks
- 2 Hunter Class tanks
Delete Sharp's platoon if the Sabres are grossly understrength.
Deployment
The Attackers deploy anywhere within 2 hexes of the south map edge.
Victory Conditions
The Sabres' victory conditions are based on how well they reduce the enemy's effectiveness by the end of the game. The Sabres receive victory points based on the following schedule:
- 1 VP for each enemy tank destroyed.
- 2 VP for each enemy light or medium 'Mech destroyed.
- 4 VP for each enemy heavy or assault 'Mech destroyed.
At the end of eight turns, the Sabres count their victory points and assess victory based on the following schedule:
| Victory Points | Results |
|---|---|
| 33–40 | Defender Substantial Victory |
| 25–32 | Defender Marginal Victory |
| 17–24 | Draw |
| 9–16 | Attacker Marginal Victory |
| 0–8 | Attacker Substantial Victory |
Special Rules
Berardinelli's fighter may begin the game airborne, and may engage in strafing attacks in accordance with the rules in AeroTech. However, at the beginning of each turn, the Sabres' player rolls one die. If the number rolled is less than or equal to the current turn number, then Berardinelli's fighter is engaged in combat with enemy craft and may not participate in the remainder of the game.
Scenario 3: Lance and Sabre
Game Set-Up
Set up the CityTech and BattleTech maps as shown. The defender may place Hardened Buildings on no more than 24 hexes of the city area, which represents the Charkai Power Station. The east and west map edges are considered impassable; units may enter and exit only off the north and south edges.
This scenario uses Expert BattleTech rules, as well as the strafing rules from AeroTech.
Defender
The Sabres defend the power station. They begin the game in exactly the same condition as they ended the previous scenario, including damage and expended ammunition.
Deployment
The Sabres set up first, anywhere on the CityTech map. Berardinelli's fighter deploys anywhere on the board, and may freely engage in strafing attacks.
Attacker
Morrow's Company, 3rd Crucis Lancers, is the Attacker. Due to the speed of the Federation pursuit of the fleeing Kurita, the lances of Morrow's Company arrive on different game turns.
- Light Lance (Begins game deployed within two hexes of the south map edge)
- 1 Blackjack (+1 piloting rolls)
- 1 Ostscout (Double heat for movement)
- 1 Stinger (One machine gun missing)
- 1 Wasp (8 heat sinks)
- Medium Lance (Enters from south map edge at the beginning of turn 2.)
- 1 Ostroc
- 2 Crusaders (8 rounds LRM ammo each)
- 1 Phoenix Hawk
- Heavy Lance (Enters from south map edge at the beginning of turn 4)
- 1 Marauder (Autocannon jams on 9+, cannot be cleared during game)
- 1 Rifleman (Left arm AC/5 produces 2 extra heat)
- 1 Catapult
- 1 Archer
- Command Lance (Enters from south map edge at the beginning of turn 6)
- Morrow's Warhammer
- 1 Thunderbolt (One medium laser disabled)
- 1 Whitworth (8 points damage to right arm)
Deployment
The Attacker sets up on the board as outlined above, and reinforcements enter from any hex on the south map edge.
Victory Conditions
This battle is do or die for the Sabres. Either they stand against steadily increasing opposition, or they fail and face the destruction of both themselves and their regiment.
The destruction of enemy 'Mechs is not the Sabres' primary objective; rather, they must prevent the enemy from bypassing them to attack the regimental DropShips, then withdraw themselves when the order to retreat arrives.
The Sabres receive 1 victory point for each 'Mech exited off the north end of the board after the withdrawal order arrives (see Special Rules), and lose 1 Victory Point for every enemy 'Mech that exits off the north map edge before then. Obviously, the more Sabres who survived the previous scenarios, the higher the Sabres' potential score. Berardinelli's fighter does not count for Victory Point purposes.
Victory Points are added at the end of ten turns, or the turn after the last Saber exits the board, whichever comes first.
| Victory Points | Outcome |
|---|---|
| 5 to 11 | Defender Substantial Victory |
| -3 to 4 | Defender Marginal Victory |
| -11 to -4 | Attacker Marginal Victory |
| -12 or less | Attacker Substantial Victory |
Special Rules
Berardinelli's fighter freely makes strafing attacks during the game. Enemy aircraft are considered engaged in attacks on the Sword of Light's DropShips.
Each turn, the Sabres' player rolls 2 dice. If the number rolled is less than or equal to the current turn number, then the loading of the 5th Sword of Light's DropShips is complete, and the withdrawal order given. The Sabres are then free to move towards the north map edge and exit the board.
The Attacker must destroy all defending units or force them to leave the map.
Scenario: The Protector
The scenario's opening interview with MechWarrior Amax Feeler III is a historical excerpt and is omitted.
Game Set-Up
Lay out the two BattleTech maps in the configuration shown. Play this scenario using Expert BattleTech rules.
Attacker
The Attacker, Sorenson's Sabres, consists of:
- Command Lance
- Captain Sorenson's Marauder
- Gutowski's Warhammer
- Berardinelli's Samurai
- Soderstrom's Phoenix Hawk
- Pursuit Lance
- Lieutenant Utsonomiya's Archer
- Rubach's Hermes III
- Marrone's Wasp
- Benton's Stinger (Temporary Assignment)
Deployment
Deploy Clay Moretti's Phoenix Hawk LAM in hex 0909 on the northern map board. Deploy the rest of the units on the first turn of play, entering on the southern edge of the southern map.
Defender
The Defender, the 1114th Assault Group, consists of:
- Command Lance
- Captain Jones's Scorpion (Piloting 3, Gunnery 2)
- 1 Vulcan
- 1 Vulcan (No jump jets)
- 1 Phoenix Hawk (Has only 4 points of armor on right torso)
- Strike Lance
- Feeler's Archer (Piloting 2, Gunnery 2)
- 1 Centurian
- 1 Firestarter
- 1 Clint
Deployment
The 1114th Assault Group of the now defunct 12th Lyran Guard deploys anywhere on the northern map. Units cannot be closer than three hexes to another BattleMech due to the dispersal from the combat drop prior to combat.
Victory Conditions
The victory conditions for this game revolve around the recovery of the downed Phoenix Hawk LAM. Sorenson's Sabres win this scenario by pulling the Land-Air 'Mech off the south edge of the southern map with less than two casualties. Any other result is a victory for the 1114th Assault Group player.
Special Rules
Clay Moretti's LAM, disabled on the field, can fire but not move. Held by two Techs at the start of the play, Clay breaks free and can man his damaged craft.
To drag the fallen Land-Air 'Mech off the field, a rescue force must spend one turn in an adjacent hex, during which the BattleMechs cannot move or fire. The towing 'Mech or 'Mechs must weigh at least 55 tons. The movement rate for the towing force is the average walking speeds of all towing 'Mechs times three-fourths.
Scenario: A Train to Catch
The opening letter from MechWarrior Vernon Marrone is fiction and is omitted.
Game Set-Up
This scenario uses CityTech rules. Layout the two mapboards in the configuration shown.
Defender
The Defender, the Grinder Company, consists of the following:
- Command Lance
- Captain Yors' Archer (Piloting 2, Gunnery 2)
- 1 Warhammer
- 1 Griffin
- 1 Stinger (Jump Jets Inoperative)
- Medium Lance
- 1 Enforcer
- 1 Phoenix Hawk (Left Arm Armor 3)
- 1 Cicada
- 1 Wasp
Deployment
The Grinder Company deploys first and anywhere on the northern map.
Attacker
The Attacker, Sorenson's Sabres, consists of:
- Medium Lance
- Captain Sorenson's Marauder
- Wilk's Rifleman (Right Autocannon operative only one 1D6 of the time; roll for each attack)
- Burgoz's Trebuchet-7K
- Benton's Stinger
- Pursuit Lance
- Lieutenant Utsonomiya's Archer
- Moretti's Phoenix Hawk LAM
- Rubach's Hermes-III
- Marrone's Wasp
Deployment
Set up the Pursuit and Medium Lances of Sorenson's Sabres anywhere on the south map.
Victory Conditions
Sorenson's Sabres win this scenario by destroying the bullet train. They win a marginal victory if their losses are 1/3 of those the Grinder Company in actual BattleMechs destroyed. Any other result is considered a victory for the Defender.
Special Rules
The bullet train consists of 7 cars and follows the path as laid out on the mapboard. Entering from the western edge on turn 3, it moves 15 hexes a turn. Each of the cars follows the first along the path of the track in consecutive order.
To destroy the train, one car must sustain a minimum of 12 points of damage. Unarmored, the train takes direct damage. Physical or hand-to-hand combat has no effect on the train; only fire from weapons systems affects it. Destroying any one car cripples the entire train, sending it crashing off the tracks.
Any BattleMech standing on the tracks as the train moves through that hex automatically destroys the train. That BattleMech takes 15D6 points of automatic damage from the impact immediately (generally enough to destroy a BattleMech).
If destroyed, the cars will fly off the track. Roll a die for each car and consult the following chart:
| Die Roll | Result |
|---|---|
| 1–3 | Car remains in that hex |
| 4 | Car derails into hex on the right of the train's path |
| 5–6 | Car derails into hex on the left of the train's path. |
Any BattleMech in the same hex as a derailed train car sustains 6D6 points of damage.
Scenario: After the Big Boys (A Long Battle)
The opening excerpt from Captain Sorenson's Sun Zhang manual and the situation text are historical and are omitted.
Game Set-Up
This scenario uses CityTech combat rules. Use the BattleTech Technical Manual 3025 for information on equipment, and set up two BattleTech maps as shown.
Defender
The Defender consists of:
- 1 Long Tom Rifle
- 3 J-27 Ordnance Transports
- The Emerald Marauders (3rd Davion Garrison Force)
- 1 Catapult
- 1 Jenner
- 1 Locust
- 1 Spider
Deployment
Deploy on the southern mapboard. The Long Tom and J-27 transports must occupy the road hexes as indicated. The Defender deploys first, and the BattleMechs must be within three hexes of the road at the start of play.
Attacker
The Attacker, Sorenson's Sabres, consists of:
- Pursuit Lance
- Lieutenant Utsonomiya's Archer (Left Torso Armor 2, Center Torso Armor 5)
- Moretti's Phoenix Hawk LAM
- Rubach's Hermes-III
- Marrone's Wasp
- Benton's Stinger (on temporary assignment)
The printed scenario gives no Attacker deployment instruction; none is supplied here.
Victory Condition
Sorenson's Sabres win a decisive victory by destroying all the defenders with the exception of the Long Tom Artillery. If the Long Tom is destroyed, consider it a marginal victory for Sorenson's Sabres. For a defending player decisive victory, the Long Tom must move off the north edge of map. Any other result is a marginal victory for the defending forces.
Special Rules
The Long Tom cannot fire its main weapons while mobile. Defending machine guns can fire, however.
The J-27 Ordnance Transports contain missile reloads. Roll a die each time they are hit. If the result is a 1, the missiles explode and the Transport is destroyed. Any BattleMech within an adjacent hex receives 2D6 points of damage in a random area. Unlike the Mobile Long Tom Artillery, the J-27's can move anywhere on the mapboard.
Bitter Pursuit
The three scenarios below describe the actions of Sorenson's Sabres during the Combine's takeover of the planet Markab. Each scenario may be played separately, or all three may be played together. The introductory excerpt from Dragonwarrior is historical and is omitted.
Scenario 1: The Rat Trap
The debriefing excerpt from MechWarrior Shytel Gutowski and the situation text are omitted.
Game Set-Up
Lay out the BattleTech maps as shown in the diagram. The maps represent the rolling terrain of the Abadan Hills on Markab. Play this scenario using Expert BattleTech rules.
Defender
The Defender in this scenario is Orlon's Company of the 3rd Crucis Lancers. For this scenario (as well as for the following two scenarios), MechWarriors from Orlon's Company have a Piloting skill 3 and Gunnery Skill 4.
- Orlon's Command Lance
- 1 Victor (2 extra heat points per turn, SRM 4 jams for 1D6 turns on a 2D6 roll of 7+)
- 1 Awesome (RA armor has only 14 points, RL armor has only 20 points. Roll 2D6 each turn; if 9+ is rolled, 'Mech may move only one hex)
- 1 Archer (CT armor has only 20 points, 3 extra heat points generated each turn)
- 1 Locust
- Winchel's Support Lance
- 1 Shadow Hawk (SRM 2 misfires on a 2D6 roll of 8+; when using jump jets, a roll of 7+ on 2D6 doubles heat points expended)
- 1 Wolverine (jump jets out, LT has only 10 points of armor)
- 1 Stinger
- Saguchi's Scout Lance
- 1 Phoenix Hawk (CT has only 15 points of armor, large laser misfires on a 2D6 roll of 9+)
- 1 Panther
- 1 Firestarter (jump jets out, RA and LT armor gone)
- 1 Valkyrie
Deployment
Defending units set up anywhere on either map. The defender can designate four hill hexes as concealment bunkers (these 'Mech foxholes are commonly referred to as "rat traps" in MechWarrior circles). They are IR shielded so that a hiding 'Mech's heat signature cannot be detected. The defender may have four of his 'Mechs in these prepared positions, noting the hexes containing the bunkers. Such 'Mechs are placed on the map only when they have been spotted or moved.
Attacker
The attacker is the entire company of Sorenson's Sabres, as described in BattleMech Status Report.
Deployment
The attacking 'Mechs enter the map from the southern edge. The company's LAM may be in flight mode, if desired. Fighters within line-of-sight can spot a 'Mech in a rat trap on a roll of 10+ on 2D6. An attacking 'Mech within five hexes and line-of-sight of a bunker automatically sees the concealed 'Mech.
Victory Conditions
The attacker must clear the map of defending 'Mechs within ten turns.
The defender must defend the map for at least nine turns, then he may withdraw. If, at the end of ten turns, he has at least half of his original force, he wins.
Any other outcome is a draw.
Special Rules
The defender's 'Mechs concealed in bunkers get a first fire option if they are still undetected. The attacker cannot return first fire. Defending 'Mechs can leave a concealment bunker by using jump jets or by expending three MP to climb out.
Scenario 2: Duel at Dalton
The excerpt from Dragonwarrior is historical and is omitted.
Game Set-Up
Set up the CityTech and BattleTech maps as shown in the diagram. Use CityTech rules and set up the buildings of Dalton as shown below:
| Buildings | Hex Locations |
|---|---|
| L2 | 0506, 0709, 0711 |
| L3 | 1010, 1111 |
| L4 | 0807 |
| M1 | 0606, 0707, 0809, 0912, 0913 |
| M2 | 0612, 0812, 1008, 1107, 1109 |
| M3 | 0906, 1209 |
| H2 | 0812, 0905, 1105 |
Defender
For campaign play, the defender receives whatever 'Mechs survived in the first scenario in their current supply and damage levels. If playing this scenario by itself, use Orlon's Company from the first scenario and ignore the additional forces below.
For campaign play, the defender receives the following additional units:
- Kemp's Reserve Lance
- 1 Warhammer (RA PPC causes double its normal heat on a roll of 6+ on 2D6, RA has 10 points of armor, RT medium and small laser disabled, RT has 12 points of armor)
- 1 Catapult (jump jets cause quadruple its normal heat on a roll of 8+ on 2D6, RT and LT each have only 8 points of armor)
- 1 Hunchback (only five turns of ammo left for the AC/20)
- 1 Panther
- Pearson's Picket Troop
- 2 Vedette Tanks
- 2 Hunter Missile Tanks
Deployment
Defenders set up first, anywhere on the northern map.
Attacker
The attacker consists of the operational 'Mechs of Sorenson's Sabres, as they appeared at the end of the first scenario. No resupply or repair is allowed.
Deployment
Attackers enter along the southern edge of the map.
Victory Conditions
The attacker must secure the raised road that goes through Dalton. If no enemy 'Mechs are within three hexes of the road by turn twelve, the attacker has won.
The defender wins by destroying more 'Mechs than the attacker destroys by turn twelve.
If both or none of these situations have occurred by turn twelve, the scenario is considered a draw.
Special Rules
Treat all terrain except the road (which is considered a Level One hill) as Depth One water. All 'Mechs over 30 tons must make a Piloting Skill Roll every turn that they walk through these flooded rice fields.
Scenario 3: Orlon's Last Stand
The diary excerpt from Captain Sorenson is historical and is omitted.
Game Set-Up
Lay out the BattleTech mapset maps as shown in the diagram. All 'Mechs that survived the previous two scenarios may resupply, but may not receive any repair. Players should use Expert BattleTech rules.
Defender
For campaign play, the defender receives whatever 'Mech and armored vehicles survived the first two scenarios. These units are resupplied but unrepaired.
The following additional units arrive for the Defender:
- Regimental Command Lance
- Colonel O'Malley's Atlas
- 1 Cyclops
- 1 Stinger
- 1 Wasp
Deployment
Defender sets up first and anywhere on the northern map.
Attacker
The attacker consists of the functional units of Sorenson's Sabres, now resupplied but unrepaired.
Deployment
Attacking 'Mechs set up anywhere on the southern map.
Victory Conditions
The side with the last functional 'Mech or other war machine on the mapboard is the victor.
Scenario: Devastating Encounter
The interrogation excerpt "The Example" is fiction and is omitted.
Game Set-Up
Place one CityTech map on the playing area, setting up the buildings of Thessia as shown below. Use CityTech game rules. For game purposes, the entire map is considered an urban area, and players may wish to extend building placement beyond the paved hexes. Woods and elevated terrain can be considered park areas.
| Buildings | Hex Locations |
|---|---|
| L1 | 0505, 0512, 0610, 0613, 1003, 1110, 1112, 1204, 1311 |
| L2 | 0609, 0705, 1109 |
| L3 | 0805, 0906, 1004, 1005, 1006 |
| L4 | 1007 |
| M1 | 0607, 0704, 1205, 1210, 1306 |
| M2 | 0506, 0608, 0713, 0812, 1208 |
| M3 | 0606, 1011 |
| H1 | 0811, 0911 |
Defender
The Defender is the Pursuit Lance of Sorenson's Sabres.
- Pursuit Lance
- Lieutenant Utsonomiya's Archer
- Rubach's Hermes-III
- Marrone's Wasp
Deployment
The three defending 'Mechs set up first and anywhere within the city section of the map.
Attacker
The Attacker is the ad hoc underground unit "Red Thunder" composed of the following elements:
- Devastator, DVE-5B, Mark III (tracked; 80 tons; cruise speed 3; flank speed 5; 240-rated fusion engine; control 4; heat sinks 10; internal structure 8; turret 2.9; armor 160 — Front 40, Left/Right Side 30/30, Back 20, Turret 40)
- Weapons and ammo: Auto Cannon 20 (Turret), 14 tons; Auto Cannon 20 (Turret), 14 tons; Ammo (AC) 15 (Body), 3 tons; SRM 6 (Front), 3 tons; Ammo (SRM) 15 (Body), 1 ton; Small Laser (Front), .5 ton; Small Laser (Left), .5 ton; Small Laser (Right), .5 ton; Flamer (Turret), 1 ton
- 23rd Inferno Platoon (Flamer)
- 3rd Assault Platoon (Laser)
- 16th Archer Platoon (SRM)
- 10th MG Platoon (Machine Guns)
All infantry is foot mobile.
Deployment
The Devastator begins the scenario in the Heavy Building in Hex 0911 or 0811. The infantry is placed in any buildings in the city area.
Victory Conditions
To win, the attacker must destroy at least one enemy 'Mech and knock out at least one armor section or weapons system on all 'Mechs.
The defender must destroy the Devastator supertank before the attacker's objective is reached. Then, he must exit off the west edge of the map.
If neither or both sides achieve their objective, the game is considered a draw.
Special Rules
If the attacker so desires, any or all of his infantry platoons may ride on the chassis of the Devastator. It costs one MP to embark and one to debark. Infantry may not fire weapons while riding the tank, and any riding platoon loses one column on its record form every time the Devastator fires weapons.
Scenario: The Ranger Surprise
The letter from an Altais trooper and the Cedrick Sveinson sidebar are historical and are omitted. The situation text for the scenario is also omitted, as it is historical.
Game Set-Up
Lay out two BattleTech maps as shown in the diagram. Players should use CityTech rules. The Supply Depot is located in Hex 0109 on the northern map and is represented by an HD1 building counter.
Defender
The defender is the entire company of Sorenson's Sabres plus the Planetary Defense Forces below:
- 255th Armored Cavalry
- 2 Hunter Missile Tanks
- 2 Vedette Scout Tanks
- 107th Motorized Infantry Company
- 3 Motorized Infantry Rifle Platoons
- 1 Motorized Infantry SRM Platoon
Deployment
The defender sets up first and anywhere on either mapboard.
Attacker
The attacker is Henry's Support Company of Noble's Assault Battalion, the Waco Rangers. It is composed of the following:
- Henry's Command Lance
- 1 Atlas
- 1 Archer
- 1 Crusader
- 1 Wasp
- Ryan's Fire Lance
- 1 Marauder
- 1 Archer
- 1 Warhammer
- 1 Stinger
- Klane's Fire Lance
- 1 BattleMaster
- 1 Archer
- 1 Wolverine
- 1 Stinger
All attackers are Piloting Skill 5 and Gunnery Skill 4.
Deployment
Henry's Support Company enters from the southern edge of the southern mapboard.
Victory Conditions
The Defender wins a decisive victory if he keeps any attacking 'Mech from entering Hex 0109 on the northern mapboard for twelve turns. He wins a partial victory if he destroys the HD1 structure in Hex 0109 (by reducing it to rubble) and inflicts more losses to the enemy 'Mech force than he receives. The defender may not fire at the Supply Depot structure until an attacking 'Mech is within eight hexes of it.
The Attacker wins by occupying and holding the depot Hex 0109 intact (i.e., not destroyed) until the end of turn twelve.