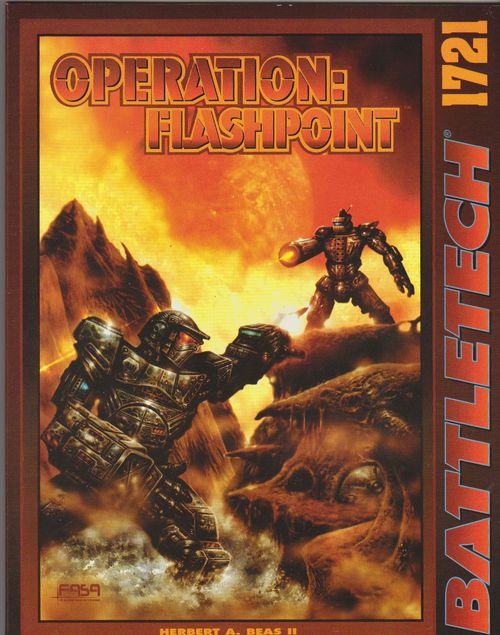
BattleTech: Operation Flashpoint
BattleTech: Operation Flashpoint Rulebook
Table of Contents
Table of Contents
- Campaign Special Rules
- Public Opinion
- Waging the Grass-Roots War
- Victory and Defeat
- Urban Combat
- Scorched Earth Tactics
- Assassination
- Cowardly Tactics and Heroic Actions
- Controlling the Media
- The Effects of Public Opinion
- Sympathizers and Commandos
- Honors of War
- Tactical Withdrawals and Retreats
- Forced Withdrawal
- Crippling Damage
- Clan Honor
- Forcing the Initiative
- Off-map Movement
- Overrun Combat
- Generating Opposing Forces
- Track 1: From Unrest to Rebellion
- Track 2: Hunter/Killers
- Track 3: Down to the Wire
- Track 4: Brother Against Brother
Campaign Special Rules
The following rules offer special abilities, campaign details and conventions of war that add depth to standard BattleTech campaigns. These rules are not exclusive to Operation: Flashpoint, however; the special rules outlining the honors of war, for example, are common conventions followed by most factions in the BattleTech universe of 3063. Other rules presented here, such as the special public opinion rules, may prove useful in other BattleTech or MechWarrior campaigns the players may embark on outside of Flashpoint as well, as they introduce the element of local support in long-running military operations.
The Special Rules sections in each track and scenario indicate which of these special rules apply, which may be ignored and which are modified.
Public Opinion
Since time immemorial, open conflict has been merely a stage in the conquest and subjugation of a people. The ancient axiom, "conquest is easy, control is not" remains true even into the thirty-first century, where the armies of the Successor Lords and Clans continue to clash. The collapse of the original Star League, the formation of the Free Rasalhague Republic, the ever-turbulent Isle of Skye, the ongoing struggle for dominance in the Chaos March—all demonstrate the fact that a people forced to join another realm by force of arms or otherwise maintained against its will shall ever rally against its oppressors. This fact alone has thwarted many a would-be conqueror who forgets that winning the hearts and minds of his (or her) future subjects goes a long way toward winning the war itself.
Public opinion has rarely mattered in previous scenario or campaign packs, where set-piece battles or even mini-campaigns were focused on the more immediate issues of winning the tactical or strategic objectives. In Operation: Flashpoint, however, as in any war for planetary dominance, winning over the locals is a factor that can potentially mean victory or defeat. Long after the local defenders have been beaten, a hostile indigenous populace can hinder any would-be invader's efforts to destroy the survivors who have gone to ground. Pushed too far, this same populace can even take up arms against its new rulers, forming resistance cells of patriots who seize every advantage at their disposal to kill an invader. By the same token, a populace won over by the invaders—either with the promise of a better life or an apparently sincere effort to spare the people from fights that their own native defenders may not be so squeamish about—could turn over those they served so long. How an army fights the public war is almost as important as how it fights the strategic war.
The Base Public Opinion By Faction Table (p. 19) provides a basic Public Opinion (PO) score between the factions currently active in the BattleTech universe. These scores reflect the overall opinion that natives of a given world may hold toward a force of invaders. The lower the number, the more pronounced the public's dislike of an invader. To find the initial scores for a given campaign, simply cross-reference the affiliation of the planet's local population with the attacking force. Note that ComStar, Word of Blake, and mercenary units do not claim native populations of their own, and so are always referred to as invaders, even when stationed on friendly worlds. The base public opinion score for a defending force (unless said force is a recent invader itself) is always assumed to be zero. In the case of a civil war, where both factions fly the same banner and publicly espouse the same views, the base public opinion is also zero, meaning the common citizen could be swayed either way by something as innocuous as a charismatic leader stroking the ego with a rousing speech. Particularly turbulent regions, however, like the Lyrans' Isle of Skye region or the increasingly pro-Capellan Tikonov Reaches in the Federated Suns, may actually favor one side more than another, treating a supposedly native defending force as an invader. To account for that, lower the PO score of the parent nation's force by five points.
The figures shown in this table take into account such factors as past history of conflict and prominence of any perceived threat. A state that has fought with another constantly and shares a border in common will tend to have a lower opinion of its neighbor than one that rarely deals with the armies of a distant realm. For example, despite recent efforts to establish a lasting peace between the two, the people of both the Draconis Combine and Federated Commonwealth still have low public opinions of one another. This stems largely from the fact that they share a common border and a history that involves many instances of extremely bloody fighting. Meanwhile, the people of the periphery, never having encountered the armies of the Free Rasalhague Republic—and in many cases barely even knowing that such a nation exists—would barely perceive them as a lasting threat to their sovereignty.
Base Public Opinion By Faction Table (native population across the top, invader down the side; a dash marks the same faction)
| Invader | Lyran Alliance | Federated Commonwealth | Draconis Combine | Free Worlds League | Capellan Confederation | Free Rasalhague Republic | Independent | Clan |
|---|---|---|---|---|---|---|---|---|
| LA | — | -5 | -15 | -10 | -10 | -15 | -15 | -10 |
| FC | -5 | — | -20 | -10 | -25 | -10 | -15 | -10 |
| DC | -15 | -20 | — |
- Denotes rival independent powers or Clans. Does not apply if both invader and native force are of the same Clan or Periphery power. If the factions in questions hold a particular grudge (such as is common among several Clans or between some Periphery powers) the gamemaster may wish to decrease base PO by an additional -5.
** Mercenary forces suffer the same base PO as their employer, but that base is multiplied by the factor shown. If the invading unit is not operating under contract to a known power or is a bandit force, the multiplier, regardless of native populace, is 3.
Waging the Grass-Roots War
When playing missions using these public opinion rules, a player must take into consideration the objectives of the missions and the possible political side-effects of any action taken to win those objectives. Collateral damage caused by fierce urban combat can affect the opinion polls for both sides, bringing about a public's antipathy. Controlling the airwaves—long enough, at least, to "get the word out"—can improve a command's sympathies to the people. To reflect these events, each scenario in Operation: Flashpoint contains a special form of the commonly-used victory points system. Penalties are suffered for particularly cowardly or under-handed tactics, bringing down the public's opinion of the side that uses them, as news and rumors filter out among the people. Bonuses for truly heroic actions improve those same scores. The Common Public Opinion Modifiers Table gives specific modifiers that cover the most basic factors influencing public opinion when two sides clash. As always, the gamemaster has the final decision on what specific modifiers apply in any given scenario.
Common Public Opinion Modifiers Table
| Situation | Modifier |
|---|---|
| Victory, Complete | +3 |
| Victory, Partial | +2 |
| Victory, Pyrrhic | +1 |
| Defeat, Marginal | +1 |
| Defeat, Partial | -1 |
| Defeat, Utter | -3 |
| Fighting in City, Attacker | -3 |
| Fighting in City, Defender | -2 |
| Scorched Earth, Attacker | -4 |
| Scorched Earth, Defender | -3 |
| Assassination, Civilian Target | -3 |
| Assassination, Military Target |
- The player controlling the media at the end of a given scenario can choose to double either his own PO bonuses or his opponent's PO demerits. This reflects the slant used by reporters when telling the controlling faction's version of events. This effect lasts until control is taken by an opposing faction.
Victory and Defeat
Defined by the Victory Conditions section of each scenario, this factor often plays a significant role in earning public support. The decisiveness of a faction's victory or defeat weighs heavily in the views of common citizens, who tend to succumb to a "go for the winners" mentality. Oddly enough, however, a narrow defeat can earn as much support as a costly victory, as many people also have a habit of rooting for the underdog.
Urban Combat
An understandable no-no from the point of view of any civilian, fighting in a city—even at its most surgical—is a critical issue in public opinion. Here, it rarely matters who wins or loses but whether they used the homes of innocents as cover. The only mitigating factor when such an event occurs is when the defender is forced to fight in the streets by an attacker who would wage war in a civilian population center.
For game purposes, urban combat is defined as follows: If more than ten nonmilitary buildings (defined by the scenario) are present on the map board, the area is considered civilian-populated and the appropriate public opinion modifiers apply.
Scorched Earth Tactics
In many scenarios, one or more specific objectives may be in place for one side or the other to capture or defend. These objectives are not invulnerable to weapons fire, which means that a particularly desperate faction may decide to destroy the objective rather than allow an enemy to take it. This is fair, tactically, but painful politically. Like urban combat, the defender has more of an excuse in resorting to "scorched earth" tactics such as these, since an attacker should ideally wait for another chance to capture what he cannot get in one battle. However, that excuse only lessens the decrease in public favor that such an event reaps.
For game purposes, scorched earth tactics are defined as using a weapon or physical attack to deliberately damage or set fire to buildings or woods.
Assassination
Though a very efficient strategic and political tool known to turn many a defeat into victory (or at least into a fighting chance for one), assassination is still a rather honorless method of attack. Regardless of the prudence for such a move, the general public won't look kindly on a faction that employs assassination tactics, and they take even less kindly to it if the attack is directed against a nonmilitary target such as a local governor or business leader.
For game purposes, any time a character attempts an assassination, regardless of whether the attempt is a success, the appropriate PO modifiers apply. The modifier is less for military targets than heads of state, however, as people tend to see assassinated military personnel as casualties of war rather than innocent victims.
Cowardly Tactics and Heroic Actions
"Cowardly tactics" is a vague term (unless one is playing with Clan forces, wherein the concept of zellbrigen goes a long way toward defining such things) that usually must be left up to the gamemaster to determine. But should no gamemaster be present to decide on what constitutes a cowardly action and just how cowardly it is, the following suggestions should help define this concept more clearly. Note that in these cases, a single element that employs such a tactic garners the penalty for its entire side. Multiple incidents in one battle do not increase the modifier.
Abandoning one's post is obvious cowardice, especially if a defender puts up only token resistance to an inbound attack force. In game terms, any element that withdraws from the map board without making a single weapon attack, if possible, has abandoned its post and suffers a -3 PO modifier. However, abandoning one's post in the face of overwhelming odds is not considered cowardly, but merely sane. Thus, any force or element that retreats from such a gross mismatch without making any attacks will not receive a negative PO modifier.
Employing overwhelming odds in battle—for example, a full company of 'Mechs against a single lance of vehicles—offers one side a distinct tactical advantage; yet people who hear of such an effort might reasonably declare such a move cowardly. The penalty for employing such devastating odds depends wholly on the size of the forces used, because most civilians have no concept of how weaponry, mass and technology may balance the odds of an apparently lopsided fight. To find the PO modifier for any mismatched battle, determine the ratio by which one side outnumbers the other. Fighting two-to-one odds earns the larger force a -1 PO modifier, three-to-one odds inflict a -2 PO modifier, four-to-one odds inflict a -3 modifier, and so on.
If an opponent withdraws from the map board as described above, this PO modifier does not apply.
Example: Chris fields a total of eight elements against Bryan's lance of four elements. The numerical advantage held by Chris is 2:1 odds, and so he would incur a -1 PO modifier.
If Chris had fielded eleven elements, the odds would still fall short of 3:1, and so he would still only incur a -1 PO modifier.
However, if Chris fielded twelve elements, then the odds would be 3:1, and so he would suffer a -2 PO modifier.
Heroic actions by the player force can be just as difficult to define as cowardly actions. By and large, they can involve such important actions as sacrificing elements to a futile charge against overwhelming odds, or staying in the field until the last friendly transport gets out. In game terms, any force that loses an element after it has been forced to withdraw gains a +1 PO modifier for each destroyed element.
In the event that a force is under attack under overwhelming odds, staying and fighting (rather than withdrawing from the map board as described above) is regarded a heroic action on almost the same level as the opponent's overwhelming force is cowardly. Using the same formula for the overwhelming force "cowardice penalty," the force that is being overwhelmed gains an equivalent bonus PO modifier. Fighting 2:1 odds, for example, earns a +1 PO modifier. Fighting 3:1 odds nets a +2 PO modifier and so on.
Controlling the Media
Each Track in Operation: Flashpoint includes a "capture the communications array" scenario, which offers both sides a chance to tell the public their side of the story and/or drum up reinforcements. These scenarios have the added benefit of allowing the players to briefly boost their sagging public opinion points or increase the negative public opinion of their foes. For all intents and purposes, this represents the "propaganda machine" employed by both sides.
This propaganda machine generally remains in effect until such time as the opposing side acquires control of the airwaves for itself. Although the capture the comm array scenarios presented in this product are essentially raids, capturing media attention has a far-reaching effect. The local media gets involved to take up the side of whomever they feel is more newsworthy at the moment, and as long as one side dominates the airwaves, the voice of a repressed faction can be denied its side of the story, resulting in a skewed public opinion of events.
While one side has media control, the public will receive news and commentaries slanted toward that side's favor. For example, at the end of a scenario, a defender earned a -3 PO modifier and a +9 PO modifier, which nets him a +6 PO modifier or 6 PO Points. If the defender controlled the media during this scenario, the defender may either double his PO Points earned (to 12) which he can add to his PO Score, or the defender may opt to double the opposing player's negative PO Modifier, bringing down that player's public opinion score with a well-aimed smear campaign.
The Effects of Public Opinion
As a conflict drags on, a distinct advantage in the opinion polls may ultimately be won by one side or the other. Though attackers often start out handicapped, it is not unheard of to find the defenders losing the people's faith through underhanded tactics and chronic defeats. At some point, things may become so bad that brave (or merely foolish) citizens decide to act on behalf of those who have won—or maintained—their favor. Here, the effect of winning hearts and minds can begin to affect the outcome of the conflict.
The Public Support Table (p. 22) gives specific game effects for a side's PO Score. These represent the support sympathetic people offer "their team" as a conflict rages on. At the end of any scenario, after PO Scores have been tallied, players for each side should consult this table, using their side's total PO Score to determine what support is offered.
Public Support Table
| PO Score | Result |
|---|---|
| -60 or lower | Opponent gains two infantry rifle platoons of green experience level; these represent sympathizers to your opponent's cause. Locals not only keep tabs on you, but your troops begin to suffer from low morale (-2 Initiative penalty). Opponent gains the Forcing the Initiative ability. You lose one infantry rifle platoon of sympathizers. If there are no sympathizers left, you suffer the defection of 1D6 warriors. |
| -59 to -50 | Opponent gains one infantry rifle platoon of green experience level; this represents sympathizers. Locals keep tabs on your position for your opponent (-1 Initiative penalty). |
| -49 to -40 | Local informants keep the opponent apprised of your actions (-1 Initiative penalty). |
| -39 to +20 | No significant support from the public; they're keeping out of it. |
| +21 to +30 | Local informants tell you your opponent's movements (+1 Initiative penalty and gain the Overrun Combat ability). |
| +31 to +40 | Gain one infantry rifle platoon of green experience level; this represents sympathizers to your cause. Also receive +1 Initiative bonus. |
| +41 to +50 | Gain two infantry rifle platoons of green experience level; these represent sympathizers. Also gain one team of commandos. High morale for your troops and excellent local intelligence give you a +2 Initiative bonus. |
Sympathizers and Commandos
Particularly high public opinion scores represent an upswell in popular support, in which some citizens, convinced of their faction's "rightness," decide to no longer sit idly by while their side fights for its survival. Taking up arms, these sympathizers will join their faction and may be employed at any time as infantry troops rated at Green experience level. (While their hearts may be in the right place, they are hardly the most effective combat troops one can find, but are useful in a pinch.) The faction that obtains such sympathizer elements should keep track of how many of these platoons join them, since these elements will remain with the players' faction until they defect or are destroyed. As long as a faction has these sympathizers, they may be employed any number of times.
More potent than the popular support elements are the commando teams. These are particularly brave souls who will go above and beyond the call of loyalty for their side. For each of these teams attached to a faction, a commando team may perform one (and only one) commando operation before the start of a scenario; the exact type of operation the commando team performs is up to the controlling player. Outlined in the Commando Operations Table (p. 23), these operations all require a successful 2D6 roll of nine or better to succeed. Regardless of the success of the operation, the team will not be able to perform any further operations and is lost.
The effects of a successful commando operation take effect immediately but last only for a single scenario.
Commando Operations Table (2D6 roll of 9 or better required for success)
| Operation Type | Effects (If Successful) |
|---|---|
| Abduction | A key enemy officer is captured; the controlling player may use the Forcing the Initiative ability.* |
| Assassination | A key enemy officer is eliminated; the opposing player receives -1 Initiative penalty.* |
| Intelligence | Info on the opponent's battle plan grants the controlling player a +2 Initiative bonus. |
| Sabotage | 1D6/2 (round down) opponent elements to be deployed in the scenario are disabled and cannot be used in the scenario (chosen randomly). |
| Scorched Earth | Destruction of supplies and equipment gives the opponent a +2 modifier to any Technician Rolls made following the scenario. |
| Scrounge | 1D6x10 tons of equipment (ammo, armor, or weaponry) are smuggled from enemy stores. |
| Sowing Dissent | Inserting a persistent rumor costs the opposing faction 1D6 PO Points. |
- The eliminated or captured officer is of minor importance in the coming battle. The loss is permanent, even though the game effect is not. For added detail and at the gamemaster's discretion, the captured or eliminated officer's element should not be deployed in the next scenario unless piloted by a warrior/crew of lesser quality.
Honors of War
Ever since the signing of the Ares Conventions in 2412, the militaries of the Inner Sphere have operated under a strict code of conduct, at least in theory. The Successor States chose to ignore these Conventions during the First and Second Succession Wars, which nearly brought about the collapse of civilization. The horrors of these conflicts brought the Ares Conventions back into use during the Third Succession War and they have since remained an unwritten agreement between the Great Houses. With the reformation of the Star League in 3058, the Ares Conventions once again became a legal mandate.
The use of nuclear and biological weapons, as well as deliberate attacks on civilians, are prohibited under the Ares Conventions. Additional unwritten but widely-accepted agreements stipulate that advanced technology centers (such as factories that produce DropShips, JumpShips, BattleMechs or their components) cannot be targeted for destruction.
On the field of battle, combat units that are clearly outmatched or are taking grave losses often surrender rather than face destruction. In a parallel to the Clan rules of engagement (see Clan Honor, p. 25), the force that accepts the surrender normally repatriates the unit and its equipment, or else allows the opponent to retreat from the battlefield or planet for a price. Typically, such a ransom amounts to one or two lances of equipment per battalion of surrendering troops, though that number often climbs higher if DropShips or particularly important officers were in the line of fire.
Some forces ignore these widely-held conventions. Depending on the severity of the violation, several consequences may befall these units. Deliberate use of nuclear or biological weapons, for example, usually brings down universal wrath on a unit, ensuring its destruction wherever it goes at the hands of outraged fellow soldiers or authorities. A unit that attacks civilians is generally labeled rogue, with a bounty placed on its members. Other consequences include professional blacklisting, fines, sanctions from the Mercenary Review and Bonding Commission (MRBC) for a mercenary unit, and also reprimands, demotions, reassignment and incarceration for a House unit.
The gamemaster may impose any consequences he wishes on players who violate the honors of war; the previous paragraphs simply offer guidelines for use in your campaign. For more information on professionalism and the Ares Conventions, see pp. 10-11 of Field Manual: Mercenaries.
Tactical Withdrawals and Retreats
In the BattleTech universe, life is cheap but BattleMechs are not. Even the least expensive 'Mechs cost more than a million and a half C-bills, and most average four or five times that amount. Many MechWarriors own their 'Mechs and can rarely afford to lose them. Mercenary units and House militaries are becoming the more common owners of BattleMechs and tanks, but even the booming economy of the Free Worlds League cannot afford to replace whole battalions and regiments.
As a result, few battles in the Inner Sphere conclude with the total destruction of one side. Under most conditions, 'Mech pilots and commanders are instructed to withdraw any combat elements that sustain severe or crippling damage in the field.
MechWarriors who retire will tend to make a fighting withdrawal, using their own remaining firepower and that of their comrades to cover their retreat off the designated side of the map board (defined in each scenario). If he or she cannot accomplish that safely, a 'Mech pilot may instead turn and run, hoping to use speed and terrain to reach safety. As a final option, a pilot may shut down his unit and leave its fate in the hands of an enemy preoccupied with active elements. The gamemaster may decide which method the withdrawing nonplayer unit in question employs.
Forced Withdrawal
Under the Forced Withdrawal rule, nonplayer elements must retreat from the battlefield once crippled (when damage has rendered them useless or in imminent danger of being destroyed; see Crippling Damage, below). An element making a forced withdrawal must move toward the edge of the map board designated for the scenario. However, an element need not spend Running MP; it can move backward if the controlling player wishes. Additionally, an element equipped with MASC need not engage that system when forced to withdraw.
Withdrawing elements may not move to directly engage an enemy element, though they may add their firepower to help cut it down. Any enemy element that closes within range of a weapon or physical attack of a withdrawing element may be targeted as well. The following guidelines cover the many circumstances that may occur; within these guidelines, the gamemaster's decisions are final.
Crippling Damage
Any nonplayer element that suffers crippling damage must withdraw from the map board. (Clan elements must follow any Clan honor rules that apply.) Unless otherwise stated in the Special Rules section of a scenario, crippling damage is defined as follows: With the exception of infantry, all of an element's weapons are considered destroyed if it loses all weapons with a range greater than five hexes or if it can no longer cause more than 5 points of combined weapons damage.
- A BattleMech or OmniMech is considered crippled when a side torso location is destroyed; the 'Mech takes two engine critical hits; one gyro and one engine critical hit; or loses the use of its sensors. Also, internal structure damage in three or more limbs and/or two or more torsos, or four or more pilot hits also renders a 'Mech crippled, as do the loss of all the 'Mech's weapons to damage or ammunition depletion. If all of a 'Mech's weapons are destroyed and it can no longer move, the 'Mech is considered destroyed. The pilot of a destroyed 'Mech may eject normally.
- A ProtoMech is considered crippled if all its weapons are lost to damage or ammunition depletion, or if the pilot suffers four or more hits. A ProtoMech Point will not begin to withdraw until three or more of its component ProtoMechs are either crippled or destroyed, at which point the entire Point must withdraw.
- A vehicle is considered crippled if it loses all of its armor in a single location or if all of its weapons are destroyed.
- An aerospace fighter is considered crippled if it suffers a critical hit to its engine or fuel tank; if all of its weapons are destroyed; or if its pilot suffers four or more hits.
- An infantry platoon is considered crippled if it loses 21 or more troops (16 or more for jump platoons). If deploying infantry squads, a squad is considered crippled if it loses 5 or more troops.
- A battlearmor element (Point or squad) is considered crippled if it loses half or more of its members.
- Vehicles and BattleMechs that are immobilized—usually through motive, leg, or gyro damage—are shut down and typically abandoned (although abandonment places the crew at the mercy of the battlefield). Only the most fanatical crews or those in dire circumstances will continue to fight. Likewise, only orders from the highest possible source will prompt an immobilized element not to withdraw from combat.
Clan Honor
Clan Honor, specifically the dueling ritual of zellbrigen, tends to be a difficult concept to employ in a campaign because the concept can be interpreted in many ways. The basic tenets, however, are simple: An individual Clan element honoring zellbrigen will focus on a single enemy element and attempt to defeat it in a one-on-one duel, preferably with a minimum of physical combat. If another combatant (friend or foe) interferes with the duel, or if the opponent does something particularly dishonorable, it may invalidate zellbrigen. In this case, the battle becomes a grand melee and all bets are off. Clan honor is discussed in great detail starting on p. 121 of the BattleTech sourcebook The Clans: Warriors of Kerensky.
The Clan Honor Interpretation Table (p. 25) gives a general idea of how each Clan interprets zellbrigen. The table shows two different time periods. Pre-Invasion describes the prevalent interpretation prior to the start of Operation Revival in 3049; Post-Invasion reflects each Clan's view after the Battle of Tukayyid in 3052. During the Inner Sphere invasion (and subsequent events through the Refusal War), each Invading Clan and many Home Clans experienced an ideological shift that caused changes in their view of zellbrigen. If you are running a game set during the invasion, decide what level of honor your players agree to before beginning play.
The table gives three different levels of interpretation. A Strict interpretation means that the Clan's warriors generally follow zellbrigen against almost all opponents (except those considered extremely dishonorable or against a long-hated enemy). An Opportunistic interpretation means that the warriors will follow zellbrigen unless mitigating circumstances dictate otherwise (they are outnumbered/outgunned, they think they can get away with it, and so on). Clans following a Liberal interpretation use zellbrigen only against another Clan, and then only if they have the advantage.
Gamemasters currently running Clan-based campaigns have likely already encountered the problem of interpreting Clan honor. Feel free to handle it as you already have, if that works best for your group.
Clan Honor Interpretation Table
| Clan Name | Pre-Invasion | Post-Invasion |
|---|---|---|
| Blood Spirit | Strict | Opportunistic |
| Burrock | Opportunistic | N/A |
| Cloud Cobra | Opportunistic | Opportunistic |
| Coyote | Strict | Strict |
| Diamond Shark | Liberal | Liberal |
| Fire Mandrill | Varies (Strict)* | Varies (Opportunistic)* |
| Ghost Bear | Strict | Liberal |
| Goliath Scorpion | Strict | Strict |
- Clan Fire Mandrill's internal divisions make it difficult to classify the entire Clan; each Kindraa follows its own interpretation. Refer to Field Manual: Crusader Clans for information on each specific Kindraa, or simply use the general classification given in parentheses.
Forcing the Initiative
Some units obtain the ability to "force the Initiative" in the course of the tracks, giving them bonuses to their BattleTech Initiative rolls based on how well the battle is going. Units with the ability to force the Initiative gain a bonus in their Initiative rolls equal to the number of elements their side destroyed, less the number of elements destroyed by the opposing player in the previous turn.
Off-map Movement
Area knowledge or units well versed in tactical flexibility may have the ability to take advantage of off-map movement in some scenarios in this booklet. In contrast to standard BattleTech rules, these forces may move some elements off one map edge during gameplay without the move being counted as a retreat or destruction. These elements may then re-enter at a pre-determined map edge later in the scenario.
To use this ability, the controlling player writes down the exit hex and mapsheet of each element moving off-map, and the hex, mapsheet, and turn where these elements will re-enter the field. Before re-entering the field, any elements performing off-map movement must remain off the map for the amount of time it would take to travel from its exit hex to its entrance hex. To calculate this travel time, count the number of half-hexes along the map edges between the entrance and exit hexes. Then divide this number by the element's Running/Flank MP rating (rounding fractions up). The result is the minimum number of turns the element must remain off the map. The controlling player can delay the element's re-entry beyond this point, if desired, but must select the re-entry turn when the element leaves the map.
Each returning element re-enters the map in the End Phase of the turn noted on its "written order." At that time, the opposing player can check the element's orders to make sure the move was legal. If the move was illegal, the element is considered withdrawn and is removed from play. (A move is illegal if the element does not remain off the map for the required travel time or does not enter at the location and turn noted on the written orders.) In a campaign setting, these withdrawn elements may be brought back into play in a later scenario.
If the returning element is supposed to enter the map in a hex containing an enemy element or a friendly element that would violate the stacking limits of the hex, the returning element is placed in a hex of the opposing player's choice adjacent to the intended entry hex.
Once the returning element has re-entered the map, any enemy element adjacent to it may immediately attack it using the rules for Point-Blank Shots from Hidden Units (p. 77, BMR). This attack does not restrict the attacking element's ability to make attacks in the following turn.
Elements off the map cannot engage in combat. If the opposing force destroys all the elements remaining on the map before an off-map element returns, the battle is lost.
Overrun Combat
Some forces are capable of "overrun" combat during BattleTech games. Under certain circumstances, these forces may fire before the enemy forces can move or fire.
When rolling Initiative for overrun-capable units, note the die roll result's Margin of Success. Divide the Margin of Success by 2 and round down. The result equals the number of elements that may move, designate, and resolve their firing before any other elements move or fire. Extra successes do not carry over into later turns (i.e., if the player has more successes than elements available to move). For example, an overrun-capable unit makes an Initiative roll of 11, while its opponent rolls only a 6. That gives the overrun-capable unit a Margin of Success of 5, which means that two of its elements may move and fire before any other elements move (5 divided by 2 = 2.5, rounded down to 2).
Units employing overrun capability do not take part in the normal move/fire sequence. In other words, overrunning elements do not count for determining how many elements each side must move when alternating turns during the Movement and Weapon Attack Phases. Overrunning elements make physical attacks as normal during the Physical Attack Phase.
Generating Opposing Forces
Operation: Flashpoint gives the gamemaster the unique capability to generate tailor-made opposition to the player unit for any scenario in this book. For the sake of simplicity, pregenerated lances based on faction are not presented here. Instead, simplified lists for the most commonly used and faction-specific designs fielded by tech era are presented here. These lists and tables should help guide a gamemaster in creating an appropriate opposing force based on the size of the player unit and the venue or era in which they are currently playing. Following is a description of the process for generating these forces step by step.
Determining Player Unit Strength
Because the purpose of this product is to challenge the player group, the first step in generating an opposing force is, naturally, to determine the strength of the player unit itself. This can be done in many different ways, but two of the most reliable methods are outlined below.
Battle Value System
By far the most accurate measure of a BattleTech element's strength is the Battle Value (BV) system. This system takes into account the relative strengths and weaknesses of each BattleMech, vehicle and infantry element, modified by the skill of the pilot or crew. The resulting number indicates how potentially powerful an element is; the higher the BV, the more powerful the element. Two forces with relatively similar BVs and numbers of elements should have an equal chance of winning a battle against each other (although such a battle would likely end with each side ravaged).
Rules for calculating battle values appear on pp. 139-145, BMR. Lists showing the BVs of all FASA 'Mechs and vehicles begin on p. 94 of Maximum Tech and more may be found in the appropriate Technical Readout. Two commercial software packages available from FASA can also calculate the BVs of a player's home-grown 'Mech designs and print out record sheets: 'Mech Generator is available for the Macintosh platform, Heavy Metal for the PC.
Once the BVs for the player force are calculated, gamemasters should separately list each element's BV, the skill of its pilot/crew, and the final BV (after modifying for Piloting and Gunnery skills). Having these figures readily available will make the next step easier. Using a computer to keep track of larger units (more than a company or so in size) will greatly aid any gamemaster in keeping track of these vital figures.
Force Points System
Although the Battle Value system offers the most accurate measure of strength, it is a very time-consuming method, more so if the players must calculate the BVs of their homegrown designs first. If sufficient time (or patience) does not exist to calculate BVs, the Force Points system may be used instead. Consult the Element Force Points Table and the Experience Level Table to find an element's value and pilot/crew experience level. A unit's overall value is the sum of each individual element's value.
Element Value. The Element Force Points Table provides a number (in Force Points) for each element, based on the element's type, weight class, and technology base. 'Mechs have several technology levels, while vehicles have three and infantry have only two. Level One represents technology available in 3025 and covers all 'Mechs and vehicles found in BattleTech Record Sheets: 3025 & 3026. Level Two-No XL represents the advanced technology available to the Inner Sphere around 3050, but only for elements that do not use an XL engine. Level Two-XL represents advanced technology units with an XL engine. Clan-No XL represents elements with standard Clan technology, while Clan-XL represents the same with XL engines.
Experience Level. After finding the force's overall value, the overall experience level should be computed. This number is used to determine the experience level of the opposing force based on the requirements of the scenario to be played. (If no experience levels are suggested in a scenario, assume that the opposing force holds an equal level of experience to the player group.) To determine a unit's overall experience level, first the experience level of each individual pilot or crew in the unit must be calculated. The overall experience of the unit is the average of the skills for each of the unit's pilots and crews. To determine the expertise of a pilot or crew, consult the Experience Level Table (p. 32). For BattleTech characters, use the pilot's or crew's Piloting and Gunnery Skill levels; for MW3 characters, the easiest way is to convert the character's relevant skill bonuses to BattleTech skill rolls using the table on p. 126, MW3. The Gunnery and Piloting subskills that result should be averaged to find each character's baseline BattleTech skills. Gamemasters willing to deal with the complexity of variable gunnery skills for energy, missile and ballistic weapons may then use these averages for the opposing force warriors as well. Once the individual warriors' skill target numbers are known, the skills for the entire unit should be added together, then divided by the number of elements, then rounded to the nearest whole number. The final result will be the unit's overall experience level.
Determining Opposing Force Strength
Once the strength of the player unit is known, the process of generating a balanced opposing force may begin. Each scenario recommends a force strength and experience level for the opposing side(s) based on the player's unit strength and experience. If the players are running a large unit, the gamemaster may not be able to generate an appropriate opposing force until the players decide which portions of their unit will commit to the scenario.
Note: Gamemasters who intend to play through the entire Kaumberg campaign (or one similar in nature) should always generate the forces of the on-planet faction(s) in their entirety, if for no other reason than the sake of consistency. Because few opportunities exist for reinforcements on any of the sides involved, a complete table of organization and equipment (TO&E) on all the involved factions will need to be considered when selecting forces for a scenario. More on this aspect of running Operation: Flashpoint will appear in the section titled Force Composition.
Selecting Elements
The force strengths recommended in each scenario offer a base Battle Value or Force Points total to reach when generating the opposing force(s). For example, the Game Set-Up section for the first scenario in this book (Flashpoint, Track 1, Scenario 1) states that the attacking forces should field two-thirds the strength of the on-site defenders. If the players are the defending force here and are fielding a unit valued at 6,000 BV (or about 60 Force Points), the attacking forces should each field a force no greater than 4,000 BV (or 40 Force Points) in strength.
The gamemaster may generate the forces sent against the players by simply choosing (or customizing) the elements found in any Technical Readout or other BattleTech source. However, to better suit a sense of authenticity, basic and faction-specific lists are presented later in this section (p. 36) to guide the gamemaster's decisions. Moreover, many BattleTech and MechWarrior products published to date also include random-element tables which may be used in a pinch. Any or all of these methods may be employed to create a unit worthy of the player group.
When generating an opposing force, it is a good idea to keep a running total of the BV or Force Points spent creating it. Gamemasters and players should not worry about the total number of elements chosen, as the strength of the opposing force may be fine tuned in the next step, if necessary. The goal is to get a force as close to the scenario-recommended strength as possible, though it is unlikely the force created will be an exact match. A slight variance of five to ten percent of the recommended force strength should be serviceable in the scenarios without upsetting game balance.
Example: Jeff wants to create an opposing force of four BattleMechs totaling 4,000 BV. He chooses a TR1 Wraith (1,089 BV), a ASN-23 Assassin (609 BV), and two COM-5S Commandos (1,008 combined BV). The BV total is 2,706, 1,294 points lower than Jeff intended. He could modify the force's total BV based on its experience level or adjust the force composition. After some calculating, he decides to substitute two STH-1D Stealths (2,134 combined BV) for the Commandos, giving him a combined force BV of 3,832. This total is only 168 below 4,000, less than five percent lower than his intended point total. Deciding this is sufficient for his purposes, Jeff decides to use this lance. Calculating the same force's strength using Force Points, Jeff's initial selections would have equaled 33 Force Points. The Wraith is worth 12 points, the Assassin 9, and the two Commandos are a total of 12. Here again, the total was far below his intended goal of 40 Force Points, but his upgrade to Stealths in lieu of Commandos would bring the total number of Force Points up to 45, five points over his intended unit strength. Once more, if Jeff wanted to change these figures, he could do so.
This example demonstrates the differences between the Battle Value system and the Force Points system. Because the Force Points system is more abstract, the above example shows how a more balanced force might appear to be a mismatch. Players and gamemasters should consider which system they wish to use before beginning the campaign.
Force Sizes
Once the opposing force is designed, the total number of elements fielded by each side should be examined before proceeding further. Although the Battle Value system and the Force Points system allow for accurate force matching in terms of raw strength, they do not take into account differences in force size. The following system, though somewhat complex, may be used to accurately evaluate forces by their size and strength.
First, add up the number of elements in each force, counting BattleMechs and vehicles as one element each, battle-armor Points/squads as half an element each, and conventional infantry platoons as a quarter element each. Subtract the total number of units from the smaller force from the total number in the larger force. This number is the Raw Force Difference. Divide that number by the total number of elements in the smaller force, and multiply the result by 100. The resulting figure is the Base Force Percentage Multiplier, the percentage by which the larger force outnumbers the smaller.
After calculating the Base Force Percentage Multiplier, multiply the Raw Force Difference by 10. The result is the Raw Force Percentage Multiplier.
Compare the Raw Force Percentage Multiplier to the Base Force Percentage Multiplier. Add 100 to the lower number to get the Final Percentage Modifier. Then multiply that number by the larger force's BV (or Force Points) to find the Modified Strength.
Now, divide the opposing force's total strength by the player unit's total strength. (Use the Modified Strength for whichever force has the most elements.) Multiply the quotient by 100. This final number is the opposing force's Strength Percentage when compared to the player unit.
Example: Both forces in a battle are worth 6,000 BV (60 Force Points), but the attacking player has five elements where the defender has only four. Four subtracted from five gives a Raw Force Difference of 1. Dividing that by 4 and multiplying the result by 100 yields a Base Force Percentage Multiplier of 25 (1 / 4 = .25; .25 x 100 = 25). This means that the attackers have 25 percent more forces than the defender. The Raw Force Difference is only 1, however (the attacker has only one more element than the defender). This gives a Raw Force Percentage Multiplier of 10 percent (1 x 10). As 10 percent is the smaller of the two multipliers, adding 100 to it will give a Final Percentage Modifier of 110 percent (the attacker's strength compared to the defender's). Multiplying the Final Percentage Modifier by the attacker's BV (6,000) gives the attacker a Modified Strength of 6,600 BV (66 Force Points).
If the player unit is the defending force in this example, the opposing force (the attacker) currently fields 110 percent of the player unit's strength ([6,600 / 6,000] x 100). If the scenario recommends an opposing force at 125 percent of the player unit's strength (7,500 BV or 75 Force Points), the opposing force may be increased by another 900 BV (9 Force Points).
If the players are the attacker and the opposing force is the defender, the opposing force fields about 91 percent of the players' strength ([6,000 / 6,600] x 100). If the scenario calls for an opposing force at 100 percent of the player unit's strength, the gamemaster may increase the opposing force's composition by up to 600 BV (6 Force Points). By the same token, a scenario calling for the opposing force to have only 67 percent of the player force would mean that the gamemaster must shed 1,600 BV (16 Force Points) from the opposing force (bringing its strength to 4,400 BV, or 44 Force Points).
The gamemaster may adjust the opposing force's strength in various ways, but should try to retain the same number of elements if possible. Otherwise, the Raw Force Difference and Base Force Percentage Multipliers will need to be recalculated. Substituting one element in the opposing force with another that better suits the Battle Value or Force Points suggested by the scenario or altering the experience levels of the warriors are easier ways to handle such a problem. The latter option works best if the opposing force needs a relatively minor change.
Experience Level
If substituting appropriate elements still does not yield an opposing force approximately equal to the recommended strength, the gamemaster may change the experience levels of individual elements in the opposing force. The BV Skill Multipliers Table appears on p. 144 of BMR, showing how the skills of the pilot or crew modify the BV or Force Point value of a given element. Increasing the skill levels of the pilot or crew increases an element's strength, while decreasing the scores decreases the element's effectiveness (and thus its value in the field).
After assigning the opposing force's final make-up, skill ratings are then given to individual pilots and crews. Game Set-Up instructions usually suggest an experience level, but in the absence of one, the gamemaster may presume the opposing force(s) has experience equal to the player unit.
The Experience Level Table (p. 32) provides an excellent guide for a gamemaster choosing piloting and gunnery skills for individual elements in the opposing force after the unit's overall experience rating is known. Using the "average" skills listed will offer quick, easy-to-remember statistics for the opposing warriors, but the combined skills column offers a more flexible way to assign skills, if only to keep the players guessing. Skills may even be rolled randomly per the Random Skills Table (p. 108, BMR) if time is short and a base experience level has already been established.
If one or more elements in the opposing force have already had experience levels assigned (as a means of balancing the unit's BV or Force Point value, for instance), the pilot or crew of that element may have those skills increased or decreased based on the scores being assigned to the rest of the force. For example, if the gamemaster is generating a Veteran force but already has one Veteran element in the unit as a way of adjusting force strength, the Veteran can simply become an Elite. A Green force being generated with a Veteran element in it will see the Veteran brought down to a Regular rating.
Force Composition
Very rarely in this product are the exact type and nature of the forces to be used ever named. Instead, a simple reference is made as to how strong or experienced the unit may be in relation to the player unit. In most campaigns, the gamemaster may select any type of force desired to field against the players. Even so, the following guidelines may prove helpful in creating a consistent and logical opposing force that fits the time and place that the players may be playing out the scenarios in this book.
The Kaumberg conflict takes place deep in the heart of the Alarion Province of the Lyran Alliance. Once joined, there will be few opportunities for new blood to enter the battle. As a result, the factions involved in the fighting must make do with whatever elements they (and the player group) have at their disposal for the duration of the tracks played. When generating opposing (and allied) forces, this means that a gamemaster would be well advised to create the complete TO&E for all the factions on Kaumberg before starting the game, rather than at each individual scenario. Doing so will allow for shorter preparation time between scenarios and give a sense of the strategic war as well as the tactical considerations of the moment. The gamemaster can thus select an appropriate opposing force for the players based on subunits of their opposing faction by simply drawing on this complete TO&E.
When considering this, the gamemaster may base each faction's TO&E on the player unit, using the basic criteria that follow. The Hasseldorf and LeSat families each maintain a force that contains twice as many elements as the player group. Half of each force consists of BattleMech units, with the rest composed of vehicles and conventional infantry elements. The Hasseldorf and LeSat units each possess a level of experience equal to the player group.
Combined, the rest of Kaumberg's ruling body commands additional forces three times the size of the player group. Composed entirely of vehicular and conventional infantry elements, these forces are one experience level lower than the Hasseldorf and LeSat units.
If the forces suggested by the written plot are not suitable for the players' campaign, then gamemasters should feel free to change any restrictions that do not work for them. However, as the scenarios are balanced to their recommended force strengths, changes should not be made needlessly.
Using Force Listings
This section includes several lists to guide gamemasters in generating BattleTech forces. Rather than presenting a random 'Mech table or a vast series of pregenerated lances, however, what follows is merely a breakdown of elements commonly used by the major factions of the Inner Sphere and the Clans throughout the major periods in BattleTech history. Also included are lists of common BattleMechs and vehicles used in each era to show which designs were prolific in each era, and that they may conceivably be fielded by any faction.
It should be noted that the provided lists do not show an element's numerical designation. This has been done to save space rather than flooding the lists with multiple variants on a design seen across the Inner Sphere. Gamemasters should make a note of what variants are to be used against the players and make certain that the element in question matches the Force Point value also provided with the list, as some models, particularly designs upgraded between 3025 and 3050, have undergone some changes.
Note: the element list tables themselves (Common 'Mech by Era/Element Rating and Faction-Exclusive Element Listings, pp. 37-38) are image-only and are not reproduced in this transcription.
Equipment Ratings and Standard Unit Values
To begin generating an opposing force based on the technology era or equipment rating of the player group, the gamemaster should roll on the Random Equipment Rating Table (p. 35), using the column that best describes the unit's tech rating. The result gives the equipment rating for the opposing force. For example, if the player unit has an equipment rating of B and the gamemaster rolls a 7 (modified to 8 by the unit's rating), the opposing force gets an equipment rating of C (3055-era units and older designs). The gamemaster should then restrict all element selections for the opposing force to the lists for C-rated elements and below.
The Base Lance/Star Force Point Value Table (p. 36) provides a rough guide to finding the Force Point value preferred in each faction's units for each era. (If the players are using the BV system instead, simply multiply the suggested Force Points by 100.) Gamemasters looking for authenticity should select elements for their faction's lances and Stars based on these figures. In fact, the combination of these figures and the information gathered on the player unit's strength should allow for faster "point balancing" of the opposing forces. For example, a player unit that has a Force Point value of 116 (11,600 BV) at a tech rating of B may be matched quickly with a light, medium and heavy lance of Capellan units in tech rating C (total Force Point value of 116, or 11,600 BV).
Random Equipment Rating Table (p. 35). Roll 2D6 and read the column for the player unit's equipment rating; apply the modifiers below to the roll before reading the table.
| 2D6 Roll | 3060/A | 3058/B | 3055/C | 3050/D |
|---|---|---|---|---|
| 3 or less | 3025/F | 3025/F | 3025/F | 3025/F |
| 4 | 3050/D | 3025/F | 3025/F | 3025/F |
| 5 | 3050/D | 3050/D | 3025/F | 3025/F |
| 6 | 3055/C | 3050/D | 3050/D | 3025/F |
| 7 | 3055/C | 3050/D | 3050/D | 3050/D |
Apply the following modifiers to the roll based on unit ratings: A, +2; B, +1; C, 0; D, -1; F, -2.
Note: the Base Lance/Star Force Point Value Table (p. 36), the Element Force Points table and the Experience Level Table (pp. 31-32) are image-only and are not reproduced in this transcription. The Random Equipment Rating Table above was read from a higher-resolution render of the page.
Element Selections
The elements making up an opposing force should next be drawn from the common list of the era closest to the year the player unit is set in, as well as the specific elements that may be available to the unit's faction. Allied affiliations (such as the Davion and Steiner families, from 3025 to the present, or ComStar and the Free Rasalhague Republic) may also draw some elements from the exclusive list of each other's affiliation, but in such a case, the number of elements chosen from an allied faction's exclusive list should never exceed half of the opposing force. Note that it is also possible to choose elements from the common listing for previous eras (except for the Star League era common elements, which are available only to ComStar and Clan factions).
Also, as years go by, so-called exclusive designs have a way of entering the ranks of other armies. To reflect this, elements that are faction-exclusive in one era become more commonplace to that faction in the next era. As such, these designs begin to turn up in the armed forces of a faction's neighboring states or Clans. Whenever an exclusive element is chosen for the force of a faction that did not originally have access to that design one era later than it first appeared, roll 2D6. On a result of 8 or more, the design has been obtained. If the result fails, a new element must be selected. Two eras later, these elements may be gained on a 2D6 roll of 6 or more for neighbor factions or on a 10 or more for factions farther away. Three technology eras removed from the date of the exclusive designs, all realms neighboring the originator of the design may choose these elements as if they were common, while factions neighboring the neighbors need to roll 8 or better on 2D6. Beyond three technology eras, an exclusive design is considered common to all factions, even those that cannot build or maintain such designs.
Not all minor factions have been listed and some have been simplified in the interest of saving space. Mercenary units should use the appropriate lists from their employer's faction or stick with the common element listings. As the Clan lists lump all Clans together, players in Clan-based campaigns may wish to examine closely their element choices, as many designs are specific to only a few Clans. The flavor text found in the Technical Readouts will generally explain which Clans use a given design. Additionally, the Random 'Mech Assignment Tables found in the BMR and the Field Manual series can also be used as a guide to which factions use which elements in any given era.
Each list includes vehicles as well as BattleMechs. On average, far more vehicle-based units exist in the Inner Sphere than BattleMech units, especially in planetary militias. However, it remains a gamemaster's choice as to what types of units work best for a game.
The design of these lists offers great flexibility, so gamemasters should be able to avoid using too many of the same element types in every lance or Star. Using the Base Lance/Star Force Point Value Table (p. 36) as a guide, gamemasters should be able to mix and match the ideal force for their faction and era.
Track 1: From Unrest to Rebellion
Track 1 Special Rules
The following special rules may be applied to the scenarios of this track, at the gamemaster's discretion.
Living on the Run
The end of scenario one will make a fugitive of one side or the other as council bickering finally becomes a call to arms. The delicate political and military balance between Kaumberg's two most powerful families, teetering on the brink of open warfare with accusations of murder and treason, will be shattered. Guilty or not, one faction will have no choice but to flee, and such flight will not allow them time to choose the resources they carry with them. However, regardless of what side finds itself on the run, there will be time to salvage something beforehand, and the following rules should help keep track of the depleted resources the fugitives should have available to them without bogging the game down in details and accounting.
At the start of the Track, each side receives 10 points for each noninfantry element in that side's initial forces, which they should allocate as they see fit among six separate supply stores called component pools. These pools represent the tonnage of armor, structural components, energy weapons, missile weapons, ballistic weapons, and electronics that each side can draw upon in the event they become the fugitive force. These tonnages need not be divided among particular components (unless the players involved truly want such a level of detail in their campaign), but rather offer enough parts that dedicated technicians can fabricate almost anything they need to repair or replace damaged components.
These parts are used on a ton-for-ton basis to replace destroyed components, but only for the component of the same type as the pool the parts are drawn from. For example, a damaged fusion reactor cannot be replaced with parts from the energy weapons component pool. Each replaced component costs its full weight in tonnage from the appropriate pool (lost limbs or body sections cost the full tonnage of all weaponry, components, and armor located therein). Repairing components that still have undamaged critical slots costs only 1 ton per damaged slot. Use the standard BattleTech Scavenging and Repair rules (pp. 82-88, BMR) when making repairs, and note that any failed attempts to make a repair or replacement costs one ton from the appropriate pool per roll, in addition to the standard repair costs. The following defines what each component pool includes:
- Armor: All armor types may be repaired with tons from this pool. Armor may be replaced on a ton or half-ton basis, using the amount of lost armor, and divided by the appropriate modifiers.
- Structural Components: Internal Structure, CASE, actuators, gyros, cockpit systems (excluding sensors), engines, vehicle motive systems, heat sinks and jump jets are all replaced using this pool. Internal structure costs 1 ton per 16 points if standard and 1 ton per 32 points for Endo Steel. Components such as engine shielding points, gyro points and actuators cost 1 ton each per replacement.
- Energy Weapons: All energy weapon systems, including PPCs and TAG systems.
- Ballistic Weapons: All ballistic weapons, including machine guns, anti-missile systems, autocannon, Gauss rifles and artillery weapons.
- Missile Weapons: All missile weapons, including SRMs, MRMs, ATMs, LRMs and Narc missile beacons.
- Electronics: Sensor systems and electronic warfare gear including targeting computers, active probes, ECM systems, Artemis IV FCS and all C3 systems.
In addition to these resources, the player receives 20 + (11D6 x 10) tons of ammunition, which must be divided among the various ammo types used by the player's force before campaign play begins.
The side that winds up as the fugitive force after Scenario One may only draw upon these resources to repair and rearm, augmented only by whatever salvage they may chance upon in the following scenarios. Any salvaged element (or element scrapped to add to the pools) will add the tonnages of its remaining undamaged components to the appropriate pools. Damaged components broken down for scrap in this fashion add only half their tonnage to the pools; salvaged actuators and the ten heat sinks built into each fusion engine, however, are not counted for salvage.
Note that while using this rule, the tonnage of components may not always add up to the exact tonnage of the element, and may in fact exceed the mass of lighter elements while falling far short of heavier ones. This is a tradeoff for the speed of an abstracted system. If players agree, a more detailed system may be devised to accurately account for the fugitive unit's parts stockpile.
Example: Jeff's force is living on the run and has just suffered a severe pounding in the field. His most damaged 'Mech is a VND-3L Vindicator. The Vindicator has lost its right torso and arm to an ammunition explosion, and has been breached in the center torso, where it has also taken an engine and gyro hit. Its armor is damaged in several sections. The breakdown of parts damaged or destroyed follows.
| Component | Destroyed | Remaining (Salvage) |
|---|---|---|
| Armor | 56 pts (2.5 tons) | 88 pts (5.5 tons) |
| Internal Structure | 18 pts (1 ton) | 57 pts (4 tons) |
| CASE | 4 (0.5 tons) | none |
| Actuators | 3 arm (3 tons) | 12 arm & leg (10 tons) |
| Gyro | 1 point (1 ton) | 3 points (3 tons) |
| Engine | 4 point (1 ton) | 5 points (5 tons) |
| Heat Sinks | none | 15 (6 tons) |
| Jump Jets | none | 4 jets (2 tons) |
In addition to the full ton of lost LRM-5 ammunition, Jeff's Vindicator will require 3.5 tons of armor, 6.5 tons of structure, and 6 energy weapon tons to restore it. But if he scraps the 'Mech, he will receive 5.5 tons in his armor pool, 22 tons in structure, 2 tons each to his energy weapon and missile weapon pools, and 2 tons of electronics. If Jeff's supplies are drastically low, he may decide to scrap the Vindicator for the sake of his other elements.
Scenario 1: Flashpoint
Situation. Stuttgart, Kaumberg, Alarion Province, 5 February 3063. (Situation fiction omitted; see the Game Set-Up note below.)
Game Set-Up. Not transcribed here. The map layout, building counts and placement for this scenario are reproduced in the source book; see the source note.
Forces
Four factions are involved in this scenario, including the players: Baron Hasseldorf's troops, Baron LeSat's troops, the citizens of Stuttgart (including the Stuttgart Police Department), and the player group. A gamemaster may reduce the number of factions to three if the players have been brought into Operation: Flashpoint as allies of either family. Doing so, however, radically alters the dynamics of the scenario.
Hasseldorf Troops. The Hasseldorfs have dispatched a small force no greater than two-thirds the size of the on-site defenders. These elements enter the map board via the north map edge during the Movement Phase of turn 1.
LeSat Troops. The LeSat force enters via the south map board edge during the Movement Phase of turn 1. The size of the LeSat force is equal in size to whatever the Hasseldorf player has fielded.
The Stuttgart Citizens. Twelve foot infantry counters should be placed representing the demonstrators gathered in the city park. These counters should be placed in the following hexes on the City Street Grid/Park #2 mapsheet: 0606, 0507, 0408, 0309, 0310, 0311, 0411, 0513, 0711, 0810, 0809 and 0806. These citizens are unarmed and each counter represents 1D6 x 5 individual people rather than the standard platoon of 28 soldiers. Additionally, at least six motorized rifle infantry platoon (regular experience level) counters should be placed in the following hexes: 0803, 0306, 0315, 0814, 0909 and 0910. These counters represent the Stuttgart Police Department.
On-Site Defenders. The on-site defenders are elements of the player group. It is recommended that they field a force no greater than a company in size. Having been dispatched to back up the Stuttgart PD and keep the demonstration under control, these elements are placed in any paved hex in hexrows 02XX and 09XX on the City Street Grid/Park #1 mapsheet.
Victory Conditions
The scenario ends when either the Hasseldorf, LeSat, or On-Site Defender forces have been destroyed or forced to withdraw.
The goal of the Hasseldorf forces is the destruction or withdrawal of all LeSat forces from the area and a minimum of collateral damage.
The goal of the LeSat forces is the destruction of the Hasseldorf forces. Collateral damage is lower on their priorities, as Stuttgart is, after all, a Hasseldorf landhold.
The On-Site Defenders must keep the fighting controlled any way possible. This is a tricky goal, but one that can be met by forcing both the Hasseldorfs and the LeSats to withdraw. If the On-Site Defenders are the last force left standing on the map at the end of the scenario, they will have achieved their goal.
The Stuttgart citizens' goal is to survive the scenario. For the purposes of victory conditions, do not score for the Stuttgart citizenry.
Consult the Victory Table to determine the extent of each side's victory after the scenario is completed. Apply the points to the factions as the scoring column indicates. Use the resulting victory level when calculating the faction's PO Score for this scenario. Note a defeated element is any element that is destroyed, surrenders, or is forced to withdraw. Whichever faction remains on the field at the end controls the board.
Victory Table
Victory Table (Scenario 1). Score each condition for the faction(s) shown; the points are listed Hasseldorf / LeSat / On-Site Defender.
| Condition | Scoring (Hasseldorf/LeSat/On-Site) |
|---|---|
| Each 25% of Hasseldorf Elements Defeated | -5/+10/+5 |
| Each 25% of LeSat Elements Defeated | +10/-5/+5 |
| Each 25% of On-Site Defenders Defeated | +1/+1/-5 |
| Each 25% of Police Elements Defeated | -5/+0/-10 |
| Each 25% of Demonstrators Defeated | -5/+0/-10 |
| All Citizens survive | +5/+5/+10 |
| Building or Woods Damage Inflicted (Per Instance) | -2/-1/-2 |
| Faction Controls Board | +10/+10/+20 |
| Final Score | Victory Level |
|---|---|
| 50 or more | Complete Victory |
| 20 to 49 | Partial Victory |
| 0 to 19 | Pyrrhic Victory |
| -19 to -1 | Narrow Defeat |
| -49 to -20 | Partial Defeat |
| -50 or less | Utter Defeat |
Special Rules
Withdrawal. The Forced Withdrawal rule (see p. 24) is in effect for the Hasseldorf Troops, LeSat Troops and the On-Site Defenders. The Hasseldorf Troops must withdraw from the north map board edge. The LeSat Troops must withdraw from the south map board edge. The On-Site Defenders must withdraw from either the west or east map board edges.
Initiative. Each of the four forces involved will make its own initiative rolls throughout this scenario. As a nonmilitary force, the Stuttgart PD will suffer a -2 Initiative penalty. The demonstrators, sent into a panic when the heavy elements begin shooting, automatically move first every round. The gamemaster should randomly determine which way the panicked demonstrators run each round.
Combat Targets. Each of the four factions has different rules of engagement and targets which they may legitimately fire upon for this scenario. Players will therefore need to keep careful track of the targets on which each element has declared fire, although the possibility exists that missed shots could broaden the range of legitimate targets at any point.
The Hasseldorf and LeSat forces will concentrate fire on each other at the start, virtually oblivious to any elements that stand in their way. Neither will deliberately initiate an attack on an on-site defending element or citizen element unless first attacked by that element or otherwise prevented from engaging its intended rivals.
The Stuttgart PD, as the only citizens capable of making attacks, will engage the units that initiated combat (Hasseldorf or LeSat), with no obvious preference in targets. The On-Site Defenders, who were, after all, dispatched as the police department's back-up, will not be targeted by the SPD. The panicked demonstrators may draw fire from the SPD as well, but only if a demonstrator element enters a police element's hex in its flight. If this occurs, the SPD element must roll 2D6, and will engage the demonstrators on a roll of 8 or higher, as they, too, panic.
The On-Site Defenders may choose to fire on either or both of the Hasseldorf and LeSat elements. They will not engage the SPD or any of the Stuttgart citizens. The player group should be made aware that this is a precarious political situation as well as a tactical issue. Choosing one faction over the other will likely place the players in either the Hasseldorf or LeSat camps, influencing future events. Doing nothing, however, will turn everyone against the players for their failure to contain the carnage, so the On-Site Defenders must do something when the crossfire begins.
Police Morale. The local police are not a military unit trained to deal with such matters as this, so a fair chance exists that any attack from the combat elements will break the morale of a SPD element. Any police element that suffers damage from an attacker must roll 2D6 during the End Phase. On a result of 7 or less, the police element's morale is broken; it is a good idea to flip the counter over to indicate a broken element. In the Movement Phases of subsequent turns, the element will move away from any enemy elements and toward the nearest map board edge at its best possible speed. During the End Phase of any turn after being so broken, the retreating element may recover its morale by rolling a 9 or better on 2D6. Until an element recovers its morale or exits the map, the retreating element may not make any weapon attacks and continues to retreat toward the nearest map board edge.
Collateral Damage. For every Weapons Attack that misses its intended target, check to see if the attack struck any elements or terrain in the target hex or in any hex along the LOS between the attacker and target, beginning with the hex adjacent to the target and moving toward the attacker. If an element or terrain is found in any of those hexes, calculate a modified to-hit number for the new target based on the same modifiers as the original attack except for the target movement and the terrain in the hex the target occupies, which are replaced by the modifiers for the new target. An additional +3 modifier applies, representing the unintentional nature of the shot. The firing element must have a valid line of sight to the secondary target. If two or more possible secondary targets are in the same hex, choose a target randomly. If a secondary target is found and the shot misses again, use the same rules above to find the next target until no secondary targets are found.
In addition, any military element that passes through a hex containing a Stuttgart Citizen element runs the risk of inadvertently trampling or running over panicked citizens. To reflect this, any 'Mech or vehicle element which passes through a Stuttgart Citizen element-occupied hex must make a Piloting Skill Roll to avoid causing damage to the unit. If the roll fails, a 'Mech causes damage equal to a kick attack against the element and a vehicle causes damage equal to a charge attack. The number of hexes of the charge is equal to the number of hexes that the vehicle had moved up to and including the hex in which the Stuttgart Citizen element lies, during the current Movement Phase.
Public Opinion Modifiers. The standard public opinion rules are in effect for this scenario, with the following definitions:
- Deliberately attacking any citizen element is regarded as a cowardly action with a -3 PO modifier (-4 if the target is not a police element) to any unit that makes such an attack.
- Both the Hasseldorf and LeSat forces suffer the penalty for fighting in a city as an attacking force. The On-Site Defenders suffer the penalty for defending in a city.
- Deliberate attacks against any city building count as scorched earth tactics. The Hasseldorf and LeSat forces, once again, are treated as attackers in such a case, while all other factions count as defenders.
- If the On-Site Defenders refuse to fire on any of the combatant factions and opt to let the two factions club themselves to death, or withdraw rather than choose sides, it counts as "abandoning the post."
Note that the On-Site Defenders must add these modifiers to their base public opinion score, which is set by whatever side of the resulting conflict they choose to side with. If the players do not actively back the Hasseldorfs in any way, they will default to the nationalist side and use that base PO Score as a starting point.
Aftermath (Scenario 1)
The Aftermath below is kept for its campaign rules only; the narrative of the provisional government's orders is omitted.
For purposes of PO Scores, the Hasseldorf family has a -20 PO Score as of the end of this scenario, while the LeSats have a PO Score of zero. The player unit, if it has not chosen sides, will become part of the provisional government's coalition force, and will thus be in LeSat's camp. Otherwise, they suffer the negative public opinion of the Hasseldorfs as modified by the standard public opinion rules.
All involved factions should add the public opinion points from this scenario to their base scores before proceeding to the next scenario. Finally, LeSat gains enough inroads with the Kaumberg mass media to obtain influence over the general populace. Starting with the next scenario, the LeSats have control of the media when figuring public opinion scores.
Scenario 2: The Great Escape
Forces.
Attacker. The attacker consists of an attack force of nationalist troops that may outnumber the defender's combat elements by no more than 25 percent and has an experience level equal to the defenders. If the players chose to side with LeSat or the provisional council in the last scenario, this force comes from the player unit.
The attacker enters via the south map board edge during the Movement Phase of turn 1.
Defender. The defender represents the rear guard of the retreating Hasseldorf-loyal forces. This can be the player units if they sided with the Hasseldorfs, but can field no more than a single 'Mech or vehicle company. This force may be placed anywhere between hexrows 05XX and 11XX, so long as the hex has an elevation of six or more.
In addition to these elements, the defender must also place one flatbed truck for every two defending elements ('Mech, vehicle or infantry), along the road hexes from 0308 to 0609 on the south mapsheet. These represent the last loads of supplies and personnel from Castle Hasseldorf. See the Special Rules section below for details on these trucks.
Victory Conditions
The scenario ends when the attacker or defender is destroyed or has withdrawn.
The attacker's primary objective is the capture of Castle Hasseldorf, preferably intact and with minimum losses, as the loss of the castle facilities will place the fugitives at a severe disadvantage in the coming campaign. Destroying as many escaping defenders as possible is a bonus, but not critical, since LeSat hopes to make scapegoats of the surviving Hasseldorf fugitives, milking the situation for all the political clout it can bring him.
The defender's goal is to escape with as many of his elements as possible, especially the flatbed trucks carrying vital supplies and staff. Holding Castle Hasseldorf is too costly to the immediate survival of the family now that most of Kaumberg's population has turned against them.
Consult the Victory Table to determine the extent of each side's victory after the scenario is completed. Apply the points on the left of the slash mark to the attackers' score. The points on the right apply to the defenders' score. Use the resulting victory level when calculating the faction's public opinion score for this scenario.
Victory Table
Victory Table (Scenario 2). Points are listed Attacker / Defender.
| Condition | Scoring (Attacker/Defender) |
|---|---|
| Each 25% of Flatbed Trucks Withdrawn | -5/+5 |
| Each 25% of Flatbed Trucks Destroyed | +3/-5 |
| Each 25% of Flatbed Trucks Crippled | +5/-5 |
| Each 25% of Defender Withdrawn | -5/+10 |
| Each 25% of Defender Destroyed | +10/-5 |
| Each 25% of Defender Crippled | +15/-10 |
| Each 25% of Attacker Destroyed/Crippled | -3/+5 |
| Castle Hasseldorf Destroyed | -15/-10 |
| Castle Hasseldorf Captured | +10/0 |
| Final Score | Victory Level |
|---|---|
| 50 or more | Complete Victory |
| 20 to 49 | Partial Victory |
| 0 to 19 | Pyrrhic Victory |
| -19 to -1 | Narrow Defeat |
| -49 to -20 | Partial Defeat |
| -50 or less | Utter Defeat |
Special Rules
Withdrawal. The Forced Withdrawal rule is in effect for the attackers (see p. 24). The attacker must withdraw from the south edge of the map board.
Flatbed Trucks. The Hasseldorf forces are protecting the retreat of their last few flatbed trucks carrying cargo when the LeSat force arrives. The Driving Skill for each flatbed truck is 6.
Before beginning play, the defender should number the trucks and roll 1D6 for each truck, recording the results on a piece of paper. On 1 or 2, the truck is hauling civilian staff members. On 3 or 4, the cargo is munitions. On 5 or 6, the cargo is equipment, such as weaponry or small 'Mech parts. The defender need not reveal the contents of the truck unless the attacker scans it with an active probe or destroys the vehicle.
Public Opinion Modifiers. The standard public opinion rules are in effect for this session, with the following definitions:
- Attacking any truck is regarded as a cowardly action with a -3 PO modifier. This value, however, is negated if the targeted truck is hauling either munitions or equipment. This rule applies to the attacker only. (If the defender opts to do such a foolish thing, it counts as scorched earth tactics!)
- Remaining on the field until all trucks are safely off-board is a heroic action that earns the defender a +1 PO modifier for each "heroic" element. However, any element that withdraws from the map without making any weapons attacks against an attacking element for at least two turns will earn the defender a -3 PO modifier for "abandoning his post."
- Attacks against Hasseldorf Castle count as scorched earth tactics, but the defender will suffer only half the PO penalty for such attacks, as the target happens to be the defender's own home.
Aftermath (Scenario 2)
The Aftermath below is a campaign-continuity rule (truck losses carried into later scenarios) and is kept with this scenario.
The loss of any trucks will hurt the defender in the upcoming scenarios, who will need whatever supplies he can carry to maintain his equipment as they flee into Kaumberg's wilderness.
For every flatbed truck destroyed that carried personnel, the success of repairs to damaged equipment between future scenarios is compromised. Each lost truckload of personnel imposes a -1 modifier to all Technician Skill rolls (Technician Checks) for the remainder of this Track.
For every lost truckload of munitions, the fugitive player loses 5 tons each of ballistic and missile ammunition. Each ton of lost ammo should be of a different type or class of weapon, determined at random.
Every lost truck carrying equipment costs the fugitive player 10 component points (consult the Living on the Run special rule for details) from supply stores. These points are divided among the various component pools in two 4-point groupings and one 2-point grouping, determined randomly.
Scenario 3: Jailbreak!
Game Set-Up. Not transcribed here (map and building placement). The outer prison, guard tower and hangar layout is in the source book.
Forces.
Attacker. The attacker is a strike team (no greater than two lances in strength) of fugitive elements. These may be the player unit if the players sided with the Hasseldorfs. If not the player unit, this force should add one more lance and is one experience level above the defender.
The attacker enters via the south map board edge during the Movement Phase of turn 1.
Defender. The defender can field a lance of vehicles for every 'Mech lance the attacker fields, plus an additional squad (see Squad Deployment p. 36, Maximum Tech) of rifle foot infantry for each attacking element, all of which have one experience level less than the attacker's force. (The vehicle elements come from the support forces the surviving government leaders have contributed to LeSat's coalition.) The gun tower guards have the same experience level as these platoons.
All infantry elements start in either the prison guard tower hexes, the prison itself, or in the impound hangar hexes. The remaining defending units may set up on any paved hex not occupied by a building or fence-line.
Additionally, the defender must secretly nominate one of the prison hexes as the cell where the prisoners are being kept. This hex number should be written down prior to gameplay.
If the players are still on the nationalists' side, they may swap each vehicle lance for one of their own lances (vehicle or 'Mech). The infantry elements remain the same, as they represent the prison guard staff.
Victory Conditions
The scenario ends when the attacker has been destroyed or has withdrawn or the defender has been destroyed.
The attacker's primary objective is to liberate his comrades from the prison and safely withdraw from the field. A secondary objective almost as important as the primary is to liberate his comrades' equipment from the nearby hangars.
The defender's objective is to destroy or cripple all attacking elements and retain the prisoners with as few casualties as possible (so successive attempts by the attacker cannot undo all his hard work).
Consult the Victory Table to determine the extent of each side's victory after the scenario is completed. Use the resulting victory level when calculating the faction's PO Score for this scenario.
Victory Table
Victory Table (Scenario 3). Points are listed Attacker / Defender.
| Condition | Points (Attacker/Defender) |
|---|---|
| Each 25% of Attacker Destroyed/Crippled | -5/+15 |
| Each 25% of Defender Destroyed/Crippled | +5/-5 |
| Each 25% of Prisoners Liberated | +8/-5 |
| Each 25% of Prisoners Killed | -10/0 |
| Each 25% of Impounded Elements Liberated | +5/-5 |
| Each 25% of Impounded Elements Destroyed | -3/+10 |
| Final Score | Victory Level |
|---|---|
| 60 or better | Complete Victory |
| 40 to 59 | Partial Victory |
| 20 to 39 | Pyrrhic Victory |
| 0 to 19 | Marginal Defeat |
| -20 to -1 | Partial Defeat |
| -21 or less | Utter Defeat |
Special Rules
Withdrawal. The Forced Withdrawal rule is in effect for the attacker (see p. 24). The attacker must withdraw from the south edge of the map board.
Liberating the Prisoners. The attacker knows that his comrades are being held inside the prison, but not the exact cell. As a result, both prison hexes must be searched to locate the captured warriors. Ideally, this should be done by an infantry platoon, but any element may perform a search. This consists of calling out to the imprisoned warriors using external speakers and waiting for a prisoner at a window to give a sign that they are the warriors being sought. This becomes more difficult if the searching element comes under fire while making a sweep of the building.
To simulate all these effects simply, the searching element must be adjacent to the prison hex it is searching and may not make any attacks. During the End Phase of the turn spent searching, the player controlling that element must make a 2D6 roll against a target number of 9. Subtract the element's Attacker Movement Modifier from the result, as a moving element tends to make too hasty a search. If the element received any damage during the turn it searched, add a -2 modifier to the die roll. Add a +3 modifier if the searching element consists of infantry. No special electronics will modify this roll, as electronics will not pick out a handful of select individuals among many. If the roll succeeds, the defender must reveal whether the searched hex is the one where the prisoners are being detained.
At that point, the attacking element that performed the search is free to fire on the prison and must inflict 25 points of damage to the prison wall to create a hole large enough for the prisoners to be freed. If, however, enough damage is inflicted to reduce the prison hex's CF below 10 points, the cell has collapsed, killing the prisoners on a 2D6 roll of 7 or more.
Picking up the escaped prisoners requires either a dedicated infantry transport or an attacking element for each prisoner being rescued. Use the rules for mounting infantry (p. 59, BMR) when performing this operation. 'Mechs and vehicles may pick up only one of the four prisoners at a time. On the other hand, dedicated transports (even a simple truck) may take all prisoners at once.
The Hangars. The attacker may wish to liberate the captured warriors' elements, which requires getting any liberated prisoners to the impound hangars. To breach the hangar doors, any successful attack, regardless of damage, will do the job, but the hangars have a CF of 15 and will collapse on their detained machines if their CFs are reduced to 0.
The vehicles housed in each structure should be determined in advance by the defender; they consist of those elements that were arrested in the aftermath of Scenario One. If the elements were not determined at the time, the attacker must designate which elements were arrested and allow the defender to designate which hangar houses which element(s). If the attacker in this scenario has any active probes, he may elect to scan the hangars before breaching them to see if the desired equipment is inside. Upon scanning or breaching the hangar, the defender must announce what elements are inside the scanned/breached hangar.
To liberate the elements within, a prisoner may be dropped off per the standard dismounting infantry rules (p. 59, BMR). The prisoners will require two turns to get in and power up each element, during which the element is considered an immobile target.
Public Opinion Modifiers. The standard public opinion rules are in effect for this session with the following definitions:
- The defender attacking an escaping prisoner is regarded as a cowardly action with a -2 PO modifier. The defender attacking the prison outright or any captured 'Mechs before the attacker moves to power them up counts as the defender using a scorched earth tactic.
- As the prison facility is located on the outskirts of the suburbs of Stuttgart, this scenario is considered an urban combat scenario.
- For every element still on the map board after all the liberated prisoners and elements safely exit, the attacker gains a "heroic action" bonus.
Aftermath (Scenario 3)
The Aftermath below is kept for its campaign rule only; the narrative of LeSat's political response is omitted.
LeSat finds that the jailbreak only further enhances his political position, since a jailbreak only underscores the apparent guilt of the Hasseldorf family. To reflect this, the fugitive forces will suffer an additional -2 PO modifier at the end of this scenario.
Scenario 4: Desperate Call
Situation. Traussen, Kaumberg, 22 March 3063. (Situation fiction omitted.)
Game Set-Up. Lay out the BattleTech maps as shown. This scenario uses the City (Hills/Residential) #1 map from BattleTech Map Set 3. A medium, Level 3 building (CF of 40) stands in hex 0804, representing the Traussen HPG relay station. The defender selects 20 to 40 building counters of any type and may place them in any clear hexes on the map.
Note: The set-up for this scenario is the same as that used for Scenario 2, Track 4 (The Final Appeal, p. 74). If the scenarios from Operation: Flashpoint are to be played as a complete campaign, the exact set-up of the first battle should be noted so it can be duplicated for the later scenario.
Forces
Attacker. The attacking force consists of fugitive elements no greater than 1 lance in strength. The attacker must designate one of these elements as a carrier for a specialized comm technician. If the players are backing the fugitives, this will be the player unit. The attacker enters via the south map board edge during the Movement Phase of turn 1.
Defender. The defending force consists of an equal number of nationalist elements. If the players are on the nationalist side, they will be the defending force. These elements set up on any road hex within 5 hexes of the Traussen HPG relay station and have an experience level equal to the attacking force.
ComStar (Optional Force). This force is placed by the gamemaster or at the agreement of both players. Up to five Com Guard elements may be placed within 3 hexes of the Traussen HPG relay. These elements represent a part of the 207th Division of the Com Guard, stationed on Kaumberg to protect the relay. They will not act unless attacked or the relay is attacked. At that point, these elements will roll their own Initiative and act against the side whose element made the attack. (More on the 207th may be found in the BattleTech Field Manual: ComStar, or under How to Run Operation: Flashpoint, p. 13.)
Victory Conditions
The scenario ends when either the defender has been destroyed or the attacker has been destroyed or has withdrawn.
The attacker's primary objective is to secure the Traussen relay and get the comm-tech inside to deliver the critical message. "Getting the word out" is a secondary objective that may not be viable if the defender has the chance to get reinforcements in time.
The defender's objective is to destroy or cripple all attacking elements and prevent the delivery of the comm-tech.
Consult the Victory Table to determine the extent of each side's victory after the scenario is completed. Use the resulting victory level when calculating the faction's public opinion score for this scenario.
Victory Table
Victory Table (Scenario 4). Points are listed Attacker / Defender.
| Condition | Points (Attacker/Defender) |
|---|---|
| Each 25% of Attacker Destroyed/Crippled | -5/+10 |
| Each 25% of Defender Destroyed/Crippled | +5/-5 |
| Comm-Tech Killed Before Sending Message | -20/+15 |
| Comm-Tech Successfully Delivers Message | +20/-20 |
| Comm-Tech "Gets the Word Out" (Per Turn) | +5/-5 |
| Destroying the Traussen Relay Station | -25/-30 |
| Final Score | Victory Level |
|---|---|
| 40 or better | Complete Victory |
| 20 to 39 | Partial Victory |
| 10 to 19 | Pyrrhic Victory |
| 0 to 9 | Marginal Defeat |
| -25 to -1 | Partial Defeat |
| -26 or less | Utter Defeat |
Special Rules
Withdrawal. The Forced Withdrawal rule is in effect for both the attacker and defender (see p. 24). The attacker must withdraw from the south edge of the map board. The defender must withdraw from the north edge of the map board.
Using the Comm Relay. The attacker has brought along a specialized communication technician who will be able to expedite sending the fugitives' transmission for aid. At the beginning of the scenario, the attacker must secretly nominate one element to carry this technician as a passenger. The comm-tech can be dropped off and picked up as per the standard BattleTech rules for Mounting and Dismounting infantry (p. 59, BMR). If carried by a BattleMech element, the tech rides in the cockpit with the MechWarrior and must make appropriate consciousness rolls if the pilot takes damage.
The comm-tech must be delivered to the relay fully conscious, where he will then enter the facility and place the vital call. The HPG relay station qualifies as a ComStar facility and is considered neutral territory. The tech may place the call with no hindrance, requiring only one turn to make the transmission.
In addition to sending the critical call for aid, this comm-tech may also use the station's secondary systems to break into Kaumberg's satellite network and get the resistance's word out to the general public. This may be done either before or after the call for aid, but is not automatically successful. Instead, at the beginning of each turn that the comm-tech elects to get the word out to Kaumberg, he must make a 2D6 roll against a target number of 8. Each successful roll represents a successful break-through of normal transmissions, during which time the fugitives can send a pre-recorded message via the tech, which will give the common folk a chance to hear their side of the conflict. For every turn after the first successful breakthrough that the comm-tech makes an additional successful break-through, the fugitives will earn an additional +1 PO modifier, to a maximum PO modifier of +5.
Public Opinion Modifiers. The standard public opinion rules are in effect for this session, with the following added definitions.
Any force that attacks the Traussen HPG relay will be committing an obvious act of scorched earth tactics. Furthermore, since the facility is a neutral target—and an HPG at that—any element that hits the relay will suffer an additional -15 PO modifier, in addition to the scorched earth penalty.
Leaving the comm-tech behind will earn the attacking force a penalty for abandoning its post.
Finally, at the end of this scenario, whichever player has earned more victory points gains the benefits of controlling the media for this scenario and all scenarios afterward in this campaign. This control will last until taken away in a later scenario. Consult the rules on Controlling the Media (p. 22), for more information on how media control affects public opinion scores.
Scenario 5: On a Mission of Mercy
Situation. Smaradgrun Forest, Kaumberg, 17 April 3063. (Situation fiction omitted.)
Game Set-Up. Lay out the BattleTech maps as shown. This scenario uses both Rolling Hills maps from BattleTech Map Set 3 and Open Terrain #2 from BattleTech Map Set 5. The Open Terrain #2 map in the center represents the clearing designated as the rendezvous point for the fugitives and their inbound allies.
Forces
This scenario works best with three player forces (two forces are played by the gamemaster), each rolling Initiative separately. One force represents the nationalist forces (here considered the attacker). The other two are the fugitive forces and their allies (defender). Each defender force should roll initiative separately, because they represent two different battlefield entities.
Nationalists. The nationalist force may field up to one company in size; one-third of this force begins the game within four hexes of the south edge of the Open Terrain #2 mapsheet. The other two-thirds of the attacking force enters the map, one-third at a time, via the south edge of the Open Terrain #2 mapsheet during the Movement Phases of turns 3 and 6, respectively. If the players are siding with LeSat's coalition at this time, these elements will be the player unit sent ahead to intercept the arriving reinforcements.
Fugitives. The fugitive force starts on the west map—Rolling Hills #2—with no more than two lances. If the players have sided with the Hasseldorfs at this time, they will be in this force, sent ahead to make first contact with the reinforcements' representatives. One-half of this force may be placed anywhere on the Rolling Hills #2 mapsheet after the attacker has placed his elements. The other half of this force will enter via the west edge of the Rolling Hills #2 mapsheet during the Movement Phase of turn 4.
Allies. The allied force may field no more than two lances of its own. This force may include the player unit if the gamemaster wishes, but bear in mind that unless the previous scenarios have been skipped over, having players enter this scenario in such a fashion makes little sense unless some creative rearrangement of the track is done first. Before the start of the game and before the nationalists set up, half this force is placed within two hexes of the east map board edge. The other half of this force will enter via the east map board edge during the Movement Phase of turn 6.
Victory Conditions
The scenario is over when all of the nationalists have been destroyed or have withdrawn or all of the fugitives and their allies have been destroyed or have withdrawn.
The attacker wins if he can prevent the rendezvous by destroying or forcing enough of the fugitive force or its allies to withdraw. Failing that, tailing the surviving fugitive elements back to their base is an option as well.
The defender wins if any number of both defending forces manages to meet in the central board and exit either the northern edge of the Open Terrain #2 mapsheet or the west edge of the map board. Destroying the attacker is a close secondary goal, as any surviving nationals can harry the allied forces afterward. The fugitives and their allies have 12 turns from the start of the scenario to accomplish their primary objective. Any longer and the nationalists will be able to call up reinforcements and close off the escape route.
Consult the Victory Table to determine the extent of each side's victory after the scenario is completed. Use the resulting victory level when calculating the faction's public opinion score for this scenario.
Victory Table
Victory Table (Scenario 5). Points are listed Attacker / Defender.
| Condition | Points (Attacker/Defender) |
|---|---|
| Each 25% of Nationals Destroyed/Crippled | -10/+15 |
| Each 25% of Fugitives Destroyed/Crippled | +10/-5 |
| Each 25% of Allies Destroyed/Crippled | +10/-5 |
| Each turn of battle over 12 | +5/-5 |
| Any Defenders Withdrawn from the North Map Edge | -20/+15 |
| Final Score | Victory Level |
|---|---|
| 60 or better | Complete Victory |
| 30 to 59 | Partial Victory |
| 20 to 29 | Pyrrhic Victory |
| 0 to 19 | Marginal Defeat |
| -29 to -1 | Partial Defeat |
| -30 or less | Utter Defeat |
Special Rules
Withdrawal. The Forced Withdrawal rule is in effect (see p. 24). The nationalists must withdraw from the south edge of the map board. The fugitives must withdraw from the west edge of the map board. The allies must withdraw from the east edge of the map board.
Additionally, the goal of both the fugitives and the allies is to rendezvous on the Open Terrain #2 map and then withdraw via the north edge of the map board. Any fugitive or allied element is considered to have rendezvoused if at the end of any turn, they are adjacent to each other. In the following turn, they must immediately begin to withdraw from the north edge of the map board.
Public Opinion Modifiers. Though the rendezvous battle occurs in an isolated area, far from the prying eyes of the general populace, word of the fight will leak eventually. Thus, the standard public opinion rules are in effect for this session.
Track 1 Wrap-Up
The Wrap-Up narrative and Additional Hooks are omitted; the Troubleshooting guidance is transcribed.
Troubleshooting
Whatever the outcomes politically, the current military strengths of the warring houses on Kaumberg should be fairly balanced by now. The nationalist forces will be weakened by losing military support from other landholders, but may gain back strength in the form of mercenary aid. The fugitives will directly gain from the aftermath of the last scenario any forces needed to achieve parity. If this is not the case, either due to significant losses by the players unit or an unprecedented run of luck that leaves one side weaker than the other, then the gamemaster may choose this time to introduce reinforcements that balance the military forces. This, of course, assumes the players are continuing into the next track, Hunter/Killers.
Combatants captured anywhere in the course of this track will remain in the custody of their captors by the track's end, requiring a rescue operation if they are to take part in any future actions. The nationalists will likely keep such prisoners in the South Stuttgart Penitentiary or a similar structure, allowing for a rerun of Scenario 3. Alternately, the fugitive forces could have any prisoners of their own held in a makeshift jail, which the nationalist force will have to first locate before a plan for liberation can be achieved.
If the player unit was sufficiently damaged that the players no longer consider it combat-worthy, they will be relegated to rearward defensive duty for either side. The fugitives, lacking easy transport off-world, will be forced to fall on whatever remains of the player unit for any kind of aid, including impression into infantry or technical support. The nationalists, on the other hand, may simply take the players out of the action altogether, allowing more functional units to take their place.
Track 2: Hunter/Killers
Track 2 Special Rules
At the gamemasters' discretion, the following special rules may be applied during the scenarios of this track.
Popular Support
If played as a part of the larger campaign, the standard public opinion rules remain in force for this track, and one side will remain as either fugitive or nationalist. If the players are jumping into the campaign at this stage, they must first select (or have selected for them) which side to support. If assuming the role of fugitives (or arriving to aid the same), the fugitive side starts with a public opinion level of -35. The nationalists (and their arriving reinforcements) have a public opinion score of +15.
The standard modifier may apply to the player group as outlined in the Base Public Opinion By Faction Table (p. 19) if the player group is a mercenary command.
As many of the scenario set-ups in this track are decided by one player or the other, the effects of a pronounced public opinion imbalance may be felt a bit more keenly in the form of lost or faulty intelligence. To reflect this, the side with higher public opinion will receive one advantage at the beginning of this track for every 20 points in public opinion scores they possess over the other side. These advantages work in conjunction with the standard public opinion effects (p. 22), but may be used only once per scenario. A list of the advantages and their descriptions appears in the following table (p. 58).
Popular Support Advantages Table (p. 58)
| Advantage | Description |
|---|---|
| Area Knowledge | When generating random maps or when maps are chosen by the opposing player, the player may override any mapsheet chosen by the opposing player and choose another one appropriate to the scenario. |
| Redeployment | The player may add or subtract half of the force recommended for his side in a given scenario. |
| Static Defense | The player, if defending, may secretly nominate 1D6 clear hexes of the map and place either a conventional minefield (see Minefields, p. 80, BMR) there or a hidden Level 1 pit trap (see Basements, p. 53, BMR). |
| Security Leak | Once per track, the player gains a +1 Initiative bonus due to a sympathetic mole in the opposing force. |
| Sabotage | A sympathizer in the enemy force manages to prevent one element (chosen at random) from taking part in the given scenario for every two lances fielded. Like the Security Leak, this advantage may be employed only once in the track. |
Track 2 Variations
Alternate Timeline or Setting. This track describes the establishment of bases for two armies engaged in a protracted war. It is not unlike many battles fought in the history of the Succession Wars as the armies of the Great Houses landed and secured a beachhead in capital cities, major facilities, and so on. Such population centers are used to provide easy labor and valuable sources of intelligence about the local area—factors which prove invaluable during the early stages of any invasion.
Clan Campaigns. Though this track is strategic in nature (an uncommon event among the Clans before Operation Revival), the battles themselves are small in scale, as each side must reserve forces during almost every fight. The Clans have shared and fought for the few worlds they possessed for centuries before they arrived in the Inner Sphere, however, and would bid portions of each enclave's force to an attack while simultaneously leaving behind the rest for defensive purposes. The limited nature of such fighting often resulted in just the form of seesaw effect the fighting in this track will present, with each side electing either to defend its claim or strike out in an effort to take an objective from its rival.
Skipping Tracks. Regardless of the origin or affiliation of the player group, the players may arrive in this track as reinforcements for their patron side, called in at almost the same time as their opposite number. Lacking sufficient aerospace assets to oppose a DropShip landing, neither side arrives with any difficulty, allowing the units brought into this track to enter combat fresh.
Track 2 Lead-Ins
The following section provides ideas that the gamemaster can flesh out into full-fledged BattleTech scenarios or MW3 encounters.
Reconnaissance. The fugitives are bottled up in the wilderness and the nationalists have enough forces to surround them. By pushing on select fronts and giving ground on others, the nationalists have begun to gradually herd the fugitives closer and closer to the open plains of Ravenshire. This effort has already forced the Hasseldorfs out of the Smaragdgrun Forest and into the somewhat less densely-wooded Wellsburg Wood, but the cover of these lush woodlands is growing thin.
Rather than lose the cover of the woods and be caught in the open by the nationalists' closing ring of forces, Baron Trent Hasseldorf will send parties out to see where the LeSat units are weakest. The few open areas in the Wellsburg Wood spring up suddenly, and encountering a hostile force far sooner than expected offers a chance that the recon units could be engaged by LeSat's picket units.
Players working with LeSat and his nationalists will likely be employed along a herding front, ordered to make strikes into the Hasseldorfs' suspected control zone so as to force the fugitives back along a route LeSat has laid out for them. Players working with the Hasseldorfs, on the other hand, will find their role more tuned toward limited probing attacks and scouting missions meant to locate a weak point in the ring of elements around the Hasseldorfs. Both possibilities open the door for spontaneous combat and set the stage for the next track.
Reinforcements. Not all of the arriving reinforcements managed to locate their patron sides right away. Some, scattered or delayed by other unforeseen circumstances, took advantage of the lull in the fighting to make a daring rendezvous with their allies. Unfortunately, both LeSat and Hasseldorf fielded enough scouts in the area to tip off their side to such activities, and harassment raids were launched to disrupt or at least damage these reinforcements.
Regardless of the players' side, they could find themselves arriving at incorrect coordinates and be forced to run a gauntlet of harassment forces dispatched by their patron faction's opponent. These battles will likely be far from decisive, but should provide a glimpse of what kind of battlefield Kaumberg has become.
Scenario 1: Breakthrough
Situation. Wellsburg Wood, Kaumberg, 3 June 3063. (Situation fiction omitted.)
Game Set-Up. The terrain of this battle is up to the attacker, as it is the fugitive force that has chosen a point where the enemy is weakest. For each lance fielded by the attacker, one map must be rolled on the following table, representing Kaumberg's heavy woodlands. The attacker nominates one edge of the map board as his home edge before gameplay begins (the opposite edge becomes the defender's home edge). The maps should be placed side by side, long edges together.
Random Heavy Woodlands Table
| 2D6 | Mapsheet |
|---|---|
| 2 | Lake Area (MS2) |
| 3 | River Delta/Drainage Basin #1 (MS4) |
| 4 | Rolling Hills #1 (MS3) |
| 5 | Woodland (BP) |
| 6 | Heavy Forest #1 (MS4) |
| 7 | Scattered Woods (MS2) |
| 8 | Heavy Forest #2 (MS4) |
| 9 | River Valley (MS2) |
| 10 | Rolling Hills #2 (MS3) |
| 11 | River Delta/Drainage Basin #2 (MS4) |
| 12 | Open Terrain #2 (MS5) |
Abbreviations: MS = Map Set, BP = BattlePack: Fourth Succession War.
Forces
Attacker. The attacker is a large breakthrough force of fugitive elements up to two companies in size. This force may consist of the player unit or a mix of player and Hasseldorf elements if the player group is working with the fugitive faction. If the players are working with the nationalists, the attacker will remain as described above, and will possess an experience level one step above the player group.
These forces set up anywhere within three hexes of the attacker's designated home edge after the defender has set up.
Defender. The defender is a picket force of nationalist elements which may number no more than one-quarter of the attacking force and are one level of experience lower than the attack force. If the player group is working on the nationalist side of the Kaumberg conflict, these elements will come from the player group, as will the reinforcements described in this scenario's Special Rules. If the player group does not possess enough strength to match the suggested strength of the reinforcements described, the discrepancy may be compensated for with LeSat troops.
These elements set up before the attacker, within two hexes of their own designated "home edge." As this picket force is mainly placed to keep an eye on the encapsulated fugitives, these elements must be placed three or more hexes away from any other defender element.
Victory Conditions
The scenario ends when the attacker or defender is destroyed or has withdrawn.
The attacker wins by destroying all defending elements, clearing a path for the rest of the fugitive forces to break through, and doing so in a short time.
The defender wins if the attacker can be destroyed, crippled or forced back before Turn 24.
Consult the Victory Table to determine the extent of each side's victory after the scenario is completed. Use the resulting victory level when calculating the faction's PO Score for this scenario. A defeated element is any element destroyed, crippled or forced to withdraw at the end of the scenario.
Victory Table
Victory Table (Track 2, Scenario 1). Points are listed Attacker / Defender.
| Condition | Points (Attacker/Defender) |
|---|---|
| Each 25% of Fugitives Defeated | -10/+15 |
| Each 25% of Nationalists Defeated | +15/-10 |
| Each Turn of Battle Over 6 | -2/+5 |
| All Nationalists Defeated Before Turn 6 | +10/-15 |
| Final Score | Victory Level |
|---|---|
| 60 or better | Complete Victory |
| 30 to 59 | Partial Victory |
| 20 to 29 | Pyrrhic Victory |
| 0 to 19 | Marginal Defeat |
| -29 to -1 | Partial Defeat |
| -30 or less | Utter Defeat |
Special Rules
Withdrawal. The Forced Withdrawal rule (see p. 24) is in effect for the attacker and defender. The attacker must withdraw from its home edge of the map board. The defender must withdraw from its home edge of the map board.
Reinforcements. The attacker must carry out this strike quickly, as the enemy will call in reinforcements the moment the strike begins. From the start of the scenario, the attacker has a limited time to destroy, cripple or drive off all opposition. If this goal is not met in the allotted time, reinforcements from the nationalist side begin to gather nearby and move to intercept the fugitives.
During the Movement Phases of turn 8 and turn 16, the defender may move onto the map board from its home edge a number of elements equal to one-quarter of that fielded by the attacker (round down).
The defender is not the only player who can call upon reserve forces, however. During the Movement Phase of turn 16, the attacker may move onto the map board from its home edge a number of elements equal to one-third of its original force (round down).
Public Opinion. Though this battle occurs in an isolated area, far from the prying eyes of the general populace, word of the fight will leak eventually. Thus, the standard Public Opinion rules are in effect for this scenario.
Aftermath (Scenario 1)
The narrative and Additional Hooks are omitted; the campaign rule is transcribed.
The narrow margin by which the fugitives break out of the nationalists' ring means that surviving nationalist elements may rally to the escape route and track them back into the deep Wellsburg Wood. Trailing elements of the fugitive forces, positioned to guard the otherwise defenseless support elements and cargo trucks, will have to deal with sporadic attacks by these pursuit forces (assuming the nationalist elements are all of sufficient MP to overtake the slowest fugitive elements).
If such a chase is played out, the attacker in the preceding scenario becomes the defender of the convoy and must roll randomly for each map the chase runs through, using the Random Heavy Woodlands Table (above). In this event, the nationalist forces may include any or all of the elements that did not arrive before the end of the scenario.
Scenario 2: Hit or Run?
Situation. North Ravenshire, Kaumberg, 15 June 3063. (Situation fiction omitted.)
Game Set-Up. The map set-up for this scenario depends largely on which target the attacker chooses first. Chronologically, both objectives are struck at nearly the same time, meaning a strike force employed against one cannot be employed against another. The same goes for the defending forces.
Map: Supply Depot. Lay out the BattleTech map as shown. The supply depot map is the City Ruins mapsheet from BattleTech Map Set 2. If an additional map is required, the defender selects a second map from the Wooded or Flatlands Tables (p. 101, BMR) to place on the City Ruins mapsheet's east edge. The defender then sets up five to ten medium buildings and twice as many light buildings on the paved hexes, representing the depot warehouses.
Map: Airfield. Lay out the BattleTech map as shown. The airfield is represented by the City Street Grid/Park #1 mapsheet from BattleTech Map Set 4. The roads running along hexrows 02XX and 09XX represent the airfield's main runways. An additional map may be placed by the defender selected from the Wooded or Flatlands Tables (p. 101, BMR) on the City Street Grid/Park #1 mapsheet's east edge. The defender should set up five light, Level 1 buildings in any clear hex along hexrow 10XX on the City Street Grid/Park #1 mapsheet to represent the hangars, and a single, Level 2 medium building in hex 0505, representing the control tower. Four more medium buildings and five more light buildings may be placed in any other clear hexes on the same mapsheet, representing other airport structures and warehouses.
Forces
Attacker. The fugitives are once more the attacker in this scenario, and may employ a force up to one company in size for each battle. Because the battles take place at almost the same time, the forces used for each strike cannot be the same, so if player elements are employed and both battles are to be played, the player unit should be divided between the two maps.
In the Supply Depot battle, the attacker enters via the east map board edge during the Movement Phase of turn 1. In the Airfield battle, the attacker enters via the east map board edge during the Movement Phase of turn 1.
Defender. The nationalists are defending both objectives with a defense force no greater than one company in size each. Additional "reaction" forces (up to one-third in strength of the assigned defender, rounded down) should be designated as well, which may be called for support (see Special Rules, below).
Defender forces in both the Supply Depot and Airfield battles may set up anywhere on the map board (but cannot be inside a building) before play begins.
Victory Conditions
Both scenarios end when either the attacker or the defender has been destroyed or has withdrawn.
The attacker's objective varies. In the Supply Depot battle, the attacker wins by destroying all defending elements and securing the objective, which will ensure that his trucks can enter the depot and gather supplies. In the Airfield battle, the attacker wins by smashing all aerospace fighters and leveling the airfield, which will force any surviving aerospace forces to use another field for refueling and resupply.
The defender wins if the attacker can be destroyed, crippled or routed without achieving his goals.
Consult the Victory Table to determine the extent of each side's victory after the scenario is completed. Use the resulting victory level when calculating the faction's PO Score for this scenario. A defeated element is any element destroyed, crippled or forced to withdraw at the end of the scenario.
Victory Table
Victory Table (Track 2, Scenario 2). Points are listed Attacker / Defender. Rows marked as battle-specific apply only to that battle.
| Condition | Points (Attacker/Defender) |
|---|---|
| Each 25% of Attacker Defeated | -10/+15 |
| Each 25% of Starting Defender Defeated | +15/-10 |
| All Defenders Defeated Before Turn 6 | +5/-5 |
| Airfield Battle Only: Each 25% of Fighters Destroyed | +10/-5 |
| Airfield Battle Only: Each 25% of Airfield Structures Destroyed | +5/-2 |
| Airfield Battle Only: Each 25% of Fighters Launched | -10/+10 |
| Depot Battle Only: Each 25% of Depot Buildings Destroyed | -10/-5 |
| Final Score | Victory Level |
|---|---|
| 60 or better | Complete Victory |
| 30 to 59 | Partial Victory |
| 20 to 29 | Pyrrhic Victory |
| 0 to 19 | Marginal Defeat |
| -29 to -1 | Partial Defeat |
| -30 or less | Utter Defeat |
Special Rules
Night Combat. The attacker strikes at night (see p. 81, BMR). Players should determine which elements in their unit have searchlights before beginning play.
Withdrawal. The Forced Withdrawal rule (see p. 24) is in effect for the attacker and defender in both the Airfield and the Supply Depot battles. The attacker must withdraw from the west map board edge in both battles. The defender may withdraw from any map board edge except the east edge.
Defender "Reaction Forces" (Both Battles). The defender has the advantage in this battle of nearby picket forces who are on patrol in anticipation of a fugitive strike here. When the fugitives move, some of these forces are able to respond to a distress call, and may tip the odds in the defender's favor if the on-site forces can hold the attacker at bay long enough.
Prior to gameplay, the defender must nominate a force one-third the size of the On-Site Defenders for each battle. Each battle is assigned one of these reaction forces.
At the end of turn 6 in either battle, the defender should roll 1D6, adding 2 to the result, to determine the number of turns required for the reaction force to arrive. The force will enter via the east map board edge during the Movement Phase of the turn in which they arrive. Two turns before the reinforcements arrive, the defender must notify the attacker of his approach.
If all defending forces are destroyed before turn 6, the reaction force will not arrive on the field in time to prevent the attacker from solidifying his victory. In this case, the scenario ends before they arrive.
Aerospace Fighters (Airfield Battle Only). Because this attack occurs at night, when any aerial recon would be ineffective, the nationalists' air power is grounded. However, at the first sign of the attack force closing in, the pilots are roused and dispatched to their planes. By the time the battle begins, these pilots have reached their craft and may attempt to get their valuable machines out of the hangars and into the skies.
A total of four medium aerospace fighters are currently at the airfield. The defender can simply choose these fighters or use the Lyran Alliance row of the Random Assignment Tables 6-Aerospace Fighters & Military DropShips (p. 63, AT2).
At the beginning of the scenario, the defender may decide to begin launching the fighters, but doing so means the craft must first taxi to the nearest runway before launching. When using the fighters to taxi, treat them as wheeled vehicles with MP rating equal to one-half (round down) their Safe Thrust. Once positioned on the end of either runway, the fighter may launch during the Movement Phase of the following turn. If a fighter wishes to attack any targets while on the ground, the attack suffers a +2 to-hit modifier.
Public Opinion. These battles occur in military bases set up near the city of Ravenshire, and so do not count as battles in a civilian population center. Though isolated from the cities, witnesses will be present and word will spread of the events of these battles. Thus, the standard Public Opinion rules are in effect for this scenario.
Aftermath (Scenario 2)
The narrative and Additional Hooks are omitted; the campaign rules are transcribed.
Depending on the attack or attacks launched, the effects of this action will be far reaching. A successful strike against the depot will add badly needed consumables to the fugitive forces. If the players are still employing the Living on the Run special rule from Track 1 (p. 40), then the fugitives gain ten tons of supplies for each building standing. These supplies are distributed among the fugitives' supply pools as the attacker sees fit.
The attack on the airfield will leave the nationalists deprived of any effective aerial reconnaissance for some time. This fact will allow the fugitives greater freedom of movement in the region, possibly even to the point of escaping the nationalist pursuit forces altogether.
Alternatively, a failed strike on either target will leave the fugitives weaker than ever, as their supplies continue to run low or the nationalist air power remains active in the area. In such an event, it is also likely that fugitive warriors will have been captured as well. Under interrogation, these warriors may reveal the current location and strength of their comrades' force, a situation that will bring the nationalists much closer to defeating the fugitives.
Scenario 3: Desperate Call, Revisited
Situation. North Ravenshire, Kaumberg, 27 June 3063. (Situation fiction omitted.)
Game Set-Up. Lay out the BattleTech map as shown. Use the City (Hills/Residential) #2 mapsheet from BattleTech Map Set 3. The North Ravenshire satellite comm center is a medium, Level 2 building located in hex 0605. In addition to the comm center, the defender should place ten light, seven medium and three heavy building counters on any clear hex on the mapsheet.
Forces
Attacker. The attacking force consists of a small portion of the fugitive elements (no more than two lances are recommended) sent to secure the comm center. The attacker must designate one of these elements as a carrier for a specialized comm technician. If the players' unit is currently sided with the Hasseldorfs, this will be their unit. If not, the attacking force is equal in experience to the defender.
The attacker enters via the south map board edge during the Movement Phase of turn 1.
Defender. The defender is a nationalist unit equal in size to the attacking force.
In addition, the defender can call on reinforcements in the form of a rifle infantry platoon of green experience level for every lance fielded by the attacker. These infantry platoons may be broken down into seven-man squads (see Squad Deployment, p. 36, Maximum Tech) or kept whole, and begin the game as hidden units (see Hidden Units, p. 77, BMR). (See Defender Reinforcements, below, for more rules on these troopers.) If the players are on the side of the nationalists, they are part of the defender. If not, the defending force's experience level is equal to the attacker.
The defender sets up his elements on any paved hex within three hexes of the comm center before the beginning of the scenario.
Victory Conditions
The scenario ends when the attacker or defender has been destroyed or has withdrawn, or six turns after the comm-tech "gets the word out" (see Using the Comm Center, below).
The attacker's primary objective is to secure the North Ravenshire comm center and get the comm-tech inside to "get the word out."
The defender's objective is to destroy or cripple all attacking elements and prevent the delivery of the comm-tech.
Consult the Victory Table to determine the extent of each side's victory after the scenario is completed. Use the resulting victory level when calculating the faction's PO Score for this scenario.
Victory Table
Victory Table (Track 2, Scenario 3). Points are listed Attacker / Defender.
| Condition | Points (Attacker/Defender) |
|---|---|
| Each 25% of Attacker Destroyed/Crippled | -5/+10 |
| Each 25% of Defender Destroyed/Crippled | +5/-5 |
| Each 50% of Civilian Reinforcements Defeated | +1/-1 |
| Comm-Tech Killed Before Finding "Sympathetic Ear" | -20/+15 |
| Comm-Tech "Gets the Word Out" (Per Turn) | +10/-5 |
| Comm-Tech Finds "Sympathetic Ear" | +15/-10 |
| Destroying the Comm Center | -25/-30 |
| Final Score | Victory Level |
|---|---|
| 40 or better | Complete Victory |
| 20 to 39 | Partial Victory |
| 10 to 19 | Pyrrhic Victory |
| 0 to 9 | Marginal Defeat |
| -25 to -1 | Partial Defeat |
| -26 or less | Utter Defeat |
Special Rules
Withdrawal. The Forced Withdrawal rule (see p. 24) is in effect for the attacker. The attacker must withdraw from the south map board edge.
Using the Comm Center. The attacker has brought along a specialized communication technician who will be able to expedite sending the fugitives' transmission for aid. At the beginning of the scenario, the attacker must secretly nominate one element to carry this technician as a passenger. The comm-tech can be dropped off and picked up as per the standard BattleTech rules for Mounting and Dismounting infantry (p. 59, BMR). If carried by a BattleMech element, the tech rides in the cockpit with the MechWarrior and must make appropriate consciousness rolls if the pilot sustains damage.
The comm-tech must be delivered to the relay conscious, where he will then enter the facility and place the vital call. However, the comm relay in this scenario is staffed by hostile forces, not neutral ComStar technicians, requiring the facility to be captured first. If the attacker brought with them any infantry elements, these troops may be employed to secure the facility first. Otherwise, the station's defending units must all be defeated before the facility can be considered "captured."
At the beginning of each turn the comm-tech works at the center, the attacker must make a 2D6 roll against a target number of 8. Each successful roll represents a successful breakthrough of normal transmissions, during which time the fugitives can send a message via the tech, giving the common folk a chance to hear their side of the conflict, and possibly locating sympathizers. For every turn after the first successful breakthrough that the comm-tech makes an additional successful breakthrough, the fugitives will earn an additional +1 PO modifier to a maximum PO modifier of +5.
Additionally, the comm-tech should make a second roll for every successful breakthrough to see if anyone responds to the fugitives' appeal for aid. If this 2D6 roll result is 10 or higher, then the comm-tech has successfully established contact with a sympathetic ear.
Timing is critical in this mission, and the comm-tech will have only six turns inside the facility once it has been captured. Any longer, and the possibility of reinforcements becomes too great a risk. Even if all defending forces have been defeated before capturing the comm center, these turns should be played out, allowing the comm-tech to do his job.
Defender Reinforcements. The town of North Ravenshire is behind the nationalist cause in this scenario, and so many—including the local police force—will take up arms to defend their side's interests. However, being inexperienced as combat troops, these locals will be slow to react to the attack.
At the beginning of any turn in which the defender has had more than half of his original force—not counting the infantry reinforcements—(rounded down) destroyed, all of the infantry reinforcement elements will become active. If any of these elements enters the comm center while the attacker's comm-tech is inside, they will kill the comm-tech on a successful 2D6 roll of 8 or better.
Public Opinion. The standard public opinion rules are in effect for this session with the following added definitions.
Any force that attacks the communications center will be committing an act of scorched earth tactics.
Leaving the comm-tech behind will earn the attacking force a penalty for abandoning its post.
Attacking the defender's civilian reinforcements—regardless of the fact that they may raise arms against the attackers first—will earn the attacker a -2 PO modifier for cowardly tactics.
Finally, at the end of this scenario, whichever player has earned more victory points gains the benefits of controlling the media for this scenario. The multiplier may be used to increase the controlling player's PO modifier or may be used as a negative PO modifier against the opposing player in this or any following scenario in this campaign.
Aftermath (Scenario 3)
The narrative and Additional Hooks are omitted; no campaign rule is printed beyond the rules above.
Scenario 4: Seize and Defend
Situation. Ruhe Valley, Kaumberg, 19 July 3063. (Situation fiction omitted.)
Game Set-Up. This scenario consists of two battles that happen in the vicinity of a pair of small towns divided by fifty kilometers of wilderness. In the first battle, the defending force will be whichever faction currently has the lower public opinion score, but in both cases the maps laid out will be similar, as each town is similar in size and is protected from attack along the northern flank by some kind of impassable terrain. (Ruhe Village is bordered on the north by a tremendous lake while Hautte rests along the southern edge of a steep mountain chain.)
The maps chosen for each battle are up to the defending player. They center on two maps selected from the Urban Terrain Table (p. 101, BMR). Additional maps may be placed along the east, west and south edges of the mapsheet from the Wooded, Wetlands, or Hill Terrain Tables (p. 101, BMR), at the defending player's discretion. On each of the city maps, the defending player should place at least fifteen building counters: three heavy, four medium and eight light.
Note: The set-up for the first battle is the same as that used for Scenario 1, Track 3 (Hold The Line, p. 72). If the scenarios from Operation: Flashpoint are to be played as a complete campaign, the exact set-up of the first battle should be noted, so that it can be duplicated for the later scenario.
Forces
Prior to playing either battle, both factions must select a portion of their forces which will be used for each objective. These two forces must be separate units, as the battles they will enter will occur simultaneously (or nearly so). The suggested force strength for each battle is no greater than one company each, with any leftover elements from either faction acting as a reserve force in case one front or the other requires back-up, or some other crisis requires the faction's attention elsewhere.
Any or all of the player unit can be employed in both battles, or players may choose to take part in just one of the two, leaving the other to be resolved however the gamemaster sees fit.
Attacker. In the first battle, the attacking force consists of a strike unit launched by the side that holds the higher PO Score. In the second battle, the attacker is the side with the lower PO Score.
In both battles, the attacker enters via the south map board edge during the Movement Phase of turn 1.
Defender. The defender for the first battle is whoever holds the lower PO Score of the two factions. The higher-scoring faction will defend in the second battle.
In both battles, the defender may set up his elements anywhere on the map board before the beginning of the scenario but elements cannot be within 16 hexes of any other element.
Victory Conditions
Both scenarios end when the attacker or the defender is destroyed or has withdrawn.
The attacker's primary objective in both battles will be to inflict maximum damage on the defender, which will force him to commit more forces to holding his objective.
The defender's objective is to destroy or cripple all attacking elements and secure his new base of operations with minimum collateral damage.
Consult the Victory Table to determine the extent of each side's victory after the scenario is completed. Use the resulting victory level when calculating the faction's PO Score for this scenario. A defeated element is any element destroyed, crippled or withdrawn by the end of the scenario.
Victory Table
Victory Table (Track 2, Scenario 4). Points are listed Attacker / Defender.
| Condition | Points (Attacker/Defender) |
|---|---|
| Each 25% of Attackers Defeated | -5/+10 |
| Each 25% of Defenders Defeated | +10/-5 |
| Each 50% of Sympathizers Defeated | +1/-1 |
| Final Score | Victory Level |
|---|---|
| 40 or better | Complete Victory |
| 20 to 39 | Partial Victory |
| 10 to 19 | Pyrrhic Victory |
| 0 to 9 | Marginal Defeat |
| -25 to -1 | Partial Defeat |
| -26 or less | Utter Defeat |
Special Rules
Withdrawal. The Forced Withdrawal rule (see p. 24) is in effect for the attacker and defender in both battles. The attacker must withdraw from the south map board edge in both battles. The defender must withdraw from the north map board edge in both battles.
Sympathizers. Regardless of PO Scores, both factions will benefit from sympathizers while acting as defender, because their chosen objective has welcomed their arrival. However, the amount of support that may be called upon is affected by the current PO Score the defender claims.
If the defender has a positive PO Score, they will receive a platoon of rifle infantry of green experience level for every 15 points (or fraction thereof) of positive PO Score. In addition to this, "passive" sympathizers will alert the defender to enemy movements, giving them a +1 Initiative bonus for every 20 points (or fraction thereof) of positive PO Score.
Public Opinion. The standard public opinion rules are in effect for this session, with the following added definitions.
Any force that deliberately attacks a building will be committing an act of scorched earth tactics.
Withdrawing from the battlefield will earn the defending force a penalty for abandoning its post.
Attacking the defender's sympathizers—regardless of the fact that they may raise arms against the attacker first—will earn the attacker a -2 PO modifier for cowardly tactics.
If both battles are played, the PO Scores for each battle are not applied until the end of the scenario.
Aftermath (Scenario 4)
The narrative of the Ruhe Valley aftermath is omitted; this scenario's aftermath carries no separate rule.
Track 2 Wrap-Up
The Wrap-Up narrative and most Additional Hooks are omitted; the Troubleshooting guidance and the rule on switching sides are transcribed.
Troubleshooting
Any serious damage caused to the player unit may leave it sidelined until its losses can be recouped either through salvage or defections from the other side. The stalemate in Ruhe Valley will create a lull that may be briefer than last time, but will allow a resourceful gamemaster some time to assess the damage to both sides and decide if the players can face another wave of combat. If this is not the case, either due to significant losses by the player unit or an unprecedented run of luck that leaves one side weaker than the other, then the gamemaster may choose this time to introduce more reinforcements to establish some balance before the players enter the next track, Down to the Wire, if they are to do so.
Combatants captured anywhere in the course of this track will remain in the custody of their captors by the track's end, requiring a rescue operation if they are to take part in any future actions. Note that the nationalists under LeSat's command will likely treat such prisoners much more callously than before, as the need to break the fugitives becomes more pressing. Prisoners may be kept in a hardened, well-protected base under more formidable guard than the South Stuttgart Penitentiary proved to be, where a rescue operation could involve an all-out assault or a more risky infiltration job. Alternatively, the fugitive forces could have any prisoners they capture taken to the local jail, forcing the nationalists to break through the defender's front line and penetrate the very heart of the fugitive enclave to accomplish any rescue.
Any player unit so badly damaged that the players no longer consider it combat-worthy may find getting out of the conflict difficult, and will instead be relegated to rearward defensive duty for either side, or broken down to fill in gaps for its patrons. By this point, both factions can ill-afford to sideline any combat-worthy elements, however, so unit integrity may be lost to keep enough warm bodies on the line.
Switching Sides
Any units that decide to switch sides at this stage will change their base PO Score to half that of the side they switch to, then suffer an added -15 PO points for the stigma of betrayal. (From the Additional Hooks: by this point, any attempt to change allegiances will more than likely face weapons fire from both sides.)
Track 3: Down to the Wire
Track 3 Special Rules
The following special rules may apply during the following scenarios, at the gamemaster's discretion.
Force Compositions
The events in this track rely heavily on a consistent makeup and deployment of the opposing forces. If played as part of the greater campaign, these forces should already be accounted for, but if joining the campaign at this stage, the number of elements assigned to each faction may be determined by using the rules in the Generating Opposing Forces section (p. 30). These base forces should be equal (or nearly so) in either event, but their deployment will make for a key strategic factor in the outcome of the scenarios played in this track.
Starting with the first scenario of this track, all fugitive forces are together in Ruhe Village, where the bolder (and until now, better supplied) nationalists have kept them bottled up with aggressive forays aimed at blockading the small tourist town. At the fugitive players' discretion, these elements may be divided among offensive and defensive roles in any way desired from scenario to scenario.
The nationalists, on the other hand, are not as concentrated. LeSat's paranoia and need to maintain control in Stuttgart has led him to keep a small but potent force to protect the capital city. In addition to this, the forces the nationalists have fielded are also further divided between attack forces used against the fugitives and elements dispersed to cover another nearby town, from which the nationalists have been broadcasting regular reports and propaganda to the masses. Beginning with the first scenario in this track, the nationalist player should designate at least one-sixth of the total number of nationalist elements to the home guard in defense of Stuttgart. The remaining field forces may then be divided among the defense of Hautte, nearby Kalensberg (where there is a holovid comm station capable of linking into Kaumberg's satellite system), and any attack forces used against the fugitives at Ruhe Village.
Careful monitoring of the location and disposition of all these elements is important throughout these scenarios, regardless of faction. Within the bounds described above, however, the players of each side in this track should feel free to shift the available forces as needed.
The Wet Season
The events in this track take place as Kaumberg's primary continent, Regenwald, enters into a five-month span of severe weather commonly called its wet season. The weather patterns grow more erratic starting around mid-June, and range from steady, days-long rainstorms or sudden downpours to the occasional village-leveling twister. The skies over Regenwald grow decidedly overcast most of the time, with light fog greeting most Kaumberg citizens in the mornings, but the sun does peek out occasionally.
The unpredictable nature of this season means that scenarios played in this period may be fought under less than ideal weather conditions. To reflect this, at the beginning of each scenario in this track, the player who sets up the map should roll 2D6 and consult the Weather Conditions Table (below) for the effects.
Weather Conditions Table
| 2D6 Roll | Weather Conditions | To-Hit Modifier | Piloting Modifier | Heat Modifier |
|---|---|---|---|---|
| 2-3 | Clear | +0 | +0 | -0/turn |
| 4-6 | Overcast | +0 | +0 | -0/turn |
| 7-8 | Light Rain | +1 | +0 | -1/turn |
| 9-10 | Heavy Rain | +1 | +1 | -2/turn |
| 11 | Severe Storm | +2* | +1 | -2/turn |
Note: Aerospace, conventional fighters and VTOLs may not fly in heavy rain; severe storm or mini-hurricane.
* To-Hit penalty applies to missile, ballistic and artillery weapons only. Energy weapons suffer only a +1 penalty.
** Due to intense winds and heavy rains, the to-hit and piloting modifiers vary for each turn. The indicated modifier should be rolled by the defending player at the beginning of each turn, rounding results up.
Track 3 Variations
Alternate Timeline or Setting. The events depicted in this track are hardly time or faction specific and can easily work into any time period or venue the gamemaster is running. Wars for planetary control in both the Inner Sphere and Clan space have traditionally been fought the way these scenarios depict, with each side striking out from its enclave or base to overwhelm the enemy at a key city or facility. Although this track is set during the FedCom Civil War, with once-allied forces now firing on one another, there is no reason the events in this track could not take place during the recent Capellan-St. Ives War, the always fractious Free Worlds League or between more traditionally-opposed factions like those of Houses Kurita and Davion.
Clan Campaigns. The events in this track describe the final, direct assaults which settle the Hasseldorf-LeSat conflict once and for all. No longer fighting a running war and scrounging for supplies, each faction is now poised for a final, brutal slugfest in which everything is decided. This kind of warfare is exactly what the Clans have been trained to wage, making the scenarios presented in this track perfect for Clan-based campaigns. The Absorption War fought between Clans Blood Spirit, Star Adder and Burrock in 3059 is a good example of the savagery of this type of Clan conflict.
Skipping Tracks. If the players took part in the first track but skipped over the second, their allegiance will influence how the last three months passed for them.
A nationalist-aligned player unit will have spent the last few months as LeSat's home guard, a force assigned to secure Stuttgart and LeSat's landhold of Gipfelsburg against possible raids from the Hasseldorf fugitives. As the battle for Kaumberg drifted steadily away from the region and into Ruhe Valley, the potential of such strikes shrank as well, but still LeSat did not redeploy his guard units, instead preferring the insurance they gave him at home. When the Council ordered his stand-down after the first battles for Ruhe Valley, LeSat used some of these units to stage his coup, surrounding the House of Lords and arresting the provisional government. If the players are with LeSat, they may have been ordered to this task.
At the end of Track One, however, the planetary council withdrew the support of most of the other nobles' conventional support units from LeSat's coalition. If the players were ultimately aligned with the council, they, too, would have been pulled, and perhaps will have been in Stuttgart for garrison purposes when LeSat launched his coup with the other home guard units at his disposal. Forced to flee by overwhelming odds or treachery from LeSat's supporters—including the use of the remaining members of the provisional government as hostages—these units would have to find new allies or be hounded more fiercely than the Hasseldorfs. If this is the case and the Public Opinion rules are in use, the players will suffer a loss of 30 PO points for the defection. They will not base their new PO Score on the Hasseldorf faction, however, as Kaumberg's population, now robbed of the planet's normally-free press, will be somewhat confused about the players' affiliation.
A fugitive-aligned force may have spent the previous three months as a diversionary force, sent on a wayward course—by accident or design—to lure extra LeSat units away. Having dealt with little more than harassment strikes, they might only now be arriving to aid their beleaguered comrades at Ruhe Village. Alternatively, the fugitive players could have been assigned the role of supply defense; while Hasseldorf house troops engaged the LeSat forces directly during the flight.
Track 3 Lead-Ins
The following section provides ideas that the gamemaster can flesh out into full-fledged BattleTech or MW3 encounters.
Coup d'Etat. LeSat's hand was forced by the planetary council's order to stand down. Convinced in his increasing paranoia that some of the House of Lords suspected his involvement in the Stuttgart Massacre, he had elements of his home guard secure Stuttgart and arrest the surviving council members. As suggested in the Skipping Tracks section, the players could be part of this coup, either as attackers working for LeSat or defenders working for the planetary council. The battle will be lost even before it begins, however, as LeSat will have already infiltrated the capitol building with his own infantry troops, who take the astonished leaders of Kaumberg into custody even before any real combat begins. With the government leaders held hostage, the defenders will have no choice but to surrender or risk the deaths of the people they are defending. As the only hope of defeating LeSat will then lie in aiding the Hasseldorfs, the time will come to switch sides for the nationalist-aligned players group.
Fugitive-loyal player groups may take part in this lead-in by having to link up with these new allies, or even determine if this whole matter is really what it appears to be and not just a staged scheme of LeSat's designed to plant a unit of moles in the players' faction.
Latecomers. The players could be reinforcements only now answering a previous call for aid for either side of this conflict. Like the proverbial cavalry coming over the hill, they reach Kaumberg just as the final assaults by both sides are ready to be launched, and their arrival could herald a final victory that places Kaumberg securely in the grip of their parent faction (the faction they have arrived to aid).
Such an arrival may likely face a contested landing, a strike to prevent an effective link-up, or perhaps even an effort by the opposing side to preemptively obliterate the faction the players have come to aid. In an extreme case, where the opposing force finds itself hideously outclassed by the arriving latecomers, the enemy could opt to flee the scene and regroup with any friendly units still on-planet, forcing the players and their allies to begin another running campaign to track and kill the enemy force.
If the Public Opinion rules are in place at this point, the players will assume the base PO Score of their parent faction, modified normally if the unit is mercenary. If no PO Scores have been established for the opposing sides, assume that the Hasseldorf family has a PO Score of -35 and LeSat has a PO Score of 20. The Kaumberg planetary government, though presently imprisoned, also possesses a PO Score of 20, as the people oblivious to that fact still see them as Baron LeSat's allies.
Scenario 1: Hold the Line
Situation. Ruhe Valley, Kaumberg, 25 July 3063. (Situation fiction omitted.)
Game Set-Up. This scenario consists of two battles that happen in the vicinity of a pair of small towns divided by fifty kilometers of wilderness. In the first battle, the defending force will be whichever faction currently has the lower public opinion score, but in both cases the maps laid out will be similar, as each town is similar in size and is protected from attack along the northern flank by some kind of impassable terrain. (Ruhe Village is bordered on the north by a tremendous lake while Hautte rests along the southern edge of a steep mountain chain.)
The maps for each battle are chosen by the defending player and focus on two maps selected from the Urban Terrain Table (p. 101, BMR). Additional maps may be placed along the east, west, and south edges of the mapsheet from the Wooded, Wetlands, or Hill Terrain Tables (p. 101, BMR), at the defending player's discretion. On each of the city maps, the defending player should place at least fifteen building counters: three heavy, four medium and eight light.
Note: This set-up is the same as the first battle's set-up in Scenario 4, Track 2 (Seize and Defend, p. 66). If the scenarios from Operation: Flashpoint are to be played as a complete campaign, the set-up from that scenario should be duplicated. Additionally, there is a possibility that this set-up will be the same as that used for Scenario 2, Track 3 (Final Stand, p. 74). If the scenarios from Operation: Flashpoint are to be played as a complete campaign, the exact set-up should be noted so it can be duplicated for the later scenario if necessary.
Forces
Attacker. If played as part of the larger campaign and Public Opinion rules are in effect, the player with the higher PO Score will be the attacker. This force should consist of the least damaged elements of the attacking force (again, if this scenario is used as part of a larger campaign) and should be no larger than a company in size.
The attacker enters via the south map board edge during the Movement Phase of turn 1.
Defender. The defender is the faction with the lower PO Score and may field up to 200 percent of the attacking player's numbers. Some or all of these elements may be deployed hidden at the defender's discretion (see Hidden Units, p. 77, BMR). Any nonhidden units are placed anywhere on the map board before the scenario begins.
Victory Conditions
The scenario ends when the attacker or defender is destroyed or the attacker has withdrawn.
The attacker's primary objective will be to inflict maximum damage on the defender while keeping his own damage to a minimum.
The defender's objective is to destroy, cripple or drive off all attacking elements and to protect his base of operations with minimum collateral damage and civilian casualties.
Consult the Victory Table to determine the extent of each side's victory after the scenario is completed. Use the resulting victory level when calculating the faction's PO Score for this scenario. A defeated element is any element destroyed, crippled or withdrawn by the end of the scenario.
Victory Table
Victory Table (Track 3, Scenario 1). Points are listed Attacker / Defender.
| Condition | Points (Attacker/Defender) |
|---|---|
| Each 25% of Attackers Defeated | -5/+10 |
| Each 25% of Defenders Defeated | +10/-5 |
| Each 50% of Sympathizers Defeated | +1/-1 |
| Final Score | Victory Level |
|---|---|
| 40 or better | Complete Victory |
| 20 to 39 | Partial Victory |
| 10 to 19 | Pyrrhic Victory |
| 0 to 9 | Marginal Defeat |
| -25 to -1 | Partial Defeat |
| -26 or less | Utter Defeat |
Special Rules
Preexisting Damage (Defender Only). The defender has secured his base only recently and has been suffering from a general lack of supplies that he has not yet found a way to replenish. As a result, several of the defending elements start this scenario with preexisting damage.
If this scenario is being played as a continuation from the previous track, all defending elements that suffered sufficient damage to require 270 minutes of repair time or more (consult p. 82-88 in BMR for repair rules) are still damaged as of the start of the scenario.
If this scenario is not being played as a continuation from the previous track, the defending player should roll 2D6 for each noninfantry element being fielded. A result of 9 or better indicates a damaged element, which suffers 2D6 10-point cluster hits, applied using the Front/Back column of the BattleMech or Vehicle Hit Location Table. Apply critical hits resulting from this damage normally, disregarding ammunition slot hits only. Any elements destroyed in this fashion may not be fielded in this scenario.
Note that even predamaged elements will have full ammunition reloads (assuming the faction has sufficient stores of the appropriate ammo).
Modified Forced Withdrawal (Attackers Only). The attackers in this scenario are mindful of the fact that they, too, have damaged elements at their own base to repair, and that severe damage to the few battle-worthy elements they are fielding now will leave them in poor shape for any follow-up strikes should any enemy units survive this fight. As a result, stricter-than-usual terms for Forced Withdrawal are in effect for the attacker in this scenario.
Any attacking element that depletes its ammunition supply or otherwise loses the use of its primary (most damaging) weapon, suffers an armor breach to any location, or takes a critical hit to the engine, gyro, or a cockpit system, must immediately begin to withdraw from the south map board edge.
Furthermore, if the attacker loses more than half his force in this fashion, the entire attack force will be ordered to make a fighting withdrawal.
Public Opinion. The standard public opinion rules are in effect for this scenario, with the following added definitions.
Any force that deliberately attacks a building will be committing an obvious act of scorched earth tactics.
Withdrawing from the battlefield will earn the defending player a penalty for abandoning his post.
Attacking the defender's sympathizers (if any are fielded)—regardless of the fact that they may raise arms against the attacker first—will earn the attacker a public opinion penalty of -2 for cowardly tactics.
Aftermath (Scenario 1)
The narrative and Additional Hooks are omitted; this aftermath carries no separate rule.
Scenario 2: The Final Appeal
Situation. Ruhe Village, Kaumberg, 12 August 3063. (Situation fiction omitted.)
Game Set-Up. Whichever side won the previous battle—regardless of which scenario it was—chooses whether to play the attacker or defender in this scenario. The maps chosen for each battle are selected by the defending player, and are based on two maps selected from the Urban Terrain Table (p. 101, BMR). Additional maps may be placed along the east, west and south edges of the mapsheet from the Wooded, Wetlands, or Hill Terrain Tables (p. 101, BMR), at the defending player's discretion. On each of the city maps, the defending player should place at least fifteen building counters: three heavy, four medium and eight light.
Note: This may very well be the largest battle of the campaign so far, as both the nationalists and the fugitives have called up virtually all the units in their employ. Forces might approach battalion size or more on both sides as a result. If so, it is recommended that this scenario be played using BF2.
Note: This map set-up should be a recreation of the same map set-up the current defending player defended in Scenario 1, Track 3 (Hold the Line). If the scenarios from Operation: Flashpoint are to be played as a complete campaign, the set-up from that scenario should be duplicated.
Forces
Attacker. The attacking force will consist of any to all combat-worthy elements at the attacking player's disposal. The attacker enters via the south map board edge during the Movement Phase of turn 1.
Defender. The defending player consists of all battle-worthy elements available to the defending player. In addition to these elements, the defending player will receive a rifle infantry platoon of green experience level for every company the defender fields.
The defender may place up to three-quarters (round down) of his elements using the hidden rules (p. 77, BMR). Elements that are not hidden are placed anywhere on the map board but at least 17 hexes from the south edge of the map board.
Victory Conditions
The scenario ends when the attacker or defender is either destroyed or withdrawn.
The attacker's primary objective is to wipe out or capture the entire defending force. This assault is a no-holds-barred fight for planetary control. Whoever wins here will likely win the fight for Kaumberg.
The defender's objective is to destroy, cripple or drive off all attacking elements and protect his base of operations with minimum collateral damage and civilian casualties.
Consult the Victory Table to determine the extent of each side's victory after the scenario is completed. Use the resulting victory level when calculating the faction's PO Score for this scenario. A defeated element is any element destroyed, crippled or withdrawn by the end of the scenario.
Victory Table
Victory Table (Track 3, Scenario 2). Points are listed Attacker / Defender.
| Condition | Points (Attacker/Defender) |
|---|---|
| Each 25% of Attacker Defeated | -10/+15 |
| All Attackers Defeated | -20/+10 |
| Each 25% of Defenders Defeated | +15/-10 |
| All Defenders Defeated | +10/-20 |
| Each 50% of Sympathizers Defeated | +1/-2 |
| Every Building Destroyed | +0/-1 |
| Final Score | Victory Level |
|---|---|
| 60 or better | Complete Victory |
| 30 to 59 | Partial Victory |
| 20 to 29 | Pyrrhic Victory |
| 0 to 19 | Marginal Defeat |
| -25 to -1 | Partial Defeat |
| -26 or less | Utter Defeat |
Special Rules
Fixed Defenses. The defender has been busy preparing for this attack and has set up fixed defenses to aid them. Ranging from simple minefields and shallow pit-traps to trenches and obstacles made from the debris of recent fighting, these static defenses are aimed at slowing an attacker's advance.
Three main types of fixed defenses may be employed by the defender: conventional minefields, pit traps and field works. Conventional minefields work exactly as described on p. 80 of BMR. Pit traps count as Depth 1 basements in accordance with the rules on p. 53 in BMR.
Field works are complex obstacle courses that restrict access to three hexsides (chosen by the defender) and have an effective construction factor of 25. Only 'Mechs, jump infantry, and vehicles capable of entering light woods may enter a field works hex, and they spend an extra 1 MP doing so if they enter from a restricted side. Infantry units may be employed in field works hexes using hidden unit rules, and outside elements attempting to target infantry within a field works hex will receive a +1 to-hit modifier in addition to the standard infantry modifiers. Until the field works hex sustains damage equal to its construction factor, these rules remain in effect. Field works have no effect on LOS for any other units.
At the beginning of the scenario, the defending player should roll 1D6 for each type of these fixed defenses to see how many of each may be employed. As minefields and pit traps are concealed, the defender should write down their locations on a piece of paper. Field works, however, must be placed on the map before gameplay begins.
Withdrawal. The Forced Withdrawal rule (see p. 24) is in effect for the attacker and defender with the following modifications.
The attacker need not automatically withdraw an element that has taken Crippling Damage. For every two elements that have taken Crippling Damage, the attacker must start to withdraw one element from the south map board edge.
The defender does not have to automatically withdraw an element that has taken Crippling Damage. For every three elements that have taken Crippling Damage, the defender must start to withdraw one element from the south map board edge.
Public Opinion. The standard public opinion rules are in effect for this scenario with the following added definitions.
Any force that deliberately attacks a building will be committing an act of scorched earth tactics.
Withdrawing from the battlefield will earn the defending force a penalty for abandoning its post.
Attacking the defender's sympathizers (if any are fielded) will earn the attacker a -1 PO modifier for cowardly tactics.
Aftermath (Scenario 2)
The narrative and Additional Hooks are omitted; this aftermath carries no separate rule.
Scenario 3: Breaking News
Situation. Kalensberg, Kaumberg, 22 August 3063. (Situation fiction omitted.)
Game Set-Up. Lay out the BattleTech map as shown. Use the City Hills/Residential Map #1 from BattleTech Map Set #3. Place a medium, Level 2 building in hex 1308 representing the Kalensburg network station. The defender may then place 15 or more building counters of light, medium, or heavy construction factors on any nonpaved hex.
Forces
Attacker. The attacker is a small force of fugitives, no greater than a company in size and with an experience level equal to the defender. If the players are aligned with the fugitives, then this force can consist of their elements, in whole or in part.
The attacker enters via the east map board edge during the Movement Phase of turn 1.
Defender. The defending force is a picket force aligned with the nationalists. This force may be no greater than two-thirds of the attacking force, and has an experience level equal to the attacker. In addition, the defender receives a rifle infantry platoon of green experience level for every lance the defender fields. If the player group is sided with the nationalists, this force will be the players' unit, composed of any elements that survived or did not take part in the previous scenario.
The defender sets up his elements within three hexes of the holovid station. Additionally, the infantry may be placed in hidden positions (see Hidden Units, p. 77, BMR).
Victory Conditions
The scenario ends when the attacker or defender has been destroyed or has withdrawn.
The attacker's primary objective is to defeat all of the defending forces and secure the comm center. Unlike previous scenarios, none of the attacking units is carrying a comm-tech. Instead, the attacker hoped to gain access to the network building simply by eliminating all resistance first. There will be no reinforcements to interrupt the comm-tech after the station is secured.
The defender's objective is to destroy or cripple all attacking elements or otherwise prevent the comm center from falling into enemy hands.
Consult the Victory Table to determine the extent of each side's victory after the scenario is completed. Use the resulting victory level when calculating the faction's PO Score for this scenario. A "defeated" element is any element destroyed, crippled or driven off at the end of the scenario.
Victory Table
Victory Table (Track 3, Scenario 3). Points are listed Attacker / Defender.
| Condition | Points (Attacker/Defender) |
|---|---|
| Each 25% of Attacker Destroyed/Crippled | -10/+15 |
| Each 25% of Defender Destroyed/Crippled | +15/-15 |
| Each 50% of Civilian Reinforcements Defeated | +1/-1 |
| Destroying the Comm Center | -30/-30 |
| Final Score | Victory Level |
|---|---|
| 40 or better | Complete Victory |
| 20 to 39 | Partial Victory |
| 10 to 19 | Pyrrhic Victory |
| 0 to 9 | Marginal Defeat |
| -25 to -1 | Partial Defeat |
| -26 or less | Utter Defeat |
Special Rules
Withdrawal. The Forced Withdrawal rule (see p. 24) is in effect for the attacker and defender. The attacker must withdraw from the east map board edge. The defender must withdraw from the west map board edge.
Public Opinion. The standard public opinion rules are in effect for this scenario. Any force that attacks the communications center will be committing an act of scorched earth tactics.
At the end of this scenario, and assuming the network station still stands, whichever player has earned more victory points gains the benefit of controlling the media. The multiplier may be used to either increase the controlling player's PO modifiers or reduce the PO modifiers of the opposing player in this scenario and all that follow until media control is lost again.
Aftermath (Scenario 3)
Securing the Kalensburg network station is a rule-bearing result. The narrative of the fugitives' broadcast is omitted.
A successful mission here at an intact holovid station will automatically net the fugitive player a +5 bonus in public opinion scores and a -5 penalty to the nationalists' score. The fugitives will also gain the benefit of controlling the media for this and all subsequent scenarios until such control is lost again later.
The narrative and Additional Hooks are omitted.
Scenario 4: One Last Duel ...
Situation. Stuttgart, Kaumberg, 29 August 3063. (Situation fiction omitted.)
Game Set-Up. Lay out the BattleTech maps as shown. Use both City Street Grid/Park maps from BattleTech Map Set 4. This area represents Stuttgart's inner city. The House of Lords, Kaumberg's planetary capitol building, is a heavy, Level 2 building that should be placed in hex 1009 on the City Street Grid/Park #1 map. After that, the defending player should place an additional four hardened, eight heavy, sixteen medium, and twenty light building counters on any clear hex of the City Street Grid/Park #2 map. Half as many building counters (of each type) should be placed in any nonpaved hex (excluding the city park—the large area across the street from the capitol building) on the City Street Grid/Park #1 map. Additional building counters can be placed at the gamemaster's discretion on any clear hex.
The scale of this battle could be quite large if the fugitive player has managed to maintain a force equal to a battalion or greater in size and chooses to field the entirety of that force in this scenario. Maps may be added if the total number of forces used exceeds three companies or Trinaries in size. Additional maps are selected by the defender from the Urban Terrain Table (p. 101, BMR). Twenty building counters (or more) should be placed on each added map by the defender.
As an alternative to cluttering the gaming table with so many mapsheets, players may wish to use BF2 instead.
Note: This set-up is the same as the setup in Scenario 1, Track 1 (Flashpoint, p. 41) and will also be used as the set-up in Scenario 4, Track 4 (For the Motherland!, p. 96). If the scenarios from Operation: Flashpoint are to be played as a complete campaign, the set-up from that scenario should be duplicated in the later scenario.
Forces
Attacker. The attacking force consists of as many of the remaining fugitive forces as the attacker wishes to commit. Players aligned with the fugitives will take part in this assault or perhaps even lead the charge, along with the surviving elements of the Hasseldorf family 'Mech units, including Baron Trent Hasseldorf himself in his ZEU-6S Zeus.
The attacker enters via any map edge during the Movement Phase of Turn 1.
Defender. The defender is the remaining forces of LeSat's nationalist forces kept out of all the recent fighting to serve as a home guard. This force may include all elements the nationalist player may have kept from the fighting since the first scenario of this track. Included in this force is Baron Franklin LeSat himself, piloting a CES-3R Caesar. In addition to these forces, the defender gains four rifle motorized infantry platoons of regular experience level, representing Stuttgart's police department. If the players are still aligned with LeSat at this point, they will be part of this force.
The defender may deploy up to half of its forces—and all the infantry forces—in hidden positions (see Hidden Units, p. 77, BMR), but they must be within 15 hexes of the House of Lords building. The rest of the defender elements may be placed anywhere on the map board before the scenario begins.
Victory Conditions
The scenario ends when all the attacking or defending elements are destroyed or have withdrawn.
The attacker's primary objective is to defeat all of the defending forces and capture Stuttgart.
The defender's objective is to destroy or cripple all attacking elements.
Consult the Victory Table to determine the extent of each side's victory after the scenario is completed. Use the resulting victory level when calculating the PO Score for this scenario. A defeated element is any element destroyed, crippled, or driven off at the end of the scenario.
Victory Table
Victory Table (Track 3, Scenario 4). Points are listed Attacker / Defender.
| Condition | Points (Attacker/Defender) |
|---|---|
| Each 25% of Attacker Destroyed/Crippled | -10/+15 |
| Each 25% of Defender Destroyed/Crippled | +15/-15 |
| Human Shields Employed | +0/-10 |
| Each Human Shield Killed | -5/-5 |
| Each 50% of Citizen Defenders Killed | +1/-1 |
| Baron LeSat Defeated | +10/-15 |
| Baron Hasseldorf Defeated | -10/+10 |
| Final Score | Victory Level |
|---|---|
| 40 or better | Complete Victory |
| 20 to 39 | Partial Victory |
| 10 to 19 | Pyrrhic Victory |
| 0 to 9 | Marginal Defeat |
| -25 to -1 | Partial Defeat |
| -26 or less | Utter Defeat |
Special Rules
Withdrawal. The Forced Withdrawal rule (see p. 24) is in effect for the defender. The defender may withdraw from any map board edge.
A Matter of Honor. The leaders of both factions have chosen to face off in this battle, as mentioned above in the respective force descriptions. As each has a personal stake (vengeance or justice) in the defeat of the other, these two warriors will single each other out for combat to the exclusion of all other targets once a line of sight (LOS) is established between them during battle. The players commanding either side should control their corresponding leader as well, but the two warriors have distinctive traits that will characterize their duel, as outlined below.
Baron Hasseldorf is a Clan War veteran and once even served as a mercenary. He has experienced heavy 'Mech-to-'Mech combat and so has elite-level combat skills. Once he finds LeSat in the city, he will order all Hasseldorf-loyal forces not to engage the enemy leader and ask any elements already engaged with LeSat to break off. He will then battle LeSat using Level 2 Clan Honor (p. 122, The Clans: Warriors of Kerensky).
LeSat is not as experienced as Trent, having been more of a "social general" than a true soldier of the line. He is no slouch, however, rating veteran-level experience due to a lot of time spent in simulations and battle exercises. He may at first accept Trent's challenge to single combat, only to lead the enemy leader into a position where he can maximize his less numerous forces' fire against him. At no point, however, will LeSat be above taking an opportunistic shot at an exposed fugitive unit if such a shot would yield a more effective result than continuing his duel with Trent. Such a shot will not invalidate their duel, but demonstrates LeSat's opportunism.
The two warriors will fight until one defeats the other.
Human Shields. The nationalists are outnumbered and desperate, willing to take extreme measures in order to win. With the planetary government under arrest and the fugitives presumably eager to demonstrate their heroism by rescuing them, LeSat may decide to capitalize on this by placing his prisoners in the line of fire. As employing such tactics constitutes an extreme example of cowardly tactics and indirect assassination, the defender may consider this an optional rule only and choose not to employ it for this scenario.
At the start of the scenario, the defending player should roll 1D6 to see how many human shields are drawn from the captured planetary leaders in LeSat's custody. (The rest of the surviving lords are stowed in various safe havens separate from each other just to keep the attackers guessing about their fate.) Each human shield should be placed on the rooftop of a building in which a hidden element is set up. The defender does not declare which buildings have human shields atop them until the element inside the building declares a Weapon Attack, at which point both the hidden element and the human shield are revealed to the attacking player.
If a human shield building's CF is reduced to zero in this fashion, the building collapses, taking with it the human shield on top.
If the fugitive player has infantry available, such elements may attempt to liberate a human shield by getting to a hostage's location (including the elevation of the building's roof) and getting back out again. Understandably, this is a very risky endeavor, as the element hiding inside the building may attempt to attack the infantry element attempting the rescue. If an infantry element does rescue the human shield, consider the person to be a 0-column trooper on the Infantry record sheet, so he will be the last to be marked off the sheet. Alternatively, a 'Mech element tall enough to reach the building's roof may try to pick up the hostage by hand using the standard rules for Mounting and Dismounting Infantry (p. 59, BMR).
Public Opinion. The standard public opinion rules are in effect for this scenario, with the following definitions.
Deliberately attacking any citizen element (police or sympathizers gained through public support) is regarded as a cowardly action with a -2 PO modifier (-3 if the target is not a police element) to the faction whose element makes such an attack.
The use of human shields by the nationalists will give the nationalist player -10 points to his PO Score. If, during the fighting, any of these hostages are killed by the attacker's efforts, the fugitives suffer -7 points to their PO Score.
The standard rules for fighting within a city apply, with the fugitives acting as the attacker.
Any leader who defeats the enemy leader without aid will gain a +5 PO modifier for heroic actions.
Note that whichever player controls the board at the end of this scenario gains the benefit of controlling the media. The multiplier may be used to increase the controlling player's PO modifiers from this battle or decrease the PO modifiers of the opposing faction.
Aftermath (Scenario 4)
The narrative of the end of the war is omitted; this aftermath carries no separate rule.
Track 3 Wrap-Up
The Wrap-Up narrative and Additional Hooks are omitted; the Troubleshooting guidance is transcribed.
Troubleshooting
In the wake of the final battle for Stuttgart, the most problematic issues facing the player unit will not stem so much from the damage inflicted upon the unit or the capture of warriors by hostile forces so much as what side they were on when the final conflict was won. If their faction stands victorious after the seven-month war for Kaumberg, then the players will see the return of all captured warriors not already rescued by their own efforts, and the salvage obtained after the final victory will be divided up to allow the player unit to restore itself to full (or nearly full) strength.
However, if the players were on the side that lost the Kaumberg civil war, they will face a harsh justice from the victors. The people of Kaumberg, appalled by the devastation brought to their world, will lay most of the blame on the shoulders of the defeated faction, regardless of politics. Public pressure will force the planetary council to bring the players to trial, even if they did nothing that would merit a court martial. A unit with offworld origins may be ordered to leave Kaumberg and never return, while a more locally-affiliated player group may face a similar fate in the form of exile. Alternatively, the player group from the defeated faction could plea bargain with the winners in an effort to restore its good name and possibly even begin to rebuild its ranks, in exchange for its aid in raising a new Kaumberg Planetary Guard.
Track 4: Brother Against Brother
The track opening narrative (the rebuilding of Kaumberg and the arrival of the Lyran and Davionist fleets) is omitted; the track rules, variations and lead-ins are transcribed.
Track 4 Special Rules
The following special rules may apply to all scenarios in this track, at the gamemaster's discretion.
Divided Loyalties
This track takes place nearly two months after the final battle between the Hasseldorfs and LeSats in Stuttgart. The people of Kaumberg have just begun to regain a semblance of order and stability in their lives. Many sided against the Hasseldorfs; many others are now looking beyond their tiny slice of the universe to realize that their empire is engulfed in the flames of civil war. The Great Houses themselves get involved in the beginning of this track, and so the people of Kaumberg will find their loyalties called into question once more. In this track, Kaumberg natives newly inducted into the rebuilt Kaumberg Planetary Guard (KPG) find themselves caught up in the larger issues of the FedCom Civil War, and some feel caught on the wrong side of the conflict. In some scenarios, this sense of divided loyalties will prevent Kaumberg natives from firing on the faction with which they most sympathize.
If the Public Opinion rules are in effect (p. 19), the player controlling any forces that include Kaumberg natives should roll 2D6 at the start of each scenario for each element piloted or crewed by Kaumberg natives. Apply a +1 modifier to the roll for each 10-point difference in PO that the fugitive Hasseldorf and nationalist LeSat factions had between each other at the end of the last played scenario. On a result of 9 or more, the Kaumberg native pilot holds to sympathies with the less-popular faction and suffers a +1 to-hit modifier to all weapon and physical attacks made against an opposing element that his faction favors. In the case of the Hasseldorf family, the "favored" faction is the Davionist troops led by Major Henry Austin, while LeSat family sympathizers see Reiche's Lyran forces as the favored force. If the roll result is 11 or higher under these conditions, the Kaumberg-native warrior will not attack a "favored" element unless weapons fire is declared against him first, and he also suffers a +2 to-hit modifier to all weapon and physical attacks made against such an element.
On the opposite end of the spectrum, Kaumberg-native pilots who follow the popular faction on their world will tend to avoid firing on the force that favors their faction's views as well. Kaumberg-native warriors who fell in with the popular faction in the above roll will not attack a favored element unless weapons fire is declared against them first, or if their roll yielded a result of 5 or less, and will also suffer a +2 to-hit modifier to all weapon and physical attacks made against such an element. If the die roll result was greater than 5, they suffer only a +1 to-hit modifier to all weapon and physical attacks made against such an element.
Attacks against nonfavored faction elements by Kaumberg-native warriors will suffer no penalties, and warriors not native to Kaumberg are exempt from these rules.
Track 4 Variations
Alternate Timeline or Setting. Although three-sided conflicts are relatively uncommon in the history of the BattleTech universe, they do occur with some frequency in particularly troubled regions such as the historically divisive Free Worlds League and the recently-destabilized Chaos March. The Ronin Wars following the formation of the Free Rasalhague Republic, the eternally-fierce competition between Periphery realms and bandit kingdoms, or even the cutthroat world of interstellar business can accommodate scenarios such as this track presents.
However, if the gamemaster is running a campaign in which only two factions are truly engaged in hostilities, these scenarios may be adapted just as easily by simply redefining the forces in each scenario. In the simplest case, this can mean dropping one of the three engaged factions altogether, but another equally-acceptable means could be reducing the size of the other two factions arrayed against the player group and then setting the scenarios up as two-front battles against the same enemy. If the latter method is used, a fair reduction in enemy force strengths would be in the neighborhood of 50 percent, as the opposing factions being merged in this method would not be firing on each other and so would have far too much firepower available against the players,
Note: the remainder of this paragraph falls on the page whose text is obscured by the full-page illustration and is illegible in the scan text layer; it is not reproduced.
Clan Campaigns. The events in this track outline a three-way conflict in which one faction is defending against two opponents who would just as soon shoot each other as the defender. Though written with a civil war in mind, these events are not unheard of in the Clans, particularly in the Clan homeworlds where two or more different Clans often share worlds and battle over their limited resources. The most recent example of these types of battles was the Abjurement of the Nova Cats and the subsequent Trials of Possession fought by numerous Clans for their holdings—as well as for the holding of the annihilated Smoke Jaguars and the relocated Ghost Bears. Similar events also occurred on more than a few occasions during the Clan invasion, as Clan forces sharing a border with or having the same corridor as a rival Clan would fight against each other as well as the local defenders. The Clan rituals of bidding and zellbrigen may help to inject some order in these chaotic scenarios, however, turning the three-way nature of these battles into two-sided engagements which would need to be fought twice as the winner in one engagement faces a Trial from the third faction.
Skipping Tracks. The easiest way for the players to enter Operation: Flashpoint with this track is to be part of the regular House troops (either the Pro-Victor or Pro-Katrina) as they arrive on scene. If entering as part of the planetary defense force, such an entry can be as easy as placing the player group close by when the KPG elected to hire some outside reinforcements against a potential attack by Great House forces.
Players entering this track after having run through either of the first two tracks will be affiliated with the KPG here, having just now been restored to full battle-worthiness after some heavy damage incurred during the previous fighting.
Track 4 Lead-Ins
This section provides a few ideas that may be fleshed out into full-fledged BattleTech or MW3 encounters.
Bandit Raiders. The troubles on Kaumberg are an invitation to local pirates and brigands who normally harry the periphery border worlds and the Rim Collection. Drawn to the wealth of Lyran Alliance worlds, these bandits will attack either Kaumberg itself or some of the nearby worlds, looking for anything of value they can steal. The player unit, after a brief period of rest, repair and rearmament, will be called upon to assist the beleaguered worlds nearby, but such an action may draw the largest of raiders to Kaumberg itself in an effort to deal with the annoyance of the planetary defense force.
The bandits will make planetfall on the island continent of Eingeschneit, an arctic region with few settlements that makes an excellent staging ground for attacks on the rest of Kaumberg. The bandits will first seize Choate, Eingeschneit's largest city, and plunder the fuel refineries there. If they are able to solidify their position there, the bandits will move to the adjoining islands, eventually making their way southward toward Regenwald. If allowed to linger too long on Kaumberg, the bandits' presence will further erode the people's flagging faith in the planetary leadership. A decisive victory, on the other hand, will prove to many that Kaumberg has indeed weathered the worst of times and is now in good hands.
Riot Control. As if Kaumberg's political leadership has not already suffered enough, sympathizers to LeSat's fallen nationalist coalition remain a constant source of agitation and anarchy. Waging a grass-roots campaign to decry the Hasseldorfs and the planetary council they feel turned on their hero, these citizens will organize public demonstrations and incite riots that keep the planetary defenders and local law enforcement agencies busy. Matters become even more complicated when Lindon Ashley, a traveler (and political refugee) from the semidemocratic Rim Collection, arrives on Kaumberg.
Distrustful of all nobility and a born activist, Ashley starts making speeches that urge the people of Kaumberg to rise up against their noble-dominated government. Finding many willing to follow his lead among Kaumberg's war-weary population, Ashley's movement will gain momentum and will begin to clash violently with both the remnant nationalists and those loyal to the Hasseldorfs and the planetary government. Open conflict between activists from any and all sides will send most of Kaumberg's major cities into turmoil, requiring aid from the KPG to settle in some cases. The players sent to aid in this endeavor, however, will receive strict orders to keep damage to a minimum. Nobody, after all, wants a repeat of the Stuttgart incident that started the last conflict.
Scenario 1: Contested Landing
Situation. Stuttgart, Kaumberg, 18 October 3063. (Situation fiction omitted.)
Game Set-Up. Lay out the BattleTech maps as shown. Use the City Ruins and Desert Hills mapsheets from BattleTech Map Set #2 and the City (Hills/Residential) #1 mapsheet from BattleTech Map Set #3 to represent the Stuttgart Kapital DropPort and surrounding area.
The defender should place up to twenty building counters of light, medium, or heavy construction on any clear hex on the City (Hills/Residential) #1 mapsheet. The wooded hexes on the City Ruins mapsheet should be replaced by heavy, Level 2 buildings denoting primary terminals and the main control center of the Stuttgart Kapital DropPort. The seven rough hexes on the City Ruins mapsheet should be replaced by medium, Level 1 buildings that are support structures connected to the main control center they surround. Five more light, Level 1 building counters should be placed in hexes 0310, 0311, 0409, 0512 and 0610 on the same mapsheet, denoting aircraft hangars.
Forces
Attacker. The attacker in this scenario represents a probing attack force from the arriving Lyran Alliance troops, sent to secure Stuttgart Kapital DropPort. These elements may be no more than one company in size of BattleMechs.
The attacker enters the scenario in the Movement Phase of turn 1 via a combat drop (see Dropping Troops, p. 72-73 in BMR).
Defender. The defender may field up to 200 percent of the attacking force's strength and may consist of the player unit (assuming the players are with the KPG) plus any additional Kaumberg Planetary Guard elements necessary to bring its strength up to that level. Any sympathizer elements gained through the standard Public Opinion rules that the defender may wish to employ in this scenario should be placed as hidden units inside the DropPort structures (see Hidden Units, p. 77, BMR).
The defending elements may be placed anywhere on the map board before the scenario begins. All of these elements may be in hidden positions (see Hidden Units, p. 77, BMR).
Victory Conditions
The scenario ends when the attacker or defender is destroyed or has withdrawn.
The attacker's primary objective is to defeat all of the defending forces and capture the Stuttgart Kapital DropPort within the allotted time.
The defender's objective is to destroy, cripple or drive off all attacking elements, preventing the Lyrans from landing a force here.
Consult the Victory Table to determine the extent of each side's victory after the scenario is completed. Use the resulting victory level when calculating the faction's PO Score for this scenario. A defeated element is any element destroyed, crippled or driven off at the end of the scenario.
Victory Table
Victory Table (Track 4, Scenario 1). Points are listed Attacker / Defender.
| Condition | Points (Attacker/Defender) |
|---|---|
| Each 25% of Attacker Destroyed/Crippled | -10/+10 |
| Each 25% of Defender Destroyed/Crippled | +10/-10 |
| DropPort Map Secured in Time | +20/-25 |
| Final Score | Victory Level |
|---|---|
| 40 or better | Complete Victory |
| 20 to 39 | Partial Victory |
| 10 to 19 | Pyrrhic Victory |
| 0 to 9 | Marginal Defeat |
| -25 to -1 | Partial Defeat |
| -26 or less | Utter Defeat |
Special Rules
Withdrawal. The Forced Withdrawal rule (see p. 24) is in effect for the attacker and defender. The attacker must withdraw from the east map board edge. The defender must withdraw from the west map board edge.
Pressed for Time. Hauptmann-Kommandant Reiche is eager to secure the Stuttgart Kapital DropPort, but cannot wait long for his troops to secure the area as his fleet is already making its final approach. For every lance (or fraction thereof) of forces fielded by the defending player, Reiche's attack force has three turns to secure the DropPort. The DropPort is considered secured when all hostile elements are destroyed or have withdrawn off the City Ruins map.
If the 'Port is not secured at the end of the allotted time, the landing is aborted and the Lyran troops must immediately begin to withdraw in the following turn from the east edge of the map board.
Reluctant Warriors. For all their "Davionist" leanings, the warriors under Baron Hasseldorf's command still view the Lyran nation as their homeland and Reiche's troops as their countrymen. They are therefore reluctant to fire on them. To represent this, all KPG elements suffer a -1 Initiative penalty and a +1 to-hit modifier to all weapon and physical attacks made against any Lyran elements. These penalties last until the Lyran elements destroy or force withdrawal of an entire lance worth of KPG troops.
If using the Divided Loyalties rule for this track (p. 85), these modifiers are in addition to any received from that rule.
If the player unit is not native to Kaumberg or has no history of loyalty to the Lyrans, they may disregard these rules and should roll a separate Initiative from the KPG unit.
Public Opinion. The standard Public Opinion rules are in effect for this scenario, with the following definitions.
Deliberately attacking any sympathizer element is regarded as a cowardly action with a -3 PO modifier to the attacking faction.
The standard rules for fighting within a city apply, but only if any elements from either side enter the City (Hills/Residential) #1 mapsheet, with the Lyran forces counting as the attackers.
Deliberate attacks against any building count as scorched earth tactics. The Lyran forces are treated as attackers in such a case, while the KPG and its support elements are defenders.
Aftermath (Scenario 1)
The Aftermath below is kept for its campaign rules only; the narrative is omitted.
If the Lyrans manage to secure the DropPort, the first of their DropShips begin to land in Stuttgart Kapital. The presence of these DropShips will force the KPG elements and its allies to fall back. The Lyrans, currently more preoccupied with the inbound Davionist forces, will not launch a strike into Stuttgart proper just now, but instead will wait to see where their rival faction lands.
If the Lyrans are unable to secure the port in time, Reiche's fleet will be forced to abort its landing and will ultimately select a safe landing zone in the plains north of Stuttgart. There, they will establish a perimeter and once more wait to see where their opposite number lands before moving on the capital city.
The Victor-loyal troops, under command of Major Henry Austin, will attempt to land in Stuttgart Kapital if the Lyrans fail to accomplish this task. Such an action will prompt another battle just like this one, only the defender will not be as reluctant to fire on the once-friendly forces now that blood has already been spilled. However, as this second landing will occur a mere day after the Lyrans' attempt, any defending element that was destroyed or crippled in the previous battle will remain out of action for a second defense.
Less interested in the KPG as he is in the Lyran troops present, Austin will not press an attack on Stuttgart itself until his forces first secure their landing zone, which will be out in the western plains if the DropPort cannot be captured.
Additional Hooks are omitted.
Scenario 2: The Final Appeal
Situation. Traussen, Kaumberg, 26 October 3063. (Situation fiction omitted.)
Game Set-Up. Lay out the BattleTech maps as shown. This scenario uses the City (Hills/Residential) #1 map from BattleTech Map Set 3. A medium, Level 3 building (CF of 40) stands in hex 0804, representing the Traussen HPG relay station. The defender selects twenty to forty building counters of any type and may place them in any clear hex on the map. At the gamemaster's discretion, additional maps may be selected from the Urban Terrain Table (p. 101, BMR) and added to the map board.
Note: This set-up is the same as the set-up in Scenario 4, Track 1 (Desperate Call, p. 51). If the scenarios from Operation: Flashpoint are to be played as a complete campaign, the set-up from that scenario should be duplicated.
Forces
Three factions (possibly four, if the optional ComStar force is used) are involved in this scenario including the players: Hauptmann-Kommandant Reiche's Lyran regulars, Major Austin's pro-Victor forces, and the Kaumberg Planetary Guard. The player group will play for the faction with which they are currently aligned. Each of the combatants' factions should roll Initiative separately.
Before the scenario begins and after the KPG elements are set up, the two attacking forces each roll 2D6. Whichever player gets the higher roll may select the edge of the map board from which his force will enter—that side is his home edge. The player with the lower roll automatically enters via the opposite edge of the map board.
Kaumberg Planetary Guard (Defender). The defending force is the Kaumberg Planetary Guard or an affiliated unit, which may field a force up to one company in strength. In addition to these forces, the defender gains five motorized rifle infantry platoons of regular experience level, representing the Traussen Police Department. If the defending player has gained any sympathizers in the course of the fighting per the Public Opinion rules, these elements may be employed as well.
The defending elements may set up on any paved hex within 10 hexes of the Traussen HPG relay before the scenario begins. All infantry elements may set up anywhere on the board before the scenario begins or may be placed in hidden positions (see Hidden Units, p. 77, BMR).
Pro-Katrina Elements (Attacker). The pro-Katrina force commanded by Hauptmann-Kommandant Reiche may field a force equal to 150 percent of the defender's strength (not counting the police and sympathizer elements used by the Kaumberg troops).
The Pro-Katrina elements enter via their home edge of the map board during the Movement Phase of turn 1.
Pro-Victor Elements (Attacker). The pro-Victor force commanded by Major Austin may also be up to 150 percent of the defending force in strength (not counting police and sympathizer elements).
The Pro-Victor elements enter via their home edge of the map board during the Movement Phase of turn 1.
ComStar (Optional Force). This force is placed by the gamemaster (or upon the agreement of both players). Up to five Com Guard elements may be placed within 3 hexes of the Traussen HPG relay. These elements represent a part of the 207th Division of the Com Guard stationed on Kaumberg to protect the relay, and will not act unless either they or the relay are attacked. At that point, these elements roll their own Initiative and act against the side whose element made the attack. (More on the 207th may be found in the BattleTech Field Manual: ComStar, or under How to Run Operation: Flashpoint, p. 13.)
Victory Conditions
The scenario ends when the attacker or defender is destroyed or has withdrawn.
The attacker's primary objective is to secure the Traussen relay and get their comm-techs inside to deliver the critical message. "Getting the word out" is a secondary objective to each of the attacking forces.
The defender's objective is to destroy or cripple all attacking elements and prevent the delivery of the comm-techs.
Consult the Victory Table to determine the extent of each side's victory after the scenario is completed. Use the resulting victory level when calculating the faction's PO Score for this scenario.
Victory Table
Victory Table (Track 4, Scenario 2). Points are listed Attacker / Defender.
| Condition | Points (Attacker/Defender) |
|---|---|
| Each 25% of Attacker Destroyed/Crippled | -5/+10 |
| Each 25% of Defender Destroyed/Crippled | +5/-5 |
| Comm-Tech Killed Before Sending Message | -20/+15 |
| Comm-Tech Successfully Delivers Message | +20/-20 |
| Comm-Tech Gets the Word Out (Per Turn) | +5/-5 |
| Destroying the Traussen Relay Station | -25/-30 |
| Final Score | Victory Level |
|---|---|
| 40 or better | Complete Victory |
| 20 to 39 | Partial Victory |
| 10 to 19 | Pyrrhic Victory |
| 0 to 9 | Marginal Defeat |
| -25 to -1 | Partial Defeat |
| -26 or less | Utter Defeat |
Special Rules
Withdrawal. The Forced Withdrawal rule (see p. 24) is in effect for the Pro-Victor, Pro-Katherine and KPG Guard forces. The Pro-Katherine force must withdraw from its home edge of the map board. The Pro-Victor force must withdraw from its home edge of the map board. The KPG force may withdraw from either of the two map board edges not designated as one of the attacking forces' home edge.
Combat Targets. Each of the factions in this scenario has different rules of engagement and different targets which they may legitimately attack for this scenario. Players will therefore need to keep careful track of the targets on which each element has declared fire, although the possibility exists that missed shots could broaden the range of legitimate targets at any point.
The pro-Victor and pro-Katrina forces will only declare each other as primary targets, with KPG elements selected only as secondary targets. However, once a KPG element has declared an attack against either attacking faction, they are no longer bound by that rule.
The Kaumberg Planetary Guard elements will engage either or both of the attacking forces, as both are here for the HPG relay.
The ComStar force (if fielded) will follow the rules of engagement described in its force listing. They will not attack the KPG elements unless the KPG elements attack first.
Using the Comm Relay. Each of the attack forces have brought along a specialized communication technician who will be able to expedite sending its faction's transmission for aid. At the beginning of the scenario, both attackers must secretly nominate one element to carry this technician as a passenger. The comm-tech can be dropped off and picked up as per the standard BattleTech rules for Mounting and Dismounting infantry (p. 59, BMR). If carried by a BattleMech element, the tech rides in the cockpit with the MechWarrior and must make appropriate consciousness rolls if the pilot suffers damage.
The comm-tech must be delivered to the relay conscious, where he will then enter the facility and place the vital call. The HPG relay station qualifies as a ComStar facility and is considered neutral territory. The tech may place the call with no hindrance, requiring only one turn to make the transmission.
In addition to sending the vital call for aid, this comm-tech may also use the relay's secondary systems to break into Kaumberg's satellite network and get its faction's word out to the general public. This may be done either before or after the call for aid, but is not automatically successful. Instead, at the beginning of each turn the comm-tech elects to "get the word out" to Kaumberg, he must roll 2D6 against a target number of 8. Each successful roll represents a successful break-through of normal transmissions, during which time the comm-tech can send appeals of his faction commander, giving the common folk a chance to hear their side of the conflict. For every turn after the first successful break-through that the comm-tech makes an additional successful break-through, his faction earns an additional +1 PO modifier, to a maximum PO modifier of +5.
Should both of the attacking factions get their comm-techs in the HPG relay at the same time, the players controlling each tech should roll 2D6. Whichever player rolls higher gains control of the relay (reroll ties), as his comm-tech has killed (or otherwise incapacitated) the comm-tech of the opposing side. Note that in the round the comm-techs battle, they may perform no other actions.
Public Opinion. The standard public opinion rules are in effect for this session, with the following added definitions.
Any force that attacks the Traussen HPG relay will be committing an act of scorched earth tactics. Furthermore, since the facility is a neutral target—and an HPG at that—any element that hits the relay will incur an additional -15 PO modifier, in addition to the normal scorched earth penalty.
Leaving the comm-tech behind will earn the attacking player a penalty for abandoning his post.
Finally, at the end of this scenario, whichever player has earned more victory points gains the benefit of controlling the media for this scenario and all scenarios afterward in this campaign. This control will last until taken away in a later scenario. Consult the Controlling the Media rules (p. 22) for more information on how media control affects public opinion scores.
Aftermath (Scenario 2)
The narrative is omitted; the consequences of the relay are transcribed.
If either attacking force gains use of the HPG relay and manages to get the word out to Kaumberg about its purpose here, it will be a terrible blow to the fragile control Kaumberg's planetary government currently holds on the population. People sympathetic to the faction that gains communications control in this scenario will begin to pressure the provisional government and the Lord of Lords to surrender control to that faction.
Furthermore, reinforcements will arrive on Kaumberg for the faction that sends the message. Though these reinforcements will not likely arrive until after the battles in this track are long over, such a development will mean that yet another wave of war may come to Kaumberg in the months ahead (which would essentially mean repeating this entire track).
If neither faction manages to get its comm-tech to the relay, media control remains in the hands of the Kaumberg government and the fighting remains essentially confined to the battlefield, rather than the airwaves.
Whichever faction remains standing at the end of the scenario also faces an interesting decision as to whether or not to hold onto Traussen and its vital communications array or to rejoin its main forces to take part in future scenarios. As for both of the Great House troops, holding Traussen may not be viable as their forces are already too balanced to risk diverting elements away on garrison duty. The KPG, by a similar token, may also elect not to hold onto Traussen as its own forces are not strong enough to take on either faction in a straight fight.
Additional Hooks are omitted.
Scenario 3: A Clash of Titans
Situation. Stuttgart Landhold, Kaumberg, 30 October 3063. (Situation fiction omitted.)
Game Set-Up. Lay out the BattleTech maps as shown. Use the Open Terrain #2 mapsheet from BattleTech Map Set 5, both Heavy Forest mapsheets from BattleTech Map Set 4, and the CityTech mapsheet from BattleTech Map Set 2. The defending player (representing the Kaumberg Planetary Guard) should place up to six medium city/building counters and two heavy city/building counters on the paved hexes in the CityTech map.
Because of the size of this scenario, it should be played out using the BF2 rules. If the scenario is played out using standard BattleTech rules, additional maps may be added, chosen and placed by the defender from the Urban Terrain Table (p. 101, BMR).
Forces
Pro-Katrina Forces (Attacker). Hauptmann-Kommandant's pro-Katrina Lyrans may field all or some of their total force in this attack, numbering up to a battalion in size. The Pro-Katrina elements enter via the north map board edge during the Movement Phase of turn 1.
Pro-Victor Forces (Attacker). Major Austin's pro-Victor forces may field up to their full battalion in size. The Pro-Victor elements enter via the west map board edge during the Movement Phase of turn 1.
Kaumberg Planetary Guard (Defender). Baron Hasseldorf's KPG may field its entire force in this scenario. The player unit should be part of this force. The KPG forces may deploy anywhere on the CityTech map or within 9 hexes of hex 1517 on the Open Terrain #2 map. Additionally, up to half of these elements may be in hidden positions (see Hidden Units, p. 77, BMR).
Victory Conditions
The scenario ends when the attacker or defender is destroyed, has withdrawn, or half of the initial elements fielded by either attacking force occupy a paved hex on the CityTech map during the End Phase of any turn.
Each of the attacking forces' objectives are simply to destroy the defending forces and enter Stuttgart before their competing faction can.
The defenders' goal is to prevent the attacking forces from entering the city.
Consult the Victory Table to determine the extent of each side's victory after the scenario is completed. Use the resulting victory level when calculating the faction's PO Score for this scenario. A defeated element is any element destroyed, crippled or driven off at the end of the scenario.
Victory Table
Victory Table (Track 4, Scenario 3). Points are listed Pro-Katrina / Pro-Victor / KPG.
| Condition | Points (Pro-Katrina/Pro-Victor/KPG) |
|---|---|
| Each 25% of Pro-Katrina Units Defeated | -10/+10/+5 |
| Each 25% of Pro-Victor Units Defeated | +10/-10/+5 |
| Each 25% of KPG Units Defeated | +10/+10/-10 |
| Half of Pro-Katrina Force On Paved Hexes | +15/-5/-10 |
| Half of Pro-Victor Force On Paved Hexes | -5/+15/-10 |
| A Single Pro-Katrina Element Reaches Paved Hex First | +10/-10/+0 |
| A Single Pro-Victor Element Reaches Paved Hex First | -10/+10/+0 |
| Pro-Katrina Force Withdrawn | -10/+5/+10 |
| Pro-Victor Force Withdrawn | +5/-10/+10 |
| Final Score | Victory Level |
|---|---|
| 60 or better | Complete Victory |
| 30 to 59 | Partial Victory |
| 20 to 29 | Pyrrhic Victory |
| 0 to 19 | Marginal Defeat |
| -25 to -1 | Partial Defeat |
| -26 or less | Utter Defeat |
Special Rules
Combat Targets. This scenario is something of a free-for-all, with each of the factions capable of legitimately firing upon each other. Unless the players have managed to somehow forge an alliance or truce that dictates otherwise (see the Additional Hooks section of the previous scenario), the following describes what each of the three factions will regard as a preferred target and what they will regard as a target of opportunity.
The pro-Victor forces will only declare the KPG as primary targets, with the pro-Katrina elements selected only as secondary targets. However, once a pro-Katrina element has declared an attack against a pro-Victor element, they are no longer bound by that rule.
The pro-Katrina forces will only declare the KPG as primary targets, with the pro-Victor elements selected only as secondary targets. However, once a pro-Victor element has declared an attack against a pro-Katrina element, they are no longer bound by that rule.
The KPG has no restrictions for targets.
Withdrawal. The Forced Withdrawal rule (see p. 24) is in effect for the Pro-Victor, Pro-Katherine and KPG Guard forces.
The Pro-Katrina force must withdraw from the north map board edge. At the beginning of any turn in which more than a third of the attacking force has been destroyed or taken crippling damage, the entire attacking force must start withdrawing.
The Pro-Victor force must withdraw from the west map board edge. At the beginning of any turn in which more than a third of the attacking force has been destroyed or taken crippling damage, the entire attacking force must start withdrawing.
The KPG force must withdraw from either the east or south map board edges.
Public Opinion. The standard public opinion rules are in effect for this session, with the following added definitions.
Any force that deliberately attacks a building hex will be committing an act of scorched earth tactics.
Any combat that occurs between elements, where either element occupies a hex of the CityTech map, will count as fighting in a city, with the KPG elements functioning as the defending force.
Withdrawing from the battlefield will earn the defending force a penalty for abandoning its post.
Attacking the defender's sympathizers—regardless of the fact that they may raise arms against the attackers first—will earn the attacker a -3 PO modifier for cowardly tactics.
Aftermath (Scenario 3)
If any attacking forces penetrate the defender's line and enter Stuttgart, the surviving defending units should immediately fall back into the city to ferret them out, during which time more attacking elements may also try to slip into the city. Once all surviving defending units return to Stuttgart, a running gun battle will ensue in the city's streets. All forces from either side which occupy the Stuttgart (CityTech) mapsheet when the last of the defending units enter the city will continue on to Scenario 4: For the Motherland!
If the defender succeeds in forcing both attacking forces to withdraw, the battered elements will regroup and weigh the options for a renewed strike on Stuttgart, leaving the salvage to the defender. Any of the attacking factions that are reduced below half of its original force strength, however, will not make another assault, and may even decide to quit Kaumberg altogether. In either case, the defender will have a few days to recover from the damages.
Additional Hooks are omitted.
Scenario 4: For the Motherland!
Situation. Stuttgart, Kaumberg, 30 October 3063. (Situation fiction omitted.)
Game Set-Up. Lay out the BattleTech maps as shown. Use both City Street Grid/Park maps from BattleTech Map Set 4. This area represents Stuttgart's inner city area. The House of Lords, Kaumberg's planetary capitol building, is a heavy, Level 2 building which should be placed in hex 1009 on the City Street Grid/Park #1 map. After that, the defending player should place an additional four hardened, eight heavy, sixteen medium, and twenty light building counters on any clear hex of the City Street Grid/Park #2 map. Half as many building counters (of each type) should be placed in any nonpaved hex (excluding the city park—the large area across the street from the capitol building) on the City Street Grid/Park #1 map. Additional building counters can be placed at the gamemaster's discretion on any clear hex.
The scale of this battle could be quite large depending on the number of surviving troops carrying over from the previous scenario. If enough House troops broke through the lines, and the defender managed to maintain a force large enough, the two forces together could exceed three companies or Trinaries in size. If so, maps may be added, selected by the defender from the Urban Terrain Table (p. 101, BMR). Twenty building counters (or more) should be placed on each added map by the defender.
As an alternative to cluttering the gaming table with so many mapsheets, however, players may wish to use BF2 instead.
Note: This set-up is the same as the set-up in Scenario 1, Track 1 (Flashpoint, p. 41) and Scenario 4, Track 3 (One Last Duel ..., p. 79). If the scenarios from Operation: Flashpoint are to be played as a complete campaign, the set-up from that scenario should be duplicated.
Forces
Attacker. The attacking force will consist of any and all of the attacking forces employed in the previous scenario that occupied a hex on the CityTech map at any point during the previous scenario. These forces should be divided by faction if elements from both Hauptmann-Kommandant Reiche's pro-Katrina troops and the pro-Victor troops commanded by Major Austin have entered the city. Each faction must roll Initiative separately.
All attacking elements are placed first and may be placed in any nonbuilding hex anywhere on the map board. However, pro-Victor and pro-Katrina elements may not be within 15 hexes of each other.
Defender. The defending forces consist of any and all of the defending units employed in the previous scenario that survived to the scenario's end.
All defending elements are placed after the attacking elements have been placed and may set up anywhere on the map board. However, the defending elements may not be within 10 hexes of an attacking element.
Victory Conditions
The scenario ends when the attacker or defender has been destroyed or has withdrawn.
The goal of the defender is the defeat or withdrawal of all attacking forces from the area and a minimum of collateral damage.
The goal of the House regular forces is the destruction of their opponent factions and the defeat of the Kaumberg Planetary Guard units. Collateral damage is a lower priority.
Consult the Victory Table to determine the extent of each side's victory after the scenario is completed. Use the resulting victory level when calculating the faction's PO Score for this scenario. A defeated element is any element that is destroyed, surrenders or is forced to withdraw. Whichever faction remains on the field at the end controls the board.
Victory Table
Victory Table (Track 4, Scenario 4). Points are listed Pro-Katrina / Pro-Victor / KPG.
| Condition | Scoring (Pro-Katrina/Pro-Victor/KPG) |
|---|---|
| Each 25% of Pro-Katrina Elements Defeated | -5/+10/+5 |
| Each 25% of Pro-Victor Elements Defeated | +10/-5/+5 |
| Each 25% of Kaumberg Guard Defeated | +5/+5/-10 |
| Collateral Damage Inflicted (Per Instance) | -1/-1/-2 |
| Faction Controls Board | +15/+15/+25 |
| Final Score | Victory Level |
|---|---|
| 50 or more | Complete Victory |
| 20 to 49 | Partial Victory |
| 0 to 19 | Pyrrhic Victory |
| -19 to -1 | Narrow Defeat |
| -49 to -20 | Partial Defeat |
| -50 or less | Utter Defeat |
Special Rules
Withdrawal. The Forced Withdrawal rule (see p. 24) is in effect for the Pro-Victor, Pro-Katrina and KPG Guard forces. The Pro-Katrina force must withdraw from the north edge of the map board. The Pro-Victor force must withdraw from the west edge of the map board. The KPG force may withdraw from either the south or east edges of the map board.
Preexisting Damage. If played as a continuation of the previous scenario, none of the elements employed from the previous scenario have been repaired or have been supplied with ammunition. Note that if the previous scenario was played using BattleForce 2 rules, the damage suffered by the units should be converted to BattleTech (p. 102, BF2).
If not played as a continuation of the previous scenario, all elements have preexisting damage. The gamemaster rolls 3D6 for each element and applies a number of 5-point damage clusters equal to the result, using the Front/Back (Rear) column of the BattleMech or Vehicle Hit Location Table. Apply critical hits resulting from this damage normally except for the following: third engine hit, second gyro hit, cockpit hit, second hip hit, any result that indicates the destruction of a leg or head, ammunition hit and any result that indicates the destruction of the center torso.
Each element is also low on ammo. Roll 1D6 for every element that carries ammunition. On a result of 1-2, each of that element's ammo bins is half full (rounding down). Any other result means the ammo bins are one-quarter full (round down).
Area Knowledge. The Kaumberg Planetary Guard is far more familiar with the layout of Stuttgart than the attacker, giving them an edge in combat once the battle is joined in Stuttgart's streets. To reflect this, the attacking force players suffer a -1 Initiative penalty. The defending player also gains the off-map movement ability (p. 25).
Collateral Damage. In the chaos of this urban battle, with hostile units scattered all over the place, the crossfire gets intense, and even without civilians in the line of fire, missed shots have the potential to complicate matters. To reflect this aspect in this scenario, the following rules apply.
For every Weapons Attack that misses its intended target, check to see if the attack struck any elements or terrain in the target hex, or in any hex along the LOS between the attacker and target, beginning with the hex adjacent to the target and moving toward the attacker. If an element or terrain is found in any of those hexes, calculate a modified to-hit number for the new target based on the same modifiers as the original attack except for target movement and the terrain in the hex the original target occupies, which are replaced by the modifiers for the new target. An additional +3 modifier applies, representing the unintentional nature of the shot. The firing element must have a valid line of sight to the secondary target. If two or more possible secondary targets are in the same hex, choose a target randomly. If a secondary target is found and the shot misses again, use the same rules above to find the next target until no secondary targets are found.
Public Opinion. The standard public opinion rules are in effect for this scenario, with the following definitions.
Both the Great House forces suffer the penalty for fighting in a city as an attacking force. The KPG defender suffers the penalty for defending in a city.
Deliberate attacks against any city building count as scorched earth tactics. The House regulars, once again, are treated as the attacker in such a case, while the KPG serve as the defender.
If the defender refuses to fire on any of the combatant factions and opts to withdraw instead, this counts as "abandoning his post."
Aftermath (Scenario 4)
The narrative of the aftermath is omitted; no separate campaign rule is printed beyond the Additional Hooks, which are also omitted.
Track 4 Wrap-Up
The Wrap-Up narrative and Additional Hooks are omitted; the Troubleshooting guidance is transcribed.
Troubleshooting
In the brutal three-way fighting of the post-LeSat invasion, the player unit likely sustained severe damage, possibly even rendering the unit no longer battle-worthy. If the players served the Kaumberg government and the KPG in the final track, their service will be rewarded with an offer to join the ranks of the decimated Planetary Guard. Though on the surface such an offer seems shaky at best, Kaumberg's military defenders have historically been called on to aid in the protection of other Alarion Province worlds against bandit raids and the like. This being Kaumberg's second-most lucrative "export," service with the KPG can ultimately work like a low-risk version of mercenary service, allowing the players time to rebuild their depleted ranks and strength while giving them valuable experience to keep their skills sharp—all with a minimum of real danger.
Players not aligned with Kaumberg's government or the Planetary Guard should receive whatever repairs and support their employers might have promised, or—if the unit is a regular House unit—new blood and equipment could be assigned. If these forces were defeated by the Kaumberg warriors, however, they will be rather low on the requisitioning officer's list for the prime gear, as they will come to suffer a stigma for their defeat to a supposedly inferior defense force.