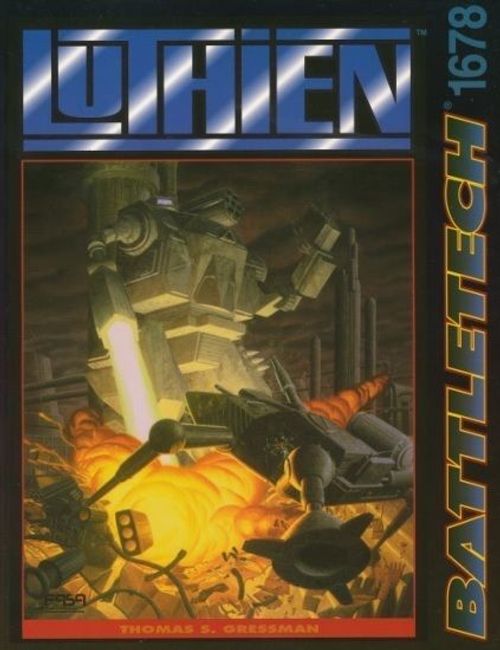
BattleTech: Luthien
BattleTech: Luthien Rulebook
Table of Contents
Table of Contents
- Special Rules
- Battle of Luthien
- Table of Organization
- Scenario 1: The Cat Springs
- Scenario 2: Into the Fire
- Scenario 3: First Skirmish
- Scenario 4: Trojan Horses
- Scenario 5: Sword Play
- Scenario 6: The Wave Breaks
- Scenario 7: Dogfight
- Scenario 8: Hounds' Teeth
- Scenario 9: Back Stab
- Scenario 10: The Sheep Fight
- Scenario 11: Black Thunder
- Scenario 12: Blind Man's Bluff
- Scenario 13: In the Dark
- Scenario 14: Cat and Dragon
- Scenario 15: We Are the Anvil
- Scenario 16: A Samurai's Death
- Scenario 17: Street Fighting
- Scenario 18: Valley of Death
- Kado-guchi Valley Rosters
- New 'Mechs
Special Rules
Forced Withdrawal Rule
The Forced Withdrawal rule establishes a damage threshold at which a 'Mech, vehicle, infantry platoon, or Elemental Point withdraws rather than risk destruction.
A BattleMech has reached its withdrawal threshold when it loses a limb, takes 2 engine, or 1 gyro hit(s), suffers an ammunition explosion, loses more than half of its weapons or more than two-thirds of its total internal structure. Vehicles withdraw when they suffer an ammunition explosion or lose half of their weapons or more than half of their total internal structures.
Infantry platoons withdraw when they suffer 75 percent casualties. An armored infantry squad or Elemental Point withdraws when it suffers its third casualty.
Units that are forced to withdraw must move towards the edge of the mapsheet as quickly as possible. They may not engage in charge, death-from-above, or physical attacks against enemy units. Elemental Points may not swarm enemy units. However, withdrawing units may fire at any enemy unit that stands between them and the edge of the mapsheet.
New 'Mechs
Three new OmniMechs, the Hankyu, Nobori-nin, and Cauldron-Born, also appear in several scenarios. Descriptions and game statistics for these Clan machines appear in New 'Mechs (see below).
Battle of Luthien
The following scenarios trace the numerous engagements that comprised the epic battle for Luthien.
Fierce aerospace skirmishes preceded the main battle, as the Smoke Jaguars and Nova Cats entered the Luthien system and landed their units on the Kurita capital world. There, the invaders faced a force that included some of the Inner Sphere's most skilled MechWarriors: the Combine's Dragon's Claws, 1st Sword of Light, Genyosha, 2nd Legion of Vega and Otomo, as well as the renowned Wolf's Dragoons and Kell Hounds.
Several of the scenarios call for the use of the Forced Withdrawal rule. The final scenario, Valley of Death, recreates the battle in the Kado-guchi Valley and uses unique Battalion/Cluster rules that are explained in that scenario.
Table of Organization
Draconis Combine Mustered Soldiery
The Dragon's Claws
- Commander: Coordinator Takashi Kurita
- Liaison Officer: Sho-sa Shin Yodama
- 3 Veteran Battalions
1st Sword of Light
- Commander: Tai-sa Shigeru Yoshida
- 1 Elite Battalion, 2 Veteran Battalions, 1 Regular Battalion
- 1 Veteran Aerospace Wing
Genyosha
- 1st Regiment, Commander: Tai-sa Narimasa Asano: 3 Elite Battalions
- 2nd Regiment, Commander: Tai-sa Laura Nelson: 3 Elite Battalions
2nd Legion of Vega
- Commander: Tai-sa Tikov Recardni
- 1 Elite Battalion, 2 Veteran Battalions
Otomo
- Commander: Tai-sa Oda Hideyoshi
- 1 Elite Battalion, 2 Veteran Battalions
3rd Aerospace Wing
- 2 Veteran Fighter Companies, 1 Regular Fighter Company
7th Aerospace Wing
- 3 Veteran Fighter Companies
Black Dragons Aerospace Fighter Wing
- 1 Elite Fighter Company, 2 Veteran Fighter Companies
6th Draconis Elite Strike Team
- 1 Elite Special Forces Squad
12th Luthien Defense Regiment
- 1 Veteran Battalion, 1 Regular Battalion, 1 Green Battalion
54th Luthien Defense Regiment
- 1 Regular Battalion, 2 Green Battalions
96th Luthien Defense Regiment
- 2 Veteran Battalions, 1 Regular Battalion
122nd Luthien Defense Regiment
- 3 Regular Battalions
143rd Luthien Defense Regiment
- 1 Veteran Battalion, 2 Regular Battalions
178th Luthien Defense Regiment
- 1 Veteran Battalion, 1 Regular Battalion, 1 Green Battalion
191st Luthien Defense Regiment
- 2 Veteran Battalions, 1 Green Battalion
201st Luthien Defense Regiment
- 1 Veteran Battalion, 2 Regular Battalions
1st Amori Militia
- 1 Regular BattleMech Company, 1 Regular Armor Company, 1 Regular Infantry Company
Luthien Armor Works Security Company
- 1 Regular BattleMech Lance, 1 Regular Infantry Company
7th Imperial City Militia
- 3 Regular Battalions
1st Omega Regiment
- 3 Veteran Battalions
2nd Omega Regiment
- 3 Regular Battalions
Wolf's Dragoons
- Alpha Regiment, Commander: Colonel Jaime Wolf: 3 Elite Battalions
- Beta Regiment, Commander: Colonel Anton Rand: 2 Elite Battalions, 1 Veteran Battalion
- Gamma Regiment, Commander: Colonel Wilhelmina Korsht: 2 Elite Battalions, 1 Regular Battalion
- Delta Regiment, Commander: Colonel Kathleen Dumont: 1 Elite Battalion, 2 Regular Battalions
- Epsilon Regiment, Commander: Colonel Elizabeth Nichole: 2 Elite Battalions, 1 Veteran Battalion
The Kell Hounds
- 1st Regiment, Commander: Colonel Morgan Kell: 3 Elite Battalions
- 2nd Regiment, Commander: Lt. Colonel Scott Bradley: 2 Elite Battalions, 1 Elite Aerospace Fighter Battalion
Clan Forces
31st Smoke Jaguar Assault Galaxy, Commander: saKhan Dorian Wirth
- 1st Jaguar Guard Cluster: 3 Elite Trinaries, 2 Veteran Trinaries
- 5th Jaguar Regulars Cluster: 3 Elite Trinaries, 1 Veteran Trinary, 1 Veteran Binary
- 5th Jaguar Dragoons: 1 Elite Trinary, 2 Veteran Trinaries, 1 Regular Trinary, 1 Regular Binary
- 1st Jaguar Guard Cluster: 3 Elite Trinaries, 2 Veteran Trinaries
- 63rd Jaguar Regulars Cluster: 2 Veteran Trinaries, 1 Regular Trinary, 1 Regular Binary, 1 Regular Supernova
44th Jaguar Attack Galaxy, Commander: Galaxy Commander Mikhail Ward
- 32nd Jaguar Regulars Cluster: 3 Regular Trinaries, 2 Regular Supernovas
- 22nd Jaguar Regulars Cluster: 1 Elite Trinary, 1 Veteran Trinary, 2 Regular Trinaries, 1 Green Binary
- 225th Jaguar Battle Cluster: 1 Elite Binary, 1 Veteran Trinary, 2 Regular Trinaries, 1 Regular Supernova
- 43rd Jaguar Battle Cluster: 1 Elite Trinary, 2 Veteran Trinaries, 2 Regular Supernovas
316th Jaguar Battle Galaxy, Commander: Galaxy Commander Leslie
- 75th Jaguar Assault Cluster: 1 Elite Trinary, 3 Veteran Trinaries, 1 Regular Trinary
- 145th Jaguar Regulars Cluster: 1 Veteran Trinary, 3 Regular Trinaries
- 28th Jaguar Combat Cluster: 1 Elite Binary, 1 Veteran Trinary, 3 Regular Binaries
- 336th Jaguar Combat Cluster: 2 Veteran Trinaries, 2 Regular Trinaries, 1 Green Binary
- 22nd Smoke Jaguar Freebirth Cluster: 2 Regular Trinaries, 2 Regular Binaries
4th Nova Cat Assault Galaxy, Commander: saKhan Lucian Carns
- 32nd Nova Cat Assault Cluster: 2 Elite Trinaries, 1 Veteran Trinary, 1 Regular Binary, 1 Veteran Supernova
- 4th Nova Cat Regulars: 2 Elite Trinaries, 1 Veteran Trinary, 1 Regular Trinary
- 3rd Nova Cat Aerospace Cluster: 2 Veteran DropShip Trinaries, 1 Veteran Fighter Trinary, 2 Regular Fighter Trinaries
- 119th Nova Cat Striker Cluster: 1 Elite Trinary, 2 Elite Binaries, 1 Veteran Supernova
183rd Nova Cat Assault Galaxy, Commander: Galaxy Commander Tinnin
- 101st Nova Cat Battle Cluster: 2 Veteran Trinaries, 2 Regular Trinaries
- 25th Nova Cat Regulars Cluster: 2 Veteran Trinaries, 1 Regular Trinary, 1 Regular Binary
- 57th Nova Cat Regulars Cluster: 3 Regular Trinaries, 1 Regular Binary, 1 Green Binary
- 211th Nova Cat Combat Cluster: 1 Elite Trinary, 1 Veteran Trinary, 2 Regular Trinaries, 1 Regular Supernova
- 321st Nova Cat Battle Cluster: 1 Elite Binary, 2 Veteran Trinaries, 2 Veteran Supernovas
Scenario 1: The Cat Springs
Game Set-Up
Lay out the BattleSpace mapsheets as shown. The lower edge of the mapsheets represents Luthien. Use standard BattleSpace rules for this scenario.
Attacker
The Attacker comprises elements of the 3rd and 7th Luthien Aerospace Wings.
- Company C, 3rd Aerospace Wing
- Command Lance: Tai-sa Lawrence Merrihue (SL-15 Slayer); Chu-i Wing-tsit Chan (SL-15 Slayer)
- Bravo Lance: Tai-i Michael Cannello (SL-17 Shilone); Chu-i Mir Imus (SL-17 Shilone)
- Charlie Lance: Chu-i Cyril Yao (SL-21 Sholagar); Chu-i Kariya Akira (SL-21 Sholagar)
Defender
The Defender comprises the following elements of the 3rd Nova Cat Aerospace Cluster.
- Elements of Company A, 7th Aerospace Wing
- Command Lance: Chu-sa Alan Horgan (SL-15 Slayer)
- Union Lance: Tai-i Frank Kuhlman (SL-15 Slayer)
- Strike Lance: Tai-i Abraham Ko (Lightning); Chu-i Birdie Diggs (Lightning)
- Elements of Trinary DropShip
- Star Captain Volls, Union Class DropShip Kerensky
- Star Captain Hewe, Union Class DropShip Richthofen
- Star Captain Cadonna, Leopard Class DropShip Midway
- Elements of Trinary Fighter
- Elements of Alpha Star: Star Captain Yehud (Jagatai-A); Pilot Marrin (Jagatai-A); Pilot Kinua (Sulla); Pilot Kaffe (Sulla)
- Elements of Bravo Star: Pilot M'shengi (Turk); Pilot Ramsden (Turk)
Deployment
The Combine forces launch from hidden lunar bases, entering at the upper left corner of the mapsheets. Each fighter has an Initial Velocity of 9 and may accelerate or decelerate at will, as long as it has adequate Thrust Points and Structural Integrity.
Fighters from the 3rd Aerospace Wing enter during the Movement Phase of Turn 1. Fighters from the 7th enter during the Movement Phase of Turn 4.
The Clan forces enter at the left side of the mapsheets at the beginning of Turn 1. All Clan ships have an Initial Velocity of 3. Starting on Turn 1, the Clan ships may accelerate or decelerate at will, as long as they have adequate Thrust Points and Structural Integrity. Consider all Clan fighters deployed from their DropShips at the start of play (see Special Rules).
Victory Conditions
The Clan player wins by exiting as many DropShips off the BattleSpace mapsheet at the Ground Hex row as possible.
The Combine player wins by inflicting as much damage on the Clan DropShips and fighters as possible.
Once the last Clan DropShip has exited the mapsheet or has been destroyed, consult the following tables to determine the outcome of the scenario.
Victory Points Table
| Action | Points |
|---|---|
| Each Union Class DropShip destroyed | +30 |
| Leopard Class DropShip destroyed | +20 |
| Each Clan fighter destroyed | +15 |
| Each DropShip door hit/destroyed | +10 |
| Each Combine fighter destroyed | -20 |
| Leopard Class DropShip exiting mapsheets | -25 |
| Each Union Class DropShip exiting mapsheet | -30 |
Victory Table
| Total Points | Result |
|---|---|
| 180 or higher | Decisive Combine Victory |
| 179 to 110 | Substantial Combine Victory |
| 109 to 50 | Marginal Combine Victory |
| 49 to -84 | Draw |
| -85 to -174 | Marginal Clan Victory |
| -175 to -264 | Substantial Clan Victory |
| -265 or lower | Decisive Clan Victory |
Special Rules
-
Clan fighters are deployed from their DropShips at the beginning of the game. However, the Clan player may attempt to recover a Clan fighter (see p. 50, BattleSpace rulebook, for rules governing such operations). If a DropShip is destroyed, count any onboard fighters as destroyed when determining victory points.
-
Consider a DropShip destroyed if its bridge or engine is destroyed. A fighter is destroyed when half of its internal structure has been destroyed.
-
If playing this scenario as part of a mini-campaign with Scenarios 2 and 3, keep track of the specific fighters and DropShips that survive the battle. These craft will form part of the forces involved in Scenarios 2 and 3.
Scenario 2: Into the Fire
Game Set-Up
Lay out the BattleSpace mapsheets as shown. The highlighted hexes represent the locations of the BattleTech mapsheets the Clan player tries to reach. Use standard BattleSpace rules for this scenario.
Attacker
The Attacker comprises the following elements of the Black Dragons Aerospace Fighter Wing.
- 1st Flight
- Alpha Lance: Chu-sa Yoshu Maki (SL-15B Slayer); Tai-i Frederick Schodt (SL-15 Slayer)
- Bravo Lance: Tai-i Kasugai Ken (F-500 Riever); Chu-i Davis Kohlb (F-500 Riever)
- Charlie Lance: Chu-i Leta Cardinali (SI-17 Shilone); Chu-i Robert Nedig (SI-17 Shilone)
- 2nd Flight
- Alpha Lance: Tai-i James Nisimura (SL-15B Slayer); Chu-i Anthony Redshaw (SL-15B Slayer)
Defender
If playing this scenario as part of a mini-campaign with Scenarios 1 and 3, use the Clan forces that survived Scenario 1 as the Defender. If playing this scenario as a self-contained game, use the following elements of the 3rd Nova Cats Aerospace Cluster.
- Elements of Trinary DropShip
- Union Lance: Star Captain Hewe (Union Class DropShip Richthofen)
- Leopard Lance: Star Captain Cadonna (Leopard Class DropShip Midway)
- Elements of Trinary Fighter
- Elements of Alpha Star: Pilot Marrin (Jagatai-A); Pilot Kinua (Sulla)
- Elements of Bravo Star: Pilot M'shengi (Turk); Pilot Ramsden (Turk)
Deployment
The Black Dragons enter at the bottom edge of the mapsheets during the Movement Phase of Turn 1. All fighters have an Initial Velocity of 4, but may accelerate or decelerate at will, as long as they have adequate Thrust Points and Structural Integrity.
Victory Conditions
The Clan player tries to land his DropShips in one of the two BattleTech hexes marked on the mapsheets.
The Combine player tries to inflict as much damage on the Clan fighters and DropShips as possible.
Once the last Clan DropShip has landed or been destroyed, consult the following tables to determine the winner of this scenario.
Victory Points Table
| Action | Points |
|---|---|
| Each Union Class DropShip destroyed | +30 |
| Leopard Class DropShip destroyed | +20 |
| Each Clan fighter destroyed | +15 |
| Each DropShip door hit/destroyed | +10 |
| Each Combine fighter destroyed | -20 |
| Leopard landing safely in drop zone | -25 |
| Each Union Class DropShip landing safely in drop zone | -30 |
Victory Table
| Total Points | Result |
|---|---|
| 150 or higher | Decisive Combine Victory |
| 149 to 100 | Substantial Combine Victory |
| 99 to 50 | Marginal Combine Victory |
| 49 to -58 | Draw |
| -59 to -116 | Marginal Clan Victory |
| -117 to -174 | Substantial Clan Victory |
| -175 or lower | Decisive Clan Victory |
Special Rules
-
Consider a DropShip destroyed if its bridge or engine is destroyed. Failed landing attempts may also destroy DropShips. A fighter is destroyed when half of its internal structure has been destroyed.
-
To land, a DropShip must end its movement in one of the two designated BattleTech hexes. During the Movement Phase of the following turn, consider the DropShip to be at low altitude. During the Movement Phase of the following turn, the DropShip may attempt to land, provided it ends its movement in a Ground hex and has a Velocity of 0. The craft may then begin planetary landing procedures as outlined on p. 53, BattleSpace rulebook.
-
Fighters may attack DropShips until the DropShips have actually landed on Luthien.
-
If playing the scenario as part of a mini-campaign with Scenarios 1 and 3, keep track of how many DropShips land safely. This number will partially determine the size and make-up of the Clan force in Scenario 3.
Scenario 3: First Skirmish
Game Set-Up
Use BattleTroops/ClanTroops rules for this scenario. Lay out the BattleTroops mapsheets as shown. Treat all Water areas as open ground.
Attacker
The Attacker comprises Sho-sa Shin Yodama's patrol, four Combine squads, each mounted in a Skulker Wheeled Scout Tank. Each crewman carries a Heavy Pistol and wears a Flak Vest. Each Skulker also contains 1 Gyrojet Rifle and 1 Laser Rifle, which can only be fired by a trooper outside the vehicle (assign at player's discretion).
- 1st Squad (4 Men): Commander Sho-sa Shin Yodama. Leadership Skill Rating 3. Experience Level Veteran. Sho-sa Yodama carries a Laser Pistol and wears a Flak Body Suit. Yodama carries a Vibrosword as a secondary weapon.
- 2nd Squad (4 Men): Commander Sho-ko Tea Stenkowski. Leadership Skill Rating 4. Experience Level Regular.
- 3rd Squad (4 Men): Commander Sho-ko Lezra Marbury. Leadership Skill Rating 4. Experience Level Regular.
- 4th Squad (4 Men): Commander Sho-ko Russell Eng. Leadership Skill Rating 4. Experience Level Regular.
Defender
The Defender comprises elements of the 1st Jaguar Guards Cluster. To determine the exact composition of the force, roll 1D6. On a result of 1, use all the units listed in the following roster. On a result of 2 or 3, eliminate MechWarrior Corliss and her Koshi-D from the Defender roster. On a result of 4 or 5, eliminate the 1st Point of the Security Binary Elemental from the roster. On a result of 6, eliminate the 2nd Point. If playing this scenario as part of a mini-campaign with Scenarios 1 and 2, add 1 to the die roll result for each DropShip that survived Scenario 2.
- Elements of Security BattleMech Star
- MechWarrior Syrtin (Piloting 4, Gunnery 4), Hankyu
- MechWarrior Corliss (Piloting 4, Gunnery 4), Koshi-D
- Security Binary Elemental
- 1st Point (5 Elementals): Point Leader Elemental Star Captain Harbin. Leadership Skill Rating 3. Experience Level Veteran. All Elementals in this Point are armed with SRMs. They carry Small Lasers as primary weapons and HP Gyrojets as secondary weapons.
- 2nd Point (5 Elementals): Point Leader Elemental Point Commander Valeska. Leadership Skill Rating 4. Experience Level Veteran. All Elementals in this Point are armed with SRMs. They carry Machine Guns as their primary weapons and SMGs as secondary weapons.
Deployment
The Clan player may deploy his Elementals anywhere east of the line on Map 5. His OmniMech(s) enter the board as reinforcements, per Special Rule 1.
The Combine units enter at the northeast corner of Map 2 during the Movement Phase of Turn 1. Consider all Combine troops aboard their respective vehicles at the start of play.
Victory Conditions
The Attacker must reconnoiter the Clan landing zone and escape with the information he acquires (see Special Rules 2, 3, and 4).
The Defender must prevent the Attacker from completing his mission.
Continue play until the last Skulker has left the board or been destroyed, then consult the following victory point tables. The player with the highest victory point total wins the scenario.
Combine Victory Table
| Action | Points |
|---|---|
| Drawing out and spotting the Hankyu | 50 |
| Each OmniMech destroyed | 30 |
| Shin Yodama escapes | 25 |
| Each Elemental destroyed | 10 |
| Each Skulker escaping | 10 |
| Each Combine trooper escaping | 5 |
| Each Clan unit spotted | 1 |
Clan Victory Table
| Action | Points |
|---|---|
| Shin Yodama killed | 50 |
| Hankyu undetected | 40 |
| Each Skulker destroyed | 30 |
| Each Combine trooper killed | 20 |
| Each Combine unit undetected | 1 |
Special Rules
-
The Clan OmniMechs remain aboard their DropShips (just off the maps) until security Elementals spot the Combine units by establishing LOS to the units. During the Initiative Phase of the first subsequent turn, the Clan player rolls 1D6 and adds the number of Combine units detected to the result. On a result of 6 or more, the Clan commanders release the OmniMechs. The 'Mechs arrive during the Movement Phase of the next turn. If the 'Mechs are not released during one turn, the Clan player repeats the roll during the Initiative Phase of each subsequent turn, until the 'Mechs are released or the scenario ends. The OmniMechs enter at the southeast corner of Map 5.
-
To "spot" the Hankyu and win the corresponding victory points, the Combine player must establish clear LOS to the Hankyu and maintain it for at least three consecutive turns. At the end of this period, the Combine player may break contact with the Hankyu and attempt to escape. The observing vehicle, or one it has passed its data to, must escape from the mapsheets for the Combine player to win the 50 points for spotting the new OmniMech.
-
The Skulkers are equipped with tight-beam data links. Activating these links requires 5 MP and direct LOS between the transmitting and receiving vehicles. The data links are the sole means for Combine units to exchange data here.
-
To "escape," Combine units must move off the north or east edge of Map 2.
-
To spot an enemy unit and win the corresponding victory point, a player must establish a clear LOS to the unit.
Scenario 4: Trojan Horses
Game Set-Up
Lay out the BattleTech mapsheets as shown. Use standard BattleTech rules.
Attacker
The Attacker comprises the following elements of the 1st Jaguar Guard Cluster.
- Trinary Assault
- Command Star: Star Colonel Frayne (Piloting 3, Gunnery 3), Daishi; MechWarrior Marva (Piloting 5, Gunnery 4), Vulture; MechWarrior Nelson (Piloting 3, Gunnery 2), Mad Cat; MechWarrior Traine (Piloting 4, Gunnery 3), Loki; MechWarrior Velika (Piloting 4, Gunnery 4), Ryoken
- Bravo Assault Star: Star Captain Kisen (Piloting 4, Gunnery 4), Man O' War; MechWarrior Olva (Piloting 4, Gunnery 4), Thor; MechWarrior Juste (Piloting 4, Gunnery 3), Nobori-nin-B; MechWarrior Zena (Piloting 4, Gunnery 4), Loki; MechWarrior Silas (Piloting 5, Gunnery 4), Black Hawk
- Charlie Assault Star: Star Captain Milon (Piloting 4, Gunnery 4), Mad Cat-B; MechWarrior Nissa (Piloting 4, Gunnery 2), Mad Cat-A; MechWarrior Unda (Piloting 3, Gunnery 4), Vulture; MechWarrior Theodore (Piloting 4, Gunnery 3), Ryoken; MechWarrior Carlo (Piloting 3, Gunnery 3), Ryoken-C
- Elements of Trinary Assault Elemental
- Bravo Elemental Assault Star: Elemental Star Captain Ualtar Sradac (4 Elementals); Point Commander Banning (4 Elementals); Point Commander Desma (4 Elementals); Point Commander Zivu (4 Elementals); Point Commander Sonya (4 Elementals)
Defender
The Defender comprises the following elements of the Otomo regiment.
- Company A, 1st Battalion
- Command Lance: Tai-sa Oda Hideyoshi (Piloting 3, Gunnery 3), Battlemaster; Sho-sa Minamida Yosuke (Piloting 4, Gunnery 3), Awesome; Tai-i Kasugai Chisei (Piloting 4, Gunnery 4), Orion; Tai-i Suzuki Hitoshi (Piloting 3, Gunnery 4), Marauder
- Heavy Lance: Tai-i Gyo Chu (Piloting 4, Gunnery 4), Warhammer; Chu-i Imazeki Shobo (Piloting 4, Gunnery 4), Archer; David Lin (Piloting 4, Gunnery 4), Thunderbolt; Emmet Casey (Piloting 5, Gunnery 4), Crusader
- Medium Lance: Chu-i Mason Omata (Piloting 4, Gunnery 4), Wolverine; Sho-ko James Hough (Piloting 5, Gunnery 4), Shadow Hawk; Pat Borgen (Piloting 5, Gunnery 4), Wolf Trap; Otto Reuter (Piloting 4, Gunnery 4), Phoenix Hawk
Deployment
Attacker: Enter at the west edge of Map 1 during the Movement Phase of Turn 1.
Defender: The Defender sets up first, anywhere on Maps 2 or 3. See Special Rules for information on mines and drone 'Mechs.
Victory Conditions
The Attacker tries to break the Defender's line. The Defender tries to stop the Attacker's advance.
Continue play until all of one side's 'Mechs have been destroyed or withdrawn (see Special Rule 3 and Forced Withdrawal Rule, p. 24). The side remaining in possession of the field is the winner.
Special Rules
-
The Combine player may place 4 command-detonated explosive hexes and 4 vibrabomb hexes anywhere on Maps 2 or 3. Note the locations and types of each hex on a piece of scrap paper before beginning play. Each command-detonated hex may only be used once. Only a member of the Command Lance may detonate the mines. If all of the Command Lance MechWarriors are killed or rendered unconscious, the Combine player may no longer detonate the mines. The vibrabomb triggers are set at 50 tons. See p. 61, BattleTech Compendium, for rules on resolving damage from command-detonated hexes and vibrabombs.
-
The Combine player may deploy 12 "Q-Mechs" anywhere on Mapsheet 2 or 3 before play begins. Each of the Q-Mechs (the disguised LoaderMechs) must be remotely controlled by a MechWarrior. Note which MechWarrior is controlling which Q-Mech. A MechWarrior may either pilot his own 'Mech or the Q-Mech, but not both in a single turn. Apply a +2 modifier to all target numbers for Piloting and To-Hit rolls for the Q-Mechs. Some Q-Mechs carry booby traps. When detonated, these powerful explosive charges inflict 20 Damage Points to all units in adjacent hexes. Allocate damage in 5-point blocks.
-
Q-Mechs cannot be forced to withdraw.
-
Any time the Clan player suspects one of his units is facing a Q-Mech, he may make a Perception (8) Roll for that unit. If the scanning 'Mech has an active probe, apply a -2 modifier to the target number. Make the roll at the end of the Movement Phase of the turn. If the roll succeeds, the unit discovers whether the 'Mech is manned or a drone. Stats for the Q-Mech follow.
Q-Mech
- Type: "Q-Mech"
- Mass: 20 tons
- Walking MP: 2
- Running MP: 3
- Jumping MP: 0
- Heat Sinks: 10
- Armor Factor: 36
| Location | Internal Structure | Armor Value |
|---|---|---|
| Head | 3 | 2 |
| Center Torso | 6 | 6/2 |
| L/R Torso | 5 | 4/1 |
| L/R Arm | 3 | 4 |
| L/R Leg | 4 | 4 |
Weapons and Ammo
Roll 2D6 once for each Q-Mech, then consult the following table to determine the 'Mech's armament.
Q-Mech Weapon Table
| Roll | Weapon/Ammo | Location |
|---|---|---|
| 2 | AC 10/10 | Right Torso |
| 3-4 | Large Laser | Right Torso |
| 5-6 | 2 Medium Lasers | Right Arm |
| 7-8 | LRM 5/24 | Left Torso |
| 9-10 | SRM 6/15 | Left Torso |
| 11 | PPC | Left Torso |
| 12 | Booby Trap | Center Torso |
Scenario 5: Sword Play
Game Set-Up
Use BattleTech and AeroTech rules for this scenario. Lay out the BattleTech mapsheets and the AeroTech High Altitude Mapsheet as shown. The highlighted hexes on the AeroTech map indicate the locations of the BattleTech mapsheets. See Special Rules 2 and 3 for special aerospace fighter rules.
Deployment (Defender)
The Defender deploys his BattleTech elements first, anywhere on Map 2 or 3. His aerospace fighters may enter the right edge of the AeroTech map at any time, beginning on Turn 3. Aerospace fighters enter the map with an Initial Velocity equal to their Overthrust Rating, and may accelerate or decelerate per standard rules.
Attacker
The Attacker comprises the following elements of the 1st Jaguar Guard Cluster and the 119th Nova Cat Striker Cluster.
- Binary Charlie, 1st Jaguar Guard Cluster
- Alpha Striker Star: Star Colonel Blaine Radick (Piloting 3, Gunnery 3), Masakari; MechWarrior Beryl (Piloting 4, Gunnery 3), Mad Cat-B; MechWarrior Trigg (Piloting 4, Gunnery 4), Thor; MechWarrior Slade (Piloting 3, Gunnery 3), Loki-A; MechWarrior Hendon (Piloting 4, Gunnery 4), Loki
- Bravo Striker Star: Star Captain Thyra (Piloting 4, Gunnery 3), Vulture-A; MechWarrior Gage (Piloting 4, Gunnery 4), Black Hawk; MechWarrior Spencer (Piloting 5, Gunnery 4), Ryoken; MechWarrior Juhas (Piloting 5, Gunnery 3), Ryoken-C; MechWarrior Lewis (Piloting 4, Gunnery 4), Puma-B
- Elements of Rogue Fighter Star: Star Captain Hayden (Piloting 4, Gunnery 3), Batu-A; Pilot Nolan (Piloting 4, Gunnery 4), Batu; Pilot Gemma (Piloting 5, Gunnery 4), Bashkir; Pilot Osred (Piloting 4, Gunnery 4), Bashkir-A
- Elements of Trinary Striker, 119th Nova Cat Striker Cluster
- Charlie Striker Star: Star Captain Meyer Wirth (Piloting 4, Gunnery 4), Vulture; MechWarrior Matthew (Piloting 5, Gunnery 4), Ryoken; MechWarrior Revell (Piloting 5, Gunnery 4), Fenris-A; MechWarrior Wanda (Piloting 3, Gunnery 3), Uller; MechWarrior Ogden (Piloting 4, Gunnery 4), Koshi-B
Defender
The Defender comprises the following elements of the 1st Sword of Light.
- Company A, 1st Battalion
- Command Lance: Tai-sa Shigeru Yoshida (Piloting 3, Gunnery 3), Cyclops; Sho-sa Haritha Finn (Piloting 4, Gunnery 4), Stalker; Tai-i Saigan Tezuka (Piloting 4, Gunnery 4), Marauder; Tai-i Michael Li (Piloting 4, Gunnery 4), Archer
- Strike Lance: Tai-i Andrew Mihelcic (Piloting 4, Gunnery 4), Warhammer; Gunsho Pehr Ellson (Piloting 5, Gunnery 4), Quickdraw; Dennis Rink (Piloting 4, Gunnery 3), Rifleman; Larry Casella (Piloting 4, Gunnery 4), Griffin
- Fire Lance: Chu-i Shigen Ozawa (Piloting 4, Gunnery 4), Archer; Norman Hanniwa (Piloting 5, Gunnery 4), Archer; Sandy Dunbar (Piloting 5, Gunnery 5), Crusader; Keith Conn (Piloting 4, Gunnery 4), Thunderbolt
- Elements of the 1st Sword of Light Aerospace Wing
- Alpha Flight: Tai-i K. K. Block (Piloting 4, Gunnery 4), Shilone; Chu-i Tomio Saidan (Piloting 4, Gunnery 3), Shilone
- Bravo Flight: Tai-i Kau Lin (Piloting 5, Gunnery 4), Sholagar; Chu-i Sam LaMonica (Piloting 4, Gunnery 4), Sholagar
Deployment
Binary Charlie enters at the western edge of BattleTech Map 1 during the Movement Phase of Turn 1. The Clan aerospace fighters enter at the left edge of the AeroTech map during the Movement Phase of Turn 2.
The Nova Cat units enter at the western edge of BattleTech Map 1 during the Movement Phase of Turn 6.
Victory Conditions
The Kurita player tries to inflict as much damage as possible on the Clan 'Mechs before withdrawing from the field.
The Clan player tries to destroy as many Kurita 'Mechs as possible.
Continue play until the last Kurita 'Mech has either left the board or been destroyed. Then add up the total tonnage of 'Mechs destroyed on each side. Each player gets 1 point for every 5 tons of enemy 'Mech destroyed. Also add up the tonnage of 'Mechs crippled (see Special Rule 1) on each side. Each player gets 1 point for every 10 tons of enemy 'Mech crippled.
The player with the highest point total wins the scenario.
Special Rules
-
A 'Mech is considered crippled if it loses a limb, takes a hit to its engine or gyro, has half its weapons disabled, or loses two-thirds (rounded down) of its total Armor Value. For example, a Loki has an Armor Value of 128. It can lose up to 84 points of armor before it is crippled.
-
Aerospace fighters may be armed with ground-attack munitions, including Swarm and Thunder LRMs, if the controlling player desires (see pp. 96-98, BattleTech Compendium, for rules on attacking ground targets). Fighters may also be armed with inferno bombs (see p. 108, BattleTech Compendium). Any fighter armed with ground attack munitions must be noted as such before play begins.
-
Combine aerospace fighters may also use cluster bombs. Treat these weapons as standard 40-point clusters for the purposes of determining thrust and handling losses to a fighter armed with cluster bombs. Calculate to-hit numbers for cluster bomb attacks per standard AeroTech rules. If a cluster bomb hits its target, it affects every unit in the hex the bomb strikes. A cluster bomb delivers 20 points of damage, distributed in 5-point groups. Roll 1D6 for each 5-point group; on a result of 1 or 2, the affected unit takes the damage in the rear of the appropriate location in the Front/Back column of the BattleMech Hit Locations table (p. 27, BattleTech Compendium). Cluster bombs that miss their targets scatter normally.
Scenario 6: The Wave Breaks
Game Set-Up
Use BattleTech rules for this scenario. Lay out the BattleTech mapsheets as shown.
Binary Elemental (listed under Game Set-Up)
- Alpha Elemental Star: Elemental Star Colonel Quinn (4 Elementals); Point Commander Rakan (4 Elementals); Point Commander Sokol (4 Elementals); Point Commander Elain (4 Elementals); Point Commander Yuath (4 Elementals)
- Bravo Elemental Star: Elemental Star Captain Coyler (4 Elementals); Point Commander Esther (4 Elementals); Point Commander Geis (4 Elementals); Point Commander Julian (4 Elementals); Point Commander Kobel (4 Elementals)
Deployment (Defender)
The Defender enters anywhere along the north edges of Map 1 or 2 during the Movement Phase of Turn 1.
Defender
The Defender comprises the following elements of the 5th Jaguar Regular Cluster.
- Trinary Battle
- Alpha Battle Star: Star Colonel Beaumont (Piloting 4, Gunnery 4), Man O' War-B; MechWarrior Dalla (Piloting 3, Gunnery 4), Mad Cat; MechWarrior Reece (Piloting 4, Gunnery 4), Thor; MechWarrior Lawford (Piloting 3, Gunnery 3), Loki; MechWarrior Grim (Piloting 4, Gunnery 3), Nobori-nin
- Bravo Battle Star: Star Captain Fried (Piloting 4, Gunnery 3), Vulture; MechWarrior Arun (Piloting 4, Gunnery 4), Thor-B; MechWarrior Levon (Piloting 4, Gunnery 3), Vulture; MechWarrior Warro (Piloting 4, Gunnery 4), Loki; MechWarrior Antes (Piloting 4, Gunnery 4), Fenris
- Charlie Battle Star: Star Captain Jarvia (Piloting 3, Gunnery 4), Ryoken; MechWarrior Nicholas (Piloting 3, Gunnery 4), Ryoken-C; MechWarrior Kunai (Piloting 3, Gunnery 3), Black Hawk-B; MechWarrior Rogar (Piloting 3, Gunnery 4), Puma; MechWarrior Evan (Piloting 4, Gunnery 4), Hankyu-A
Attacker
The Attacker comprises the following elements of the 1st Genyosha regiment.
- Company A, 1st Battalion
- Command Lance: Tai-sa Narimasa Asano (Piloting 3, Gunnery 3), Warhammer; Sho-sa Myamoto Goro (Piloting 4, Gunnery 4), Hatamoto-Chi; Chu-i Suni MacKay (Piloting 4, Gunnery 3), Battlemaster; Chu-i Kimberly Eschi (Piloting 4, Gunnery 3), Marauder
- Attack Lance: Tai-i Hohiro Chisei (Piloting 3, Gunnery 3), Guillotine; Sho-ko Martin Fox (Piloting 4, Gunnery 4), Orion; John Licata (Piloting 4, Gunnery 5), Grand Dragon; Davis Marree (Piloting 3, Gunnery 3), Wolverine
- Combat Lance: Tai-i Honda Jiro (Piloting 4, Gunnery 3), Ostroc; Sho-ko Hesham Ish (Piloting 4, Gunnery 4), Thunderbolt; Arthur Segneff (Piloting 3, Gunnery 3), Kintaro; Karl Bayani (Piloting 5, Gunnery 4), Shadow Hawk
- Elements of Charlie Company, 1st Battalion
- Heavy Lance: Chu-i Samuel Chin (Piloting 4, Gunnery 4), Crusader; Paul Lincoln (Piloting 4, Gunnery 4), Thunderbolt; Carlos Hewitt (Piloting 5, Gunnery 4), Grasshopper; Bob Fontaine (Piloting 4, Gunnery 4), Griffin
Deployment (Attacker)
The Attacker enters anywhere along the south edges of Maps 3 or 4 during the Movement Phase of Turn 1.
Victory Conditions
The Clan player tries to exit as many units as possible off the south edge of Map 4.
The Kurita player tries to prevent the Clan player from accomplishing his objective.
Once the last Clan unit has exited the mapsheets or been destroyed, consult the following tables to calculate the victor.
Victory Points Table
| Action | Points |
|---|---|
| Each Clan 'Mech destroyed | 30 |
| Each Clan 'Mech crippled | 20 |
| Each Elemental killed | 5 |
| Each Kurita 'Mech destroyed | -10 |
| Each Kurita 'Mech crippled | -5 |
| Each Clan 'Mech exiting the board | -20 |
| Each Elemental Point exiting the board | -10 |
Victory Table
| Total Points | Result |
|---|---|
| 600 or higher | Decisive Combine Victory |
| 599 to 300 | Substantial Combine Victory |
| 299 to 100 | Marginal Combine Victory |
| 99 to -159 | Draw |
| -160 to -329 | Marginal Clan Victory |
| -330 to -499 | Substantial Clan Victory |
| -500 or lower | Decisive Clan Victory |
Special Rules
- A 'Mech is "crippled" if it has lost a limb, has taken engine or gyro hits, at least half of its weapons are destroyed, or has lost more than two-thirds (rounded down) of its total Armor Points. Crippled 'Mechs cannot exit the board for purposes of scoring in this scenario.
Scenario 7: Dogfight
Game Set-Up
Use AeroTech rules for this scenario. Lay out the AeroTech Low Altitude Mapsheet.
Attacker
The Attacker comprises the following elements of the 25th Nova Cat Regulars Cluster and the 63rd Jaguar Regulars Cluster.
- Elements of Gamma Fighter Star, Trinary Fighter, 25th Nova Cat Regulars Cluster: Pilot Farrand (Piloting 3, Gunnery 3), Visigoth; Pilot Atalaya (Piloting 4, Gunnery 3), Visigoth; Pilot Gobel (Piloting 4, Gunnery 4), Sulla; Pilot Petrary (Piloting 5, Gunnery 4), Sulla
- Elements of Bravo Fighter Star, Trinary Fighter, 63rd Jaguar Regulars Cluster: Star Captain Saxon Mehta (Piloting 3, Gunnery 2), Jagatai; Pilot Landa (Piloting 3, Gunnery 4), Jagatai; Pilot Ricci (Piloting 4, Gunnery 3), Turk-B; Pilot Nehilla (Piloting 4, Gunnery 4), Turk-B; Pilot Taw (Piloting 3, Gunnery 3), Batu; Pilot Beres (Piloting 4, Gunnery 4), Batu
Defender
The Defender comprises the following elements of Wolf's Dragoons Orbital/Aerospace Operations Group, and the Kell Hounds Aerospace Fighter Battalion.
- Elements of White Flight, Delta AeroSpace Company, Wolf's Dragoons
- Alpha Lance: Captain Albert Larkin (Piloting 3, Gunnery 3), Eagle; Lieutenant Daryl Plunkett (Piloting 4, Gunnery 3), Eagle
- Beta Lance: Lieutenant Elana Maguire (Piloting 3, Gunnery 3), Corsair; Warrant Officer Goodman Stafford (Piloting 3, Gunnery 3), Corsair
- Elements of 1st AeroSpace Fighter Company, Kell Hounds
- Blue Lance: Lieutenant Marie d'Or (Piloting 3, Gunnery 3), Shilone; Warrant Officer William Hanrahan (Piloting 3, Gunnery 3), Shilone
- Elements of 2nd AeroSpace Fighter Company, Kell Hounds
- Command Lance: Captain Adam Fox (Piloting 3, Gunnery 3), Riever; Warrant Officer Hattie Cocrant (Piloting 4, Gunnery 4), Riever
- Red Lance: Lieutenant Brian Wolfson (Piloting 3, Gunnery 3), Chippewa; Warrant Officer Tim Branson (Piloting 4, Gunnery 4), Chippewa
Deployment
The Defender enters the mapsheet anywhere along the right edge during the Movement Phase of Turn 1. All fighters enter the map with an Initial Velocity equal to their Thrust.
The Attacker enters anywhere along the left edge of the mapsheet during the Movement Phase of Turn 1. All fighters enter the map with an Initial Velocity equal to their Thrust Ratings.
Victory Conditions
Each side wins by forcing the other to withdraw from the mapsheet. See Special Rules.
Special Rules
-
Beginning on Turn 3, each player makes a withdrawal check every turn. To perform the check, roll 2D6 and compare the result with the number of friendly fighters damaged or destroyed at that point. If the number of damaged or destroyed friendly fighters exceeds the roll result, that player must begin to withdraw his fighters.
-
Withdrawing fighters must move at their best speed toward the map edge where they entered. They may engage in weapons fire against any enemy unit between them and the edge of the map, or against any pursuing fighter, provided the withdrawing fighter has rearward-facing weapons.
Scenario 8: Hounds' Teeth
Game Set-Up
This scenario uses BattleTech and AeroTech rules. Lay out the BattleTech mapsheets as shown. Treat Hex Row 08XX on Maps 2 and 3 as Level 1 open terrain. This hex row represents the main road through the Waseda Hills.
Lay out the AeroTech Low Altitude Mapsheets. The highlighted hexes represent the location of the BattleTech mapsheets.
Defender
The Defender comprises the following elements of the Kell Hounds.
- Elements of 1st BattleMech Battalion
- Regimental Command Lance: Colonel Morgan Kell (Piloting 3, Gunnery 3), Archer; Captain Caitlin Shaw (Piloting 3, Gunnery 3), Shadow Hawk; Captain Akira Brahe (Piloting 4, Gunnery 3), Phoenix Hawk; Clifford Carney (Piloting 4, Gunnery 4), Crusader
- Recon Lance, 1st Company: Captain Daniel Allard (Piloting 3, Gunnery 3), Wolfhound; Meredith Devlin (Piloting 3, Gunnery 3), Jenner; Paul O'Clare (Piloting 5, Gunnery 4), Panther; Amber Brennan (Piloting 5, Gunnery 4), Panther
- Command Lance, 2nd Company: Major Salome Ward (Piloting 3, Gunnery 3), Wolverine; Lieutenant Mike Fitzhugh (Piloting 3, Gunnery 3), Catapult; Clint Murphy (Piloting 3, Gunnery 3), Quickdraw; Brendan O'Reilly (Piloting 4, Gunnery 4), Centurion
- Elements of AeroFighter Battalion, 1st Company
- Red Lance: Major Seamus Fitzpatrick (Piloting 3, Gunnery 3), Shilone; Warrant Officer Patrick McMahan (Piloting 3, Gunnery 3), Shilone
- White Lance: Lieutenant R. O. B. Kirk (Piloting 3, Gunnery 3), Slayer; Warrant Officer Kim Frost (Piloting 4, Gunnery 4), Slayer
Attacker
The Attacker comprises the following elements of the 119th Nova Cat Striker Cluster.
- Elements of Trinary Striker
- Alpha Battle Star: Star Colonel Achisson (Piloting 3, Gunnery 4), Huntsman; MechWarrior Elva (Piloting 4, Gunnery 4), Man O' War; MechWarrior Pini (Piloting 4, Gunnery 3), Mad Cat-C; MechWarrior Manza (Piloting 4, Gunnery 3), Vulture; MechWarrior Joanne (Piloting 4, Gunnery 3), Black Hawk
- Alpha Striker Star: Star Captain Willis (Piloting 4, Gunnery 4), Thor; MechWarrior Garlow (Piloting 4, Gunnery 4), Loki; MechWarrior Dominick (Piloting 3, Gunnery 3), Loki-B; MechWarrior Stephen (Piloting 3, Gunnery 4), Vulture-A; MechWarrior Beatrice (Piloting 3, Gunnery 4), Ryoken-C
- Elements of Binary Elemental Striker
- Bravo Elemental Striker Star: Elemental Star Captain Ross (4 Elementals); Point Commander Thomas (4 Elementals); Point Commander Helen (4 Elementals); Point Commander Leyden (4 Elementals); Point Commander Shawn (4 Elementals)
- Elements of Rogue Fighter Star: Pilot Richard (Piloting 3, Gunnery 2), Batu; Pilot Calista (Piloting 3, Gunnery 2), Batu; Pilot Phillip (Piloting 4, Gunnery 3), Avar; Pilot Atley (Piloting 3, Gunnery 4), Avar
Deployment
The Defender sets up his 'Mech units first, using Hidden Unit rules (see Special Rule 1), anywhere on Map 2 or 3.
The Defender's aerospace fighters enter anywhere along the right edge of the AeroTech Low Altitude Mapsheet during the Movement Phase of Turn 3. See Special Rule 4 for more scenario rules governing aerospace fighters.
The Attacker enters his 'Mech units anywhere along the west edge of Map 1 during the Movement Phase of Turn 1.
The Attacker's aerospace fighters enter anywhere along the left edge of the AeroTech Low Altitude Mapsheet during the Movement Phase of Turn 3. See Special Rule 4 for more scenario rules governing aerospace fighters.
Victory Conditions
The Attacker must exit as many undamaged units as possible from the eastern edge of Map 3 (see Special Rule 2).
The Defender must delay the Attacker's exit as long as possible, while damaging or destroying as many enemy units as he can (see Special Rule 2).
Once the last Clan unit has either left the board or been destroyed, consult the tables below to determine the winner of this scenario.
Victory Points Table
| Action | Points |
|---|---|
| Each undamaged Clan 'Mech exiting Map 3 | +50 |
| Each undamaged Elemental Point exiting Map 3 | +25 |
| Each Kell Hound 'Mech destroyed | +20 |
| Each Kell Hound 'Mech damaged | +10 |
| Each Clan 'Mech damaged or destroyed | -50 |
| Each Elemental Point damaged or destroyed | -30 |
| Each turn past Turn 5 the Attacker's exit is delayed | -10 |
Victory Table
| Total Points | Result |
|---|---|
| 800 or higher | Decisive Clan Victory |
| 799 to 530 | Substantial Clan Victory |
| 529 to 260 | Marginal Clan Victory |
| 259 to -199 | Draw |
| -200 to -399 | Marginal Kell Hound Victory |
| -400 to -599 | Substantial Kell Hound Victory |
| -600 or lower | Decisive Kell Hound Victory |
Special Rules
-
The Defender may deploy his ground forces using the Hidden Unit rules. To do so, the Defender secretly records the mapsheet and hex location where each concealed unit begins the game. Record the facing of each unit as well. These units remain hidden until they attack, move, or an enemy unit moves into its hex or ends its movement in an adjacent hex. See p. 57, BattleTech Compendium, for more on hidden units.
-
A BattleMech is "damaged" when it loses a limb, takes two engine hits or one gyro hit, suffers an ammunition explosion, or loses more than half of its weapons or more than two-thirds of its total Armor Value. Elemental Stars are "damaged" when they suffer their third casualty.
-
The Kell Hounds player gains victory points for each turn past 5 that any undamaged Clan units remain on the mapsheets. See the Victory Points Table.
-
Each side has a limited number of aerospace fighters. The Kell Hounds' Shilones and the Nova Cats' Avars have been designated as ground-attack craft, and each carries 2 60-point and 2 40-point bombs. These fighters may move onto the BattleTech mapsheets and attack at any time following their entry to the AeroTech mapsheet. Reduce each bomb-carrying fighter's initial Thrust Rating by 4. Any aerospace fighters may engage in strafing runs. Following each strafing or bomb run, the attacking fighter must remain on the AeroTech mapsheet for 1 full turn before it may make another ground-attack run.
-
Morgan Kell has developed the ability to prevent the sensors and targeting computers of other battlefield units from locking onto his 'Mech. To simulate this ability, treat Morgan Kell's Archer as though it were at double its actual range and add a +4 modifier to all to-hit numbers when resolving weapons fire against the 'Mech. Kell also adds a +2 modifier to his to-hit roll results when firing against enemy units.
Scenario 9: Back Stab
Game Set-Up
Lay out the BattleTech mapsheets as illustrated. This is a double-blind scenario for use with BattleTech rules (see Special Rule 1).
Defender
The Defender sets up first, anywhere on Maps 1 and 3. The Defender comprises the following elements of the 32nd Jaguar Regulars Cluster.
- Armored Infantry Platoon, 3rd Company: Chu-i Marco Gensei (3 Armored Infantrymen); Sho-ko Wayne Levy (3 Armored Infantrymen); Go-cho John Zawilla (3 Armored Infantrymen); Go-cho Daina Natale (3 Armored Infantrymen)
- Elements of Trinary Battle
- Alpha Battle Star: Star Captain Corinne Radick (Piloting 3, Gunnery 3), Loki; MechWarrior Patrick (Piloting 4, Gunnery 4), Vulture; MechWarrior Hedgar (Piloting 4, Gunnery 3), Ryoken; MechWarrior Taylor (Piloting 4, Gunnery 4), Fenris-A; MechWarrior Martin (Piloting 4, Gunnery 4), Koshi
- Charlie Battle Star: Star Captain Vincent (Piloting 4, Gunnery 4), Ryoken; MechWarrior Danvers (Piloting 4, Gunnery 3), Ryoken-B; MechWarrior Simon (Piloting 3, Gunnery 2), Black Hawk-D; MechWarrior Matthew (Piloting 4, Gunnery 4), Koshi; MechWarrior Russell (Piloting 4, Gunnery 3), Uller-A
- Elements of Binary Battle Elemental
- Alpha Elemental Battle Star: Elemental Star Captain Raymond (4 Elementals); Point Commander Wanda (4 Elementals); Point Commander Faust (4 Elementals); Point Commander Wagner (4 Elementals); Point Commander Basil (4 Elementals)
Attacker
The Attacker comprises the following elements of the 2nd Genyosha and the Otomo.
- Elements of 3rd Battalion, 3rd Company, Otomo
- Fire Lance: Chu-i Marissa Chinzao (Piloting 4, Gunnery 3), Rifleman; Richard Nehl (Piloting 3, Gunnery 4), Archer; Colin Sandowski (Piloting 3, Gunnery 3), Dervish; Earl Harkus (Piloting 4, Gunnery 4), Centurion
- Elements of 3rd Battalion, 2nd Genyosha
- Command Lance, 2nd Company: Tai-i Ruth Horner (Piloting 4, Gunnery 3), Warhammer; Chu-i Juri Belle Ford (Piloting 4, Gunnery 3), Shadow Hawk; S. M. Steidl (Piloting 4, Gunnery 4), Griffin; John Falatek (Piloting 4, Gunnery 4), Wolverine
Deployment
The Attacker enters along the northern edge of Map 3, west of the river, during the Movement Phase of Turn 1.
Victory Conditions
The Attacker must inflict as much damage on the Defender as possible, then withdraw off the north edge of Map 3.
The Defender must prevent the Attacker from accomplishing his objective.
Once the last Combine unit has exited the mapsheets or been destroyed, consult the following tables to determine the winner of this scenario.
Victory Points Table
| Action | Points |
|---|---|
| Each Clan 'Mech destroyed | +20 |
| Each Clan 'Mech damaged | +10 |
| Each Elemental killed | +5 |
| Each Elemental damaged | +2 |
| Each Combine 'Mech destroyed | -20 |
| Each Combine 'Mech damaged | -10 |
| Each Armored Infantryman killed | -5 |
| Each Armored Infantryman damaged | -2 |
Victory Table
| Total Points | Result |
|---|---|
| 300 or higher | Decisive Combine Victory |
| 299 to 200 | Substantial Combine Victory |
| 199 to 100 | Marginal Combine Victory |
| 99 to -64 | Draw |
| -65 to -133 | Marginal Clan Victory |
| -134 to -199 | Substantial Clan Victory |
| -200 or lower | Decisive Clan Victory |
Special Rules
-
This is a double-blind scenario. Do not allow the players to see the positions of enemy units on the mapsheets.
-
A 'Mech is damaged when 40 percent or more of its internal structure has been destroyed. An armored infantryman or Elemental is damaged when he takes 6 or more Damage Points.
-
The Combine units' familiarity with the terrain enables them to move unobserved by the Clan units until they fire, move adjacent to a Clan unit, or move onto Map 1 or 3. When using Hidden Movement, 'Mechs are limited to half their Walking speeds and their Heat Scales must not exceed 4. Any 'Mech that has suffered any gyro, engine, or sensor hits may not use Hidden Movement. A pilot using Hidden Movement must make a Piloting Skill Roll each turn. If the roll fails, his 'Mech has been spotted, and a counter is placed on the mapsheet. Infantry units may also make use of Hidden Movement, but cannot move faster than 2 hexes per turn. The target number for their hidden movement rolls is 4. When making a hidden move, the Combine player must note the following information on a piece of scrap paper: the turn number, the mapsheet, the starting hex, and the ending hex of the movement. For example, a note might read Turn 4; Horner's Warhammer, Starting Hex 1212, Mapsheet 2; Ending Hex 1210, Mapsheet 2.
-
The Clan player may detect a hidden Combine unit's presence by declaring the direction he is looking (1-6, relative to the unit's facing), and making a Gunnery Skill Roll against a Target Number 8. If the unit attempting the detection has an active probe, reduce the target number to 6. If the roll succeeds, the Clan unit detects all hidden Combine units in the sweep area; mark their locations with counters.
Scenario 10: The Sheep Fight
Game Set-Up
This scenario is for use with BattleTech rules. Lay out the BattleTech mapsheets as shown. First, lay out two mapsheets with the blank hex grid facing up. Then position the four terrain maps over the blank hex grid. Maps 1 and 3 are five full hexes away from Maps 2 and 4. This strip of blank hexes represents the Shaidan River. Treat the river hexes as Depth 4 Water Hexes.
Randomly place eleven Medium and Light buildings on the paved areas of Map 3. These buildings represent the town of Amori.
Treat all open terrain on Mapsheets 1 and 3 as Swamp Hexes. Apply all appropriate modifiers for units entering these hexes. Place two paper bridge markers across the "river." Treat all Woods Hexes on Maps 1 and 3 as open terrain.
Defender
The Defender comprises the following elements of the 1st Amori Militia and the 33rd Coastal Patrol Squadron.
All 'Mechs used by the 1st Amori Militia are older designs, as listed in Technical Readout 3025.
- Elements of BattleMech Company, 1st Amori Militia
- Command Lance: Tai-i Jeremy Velk (Piloting 4, Gunnery 3), Warhammer; Shujin Siv Seng Hong (Piloting 5, Gunnery 4), Trebuchet; John Naas (Piloting 4, Gunnery 5), Wolverine; Marianne Jerich (Piloting 4, Gunnery 4), Phoenix Hawk
- Recon Lance: Chu-i Max Sapporo (Piloting 4, Gunnery 4), Assassin; Shujin Anthony Campolo (Piloting 5, Gunnery 3), Panther; Bertrand Moore (Piloting 4, Gunnery 4), Wasp; Louis Wegert (Piloting 4, Gunnery 4), Stinger
- Elements of Tank Company, 1st Amori Militia
- 1st Platoon: Sho-ko Alan Gray (Piloting 4, Gunnery 3), Vedette Medium Tank; Gunjin E. F. Arott (Piloting 4, Gunnery 4), Striker Light Tank; Gunjin Virginia Sauer (Piloting 4, Gunnery 4), Striker Light Tank; Gunjin Iola Harkness (Piloting 3, Gunnery 3), Scorpion Light Tank
- Elements of Infantry Company, 1st Amori Militia
- 1st Platoon: Chu-i Hanaita Setochi (1 Foot Machine Gun Platoon)
- 2nd Platoon: Sho-ko Coleman Ellis (1 Foot Rifle Platoon)
- Elements of 33rd Coastal Patrol Squadron
- Chu-i Morgan Stewart (Piloting 3, Gunnery 4), Monitor Naval Vessel Minikuchi
Attacker
The Attacker comprises the following elements of the Jaguar 22nd Freebirth Cluster.
- Binary Striker
- Alpha Striker Star: Star Captain Edna (Piloting 3, Gunnery 4), Shadow Hawk IIC; MechWarrior Forman (Piloting 3, Gunnery 4), Jenner IIC; MechWarrior Berlin (Piloting 4, Gunnery 4), Locust IIC; MechWarrior Robert (Piloting 3, Gunnery 3), Peregrine; MechWarrior Magdy (Piloting 4, Gunnery 4), Vixen
- Bravo Striker Star: Star Captain Jacqueline (Piloting 4, Gunnery 4), Griffin IIC; MechWarrior Geary (Piloting 3, Gunnery 2), Hellhound; MechWarrior Arthur (Piloting 4, Gunnery 3), Peregrine; MechWarrior Foster (Piloting 4, Gunnery 3), Jenner IIC; MechWarrior Sereno (Piloting 4, Gunnery 4), Locust IIC
- Elements of Trinary Elemental
- Elemental First Star: Elemental Star Captain Jonas (4 Elementals); Point Commander Frayne (4 Elementals); Point Commander Andrea (4 Elementals); Point Commander Bridger (4 Elementals); Point Commander Logan (4 Elementals)
- Elemental Third Star: Elemental Star Captain Sennett (4 Elementals); Point Commander Ita (4 Elementals); Point Commander Hector (4 Elementals); Point Commander Druwin (4 Elementals); Point Commander Muir (4 Elementals)
Deployment
Defender: The Defender may deploy his 'Mechs, tanks, and infantry units anywhere south of Hex Row 10xx on Maps 1 and 3. The Minikuchi may deploy in any Water Hex south of Hex Row 10xx or the river, using Hidden Unit rules (see Special Rule 1).
Attacker: The Attacker may enter anywhere along the north edge of Maps 1 and 3 during the Movement Phase of Turn 1.
Victory Conditions
The Attacker must seize control of the Shaidan River bridges and the town of Amori (see Special Rules 4 and 5).
The Defender must prevent the Attacker from achieving his victory conditions.
Play ends when the last Attacker unit has exited the mapsheets, surrendered, or been destroyed. The Attacker may also end play by occupying Amori for five complete turns (see Special Rule 5). Consult the following tables to determine the outcome of this scenario.
Victory Points Table
| Action | Points |
|---|---|
| Clan player captures Amori | +25 |
| Each bridge captured by the Clan Player | +10 |
| Each militia 'Mech destroyed | +20 |
| Each militia tank destroyed | +15 |
| The Minikuchi destroyed | +10 |
| Each militia infantry platoon destroyed | +5 |
| Each bridge destroyed | -10 |
| Each Clan 'Mech destroyed | -20 |
| Each Elemental Point destroyed | -15 |
| Amori never captured | -25 |
Victory Table
| Total Points | Result |
|---|---|
| 250 or higher | Decisive Clan Victory |
| 249 to 166 | Substantial Clan Victory |
| 165 to 83 | Marginal Clan Victory |
| 82 to -116 | Draw |
| -117 to -233 | Marginal Militia Victory |
| -234 to -349 | Substantial Militia Victory |
| -350 or lower | Decisive Militia Victory |
Special Rules
-
The Minikuchi may deploy using Hidden Unit rules. Record the initial location of the craft on a piece of scratch paper, making sure to include both the map and hex numbers. If the militia player wants to start the Minikuchi in the river, it must be in a river bank hex (one of the half hexes). In this case note the Minikuchi's starting location as "River bank, adjacent to Hex XXXX." See p. 57, BattleTech Compendium, for more on Hidden Unit rules.
-
The militia player must prevent the Attacker from gaining control of the river bridges by destroying them. Treat each bridge as a Medium Building, with a 40 CF. The bridges are Level 1 and block LOS.
-
The militia rifle platoon has three 15-point demolition charges, which may be used to destroy the bridges. Planting the charges requires 2 full turns, during which the platoon may not move or fire its weapons. Place a counter on any hex mined with a demolition charge. The rifle platoon or Tai-i Velk may detonate the charges once they are in place. These demolition charges are unsuitable for anti-'Mech use and may not be used to "kneecap" enemy BattleMechs. The Elementals may attempt to remove the charges if they wish. To remove one of the charges, an Elemental Point must move into the hex containing the charge and roll 2D6. If the result is 8 or higher, the Elementals successfully disarm the charge. The charges may not be re-armed once they are disabled.
-
To capture the bridges, the Clan player must clear the 3-hex areas around each end of the bridge of militia units for 3 full turns. If the Defender destroys a bridge after it has been captured, the Clan player loses any victory points for capturing the bridge and the Defender wins the victory points for destroying it.
-
To capture Amori, the Clan player must clear all three paved areas of militia units for 5 full turns.
-
The Forced Withdrawal rule is in effect (see p. 24). Clan units must withdraw off the north edge of Maps 1 or 3. Militia ground units must withdraw off the south edge of Maps 2 or 4. The Minikuchi must withdraw off the western edge of the mapsheets.
-
Units forced to withdraw count as "destroyed" when determining victory points.
Scenario 11: Black Thunder
Game Set-Up
This scenario uses MechWarrior, Second Edition rules. The players control the DEST troopers, while the gamemaster controls the crew of the Clan DropShip Broadsword.
The deck plan of the Broadsword (quarters, fighting bay, drop chute, elevator, ramps, repair area, engine room, bridge, 'Mech bay, conference room, and crew quarters) is printed as a diagram on p. 60 and is not reproduced here.
Defender
The Defender comprises the crew and an Elemental Point from the security detail of the Union Class DropShip Broadsword.
- Captain, First Officer: Both the captain and first officer use the Free Trader Archetype, p. 46, MechWarrior, Second Edition, except for equipment. Each has an Armored Vest, a Laser Pistol w/5 reloads, Medkit, and a Personal Communicator.
- Chief Engineer, Head 'Mech Tech, Head Fighter Tech: These officers use the Tech Archetype, p. 48, MechWarrior, Second Edition, with the following exceptions. The chief engineer substitutes the Technician/DropShip Skill for the archetype's Technician/BattleMech Skill. The head fighter tech substitutes the Technician/Aerospace Skill for the archetype's Technician/BattleMech Skill. Each of these officers is equipped with an Armored Vest, a Hold-Out Laser Pistol w/3 reloads, a Medkit, and a Personal Communicator.
- Bridge Crew (2): These officers use the Free Trader Archetype, p. 46, MechWarrior, Second Edition, except for equipment. Each bridge crew member has an Armored Vest, an Auto Pistol w/2 reloads, a Medkit, a Personal Communicator, and a Submachine Gun w/5 reloads.
- Engine Room Crew (3): The engine room crew members use the Tech Archetype, p. 48, MechWarrior, Second Edition, with the following exceptions. Each replaces the archetype's Technician/BattleMech Skill with the Technician/DropShip Skill. Each has an Armored Vest, an Auto Pistol w/2 reloads, a Medkit, a Personal Communicator, and a Submachine Gun w/5 reloads.
- Technical Crew (4): The technical crew members all use the Tech Archetype, p. 48, MechWarrior, Second Edition, and have the same equipment as the engine room crew members.
- Alpha Point, Security Elemental Star: Use the Clan Elemental Archetype, p. 43, MechWarrior, Second Edition, for the five Elementals of this Point. Substitute the following equipment for the gear listed in the Archetype. Three of the Elementals each carry a Small Laser, SRM-2 Launcher, and a Gyro-jet Pistol. The two remaining Elementals each carry a Machine Gun, an SRM-2 Launcher, and an Auto Pistol. All wear Clan battle armor (see Special Rule 5).
Attacker
The Attacker comprises the ten-member 6th Draconis Elite Strike Team. All team members share the following statistics.
- DEST Members (10)
- Attributes: BLD 6 (6+), REF 5 (7+), INT 5 (7+), LRN 5 (7+), CHA 1 (11+)
- Characteristics: Athletic 7+, Physical 8+, Mental 8+, Social 12+
- Advantages: Well-Equipped
- Skills: Acrobatics 3 (4+), Blade 4 (4+), Escape Artist 1 (7+), Perception 3 (5+), Security Systems 1 (7+), Small Arms 4 (4+), Stealth 3 (5+), Streetwise 1 (11+), Support Weapons 2 (6+), Unarmed Combat 3 (4+)
- Edge: 2
- Equipment: Armored Body Suit w/ECM, Camo, IR sneak functions; Blazer w/10 reloads; 2 Medkits; 4 Microgrenades; Mydron Auto Pistol w/15 reloads; Personal Communicator; Vibroblade
Individual Team Members. The following list identifies the individual DEST members and notes any modifications to their basic DEST profiles.
- Team Leader Tai-i Maeda Shingen: add Leadership 3 (9+), Tactics 3 (9+).
- Assistant Team Leader Chu-i Harry Kuit: add Leadership 3 (9+), Tactics 2 (10+).
- Team Sniper Sho-ko Selig Moshula: add Perception 4 (6+), Small Arms 5 (4+), and replace Blazer and reloads with a Gyrojet Rifle w/10 reloads and an IR-capable Sniper Scope.
- Communications Specialist Gunjin William Machesky: add Communications/Conventional 4 (5+), and a Backpack IFF Transceiver.
- Heavy Weapons Specialist Gunso Ralph Ge: add Gunnery 2 (7+) for all weapons, and Support Weapons 3 (6+).
- Demolitions Specialist Gunjin Yuval Kost: add Demolitions 3 (6+), and 5 Demolition Charges.
- Gunso Martin Davis: add Piloting/Spacecraft 3 (6+).
- Gunso Victor Kaufman: add Piloting/Spacecraft 3 (6+), Tech/Spacecraft 3 (6+).
- Gunjin Carole Pock and Gunjin Thomas DeMarco use the supplied DEST profile with no modifications.
Deployment
Elementals 1 and 2 begin the scenario outside the DropShip, next to the Mech ramp. Elementals 3, 4, and 5 begin the game on the bridge, as do the captain, first officer, and bridge crew. The chief engineer and engine room crew begin the game on the engineering deck. The head 'Mech tech, head fighter tech and technical crew members may begin the game anywhere in the DropShip, except the bridge or engineering deck.
The members of the 6th DEST begin off the map. The Attacker players determine where and how they enter.
Victory Conditions
The DEST members try to capture the Clan DropShip. If they cannot, they try to destroy the vessel.
The DropShip's security element and crew try to prevent the DEST members from accomplishing their assignment.
Victory Table
| Action | Result |
|---|---|
| DropShip captured | Decisive Combine Victory |
| DropShip destroyed | Marginal Combine Victory |
| DropShip not captured or destroyed | Decisive Clan Victory |
Special Rules
-
As the DEST members approach the DropShip, each makes an Opposed Skill Roll, pitting their individual Stealth Skills against the Elemental guards' LRN ratings. Reduce the Elementals' roll results by 2 to simulate the effects of the DEST members' Sneak Suits. Once aboard the DropShip, the DEST members must deactivate their Sneak Suits, for fear of shooting one another during a fire fight.
-
If the Elementals or a crew member detect the DEST members, an alarm automatically sounds. All DropShip crew members respond to the alarm, except for the captain, first officer, and chief engineer, who remain in their original positions. The bridge crew relays the alarm to nearby Clan DropShips and a relief force of 10 Elementals responds, arriving at the Broadsword's landing zone within 5 minutes. These Elementals use the Clan Elemental Archetype, p. 43, MechWarrior, Second Edition, and carry Machine Guns, Auto Pistols, and SRM 2 Launchers.
-
The DropShip is considered captured if the DEST members clear the vessel of active defenders. The DEST team then may attempt to start the vessel's engines and take off. Starting the engines takes 5 minutes. To attempt an engine start, one of the DEST team members with Piloting/Spacecraft skill must be alive and conscious. Any successes on a Piloting/Spacecraft Skill Roll allow the character to start the 'Ship's engines. Every point in the margin of success allows the character to reduce the start-up time by 1 minute, to a minimum of 3 minutes. Once the engines have been started, a second successful Piloting/Spacecraft Skill Roll allows the vessel to lift off. The DropShip's weapons systems may be brought on-line with a successful Gunnery/Spacecraft roll. To avoid being shot down by friendly fighters, the DEST team carries a backpack-sized IFF transceiver. This device must be wired into the Broadsword's communications system, which requires a Communications/Conventional Skill Roll, with a +2 modifier. Any success indicates the equipment is hooked up and functioning properly.
-
If the DEST members cannot capture the DropShip, they may destroy the vessel with their 5 Demolition Charges. Setting the charges requires one successful Demolitions Skill Roll per charge. One charge must be set on the bridge and three in engineering to destroy the DropShip. Planting each charge requires 2 minutes. The DEST team may use time delay or radio detonators to trigger the charges.
-
Elemental battle armor is similar to a Flak/Ablative Body Suit. It affords the wearer complete protection from primitive melee weapons, vibrodaggers, stunsticks and neural whips. It reduces the damage of a vibroblade by one-half. Battle armor reduces the damage of slug throwers and energy weapons by two-thirds and absorbs a total of 40 Damage Points. Each battle armor suit also includes a Personal Communicator, starlight viewer, and an IR scanner. Putting on and powering up a suit of Elemental armor takes 5 minutes.
Elemental Readiness Table
| Roll Result | Readiness |
|---|---|
| 1 | Armored, on duty outside the 'Mech bay |
| 2 | Armored, on duty outside the bridge |
| 3-4 | Unarmored, off duty, resting in the crew quarters |
| 5 | Unarmored, on the bridge |
| 6 | Unarmored, in the 'Mech bay |
Scenario 12: Blind Man's Bluff
Game Set-Up
This scenario uses BattleTech rules. Lay out the BattleTech mapsheets as illustrated. Place building counters as indicated on the mapsheets, and treat all Water Hexes on Map 1 as Pavement Hexes. Treat Hexes 1310, 1409, and 1509 on Map 1 as Paved Hexes.
Defender
The Defender comprises the Luthien Armor Works Security Company.
- BattleMech Lance
- Chu-i Luciana McQuaide (Piloting 4, Gunnery 3), Crusader
- Kashira Carl DiPerna (Piloting 4, Gunnery 4), Thunderbolt
- Go-cho Harry Schultz (Piloting 4, Gunnery 3), Grand Dragon
- Gunjin R. Paul Hawn (Piloting 5, Gunnery 3), Shadow Hawk
- Infantry Company
- Tai-i Ofuji Seibei (1 Foot Rifle Platoon)
- Chu-i Bruno Gaghan (1 Foot Rifle Platoon)
- Kashira Pascal Tan (1 Foot Rifle Platoon)
Attacker
The Attacker comprises the following elements of Trinary Striker, 22nd Jaguar Regulars Cluster.
- Bravo Striker Star
- Star Captain Honse (Piloting 3, Gunnery 2), Mad Cat-D
- MechWarrior Marc (Piloting 4, Gunnery 3), Thor-A
- MechWarrior Douglass (Piloting 4, Gunnery 4), Vulture
- MechWarrior Rowles (Piloting 3, Gunnery 4), Ryoken-A
- MechWarrior Jucha (Piloting 4, Gunnery 4), Puma-B
Deployment
Defender: The Defender sets up first, using Hidden Unit rules (see p. 57, BattleTech Compendium). The 'Mech lance may deploy anywhere on Mapsheets 1 or 2. At least one infantry platoon must deploy within the confines of the industrial complex (the paved area on Mapsheet 1).
Attacker: The Attacker enters the mapsheets anywhere along the east edge of Mapsheet 2, during the Movement Phase of Turn 1.
Victory Conditions
The Attacker tries to destroy the Luthien Armor Works.
The Defender tries to prevent the Attacker from accomplishing his objective.
Once the last unit from one side has withdrawn or been destroyed, consult the following tables to determine the winner of this scenario.
Victory Points Table
| Action | Points |
|---|---|
| Each Combine 'Mech destroyed | +15 |
| Each Combine 'Mech forced to withdraw | +10 |
| Each Combine platoon destroyed | +5 |
| Each Combine platoon forced to withdraw | +3 |
| Each complex building destroyed | +5 |
| Each complex building intact | -5 |
| Each Clan 'Mech forced to withdraw | -10 |
| Each Clan 'Mech destroyed | -15 |
Victory Table
| Total Points | Result |
|---|---|
| 160 or higher | Decisive Clan Victory |
| 159 to 105 | Substantial Clan Victory |
| 104 to 95 | Marginal Clan Victory |
| 94 to -54 | Draw |
| -55 to -109 | Marginal Combine Victory |
| -110 to -164 | Substantial Combine Victory |
| -165 or lower | Decisive Combine Victory |
Note: the range "104 to 95" for Marginal Clan Victory is transcribed as printed in the book; the adjoining ranges are as printed as well.
Special Rules
-
Any time a 'Mech located on one of the Paved Hexes that represent the complex attempts to locate an enemy unit, add a +2 modifier to the target numbers of its rolls. Add a +2 modifier to target numbers for all to-hit rolls for ranged weapon (not physical) attacks also. The effects of Beagle Active Probes, Artemis Fire Control Systems, Narc beacons, and targeting computers are negated while the 'Mech possessing these systems or its target is in the complex. Likewise, Streak missile systems act like ordinary SRM launchers within the complex. If this scenario is used for team play, team members may not communicate with any player whose unit is inside the complex. Once that unit leaves the complex, the players may converse freely.
-
The Attacker may destroy the complex buildings according to the rules on p. 39, BattleTech Compendium. For rules on setting fires in buildings, see pp. 53 and 54 of the BattleTech Compendium. Buildings that are reduced to less than one-fourth (rounded down) of their original Construction Factor are considered "destroyed" for the purpose of awarding victory points.
-
A 4-meter high chain-link fence surrounds the complex, except in the hex where the road enters the paved area. Infantry units entering or leaving the complex must spend 1 complete turn climbing the fence before they can proceed. 'Mechs must spend 1 extra MP and make a successful Piloting Skill Roll to cross the fence. If the roll fails, the 'Mech falls and may not move or fire its weapons until the next turn. Once a 'Mech has broken through the fence, place a marker in that hex to show that the fence has been destroyed. Infantry may then cross the fence through that hex without the full-turn delay.
-
The Forced Withdrawal rule is in effect for this scenario (see p. 24).
Scenario 13: In the Dark
Game Set-Up
Lay out the BattleTech mapsheets as shown. Treat all Water Hexes as sinkholes of the same depth. Treat all Woods Hexes as open terrain. Place five Medium Buildings on Mapsheet 6, as illustrated. These buildings represent the mining complex. Each has 40 CF.
Defender
The Defender comprises the following elements of the 143rd Luthien Defense Regiment.
- Elements of 1st Battalion
- Regimental Command Lance: Tai-sa Alexi Nagumo (Piloting 3, Gunnery 3), BattleMaster*; Sho-sa Tereshima Keiji (Piloting 3, Gunnery 3), Warhammer*; Tai-i James Madder (Piloting 4, Gunnery 3), Stalker; Tai-i Chester Emery (Piloting 4, Gunnery 4), Marauder
- Heavy Lance, A Company: Tai-i Anthony Kilmo (Piloting 4, Gunnery 4), Archer; Kashira Mayumi Otsuji (Piloting 4, Gunnery 4), Thunderbolt; Alten Ciul (Piloting 4, Gunnery 3), Scorpion; Edward Halo (Piloting 4, Gunnery 4), Wolverine
- Recon Lance, A Company: Chu-i Kieko Suzuki (Piloting 3, Gunnery 3), Vulcan; Go-cho John Flannagan (Piloting 3, Gunnery 4), Assassin; Do Young Kwak (Piloting 4, Gunnery 4), Jenner; Christine Ford (Piloting 4, Gunnery 4), Stinger*
- Elements of C Company
- Tai-i Ashida Uda, 1 Jump Infantry Platoon w/Lasers
- Kashira Yoshtiaka Tanaka, 1 Jump Infantry Platoon w/SRMs
- Gunso Takashi Okura, 1 Foot Infantry Platoon w/Machine Guns
- Gunso Richard Costa, 1 Foot Infantry Platoon w/Flamers
*See Special Rules 1.
Attacker
The Attacker comprises the following elements of the 225th Jaguar Battle Cluster.
- Alpha Battle Star, Binary Battle: Star Colonel Arista (Piloting 3, Gunnery 3), Daishi; MechWarrior Havelock (Piloting 3, Gunnery 2), Masakari-C; MechWarrior Landon (Piloting 3, Gunnery 3), Man O' War; MechWarrior Stacey (Piloting 3, Gunnery 3), Man O' War-A; MechWarrior Giles (Piloting 3, Gunnery 2), Mad Cat-C
- Bravo Battle Star, Binary Battle: Star Captain Elaine (Piloting 4, Gunnery 3), Loki*; MechWarrior Hobart (Piloting 3, Gunnery 2), Vulture-C; MechWarrior Vega (Piloting 4, Gunnery 3), Ryoken; MechWarrior Cynric (Piloting 3, Gunnery 3), Ryoken-C; MechWarrior Zera (Piloting 4, Gunnery 4), Puma
- Alpha Elemental Star, Trinary Elemental: Elemental Star Colonel Arundel (4 Elementals); Point Commander Landmar (4 Elementals); Point Commander Reha (4 Elementals); Point Commander Slade (4 Elementals); Point Commander Ivor (4 Elementals)
- Charlie Elemental Star, Trinary Elemental: Elemental Star Captain Bellamy (4 Elementals); Point Commander Dow (4 Elementals); Point Commander Odessa (4 Elementals); Point Commander Channing (4 Elementals); Point Commander Lucinda (4 Elementals)
Deployment
Defender: The Defender sets up first, anywhere on Mapsheets 2, 3, 5, or 6. At least two 'Mechs and one platoon of infantry must deploy within 3 hexes of the M4 building in Hexes 0907-1007. Remaining infantry may begin inside any of the buildings.
Attacker: The Attacker enters anywhere along the south edge of Mapsheets 1 and 4, during the Movement Phase of Turn 1.
Victory Conditions
The Attacker must destroy the mining complex.
The Defender tries to prevent the Attacker from achieving his objective.
Once the last unit from one side has either been destroyed or withdrawn, consult the following tables to determine the winner of this scenario.
Victory Points Table
| Action | Points |
|---|---|
| Building 0907-1007 destroyed | +20 |
| Each complex building destroyed | +10 |
| Each Combine 'Mech destroyed | +10 |
| Each Combine infantry platoon destroyed | +5 |
| Each Elemental Point destroyed | -5 |
| Each Clan 'Mech destroyed | -10 |
| Each complex building intact | -10 |
| Building 0907-1007 intact | -20 |
Victory Table
| Total Points | Result |
|---|---|
| 180 or higher | Decisive Clan Victory |
| 179 to 100 | Substantial Clan Victory |
| 99 to 30 | Marginal Clan Victory |
| -54 to 29 | Draw |
| -55 to -119 | Marginal Combine Victory |
| -120 to -189 | Substantial Combine Victory |
| -190 or lower | Decisive Combine Victory |
Special Rules
-
All Night Combat rules are in effect (see p. 61, BattleTech Compendium). 'Mechs mounting searchlights are denoted with an asterisk in the Attacker and Defender sections.
-
The Forced Withdrawal rule is in effect for this scenario (see p. 24).
-
See p. 39, BattleTech Compendium, for rules governing damage to buildings. For the purpose of awarding victory points, each building is "destroyed" when its Construction Factor has been reduced to 10 or lower.
Scenario 14: Cat and Dragon
Game Set-Up
This scenario uses BattleTech rules. Lay out the BattleTech mapsheets as shown.
Defender
The Defender comprises the following elements of the Dragon's Claws.
- Liaison Officer: Sho-sa Shin Yodama (Piloting 4, Gunnery 3), Phoenix Hawk
- Regimental Command Lance
- Coordinator Takashi Kurita (Piloting 3, Gunnery 3), Grand Dragon
- Chu-sa Date Tadakatsu (Piloting 3, Gunnery 3), Mauler
- Sho-sa Toshio Ishmaru (Piloting 4, Gunnery 3), Cyclops
- Sho-sa Keiji Magaino (Piloting 4, Gunnery 4), Katana
- Elements of A Company, 1st Battalion
- Command Lance: Tai-sa Kazuhiro Sonoda (Piloting 4, Gunnery 3), Orion; Tai-i Kouji Oomori (Piloting 4, Gunnery 4), JagerMech; Kashira Hideki Arai (Piloting 4, Gunnery 4), Crusader; Go-cho Sunichi Furukawa (Piloting 3, Gunnery 3), Catapult
- Medium Lance: Tai-i Teji Udea (Piloting 3, Gunnery 4), Shadow Hawk; Gunso Nozomu Tanabe (Piloting 5, Gunnery 3), Trebuchet; Yano Jun (Piloting 4, Gunnery 4), Hunchback; Kenyu Kobiyashi (Piloting 4, Gunnery 4), Centurion
Attacker
The Attacker comprises the following elements of the 32nd Nova Cat Assault Cluster.
- Alpha Assault Star, Trinary Assault: Star Colonel Santo (Piloting 3, Gunnery 3), Daishi-A; MechWarrior Garrett (Piloting 4, Gunnery 3), Gladiator-C; MechWarrior Rita (Piloting 3, Gunnery 4), Masakari; MechWarrior Ellis (Piloting 3, Gunnery 3), Man O' War; MechWarrior Lawrence (Piloting 3, Gunnery 3), Thor
- Bravo Assault Star, Trinary Assault: Star Captain Erika (Piloting 4, Gunnery 3), Thor; MechWarrior Victor (Piloting 4, Gunnery 3), Loki-B; MechWarrior Stephan (Piloting 4, Gunnery 4), Vulture-C; MechWarrior Corwin (Piloting 4, Gunnery 4), Ryoken-D; MechWarrior Lynette (Piloting 3, Gunnery 3), Ryoken
- Bravo Elemental Star, Trinary Elemental: Elemental Star Captain Alonzo Tutuola (4 Elementals); Point Commander Eileen (4 Elementals); Point Commander Norman (4 Elementals); Point Commander Burney (4 Elementals); Point Commander Marcellus (4 Elementals)
Deployment
Defender: The Defender sets up first, anywhere on Mapsheet 2 or 4 east of Hex Row 06xx.
Attacker: The Attacker enters anywhere along the west edge of Mapsheet 1 or 3.
Victory Conditions
The Attacker tries to drive the Defender from the field.
The Defender tries to prevent the Attacker from accomplishing his mission.
When the last unit from either side has been destroyed or forced to withdraw, consult the following tables to determine the outcome of this scenario.
Victory Points Table
| Action | Points |
|---|---|
| Takashi Kurita killed | +20 |
| Takashi Kurita's 'Mech destroyed | +15 |
| Each Combine 'Mech destroyed | +10 |
| Each Combine 'Mech forced to withdraw | +5 |
| Each Clan 'Mech destroyed | -10 |
| Each Clan 'Mech forced to withdraw | -5 |
| Each Elemental Point destroyed | -5 |
| Each Elemental Point forced to withdraw | -3 |
Victory Table
| Total Points | Result |
|---|---|
| 125 or higher | Decisive Clan Victory |
| 124 to 80 | Substantial Clan Victory |
| 79 to 35 | Marginal Clan Victory |
| 34 to -34 | Draw |
| -35 to -73 | Marginal Combine Victory |
| -74 to -109 | Substantial Combine Victory |
| -110 or lower | Decisive Combine Victory |
Special Rules
-
Shin Yodama had strict orders to prevent Takashi Kurita from charging headlong into battle at the first sight of the enemy. Beginning in the Initiative Phase of the first subsequent turn after the first Clan unit enters the range of Takashi's weapons, the Combine player makes an Opposed Skill Roll, using Yodama's Leadership Skill of 2 (4+) against Takashi's Leadership Skill of 3 (5+). Add a +2 modifier to Yodama's roll result to reflect the destruct device Theodore had placed in Takashi's 'Mech. If Yodama succeeds, the Coordinator remains under his control. If Takashi wins the contest, he immediately charges the nearest enemy unit and engages it in physical combat. Assuming the Coordinator survives that skirmish, he then charges the next nearest enemy unit, repeating this behavior throughout the Scenario. In the Initiative Phase of the first turn after Takashi breaks control, make a Piloting Skill Roll for all surviving Dragon's Claws 'Mechs. Any 'Mechs that fail this roll will also charge the nearest enemy 'Mech not engaged in physical combat. No warrior who breaks control may be brought back under control during this scenario.
-
The Dragon's Claws are automatically freed to fight as soon as any Clan unit enters Hex Row 14xx on Mapsheet 1 or 3.
-
If Takashi Kurita is killed or his 'Mech destroyed, the Combine player must make a "morale check" for each surviving Dragon's Claw MechWarrior during the Initiative Phase of the following turn. To perform the check, the player rolls 2D6 for each MechWarrior, applying a +2 modifier to the result if Takashi has been killed. On a final result of 4-8, the MechWarrior goes berserk in an attempt to avenge the fallen Coordinator. A berserk MechWarrior charges the nearest enemy unit. Add a +1 modifier to all to-hit numbers for berserk warriors making ranged-weapon attacks. Apply a -2 modifier to to-hit numbers for physical attacks. Once a warrior goes berserk, he remains so until he destroys an enemy unit in close combat. If the result of the morale check roll is 9 or greater, the MechWarrior breaks and flees. His 'Mech must move off the eastern edge of Mapsheet 2 or 4 at its fastest possible speed and may not stop to engage an enemy in physical combat. A fleeing 'Mech may engage an enemy unit in weapons combat only if the enemy unit lies between the fleeing 'Mech and the eastern edge of the mapsheet. If Shin Yodama still lives, and his 'Mech's sensors still function, he may attempt to rally any fleeing 'Mechs during the Initiative Phase of each turn. To make a rally attempt, roll 2D6 for each fleeing 'Mech. On a result of 9 or greater, Yodama successfully rallies that particular 'Mech.
If Takashi's 'Mech is destroyed but he survives, any Kurita warrior receiving a 2, 3, or 4 on his morale check roll immediately runs his 'Mech to the hex where the Coordinator's 'Mech was destroyed to protect Takashi from the enemy.
-
If Shin Yodama keeps the Coordinator under control and the Combine wins this scenario, go to Scenario 15. If Takashi escapes Yodama's control or the Combine forces lose this scenario, go to Scenario 16.
-
The Forced Withdrawal rule is in effect for this scenario (see p. 24).
Scenario 15: We Are the Anvil
Game Set-Up
This scenario uses BattleTech rules. Lay out the BattleTech mapsheets as illustrated. Treat all Rough Terrain Hexes on Mapsheet 5 as Light Woods Hexes.
If playing this scenario as part of a mini-campaign with Scenario 14, use the Clan forces that survived Scenario 14. No time for repairs or reloads exists between scenarios. If playing this scenario as a self-contained game, use the following forces. Reduce by half the ammunition supplies for all ballistic weapons (autocannons, Gauss rifles, missile launchers, and the like).
Defender
The Defender comprises the following Clan forces.
- Elements of Alpha Elemental Star, Trinary Elemental: Elemental Salton (2 Elementals); Point Commander Paola (3 Elementals); Point Commander Dugan (4 Elementals); Point Commander Mintha (1 Elemental)
- Elements of Bravo Elemental Star, Trinary Elemental: Elemental Star Captain Alonzo (3 Elementals); Point Commander Eileen (3 Elementals); Elemental Baird (2 Elementals); Point Commander Norman (2 Elementals); Point Commander Marcellus (4 Elementals)
- Elements of Charlie Elemental Star, Trinary Elemental: Elemental Star Captain Reese (3 Elementals); Point Commander Deirdre (4 Elementals); Point Commander Lazaro (2 Elementals); Elemental Wirt (3 Elementals); Point Commander Flann (2 Elementals)
- Elements of the 32nd Nova Cat Assault Cluster
- Alpha Assault Star, Trinary Assault: Star Colonel Sarik (Piloting 3, Gunnery 3), Daishi-A; MechWarrior Rita (Piloting 3, Gunnery 4), Masakari; MechWarrior Ellis (Piloting 3, Gunnery 3), Man O' War
- Bravo Assault Star, Trinary Assault: Star Captain Erika (Piloting 4, Gunnery 3), Thor; MechWarrior Victor (Piloting 4, Gunnery 3), Loki-B; MechWarrior Stephan (Piloting 4, Gunnery 4), Vulture-C; MechWarrior Corwin (Piloting 4, Gunnery 4), Ryoken-D
- Charlie Assault Star, Trinary Assault: Star Captain Vogel (Piloting 4, Gunnery 3), Mad Cat; MechWarrior Cyril (Piloting 3, Gunnery 3), Vulture-C; MechWarrior Damon (Piloting 3, Gunnery 2), Ryoken; MechWarrior Charlotte (Piloting 4, Gunnery 2), Ryoken-D
Attacker
The Attacker comprises the following Combine and Kell Hounds forces.
- Liaison Officer: Sho-sa Shin Yodama (Piloting 4, Gunnery 3), Phoenix Hawk
- Regimental Command Lance (Dragon's Claws)
- Coordinator Takashi Kurita (Piloting 3, Gunnery 3), Grand Dragon
- Sho-sa Hiroya Oomiya (Piloting 4, Gunnery 3), Cyclops
- Sho-sa Keiji Magaino (Piloting 4, Gunnery 4), Katana
- Elements of A Company, 1st Battalion
- Command Lance: Kashira Hideki Arai (Piloting 4, Gunnery 4), Crusader; Go-cho Suuichi Furukawa (Piloting 3, Gunnery 3), Catapult
- Fire Lance: Chu-i Kenichi Arai (Piloting 4, Gunnery 4), Archer; Juuroota Ikeda (Piloting 4, Gunnery 3), Rifleman; Masahiro Akiyama (Piloting 3, Gunnery 4), Griffin
- Medium Lance: Tai-i Teji Udea (Piloting 3, Gunnery 4), Shadow Hawk; Gunso Nozomu Tanabe (Piloting 5, Gunnery 3), Trebuchet; Kenyu Kobiyashi (Piloting 4, Gunnery 4), Centurion
- Elements of B Company, 1st Battalion
- Recon Lance: Chu-i Kenichi Yataga (Piloting 3, Gunnery 4), Hermes II; Keiichi Oohira (Piloting 3, Gunnery 3), Raven
- Elements of 121st Company, 2nd Battalion
- Assault Lance: Lieutenant Valentina Tereshkova (Piloting 4, Gunnery 4), Centurion; Jacob Van Zyl (Piloting 4, Gunnery 4), Hermes II; Victor Scaligen (Piloting 4, Gunnery 4), Cicada; Luther Gratian (Piloting 3, Gunnery 4), Whitworth
Deployment
The Defender sets up first, in the area bounded by Hex 0110 on Mapsheet 1, Hex 1209 on Mapsheet 2, Hex 0102 on Mapsheet 3, and Hex 1517 on Mapsheet 4.
The Combine units enter anywhere on Mapsheets 1, 2, or 4, north of Hex Row 0105-1505 on Mapsheets 1 and 2 and east of Hex Row 14xx on Mapsheets 2 and 4. The Kell Hounds enter anywhere along the south or west edges of Mapsheet 5, during the Movement Phase of Turn 5.
Victory Conditions
The Attacker tries to drive the Defender from the field and destroy as many Clan units as possible. The Defender tries to exit his forces off the east edge of Mapsheet 2 or 4 and destroy as many Dragon's Claws and Kell Hounds 'Mechs as possible.
Once the last defending unit has exited the board or been destroyed, consult the following tables to determine the winner of this scenario.
Victory Points Table
| Action | Points |
|---|---|
| Each Clan 'Mech exiting Mapsheet 2 or 4 | +15 |
| Each Elemental Point exiting Mapsheet 2 or 4 | +10 |
| Each Dragon's Claws 'Mech destroyed | +10 |
| Each Kell Hounds 'Mech destroyed | +5 |
| Each Clan 'Mech destroyed | -15 |
| Each Elemental Point destroyed | -10 |
| Each Clan 'Mech forced to withdraw | -7 |
Victory Table
| Total Points | Result |
|---|---|
| 450 or higher | Decisive Clan Victory |
| 449 to 350 | Substantial Clan Victory |
| 349 to 150 | Marginal Clan Victory |
| 149 to -79 | Draw |
| -80 to -200 | Marginal Combine Victory |
| -200 to -274 | Substantial Combine Victory |
| -275 or lower | Decisive Combine Victory |
Note: the printed Victory Table lists "-200" as the end of the Marginal Combine range and the start of the Substantial Combine range; both are transcribed as printed.
Special Rules
-
Morgan Kell has developed the ability to "jam" the sensors and targeting computers of other battlefield units attempting to lock onto his 'Mech. To simulate this ability, treat Kell's Archer as if it were at double its actual range when resolving weapons fire against him and apply a +4 modifier to all to-hit numbers. When Kell fires at enemy units, apply a -2 modifier to the to-hit numbers.
-
The Forced Withdrawal rule is in effect (see p. 24). Clan units forced to withdraw do not count as "exiting" the mapsheets when tallying victory points.
-
See Special Rule 3, in Scenario 14, p. 70.
Scenario 16: A Samurai's Death
Game Set-Up
This scenario uses BattleTech rules. Lay out the BattleTech mapsheets as illustrated.
If playing this scenario as part of a mini-campaign with Scenario 14, use whatever forces survived Scenario 14. No time for repairs or reloads exists between the scenarios. If playing this scenario as a self-contained game, use the following forces. Reduce by half the ammunition stores of all ballistic weapons (autocannons, Gauss rifles, missile launchers, and so on).
Defender
The Defender comprises the following elements of the Dragon's Claws, Elements of A Company, 1st Battalion, and Elements of B Company, 1st Battalion.
- Liaison Officer: Sho-sa Shin Yodama (Piloting 4, Gunnery 3), Phoenix Hawk
- Regimental Command Lance: Coordinator Takashi Kurita (Piloting 3, Gunnery 3), Grand Dragon; Sho-sa Hiroya Oomiya (Piloting 4, Gunnery 3), Cyclops; Sho-sa Keiji Magaino (Piloting 4, Gunnery 4), Katana
- Elements of A Company, 1st Battalion
- Command Lance: Kashira Hideki Arai (Piloting 4, Gunnery 4), Crusader; Go-cho Suuichi Furukawa (Piloting 3, Gunnery 3), Catapult
- Fire Lance: Chu-i Kenichi Arai (Piloting 4, Gunnery 4), Archer; Juuroota Ikeda (Piloting 4, Gunnery 3), Rifleman; Masahiro Akiyama (Piloting 3, Gunnery 4), Griffin
- Medium Lance: Tai-i Teji Udea (Piloting 3, Gunnery 4), Shadow Hawk; Gunso Nozomu Tanabe (Piloting 5, Gunnery 3), Trebuchet; Kenyu Kobiyashi (Piloting 4, Gunnery 4), Centurion
- Elements of B Company, 1st Battalion
- Recon Lance: Chu-i Kenichi Yataga (Piloting 3, Gunnery 4), Hermes II; Keiichi Oohira (Piloting 3, Gunnery 3), Raven
Attacker
The Attacker comprises the following elements of the 32nd Nova Cat Assault Cluster.
- Elements of Alpha Assault Star, Trinary Assault: Star Colonel Sarik (Piloting 3, Gunnery 3), Daishi-A; MechWarrior Rita (Piloting 3, Gunnery 4), Masakari; MechWarrior Ellis (Piloting 3, Gunnery 3), Man O' War
- Elements of Bravo Assault Star, Trinary Assault: Star Captain Erika (Piloting 4, Gunnery 3), Thor; MechWarrior Victor (Piloting 4, Gunnery 3), Loki-B; MechWarrior Stephan (Piloting 4, Gunnery 4), Vulture-C; MechWarrior Corwin (Piloting 4, Gunnery 4), Ryoken-D
- Elements of Charlie Assault Star, Trinary Assault: Star Captain Vogel (Piloting 4, Gunnery 3), Mad Cat; MechWarrior Cyril (Piloting 3, Gunnery 3), Vulture-C; MechWarrior Damon (Piloting 3, Gunnery 2), Ryoken; MechWarrior Charlotte (Piloting 4, Gunnery 2), Ryoken-D
- Elements of Alpha Elemental Star, Trinary Elemental: Elemental Salton (2 Elementals); Point Commander Paola (3 Elementals); Point Commander Dugan (4 Elementals); Point Commander Mintha (1 Elemental)
Deployment
Defender: The Defender sets up first. He may place his units anywhere in the area bounded by Hex 0115 on Mapsheet 1, Hex 1511 on Mapsheet 2, Hex 0101 on Mapsheet 3, and Hex 1516 on Mapsheet 4.
Attacker: The Attacker enters anywhere along the south edge of Mapsheets 3 and 4, during the Movement Phase of Turn 1.
Victory Conditions
Both the Attacker and Defender try to annihilate each other. The side with the last surviving unit wins the scenario.
Special Rules
See Special Rule 3, p. 70, in Scenario 14.
Scenario 17: Street Fighting
Game Set-Up
This scenario uses BattleTech and AeroTech rules. Use the Imperial City map provided.
Defender
The Defender comprises the following elements of the 7th Imperial City Militia and the 1st Omega Regiment.
- Elements of 7th Imperial City Militia
- Close Combat Lance, Company A, 1st Battalion: Chu-i David Morissey (Piloting 4, Gunnery 3), Shadow Hawk; Alan Camaerata (Piloting 4, Gunnery 4), Hunchback; Margaret Stevwing (Piloting 5, Gunnery 4), Centurion; Bob Rajnovik (Piloting 4, Gunnery 4), Vulcan
- Elements of Company C, 3rd Battalion: Kashira Regis Kindig (1 Foot Infantry Platoon w/SRMs); Shujin Oran Tanaka (1 Jump Infantry Platoon w/Lasers)
- Elements of Company A, 1st Battalion, 1st Omega Regiment
- 1st Squad, 1st Platoon: Tai-i Shinya Horiuchi (4 Armored Infantrymen); Shujin Deng Ky (4 Armored Infantrymen)
- 2nd Squad, 1st Platoon: Chu-i Young Ik Kim (4 Armored Infantrymen); Gunjin Pietro Rosati (4 Armored Infantrymen)
- Elements of Delta Regiment, Wolf's Dragoons
- Alpha Wing, Delta Aerospace Company: Lieutenant Julia Norton (Piloting 4, Gunnery 4), Sholagar; Michael Kyle (Piloting 4, Gunnery 4), Sholagar
- Lieutenant Ole Karlsen (Piloting 3, Gunnery 3), Stingray; Charlene Durant (Piloting 3, Gunnery 3), Stingray
Deployment (Defender): The Defender sets up first. He may deploy his forces anywhere on the mapsheet except for Chu-i Morissey's Shadow Hawk, one infantry platoon, and one armored infantry squad, which must begin the game in the manufacturing complex. The Dragoon fighters enter later as reinforcements (see Special Rule 2).
Attacker
The Attacker comprises the following elements of Trinary Striker, 4th Nova Cat Regulars.
- Striker Star: Star Captain Danilo (Piloting 4, Gunnery 3), Vulture; MechWarrior Abbott (Piloting 4, Gunnery 4), Ryoken; MechWarrior Leial (Piloting 3, Gunnery 4), Black Hawk-B; MechWarrior Roarke (Piloting 4, Gunnery 4), Fenris; MechWarrior Gaspar (Piloting 3, Gunnery 3), Puma
- Elements of Scout Star: MechWarrior Luis (Piloting 3, Gunnery 3), Ryoken; MechWarrior Enoch (Piloting 4, Gunnery 4), Uller; MechWarrior Gage (Piloting 3, Gunnery 4), Koshi-B
- Alpha Elemental Star: Elemental Star Captain Sylvie (4 Elementals); Point Commander Ryle (4 Elementals); Point Commander Erna (4 Elementals); Point Commander Fitch (4 Elementals); Point Commander Andrew (4 Elementals)
- Charlie Elemental Star: Elemental Star Captain Moira (4 Elementals); Point Commander Walker (4 Elementals); Point Commander Feodor (4 Elementals); Point Commander Alben (4 Elementals); Point Commander Herta (4 Elementals)
Deployment (Attacker): The Attacker enters anywhere along the south edge of the mapsheet, east of Hex Row XXX, during the Movement Phase of Turn 1. (The hex row is printed as "XXX" in the book.)
Victory Conditions
The Attacker tries to destroy as much of the industrial complex as he can (see Special Rule 3).
The Defender tries to prevent the Attacker from achieving his objective.
When the last unit from one side has been destroyed or driven from the mapsheets, consult the following tables to determine the outcome of this scenario.
Victory Points Table
| Action | Points |
|---|---|
| Each Heavy Building destroyed | +20 |
| Each Light or Medium Building destroyed | +15 |
| Each Dragoon fighter shot down | +15 |
| Each Combine 'Mech destroyed | +10 |
| Each Armored Infantry squad destroyed | +7 |
| Each Infantry Platoon destroyed | +5 |
| Each Elemental Point destroyed | -7 |
| Each Clan 'Mech destroyed | -10 |
| Each Light or Medium Building intact | -15 |
| Each Heavy Building intact | -20 |
Victory Table
| Total Points | Result |
|---|---|
| 300 or higher | Decisive Clan Victory |
| 299 to 225 | Substantial Clan Victory |
| 224 to 75 | Marginal Clan Victory |
| 74 to -13 | Draw |
| -14 to -124 | Marginal Combine Victory |
| -125 to -220 | Substantial Combine Victory |
| -221 or lower | Decisive Combine Victory |
Special Rules
-
The Forced Withdrawal rule is in effect (see p. 24).
-
The Combine player may begin rolling for air support during the End Phase of Turn 3. He rolls 2D6 and adds the number of buildings and Combine 'Mechs the Clan player has destroyed to the roll result. If the modified result is less than 11, air support is not available yet. The player may repeat the roll during the End Phases of each subsequent turn until the roll succeeds.
If the modified result equals or exceeds 11, the Dragoon aerospace fighters become available during the Initiative Phase of the following turn. Roll 1D6 for each Dragoon fighter; the result corresponds to the number of strafing runs the fighter can make. Then repeat the roll for each fighter and consult the following table to determine the ground-attack weapons each fighter carries. Once the fighters have expended all their ground-attack ordnance and completed their allotted strafing runs, they must withdraw from the mapsheets and return to their base.
Ground Ordnance Table
| Result | Ordnance |
|---|---|
| 1 | 2 Inferno bombs |
| 2 | 1 Inferno bomb |
| 3 | 1 80-point bomb |
| 4 | 2 60-point bombs |
| 5-6 | No ground-attack ordnance |
- Consider a building destroyed when its Construction Factor (CF) has been reduced to one-fourth of its original value or less. For example, a Heavy Building has a CF 65; it is destroyed when its CF is reduced to 16 or less. All the buildings in the industrial complex are Heavy Buildings. For more information on damage to buildings, see p. 39, BattleTech Compendium.
Scenario 18: Valley of Death
The Battle of Luthien reached its climax in the Kado-guchi Valley, where twelve Inner Sphere regiments squared off against five Clan Galaxies. To simulate the scope of this engagement, this scenario is presented as a regimental-level battle, with unique, simplified rules. The opposing forces are divided into 36 Inner Sphere battalions and 18 Clan Clusters. The roster beginning on p. 84 lists all the units involved in the engagement, along with game information for each. Detailed explanations of the rules for this scenario follow.
Game Set-Up
Play the scenario on the Kado-guchi Valley mapsheet supplied with this scenario pack. The Combine and mercenary units enter at the east side of the mapsheet; the Clan units enter at the west side. Continue play until one side achieves all its objectives, one side is driven from the mapsheet or destroyed, or until 24 turns have been completed.
As the scenario progresses, the 2:1 battalion/Cluster ratio will likely change. Adjust the number of units shifted during each move accordingly, so that all the units may be maneuvered in the same number of moves. If the Clan player destroys half the defenders, for example, one battalion and one Cluster are shifted during each move.
Each unit listed in the roster has a Movement Rating based on the weight class of the unit (light, medium, heavy, assault). This rating indicates how many hexes that unit may move in a single turn. Consult the following Special Movement Modifiers table for terrain movement modifiers. Each hex on the map represents 300 meters.
Special Movement Modifiers Table
| Terrain | Additional MP Cost/Hex |
|---|---|
| Clear/Open | 0 |
| Water | +1 |
| Light Woods | +1 |
| Heavy Woods | +2 |
| Rough/Rubble | +1 |
| Medium/Light Buildings | +2 |
| Heavy/Hardened Buildings | +3 |
| Elevation | +1 per level |
Turn Sequence
Each turn in this scenario represents ten minutes of game time. During each turn, all the units on the map may move and make attacks.
Each turn consists of five phases in the following order: Initiative Phase, Movement Phase, Detection Phase, Attack Phase, and End Phase.
Initiative Phase
At the beginning of each turn, each player rolls 2D6. If two groups are playing, one player rolls for each group. The player with the highest result wins the Initiative and may choose whether to move first or second for that turn. Both players roll again in the event of a tie.
Movement Phase
The player or team designated as moving first moves two of his battalions or one of his Clusters. The player or team designated as moving second then moves two of his battalions or one of his Clusters. Movement continues to alternate until all units on the battlefield have moved.
Detection Phase
In the Detection Phase, players attempt to use their units' sensor systems to detect and target enemy units for attack. All action in this phase takes place simultaneously.
To determine if one unit detects another, roll 2D6. Subtract the detecting unit's Sensor Rating from the total. If the result is equal to or less than the target unit's Signature Rating, the detecting unit can "see" the location of the target unit. The roster lists a Sensor and Signature Rating for each unit.
Attack Phase
Players declare and resolve attacks against enemy units during the Attack Phase of each turn. Players may attack with ranged-fire attacks or close-assault attacks. As in the Detection Phase, all action in this phase takes place simultaneously.
Any attacking unit must first detect its target per the procedure described in the preceding Detection Phase section. Targets must be within range of the attacking unit's weapons. Because of the diversity of most 'Mech battalions and Clusters, consider all units in this scenario to have a maximum weapon range of 3 hexes. Close-assault attacks may occur only between units occupying the same hex. Otherwise, close-assault attacks are resolved in the same manner as ranged-fire attacks.
Once an attacking unit has detected its target, the attacking player makes an attack roll with 3D6. Subtract the target unit's Defense Rating from the attacking unit's Attack Rating and add the difference to the roll result. Apply the appropriate range modifier to the result as well (see the following Range Modifier Table). Then consult the Attack Results Table to determine the outcome of the attack.
Range Modifier Table
| Range | Modifier |
|---|---|
| Close Assault | +1 |
| 1 hex | 0 |
| 2 hexes | -1 |
| 3 hexes | -3 |
Attack Results Table
| Roll | Result |
|---|---|
| 5 or lower | Attack misses |
| 6-7 | D1 |
| 8-9 | M1 |
| 10-11 | A1 |
| 12-13 | S1 |
| 14-15 | A1, D1, S1 |
| 16 | A1, D1, M1 |
| 17 | A1, D1, M1, S1, Retreat |
| 18+ | A2, D2, M2, S2, Rout |
Attack Results Key
- Attack Misses: The attack has no effect on the targeted unit.
- A1: The attack reduces the targeted unit's Attack Rating by 1.
- D1: The attack reduces the targeted unit's Defense Rating by 1.
- S1: The attack reduces the targeted unit's Sensor Rating by 1.
- M1: The attack reduces the targeted unit's Movement Rating by 1.
- Retreat: The attack forces the targeted unit to withdraw directly away from the attacking unit. The targeted unit must retreat a number of hexes equal to its current Movement Rating. Each Retreat result also reduces the targeted unit's Morale level by 1. A unit that suffers a Retreat result may make an optional morale check to stand its ground (see Morale, below).
- Rout: The attack breaks the morale of the targeted unit, which then flees from the battlefield. A routed unit must move directly toward the edge of the mapsheet where it entered, at its current Movement Rating. During the End Phase of each turn, a routed unit may make a morale check to restore its morale (see Morale). Each Rout result suffered by a single unit reduces that unit's Morale Rating by 2. A unit that leaves the mapsheet as a result of a Rout has been eliminated from the battle.
When a unit's Attack, Defense, or Sensor rating is reduced to zero, it is eliminated from the battle.
Morale
Each unit has its own Morale Rating, reflecting its status. Morale Ratings are listed in the roster at the end of this scenario.
Whenever a unit makes a required morale check or elects to make one, the player controlling that unit rolls 1D6. If the result is less than or equal to that unit's current Morale Rating, the unit's morale holds.
A unit suffering a Retreat attack result may elect to make an immediate morale check to determine if its morale is strong enough to override the Retreat result. Make this morale check after reducing the unit's Morale Rating by 1 per the Attack Results Table. A successful morale check restores the unit's morale.
A routed unit may make a morale check during the End Phase of every turn, provided it does not move off the mapsheet during the Movement Phase. Make this morale check after reducing the unit's Morale Rating by 2 per the Attack Results Table.
If a retreating or routed unit moves within sensor range of a friendly unit, the unbroken unit must make a morale check to determine whether it is carried away by the retreat or rout. A unit swept away by a retreating or routed friendly unit does not suffer a reduction in its Morale Rating.
End Phase
Once all attacks in the turn have been resolved, the players record any damage to their units and make any necessary morale checks. The turn is then completed and the next turn begins with a new Initiative Phase.
Setting Objectives
Prior to beginning play, both players should select two primary and three secondary objectives. Accomplishing these objectives determines who wins the engagement. Capturing Imperial City should be one of the Clan player's primary objectives. Likewise, driving the entire Clan force from the mapsheet should be one the Combine player's primary objectives. Other primary goals might include capturing the Morinaga Weapons Complex or destroying the Tonichi Aerospace Facility. The Combine player's goals might include keeping such installations intact or destroying a specific number of Clan units. Both players must approve each other's objectives before beginning play.
Achieving a primary objective earns a player 15 points. Achieving a secondary objective earns a player 7 points. The player with the highest score at the end of the game wins.
Capturing and Destroying Objectives
The Clan player's objectives probably will include capturing or destroying one or more Combine installations.
To capture a location, a player must occupy it with a force of at least one battalion or Cluster. The occupying unit must remain in the location hex for at least 6 complete turns to capture the objective. In the case of multi-hex locations, such as Imperial City, the occupying force must capture all hexes of the location. If an occupying unit is routed from the objective hex or forced to retreat out of it, it loses the hex. If a unit successfully captures an objective by occupying its hexes for 6 turns, it may then move out of the hexes. Mark the captured hex with a small piece of masking tape. If an enemy force subsequently enters that hex, the location is no longer considered captured. Remember to remove the tape marker. The opposing player must then recapture the hex to achieve his objective.
To destroy a location, a unit must move into one of the targeted location's hexes and announce its attempt to destroy that location. During the Attack Phase of that turn and subsequent turns, the player rolls 1D6. If the result is less than or equal to the occupying unit's Attack Rating, it has inflicted damage on the objective. Destroying a location requires three successful rolls per hex. Once an objective is damaged or destroyed, mark it with a small piece of masking tape. Destroyed buildings and the like cannot be repaired.
Kado-guchi Valley Rosters
Transcription gap: the Kado-guchi Valley roster (book pp. 84-88: the Inner Sphere battalion and Clan Cluster Attack, Defense, Morale, Movement, Sensor and Signature Ratings) is NOT yet transcribed in this file. The source is an image-only scan whose two-column rating blocks could not be read reliably from text recognition alone. Scenario 18 is incomplete without this roster.
New 'Mechs
Transcription gap: the stat blocks for the Hankyu (book p. 91), Nobori-nin (book p. 92) and Cauldron-Born (book pp. 95-96) are NOT yet transcribed in this file. Their configuration tables are multi-column and were only partly recovered by text recognition, so no figures are given here. Do not use this file as the source of these 'Mech statistics until the gap is closed.