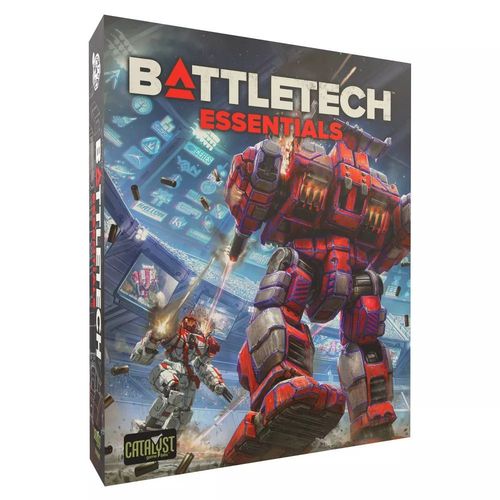
Battletech: Essentials
Battletech: Essentials Rulebook
Table of Contents
Table of Contents
Quick-Start Rules
These quick-start rules will hurtle you onto the battlefields of the 31st century in minutes—simply read through the rules, then set up the game as shown in the Scenarios section (see p. 9).
Box Contents
Your BattleTech Essentials box includes:
- Quick-Start Rules: The booklet you're reading right now.
- Miniatures and Punchboard: Two high-quality, ready-to-play plastic miniatures. The punchboard includes additional playing pieces to increase the number of 'Mechs at your command, as well as terrain.
- 'Mech Record Sheets: Record sheets track the damage each 'Mech suffers as well as its weapon and movement stats. These are laminated, so players can use dry erase markers to quickly play a game, erase, and re-set to the next game. (The back of each sheet presents fiction surrounding that BattleMech.)
- MechWarrior Cards: These pilot cards can activate special abilities that MechWarriors bring to every battlefield.
- Mapsheet: The mapsheet is divided into six-sided areas called hexes, which regulate movement and combat during a turn. This is often referred to as the "playing area".
- Dice: BattleTech uses two six-sided dice rolled together, abbreviated as 2D6. A dice icon appears next to any rule that requires a 2D6 roll.
- An Instant Guide To The Inner Sphere: A quick overview of the fictional universe where you're gaming takes place!
- Spanner in the Works: This short story will immerse you into the BattleTech universe.
- Solaris VII Arena Map Rules: Once you've played the first scenario found in this booklet, this sheet covers additional rules to unlock the crazy fun of Arena combat.
Sequence of Play
A BattleTech game consists of a series of turns. During each turn, 'Mechs on the map may move and fire their weapons. Each turn consists of several smaller segments of time, called phases, which are performed in the following order:
- Initiative Phase
- Movement Phase
- Weapon Attack Phase
Initiative Phase
One player from each side rolls 2D6 to determine their side's Initiative. The side with the higher result has won Initiative throughout the turn. Re-roll all ties.
Movement Phase
The side that lost Initiative moves their 'Mech first. The side that won Initiative moves their 'Mech second. Each time a player must move a 'Mech, the "move" can be to stand still.
Weapon Attack Phase
The side that lost Initiative declares any attacks the 'Mech will make, specifying which weapons will be fired and at which target(s).
The side that won Initiative then does the same.
Each time a player must declare an attack, the declaration can be not to fire any weapons.
Resolving Weapons Fire
Players resolve weapons fire one 'Mech at a time. The order in which each 'Mech's shots are resolved is up to that 'Mech's controller. All weapon attacks by one 'Mech should be resolved before those of the next 'Mech.
Determining Damage
Players record damage as attacks are resolved, but this damage does not take effect until the end of this phase. This means a 'Mech may make its declared attacks even if that 'Mech or its weapons are destroyed during this phase.
End of Game
Players repeat the steps above until one side meets its victory conditions for the scenario. If a specific scenario is not being used, the side with the last surviving 'Mech(s) on the map wins. If the last 'Mechs from each side are destroyed simultaneously, the game is a draw.
Movement Dice
Movement dice help players remember which 'Mechs moved and in what way. While not required, it is highly recommended that players use this rule, and the remainder of these rules will assume that they are doing so. (These dice are not included in this box.)
Commonly, white dice are used to mark 'Mechs that walked, black dice for those that ran, and red dice for those that jumped. The number displayed is the Target Number generated due to the move, with "6" traditionally indicating a modifier of 0 (only moved 0-2 hexes, and didn't jump). The move cannot be changed once a movement die is placed.
It's best to use dice of a different size and/or color than those used for rolling attacks, to prevent confusion. After all weapons fire is completed, remove all movement dice from the board.
Movement (Movement Phase)
During the Movement Phase of each turn, players must choose one movement mode for each 'Mech they control: standing still, walking, running, or jumping.
Movement Modes
At the beginning of each 'Mech's movement, a player must select one (and only one) of the following movement modes.
Standing Still
If the player declares that a 'Mech will stand still, the 'Mech stays in the hex in which it started the turn. It can expend no MP during that turn and cannot move or change facing. Standing still provides no penalty to the 'Mech's own weapons fire, nor that of any other 'Mechs which attack it.
Walking
If the player declares that a 'Mech will walk, it may expend a number of MP up to its Walking MP rating. A walking 'Mech suffers a +1 Target Number modifier when making attacks. A walking 'Mech may also be harder to hit. These combat effects appear on the Attack Modifiers Table found on p. 7 and are further explained under Firing Weapons, p. 5.
Running
A 'Mech can move farther in a turn when running than walking. However, a 'Mech cannot move backward while running.
If the player declares that a 'Mech will run, it may expend a number of MP up to its Running MP rating. A running 'Mech suffers a +2 Target Number modifier when making attacks, but its speed may make it harder to hit. These combat effects appear on the Attack Modifiers Table found on p. 7 and are further explained under Firing Weapons, p. 5.
Jumping
A 'Mech which possesses Jumping MP may select this movement mode and expend up to that many MP. A jumping 'Mech suffers a +3 Target Number modifier when making attacks, but will be harder to hit. These combat effects appear on the Attack Modifiers Table found on p. 7 and are further explained under Firing Weapons, p. 5.
Jumping features numerous exceptions to the basic movement rules; see Jumping Movement, below.
Movement Basics
After being assigned a movement mode, a 'Mech then spends up to the Movement Points (MP) provided. A 'Mech need not spend all available MP, but no matter how few are spent, the 'Mech's movement mode does not change. MP unspent at the end of the phase are lost.
Facing
Every hex on the map has six sides, and every 'Mech must face one of those six hexsides: this is known as its facing. A 'Mech faces the way its feet are pointing.
Changing facing costs 1 MP per hexside. For example, in the Facing Change Diagram, a 180-degree turn (three facings, from Hex A to Hex B) costs 3 MP.
Moving Between Hexes
A 'Mech can move forward into the hex it is facing, or backward into the hex directly to its rear. It cannot move into any other hex without first changing its facing, as shown on the Ground Movement Direction Diagram.
Backward Movement: A 'Mech can only move backward with Walking MP. A walking 'Mech can move both forward and backward in the same turn.
Jumping Movement
Jumping features numerous exceptions to the movement rules.
A jumping 'Mech can move 1 hex for each available Jumping MP regardless of terrain. A 'Mech may jump into the same hex it began the turn in for 1 MP.
A jumping 'Mech ignores terrain (and the presence of other 'Mechs) in hexes it jumps through. However, it cannot land in a hex containing another 'Mech. A jumping 'Mech also ignores facing: it can jump in any direction regardless of its initial facing, and chooses any facing desired upon landing.
Terrain
All hexes cost at least 1 MP to enter. However, terrain often raises this MP cost, as shown on the Movement Costs Table. For example, entering a Heavy Woods hex costs 3 MP: the base 1 MP for entering any hex (the distance traveled), and 2 MP more for the Heavy Woods (to navigate through the trees).
Clear
Clear terrain represents fields, meadows and other grasslands. The ground is firm and may be gently rolling, but its height does not change significantly from one side of the hex to the other.
If a hex is not clearly marked as another terrain type, assume it is Clear.
Light Woods
Light Woods hexes are covered with sparse trees. 'Mechs cannot cross the hex as easily as Clear terrain (hence the +1 MP cost). Three intervening hexes of Light Woods will block LOS. (See Intervening Terrain.)
Heavy Woods
Heavy Woods hexes are thickly covered in trees, making movement even more difficult than Light Woods (the +2 MP cost). One Light Woods and one Heavy Woods hex intervening will block LOS. (See Intervening Terrain.)
Movement Costs Table
| Movement Action/Terrain Type | MP Cost Per Hex/Terrain Cost |
|---|---|
| Cost to Enter Any Hex | 1 |
| Terrain Cost When Entering Any New Hex: Clear | +0 |
| Light Woods | +1 |
| Heavy Woods | +2 |
| Additional Movement Actions: Facing Change | 1/hexside |
Stacking
A 'Mech cannot move through a hex occupied by an enemy 'Mech (friendly 'Mechs are fine), nor end its movement in a hex occupied by any other 'Mech.
Combat (Weapon Attack Phase)
After all players complete the Movement Phase, their 'Mechs engage in combat.
For one 'Mech to fire at another, the attacking 'Mech must have a valid line of sight to the target, and the target must be within the range and firing arc of the weapons the attacking player wishes to use. The attacking player then calculates the Target Number needed to hit the enemy based on several factors: Gunnery Skill, attacker movement, target movement, other modifiers such as those for terrain and range. (See the G.A.T.O.R. sidebar, p. 5.)
Attack Declaration
All attacks are declared before any are resolved. However, an attack may be aborted if the modified Target Number is greater than 12; see Rolling To Hit, p. 7. Players may not make attacks they have not previously declared.
Line of Sight
In order to attack a target, a clear line of sight (LOS) must exist between the target and the attacker. A straight line running from the center of the attacking 'Mech's hex to the center of the target 'Mech's hex defines the LOS between two 'Mechs. Any hexes this line passes through lie along the LOS, even if the line barely crosses the corner of a hex.
If the LOS passes exactly between two hexes, the player controlling the targeted 'Mech decides which of the two hexes lie along the LOS. The chosen hex is used for LOS of all attacks between those two 'Mechs for the remainder of the turn. If this choice means you lose LOS, you can look for another target.
The hexes containing the attacking and target 'Mechs are not considered when determining LOS.
Intervening Terrain
Terrain along the LOS between the attacker and the target is called intervening terrain. This does not include the hexes occupied by the attacker and target.
Woods: Three or more points of intervening woods block LOS. Light Woods are worth 1 point, and Heavy Woods are worth 2 points.
Intervening 'Mechs
Intervening 'Mechs have no effect on LOS or attacks.
Line of Sight Diagram
The Line of Sight Diagram includes numerous 'Mechs to best illustrate LOS principles. The 'Mech in Hex A wants to make an attack. Checking LOS for the 'Mech in Hex A to the other 'Mechs, we find the following conditions.
'Mech A has clear LOS (green lines) to the 'Mechs in hexes B and C, as there is no intervening terrain.
LOS to the 'Mech in Hex D (orange line) passes directly between a clear hex and a light woods hex. The target player chooses for the light woods to affect the LOS. This choice does not block LOS, however, because the heavy woods in the target hex are not intervening, and therefore do not block LOS.
The LOS to the 'Mechs in hexes E and F are blocked (red lines) because there is at least one hex of light and heavy woods intervening.
You can use the diagram to practice finding LOS with the other 'Mechs. Try to determine how many targets each 'Mech can see, and compare your results to the correct results that follow: Hex B has four targets, Hex C has three targets, Hex D has five targets, Hex E has three targets and Hex F has two targets.
Weapon Attacks
During the Weapon Attack Phase, players use their 'Mechs' armaments to attempt to inflict damage.
The rough order of such actions is as follows:
- An attacking 'Mech fires a weapon at an enemy target 'Mech;
- If the weapon hits, it inflicts a certain amount of damage;
- The attacker rolls a hit location;
- The targeted player marks off in that location the number of armor circles equal to the amount of damage inflicted;
- If a location is destroyed and damage from the attack remains, that damage is transferred to the next location inward;
- This procedure repeats until all weapons fire is resolved.
Players fire each weapon on a 'Mech individually. Each weapon may be fired only once per turn, and only gets one to-hit roll per turn.
Ammunition Expenditure
If a weapon uses ammunition—noted on the record sheet under "Ammo Type"—the player marks off one shot of ammunition (and only one, no matter the weapon) in the 'Mech Data section of the appropriate record sheet when they announce an attack with that weapon. When a weapon is out of ammunition, it can no longer be fired.
Firing Arc
If an attacking 'Mech has LOS to its intended target, the attacking player then checks to see if the enemy is within the firing arc of their 'Mech's weapons. The only 'Mechs that can be attacked are those in the Forward Arc (seen on the Firing Arc Diagram). The firing arc extends from the firing 'Mech to the edge of the playing area.
The maximum ranges for each 'Mech's weapons appear on its record sheet.
Firing Weapons
Each weapon is always fired individually, even if the 'Mech has multiples of the same weapon in the same location.
Making the Attack
When making an attack, use the G.A.T.O.R. sidebar, below, to create a final Target Number. Then roll 2D6 to see if the attack hits the target. If the result is equal to or greater than the modified Target Number, the attack hits.
If the modified Target Number is greater than 12, the shot automatically misses; rolling a 12 does not result in an automatic hit. If a player determines that their 'Mech's declared attack will automatically miss, they can choose not to make the attack, though another target cannot be chosen in its place.
If the modified Target Number is 2 or less, the shot automatically hits.
Resolution Order: The attacker chooses the order in which they make attack rolls for all of their 'Mechs' declared attacks; the order can change from turn to turn.
G.A.T.O.R.
The attack process is not complicated—it's simply a matter of rolling 2D6 and trying to equal or exceed your modified Target Number. However, it's the modified part—juggling all those numbers—that can be tricky.
After you understand the Target Number Modifiers section below, you'll find that "GATOR" is a helpful mnemonic that reminds you what needs to be taken into account:
- G: Gunnery Skill Rating of the attacker (the base Target Number for the attack). Then add:
- A: Attacker movement modifier [the color of the Movement Die on your 'Mech]
- T: Target movement modifier [the number of the Movement Die on the target 'Mech]
- O: Other modifiers (for this box set, just Terrain modifiers)
- R: Range modifiers
Start with your Gunnery Skill Rating, then add all other applicable modifiers, and the result is your modified Target Number to meet or exceed on the die roll. In the Target Number Modifiers section (as well as the Attack Modifiers Table), modifiers are listed in GATOR order, beginning with the attacker movement modifier.
Target Number Modifiers
The base Target Number may be modified by several factors, including movement, terrain (woods), and range. All modifiers are cumulative.
Base Target Number (Gunnery Skill) (GATOR)
The base Target Number for a weapon attack is the pilot's Gunnery Skill. For these Quick-Start Rules, unless specifically stated otherwise, that base Target Number is 4 (it is already printed on each record sheet).
Attacker Movement Modifier (GATOR)
The attacker's Target Number is modified by their own movement using the values in the Attack Modifiers Table (see p. 7). The attacker's movement modifier is based on the movement mode the attacker used that turn (Walking, Running, or Jumping), not the actual MP they expended or distance they moved (the color of the Movement Die on the attacking 'Mech, not the number).
Target Movement Modifier (GATOR)
A moving target is harder to hit, and so an attacker's Target Number is modified by its target's movement using the values in the Attack Modifiers Table (see p. 7). The target movement modifier is based on the number of hexes traversed by the target this turn, not the amount of MP it spent (the number on the Movement Die on the target 'Mech, not the color).
If the target moved both backward and forward in the turn, base the modifier on the number of hexes moved from the hex in which the 'Mech last reversed its movement. For example, if the target moved backward three hexes and then forward two hexes, the target movement modifier would be based only on the final two hexes of movement, resulting in a modifier of 0 (the Movement Die would show a 6).
If the target jumped this turn, the attacker applies a +1 modifier to their Target Number, in addition to the modifier for the number of hexes the target moved.
Terrain Modifiers (GATOR)
Terrain in the way of an attack reduces the chance of a successful shot.
Light Woods: Add a +1 modifier to an attack's Target Number if the target is in a Light Woods hex. Apply a further +1 modifier per hex of Light Woods intervening between the attacker and target (see Intervening Terrain, p. 4).
Heavy Woods: Add a +2 modifier to an attack's Target Number if the target is in a Heavy Woods hex. Apply a further +2 modifier per hex of Heavy Woods intervening between the attacker and target (see Intervening Terrain, p. 4).
Remember that three or more points of intervening woods block LOS—Light Woods are worth 1 point, and Heavy Woods are worth 2 points. In other words, you cannot add more than a +2 modifier for intervening terrain, or else LOS is blocked. Also remember that the hex a target is in is never intervening: it can apply a Target Number modifier, but it doesn't affect LOS.
Range Modifier (GATOR)
The farther away a target is, the harder it is to hit. Taking the shortest path, count the number of hexes between the attacker and the target, including the target's hex. The total is the range to the target.
Each weapon's range is divided into range brackets: short, medium, and long. For example, as shown on the sample record sheet, a Long Range Missile (LRM) launcher has a range of 21 hexes. Its short range bracket is "7," meaning that any attack made with LRMs against targets 1-7 hexes away is in the LRM's short range.
(Sample record sheet shown: Thunderbolt TDR-5S, Tonnage 65, Heavy, Inner Sphere. Walking 4, Running 6, Jumping 0. Range modifiers +0 / +2 / +4. Weapons: 1 LRM 15 (RT) 1/Msl, 7/14/21; 1 SRM 2 (RT) 2/Msl, 3/6/9; 3 Medium Laser (LT) 5, 3/6/9; 1 Large Laser (RA) 8, 5/10/15; 2 Machine Gun (LA) 2, 1/2/3. Ammo: LRM 15, 16 shots; SRM 2, 50 shots.)
The range bracket a target is in determines the range modifier for an attack with that weapon against that target. A short-range shot does not modify the attack's Target Number. A medium-range shot adds a +2 Target Number modifier, while a long-range shot adds a +4 modifier. (As shown, these modifiers are listed above the range bracket columns on the record sheets.) Weapons cannot hit a target beyond their long range.
For these Quick-Start Rules, this is the only factor that changes between weapons; if you figure your GATOR for one weapon, then simply change the Range Modifier, as needed, for other weapons, instead of refiguring the whole process.
Attack Modifiers Table
| All Attacks | Modifier |
|---|---|
| Gunnery Skill (GATOR) | Base Target Number |
| Attacker Movement Modifier (GATOR) | |
| Stationary [White Movement Die, number 6 showing] | None |
| Walked [White Movement Die] | +1 |
| Ran [Black Movement Die] | +2 |
| Jumped [Red Movement Die] | +3 |
| Target Movement Modifier (GATOR) (highest applicable modifier only unless noted) | |
| Moved 0-2 hexes | 0 |
| Moved 3-4 hexes | +1 |
| Moved 5-6 hexes | +2 |
| Moved 7-9 hexes |
Rolling to Hit
Once the player has determined the modified Target Number for each weapon their 'Mech is firing, they roll separately for each weapon to see if it hits. For each weapon attack, the player rolls 2D6. If the result is equal to or greater than the modified Target Number, the attack succeeds.
Players may choose the order in which each weapon attack is rolled, and the order in which damage from each successful attack is resolved.
The Rolling To Hit Diagram illustrates how to determine a modified Target Number.
The Rifleman has used its Running movement of 6 MP to move from Hex A to Hex B. Though it expended 6 MP in the move, it actually travelled three hexes, and so the player places a black Movement Die next to the Rifleman with a "1" showing. The Centurion walked to get from Hex C to Hex D, placing the Rifleman in its Firing Arc. It spent a total of 4 MP but only travelled one hex, and so a white Movement Die is placed next to the Centurion with a "6" showing (which means no modifier).
The Rifleman is firing one large laser and one medium laser at the Centurion. The player remembers the GATOR principle as they begin to add up their numbers.
The Base Target Number is the Rifleman MechWarrior's Gunnery Skill of 4 (G). The Rifleman used Running movement this turn, so its attacker movement modifier is +2—the black Movement Die (A). The target moved, but not enough to receive a target movement modifier; its Movement Die shows a "6", meaning no modifier (T). There is a light woods hex intervening along the LOS between the Rifleman and Centurion, which adds a +1 terrain modifier (O). The target is four hexes away, which is in short range for the large laser, and medium range for the medium laser; this adds a range modifier of +2 to the medium laser shot (R). The result is a modified Target Number of 7 [4 (Gunnery Skill) +2 (attacker movement) +0 (target movement) +1 (terrain modifier) = 7] for the large laser, and a Target Number of 9 for the medium laser (modifiers as above, plus another +2 (range modifier)).
The Centurion is attacking back with its AC/10. The Centurion's MechWarrior's Gunnery Skill is 4. The Centurion used Walking movement this turn, so it must add an Attacker Movement Modifier of +1—the white Movement Die. The target travelled three hexes, creating a +1 Target Movement Modifier—the black Movement Die. There is a Light Woods hex between the attacker and target along the LOS, and the target is in Light Woods, creating a +2 Terrain Modifier. The range to the target is four hexes, which is short range for the AC/10. For that attack, the modified Target Number is 8 [4 (Gunnery Skill) +1 (Attacker Movement) +1 (Target Movement) +2 (Terrain Modifier) +0 (Range) = 8].
Determining Hit Location
To determine the location of a hit, the player rolls 2D6 and consults the Hit Location Table found on each 'Mech's record sheet (it's also found on page 12).
'Mech Hit Locations Table
| 2D6 | Location |
|---|---|
| 2 | Center Torso |
| 3 | Right Arm |
| 4 | Right Arm |
| 5 | Right Leg |
| 6 | Right Torso |
| 7 | Center Torso |
| 8 | Left Torso |
| 9 | Left Leg |
| 10 | Left Arm |
| 11 | Left Arm |
| 12 | Head |
Cluster Hits Table
| Roll (2D6) | Weapon Size 2 | 5 | 6 | 10 | 15 |
|---|---|---|---|---|---|
| 2 | 1 | 1 | 2 | 3 | 5 |
| 3 | 1 | 2 | 2 | 3 | 5 |
| 4 | 1 | 2 | 3 | 4 | 6 |
| 5 | 1 | 3 | 3 | 6 | 9 |
| 6 | 1 |
Missile Attacks: After each hit by a missile weapon, a roll is made on the Cluster Hits Table above, to determine the number of projectiles that actually hit the target. Use the column corresponding with the size of the launcher (the number in its name; e.g. a SRM 6 uses the "6" column).
- SRM: On a record sheet, the Damage column for short-range missiles (SRMs) lists them as "2/Msl", meaning two points of damage per missile. The attacker rolls a separate hit location for each SRM that hits. For example, a hit with 4 SRMs means four separate hit location rolls, with one missile hitting each of those locations, for two points of damage each.
- LRM: On a record sheet, the Damage column for long-range missiles (LRMs) lists them as "1/Msl", meaning one point of damage per missile. After determining how many LRMs hit the target from an attack, the attacker breaks that attack's damage up into groups of five points; any leftover damage becomes its own undersized group. The attacker rolls a separate hit location for each of these LRM damage groupings (not each individual missile). For example, a hit with 12 LRMs means three separate hit location rolls: two 5-point Damage Value groupings, and one 2-point grouping.
Recording Damage
Each attack that hits the target does damage. Every weapon does a specific amount of damage, shown as the Damage Value (or Damage Value grouping) in the Weapons Inventory of each record sheet.
Damage wipes out armor circles in a location. Follow the step-by-step procedure outlined in Damage Resolution (see p. 8) to determine the effects of damage.
Hit Location & Damage
Damage Resolution
To apply damage, begin with the amount of damage inflicted and the hit location, and start at Step 1. Answer both questions yes or no, and follow the instructions.
- Does the location have armor?
- Yes: Check off one armor circle on the Armor Diagram in the appropriate location for every point of damage taken, until all damage is applied or all armor in the location is destroyed. If all armor in the location is destroyed, the location and any weapons mounted in it are destroyed. Regardless, go to Step 2.
- No: Proceed to Step 2.
- Is there damage remaining?
- Yes: Damage transfers to the armor of the next location inward (see the Damage Transfer arrows on the Armor Diagram on each 'Mech record sheet). Go to Step 1 to allocate remaining damage.
- No: Attack is finished.
Torso Destruction
If a 'Mech's right or left torso has all of its Armor Points (circles) destroyed, the corresponding arm is blown off immediately and can sustain no further damage. The corresponding leg is not damaged. If the center torso is destroyed, the entire 'Mech is destroyed (see Destroying a 'Mech, below).
Leg Destruction
If one or both of a 'Mech's legs is destroyed, it cannot move nor make any facing changes for the rest of the game. It may fire weapons normally until it is completely destroyed, however (see Destroying a 'Mech, below).
Transferring Damage
BattleMechs can survive the destruction of any body location except the head or center torso. If any other locations besides the center torso or head take further hits after being destroyed, or if excess damage remains from the shot that destroyed the location, that damage transfers to the armor of the next location inward.
This principle is illustrated with the Damage Transfer arrows on the Armor Diagram on each 'Mech record sheet. Damage to a missing arm or leg transfers to the torso on the same side; left leg or arm damage is transferred to the left torso, and right arm or leg damage to the right torso. Damage to a destroyed side torso location transfers to the center torso.
Destroying a 'Mech
A 'Mech is destroyed if its head or center torso is destroyed. Destroyed 'Mechs are removed from the map at the end of the phase in which they were destroyed, and have no further effect on game play.
Damage Example
Karli declared an attack from her Centurion at her opponent's RFL-3N Rifleman. The Centurion hits with its AC/10 (10 Damage Value) and eight missiles from its LRM-10 (grouped into one 5-point Damage Value grouping and one 3-point Damage Value grouping). After rolling three times on the Hit Location Table, it turns out all three damage groupings strike the Rifleman's left arm. This is good news for Karli, because the Rifleman suffered 4 points of damage there during a previous turn, meaning the arm only had 11 armor before these hits.
The AC/10 reduces the location's Armor Value by 10, so the player fills in ten circles. The first LRM grouping does 5 points of damage, but since the Rifleman's remaining Armor Value in the left arm is 1, that leaves 4 points of damage that the location cannot absorb; the left arm is completely destroyed.
The remaining 4 points of damage from that first LRM grouping transfer, per the Damage Transfer arrow, to the armor of the next location inward, which is the left torso. The player fills in four circles on the left torso location. Then the final 3-point Damage Value grouping automatically transfers, so three more circles are filled in, leaving 8 of the original 15. In a subsequent turn, if the Centurion's AC/10 or at least eight of its LRMs strike the left torso (or left arm), it will be destroyed, leaving any damage from other weapons (or that AC/10) that may have hit the left arm or left torso to transfer to the center torso.
BattleMech Variants
Each BattleMech is considered a unique chassis, but each chassis may have several variants developed over the centuries of war, boasting alternate weapons, equipment, or armor placement.
This boxed set does not include the two legendary 'Mech variant record sheets corresponding to the miniatures herein—the Centurion "Yen-lo-Wang" and Rifleman "Legend-Killer"—as their rules are beyond the scope of this box (see p. 10). However, you may encounter references in other products to specific 'Mech variants, such as Scenario rules which call out these variants by designation, such as a TDR-5S Thunderbolt versus a TDR-5SE Thunderbolt. Importantly, the illustration of a particular chassis does not change from one record sheet to the next. It always represents the primary chassis as depicted in a Technical Readout sourcebook.
When selecting record sheets, start with the name/illustration, and then quickly review the code designation to ensure you've selected the right variant!
Tech Base: Each record sheet included in this boxed set notes an "Inner Sphere" Tech Base. Tech Bases are not used with the rules in this box, but come into play in more advanced products, such as the BattleMech Manual. They are included here to help familiarize players with all the details of a record sheet.
Scenarios
This training scenario recreates one of the many "greenhorn" simulator programs used to train burgeoning MechWarriors on the game world of Solaris VII.
Both Players Roll 2D6: the winner is the attacker and places their 'Mech on the mapsheet after the loser has placed their 'Mech.
Game Set-Up
Layout The Patchwork (The Reaches) mapsheet as shown. For this scenario, ignore the Hardpacked Gravel terrain on the map. (For future scenarios, see the Solaris VII Arena Map Rules sheet.)
Defender
Select the CN9-A Centurion from the record sheets; use the illustration on the record sheet to select the correct miniature.
Deployment
The defending player sets up first, placing their 'Mech anywhere within 2 full hexes of the south edge (short end) of the mapsheet.
Attacker
Select the RFL-3N Rifleman from the record sheets; use the illustration on the record sheet to select the correct miniature.
Deployment
The attacking player may place their 'Mech on any of the hexes along the north edge (short end) of the mapsheet.
Victory Conditions
Victory belongs to the first side to destroy the enemy 'Mech. Now play your first game!
Variations
You've now got your first game under your belt and you're ready to tackle more. BattleTech is wonderfully flexible in allowing players to quickly mix and match maps, 'Mechs, and other elements for endless games. Use the following ideas for additional variations on the scenario above, then feel free to try and build your own.
Terrain
The punch-out sheet includes terrain pieces to modify either Mapsheet. (For the Raised/Lowered and Hardpacked Gravel tokens, see the Solaris VII Arena Map Rules sheet.) If players cannot agree on a way to add the terrain, use the following rules before deploying any 'Mechs:
- Both players must add the same number of terrain pieces.
- Randomly determine who will start, then rotate back and forth placing only one terrain piece at a time.
- Terrain cannot be within two hexes of the edge of the mapsheet, and there must always be three hexes between each terrain piece.
Additional BattleMechs
While it's easiest to learn the game through the one-on-one matchup presented above, BattleTech is best played with multiple 'Mechs on each side. For your next game, expand each side with the following 'Mechs (use the illustrations on the record sheets to find the appropriate cardboard punch-out playing pieces):
- Defender: TDR-5S Thunderbolt and WVR-6R Wolverine.
- Attacker: CN9-A Centurion and RFL-3N Rifleman.
Playing With Multiple 'Mechs
There are slight rules modifications when using more than one 'Mech on a side. Use the following modifications to the standard rules:
Movement Phase (p. 2): The side that lost Initiative chooses a 'Mech and moves it first. The side that won Initiative then moves a 'Mech. Movement alternates between sides until all 'Mechs have been moved. Each time a player must move a 'Mech, they may designate movement for any 'Mech that has not been destroyed, even if the "move" is to simply do nothing.
Stacking (p. 4): During the Movement Phase, a 'Mech may move through hexes occupied by other friendly 'Mechs.
Weapon Attack Phase (p. 4): The side that lost Initiative chooses a 'Mech and declares any attacks it will make, specifying which weapons will be fired and at which target(s).
The side that won Initiative then does the same.
The act of declaring attacks alternates between sides until all fire has been declared. Each time a player must declare an attack, they may do so for any 'Mech that has not been destroyed, even if the declaration is to do nothing.
Finally, all declared attacks must be resolved, even if the intended target is destroyed before all attacks against it have been resolved.
Multiple Targets: A 'Mech cannot declare weapon attacks against more than one target in the same turn.
Alternate Victory Conditions
The simplest win condition is "destroy the opposing force." More complex objectives will transform your play style and enjoyment of the game.
In this alternate scenario, "Breakthrough," the attacker is an outnumbered force trapped behind enemy lines, and must break through to safety by escaping across the map and exiting its south edge.
Use the same set-up as the training scenario on page 9, with the following modifications:
- Defender: CN9-A Centurion, RFL-3N Rifleman (Gunnery 5).
- Attacker: TDR-5S Thunderbolt (Gunnery 5)
- Armor Damage: Roll 2D6 twice on the Hit Location Table for the defender's Centurion and once again for the defender's Rifleman. Apply five points of damage to each rolled location. Re-roll any hits to either 'Mech's head.
- Victory Condition: The scenario ends when all defenders are destroyed, or when both attackers are destroyed or have retreated off the south edge of the mapsheet. Use the following table to determine victory:
Breakthrough Victory Points Table
| Attacker | Defender |
|---|---|
| 2 points for each attacking 'Mech that safely exits the south edge of the mapsheet | 3 points for each attacking 'Mech destroyed |
| 1 point for each defending 'Mech destroyed |
Solaris VII Arena Map Rules
With a few games under your belt, you can use this rules sheet to bring further Solaris action to your table. This includes additional options to The Patchwork (The Reaches) map, as well unlocking the Steiner Stadium (Solaris City) map.
MechWarrior Cards
These cards bring notable MechWarriors from the fiction to life (see Beyond the Quick-Start Rules, p. 11). However, these are some of the most legendary pilots in all of BattleTech fiction, especially in Justin and Gray. As such, they include rules that go well beyond what is found in this box.
Once you've moved to A Game of Armored Combat box, and played a game there, you'll be ready to field these pilot cards; visit bg.battletech.com/downloads for full record sheets for these legendary 'Mechs.
When you're ready to add them to a game, use the following rules:
- Only one BattleMech per side can have an attached MechWarrior Card.
- MechWarrior Cards have Special Pilot Abilities (SPAs), with values listed. Each side's total SPA values should be as close to equal as possible.
Force Balance: As noted above, both MechWarrior Cards should have the same Special Pilot Abilities cost, so both players will need to agree on that cost prior to the game. If you cannot agree, roll a D6. This is the maximum Special Pilot Abilities cost allowed for that game.
Gunnery Skills: All MechWarrior Cards include Gunnery Skills. If the listed skill is lower than 4, use the value listed on the card.
Piloting Skills: These ratings allow players to use these cards once they've moved on to the BattleTech: A Game of Armored Combat box set. They have no effect in the Quick-Start Rules.
WARNING: Some cards contain spoilers for the Warrior Trilogy fiction (see The Universe Awaits, p. 11).
MechWarrior Card Example (Anya Terrel)
The sample card (front and back) shows the Gunnery Rating (top left), Piloting Rating (top right), Rank, Affiliation, BattleMech, a Background text, and Special Pilot Abilities with a cost. Sample card, Anya Terrel (Gunnery Rating 2, Piloting Rating 2): Rank: Solaris Gladiator. Affiliation: Unknown. BattleMech: Wolverine.
Special Pilot Abilities (Cost: 7):
- Dodge: Make a Piloting Skill Roll when targeted during the Physical Attack Phase. Compare the Margin of Success to any incoming physical attacks. Any successful attack with a lower Margin of Success misses.
- Maneuvering Ace: May make Lateral Shifts. Apply a -1 modifier to Piloting Skill Rolls to avoid skidding.
- Float Like a Butterfly (3): May re-roll a successful attack or Determine Critical Hits roll, where Terrel is the target, three per scenario. The second roll must be accepted.
(These abilities are A Game of Armored Combat rules.)
Beyond the Quick-Start Rules
These rules offer just a taste of the action of the BattleTech tabletop miniatures game—there are many more additions that will unlock hours of tactics, strategy and enjoyment. Here are a few of the highlights awaiting you:
- Piloting Skills: A BattleMech requires a fine hand at the controls. Piloting Skill Ratings are used in a variety of actions, like punching and kicking! It's also used to determine if a BattleMech falls after taking damage or under other circumstances, damaging itself and potentially the MechWarrior as well!
- Critical Hits: Under each 'Mech's armored hide is a network of fragile parts essential to its survival. These are shown on the complete Critical Hits Table, where weapon strikes which penetrate your armor may tear away at your 'Mech's critical components.
- Heat: Heat build-up is a BattleMech's greatest limiting factor. Though a 'Mech dissipates heat through its heat sinks, a high rate of activity can produce more heat than they can handle. A warrior who pushes their 'Mech past its limits eventually must pay the price, from reduced capabilities to a complete shutdown!
- Additional Terrain: Other mapsheets include additional terrain, from water to hills of various levels, and of course buildings! Learning to use terrain to your advantage is crucial.
- Firing Arcs and Attack Direction: The quick-start rules detail only a single firing arc, and all damage is applied in the same manner. Yet there are multiple arcs, as well as attack directions and rear armor! A savvy MechWarrior uses these arcs to maximize their shots against the weakest parts of the defender, while protecting their own weaknesses.
- More Weapons And Equipment: There's many more weapons and equipment to field, each with their own tactics, and construction rules that will allow you to make your own BattleMechs! Additionally, as hinted at by the "Tech Base: Inner Sphere" designation found on the record sheets, those additional weapons, equipment and rules cover advancements from the height of the Star League, to the depths of lostech in the Succession Wars, and beyond. A myriad of great options for your game table...if you can dream it, there's a rule for that!
- Much More!: Once you're ready, dive into A Game of Armored Combat to take your gaming to the next level!
- The Universe Awaits: While the BattleTech game is exciting, its setting has captured players' imaginations for decades. Technical Readout: Succession Wars brings your BattleMechs to life within that universe. If you enjoyed Spanner in the Works, you can move onto more fiction. The Mercenary Life is an anthology; a perfect way to dip your toe. Or you can start the fan-favorite Gray Death Legion Trilogy. Or even launch into the universe-changing Warrior Trilogy, where you'll find some of the characters from the novella. Wherever you start, there is a slew of immersive BattleTech e-pub fiction at .
Reference
The final page of the booklet repeats, as quick-reference tables, the Sequence of Play (Initiative Phase, Movement Phase, Weapon Attack Phase), the G.A.T.O.R. mnemonic, the Movement Costs Table, the Attack Modifiers Table, the Hit Location Table and the Cluster Hits Table, all as given above.