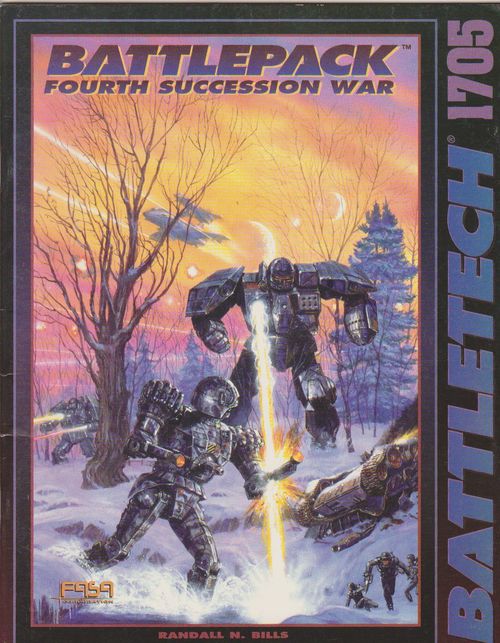
BattleTech BattlePack: Fourth Succession War
BattleTech BattlePack: Fourth Succession War Rulebook
Table of Contents
Table of Contents
- How to Use the Scenarios
- General Scenario Rules
- Scenario 1: The Hammer Falls
- Scenario 2: Rise of the Revenant
- Scenario 3: Strike at the Heart
- Scenario 4: Justice is Served
- Scenario 5: Operation Intruders Communion
- Scenario 6: Line in the Sand
- Scenario 7: The Janos Mistake
- Scenario 8: In the Claw of the Dragon
- Scenario 9: At the Gates of Hell
- Scenario 10: Sic Semper Tyrannis
- New 'Mechs
How to Use the Scenarios
The rules given for each scenario provide the information needed to understand and play out the battle, including guidelines for determining the winner and loser. Each scenario begins with a personal account of the battle and includes a Situation section that provides the historical background of the engagement. Additional sections in each scenario are titled Game Set-Up, Attacker, Defender, Victory Conditions and Special Rules.
Game Set-Up provides specific information needed to play the scenarios, including directions for laying out mapsheets and dealing with special terrain features, and suggestions on appropriate BattleTech rules to use.
The Attacker and Defender sections provide rosters of the scenario's combatants and directions for deploying forces. The troop rosters include the 'Mechs used and the skills of their pilots. Each pilot's name is followed by the appropriate skills in parentheses, with Piloting Skill before the slash and Gunnery Skill after the slash. For example, (4/3) represents Piloting Skill 4 and Gunnery Skill 3.
Victory Conditions provides guidelines for determining the outcome of the battle. Combat rarely continues until one side is obliterated; in most cases, both sides may claim some measure of victory if they achieve their tactical objectives. Victory conditions simulate this conduct by listing specific tactical objectives for one or both opponents in each scenario. Finally, Special Rules lists any rules aside from those in the standard BattleTech game that are needed to play the scenario.
General Scenario Rules
Unless noted otherwise in a given scenario, the following rules apply to all of the scenarios in this book.
Terminology
Throughout this book, the playing area (or game board) is referred to in terms of maps and mapsheets. A mapsheet is a single 22" x 17" BattleTech mapsheet. The map is the total playing area for a scenario; it may consist of one or more individual mapsheets.
Each player will have a home map edge, which usually represents the direction in which friendly forces are located. A player's units enter the scenario from his home edge, and must exit from that edge to safely retreat off the map.
Number of Players
The BattlePack scenarios are written for two players. If more than two individuals are playing, divide the players into two opposing teams. The members of each team designate a "team leader," either by mutual agreement or a dice roll. That player assigns BattleMechs to the players on his team and rolls for his team's Initiative each turn.
Setup
Roll Initiative for the first turn per standard rules. All units start play off the map unless otherwise noted. A player's units may enter the map on any hex along that player's home edge. Each unit must enter the map on a full hex nearest the home edge; that hex counts as the unit's first hex of movement.
Movement and Retreat
Scenario maps are fixed in place once play begins. Unless otherwise noted, units that exit the map at any edge other than their home edge are considered destroyed. Units that exit the map through their home edge have retreated—they remain out of play for the remainder of the scenario and cannot return. However, retreated units do not count as destroyed when determining victory. Units cannot retreat unless the scenario rules allow them to do so. Units may exit the map intentionally or may be forced off by an opposing unit using a push, charge or death-from-above attack.
Half-hexes along the edge of the map—even those with hex numbers in them—are not considered within the playing area. A unit that enters one of these half-hexes for any reason automatically exits the map.
Ending the Game
Generally, a scenario ends when all of one player's units have been destroyed or have retreated off the map. At that point, the opposing player wins. Depending on the specific scenario, however, a player may need to achieve additional or alternative goals to claim victory.
Victory Levels
Most scenarios include varying levels of victory that depend on the goals of each side. A player must achieve all of his side's objectives to win a Decisive victory. In addition, winning a Decisive victory usually requires minimal loss of units on the winner's side. To win decisively requires skill and luck; scoring such a victory against a player of equal ability is cause for celebration.
A player achieves a Marginal victory when he meets his side's objectives but also suffers significant losses, or when he accomplishes only part of the objective. Though a Marginal victory is still considered a win, the battle could have gone better. Both sides can achieve a Marginal victory in the same scenario.
When both players achieve the same victory level, the scenario is considered a Draw.
Scenario 1: The Hammer Falls
The scenario's personal account and its Situation narrative (pp. 12-13) are omitted as fiction and historical background. The sections below are the scenario's rules.
Game Set-Up
Lay out the Woodland and standard BattleTech mapsheets as shown.
Attacker
The attacker consists of two lances of Justinia's Cuirassiers, Second Battalion.
Command Lance
- Captain Fung Suk Lo (3/3), GHR-5H Grasshopper
- Subcommander Jason Siao (4/4), CTF-2X Cataphract
- Subcommander Choung Sung (4/4), VND-1R Vindicator
- Sandra Young (4/3), VND-1R Vindicator
Strike Lance
- Commander Travis Yong (3/3), AS7-D Atlas
- Subcommander Jarvis Collins (4/4), STK-3F Stalker
- Anella Ching (4/3), CPLT-C1 Catapult
- Tonia Smith (4/4), TBT-5N Trebuchet
Deployment: The attacker's home map edge is the west edge of the map. The attacking forces enter from their home map edge during the Movement Phase of Turn 1.
Defender
The defender consists of a company of the Twelfth Vegan Rangers, Alpha Regiment, First Battalion.
Command Lance
- Major Jennifer Nichols (4/3), CPLT-C1 Catapult
- Lieutenant Karla Lewis (4/4), JM6-S JagerMech
- Sergeant Paul Winters (4/3), GHR-5H Grasshopper
- James Doolittle (5/3), ENF-4R Enforcer
Assault Lance
- Lieutenant Fox Dillon (4/3), AWS-8Q Awesome
- Sergeant Jonnie Ferris (4/4), BNC-3E Banshee
- Paul Jeffries (5/4), CP-10-Z Cyclops
- Suzanne Thornton (4/4), STK-3F Stalker
Recon Lance
- Lieutenant Jason Phelps (3/3), FS9-H Firestarter
- Sergeant Joshua Jacobs (4/4), ASN-21 Assassin
- Julies Tilman (5/3), JR7-D Jenner
- Jeff Minx (4/4), SDR-5V Spider
Deployment: The defender's home map edge is the east edge of the map. The Recon Lance sets up before play begins anywhere on the Woodland map. The Command Lance enters from their home map edge during the Movement Phase of Turn 6. The Assault Lance enters from their home map edge during the Movement Phase of Turn 9.
Victory Conditions
The scenario ends when all the attacking units have been destroyed. It also ends if all defending units are destroyed in the End Phase of Turn 9 or later.
The attacker wins a Decisive Victory if he destroys all the units in the Recon Lance. He wins a Marginal Victory if he is able to destroy 6 defending 'Mechs but fails to destroy all of the 'Mechs in the defender's Recon Lance.
The defender wins a Decisive Victory if he destroys all the attacking units and a 'Mech survives from the Recon Lance. He wins a Marginal Victory if he destroys all of the attacking units, but no units in the Recon Lance survive.
Scenario 2: Rise of the Revenant
The scenario's opening narrative and its Situation section (pp. 14-15) are omitted as fiction and historical background.
Attacker
The attacker consists of the Recon Company of the Eleventh Legion of Vega, First Battalion.
Command Lance
- Tai-i Fuhito Tetsuhara (4/3), PNT-9R Panther
- Karl Tomo (4/4), PNT-9R Panther
- Robert Fruin (4/4), JR7-D Jenner
- Craig Langer (4/4), JR7-D Jenner
Support Lance
- Chu-i Geoff Itemji (4/3), QKD-4G Quickdraw
- Jusiral Tishilar (4/3), PNT-9R Panther
- Okubo Lashjui (4/4), JR7-D Jenner
- Mark Ochoa (5/4), JR7-D Jenner
Pursuit Lance
- Chu-i Basir Fanhorn (3/4), ASN-21 Assassin
- James Iverson (5/4), JR7-D Jenner
- Stephen Tetsuo (4/4), SDR-5V Spider
- Sean Theisen (4/3), SDR-5V Spider
Deployment: The attacker places his units second, and may position them anywhere on the map.
Defender
The defender consists of a lance of the Fourth Skye Rangers, First Battalion, Third Company.
Assault Lance
- Hauptmann George Carlson (4/3), AS7-D Atlas
- First Leutnant Scott Hayes (4/3), BNC-3E Banshee
- Joseph Steinbrenner (4/3), ZEU-6S Zeus
- Scott Thompson (4/3), ZEU-6S Zeus
Deployment: The defender sets up first in the following hexes: Atlas in Hex 0908, Banshee in 0809 and the Zeuses in hexes 0710 and 0610. The Atlas and Banshee face north. Both Zeuses face northeast.
Game Set-Up
Lay out the Woodland map as shown.
Victory Conditions
The attacker's goal is to destroy 1 defending 'Mech before withdrawing. Once this is accomplished, he will retreat his forces as quickly as possible off any map edge. Attacking units may not begin to retreat until at least 1 defending 'Mech has been destroyed. The scenario ends when all of the attacking 'Mechs are either destroyed or have retreated from the map.
The attacker wins a Decisive Victory if he destroys 1 defending unit and withdraws at least 10 units from the board. He wins a Marginal Victory if he destroys 1 defending unit and withdraws at least 6 units from the board.
The defender wins a Decisive Victory if he destroys 7 of the attacking units before they withdraw. He wins a Marginal Victory if he destroys 3 of the attacking units before they withdraw.
Special Rules
Because the attacking force has the advantage of complete surprise, the defending side automatically loses the Initiative for the first two turns.
Scenario 3: Strike at the Heart
The scenario's opening narrative and its Situation section (pp. 16-17) are omitted as fiction and historical background.
Game Set-Up
Lay out the Woodland and standard BattleTech mapsheets as shown.
Attacker
The attacker consists of a lance from the Second Crucis Lancers, Third Battalion, Second Company.
Support Lance
- Leftenant Jason Argyle (5/5), STK-3F Stalker
- Armand Toole (5/5), GHR-5H Grasshopper
- Paul Grundman (6/5), AWS-8Q Awesome
- Betty Keys (6/5), CPLT-C1 Catapult
Deployment: The attacker's home map edge is the west map edge. The attacking units enter from the east map edge during the Movement Phase of Turn 1.
As printed, the attacker's home edge is the west edge but the attacking units enter from the east edge; the Victory Conditions below count exits from the west map edge. Transcribed as printed.
Defender
The defender consists of elements of the Ariana Grenadiers.
Command Lance
- Justina Ferris (4/3), CTF-2X Cataphract
- Ruth Dunning (4/3), DV-6M Dervish
- Dennis Duong (5/3), VND-1R Vindicator
- Cynthia Wong (4/3), VND-1R Vindicator
Deployment: The defender's home map edge is the east map edge. The defending units set up anywhere on the Woodland map.
Victory Conditions
The scenario ends when all the attackers are destroyed or have left the map from the west map edge. The Second Crucis Lancers are attempting to capture the city of Gizhiga, which lies a kilometer beyond the Woodland map. Their goal is to march across the map without losing any forces, which will allow them to attack and capture the city.
The attackers achieve a Decisive Victory if they are able to exit all 4 'Mechs off the west map edge. The attackers achieve a Marginal Victory if they exit 3 'Mechs off the west map edge.
The defenders achieve a Decisive Victory if they are able to destroy 2 or more attacking units. The defenders achieve a Marginal Victory if they destroy 1 attacking unit.
Special Rules
The Second Crucis Lancers comprise the most inexperienced troops of all the Crucis Lancers regiments, which is reflected in their poor Piloting and Gunnery skills. In addition, modify the Lancers' Initiative Rolls by -1 for the duration of the scenario.
Scenario 4: Justice is Served
The opening diary excerpt and the Situation section (pp. 18-19) are omitted as fiction and historical background.
Game Set-Up
Lay out both standard BattleTech mapsheets as shown. Treat the shaded hexes marked on the map diagram as Depth 1 water.
Attacker
The attacker consists of a lance of the Tyr Regiment, Second Battalion.
Assault Lance
- Kavellrist Nels Rasmussen (4/3), AS7-D Atlas
- Kavellrist Dolores Olsen (4/3), ZEU-6S Zeus
- Kavellrist Barrie Cizek (4/4), CP-10-Z Cyclops
- Kavellrist Don Siggurson (4/3), STK-3F Stalker
Deployment: The attacker enters from the east map edge during the Movement Phase of Turn 1.
Defender
The defender consists of elements of the Seventeenth Rasalhague Regulars.
Command Lance
- Tai-i Jerry Osaka (4/4), DRG-1N Dragon
- Matthew Skelly (5/4), CPLT-C1 Catapult
- Frank Katsuke (4/4), QKD-4G Quickdraw
- Warren Jarrett (4/3), DV-6M Dervish
Fire-Support Lance
- Chu-i Tyler Jetneke (4/3), TBT-5N Trebuchet
- Jason Sellers (4/4), CLNT-2-3T Clint
- Tom Tetsu (4/3), PNT-9R Panther
- Kevin Tompson (5/4), PNT-9R Panther
Deployment: The defender sets up anywhere on the map.
Victory Conditions
The scenario ends when all the units on one side or the other have been destroyed or retreated from the map.
The Tyr regiment's goal is to destroy as many enemy units as possible, thereby forcing the enemy troops to retreat offplanet. The Seventeenth Regulars will attempt to hold the enemy off as long as possible before receiving the command to retreat offplanet.
As soon as the defenders receive the retreat order (see Special Rules), the defending player rolls D6. On a result of 1-3, the defending player will retreat his 'Mechs off the north map edge. On a result of 4-6, he will retreat his 'Mechs off the south map edge. The player may not retreat off any other map edge.
The attacker wins a Decisive Victory by destroying 6 or more defending units. He wins a Marginal Victory by destroying 4 or 5 defending units.
The defender wins a Decisive Victory by retreating 6 or more units off the map. He wins a Marginal Victory by retreating 4 or 5 units off the map.
Special Rules
As soon as the local population on Kirchbach saw the Tyr regiment, the mostly Scandinavian inhabitants began to riot and disrupt communication between the garrisoning Combine forces. To simulate this disorder, the defending units may not withdraw from the map except under specific circumstances.
Beginning on Turn 10, the defending player rolls D6 at the beginning of each turn. A result of 6 means he has received the word to retreat, and follows the rules in the Victory Conditions for retreat. Any other result forces him to remain on the map for another turn. On Turn 11, he must roll a 5 to retreat; on Turn 12, a 4, and so on. At the beginning of Turn 15, the player automatically rolls to determine which map edge he may retreat off, and may begin retreating that turn.
Scenario 5: Operation Intruders Communion
The opening narrative, the novel excerpt and the Situation section (pp. 20-21) are omitted as fiction and historical background.
Game Set-Up
Lay out the Woodland and standard BattleTech mapsheets as shown.
Attacker
The attacker consists of elements of the Fourth Tau Ceti Rangers, First Battalion.
Command Lance
- Captain Twil Oster (3/3), CTF-2X Cataphract
- Subcommander Walter Parry (4/3), VND-1R Vindicator
- Jas Hodges (4/4), HBK-4G Hunchback
- Cynthia Keller (4/4), TBT-5N Trebuchet
Strike Lance
- Commander Vicky Enix (4/3), CGR-1A5 Charger
- Subcommander Abe Froeman (4/4), AWS-8Q Awesome
- Subcommander Teoweyn Foster (4/3), QKD-4G Quickdraw
- Jenny Collins (4/4), CPLT-C1 Catapult
Deployment: The attacker enters from the east map edge during the Movement Phase of Turn 1.
Defender
The defender consists of two reinforced lances of the Delta Company of the Davion Light Guards.
Fox Lance
- Corporal Hugh de Payens (3/3), FS9-H Firestarter
- Subaltern Joshua Kenson (4/3), FS9-H Firestarter
- Subaltern Frank Krill (3/3), JR7-D Jenner
- James Faraday (4/3), JR7-D Jenner
- Julia French (4/3), JR7-D Jenner
Cat Lance
- Corporal Geoffrey St. Omer (3/3), WLF-1 Wolfhound
- Kelly Bruebaker (4/3), HCT-3F Hatchetman
- Subaltern Joseph Carlyle (3/3), JR7-D Jenner
- Subaltern Jewel Smith (4/4), JR7-D Jenner
- Geoff Sutfin (4/4), JR7-D Jenner
Deployment: The defending player sets up first, anywhere on the Woodland mapsheet.
Victory Conditions
The attacking elements of the Fourth Tau Ceti Rangers are attempting to pin down the defending force until the commando forces extract as much data as possible from the secret NAIS facility, after which they will withdraw. The scenario ends at the end of Turn 12 or when one side has been destroyed, whichever occurs first.
The attacker wins a Decisive Victory if he destroys 6 or more defending units. He wins a Marginal Victory if he destroys 4 or 5 units.
The defender wins a Decisive Victory if he destroys 4 or more attacking units. He wins a Marginal Victory if he destroys 2 or 3 units.
Special Rules
Because Delta Company specializes in "swarming" larger 'Mechs using multiple smaller 'Mechs, a tactic that generally confuses and disorients the enemy, the defending player adds a +2 modifier to Initiative die rolls for the entire scenario.
Scenario 6: Line in the Sand
The opening interrogation excerpt and the Situation section (pp. 22-23) are omitted as fiction and historical background.
Game Set-Up
Lay out both standard BattleTech mapsheets and the Woodland mapsheet as shown. All Level 0 Clear hexes on the Woodland mapsheet are considered Swamp (see Special Rules, below). The half hexes that join with the two standard BattleTech mapsheets along both long edges of the Woodland mapsheet are also considered Swamp. The shaded area represents the attacker's deployment zone.
Attacker
The attacker consists of elements of the Fifth Syrtis Fusiliers, First Battalion, Second Company.
Assault Lance
- Leftenant Ammanda Johnson (3/3), STK-3F Stalker
- Subaltern Jay Lenny (4/3), AS7-D Atlas
- Mort Collins (4/3), AWS-8Q Awesome
- Jack Fuller (4/4), JM6-S JagerMech
Fire Lance
- Leftenant Jock Pordue (4/3), CPLT-C1 Catapult
- Subaltern Jeffrey Franks (4/4), JM6-S JagerMech
- Subaltern Lydia Poe (5/4), TBT-5N Trebuchet
- Peter Fische (4/4), DV-6M Dervish
Deployment: The attacker sets up first. His forces start play on the Woodland mapsheet, set up in the center (see shaded area on p. 24: hex columns numbered 06xx to 10xx). Within this area, the attacker may place units in any hexes with any facing.
Defender
The defender consists of elements of the Fourth McCarron's Armored Cavalry Regiment.
Command Lance
- Captain Jason Torrance (3/3), CTF-2X Cataphract
- Subcommander Collie Florence (4/3), GHR-5H Grasshopper
- Subcommander Victor Kung (4/4), VND-1R Vindicator
- Andrea Assellin (4/4), VND-1R Vindicator
Strike Lance
- Commander Laura Sung (4/3), CGR-1A5 Charger
- Subcommander Charlie Voe (5/4), CGR-1A5 Charger
- Jason Williams (4/3), AWS-8Q Awesome
- Ferris Razani (5/4), CTF-2X Cataphract
Recon Lance
- Commander Susan Marshigama (4/3), QKD-4G Quickdraw
- Subcommander Stephen Jones (5/4), HER-2S Hermes II
- Subcommander James Clifton (4/3), CDA-2A Cicada
- Subcommander Forrest Jones (5/3), ASN-21 Assassin
Deployment: The defender sets up second and may place his 'Mechs anywhere on either of the standard BattleTech mapsheets.
Victory Conditions
The scenario ends when one side or the other has been destroyed, or all of the attacking forces have left the map.
Because of the position in which the forces of the Fifth Syrtis Fusiliers find themselves, they immediately begin to retreat off the map. Starting on Turn 1, the attacking player may begin to move his forces off the map. Units may only leave the map via the east and west map edges, though all attacking units need not leave through the same map edge.
The attacker wins a Decisive Victory if he retreats 6 or more 'Mechs off the map. He wins a Marginal Victory if he retreats 4 or 5 'Mechs off the map.
The defender wins a Decisive Victory if he destroys 6 or more attacking units before they leave the map. He wins a Marginal Victory if he destroys 4 or 5 attacking units before they leave the map.
Special Rules
All Level 0 Clear hexes on the Woodland mapsheet are considered Swamp. Increase the movement cost to enter any Swamp hex by 1 MP. For example, entering a swampy Clear hex costs 2 MP rather than the standard 1 MP.
When a BattleMech enters a Swamp hex, the player must make a Piloting Skill Roll. If the roll fails, the unit becomes stuck in the hex and may not move for the rest of the turn (a BattleMech that fails this roll does not fall). The unit may torso twist normally, but may not change its facing. For any weapon or physical attacks made against a unit stuck in a Swamp hex, modify the to-hit number by -2. A jumping BattleMech that lands in a Swamp hex automatically becomes stuck. 'Mechs that fall do not.
At the start of the next turn's Movement Phase, the player controlling a stuck unit makes a Piloting Skill Roll. On a successful roll, the unit breaks away from the swampy terrain and may move normally. If the roll fails, the unit remains stuck and the player makes another Piloting Skill Roll at the start of the next Movement Phase.
Scenario 7: The Janos Mistake
The opening narrative and the Situation section (pp. 25-27) are omitted as fiction and historical background.
Game Set-Up
Lay out both standard BattleTech mapsheets as shown.
Attacker
The attacker consists of a reinforced lance from the Third Republican Regiment, Third Battalion, Second Company.
Command Lance
- Commander Jon Fiong (4/3), CTF-2X Cataphract
- Subcommander Suzan Lei (4/4), GHR-5H Grasshopper
- Subcommander Paula Terrel (4/4), CPLT-C1 Catapult
- Commander Tom Franks (5/4), VND-1R Vindicator
- Subcommander Sung Young (5/4), SDR-5V Spider
- Subcommander Sharon Fong (4/4), SDR-5V Spider
Deployment: The attacker enters via the west map edge during the Movement Phase of Turn 1.
Defender
The defender consists of one lance of the Fifteenth Marik Militia, Second Battalion, First Company.
Assault Lance
- Force Commander Dan Jackson (3/3), AS7-D Atlas
- Lieutenant, Senior Grade Jay Dill (4/3), AWS-8Q Awesome
- Lieutenant, Junior Grade Ferra McConner (5/4), CP-10-Z Cyclops
- Bryan Potter (4/3), QKD-4G Quickdraw
Deployment: The defender sets up first, anywhere on the east BattleTech mapsheet.
Victory Conditions
The scenario ends when all units on one side or the other have been destroyed or when the defender's headquarters (see Special Rules, below) is destroyed.
The Third Republican forces have been slowly losing the battle because of the battlefield acumen of the Fifteenth Marik Militia's commander, Colonel Hawkins. In an attempt to decapitate the head of the snake, the Republicans' priority is to destroy the defending forces' HQ. Therefore, the attacker wins a Decisive Victory if his forces destroy the HQ. The attacker cannot win a Marginal Victory.
The defender wins a Decisive Victory if the HQ is not destroyed. He wins a Marginal Victory if the HQ is destroyed, but his forces destroy 4 or more enemy units.
Special Rules
The defending commander of the Fifteenth Marik Militia is commanding his troops from a hidden headquarters. At the beginning of the game, the defending player secretly chooses any hex on the map in which to hide his HQ. The defender should write down the hex number on a piece of paper, which is later revealed to the attacker.
The HQ remains hidden until an enemy unit moves into its hex, attempts to move into its hex, or ends its movement adjacent to its hex. If a unit attempts to enter a hex containing the HQ, the unit immediately ends its movement and the HQ is revealed.
The HQ, though not considered an immobile target, cannot move from the hex in which it is hidden at the beginning of the game. It has a total of 25 points of armor and can be attacked as if it were a standard unit. Once 25 or more points of damage have been done to the HQ, it is destroyed.
Scenario 8: In the Claw of the Dragon
The opening holodrama excerpt and the Situation section (pp. 28-29) are omitted as fiction and historical background.
Attacker
The attacker consists of the Regimental Command Lance of the Tenth Lyran Guards.
Regimental Command Lance
- Duke Frederick Steiner (3/2), AS7-D Atlas
- Leutnant-Colonel Tonya Graham (3/3), ZEU-6S Zeus
- First Leutnant Julie Camara (3/3), AWS-8Q Awesome
- Leutnant Cole File (4/3), STK-3F Stalker
Deployment: The attackers move onto the map during the Movement Phase of Turn 1 using the Dropping Troops rule (see Special Rules, below). They may land on either mapsheet.
Defender
The defender consists of several elements from the Legions of Vega.
Command Lance
- Chu-sa Ome Takiro (4/4), GHR-5H Grasshopper
- Chu-i Jason Oma (4/4), DRG-1N Dragon
- Keith Richards (5/4), DRG-1N Dragon
- Jeffrey Kaneda (5/4), STK-3F Stalker
Support Lance
- Chu-i Jefferson Oshika (4/3), CPLT-C1 Catapult
- Wu Minowa (4/4), AWS-8Q Awesome
Recon Lance
- Chu-i Stephen Awano (4/4), WTH-1 Whitworth
- Hajii Rekai (4/4), WTH-1 Whitworth
- Hojim Mara (5/4), PNT-9R Panther
Deployment: The defender deploys first, anywhere on either mapsheet.
Game Set-Up
Lay out the standard BattleTech and Woodland mapsheets as shown.
Victory Conditions
The scenario ends when all the units on either side or all 5 ammunition bunkers (see Ammunition Bunkers) have been destroyed. The attacker is attempting to destroy all the ammunition bunkers, thereby depriving the defender of further munitions for his invasion. The defender is attempting to destroy all of the attacking units before they can destroy the bunkers.
The attacker wins a Decisive Victory if he destroys all 5 ammunition bunkers. He wins a Marginal Victory if he destroys 3 or 4 bunkers.
The defender wins a Decisive Victory if he destroys all of the attacking units and 2 or fewer bunkers are destroyed. He wins a Marginal Victory if he destroys all of the attacking units and 3 or 4 bunkers are destroyed.
Special Rules
This scenario requires special rules for dropping troops and for ammunition bunkers, as described below.
Dropping Troops
Players can insert BattleMechs directly into hostile territory by dropping them out of a DropShip in the atmosphere or low orbit. The attacking units enter this scenario using this risky maneuver, known as a combat drop.
The attacking player should nominate a hex on the mapsheet in which each unit will land. For each 'Mech, the player makes a Piloting Skill Roll to determine whether the landing was successful. A failed roll means the landing failed and the unit missed the target hex.
On a failed landing, the unit will scatter. To determine where the 'Mech lands, first roll one die to determine the direction of the scatter per the Scatter Diagram below. Then roll 1D6 per point by which the Piloting Skill Roll result fell below the target number. The total result of the dice rolls represents the distance away from the target hex (in hexes) that the unit lands.
Scatter Diagram. The six hexes adjacent to the target hex are numbered 1 through 6 around it: 1 is the hex to the north (top), 2 to the northeast, 3 to the southeast, 4 to the south (bottom), 5 to the southwest and 6 to the northwest.
A BattleMech that fails its landing will also take damage as though it had fallen a number of elevation levels equal to the number of points by which the roll failed (see Falling, p. 15, BattleTech boxed set rulebook). For example, if a 'Mech with a Piloting Skill Roll target number of 4 or higher rolled a 2, the unit would suffer damage as from a fall of 2 elevation levels.
Dropped troops always land at the end of the Movement Phase. They may not fire or otherwise act for the remainder of that turn, but may be fired upon (the attacker modifies the to-hit number by +1 for target movement, and adds the appropriate modifiers for range, terrain and so on). Landed units function normally thereafter.
Ammunition Bunkers
At the beginning of the game, the defending player places five ammunition bunkers anywhere on either mapsheet (use markers such as dice, coins and so on to represent the bunkers). They must be placed in Clear Level 0 hexes, each at least ten hexes away from all other bunkers.
Each ammunition bunker is an immobile target that mounts 60 points of armor. Once the bunker has taken 60 or more points of damage, it is destroyed. No unit may move through a hex containing an ammunition bunker. However, once a bunker is destroyed, the hex is considered Rough terrain, and units may move through it per standard movement rules.
Scenario 9: At the Gates of Hell
The opening narrative, the Situation section and the historical account (pp. 31-33) are omitted as fiction and historical background.
Attacker
The attacker consists of elements of the Eighth Galedon Regulars.
Command Lance
- Chu-i Takira Oni (5/4), DRG-1N Dragon
- Simone Taylor (5/4), CP-10-Z Cyclops
- Kim Minuro (5/4), CPLT-C1 Catapult
- Tiron Jefferson (5/4), TBT-5N Trebuchet
Deployment: The attackers may enter via any map edge during the Movement Phase of Turn 1. Different units may enter from different map edges.
Defender
The defenders are two of the few Wolf's Dragoons from Delta Regiment to survive the fighting on the worlds of Misery and Wapakoneta.
Provisional Lance
- Captain Lucas Kent (2/1), HOP-4B Hoplite
- Lauren Simmons (2/1), WLF-1 Wolfhound
Deployment: The defender sets up first, anywhere on the map.
Game Set-Up
Lay out the standard BattleTech mapsheet as shown.
Victory Conditions
The scenario ends when all units on one side or the other have been destroyed.
The attacker wins a Decisive Victory by destroying all the defending units. He cannot win a Marginal Victory.
The defender wins a Decisive Victory by destroying all the attacking units. He wins a Marginal Victory by destroying 3 attacking units.
Scenario 10: Sic Semper Tyrannis
The opening audio-recording excerpt, the Situation section and the historical account (pp. 34-36) are omitted as fiction and historical background.
Attacker
The attacker consists of one lance of the First Kathil Uhlans.
Pursuit Lance
- Leftenant Michael Finley (3/3), ENF-4R Enforcer
- Subaltern Kimberly Jackson (4/3), HCT-3F Hatchetman
- Subaltern Troy McConner (4/3), HCT-3F Hatchetman
- Subaltern Jack Foster (4/3), FS9-H Firestarter
Deployment: The attacker sets up first and may place his units anywhere on the mapsheet.
Defender
The defender consists of one lance of House Imarra troops.
Command Lance
- Major Carl Sung (4/4), CTF-2X Cataphract
- Commander Jessica Ericsson (4/4), CTF-2X Cataphract
- Subcommander Sandy Voug (4/4), BJ-3 Blackjack
- Subcommander Kim Fuchi (5/4), BJ-3 Blackjack
Deployment: The defender enters via any map edge during the Movement Phase of Turn 1. Different units may enter from different map edges.
Game Set-Up
Place one BattleTech mapsheet face-down as shown.
Victory Conditions
The game ends when all units on either side are destroyed, or at the end of Turn 10.
The attacker has come to Sian simply to extract an agent. At the end of Turn 10, the attacking forces have found their agent, at which point they leave. The defender attempts to destroy as many attacking units as possible before they can depart with the traitor.
The attacker wins a Decisive Victory if 3 or more of his units survive at the end of the scenario. He wins a Marginal Victory if 1 or 2 of his units survive.
The defender wins a Decisive Victory if he destroys all 4 attacking units. He wins a Marginal Victory if he destroys 3 attacking units.
Special Rules
This scenario uses the following special rules for the green smoke deployed by the Uhlans and the triple-strength myomer used by the Capellans. Additionally, the Blackjack BattleMechs employed by the defender are equipped with double heat sinks.
Green Smoke
The scenario occurs at the Sian spaceport, where thick, green smoke completely covers the battlefield, obscuring the vision of the MechWarriors. For the duration of the scenario, all units receive a +2 modifier to all their to-hit numbers.
This smoke is a chemical compound that does excessive damage to the internal structures of the defending Liao 'Mechs when it comes into contact with them. During the End Phase of every turn, check to see if any of the defending 'Mechs have a location with no armor. If any location lacks armor, that location automatically takes 6 points of additional damage. The attacker makes a single roll for a possible critical hit on the Determining Critical Hits Table. This damage also transfers per the rules for ammunition explosions (see BattleMech Critical Hit Effects, p. 24, BattleTech rulebook).
Triple-Strength Myomer
Each of the defending 'Mechs is equipped with extra-strength myomer stolen from a secret NAIS facility. Though this triple-strength myomer gives the 'Mechs great strength, the formula used to create it contained an intentional flaw that made the fibers vulnerable to the chemical compound in the green smoke. Despite this flaw, however, the myomer still provides the defending 'Mechs with the following benefits when they are running hot. For each turn that it ends with a Heat Level of 9 or higher, a BattleMech equipped with the myomer receives the following benefits, which take effect in the next turn:
- Ignore the standard -1 MP heat effect when the 'Mech reaches 5 on the Heat Scale (but apply all other heat modifiers). In addition, increase the 'Mech's Walking MP by 1 and recalculate its Running MP accordingly. Triple-strength myomer does not affect Jumping MP.
- Double the damage for punching, kicking, clubbing and hatchet attacks.
Double Heat Sinks
The BJ-3 Blackjack is equipped with double heat sinks, which can dissipate twice as much heat as standard models, though they are three times as bulky. The Blackjack has ten double heat sinks, which means it can dissipate 20 points of heat each turn. Each heat sink destroyed therefore reduces the 'Mech's ability to dissipate heat by 2.
New 'Mechs
The eight 'Mech designs in this book are transcribed below from their printed stat blocks and commentary. The record-sheet drawings that accompany them (pp. 37-40) are not transcribed. The back cover (p. 41), a map of the Successor States, is omitted.
FS9-H Firestarter
- Mass: 35 tons
- Chassis: Argile H/09
- Power Plant: GM 210
- Cruising Speed: 65 kph
- Maximum Speed: 97 kph
- Jump Jets: Firestone Radial 6s
- Jump Capacity: 180 meters
- Armor: Livingston Ceramics
- Armament: 2 Magna II Medium Lasers; 2 Deprus RF Machine Guns; 4 Purity L-series Flamers
- Manufacturer: Argile Technologies of Skye
- Communications System: Tansech Omni-7
- Targeting and Tracking System: Tansech C30-97
Commentary: One of the most specialized BattleMechs ever produced, the Firestarter is the bane of unarmored infantry units throughout the Inner Sphere. The four flamers that give the 'Mech its name are often used to set fire to any terrain features that might provide cover to an enemy, or to channel an enemy's movement into an ambush. Fast and agile, the Firestarter is also used as a scout 'Mech, as it is tough enough to withstand enemy fire and still report back to its unit. In 'Mech to 'Mech combat, however, the Firestarter is generally ineffective. Its two medium lasers and machine guns provide some firepower, but not enough to seriously threaten anything except very light 'Mechs. The Firestarter is therefore rarely used as anything but an incendiary and a scout, the two missions for which it was designed.
WLF-1 Wolfhound
- Mass: 35 tons
- Chassis: Arc-Royal KH/3
- Power Plant: GM 210
- Cruising Speed: 65 kph
- Maximum Speed: 97 kph
- Jump Jets: None
- Jump Capacity: None
- Armor: Durallex Medium
- Armament: 1 Cyclops Eye Large Laser; 4 Defiance B3M Medium Lasers
- Manufacturer: TharHes Industries
- Communications System: O/P COM-22/H47
- Targeting and Tracking System: Digital Scanlok 347
Commentary: A bit of an anomaly among BattleMechs, the Wolfhound was designed originally for use by mercenaries. The Wolfhound made its debut with the Kell Hounds and Wolf's Dragoons mercenary units, though some few are rumored to be in service with the Federated Commonwealth, where the manufacturer is located. Designed as a response to the Draconis Combine's Panther, the Wolfhound proved itself more than a match for that 'Mech, routinely defeating its chosen opponent. Well armored for a light 'Mech, the Wolfhound uses its large laser to soften up opponents at long ranges, then rushes in with great speed to savage the damaged enemy with its medium lasers. Carrying only energy weapons, the Wolfhound has great staying power as well, allowing it to remain on the battlefield until it is too damaged to continue fighting.
BJ-3 Blackjack
- Mass: 45 tons
- Chassis: GM BJ-I
- Power Plant: GM 180
- Cruising Speed: 43 kph
- Maximum Speed: 65 kph
- Jump Jets: Whitworth Jetlift
- Jump Capacity: 120 meters
- Armor: StarGuard II
- Armament: 2 Ceres Arms Smasher PPCs; 4 Intek Medium Lasers
- Manufacturer: General Motors
- Communications System: Dalban Micronics
- Targeting and Tracking System: Dalban AQ
Commentary: The Blackjack was originally designed as an insurgency-suppression and fire-support 'Mech. After the rediscovery of lost Star League technology that allowed heat to be dispersed twice as fast from a BattleMech, Duchess Candace Liao ordered several Blackjacks upgraded with that technology and concentrated the upgraded 'Mechs in fire support. Adding PPCs to the upgraded Blackjacks greatly increased their firepower, and their mobility allows them to stay at long range, performing their fire-support duties admirably. An enemy that closes with the Blackjack finds that it is far from defenseless—four medium lasers provide just as much punch at short range as the PPCs do at long range. After performing well in the Fourth Succession War, most of the Blackjacks and their upgraded technology were given to House Davion as part of a peace proposal.
HCT-3F Hatchetman
- Mass: 45 tons
- Chassis: Chariot Type II
- Power Plant: GM 180
- Cruising Speed: 43 kph
- Maximum Speed: 65 kph
- Jump Jets: Luxor 2/Q
- Jump Capacity: 120 meters
- Armor: Durallex Medium
- Armament: 1 Defiance Killer Autocannon; 2 Defiance B3M Medium Lasers
- Manufacturer: Defiance Industries of Hesperus II
- Communications System: TharHes Thalia HM-22
- Targeting and Tracking System: TharHes Ares-8a
Commentary: The Hatchetman is an unusual BattleMech for several reasons. The first, and most obvious, is the large metal hatchet it carries that gives it its name. At close ranges, the Hatchetman can swing the hatchet with incredible force, severely damaging anything it hits. The second unusual design feature is the Hatchetman's ejection system. Instead of simply ejecting the MechWarrior, as most designs do, the entire head assembly comes off. The head is equipped with maneuvering jets and can travel a short distance before landing. This arrangement provides much more protection to the pilot, reducing the chance of ejecting unprotected into a firefight. The Hatchetman has excellent firepower as well, using its autocannon for fighting at longer ranges and adding the two medium lasers in close battles.
HOP-4B Hoplite
- Mass: 55 tons
- Chassis: Star League HO-01a
- Power Plant: DAV 220
- Cruising Speed: 43 kph
- Maximum Speed: 65 kph
- Jump Jets: None
- Jump Capacity: None
- Armor: DuraShield 12-b.1
- Armament: 1 Magna Hellstar PPC; 1 Mitchell Systems LRM 15 Rack
- Manufacturer: Unknown
- Communications System: MultiGab 2000
- Targeting and Tracking System: Dalban HiRez II
Commentary: A Star League design long thought lost, the Hoplite has reappeared in the ranks of Wolf's Dragoons. No one has yet discovered where the mercenaries got the BattleMech, but it seems likely that the Dragoons simply found some mothballed on a forgotten Periphery world. Most of the Hoplites fielded have an autocannon and a small LRM launcher, but several have been seen with a PPC and a larger missile launcher. The PPC variant is much more efficient than the autocannon design, requiring less ammunition and capable of delivering more firepower to a target. With plenty of armor and efficient heat dissipation, this PPC-armed Hoplite has proved that it can stay on the battlefield for long periods, delivering fire support. With no short-range weapons and arms nearly incapable of physical attacks, however, the Hoplite can be vulnerable up close, and is often paired with another 'Mech such as the Enforcer to help protect it.
CTF-2X Cataphract
- Mass: 75 tons
- Chassis: Earthwerks CTF
- Power Plant: VOX 280
- Cruising Speed: 43 kph
- Maximum Speed: 65 kph
- Jump Jets: None
- Jump Capacity: None
- Armor: Kallon Royalstar
- Armament: 1 SarLon MaxiCannon Type 10; 1 Firmir MaxiLase Large Laser; 1 Hovertec Quad SRM Launcher; 2 Firmir Standard Medium Lasers
- Manufacturer: Earthwerks Incorporated
- Communications System: CommuTech Multi-Channel 10
- Targeting and Tracking System: BlazeFire Sightlock
Commentary: The Cataphract is the Capellan Confederation's attempt at a heavy 'Mech, an attempt that has so far proven successful. Layered with armor, the 'Mech can absorb a large amount of damage, but even more impressive is the damage it can deal out. At longer ranges, the autocannon and large laser combine to provide a vicious punch, and the Cataphract only becomes deadlier as it closes. Adding the two medium lasers and the SRM to the autocannon and large laser creates a barrage of fire that can destroy lighter 'Mechs almost instantly. Unfortunately, the Cataphract cannot maintain this bombardment for long without becoming dangerously overheated. This flaw in the design limits its usefulness, but the Cataphract has nonetheless become increasingly common in Capellan regiments.
CGR-1A5 Charger
- Mass: 80 tons
- Chassis: Wells 990
- Power Plant: Pitban 320
- Cruising Speed: 43 kph
- Maximum Speed: 65 kph
- Jump Jets: None
- Jump Capacity: None
- Armor: Durallex Heavy
- Armament: 1 Tomodzuru Autocannon Mount Type 20; 2 Bical SRM-6 Missile Racks; 1 Argra 3L Medium Laser; 1 Magna Mark I Light Laser
- Manufacturer: Wells Technologies
- Communications System: Tek BattleCom
- Targeting and Tracking System: Dalban Hirez
Commentary: The Charger is a much-maligned design, as several early models proved ineffective on the battlefield. These original Chargers were designed as heavy scouts, but the engine required to give them the necessary speed left little room for armor and even less for weapons. Many in the Inner Sphere wrote the design off, but the Capellan Confederation is continually testing new variants. The latest one changes the focus of the design from scout to close assault 'Mech. Carrying the largest autocannon available, as well as two large SRM racks and a medium and small laser, these new Chargers can reduce most opponents to slag in a remarkably short time. Though it is slightly slower than the scout version, the 'Mech is still quite fast for its size. The Capellans also increased the armor by 50 percent, giving the 'Mech a longer life on the battlefield. The need for ammunition, however, often causes the Charger to retreat long before it is severely damaged.
STK-3F Stalker
- Mass: 85 tons
- Chassis: Titan H1
- Power Plant: Strand 225
- Cruising Speed: 32 kph
- Maximum Speed: 54 kph
- Jump Jets: None
- Jump Capacity: None
- Armor: Valiant Lamellor
- Armament: 2 Jackson B5c Long-Range Missile 10-Racks; 2 Magna Mark III Heavy Lasers; 4 Magna Mark II Medium Lasers; 2 Thunderstroke Short-Range Missile 6-Racks
- Manufacturer: Triad Technologies
- Communications System: Cronol PR
- Targeting and Tracking System: Spar 3c Tight Band
Commentary: Designed to fight well at all ranges, the Stalker mounts far more weaponry than it can safely fire at once. It can fire all of its long-range or all of its shortrange weapons without concern, however, making it deadly at all ranges. The Stalker is also extremely well armored, absorbing damage that would destroy most 'Mechs while continuing to fight. The tradeoff for all this weaponry and armor, however, is in the Stalker's speed. One of the slowest 'Mechs in use, the Stalker is generally used either as fire support or in heavy cavalry units, where a slow and steady push against the enemy is the objective. An extremely popular design, the Stalker sees use throughout the Inner Sphere and Periphery, and is a common sight on any battlefield.