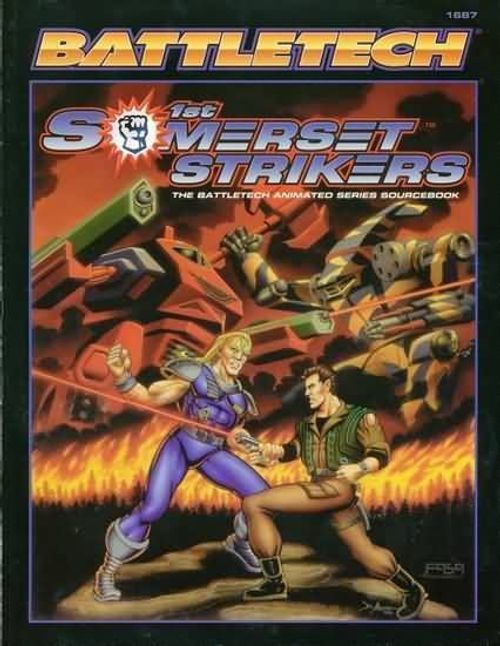
BattleTech: 1st Somerset Strikers
BattleTech: 1st Somerset Strikers Rulebook
Table of Contents
Table of Contents
Special Equipment
The following rules apply to certain special equipment that players can use in BattleTech and MechWarrior campaigns. Unless otherwise noted, all special equipment may be used at any level of BattleTech.
Battle Armor
Complete rules for the use of Clan battle armor units (also referred to as "Toads" or "Elementals") appear on pages 66-69 of the BattleTech Compendium: The Rules of Warfare, as well as in CityTech, Second Edition. The following additional rules apply to the Infiltrator and the Sloth, the battle armor prototypes fielded by the Strikers. Treat the Infiltrator and the Sloth as standard battle armor units unless the rules given below indicate otherwise.
An Inner Sphere battle armor squad usually consists of four troopers, though the size of units can vary from one to five troopers depending on circumstances.
Movement
Infiltrator units have 2 MP, Sloth units 3 MP. Neither type of unit can jump, and both are subject to the standard movement restrictions regarding infantry and terrain. Inner Sphere battle armor units cannot travel with a BattleMech using the Mechanized Battle Armor rules.
Combat
The Infiltrator and Sloth carry different weapons than standard battle armor but resolve fire in the same fashion. Specific rules for the weapons carried by each type of unit appear below.
Each Infiltrator is armed with an auto grenade launcher. For game purposes, treat this weapon as a machine gun, except that each hit inflicts only 1 point of damage. Roll on the Battle Armor Direct Fire Table per standard rules to determine the number of hits. Against unarmored infantry, each hit from the grenade launcher inflicts 1D6 damage. The Infiltrator carries a limited supply of grenades, allowing the unit to fire only four times.
Each Sloth comes equipped with two small lasers and a magnetic mine launcher. During the Weapon Attack Phase, a Sloth unit can either fire its lasers or launch one or more mines, but not both. After a successful attack with small lasers, roll on the Battle Armor Missiles Table to determine the number of hits inflicted on a target.
A Sloth unit that begins the Weapon Attack Phase in the same hex as a BattleMech or vehicle may choose to launch one or more magnetic mines instead of making a standard weapon attack. Unlike standard battle armor missile attacks, the controlling player can choose to fire mines with some or all of the Sloths in a unit, marking off the ammunition expenditure for each one fired on the record sheet. Each Sloth carries only one mine, so an undamaged squad of four Sloths can fire from one to four mines. If a Sloth is destroyed before it fires its mine, that mine is lost.
The base to-hit number for a magnetic mine attack is 8, modified for movement and terrain as normal. If the unit is making a pointblank shot from hiding (see Hidden Units, p. 89 of the BattleTech Compendium: The Rules of Warfare), do not modify the to-hit number for movement or terrain. If the attack hits, roll on the Battle Armor Direct Fire Table to determine how many mines have become attached to the target, using the Point Members Active column that matches the number of mines fired by the Sloth unit. The mines hit the Center Torso if the target is a BattleMech, or the Front if the target is a vehicle. The attacker then rolls 2D6 for each mine that is attached and consults the Determining Critical Hits Table. If the result is 7 or less, the target takes 4 points of damage from the explosion. If the attack results in one or more critical hits, resolve those normally.
Their physical construction and lack of jump jets make it impossible for Infiltrators and Sloths to climb up onto a BattleMech, and so neither type of unit may engage in anti-BattleMech leg or swarm attacks.
Damage to Battle Armor
All standard rules regarding attacks against battle armor apply to Infiltrator and Sloth units. However, these units have an Armor Value of 5 points instead of the standard 10 for Clan battle armor, plus an additional point of damage that represents the trooper inside.
Infiltrator suits are specially constructed to baffle all types of sensors. This ability makes them very difficult to target at long ranges. Against Infiltrator units, increase the to-hit modifier for medium range to +3, and the to-hit modifier for long range to +6. Beagle active probes and their Clan equivalents cannot locate hidden Infiltrator units.
Enhanced Imaging
The enhanced imaging (EI) system used by the Jade Falcons in the BattleTech animated series has two components: standard EI equipment and the enhanced imaging neural implant. Each component is described below, along with rules for using the EI system in BattleTech and MechWarrior.
Standard EI
Most Clan 'Mechs in service in 3050 have standard EI, which is simply an enhanced "virtual reality" heads-up display. This system aids in battlefield coordination and targeting but confers no bonuses significant enough to make a difference in BattleTech game play.
Enhanced Imaging Neural Implant
The EI neural implant works in conjunction with the standard EI display system, allowing the MechWarrior to access and use his EI display simply by thought. Any unit equipped with an EI display can be operated much more effectively by a pilot with an EI implant. Needless to say, the implant does not work with a vehicle that lacks EI equipment. Battle armor units may use EI implants, but every member of a Point must be implant-equipped in order for the Point to receive any benefit.
The neural implant only benefits BattleMech and battle armor pilots. Conventional vehicle drivers and aerospace pilots derive no benefit from the implant because their machines do not have a humanoid shape.
Only the most fanatical Clan warriors use the implant, as it has dangerous and painful side effects. On the average, about 5 percent of all Clan MechWarriors have EI implants. Because they tend to operate in units with one another, however, the proportion seems somewhat higher to most Inner Sphere observers. The number of MechWarriors using EI implants is noticeably higher in Crusader Clans such as the Jade Falcons and the Smoke Jaguars.
Rules for the EI neural implant should only be used in Level Three BattleTech and MechWarrior play.
Using EI in BattleTech
A unit equipped with standard EI gains many advantages when piloted by a warrior with a neural implant. In the text of the scenarios in this book (see pp. 101-111), pilots equipped with neural implants are marked with a dagger (†). The enhanced imaging system can be switched on or off during the End Phase of any turn. When the system is off, the unit acts as though it did not have EI; the pilot gains no benefits but also does not suffer extra feedback damage. The status of each unit's EI system must be clearly marked on its record sheet at all times.
While enhanced imaging is on, the unit gains the following benefits:
- All Piloting Skill rolls receive a -1 modifier.
- To-hit modifiers for shooting through woods and smoke are reduced, but normal line-of-sight rules for these types of terrain still apply. Firing through or into any number of Light Woods hexes adds a single +1 modifier. The penalty for firing through or into Heavy Woods or smoke-filled hexes is reduced from +2 per hex to +1 per hex.
- The night combat modifier does not apply.
- The unit may aim its direct-fire weapons at a specific location as though it had a targeting computer, though the modifier for such an action is +6 rather than the usual +3. A unit that has both EI and a targeting computer gains all the benefits of both pieces of equipment. In addition, the called shot modifier for aiming at a specific location is reduced to +2.
Balancing its benefits, the enhanced connection a neuro-implanted pilot shares with his machine also has a serious drawback. Feedback from damage to internal systems delivers strong electric shocks to the pilot that can prove fatal. The specific effects of the feedback vary, depending on the type of unit.
In BattleMechs, the pilot suffers 1 point of damage each time an attack damages the 'Mech's internal structure unless the controlling player makes a 2D6 roll of 7 or better. A Sensors Critical Hit disables the entire EI system in addition to its other effects.
Elementals equipped with neural implants suffer 1 extra point of damage from every attack that hits them. For purposes of determining this damage, an attack refers to each hit that strikes a particular trooper, including clusters of LRMs and artillery damage.
Using EI in MechWarrior
In MechWarrior, any Clan character can begin play with an EI implant as a 1-point advantage. However, the gamemaster should point out to players that the implant has serious physical and mental side effects, as well as branding the character as a Clan warrior for all to see. Such easy identification will make it difficult, if not impossible, to infiltrate Inner Sphere settlements.
The neural implant confers no bonuses in personal combat. When engaging in BattleTech combat, follow the guidelines given above, with the following changes. Replace the 2D6 roll of 7 or better to avoid damage after taking an internal hit with a BLD Saving Roll. In cases where a pilot would take 1 point of damage using BattleTech rules, roll 2D6 Lethal Damage instead.
The gamemaster determines the specific mental side-effects of the neural implant, but in any case the character becomes increasingly mentally unstable. He degenerates over the course of a year or so until he is extremely abusive and paranoid. Clan scientists have developed special drugs and therapy that can delay this degeneration, but most player characters will not have access to such treatment. Even with the treatment, most EI subjects become so disturbed within three years that they are unfit for duty.
Tactical Operations Center
As the Strikers' Tactical Operations Officer, Lt. Rachel Specter uses a unique computer and communications setup to coordinate the battlefield activities of her unit. Her system laid the groundwork for the development of the Federated Commonwealth's version of the C3 network (Command/Control/Communications). Though similar in many ways to the C3 system, Rachel's equipment is more closely related to the Star League-vintage command console. The innovation of installing a slave computer in each unit in the network came along several years later, giving rise to the "true" C3 computer system.
For game purposes, the Tactical Operations Center (TOC) mimics the abilities of the command console combined with the Guardian ECM Suite. Rules for the command console appear on p. 64 of the BattleTech Tactical Handbook. Rules for the Guardian ECM suite appear on p. 116 of the BattleTech Compendium: The Rules of Warfare.
During the course of the BattleTech animated series, the TOC took several forms. Specific game rules for each version of Rachel's Tactical Operations Center are given below.
JumpShip-Based TOC
Rachel's system was initially installed on the JumpShip Katana. Though this placement safeguarded her from the dangers of combat, the considerable delay in transmissions from a planet to the jump point and back posed a major problem. The time lag meant that only small amounts of tactically useful information made it to the forces on the ground. To reflect this, players gain no game benefits when using a TOC system aboard a JumpShip.
Aerospace-Based TOC
During the fighting on Romulus (Episode Three), Rachel hastily installed a stripped-down version of her system aboard a Banshee fighter. Though the fighter's close proximity to the battlefield eliminated the time-delay problem, the cramped quarters of the fighter's cockpit allowed for only a small portion of communications equipment. To reflect this, players gain no game benefits when using a TOC system aboard an aerospace fighter.
Vehicle-Based TOC
By the time the Strikers reached Apollo (Episode Ten), Rachel had installed a full-sized version of her equipment in a Packrat LRPV and used it quite effectively during the subsequent battle.
The vehicle-based TOC is represented in the BattleTech game by a Command Console and a Guardian ECM Suite. Players who do not have the rules for these pieces of equipment should simply add a +2 bonus to the Strikers' initiative while the Packrat is in play. For vehicle game statistics for the Tactical Operations Center, see the Packrat, p. 126.
'Mech-Based TOC
Rachel eventually installed a sophisticated version of the TOC in the cockpit of Adam's Awesome. Like the vehicle-based unit, the 'Mech-based TOC is represented in the BattleTech game by a Command Console and a Guardian ECM Suite. Players who do not have the rules for these pieces of equipment should simply add a +2 bonus to the Strikers' initiative while the Awesome is in play. For the 'Mech's game statistics, see p. 121.
Scenarios
The following nine BattleTech scenarios re-enact some of the pivotal battles in the BattleTech animated series. In order to play these scenarios, players will need CityTech, Second Edition, or the BattleTech Compendium: The Rules of Warfare. A selection of Map Sets and miniatures will also be helpful.
How to Use the Scenarios
The individual scenarios include sections titled Game Set-Up, Attacker, Defender, Victory Conditions, and Special Rules.
Game Set-Up provides specific information needed to play the scenario, including instructions on laying out mapsheets, directions for special terrain features, and suggestions on appropriate BattleTech rules to use.
Attacker and Defender provide details on each scenario's combatants. These sections also contain directions on deploying forces and guidelines for running the scenarios as self-contained games.
Victory Conditions determine the outcome of each encounter and vary from scenario to scenario. It is important to note that the winner of a particular scenario need not always destroy every 'Mech on the other side. Because the scenarios are based on the adventures of the Somerset Strikers, many of them can be "won" by a timely retreat or even a partial defeat. In these cases, the level of victory is determined by comparing the performance of the players on a given side to that side's performance in the show. When the players equal or exceed the level of their side as seen in the show, they have achieved a decisive victory. When they meet some but not all of their objectives, they achieve a marginal victory. Both sides can win a marginal victory, but only one side can achieve a decisive victory.
Special Rules lists any rules needed to play the scenario that are not covered in General Rules (below), in the BattleTech rules, or in Special Equipment, pp. 98-100.
General Rules
The following text explains certain special rules that apply to all of the 1st Somerset Strikers scenarios.
Clan Honor
Clan warriors follow a strict code of honor that sets them apart from their Inner Sphere counterparts. To reflect this fact, all Clan warriors must adhere to the following guidelines unless otherwise mentioned in the text of a scenario. These guidelines are simplified for ease of play. For a more detailed treatment of Clan honor, see the Tukayyid scenario pack.
Each Clan unit (BattleMech or Elemental Point) must choose as its opponent one enemy unit among those the Clans are facing. Once an opponent has been chosen, the Clan unit must fight that opponent until the enemy unit has been destroyed or flees the battlefield. No other Clan unit will attack that enemy unit. If there are more Clan units than Inner Sphere units, some of the Clan units will simply hang back and wait for one of their comrades to fall. If there are more Inner Sphere units than Clan units on the battlefield, it is considered bold but acceptable conduct for a Clan unit to take on more than one opponent at a time.
Clan warriors find physical combat between BattleMechs distasteful. No Clan 'Mech will initiate a physical attack.
The proud Clan warriors consider it a disgrace to retreat from battle when facing an inferior foe such as the Inner Sphere. Unless the scenario rules specifically state otherwise, no Clan unit may exit off the map edges.
Aerospace Support
Several scenarios include a Banshee fighter on the Strikers' side. Simplified rules for strafing attacks are included in the Special Rules sections of those scenarios. If the players have access to more comprehensive rules, they should feel free to use those instead. Detailed aerospace rules can be found in AeroTech and BattleSpace. Simplified aerospace rules can be found in the BattleTech Compendium: The Rules of Warfare.
The Banshee may not carry bombs in any of the scenarios in this book.
Edge
In the MechWarrior, Second Edition, game, the player characters have a special attribute called Edge. This attribute represents (among other things) luck and experience. As its name implies, this attribute gives the player characters "the Edge" they need to win against incredible odds and come out looking like the heroes they should be.
Each character's Edge points are shown in his or her MechWarrior statistics (pp. 119-125). Players familiar with MechWarrior already know how to use Edge points in game play. However, players not using the MechWarrior game should use the Edge rules, or the Strikers side will play at a distinct disadvantage. The following rules describe how to use Edge points for the BattleTech scenarios in this book only. The gamemaster will tell players how to use Edge points in his or her MechWarrior game.
During each scenario, a character can spend 1 Edge point to re-roll any single die roll (1D6 or 2D6 rolls). Rolls that can be affected by Edge include, but are not limited to: to-hit rolls, Piloting Skill rolls, hit location rolls, Missile Hits Table rolls, and rolls on the Determining Critical Hits Table. The character must accept the second roll or spend another Edge point to re-roll it again.
Each character's allotment of Edge points is renewed at the beginning of each scenario. This means that a character will always start a scenario with the full number of Edge points shown in his or her MechWarrior game statistics, even if the players have spent some of that character's Edge in a previous scenario.
Clash in the Canyon
Episode 2. In orbit around Dustball, Rachel Specter spots incoming drop pods on the Kwaidan's radar. She tracks the signal and directs her fellow Strikers to a narrow canyon, where they find two Clan 'Mechs about to destroy a fallen Centurion.
Game Set-Up
Lay out the BattleTech mapsheets as shown to represent the canyon floor. Fold both maps in half so that only the area indicated below is showing (grayed areas should not show). Any hexes that are not Clear Level 0 terrain are considered Level 0 Rough terrain (this includes all hills, water, and woods).
[Map diagram omitted: the canyon floor on two BattleTech mapsheets, one of them labelled Desert Hills. The printed diagram is not reproduced here.]
Attacker
The attacker consists of the 1st Somerset Strikers.
Strikers Lance
- Major Adam Steiner (Piloting 2, Gunnery 2), AXM-2N Axman
- Captain Zachary Miles Hawkins (Piloting 4, Gunnery 3), MAL-1R Mauler
- Lieutenant Ciro Ramirez (Piloting 5, Gunnery 4), WLF-2 Wolfhound
Strikers Air Support
- Cadet Katiara Kylie (Piloting 3, Gunnery 4), BSE-X2 Banshee
Deployment
The Striker 'Mechs may set up anywhere within six hexes of the east end of the canyon, as long as none of them have line of sight to the Clan 'Mechs. See Special Rules, below, for rules regarding Kylie's Banshee.
Defender
The defender consists of two 'Mechs from the Black Vision.
Falcon Star
- Star Colonel Kristen Redmond (Piloting 2, Gunnery 2†), Vulture Prime
- MechWarrior Deval (Piloting 4, Gunnery 3†), Hunchback IIC
Deployment (Defender)
The defender sets up first. Place the Vulture in Hex 0710 of the Desert Hills mapsheet, facing southeast. Place the Hunchback IIC in Hex 0609 of the same map facing east.
Victory Conditions
The Strikers win a decisive victory if they destroy both Clan 'Mechs. They win a marginal victory if both Clan 'Mechs are either driven off or destroyed.
The Jade Falcons win a decisive victory if they destroy all of the opposing 'Mechs. They win a marginal victory if both of their 'Mechs escape through the west end of the canyon.
Special Rules
The north and south edges of the map represent the steep walls of a canyon, which are impassable. Units may only exit the mapsheets off the east and west edges. All partial hexes are considered part of the canyon wall; they block line of sight, and units may not move into them.
The Clan 'Mechs may only begin to retreat once they have line of sight to one or more Striker 'Mechs. They may only retreat out of the west end of the canyon.
The Banshee strafes the Clan 'Mechs just before the beginning of Turn 1. The Strikers player should choose one of the Clan 'Mechs and attack it with both medium lasers, hitting on a 7 or better. As the battle progresses, the fighter may turn around and strafe the battlefield up to three more times, during the Weapon Attack Phases of Turns 2, 4, and 6. Resolve hit location for all these strafing attacks as if they originated from directly east of the target.
Dustball Showdown
Episode 2. The Clan forces have dropped onto Dustball in force and are ruthlessly advancing on New Monaco. Only the Strikers stand in their way.
Game Set-Up
Lay out the BattleTech mapsheets as shown, with the blank side showing.
[Map diagram omitted: two blank mapsheets placed side by side with north marked.]
Attacker
The attacker consists of a Trinary of the Black Vision. The unit's aerospace wing is occupied with Dustball's security 'Mechs and conventional forces, leaving two Stars of 'Mechs to engage the Strikers.
Cluster Command Star
- Star Colonel Kristen Redmond (Piloting 2, Gunnery 2†), Vulture Prime
- MechWarrior Tanya Pryde (Piloting 3, Gunnery 2†), Vulture Prime
- MechWarrior Deval (Piloting 4, Gunnery 3†), Hunchback IIC
- MechWarrior Gengra (Piloting 4, Gunnery 3†), Thor M
- MechWarrior Pith (Piloting 4, Gunnery 3†), Thor M
Alpha Talon
- Star Commander Cyrill Hazen (Piloting 3, Gunnery 2), Mad Cat Prime
- MechWarrior Jentry (Piloting 4, Gunnery 3), Mad Cat Prime
- MechWarrior Fatha (Piloting 4, Gunnery 3), Thor M
- MechWarrior Korthan (Piloting 4, Gunnery 3), Thor M
- MechWarrior Damil (Piloting 4, Gunnery 3), Hunchback IIC
Deployment
The Cluster Command Star sets up first, on the west mapsheet in the hexes numbered 0113-0117. Alpha Talon does not enter the map until the beginning of Turn 3, at which point the 'Mechs are placed on Hexes 0113-0117 of the west mapsheet.
Defender
The defender consists of the 1st Somerset Strikers.
Strikers Lance
- Major Adam Steiner (Piloting 2, Gunnery 2), AXM-2N Axman
- Captain Zachary Miles Hawkins (Piloting 4, Gunnery 3), MAL-1R Mauler
- Captain Valten Ryder (Piloting 3, Gunnery 4), CN9-D Centurion
- Lieutenant Ciro Ramirez (Piloting 5, Gunnery 4), WLF-2 Wolfhound
Strikers Air Support
- Cadet Katiara Kylie (Piloting 3, Gunnery 4), BSE-X2 Banshee
Deployment (Defender)
The Strikers set up second and may start anywhere on the east mapsheet facing any direction. Val's Centurion does not begin play on the map. During the Movement Phase of Turn 3, he enters play from any hex along the north or east edge of the map. For rules regarding Kylie's Banshee, see Special Rules, below.
Victory Conditions
The attackers intend to assault New Monaco, which lies just off the east edge of the map. However, they will gladly crush all resistance before moving forward. The attackers win a decisive victory if they destroy or drive off all the defending 'Mechs before the FedCom raiding party arrives.
Though they do not know it, the defenders only need to stall the Clans until the FedCom troops arrive. They win a decisive victory if they destroy four or more Clan 'Mechs while losing none of their own. The defenders win a marginal victory if none of their 'Mechs are destroyed. Note that Striker 'Mechs exiting the map off the east edge are not considered destroyed, but "driven off" by the Clans (see previous paragraph).
Special Rules
At the end of Turn 6, the DropShips of the FedCom raiding party begin to land, ending the scenario.
The hot desert sun of Dustball forces all 'Mechs to build up 1 extra point of heat during the Heat Phase of each turn. All Clan 'Mechs enter play with a heat point level of 13, including the Clan 'Mechs entering the map on Turn 3.
The Clan forces may not leave the map. The Strikers may exit the map off the east edge only.
The Banshee strafes the Clan 'Mechs just before the beginning of Turn 1. The Strikers player should choose one of the Clan 'Mechs and attack it with both medium lasers, hitting on a 7 or better. As the battle progresses, the fighter may turn around and strafe the battlefield up to three more times, during the Weapon Attack Phases of Turns 2, 4, and 6. Resolve hit location for these strafing attacks as though the attack originated from directly east of the target.
The Taking of Wotan
Episode 3. This scenario represents the climactic engagement of the battle for Wotan, where the Falcon's Claws clashed with the command group of the Wotan Tamar March Militia (TMM).
Game Set-Up
Lay out the BattleTech mapsheets as shown. Place Medium Elevation 2 buildings in the following six hexes: 0710, 0712, 0714, 0909, 0911, 0913.
[Map diagram omitted: two mapsheets, one labelled BATTLETECH and one labelled CITYTECH, placed side by side with north marked.]
Attacker
The attacker consists of the Falcon's Claws Command Star.
Command Star
- Star Colonel Nicolai Malthus (Piloting 2, Gunnery 1†), Thor M
- MechWarrior Douglas (Piloting 4, Gunnery 3), Mad Cat Prime
- MechWarrior Jala (Piloting 4, Gunnery 3), Mad Cat Prime
- MechWarrior Leopold (Piloting 4, Gunnery 3), Vulture Prime
- MechWarrior Erin (Piloting 4, Gunnery 3), Vulture Prime
Deployment
The Falcons enter from the west edge of the BattleTech map during the Movement Phase of the first turn.
Defender
The defender consists of two badly demoralized lances of the Wotan TMM.
Command Lance
- Lt. General Ansel Cabrillo (Piloting 3, Gunnery 3), MAL-1R Mauler
- Major Wilma Stenson (Piloting 4, Gunnery 3), CN9-A Centurion
- Sergeant Petrov Himmelmann (Piloting 5, Gunnery 4), CN9-A Centurion
- MechWarrior Abel Rodriguez (Piloting 6, Gunnery 5), CN9-A Centurion
Recon Lance
- Lieutenant Pamela Genaro (Piloting 4, Gunnery 4), CN9-D Centurion
- Sergeant Edward Fitzgibbons (Piloting 5, Gunnery 5), WLF-1 Wolfhound
- MechWarrior John Kerouac (Piloting 6, Gunnery 5), WLF-1 Wolfhound
- MechWarrior Cedric Quentin (Piloting 6, Gunnery 5), WLF-1 Wolfhound
Deployment (Defender)
The defenders set up first. The 'Mechs of the Recon Lance may start anywhere on the east half of the BattleTech map or the west half of the CityTech map. The Command Lance begins in any hexes along the east edge of the CityTech map (hex numbers ending in 17). All of the defending 'Mechs begin the scenario facing west.
Victory Conditions
The attackers win a decisive victory if they destroy all of the defending 'Mechs without losing any of their own. They win a marginal victory if they destroy all of the defending 'Mechs but suffer losses in the process.
The defenders win a decisive victory if they destroy all of the attackers. They win a marginal victory if they destroy three or more of the attacking OmniMechs.
Special Rules
The defenders are blocking the way to Wotan's capitol and will fight to the last 'Mech. Therefore, no defending unit may retreat off of the map. Additionally, the defenders are tired and demoralized in the face of the seemingly unstoppable Clan foe. To reflect this, the defending player must add a +1 to-hit modifier to all attacks and subtract 2 from all Initiative rolls.
Race for the Kwaidan
Episode 4. The Strikers, badly battered from battling the Jade Falcons on Romulus, must stage a fighting retreat to the DropShip Kwaidan.
Game Set-Up
Lay out the BattleTech mapsheets as shown.
[Map diagram omitted: two mapsheets placed side by side, the west map and the east map, with north marked.]
Attacker
The attacker consists of Kristen Redmond's Star.
Falcon Star
- Star Captain Kristen Redmond (Piloting 2, Gunnery 2†), Vulture Prime
- MechWarrior Jentry (Piloting 4, Gunnery 3†), Mad Cat Prime
- MechWarrior Fatha (Piloting 4, Gunnery 3†), Mad Cat Prime
- MechWarrior Korthan (Piloting 4, Gunnery 3†), Vulture Prime
- MechWarrior Damil (Piloting 4, Gunnery 3†), Hunchback IIC
Deployment
Kristen's Vulture stands on the west map, in Hex 0804, facing east. The remaining 'Mechs of her Star are arrayed behind her in any fashion the Clan player desires. None may be in a Woods or Hill hex, and none may be further east than Redmond.
Defender
The defender consists of a detachment of the Somerset Strikers. All are badly damaged and low on ammo. Mark off half the armor (rounding up) on all locations on every 'Mech. All ammunition bins on every 'Mech are stocked with half their full capacity (rounding down). The Centurion's LB 10-X autocannon is loaded with normal ammo (not cluster munitions).
Strikers Lance
- Major Adam Steiner (Piloting 2, Gunnery 2), AXM-2N Axman
- Captain Zachary Miles Hawkins (Piloting 4, Gunnery 3), MAL-1R Mauler
- Captain Valten Ryder (Piloting 3, Gunnery 4), CN9-D Centurion
Deployment (Defender)
All of the Strikers begin the scenario on the east mapsheet. Place the Centurion in Hex 0801 facing west. Place the Axman in Hex 0702 facing southeast. Place the Mauler in Hex 0802 facing east.
Victory Conditions
The attackers win a decisive victory if Kristen Redmond destroys all of the defending 'Mechs without aid from the other 'Mechs in her Star. The attackers win a marginal victory if they destroy all of the defending 'Mechs.
The defenders win a decisive victory if all three 'Mechs escape off the east edge of the mapsheet. They win a marginal victory if one or two 'Mechs escape off the east edge.
Special Rules
Kristen Redmond has declared that she alone will deal with all three Strikers. Therefore, no other Clan 'Mech may fire its weapons or move closer to the defenders than Kristen. This restriction is lifted if Kristen's Vulture is destroyed or disabled. The Vulture is considered disabled if all of its weapons, both arms, or one or both legs are destroyed; if it shuts down due to overheating; or if Kristen fails a Consciousness roll.
Valten Ryder has decided he will hold off the Clanners while his teammates head for the Kwaidan. Therefore, he may not begin to move east until the other two Striker 'Mechs are at least halfway to the edge (Hexrow xx10 or farther). While Val maintains his courageous defensive posture, Kristen will fire only upon his Centurion. Once Val begins to retreat, Kristen may fire at any of the Strikers.
Battle in the Swamp
Episode 7. Star Captain Kristen Redmond outbid Malthus for the honor of destroying the Strikers on Waldorff. To win the bid, however, she cut her forces dangerously low. The following scenario re-creates the battle in Waldorff's swamps.
Game Set-Up
Lay out the BattleTech mapsheet as shown. All Water hexes are considered Depth 0.
[Map diagram omitted: one mapsheet, labelled River Delta / Drainage Basin #2.]
Attacker
The attacker consists of Kristen Redmond in her Vulture Prime and two Elementals in battle armor. The Vulture's medium pulse lasers have been disabled as part of the bid.
Falcon Star
- Star Captain Kristen Redmond (Piloting 2, Gunnery 2†), Vulture Prime
- Point Commander Yartak†, battle armor w/small laser
- Elemental Harris†, battle armor w/small laser
Deployment
The attackers set up first, placing their units anywhere along the west edge of the map.
Defender
The defender consists of the 1st Somerset Strikers.
Strikers Lance
- Major Adam Steiner (Piloting 2, Gunnery 2), AWS-9Ma Awesome
- Captain Zachary Miles Hawkins (Piloting 4, Gunnery 3), MAL-1R Mauler
- Captain Valten Ryder (Piloting 3, Gunnery 4), BSW-X1 Bushwacker
- Cadet Katiara Kylie, IFR-X1 Infiltrator
- Franklin Sakamoto, SLH-X1 Sloth
Deployment (Defender)
The defenders set up second, placing their units anywhere along the east edge of the map.
Victory Conditions
Standard victory conditions apply for this scenario. The team with the last surviving unit left on the mapsheets wins a decisive victory. No marginal victory is possible in this scenario.
Special Rules
Due to the small number of battle armored units available in this scenario, each armored trooper is deployed as a separate unit.
If the players wish to use the rules for Hostile Environments, treat all the River hexes as Clear swampy terrain (see p. 91, BattleTech Compendium: The Rules of Warfare).
The entire battlefield is covered in thick fog. As a result, attacks against standing 'Mechs suffer a +1 to-hit modifier, while attacks against prone 'Mechs and infantry suffer a +2 to-hit modifier. Clan EI neural implants reduce these penalties by 1. These modifiers do not apply to a target in a hex adjacent to the attacker.
Enemy of My Enemy
Episode 10. The Strikers execute a hot drop onto Apollo, expecting to find Adam's brother Andrew. Instead, they walk into a trap laid by Nicolai Malthus. To further complicate matters, Kristen Redmond arrives with orders from Galaxy Commander Chistu to stop Malthus's renegade activities once and for all.
Game Set-Up
Lay out the BattleTech mapsheets as shown.
[Map diagram omitted: two mapsheets labelled Desert Mountain #1 and Desert Mountain #2, placed side by side with north marked.]
Attacker
The attacker consists of two distinct Clan forces, one led by Malthus and one led by Redmond.
Malthus's Star
- Star Colonel Nicolai Malthus (Piloting 2, Gunnery 1†), Thor M
- MechWarrior Ciro (Piloting 5, Gunnery 4†), Mad Cat Prime
- MechWarrior Ross (Piloting 4, Gunnery 3†), Hunchback IIC
- MechWarrior Uri (Piloting 4, Gunnery 3†), Hunchback IIC
- MechWarrior Elaine (Piloting 4, Gunnery 3†), Hunchback IIC
Redmond's Star
- Star Colonel Kristen Redmond (Piloting 2, Gunnery 2†), Vulture Prime
- MechWarrior Pytor (Piloting 2, Gunnery 2), Hunchback IIC
- MechWarrior Jentry (Piloting 4, Gunnery 3†), Mad Cat Prime
- MechWarrior Elston (Piloting 4, Gunnery 3†), Mad Cat Prime
- MechWarrior Althea (Piloting 4, Gunnery 3†), Mad Cat Prime
Deployment
The Clans set up second. Place Malthus's Thor in Hex 1412 on the west map. The other 'Mechs of his Star may be placed in any Level 0 hexes within two hexes of the Thor. Set up Redmond's Star in the following five hexes of the west map: 0109, 0110, 0111, 0209, and 0210.
Defender
The defender consists of elements of the 1st Somerset Strikers.
Strikers Lance
- Major Adam Steiner (Piloting 2, Gunnery 2), AXM-2N Axman
- Captain Zachary Miles Hawkins (Piloting 4, Gunnery 3), MAL-1R Mauler
- Captain Valten Ryder (Piloting 3, Gunnery 4), BSW-X1 Bushwacker
- Ernest "Patch" McGuire (Drive 9), Packrat Mobile Tactical Operations Center
Deployment (Defender)
The Strikers set up first. Place Adam's Axman in Hex 0406 of the east map. The other Striker 'Mechs may be set up in any Level 0 hex within two hexes of the Axman. The Packrat may begin play in any Level 0 hex on the east map, and need not be placed until after all Clan units have been deployed.
Victory Conditions
Malthus's Star wins a decisive victory if the all of the Strikers' BattleMechs are destroyed [sic: "the all of" as printed] without the cooperation of Redmond's Star. They win a marginal victory if the Strikers are destroyed after the two Clan Stars join forces (see Special Rules, below).
Redmond's Star wins a decisive victory if Malthus's Star is destroyed before the two units join forces. After that point, the two Clan Stars share a marginal victory if they destroy all the Strikers' 'Mechs.
The Strikers must survive long enough to discover that Andrew is not present on this planet, then make good their escape (see Special Rules, below). If all of the Striker units escape off the map after this point, the defenders win a decisive victory. If two or more units escape, they win a marginal victory.
Special Rules
This scenario should be played by three players: one controlling the Strikers, one controlling Malthus's Star, and one controlling Redmond's Star.
The Strikers are trying to locate Adam's brother, who is supposed to be leading the resistance on Apollo. They will eventually discover that he is not present, but they must continue to battle the Clan forces until they do. During the End Phase of each turn, the Strikers' player should roll 2D6. If the result is equal to or less than the current turn number, the Strikers may begin to retreat. No Striker unit may leave the map before this time. As luck would have it, they will have to exit the map through the side furthest from their slowest mobile unit. If two sides are equidistant, roll randomly to determine the side off which the Strikers must retreat.
At the beginning of the scenario, Redmond's Star may only attack Malthus's Star. She and her troops have specific orders to bring him in and are not concerned with the Strikers. Eventually, Redmond agrees to join Malthus in hunting down the Strikers. To determine when this happens, the two Clan players should roll 2D6 during the End Phase of each turn, beginning with the first turn in which Redmond's Vulture has a line of sight to Malthus's Thor. If the results of these die rolls are equal, the two Stars join forces against the Strikers.
Note that Rachel is coordinating the Strikers' efforts from the Packrat. For rules regarding her activities, see Tactical Operations Center, p. 100.
Chaos in the Jungle
Episode 11. The Strikers join forces with ISF agents to free Franklin Sakamoto from captivity on Bensinger IV, only to find themselves once again trapped between two warring factions.
Game Set-Up
Lay out the BattleTech mapsheets as shown.
[Map diagram omitted: two mapsheets labelled Heavy Forest #1 and Heavy Forest #2, placed side by side with north marked.]
Attacker
The attacker consists of two distinct groups: a lance of ISF 'Mechs led by Okura and a detachment of the 1st Somerset Strikers.
ISF Lance
- Toshiro Okura (Piloting 3, Gunnery 2), CN9-D Centurion
- ISF MechWarrior (Piloting 4, Gunnery 3), CN9-D Centurion
- ISF MechWarrior (Piloting 4, Gunnery 3), CN9-A Centurion
- ISF MechWarrior (Piloting 4, Gunnery 3), CN9-A Centurion
1st Somerset Strikers
- Major Adam Steiner (Piloting 2, Gunnery 2), AWS-9Ma Awesome
- Captain Zachary Miles Hawkins (Piloting 4, Gunnery 3), MAL-1R Mauler
- Captain Valten Ryder (Piloting 3, Gunnery 4), BSW-X1 Bushwacker
- Franklin Sakamoto (Piloting 2, Gunnery 3), HTM-27T Hatamoto-Chi
1st Somerset Strikers Air Support
- Cadet Katiara Kylie (Piloting 3, Gunnery 4), BSE-X2 Banshee
Deployment
Okura's Centurion begins in Hex 0109 of the east mapsheet. The other 'Mechs of his lance may be placed in any hexes on the east mapsheet, as long as none of them start play with a line of sight to the Hatamoto-Chi or the rebel 'Mechs.
Franklin's Hatamoto-Chi begins in Hex 1509 of the west mapsheet. The other Striker 'Mech may begin in any of the hexes along the east edge of the east mapsheet. For rules regarding Kylie's Banshee, see Special Rules, below.
Defender
The defender consists of a lance of rebel 'Mechs.
Rebel Lance
- Rebel Lance Commander (Piloting 4, Gunnery 3), WLF-1 Wolfhound
- Rebel MechWarrior (Piloting 5, Gunnery 4), WLF-1 Wolfhound
- Rebel MechWarrior (Piloting 5, Gunnery 4), WLF-1 Wolfhound
- Rebel MechWarrior (Piloting 5, Gunnery 4), WLF-1 Wolfhound
Deployment (Defender)
Place the four rebel 'Mechs in the following hexes of the West mapsheet: 1407, 1410, 1507, and 1511.
Victory Conditions
The Strikers win a decisive victory if all of their 'Mechs manage to exit the map off the west edge. They win a marginal victory if Franklin's Hatamoto-Chi exits the west edge of the map and a combined total of five or more ISF and rebel 'Mechs are destroyed.
The ISF wins a decisive victory if they destroy the Hatamoto-Chi and all the rebel 'Mechs. They win a marginal victory if they accomplish one or the other of these objectives.
The rebels win a decisive victory if Franklin's Hatamoto-Chi exits the west edge of the map and all the ISF 'Mechs are destroyed. However, this victory is reduced to marginal if the Strikers achieve a decisive victory.
Special Rules
This scenario should be played by three players: one controlling the Strikers, one controlling the ISF, and one controlling the rebels.
If they are available to the players, the rules for Clearing Woods and Fire should be used in this scenario.
The Banshee strafes the rebel 'Mechs just before the beginning of Turn 1. The Strikers player should choose any one rebel 'Mech and attack it with both medium lasers, hitting on an 8 or better. As the battle progresses, the fighter may turn around and strafe the battlefield up to three more times, during the Weapon Attack Phases of Turns 2, 4, and 6. Hit location for all these strafing attacks is resolved as though the attack originated from directly east of the target. After her first strafing run, Kylie may choose to attack either a rebel 'Mech or an ISF 'Mech.
Note that Rachel is coordinating the Strikers' efforts from Adam's Awesome. For rules regarding her activities, see Tactical Operations Center, p. 100.
The Liberation of Somerset Military Academy
Episode 12. The Strikers finally arrive on Somerset, where they must battle the Clan garrison led by Kristen Redmond. Hawk arms the freed Somerset cadets with weapons, and they then join the fight.
Game Set-Up
Lay out the BattleTech mapsheets as shown. Place Light buildings in Hexes 0606, 0608, 0610, 1006, 1008, and 1010 of the CityTech mapsheet. Place a Medium building in Hex 0806 of the CityTech mapsheet. Consider all unmarked Water hexes Depth 1.
[Map diagram omitted: two mapsheets labelled BattleTech (west) and CityTech (east), placed side by side with north marked.]
Attacker
The attacker consists of elements of the 1st Somerset Strikers, plus the cadets of the Somerset Military Academy.
Strikers Lance
- Major Adam Steiner (Piloting 2, Gunnery 2), AWS-9Ma Awesome
- Captain Zachary Miles Hawkins (Piloting 4, Gunnery 3), MAL-1R Mauler
- Captain Valten Ryder (Piloting 3, Gunnery 4), BSW-X1 Bushwacker
- Cadet Katiara Kylie (Piloting 3, Gunnery 4), IFR-X1 Infiltrator
Strikers Air Support
- Franklin Sakamoto (Piloting 4, Gunnery 3), BSE-X2 Banshee
Somerset Cadet Corps
- Commander Andrew Steiner (Piloting 4, Gunnery 3), AXM-2N Axman
- Foot Infantry Platoon A1, Portable Lasers
- Foot Infantry Platoon A2, Portable Lasers
- Foot Infantry Platoon A3, Portable Lasers
- Foot Infantry Platoon B1, Portable Lasers
- Foot Infantry Platoon B2, Portable Lasers
- Foot Infantry Platoon B3, Portable Lasers
Deployment
The Strikers set up after the Clan units are deployed. Place Hawk's Mauler in Hex 0812 of the CityTech mapsheet. Place one infantry platoon in each of the six hexes surrounding the Mauler. The remainder of the Strikers' ground forces, including the Axman, begin play on any hexes along the west edge of the CityTech mapsheet. See Special Rules, below, for rules regarding the Banshee.
Defender
The defender consists of elements of the Jade Falcon garrison of Somerset.
Redmond's Star
- Star Colonel Kristen Redmond (Piloting 2, Gunnery 2†), Vulture Prime
- MechWarrior Pytor (Piloting 2, Gunnery 2†), Hunchback IIC
- MechWarrior Jentry (Piloting 4, Gunnery 3†), Mad Cat Prime
- MechWarrior Elston (Piloting 4, Gunnery 3†), Mad Cat Prime
- MechWarrior Althea (Piloting 4, Gunnery 3†), Mad Cat Prime
Somerset Garrison Infantry
- Elemental Point†, Small Lasers
- Foot Infantry Platoon, Portable Lasers
Deployment (Defender)
The Clan forces set up first. The Point of Elementals begins play inside the Medium building in Hex 0806 of the CityTech mapsheet. Place the foot infantry platoon in hex 0808 of the CityTech mapsheet. Redmond's Star begins in any of the hexes along the east edge of the CityTech mapsheet.
Victory Conditions
The Strikers must destroy all of the Clan forces to retake Somerset Military Academy and proceed to the second part of the scenario (see Malthus Attacks, p. 111). If they fail, the Clans maintain control of Somerset.
Special Rules
The Banshee strafes the Clan units just before the beginning of Turn 1. The Strikers' player should choose one Clan unit and attack it with both medium lasers, hitting on a 7 or better. As the battle progresses, the fighter may turn around and strafe the battlefield up to three more times during the Weapon Attack Phases of Turns 2, 4, and 6. Resolve hit locations for all these attacks as though the attack originated from directly west of the target.
The Strikers benefit from an ecstatic level of morale during this scenario. Apply a +1 bonus to all to-hit, piloting, and Initiative rolls. Note that this bonus allows the Strikers to roll a 13, making otherwise impossible shots possible. This bonus is lost if Adam's 'Mech is destroyed.
Note that Rachel is coordinating the Strikers' efforts from Adam's Awesome. For rules regarding her activities, see Tactical Operations Center, p. 100.
Malthus Attacks
Episode 13. Soon after the Strikers liberate the Academy, Malthus's troops arrive to take it back.
Attacker
The attacker consists of elements of the Falcon's Claws.
Command Star
- Star Colonel Nicolai Malthus (Piloting 2, Gunnery 1†), Thor M
- MechWarrior Ciro (Piloting 5, Gunnery 4†), Mad Cat Prime
- MechWarrior Ross (Piloting 4, Gunnery 3†), Hunchback IIC
- MechWarrior Uri (Piloting 4, Gunnery 3†), Vulture Prime
- MechWarrior Elaine (Piloting 4, Gunnery 3†), Vulture Prime
Elemental Star
- Star Commander Natalya†, four additional Elementals
- Elemental Point†
- Elemental Point†
- Elemental Point†
- Elemental Point†
Deployment
Malthus's forces enter from the west edge of the BattleTech mapsheet.
Defender
The defender consists of whatever forces remain from the previous scenario (see The Liberation of Somerset Military Academy, p. 110). If Kylie survived the previous battle, she will switch to a Banshee fighter for this scenario. Franklin will pilot a Sloth battlesuit in this scenario.
Between battles the Strikers are able to reload ammunition, and can arm an additional three platoons of infantry before Malthus arrives. No other repairs are possible.
Strikers Replacements
- Cadet Katiara Kylie (Piloting 3, Gunnery 4), BSE-X2 Banshee
- Franklin Sakamoto, SLH-X1 Sloth
- Foot Infantry Platoon C1, Portable Lasers
- Foot Infantry Platoon C2, Portable Lasers
- Foot Infantry Platoon C3, Portable Lasers
Deployment (Defender)
All units begin this scenario in the same position they occupied at the end of the previous scenario. Place Franklin's Sloth in the position the Infiltrator occupied. Place the three new platoons of infantry in any three Light buildings of the Strikers player's choice.
Victory Conditions
The Strikers must destroy all of the Clan forces to take back Somerset and win a decisive victory.
The Clan forces win a decisive victory if they destroy all of the Strikers' units. They win a marginal victory if Adam Steiner is killed.
At any time during the battle, either player can call for a Trial of Possession for Somerset. Both players must agree to the trial, and the winner will win the scenario. This trial must be a single combat between Malthus and Adam; no other units from either side may interfere, and Rachel must leave Adam's 'Mech, eliminating the TOC bonuses. If either Malthus's or Adam's 'Mech is destroyed before a trial can be called, no trial can take place and so standard victory conditions apply.
Special Rules
The Banshee strafes the Clan units just before the beginning of Turn 1. The Strikers player should choose one Clan unit and attack it with both medium lasers, hitting on a 6 or better. As the battle progresses, the fighter may turn around and strafe the battlefield up to three more times, during the Weapon Attack Phases of Turns 2, 4, and 6. Resolve hit locations for all these attacks as though the attack originated from directly east of the target.
The Strikers benefit from an ecstatic level of morale during this scenario. Apply a +1 bonus to all to-hit, piloting, and Initiative rolls. Note that this bonus allows the Strikers to roll a 13, making otherwise impossible shots possible. This bonus is lost if Adam's 'Mech is destroyed.
Malthus is bent on destroying Adam, but he thinks that Adam is piloting the Axman. Malthus will attack only the Axman until it is destroyed or the pilot ejects. After that, Malthus will take on the Awesome.
Note that Rachel is coordinating the Strikers' efforts from Adam's Awesome. For rules regarding her activities, see Tactical Operations Center, p. 100.
Character Statistics
The following are MechWarrior, Second Edition, game statistics for the major characters in the BattleTech animated show. Only each character's Edge and Advantages are reproduced here, because the Edge rules in General Rules refer to them. The attribute and skill blocks of the MechWarrior sheets are roster data and are not reproduced.
| Character | Edge | Advantages / Title |
|---|---|---|
| Adam Steiner | 6 | None listed |
| Valten Ryder | 3 | None listed |
| Rachel Specter | 4 | None listed |
| Ciro Ramirez | None | Title: Baronet (Heir); Enhanced-Imaging Neural Implant (after capture by Clans) |
| Katiara Kylie | 2 | Natural Aptitude: Piloting/Aerospace |
| Franklin Sakamoto | 2 | Title: Coordinator (Heir, renounced) |
| Jeroen Frestadt | None | None listed |
| Dr. Deirdre Nakamura | None | None listed |
No character statistics block for Zachary Miles Hawkins, Archon Melissa Steiner-Davion, Prince Victor Steiner-Davion, or Vandervahn Chistu appears in the Character Statistics section (pp. 112-118). The Edge rules in General Rules point to "pp. 119-125" for these values, but those pages are the Hardware Statistics section, which contains no MechWarrior sheet for these characters, so their Edge values are not given in this rulebook.
Hardware Special Rules
The Hardware Statistics section (BattleMech, vehicle, spacecraft and battle armor record data) is roster data and is not reproduced. The one rules passage in that section is reproduced here.
Banshee (BSE-X2) Special Rules
The Banshee is an experimental combination of conventional and aerospace fighter design. As such, it has a number of unique performance characteristics. Note that the construction of this vehicle required stepping outside the normal confines of the AeroTech rules, and as such this design is considered "Level 3."
While in space or at high altitude (medium or higher in BattleSpace), the Banshee operates as an aerospace fighter. However, when the craft is operating at low altitude (or very low or NOE in BattleSpace), it spends Thrust and maneuvers as a conventional fighter with VTOL capability. If the Banshee starts play in space or at high altitude, it has 75 Fuel Points. If it starts play at low altitude, the fighter has 150 Fuel Points. When the Banshee moves from low altitude to high altitude, immediately divide its remaining Fuel Points in half, rounding down. When the Banshee moves from high altitude to low altitude, multiply its remaining Fuel Points by 2.
When playing with the Aerospace Support rules (page 70, BattleTech Compendium: The Rules of Warfare), Banshee fighters are capable of making up to four attack runs before being forced to disengage.
The special cockpit design of the Banshee grants the pilot a +2 to his Piloting Skill roll when making a Blackout roll (see High Thrust Maneuver Damage, AeroTech, page 6; BattleTech Compendium page 78).