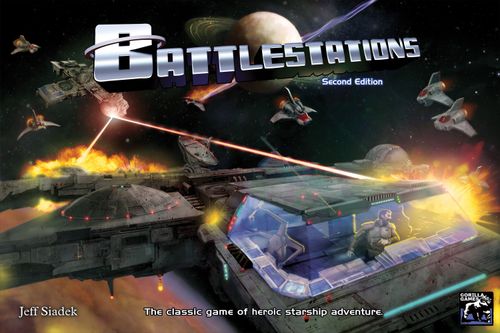
Battlestations: Second Edition
Battlestations: Second Edition Rulebook
Table of Contents
Table of Contents
Overview
Approaching the Game
Battlestations is a boardgame with a strict turn structure and definite mission objectives. Battlestations is also a roleplaying game, where your continuing characters grow in power with actions that affect the ongoing campaign.
You will learn about the components as you set up for the first game on the next page.
Each player will select a character as their hero except the Enemy player who controls the rest of the universe and works against the others.
For your first game, don't select a character marked ADVANCED. If you have fewer than 4 players (plus the Enemy), use Bots to fill the unused professions. See the Bots section for bot details.
After you are all set up, you'll follow the Sequence of Play below until a mission end condition has been met.
Sequence of Play
1. Ship Movement. Move ships a number of hexes forward equal to their speed. Note that this happens regardless of whether the Helm is crewed or even functional. There are no collisions.
2. Missile Movement / Resolution. Move each missile up to 6 hexes toward its target. After all missile movement is completed, each missile resolves.
3. Character Actions. Heroes and their bots move and take an action in order of their choosing but each character must complete their action before another can begin theirs. See the character actions section under Playing the Game.
4. Enemy Actions. Enemies move and act in order of the Enemy player's choosing just like the heroes do.
5. End of Phase.
6. Begin New Phase.
Getting Started
This booklet has 8 missions. Play them in order. Some scenarios have sections marked Enemy Eyes Only that should only be read by the Enemy player.
The player who best understands the game should play as The Enemy. The Enemy will make rulings and control mission elements, enemy characters, dangerous environments, and obstacles. The other players each select one of the pre-generated characters. It is recommended to have a good mix of characters from all 4 professions.
You'll set up by laying out a starmap and building ships according to the mission details.
Place the miniatures for the heroes as listed in the mission briefing. Each miniature should get a base that corresponds to the color on their card to remind you of their profession.
Issue each player starting equipment and Luck tokens as indicated on their character sheet. For now, don't bother tracking whether equipment is stowed or is in characters' hands. Let's get started with the first mission.
Setting Up
Components of the Game
This section examines the game's components and how to prepare for your first mission, Rebellion. You will want to read this guide up until the Rebellion mission, then keep the back page (the Action Summary) handy as a reference.
Character Cards. Each player selects 1 character (not "ADVANCED") of a different profession: Marine, Pilot, Engineer, or Scientist.
The character card is annotated as follows:
- Species — Your body type is used in determining your attributes on the right and gives you an Alien Ability.
- Skills — Athletics determines how much you can carry (1 object more than your Athletics). It is also used to resist disintegration and stun. Combat is used for personal attacks and to operate ship's weapons. Engineering is used to pump Engines and repair modules. Piloting is used to operate the Helm and use a JetPack. Science is used to operate Science Bay, Teleporter, Hyperdrive, as well as heal people with a MedKit.
- Alien Ability — Each species gets a unique ability. Some characters get more than one. For example, a character with a "claw" ability can attack with it for 1d6 damage, with a free attack each Phase.
- Special Ability — For each Rank you have (everybody starts at Rank 1) you get 1 special ability that bends the rules of the game, such as Death Striker — turn the card over to see the ability detailed on back.
- Attributes — These numbers already take into account your character's Skills, Species, Rank (of 1) and Special Ability. Move is the number of squares you can go during your move action (no diagonals). Hit Points is the amount of damage you can take before becoming unconscious. If you get 6 more than this you die – but your clone will replace you after the mission (see Character Advancement). Target Number is what others need to roll in a Combat check to hit you. Luck is the number of free rerolls you get each mission on your skill checks, ship survival checks, or damage you would take. Hands — you must have a free hand to operate battlestations.
- Equipment — detailed under Equipment below.
- Profession — You get a free reroll on skill checks to take actions within this skill. Note the Marine's red color indicates you get a reroll using the red modules (Cannon and Missile Bay) and personal weapon attacks. You may only reroll one of your dice for skill checks of your profession, NOT DAMAGE.
Miniatures. Each player selects the corresponding miniature for their character. Snap on a base to match your profession color.
Ship Modules. Arrange the 9-module starbase and heroes' ship as shown in the mission diagrams. Place the hero miniatures anywhere in the Cargo Bay. Place human enemies on the heroes' ship at the battlestations as indicated, as well as the enemy bots on the starbase as shown.
A CHECK consists of rolling 2 dice and trying to hit at, or above, a difficulty number. A REROLL lets you roll one of the dice again.
Counters. After you punch the counters from the 3 counter sheets, place the starbase token underneath the starship miniature on the starmap, as shown in the mission diagram.
Plot Twist Deck. Set aside the Plot Twist cards, Phase Die, unused Character Cards, Promo Cards and pad of 50 Character Sheets for now. They'll be used in future games.
Starmaps & Starships. Select any map board and place it on the table with the non-asteroid side face up. Place the starship miniature on a hex near the edge of the starmap facing the opposite edge.
Ship Control Card. Use a ship control card for each ship in the mission. Place the color coded glass beads on it to mark the speed and all power levels at 1. Ignore "OOC" for now.
Ship Modules
Battlestations. Battlestations are digital kiosks or consoles in a ship module used to control ship functions. They are indicated as the squares with a 5 pointed star. Your character must be at the appropriate Battlestation in order to operate a Ship Module. We'll learn more about other modules during the missions as they become relevant.
Helm
Flying the Ship. Once in motion, ships continue to move whether someone is at the Helm or not. At the start of each Phase, a ship moves a number of hexes equal to its speed, in the direction it is heading.
If you want to change the speed or heading of the ship, take a Piloting action at a Helm battlestation. The difficulty of this is double the ship's speed +6. Success changes the speed by one or the heading by one hex side. This costs one Helm power regardless of whether the action was successful.
Before you roll, you can add +3 to the difficulty to make the maneuver more effective (turn one additional hex or gain one extra speed).
Engine
Pumping Power. If you want more power for your ship, you need to make an Engineering skill check at an Engine battlestation at a difficulty of 8 to gain 1 power.
Before you roll, you can add 3 to the difficulty to get 2 power instead. Failure yields no power. You can put this power into Helm, Guns, or Shields as you like. You can transfer power in the same way.
Cannon
Ship Attacks. This is how you put the hurt on enemy targets. To fire the Cannon, spend a Guns power at a Cannon battlestation and make a Combat skill check. The difficulty to hit a ship is the range in hexes plus double their speed.
The difficulty to hit a missile is the distance plus 12. If you hit a missile, you destroy it.
Rules of Battle
Starship Combat
Hit Allocation. In the basic game all ship weapons can shoot in all directions and hit other ships in the side that makes the most sense. If two ships are facing one another, they'll probably shoot each other in the front. Do not try to go toe to toe with a larger vessel!
When a ship's weapon hits, you'll have to determine exactly where it hits. Select a column or row on the appropriate side of the enemy ship to determine where the shot rips through and roll 2 dice for hit allocation. If the result is a "7" you hit exactly where you intended. If the number is lower, your shot is further to the port (left) or forward side of the ship, or if the number is higher your shot is further starboard (right) or aft.
The hit allocation table runs from 2 (furthest to port/forward) through 7 (dead center, as intended) to 12 (furthest to starboard/aft): a roll of 2-5 misses the silhouette to the port/forward side (1 point of damage per Guns level), 6 applies to the Helm and, if strong enough, blows through to Life Support and the port Engine, 7 hits exactly where intended, 8 and 9-12 fall further toward starboard/aft, with the highest rolls again missing the silhouette (1 point of damage per Guns level).
If you are shooting from the front (consult the pink arrows) and roll a 2, 3, 4, 5 or 9, 10, 11, or 12, you miss the silhouette and only deal 1 point of damage per Guns level. On a roll of a "6" from the front, your shot applies to the Helm and (if strong enough) blows through to the Life Support and port Engine.
Shields and Damage. Suppose a ship with 5 Guns power is hitting a ship with 3 Shields power. Roll a total number of dice equal to the firing ship's Guns power and the target ship's Shields power, then take away a number of the highest dice equal to the target ship's Shields.
For example, a ship with 5 Guns power is targeting a ship with a Shields power of only 3. Roll 8 dice and take away the highest 3 dice. 8 dice might look like this (arranged in order): 6,6,4,4,4,2,2,1. After removing the highest 3 dice (because the target has 3 Shields) it looks like this: 4,4,2,2,1.
Damage Effects. The first die lands in the first module and each additional die (in order) hits the next module, so in the example you'll have a 4 applied to the Helm and Life Support and a 2 applied to the port Engine. The extra dice spill past the silhouette and deal 1 point of damage each. The dice that land on modules deal their full value in hull damage (see Hull Damage below).
A die result that is a 4, 5, or 6 breaks the module and deals 2 dice of personal damage to each of the occupants. A die result of "1", "2", or "3" does not break the module but does deal 1 die of personal damage to the occupants. Each die that misses the silhouette deals only 1 point of hull damage. For now, a module can have at most 1 broken marker.
Broken modules will not function. A broken Helm means your ship can't maneuver. (It will still move because moving does not require a module action; you only need the Helm to change speed or heading.) Let's hope it is pointed in the right direction!
Repairs. A repair action (from anywhere in the module) with an Engineering skill check at a difficulty of 11 removes a broken marker from that module.
Hull Damage. Hull damage is a measure of the total wear and tear on your vessel. To take damage, total up the damage dice that affected modules, plus one point for each die that missed the silhouette of the ship. You need to perform a hull check each time it takes damage. The difficulty is the hull check number (see the Hull Check table below) minus the size of your ship. If you fail, your ship explodes.
Anybody aboard may spend Luck on hull checks. As the damage threshold goes up, the difficulty of the check goes up. (Your first hull check occurs at 21 points of damage since previous checks would automatically succeed.)
Hull Check table (cumulative damage → hull check number): 1→1, 3→2, 6→3, 10→4, 15→5, 21→6, 28→7, 36→8, 45→9, 55→10, 66→11, 78→12, 91→13, 105→14, 120→15, 136→16, 153→17, 171→18, 190→19, 210→20, 231→21, 253→22.
Melee Combat: Personal Combat
If you want to deal damage to somebody on a personal level, you need to do personal combat. Melee weapons can only be used when you are in contact with your target (including diagonally).
Ranged weapons must trace line of sight by drawing a line from the center of the square you are in to the center of the square for the target. If that line is unobstructed by walls or module art, you can shoot them!
Personal attacks require you to make a Combat skill check against a difficulty of the target's Target Number.
Success inflicts your weapon's effect. This will mean one or more dice of damage as indicated by the weapon.
Some weapons have a modifier to damage. The blaster deals 2d6-1 damage. This means you roll 2 dice and subtract 1 from the total. Armor subtracts 1 from the damage and various species have their own abilities that modify the damage they sustain.
Personal Damage. If your damage total equals or exceeds your hit points, you are unconscious; you cannot act until after the Phase in which your damage is brought below your hit points. You can track damage by putting damage markers on your character card or using a pencil on a character sheet.
If your damage exceeds your hit points by 6, you are dead and out of play for the rest of this mission. Your clone will activate after the mission but you gain no experience (see Character Advancement).
Healing. Anybody with a MedKit can spend their action to try to heal themselves or an adjacent target by making a Science skill check of 11. Success removes 1d6 of wounds from the target. There is no penalty for failure.
Playing the Game
The Basics
Missions. Battlestations is played in a series of missions, with each campaign sequence starting with an initial Setup, followed by Playing the Mission and concluding with the Aftermath. The Aftermath is explained in more detail after you complete your first mission.
Personal Movement. You can move a number of squares orthogonally (not diagonally) up to your personal move number, either before or after your action. You can even select move as your action allowing you to move twice but take no other action. Canosians get an extra move action.
For example, a Human character with a move of 5 can move up to 5 squares. It can't move diagonally but can move orthogonally once up and once over to arrive in a diagonal square.
Character Actions (Skill Checks). A character can take any action on the action list in the Action Summary. Actions marked with a " * " must be taken at a battlestation in the appropriate module.
If the action has a difficulty number listed, it requires a skill check. In those cases, reduce the difficulty by the relevant skill, then roll 2 dice (for example, to turn the ship, reduce the difficulty by your Piloting skill). If your total is equal to or higher than the difficulty number, you succeed.
Equipment
| Weapon | Damage | Effect |
|---|---|---|
| Ranged Weapons | ||
| Blaster | 2 dice -1 point | No additional effect. |
| Laser | 1 die +1 point | Ignore Damage Reduction |
| Disintegrator | 1 die | Target must roll 2 dice and add their Athletics. If the total is less than 8, they are vaporized. |
| Particle Gun | 1 die + Effect | Add 1 point of damage for each point that the skill check is above the Target Number (max 5). |
| Nerve Disruptor | 2 dice -4 points | If any damage gets through, the target drops everything they are carrying in hand. |
| Voltrex | 1 die | You may take up to 4 shots. Each shot is at a penalty equal to the total number of shots you are taking. Dangerous. If you roll doubles, you damage yourself. |
Other Personal Equipment
- JetPack. Allows you to Jet as part of your move. Piloting check 8 to turn 1 square of your movement into a jet of up to 10 squares in a straight line. Failure deals 1 die of damage and reduces your move by 1 on this move action. You may add 3 to the difficulty to turn 2 of your moves into jet moves.
- ToolKit. Reduce the difficulty to repair by 1.
- MedKit. Allows you to take a "Heal" action. Science difficulty of 11 to remove 1 die of damage from self or an adjacent target.
- Armor. Reduces damage you take by 1 point.
Note that a character in the basic game may have a maximum number of items equal to their Athletics +1.
Enemies
The Enemy player takes their turn after the heroes have gone. Enemy characters move and take actions just like the heroes do, but are entirely controlled by the Enemy player. If this is your first time playing the mission use the enemies given in the mission. If you are replaying the missions the Enemy player might mix it up some.
Bots. Bots are controlled by consensus of the heroes and take turns like any other character. They have a move of 4 and a skill of 3 within their profession where they get a reroll (Marine, Engineer, Pilot, Science) and 1 in all other skills.
Bots have no special abilities or Luck, and take no wounds. Instead of hit points, they are broken if a damage die that would damage them comes up as a "5" or "6" and destroyed if a damage die comes up as "6" and they are already broken. Broken bots cannot function. Others can repair bots via a Science or Engineering check (difficulty of 11).
Bots are equipped with built in Blasters and MedKits, both of which can be picked up off of a destroyed bot.
Character Advancement
If you survive a mission, you earn 100 Experience and 100 Prestige. If you succeed, you get an additional 100 Experience and Prestige.
Any hero that dies in a mission will have a clone activated. They won't get the Experience the rest of the crew gets but they will get as much Prestige plus 100 bonus Prestige (death is heroic).
You spend Prestige to go up in Rank. This is mandatory if possible. It costs 100 times your next Rank in Prestige to advance. You begin at Rank 1 so you'll need to spend 200 Prestige to advance to Rank 2.
Characters who rank up gain an additional Hit Point, Luck, and Special Ability. Choose from the special ability cards. You may not take the same ability twice.
You spend Experience to increase skill levels the same way Prestige is spent to gain Rank. A character with a 3 Piloting skill must spend 400 Experience to go to level 4 Piloting. You may save Experience for later.
After a successful mission, each hero may claim one piece of equipment from a downed enemy. Note that a character in the basic game may have a maximum number of items equal to their Athletics +1.
After your first mission, you'll want to transfer the data from your sample character sheet onto a blank character sheet. Note that the sample character cards have already taken into account the character's starting rank and species base hit points.
Character Sheet fields: Name, Profession, Species, Alien Ability; Skills (Athletics, Combat, Engineering, Piloting, Science) with a level for each; Statistics (Base + Rank + Base for Hit Points, Move, Damage; Luck = Rank + 5, Spent Luck; Target Number = Rank; Hands, Carry x10); Prestige (Unspent), Experience (Unspent), Credits (Unspent); Special Abilities by Rank (1-4) with Notes, Pool and Used; Personal Equipment with Notes, Mass and Status. Circle your starting skill set from one of: {42000, 41110, 33100, 32210, 22221, 321111}.
Missions
Mission 1: Rebellion
Briefing. The Universal Republic has been tightening its grip on member planets in preparation against a Civil War that looms ever more likely because of the new restrictions. Your ship, the Redundant II, is docked at a U.R. starbase for mandatory inspection. Your crew waits helplessly outside in a Cargo Bay while government stooges paw through your stuff.
Suddenly, government troops move into position. Their officer announces that your ship is being nationalized for the war effort against the rebels, ordering you to turn in your personal weapons as well.
You might have been on the fence about the political question before, but now that they are seizing your ship your allegiance is no longer up in the air.
Objective. Recapture your ship and escape by moving 13 hexes away from the planet.
Setup. Put markers for the heroes' ship and a starbase at the edge of a starmap. Build a starbase and the heroes' ship with a control card set at speed zero and 1 power each in Helm, Guns, and Shields. Ignore "OOC" for now. Encourage the heroes to rename their ship.
Place all of the hero characters in the squares of their choice in the empty Cargo Bay docked next to the Helm of the heroes' ship.
The number of enemy characters aboard the heroes' ship is equal to the number of heroes. Use bot characters to fill out the rest of the enemy crew to 4 just as for the heroes.
Onboard the heroes' ship, place the enemy at battlestations as follows: Pilot at the Helm, Marine at the Cannon, Scientist at the Science Bay and Engineer at one of the Engines. Snap on colored bases to match their profession.
There is a full enemy crew of 4 bots on the starbase, one for each profession. Place each at an Engine battlestation.
The mission ends when either side has been subdued or the heroes escape. (Setup features the heroes' ship "Redundant II" docked next to a size-3 starbase, with 4 enemy humans aboard the heroes' ship and 4 enemy bots on the starbase.)
Lessons Learned: 1. Personal Combat. 2. Skill Checks. 3. Personal Movement. 4. Piloting the ship. 5. Cannon attacks. 6. Undocking.
New Rules
Undocking. As soon as the ship gets any speed (Piloting action in the Helm) it undocks. It will start moving away from the starbase during "ship movement" on the next Phase. Move the ship modules slightly away from the base to indicate this.
Passive Checks. A character struck by a Disintegrator must roll an Athletics check of 8 or better or be turned to dust. This is a passive check so it does not cost an action and is not subject to other penalties. You can spend your Luck to reroll your own passive Athletics checks.
Enemy Eyes Only. The enemy crew is human. The Marine is armed with a Disintegrator. The rest of the crew is armed with Blasters (2d6-1 damage). The Scientist also has a MedKit. The Pilot also has a JetPack. They are armored.
Enemy Stats (Human): Hit Points 7, Target # 8, Movement 5, Athletics 1, Primary Skill 3, Other Skills 0. Humans may reroll one or both dice in professional skill checks.
The starbase will threaten to fire on the heroes, demanding that they "Stand Down." However, they won't actually fire on them until the Enemies aboard have been disabled, at which point they will open fire. They shoot the Cannon every Phase with a Guns power of only 1.
The bot Marine with a skill of 3 will move to operate the Cannon.
Missiles are unavailable in this scenario.
Aftermath. If the mission is a success, conduct character advancement before the heroes move on to mission 2 "First Contact" for the next campaign turn.
If the mission is a failure, the heroes awaken in the cloning vats where a Major in the Rebel navy welcomes them to the Rebellion and gives them a new ship (which looks a lot like the ship they just lost).
Upon subsequent missions in this campaign, the Enemy player gets 1 bonus Luck for each time the heroes have failed a mission. If this bonus ever gets to 3, the Enemy wins the campaign.
Between missions, remove all damage from the ship, bots, and crew. Replenish all special ability pools and Luck. You're ready to go on to the next mission.
Mission 2: First Contact
Briefing. We have discovered a new intelligent life form. They don't understand us so they fear us. They launch missiles at things they fear. You've got to decrypt the Rosetta Stone word "Shknorkleblorp" so we can recruit them for the rebel cause before they blow you to bits. So far, we've only deciphered the starting letter.
Objective. Successfully broadcast the secret word to the planet.
Overwhelming Success. Broadcast the secret word to the planet with all hands surviving.
Setup. Place a planet in the middle of the map. Place the heroes' ship 17 hexes away at speed 1 with a random facing.
Lessons Learned: 1. Missiles. 2. Cannon Reconfiguration. 3. Phases and Rounds. 4. Used Markers. 5. Science Bay to ask Yes/No questions. 6. ECM. 7. OOC. 8. Overwatch. 9. Power Usage.
New Rules
Research with Science Bay: Yes/No Questions. The difficulty of this check is equal to the distance to the target. You may add +3 to the difficulty for each additional question you want to ask in the same action.
Reconfiguring a Cannon. An Engineering skill check of 8 can reconfigure your Cannon into Multicannon mode. In Multicannon mode, it does not get used markers but the Guns power for your shots is considered 1 regardless of how high it is. It still expends 1 Guns power per shot. (This is great for shooting missiles.) Reconfiguring a Cannon does not add or count used markers, and there is no penalty for failure.
Phases and Rounds. There are 6 Phases in each Round. At the end of Phase 6, perform the following end-of-round bookkeeping: 1. Remove all used markers from all of the ships. 2. Reduce speed and each power level by 1 on each ship. 3. Begin a new Round with the yellow Phase Die on 1. 4. At the start of each Round, raise all power levels to a minimum of 1 if the ship has at least one functional Engine. 5. Track the Phase with the large, yellow Phase Die.
Used Markers. Other than the Helm, repeated use of a module makes it harder to make the skill checks to use them. Add a used marker to the Cannon, Teleporter, Engine, Science Bay, Hyperdrive, etc. each time they are used (even if the attempt fails). Subsequent uses of the module will be at a penalty to the skill check of -3 for each used marker. Used markers go away at the end of the Round (Phase 6). Helms do not get used markers. When used to transfer power, Engines do not get used markers and ignore used markers.
ECM (Electronic Counter Measures). You can use the Science Bay to trick a missile into doing nothing during missile movement on the next Phase. The difficulty is the distance to the missile from your ship. You may add +3 to the difficulty for each additional missile to affect. The difficulty is based on the farthest missile. If you fail then none of the missiles are affected. ECM is temporary; on subsequent Phases, the missile will continue its assault on you unless you ECM it again.
Power Usage. Each ship can have a maximum amount of power equal to the ship size. It spends 1 Helm power each time it attempts a maneuver, 1 Guns power each time it fires a Cannon or launches a Missile and 1 Shields power each time the ship is shot with a Cannon.
OOC (Out of Control). A lot of stuff can rock the boat, from getting hit by enemy fire to maneuvers. This is called going Out Of Control and is represented on the ship control card as OOC. Each damage die that a ship sustains that is a 4, 5, or 6 raises the OOC level by 1. Each maneuver raises the OOC by 1 and a double maneuver raises it by 2 etc. Failing a maneuver generates OOC as if it had succeeded plus the amount by which the check failed.
OOC imposes a penalty to all characters' skill checks and movement on the ship (with the exception of the "Steady the Ship" Piloting maneuver). OOC penalties apply only once during the Phase for a character who double moves. Thus a character with a 5 move could move only 2 squares on a ship with an OOC level of 3. If that character also moves as their action, they would go 5 squares more, for a total of 7.
A simple "Steady the Ship" Helm maneuver (Piloting skill check against 6+2x speed) clears the OOC to zero.
A ship can have at most 4 OOC. Each point of excess OOC becomes 1 hull damage.
Overwatch. Sometimes you want to hold an action until just the right moment. You might want to be ready with your blaster and shoot anybody that comes into line of sight. Or you might want to be ready to fire the Cannon as soon as the target gets closer to increase your chances to hit. This is called "going on overwatch."
You can go on overwatch with any action. You must complete the action before your next turn to act or the action is wasted. Note that this is different from the "Prepare" action (introduced in Mission 3) in that you may resolve your overwatch action any time before your next turn to act.
Heroes must complete their overwatch actions before the Hero action portion of the Phase. Enemies can go on overwatch and must complete their actions before the next Enemy action portion of the Phase.
Mission Difficulty. Tougher heroes are sent on tougher missions. Battlestations uses the Mission Difficulty system to balance the challenge. Figure the Mission Difficulty as the average Rank of the heroes. This is called the "MD" and used in various places to balance. If a mission setup calls for MD+3 enemy characters, and the average Rank of the heroes is 2, then you'll be facing 5 enemy characters.
Launching Missiles. It requires an 11 Combat skill check at a Missile module battlestation and a point of Guns power to attempt to launch a missile. This adds a used marker to the module. Failure to launch when a used marker is on the module detonates a missile in the module. When you launch a missile, you must declare it to be a warhead missile or a science probe. You may count the distance to your science probe instead of your ship when Researching (asking yes/no questions) with the computer, while warheads attack targets.
Missile Movement. Each missile moves 6 hexes toward its target in the shortest path possible during missile movement. The player who launched the missile makes any choices if there are equidistant paths.
Missile Attacks. After missile movement resolve missile attacks. If a missile hits another missile it was targeting, it automatically destroys it. If the missile arrives at a target ship, roll 2 dice for hit allocation. If it misses the silhouette, it continues attacking on subsequent Phases. If it hits, break the module, cause 1 OOC to the target ship and deal 2 dice of damage to the ship's hull and 2 dice of wounds to each occupant of the struck module.
Shooting at a Missile. The difficulty to shoot at a missile with the Cannon is the distance +12. Hits to a missile destroy them.
Enemy Eyes Only. Missiles. The planet launches MD+4 standard warhead missiles per Round at a rate of one per Phase and extra on the first Phases if the total number of missiles is greater than 6. (If the MD is 5 then it will launch 2 missiles on the first 3 Phases.) The planet in this mission does not need to roll a skill check to launch missiles.
Secret Word. Select a word of your own or use any of the following: broadcast, missile, enemy, hero, intelligent, language, secret, word. Tell the heroes the starting letter. The length of the word should be 3 letters + the MD. So for MD 2 pick a 5 letter word.
I find it fun to try to use the word casually during play at least once a Phase as in, "You have to broadcast the message to the planet" if the word is planet.
Note that when the heroes do broadcast the secret word, the planet will stop launching missiles but they have no recall for missiles already out there.
Aftermath. The mission won't end until the heroes warp out or have dealt with all missile threats.
From this mission forward there will be the possibility of Overwhelming Success. Meeting the overwhelming success parameters earns 100 bonus Experience and Prestige.
Other than this, use the Advancement rules from Character Advancement after each mission from now on. By now, you'll really want to transfer the data from your sample character sheet onto a blank character sheet.
Mission 3: Showdown
Briefing. The Republic ship "Fearlight" is holding a star system hostage. We must free the planet at all costs.
Objective. Capture, destroy, or drive the Fearlight off the map. The first ship that leaves the map loses the mission.
Overwhelming Success. Complete the mission within 3 Rounds.
Setup. The Fearlight is a Tentac ship. Crew it up with Tentacs (Rank 2), as shown. They have an Athletics of 2, primary skill of 2+MD and 1 in all other skills. Thus if the MD is 3, they have a 5 primary skill.
Whenever a Tentac is to suffer damage, roll an extra die and take away the highest die. They are armed with Lasers, ToolKits and MedKits. Lasers give +1 to the Combat skill check to use them and deal 1 die of damage +1 point and they ignore the target's damage mitigation such as armor or species ability.
Enemy Stats (Tentac): Hit Points 9, Target # 9, Move 6, Athletics skill 2, Primary skill 2+MD, Other Skills 1.
Use the clear (non-asteroid) side of the 4 starmaps arranged in a square. Place a planet at the center of the map. Place the Fearlight 6 hexes from the top edge facing the bottom and the heroes' ship 6 hexes from the bottom edge facing the top. Both ships are on the center line of the boards at speed 1.
Lessons Learned: 1. Teleporters. 2. Remote Module Usage. 3. Transferring Power. 4. Prepare. 5. Assist. 6. Enemy Luck. 7. Boarding Missiles.
New Rules
Remote Module Usage. You can use any module remotely from any other battlestation in the ship. However, not being in the right module puts you at a disadvantage - your skill check is at +3 difficulty.
Let's say the Pilot needs Helm power but the Engineer is busy being dead. The Pilot can run all the way back to the Engine to transfer power at a difficulty of 8 from an Engine battlestation or he could attempt to do it remotely from his Helm battlestation at a difficulty of 11. Let's hope he has some Engineering skill or is luckier than his Engineer crewmate was.
Transferring Power. You can use the Engine to transfer power between systems. The difficulty is the same as pumping for power except that it ignores used markers and doesn't generate them. Thus, an Engineering check of 8 transfers 1 power out of Helm and into Guns. You can add +3 to the difficulty per additional power to transfer and split it as you like.
Prepare. You can spend your action this turn to "prepare" a specific action. If you take that action next Phase, you'll reduce the difficulty by 1.
Assist. You can spend your action to assist another character in their action. The difficulty to assist is 8 in the same skill the character you are assisting is using. For example, you want to assist a Pilot. You need to make a Piloting skill check of 8. If you succeed, their difficulty is reduced by 1.
A character can benefit from at most one assistance. Assisting can be done without remote penalty to an adjacent character or one taking a battlestation action at a different battlestation in the same module as you. Copilot anybody?
Scan. You can see what's going on aboard an enemy ship by making a Scan from the Science Bay using your Science skill against a difficulty of half the distance on the starmap. You can add +3 for each additional Scan and can spend Scans to reroll hit allocation rolls.
Teleporters. You can use a Teleporter to send a boarder on your ship to another ship. The boarder must be at a Teleporter battlestation and so do you. You can send yourself.
Make a Science skill check at a difficulty equal to the distance to the enemy ship plus your Shields plus their Shields (and +3 for each used marker if the Teleporter has already been used this Round).
Upon success, resolve targeting and hit allocation like a normal starship attack but place the teleported character in any empty square within the module you hit rather than dealing damage.
If you fail on the skill check to send (or miss the hit allocation), deal 1 die of damage to the unfortunate boarder and leave him in the square he left (slightly worse for wear).
Teleporter Bombs. By spending a point of Guns power, you can teleport a bomb instead of a character. Success puts a bomb in the target module. Failure detonates the bomb in the Teleporter. Teleporter bombs explode like missile impacts.
Boarding Missiles. When you launch a missile, you can configure it as a boarding missile and up to 2 characters on, or adjacent to, the battlestation can ride in the missile to the target. Treat this as a normal missile except that when it reaches the target, the boarders pop out as if they'd been teleported there, and the hull breach automatically seals behind them.
Enemy Luck. The Enemy gets an amount of Luck equal to the MD at the start of each mission. This resets after each mission.
This can be spent the same way heroes spend Luck (skill checks, damage they would receive, hull checks but NOT on bots or damage they are dealing). Enemy characters may spend a maximum of 1 Luck on a given roll. Each enemy character may spend at most 1 of these Luck on a failed hull check for a ship they are on.
Each time the heroes fail a mission, the Enemy Luck goes up by 1 for the campaign. So if the MD is 3 and the heroes have failed 2 missions, the Enemy will get 5 Luck to start the mission.
Mission 4: Ghost Ship
Briefing. The Claw, carrying valuable data damning to the Universal Republic, has disappeared into a negative energy cloud in Sector 3. Only one of the crew's clones activated and since it is a clone, it has no knowledge of the events. The rest of the crew's clones never activated. Your mission is to investigate what happened to that ship, rescue survivors if possible, and recover the logs from the Helm if the ship itself is irretrievable.
Objective. Return with 20 units of data gathered from the Claw's Helm.
Overwhelming Success. As above, and rescue a survivor and/or activate the clone of a lost crew.
Setup. Place 2 clear (non-asteroid) starmaps in a line. The bottom-most map represents the energy cloud. The heroes warp in 10 hexes from the near edge of the energy cloud map board.
Lessons Learned: 1. Gathering Data. 2. Long Range Cannons. 3. Slagging.
Special Rules
Gathering Data. Scans will not penetrate the cloud but the Science Bay can be used to ask yes or no questions about hexes within. Gathering Data can be done only from the Helm of the Claw at a difficulty of 8 Science check. The amount of successes indicates the amount of data gathered. Each unit of data allows the heroes access to one line of the log (under Enemy Eyes Only).
Long Range Cannons. You can configure a Cannon into Long Range mode by making an Engineering skill check action against a difficulty of 8 at the Cannon battlestation. Unlike most other battlestation actions, this action cannot be taken remotely.
A Cannon configured in Long Range mode counts both the range to the target and the power of your ship's Guns as half for damage purposes. Round up in both cases.
Enemy's Eyes Only. The crew of the Claw have been trapped between dimensions. They are ghosts. The cloud is trying to trap the heroes' ship so they will become ghosts as well.
Enemy Setup. The Claw begins in the center square of the energy cloud starmap with a random facing. Do not place it on the map. Track it instead on a separate sheet of paper using the hex numbers until the heroes enter the cloud. Put 2 broken markers on the Hyperdrive. It is slagged.
Ghosts. There are 3+MD ghosts in the enemy crew. Only one ghost will haunt a given module at a time. They have MD in all skills and they ignore OOC but they get no professional reroll. They cannot be seen and take one action each Phase from the following list: 1. Repair the module they are in. 2. Move to any other module that is neither haunted nor slagged (see Note on Slagging below). 3. Operate the module they are haunting. 4. Attack a character in their module. If their Combat check succeeds, they inflict 1d6+MD damage and raise the chill factor for that character by one.
Chill factor. Each hero's chill factor starts at MD. It goes up by one each time they are hit by a ghost and at the end of each Phase a character spends in the cloud. At the end of each Phase in the cloud, each character will have to make an Athletics check against a difficulty of their Chill factor. Failure causes the character to dematerialize (leaving their equipment behind) and become a ghost in the nearest module that is not already haunted.
Ghosts cannot be damaged. They can be destroyed if the module they are in is slagged.
Note on Slagging: A module that suffers a second broken marker is slagged. All actions inside a slagged module (including repairs) are at a +3 additional difficulty. You cannot jet into a slagged module.
Leaving the cloud. Any character on a ship that leaves the cloud is restored to a chill factor of MD. If a ghost leaves the cloud, they rematerialize as characters instantly.
From the inside of the cloud, the outside is perfectly visible. Ships can function as if there were no cloud. Track the location of the Claw on a separate map until the heroes enter the cloud because the Claw can see out and attack the heroes' ship but the heroes can't see the Claw until they get inside the cloud.
The Claw's Log (revealed one line per unit of data gathered):
- We've entered a negative energy cloud
- that has had a chilling effect on morale.
- One of our crew has suddenly vanished
- and there are strange occurrences on the
- ship. Our Science Officer has been unable
- to locate the missing crewman despite
- narrowing it down to a single module.
- Systems have begun acting without prompt.
- The ship has taken on a mind of its own.
- It is thwarting attempts to leave the cloud.
- Another crewman has disappeared and the
- ship is now redoubling its efforts to move
- us deeper into the cloud.
- We've had some success fighting the
- battlestations themselves. When we
- slagged the Hyperdrive, it seemed to
- appease the apparition(s) because it or they
- became less active.
- The rest of the crew is all gone. I'm alone
- and I feel icy invisible claws clutching at...
- End of log
Mission 5: Dark Data
Briefing. The Universal Republic keeps records on everything and everybody at a starbase in orbit around New Earth in Sector 1. Unfortunately for them, their meticulous recordkeeping includes creating high definition holos of their own war crimes.
If we can get a strike team in quick enough to gather data and make an escape before the Xeloxian chase team gets you, we'll have the evidence we need to destroy public support for the Universal Republic.
Objective. Gather 20 units of Data and warp out.
Overwhelming Success. Gather 10 extra units of Data and warp out.
Setup. Use the asteroid sides of 4 starmaps in a line. Place a planet marker near the edge of the top starmap with a starbase in orbit. Place the heroes' ship 10 hexes away. Place 2 identical size 3 Xeloxian ships, the "Triple-Two" and the "Half Dozen," in adjacent hexes 24 hexes further from the planet than the heroes.
Starbase. The Starbase is crewed by 1 Xeloxian of each profession.
Xeloxians have six limbs radiating from a central hub. Each limb can act as an "arm" or a "leg" so they add free hands to their move value. Their aggressiveness allows them to add 1 point to damage they deal in personal combat.
They are the only creatures other than humans with physiology allowing them to wear armor. Armor stops 1 point of damage and doesn't require a hand to use. It still counts as equipment.
These Xeloxians are armed with disintegrators that deal 1 die of damage (+1 point for Xeloxian's special ability of "Aggressive") and cause the target to roll an Athletics check of 8 or better or be turned into dust.
Lessons Learned: 1. Orbit. 2. Starbases. 3. Peeking. 4. Popping. 5. Sick Bay. 6. Docking. 7. Hyperdrive.
Enemy Eyes Only. The Xeloxian ships move at speed 3 and do not generate power, lose speed or take other actions until they are within 12 hexes of the heroes' ship. The ships are moving at speed 3 and crewed by 1 Xeloxian of each profession.
Enemy Stats (Xeloxian): Hit Points 9, Target # 8, Move 2+free hands, Athletics Skill 2, Primary Skill 1+MD, Secondary Skill 2.
New Rules
Gathering Data. Gathering data requires a Science skill check of 8 in the starbase. The amount by which the skill check exceeds 8 indicates the number of units of data to gather.
Orbit. An object moving at speed 1 along the hex side of a planet will automatically turn toward the planet at the end of movement and does not decelerate at the end of the Round. This is called "orbiting."
Starbases. Starbases behave like ships except for the following: a) Any hit to a starbase comes from the front. Starbases have 360 facing with all modules; b) Starbases can have OOC but it clears at the end of each Phase; c) Starbases do not track power. They have no Helm power and 1 point each in Guns and Shields for each functional Engine they have.
Peeking. A character can end their movement between 2 squares to "peek." A peeking character adds +3 to the difficulty to target them by characters that can't see both squares.
A character straddling two squares (say B and C) is in both positions for purposes of targeting. A character in an adjacent square that can't see both squares is at +3 difficulty to shoot them. A character that can see both squares (you can always see diagonally adjacent squares) is at no penalty.
For purposes of incoming ship's weapon damage, a peeking character would suffer damage as if they are in the module that is hardest hit.
Popping. Sometimes you just want to pop out and take a shot and pop back. You can take ANY action with a pop. This gives you one square of bonus movement that you use right there to pop before your action, after it, or both. Note that if you pop before your movement you may stop in the popped square or choose to pop back.
Any action you take while popping is at +1 difficulty to the skill check (if any). Any attempt to target you while popping is at +1 difficulty to the skill check for people who were on overwatch to attack you.
Sick Bay. You can use a Sick Bay battlestation like a MedKit on anybody in the Sick Bay module, at a difficulty of 8 instead of 11.
You can also use it to raise the (nearly) dead. A character whose wounds exceed their hit points by 6 or more is dying. To heal a dying character, the difficulty is equal to their wounds minus their hit points. Success brings the character's total wounds equal to 5 greater than their Hit Points so they go from dying to right next to dying. They can be subsequently healed as normal.
The Sick Bay does not acquire used markers.
Docking. A ship that has matched speed and facing of the target ship (or base) may attempt a simple Helm maneuver to dock (Piloting skill vs double ship size + double ship speed). Line up any 2 external doors on opposite sides (you can dock your port side to the target's starboard or the other way around). If either ship performs any maneuver the dock is broken.
Hyperdrive. Make a Science skill check at a difficulty of 8 at a Hyperdrive battlestation to add one program marker (or 11 to add 2 program markers) to the Hyperdrive. When you have as many program markers as your ship size (3 for the Redundant II), you can attempt to warp out. This action cannot be taken within 12 hexes of a planet.
To Warp Out, take a Science skill check at a difficulty of 8 at a Hyperdrive battlestation. This action can only be attempted if you have programmed the Hyperdrive (see above) and it cannot be taken within 12 hexes of a planet. This is also called "leaving the system."
Mission 6: Breakout
Briefing. The Universal Republic forces from the Silicoid Navy have surrounded our base. We've gathered enough evidence to sway the galactic court of public opinion against them if only we can escape to bring our findings to light.
Your mission is to run the gauntlet and escape.
Objective. Warp out.
Overwhelming Success. All hands survive.
Setup. Use the asteroid side of 4 starmaps placed in a big square. Place a planet in the center hex. Place the crew at the battlestations of their choice.
Place a marker for enemy ships in each of the 6 hexes radiating from the planet at a distance of 12 hexes away from the planet facing toward it at speed 1.
Place the ship marker for the heroes' ship in orbit around the planet in the hex of the heroes' choosing.
The Silicoids are equipped with lasers and MedKits but since Silicoids have only one hand they'll need it free so they can operate battlestations. Lasers deal 1 die of damage +1 point and ignore damage reduction and armor.
Lessons Learned: 1. Collisions. 2. Asteroids. 3. Plot Twists.
Enemy's Eyes Only. Only the Silicoid ship that the heroes are flying toward will be completely active for this mission. The other ships will launch one missile each at the start of each Round. Don't bother setting them up, tracking power levels or making skill checks to launch their single missile once per Round.
These semi-participating ships will move one hex closer to the heroes' ship each Phase at speed 1 ignoring pretty much all of the rules for speed and facing. Their missiles, however, are quite real.
Enemy Stats (Silicoids): Hit Points 12, Target # 7, Move 4, Primary Skill 2+MD, All other Skills 1.
New Rules
Collisions. Space is big. You won't hit another ship in your hex unless one of you is on overwatch to ram the other during movement. Move ships one hex at a time starting with the faster, smaller ships first. If they are in the same hex at the same time, a collision is possible.
Collisions with a ship are dealt with as follows: The ramming ship must be on overwatch to ram and make a simple Helm maneuver (Piloting vs double ship size + double ship speed). Count the amount by which their skill check exceeded the difficulty.
If the ship getting rammed has somebody on overwatch to dodge, they must make a simple Helm maneuver check (Piloting vs double ship size + double ship speed) and succeed by at least as much as the rammer succeeded to avoid the ram.
Each ship deals 2 Cannon-style hits to the other, the first equal to the ship size, and the second equal to the ship speed. Ignore Shields for these hits. The hit allocations can't be rerolled with Luck, Scans, or special abilities.
Asteroids. Asteroids and planets are big. If you enter the hex of an asteroid or planet at a speed greater than 1, you must have somebody on overwatch to dodge it or you will skip off the atmosphere or bounce off the asteroid and suffer a hit as though rammed by a ship of your own size and speed.
After a collision, each ship involved loses 1 speed and gets a random facing.
Missiles in Asteroid and Planetary Hexes. A missile that enters a planet hex must make a check on 2 dice at no bonus against a difficulty of 7 or be destroyed. Missiles ignore asteroids. Missiles must move along the shortest path possible toward their target but may select the safer of 2 equidistant paths.
Plot Twists. Shuffle up the Plot Twist cards. From this mission forward, the Enemy gets Plot Twist cards to help them thwart the heroes.
The Enemy draws a number of Plot Twist cards equal to the highest Rank among the heroes. Each of these cards can be played as indicated on the card or discarded for 2 Enemy Luck.
Mission 7: Gotta Get a Bigger Boat
Briefing. We've got the data but we'll need a bigger vessel to get through the defenses the U.R.E.F. has put up around Capitola. Fortunately we know of a band of Zoallan pirates who've hijacked the perfect vehicle for you. All you have to do is take it from them.
Objective. Capture the Valiant and Warp out.
Overwhelming Success. Warp out within 3 Rounds.
Setup. Use the clear side of 2 starmaps. Place a planet on one edge. Place the Valiant 6 hexes from the planet facing away from it. Place the heroes' ship 12 hexes from the Valiant facing toward it. Place the crew at the battlestations of their choice.
Note that there are two Life Support modules on the Valiant. There is a variable number of pirates. The rest of the 8 slots will be filled by enemy bots.
Enemy's Eyes Only. There are 3+MD Zoallan pirates aboard instead of the usual complement. Place them as you see fit. Their carapace reduces all damage by 2. They are armed with Nerve Disruptors.
Stats (Zoallan): Hit Points 5, Target # 9, Hands 3, Movement 7, Athletics 1, Primary 3, Other Skills 0.
Mission 8: Mindfield
Briefing. The U.R.E.F. is trying to prevent us from delivering the data we gathered in the last mission by blockading Capitola. We must land there to present our findings in person.
Objective. Land on the planet before the end of the fourth Round.
Overwhelming Success. All hands survive.
Setup. Use the clear side of a starmap for the minefield. Each space counts as a mine space rather than clear. When a mine is cleared, mark the hex with a used marker to show that it is now clear.
Place a planet in the center with used markers surrounding it to indicate those hexes are clear. Place a marker for enemy ship in orbit at speed 1.
Place another clear starmap adjacent. The heroes' ship warps in (appears) on this map 18 hexes from the planet.
If the heroes managed to capture the Valiant, they've got 4 more available crew slots. These extra spaces can be filled by bots if you haven't managed to recruit more players to join your crew.
Place the crew and their bots at the battlestations of their choice.
The enemy ship is of Canosian Registry so they count Shields as 1 higher than they actually are as long as they have at least 1 power in Shields.
It is crewed by Rank 3 Canosians with a primary skill of 4, and 2 in all other skills.
They are equipped with Nerve Disruptors, JetPacks and MedKits. Nerve Disruptors deal 2 dice -4 points of damage and if any damage gets through, the target drops all items in their hands. Yard sale!
Enemy Stats (Canosians): Hit Points 12, Target # 8, Hands Infinite, Movement 5 + Bonus, Primary Skill/Others 4/2.
New Rules
Ship Size. Ships can be bigger. A ship with more modules is harder to maneuver but has more capabilities. A ship's size is figured by dividing its number of modules by 3 (round up).
Cargo Bay. The Cargo Bay module can be used to hold equipment in various missions. I wonder what the enemy has in their Cargo Bay?
Helm Maneuvers. Until now, we've said the difficulty of a maneuver is 6 + double the speed but actually, the difficulty is double the ship size + double the speed. The ship size until now has been 3 so it hasn't made a difference. However, increasing ship size will change that and ships of a given registry have benefits.
Atmosphere. A ship entering a planetary hex at speed greater than 1 must have somebody on overwatch to successfully dodge it or it will suffer a ram as though struck by a ship of its own size and speed. Dodging requires a Piloting skill check against a difficulty of double the ship size plus double its speed.
A ship on a planet hex must be at speed zero to perform any atmospheric maneuvers. You cannot accelerate while in the atmosphere. The difficulty of any atmospheric maneuver is triple the ship size.
It requires separate maneuvers to enter the atmosphere and land.
- Enter Atmosphere — Piloting vs. 3x ship size. Success puts you in the atmosphere over the planet. From here you need to either Land or Leave Atmosphere.
- Land — Piloting vs. 3x ship size. Landing is always successful! Hooray! However, if the skill check to land isn't successful, the ship suffers the failure margin as dice of damage. For example, you are trying to land a size 3 ship and need a 9 total but your total is only 6, so your ship suffers 3 dice of hull damage. Bumpity, Bumpity, Bumpity. To take off, you must launch.
- Launch — Piloting vs. 3x ship size. Success takes you from Landed to "In Atmosphere," from which you could take the action to "Land" or "Leave Atmosphere."
- Leave Atmosphere — Piloting vs 3x ship size. Success takes you from in atmosphere to in space. At this point you may choose a facing and put your ship counter on the planetary hex. You are still in the hex with the planet, but you may now maneuver.
You won't need to Launch or Leave Atmosphere in this mission but this is a convenient place to tell you about it.
Mines. A ship entering a hex with a mine must have a character on overwatch to dodge the mine (with a simple Helm maneuver against double the size and speed of the ship) or they will be hit by it.
These mines all behave exactly like warhead missiles. If they miss the silhouette of the ship on hit allocation, they remain in space.
Mines can be shot with a difficulty of 12 plus the distance. Any hit destroys a mine.
Enemy's Eyes Only. Not only has the UREF mined the space around Capitola, they've also got a secret weapon aboard their ship. The Cargo Bay holds one item. It is a mind control device.
Mind Control Device. As long as the Enemy Cargo Bay is functioning, it sends out a pulse of mind control at the end of each Phase. Each hero (bots are immune) must make a passive Athletics check against 7+MD or be overcome by an urge to ram the ship into a mine. Anybody who fails this check gets a bonus move and action (Yay!) that they must take from the following list. They must choose the topmost action that is available to them. Their movement must be toward a Helm battlestation or if they cannot get there, to any battlestation.
- Turn the ship toward a mine if the Helm is not broken and there is Helm power.
- Accelerate the ship if it is already headed toward a mine.
- Fix the Helm if it is broken.
- Put power into the Helm if there is no Helm power.
- Double Move toward a Helm battlestation if they can't get to one in a single move.
Miscellany
Ship Registry
The shape of each ship reflects the craftsmanship of the planet where it was built. Each registry confers its own special benefit.
| Registry | Benefit |
|---|---|
| Canosian | If there is any power at all in Shields, they are considered 1 higher for the purpose of enemies targeting your ship and 1 lower for purposes of your ship Teleporting out. |
| Human | Reduce difficulty for all maneuvers by 1. |
| Trundlian | If there is any power at all in Guns, they are considered 1 higher. |
| Vomeg | Reduce difficulty for all targeting by 1. |
| Zoallan | Missiles move 7 hexes instead of 6 (the difficulty to target the missiles is unchanged). |
| Xeloxian | Ship reduces OOC by 2 at the end of each Phase instead of 1. |
| Silicoid | Ship may reroll a die in failed hull checks. |
| Tentac | External modules ignore facing restrictions and have 360 degree firing arc. |
What's Next?
If you want to play this campaign again, the Enemy can mix it up a little by changing the species the heroes are up against, and playing with expanded rules options.
This mini-campaign is designed to get you familiar with Battlestations. The Advanced Rulebook takes it to another level with character advancement and more in-depth tactical options with new weapons, actions, and equipment.
There are missions with space raiders, smugglers, zombies, mysteries, multiple hero ships, and solo play... as well as dozens of missions created by my favorite designers. You can also create your own missions.
For those of you who are already Battlestations fans, don't fret. We simplified here for new players, but the complete game still exists in the Advanced Rulebook with over 100 special abilities, dozens of species and over 75 adventures.
Join the active Battlestations community online and at conventions around the world. There's an entire galaxy out there for you to explore, plunder or defend. Welcome!
—Jeff Siadek
www.gorillaboardgames.com/battlestations
Action Summary
| Action | Difficulty | Skill | Result |
|---|---|---|---|
| Fire Cannon | Distance + 2x target speed | — | See Cannon. |
| Launch Missile | 11 | — | Put a missile or Science Probe on the map. |
| Personal Attack | Target # | N/A | Resolve effect of weapon. |
| Pump Engine | 8 (+3 per additional) | — | Add 1 power to any of your ship's power levels. |
| Transfer Power | 8 (+3 per additional) | — | Move 1 point of power between 2 ship systems. Doesn't add or count used markers. |
| Repair | 11 | Any |
(The printed card also repeats the Guns Power / Hull Check reference table given earlier under Starship Combat, in the margin alongside this Action Summary.)