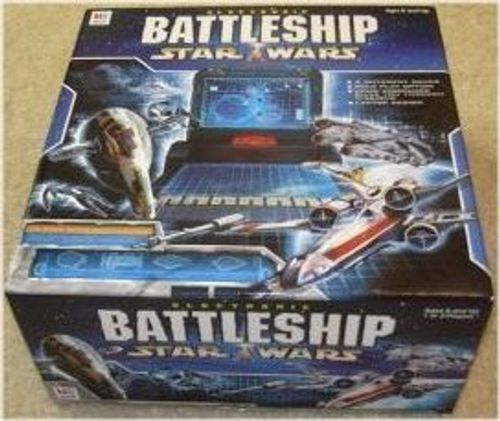
Battleship: Star Wars Advanced Mission
Battleship: Star Wars Advanced Mission Rulebook
Table of Contents
Table of Contents
Equipment
- Folding game unit
- 10 plastic starships
- 10 plastic starship stands
- 200 white pegs
- 100 red pegs
- 50 blue pegs
- Label sheet
First Mission – Checklist
1. Apply Labels
Apply the labels to both sides of the game unit, as shown in Figure 1.
Then, flip open the peg storage compartment lids (on both sides of the game unit), and apply the remaining labels to the underside of each lid as shown in Figure 2.
IMPORTANT: One label is marked "Republic Commander" and the other label is marked "Imperial Commander." Be sure to put the Republic Commander label on the side of the unit with the red ON/OFF button. (See Figure 4 for ON/OFF button location.)
2. Insert Batteries
Remove the screw in the battery compartment door, located on the underside of the unit, and remove the door. Insert 3 AA-size batteries (we recommend alkaline), making sure to align the + and – symbols with the markings in the plastic. Replace the door and tighten the screw.
CAUTION: TO AVOID BATTERY LEAKAGE
- Be sure to insert the batteries correctly and always follow the game and battery manufacturers' instructions;
- Do not mix old and new batteries, or alkaline, standard (carbon-zinc) or rechargeable (nickel-cadmium) batteries;
- Always remove weak or dead batteries from the product.
Test the batteries by pressing the ON/OFF button (see Figure 4). You should hear a series of high-pitched beeps from R2D2. If you do not, the batteries may be weak or improperly installed.
3. Complete Setup
Carefully remove the starships, starship stands and pegs from the plastic bags. Discard the bags. Then divide the pegs equally between the two players. Each player should have:
- 100 white MISS pegs
- 50 red HIT pegs
- 25 blue SCAN pegs (used for ADVANCED MISSION only)
Place your pegs in the storage compartments under the flip door on both sides of the game unit, as shown in Figure 2.
Decide which player will command the Republic Star Fleet™ and which player will command the Imperial Star Fleet™. The Republic Star Fleet Commander takes the 5 Republic starships (Star Cruiser™, Millennium Falcon™, X-Wing Fighter™, Naboo Star Fighter™, Jedi Star Fighter™) and the Imperial Star Fleet Commander takes the 5 Imperial starships (Star Destroyer™, Sith Infiltrator™, Tie Interceptor™, Droid Star Fighter™, Slave 1™). Each player then takes 1 5-hole stand, 1 4-hole stand, 2 3-hole stands, and 1 2-hole stand and inserts the post at the top of the stand into the hole in the bottom of the starship as shown in Figure 3.
Figure 3 (stand assignments): Star Cruiser (5-hole stand); Millennium Falcon (4-hole stand); X-Wing Star Fighter (3-hole stand); Naboo Star Fighter (3-hole stand); Jedi Star Fighter (2-hole stand); Star Destroyer (5-hole stand); Sith Infiltrator (4-hole stand); Tie Interceptor (3-hole stand); Droid Star Fighter (3-hole stand); Slave 1 (2-hole stand). Insert the post of the stand into the hole in the bottom of the starship.
Control Manual
Figure 4 – Game in open position. The labelled parts are: Grid Coordinates; Imperial Star Fleet Target Grid; Imperial Commander; On/Off Button; Republic Commander; Republic Star Fleet Base Grid.
Figure 5 – Control panel.
- Special Weapons: Use the top row of buttons to deploy weapons with special capabilities. Use only in ADVANCED MISSION.
- Interrupt: Interrupts the speech and sound.
- Repeat: Repeats last voice command.
- Fire/Enter: Enter game options and confirm certain commands. When ready, use to launch attacks.
- Number Keys 1–14
- Letter Keys A–J
- Cancel: Cancels your last command. The last prompt by the computer will be repeated. Enter new data.
- Scan: Use in ADVANCED MISSION only. Use with the Jedi Starfighter and Slave 1 to locate enemy starships.
Battle Deployment
Playing Star Wars® BATTLESHIP® is easy. All through the game, it will give you spoken commands telling you what to do next. If you make a mistake or enter an invalid command, the computer will help you.
To get the best from the game and to make sure you don't miss any of its many exciting features, take the time to read through the relevant sections of this instruction book. The rest is up to you. Your skill and strategy will decide whether your Star Fleet will be the one that survives and wins!
It is vital that all personnel study the Control Manual shown on the previous page. Remember, your game unit has the power to destroy an entire Star Fleet.
Note: The grid cannot automatically "read" where you place your starships. You MUST input the coordinates of your starships before beginning each game. This is explained on the following pages.
Missed an important message? If you aren't sure you heard the last voice message correctly, press the REPEAT button on your keypad to hear it again.
Start-up Sequence for Solo Play
You can play Electronic BATTLESHIP by yourself by challenging the computer. To go it alone, follow the Start-up sequence below using the Republic side of the game unit (the side with the ON/OFF button).
- Press the red ON/OFF button.
- You will hear a series of high-pitched beeps from R2D2 followed by «COMMAND CENTER ACTIVATED».
- Press the number "1" button to select Solo Play.
- You will hear «1-PLAYER MISSION SELECTED», followed by «PLAYER CHOOSE SIDES». You can command either the Republic Star Fleet or the Imperial Star Fleet. To activate that side press any button on the side you chose. You will then hear «INPUT SKILL LEVEL». Select from 3 skill levels by pressing the corresponding number button on your side. See Skill Levels on page 6. You will hear your choice confirmed with, for example, «SKILL LEVEL 1 SELECTED» followed by «INPUT GAME OPTION». Continue setup instructions at step 5 under the 2-PLAYER GAME.
When you have completed the Start-up sequence, you will hear the prompt «AWAITING ORDERS REPUBLIC (IMPERIAL) SIDE COMMANDER». You are now ready for battle!
In a Solo game, play as you would during a 2-player game. At the end of your turn, the computer will automatically take its turn just as if you were facing a human opponent. Listen for the result of the enemy attack and, when prompted, take your next turn. Plan your strategy carefully and depending on the Skill Level chosen, prepare to outwit your enemy!
If you need to hear any of the prompts again, press the REPEAT button.
3 Skill Levels
Skill Level 1 is the easiest. Skill Level 3 the most challenging. The difference between the levels is the speed at which the computer will analyze and decipher your battle strategy. Whenever the computer scores a hit or a miss, it gathers information about the possible position of your Star Fleet. The higher the Skill Level, the better the computer performs this function… and the harder it will be for you to defeat the enemy.
Start-up Sequence for a 2-Player Game
Decide who is the Republic Commander and who is the Imperial Commander.
- Press the red ON/OFF button.
- You will hear a series of high-pitched beeps from R2D2 followed by «COMMAND CENTER ACTIVATED». If you are the Republic Commander (the player with the ON/OFF button on your side), follow the Start-up sequence (numbers 3-7) that follow. During this time, the buttons on the Imperial Commander's side will be deactivated.
- The Republic Commander presses the number "2" button to select a 2-player game.
- You will hear «2-PLAYER MISSION SELECTED», followed by «COMMUNICATION ESTABLISHED — INPUT GAME OPTION».
- Choose which mission you will volunteer for (these are described on page 7):
- CLASSIC MISSION
- SALVO MISSION
- BONUS MISSION
- ADVANCED MISSION
- Follow the voice prompt by pressing the numbered button that matches your chosen mission. If you press the number "1" button, you will hear «CLASSIC MISSION SELECTED».
- Then you'll hear «REPUBLIC SIDE COMMANDER, ENTER STAR FLEET CONFIGURATION». Choose one of the two options described on page 8 by pressing the appropriate number button.
The Missions
We recommend you start with the CLASSIC MISSION. This will help you get used to the way the game plays, before moving on to more difficult missions.
Classic Mission
This is the simplest way to play and a great place to start perfecting your strategic battle skills.
- You will use all five of your ships to make up a Star Fleet.
- On your turn, you will fire a single shot to score a hit or a miss.
- The winner is the first player to destroy all of the ships in the enemy Star Fleet.
When prompted by the computer, press the number "1" button to choose this mission.
Salvo Mission
The Salvo Mission works in the same way as the Classic Mission, but in Salvo, you fire one shot for each one of your starships still on the board.
For example, while your Star Fleet is still intact (even if some of your starships have taken a hit), you will be able to fire five times on your turn. If, for instance, your fleet has lost two of its five starships, you will only be able to fire three times on your turn.
When prompted by the computer, press the number "2" button to choose this mission.
The Bonus Mission
The Bonus Mission works in the same way as the Classic Mission with the following exception:
- Each time you score a hit on an enemy starship, you earn an extra turn, and so on until you miss.
When prompted by the computer, press the number "3" button to choose this mission.
The Advanced Mission
Restricted to experienced personnel. Turn to the special section, starting on page 13.
When prompted by the computer, press the number "4" button to choose this mission.
Custom Configuration
This allows you to deploy your fleet by choosing the position of each of your starships yourself. See the instructions below.
Auto Configuration
This lets you choose one of 100 different predetermined deployment formations. See pages 22-42 for your choice of configurations. See page 10 for instructions.
Custom Configuration Steps
- To select Custom Configuration, press the number "1" button. You will hear «CUSTOM CONFIGURATION SELECTED» then «STAR CRUISER REPORTING» and «ENTER COORDINATES». You will now need to position each of your starships somewhere on your base grid. Start with your Star Cruiser.
- Place the plastic Star Cruiser in a location of your choice on your base grid by inserting the tabs on its stand into the grid. Starships can be placed vertically or horizontally, but never diagonally.
- Now enter the coordinates matching the position of your Star Cruiser into the computer. To do this, you only need to enter in two sets of coordinates: one set for one end of the starship's stand and a second set for the other end of the starship's stand, before pressing FIRE/ENTER to confirm. In the case of the Star Cruiser, which takes up five spaces on the grid, you might enter coordinates A1 and A5 for a horizontal position (or perhaps, B3 and F3 for a vertical position). The computer automatically fills in the spaces in between and registers that your Star Cruiser is located over those five spaces on the grid.
Note: The computer does this for all starships in your Star Fleet, except for the starships on 2-hole stands (Jedi Star Fighter or Slave 1), which only cover two spaces. In this case, simply enter both coordinates.
Figure 6: To enter the position of this Star Destroyer, you only need to enter coordinates D3 and D7. The computer will automatically enter the other spaces in between.
To Enter Coordinates
Always press the letter key first (A-J), followed by the number key (1-14).
If you make a mistake at any point, press the CANCEL button. You will hear the same prompt, for example, «STAR CRUISER REPORTING — ENTER COORDINATES», asking you to try again.
If you try to enter coordinates which the computer will not accept, you will hear «INCORRECT COORDINATES». This might be because you are trying to place a Star Cruiser too close to the edge of the grid, or later in the setup procedure, if you try to place a starship over a space that is already occupied. When you hear this message, simply enter a new set of coordinates.
When you have entered correct coordinates for your Star Cruiser, press the FIRE/ENTER button. Your game unit will automatically register the information.
- You will now hear the next prompt from the computer «MILLENNIUM FALCON REPORTING» and «ENTER COORDINATES». Repeat the same sequence as above: choose the position for your Millennium Falcon on the grid (remember it takes up four spaces), place your plastic Millennium Falcon in a location on your base grid, enter two coordinates, then confirm its position by pressing FIRE/ENTER.
- Your game unit will prompt you to complete the programming for all starships in your fleet, continuing with your X-Wing Star Fighter, Naboo Star Fighter and finishing with your Jedi Star Fighter.
- IMPERIAL COMMANDER: When programming is complete for the Republic Commander, you will hear «IMPERIAL SIDE COMMANDER ENTER STAR FLEET CONFIGURATION». The Imperial side of the game unit is now activated. If you are the Imperial Commander, it is now your turn to follow the same programming procedure, as described above. You will deploy your starships in the following order: Star Destroyer, Sith Infiltrator, Tie Interceptor, Droid Star Fighter, and Slave 1.
Note: The Imperial Commander can choose Auto Configuration (see page 10), even if the Republic Commander has chosen a Custom Configuration and deployed his/her starships one by one. The reverse also applies: if the Republic Commander chooses Auto Configuration, the Imperial Commander can choose Custom Configuration.
- When both players' sides have been programmed, you will hear… «AWAITING ORDERS FROM REPUBLIC SIDE COMMANDER…».
Auto Configuration Steps
-
To select Auto Configuration, press the number "2" button. You will hear «AUTO CONFIGURATION SELECTED» then «ENTER COORDINATES».
-
Check through the 100 available deployment formations (see pages 22-42). When you have found one that suits your battle strategy, enter its coordinates by pressing the appropriate letter and number buttons.
If you make a mistake at any point, press the CANCEL button. You still hear the same prompt «AUTO CONFIGURATION SELECTED — ENTER COORDINATES» asking you to try again.
If you try to enter coordinates which the computer will not accept, you will hear «INCORRECT COORDINATES». This might be because you have entered a set of coordinates that do not correspond to any of the options available. When you hear this message, check the coordinates for your chosen configuration and enter them again.
-
When you have correctly entered your chosen coordinates, press FIRE/ENTER to confirm.
-
Now place the matching plastic starships on your base grid by inserting their tabs into the grid, so that their positions match those of your chosen Auto Configuration.
If you are the Republic Commander and have finished entering Auto Configuration, the Imperial Commander will now hear «IMPERIAL COMMANDER — ENTER STAR FLEET CONFIGURATION». It is now the Imperial Commander's turn to choose Custom Configuration (see page 8) or Auto Configuration as described above.
Automatic Shutoff
Your game unit will shut off automatically after 10 minutes if no buttons have been pressed.
If no buttons have been pressed for one minute, you will hear a series of beeps. This is a prompt warning you that your game unit will shut down. You will hear two further signals at one-minute intervals. The unit will then switch off approximately seven minutes later. To "wake up" your unit during this 10-minute shutoff phase and continue the game where you left it, press the REPEAT button. You will hear the last voice command again, to remind you of where you were in the game.
As the game unit switches off (whenever you press the ON/OFF button or when the unit goes into automatic shutoff), you will hear three beeps and the lights will flash three times.
Note: Once the game unit is switched off, the current game is lost.
Playing the Game
Throughout the battle, you will receive information from your Systems Control. Systems will confirm your orders and report back on the results of your attacks. You will also be in constant live satellite contact with each of the starships' captains at the battle scene. As the conflict develops, use this information to plan your next attack and develop your strategy.
-
When you hear «AWAITING ORDERS FROM REPUBLIC SIDE COMMANDER…» insert a white peg in a location of your choice on the upright target grid — this represents the area occupied by your opponent's Star Fleet. Now read off the corresponding letter down the side and the number along the top to identify the peg's position.
Figure 7: This target is located at B3.
-
Now enter those coordinates into the computer by pressing the matching letter and number buttons on your game unit, and pressing the FIRE/ENTER button.
-
Hit or Miss? When the missile reaches its target, you will be able to tell from the sound whether you have scored a hit or a miss.
-
If you hit a starship, you'll hear the explosion, then your starship's captain saying «SYSTEMS CONFIRMS HIT AT…» followed by the coordinates you entered. Replace the white peg on your upright target grid with a red one to indicate a "Hit."
Your opponent records the hit by inserting a red peg in the corresponding space on his/her starship's stand.
Figure 8: You hit a starship located at target B3. You'll hear: «SYSTEMS CONFIRMS HIT AT BESPIN 3».
-
If you miss, you'll hear only the sound of the missile launch, followed by a deathly silence, then, for example, «SYSTEMS CONFIRMS MISS AT BESPIN 3». There is no starship located over your target space. Leave the white peg on your upright target grid in position. This now indicates a "Miss."
-
-
In a Classic Mission game, after firing one shot, your turn ends and you'll hear «AWAITING ORDERS FROM IMPERIAL COMMANDER». It's now your opponent's turn to choose a target and follow steps 1-3 above.
-
Keep taking turns, firing shots at the enemy. By keeping an accurate record of where you scored a hit or a miss (using the pegs on your upright target grid), you'll begin to see where your opponent has placed his/her starships.
Note: If you score a hit on an enemy starship, and later in the battle you land a hit on the same space, this will be reported as a miss.
Destroying a Starship
When you score a hit that destroys a starship (when all of its spaces have been hit), the computer will let you know. For example, a third hit on a Droid Star Fighter will destroy it, and you will hear systems confirm «TARGET NEUTRALIZED — DROID STAR FIGHTER HAS BEEN DESTROYED».
Winning the Game
When you have destroyed the fifth and final enemy starship, systems will announce «ENEMY FLEET DESTROYED — CONGRATULATIONS, ADMIRAL!». You've won the battle!
Galactic Star Fleet coding system. All starship personnel must use the Galactic Star Fleet coding system to refer to the letters in the grid coordinates. Use the chart below as a reminder:
A = Alderaan™ · B = Bespin™ · C = Chewie · D = Dagobah™ · E = Endor™ · F = Force™ · G = Geonosis™ · H = Hoth™ · I = Imperial™ · J = Jedi™
Starting a New Game
To play a new game, press the ON/OFF button to switch the unit off. Remove the pegs and starships from your grid; and then press the ON/OFF button again to switch the unit back on. This will return you to the very beginning of the setup procedure (choose between 2-player or solo play, or select another mission).
If you have finished playing, press the ON/OFF button once and place all starships and pegs in their storage areas. Close the game unit.
Entered the Wrong Coordinates?
If you make a mistake or change your mind, you can change the letter or number of your chosen target, as long as you do so before pressing the FIRE/ENTER button. Press the CANCEL button immediately after pressing the letter or number button and make another choice.
Advanced Mission
Reserved for experienced personnel only, the ADVANCED MISSION presents new threats and opportunities. Its special features are summarized below and described in detail over the following pages.
- The Rebel Star Cruiser and Imperial Star Destroyer are equipped with two Ion Cannons, which can fire in two distinct Firing Patterns.
- The Millennium Falcon and Sith Infiltrator are equipped with one devastating Concussion Missile.
- The X-Wing Star Fighter and Tie Interceptor can fire two Laser Cannons, each with two Firing Patterns.
- The Naboo Star Fighter and Droid Star Fighter can fire two Proton Torpedoes, in four different directions, sweeping straight across the enemy target zone.
- The Jedi Star Fighter and Slave 1 ship can scan for enemy starships in an area. They can do this 3 times in the game.
- Each side has one Super Laser Cannon shot to use once in the game. This cannon has the power to destroy an entire starship if it scores a hit.
Selecting the Advanced Mission
Follow the normal Start-up steps 1-5 (see page 6), and select the ADVANCED MISSION by pressing the number "4" button. You will hear «ADVANCED MISSION SELECTED». Complete the Start-up procedure as normal, following the voice prompts.
Playing the Advanced Mission
On your turn, play the game as you would a Classic Mission. With the ADVANCED MISSION, however, you can bring special weapons into play. Here's how…
Using Your Special Weapons
To use a special weapon on your turn, simply press one of the buttons along the top row of your keypad, as described in the following sections.
Note: These buttons are deactivated during a Classic, Salvo or Bonus Mission.
When selecting grid coordinates for special weapons or scanning, make sure each coordinate is appropriately located. If not, you will hear «INCORRECT COORDINATES».
Rebel Star Cruiser and Imperial Star Destroyer: 2 Ion Cannons
-
Press the Ion Cannon button. You will hear «STAR CRUISER (or STAR DESTROYER) REPORTING — COMMANDER — ION CANNON ARMED» and then «ENTER FIRING PATTERN».
The Ion Cannon can be fired in two distinct Firing Patterns.
Figure 9: Firing Pattern 1; Firing Pattern 2.
-
Look at your upright target grid and decide where you want your Ion Cannon to fire. Your choice of Firing Pattern will depend on where you think your enemy might have deployed his/her Star Fleet. Insert five white pegs on your target grid to mark your Firing Pattern.
-
Activate your chosen Firing Pattern by pressing the corresponding number button (1 or 2). You will hear, for example, «FIRING PATTERN 1 SELECTED, ENTER TARGET COORDINATES».
-
Enter the coordinates for the space in the center of the Firing Pattern only (the computer will take care of the other four spaces, matching your chosen Firing Pattern). If you make a mistake when entering your coordinates, press CANCEL immediately and, when prompted, try again. If you have chosen a set of coordinates which the computer will not accept, you will hear «INCORRECT COORDINATE». Enter new coordinates.
-
Press FIRE/ENTER to confirm your orders. You will hear «TARGET CONFIRMED — FIRE WHEN READY».
-
Press FIRE/ENTER again. You will hear an explosion if you have hit one or more enemy starships, or nothing if all of the spaces covered by the chosen Firing Pattern were free of starships.
Note: Remember, if your enemy destroys your Star Cruiser or Star Destroyer before you use your Ion Cannons, the cannons are destroyed as well.
Strike Capability: During any mission, you will only be able to use two Ion Cannons (and only one on a turn). You can use a different Firing Pattern for each, or the same for both launches.
Keeping Track: Hits and misses will be confirmed by the computer. As you listen to the voice of your Commanders, mark the hits on your upright target grid by replacing the white pegs with red ones, and leave the white pegs for any misses where they are.
Millennium Falcon and Sith Infiltrator: 1 Concussion Missile
-
Press the Concussion Missile button. You will hear «MILLENNIUM FALCON (or SITH INFILTRATOR) REPORTING — COMMANDER — CONCUSSION MISSILES ARMED» and then «ENTER TARGET COORDINATES».
The Concussion Missile will hit any enemy starships in a square covering nine spaces.
Figure 10: The Concussion Missile will hit all enemy starships in a square area of nine spaces.
-
Look at your upright target grid and decide where you want your Concussion Missile to hit. Insert nine white pegs on your target grid to mark your Firing Pattern.
-
Enter the coordinates for the space in the center of the Firing Pattern only (the computer will take care of the other eight spaces that surround it). If you make a mistake when entering your coordinates, press CANCEL immediately and, when prompted, try again. If you have chosen a set of coordinates which the computer will not accept, you will hear «INCORRECT COORDINATE». Enter new coordinates.
-
Press FIRE/ENTER to confirm your orders. You will hear «TARGET CONFIRMED — FIRE WHEN READY».
-
Press FIRE/ENTER again. You will hear an explosion if you have hit one or more targets, or nothing if all of the spaces covered by the missile's Firing Pattern were free of starships.
Note: If your enemy destroys your Millennium Falcon or Sith Infiltrator before you use your Concussion Missile, that missile is no longer available.
Strike Capability: During any mission, you will only be able to use one Concussion Missile. Although this means you will have to choose carefully when to use it, remember that its effect is devastating!
X-Wing Star Fighter and Tie Interceptor: 2 Laser Cannons
-
Press the Laser Cannon button. You will hear «X-WING STAR FIGHTER (or TIE INTERCEPTOR) REPORTING — COMMANDER — LASER CANNONS READY» and then «ENTER FIRING PATTERN».
The Laser Cannon can be used in two distinct Firing Patterns.
Figure 11: Firing Pattern 1; Firing Pattern 2.
-
Look at your upright target grid and decide where you want your Laser Cannon to hit. Your choice of Firing Pattern will depend on where you think your enemy might have deployed his/her Star Fleet. Insert three white pegs on your upright target grid to mark your Firing Pattern.
-
Activate your chosen Firing Pattern by pressing the corresponding number button (1 or 2). You will hear, for example, «FIRING PATTERN 1 SELECTED, ENTER TARGET COORDINATES».
-
Enter the coordinates for the space in the center of the Firing Pattern only (the computer will take care of the other two spaces, matching your chosen Firing Pattern). If you make a mistake when entering your coordinates, press CANCEL immediately and, when prompted, try again. If you have chosen a set of coordinates which the computer will not accept, you will hear «INCORRECT COORDINATE». Enter new coordinates.
-
Press FIRE/ENTER to confirm your orders. You will hear «TARGET CONFIRMED — FIRE WHEN READY».
-
Press FIRE/ENTER again. You will hear an explosion if you have hit one or more targets, or nothing if all of the spaces covered by your chosen Firing Pattern were free of starships.
Strike Capability: During any mission, you will only be able to use two Laser Cannons (and only one on a turn). You can use a different Firing Pattern for each, or the same for both launches.
Destroyed or Out of Ammo? If you try to call on a starship's special weapons when that starship has been destroyed, or if you have used all the ammunition available (for example, after you have used your Star Cruiser's two Ion Cannons), you will hear, for example, «MISSILE UNAVAILABLE» or «STAR CRUISER HAS BEEN DESTROYED». You will then be asked for new orders.
Naboo Star Fighter and Droid Star Fighter: 2 Proton Torpedoes
-
Press the Proton Torpedo button. You will hear «NABOO STAR FIGHTER (or DROID STAR FIGHTER) REPORTING — COMMANDER — TORPEDO CANNON ARMED» and then «ENTER FIRING PATTERN».
-
The torpedoes can be launched in two distinct Firing Patterns.
Figure 12: Firing Pattern 1 (Vertical); Firing Pattern 2 (Horizontal).
-
Activate your chosen Firing Pattern by pressing the corresponding number button (1 or 2). You will hear the computer confirm, for example, «FIRING PATTERN 1 SELECTED» and then «ENTER PATH COORDINATES».
Each Torpedo will travel in a straight line from a point along the edge of the grid, which you select. Depending on the Firing Pattern you select, it will travel vertically or horizontally from one side of the grid to the other. If it hits a target along its course, the torpedo will explode and travel no further.
Look at your upright target grid and decide along which line of spaces you want your torpedo to travel. Your choice of Firing Pattern will depend on where you think your enemy might have deployed his/her starships. Press the corresponding number button to select your Firing Pattern.
-
The direction in which the torpedo travels is determined by the point from which it starts its course. To activate your chosen Firing Pattern, simply enter the coordinates for the space at the edge of the upright target grid that marks the starting point of your torpedo's course. Insert a white peg on the grid to mark that starting point.
Figure 13: You've not fired at any targets along this line yet and you suspect there might be an enemy starship somewhere along this axis. Choose Firing Pattern 2 to fire your Torpedo horizontally across the grid, and choose space J14 as your starting point. Your Torpedo will travel westward from right to left.
If you make a mistake when entering your coordinates, press CANCEL immediately and, when prompted, try again. If you have chosen a set of coordinates which the computer will not accept, you will hear «INCORRECT COORDINATE». Enter new coordinates.
-
Press FIRE/ENTER to confirm your orders. You will hear «TORPEDO PATH CONFIRMED — FIRE WHEN READY».
Strike Capability: During any mission, you will only be able to use two Proton Torpedoes (and only one on a turn). You can fire in different directions for each launch, or the same if you so choose.
Strategy Hint: Even if your torpedo fails to hit a target along an entire row or column, all is not lost! At least you can mark that row with white "Miss" pegs and not waste time and ammunition firing at those spaces again.
Scanning
Instead of firing a weapon on your turn, you may scan a small area for enemy starships.
-
Press the SCAN button followed by the Long Range Scan button. You will hear «JEDI STAR FIGHTER (or SLAVE 1) REPORTING — COMMANDER — LONG RANGE SCANNER ACTIVE» and then «ENTER SCAN COORDINATES».
-
Your Scanner has the capability to detect enemy activity in a given area. The scanner's ability is limited to scanning an area of nine spaces at a time (3 by 3 spaces) and cannot confirm the exact position of starships within that area or the number of starships.
Figure 15: Your Jedi Star Fighter will scan a square on nine target spaces.
-
Enter the coordinates for the space in the center of the scanning pattern only (the computer will take care of the other eight spaces that surround it). If you make a mistake when entering your coordinates, press CANCEL immediately and, when prompted, try again. If you have chosen a set of coordinates which the computer will not accept, you will hear «INCORRECT COORDINATE». Enter new coordinates.
Insert a blue "Scan" peg into your upright target grid at the same coordinates you just entered.
-
Press the SCAN button to confirm your orders. The scan result is then reported as follows:
- If the scan finds something in your target area, you will hear «SCAN DETECTS ENEMY VESSEL — PRECISE LOCATION UNKNOWN». Even though you cannot determine where the enemy lies, insert eight more blue pegs around the one you just placed on your upright target grid. This will highlight the area as one concealing an enemy presence. On subsequent turns, you can concentrate your attacks in this area.
- If the scan finds nothing in your target area, you will hear «SCAN DETECTS NO ENEMY VESSELS IN TARGETED AREA». You now know there are no enemy ships in the area and can mark all nine spaces covered by the scan with white "Miss" pegs. Even though you have found nothing in the area of your scan, the scanner can help you narrow down the precise location of the enemy.
You can make as many as three scans during a game (one per turn), as long as your Jedi Star Fighter (or Slave 1) has not been destroyed. If this happens and you try to use its scan capability, you will hear «LONG RANGE SCANNER UNAVAILABLE». You will then be asked for new orders.
Super Laser Cannon
Each player has one Super Laser Cannon that can be used once in the game. The Super Laser Cannon will destroy an entire starship if it hits.
- To use your Super Laser Cannon, press the Super Laser Cannon button on the top row of your keypad. You will hear «SUPER LASER CANNONS READY — COMMUNICATION ESTABLISHED — ENTER LASER COORDINATES».
- If you do not hit a starship, you will hear «SYSTEMS CONFIRMS MISS AT-(COORDINATES)».
- If you hit a starship, you will hear an explosion followed by all the remaining coordinate locations for that starship, followed by the name of the starship having been destroyed.
Deployment Formations
The manual's Deployment Formations pages (pp. 22–41) show the 100 predetermined Auto Configuration layouts, each as a Republic grid and an Imperial grid. They are numbered A1 through J10, in ten groups of ten: A1–A10, B1–B10, C1–C10, D1–D10, E1–E10, F1–F10, G1–G10, H1–H10, I1–I10 and J1–J10. Each layout is a picture of starship positions on a 10 × 14 grid, so it cannot be reproduced as text here. To choose a formation, find its label on these pages and enter its coordinates as described under Auto Configuration.
Transcriber note: the formation layouts are graphics only in the source. They are indexed here by label and are not transcribed as individual grids.
Maintenance
- Handle the game carefully.
- Store the game away from dusty or dirty areas.
- Keep the game away from moisture or temperature extremes.
- Do not disassemble the game. If a problem occurs, remove and replace the batteries to reset the computer.