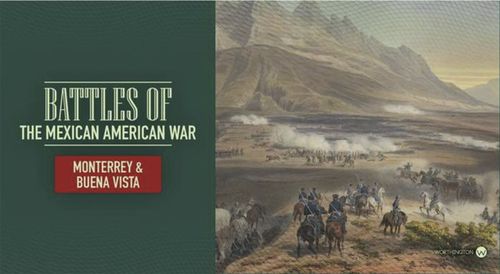
Battles of the Mexican American War: Monterrey & Buena Vista
Battles of the Mexican American War: Monterrey & Buena Vista Rulebook
Table of Contents
Table of Contents
Game Board
The game boards depict the key terrain of both battlefields. A hex grid overlays the map, regulating movement and the impact of terrain on movement and combat. Victory Point (VP) stars are marked on the board. Blue stars score VPs for the Americans when occupied, and green stars do the same for the Mexicans. The board also includes charts for tracking turns, artillery points, leadership points, and a combat results table.
Game Units
Army Units: Counters represent American and Mexican infantry and cavalry. Each unit has two sides: full strength and reduced strength. Only one unit may occupy a hex.
Combat Factor (CF): The first number on a unit (on the left for infantry, on the top for cavalry), representing its strength. Modified by terrain, leadership, and artillery.
Movement Points (MP): The second number, representing how many hexes the unit may move per turn. Affected by terrain, roads and leadership.
Army units with a yellow "M" circle are for Monterrey; those with a blue "B" circle are for Buena Vista.
Leadership Points: Leaders in battles are reflected by Leadership Points, and are tracked on the game board. They represent their ability to rally the troops, push attacks and force march units. Each turn a player, when active, can use 1 Leadership Point. They vary by side and battle and are limited.
Artillery Points: Artillery firepower is represented by Artillery Points, which are tracked on the game board. They are used to provide defensive support to a unit when attacked and can target the active player's units to break up attacks. Each turn a player, when not active, can use 1 Artillery Point. They vary by side and battle and are limited.
Game Markers: Track turns, artillery points, leadership points, etc., and are used in both battles.
Dice: Each player rolls a die to resolve combat.
Game Setup
Battle setups are shown, starting on page 12. Use these setup charts for each battle to determine starting units, their placement, entry turns, and which player goes first. Place all units at full strength. Artillery and leadership markers are placed on their respective tracks at starting values. The turn marker starts at space 1.
Editor's note: the setup pages in this document show the deployment areas and each side's starting Leadership and Artillery Points. The unit-by-unit placement is not printed as text in this rulebook, and the setup diagrams show no counters, so it is not transcribed here; see the setup sections below.
Sequence of Play (Per Turn)
Each turn:
- First player moves then attacks.
- Second player moves then attacks.
For each active player:
- Move any desired units. All units may move, but do not have to move.
- Conduct and resolve attacks.
Unit Movement
- Units move once per turn and may move up to their MP value.
- Movement is from one adjacent hex to another; skipping hexes is not allowed.
- MP cannot be saved or transferred.
- Units cannot pass through enemy units but may move through friendly units.
- Units cannot end moves in an occupied hex.
- Leadership points may be spent to grant +2 MP to one unit per turn.
Movement Costs
- 1 MP per hex.
- +1 MP for woods, hills, ravines, elevation gains, and river crossings.
- +1 MP to move adjacent an enemy unit.
- Movement costs are cumulative.
Example: Crossing a river and entering woods costs 3 MP.
- Moving on connected roads costs 0.5 MP per hex (rounded up).
- Roads negate terrain movement penalties.
Example: A 3 MP unit can move 6 hexes on roads, regardless of terrain.
Example: A 4 MP unit in woods adjacent to a road pays 2 MP to enter the road (1 MP for hex + 1 MP for woods), then moves along two road hexes in woods for 1 MP, and enters a clear hex for 1 MP.
Movement Restrictions
- Units start and complete moves one at a time.
- Must stop when moving adjacent to an enemy.
- May not move adjacent to an enemy if already adjacent.
- Cannot enter swamp hexes.
- Complete all movement before attacks.
Reinforcements
Enter on the designated hex or hexes or an adjacent unblocked hex.
Combat
Attacking
Only the active player's units may attack. Once movement is complete, any active unit (moving or not) adjacent to an enemy may attack (not mandatory).
- For each attack, declare target (only one unit) and attackers (one or more if adjacent).
- Total the CFs for the attacker unit(s) and defender unit for each attack.
- Leadership points may add +2 CF to one infantry attacking unit (must be declared before combat).
The attacking player states which defending unit will be attacked and which of his units adjacent to the defending unit he is using in the attack. This is considered one attack for which the total combat factors for the attacker and defender must be determined. The active player determines where attacks will occur and the order the attacks are resolved.
An active player may decide which adjacent opposing units to attack, even when adjacent to more than one opposing unit. Attacking all adjacent units is not required to attack a single adjacent unit. He may also decide which of his units to use in an attack on an opposing adjacent unit.
Example: The active player has 3 units adjacent to a defending unit. He may use 1, 2, or all 3 to attack, or he could decide not to attack.
Note: In combat the defending player always has only one unit defending one hex.
Defending
- Only one defending unit per hex.
- Terrain modifiers apply to defender: +2 CF for woods, hills, forts, towns, elevation that the defender occupies, river, ravine, and bridge hex lines the attack crosses.
- Terrain modifiers are cumulative.
- Artillery points may add +2 CF to the defending unit (declared before die roll).
Example: A 3 CF unit on a hill defends with 5 CF.
If any attacker crosses a river or elevation hex line, the defender receives the terrain modifier.
Combat Resolution
The attacking units total all CF of the units attacking one defending unit in a hex plus any CF additions for leadership points used in the attack.
The defending unit adds its CF and any terrain effects of the defending hex plus any additions for supporting artillery after the attacker totals his.
CF Differential Limit: Regardless of how many modifiers (including the unit CF) are applied, the difference between the attacker and defender (and vice versa) CF totals cannot exceed 10. Any that do are ignored. This is determined before attacker and defender die rolls in combat.
Example: 14 CF attacking 2 CF defending = use 10 CF for the attacker.
To resolve combat for each attack:
- Active player is always the attacker.
- Total CF for attacking units and defending unit.
- Maximum CF difference between attacker and defender is 10.
- Each player rolls 1d6.
- Add the result to the total CF for a "combat number."
Winning Combat
Compare combat numbers:
- Defender wins if equal or higher: attackers retreat.
- Attacker wins if higher: defender retreats.
Losses
- Win by 4 to 6: loser takes 1 loss.
- Win by 7 or more: loser takes 2 losses.
Losses are applied by flipping a full-strength unit to its reduced side, or removing an already reduced unit.
Retreats
- Move 1 hex away towards friendly units. Avoid occupied hexes (enemy or friendly).
- If no valid retreat hex: take 1 additional loss.
- Retreats use no MF.
- Attacker may occupy vacated hex.
Example: 5 CF attacks a full strength 3 CF in woods (+2 CF). Totals are 5 vs. 5. Rolls: attacker 5, defender 1. Totals: 10 vs. 6. Attacker wins, defender retreats and takes 1 reduction loss by flipping unit to its reduced side.
Board and Game Explanation
The following key identifies the board's features. Numbers 1 to 12 are the callouts on the printed board diagram.
- Clear Terrain: Cost 1 MP to move into each hex.
- Woods: Add +1 MP to enter. +2 CF to Defender.
- Elevation Change: Add +1 MP to go up. +2 CF to Defender.
- River and Ravine:* Can be crossed for +1 MP, unless at a bridge. +2 CF to Defender. *Ravines (shown here) in Buena Vista only.
- Roads: Cost 1/2 MP when used and negates terrain cost.
- Town: Cost 1 MP to enter. +2 CF to Defender.
- Fort: Add +1 MP to enter. +2 CF to Defender.
- Bridge: Negates River MP cost. +2 CF to Defender.
- A. Turn Track: Start at 1 and progress up the track. B. Artillery Track: Each player starts on the number provided in the setup and moves down the track as artillery points are used. C. Leader Track: Each player starts on the number provided in the setup and moves down the track as Leader points are used.
- A. Leadership Uses: Shows what Leadership points can be used for by the active player. B. Combat Results: Shows effects on winner and loser in combat.
- Artillery Uses and Target Chart: Shows what Artillery points can be used for by the non-active player. Use the chart for results when targeting active player units.
Artillery Use
Only the non-active defending player may use artillery in a turn. 1 point may be used per turn, for one unit. Artillery points are reduced as spent.
Artillery Options:
-
Add +2 CF to a defending unit. Must be declared before dice rolls. Use +2 CF marker to show benefiting unit.
Example: 6 CF vs. 2 CF. Defender adds artillery (now 4 CF). Rolls: attacker 3, defender 4. Totals: 9 vs. 8. Attacker wins; defender retreats, no reduction loss.
-
Target one enemy unit within 3 hexes of friendly infantry. Must be done after active player movement, but before attacks announced. Use the artillery target chart.
-1 die modifier if target is in woods, hills, or towns.
Example: The non-active player spends 1 artillery point and targets an enemy unit 3 hexes away from one of his infantry units. He rolls a 5 and checks the result on the artillery target table. It causes the enemy unit to retreat 1 hex.
Example: The non-active player has an infantry unit attacked by 3 adjacent enemy units. He spends 1 artillery point and targets 1 of them before the combat dice are rolled. The target roll is a 4 and causes the enemy adjacent unit to retreat 1 hex away from the defender.
Artillery Target Chart:
| Die Roll | Result |
|---|---|
| 1 | No Effect |
| 2 | No Effect |
| 3 | No Effect |
| 4 | Retreat 1 Hex |
| 5 | Retreat 1 Hex |
| 6 | Reduce & Retreat 1 Hex |
Editor's note: Buena Vista's special rule (American +1 to artillery target die rolls) modifies this chart's die roll; see the Buena Vista Setup section.
Leadership Use
Only the active attacking player may use leadership points. Use 1 per turn for one unit. Use leadership status markers to show benefiting unit. Leadership options:
- Force March: +2 MP to one infantry unit.
- Charge!: +2 CF to one infantry unit's attack (must be before opposing artillery is applied).
- Rally: Before movement is started, roll a die; on a 4–6 result, flip one reduced unit, not adjacent to enemies, to full strength. Flipped unit may not move this turn.
Victory Conditions
Each battle has specific VP objectives. General rules:
- 1 VP per eliminated enemy unit.
- 1 VP per occupied VP star of your side's color.
- Controlling an opponent's VP does not score.
- Some hexes have shared VP objectives.
Victory is awarded instantly if a side reaches its VP goal. Otherwise, the side with the most VPs at the end of the game wins.
Monterrey Setup
Editor's note: the source prints this heading as "MONTERRY SETUP" (misspelled); it is the Monterrey battle.
Americans set up all units first in Area 1. Mexicans set up all units in Area 2 second. Americans move first.
American Setup: Leadership Points: 6. Artillery Points: 7.
Mexican Setup: Leadership Points: 4. Artillery Points: 4.
Winning: Automatic win at 7 VP or have the highest VP value at the end of the game wins, ties go to the Mexicans.
Special Rules: Black Fort adds +5 CF to any Mexican Infantry unit in hex I4.
Buena Vista Setup
Mexicans set up all units first in Area 1. Americans set up all units in Area 2 second. Mexicans move first.
American Setup: Leadership Points: 7. Artillery Points: 9.
Mexican Setup: Leadership Points: 5. Artillery Points: 3.
Winning: Automatic win at 7 VP or have the highest VP value at the end of the game wins, ties go to the Americans.
Special Rules: American add +1 to all their Artillery Target die rolls.
Things to Remember
Combat Resolution: Total the attacking CF and defending CF, then determine if a CF differential applies, maximum of 10. Next, both roll a combat die, add results to their CF totals to determine combat results. Compare totals:
- Defender wins if equal or higher, attackers retreat.
- Attacker wins if higher, defender retreats.
- Win by 4 to 6: loser takes 1 loss.
- Win by 7 or more: loser takes 2 losses.
Leadership Uses: Spend 1 Leadership Point when active. Each point can be used in one of the following ways for 1 unit:
- Force March: +2 MP to an infantry unit
- Charge: +2 CF to an infantry unit
- Rally: Roll a die, a 4–6 flips a unit back to full strength
Artillery Uses: Spend 1 Artillery Point when NOT active. Each point can be used in one of the following ways for 1 unit:
- Add +2 CF to a defending infantry unit.
- Target enemy unit within 3 hexes of a friendly infantry, use chart. -1 DRM for target in terrain.
Artillery Target Chart:
| Die Roll | Result |
|---|---|
| 1 | No Effect |
| 2 | No Effect |
| 3 | No Effect |
| 4 | Retreat 1 Hex |
| 5 | Retreat 1 Hex |
| 6 | Reduce & Retreat 1 Hex |