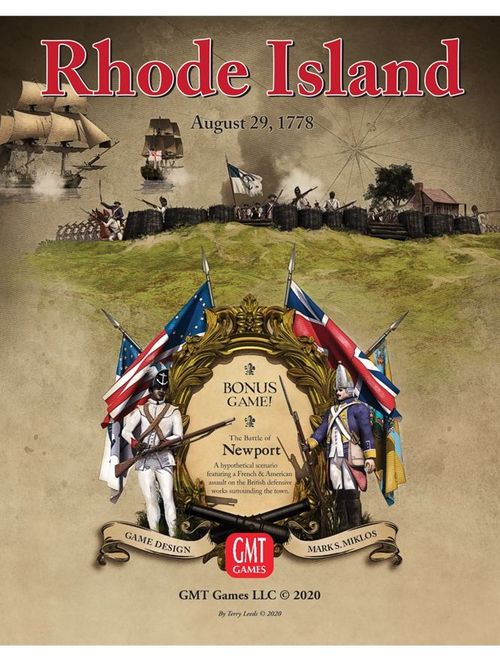
The Battles of Rhode Island & Newport
The Battles of Rhode Island & Newport Rulebook
Table of Contents
Table of Contents
- Part One: Series Rulebook
- 1. Introduction
- 2. Components
- 3. Terminology
- 4. How to Win
- 5. Sequence of Play Outline
- 6. Initiative
- 7. Stacking
- 8. Zones of Control
- 9. Movement
- 10. Rifle Fire
- 11. Defensive Artillery Fire
- 12. Close Combat
- 13. Combat Results
- 14. Leaders
- 15. The Rally Phase and Unit Morale
- 16. Army Morale
- Tactical Matrix
- Close Combat Table
- Expanded Sequence of Play
- Part Two: The Battles of Rhode Island & Newport Exclusive Rulebook
- Counter Sheet Notes for Vol. 9
- RHODE ISLAND
- NEWPORT
Part One: Series Rulebook
Great Battles of the American Revolution — Series Rulebook. Game design by Mark S. Miklos.
1. Introduction
This Series Rulebook provides the baseline rule set that applies to all volumes in GMT's Battles of the American Revolution series. Individual volumes contain Exclusive Rules applicable to that volume only. In cases where a volume's Exclusive Rules conflict with the Series Rules, the Exclusive Rules take precedence.
2. Components
See each volume's specific rules for the list of components included in each game.
2.1 Counters
Unit Color Codes: Units from different nationalities each have their own unique color for easy identification. In some volumes units have shaded stripes across the top to denote which type of unit they are, or their Movement Allowance may be highlighted to identify belonging to a specific formation or that specific rules apply to those units.
2.2 Units and Leaders
Some units are "two-step" units. The front side is their full strength side; the reverse (reduced) side generally has a lower strength point and unit morale value. Units that only have one side are "one-step" units and are eliminated if they suffer a step loss.
The full strength side of all units contains their unit name, setup hex or turn of entry, unit morale, strength points, and movement allowance.
All leader counters list the leader name, setup hex or turn of entry, rank, close combat DRM, leadership DRM, and movement allowance.
2.3 The Die
Games include 10-sided dice that are used to resolve certain game functions. The 0 is treated as a 0 (not a 10).
2.4 Game Scale
Unit Scale: Each strength point of troops equals approximately 100 men. Each artillery strength point equals two cannon. See Exclusive Rules for exceptions.
Map Scale: Each hex is approximately 200 yards from hexside to hexside.
Time Scale: Each turn represents approximately one hour. For volumes with "strategic" turns, those represent one or more days each.
3. Terminology
3.1 Key Terms
Combat Unit: Any type of infantry, cavalry, or artillery unit. Leaders and markers are not combat units.
First Fire Marker: Indicates rifle units that have not yet performed their first Fire Combat.
Die Roll Modifier (DRM): An event or situation which causes a die roll to be adjusted.
Highest Ranking Leader: The Leader that must be in command if two or more leaders are present during close combat. Leader seniority is listed in all Exclusive Rules. NOTE: If more than one leader is present, any leader may be selected by the owning player to satisfy a casualty requirement.
Into Fieldworks: An attack across a fieldworks hexside from outside the hex which contains the fieldworks symbol (see Terrain Keys in volumes and battles with fieldworks).
Light Infantry: Light Infantry units are designated by the symbol "LT" on the counter.
Line of Sight (LOS): The ability of combat units to see each other across intervening hexes.
Militia: Militia is often (but not always) a lower quality unit consisting of volunteers without proper military training.
Movement Points (MPs): Used to regulate how far a unit can move in one game turn.
Out of Fieldworks: An attack or ZOC which crosses a fieldworks hexside from the hex which contains the fieldworks symbol (see Terrain Keys in volumes and battles with fieldworks).
Parade Order: A combat unit is in Parade Order if it is not disrupted or shattered.
Phasing Player: The player whose player turn it is, and is therefore moving units or assigning Close Combats. The other player is considered the non-phasing player.
Rally on Me Marker: These markers are placed on stacks containing both Disrupted/Shattered and Parade Order combat units as a reminder to make morale checks in the Rally Phase.
Rifle Unit: A light infantry or infantry unit which is armed with rifles. (Design Note: Rifles permitted units to fire over greater distances than units solely armed with muskets.) There are two types of rifle units:
- Those designated by a white "R" in a black circle. These units afford their opponent a DRM if they participate in close combat (this is a benefit to the opponent).
- Those designated by a black "R" in a white circle. These units do not afford their opponent a DRM if they participate in close combat (i.e., there is no benefit to the opponent).
Musket/Rifle Unit: These units represent mixed musket/rifle formations. These units do not afford their opponent a DRM if they participate in combat (i.e., there is no benefit to the opponent). The SP values on the counter are read as Close Combat/Rifle Fire, with each value applied in the corresponding turn phase. Example: The values on the unit shown are read as a Combat Factor of 2 and Fire Combat value of 1, and four movement points.
Strength Points (SPs): The combat strength of a unit. Used for stacking, artillery/rifle fire and close combat.
Surrounded: When enemy units or their ZOC occupies all six hexes adjacent to a unit. Important: For this rule only, friendly units negate enemy ZOC in their hex.
Up Slope: Attack across a slope hexside into the hex which contains the solid line portion of the slope symbol. Movement is affected in both directions across a slope hexside (see Terrain Keys and Player Aid Cards for each volume).
Victory Points (VPs): Used to determine which side has won the battle. VPs are gained by eliminating and capturing enemy steps, units and leaders, by capturing and/or holding terrain objectives, and by choosing to influence certain game actions.
Zone of Control (ZOC): The ability of a unit to exert influence over an adjacent hex.
4. How to Win
There are three victory levels, Decisive, Substantial, and Marginal.
Decisive Victory: Conditions for Decisive victory are described in each volume's Exclusive Rules.
Substantial Victory: Baseline conditions for Substantial victories are described in rule 16.3, however some Exclusive Rules modify the threshold for Substantial victories.
Marginal Victory: Conditions for Marginal victories are described in Exclusive Rules. NOTE: in some volumes one or both sides may not be able to score a Marginal victory.
VP Clarifications:
- A 2-step unit that is eliminated is worth 2 VPs whereas a 2-step unit that is captured is worth only 1 VP. In other words, captured units are worth 1 VP regardless of whether they have one or two steps. Eliminating a unit will destroy its organizational staffing which means more effort than providing replacements must be expended to return the unit to fighting capacity.
- 2-step units that begin the game on their reduced side only count as 1 VP if eliminated.
- Shattered units on the board at the end of the game end are worth 1/2 VP.
5. Sequence of Play Outline
Each game turn consists of two player turns. During the initiative segment, players determine which player executes their player turn first. Each player turn consists of several phases that must be executed in sequence. A more detailed version can be found in the Expanded Sequence of Play on the back page.
A. Initiative Segment
Determine which player has the Initiative this turn.
B. Initiative Player Turn
- Flip the game turn marker to indicate the correct player turn
- Movement phase
- Rally phase
- Defensive Artillery Fire phase
- Rifle Fire phase (simultaneous)
- Close Combat phase
- Move the game turn marker to the bottom half of the game turn and flip it over
C. Second Player Turn
- Movement phase
- Rally phase
- Defensive Artillery Fire phase
- Rifle Fire phase (simultaneous)
- Close Combat phase
D. End-of-Turn Segment
- Check for Automatic Victory
- If it is the last game turn of the scenario, determine a winner
- If additional game turns remain, advance the game turn marker to the top half of the next turn.
6. Initiative
6.1 General Rule
Initiative for a turn is determined by each player rolling a die and adding their Army Morale Initiative DRM (found on the Army Morale Track). The higher modified roll wins the initiative for that game turn.
6.2 Ties
If the modified die rolls result in a tie, both players roll again using the same modifiers (including any modifiers if momentum chits were used).
NOTE: See Exclusive Rules for exceptions.
6.3 Momentum
Momentum chits may be used to modify the initiative die roll. The player who had initiative on the previous game turn must decide how many Momentum Chits to spend first (see 12.72).
7. Stacking
7.1 Stacking Limit
Each hex may contain up to six friendly SPs of combat units other than artillery PLUS one friendly artillery unit (regardless of its SPs). Leaders and markers do not count for stacking purposes. Exclusive Rules may contain further restrictions and/or exceptions to stacking.
7.2 Stacking during Movement and Retreat
Stacking limits apply at all times, including during movement and retreat. A unit may never move or retreat through a hex in excess of stacking limits (for an exception, see 13.23).
7.3 Overstacking Penalty
If units are found to be overstacked at any time the owning player must immediately eliminate enough steps to meet the stacking limit. IMPORTANT: All step losses taken impact Army Morale and Victory Points as if they were lost in combat.
7.4 Intelligence
7.41 General: Both sides may examine all stacks of friendly and enemy units at all times.
7.42 Limited Intelligence: Some Exclusive Rules limit one or both players from freely examining enemy stacks. In those cases, use the rules below unless additionally modified by the Exclusive Rules.
A player under Limited Intelligence restrictions may not examine enemy stacks until either:
- During fire combat, in which case the player can examine a specific stack to choose a target. NOTE: the player must commit to conducting Fire Combat against a specific hex and only then can they examine the units therein to determine which will be the target. The player must fire on the selected hex once the stack has been examined.
- During the Close Combat Phase a stack can be examined to determine combat odds, however once a stack is examined that hex must be attacked. NOTE: the enemy stack can only be examined after it has been designated for Close Combat attack.
7.43 Limited Intelligence Penalty: Each time a player examines an enemy stack except in the situations noted in 7.42 above, they suffer an immediate -1 AM adjustment.
8. Zones of Control
8.1 General Rules
All Parade Order combat units exert a ZOC into all six adjacent hexes. A unit loses its ZOC while it is disrupted or shattered. The ZOC is restored if the unit rallies to Parade Order. Note that ZOCs do extend across Ford and non-Ford Creek hexsides.
Exception: A ZOC extends out of, but not into, light forest/orchard, heavy forest, and fieldworks hexsides. See Exclusive Rules for additional exceptions.
EXAMPLE: Unit A's ZOC does not extend into the Plantation House or the Heavy Woods. Unit B's ZOC extends out of, but not into, the Lt Woods hexes.
8.2 Negating ZOCs
A combat unit negates an enemy ZOC in its hex for the purpose of the surrounded Close Combat modifier (12.8). It does not negate an enemy ZOC in its hex for retreat purposes (13.22).
8.3 Effects of ZOC on Movement
8.31 A unit that enters a hex in an enemy ZOC must stop and end all movement for the turn. In addition, it costs +1 MP to enter or exit an enemy rifle unit's ZOC.
8.32 A unit which begins in an enemy ZOC may move directly into another enemy ZOC but may move no further. If the first hex entered does not contain an enemy ZOC, the unit may continue moving up to its full movement allowance unless it again enters an enemy ZOC, which ends its movement.
9. Movement
9.1 Reinforcements
9.11 Placement: At the beginning of their side's Movement Phase on the game turn of arrival, reinforcements are placed according to the entry hex printed on the unit or turn track, or as specified in the Exclusive Rules.
Reinforcements may be placed in their entry hex in excess of stacking limits; however they must conform to stacking limits by the end of the movement phase.
Reinforcements may always be voluntarily delayed until a later game turn unless the Exclusive Rules for that game prohibit it.
9.12 Movement: Placement on the unit's entry hex costs no MPs. Reinforcements may move their full movement allowance and use strategic movement during their turn of entry unless prohibited by Exclusive Rules.
9.2 General Rules
During the movement phase the phasing player may move all, some, or none of their units. Units expend Movement Points (MPs) to enter adjacent (contiguous) hexes up to the Movement Allowance printed on the unit's counter.
Units pay MPs for each hex entered based on the terrain in that hex (see the Terrain Effects Chart for each individual volume in the series).
Because stacking rules are in force at all times (see 7.2) each individual unit must complete its movement before another unit may move. Units are never required to move (Exception: see 13.3).
MPs cannot be saved from one turn to another nor transferred to another unit. A unit may never expend more MPs than its movement allowance.
NOTE: A unit may always move one hex as long as no movement restrictions (e.g., prohibited terrain) or Exclusive Rules are broken. See 13.4 and Exclusive Rules for exceptions.
9.3 Movement Restrictions
The following movement restrictions apply:
- Shattered units may not move (see 13.4).
- Disrupted units may only move 1 hex per turn. If adjacent to enemy units they must attempt to move away from as many as possible (see 13.3).
- Pinned units may move only if they do not end the movement phase adjacent to any enemy units and the phasing player reduces his Army Morale (see 9.5 & 13.1, Pin).
- A unit may never enter an enemy occupied hex or prohibited terrain.
- A unit may never move through a hex in excess of stacking limits (see 7.2).
9.4 Effects of Terrain on Movement
The MP cost of entering hexes and crossing hexsides are cumulative. Exceptions: Up Slope/Creek and Down Slope/Creek hexsides are each treated as a distinct combined terrain type as indicated on Volume specific Terrain Effects Charts, which may contain additional terrain anomalies.
9.5 Strategic Movement
Units using Strategic Movement may move up to twice their printed Movement Allowance as long as they start in and remain on terrain types which allow for Strategic Movement. See Exclusive Rules and Player Aid Cards for which terrain types qualify for strategic movement.
9.51 Units using strategic movement may not begin adjacent or move adjacent to enemy units at any point during their move.
9.6 Removing Pin Markers
After all movement is complete, remove pinned markers from all units on both sides which are not adjacent to enemy units (see 13.1, Pin). The phasing player must reduce his Army Morale by one for each pinned combat that is broken.
10. Rifle Fire
10.1 General Rules
During the Rifle Fire Phase, both players may fire their rifle unit(s). Rifle Fire is voluntary. No unit is ever required to fire. No unit may fire more than once per phase.
10.2 Selecting a Target
The phasing player must select his target unit(s) before the non-phasing player selects his. If a unit chooses to fire, it must select an adjacent target combat unit. No unit may be the target of more than one Rifle Fire per phase. If more than one rifle unit fires at a target unit, the number of SPs firing is combined.
10.3 Procedure
STEP 1: The firing player cross-references his firing SPs on the "adjacent" column of the Ranged Fire To Hit Table to determine the "To Hit" number.
STEP 2: The player rolls a die. The result is modified by all applicable DRMs given in the Ranged Fire Combat DRM Table. The modified die roll is compared to the "To Hit" number. If it is equal to or greater than the "To Hit" number, a hit is scored. NOTE: This table may have different titles from Volume to Volume (e.g., Rifle/Artillery Fire Table, Artillery Fire Table, etc.).
STEP 3: If a hit is scored, a second (unmodified) die roll is made on the Rifle Fire Damage Table to determine the result. Only the target combat unit will be affected by the result. Ignore any reference to other units in the hex (Exception: 13.1, Leader Casualty). After applying the results, make any Army Morale adjustments that are required.
EXAMPLE: The two American militia units conduct Rifle Fire on the British Guards unit. The SPs of the two rifle units must be combined. Assuming no terrain modifiers, the "To Hit" number is >= 6 with one die, but the two rifle units have not yet fired this game and so receive a +1 DRM First Fire Bonus. The American player rolls a 5 which scores a hit. He then consults the Fire Damage Table and rolls again. He rolls a "4" which results in an R (Retreat) for the Guards unit.
10.4 Simultaneous Fire
Rifle Fire is considered simultaneous. Results, including Army Morale adjustments, are applied at the same time after both sides have fired. The non-phasing player must execute any retreats before the phasing player.
10.5 First Fire Bonus
Rifle units firing for the first time receive a +1 "First Fire" DRM on the To-Hit Table. They do not get the first fire bonus if they are combining fire with other units that have already conducted their first fire. In either case, indicate the units that have fired by removing their "First Fire" markers.
If multiple units are firing together and none have fired previously the first fire bonus is only +1; the first fire bonus is not cumulative.
All firing units lose their first fire bonus for future fire combats even if their fire has no effect.
IMPORTANT NOTE: A rifle unit also loses its first fire bonus if it participates in Close Combat in any Game Turn before conducting fire combat.
10.6 First Fire Markers
First Fire Markers should be placed on top of or below Rifle units at game or scenario start (players should agree on which method to use to prevent confusion), and are removed after the unit's first fire combat.
NOTE: If players choose not to use First Fire markers they should track which units have fired on paper or electronically.
10.7 German Jaeger Rifles
The German Jaegers may make two die rolls against their "To Hit" number if:
- They are not in a clear or crops hex, and
- There is an open flank as defined in the Turn Flank requirements (see 12.633).
Both die rolls must be against the same target and only one hit will result in a damage die roll. If both die rolls hit, ignore the second hit.
DESIGN NOTE: The Jaeger companies performed a tactic known as Strassefeuer ("street fire") in which groups of up to 25 men would advance in open order on the exposed flank of an enemy, in five files of five men each. The first man in each file would fire and countermarch to the left to gain the rear of his file and reload. The next man in each file would then fire and countermarch in like fashion. This would continue while the formation was steadily advancing, thus each volley would be delivered several paces closer to the enemy than the previous one. The effect could be devastating, particularly when directed at point-blank range.
11. Defensive Artillery Fire
11.1 General Rules
During the Defensive Artillery Fire phase, the non-phasing player may fire any of his artillery. Defensive Artillery Fire is voluntary — no unit is ever required to fire. No unit may fire more than once per phase.
11.2 Selecting a Target
If an artillery unit chooses to fire, it must target a combat unit that is within range and Line of Sight (LOS). See Exclusive Rules for exceptions as some volumes contain artillery types that do not need LOS to fire.
No unit may be the target of more than one defensive artillery fire per phase. Multiple artillery units can combine their SPs to fire at a target. The number of SPs is totaled and the range of the unit farthest from the target is used to determine the "To Hit" number.
The range for artillery units is three hexes (see Exclusive Rules for exceptions). Calculate range from the firing unit to the target, counting the target's hex but not the firing unit's hex.
DESIGN NOTE: Although extreme ranges were possible for field artillery (3 and 6 pounders), it was the standard practice of the day to fire at 600-800 yards, and often much closer. All artillery of this period was smooth bore and, like the musket, inaccurate at anything but comparatively short distances.
11.3 Procedure
STEP 1: The firing player cross-references the number of SPs firing with the range to target on the Ranged Fire To Hit Table to determine the "To Hit" number.
STEP 2: The player rolls a die, which is modified by all applicable DRMs on the Ranged Fire To Hit Table. The modified roll is compared to the "To Hit" number. If it is equal or greater than the "To Hit" number, a hit is scored.
STEP 3: If a hit is scored, a second (unmodified) die roll is made on the Artillery Fire Damage Table to determine the result. Only the target combat unit will be affected by the result. Ignore any reference to other units in the hex. (Exception: 13.1 Leader Casualty.) After applying the results, make any Army Morale adjustments that are required.
11.4 Line of Sight
11.41 For artillery units to fire beyond an adjacent hex, they must be able to see it. In game terms, the artillery unit must be able to trace a clear Line of Sight to the target unit. LOS is always clear when firing at an adjacent unit. LOS is traced from the center of the firing hex to the center of the target hex. For purposes of LOS, slope and slope/run hexsides are considered to be exactly the same, and are referred to solely as slope hexsides.
11.42 BLOCKING TERRAIN: Forest, light forest, and slope/hill hexes are always blocking terrain. See Exclusive Rules for specific terrain types that may affect LOS in various volumes. Any hex that contains combat units, whether friendly or enemy, also blocks LOS (see Exclusive Rules for exceptions).
LOS can always be traced into blocking terrain or hexes containing combat units, but never through it (Exception: 11.43, Case C).
11.43 UP SLOPE: Determination of LOS depends upon whether or not both the firing unit and the target unit are in "up slope" positions to each other. A unit is in an "up slope" position if the LOS traced from the other unit crosses an up slope hexside as it enters the target hex.
A. Neither unit is "up slope": The LOS is blocked if it passes through any blocking terrain hex. In addition, the LOS is blocked if it crosses any slope hexside which is not part of the firing or target unit's hexes.
B. One unit is "up slope": The LOS is blocked if it passes through any blocking terrain hex. With one unit "up slope", a LOS may be traced through a slope hexside which is not part of the firing or target unit's hexes. The up slope direction of the hexside must be in the same orientation as the up slope direction of the slope hexside in the firing or target unit's hex. If the orientation is not the same, the LOS is blocked. If both the firing and target units have slope hexsides and the range is 3 hexes, the intervening hexside must also be a slope hexside with the same orientation as the other two hexsides. If this intervening hexside is not a slope hexside or if the orientation is different, the LOS is blocked.
C. Both units are "up slope": The LOS between these units is always clear. Ignore blocking terrain.
EXAMPLE: The artillery unit is about to conduct artillery fire. The shaded hexes indicate those hexes which are not in the artillery unit's Line of Sight. Hexes marked "B" are blocked by blocking terrain, hexes marked "S" are blocked by slopes, and hexes marked "U" are blocked by a combat unit.
11.44 HEX SPINES: If a LOS runs exactly along a hexside, it is blocked only if both hexes adjacent to the hexside contain blocking terrain and/or combat units.
12. Close Combat
12.1 General Rules
12.11 ATTACKER/DEFENDER: The phasing player is considered the Attacker, while the non-phasing player is the Defender.
12.12 WHO MUST ATTACK: Close Combat is mandatory for all friendly combat units (except artillery units) which are adjacent to enemy units. This includes any units which retreated from Fire Combat and are now adjacent to enemy units. Exception: Rifle units are never required to attack. See Exclusive Rules for additional exceptions.
12.13 WHO MUST BE ATTACKED: All enemy units which are adjacent to friendly units must be attacked. Exception: See 12.14 Diversion.
12.14 DIVERSION: During each Close Combat phase, the phasing player may designate one stack of defending units as receiving a Diversion. The Attacker does not attack these defending units, but the adjacent Attacker's units that created the Diversion must attack some other enemy units. All attacking units which are adjacent to the defending units receiving the Diversion are penalized by having the odds in the Close Combat(s) in which they are involved shifted one column to the left (for example, 2-1 is reduced to 3-2).
12.15 MULTI-HEX COMBAT RESTRICTIONS:
- Each unit, attacking or defending, may only be involved in one Close Combat per player turn.
- Attacking units stacked in a single hex may combine in a single attack or attack different units.
- All defending units in a single hex must be attacked together in a single Close Combat.
- Each Close Combat must involve either one attacking hex or one defending hex only.
EXAMPLE: Attackers A, B and C have moved next to Defenders X, Y and Z. During close combat, Defenders Y and Z must be attacked together. However, Attackers B and C need not attack the same hex, though all units shown must be involved in a combat. The attacking player decides to have C attack X, while A and B combine in a single close combat against Y and Z.
EXAMPLE: One attacking hex versus two or more defending hexes, or two or more attacking hexes versus one defending hex, are legal; but two or more attacking hexes versus two or more defending hexes in a single Close Combat is illegal.
12.2 Procedure
12.21 DESIGNATE ATTACKS: The phasing player must announce all Close Combats before resolving any of them. The phasing player designates which friendly units are attacking and which enemy units are being attacked.
12.22 REMOVE PIN MARKERS: After the phasing player has announced all Close Combats, the players remove the "Pin" markers from all units on the board (see 13.1, Pin).
12.23 COMBAT SEQUENCE: Each Close Combat is resolved separately in any order that the Attacker chooses. For each, follow the procedure given below:
STEP 1, DETERMINE ODDS RATIO: The players total the non-artillery SPs of all their units involved in this Close Combat. The Attacker compares his SP total to that of the Defender. The ratio of Attacking SPs to Defending SPs is rounded off in favor of the Defender to a set of odds given on the Close Combat Table. EXAMPLE: 5 SPs attacking 4 SPs is 1:1, but 4 SPs attacking 5 SPs is 1:2. See 12.3 if all defending units are artillery.
STEP 2, DETERMINE LEAD UNITS: Each side, starting with the Attacker, must choose one unit to be its lead unit. The lead unit must be a Parade Order unit if one is available in the hex. Artillery units may not be chosen as lead units. This unit's morale, as modified by Army Morale, will be used as a DRM for the Close Combat. Also, if there is an adverse combat result, the lead unit will be the first unit to absorb the result (Exception: See 13.1 regarding capture results).
LEAD UNITS AND PROHIBITED TERRAIN: Units cannot be chosen as lead units if they would be required to advance after combat into prohibited terrain. If all attacking units are doing so into prohibited terrain then one unit can be selected as the lead unit, however it will not be allowed to advance after combat if the defending hex is vacated.
CAVALRY AND INDIAN WITHDRAWAL: After the attacker declares the lead unit the defender may declare a Cavalry or Indian Withdrawal (see 12.4 and 12.5). NOTE: Step 2 above requires the attacker to declare the lead unit first, ensuring a combat unit is identified that will have to advance should the defender choose to withdraw.
STEP 3, DETERMINE DRMs: Before rolling the die, the players check the Close Combat DRM Chart to see what additional adjustments will be made to that die roll. NOTE: Militia defending with non-militia artillery would not be considered an all-militia force even though the artillery does not participate in Close Combat nor serve as the lead unit. DESIGN NOTE: Each close combat takes into account factors other than the sheer numbers involved. These factors are integrated as adjustments to the resolution die roll.
STEP 4, SELECT AND RESOLVE TACTICS: Each side secretly chooses one of their available tactics by placing the tactics card or chit face down in front of them. The two tactics cards (or chits) are revealed simultaneously, and cross-referenced on the Tactics Card (or the Tactics matrix on the Player Aid Card), to determine if there is any DRM.
No Combat (NC): If one or both players chose the Withdraw tactic, and the result indicated on the Tactics Matrix is No Combat, the side playing the Withdraw tactic must retreat all units one hex. Exception: Artillery in the attacker's hex never retreats if the attacker played Withdraw. If both sides chose Withdraw, the defender retreats first. Skip to Step 9.
STEP 5, RESOLVE CLOSE COMBAT: Close Combat is resolved by rolling a die, applying any DRMs, and cross-referencing it with the Odds Ratio on the Close Combat Table. The results to the left of the slash apply to the Attacker. The results to the right of the slash apply to the Defender.
STEP 6, MOMENTUM DECISION: The player holding the fewest Momentum Chits (the Defender in the case of a tie) may choose to spend one to return to the Resolve Close Combat step and re-roll the die. If this player declines to use momentum, the other player may choose to expend a Momentum Chit to return to the Resolve Close Combat step and re-roll the die. Multiple Momentum Chits may be spent by one or both sides in each Close Combat, but only one may be spent each time this step is reached (that is, there must be a re-roll of the Close Combat die between Momentum Chit expenditures). DESIGN NOTE: This sequence is an attempt to ensure that the player entering a battle with the most momentum has the best chance to be the last player to call for a re-roll.
STEP 7, APPLY CLOSE COMBAT RESULTS: The Close Combat results are applied before proceeding to the next Close Combat (see 13.1 for explanations of results). When both players are required to retreat, the Defender must retreat before the Attacker. After applying the results, make any Army Morale adjustments which are required.
STEP 8, GAIN/LOSE MOMENTUM: See sections 12.73 and 12.74 for ways Momentum is gained or lost. Exclusive Rules may provide additional ways Momentum is gained or lost.
STEP 9, ADVANCE AFTER COMBAT: If the defender's hex becomes vacant, the attacker must advance with at least the lead unit if it did not retreat. Other units which participated may advance up to the stacking limit, including units which had to take a morale check and passed it. Artillery units may never advance. The defender may never advance after combat.
12.3 Artillery in Close Combat
Artillery SPs never count for Close Combat.
12.31 Artillery Defending Alone: If the only defending units are artillery they are captured without conducting an actual close combat.
12.32 Artillery Capture Procedure:
- The attacker must first identify the lead unit after which the artillery is captured.
- Place all the defending artillery units in the Captured box and make Army Morale adjustments.
- Skip to Step 9.
NOTE: Specifying the lead unit prior to effecting the capture ensures the attacker commits a unit that must advance after the capture.
12.4 Cavalry Withdrawal
12.41 If all the defending units in a Close Combat are Parade Order cavalry and none of the attacking units are mounted cavalry, the Defender has the option to announce a Cavalry Withdrawal after the attacker has declared his lead unit but before the attacker resolves the Close Combat.
12.42 Instead of resolving the Close Combat normally, the mounted cavalry unit(s) retreat three hexes, regardless of movement costs, following retreat priorities to a hex not adjacent to an enemy unit. Mark the unit(s) with a Cavalry Withdrawal marker and go straight to step 9 of the Close Combat procedure. NOTE: The attacker's lead unit, at a minimum, must advance into the vacated hex.
12.43 Effects. Mounted cavalry units marked with a Cavalry Withdrawal marker:
- Retain their ZOC
- May not move or attack
- Defend normally
- May not choose Cavalry Withdrawal again while under a Cavalry Withdrawal marker
Pinned Defending mounted Cavalry units may choose Cavalry Withdrawal if they break the pin at a cost of -1 Army Morale (see 9.5 and 13.1, Pin).
12.44 Removal: Cavalry Withdrawal markers are automatically removed from friendly units during the owning player's next Rally phase.
12.5 Indian Withdrawal
12.51 If all the defending units in a Close Combat are Parade Order Indian units located in any type of woods, and none of the attacking units are Indians or light infantry, the defender has the option to announce an Indian Withdrawal after the attacker has declared his lead unit but before the attacker resolves the Close Combat. NOTE: Exclusive Rules may list other terrain types in which Indian units may conduct Indian Withdrawal. NOTE: Exclusive Rules may list units other than Indians that may use Indian Withdrawal.
12.52 When played, the Indian Unit immediately retreats three hexes, regardless of movement costs, following retreat priorities to a hex not adjacent to an enemy unit. NOTE: The attacker's lead unit, at a minimum, must advance into the vacated hex.
12.53 Mark the unit(s) with an Indian Withdrawal marker and go straight to step 9 of the Close Combat procedure.
12.54 Effects. Indian units under an Indian Withdrawal marker:
- Retain their ZOC
- May not move or attack
- Defend normally
- May not choose Indian Withdrawal again while under an Indian Withdrawal marker
Pinned Defending Indian units may choose Indian Withdrawal if they break the pin at a cost of -1 Army Morale (see 9.5 and 13.1, Pin).
12.55 Removal. Indian Withdrawal markers are automatically removed from friendly units during the owning player's next Rally Phase.
12.6 Tactics Cards
12.61 At the beginning of the game, each player takes one set of Tactics Cards. During every Close Combat, each player will secretly select one eligible Tactics Card to influence the battle. Once both players have made their selections, the cards are simultaneously revealed.
NOTE: For those who prefer not to use tactics cards, tactics chits are still provided in all series volumes and the Tactical Matrix still appears on all Player Aid Cards for reference.
12.62 Reading Tactics Cards
Every tactics card lists the eight tactics, grouped by their ability to be used: Basic tactics (see 16.631) are shaded in yellow, those requiring a leader to be stacked with or adjacent to a unit(s) in the Close Combat (see 16.632) are shaded in light green, and those requiring a leader and an open flank (see 16.633) are shaded in a darker green.
For the Tactics Card selected, players consult the appropriate column (attacker or defender) and read down that column to find the DRM associated with each tactic that can be played by their opponent.
EXAMPLE: The attacker has selected "Attack en Echelon" and the defender "Skirmish". Reading down the attack column to "Skirmish" on the Attack en Echelon card shows a -1 DRM for the combat. The defender sees the same result by reading down the defend column to "Attack en Echelon" on the Skirmish card.
12.63 TACTICS CARD USE RESTRICTION: The following requirements must be met before a Tactics Card is eligible to be selected in each Close Combat.
12.631 Skirmish, Attack en Echelon, Stand Fast, and Withdraw may be used in all combats with one exception: An all-infantry force may not choose the "Withdraw" tactic in clear, field, or crops terrain if the opposing force contains any mounted units.
12.632 Frontal Assault & Commit Reserve: A Leader must be stacked with or adjacent to at least one unit involved in this Close Combat; the unit does not have to be the lead unit. See Exclusive Rules for exceptions.
12.633 Turn Flank & Refuse Flank: There must be one empty hex adjacent to both players' units (one hex with defending units in it, and one hex with attacking units in it), AND a friendly Leader must be stacked with or adjacent to at least one unit involved in the Close Combat; the unit does not have to be the lead unit. See Exclusive Rules for additional restrictions.
NOTE: Flanks may not be turned or refused if the only empty hex as described above is prohibited terrain for the lead unit.
12.64 One Leader can meet the eligibility requirements for Tactics Card use for all units with which it is stacked or to which it is adjacent. Exception: When Exclusive Rules identify units as Demi-leaders there are specific restrictions on who they may command in close combat.
12.65 If one player plays an illegal Tactics Card, their opponent receives a modifier of one in their favor (+1 for attacker or -1 for the defender). If both players play illegal Tactics Cards, the Tactics modifier is 0.
12.7 Momentum Chits
12.71 There is a pool of five back-printed Momentum Chits. Players accumulate Momentum Chits during the game. Players may accumulate Momentum Chits as a result of Close Combat. The Exclusive Rules for every campaign or scenario list which side or sides begin the game with Momentum, if any.
12.72 SPENDING MOMENTUM CHITS: Momentum chits are normally used in one of the three ways listed below. NOTE: Some Exclusive Rules list other ways to spend Momentum chits.
- CLOSE COMBAT: Each chit spent allows the re-roll of one Close Combat resolution die roll. More than one Momentum Chit may be used in one Close Combat (see 12.23, step 6).
- INITIATIVE: For each Momentum Chit spent BEFORE the initiative die is rolled, a player may add two (+2) to their initiative die roll. The player who had initiative on the previous game turn must decide how many Momentum Chits to spend first (see 6).
- INITIATIVE: A player may spend three Momentum Chits BEFORE the initiative die rolls to dictate player order for the current game turn. NOTE: this means a player could spend three momentum chits to compel their opponent to take the initiative for that game turn.
When a Momentum Chit is used, it is returned to the pool and can be accumulated again later.
12.73 GAINING MOMENTUM CHITS:
- The Defender gains one Momentum Chit during the Gain Momentum step whenever the final modified Close Combat die roll is less than or equal to -1.
- The Attacker gains one Momentum Chit during the Gain Momentum step whenever the final modified Close Combat die roll is greater than or equal to 10.
- If a player is entitled to receive a Momentum Chit but there are none available in the pool, the opposing player must return one Momentum Chit to the pool instead. If the opposing player does not have a Momentum Chit, there is no further effect. See Army Morale Adjustment chart for additional cases.
Exclusive Rules may list additional ways Momentum Chits are gained.
12.74 LOSING MOMENTUM CHITS: If a unit with a printed unit morale of +2 is captured while it is at full strength, the owning player must return one Momentum Chit to the pool. If the player does not have a Momentum Chit, the opposing player is entitled to take a Momentum Chit from the pool. If there are no Momentum Chits in the pool, there is no further effect.
Exclusive Rules may list additional ways Momentum Chits are lost.
12.8 Surrounded Close Combat Modifier
When all six hexes adjacent to a defending unit are occupied by enemy units, enemy ZOCs or prohibited terrain, the attacker modifies his Close Combat die roll by +1. The converse also applies — if the attacker is surrounded, the Close Combat die roll is modified by -1. For this rule only, friendly units negate enemy ZOCs in their hex.
13. Combat Results
In the following rules, the "affected unit" is the lead unit in a Close Combat, or the target unit for Fire Combat. In Fire Combat, other friendly combat units in the hex are never affected, but leaders may be.
13.1 Explanation of Results
"-" No effect.
"AM" Army Morale Loss: The affected player must reduce his Army Morale marker by one.
"R" Retreat: The owning player retreats the affected unit one hex (see 13.2). The other friendly units in the close combat, and the Defender's artillery (but not the Attacker's artillery), must make a morale check; if they fail, they must retreat one hex also. When both sides must retreat, the defender retreats and makes morale checks first. See Exclusive Rules for exceptions to mandatory retreat.
"D" Disruption: The owning player retreats the affected unit three hexes (see 13.3) and places a disruption marker on the unit. The other friendly units in the close combat, and the Defender's artillery (but not the Attacker's artillery), must make a morale check; if they fail, they must retreat one hex.
- If the affected unit was already disrupted, it is now shattered. The affected unit must still retreat three hexes.
- If the affected unit was already shattered, it is eliminated and placed in the eliminated box.
"1" One-Step Loss: The affected unit loses one step. If the unit is a full-strength two-step unit, it is flipped over and remains in the hex; otherwise, the unit is placed in the eliminated box. The other friendly units in the close combat, and the Defender's artillery (but not the Attacker's artillery), must make a morale check; if they fail, they must retreat one hex. DESIGN NOTE: Because it is considered to be covering the retreat of the other units, the unit that takes the loss never retreats.
"2" Two-Step Loss: The affected unit is eliminated and placed in the eliminated box. If the affected unit was only a one-step unit or was a reduced two-step unit, a second unit must take a one-step loss; if there is no other unit in the hex, the second step loss is ignored. The other friendly units in the close combat, and the Defender's artillery (but not the Attacker's artillery), must make a morale check; if they fail, they must retreat one hex.
"DC" Captured, Defender's Choice: One combat unit of the Defender's choice is captured (if the printed unit morale is +2, see 12.74). The unit does not have to be the lead unit, neither does it have to be at full strength. The other defending units, including defending artillery, must pass a morale check. If they pass, they must retreat one hex; if they fail, they suffer a "D" result (retreat three hexes and become disrupted).
"AC" Captured, Attacker's Choice: One combat unit of the Attacker's choice on the affected side is captured; place the unit in the captured box (if the printed unit morale is +2, see also 12.74). This unit does not have to be the lead unit nor does it have to be at full strength. The other friendly units in the close combat (including all the Defender's artillery but not any of the Attacker's artillery) must make a morale check; if they pass, they must retreat one hex; if they fail, they suffer a "D" result (retreat three hexes and become disrupted).
"PIN" Pinned: The opposing units remain engaged. All disrupted and shattered units on both sides are captured with the defender, followed by the attacker, placing those units in the captured box and making Army Morale adjustments. A pinned marker is then placed on all hexes involved in this close combat. The next phasing player must either:
A. Attack with all units marked as pinned, and attack all defending units marked as pinned during this player turn (additional units may stack and/or attack with the pinned units);
OR:
B. Move all friendly pinned units so that they are not adjacent to any enemy units; and do not move any other friendly units adjacent to the enemy pinned units; and reduce his or her Army Morale by one (9.5).
NOTE: In Case B above, one Army Morale point is spent for EACH individual PIN result that is removed in this way.
NOTE: In Case B above a leader cannot leave a pin hex without triggering an Army Morale penalty.
NOTE: Pinned defending units may not receive a diversion. This is an exception to 12.14.
"Pin" markers are removed from all friendly and enemy units either at the end of the movement phase, with an Army Morale Penalty (see 9.5), or after all Close Combats are assigned (see 12.22).
See Exclusive Rules for Pin exceptions.
Pinned Unit Cases
| Case | The Pinned Unit(s) are | And Pinned Against | Then |
|---|---|---|---|
| Case 1 | One or more units in a single hex | A single hex | All Pinned units must attack the pinned hex; other units may join the combat |
| Case 2 | In multiple hexes | A single hex | All Pinned units must attack the pinned hex; other units may join the combat |
| Case 3 | A single unit | Multiple hexes | The unit must attack all hexes it is Pinned to; OR if additional units attack all Pinned hexes, the Pinned unit may attack any of the hexes it is pinned against; if additional units attack some Pinned hexes the Pinned unit must attack all remaining hexes it is pinned to |
| Case 4 | More than one unit in a single hex | Multiple hexes | The units must, in some combination, attack all hexes pinned to; OR if additional units attack all Pinned hexes, the Pinned units may attack any of the hexes it is pinned against |
NOTE: See Exclusive Rules for exceptions to these cases.
"*" Leader casualty: The modified die roll must equal this number exactly. The owning player removes one Leader and places it in the eliminated box. The Leader chosen need not be the one in command. This is the only result from artillery or rifle fire that may affect other units in the hex. If no leader is present, ignore both the result and the Army Morale adjustment due to Leader casualty.
13.2 Retreat
13.21 RETREAT GUIDELINES: If possible, a unit must retreat into a hex which is not adjacent to an enemy unit. In addition, the unit must retreat towards a friendly map edge if possible. See specific game rules for definition of "friendly map edge".
13.22 RESTRICTIONS: Units may not retreat:
- Into an enemy occupied hex
- Into an enemy ZOC, even if friendly units already occupy the hex
- Into prohibited terrain
- Off the map
- In violation of stacking limits (see 13.23 for exception).
13.23 RETREAT AND CAPTURE: Any unit that cannot retreat the full distance because of restrictions is captured instead; this includes retreats caused by Rifle Fire or Artillery Fire. The unit is removed and placed in the captured box.
Exception: If a two-step unit would be captured for failure to retreat due to stacking limit violations, the owning player may choose to take a step loss and retreat, provided that the reduced-strength unit would not violate stacking limits in the hex into which it retreats. The Army Morale adjustments of suffering a "1" result are applied if the unit is reduced in this manner. (The player may still choose to have the unit captured instead of taking a step loss.)
13.24 COMBAT AND PREVIOUSLY RETREATED UNITS: If a unit retreats from a Close Combat into a hex which has not yet had its Close Combat resolved, it may not contribute any strength to that Close Combat, nor may it be selected as the lead unit. If its side suffers any result in the Close Combat, the previously-retreated unit must make a morale check. If it passes, it must retreat one hex; if it fails, it suffers a "D" result (see 13.1, Disrupt).
13.25 LEADER RETREATS: Any Leader may freely retreat along with any friendly retreating units with which it is stacked. Leaders are never required to retreat.
13.26 ARTILLERY RETREATS: Artillery units retreat like other units. Artillery units are NOT captured automatically if they end the Apply Close Combat Results Step adjacent to enemy combat units. Automatic capture only occurs to defending artillery units during the Determine Odds Ratio Step. NOTE: Attacking artillery never retreats.
13.3 Disruption
Disrupted units:
- Must retreat three hexes and end three hexes from their starting hex, counting by the shortest distance, or else be captured. The end hex may not be adjacent to an enemy unit if there is any hex which is also three hexes from the starting hex and not adjacent to an enemy unit. The prohibition against retreating into enemy ZOCs applies (see 13.22).
- May only move one hex per turn, and may not move adjacent to an enemy unit. If a disrupted unit begins a movement phase adjacent to an enemy unit(s), it must use its one hex move to move away (i.e., no longer adjacent) from all enemy units if possible; if not, then it must move away from as many enemy units as possible.
- May not attack; artillery and rifle units may not fire. NOTE: if the unit ends their Combat Phase adjacent to a Parade Order enemy combat unit AND it is not stacked with a friendly Parade Order combat unit, it suffers an additional "D" result, and becomes shattered. If it cannot retreat three hexes it is captured per 13.23.
- Defend with only half of their SPs (fractions rounded up)
- Have no ZOC
- Are shattered, if they receive an additional "D" result
- Are captured if they receive a "PIN" result
- May not attempt to Rally in the Rally Phase if adjacent to any enemy combat unit.
13.4 Shattered
Shattered units:
- When shattered, retreat three hexes per 13.3
- May not move
- May not attack; artillery and rifle units may not fire
- Defend with 1 SP (regardless of their actual SP ratings), and may NOT receive any terrain DRMs
- Have no ZOC
- Are eliminated, if they receive an additional "D" result (place such units in the eliminated box)
- Are captured, if they receive a "PIN" result
- Are captured, if they end ANY Close Combat phase adjacent to enemy units, and are not stacked with friendly Parade Order units; remove the units and place them in the captured box.
- May not attempt to Rally in the Rally Phase if adjacent to any enemy combat unit.
- Shattered units on the board at the end of the game are worth 1/2 VP.
13.5 Morale Checks
When a Morale Check is required, a die is rolled and the value is added to the unit's modified morale. If the result is 5 or greater, the unit passes the morale check. If the result is 4 or less, the unit fails the morale check.
MORALE CHECK MODIFIERS: Apply the following modifiers to the Morale Check die roll:
- +1 Defending units attacked solely across unbreached fieldwork hexsides including forts, redoubts, stockades, revetments, earthworks, flechettes or any other type of fortified hexside specifically depicted in the game.
- +? Leadership DRM (see 14.23)
See Exclusive Rules for volume specific Morale Check modifiers and situations.
14. Leaders
14.1 Stacking Leaders
Any number of friendly Leaders may stack in a hex, however only the highest ranking leader (see Exclusive Rules for leader seniority) may command units in a hex (that is, provide DRMs for those units). Place the Leader in command on top of the friendly units. Some Exclusive Rules have limitations on leader stacking.
14.2 Using Leaders
14.21 CLOSE COMBAT DRM: During Close Combat, a Leader in command and stacked with units participating in the Close Combat modifies the die roll with his Close Combat DRM. When attacking, the rating is added to the die roll; when defending, it is subtracted.
14.22 TACTICS CARDS: A leader's presence in or adjacent to attacking or defending units allows for the play of additional tactics cards (see 12.63). See Exclusive Rules for exceptions.
14.23 LEADERSHIP DRM: During all morale checks and rally attempts, the Leader in command may add his Leadership DRM to all combat units in his hex.
Leadership Ability Table
| Leadership Function* | Range: Same Hex | Range: Adjacent | Usage |
|---|---|---|---|
| Close Combat DRM | Yes | No, unless the leader's hex is involved in the same CC | Applies to all CCs fought by units in the leader's hex |
| Leadership DRM | Yes | Yes for George Washington only, otherwise No | Applies to each unit's roll |
| Tactics Chit Usage | Yes | Yes | Applies to all CC to which the leader is adjacent |
*Leader must be in-command in order to perform any of the functions described in this matrix.
14.3 Affecting Leaders
14.31 Leaders are never disrupted. If stacked with units which retreat or suffer disruption, the leader may either retreat with them or remain in place. Leaders are only affected directly in combat by an "*" result.
14.32 Leaders alone in a hex are captured immediately if Parade Order or Disrupted enemy combat units enter their hex. This capture can occur either during the movement phase or as a result of advance after combat. If the Leader is captured during enemy movement, the capturing unit does not have to stop or expend additional movement points.
15. The Rally Phase and Unit Morale
15.1 The Rally Phase
During the Rally Phase, the phasing player's disrupted or shattered units that are not adjacent to enemy combat units may attempt to Rally. A unit attempts to Rally by making a Morale Check (13.5). A Leader in command may modify the Rally attempt of any units in the same hex by adding his Leadership DRM (14.23). A Leader is not required in order to make a Rally attempt.
15.2 Rally Effects
A disrupted unit that passes its Morale Check is restored to Parade Order. If it fails its morale check, it remains disrupted. A shattered unit that passes its Morale Check becomes disrupted. If it fails its Morale Check, it remains shattered.
15.3 Unit Morale
15.31 BASE MORALE: A unit's base morale is printed on the unit. The base morale on the reduced side of a unit is usually one less than on the full-strength side.
15.32 MODIFIED MORALE: A unit's modified morale is the unit's base morale plus the unit's army morale modifier (see 16.2). A lead unit's modified morale is used as a DRM for Close Combat (see 12.2).
15.33 Rally on Me: "Rally on Me" markers should be placed on top of stacks containing both Parade Order and Disrupted/Shattered units as a reminder to make morale checks in the Rally Phase.
16. Army Morale
DESIGN NOTE: In this period of warfare, battles were decided less often by inflicting overwhelming losses than by destroying the opponent's will to resist. The Army Morale Track measures the tenacity and will to fight of a player's entire force. The success or failure of the individual units throughout the course of play will have a cumulative effect upon the overall status of each player's army. Conversely, the overall morale status of a player's army influences the ability of individual units to perform to maximum effect.
16.1 Adjusting Morale
Army Morale may need to be adjusted each time one of the following occurs (see Exclusive Rules and Player Aid Cards in each volume for additional cases):
- A Fire or Close Combat result is other than "no effect".
- A unit rallies (+1)
- A Leader casualty (see Exclusive Rules)
- PIN markers are removed in the Movement Phase (see 9.6).
16.2 Army Morale Levels
16.21 HIGH MORALE: If an army is considered at High Morale the Initiative DRM for that army is +1. All units in a High Morale army use their printed unit morale ratings.
16.22 FATIGUED: If an army is Fatigued, the Initiative DRM for that army is 0. All units in a Fatigued army have their unit morale ratings reduced by 1.
16.23 WAVERING: If an army is Wavering, the Initiative DRM for that army is -1. All units in a Wavering army have their unit morale rating reduced by 2.
16.24 If the Army's Morale changes between High, Fatigued or Wavering during the resolution of a Fire Combat or Close Combat, resolve any resulting morale checks using the Army Morale level that was in effect at the beginning of that Combat. The new Army Morale level is used for any Combats which are still to be resolved in that Combat Phase.
16.3 Demoralized and Substantial Victories
If an Army's Morale falls to 0, it is considered Demoralized. The game ends immediately, and the opposing player wins a Substantial Victory.
Tactical Matrix
Read down the Defender's tactic (rows) and across to the Attacker's tactic (columns). NC = No combat. Withdraw, Frontal Assault and Commit Reserve require a Leader; Turn Flank and Refuse Flank require a Leader and an Open Flank.
| Defender \ Attacker | Skirmish | Attack en Echelon | Stand Fast | Withdraw | Frontal Assault | Commit Reserve | Turn Flank | Refuse Flank |
|---|---|---|---|---|---|---|---|---|
| Skirmish | 0 | -1 | +1 | NC | +2 | -1 | -1 | 0 |
| Attack en Echelon | +1 | 0 | -1 | -1 | 0 | 0 | +1 | -1 |
| Stand Fast | -1 | +1 | 0 | NC | -1 | -1 | +2 | 0 |
| Withdraw | NC | +1 | NC | NC | +2 | 0 | 0 | NC |
| Frontal Assault | -2 | 0 | +1 | -2 | 0 | +1 | +1 | 0 |
| Commit Reserve | +1 | 0 | +1 | 0 | -1 | 0 | -1 | -1 |
| Turn Flank | +1 | -1 | -2 | 0 | -1 | +1 | 0 | +2 |
| Refuse Flank | 0 | +1 | 0 | NC | 0 | +1 | -2 | 0 |
Close Combat Table
Results are given as Attacker/Defender.
| Die Roll | 1-3 | 1-2 | 1-1 | 3-2 | 2-1 | 3-1 | 4-1 |
|---|---|---|---|---|---|---|---|
| -2 | 2/- | AC/- | AC/- | AC/- | AC/- | 1*/- | D/- |
| -1 | AC/- | 1*/- | 1*/- | 1*/- | 1*/- | D/- | D/- |
| 0 | 1*/- | 1/- | 1/- | 1/- | 1/- | D/- | R/- |
| 1 | 1/- | D/- | D/- | D/- | D/- | R/- | R/- |
| 2 | 1/- | D/- | D/- | D/- | R/- | R/- | PIN |
| 3 | D/- | D/- | R/- | R/- | PIN | PIN | R/R |
| 4 | D/- | R/- | R/- | PIN | R/R | R/R | -/R |
| 5 | R/- | PIN | PIN | R/R | -/R | -/R | -/D |
| 6 | PIN | R/R | R/R | -/R | -/R | -/D | -/D |
| 7 | R/R | -/R | -/R | -/D | -/D | -/D | -/1 |
| 8 | -/R | -/R | -/D | -/D | -/D | -/1 | -/1* |
| 9 | -/R | -/D | -/D | -/1 | -/1 | -/1* | -/DC |
| 10 | -/D | -/D | -/1 | -/1* | -/1* | -/DC | -/AC |
| 11 | -/D | -/1* | -/1* | -/DC | -/AC | -/AC | -/2 |
Notes:
- Odds of less than 1-3 are resolved as 1-3 with a -1 DRM.
- Odds of greater than 4-1 are resolved as 4-1.
- Shift the Odds on Close Combats where any attacking units are adjacent to Diversion defending units 1 column to the left (i.e., 2-1 becomes 3-2).
- Die rolls less than -2 are treated as -2. Die rolls greater than 11 are treated as 11.
Combat Results: "-" No Effect; AM Army Morale Loss; R Retreat; D Disruption; 1 One Step Loss; 2 Two Step Loss; DC Captured, Defender's Choice; AC Captured, Attacker's Choice; PIN Pinned; * Leader Casualty. The table also indicates results on which the Defender gains momentum and on which the Attacker gains momentum.
Expanded Sequence of Play
A. Initiative Segment (see 6.0)
- Each player rolls one die and modifies it by the Army Morale DRM to determine who has the Initiative this turn.
B. Initiative Player Turn
-
Flip the game-turn marker to indicate the correct player turn.
-
MOVEMENT PHASE (see 9.0)
- Place reinforcements if any (9.11)
- Disrupted units may only move one hex (13.3)
- Shattered units may not move (13.4)
- Pinned units may move only if they do not end their move adjacent to an enemy unit and the phasing player reduces his Army Morale (9.3)
- Units may conduct Strategic Movement (see 9.5)
-
RALLY PHASE (see 15.0)
- Make a Morale Check (13.5) for each friendly Disrupted (13.3) or Shattered (13.4) unit that is not adjacent to an enemy combat unit.
- A modified die roll >= 5 Rallies the unit.
- Shattered units that Rally become Disrupted, Disrupted units that Rally become Parade Order.
- See Exclusive Rules for other game functions that may be performed in the Rally Phase.
-
DEFENSIVE ARTILLERY FIRE PHASE (see 11) — The non-phasing player may fire any or all of his artillery units.
- STEP 1: Determine "To Hit" number (cross reference artillery SPs with the range to the target on the Ranged Fire To-Hit Table).
- STEP 2: Roll a die. If the modified die roll is equal to or greater than the "To Hit" number, a hit is scored.
- STEP 3: If a hit is scored, a second unmodified die roll is made on the Artillery Fire Damage Table to determine the result. After applying the results, make any Army Morale adjustments that are required (16.1).
-
RIFLE FIRE PHASE (rule 10.0) — Both players may conduct Rifle Fire with their Rifle units. Fire is considered simultaneous (10.4).
- STEP 1: Determine "To Hit" number (cross reference Rifle SPs with the "adjacent" column on the Ranged Fire To-Hit Table) (10.3).
- STEP 2: Roll a die. If the modified die roll is equal to or greater than the "To Hit" number, a hit is scored (10.3).
- STEP 3: If a hit is scored, a second (unmodified) die roll is made on the Rifle Fire Damage Table. Make any Army Morale adjustments that are required (16.1).
-
CLOSE COMBAT PHASE (rule 12)
- A. Designate all attacks (12.21). The phasing player must attack with all his units that are adjacent to enemy units, and all adjacent enemy units must be attacked. Exceptions: Artillery and rifle units (see 12.12 and the following exception); Diversions (see 12.14).
- B. Remove Pin markers from all units (12.22).
- C. Conduct all designated Close Combats. CLOSE COMBAT SEQUENCE (12.23): STEP 1: Determine Odds Ratio. STEP 2: Determine Lead Units — after the attacker declares its lead unit, defender may choose Cavalry or Indian Withdrawal (see 12.4 & 12.5); Artillery Capture (12.3). STEP 3: Determine DRMs. STEP 4: Select and Resolve Tactics. STEP 5: Resolve Close Combat. STEP 6: Momentum Decision. STEP 7: Apply Close Combat Results — make Army Morale Adjustments. STEP 8: Gain Momentum. STEP 9: Advance after Combat.
C. Second Player Turn
Same as above, except ignore B1 and B7.
D. End-of-Turn Segment
- Check for Automatic Victory (see Exclusive Rules).
- If it is the last game turn of the scenario, determine a winner.
- Advance the game-turn marker to the top half of the next game turn.
Part Two: The Battles of Rhode Island & Newport Exclusive Rulebook
The Battles of Rhode Island & Newport — Exclusive Rulebook. © 2020 GMT Games, LLC.
Counter Sheet Notes for Vol. 9
The Battle of Rhode Island and The Battle of Newport
Volume 9 in the Battles of the American Revolution Series contains two separate games; the Battle of Rhode Island and the Battle of Newport. The first thing you will notice about your counter sheets is that we have distinguished the combat units and leaders for these two games by drawing a thin horizontal white line across those units used in the title game; the Battle of Rhode Island. Those units are located on the half-sheet of counters.
Markers (such as Disruptions, Rally on Me, Momentum, Game Turn etc.) are meant to be shared between the games. Space limitations prevented us from duplicating these markers.
Certain markers are game-specific for Newport-only. These include French Resolve, British Army Sortie, Bog Status, entrenchments, breach markers and Mortar Status. The game also includes British and American Strength Points Lost markers. Both are used in the Battle of Rhode Island but only the American SP Lost marker is used in Newport. The exclusive rules make clear which markers are used in which game and where and how to use them.
Replacement Counters
It has been a tradition in the BoAR series to publish replacement counters for previous games when new information becomes available. Volume 9 includes eleven-such replacement counters as specified below:
Pensacola:
- El Tigre. This combat unit replaces the Guadalajara infantry regiment. "El Tigre" was its fighting nickname. Simply exchange this unit for the original Guadalajara unit.
- España. The uniform specs for this unit have been corrected. Simply exchange this unit for the original.
- 2nd Cataluña Volunteers. The designation "Vols" was added to the unit's name and the uniform specs have been corrected. Simply exchange this unit for the original.
- Don Bouligny. This is a new leader for the Spanish player. The Don was the commander of the Luisiana Regiment. He begins on the board in the hex designated on his counter and is restricted to the command of Luisiana units-only as indicated on his counter. This includes any unit, including dragoons, with "Luisiana" in its name.
Savannah:
- Indian Withdrawal. This marker should be added to the Savannah counter mix and used by the British player if and when circumstances allow his Creek Indians to withdraw from combat as specified in series rules.
- Bombardiers. The unit morale of this French unit has been increased to +2. Bombardiers were elite marines in the French naval service. Simply exchange this unit for the original.
- Pulaski's Legion. This American unit has been augmented with an additional strength point designation of (2) shown in red ink. When attacking alone Pulaski's combat strength is deemed to be 2. For all other purposes his strength remains 1. He continues to be worth "1" for stacking purposes as well. Simply exchange this unit for the original.
DESIGN NOTE: Pulaski, when attacking alone, will charge the enemy in heavy-cavalry shock fashion after the norms of European cavalry usage. Players who have already augmented their games of Guilford Courthouse or Eutaw Springs with the replacement unit for William Washington's dragoons will be familiar with this new strength point designation.
Germantown:
- Scotch Willie Maxwell. This leader replaces the original Maxwell leader unit in the game which did not include Maxwell's portrait nor his fighting nickname. Simply exchange this unit for the original.
Brandywine:
- Scotch Willie Maxwell. This leader replaces the original Maxwell leader unit in the game. Players with the 2nd edition of Brandywine (from the Tripack) will already have a portrait of Maxwell while those with the first edition who may never have upgraded their game with a prior replacement unit will have Maxwell's unit indicated by a shield. In either case simply exchange the original counter with this one that also includes Maxwell's fighting nickname.
- Badlam. This American artillery unit's name was misspelled as Bedlam. The spelling has been corrected. Simply exchange the units.
- Amusettes. The Hessian amusette unit's name was misspelled with two "m's." The spelling has been corrected. Simply exchange the units.
RHODE ISLAND
I. Prepare for Play
British Units: British Regulars, American Loyalists, German Hessians, Tory Militia.
American Units: Continental Regulars, State Troops, Patriot Militia.
1.1 Game Length
The game begins at 7:00 AM (Turn 1) and ends at 7:00 PM (Turn 13). The game ends immediately if a Decisive or Substantial Victory is achieved prior to Turn 13.
Exception: It is possible for the game to be extended one additional turn (Turn 14) by the play of an Opportunity Card. This additional turn is considered a "night" turn and has special limitations printed on the card.
1.2 Player Order
The British player moves first on Game Turn 1. Thereafter, player order is determined randomly per Series Rule 6.0.
1.3 At-Start Army Morale
American: 13; British: 14
1.4 Momentum
The American player begins the game with one Momentum Chit.
1.5 Deployment
Both sides deploy their units either in the at-start hex number or on the turn of entry (as indicated on the counters).
NOTE: Several units in the game are designated as "Opportunity Units" (indicated by "Opp" on their counters). These units should be placed in the Opportunity Units Box. They enter play as a result of card play.
1.6 Opportunity Cards
Players should shuffle one another's Opportunity Card decks and then draw two cards each from their own decks.
II. How to Win
2.1 British Decisive Victory
Control Butt's Hill Fort (hex 2802) at the end of any game turn. See rule 4.2 for the definition of control.
2.2 American Decisive Victory
As soon as the American player eliminates or captures 16 SPs of British, Hessian or Loyalist combat units (excluding artillery, militia and dragoons), the American player instantly wins a Decisive Victory.
Important: Lost SPs are tracked even for flipped units on the map.
2.3 Substantial Victory
Either side can achieve Substantial Victory as indicated in Series Rule 16.3.
2.4 Marginal Victory
If neither player achieves a Decisive or Substantial Victory by the end of the game, the player with the most Victory Points wins a Marginal Victory. If tied, the game ends in a draw.
2.5 Victory Point Schedule
2.5.1 Combat Unit and Leader Casualties: See the Victory Point Schedule and the Leader Summary Table on the Player Aid Card.
2.5.2 The Artillery Redoubt (hex 2306) is worth 1 VP to whichever player controls it at the end of the game. See rule 4.2 for the definition of control.
2.5.3 Objective Hexes 2512 & 2813 (together) are worth 1 VP to the American player if he controls them both at the end of game turn 6. See rule 4.2 for the definition of control.
NOTE: Players should use control markers to indicate control status for all victory hexes.
III. Series Rules Variations
3.1 Leaders
3.1.1 British Seniority (rank denoted by #)
- #1 Major General Baronet Pigot and #2 Major General Prescott (the latter enters through card play only) may command any British player unit. Prescott's Close Combat modifier of "1" is parenthesized – this is only used when leading the Night Turn attack that occurs through card play. Otherwise, his value is "0".
- #3 Major General von Lossberg may only command German or Loyalist units. Exception: von Lossberg may command British and Tory Militia units IF he and General Smith are stacked together in the same hex.
- #4 Brigadier General Smith may only command British, Loyalist or Tory Militia units.
- Captain von der Malsburg is a Demi-Leader (denoted by the yellow star on his counter) for Tactics Card play for himself only.
3.1.2 American Seniority (rank denoted by #)
- #1 Major General Sullivan, #2 Major General Greene and #3 Brigadier General Glover may command any American player unit.
- #4 Colonel Livingston may only command units belonging to Livingston's Advanced Guard. For ease of recognition, these units have their SPs and MPs printed in yellow.
- Colonel Laurens is a Demi-Leader (denoted by the yellow star on his counter) for Tactics Card play for units belonging to Laurens' Advanced Guard only. For ease of recognition, these units have their SPs and MPs printed in orange.
- The 1st Rhode Island Regiment is a Demi-Leader (denoted by the yellow star on its counter) for Tactics Card play for itself and the 2nd Rhode Island Regiment only and only when in the Artillery Redoubt (hex 2306).
3.2 Initiative Considerations
- The British player goes first on the night turn.
- Player order may be determined by the play of Opportunity Cards.
3.3 Retreat Priorities
BRITISH PLAYER: The British player retreats toward the south, southeast or southwest edges of the map if possible. See retreat priority illustration on the map.
AMERICAN PLAYER: The American player retreats toward the north, northeast or northwest edges of the map if possible. See retreat priority illustration on the map.
3.4 Limited British Intelligence
The British player, but not the American, is subject to Limited Intelligence rules. See Series Rules 7.42.
3.5 American Sortie Restriction
Units belonging to Livingston's and Laurens' Advanced Guards are not restricted in movement. Remaining American units may not move until they are allowed to sortie as follows:
- Turn 5 - Only the American units whose SPs and MPs are printed in white may move.
- Turn 7 - All remaining American units may move.
3.5.1 Garrison Requirements: The American player must occupy hexes 2704, 2904 and 3104 (denoted by the stacked arms graphic in the hex) with at least one non-artillery combat unit per hex. This garrison requirement is checked at the end of each American player movement phase only.
- The American player may voluntarily violate this garrison requirement; however he loses 1 point of Army Morale per turn if any of the three specified hexes is un-garrisoned.
- Garrison requirements are lifted as soon as any of the three specified hexes is attacked in Close Combat by British player combat units, regardless of the outcome of the attack.
- Place the Garrison Requirements Lifted marker on the next turn of the Game Turn Track to remind players that the requirements have been lifted.
3.6 Variable Reinforcements
The Hessian Ditfurth Fusiliers and Landgraf Regiment have variable turns of entry depending on die roll. Beginning on the friendly Movement Phase of Game Turn 8, the British player rolls one die and compares the result to the range printed on the Game Turn Track. If the correct die is rolled, both units enter play on entry hex B-1. These units enter automatically on turn 10 if not already in play.
3.7 Strategic Movement Restriction
- The von Huyn Regiment, the King's American Regiment and the Royal Artillery Detachment may not use strategic movement on game turn 1. Their MPs are highlighted in a white box on the counters to remind players of this restriction.
- British player reinforcements entering on Game Turn 3 at hex B-3 may not use strategic movement on their turn of entry.
IV. Special Rules
4.1 Opportunity Cards
4.1.1 Setting Up
Each player possesses a deck of 26 Opportunity Cards. After your opponent shuffles your deck, you draw two cards prior to the beginning of play.
4.1.2 Obtaining Additional Cards
There are several ways that players may receive additional Opportunity Cards during the course of play:
Method 1: Both players draw an Opportunity Card at the beginning of Game Turn 10. Players also draw cards at the beginning of the Night Turn if night is in play. (See British Opportunity Card #18.)
Method 2: During each friendly Rally Phase, prior to making Rally rolls, players may spend one Momentum chit to draw a new card from their decks. This is an additional use of momentum as indicated in Series Rule 12.62.
Method 3: Both players may earn additional Opportunity Cards according to the Opportunity Card Casualty Track printed on the map board. Players should advance their Strength Point Lost markers along this track each time non-militia infantry SPs are lost; including steps lost to units still in play, and draw Opportunity Cards on the spaces indicated.
NOTE: The American 1st Rhode Island Regiment and Wade's Massachusetts state troops do not lose a strength point when they flip—do not advance the marker on the Opportunity Card Casualty Track until the unit is eliminated. See Exclusive Rule 5.5.
Method 4: BRITISH PLAYER ONLY. The British player draws one Opportunity Card at the end of game turn 7 IF he controls either hex 2512 or hex 2813. He draws two Opportunity Cards IF he controls both hexes. See rule 4.2 for the definition of control.
Method 5: AMERICAN PLAYER ONLY. The American player draws one Opportunity Card the first time that any British player artillery unit is captured or eliminated.
DESIGN NOTE:
Method 1: Historically the fighting ended at about 3:30 PM (Bottom half of turn 9.) Players are allowed to draw cards on Game Turn 10 to equip themselves for the final third of the game.
Method 3: Historically the British lost 11% and the Americans 7.8% of their forces engaged. The British player has 37 infantry SPs, not including his Turn 8 reinforcements or Opportunity Units, none of which saw action. The American player has 39 infantry SPs, not including his turn 9 & 10 reinforcements or Opportunity Units which also did not see action. As a base calculation to match the historical casualty rates I multiplied the percentages lost by the SPs available; for the British that equaled 4 and for the Americans it equaled 3. I established those numbers as trigger points for card-draw and then gave the players additional draws as follows. Since the British lost more troops in the actual battle, I wanted to reward the American player. He draws when British infantry SP losses reach half way to the trigger point and again when they exceed the trigger point by half; at 2, 4 & 6 British SPs lost respectively. The British player draws when the American infantry SPs lost equal 3, their historical percentage, and again when the British player doubles the number of American SPs lost historically.
4.1.3 Card Usage
The cards are self-explanatory—follow the directions as indicated.
- There is no limit to the number of cards a player may hold in his hand; however some cards may not be held, as indicated on the card.
- Cards may be played by either player at any moment and during any phase, unless specifically disallowed by card text.
- Once a card is played it is discarded permanently.
4.2 Control of Victory Locations
- For the purposes of rules 2.1, 2.5 and 4.1.2 (Method 4), the Americans control all victory hexes at the start of the game.
- In order to take control of any of these hexes, the British player must occupy or pass through the given hex with a combat unit other than artillery. Place a British control marker in this case.
- The American player can regain control in the same manner. Flip the control marker to the American side in this case.
- Control is checked for effect at the following times:
- End of any game turn (rule 2.1).
- End of Game Turn 6 (rule 2.5.3).
- End of Game Turn 7 (rule 4.1.2 Method 4).
- End of Game (rule 2.5.2).
- Control is temporarily nullified for all four of these situations if there is an enemy combat unit adjacent to the hex(es) in question. VPs or cards are not gained by the owning player.
NOTE: Adjacency does not grant control of an empty enemy-controlled hex. If friendly combat units do not actually enter the hex in question, then control remains with the enemy player once/if adjacency no longer applies.
V. Special Units
5.1 Graeme's Squadron
Beginning on Game Turn 5, the British player may attempt up to two offshore bombardments against American combat units. However, only one bombardment may be attempted per Game Turn.
5.1.1 Target Selection
- During friendly or enemy Close Combat, place one of Graeme's Squadron markers in a navigable hex in the Middle Channel.
- Select an enemy occupied hex that is within 4-hexes of the squadron marker.
DESIGN NOTE: Graeme's Squadron consisted of five vessels; the 20-gun frigate HMS Sphynx, the 20-gun armed ship Vigilant, the former Rhode Island Navy 10-gun row galley Spitfire, a Loyalist brig and an unidentified armed vessel. While the Sphynx and Vigilant carried some 24-pound guns the other vessels were lightly armed. This, together with the ineffectiveness of Graeme's squadron in action on August 29, is the reason I attenuated the range of this collection of naval artillery from five hexes to four and why the odds of achieving a modifier on the Offshore Bombardment Table are low.
- Enemy units in the target hex must be either attacking or defending in the current Close Combat phase in order to be fired upon.
- Standard line-of-sight rules apply.
5.1.2 Offshore Bombardment Table
The British player rolls one die on the Offshore Bombardment Table located on the map and player aid card and applies the results to the Close Combat. The modifier, if any, is cumulative with other Close Combat modifiers in this Close Combat.
5.1.3 Two Shots Only
At the conclusion of Close Combat, place the squadron marker on the current turn of the Game Turn Track to indicate it has fired and is no longer available. Once the second squadron marker is moved to the Game Turn Track the British player may not conduct offshore bombardment for the rest of the game.
5.1.4 Night
Offshore bombardment may not be conducted during the night turn.
5.2 Dragoons
Langdon's NH Light Horse and the British 17th Light Dragoons have their SP ratings shown in parenthesis to indicate they cannot attack when alone in a hex, even if participating in a multi-hex combat. Exception: They may always attack enemy dragoons even when alone.
- This rule supersedes any other rule requiring units to attack.
- Dragoons cannot be the lead unit if other Parade Order units are in the combat.
- Otherwise, they behave like any other combat unit when stacked with other units.
NOTE: The NH Light Horse enters through card play only.
5.3 Butt's Hill Fort Battery
5.3.1 Movement
This battery cannot move. It is considered "dug in".
5.3.2 Adverse Combat Results
- The battery ignores Retreat results.
- If it suffers a Disruption result, it disrupts in place.
- Other units in the hex are not exempt from combat results and follow normal procedures.
5.3.3 Fire Combat
- The battery is heavy artillery, with a range of 4 hexes.
- Due to "pre-sighting", it receives an automatic +1 DRM when firing on the Ranged Fire To-Hit Table.
- Damage die rolls ARE NOT modified.
5.3.4 Spiking
During the friendly Rally Phase, the American player may spike the guns in the Butt's Hill Fort Battery. Additional friendly units are not required in the hex in order to spike the guns.
PROCEDURE:
- Simply remove the unit during the Rally Phase.
- Spiking may occur even if enemy combat units are adjacent.
- Place the battery to the side so it is not confused with normally captured or eliminated units.
EFFECTS:
- The American player suffers –1 Army Morale when the guns are spiked.
- The British player does not gain Army Morale and no VPs are awarded.
5.4 Sullivan's Life Guards
The Sullivan's Life Guards unit has its SP rating shown in parentheses to indicate it cannot attack when alone in a hex, even if participating in a multi-hex combat.
- This rule supersedes any other rule requiring units to attack.
- Otherwise, it behaves like any other combat unit when stacked with other units.
5.5 1st Rhode Island and Wade
The American 1st Rhode Island Regiment and Wade's Massachusetts state troops are special one step units with combat values on their reverse side. When these units takes their first step loss, they are flipped as usual. However, the following cases apply:
- There is no Army Morale adjustment.
- There is no Victory Point awarded.
- There is no change to the Opportunity Card Casualty Track.
5.6 Webb's Regiment
When Webb takes a step loss, the unit becomes known as Huntington.
A complete game of The Battle of Rhode Island & The Battle of Newport contains: this Exclusive Rulebook, one Series Rulebook, one 2-sided 22" x 34" mounted map, one full sheet of die cut counters, one half sheet of die cut counters, two identical player aid cards, 16 Tactics cards (8 British, 8 American), 52 Opportunity cards (26 British, 26 American), and two 10-sided dice.
NEWPORT
DESIGN NOTE: The Battle of Newport is a hypothetical scenario, provided for players who wish to explore what a full-scale Franco-American assault on the British works around Newport might have looked like.
I. Prepare for Play
British Units: British Regulars, American Loyalists, German Hessians, Tory Militia.
American Units: Continental Regulars, State Troops, Volunteer Troops, Patriot Militia, French Troops.
1.1 Game Length
The game begins at 11:00am August 10th (Turn 1), and ends at 6:00pm August 11th (Turn 20). The game ends immediately if a Substantial or Decisive victory is achieved prior to Turn 20.
Exception: The game may end at the end of Game Turn 8 if special victory conditions have been met (see rule 2.1.1).
1.2 Player Order
The American player moves first on Game Turn 1. Thereafter, player order is determined randomly per Series Rule 6.0.
Exception: See rule 4.5 (last two bullets) to determine Initiative for Turn 9 if the game continues into the second day.
1.3 At-Start Army Morale
American: 20; British: 19
1.4 Momentum
The American player begins the game with one momentum chit.
1.5 Initial Deployment
1.5.1 British Deployment
The British player sets up his units according to the at-start locations printed on their counters. Two of the British player's leaders have four asterisks in lieu of at-start locations. They set up as follows:
- Major General von Lossberg with the 1st Ansbach, the 2nd Ansbach or the von Huyn regiments.
- Brigadier General Smith with the 22nd Foot, the 43rd Foot, or at the British Field Headquarters (hex 2617).
1.5.2 American Deployment
The American player deploys in one of three ways:
- Some units have at-start locations printed on their counters and should be set up in those hexes.
- Some units have zone designations (Z-1, Z-2, Z-3 or Z-4) on their counters in lieu of an at-start hex. These units deploy in any hexes corresponding to their specific zone. Zones are located on the map as lightly shaded areas bounded by dashed lines. Exception: Infantry MAY NOT STACK with each other when deploying in zones. This stacking restriction only applies to the initial deployment, and does not affect stacking with artillery or leaders. Once the game begins, this stacking restriction is lifted.
- Some units have a turn-of-entry designations on their counters and arrive as reinforcements on the turn and in the hex specified on the counter. They should be placed on the Game Turn Track accordingly.
II. How to Win
2.1 American Decisive Victory
2.1.1 Day 1
Control any three of the following locations in the British outer defenses (indicated by the dashed red line on the map) at the end of Game Turn 8: Tomini Hill Redoubt, Irish's Redoubt, Bannister's Redoubt, Dudley's Redoubt or Card's Redoubt. Control is defined as occupying with a Parade Order combat unit other than artillery regardless of the presence of adjacent enemy units. If this condition is not met the game continues into the Night Interphase (see rule 4.5).
2.1.2 Day 2
Control any three of the following locations in the British inner defenses (indicated by the solid red line on the map) at the end of any game turn on Day 2: Barrier Redoubt, Easton Redoubt or Batteries #1, #2 or #3. Control is defined as occupying with a Parade Order combat unit other than artillery regardless of the presence of adjacent enemy units.
2.1.3 British Surrender
If at least one space of the City of Newport is occupied by a Parade Order American player combat unit at the end of any British player turn, the British player must perform a "Surrender Die Roll." The following DRMs apply:
- –2 if the British army is wavering
- –1 if the British army is fatigued
- –1 if Major General Pigot is a casualty
- –1 for each city hex that is occupied by the American player at the time of the die roll
- –1 for each British objective hex defined in rule 2.1.2 above that is controlled by the American player at the time of the die roll
The British surrender on a modified die roll of –1 or less.
2.2 British Decisive Victory
As soon as the British player eliminates or captures 18 SPs of American and/or French combat units (excluding artillery, militia, engineers and dragoons), the British player instantly wins a Decisive Victory.
The British player can track American player SP losses on the American/French Infantry Strength Points Lost Track located on the map using the American Strength Point Lost marker.
Important: Lost SPs are tracked even for flipped units on the map.
2.3 Substantial Victory
2.3.1 American Player
On Day 1, the moment British Army Morale wavers the American player wins a Substantial victory. On Day 2, the American player can achieve Substantial Victory as indicated in Series Rule 16.3
2.3.2 British Player
The British can achieve Substantial Victory as indicated in Series Rule 16.3 on either day.
2.4 Marginal Victory
If neither player has achieved a Decisive or Substantial Victory by the end of game turn 20 the British player is awarded a Marginal Victory regardless of the number and value of both players' casualties in the eliminated and captured boxes.
NOTE: A Marginal Victory is not available to the American player during either day's fighting.
2.5 Victory Point Schedule
Victory points are not calculated, but may be utilized as a tie-breaker in tournament play.
III. Series Rules Variations
3.1 Leaders
3.1.1 British Seniority (rank denoted by #)
- #1 Major General Baronet Pigot and #2 Major General Prescott may command any British-player units.
- #3 Major General von Lossberg may only command German or Loyalist units. Exception: von Lossberg may command British and Tory Militia units IF he and General Smith are stacked together in the same hex.
- #4 Brigadier General Smith may only command British, Loyalist or Tory Militia units.
- #5 Major General von Bose may only stack with and command German units.
- #6 Captain Brisbane may only command British maritime units (naval and marines) indicated by small anchor symbols.
- #7 Captain von der Malsburg is a Demi-Leader (denoted by the yellow star on his counter) for Tactics Card play for himself only.
3.1.2 American Seniority (rank denoted by #)
- #1 Major General Sullivan and #2 Major General Greene may command any American units.
- #3 Major General Marquis de Lafayette may command any American and French units.
- #4 Brigadier General Glover and #5 Brigadier General Varnum may command any American units.
- #6 Major General Hancock may only command Massachusetts militia units. Hancock and the units he may command are identified by the thin brown stripe over their names.
3.1.3 French Seniority (rank denoted by #)
- #1 Vice Admiral-General Comte d'Estaing may command any French units.
- #2 Captain Bougainville may only command French maritime units (naval and marines) indicated by small anchor symbols.
3.2 Retreat Priorities
3.2.1 British Player
The British player retreats toward either HQ hex (2617 or 3513) if possible. See retreat priority illustration on the map.
3.2.2 American Player
American units retreat toward the northeast or north map edges if possible. French units retreat toward the north map edge if possible. See retreat priority illustration on the map.
3.3 British Sortie Restriction
No British player units stationed on or behind the inner defensive line (indicated by the solid red line on the map) may move north or east of it until the first friendly movement phase after at least one hex along the outer defensive line has been attacked in close combat (or occupied if vacant) by enemy combat units. The outer defensive line is indicated by the dashed red line on the map.
- Units affected by this rule have their MPs highlighted in a white box for ease of recognition.
- Place the British Army Sortie marker on the Game Turn Track (corresponding to the next British player turn) to remind players that British inner line units are free to move.
- Prior to sortie restrictions being lifted British units stationed on or behind the inner defensive line are free to move anywhere along or behind that line without restriction.
NOTE: Although not directly connected with it, Card's Redoubt (hex 2220) and Little Tomini Hill (hex 3427) are considered part of the outer defensive line.
3.3.1 Garrison Requirements: The British player must occupy hexes 3113, 3115, 3118 and 3420 (indicated by the stacked arms graphic in the hex) with at least one artillery AND one non-artillery combat unit per hex. This garrison requirement is checked at the end of each British-player movement phase only.
- The British player may voluntarily violate this garrison requirement; however he loses 1 point of Army Morale per turn if any of the four specified hexes is un-garrisoned.
- Garrison requirements are lifted if any of the four specified hexes are attacked in Close Combat by American or French units, regardless of the outcome of the attack.
- Place the Garrison Requirements Lifted marker on the next turn of the Game Turn Track to remind players that the requirements have been lifted.
3.4 Strategic Movement Restriction
French & American reinforcements arriving on Game Turns 1 & 2 and American reinforcements arriving on Game Turn 3 may not use strategic movement on their turns of entry.
3.5 Variable Reinforcements
American reinforcements scheduled to arrive on Game Turns 6 & 15 must roll a die to determine if they enter the game on that turn. Consult the Game Turn Track to determine the die roll needed to enter. If the unit does not arrive, advance it to the next turn on the Game Turn Track and roll again then.
Exception: No units can enter the game during the Night Interphase but may try to enter the game again on the following day.
NOTE: The 2nd Brigade of New Hampshire Volunteers automatically enters on Game Turn 11 if it has not already entered play.
NOTE: The 1st Brigade of New Hampshire Volunteers might never enter play, depending on die roll.
3.6 French Considerations
3.6.1 Stacking and Movement
- French and American combat units may never voluntarily end a movement phase stacked unless Lafayette is stacked with them.
- French and American units that begin a movement phase stacked without Lafayette must maneuver to unstack if possible.
3.6.2 Combat
- Franco-American stacks without Lafayette that are involved in Close Combat are penalized by a (+/-) 1 DRM whether attacking or defending.
- French and American combat units may not cooperate in attacks originating from separate hexes against a common enemy hex unless Lafayette is commanding the attack, after which they may advance together into the vacated hex subject to stacking limits.
3.6.3 Morale Check
The first time the American player's Army Morale falls to 8 or below he rolls a die and consults the French Morale Impact Table located on the map and applies the results immediately.
- This is a one-time event and is not repeated if American Army Morale climbs above 8 and subsequently falls back to 8.
- Place the French Morale Check marker on the Army Morale Track to remind players that this one-time requirement has been met.
IV. Special Rules
4.1 Bog Transit Procedure
DESIGN NOTE: Major General Pigot ordered a dam built where Bailey's Brook empties into Easton Pond. The goal was to turn the valley below Honeyman Hill into a bog that would discourage a direct attack against his right flank. Since the Battle of Newport never actually happened, however, the bog was never tested and we can't now for certain how effective it might have been. Meanwhile Major Frederick Mackenzie of Pigot's staff writes skeptically about the potential effectiveness of the bog. Given the uncertainly I designed the Bog Transit Table to represent low odds of extreme outcomes; completely passable or completely impassable. Other outcomes are equally distributed leaving it entirely up to chance as to how effective the bog will be and guaranteeing variation in outcomes from game to game.
Once during the game, only the American player may attempt to learn the transit status of the bog. Utilize the following procedure:
Step 1: A single parade order combat unit other than artillery that begins its movement phase adjacent to a bog hex may expend its entire movement to enter the bog. This cannot occur at night.
Series Rule 9.3 Exception: In this case, entering otherwise prohibited terrain is allowed.
Step 2: The American player checks the transit status of the bog immediately after British Defensive Artillery Fire if his combat unit still occupies the bog hex. American units forced to retreat during British Defensive Artillery Fire may not do so into another bog hex.
Step 3: The American player rolls a die and consults the Bog Transit Table on the map to determine if the bog is passable and the movement point cost per unit-type to enter the hex.
NOTE: Engineers are treated as infantry for this purpose.
Step 4: Place the Bog Status Marker that corresponds to the die roll result on the next turn of the Game Turn Track to remind players that bog transit status has been determined and the turn on which either player may begin transiting the bog if permitted.
Series Rule 9.2 Exception: Units must always be able to pay the cost to enter terrain in the bog.
NOTE: If the result of the bog transit check was "impassable" the American unit performing the check must exit the bog during the friendly Movement Phase of the turn indicated by the Bog Status Marker.
The outcome of the Bog status check is permanent for the duration of play.
4.2 ZOCs & Fieldworks
4.2.1 Movement
French or American units which begin their movement phase adjacent to British fieldworks hexsides may not cross those hexsides during friendly movement if in so doing they move directly from one British ZOC into another. This is an exception to Series Rule 8.32.
NOTE: Fieldworks include: Abatis, battery, flechette, redoubt, siegeworks, stone wall, and trench hexsides.
4.2.2 Combat
British lead units are never required to advance after combat if the following two conditions exist:
- All attacking British player units are positioned behind the outer or inner defensive lines (as defined in rule 3.3) AND
- All defending American player units are outside those same perimeters.
4.2.3 Zones of Control
ZOC's extend out of but not into unbreached fieldworks hexsides.
4.3 American Siegeworks
Siegeworks are a type of fieldworks that can be constructed by the American player. Completed siegeworks have the following attributes:
- Enemy fire combat and close combat suffers a –1 DRM against friendly units occupying completed siegeworks.
- Enable American siege artillery to fire and increase the range of the American mortar to 6 hexes.
- Completed siegeworks cannot be moved or destroyed.
- Siegeworks under construction offer no defensive advantage to American player units that occupy them, nor do they enable siege artillery to fire or increase the range of the mortar.
4.3.1 Construction Procedure
During the friendly movement phase, the American player can construct siegeworks in any eligible hex according to the following procedure:
Step 1: The American player may place one construction marker per turn on any clear or crops hex that is not adjacent to an enemy combat unit.
Exception: On Turn 1 the American player MUST place a construction marker in hex 1622. The Boston Artificers unit that begins in that hex may not move until the siegeworks are completed. This is an exception to the note in Step 3 below.
OPTIONAL RULE: For play balance against a superior British player consider hex 1622 to have a fully constructed siegework (Siege Battery B) at the start of the game. The Artificers can move on Turn 1.
Step 2: To place a construction marker, the Boston Artificers unit must begin the movement phase in Parade Order in the hex under construction and may not move that turn.
Step 3: At the end of the next American player movement phase the marker is flipped to its completed side and aligned so that the hexsides to be entrenched are portrayed by the white symbols.
NOTE: It is not necessary for the Artificers to remain in the hex in order to complete the construction. See Step 1 exception.
Step 4: When constructing siegeworks the American player is limited by the counter mix and by the ability of the Artificer unit to initiate construction.
Step 5: Siegeworks hexsides do not need to be connected.
DESIGN NOTE: Historically, the siegeworks in hexes 1620 & 1622 were not begun until August 15, five days after the date set for the grand assault and after d'Estaing had sortied the French fleet to engage Admiral Howe. Progressively the western slope of Honeyman Hill and the area below it to a distance of 700 yards from the British right at Green End were dug in comprising four batteries; two of four guns and one each of five and seven guns. The at-start siegeworks in hex 1620 and the ability of the American player to construct additional ones within which to mount his siege artillery is provided in this hypothetical scenario for play balance.
Players wishing to conduct the assault in its purest form, or for play balance against a superior American player, may treat Rules 4.3 and 5.1.2 as OPTIONAL. In such a case the American mortar would still be available but its range would be restricted to 5 hexes only. The capabilities of the Boston Artificers and the British Labor Battalion would likewise be limited to providing a +1 DRM when attacking enemy-occupied fieldworks.
4.3.2 Siegework Interdiction
Siegeworks under construction cannot be flipped to their completed side if a Parade Order enemy combat unit, including artillery, is adjacent.
- Siegeworks under construction are automatically removed if entered by a Parade Order enemy combat unit.
Exception: Siegeworks under construction are not removed if entered solely by enemy artillery.
4.4 Spiking Guns
During the friendly Rally Phase, the phasing player may spike any of his artillery units. Additional friendly units do not need to be stacked with the gun(s) in order to spike them.
PROCEDURE
- Simply remove the desired artillery unit(s) during the Rally Phase.
- Guns may be spiked on multiple game turns and any number of guns may be spiked at one time.
- Spiking may occur even if enemy combat units are adjacent.
- Place the spiked artillery unit(s) to the side so they are not confused with normally captured or eliminated units.
EFFECTS
- The phasing player suffers –1 Army Morale on the turn in which any guns are spiked. NOTE: It doesn't matter how many guns are spiked in a turn; only 1 point of Army Morale will be surrendered each turn in which any guns are spiked.
- The non-phasing player does not gain any Army Morale nor do the spiked guns count for VPs.
4.5 Night Interphase
The following modifications to the Sequence of Play apply to the Night Interphase:
- Initiative is determined normally.
- Movement and ZOCs: Units may not enter an enemy ZOC. Units that begin in an enemy ZOC must move away if possible.
- MPs are determined by several factors:
- Units that begin adjacent to enemy combat units.
- Units that are not adjacent to enemy combat units and are not on a road hex.
- Units that are not adjacent to enemy combat units and begin on a road hex.
- Strategic movement is permitted according to series rules.
- See the Night Interphase Movement Table printed on the map for a summary of available MPs per unit type (also shown on the Player Aid Card).
- Pinned units may break pin at night at no cost in Army Morale Points. This is an exception to Series Rule 13.1.
- The Boston Artificers may not place new construction markers, however construction markers already on the board may be flipped to their completed side according to rule 4.3.1, Step 3.
- The British Labor Battalion may repair breaches according to rule 5.1.2.5.
- All rally attempts add +1 DRM, in addition to standard modifiers.
- Spiking artillery is permitted according to rule 4.4.
- Fire Combat is not allowed.
- Close Combat is not allowed even among adjacent units. This is an Exception to Series Rule 12.12.
- After both players have completed their player-turns, each player adjusts his Army Morale as follows:
- If Army Morale is already high no adjustment is made.
- If Army Morale is fatigued, add 3 Army Morale points.
- If Army Morale is wavering, add 1 Army Morale point.
- After any Army Morale adjustments are made, the player with the higher total automatically has the Initiative on Game Turn 9. If Army Morale is tied determine Initiative in the standard way.
Series Rule 12.62 Exception: Spending three momentum chits to dictate player order is NOT permitted on Game Turn 9.
Artillery Characteristics Matrix
| Artillery Type | Fire with other Artillery? | LOS Required? | Targeting | Stacking allowed during Movement? | Range |
|---|---|---|---|---|---|
| Field Artillery | Yes | Yes | Unit | No | 1-3 |
| Heavy Artillery | Yes | Yes | Unit | No | 1-4 |
| Howitzers | No | No | Unit | No | 1-4 |
| Coehorn Mortar (Br) | Yes***** | Yes | Unit | Yes**** | 1-4 |
| Naval Guns (Br) | Yes | Yes | Unit | No | 1-5 |
| Mortar (Am) | No | No | Hex | Yes*** | 2-5/6* |
| Siege Artillery (Am) | No | Yes** | Hex, then Hexside | Yes*** | 1-7 |
* Range when the mortar is in a siege works hex ** Combat units do not block LOS, terrain DOES block LOS *** Allowed when the mortar or siege artillery unit is in a siege works hex – moving artillery can pass through the hex **** Stacking is permitted with field or heavy artillery only. If the coehorn mortar is alone in any hex, other artillery units may pass through the coehorn unit's hex. ***** With field or heavy artillery only
V. Special Units
5.1 Artillery
The Battle of Newport features various types of field guns and heavy weapons, many with special capabilities. These capabilities are summarized in the rules that follow.
ALL artillery fire is conducted in the owning player's defensive artillery fire phase. This differs from other games in the series which feature siege rules.
NOTE: Review the Player Aid Card for the various charts and footnotes pertaining to artillery, while key items are summarized below.
5.1.1 American Mortar
5.1.1.1 Movement
On each game turn, the mortar may either move OR fire. Use the "Moved/Fired" marker to keep track of which function the mortar has performed during each game turn. Remove the "Moved/Fired" marker at the end of the current game (not player) turn.
Series Rule 7.1 Exception: Friendly artillery may move through a hex occupied by the mortar during the movement phase ONLY when the mortar is in a completed siegeworks hex.
5.1.1.2 Targeting and Range
- Unlike other artillery, the mortar does not target enemy units but instead directs its fire into a (non-adjacent) target hex.
- The mortar may not combine fire with other types of artillery.
- The range of the mortar is 5 hexes and does not require a LOS to the target hex. This is an exception to Series Rule 11.4.
NOTE: Mortar range is increased to 6 hexes if it is firing from completed siegeworks.
5.1.1.3 Scatter and Drift
Mortar fire is subject to Scatter & Drift (See Scatter & Drift diagram on the map). Follow the process outlined below:
Step 1: Select a target hex and roll 1 die, comparing the result to the diagram to determine where the shells actually land. Refer to the Mortar Fire Scatter and Drift table on the Player Aid Card for applicable modifiers when rolling.
Step 2: If units occupy the resulting impacted hex, the owning player selects the unit to receive potential damage.
Step 3: Damage is determined by rolling on the Mortar Fire Damage Table on the Player Aid Card.
Step 4: If the mortar has suffered a step-loss, apply a –1 DRM on the Mortar Fire Damage Table. If a breach result is achieved, see rules 5.1.2.4 and 5.1.2.5 regarding breaches and repairing them.
5.1.2 American Siege Artillery
5.1.2.1 Movement
Series Rule 7.1 Exception: Friendly artillery may move through a hex occupied by siege artillery during the movement phase ONLY when the siege artillery is in a completed siegeworks hex.
5.1.2.2 Targeting and Range
- American siege artillery may ONLY fire at British fieldworks hexsides in an effort to cause breaches.
- American siege artillery has a range of 7 hexes and must be located under an American siegeworks marker in order to be eligible to fire. (See rule 4.3.1 for siegeworks construction). Note that there is a completed siegework at the start of the game in hex 1620.
- After choosing the target hex, the American player selects a hexside facing the firing hex for resolution.
Series Rule 11.4 Exception: Combat units do not block LOS for this purpose. Terrain blocks LOS normally.
5.1.2.3 Resolution: Siege artillery fire is resolved using the Siege Bombardment Fire "To Hit" Table and the Siege Fire Damage Table located on the Player Aid Card.
5.1.2.4 Breaches
- If a breach is achieved place a breach marker with its arrow facing the breached hexside. If a breach is caused by mortar fire, the American player has the option of selecting ANY hexside to receive the breach.
- Any combat units in a hex whose hexside was breached must make an immediate morale check without applying the +1 DRM available to units checking morale behind unbreached fieldworks.
- British artillery may only fire across un-breached fieldworks hexsides. This restriction does not apply to Abatis.
5.1.2.5 Repairing Breaches
- Breaches caused by siege artillery or mortar fire may only be repaired by the British Labor Battalion.
- Only one hexside can be repaired per turn.
- To repair a breached hexside, the Parade Order Labor Battalion must begin its movement phase adjacent to the breach and may not move that turn.
- Breaches may be repaired even if enemy combat units are adjacent.
- Remove the breach marker at the end of the movement phase.
5.1.3 Howitzers
- Howitzers may not combine fire with other types of artillery.
- Howitzers do not require line of sight to their target. This is an exception to Series Rule 11.4.
- Howitzers have a range of 4 hexes, and fire combat is resolved normally.
- Damage is resolved on the Howitzer Fire Damage Table on the Player Aid Card.
5.1.4 Heavy Artillery & Naval Artillery
Both players have heavy artillery, traditionally 12-pound field guns. In addition, the British player has four batteries of naval artillery transferred to shore when the British scuttled their fleet in and around Narragansett Bay. These guns were traditionally 18-pound and 24-pound ordnance. Heavy artillery and naval artillery may combine fire with standard field guns and have the following ranges:
Heavy Artillery — 4 hexes
Naval Artillery — 5 hexes
DESIGN NOTE: The British also deployed a few massive 32-pound guns in their fixed fortifications at the North Battery, Fort George and Brinton's Point. Some of these guns are shown artistically on the map for historical reference but have no effect on play as they were deployed as shore batteries against enemy shipping only.
5.1.5 British Coehorn Mortar
The British Coehorn mortar is a special artillery enhancement unit that augments damage against non-artillery targets.
5.1.5.1 Stacking: The Coehorn only confers this special enhancement when stacked with a British heavy or field artillery unit. The coehorn mortar never counts against stacking limits. This is an exception to Series Rule 7.1.
5.1.5.2 Combat Effect: An artillery unit stacked with the coehorn mortar adds +1 DRM to the damage die roll if it scored a hit against a non-artillery target. This modifier applies even if British artillery is combining fire on the same target so long as the coehorn is stacked with one of the firing units.
5.1.5.3 Other Coehorn Unit Specifics
- Friendly artillery units may pass through a hex if the only artillery unit in the hex is a Coehorn mortar.
- The coehorn has a ZOC.
- If moving while stacked with British artillery, the two units move at the movement rate of the artillery unit.
- The coehorn may be targeted by enemy fire combat.
- Even though the coehorn has no Close Combat strength, it must be attacked during the close combat phase to be captured when alone in a hex.
5.2 Engineers
Each player has engineers; the Boston Artificers and the British Labor Battalion. These units do not count against stacking limits which is an Exception to Series Rule 7.1, but they do project a ZOC.
5.2.1 Combat
- The two engineer units have an asterisk in place of their SP value. When alone Engineers defend with a provisional strength of 1 SP.
- Engineers may not be selected as lead units when stacked with friendly units in close combat.
- When stacked with friendly units that are attacking enemy fieldworks, these units provide a +1 DRM to the attack.
5.2.2 Usage Summary
- The Boston Artificers are used to construct siegeworks. See rule 4.3.1.
- The British Labor Battalion is used to repair breaches caused by enemy siege bombardment. See rule 5.1.2.5.
- Either unit can be used to provide a +1 DRM when participating in an attack upon enemy occupied fieldworks. See above (rule 5.2.1, 3rd bullet.)
5.3 Dragoons
The 17th Light Dragoons, Captain-General's Cavaliers and Langdon's NH Light Horse may not move across or attack across unbreached abatis hexsides except at roads. They have their SP values shown in parenthesis to indicate they cannot attack when alone in a hex, even if participating in a multi-hex combat. Exception: They may always attack enemy dragoons even when alone.
- This rule supersedes any other rule requiring units to attack.
- They cannot be the lead unit if other Parade Order units are in the combat.
- Otherwise, they behave like any other combat unit when stacked with other units.
5.4 Sullivan's Life Guards
The Sullivan's Life Guards unit has its SP rating shown in parentheses to indicate it cannot attack when alone in a hex, even if participating in a multi-hex combat.
- This rule supersedes any other rule requiring units to attack.
- Otherwise, it behaves like any other combat unit when stacked with other units.
5.5 1st Rhode Island Continental Regiment
The 1st Rhode Island is a special one step unit with a combat value on its reverse side. When this unit takes its first step loss, it is flipped as usual. However, the following cases apply:
- There is no Army Morale adjustment.
- There is no Victory Point awarded (used only for Tournament tie-breakers in Newport).
- No SP loss is recorded on the American/French Infantry Strength Points Lost Track.