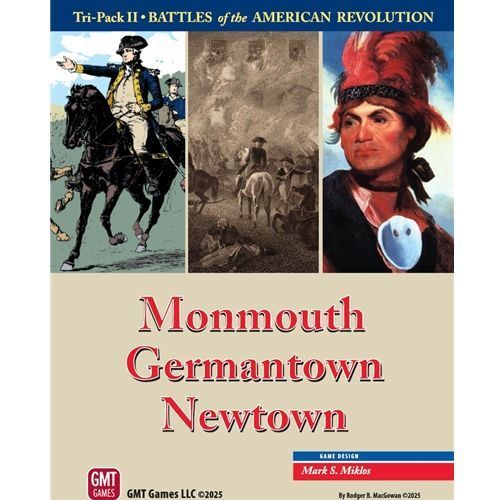
Battles of the American Revolution Tri-Pack II: Monmouth, Germantown, Newtown
Battles of the American Revolution Tri-Pack II: Monmouth, Germantown, Newtown Rulebook
Table of Contents
Table of Contents
- Part One: Series Rulebook
- 1. Introduction
- 2. Components
- 3. Game Scale and Terminology
- 4. How to Win
- 5. Sequence of Play Outline
- 6. Initiative
- 7. Stacking
- 8. Zones of Control (ZOCs)
- 9. Movement
- 10. Rifle Fire
- 11. Defensive Artillery Fire
- 12. Close Combat
- 13. Combat Results
- 14. Leaders
- 15. The Rally Phase and Unit Morale
- 16. Army Morale
- Expanded Sequence of Play
- Part Two: Monmouth Courthouse Exclusive Rulebook
- I. Prepare for Play
- II. Victory Conditions
- III. Sequence of Play
- IV. Special Rules
- V. Play Balance (Optional)
- VI. Historical Scenarios
- Historical Article
- Order of Battle
- Your Monmouth Counter Sheet
- Part Three: Germantown Exclusive Rulebook
- Germantown Combat Units
- I. Prepare for Play
- II. How to Win
- III. Special Rules
- IV. Special Units
- Historical Summary
- Germantown Orders of Battle
- Germantown Countersheet Manifest
- Sequence of Play
- Part Four: Newtown Exclusive Rules
- Newtown Combat Units
- Shared Markers
- Replacement Counters
- Newtown Exclusive Rules
- I. Prepare for Play
- II. How to Win
- III. Series Rules Variations
- IV. Special Rules
- V. Indian Rules
- VI. Special Units
- Newtown Historical Scenario
- Newtown Historical Essay: The Battle of Newtown
- Newtown Order of Battle
Part One: Series Rulebook
Great Battles of the American Revolution — Series Rulebook (Version: February 2013).
1. Introduction
Rules that apply only to a specific battle are found in the specific rulebook. Certain rules sections are marked as Advanced. These rules should be ignored until the players are familiar with the rules and the system. The Advanced rules should be used by experienced players and during all tournaments.
2. Components
See the specific rules for the list of components included in each game.
2.1 The Game Map
The map depicts the area over which the battle was fought, covered by a hexagonal grid that regulates movement and combat.
2.2 Counters
UNIT COLOR CODES: Each unit has a color band across the top of it. This band defines which group the unit belongs to. See the specific rules for their definition.
TWO-STEP UNITS: Some units have values on both sides; these units have two steps. The full-strength side is marked with either the setup hex, or the turn of entry and entry hex; the reduced side has a lower strength point value, and the unit morale is usually one less than the full-strength side.
(Diagram: sample combat unit and leader counters showing unit name, entry turn/start hex, unit morale, strength, movement allowance, and unit types such as artillery, American militia, light infantry and dragoons; leaders show name, rank, Close Combat DRM, Leadership DRM.)
2.3 The Die
The game includes one 10-sided die that is used to resolve certain game functions. The 0 is treated as a 0 (not a 10).
3. Game Scale and Terminology
3.1 Game Scale
UNIT SCALE: Each infantry, light infantry, militia, rifle or mounted cavalry Strength Point equals approximately 100 men. Each artillery Strength Point equals two cannons.
MAP SCALE: Each hex is approximately 200 yards from hexside to hexside.
TIME SCALE: Each turn represents approximately one hour.
3.2 Key Terms
British Player: Refers to the player who controls the British Regulars, Loyalists and German units.
British units: The British Regulars, Loyalists and German units are treated as one nationality except in certain circumstances. See Exclusive Rules for any stacking or command limitations.
Combat Unit: Any infantry, light infantry, mounted cavalry, artillery or militia unit. Leaders and markers are not combat units.
Die Roll Modifier (DRM): An event or situation which causes a die roll to be adjusted.
Highest Ranking Leader: The Leader with the most stars listed for Rank. In the case where multiple Leaders have the same number of stars, their seniority is given in the specific rules.
Into Fieldworks: An attack across a fieldworks hexside from outside the hex which contains the fieldworks symbol (see Terrain Key).
Light Infantry: Light Infantry units are designated by the symbol 'LT' on the counter.
Line of Sight (LOS): The ability of combat units to see each other across intervening hexes.
Militia: Militia is often (but not always) a lower quality unit consisting of volunteers without proper military training. American Militia units are designated by a kneeling soldier on the counter. British militia are depicted standing to attention.
Movement Points (MPs): Used to regulate how far a unit can move in one game turn.
Out of Fieldworks: An attack or ZOC which crosses a fieldworks hexside from the hex which contains the fieldworks symbol (see Terrain Key).
Parade Order: A combat unit is in Parade Order if it is not disrupted or shattered.
Phasing Player: The player whose player turn it is, and is therefore moving units or assigning Close Combats. The other player is considered the non-phasing player.
Rifle Unit: A light infantry or infantry unit which is armed with rifles. Rifles permitted units to fire over greater distances than units solely armed with muskets. Rifle units are either designated by a white "R" in a black circle or a black "R" in a white circle on the counter. The distinction will have bearing on Close Combat modifiers.
Musket/Rifle Unit: Typically these are mixed musket/rifle formations which are effective in Close Combat. The SP values are read as Close Combat/Rifle Fire, and each value is applied in the corresponding phase.
Strength Points (SPs): The combat strength of a unit. Used for stacking, artillery/rifle fire and close combat.
Surrounded: When all six hexes adjacent to a unit are occupied by enemy units or their ZOC. Important: For this rule only, friendly units negate enemy ZOC in their hex.
Up Slope: Attack across a slope hexside into the hex which contains the solid line portion of the slope symbol. Movement is affected in both directions across a slope hexside (see Terrain Key).
Victory Points (VPs): Used to determine which side has won the battle. VPs are gained by eliminating and capturing enemy steps, units and leaders, by capturing and/or holding terrain objectives, and by choosing to influence certain game actions.
Zone of Control (ZOC): The ability of a unit to exert influence over an adjacent hex.
4. How to Win
See specific rules for Decisive and Marginal Victories. See rule 16.3 for a Substantial Victory.
VP Clarification: A 2-step unit that is eliminated is worth 2 VPs whereas a 2-step unit that is captured is worth only 1 VP. In other words, captured units are worth 1 VP regardless of whether they have one or two steps. Eliminating a unit will destroy its organizational staffing which means more effort than providing replacements must be expended to return the unit to fighting capacity.
5. Sequence of Play Outline
Each game turn consists of two player turns. During the initiative segment, players determine which player executes their player turn first. Each player turn consists of several phases that must be executed in sequence.
A. Initiative Segment Determine which player has the Initiative this turn.
B. Initiative Player Turn
- Flip the game turn marker to indicate the correct player turn
- Movement phase
- Rally phase
- Defensive Artillery Fire phase
- Rifle Fire phase (simultaneous)
- Close Combat phase
- Move the game turn marker to the bottom half of the game turn and flip it over
C. Second Player Turn
- Movement phase
- Rally phase
- Defensive Artillery Fire phase
- Rifle Fire phase (simultaneous)
- Close Combat phase
D. End-of-Turn Segment
- Check for Automatic Victory
- If it is the last game turn of the scenario, determine a winner
- Advance the game turn marker to the top half of the next game turn
6. Initiative
6.1 General Rules
Initiative is determined by a die roll. Each player rolls a die and adds their Army Morale Initiative DRM (found on the Army Morale Track). The higher modified roll wins the Initiative for the game turn.
TIES: In case of a tie of modified rolls, both players roll again using the same modifiers.
NOTE: see Specific rules for exceptions.
6.2 (Advanced) Momentum Chits and Initiative
Besides the Army Morale DRM, this die roll can also be modified by use of Momentum chits (12.62).
7. Stacking
7.1 Stacking Limit
Each hex may contain up to six friendly SPs of infantry, light infantry, militia or mounted cavalry, and one friendly artillery unit (regardless of its SPs). Leaders and markers do not count for stacking purposes. Exclusive Rules may contain further restrictions and/or exceptions to stacking.
7.2 Stacking during Movement and Retreat
Stacking limits apply at all times, including during movement and retreat—a unit may never move or retreat through a hex in excess of stacking limits.
7.3 Overstacking Penalty
If units are ever found to be overstacked, the owning player must eliminate enough steps to meet the stacking limit.
7.4 Intelligence
Both sides may examine all stacks of friendly and enemy units. Where Exclusive Rules provide exceptions and players are prohibited from examining enemy stacks, follow the following procedure for designating Fire Combat targets and Close Combat.
- Once a target hex is identified for Artillery or Rifle Fire, the firing player is free to examine all units in that specific hex in order to pick the specific target.
- One unit in the reviewed hex must be fired upon in that very same Fire Phase before any other targets are identified.
- It is also permitted to examine an enemy stack for purposes of calculating odds in Close Combat but only after friendly units have been moved adjacent and the Close Combat phase is in effect.
- A penalty of –1 Army Morale will be imposed upon a player EACH TIME he examines an enemy stack other than for the above stated purposes.
8. Zones of Control (ZOCs)
8.1 General Rules
All Parade Order combat units exert a ZOC into all six adjacent hexes. A unit loses its ZOC while it is disrupted or shattered. The ZOC is restored if the unit rallies to Parade Order. Note that ZOCs do extend across Ford and non-Ford Creek hexsides.
Exception: A ZOC extends out of, but not into, light forest/orchard, heavy forest, and fieldworks hexsides. See exclusive rules for additional exceptions.
EXAMPLE (diagram): Unit A's ZOC does not extend into the Plantation House or the Heavy Woods. Unit B's ZOC extends out of, but not into the Lt Woods hexes.
8.2 Negating ZOCs
A combat unit negates an enemy ZOC in its hex for the purpose of the surrounded Close Combat modifier (12.7). It does not negate an enemy ZOC in its hex for retreat purposes (13.22).
8.3 Effects of ZOC on Movement
8.31 A unit that enters a hex in an enemy ZOC must stop and end all movement for the turn. In addition, it costs +1 MP to enter or exit an enemy rifle unit's ZOC.
8.32 A unit which begins movement in an enemy ZOC may move directly into another enemy ZOC but must stop in that hex. If the first hex entered does not contain an enemy ZOC, the unit may continue moving until it again enters an enemy ZOC.
8.4 Other Effects of ZOCs
- ZOCs and the Surrounded Close Combat Modifier (12.7)
- ZOCs and Retreat (see 13.22).
9. Movement
9.1 General Rules
During the movement phase, the phasing player may move all, some, or none of his units. Units expend Movement Points (MPs) to enter hexes and cross hexsides moving into adjacent (contiguous) hexes (see the Terrain Effects Chart [TEC]). MPs may never be saved for use in future turns or transferred to other units in any way. Each unit must complete its movement before any other unit may move. Units are never required to move. A unit may never expend more MPs than its movement allowance.
Exception: A unit may always move one hex as long as no movement restrictions are broken (Under certain circumstances, heavy artillery in Savannah may not automatically move 1 space).
9.2 Movement Restrictions
The following movement restrictions apply:
- Shattered units may not move (13.4).
- Disrupted units may only move 1 hex per turn (13.3).
- Pinned units may move only if they do not end the movement phase adjacent to any enemy units and the phasing player reduces his Army Morale (9.3 & 13.1).
- A unit may never enter an enemy occupied hex or prohibited terrain (see TEC).
- A unit may never move through a hex in excess of stacking limits (7.2).
9.3 Removing Pinned Markers
After all movement is complete, remove pinned markers from all units on both sides which are not adjacent to enemy units (see PIN under 13.1). The phasing player must reduce his Army Morale by one if any pinned markers are removed.
9.4 Effects of Terrain on Movement
See the TEC and the specific rules booklets for terrain cost. All terrain effects of hexes and hexsides on movement are cumulative.
Exceptions: Up Slope/Creek and Down Slope/Creek hexsides are each treated as a distinct combined terrain type as indicated on the Terrain Effect Chart (i.e. when reading Up Slope/Creek, ignore the Up Slope and Creek effects).
9.5 Roads/Tracks/Paths and Strategic Movement
9.51 ROADS/TRACKS/PATHS: If a unit moves from one hex to another through a hexside crossed by a road, track or path, it spends 1 MP. It ignores the cost of the other terrain in the hex and of any other hexside terrain.
9.52 STRATEGIC MOVEMENT: A unit may move up to twice its printed movement allowance if it conducts its entire movement along roads or tracks, provided it does not begin or move adjacent to enemy units at any point in its movement. Therefore, every hexside crossed must contain connected road or track. Creek fords do not impede Strategic Movement.
9.6 Reinforcements
9.61 PLACEMENT: At the beginning of their side's Movement Phase on the game turn of arrival, reinforcements are placed in hexes marked with the letter that appears after the turn of entry on their counter. Reinforcements may be placed in excess of stacking limits, but the units must obey normal stacking limits as soon as they leave the entry hex, or by the end of the player turn of entry. Reinforcements may always be voluntarily delayed until a later game turn unless the Exclusive Rules for that game prohibit it.
9.62 MOVEMENT: Placement on the board does not cost any movement points. The unit can expend its entire movement allowance and use Strategic Movement during the game turn of entry. See Exclusive Rules for exceptions.
10. Rifle Fire
10.1 General Rules
During the Rifle Fire Phase, both players may fire their rifle unit(s). Rifle Fire is voluntary. No unit is ever required to fire. No unit may fire more than once per phase.
10.2 Selecting a Target
The phasing player must select his target unit(s) before the non-phasing player selects his. If a unit chooses to fire, it must select an adjacent target combat unit. No unit may be the target of more than one Rifle Fire per phase. If more than one rifle unit fires at a target unit, the number of SPs firing is combined.
10.3 Procedure
STEP 1: The firing player cross references his firing SPs on the 'adjacent' column of the Fire Table to determine the 'To Hit' number.
STEP 2: The player rolls a die. The result is modified by all applicable DRMs given in the Fire Combat DRM Table. The modified die roll is compared to the 'To Hit' number. If it is equal to or greater than the 'To Hit' number, a hit is scored.
STEP 3: If a hit is scored, a second (unmodified) die roll is made on the Rifle Fire Damage Table to determine the result. Only the target combat unit will be affected by the result. Ignore any reference to other units in the hex (Exception: 13.1 Leader Casualty). After applying the results, make any Army Morale adjustments that are required.
EXAMPLE: The two American militia units conduct Rifle Fire on the British Guards unit. The SPs of the two rifle units must be combined. Assuming no terrain modifiers, the 'To Hit' number is ≥ 6 with one die, but the two rifle units have not yet fired this game and so receive the +1 DRM First Fire Bonus. The American player rolls a 5 which scores a hit. He then consults the Fire Damage Table and rolls again. He rolls a '4' which results in an R (Retreat) for the Guards unit.
10.4 Simultaneous Fire
Rifle Fire is considered simultaneous. Results, including Army Morale adjustments, are applied at the same time after both sides have fired. The non-phasing player must execute any retreats before the phasing player.
10.5 First Fire Bonus
The DRM for first-time rifle fire can only be used if ALL the units are conducting their first fire. (Players should keep a record of which rifle units have fired.) All firing units lose their first-fire bonus for future fire combats even if no hit is attained. A rifle unit also loses its First Fire capability if it participates in Close Combat in any Game Turn prior to attempting Rifle Fire.
10.6 (Advanced) German Jaeger Rifles
The German Jaegers may make two die rolls against their 'To Hit' number if:
- they are not in a clear or crops hex, and
- there is an open flank as defined in the Turn Flank requirements (12.52).
Both die rolls must be against the same target and only one hit will result in a damage die roll. If both die rolls hit, ignore the second hit.
DESIGN NOTE: The Jaeger companies performed a tactic known as Strassefeuer ("street fire") in which groups of up to 25 men would advance in open order on the exposed flank of an enemy, in five files of five men each. The first man in each file would fire and countermarch to the left to gain the rear of his file and reload. The next man in each file would then fire and countermarch in like fashion. This would continue while the formation was steadily advancing, thus each volley would be delivered several paces closer to the enemy than the previous one. The effect could be devastating, particularly when directed at point-blank range.
11. Defensive Artillery Fire
11.1 General Rules
During the Defensive Artillery Fire phase, the non-phasing player may fire any of his artillery. Defensive Artillery Fire is voluntary—no unit is ever required to fire. No unit may fire more than once per phase.
11.2 Selecting a Target
If a unit chooses to fire, it must select a target combat unit that is within range and LOS (11.4). All artillery units have a maximum range of three hexes (in Vol. IV there will be an exception). The range is the number of hexes from the firing unit to the target, counting the target's hex but not the firing unit's hex. No unit may be the target of more than one Defensive Artillery Fire per phase. If more than one artillery unit wants to fire at a unit, the number of SPs firing is totaled and the range of the farthest unit is used to determine the 'To Hit' number.
DESIGN NOTE: Although extreme ranges were possible for field artillery (3 and 6 pounders), it was the standard practice of the day to fire at 600-800 yards, and often much closer. All artillery of this period was smooth bore and, like the musket, inaccurate at anything but comparatively short distances.
11.3 Procedure
STEP 1: The firing player cross references his SPs with the range to the target on the Fire Table to determine the 'To Hit' number.
STEP 2 (same as in 10.3 above): The player rolls a die which is modified by all applicable DRMs given in the Fire Combat DRM Table. The modified die roll is compared to the 'To Hit' number. If it is equal to or greater than the 'To Hit' number, a hit is scored.
STEP 3: If a hit is scored, a second (unmodified) die roll is made on the Artillery Fire Damage Table to determine the result. Only the target combat unit will be affected by the result. Ignore any reference to other units in the hex. (Exception: 13.1 Leader Casualty.) After applying the results, make any Army Morale adjustments that are required.
11.4 Line of Sight
11.41 For artillery units to fire at a target two or three hexes away, they must be able to see it. In game terms, the artillery unit must be able to trace a clear Line of Sight to the target unit. LOS is always clear when firing at an adjacent unit. LOS is traced from the center of the firing hex to the center of the target hex. For purposes of LOS, slope and slope/run hexsides are considered to be exactly the same, and are referred to solely as slope hexsides.
11.42 BLOCKING TERRAIN: The following hex types are blocking terrain: forest, light forest, Meeting House and Town (see exclusive rules for additional examples of blocking terrain). In addition, any hex that contains combat units, whether friendly or enemy, is blocking terrain. LOS can always be traced into blocking terrain, but never through it (Exception: 11.43, case C—Both units are 'up slope').
11.43 UP SLOPE: Determination of LOS depends upon whether or not both the firing unit and the target unit are in 'up slope' positions to each other. A unit is in an 'up slope' position if the LOS traced from the other unit crosses an up slope hexside as it enters the target hex.
- A. Neither unit is 'up slope': The LOS is blocked if it passes through any blocking terrain hex. In addition, the LOS is blocked if it crosses any slope hexside which is not part of the firing or target unit's hexes.
- B. One unit is 'up slope'. The LOS is blocked if it passes through any blocking terrain hex. With one unit 'up slope', a LOS may be traced through a slope hexside which is not part of the firing or target unit's hexes. The up slope direction of the hexside must be in the same orientation as the up slope direction of the slope hexside in the firing or target unit's hex. If the orientation is not the same, the LOS is blocked. If both the firing and target units have slope hexsides and the range is 3 hexes, the intervening hexside must also be a slope hexside with the same orientation as the other two hexsides. If this intervening hexside is not a slope hexside or if the orientation is different, the LOS is blocked.
- C. Both units are 'up slope'. The LOS between these units is always clear. Ignore blocking terrain.
11.44 HEX SPINES: If a LOS runs exactly along a hexside, it is blocked only if both hexes adjacent to the hexside contain blocking terrain and/or combat units.
EXAMPLE (diagram): The artillery unit is about to conduct artillery fire. The shaded hexes indicate those hexes which are not in the artillery unit's Line of Sight. Hexes marked 'B' are blocked by blocking terrain, hexes marked 'S' are blocked by slopes, and hexes marked 'U' are blocked by a combat unit.
12. Close Combat
12.1 General Rules
12.11 ATTACKER/DEFENDER: The phasing player is considered the Attacker, while the non-phasing player is the Defender.
12.12 WHO MUST ATTACK: Close Combat is mandatory for all friendly combat units (except artillery units) which are adjacent to enemy units. This includes any units which retreated from Fire Combat and are now adjacent to enemy units.
Exception: Rifle units are never required to attack. See Exclusive rules for additional exceptions.
12.13 WHO MUST BE ATTACKED: All enemy units which are adjacent to friendly units must be attacked.
Exception: See 12.14 Diversion.
12.14 (Advanced) DIVERSION: During each Close Combat phase, the phasing player may designate one stack of defending units as receiving a Diversion. The Attacker does not attack these defending units, but the adjacent Attacker's units that created the Diversion must attack some other enemy units. All attacking units which are adjacent to the defending units receiving the Diversion are penalized by having the odds in the Close Combat(s) in which they are involved shifted one column to the left (for example, 2-1 is reduced to 3-2).
12.15 MULTI-HEX COMBAT RESTRICTIONS:
- Each unit, attacking or defending, may only be involved in one Close Combat per player turn.
- Attacking units stacked in a single hex may combine in a single attack or attack different units.
- All defending units in a single hex must be attacked together in a single Close Combat.
- Each Close Combat must involve either one attacking hex or one defending hex only.
EXAMPLE: one attacking hex versus two or more defending hexes or two or more attacking hexes versus one defending hex are legal, but two or more attacking hexes versus two or more defending hexes in a single Close Combat is illegal.
EXAMPLE (diagram): Attackers A, B and C have moved next to Defenders X, Y and Z. During close combat, Defenders Y and Z must be attacked together. However, Attackers B and C need not attack the same hex, though all units shown must be involved in a combat. The attacking player decides to have C attack X, while A and B combine in a single close combat against Y and Z.
12.2 Procedure
12.21 DESIGNATE ATTACKS: The phasing player must announce all Close Combats before resolving any of them. The phasing player designates which friendly units are attacking and which enemy units are being attacked.
12.22 REMOVE PIN MARKERS: After the phasing player has announced all Close Combats, the players remove the 'Pin' markers from all units on the board (13.1).
12.23 COMBAT SEQUENCE: Each Close Combat is resolved separately in any order that the Attacker chooses. For each, follow the procedure given below:
STEP 1, DETERMINE ODDS RATIO: The players total the non-artillery SPs of all their units involved in this Close Combat. The Attacker compares his SP total to that of the Defender. The ratio of Attacking SPs to Defending SPs is rounded off in favor of the Defender to a set of odds given on the Close Combat Table.
EXAMPLE: 5 SPs attacking 4 SPs is 1:1, but 4 SPs attacking 5 SPs is 1:2.
- See 12.3 if all defending units are artillery.
- The defender may declare a Cavalry Withdrawal at this time (see 12.4)
STEP 2, DETERMINE LEAD UNITS: Each side, starting with the Attacker, must choose one unit to be its lead unit. The lead unit must be a Parade Order unit if one is available in the hex. Artillery units may not be chosen as lead units. This unit's morale, as modified by Army Morale, will be used as a DRM for the Close Combat. Also, if there is an adverse combat result, the lead unit will be the first unit to absorb the result (Exception: See 13.1 regarding capture results).
- LEAD UNITS AND PROHIBITED TERRAIN: Units cannot be chosen as lead units if they would be required to advance after combat into prohibited terrain. If only this kind of unit is available, it can be selected as the lead unit, but will not be allowed to advance after combat.
STEP 3, DETERMINE DRMs: Before rolling the die, the players check the Close Combat DRM Chart to see what additional adjustments will be made to that die roll.
NOTE: Militia defending with non-militia artillery would not be considered an all-militia force even though the artillery does not participate in Close Combat nor serve as the lead unit.
NOTE: Rifle units designated by a white letter "R" in a black circle will suffer adverse DRMs in Close Combat while those designated by a black letter "R" in a white circle are immune from adverse DRMs in Close Combat.
DESIGN NOTE: Each close combat takes into account factors other than the sheer numbers involved. These factors are integrated as adjustments to the resolution die roll.
STEP 4, SELECT AND RESOLVE TACTICS: Each side secretly chooses one of its eligible Tactics Chits by placing the chit faceup under their hand. The two Tactics Chits are then revealed simultaneously and cross-referenced on the Tactics Matrix to determine if there is any DRM.
- NC Tactics Matrix Result: No combat takes place. If a side played a Withdraw chit and the Tactics Matrix result is NC, the side playing the Withdraw chit must retreat all units one hex. Exception, artillery in the attacker's stack never retreats. If both sides chose Withdraw, the Defender retreats first. Skip to step 9.
STEP 5, RESOLVE CLOSE COMBAT: Close Combat is resolved by rolling a die, applying the DRMs, and cross-referencing it with the Odds Ratio on the Close Combat Table. The results to the left of the slash apply to the Attacker. The results to the right of the slash apply to the Defender.
STEP 6 (Advanced), MOMENTUM DECISION: The player holding the fewest Momentum Chits (the Defender in the case of a tie) may choose to spend one to return to the Resolve Close Combat step and re-roll the die. If this player declines to use momentum, the other player may choose to expend a Momentum Chit to return to the Resolve Close Combat step and re-roll the die. Multiple Momentum Chits may be spent by one or both sides in each Close Combat, but only one may be spent each time this step is reached (that is, there must be a re-roll of the Close Combat die between Momentum Chit expenditures).
DESIGN NOTE: This sequence is an attempt to ensure that the player entering a battle with the most momentum has the best chance to be the last player to call for a re-roll.
STEP 7, APPLY CLOSE COMBAT RESULTS: The Close Combat results are applied before proceeding to the next Close Combat (see 13.1 for explanations of results). When both players are required to retreat, the Defender must retreat before the Attacker. After applying the results, make any Army Morale adjustments which are required.
STEP 8 (Advanced), GAIN MOMENTUM: If the final modified Close Combat die roll is less than or equal to -1, the Defender gains one Momentum Chit. If the final modified Close Combat die roll is greater than or equal to 10, the Attacker gains one Momentum Chit.
STEP 9, ADVANCE AFTER COMBAT: If the defender's hex becomes vacant, the attacker must advance with at least the lead unit if it did not retreat. Other units which participated may advance up to the stacking limit, including units which had to take a morale check and passed it. Artillery units may never advance. The defender may never advance after combat.
12.3 Artillery in Close Combat
Artillery SPs never count for Close Combat. If the only defending units are artillery, they are captured. Place all the defending artillery units in the captured box and skip to step 9.
12.4 Cavalry Withdrawal
If all the defending units in a Close Combat are Parade Order cavalry and none of the attacking units are cavalry, the Defender has the option to announce a Cavalry Withdrawal. Instead of resolving the Close Combat normally, his mounted cavalry retreats three hexes to a hex not adjacent to an enemy unit. Mark the unit(s) with a Cavalry Withdrawal marker and go straight to step 9 of the Close Combat procedure.
RESTRICTIONS: Mounted cavalry units marked with a Cavalry Withdrawal marker:
- May not move or attack
- Defend normally
- Retain their ZOC.
Mounted cavalry that are attacked again while already marked with a Cavalry Withdrawal marker may not choose back-to-back Cavalry Withdrawal options.
Pinned cavalry can choose the Cavalry Withdrawal option at a cost of –1 Army Morale adjustment according to Series Rule 13.1.
REMOVAL: Cavalry Withdrawal markers are automatically removed from friendly units during the owning player's next Rally phase.
12.5 Tactics Chits
NOTE: Beginning with Pensacola, Tactics Cards are now provided as an alternative to Tactics Chits. They are used in the same way as the chits are used.
12.51 At the beginning of the game, each player takes one set of Tactics Chits. During each Close Combat, each player will select one eligible Tactics Chit to influence the battle.
12.52 (Advanced) TACTICS CHIT USE RESTRICTION: The following requirements must be met before a Tactics Chit is eligible to be selected in each Close Combat.
- Skirmish, Attack en Echelon, Stand Fast, Withdraw: No restriction. Exception: An all-infantry force may not choose the 'Withdraw' tactic in clear, field, or crops terrain if the attacking force contains any mounted units.
- Frontal Assault, Commit Reserve: A Leader must be stacked with or adjacent to at least one unit involved in this Close Combat; the unit does not have to be the lead unit. See Exclusive Rules for leader restrictions.
- Turn Flank, Refuse Flank: There must be one empty hex adjacent to both players' units (one hex with defending units in it, and one hex with attacking units in it), AND a friendly Leader must be stacked with or adjacent to at least one unit involved in the Close Combat; the unit does not have to be the lead unit. See Exclusive Rules for additional restrictions.
Note: Flanks may not be turned if the only empty flank hex as described above is prohibited terrain.
12.53 One Leader can meet the eligibility requirements for Tactics Chit use for all units with which it is stacked or to which it is adjacent.
12.54 (Advanced) If one player plays an illegal Tactics Chit, their opponent receives a modifier of one in their favor (+1 for attacker or -1 for the defender). If both players play illegal Tactics Chits, the Tactics modifier is 0.
12.6 (Advanced) Momentum Chits
12.61 There is a pool of five back-printed Momentum Chits. Players accumulate Momentum Chits during the game. See specific rules to determine if one side starts the game with a Momentum chit.
12.62 SPENDING MOMENTUM CHITS: Momentum chits may be used in one of the three methods below. When a Momentum Chit is used, it is returned to the pool and is eligible to be accumulated again.
- CLOSE COMBAT: Each chit spent allows the re-roll of one Close Combat resolution die roll. More than one Momentum Chit may be used in one Close Combat (12.23, step 6).
- INITIATIVE: For each Momentum Chit spent BEFORE the initiative die is rolled, a player may add two (+2) to their initiative die roll. The player who had Initiative on the previous game turn must decide how many Momentum Chits to spend first (6.0).
- INITIATIVE: A player may spend three Momentum Chits AFTER the initiative die rolls to negate the result of the die rolls and instead dictate which player has the initiative (6.0).
See Exclusive Rules for other ways to spend Momentum.
12.63 GAINING MOMENTUM CHITS:
- The Defender gains one Momentum Chit during the Gain Momentum step whenever the final modified Close Combat die roll is less than or equal to –1.
- The Attacker gains one Momentum Chit during the Gain Momentum step whenever the final modified Close Combat die roll is greater than or equal to 10.
12.64 LOSING MOMENTUM CHITS: If a unit with a printed unit morale of +2 is captured while it is at full strength, the owning player must return one Momentum Chit to the pool. If the player does not have a Momentum Chit, the opposing player is entitled to take a Momentum Chit from the pool. If there are no Momentum Chits in the pool, there is no further effect.
12.65 If a player is entitled to receive a Momentum Chit but there are none available in the pool, the opposing player must return one Momentum Chit to the pool instead. If the opposing player does not have a Momentum Chit, there is no further effect. See Army Morale Adjustment chart for additional cases.
12.7 Surrounded Close Combat Modifier
When all six hexes adjacent to a defending unit are occupied by enemy units, enemy ZOCs or prohibited terrain, the attacker modifies his Close Combat die roll by +1. The converse also applies—if the attacker is surrounded, the Close Combat die roll is modified by -1. For this rule only, friendly units negate enemy ZOCs in their hex.
13. Combat Results
In the following rules, the 'affected unit' is the lead unit in a Close Combat, or the target unit for Fire Combat. In Fire Combat, other friendly combat units in the hex are never affected, but leaders may be.
13.1 Explanation of Results
"-" No effect.
"AM" Army Morale Loss: The affected player must reduce his Army Morale marker by one.
"R" Retreat: The owning player retreats the affected unit one hex (see 13.2). The other friendly units in the close combat, and the Defender's artillery (but not the Attacker's artillery), must make a morale check; if they fail, they must retreat one hex also. When both sides must retreat, the defender retreats and makes morale checks first. See Exclusive Rules for exceptions to mandatory retreat.
"D" Disruption: The owning player retreats the affected unit three hexes (see 13.3) and places a disruption marker on the unit. The other friendly units in the close combat, and the Defender's artillery (but not the Attacker's artillery), must make a morale check; if they fail, they must retreat one hex.
- If the affected unit was already disrupted, it is now shattered. The affected unit must still retreat three hexes.
- If the affected unit was already shattered, it is eliminated and placed in the eliminated box.
"1" One-Step Loss: The affected unit loses one step. If the unit is a full-strength two-step unit, it is flipped over and remains in the hex; otherwise, the unit is placed in the eliminated box. The other friendly units in the close combat, and the Defender's artillery (but not the Attacker's artillery), must make a morale check; if they fail, they must retreat one hex.
DESIGN NOTE: Because it is considered to be covering the retreat of the other units, the unit that takes the loss never retreats.
"2" Two-Step Loss: The affected unit is eliminated and placed in the eliminated box. If the affected unit was only a one-step unit or was a reduced two-step unit, a second unit must take a one-step loss; if there is no other unit in the hex, the second step loss is ignored. The other friendly units in the close combat, and the Defender's artillery (but not the Attacker's artillery), must make a morale check; if they fail, they must retreat one hex.
"DC" Captured, Defender's Choice: One combat unit of the Defender's choice on the affected side is captured; place the unit in the captured box (if the printed unit morale is +2, see also 12.64). This unit does not have to be the lead unit, neither does it have to be at full strength. The other friendly units in the close combat, and the Defender's artillery (but not the Attacker's artillery), must make a morale check; if they pass, they must retreat one hex; if they fail, they suffer a "D" result (retreat three hexes and become disrupted).
"AC" Captured, Attacker's Choice: One combat unit of the Attacker's choice on the affected side is captured; place the unit in the captured box (if the printed unit morale is +2, see also 12.64). This unit does not have to be the lead unit nor does it have to be at full strength. The other friendly units in the close combat (including all the Defender's artillery but not any of the Attacker's artillery) must make a morale check; if they pass, they must retreat one hex; if they fail, they suffer a "D" result (retreat three hexes and become disrupted).
"PIN" Pinned: The opposing units remain engaged. All disrupted and shattered units on both sides are captured. The Defender, followed by the Attacker, then places his or her units in the captured box and adjusts army morale. A pinned marker is then placed on all hexes involved in this close combat. The next phasing player must either:
- A. Attack with all units marked as pinned, and attack all defending units marked as pinned during this player turn (additional units may stack and/or attack with the pinned units); OR:
- B. Move all friendly pinned units so that they are not adjacent to any enemy units; and do not move any other friendly units adjacent to the enemy pinned units; and reduce his or her Army Morale by one (9.3).
NOTE: In case B above a leader cannot leave a pin hex without triggering an Army Morale penalty.
NOTE: Pinned defending units may not receive a Diversion.
'Pin' markers are removed from all friendly and enemy units either at the end of the movement phase, with an Army Morale Penalty (9.3), or after all Close Combats are assigned (12.22). Pinned defending units may not receive a diversion. This is an Exception to 12.14.
"*" Leader casualty: The modified die roll must equal this number exactly. The owning player removes one Leader and places it in the eliminated box. The Leader chosen need not be the one in command. This is the only result from artillery or rifle fire that may affect other units in the hex. If no leader is present, ignore both the result and the Army Morale adjustment due to Leader casualty.
13.2 Retreat
13.21 RETREAT GUIDELINES: If possible, a unit must retreat into a hex which is not adjacent to an enemy unit. In addition, the unit must retreat towards a friendly map edge if possible. See specific game rules for definition of 'friendly map edge'.
13.22 RESTRICTIONS: Units may not retreat:
- Into an enemy occupied hex
- Into an enemy ZOC, even if friendly units already occupy the hex
- Into prohibited terrain
- Off the map
- In violation of stacking limits (see 13.23 two-step unit exception).
13.23 RETREAT AND CAPTURE: Any unit that cannot retreat the full distance because of restrictions is captured instead; this includes retreats caused by Rifle Fire or Artillery Fire. The unit is removed and placed in the captured box.
Exception: If a two-step unit would be captured for failure to retreat due to stacking limit violations, the owning player may choose to take a step loss and retreat, provided that the reduced-strength unit would not violate stacking limits in the hex into which it retreats. The Army Morale adjustments of suffering a '1' result are applied if the unit is reduced in this manner. (The player may still choose to have the unit captured instead of taking a step loss.)
13.24 Any unit that is retreating three hexes must end three hexes from its starting hex, counting by the shortest distance, or else be captured. The hex may not be adjacent to an enemy unit if there is any hex which is also three hexes from the starting hex and not adjacent to an enemy unit. Cavalry Withdrawal (12.4) may never end adjacent to an enemy unit.
13.25 COMBAT AND PREVIOUSLY RETREATED UNITS: If a unit retreats from a Close Combat into a hex which has not yet had its Close Combat resolved, it may not contribute any strength to that Close Combat, nor may it be selected as the lead unit. If its side suffers any result in the Close Combat, the previously-retreated unit must make a morale check. If it passes, it must retreat one hex; if it fails, it suffers a "D" result (per 13.1).
13.26 LEADER RETREATS: Any Leader may freely retreat along with any friendly retreating units with which it is stacked. Leaders are never required to retreat.
13.27 ARTILLERY RETREATS: Artillery units retreat like other units. Artillery units are NOT captured automatically if they end the Apply Close Combat Results Step adjacent to enemy combat units. Automatic capture only occurs to defending artillery units during the Determine Odds Ratio Step.
13.3 Disruption
Disrupted units:
- May only move one hex per turn, and may not move adjacent to an enemy unit. If a disrupted unit begins a movement phase adjacent to an enemy unit, it must use its one hex move to move away from (i.e. no longer adjacent to) as many enemy units as possible
- May not attack; artillery and rifle units may not fire
- Defend with only half of their SPs (fractions rounded up)
- Have no ZOC
- Are shattered, if they receive an additional "D" result
- Are captured if they receive a 'PIN' result
- Suffer an additional "D" result, if they end their own Close Combat phase adjacent to enemy units, and are not stacked with friendly Parade Order units. This results in the unit becoming shattered (i.e. they must retreat 3 hexes or be captured).
13.4 Shattered
Shattered units:
- May not move
- May not attack; artillery and rifle units may not fire
- Defend with 1 SP (regardless of their actual SP ratings), and may NOT receive any terrain DRMs
- Have no ZOC
- Are eliminated, if they receive an additional "D" result (place such units in the eliminated box)
- Are captured, if they receive a 'PIN' result
- Are captured, if they end ANY Close Combat phase adjacent to enemy units, and are not stacked with friendly Parade Order units; remove the units and place them in the captured box.
13.5 Morale Checks
When a Morale Check is required, a die is rolled and the value is added to the unit's modified morale. If the result is 5 or greater, the unit passes the morale check. If the result is 4 or less, the unit fails the morale check.
MORALE CHECK MODIFIERS: Apply the following modifiers to the Morale Check die roll:
- +1 Defending units attacked solely across unbreached fieldwork hexsides including forts, redoubts, stockades, revetments, earthworks, flechettes or any other type of fortified hexside specifically depicted in the game.
- +? Leadership DRM (14.23)
14. Leaders
14.1 Stacking Leaders
Any number of friendly Leaders may stack in a hex. However, only the highest ranking Leader (see 3.2) may command units in a hex (that is, provide DRMs for those units). Place the Leader in command on top of the friendly units. Check Exclusive Rules for limitations to leader stacking.
14.2 Using Leaders
14.21 CLOSE COMBAT DRM: During Close Combat, a Leader in command modifies the die roll with his Close Combat DRM. When attacking, the rating is added to the die roll; when defending, it is subtracted.
14.22 TACTICS CHITS: If a combat unit is stacked with or adjacent to a Leader during Close Combat, the player is eligible to play additional Tactics Chits (12.5).
14.23 LEADERSHIP DRM: During all morale checks and rally attempts, the Leader in command may add his Leadership DRM to all combat units in his hex.
14.3 Affecting Leaders
14.31 Leaders are never disrupted. If stacked with units which retreat or suffer disruption, the leader may either retreat with them or remain in place. Leaders are only affected directly in combat by an "*" result.
14.32 Leaders alone in a hex are captured immediately if Parade Order or Disrupted enemy combat units enter their hex. This capture can occur either during the movement phase or as a result of advance after combat. If the Leader is captured during enemy movement, the capturing unit does not have to stop or expend additional movement points.
15. The Rally Phase and Unit Morale
15.1 The Rally Phase
During the Rally Phase, the phasing player's disrupted or shattered units that are not adjacent to enemy combat units may attempt to Rally. A unit attempts to Rally by making a Morale Check (13.5). A Leader in command may modify the Rally attempt of any units in the same hex by adding his Leadership DRM (14.23). A Leader is not required in order to make a Rally attempt.
15.2 Rally Effects
A disrupted unit that passes its Morale Check is restored to Parade Order. If it fails its morale check, it remains disrupted. A shattered unit that passes its Morale Check becomes disrupted. If it fails its Morale Check, it remains shattered.
15.3 Unit Morale
15.31 BASE MORALE: A unit's base morale is printed on the unit. The base morale on the reduced side of a unit is usually one less than on the full-strength side.
15.32 MODIFIED MORALE: A unit's modified morale is the unit's base morale plus the unit's army morale modifier (see 16.2). A lead unit's modified morale is used as a DRM for Close Combat (see 12.2).
16. Army Morale
DESIGN NOTE: In this period of warfare, battles were decided less often by inflicting overwhelming losses than by destroying the opponent's will to resist. The Army Morale Track measures the tenacity and will to fight of a player's entire force. The success or failure of the individual units throughout the course of play will have a cumulative effect upon the overall status of each player's army. Conversely, the overall morale status of a player's army influences the ability of individual units to perform to maximum effect.
16.1 Adjusting Morale
Army Morale may need to be adjusted each time one of the following occurs (see Army Morale Adjustment Chart):
- A Fire or Close Combat result is other than 'no effect'.
- A unit rallies (+1)
- A Leader casualty (see specific rules)
- PIN markers are removed in the Movement Phase (9.3).
16.2 Army Morale Levels
16.21 HIGH MORALE: If an army is considered at High Morale the Initiative DRM for that army is +1. All units in a High Morale army use their printed unit morale ratings.
16.22 FATIGUED: If an army is Fatigued, the Initiative DRM for that army is 0. All units in a Fatigued army have their unit morale ratings reduced by 1.
16.23 WAVERING: If an army is Wavering, the Initiative DRM for that army is –1. All units in a Wavering army have their unit morale rating reduced by 2.
16.24 If the Army's Morale changes between High, Fatigued or Wavering during the resolution of a Fire Combat or Close Combat, resolve any resulting morale checks using the Army Morale level that was in effect at the beginning of that Combat. The new Army Morale level is used for any Combats which are still to be resolved in that Combat Phase.
16.3 Demoralized and Substantial Victories
If an Army's Morale falls to 0, it is considered Demoralized. The game ends immediately, and the opposing player wins a Substantial Victory.
Expanded Sequence of Play
A. Initiative Segment (see 6.0)
- Each player rolls one die and modifies it by the Army Morale DRM to determine who has the Initiative this turn.
B. Initiative Player Turn
-
Flip the game-turn marker to indicate the correct player turn.
-
MOVEMENT PHASE (see 9.0)
- Shattered units may not move (13.4).
- Disrupted units may only move one hex (13.3)
- Pinned units may move only if they do not end their move adjacent to an enemy unit and the phasing player reduces his Army Morale (9.4).
- Units may conduct Strategic Movement along roads or tracks (rule 9.22)
- RALLY PHASE (see 15.0)
- Make a Morale Check (13.5) for each friendly Disrupted (13.3) or Shattered (13.4) unit that is not adjacent to an enemy combat unit.
- A modified die roll ≥ 5 Rallies the unit.
- Shattered units that Rally become Disrupted, Disrupted units that Rally become Parade Order.
- DEFENSIVE ARTILLERY FIRE PHASE (see 11.0)
- The non-phasing player may fire any or all of his artillery units.
STEP 1: Determine "To Hit" number (cross reference artillery SPs with the range to the target on the Fire Table). STEP 2: Roll a die. If the modified die roll is equal to or greater than the "To Hit" number, a hit is scored. STEP 3: If a hit is scored, a second unmodified die roll is made on the Artillery Fire Damage Table to determine the result. After applying the results, make any Army Morale adjustments that are required (16.1).
- RIFLE FIRE PHASE (rule 10.0)
- Both players may conduct Rifle Fire with their Rifle units.
- Fire is considered simultaneous (10.4).
STEP 1: Determine the "To Hit" number (10.3). STEP 2: Roll a die. If the modified die roll is equal to or greater than the "To Hit" number, a hit is scored (10.3). STEP 3: If a hit is scored, a second (unmodified) die roll is made on the Rifle Fire Damage Table. Make any Army Morale adjustments that are required (16.1).
- CLOSE COMBAT PHASE (rule 12.0)
- A. Designate all attacks (12.21). The phasing player must attack with all his units that are adjacent to enemy units (exception: artillery and rifles), and all adjacent enemy units must be attacked.
- B. Remove Pin markers from all units (12.22).
- C. Conduct all designated Close Combats
CLOSE COMBAT SEQUENCE (12.23):
- STEP 1: Determine Odds Ratio (Artillery Capture (12.3); Cavalry Withdrawal (12.4))
- STEP 2: Determine Lead Units
- STEP 3: Determine DRMs
- STEP 4: Select and Resolve Tactics
- STEP 5: Resolve Close Combat
- STEP 6: Momentum Decision*
- STEP 7: Apply Close Combat Results (Make Army Morale Adjustments)
- STEP 8: Gain Momentum*
- STEP 9: Advance after Combat
*Advanced Game only
- Move the game-turn marker to the bottom half of the game turn and flip it over
C. Second Player Turn Same as above, except ignore B1 and B7.
D. End-of-Turn Segment
- Check for Automatic Victory (see Exclusive rules booklet)
- If it is the last game turn of the scenario, determine a winner.
- Advance the game-turn marker to the top half of the next game turn.
Part Two: Monmouth Courthouse Exclusive Rulebook
Monmouth Courthouse Exclusive Rulebook (2007). Battles of the American Revolution Volume V.
I. Prepare for Play
Counters:
American Player
- Blue with lt. blue stripe: Continentals of Lee's Advanced Corps
- Blue with no stripe: Continentals of Washington's Main Army
- Blue with green stripe: Patriot Militia
DESIGN NOTE: Two American units have different names on their reverse side. This represents the fact that those unit commanders were casualties during the actual battle and were replaced by their subordinates. The units are Wesson/Ramsay and Durkee/Olney.
British Player
- Tan with red stripe: British Regulars
- Tan with yellow stripe: Provincials
- Tan with green stripe: Hessians
Set Up:
Several units have 4-digit hex locater numbers printed on the counters. These should be set up on the board accordingly.
Place all other units on the Game Turn Track corresponding to their printed turn-of-entry information. [See 4.11, 4.12 & 4.13]
Army Morale:
Each army has a starting Army Morale of 20.
Momentum:
Neither side begins the game with Momentum.
Initiative:
The Initiative on Game Turn 1 is American followed by British. Turns 2–14 are random player order.
Game Length:
The Campaign Game is 14 turns long, unless either side achieves automatic victory. (See also individual scenarios for shorter games.)
II. Victory Conditions
British Decisive Victory
Case 1: Eliminate, capture, or shatter 16 SPs of American combat units, excluding militia, on or before game turn 7.
Case 2: Occupy hex 1211, at the intersection of the Englishtown and Manalapan Roads, at the end of any game turn. A large red star identifies this hex. Occupation is defined as having a Parade Order combat unit, excluding artillery, in the hex - regardless of enemy units or their zones of control.
DESIGN NOTE: Possession of this hex indicates the British have gotten in the rear of the American position and can threaten the American depot at Englishtown.
American Decisive Victory
Case 1: Eliminate, capture, or shatter every combat unit in the British rear-guard, on or before game turn 7.
The British rear-guard can be identified by their MP values shown in white boxes.
Case 2: Occupy hex 4114, at the intersection of the Burlington and Shrewsbury Roads and Dutch Lane, at the end of any game turn. A large blue star identifies this hex. Occupation is defined as having a Parade Order combat unit, excluding artillery or militia, in the hex - regardless of enemy units or their zones of control.
DESIGN NOTE: Possession of this hex indicates the Americans have gotten behind the British rear guard and can threaten the British baggage train making its way to Middletown and Sandy Hook.
Substantial Victory
See Series Rules
Marginal Victory
A margin of 3 or more victory points at the end of the game. Any other result is considered a draw.
Terrain Victory-Points
Hex 2716: Indicated on the map with a small yellow star, is worth 1/2 VP to whichever player controls* it at the end of the game.
DESIGN NOTE: Known today as "Overlook Hill," this high ground was a significant vantage point for both sides during the battle and dominated the battlefield during the mid day action.
Hex 3519: Monmouth Courthouse is worth xx VP per turn to the American player only when controlled* by him at the end of any game turn. This objective is indicated with a small blue star.
Hex 1815: Parsonage Farm. This hex is worth xx VP per turn to the British player only when controlled* by him at the end of any game turn. This objective is indicated with a small red star.
*Control of these terrain objectives is defined as occupying or being the last to pass through the hex with a Parade Order combat unit other than artillery or militia. Friendly control of an unoccupied victory hex can be negated by the presence of an enemy ZOC. In such a case, neither player receives the VPs.
Back-printed "Control" markers are provided for players to keep up with the changing status of control throughout the game.
Important: Players should keep a sidebar record of these VPs.
III. Sequence of Play
A. Initiative Segment (Begin on turn 2)
B. Initiative Player Turn
- Command & Control Phase: Begin on turn 2, Americans only. Omit after Lee is relieved of command, (See Command & Control Rule 4.64).
- Movement Phase. Receive reinforcements as scheduled on the Game Turn Track. Reinforcements can enter play at any time during a player's movement.
- Rally Phase
- Defensive Artillery Fire Phase (non-phasing player)
- Rifle Fire Phase (simultaneous)
- Close Combat Phase
C. Second Player Turn
Repeat steps 1-6
D. End of Turn Segment
E. Victory Determination/Advance Game Turn Marker
IV. Special Rules
4.1 Reinforcements
Reinforcements enter the game according to the Game Turn Track. American reinforcements enter at hexes A-1, A-2, A-3 or A-4. British reinforcements arrive at hex "B." Exception: See British Conditional Reinforcements (Rule 4.12).
BONUS MOVEMENT:
- On Turn 1 and 2 American reinforcements receive +2 MPs on turn of arrival.
- All British artillery receives +1 MP on turn of arrival.
BLOCKED ENTRY HEXES: If enemy units or their ZOC occupy the entry hex, reinforcements are delayed for one Game Turn, after which they may enter at the nearest hex that is neither blocked by units nor their ZOC. If two such hexes are equally distant, the owning player may choose. In such a case the arriving units must pay normal terrain cost to enter the hex.
ENTRY AND STACKING: Reinforcements may enter play over stacked but must immediately move to conform to stacking limits. Units unable to conform to stacking limits are delayed until the next game turn. Such units must enter play ahead of any other reinforcements scheduled to enter at the same hex on subsequent turns.
4.11 Morgan's Detachment
The American player has several units labeled "MD" for Morgan's Detachment. Place these units on Turn-8 of the Game Turn Track at the start of the game. Beginning on the American half of Game Turn 8, the American player rolls a die and consults the Game Turn Track to see if the die roll corresponds to the range necessary to allow Morgan's Detachment to enter play. Morgan's units enter through the hex marked "A-4" and may not use Strategic Movement on the turn they enter play.
If Morgan's Detachment does not enter play on a given turn, the units should be moved along the Turn-Track accordingly.
4.12 British Conditional Reinforcements
The British player has Conditional Reinforcements that enter only if Morgan's Detachment has entered the game. These reinforcements consist of the Hessian Mounted Jaeger unit "v. Wurmb" and the British "17th Light Dragoons." They enter play during the British player's Movement Phase of the Game Turn following the turn in which Morgan's Detachment arrived. Note: These two units are marked "MD +1" accordingly.
Place these units on Turn-9 of the Game Turn Track at the start of the game and move them along the Turn-Track as necessary.
- v. Wurmb enters at any hex along the southern map edge, between 4127 and 3527 inclusive, and pays normal terrain cost to arrive. These hexes are identified on the map with red arrows.
- The 17th Light Dragoons enter at hex "B."
4.13 Variable Reinforcements
Units belonging to either player whose turn of entry information is in parenthesis are Variable Reinforcements that require a die roll to enter play.
4.131 The American player has Variable Reinforcements that may enter play on Game Turn 12. The American player rolls a die and consults the Variable Reinforcement Entry Table to see if the die roll corresponds to the range necessary to allow these units to enter the game.
American Variable Reinforcements enter through the hex marked "A-1."
4.132 The British player has Variable Reinforcements that may enter play on Game Turn 9. The British player rolls a die and consults the Variable Reinforcement Entry Table to see if the die roll corresponds to the range necessary to allow these units to enter the game.
SECOND DIE ROLL: British units that pass their variable entry die roll must roll again, individually, and enter play on a second die roll of 5-9. Hessian units do not require a second die roll to enter.
4.14 Momentum and Reinforcements
Each player may spend 1 Momentum chit per turn to add +2 DRM to his Variable Reinforcement die roll. This is an addition to Series Rule 12.62. The British may do so on turn 9. The Americans may do so on turn 12.
Important Exception: Morgan's Detachment is not affected by this rule.
4.2 Heavy Artillery & Howitzers
The British player has two special artillery units: "Pattison," representing 12-pound heavy field guns, and "Howitzers," representing 8" howitzers. Both of these units have a range of 4 hexes.
- Howitzers may throw arching fire over intervening blocking terrain or units and do not require LOS. This is an Exception to Series rule 11.4
- The Exception in Series Rule 9.1 does not apply to heavy artillery, which must always be able to pay the cost of a space in order to enter it.
4.3 Leader Rules
4.31 American
Any American leaders may command any American units, unless specified below.
Lee: By the end of the 3rd American player-turn, Lee must be on or east of hex row 21xx. (Historical Footnote: Hex 2115 contains the silhouette of a mounted officer. This is the approximate location where Washington relieved Lee of command.) If Lee fails to reach or cross hex row 21xx by the end of the 3rd turn, or if having reached it he subsequently moves west of it for any reason while still in command of the Advanced Corps, the American player loses 2 Army Morale points and the British player gains 1 Victory Point. Players should keep a sidebar record of this VP gain if applicable.
This is a one-time penalty and the VP and AM adjustment is permanent, even if Lee later returns onto or east of hex row 21xx.
PLAYER NOTE: Even if the American player has incurred this penalty, he must still move Lee onto or east of hex row 21xx as soon as possible. To not do so is to violate the spirit of the game.
Once Washington removes Lee from command of the Advanced Corps, Lee may move freely on the board without penalty. (See 4.64)
Washington: Washington has the ability to project his Leadership DRM into adjacent hexes. This is an Exception to Series Rule 14.23. His Leadership DRM is +1 for combat units with whom he is adjacent. This adjacency modifier is unique to Washington and is in addition to any Leadership DRM provided by a leader in command in the adjacent hex.
Morgan: May only command units belonging to "Morgan's Detachment." He may influence the play of Tactics Chits, however, according to Series Rule 14.22
Von Steuben: Von Steuben is removed from play without VP or Army Morale adjustments at the end of Game Turn 4. He may return to the game with American Variable Reinforcements scheduled to arrive on Game Turn 12. If von Steuben is a casualty prior to turn 4, he is treated normally.
4.311 American Seniority: (Major Generals) Lee followed by Greene, Stirling, Lafayette, and von Steuben.
4.32 British
Any British leaders may command any British, Provincial, or Hessian units unless specified below.
Erskine: May only command units belonging to the British or Provincial Lt. Infantry. He may influence the play of Tactics Chits, however, according to Series Rule 14.22
Webster: May only command the 33rd Regiment.
Monckton: May only command units belonging to the British 2nd Grenadiers.
Simcoe: May only command Provincial units.
4.321 British Seniority
- (Lt. Generals) Clinton followed by Cornwallis
- (Lt. Colonels) Monckton, followed by Webster and Simcoe
4.33 Demi-Leader
Oswald: Oswald can stack with any American artillery unit, regardless of the other unit's SP. This is an Exception to Series Rule 7.1. Artillery stacked with Oswald can move at his 4 MP rate of movement while it remains stacked. Oswald has no influence over the play of Tactics Chits.
4.4 Molly Pitcher (Optional)
AUTOMATIC RALLY: Whenever any American artillery unit attempts to rally from Disruption, the American player may invoke this rule (one time only). Place the Molly Pitcher counter on top of the artillery unit. That unit automatically rallies without die roll. Apply normal Army Morale adjustments. That artillery unit will always automatically rally after a Disruption. This is true even during Heat Game Turns.
SHATTERED ARTILLERY: Molly Pitcher will not automatically rally an artillery unit that is Shattered. Such rally must occur normally. Once the artillery has rallied from Shattered to Disrupted, Molly Pitcher can, during the next Rally Phase, complete the rally automatically as described above.
PROPERTIES: The Molly Pitcher counter remains stacked with that artillery unit for the rest of the game. The Molly Pitcher counter has the following properties:
- does not count against stacking, has no combat value, and cannot be targeted by enemy rifle or artillery fire.
- If the artillery unit is eliminated or captured, Molly Pitcher is permanently removed from the game. (A step loss to a back-printed artillery unit does not eliminate Molly.)
- There are no additional VP or Army Morale adjustments for Molly Pitcher.
- If the artillery unit retreats or countermarches off the board, Molly Pitcher may not reenter play.
Clarification: It is always the American player's option as to which artillery unit will benefit from Molly Pitcher and when such benefit will be invoked, subject only to an initial Disruption result.
Historical Deployment Option: To play Molly Pitcher historically, deploy her only with Proctor's artillery, subject to the above conditions.
4.5 Heat Game Turns
Turns 6–12 are Heat Game Turns. They are indicated on the Game Turn Track by yellow informational bands that span each Heat Game Turn box. The following rules are in effect for both sides during Heat Game Turns:
- –1 DRM to all Morale Checks.
- If the Initiative die rolls result in a tie, the Game Turn is skipped unless at least 1 player used Momentum to influence the die roll. In that case, roll again until the tie is broken in the standard fashion.
- Any Reinforcements due to arrive during a Game Turn that is skipped due to heat, are delayed until the next playable turn.
4.6 Command & Control
4.61 Procedure:
Beginning on Game Turn 2, the American player rolls 1 die to identify any brigades or detachments that may be affected by a break down in Command & Control (C&C) for the turn. Place the C&C ID marker on the ID Table located on the map. The marker will fit into the box corresponding to the die roll. Align the marker so that the arrow points to the selected brigades or detachments.
CONFUSION MARKERS: Place individual C&C Confusion markers, (Question Marks), on each unit of the identified brigades or detachments, wherever those units may be on the board.
IDENTIFICATION: Units can be easily identified by the corresponding letter code printed on each one. For example, units belonging to Maxwell's Brigade have the letter "M" displayed on the counters, while units belonging to Scott's Brigade have the letter "S" etc.
IMPACT: Roll the die a second time to determine impact on the designated units. Place the C&C Impact marker on the Impact Table, also located on the map. The marker will fit into the box corresponding to the die roll. Align the marker so that the arrow points to the nature of the Command & Control breakdown.
The impact of Command & Control breakdown will equally affect all units belonging to the designated brigades or detachments, wherever they may be on the board, as previously identified by the placement of the C&C Confusion markers.
4.62 C&C Impact / "Countermarch" Results
When called upon to countermarch, units must, if possible, move their full MP toward their entry hex, subject to all normal movement and stacking restrictions. Units that begin on a road must use strategic movement during their countermarch, if possible.
Units that countermarch off the board may not re-enter play.
An Army Morale adjustment of –1 is made each turn in which any American units countermarch off the board. No VP is awarded.
Clarification: It doesn't matter if one unit countermarched off the board or a stack of 3 units. The penalty would still be a loss of 1 AM point for that Game Turn.
Units called upon to countermarch as a result of Command & Control Impact, but who are unable to because of the presence of enemy units, enemy ZOC, or prohibited terrain, are captured instead.
4.63 C&C Impact / Leaders, Modifiers, & Other Effects
See Command & Control Table.
4.64 Relieving Lee of Command:
Lee is relieved as soon as he and Washington occupy the same hex. Washington must end the turn with Lee and neither can move any further that turn. The change of command has the following effects:
- American Army Morale is increased by 1.
- There are no British Army Morale adjustments.
- There are no VP adjustments for either player.
- C&C restrictions are lifted at the beginning of the next American player turn.
- Place the "Command & Control Intact" marker on the corresponding turn of the Game Turn Track as a reminder.
- Lee remains in the game after being relieved and functions like a normal leader for all game purposes thereafter.
IF LEE DIES: If Lee is a casualty prior to being relieved of command, units of the Advanced Corps still roll on the Command & Control Table. In this case, C&C restrictions are lifted on the turn after Washington enters the game, (Game Turn 7.) Place the C&C Intact marker on turn 7 as a reminder.
If Lee is a casualty prior to being relieved, apply normal Army Morale and VP adjustments.
4.7 British Rear-Guard Maneuver Zone
A progression of hexes, extending from hex 3028 to hex 4308, is marked by subtle dashed outlines within each hexagon. This "line" represents the extent of the British Rear Guard Maneuver Zone. British and Provincial units with their MP values in white boxes belong to the British Rear Guard and are under the following restrictions:
- may not move beyond the Maneuver Zone although they may move freely on or behind it (east, southeast, or south.) Exception: Lt. Colonel Simcoe and the Diemar Hussars may move without restriction.
- Rear Guard units that attack while at the Maneuver Zone limit cannot advance after combat. This is an exception to Series Rule 12.23 Step 9.
These restrictions remain in effect until the British player-turn of Game Turn 6.
4.8 Retreat
AMERICAN: American units must retreat toward the west edge of the map if possible. American units belonging to Morgan's Detachment may also retreat toward the southern map edge if desired.
BRITISH: British units must retreat toward the east edge of the map if possible.
4.9 ZOC
In addition to Series Rule 8.1, ZOC extends out of (but not into) village hexes.
V. Play Balance (Optional)
5.1 Pro-British
To tilt the balance of the game in favor of the British:
- The British player automatically receives his turn 9 reinforcements.
- The American player does not receive his turn 12 reinforcements.
- Apply +2 DRM to all Morgan's Detachment die rolls.
5.2 Pro-American
To tilt the balance of the game in favor of the Americans:
- British player does not receive his turn 9 reinforcements.
- American player automatically receives his turn 12 reinforcements.
- Apply –1 DRM to all Morgan's Detachment die rolls.
VI. Historical Scenarios
6.1 Scenario I: "Lee's Advance"
6.11 Scenario Length
Game Turns 4 through 7 (9:00 AM to Noon) unless either side achieves automatic victory.
6.12 Set Up.
British
| Hex | Units |
|---|---|
| 3915 | 2nd Queen's Light Dragoons, Dismounted Dragoons |
| 4014 | Queen's Rangers, 1st Light Infantry Company |
| 4015 | 1st Light Infantry, 1st Light Infantry Artillery |
| 4113 | 1st Queen's Light Dragoons, Diemar Hussars |
| 4114 | Clinton |
American
| Hex | Units |
|---|---|
| 2215 | 4th NJ |
| 2314 | 3rd NJ, Randall Artillery |
| 2414 | 2nd NJ |
| 2513 | 1st NJ |
| 3013 | Cilley's Picked Men, Wells Artillery |
| 3015 | Lee |
| 3113 | Parker's Picked Men |
| 3213 | Gist |
| 3218 | Seward Artillery |
| 3219 | Wesson's Picked Men |
| 3319 | Livingston |
| 3414 | Oswald Artillery |
6.13 British Reinforcements
10:00 AM: Cornwallis, Erskine, 1st Grenadiers, 1st Grenadier Company, 1st Grenadier Artillery, Monckton, 2nd Grenadiers, 2nd Grenadier Artillery, Lengerke Grenadiers, von Linsing Grenadiers, von Minnigerode Grenadiers, Coldstream Guards, & 1st Foot Guards
11:00 AM: "No Flint" Grey, 1st & 2nd Black Watch, 44th, 17th, 15th, & 3rd Brigade Artillery
Noon: Webster, 33rd, 46th, 37th, 64th, 4th Brigade Artillery, Howitzers, & Pattison Artillery.
6.14 Army Morale
- British 20
- American 19
6.15 Momentum
Neither side begins with Momentum.
6.16 Initiative
Initiative on the first turn (9:00 AM) is British followed by American. Remaining turns are random player order.
6.17 Command & Control
Use "Turn 4 +" on the C&C Table.
6.18 Rules Not Used
- Molly Pitcher (4.4)
- British Rear Guard Maneuver Zone (4.7)
- Restrictions and penalties associated with Lee's movement (4.31)
- Procedures and consequences for relieving Lee of command (4.64)
6.19 Victory Conditions
British Decisive: Occupy 2716 with at least 1 Parade Order combat unit other than artillery at the end of any Game Turn.
American Decisive: Occupy 4114 with at least 1 Parade Order combat unit other than artillery or militia at the end of any Game Turn.
Substantial: Cause the enemy's Army Morale to Waiver.
Marginal: Achieve a margin of 1.5 or more VP by the end of the game.
6.2 Scenario II: "The Holding Action"
6.21 Scenario Length
Game Turns 7 through 10 (Noon to 3:00 PM) unless either side achieves automatic victory.
6.22 Set Up
British
| Hex | Units |
|---|---|
| 2018 | 1st Queen's Light Dragoons, Dismounted Dragoons |
| 2117 | Monckton, 2nd Grenadiers, 2nd Grenadier Artillery |
| 2218 | Clinton, Cornwallis, 1st Grenadiers, 1st Grenadier Artillery |
| 2217 | 2nd Queen's Light Dragoons, 1st Grenadier Company |
| 2318 | Howitzers |
| 2317 | Coldstream Guards |
| 2419 | Pattison Artillery |
| 2417 | 1st Foot Guards |
| 2312 | 15th |
| 2311 | "No Flint" Grey, 2nd Black Watch, 17th, 2nd Brigade Artillery |
| 2310 | 44th, 1st Black Watch |
American
| Hex | Units |
|---|---|
| 1512 | Lafayette, 2nd N.J. |
| 1715 | White's Light Horse |
| 1815 | Livingston, Cook Artillery |
| 1914 | Olney (as Durkee reduced), Oswald Artillery, Seward Artillery |
| 1913 | 1st N.J. |
| 1811 | Cilley's Picked Men |
| 1810 | Parker's Picked Men |
| 2115 | Washington, Lee |
| 2316 | Wayne, Ramsay (as Wesson reduced), Stewart's Picked Men (reduced), VA "Converged" Regiment |
| 1208 | Stirling, Conn. Brigade, Conn. Artillery |
| 1107 | Glover's Brigade, Proctor Artillery |
6.22 American Reinforcements
(As printed: the Exclusive Rulebook labels both this subsection and the setup above "6.22" — reproduced as printed.)
2:00 PM: 3rd PA, Malcolm, Spencer, 1st PA Brigade (Hex A-1)
NOTE: American reinforcements cannot use Strategic Movement on their turn of arrival.
6.23 Army Morale
- British = 20
- American = 18
6.24 Momentum
The British begin with 1 Momentum chit.
6.25 Initiative
The first turn (Noon) consists of the British Close Combat phase only. Initiative on turns two and three (1:00 & 2:00 PM) is American followed by British. Initiative on turn four (3:00 PM) is random player order.
6.27 Rules Not Used
- Command & Control (4.6)
- Restrictions and penalties associated with Lee's movement (4.31) The scenario begins with Washington relieving Lee of command, however no Army Morale adjustment occurs.
- British Rear Guard Maneuver Zone (4.7)
- Molly Pitcher (4.4)
6.28 Victory Conditions
British Decisive: Simultaneously occupy both sides of the bridge spanning the West Morass with at least 1 Parade Order combat unit in each hex, other than artillery, at the end of any Game Turn [OR] Occupy any hex along Perrine Ridge (1511, 1611, 1610, 1709) with at least 1 Parade Order combat unit, other than artillery, at the end of any Game Turn [OR] capture or eliminate George Washington.
American Decisive: Eliminate or capture 15 SP of British or Provincial combat units.
Substantial: Cause the enemy's Army Morale to Waiver.
Marginal: Achieve a margin of 3 or more VPs by the end of the game.
6.29 Special Scenario Rules
6.291 Abbreviated First Turn: The first Game Turn consists of British Close Combat only.
6.292 Hedgerow: The American units along the hedgerow (1715, 1815, and 1914) cannot move until attacked in Close Combat. As soon as any unit along the hedgerow is attacked, all units along the hedgerow are free to move.
6.3 Scenario III: "Washington's Stand"
6.31 Scenario Length
Game Turns 8 through 13 (1:00 PM to 6:00 PM) unless either side achieves automatic victory.
6.32 Set Up
British
| Hex | Units |
|---|---|
| 1716* | Monckton, 2nd Grenadiers, 2nd Grenadier Artillery |
| 1816* | Pattison Artillery |
| 1910 | 2nd Black Watch |
| 1915* | Clinton, 1st Grenadiers, 1st Grenadier Artillery |
| 2007 | Diemar Hussars |
| 2015* | 1st Grenadier Company, Howitzers |
| 2018 | Dismounted Dragoons, 1st & 2nd Queen's Light Dragoons |
| 2106 | Queen's Rangers, 1st Light Infantry Company |
| 2107 | Erskine, 1st Light Infantry, 1st Light Infantry Artillery |
| 2109 | 1st Black Watch, 44th |
| 2111 | "No Flint" Grey, 15th, 17th, 3rd Brigade Artillery |
American
| Hex | Units |
|---|---|
| 1107 | Delaware Blues |
| 1208 | 1st MD Brigade |
| 1308 | N.C. Brigade |
| 1313 | Wayne, 3rd PA, Spencer, Malcolm |
| 1407 | Lafayette, Weedon's Brigade |
| 1410 | 1st N.J., 2nd N.J. |
| 1412 | 1st PA Brigade |
| 1507 | N.H. Brigade |
| 1511 | 2nd PA Brigade, PA Artillery |
| 1610 | Glover's Brigade, Proctor Artillery, Molly Pitcher |
| 1611 | Learned's Brigade, Mass. Artillery |
| 1706 |
6.33 American Reinforcements
2:00 PM: Greene, Woodford's Brigade, Middlesex Militia, Chevalier du Plessis Artillery (Hex A-3)
5:00 PM: Von Steuben, 2nd MD Brigade, Patterson's Brigade, Muhlenberg's Brigade (Hex A-1)
6.34 Army Morale
- British = 19
- Americans = 19
6.35 Momentum
The Americans begin with 1 Momentum chit.
6.36 Initiative
Initiative on the first turn (1:00 PM) is American followed by British. Remaining turns are random player order.
6.37 Rules Not Used
- Command & Control (4.6)
- British Rear guard Maneuver Zone (4.7)
6.38 Victory Conditions
British Decisive: Occupy Hex 1211 with at least 1 Parade Order combat unit other than artillery at the end of any Game Turn.
American Decisive: Occupy either the Deacon Craig farm (2512) or the Peter Wikoff farm (2017) with at least 1 Parade Order combat unit other than artillery of militia at the end of any Game Turn.
Substantial: Cause the enemy's Army Morale to Waiver.
Marginal: Achieve a margin of 3 or more VPs by the end of the game.
6.39 Special Scenario Rules
6.391 Hessian Grenadiers
The three Hessian Grenadier Battalions must pass a Morale Check each time they wish to move during the British player's Movement Phase. Each Hessian Battalion must roll individually. Apply –1 DRM in addition to any other applicable modifiers to this Hessian Morale Check die roll. Once a Hessian Battalion is involved in either Fire or Close Combat it may move normally for the rest of the scenario.
6.392 Comb's Hill
British units may not cross to the south side of Spotswood South Brook /Weamacock Brook before turn-4 (4:00 PM.)
DESIGN NOTE: Clinton was aware of high ground to his left but considered the marshy ground at the base of Comb's Hill to be too much of an obstacle. Furthermore, he was not expecting the arrival of Greene's American reinforcements on that flank.
Historical Article
Monmouth Courthouse — June 28th, 1778
"His presence inspired none, discouraged many, and left the Division to work their own way out of confusion."
In spite of the early privations suffered by the Continental Army at Valley Forge, during the winter of 1777-1778, the force that emerged in the spring of the New Year was renewed, replenished, and eager to prove itself. General Washington intended to use this trained and disciplined cadre to deal a decisive blow to his newest adversary, British Lt. General Sir Henry Clinton.
Clinton had replaced General Howe as Commander in Chief of British forces in North America in late May and began immediately to execute a new directive from London. Philadelphia, captured the previous autumn by Crown forces, (see GMT's "Brandywine"), was to be evacuated. British forces were to shift their base of operations back to New York City. Clinton had naval transport for a portion of his host but he could not move it all by sea. A land march across New Jersey would be necessary and it was here, along this line of march, that Washington intended to strike.
Clinton was responding to secret orders that precluded any inland offensive operations against the Americans while the new British Peace Commission, slated to arrive in early June, undertook their negotiations to end the war. Coastal raids against New England towns were to be the only aggressive operations allowed. Washington, of course, was unaware of this handicap to British arms. As early as April 20th, he called a council of war at his headquarters in Valley Forge to determine whether the army should remain on the defensive or strike against Philadelphia.
His general officers were of mixed opinion. Firebrands, such as Anthony Wayne, called for the attack, and the sooner the better. The Europeans, von Steuben among them, were more conservative and urged defense. Several others, including Henry Knox, argued for a march across New Jersey to threaten New York. General Greene suggested a flying column to push toward New York while the rest of the army remained at Valley Forge. In the end, Washington elected to hold the army in place and await developments. He did, however, deploy General Maxwell and the four regiments of the New Jersey Brigade into that State on May the 7th. They were to supplement the New Jersey militia and keep close tabs on the movements of the enemy.
II
By the 2nd of June, patriot informers from Philadelphia had advised General Washington of the intended evacuation of the British and he, in turn, raised the level of alert to General Maxwell and the American forces in New Jersey. The failure of the British Peace Commission, which is not a subject for the present historical summary, was apparent by June 16th and Clinton wasted no time in hastening the evacuation. Over 17,000 troops, with baggage and followers, began their laborious movement over the next several days.
Confronted with the imminent departure of the British, Washington called another council of war on the 17th. This was the 3rd such gathering of his general officers in a month. Vocal in his opinion that the Continental Army not take the offensive was newly arrived Major General Charles Lee. Lee was the army's second in command, a veteran soldier of European service, and was considered by many in America to be the preeminent officer in the service of the new nation.
Lee had arrived in the American camp on April 23rd after a prisoner exchange. The British captured him some 15 months earlier during the American retreat across New Jersey in 1776. It is worth mentioning that, while he was a prisoner, Lee actually authored a plan suggesting how the British could win the war and end the Rebellion. It proposed an invasion of Maryland with the aim of cutting Virginia off from Pennsylvania to split the colonies. His plan was very detailed, even specifying troop strengths, deployments, and interior lines by which the forces could be mutually supporting. Lee's subsequent conduct, both during councils of war and on the fateful day of June 28th, can be better understood when one acknowledges the cozy relationship he had with his captors.
Generals Wayne and Lafayette urged a bold attack to take advantage of the British, strung out as they were with 1,500 wagons in column. The British were only achieving 6 to 7 miles a day. Heavy rains had been falling since their march began and the New Jersey militia had been cutting bridges and sniping at their flanks and rear.
Washington sent an advanced force toward the British on June 18th. The rest of the Continental Army broke camp at Valley Forge the next day and joined the march. Stryker writes, in his definitive study on the Battle of Monmouth, "All day Friday, [June 19th], it rained heavily and this hindered not only the corps under Washington's command, but those which preceded it...but the spirits of the men...were greatly elated...and every man felt a strong incentive to push rapidly toward the British and, if possible, deal a bold stroke for liberty." This may have been true of everyone, that is, except Charles Lee, whose urgings against approaching the enemy went unheeded by the Commander in Chief.
Both armies maneuvered across the narrow waste of the State, coping with heavy rain as they went. By the 24th of June, the Americans were at the village of Hopewell in Hunterdon, (now Mercer), County, about 14 miles from Trenton and 8 miles from Princeton. The British, at this time, were dispersed among several villages in Monmouth County; Cornwallis' 1st Division at Cabbage Town, (now Canton), one mile northeast of Allentown and Knyphausen's 2nd Division at Imlaystown, 3-miles distant.
Washington called his 4th council of war while at Hopewell on the 24th. [As an interesting footnote to history, this council of war took place during a solar eclipse at 9:00 in the morning.] More than at any other time up to this point, Lee showed disdain for any kind of offensive action against the British. He said that only a small detachment, if any, should be sent to reinforce Maxwell on the enemy flanks. The main American army should march toward the Hudson River. He said that, "to risk an engagement with the enemy would appear to him very criminal" and that, "the late alliance with France would be a more effective step toward independence then any act of the army, however bold it might be in conception." Stryker points out that Lee "seems to have been strenuous in his efforts to give the enemy an uninterrupted march across the State."
Because of Lee's seniority and reputation, his argument impressed many of the younger officers. Lafayette, on the other hand, said it "would be disgraceful and humiliating to allow the enemy to cross the Jerseys in tranquility." In the end it was decided to reinforce the troops on the enemy's flanks with Morgan's 600 riflemen and the 1,440 men of the 1st New Hampshire, 9th Pennsylvania, 1st Virginia, and 4th Maryland regiments. The next day, June 25th, another 1,000 troops were sent forward under Wayne and Lafayette. The latter was instructed to take overall command of all forces now gathering to impede the march of the British. Meanwhile, the rest of the army would continue it's measured pace forward.
III
Washington was convinced, in spite of General Lee's opinions to the contrary, that what was called for was a bold stroke. The army of Great Britain would not be granted a leisurely stroll across the State. Lafayette was in command of over 5,000 troops with explicit orders from Washington to mount as large an offensive operation against the enemy's flank and rear as prudence would allow.
Yet, it is precisely at this juncture that Washington's renowned sense of decorum and right conduct nearly proved to be his undoing. By the standards of the day, a force this size was larger than that customarily assigned to a junior Major General such as Lafayette. Protocol would suggest that Lee, as second in command and the senior Major General on the field, be given this command as a post of honor. Washington's instincts on the matter were initially correct. He gave command to Lafayette because Lee was outspoken against this, or any other aggressive action against the British. Lee had confided to friends that these plans would lead to certain defeat, if not to the utter rout, of the American army. Speaking of Lafayette's appointment, Lee said he was "well pleased to be free from all responsibility for a plan which he was sure would fail."
By the evening of the same day, however, General Lee fell victim to second thoughts. He became convinced that his reputation would suffer irrevocably if he allowed the junior Frenchman to remain in the post of honor that was, by right, his. He began to speak to those around him of the wrong that was being done him by the Commander in Chief and that he regretted his first decision in declining the honor. Finally, Lee officially requested General Washington to place him in command of the Advanced Corps.
Washington was somewhat frustrated by this turn of events at such a critical moment. He might have listened to his own counsel and acknowledged that the opinions Lee had so often and forcibly expressed, rendered him unfit for command. Instead, Washington yielded to protocol and correct form and restored Lee to command. To avoid offending Lafayette, he assigned two more brigades to the Advanced Corps, leaving no doubt that a more senior officer was required in command. He also left Lafayette attached to the corps and left the overall orders unchanged.
Virtuous men tend to assume virtue in others. On this occasion, Washington singularly misjudged Lee's character. The result was nearly disastrous for American arms.
IV
The British approached the village of Monmouth Courthouse, (now Freehold), on June 25th, in a column 12-miles long. As Stryker describes, "there followed in close succession all the soldiers of Clinton's army, foot, horse and artillery, provision train, baggage, army wagons, numerous private carriages, a large number of bat-horses, bakeries, laundries and blacksmiths' shops on wheels, large hospital supplies, boats, bridges, magazines, withal a crowd of female camp followers and every kind of useless stuff."
All that day the British were continually harassed by American forces in greater numbers than before; Morgan's riflemen were operating on the British right, Maxwell's New Jersey Continentals on the left, General Scott's detachment assaulting the rear guard, and, operating in front of Knyphausen's leading division, General Dickinson's New Jersey militia was doing all it could to destroy bridges and check the progress of the British army. In addition, many diarists speak of the intense heat of the day. It has been estimated that nearly one-third of the troops fell out by the roadside, overcome with heat. To compound the discomfort, swarms of mosquitoes attacked these soldiers, as they lay prostrated on the ground.
By the morning of the 26th, the British divisions were encamped at and around the village of Monmouth Courthouse. American forces were as near as five miles from the rear of the British column. American pickets skirmished sharply throughout the day with Hessian Jaegers supported by the Queen's Rangers. Notwithstanding the proximity of the opposing forces, Clinton issued orders for his army to remain in place the next day, June 27th, to rest and recuperate from the exertions of the march. The night of the 26th brought drenching rains with lightning and thunder, lasting nearly to daybreak, that added a degree of misery to the encampment.
Historians speculate why Clinton did not resume the march on June 27th. He was near enough to Sandy Hook, his embarkation point to transfer the land force across to New York City, that, as Stryker describes, "A strong physical exertion and the great object of the march would have been attained." Certainly the 40-hour delay has the appearance of courting a fight with the pursuing Americans.
At mid-day on the 27th he issued orders to break camp before dawn on the 28th and march as rapidly as possible on the Middletown Road toward the coast. Knyphausen would lead the march, taking the baggage of the whole army, most of the Hessian troops, the Provincials and the British 1st and 2nd Brigades. Cornwallis' 9,500-man 1st Division, comprising the elite units of the army as well as the British 3rd, 4th, and 5th Brigades, would follow. A rear guard of dragoons and light infantry, attended by Clinton himself, would remain behind until the whole was well under way. In anticipation of the specified early departure, and to safeguard against marauding American patrols, the entire army lay on its arms throughout the night. The air was hot and the breeze was absent until another severe thunderstorm came up, more intense than on the previous evening.
V
For Washington, the hour was at hand. He might have chosen not to fight, if his only concerns were military necessity. It could have been argued that waiting for French intervention to materialize would have been the prudent thing to do. But Washington was astute enough to realize that by striking a blow, America would show the world that it continued in its struggle for freedom and was not content to merely wait passively for help from a foreign nation. Washington also understood that he had to silence his detractors, such as those that had supported the Conway Cabal to replace him as Commander in Chief. He needed to demonstrate that the army had confidence in him and would follow where he led.
Tactically, he understood that at Monmouth he could bring his entire force to bear while Clinton, ever mindful of the vulnerability of his immense baggage train, would only be able to respond with half his forces. Under the circumstances, Washington had to show that he did not fear to offer battle to the most formidable army in the world. He was convinced that these Continental soldiers, trained by von Steuben at Valley Forge, would not hesitate in a bold attack. He was eager, he was confidant, and he expected nothing short of resounding success.
Meanwhile, 5-miles from Monmouth Courthouse, at Englishtown, Lee reviewed his Advanced Corps. He told an aide that he hardly knew any of the officers now serving under him. Not only was he unfamiliar with his subordinates, he also revealed in a staff meeting on the 27th that he had no reliable intelligence about the exact strength or location of the enemy to his front or, for that matter, of the ground over which they were to fight. He formulated no plan of action and merely asked that all subordinate officers serve as required. In addition, he wrote to Washington saying he had no knowledge of where Morgan's detachment was operating even though it was under his command.
In the early hours of the 28th, Washington replied that Morgan was operating to the south. He also advised Lee to position men in battalion strength in close contact with the enemy's rear-guard to pin it so that the rest of the Advanced Corps could come up. All the while the main Continental Army would continue its approach, remaining in supporting distance. In compliance, Lee ordered Colonel William Grayson's 600-man detachment to break camp at 6:00 AM and march toward the enemy. He also sent a confusing message to Morgan that led him to believe Lee was planning an attack on the 29th rather than the 28th. As a result, Morgan did not participate in the Battle of Monmouth and Lee's right flank was unprotected throughout the coming day.
At 7:00 AM the rest of the Advanced Corps began to march out of Englishtown. Many troops left their coats, packs and other equipment behind in expectation of another day of intense heat. (Their British and Hessian counterparts, having no such privilege, would suffer immeasurably from the heat as the day wore on.) Washington sent word to Lee that his divisions were also on the march and to, "bring on an engagement or attack as soon as possible unless some very powerful circumstances forbid it."
As a foreshadowing of the confusion that would mark the morning's action, Lee's line of march, consisting of Durkee's, Wayne's, Scott's, Maxwell's and Jackson's commands, got entangled. There was also contradictory intelligence coming in from Dickinson's New Jersey militia. Some reports indicated that the British had left Monmouth, others that one division still remained there, and still others that the British were moving toward the Americans. Under these circumstances, the American approach toward Monmouth was a halting one at best.
The first actual contact of the Battle of Monmouth Courthouse occurred at about 8:00 AM. One hundred and fifty members of the Hunterdon County militia were conducting a reconnaissance along the Englishtown Road, under the temporary command of Baron von Steuben of Washington's staff. They were attacked by the mounted contingent of the Queen's Rangers, known as the Deimar Hussars. Although the militia was initially scattered, they were able to stabilize a line along a hedgerow near the Parsonage Farm. The hussars were checked and eventually fell back to Monmouth when they saw Grayson's detachment approaching from the west. Lee ordered Grayson's detachment to be reinforced by 200 men under Colonel Henry Jackson, by Butler's 9th Pennsylvania Regiment and by four guns under Colonel Eleazer Oswald. Brigadier General Anthony Wayne was given command of this vanguard and ordered to proceed toward Monmouth with caution.
Back at Monmouth Courthouse, meanwhile, Clinton ordered Cornwallis to lead his division out of the village, confident that the Americans were no nearer than 6 miles distant. He was to follow the same line of march taken previously by Knyphausen who had broken camp at 4:00 in the morning. Clinton himself remained with the rear guard.
At about 9:30 AM, the American vanguard of the Advanced Corps came into contact with cavalry and light infantry elements of the British rear guard outside of the village. After an exchange of musketry and several shots from the field pieces, the rear guard withdrew toward Briar Hill to the northeast of town. This high ground dominated the otherwise relatively flat land immediately around Monmouth Courthouse. It was also the direction taken by both Knyphausen and Cornwallis as they marched out of town.
At this point, Lee rode forward with Wayne to observe the enemy. He saw the dust of Cornwallis' column heading east and perceived a chance to destroy the enemy rear guard. Wayne was directed to move some of his units in direct pursuit of the British, to pin them, while the rest of his detachment was ordered to swing north and east, around the British left, to encircle them. By 10:00 AM additional units of the Advanced Corps were arriving. Lafayette was ordered to march through the village, deploy on the flat plain beyond, and attack the left flank of the rear guard while Wayne descended upon it from the north. So confident was Lee that he sent a presumptive message to Washington declaring he was about to capture the entire British rear guard.
VI
Clinton, meanwhile, was not remaining passive. Cornwallis' column had barely covered a mile when it received word to countermarch in support of the beleaguered rear guard. Clinton deployed his rear guard on the right, to oppose Wayne, while the freshly arriving Grenadiers, Foot Guards, and British Brigades under Cornwallis advanced in two columns; one opposing the American center and another marching toward the Courthouse with the goal of turning Lee's right. Artillery was placed in the center, cavalry were deployed in front and the Hessian Grenadiers held in reserve.
Where Lee had had a fleeting opportunity to outnumber the rear guard of the enemy, he now found himself with the tables turned. It was he that was outnumbered by Cornwallis' entire 1st Division. Coupled with his certain belief that the Americans could not stand up to Clinton's best troops, and his lack of due diligence and preparation before the battle, it is no wonder that paralysis of command settled in. Things unraveled quickly.
By 11:30 AM Lee's entire Advanced Corps was in full retreat. Some units were retreating in orderly fashion while others retreated in disarray. Most had not fired a shot and could not say why they were retreating, or even if definitive orders to that effect had been given. Scott and Maxwell, seeing the withdrawal of troops to their left and right, made an independent decision to withdraw in the absence of command and control from Lee's Headquarters. Oswald's guns were falling back. Jackson withdrew despite orders, delivered by one of Lee's aides, to hold. Grayson was then ordered to withdraw but Butler's 9th Pennsylvania, which had gotten over extended, was about to be encircled. Butler escaped the pocket by crossing Spotswood North Brook, circling north of Forman's Mills, and taking the Amboy Road. In total, some 3,000 men and 10 guns were leaving the field. Lee, at last, took decisive action. He called a general retreat, whereupon Lafayette immediately withdrew his three regiments, heavily pressed by the British.
Lt. Colonel Laurens, aide de camp to General Washington, later said, "all this disgraceful retreating passed without the firing of a musket, over ground which might have been disputed inch by inch." The mayhem that ensued during the mid-morning hours of June 28th is best summarized in Carrington's Battles of the American Revolution; "It is equally clear that General Lee made no adequate effort to concentrate his division, promulgated no definite orders; and in the conducts of his movements and the precipitate retreat, absolutely failed to control his army and keep it in hand. His presence inspired none, discouraged many, and absolutely left the division to work their own way out of confusion, as if there were no officer in general command." Considering all of Lee's comments before the battle, and his expressed opinion that any engagement would end in failure, the outcome of his morning action must be viewed, if not as treason, at least as a self-fulfilling prophecy.
As Lee's entire force streamed toward the rear, Oswald attempted to check the British advance by assembling a grand battery of 10-guns but was soon forced back by the oncoming British. The detachments of Stewart and Livingston attempted to make a second stand further west on the Ker Farm but were forced back when the British gained higher ground that made the position untenable. As the British juggernaut rolled on, Lee was desperately trying to rally troops and find a defensible position. He learned of high ground, (Perrine Ridge), further to the rear that would support both flanks and had shade for the men who were dropping from fatigue in what became the hottest day in recorded weather history in New Jersey up until that time. He sent Captain Peter Wikoff, a local resident and militia officer, toward Perrine Ridge with instructions to find the commander of the first Continental unit he saw and guide him to the ridge with instructions that no other units should retreat beyond that point.
Near midday, Washington was riding at the head of the main Continental column just then passing Tennent Meetinghouse. Earlier messages from the front had him full of the expectation of success but as he drew nearer to the action he began to see a steady stream of troops moving to the rear. There were stories of a great retreat, some calling it a rout, which had befallen the Americans. Washington threatened to have a young fifer whipped for sharing this intelligence, thinking it was a defeatist lie. Yet, more and more evidence seemed to be arriving to the contrary, including testimonials from some local civilians. At the bridge over the West Morass of the Spotswood Middle Brook, Washington met Peter Wikoff who was directing the 2nd New Jersey Regiment toward Perrine Ridge as Lee had instructed. Washington deployed Stewart's and Ramsay's men in a wood just east of the bridge and then saw Lee approaching at the head of several columns of retreating troops.
VII
What happened next has become the stuff of legend. With enemy troops only 15-minutes away, the Commander in Chief demanded to know the meaning of the retreat. Lee offered a confused response, blamed his subordinates for dereliction of duty, and bluntly stated that he had never favored attacking the British in the first place. Washington's reply was "warm," according to eyewitnesses, although it probably fell short of General Scott's second-hand assertion that Washington swore until the leaves shook on the trees. He did, however, remark to Lee that he should have never requested the command if he had not intended to attack.
Washington relieved Lee of command on the spot and personally took over management of the situation. A defensive line was established along nearby Perrine Ridge while a holding action, supervised by Lee at Washington's request, and located along the hedgerow previously mentioned, bought much needed time.
Clinton personally led an attack to break the hedgerow line. At the head of the 2nd Grenadiers with elements of the 1st Grenadiers in support, he shouted, "Charge, Grenadiers, never heed forming!" Despite Oswald's guns firing grapeshot at 40 yards and a blaze of musketry at barely 20 yards, the Grenadiers succeed in overrunning the hedgerow.
The Foot Guards meanwhile, with two companies of the 1st Grenadiers, succeeded in driving Stewart and Ramsay out of the woods and across the bridge over the West Morass. Farther north, Scott's Brigade had crossed the Craig Farm that lay between Spotswood Middle and North Brooks. The 2nd Battalion, 42nd Highlanders, (Black Watch), pursued him over the Sutfin Farm toward Perrine Ridge. The Highlanders were checked by artillery fire and halted in an orchard on the Sutfin Farm.
By 1:00 PM, all American units were across Spotswood Middle Brook. Lee was ordered to continue to the rear to reorganize his exhausted command. Of the twenty regiments, battalions or detachments that made up Lee's initial force, only the 1st and 2nd New Jersey Regiments and the picked men of Parker and Cilley's detachments remained on the field. Washington's main army, however, was coming up in fine fashion. Between 12:30 and 1:00 PM Lord Stirling's Division, of Huntington's, Glover's, Learned's, and the 1st Pennsylvania Brigades, 14 regiments in all, arrived and deployed along Perrine Ridge while Knox assembled 12 guns in support.
By 1:00 the British had also succeeded in forming a massed battery of their own. Ten guns took post approximately 1,000 yards away, between the Wikoff and Parsonage Farms. From 1:00 to 3:00 PM a cannonade boomed across the New Jersey farmland. During this interlude, Washington sent von Steuben to the rear to take over from Lee the task of reforming the units that had left the field. He also deployed Lafayette with four Brigades plus the 1st and 2nd New Jersey Regiments, in a second line of defense to cover Stirling's left flank north of Spotswood North Brook. That second line was tested by the British around 2:00 PM when part of "No Flint" Grey's 3rd Brigade, supported by light infantry under Brigadier General Sir William Erskine, the Queen's Rangers, and two 3-pounders, sparred with Lafayette for an about an hour. Seeing, however, that the Americans were too numerous in that quarter, Clinton ordered those troops back across Spotswood North Brook to rejoin the rest of Grey's Brigade east of the Sutfin Farm.
At approximately 3:00 PM, just as the British probe in the north was ending and the great cannonade in the center was dying down, Major General Nathanael Greene appeared on the high ground of Comb's Hill on the British left flank. Shortly before Noon, Washington had sent him on a flank march. With Woodford's Virginia Brigade, some militia, and 4-guns under the command of Brevet Lt. Colonel the Chevalier du Plessis, Greene was now able to enfilade the entire British position along the hedgerow. Comb's Hill was virtually unassailable because of swamp and marsh that encircled the hill on the side fronting the British. The danger posed by this new American battery, combined with Grey's failure to turn the American left, and Washington's strong position on Perrine Ridge, convinced Clinton to order a general withdrawal.
Washington probed the retreating British with a series of limited counterattacks along the line. Cilley and Parker, with 600 men, drove the Highlanders from the Sutfin orchard. Wayne attacked the 1st Grenadiers on the British left with the 3rd Pennsylvania Regiment and the regiments of Malcolm and Spencer. He was checked, however, by the timely arrival of British Lt. Colonel James Webster in command of his own crack 33rd Regiment of Foot and Wayne was driven back across the hedgerow. Washington planned other attacks while von Steuben was leading more American troops forward. By now, however, it was 6:00 PM. The grueling heat, the exertions of the day and the late hour led to Washington's decision to call off the planned attacks. American troops slept on the ground they occupied and the British marched, unmolested, off the field of battle.
VIII
Clinton's retreat from Monmouth was as deft as some of those executed by Washington in the course of the war. By dawn on the 29th, Cornwallis' entire Division had joined that of Knyphausen, 13 miles away. This was done in spite of the fact that Poor's New Hampshire Brigade was a mere half mile away from the British position when it began marching away at 10:00 PM. By July 5th the British were embarking their army at Sandy Hook for destinations on Long Island, Staten Island, and Manhattan Island. It took the British just two days to cover the last 24 miles of their march to Sandy Hook whereas it had taken them 9 days to cover the first 60 miles from Philadelphia to Monmouth Courthouse, fueling speculation among some that Clinton wanted Washington to catch up as was suggested earlier in this summary.
Washington reported 362 casualties, (69k, 161w, 132m.) The official British return cites 361 casualties (67 killed in action, 59 dead as a result of heat, 170w, 65m.) In addition, the American's estimated that 440 Hessians and 136 British had deserted, and another 100 troops had been taken prisoner, during the march across New Jersey.
The numbers, as well as the strategic situation after the battle, seem to suggest a draw. Washington held the field, which was the standard measure of victory in the 18th century. Clinton, however, continued unmolested to New York, which had been his strategic objective. Washington failed to deal his adversary a crushing blow as he had hoped, yet the American Army acquitted itself valiantly once the command and control problem was resolved by Lee's dismissal. Perhaps the salient feature of the battle was that it represented the last major field action of the war in the northern theater.
After Monmouth the British would shift their focus to the south in an attempt to contrive a new winning strategy for ending the American Revolution. (See GMT's "Savannah" & "Guilford")
Lee's Court Martial
A court martial was convened in New Brunswick, New Jersey, on the 4th of July. Lee was formerly charged with three offenses.
- Disobedience of orders in not attacking the enemy on the 28th of June agreeable to repeated instructions.
- Misbehavior before the enemy on the same day, by making an unnecessary, disorderly and shameful retreat.
- Disrespect to the Commander in Chief in two letters (written 6/29 and 6/30.)
The court was presided over by Lord Stirling and was comprised of 4 Brigadier Generals and 8 Colonels. Lee chose to defend himself. On August 12th he was convicted of all three charges, although the word "shameful" was removed from the 2nd charge. He was suspended from the service for one year.
On December 5th the Congress upheld the verdict, voting 6 to 2 by State and 16 to 7 by individuals. Lee was subsequently wounded in a duel with Laurens and narrowly avoided a duel with von Steuben. Congress officially withdrew his commission as an officer in the Continental Army in January 1780. Lee returned to Philadelphia where he sold his estates and lived in poverty until his death in October 1782.
Molly Pitcher
A colorful legend about the Battle of Monmouth concerns Mary Ludwig Hayes. She was the wife of John Hayes, a private in the 7th Pennsylvania Regiment. At Monmouth he was detailed to Proctor's 4th Continental Artillery to serve as a matrose. She had been drawing and fetching water for the hot and thirsty artillerists throughout the afternoon while her husband worked his field piece. After he was wounded, she took his place at the gun during the great cannonade.
Private Joseph Plumb Martin, the ubiquitous diarist of the Revolutionary War, was stationed as a skirmisher along the rail fence just below the gun line and writes that she had a cannon ball pass through her petticoats and between her legs during the action.
After the death of her husband she remarried one John McCauley and was known in Carlisle, where they lived, as Molly Pitcher. In 1822, the Pennsylvania legislature granted her the sum of $40 and an annuity of the same amount. She died January 22nd, 1832, at the age of 79.
Despite images to the contrary, there is no certain evidence that she was ever introduced to General Washington after the battle.
Morgan's Detachment Design Note
Morgan's Detachment did not play a part in the Battle of Monmouth Courthouse. Sometime after 11:30 am, Wayne received a message from Morgan, asking for orders. Wayne replied vaguely that since Lee was in retreat, Morgan should govern himself accordingly. Wayne also failed to pass this communication on to Lee who remained ignorant of Morgan's precise whereabouts. Had Morgan been engaged, pressure could have been brought upon the British left-rear since Morgan was only 3-miles away to the south at Richmond's Mill. This failure by Wayne to seize an opportunity to damage the enemy was uncharacteristic and may have been due to his utter disgust at having to retreat in the first place.
The Morgan rules allow players to experience the "what-if" possibilities had Morgan become engaged. Odds are low that Morgan will enter play. This reflects the imprecise nature of his initial orders and of Wayne's reply to his request on the 28th.
Had Morgan emerged on Clintons left, the British Commander-in-Chief would have responded by calling up more mobile reinforcements; hence British Conditional Reinforcements. The 17th Light Dragoons are deployed from the baggage train while the Hessian Mounted Jaegers are hypothetically shown as "shadowing" Morgan's men. That nuance is added for balance.
Order of Battle
Battle of Monmouth Courthouse — June 28th, 1778
ROYAL ARMY
Lt. General Sir Henry Clinton
1st Division — Lt. General Charles, Earl Cornwallis
Rear Guard: Queen's Lt. Dragoons (Lt. Col. Hon. William Harcourt); 1st Battalion Lt. Inf. (Lt. Colonel Robert Abercromby); Queen's Rangers (Major John Graves Simcoe)
British Grenadiers: 1st Battalion Grenadiers (Lt. Colonel William Meadows); 2nd Battalion Grenadiers (Lt. Col. Hon. Henry Monckton)
Hessian Grenadiers: Colonel Henrich Julius von Kospoth — Battalion Linsing (Lt. Colonel Otto von Linsing); Battalion Lengerke (Lt. Colonel Georg Lengerke); Battalion Minnigerode (Lt. Col. Friedrich v. Minnigerode)
Guards Brigade: Brigadier General Edward Mathew — Coldstream Guards (Colonel Henry Trelawney); 2nd Battalion Foot Guards (Lt. Colonel James Ogilvie)
3rd Brigade: Major General Sir Charles "No Flint" Grey — 15th Foot (Lt. Colonel Joseph Stopford); 17th Foot (Lt. Colonel Charles Mawhood); Black Watch (Lt. Colonel Thomas Stirling); 44th Foot (Lt. Colonel Henry Hope)
4th Brigade: Major General Agnew — 33rd Foot (Lt. Colonel James Webster); 37th Foot; 46th Foot (Lt. Colonel Enoch Markham); 64th Foot (Major Robert McLeroth)
5th Brigade: Major General Hon. Alexander Leslie — Royal Fusiliers (Lt. Colonel Alured Clarke); Cameronians (Lt. Colonel Charles Stuart); 63rd Foot (Lt. Colonel James Paterson)
Royal Artillery
2nd Division — Lt. General Wilhelm von Knyphausen [Not Engaged]
17th Lt. Dragoons; 2nd Battalion Lt. Infantry; Jaeger Korps; 1st Brigade; 2nd Brigade; Hessian Brigade Stirn; Hessian Brigade von Loos; Loyalist Corps; Provincial Horse; Royal Artillery
CONTINENTAL ARMY
General George Washington
Continental Artillery: Brigadier General Henry Knox
Advanced Corps — Major General Charles Lee
Grayson's Detachment: Colonel William Grayson — Grayson's Additional Regiment (Col. William Grayson); Patton's Additional Regiment (Lt. Colonel John Parke); VA Converged Battalion (Colonel James Woods)
Durkee's Detachment: Colonel John Durkee — CT Converged Battalion (Colonel John Durkee); RI Converged Battalion (Lt. Colonel Jeremiah Olney)
Wayne's Detachment: Major Gen. the Marquis de Lafayette — Wesson's Picked Men (Colonel James Wesson); Livingston's Battalion (Col. Henry Beekman Livingston); Stewart's Picked Men (Colonel Walter Stewart)
Scott's Detachment: Brigadier General Charles Scott — Cilley's Picked Men (Colonel Joseph Cilley); Gist's Battalion (Colonel Nathaniel Gist); 9th Pennsylvania (Colonel Richard Butler); Parker's Picked Men (Colonel Richard Parker)
Jackson's Detachment: Colonel Henry Jackson
New Jersey Brigade: Brigadier General William Maxwell — 1st NJ (Colonel Mathias Ogden); 2nd NJ (Colonel Israel Shreve); 3rd NJ (Colonel Elias Dayton); 4th NJ (Lt. Colonel David Brearly); Somerset County Lt. Horse (Lt. Colonel Anthony White)
Morgan's Detachment: Colonel Daniel Morgan
New Jersey Militia Brigade: Brig. Gen. Philemon Dickinson
Right Wing — Major General Nathanael Greene
Woodford's Brigade: Brigadier General William Woodford — 3rd/7th VA (Colonel William Heth); 11th/15th VA (Lt. Colonel John Cropper)
North Carolina Brigade: Vice Brigadier General Lachlan McIntosh — 1st NC (Colonel Thomas Clark); 2nd NC (Colonel John Patten)
New Hampshire Brigade: Brigadier General Enoch Poor — 1st NH (Colonel Joseph Cilley); 2nd NH (Colonel Nathan Hale); 3rd NH (Colonel Alexander Scammell); 2nd NY (Colonel Philip van Cortlandt); 4th NY (Colonel Henry Beekman Livingston)
Connecticut Brigade: Brig. General Jedediah Huntington — 2nd/5th CT (Colonel Philip Bradley); 1st/7th CT (Colonel Heman Swift)
1st Maryland Brigade: Brig. General William Smallwood — 1st MD (Colonel John Hawkins Stone); 3rd MD (Colonel Mordecai Gist); 5th MD (Colonel William Richardson); 7th MD (Colonel John Gunby); Delaware (Colonel David Hall)
2nd Maryland Brigade: Brig. General William Smallwood — 2nd MD (Lt. Colonel Thomas Woolford); 4th MD (Colonel Josias Carvil Hall); 6th MD (Colonel Otho Holland Williams)
Muhlenberg's Brigade: Brigadier General Peter Muhlenberg — 1st/5th/9th VA (Colonel Richard Parker); 1st VA State (Colonel George Gibson); 2nd VA State (Colonel Gregory Smith); German Battalion (Lt. Colonel Ludowick Weltner)
Weedon's Brigade: Vice Brigadier General George Weedon — 2nd VA (Colonel Christian Febiger); 6th VA (Colonel John Gibson); 10th VA (Colonel John Green); 14th VA (Colonel William Davies)
Glover's Brigade: Brigadier General John Glover — 1st MA (Colonel Joseph Vose); 4th MA (Colonel William Shepard); 13th MA (Colonel Edward Wigglesworth); 15th MA (Colonel Timothy Bigelow)
Learned's Brigade: Brigadier General Ebenezer Learned — 2nd MA (Colonel John Bailey); 8th MA (Colonel Michael Jackson); 9th MA (Colonel James Wesson)
Paterson's Brigade: Brigadier General John Paterson — 10th MA (Colonel Thomas Marshall); 11th MA (Colonel Benjamin Tupper); 12th MA (Colonel Samuel Brewer); 14th MA (Colonel Gamaliel Bradford)
Left Wing — Major General William Alexander Lord Stirling
1st Pennsylvania Brigade: Colonel William Irvine — 1st PA (Colonel James Chambers); 2nd PA (Colonel Henry Bicker); 7th PA (Colonel William Irvine); 10th PA (Colonel George Nagel)
2nd Pennsylvania Brigade: Colonel Francis Johnston — 4th PA (Lt. Colonel William Butler); 5th PA (Colonel Francis Johnston); 11th PA (Colonel Richard Humpton); 1st NY (Colonel Goose Van Schaick)
3rd Pennsylvania Brigade: Colonel Robert Magaw — 3rd PA (Colonel Thomas Craig); 6th PA (Lt. Colonel Josiah Harmar); 12th PA (Colonel William Cooke); Malcolm's Additional Regiment (Lt. Colonel Aaron Burr); Spencer's Additional Regiment (Colonel Oliver Spencer)
Your Monmouth Counter Sheet
This counter sheet includes seven replacement counters for previous games in the Battles of the American Revolution Series.
Saratoga (2nd Edition)
- Latimore's Connecticut Militia
- Cook's Connecticut Militia
- Connecticut Light Dragoons
All three had the designation "CN" changed to "CT," which is the correct abbreviation for the State of Connecticut.
Brandywine
- The Philadelphia Associators unit has had changes made to its uniform specs.
- The Coldstream Guards unit is a replacement for the 1st Foot Guards. Only the name has changed.
Guilford
- The Royal Fusiliers unit is a replacement for the British 7th Regiment. Only the name has changed.
Eutaw
- The Swamp Fox has had his Movement Allowance increased to 5.
Part Three: Germantown Exclusive Rulebook
Germantown Living Rules (November 2010).
Germantown Combat Units
BRITISH Player
Tan with red stripe: British Regulars
Tan with yellow stripe: Provincials
Tan with green stripe: Hessians
AMERICAN Player
Light blue with dark blue stripe: Continentals
Light blue with light blue stripe: Continentals (Greene's Wing)
Light blue with no stripe: Patriot Militia
Most but not all American combat units feature a white letter designation. This indicates formations as follows:
- A = Armstrong's Brigade
- C = Conway's Brigade
- G = Greene's Division
- M = McDougall's Brigade
- Mx = Maxwell's Brigade
- N = Nash's Brigade
- S = Sullivan's Division
- Sm = Smallwood's Division
- St = Stephen's Division
- W = Wayne's Division
I. Prepare for Play
1.1 Fortified Hexes & Hexsides
- The Chew House (hex 3313) is considered a fortified hex (see rule 3.10 & Terrain Effects Chart).
- Fieldworks are located along hexsides 3724-3624, "Ewald's Barricade" & hexsides 3907-3908, "Luken's Mill Flechette" (see Terrain Effects Chart).
1.2 Initiative
- Turns 1-3: American followed by British
- Turns 4-10: Random Player Order
1.3 Game Length
The game begins at 5:20 AM (Turn 1) and ends at 2:20 PM (Turn 10) unless either side achieves automatic victory.
1.4 Army Morale
British: 14, American: 13
1.5 Momentum
The American player starts with 1 Momentum Chit.
1.6 At-Start Set Up
- All units with 4-digit at-start location numbers are placed on the board in the corresponding hexes.
- Units with turn of entry designations are placed on the Game Turn Track as reinforcements.
1.7 Sequence of Play
- Initiative Determination (beginning Turn 4)
- Fog Check (Turns 4-6 only)
- Fog is automatically "dense" on Turns 1-3 and weather is automatically clear on Turns 7-10.
- Move Stephen's Formation (beginning on Turn 2, American Player Only)
- Consult Stephen's Movement Table for random direction.
- Friendly Fire Check (beginning on Turn 4, American Player Only)
- Friendly Fire can only occur once in the game. Afterward, this step is skipped in the Sequence of Play.
- Movement Phase
- Reinforcements
- Rally Phase
- Panic Recovery
- Defensive Artillery Fire Phase (non-phasing player)
- Includes off-board militia bombardment during clear weather
- Rifle Fire Phase (simultaneous)
- Close Combat Phase
- Advance Game Turn Marker
II. How to Win
2.1 Decisive
2.1.1 British Decisive Victory:
Case (1): Eliminate or capture 17 or more SPs of non-militia non-artillery combat units, including SPs lost among reduced units still on the board.
Case (2): If Washington is a casualty, the number of SPs required for Decisive Victory is reduced to 12.
Note: When counting lost SPs for Decisive Victory purposes, Panicked units that retreated off the board are counted although they do not count for VPs when calculating Marginal Victory.
2.1.2 American Decisive:
Case (1): American Army does not panic; Occupy British entry hex "B" (hex 4617) with a combat unit other then artillery at the end of any game turn without any British combat units adjacent.
Case (2): American Army Panics; Occupy or be the last to have occupied the Chew House (hex 3313) and occupy Market Square (hex 3915) with combat units other then artillery at the end of any game turn without any British combat units adjacent.
2.2 Substantial
Same as Series Rules.
2.3 Marginal
- American Marginal Victory = 2 or more American VP margin.
- British Marginal = 2 or more British VP margin.
- Any other outcome is considered a draw.
2.4 Objective Hexes and Leader Casualties
2.4.1 Chew House: (hex 3313) is worth 1 VP to the British player if he occupies it at the end of the game.
2.4.2 Market Square: (hex 3915) is worth 1 VP to the American player if he occupies it at the end of the game.
2.4.3 Leader Casualties: See Leader Summary Table on Player Aid Card.
III. Special Rules
3.1 Fog
- Turns 1-3, fog is automatically "Dense."
- Turns 4-6, American player rolls on the Fog Table (see map).
- Turns 7-10, weather is automatically "Clear."
3.1.1 Effects of Dense Fog:
- Maximum artillery range is reduced to one hex (adjacent).
- Movement is normal along roads, lanes, and trails.
- Strategic Movement along roads and lanes is permitted according to Series Rule 9.52.
- Movement is reduced by 1 MP if any portion of a unit's movement is off of road, lane or trail.
- –1 DRM to Friendly Fire Check (American only).
3.1.2 Effects of Moderate Fog:
- Maximum artillery range is reduced to 2 hexes.
- –1 DRM to Friendly Fire Check (American only).
3.2 Stephen's Shame
Design Note: Major General Stephen was drunk on duty and later court-martialed and cashiered for his role in the American defeat at Germantown.
3.2.1 Movement Procedure
Stephen's movement precedes the regular American movement phase.
- Beginning on Turn 2, the American player rolls on Stephen's Movement Table (located on the map) to determine the mandatory direction the units in Stephen's Division will move.
Important Correction: On Stephen's Movement Table, a die roll result of 7 in the Turn 5+ column was omitted. When rolling 7, units must move north (N). Players should edit the Table accordingly.
- Units in Stephen's Division must move their full movement allowance, if possible.
Exception: General Stephen must always end Stephen's Movement Phase stacked with at least one of his infantry units.
Exception: Units in Stephen's Division that intend to have combat with adjacent enemy units may remain in place.
- If any of Stephen's units marches off the board due to the random direction assigned by the Stephen's Movement Table, those units may not re-enter play.
Reduce American Army Morale by 1 the first time this occurs. This reduction in Army Morale is a one-time event.
- On Turns 2, 3 and 4 a directional die roll of 9 will yield a "No Restriction" result. In such a case the American player may not voluntarily march Stephen's units off the board. Voluntarily abandoning the field of play is prohibited.
3.2.1.2 Strategic Movement: Units in Stephen's Division that begin on a road or lane and are not adjacent to enemy combat units must use Strategic Movement if the first hex entered along the road or lane conforms to the direction mandated by the directional die roll. In such a case, move the units as far along the road or lane as possible, even if the road/lane turns away from the original die roll direction.
Clarification: If a unit begins on a road or lane, and if the direction rolled is other than that of the road or lane, then the unit must leave the road or lane and set out across county.
- If an intersection or a fork in the road occurs while Stephen's units are using Strategic Movement, those units must turn as closely as possible in the direction determined by the original directional die roll. If two or more directions are equally valid, the American player may choose the one he prefers.
- If Stephen's units are using Strategic Movement and the road or lane ends or if the road or lane is blocked by adjacent enemy units, Stephen's units end their movement according to Series Rule 9.52.
Extended Example of Stephen's Movement: Assume the 4th VA Brigade starts on hex 3304 on game turn 5.
Die Roll 0-1: The brigade must move south. Because the Lime Kiln Rd continues south from hex 3304, the brigade must use Strategic Movement. Hex 3405 is an intersection but the Lime Kiln Rd continues south into hex 3505 and so that direction must be chosen. Hex 3806 is also an intersection. Of the three directions available, hex 3807 (southwest) conforms most closely to the original mandatory direction (south) and must be chosen. Assuming no enemy units are adjacent to the road, the brigade will end up in hex 3907. It could not continue into hex 3908 because the Luken's Mill flechette is an enemy fieldwork which requires an American unit to pay +1 MP to cross.
Die Roll 2-5: The brigade must move southwest. It will end movement in hex 3307, having paid +1 MP to cross Mill Creek at hexside 3306-3307.
Die Roll 6: The brigade must move northwest. It will end movement in hex 3006, having paid 1½ MPs each to pass through the heavy woods in hexes 3205 and 3105.
Die Roll 7: The brigade must move north. This means the brigade must use Strategic Movement and will march off the board passing through entry hex A. The American player must immediately reduce American Army Morale by 1.
Die Roll 8: The brigade must move northeast. It will end in hex 3300.
Die Roll 9: The brigade must move southeast. It will end movement in hex 3603, having paid +1 MP to cross Saw Mill Creek at hexside 3503-3603.
3.2.2 Friendly Fire Procedure
Beginning on Turn 4, whenever units in Stephen's Division end their movement stacked with or adjacent to units from other formations, there is the possibility of a Friendly Fire incident occurring.
- Place a Friendly Fire marker on every unit from Stephen's Division that is adjacent to or stacked with a unit from another American formation; also place Friendly Fire markers on those American units that are adjacent to one or more units from Stephen's Division.
Exception: Artillery and units without formation designations neither trigger nor receive Friendly Fire.
Note: Players are not limited by the counter mix when placing Friendly Fire markers. If more markers are needed use any suitable means.
- Units roll individually on the Friendly Fire Table (see map) to determine if an incident occurs. The American player may resolve potential Friendly Fire in any order he wishes.
- If the result is "No Effect," remove the Friendly Fire marker.
- As soon as the first unit experiences Friendly Fire, flip its Friendly Fire marker to the "Panic" side and remove all remaining Friendly Fire markers. Friendly Fire can only occur once in the game.
Reduce American Army Morale by 1 the moment that Friendly Fire occurs. This reduction in Army Morale is a one-time event.
- Every unit stacked with or adjacent to the unit in panic is now also marked with a Panic marker, as are all units adjacent to those units, including artillery but excluding units without formation designations.
Note: Players are not limited by the counter mix when placing Panic and Friendly Fire markers. If more markers are needed use any suitable means.
3.2.3 Effects of Panic
- Units in panic immediately retreat 4 hexes northwest, if possible, following all other retreat rules as normal.
- Units in panic that retreat off the board may not re-enter play (see 2.1 for effects on British Decisive Victory conditions).
Reduce American Army Morale by 1 the first time this occurs. This reduction in Army Morale is a one-time event.
- Panicked units have no ZOC and may not move, fire or attack, but may defend at ½-strength (round up).
3.2.3.1 Recovery From Panic:
-
Panicked units may attempt to recover by performing a morale check beginning on the Rally Phase of their next player turn.
-
Apply a –1 DRM to the rally die roll in addition to normal modifiers.
- If a panicked unit passes the morale check it is considered recovered. Remove the Panic marker.
Important Note: Units that recover from panic do not gain Army Morale points.
- If a panicked unit fails the morale check it remains panicked and immediately retreats another 4 hexes toward the northwest, if possible.
3.3 Initial British Movement Restrictions
- Turn 1: Only British & Hessian units on or north of hex row 34xx can move.
- Turn 2: Units released on Turn 1 and all remaining Hessian units may move.
- Turn 3: All of the British player's units may move.
3.4 Reinforcements
- Arriving units enter at no cost and may move normally, including the use of Strategic Movement.
- If enemy units or their ZOCs occupy an entry hex, reinforcements may enter at the nearest unblocked hex paying normal terrain costs to do so. If more than one such hex is available, the owning player may choose.
3.4.1 American Reinforcements:
Enter on Turn 2 at hex 2800, labeled "A-1."
Important Note: These American reinforcements cannot be voluntarily withheld. This is an exception to Series Rule 9.61.
3.4.1.2 American Variable Reinforcements:
Beginning on Turn 7, the American player rolls to see if Smallwood's Militia enters play. The die is rolled during the American player's Movement Phase. Consult the Game Turn Track and roll the number shown. Note, the turn-of-entry designation for these units is in parenthesis as a reminder that they have variable entry.
- If successful, Smallwood's units enter at hex 3800, labeled "A-2."
- If unsuccessful, advance Smallwood's units along the turn track and roll again in the following turn.
3.4.2 British Reinforcements:
Enter on Turn 5 at hex 4617, labeled "B."
3.5 American Militia Bombardment Zone
The presence of American militia artillery across the Schuylkill River, off the map and out of play, has been abstracted as follows:
- During clear weather turns only the Americans may fire "off board" artillery at enemy combat units occupying the American Militia Bombardment Zone. This zone is identified by a dashed red line (see map).
- Fire is conducted during the Defensive Artillery Fire Phase. SPs firing are assumed to be 1 and range is assumed to be 3 regardless of the target hex.
Note: Line of Sight does not apply, but all other fire modifiers do. This is an exception to Series Rule 11.41.
3.6 American Surprise
To reflect surprise, units belonging to the American Vanguard receive a +1 DRM in Close Combat on Turn 1 only.
Note: These units have their MPs highlighted in a yellow box for ease of identification.
3.7 Wayne's Fury
Whenever a unit in Wayne's Division is the lead unit in an attack against British Light Infantry, and Wayne is stacked with that unit, the attacking Americans receive a +1 DRM in Close Combat.
Design Note: Wayne's troops were eager to exact revenge upon the British Light Infantry for its role in the Paoli Massacre.
3.8 Retreat Priorities
- American units must retreat north, northwest or west if possible.
- British units must retreat south, southeast or east if possible.
3.9 Leaders
3.9.1 American
Any American leaders may command any American units, unless specified below.
Washington: Washington has the ability to project his Leadership DRM into adjacent hexes.
- This is an Exception to Series Rule 14.23.
- His Leadership DRM is +4 when stacked and +1 when adjacent to friendly combat units.
- When adjacent, his +1 Leadership DRM is cumulative with any Leadership DRM provided by a leader in command in the adjacent hex.
Armstrong: Armstrong can only command American militia.
Design Note: Although Armstrong held a Continental Commission as Brigadier General, he is restricted to the command of militia in this game.
Matthews: Matthews can only command the 9th VA.
3.9.1.1 American Seniority:
- Major Generals: Sullivan followed by Stephen and Greene.
- Brigadier Generals: Maxwell followed by Wayne and Muhlenberg.
3.9.2 British
Any British or Hessian leaders may command any British, Provincial or Hessian units unless specified below.
Musgrave: Musgrave can only command the 40th Foot.
3.9.2.1 British Seniority:
Major Generals: Cornwallis followed by Agnew, Grey and Grant.
Design Note: Grey's rank of Major General was a brevet rank, awarded in 6/76, while Grant's rank dated from 1/77. Grey was superior to Grant locally, but would not be considered his superior throughout the British military establishment. Grey's brevet rank became permanent in 1778.
3.9.3 Demi-leader
Ewald: Ewald is a demi-leader when alone or when stacked with Hessian units.
- He allows for the play of advanced tactics without normal use restrictions (see Series Rule 12.52).
- Ewald loses his demi-leader capability while stacked with non-Hessian units or while participating in a multi-hex attack.
- His status as a demi-leader is indicated by the 5-pointed gold star on the counter.
3.10 Chew House
The Chew House is a fortified hex with the following effects.
3.10.1 Movement: Cavalry & artillery may move through but may not end movement in the hex.
- ZOC extends out of but not into the hex.
- Retreat by cavalry or artillery into the hex is prohibited.
3.10.2 Morale Check: Units in the hex receive +1 DRM to morale check die rolls.
3.10.3 Fire Combat: Enemy units suffer –3 DRM when firing at units in the hex.
3.10.4 Close Combat: Enemy units suffer –2 DRM when attacking units in the hex.
- Units in the hex are not required to attack adjacent enemy units. Exception: Pinned units must attack.
- Diversions may be used normally.
- Units in the hex may not select "Turn Flank" or "Attack en Echelon" tactics.
- Units in the hex may ignore "Retreat" results from fire or close combat. In this case, other units normally required to make morale checks may ignore them.
- Disruption, step-loss and capture results are treated normally.
- Advance after combat out of the hex is optional.
3.10.5 Victory Points: 1 VP is awarded to the British player only at the end of the game if he occupies or was the last to occupy the hex.
IV. Special Units
4.1 PA State Foot & 5th Pennsylvania
- These are mixed musket/rifle regiments with two SP values separated by a backslash.
- The SP values are interpreted as Close Combat / Rifle Fire, and each value is applied in the corresponding phase.
Note: When either of these units receives a step loss, the Close Combat value on the back of the counter is reduced but the Rifle Fire value is not.
4.2 PA Rifle Regt, PA State Foot & 5th Pennsylvania
- These rifle-armed regiments do not suffer the normal –1 DRM for rifle units in Close Combat.
- Their rifle designation is shown as a black "R" in a white circle rather then the standard white "R" in a black circle for ease of identification.
4.3 American Vanguard
- Doyle's Rifle Company, Spencer's Regiment, Conway's Brigade, Conway's Brigade Artillery and Moylan's Horse belong to the American Vanguard.
- The Vanguard is entitled to a surprise attack benefit on Turn 1 only (see 3.6).
- The Vanguard has its MPs highlighted in a yellow box for ease of identification.
Historical Summary
The Battle of Germantown
After their successes at Brandywine and Paoli the British advanced upon Philadelphia relatively unmolested. On the night of 22 September 1777 the British forded the Schuylkill River, and the next day marched to Norrington. When news of the British advance reached Philadelphia the city was gripped by panic; Congress fled, the city was stripped of anything the British could use, known patriots fled from their homes, cattle in the surrounding countryside were driven off and wagon loads of clothing and forage were carted out of the city.
On the 25th General Howe marched to Germantown, outside of Philadelphia, and bivouacked 9,000 troops there. The following day Lord Cornwallis entered the American capital with an additional 3,000 men. They paraded through the streets and were enthusiastically welcomed by the local Loyalists. The sight of Loyalists in Philadelphia was as welcome to General Howe as the sight of his red-coated troops was to the Tories. According to Sir William, "Through the whole march of the army, from the Head of Elk to Philadelphia, the male inhabitants, fit to bear arms (a very few excepted) had deserted their dwellings, and I had great reason to believe, were in arms against us. The Quakers were the only people against whom I entertained no suspicion."
Cornwallis quickly set to work on fortifications, setting up batteries to defend the riverfront from the Pennsylvania State Navy, which patrolled the Delaware. The Royal Navy had entered the lower Delaware and awaited the army's help to reduce American river defenses.
By the end of September General Washington's army numbered 11,000 men, thus slightly outnumbering the British bivouacked at Germantown; Washington determined to make a surprise attack during the predawn hours of October 4. Howe had chosen to rely on his patrols, perhaps being overconfident that no attack was possible. As a result he had failed to fortify his position. Washington's ambitious plan called for four columns to make a long, coordinated march at night in order to conduct simultaneous surprise attacks at first light on these unfortified British positions.
On the far right, Major General Armstrong with the Pennsylvania Militia was to turn the British left flank near the Schuylkill River. Sullivan's 3rd and Stirling's 5th Divisions would advance along Germantown Road accompanied by General Washington. The main attack would be made on the left by Greene's and Stephen's Divisions, who were to march upon the Germantown marketplace and force the British right wing. On the extreme left, Brigadier-General Smallwood's Maryland Militia and Brigadier-General Forman's New Jersey Militia would advance down the Old York Road, and get into the rear of the British right wing.
The timing of Washington's plan had allowed for two hours of rest for each column upon reaching their pre-attack positions. Unfortunately, the plan fell apart from the outset, as all the columns were late in reaching their appointed positions. A thick fog that night made the approach march difficult, though it also disguised the advance. Early on the morning of October 4 the British 1st Light Infantry captured an American scout and learned of the impending attack, but—incredibly—this information was not relayed.
At about 5.30am the 6th Pennsylvania Regiment, at the forefront of Sullivan's column, reached the community of Mount Airy on a rise of high ground known as Mount Pleasant and engaged the pickets of the 2nd Light Infantry. The Lights formed to counterattack, thinking it a small patrol, but Conway's Brigade and Sullivan's and Wayne's Divisions formed their line and forced the pickets to retreat. The heavy musketry stabbing through the fog and smoke convinced the Lights that this was a significant force. Their whole battalion was forced to fall back from its position along with the accompanying Royal Artillerymen who were also obliged to drag away their two 6-pounders, but not before one of their round shot went sailing over Conway's Brigade and mortally wounded Brigadier-General Nash, commander of the North Carolina Brigade.
General Howe, now aware of the attack, galloped toward the sound of gunfire and was astonished to see his Light Infantry in full retreat. A hail of grapeshot from the Americans soon convinced him of the seriousness of the situation. At about this time, Armstrong's Pennsylvania Militia arrived on the British left. The Hessian Jaegers positioned there had been warned the previous day of a possible attack and in the early hours one of their patrols discovered Armstrong's advance. Captain Ewald positioned his Jaegers on the heights overlooking a defile, and at barricades thrown up over a bridge spanning Wissahicken Creek, and waited. Armstrong attacked with the full force of his division, but the Jaegers held throughout the entire engagement.
The Chew House
At about 6.15am the 2nd Light Infantry were continuing to fall back towards the Chew House where the 40th Foot was stationed. The accompanying artillerymen were forced to abandon their guns, cutting the drag ropes so that they could not easily be moved if captured. The 40th formed their line to support the retreating Light Infantry, until the news that Wayne's Division were in their camp, outflanking them, obliged Colonel Musgrave to order the 40th to retreat in their turn. Acting decisively, however, Musgrave first ordered about 120 of his men to hold the Chew House, the imposing stone-built country house of the wealthy Benjamin Chew. This substantial example of Georgian architecture was quickly turned into a fortress. Doors and windows were barricaded with furniture and most of the little garrison manned firing positions in the upper windows and those of the semi-basement. Lieutenant William Harris' detachment guarded the ground floor with fixed bayonets.
The defenders fired upon Sullivan's and Wayne's Divisions as they passed, but these units sensibly did not stop to engage. When General Washington arrived with Stirling's Division, however, the house attracted more attention. Upon the advice of Brigadier-General Henry Knox, the commander of Washington's artillery, Washington ordered an attack. Four cannon opened fire at about 7am, first upon the northwest corner and then directly upon the front. The doors and windows were quickly blown in, but after half an hour the guns had proved too light to breach the solid stone structure, and Washington ordered the house taken by storm. Maxwell's New Jersey Brigade formed to the west of the house and the North Carolina Brigade to its north, opening a steady fire. The 3rd New Jersey Regiment made a valiant assault, but each attempt was beaten back by the defenders with mounting losses.
At about this time, Greene's Division arrived and drove in the pickets of the 1st Light Infantry forcing them back onto the main British body. Stephen's Division inclined to their right towards Abington Road and became separated from Greene in the fog. Meanwhile, the British were preparing a counter-attack. The 5th and 55th Foot were ordered to support the 40th; but the order was countermanded upon the arrival of Greene's Division, and these units were drawn off to protect the British right flank, followed by the 15th and 37th Regiments.
Woodford's 3rd Virginia Brigade of Stephen's Division, following the sound of gunfire, approached the Chew House from the east; they halted, and opened fire with the brigade's four artillery pieces. The house was now taking fire from three sides. Further south, at about 7.30am Anthony Wayne became apprehensive about these sounds of heavy fighting in his rear. Having lost contact in the fog with Sullivan's Division to his right, he feared the worst; his division broke off their attack, and counter-marched towards the sound of cannon fire. They approached the Chew House from the south, completing its encirclement. Stephen was advancing with Scott's 4th Virginia Brigade when they encountered one of Wayne's counter-marching brigades. Mistaking them for British, the Virginians opened fire; in the fog and smoke the Pennsylvanians were equally confused, and the two brigades blindly traded volleys for some minutes.
On the British far right, the New Jersey and Maryland Militia were sighted by the Queen's Rangers on the Old York Road. The 27th and 28th Foot and the Foot Guards were brought up in support of the Loyalist unit, forming a line of battle.
The American Withdrawal
At around 8am significant elements of the American line began to run out of ammunition. Wayne's men were the first to break off their attack, followed by Greene's and Sullivan's units. With no other option available, General Washington ordered the American center to withdraw. Major-General Grant engaged Greene's Division with the 37th, 5th, and 15th Regiments; and by exploiting the gap in the line left by Stephen's Division, the British broke the American left. In the ensuing retreat the 9th Virginia Regiment, which had penetrated all the way to Market Square, was captured en masse. The British Right Division under Grant advanced in pursuit of the New Jersey and Maryland Militia and Greene's and Stephen's retreating divisions, pursuing them as far as Whitemarsh Church.
Lord Cornwallis, having galloped north from Philadelphia, took command of the British center and advanced into Germantown against Sullivan's Division. Lieutenant-General von Knyphausen, commanding the left, held his line in place. As Cornwallis approached the outskirts of Germantown his 17th and 44th Regiments were ordered to drive the Americans out of the town. These two regiments preceded the British movement against the retreating American center; and when the 44th arrived at the gates of the Chew House, its 40th Foot defenders sallied out and joined in the pursuit. During this advance down the streets of Germantown, Brigadier-General James Agnew was fatally shot by a civilian.
Cornwallis continued his pursuit as far as Chestnut Hill, where the British Grenadier battalions arrived after a forced march from Philadelphia. They threw themselves across Wissahicken Creek to protect their flank, and Cornwallis continued cautiously toward Whitemarsh. At 10am the British skirmished with the American rearguard, but were unable to come up with the main force. After a ten mile pursuit, Cornwallis retired to Germantown.
Rather than pursue Washington's army in a game of cat and mouse, General Howe pulled his forces back into Philadelphia. Plans were already underway for a chain of redoubts between the Delaware and Schuylkill rivers to defend the northern end of the city and alterations were made to the camp in Germantown to prevent a future attack.
Despite the loss of the battle, Washington was applauded by friend and foe alike for his sheer audacity in launching an attack against the British camp. The French, then considering entering the war as an American ally, were much impressed by this display of resolve.
With the conclusion of the Battle of Germantown the British Army were masters of Philadelphia. General Howe expected that possession of Philadelphia would be a significant blow to the Patriot cause and the morale of its supporters. But whereas he had set out to capture the capital city of the rebellious colonies and had done so, he did not capture the leaders of the rebellion. The Continental Congress left Philadelphia before the occupation of the city and governed, as it were, just as effectively from other locations. More importantly, General Howe had failed to bring George Washington and the Continental Army to heel in a decisive defeat. That army continued to survive and became an even more cohesive fighting force after its long winter at Valley Forge, ensuring that the rebellion would continue.
Sources:
- The Philadelphia Campaign: Volume One: Brandywine and the Fall of Philadelphia by Thomas J. McGuire
- The Philadelphia Campaign: Volume Two: Germantown and the Roads to Valley Forge by Thomas J. McGuire
- The Philadelphia Campaign: June 1777-July 1778 by David G. Martin
- The Philadelphia Campaign, 1777-1778 (Modern War Studies) by Stephen R. Taaffe
- The Drillmaster of Valley Forge: The Baron de Steuben and the Making of the American Army by Paul Douglas Lockhart
Germantown Orders of Battle
Battle of Germantown — October 4th, 1777
BRITISH FORCES
General William Howe – commanding
Center Division – Major General Charles Lord Cornwallis
- 16th "Queens Light" Dragoons
- 2nd Battalion Light Infantry
- 1st & 2nd Grenadier Battalions
- 3rd Brigade – Major General Charles "No Flint" Grey
- 17th Foot
- 44th Foot
- 3rd Brigade Artillery
- 4th Brigade – Brigadier General James Agnew
- 33rd Foot
- 46th Foot
- 64th Foot
- 4th Brigade Artillery
- 40th Foot (from 2nd Brigade)
- Leib Regiment (from Hessian Brigade)
- Leib Regiment Artillery
- Corp Reserve Artillery Batteries (deployed with British pickets)
Right Division – Major General James Grant
- Queens Loyalist Rangers
- 1st Battalion Light Infantry
- 1st & 2nd Guards Battalions
- 1st Brigade
- 4th Foot, "Kings Own"
- 28th Foot
- 49th Foot
- 1st Brigade Artillery
- 2nd Brigade – Major General James Grant
- 5th Foot
- 27th Foot, "Enniskillings"
- 55th Foot
- 2nd Brigade Artillery
- Hessian Brigade – Major General Johann Stirn
- Chasseurs
- Von Linsing Grenadier Battalion
- Mirbach Regiment
- 15th Foot (from 3rd Brigade)
- 37th Foot (from 4th Brigade)
Left Division – Lt. General von Knyphausen
- Jaegers
- Von Minnigerade Grenadier Battalion
- Von Donop Regiment
- Von Donop Regiment Artillery
CONTINENTAL ARMY
General George Washington – commanding
Center Column – General George Washington
3rd Division – Major General John Sullivan
- 1st Maryland Brigade
- 1st Maryland
- 3rd Maryland
- 5th Maryland
- 6th Maryland
- Delaware Blues
- 1st Maryland Brigade Artillery
- 2nd Maryland Brigade
- 2nd Maryland
- 4th Maryland
- Smith's Rifle Company
- German Battalion
- Hazen's Regiment, "Congress' Own"
- 2nd Maryland Brigade Artillery
4th Division – Brigadier General Anthony Wayne
- 1st Pennsylvania Brigade
- 1st Pennsylvania, "Pennsylvania Rifle Regiment"
- 7th Pennsylvania
- 10th Pennsylvania
- Hartley's Regiment
- 1st Pennsylvania Brigade Artillery
- 2nd Pennsylvania Brigade
- 4th Pennsylvania
- 5th Pennsylvania
- 8th Pennsylvania
- 11th Pennsylvania, "Old Eleventh"
- 2nd Pennsylvania Brigade Artillery
5th Division – Major General William Alexander; Lord Stirling
- 3rd Pennsylvania Brigade
- 3rd Pennsylvania
- 6th Pennsylvania
- 9th Pennsylvania
- 12th Pennsylvania
- Spencer's Regiment
- 3rd Pennsylvania Brigade Artillery
- New Jersey Brigade
- 1st New Jersey
- 3rd New Jersey
- New Jersey Brigade Artillery
- North Carolina Brigade
- 1st thru 8th North Carolina Regiments
- North Carolina Brigade Artillery
Left Column – Major General Nathanael Greene
1st Division – Major General Nathaniel Greene
- 1st Virginia Brigade
- 1st Virginia
- 5th Virginia
- 9th Virginia
- 13th Virginia, "West Augusta"
- 1st Virginia Brigade Artillery
- 2nd Virginia Brigade
- 2nd Virginia
- 10th Virginia
- 14th Virginia
- Pennsylvania State Foot
- 2nd Virginia Brigade Artillery
2nd Division – Major General Adam Stephen
- 3rd Virginia Brigade
- 3rd Virginia
- 7th Virginia
- 11th Virginia
- 15th Virginia
- 3rd Virginia Brigade Artillery
- 4th Virginia Brigade
- 4th Virginia
- 8th Virginia, "German Regiment"
- 12th Virginia
- Grayson's Regiment
- Patton's Regiment
- 4th Virginia Brigade Artillery
- McDougal's Brigade
- 4th Connecticut
- 5th Connecticut
- 8th Connecticut
- McDougal's Brigade Artillery
Left Militia Column – Brigadier General Smallwood's Division
- Maryland Brigade
- New Jersey Brigade
- 8th Chester County (PA) Regiment
Right Militia Column – Brigadier General Potter's Division
- Armstrong's Pennsylvania Brigade
- Levies from Philadelphia, Cumberland, York, Lancaster, Bucks & Berks counties.
- Philadelphia Associators
- Potter's Artillery
- Irvine's Pennsylvania Brigade
Cavalry
- Schott's Independent Dragoon Company
- Bland's Horse
- Moylan's Horse
- McLane's Delaware Horse
Independent Unit
- Doyle's Rifle Company
Germantown Countersheet Manifest
The counter sheet includes 7 replacement counters for Volume II in the Battles of the American Revolution series: The Battle of Brandywine.
- Grenadier Guards: This unit replaces the 1st Foot Guards and has also been modified to include grenadier-style headgear.
The following units have all received corrections to their uniform specs:
- Bland's Horse
- Spencer
- Old Eleventh
- Hartley
- 7th Pennsylvania
- Lady Washington's Horse
Sequence of Play
germantown * 1777
- Initiative Determination (Beginning Turn 4)
- Fog Check (Turns 4-6 Only)
- Fog is automatically "dense" on Turns 1-3 and weather is automatically clear on Turns 7-10.
- Move Stephen's Formation (Beginning on Turn 2, American Player Only)
- Consult Stephen's Movement Table for random direction.
- Friendly Fire Check (Beginning on Turn 4, American Player Only)
- Friendly Fire can only occur once in the game. Afterward, this step is skipped in the Sequence of Play.
- Movement Phase
- Reinforcements
- Rally Phase
- Panic Recovery
- Defensive Artillery Fire Phase (non-phasing player)
- Includes off-board militia bombardment during clear weather
- Rifle Fire Phase (simultaneous)
- Close Combat Phase
- Advance Game Turn Marker
Part Four: Newtown Exclusive Rules
Newtown Exclusive Rules (2013), from the Newtown & Oriskany booklet. Only the Newtown portion is included.
Newtown Combat Units
INDIAN Player
- Tan with no stripe: Indians
- Tan with red stripe: British Regulars
- Tan with yellow stripe: Provincials
- Tan with brown stripe: Tory Militia
AMERICAN Player
- Blue with no stripe: Continentals
- Blue with light blue stripe: Patriot Militia
(Oriskany units are marked with a thin white horizontal stripe.)
Shared Markers
In order to conserve counter mix space, many markers are shared between both games (Newtown and Oriskany). In addition, the Ambush markers (front-side) are used in Oriskany while the Failed Resolve markers (back-side) are used in Newtown. Shared markers shown in the booklet include Momentum Destroyed, Withdrawal and Disrupted.
Replacement Counters
The counter sheet includes 10 replacement combat units and 5 markers for previous games in the Battles of the American Revolution series.
- Saratoga ("Next Day" scenario): MacKay's Corp (new unit); Queen's Loyal Rangers (new unit); British HQ (new marker)
- Brandywine Creek: 2nd N.J. Volunteer Artillery (new unit)
- Eutaw Springs: Palmetto Foot (Strength Points have been increased from 1 to 2 and the unit now has a reduced side); 2nd Royal Highland Emigrants (new unit)
- Savannah: Georgia Volunteers (Unit Morale has been degraded from 0 to –1); Volunteers of Ireland (new unit; Design Note: This ad-hoc unit also includes Maryland Loyalists, the 4th N.J. Volunteers and infantry from Tarleton's British Legion); Georgia Lt. Dragoons (new unit)
- Pensacola: Fijo de Luisiana (new unit)
- Germantown: 2nd N.J. Volunteer Artillery (new unit); Friendly Fire/Panic (four additional markers)
Newtown Exclusive Rules
Design Note: Despite our efforts to maintain accurate period names for all map features, three locations have post-battle nomenclature due to inconclusive research into their pre-battle identification: Newtown: "Sullivan's Hill" and "Butler's Creek"; Oriskany: "Bloody Creek".
I. Prepare for Play
1.1 Game Length
The game begins at 8:00 AM (Turn 1) and ends at 7:00 PM (Turn 12) unless either a Decisive or Substantial Victory is achieved prior to the final turn (see Section II).
1.2 Player Order
Only the American player moves on Game Turn 1, thereafter the player order is determined randomly per Series Rule 6.0.
1.3 At-Start Army Morale
American: 14, Indian: 13
1.4 Momentum
The Americans begin the game with one Momentum Chit.
1.5 Deployment
Both sides deploy their units either by the at-start hex or turn of entry indicated on the counters.
1.6 Optional Unit Selection
Both players must agree on the use/disuse of the Optional Seven Nations Indian player combat unit (Rule 6.2) before rolling for Indian Honor (Rule 1.7) or Pre-game Indian Enhancement (Rule 1.8).
1.7 Indian Honor
The Indian player rolls on the Indian Honor Table to determine which combat unit begins the game with honor (Rule 5.1).
1.8 Pre-game Indian Enhancement
- Set the following markers and Random Event combat units (labeled RE) aside for use with the Pre-game Indian Enhancement Table: War Dance, French Margaret, Visions, Big Medicine, Wampum Belt, Tiahogwando, Capt. Montour, 8th Foot, and Mohawk Valley.
- The Indian player rolls on the Pre-game Indian Enhancement Table and applies the result.
- The Table will indicate which marker or RE combat unit, if any, is required and how it is to be applied.
1.9 Activation Markers
1.9.1 Pre-Game Marker Placement – Indian Player Only
- Place Activation-Movement markers for each Indian tribe/clan in an opaque container.
- If the Seven Nations unit is in play (Rule 1.6), add its marker to the container (Rule 6.2).
- If the Onondaga unit is in play (Rule 1.8), add its marker to the container (Rule 6.3).
1.9.2 Marker Additions During Play
- The moment that American player and Indian player combat units become adjacent to one another, the Combat marker is immediately added to the container.
- As soon as Indian Resolve is triggered (Rule 5.4), the Indian Resolve marker is added to the container during the End Phase of the Indian Player Turn.
1.10 Opportunity Cards (Rule 4.2)
Each player draws one card from his or her respective deck.
II. How to Win
2.1 Indian Decisive Victory
Eliminate 7 SPs of American combat units (except artillery).
2.2 American Decisive Victory
Destroy every Newtown hex (Rule 4.1).
2.3 Substantial Victory
Either side can achieve a Substantial Victory as indicated in Series Rule 16.3.
2.4 Marginal Victory
If neither player achieves a decisive or Substantial Victory by the end of the game, the American player must have at least 9 more VPs than the Indian player to earn an American Marginal Victory. Any other result is an Indian Marginal Victory.
2.5 Victory Point Schedule
2.5.1 Leader Casualties: See the Leader Loss Table.
2.5.2 Indian Player Only: 2 VPs are awarded if the Cattle Herd is captured (see Rule 6.5.3).
2.5.3 American Player Only: VPs are awarded if there are no Indian player combat units in any breastwork hexes at the end of the Indian Final Movement Phase on Turns 5-8 (based on a sliding scale shown on the Game Turn Track). Place the Breastwork Abandoned marker on the Turn Track as a reminder. If the Indian player subsequently occupies at least one breastwork hex there is no further VP adjustment.
III. Series Rules Variations
3.1 Leaders
3.1.1 Indian Seniority: The Indian player has three Leader units: Old Smoke, Colonel John Butler and Cornplanter. The following rules apply to these leaders:
- Old Smoke & Cornplanter can command any Indian units.
- John Butler can command Butler's Rangers, the 8th Foot [Platoon or Battalion] and the Mohawk Valley Militia.
- If Indian and non-Indian units are stacked together with John Butler and Cornplanter, the Indian player may designate either of these leaders to command the entire stack. Old Smoke cannot command a mixed stack.
- If Butler has the Wampum Belt, he may command Indian units alone.
- Joseph Brant is a demi-leader for himself, the Mohawk Valley Militia and any Indian units with whom he is stacked.
3.1.2 American Seniority: The American player also has three Leader units: Major General Sullivan, Brigadier General Clinton and Brigadier General Poor. All American leaders can command any American-controlled units.
3.2 Retreat Priorities
3.2.1 Indian Player: The Indian player retreats toward Newtown or hex 1408 if possible.
3.2.2 American Player: The American player retreats toward hex 6020 if possible.
3.3 Stacking Exception – The Cattle Herd
The Cattle Herd may freely pass through friendly units during the movement phase but McLane's Delaware Horse is the only American combat unit that can end the movement phase stacked with the cattle herd. If the Cattle Herd is alone in a hex, Indian player combat units may enter its hex to capture it (Rule 6.5.1).
3.4 Limited American Intelligence
The American player may not examine Indian player stacks. If he does, a penalty of –1 Army Morale will be imposed on him each time.
- Once a target hex is identified for Artillery or Rifle fire, the American player is free to examine all units in that specific hex in order to pick the specific target.
- One unit in a reviewed hex must be fired upon in that very same Fire Phase before any other targets are identified.
3.5 Strategic Movement
3.5.1 Cattle Herd: The Cattle Herd cannot use Strategic Movement.
3.5.2 At-Start American Units: American units deployed on the map at the beginning of the game cannot use Strategic Movement on Game Turn 1.
3.5.3 The Seven Nations Unit: The optional Seven Nations unit cannot use Strategic Movement on Game Turn 1.
3.6 Combat Considerations
3.6.1 Retreat and Stacking: In certain situations, Indian player units (Indians, British Regulars, Provincials and Tory Militia) can retreat prior to combat (5.7) and Indian units have special rules regarding retreats (5.9).
3.6.2 Advance after Combat: A victorious Indian player Lead Unit is not required to Advance After Combat when occupying breastworks. This is an exception to series rule 12.2.
Note: This rule applies only if all defending units were attacked across breastwork hexsides.
3.6.3 Indian Combat Quality: In this game, Indians are treated as Regulars for Close Combat DRM purposes.
IV. Special Rules
4.1 Destroying Newtown Hexes
- Newtown hexes are automatically destroyed whenever an American combat unit begins a friendly Movement Phase in the hex.
- The unit may not move.
- Place a destroyed marker on the hex.
4.2 Opportunity Cards
4.2.1 Setting Up: Each player possesses a deck of 12 Opportunity Cards. Shuffle the decks and place them facedown before play.
4.2.2 Obtaining Cards
- Each player draws one card prior to beginning Turn 1.
- During each friendly Rally Phase, prior to making rally rolls, the American player may spend one momentum chit to draw a new card from his deck.
- The Indian player may add only one additional card to his hand during the entire game. He does so immediately when any Indian combat unit crosses to the eastern side of the creek running between hex rows 45xx & 46xx. Therefore, the Indian player may hold a maximum of just two cards in his hand during the game.
- The American player has no hand-size limit.
4.2.3 Card Usage
- The cards are self-explanatory—follow the directions as indicated.
- Cards may be played by either player at any moment and during any phase, unless specifically disallowed by card text.
- Once a card is played it is discarded permanently.
4.2.4 Card Notes
- Fathers, Sons and Brothers: Note that an ignored result also prevents units stacked with the identified unit to be impacted as well. Example: A unit avoids a 1 Step loss result. Therefore any units stacked with that unit are unaffected since the step loss never occurred.
- They Were as Ghosts, Chaos and Parley: These cards can be played at any time, including immediately prior to the Close Combat resolution die roll.
V. Indian Rules
5.1 Indian Honor
At the start of the game the Indian player rolls on the Indian Honor Table to determine which tribe/clan begins the game "with Honor".
5.1.1 Assignment of Honor One combat unit in the designated tribe/clan (Indian player's choice) is assigned the Honor marker, which is placed under the selected unit.
5.1.2 Effects of Honor
- The unit "with Honor" receives +1 to its Unit Morale for all purposes.
- The unit with Honor must be the Lead Unit if involved in Close Combat, or Honor is lost and the marker is immediately removed and set aside for reassignment in the End Phase (see 5.1.4).
5.1.3 Loss of Honor
- The Honor marker is removed as in rule 5.1.2 above.
- The Honor marker is removed if the owning unit fails an Indian Resolve Morale Check (see 5.4.2).
- The Honor marker is removed if the owning unit is the Lead Unit in a Close Combat that produces any adverse results impacting that Lead Unit: NC, R, D, PIN, R/R, 1, 2, C.
Design Note: Although "NC" is not specifically an adverse result, if an Indian unit with Honor entered combat and was not able to bring the enemy to bear and produce a victorious result, the detrimental effects to that unit's Honor among the tribes would be much the same.
Clarification: Honor is not lost by choosing Indian Withdrawal, which is not a combat result.
5.1.4 Honor Reassignment
- During the End Phase of the current Indian Player Turn, roll on the Indian Honor Table to determine the next tribe/clan from which the Indian player will choose the combat unit that will receive the Honor marker.
- If Honor was not lost during the current Game Turn, no roll is made.
- To receive Honor a unit must be in Parade Order. In addition, Honor cannot be assigned to a unit marked with Failed Resolve, nor to the unit that just lost the Honor marker in the current Player Turn.
- If the die roll does not result in an eligible combat unit for Honor marker placement, then Honor is not assigned and the marker should be placed on the next turn of the Game Turn Track. Honor will then be rolled for again during the next Indian player End Phase.
- The Tuscarora, Seven Nations (optional) and Onondaga (possible pre-game enhancement result) units can never own the Honor marker.
5.2 Indian Player Movement Phases
The Indian Player Turn has three distinct Movement Phases (see the Sequence of Play).
5.2.1 Standard Movement Phase The Indian player may move his non-Indian combat units: British Regulars, Butler's Rangers, and the Mohawk Valley Militia.
5.2.2 Activation Movement Phase
Design Note: Newtown introduces a chit-pull mechanic that controls the movement of Indian combat units (only) in the Indian player Movement Phase.
- The Indian player draws Activation markers one at a time from the container and moves only those units corresponding to the Activation marker drawn.
Note: The Mohawk Valley Militia can move in the Standard Movement Phase or in the Activation Movement Phase with the Mohawk tribe when their marker is drawn (not both).
Note: The counter mix includes two activation markers for the Mohawk and Mohawk Valley Militia. Both markers go in the cup, but only the first marker drawn is used—the second is ignored.
Design Note: This mechanic demonstrates these units' mobility in a tempered fashion by increasing the chance of their markers being drawn, rather than allowing them to move twice outright.
Note: The Seneca tribe consists of the Wolf Clan and the Turtle Clan. The counter mix includes two Seneca Activation Markers; one each showing a wolf's paw print and a turtle. Likewise, each Seneca combat unit and leader features one or the other of these totems. Only those units in the Clan corresponding to the totem on the Activation marker drawn (wolf or turtle) can move when its Activation marker is drawn.
- When a Check Indian Resolve marker is drawn, all Indians within range and LOS of an American artillery unit must immediately perform an Indian Resolve Morale Check (Rule 5.4.2).
- The Activation Movement Phase ends immediately when the Combat marker is drawn. Proceed to the Rally Phase.
- Activation markers are returned to the container during the End Phase of each Indian Player Turn (see the Sequence of Play).
5.2.3 Final Movement Phase
- Indian units whose Activation markers have not been drawn and who are not adjacent to enemy combat units may now move.
- Units marked with Failed Resolve may not move in the Final Movement Phase.
- Units cannot move adjacent to enemy combat units in the Final Movement Phase, even if enemy ZOC is not projected into the adjacent hex.
5.3 Indian Sortie
5.3.1 Restriction
- Until released by a successful sortie die roll, Indians may only move freely on or west of hex row 34xx.
Exception: Blacksnake starts east of hex row 34xx and is not restricted.
5.3.2 Sortie Rolls
- Beginning with game turn 2 the Indian player rolls the die and checks the result against current range printed on the turn track.
- If the result falls within the range, Indian units may sortie east of hex row 34xx.
5.3.3 One and Done Once a sortie roll is successful, it applies for the remainder of the game and no future die rolls are attempted. Place the Successful Sortie marker on the turn track as a reminder.
5.4 Indian Resolve
5.4.1 Check Indian Resolve Markers
- On the first turn in which at least one American defensive artillery fire achieves a hit on the To-Hit Table against a targeted Indian combat unit, one Check Indian Resolve marker is added to the opaque container during the End Phase of the current Indian Player Turn.
Note: Only a "hit" is necessary—it is not necessary to cause damage on the subsequent Damage Die Roll.
- On the first turn in which an Indian combat unit fails an Indian Resolve Morale Check, the second Check Indian Resolve marker is added to the opaque container during the End Phase of the current Indian Player Turn.
5.4.2 Indian Resolve Morale Checks
- When a Check Indian Resolve marker is drawn during the Activation-Movement Phase, all Indian units within range and LOS of American artillery units must make an Indian Resolve Morale Check.
Exception: Mohawk never check Resolve.
- Review the Indian Resolve DRM Table for modifiers to the die roll.
- Place Failed Resolve markers on any units which fail their Resolve Morale Checks.
5.4.3 Effects of Failed Resolve
- The unit is immediately retreated 4 hexes toward Newtown or hex 1408 if possible (the unit may not utilize Indian Evasion [Rule 5.9]).
- The unit is captured if it cannot retreat without moving adjacent to American player units.
- The unit may not move in a friendly Movement Phase until it recovers Resolve.
- The unit may fire in the Rifle Fire Phase.
- The unit may not attack in Close Combat and therefore may not Retreat Before Combat.
- The unit may not choose Indian Withdrawal if attacked.
- The unit is captured if pinned.
- The unit automatically loses Honor (Rule 5.1.3).
- An attacker receives a +1 Close Combat modifier when attacking a unit with a Failed Resolve marker.
5.4.4 Recovering Resolve A Failed Resolve marker is removed during the Indian player Rally Phase upon a successful morale check (in the same way Disruptions are recovered per the Series Rules).
Units that fail to recover Resolve continue to retreat four hexes per turn. Units that Retreat off the board cannot reenter play. No VPs are awarded, however reduce Indian Army Morale by –1 for every turn in which any units Retreat off the board.
5.5 Indian Ambush
Design Note: The Indian vanguard was deployed well east of the main Indian line. They were to demonstrate and lure the American column into an ambush at the masked breastwork. Historically the ambush was sprung by elements of the American Light Corps and the American army was able to approach and deploy. This rule allows for the possibility that the ambush was successful.
- The first time in the game that either player declares Close Combat the Indian player rolls on the Ambush Table.
- This roll occurs after all combats are designated, but before any are resolved.
- If the Ambush Table yields a successful result, then all Close Combats in that Combat Phase (only) are shifted 2 columns in favor of the Indian player.
5.5.1 Optional Rule For play balance treat Ambush as automatic.
5.6 Indian Ferocity
Indian Lead Units located in a woods hex receive a Close Combat DRM against enemy units.
- This DRM is gained whether attacking (+1) or defending (–1).
- Disrupted or shattered Indians or Indians with Failed Resolve never benefit from ferocity.
5.7 Indian Retreat before Combat
During the Indian player Close Combat Phase, after all Close Combats are designated, the attacking Indian player is allowed to Retreat before Combat in any or all of these designated combats.
- Each Retreat is executed one by one in any order desired by the Indian player.
- Each Retreat must be resolved before another is begun.
- The retreating units are retreated one hex according to Series Rule 13.2.
- As each retreat is resolved, the defending American player has the option to immediately advance one Parade Order combat unit into each hex vacated by the retreating Indian player's units. Artillery units may never advance.
Important: If any Indian player unit retreats away from a particular American unit/stack, then all Indian player units must retreat away from this same American player unit/stack. Note that this can impact other designated Close Combats—not just the one relating to the American unit/stack in question.
Illustrated example (diagram): If unit "B" decides to execute Retreat Before Combat instead of attacking American unit "F", then units "A", "C" and "D" must also execute a Retreat as they are adjacent to American unit "F". Note that they would be required to do so even if they were designated to attack American units "E" or "G". Note: If American unit "H" is present in the indicated location, such a move would become highly risky for units "C" and "D" unless hexes 1 or 2 are woods hexes (negating unit "H"'s ZOC). (See Rule 5.9, Indian Evasion.)
- Pinned Indian units can utilize Retreat before Combat, but must pay the standard –1 AM point.
5.7.1 Completion of Retreats Once all Retreats before Combat are completed, previously designated Close Combats where Indian player and American player units remain adjacent are now resolved per the Series Rules.
5.8 Indian Withdrawal
- If all defending units in a woods, orchard or corn hex are Parade Order Indians and none of the attacking units include Light Infantry, the defending Indians have the option to announce an Indian Withdrawal after the attacker has declared his Lead Unit but before the Close Combat is resolved.
- The defending Indians retreat three hexes to a hex not adjacent to an enemy unit.
- Mark the withdrawn Indians with an Indian Withdrawal marker.
- Defending "pinned" Indians can choose Indian Withdrawal at a cost of –1 to Army Morale.
- Indians with Failed Resolve may not choose Indian Withdrawal.
- Withdrawn units may not move or attack, but they retain their ZOC and defend normally.
- If attacked while marked with Indian Withdrawal they may not again choose it.
- The marker is automatically removed after the next Activation-Movement Phase.
5.9 Indian Evasion
- If retreating Indian units are blocked by friendly units in a way that would cause the hex to be over-stacked the retreating Indians may freely pass through to the next available hex (this is an exception to Series Rule 13.22—last bullet).
- If retreating Indian units are blocked by enemy ZOC, the Indian unit enters the ZOC hex and performs a morale check subtracting –1 from the die roll.
- Subtract an additional –1 if the ZOC is projected by a rifle unit.
- If the retreating Indian passes the morale check it continues to retreat to the next available hex.
- If it fails the morale check it takes a step loss applying normal VP and AM adjustments.
- If the retreating Indian unit has a reduced side it may now continue retreating to the next available hex.
- If it would have to pass through additional ZOCs it would perform the procedure in each such hex entered.
- Indian units cannot retreat into or through hexes containing enemy units.
VI. Special Units
6.1 8th Foot (Platoon)
Design Note: This unit represents the 15 men of the 8th Foot present at the Battle of Newtown.
6.1.1 Attachment
- The 8th Foot (Platoon) begins the game "attached" to Walter Butler's Company of Loyalist Rangers.
- To "re-attach" to another friendly combat unit—simply stack the 8th Foot (Platoon) with the new unit. This may occur as often as desired.
- The 8th Foot (Platoon) should be stacked directly under the unit it is attached to.
- Note that no unit can move more than once per turn. Therefore, if the 8th Foot (Platoon) moves to stack with an Indian player unit and attaches to it, the new "parent" unit will not be able to move that turn.
6.1.2 Stacking The 8th Foot (Platoon) never counts against stacking.
6.1.3 Movement
- When alone in a hex, the 8th Foot (Platoon) may not voluntarily move adjacent to an enemy combat unit.
- If it begins its Movement Phase alone and adjacent to an enemy combat unit it must move to a non-adjacent hex if possible. If unable to move away due to enemy units or their ZOC it is captured.
- When "attached" to another friendly combat unit it moves with that unit.
Exception: The 8th Foot (Platoon) does not receive 5 MPs while attached to an Indian combat unit. If attached to such a unit the Indian unit would be limited to a movement of 4 MPs.
6.1.4 Combat
- When alone, the 8th Foot (Platoon) defends with a provisional defense strength of 1 SP.
- When attached, the 8th Foot (Platoon) does not add its 1 SP to the strength of the stack and cannot be selected as the Lead Unit. Parentheses have been added to the counter to remind players of this rule.
- It may be targeted by enemy artillery or rifle fire.
- The 8th Foot (Platoon) adds "+1" to the unit morale of the combat unit to which it is attached for all game purposes.
6.1.5 Combat Results
- If the combat unit to which the 8th Foot (Platoon) is attached suffers a combat result of R, D, Capture or Pin, it accompanies that unit and shares its fate.
- If the combat unit to which the 8th Foot (Platoon) is attached suffers a step loss, the 8th Foot (Platoon) does not absorb that loss unless it is the last remaining step available that can satisfy the requirements of a "2" Step Loss result.
6.1.6 VPs & AM Apply normal VP and Army Morale adjustments when the 8th Foot (Platoon) is either eliminated or captured. This adjustment would be in addition to the adjustment for its parent unit.
6.1.7 "Full Measure" As a result of a die roll on the pre-game Indian Enhancement Table, the 8th Foot (Platoon) may be replaced by the 8th Foot Battalion. The Battalion is treated in every way as a standard combat unit and all special rules pertaining to the 8th Foot (Platoon) are disregarded.
6.2 Seven Nations
Design Note: These allied Canadian Indians represent Mohawk, Algonquin, Nipissing, Caughnawaga, Abenakis, Huron & Cayuga/Onondaga. They occasionally campaigned with the Iroquois people of the Mohawk Valley. This unit is optional and provided for play balance.
- If both players agree, the Seven Nations and its Activation marker can be added to the Indian player counter mix at the start of play (Rule 1.6).
- If used, the Seven Nations unit is placed in hex 1408.
- It may not use Strategic Movement during Turn 1.
6.3 Onondaga
The Onondaga may enter the game as a result of a die roll on the pre-game Indian Enhancement Table. Place the unit in any Newtown village hex.
6.4 Provisional NY Battalion & Joseph Brant's Mohawks
- These are mixed musket/rifle units with two SP values separated by a backslash. The SP values are read as Close Combat/Rifle Fire, and each value is applied in the corresponding phase.
- When either of these units receives a step loss, the Close Combat value on the back of the counter is reduced but the Rifle Fire value is not.
6.5 The Cattle Herd
6.5.1 Movement and Stacking Considerations
- The Cattle Herd may freely pass through friendly units during the movement phase but McLane's Delaware Horse is the only American combat unit that can end the movement phase stacked with the cattle herd. If the Cattle Herd is alone in a hex, Indian player combat units may enter its hex to capture it.
- The Cattle Herd may not use Strategic Movement.
- During each friendly Movement Phase the Cattle Herd must move westward as far as possible along the road.
- If the herd is stampeded off the road by the play of an Opportunity Card it must move back to the road by the quickest route possible (fewest movement points spent) paying normal terrain costs.
- The Cattle Herd is captured whenever an Indian player combat unit enters its hex. Note that this capture can occur in any Indian Movement Phase or during Advance After Combat.
6.5.2 Combat Considerations
- The Cattle Herd is not a combat unit, and therefore has no combat value.
- The Cattle Herd cannot be attacked.
- The Cattle Herd does not retreat as a result of combat.
- It remains in place even if stacked with McLane's Delaware Horse and the latter was attacked and suffered a result which forced it to vacate the hex.
- If the Cattle Herd is stacked with McLane's Delaware Horse and the latter suffers a PIN combat result, the Cattle Herd is not considered pinned.
- Upon its capture, the Indian player gains 2 VPs and the American player loses 2 points of Army Morale.
Newtown Historical Scenario
Game Length
The scenario begins on the bottom half of Turn 5 and ends at the end of Turn 10 unless either a Decisive or Substantial Victory is achieved prior to the final turn.
Player Order
The game begins on the bottom half of Turn 5. The only game function on this half-turn is American Defensive Artillery Fire.
The Americans automatically move first on Turn 6, thereafter the player order is determined randomly.
At-Start Army Morale
American: 14, Indian: 13
Momentum
The Americans begin the game with one Momentum Chit.
Deployment
Indian Player
- Hex 3119: McDonell
- Hex 3320: Joseph Brant & Mohawk Valley Militia
- Hex 3420: Little Billy & Jack Berry
- Hex 3419: Walter Butler (with 8th Foot Platoon attached)
- Hex 3418: Farmer's Brother & Red Jacket
- Hex 3417: Half Moon
- Hex 3415: Little Beard, Captain Montour (with Honor) & Fish Carrier
- Hex 3314: Sagwarithra
- Hex 2914: Handsome Lake
- Cornplanter & Blacksnake anywhere on or west of hex row 34xx, south of Butler's Creek and north of the Hog Back
- Colonel Butler (with Wampum Belt) with any Indian units at the breastwork
- Old Smoke (with Big Medicine) with any Indian units
- Not used in this scenario: Random Event and Optional combat units
American Player
- Hex 3722: 1st N.J.
- Hex 3620: Lt. Stephens Artillery, Selin's Ind. Rifle Company, Spalding's Ind. Company
- Hex 3719: Sullivan, German Battalion & Wyoming Militia
- Hex 3619: Capt. Machin Artillery & PA Brigade
- Hex 3618: Lt. Jenkins Artillery, Parr & Light Infantry
- Hex 3818: Capt. Wool Artillery & Tryon County Volunteers
- Hex 3919: N.J. Brigade & Spencer
- Hex 3715: 2nd N.H. & 3rd N.H.
- Hex 3815: Poor & N.H. Brigade
- Hex 3714: Du Bois
- Hex 3916: Clinton & N.Y. Brigade
- Hex 4016: Provisional N.Y. Battalion
- Not used in this scenario: McLane's DE Horse and the Cattle Herd
Opportunity Cards
Each player draws one card from his or her respective deck.
Victory Conditions
The victory conditions are the same as in the campaign game except that no points are awarded to the Indian player for capturing the Cattle Herd.
Variations to Campaign Game Rules
Pre-Game: The Indian player does not roll for Honor or Pre-Game Indian Enhancement. Those outcomes are already reflected in the at-start deployment.
Opportunity Cards: The Indian player may not add a second Opportunity Card to his hand in this scenario.
Indian Sortie: There are no sortie restrictions in this scenario.
Indian Ambush: Ambush is automatically unsuccessful. No die is rolled.
Newtown Historical Essay: The Battle of Newtown
“The Indian Country is not to be merely overrun, but destroyed.”
~ General George Washington
The Battle of Newtown was the decisive opening salvo in what has come to be known as the Sullivan-Clinton Campaign of 1779. This campaign, undertaken to vanquish the Iroquois, was in response to frontier conditions in New York and Pennsylvania which had grown more and more acute during 1778. Britain’s Indian allies, principally the Seneca, Cayuga, Onondaga and Mohawk, terrorized the frontier settlements. Some of their incursions that year still echo through history with names like the Wyoming and Cherry Valley massacres. Although the Sullivan-Clinton Expedition is rightly regarded as a punitive movement it was much more than that. Its immediate purpose was indeed to give protection to the frontier settlements by destroying Indian villages and sources of supply. A second objective was to interdict British supplies out of Iroquoia, known as the granary of Niagara. A third objective was to threaten the forts at Oswego and Niagara, which were bases of operation for the British in the region. But the Expedition’s arguably most important strategic objective has faded in the collective memory. By 1779 the war was deadlocked. Burgoyne had surrendered an army at Saratoga, France was an active ally and other European nations were friendly. Peace was openly discussed in the British parliament. Washington and other American leaders saw that independence with a mere fringe of land along the seacoast would scarcely be worth the cost of the struggle if the rest of the continent to the west and north remained in the hands of the British Empire and its allies. Washington knew from actual experience the potential wealth of the fertile regions of the interior. He realized that when the time came to discuss terms of peace, those rich areas could only be secured for the young nation if they were actually possessed by them. Hence, the Sullivan-Clinton Expedition was at its very core a gamble for an inland empire.
After the Cherry Valley massacre on November 11th General Washington recognized the necessity of a decisive response to crush the power of the Indian nations. His plan for the Indian Expedition was authorized by Congress on February 25th, 1779 and leadership of the campaign was first offered to General Gates because of his seniority. He curtly refused and so, in his stead, Major General John Sullivan of New Hampshire was appointed. Brigadier General James Clinton of New York was made second in command and given direct charge of the forces being raised in the Mohawk Valley. He was to march south and join with Sullivan’s forces at Tioga in northern Pennsylvania. Clinton was also directed to preempt the Onondagas. Their ancestral homelands in eastern Iroquoia threatened the right flank of the proposed line of march of the combined expedition as it travelled north from Tioga into the Finger Lakes region of western New York State. Accordingly, General Clinton ordered the invasion of the Onondaga country on April 6th, 1779. A flying column of 558 officers and men covered 180 miles in five days. They burned numerous homes, killed or captured fifty of the enemy and destroyed the livestock, food, guns and ammunition that could not be carried off as plunder. Loyalist Colonel John Butler of Butler’s Rangers advised those Onondaga who were still loyal to the King, “To come off, and bring their Council Fire with them, to some place among the Senecas and Cayugas, there to resettle and rekindle their fire.”
The Sullivan-Clinton Expedition was one of the largest offensives of the War. General Sullivan agreed with Washington’s goals, “the total destruction and devastation of the Iroquois villages so that the country may not merely be overrun but destroyed,” but he faced a major logistical undertaking. His force would operate for several weeks beyond traditional supply lines, meaning it would have to be self-sufficient. When complete, Sullivan’s command would include four brigades totaling about 4,500 men, approximately 25% of the entire Continental army. Specifically, he was given Enoch Poor’s New Hampshire Brigade, William Maxwell’s New Jersey Brigade, Edward Hand’s Pennsylvania Brigade and James Clinton’s New York Brigade. In addition Sullivan received a company of Virginia riflemen, several artillery pieces, and Pennsylvania militia. A band was also provided to cheer the weary marchers. The plan was simple. Sullivan would gather his forces near Easton, Pennsylvania and advance up the Susquehanna River Valley, first to Wyoming and then on to Tioga. Simultaneously, Clinton’s Brigade would proceed westward from the Mohawk Valley, down the upper Susquehanna and link with the main force at Tioga. From there the combined force would travel into the Iroquois country and destroy everything in its path. Getting supplies proved difficult. Equally difficult was the advance from Easton to Wyoming and beyond and Washington became concerned about the growing delays. He continually urged speed lest the enemy organize to thwart their plans. Washington, assuming that Sullivan would be on the march by early June, reached the limits of his patience in late July with Sullivan’s reluctance to begin the campaign. He had envisioned a rapid strike into Iroquois territory, not a slow methodical campaign. “I cannot but repeat my entreaties that you hasten your operations with all possible dispatch,” he wrote. As an expedient, the Commanding General ordered Colonel Daniel Broadhead to take a small force north from Fort Pitt along the Allegheny River and possibly link with Sullivan or at the very least serve as a diversion. When Washington’s message arrived, the army was finally on the move to Tioga from its advanced base at Wyoming. Tioga was a small village at the confluence of the Chemung and Susquehanna Rivers. Supplies were carried there in 120 boats while the army marched along one shore in a formation that surrounded the near twelve hundred pack horses and seven hundred beef cattle. On average the force stretched out about six miles as it marched, reaching Tioga on August 11th.
With his three brigades concentrated and his supplies up Sullivan took a more aggressive approach. He ordered a night march to the Indian village of Chemung twenty miles above Tioga. At dawn the army stormed the town only to find it deserted. The soldiers looted and burned close to forty houses and most of the surrounding fields. There was brief skirmishing with an Indian covering party during which seven Americans were killed and thirteen wounded. Following the action Sullivan returned to Tioga to await the rendezvous with Clinton and his New York Brigade which was accomplished on August 19th. After detaching 250 men, the musicians and the army’s camp followers to secure a base of supply at Tioga, Sullivan finally stepped off on August 26th, two months behind schedule. On August 28th the army reached the charred remains of Chemung where it halted to refresh on a late harvest of beans, squash, and pumpkins. While the army feasted, Loyalist Colonel John Butler and his Iroquois allies made their move. Butler, Mohawk Chief Joseph Brant and the Seneca Chiefs Old Smoke and Cornplanter selected an ambush site near the Seneca village of Newtown along the American’s line of march. They constructed a camouflaged breastwork a half mile long and perpendicular to the trail on rising ground that fronted a stream. Here they posted seven hundred warriors. The right was secured by a low ridge known as the Hog Back and by the river beyond, and was garrisoned by Butler’s Rangers and Brant’s Mohawks. The left was secured by high hills and mountains and was garrisoned by still more Iroquois warriors. They dug in and waited. Actual numbers for the Indian army vary depending upon sources but a comfortable estimate is 1,500 total warriors plus Butler’s 300 Loyalist Rangers enhanced by a fifteen-man detachment of the British 8th Foot. They hoped that a diversion would draw Sullivan across their front and the confusion generated by sudden fire from one flank, quickly followed by fire from the other flank would rout the invading army.
At 9:00 a.m. on the morning of August 29, the American army moved off. Riflemen in the vanguard moved cautiously because scouts had reported a large encampment ahead the night before. A small group of Indians appeared. Suspecting an ambush, Major Parr ordered one of his riflemen to climb a tree whereupon he discovered the enemy’s works and alerted the army. Hand’s light troops came forward in support of the riflemen and they skirmished with the Indians while the rest of the army came up. At 11:00 a.m. Sullivan arrived on the scene. He ordered Poor and Clinton to outflank the Indian left with their brigades. Hand would demonstrate in front of the enemy and Maxwell would be held in reserve. Meanwhile, the American artillery was brought forward. At 3:00 p.m. the bombardment opened. It was to have been coordinated with the attack on the enemy left but Poor’s troops had gotten bogged down crossing swampy ground and had not reached their position. Hearing the sound of the guns, Poor and Clinton quickened their march. As they scaled the heights they encountered stiff opposition. New Hampshire troops in Poor’s Brigade under Colonel Henry Dearborn charged upslope with fixed bayonets while under a heavy fire. Other Continental units unleashed a volley. Fierce fighting, some hand to hand, engulfed the ridgeline. Suddenly, Seneca defenders at the breastwork, commanded by Red Jacket, routed under the artillery barrage. Almost immediately, the whole Iroquois line broke. Warriors on the high ground on the Indian left were the last to flee, leaving the Americans in possession of the field. It is said that sometime after the Battle of Newtown, the Seneca leader Cornplanter asked Red Jacket’s wife, “Why do you stay with him? He is a coward.” The Battle of Newtown had not been costly. Sullivan reported three killed and 39 wounded and, as at Chemung, he was unaware of the number of Indian casualties because they carried off their dead and wounded as they fled. Morale soared as the victorious army entered and plundered Newtown. Detachments burned 150 acres of what one soldier called, “the best corn I ever saw.”
The Iroquois made no other attempts to impede the progress of the Sullivan-Clinton Expedition which set about fulfilling the Commander-in-Chief’s orders with zeal. Sullivan and his army marched 250 miles into hostile territory, destroyed 40 villages comprising nearly 1,200 houses, 160,000 bushels of corn and a vast quantity of vegetables of every kind. His troops put to the torch hundreds upon hundreds of acres of crops and defeated the Indians and Loyalists at Newtown in the only pitched battle of the campaign. By campaign’s end on September 24th Sullivan bragged that there was “not a single town left” in the Six Nations in exchange for a total loss of a mere forty men. Colonel Broadhead congratulated Sullivan saying, “The wolves of the forest will have sufficient cause to howl as they will be quite destitute of food.” It was a scorched earth policy the likes of which North America would not see again until Sherman’s passage through Georgia in 1864; the troops acknowledged their accomplishment with a triumphant feu de joie! General Washington was pleased. He had repeatedly stressed the necessity of pushing the Indians to the greatest practicable distance from American settlements and of throwing them “wholly on the British enemy” for subsistence. The winter of 1779-1780 proved to be the coldest in living memory and became known as the “winter of hunger.” Approximately 5,000 Indian refugees suffered in the harsh winter, which not only demoralized and destabilized the Indians but also disintegrated them. The snow lay five feet deep for months and whole families froze to death. So did most of the game. Diseases ran rampant. In spite of the campaign’s success, one American officer noted, “the nests are destroyed but the birds are still on the wing.” The Iroquois, brimming with a desire for revenge, regrouped as a fighting force the following spring; raids continued throughout the war but the power of the Iroquois Confederacy had been broken forever at Newtown. Meanwhile, America’s loyal allies, the Oneida, would lose their villages to reprisal attacks by their former Iroquois brethren, then spend the duration of the war in squalid refugee camps around Ft. Stanwix and Schenectady. And all Indians were equally ignored in the Treaty of Paris which ended the Revolutionary War in a land transfer between the Americans and their British cousins. Thus was power wrested from the Six Nations and one of North America’s most fertile regions opened to American settlement.
The Sullivan-Clinton Expedition captured the imagination of the fledgling nation, and awakened a latent interest in growth as a precursor to the idea of Manifest Destiny. Its pivotal role was validated when, one hundred years later, some 50,000 spectators gathered on the Newtown Battlefield to listen to the stirring words of the iconic former general of the Civil War, William Tecumseh Sherman who spoke the key note address at the unveiling of the Sullivan Monument. Sullivan, for his part, resigned his commission following this, his most successful campaign, citing poor health and a wish to be with his family.
Newtown Order of Battle
Battle of Newtown, August 29, 1779
Continental Army Expeditionary Force Major General John Sullivan – Commander-in-Chief
- McLane's DE Horse
- Artillery Regiment – Colonel Thomas Proctor
- 1st Brigade – Brigadier General William Maxwell: 1st N.J. Regiment – Colonel Matthias Ogden; 2nd N.J. Regiment – Colonel Israel Shreve; 3rd N.J. Regiment – Colonel Elias Dayton; Spencer's Regiment – Colonel Oliver Spencer
- Second Brigade – Brigadier General Enoch Poor: 1st N.H. Regiment – Colonel Joseph Cilley; 2nd N.H. Regiment – Lt. Colonel George Reid; 3rd N.H. Regiment – Colonel Henry Dearborn; 7th MA Regiment – Major Daniel Whiting
- Third Brigade – Brigadier General Edward Hand: 4th PA Regiment – Lt. Colonel William Butler; 11th PA Regiment – Lt. Colonel Adam Hubley; German Battalion – Major Daniel Burchardt; Light Corp – Major James Parr (Selin's Ind. Rifle Company – Captain Anthony Selin; Spalding's Ind. Company – Captain Simon Spalding); Wyoming Militia – Captain John Franklin
- Fourth Brigade – Brigadier General James Clinton: 2nd N.Y. Regiment – Colonel Philip Van Cortlandt; 3rd N.Y. Regiment – Colonel Peter Gansevoort; 4th N.Y. Regiment – Lt. Colonel Frederic Weissenfels; Du Bois Regiment – Colonel Lewis Du Bois; Provisional Battalion – Colonel John Harper; Tryon County Volunteers; N.Y. Artillery Detachment – Captain Isaih Wool
Iroquois Forces Combined Command: Sayenqueraghta (Old Smoke) of the Seneca; Koeentwahka (Cornplanter) of the Seneca; Thayendanegea (Joseph Brant) of the Mohawk; Colonel John Butler
- Butler's Rangers – Colonel John Butler
- 8th Regiment of Foot (Platoon)
- Mohawk Valley Tory Militia
- Iroquois Warriors of the Mohawk, Seneca, Cayuga & Tuscarora Nations
- Allied Warriors of the Delaware Nation