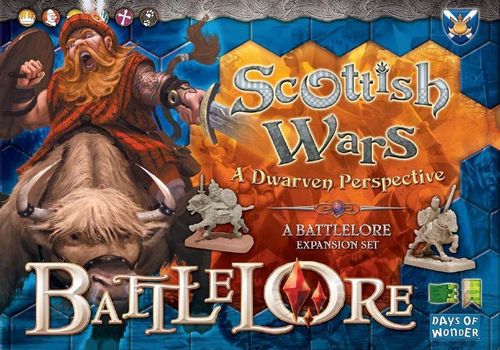
BattleLore: Scottish Wars
BattleLore: Scottish Wars Rulebook
Table of Contents
Table of Contents
Components
Unit and card contents of the pack, as printed on the pack's first pages:
- Four Iron Dwarves Spear Bearer units, 4 Iron Dwarf Spear Bearer figures each, with 2 Iron Dwarves Spear Bearer Specialist cards and 1 Spear Summary card;
- Two Iron Dwarves Clan Chiefs units, 4 Iron Dwarves Clan Chief figures each, with 2 Iron Dwarves Clan Chiefs Specialist cards and 1 Clan Chiefs Summary card;
- Two Iron Dwarves Cattle Riders units, 3 Iron Dwarves Cattle Rider figures each, with 1 Iron Dwarves Cattle Riders Specialist card and 1 Cattle Riders Summary card;
- Four Mounted Knights units, 3 Mounted Knights figures each, with 2 Mounted Knights Specialist cards, 1 Mounted Knights Summary card and 1 Knight's Lance Summary card;
- Banners for either camp (Pennant or Standard).
The unit-type Summary cards and the Specialist cards are part of the pack's card and insert contents; their printed text is not reproduced in the rules document beyond what is given below.
A word about the Dwarven units
Like all Iron Dwarves Foot troops, the Dwarven units introduced in this booklet share the same Iron Morale common to all Iron Dwarves Foot units, as detailed in p 37 of the BattleLore Player's Guide. Iron Dwarf foot units are Bold. They may ignore one flag rolled against them in battle.
Note that Cattle riders are mounted units, and as such do not have the same default Bold morale as their brethren on foot!
Iron Dwarves Spear Bearers
These sturdy little fellows use their caber tossing skills to great effect, always battling back at +1d when they get the chance (which is often, since, being Iron Dwarves, they are Bold by nature).
Iron Dwarves Clan Chiefs
A fierce and mean fighting machine unto itself, an Iron Dwarves Clan Chiefs unit may charge up to 2 hexes and still battle, when engaging in Melee. When at full strength, with its full complement of 4 figures, the unit also battles with one additional battle die, and is Bold2; it may ignore two flags as long as it still has its 4 figures.
Iron Dwarves Cattle Riders
Riding atop their barely domesticated highland cows, Iron Dwarves Cattle Riders don't charge into enemy ranks like your typical mounted troop. Instead, they just trot into combat!
Despite being Blue banner mounted troops, Iron Dwarves Cattle Riders may only move up to 2 hexes and battle. In addition, after a successful melee, the only Follow-on actions Iron Dwarves Cattle Riders may conduct are Gain Ground and a Bonus Melee attack. Unlike other mounted troops, Iron Dwarves Cattle Riders cannot move one additional hex in Pursuit.
Mounted Knights
The proudest riders in the land, Knights are Bold by nature, despite being human. They may ignore one flag and possibly battle back.
Wearing the best of armor and skilled with the lance, they also ignore 1 additional shield rolled against them, when attacked in Melee. Therefore, Mounted Knights may usually ignore two shields when attacked in melee by most foot units. They do not ignore shield rolls from ranged weapon units that score a hit on them in ranged combat, however.
Medieval Lore Adventures: Using the Lore System in Historical Battles
- Each camp only has a Commander, but no full-fledged War Council. Shuffle the Command cards and deal the proper number of Command cards to each player as indicated per the adventure's battle notes.
- Neither camp starts the game with any Lore cards or Lore tokens.
- Lore tokens are gained in battle as per the normal rules, i.e. when rolling a Lore symbol that is not already dedicated to some other use.
- Just like in Lore Adventures, the End of Turn - Draw a new Command card phase is modified as detailed in the Modified End of Turn in Lore Adventures section on p. 53 of the BattleLore Player's Guide.
- However, the maximum number of Lore cards a player may hold is limited to a single Lore card. Some Lore cards may need to be discarded as a result.
- All Lore cards played are considered as played Out-of-Character: 3 more Lore tokens than is indicated on the Lore card's cost must be paid when the card is played, and the card is always considered as played at Level 1.
To keep in theme with the historical focus, the Lore deck should be built as follows, before the game starts:
- Take all Warrior cards;
- Take all Rogue cards except for # 1 - Pick Pocket, # 3 - Déjà Vu!, # 7 - False Orders, # 8 - Terrified!, and # 15 - Foiled!;
- Take the Wizard's # 4 - Eagle Eye and # 9 - Mass Speed;
- Take the Cleric's # 3 - Bless and # 4 - Move as the Wind;
- Shuffle all these cards together to form the Medieval Lore deck.
A word about the Scottish War adventures that follow
The adventures in this expansion are based on historical battles the Iron Dwarves fought to preserve their kingdom's independence from English rule. Although these adventures deploy fantasy troops, it is recommended they be played using the Medieval Lore rules; this will enhance the "historical" feel and grit typical of the combats of this time.
To this effect, a copy of the Medieval Lore rules first introduced in The Hundred Years' War - Crossbows & Polearms pack is included here again.
Fantasy-minded players should be reassured though: these adventures may be fought equally well using standard Lore rules and a level 6 War Council for each camp.
Note on the Medieval Lore rules: the pack's rules sheet states that a copy of the Medieval Lore rules is included, but the printed Medieval Lore rules themselves are not reproduced in this document. The rules above are the Scottish Wars-specific adjustments and the Medieval Lore deck build, as printed. The Medieval Lore rules are those of the Hundred Years' War - Crossbows & Polearms pack.
Adventures
Each adventure's printed Setup Order lists the tile counts, Briefing gives each camp's commander and the number of Command cards dealt (x), and Victory Conditions gives the number of Victory Banners needed to win. Special Rules are printed under each map. The map layouts themselves are diagrams and are not transcribed.
Stirling Bridge
September 11, 1297.
Following the Earl of Surrey's crushing victory over the Dwarven aristocracy at Dunbar, John Balliol, the King of Scots, was forced to surrender and denounce his treaty with the French. The king's reputation was already deeply tarnished following King Edward's self-appointment as Lord Paramount of Scotland which turned Balliol into a mere vassal on his own lands. With this supposed "conquest" of his land, his standing fell even further, and discontent among the populace became rampant. The English king's comment that "he who rids himself of s** does a good job" likely didn't help diplomatic matters either...*
William Wallace - a fiercely independent troublemaker, who had been driven mad by the death of his mistress at the hands of an English sheriff - was soon leading raids against the English occupiers. Joined by his companion, De Moray, and bands of like-minded patriots, the Scottish dwarves soon took up a position on Abbey Craig, on the far bank of the River Forth, near Stirling Castle.
Setup Order: river tile x8; hill tile 11x; river tile x8; forest tile 6x; bridge tile x1; ford tile 1x; objective (shield icon) x1. The setup list gives the tiles as icons; the names given here are descriptions of the printed artwork.
Briefing: The English, led by an over-confident Surrey, approached from the South and had begun crossing Stirling Bridge when the dwarves charged down the hills. With half of their troops on the other side of the river, the English forces were soon cut down to pieces. The remnants of their army quickly fled down to Berwick.
News of Wallace's victory spread like wildfire through the complacent Dwarven nobility, reawakening their national sentiment and deep distrust of the English. By March of the following year, Wallace was knighted and appointed sole Guardian of Scotland.
| Camp | Commander | Command cards | Victory Conditions |
|---|---|---|---|
| English | John de Warenne, 7th Earl of Surrey | x4 | 5 |
| Scottish | William Wallace & Andrew de Moray | x6 | 5 |
Special Rules:
- The Scottish camp gains 3 Victory Banners as long as it controls (occupies) Stirling Bridge.
- River Forth is impassable, except at the bridge and the very shallow ford, neither of which stops a unit's movement.
- All Pennant Archer units are Long Bow units.
- Medieval Lore rules are in effect.
Falkirk
July 22, 1298.
Wallace's triumph proved to be short-lived... Hearing of Surrey's defeat at Stirling Bridge, and of Wallace's further raids into Northern England, King Edward hastily concluded a truce with Philip the Fair and was soon rushing back from Flanders to land his troops in the North. Upon summoning the Dwarven nobility to York and seeing none of the familiar Clan Chiefs' faces appear to his side, Edward soon realized just how much Wallace had changed the mood in Scotland and began preparing for war. In the summer of 1298, the two finally met in the fields at Falkirk.
The backbone of Wallace's army was his now infamous schiltrons - a terrifying, dense forest of spears assembled into impenetrable hedgehogs - interspersed with contingents of archers. Confident, Wallace waited... The first English columns came on rapidly and rolled onto boggy ground, before Edward could fully deploy his army. Hit by volleys of arrows from the Scottish archers, the English cavalry swerved to the left to find firmer ground, then closed its files and charged. The sight of the lowered lances was too much for the Dwarven cavalry, who quickly dispersed. Wallace's bowmen suffered a worse fate, with many of them caught in the open between their Dwarven allies and skewered alive on the Knight's lances. But the schiltrons held firm!
With no enemy horse or archers left to harass his troops, Edward ordered his bowmen forward. Soon, wave upon wave of deadly arrows hailed down upon Wallace's schiltrons. The stalwart dwarves could not withstand such firepower, and when Edward unleashed his cavalry a final time, his knights rode roughshod over the field, hacking down the survivors.
Setup Order: marsh tile x5; forest tile 11x; hill tile x6.
| Camp | Commander | Command cards | Victory Conditions |
|---|---|---|---|
| English | Edward I, Hammer of the Scots | x5 | 6 |
| Scottish | William Wallace, Guardian of Scotland | x5 | 6 |
Special Rules:
- Marsh Terrain tiles in the middle of the map come from the Call to Arms expansion. If you do not have this expansion, you may use river tiles instead, with the following terrain rules:
Movement: A unit that enters a Marsh Terrain hex must stop and may move no further on that turn. Follow-on moves are subject to the same terrain movement restrictions.
Battle:
- A unit that moves onto a Marsh Terrain hex may still battle that turn.
- A unit on a Marsh Terrain hex battles with a maximum of 2 dice.
- A unit attacking an enemy unit on a Marsh Terrain hex battles with a maximum of 2 dice.
Line of Sight: A Marsh Terrain does not block line of sight.
- All Pennant Archer units are Long Bow units.
- Medieval Lore rules are in effect.
Bannockburn
June 23, 1314.
The siege of Stirling Castle had begun in 1313; with both camps failing to make enough headway to force a decision. Edward Bruce, unbeknownst to his brother Robert, made a pact with the castle's commander, Sir Philip Mowbray - If no relief came to the besieged troops by mid-summer of 1314, they would submit to Bruce's rule and control. The English king could not allow the castle to fall, nor this act of insubordination to stand. He prepared for war - intent on not only relieving Stirling Castle, but also, and more importantly, destroying the Scottish army once and for all.
Well aware of the folly of his brother's pact, Bruce marched onto Stirling at the head of his own troops. As he deployed his command under the cover of the surrounding woods and hills, the English vanguard reached them.
Seeing the Scots in the midst of their deployment, the English knights must have thought the dwarves were unprepared. They lowered their lances and charged. But Bruce's schiltrons were unfazed and ready. Despite repeated charges, the English knights could not break them. Edward ordered his archers forward, but they were soon pushed back by an unexpected Dwarven cavalry charge! This was too much for the English troops' morale, who began running in retreat. Hundreds would die in their attempt to swim back across the Bannock.
Although another ten years would elapse before the English formally recognized Scottish independence, Bannockburn was the decisive turn of the tide in the First Scottish War.
Setup Order: river tile x7; forest tile 8x; river tile x7; hill tile 4x.
| Camp | Commander | Command cards | Victory Conditions |
|---|---|---|---|
| English | Edward II, King of England | x5 | 5 |
| Scottish | Robert the Bruce, King of Scotland | x6 | 5 |
Special Rules:
- The entire Bannock Burn is a fordable stream.
- All Pennant Archer units are Long Bow units.
- Medieval Lore rules are in effect.
Dupplin Moor
August 10-11, 1332.
The death of Robert the Bruce in 1329 left an infant king on the throne. As always, this quickly led to trouble... In the winter of 1331, Edward Balliol stepped forward to contest the Crown of Scotland, spurred on by the English and their ill-fated allies at Bannockburn, chief among them Henry Beaumont. Setting sail from France, Balliol's army landed on August 6th, then quickly marched under Beaumont's command to engage the Earl of Mar, Regent of Scotland, and his Northern forces. The two camps came into view of each other soon after Balliol's landing, with the Scots laughing heartily at the puny forces under Beaumont's command. Afraid of finding himself sandwiched between Mar's already much larger army and the fast approaching forces of the Earl of Dunbar at his rear, Beaumont kept his cool. Under cover of darkness, he snuck his troops across the River Earn to surprise the over-confident and fast asleep snoring dwarves.
The English were badly outnumbered, but the Dwarves were angry and confused upon being awakened. Still partly asleep, accusations of treachery among their own kin began flying - how else could the English surprise them? The Dwarves were in such disarray that even their commanders, the Earl of Mar and Lord Robert, were fighting each other for the honor of leading the charge against the now bemused English. Cool as their arrows in the morning dew, the English longbowmen waited until the raging dwarves were closing in on them to unleash a flurry of arrows. Chaos ensued, with hundreds of dwarves fled in retreat, only to impale themselves on their own schiltrons' spears. The worst Scottish rout since Falkirk, Dupplin Moor left a bitter taste on many a dwarf's tongue.
Setup Order: hill tile x8; forest tile x7.
| Camp | Commander | Command cards | Victory Conditions |
|---|---|---|---|
| English | Henry Beaumont | x5 | 6 |
| Scottish | Domhnall II, Earl of Mar | x5 | 6 |
Special Rules:
- A Scottish unit that exits the board through the center section of the battlefield on the English side gains a victory banner. Remove the unit and place its Standard banner on the Scottish Victory Track.
- All Pennant Archer units are Long Bow units.
- Medieval Lore rules are in effect.
Neville's Cross
October 17, 1346.
As Philip VI battled Edward III in the south of France, the English threatened to open up a second front by landing additional armies in the north. Under strenuous pleas from Philip to revive the Auld Alliance and battle the English on two shores, King David led a Scottish army across the English border. With Edward in France, King David anticipated an easy stroll through the northern marches. Little did he know that Edward, ever cautious, had asked Sir Ralph de Neville to lay in wait for the Scots. The English army deployed on a narrow front between two rivers near Neville's Cross, one of several ancient crosses that encircled the city of Durham.
In command of the Scottish vanguard, the Earl of Moray pressed forward but became tangled in the woods, presenting an ideal target for the English archers. The Scottish made good progress on the left and charged home with spears, but were forced back by the arrival of the English cavalry. The King's division was then exposed and David was captured, bound and dragged off to the Tower of London. By dusk the dwarves could endure no more and fled.
Setup Order: river tile x11; forest tile 11x; river tile x5; tile (icon) x1.
| Camp | Commander | Command cards | Victory Conditions |
|---|---|---|---|
| English | Sir Ralph de Neville | x6 | 5 |
| Scottish | David II, King of Scots | x6 | 5 |
Special Rules:
- River Ware is impassable, except at the bridge. River Browney is impassable.
- All Pennant Archer units are Long Bow units.
- Medieval Lore rules are in effect.