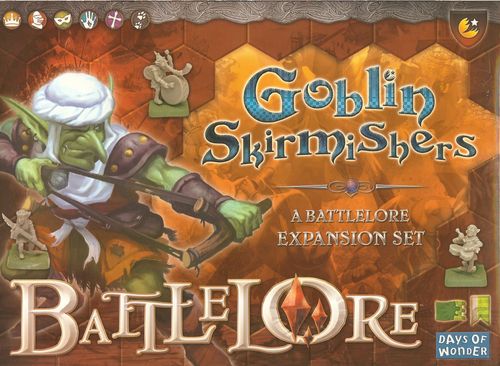
BattleLore: Goblin Skirmishers Specialist Pack
BattleLore: Goblin Skirmishers Specialist Pack Rulebook
Table of Contents
Table of Contents
A Word About These Units
Like all Goblinoid troops, the units introduced in this booklet share the same traits common to all Goblinoid units, as detailed in pp. 38-39 of the BattleLore Player's Guide; Namely - Goblin Rush (blue and red Goblinoid infantry may move two hexes and battle when rushing to engage an enemy in Melee) and Goblin Run (when forced to retreat, Goblinoid units retreat 2 hexes for each flag they cannot ignore, and check for panic losses for each hex of retreat).
The Goblin band unit is unique in its composition and capabilities. At the start of an Adventure a Goblin band must have 1 Goblin Bass Drum Banner Bearer figure and 3 Goblin Drummer figures (see Goblin Drummers below).
In addition to battling at 2d in Melee, the Goblin band provides a Support presence to all friendly units in the same section of the battlefield. Any friendly unit located in the same section as the Goblin band receives support from the Goblin band as if the Goblin band was adjacent to the friendly unit for support purposes, regardless of how far the Goblin band may actually be from the unit it lends a support presence to.
Line of sight is not required for support presence, and the Goblin band can be next to enemy units and still offer a support presence. All that matters is that the Goblin Bass Drum Banner Bearer be in the same section as the friendly unit it is drumming support for. Like all Banner Bearers, the Goblin Bass Drum Banner Bearer is the last figure eliminated from the unit in combat.
If the Goblin band is on a hex shared by two sections, then all friendly units in both sections benefit from the band's support presence. If two Goblin bands are fielded in the same section, then all friendly units in this section are fully supported (since 2 support presence = 1 Support) and Bold. In Reluctant Allies Epic games, players allied together both benefit from the support presence of the Goblin band fielded by either one of them.
Support Presence Example
The infantry is Bold and supported because it receives a support presence from two different sources: the adjacent Goblin cavalry, and the distant Goblin band. The Goblin cavalry is not supported, since it only has one support presence - from the adjacent infantry - but none from the Goblin band in another section of the battlefield.
(Diagram labels printed beside the example: "Supported" and "Unsupported".)
Goblin Band
Components: 1 Goblin Band specialist card; 1 Bass Drum summary card; 1 Goblin Bass Drum Banner Bearer figure.
The Goblin band itself is Bold, and may ignore one flag rolled against it in battle for as long as it still has a Goblin Drummer (see below) within its ranks. If it loses all three drummers and is down to its Bass Drum Banner Bearer, the band receives no support or support presence from itself (i.e. the bass drum does not boost its own morale).
Goblin Drummers
Components: 3 Goblin Drummer figures; 1 Goblin drummers specialist card; 1 Goblin Drum summary card.
Goblin Drummers are unique in that they can either be deployed as part of a Goblin band, as described above, or they can be embedded as a single figure, in replacement of an existing figure, in any other type of Goblinoid foot unit.
The effect of the Goblin Drummer is to make the Goblinoid unit it is embedded in Bold and able to ignore one (additional) flag, for as long as the Goblin Drummer figure remains alive within that unit.
In battle, the player controlling the unit is the one who decides which figure to remove, when losing figures in combat. The Banner Bearer of the unit must always be removed last however. As a result, an embedded Goblin Drummer will usually be the second to last figure to disappear, within a unit. At that point, the unit the Goblin Drummer was in no longer receives any benefit from it.
Unless explicitly specified otherwise by a unit's description (e.g. Goblin Band) or the adventure's Special rules, you can embed a maximum of 1 Goblin drummer per Goblinoid foot unit (and always in replacement of, not in addition to, an existing figure from that unit).
Goblin Slingers
Components: 2 units with 4 Goblin Slinger figures each; 1 Goblin Slingers specialist card; 1 Sling summary card.
Nimbler than their bow-equipped cousins, Goblin Slingers shoot equally well on the run and when taking aim. Combined with their great mobility, this makes them the perfect troops to taunt slow-moving enemy troops as well as for finishing off lone, straggling enemy figures.
Hobgoblin Spear Bearers
Components: 2 units with 4 Hobgoblin Spear Bearer figures each; 1 Goblin Spear Bearer specialist card; 1 Spear summary card.
The elite of the elite among Goblinoid troops, these fearsome units are best approached cautiously, if at all... Not only do they battle back (when Bold) at + 1d, they also rush up to two hexes when engaging their enemy in Melee - something that their foes will only ignore at a great peril!
Adventures
The pack includes two ready-to-play adventures. Each adventure gives its setup order, special rules, and briefing. The leader cards for each adventure show the war council level and victory condition icons printed in the booklet.
The Sounds of Water
Galician border 1383
The sound of running water drowned out the beat of their drums, but it did not seem to matter: These pesky goblins were holding ranks as if magically bound!
Setup Order (tile counts, as shown on the setup panel; tile types are pictured in the booklet)
- x9
- x1
- x3
- x5
- x1
- x2
A Spider figure is placed on the map as shown.
Special Rules
The entire river is fordable. In addition the shallow fords do not stop movement.
Briefing
- João I, Grand Master of Aviz
- Juan I, King of Castile
Victory Conditions (as printed on the briefing cards)
- João I: x 3+ Victory Conditions; WAR COUNCIL Level 6
- Juan I: x 3+ Victory Conditions; WAR COUNCIL Level 6
Riding Down the Spear Bearers
Portugal 1384
The Castilian rear-guard had crossed the river, intent on riding us down. But our Hobgoblin brethren had a nasty surprise for them in the waiting...
Setup Order (tile counts, as shown on the setup panel; tile types are pictured in the booklet)
- x7
- 3x
- x4
- 2x
- x1
A Spider figure is placed on the map as shown.
Special Rules
The entire river is impassable except at the bridge.
Briefing
- João I, Grand Master of Aviz
- Juan I, King of Castile
Victory Conditions (as printed on the briefing cards)
- João I: x 3+ Victory Conditions; WAR COUNCIL Level 6
- Juan I: x 3+ Victory Conditions; WAR COUNCIL Level 6