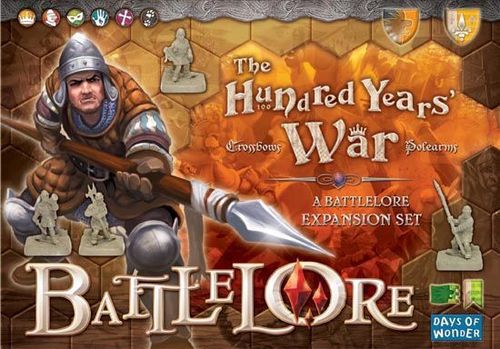
BattleLore: The Hundred Years' War – Crossbows & Polearms
BattleLore: The Hundred Years' War – Crossbows & Polearms Rulebook
Table of Contents
Table of Contents
Components
Unit and card contents of the pack, as printed on the pack's first page:
- Four Arbalestier units (Blue Banner Crossbowmen), 4 Arbalestier figures each, with 2 Arbalestiers Specialist cards and 1 Arbalest Summary card;
- Two Spearmen units (Blue Banner Spearmen), 4 Spearmen figures each, with 1 Spearmen Specialist card and 1 Spear Summary card;
- One Halberdiers unit (Red Banner Halberdiers), 4 Halberdier figures, with 1 Halberdiers Specialist card and 1 Halberd Summary card;
- Four Horn Blower figures, with 2 Horn Blower Specialist cards and 1 Horn Summary card.
A word about these units
Like all English and French foot troops, the units introduced in this booklet follow the Movement and Combat restrictions relative to their respective Banner's color, as detailed in the Foot Units section on p. 16 of the BattleLore Player's Guide.
Arbalestiers
Often considered an unfair weapon for the ease with which it let a commoner down a knight, this heavier crossbow was nonetheless no match for the English longbow, as the battles of Crécy, Poitiers and Agincourt would show.
Spearmen
In the hands of a mob in "hedgehog" formations or the ranks of well-trained professionals, the spear was a devastating weapon that would easily roll over any enemy... for as long as the troops wielding it held their ground, that is.
Halberdiers
Oftentimes considered the medieval equivalent of a giant can opener, the Halberd's unique hook would literally pull heavily armored troops off the saddle of their mount and tear them up.
Horn Blowers
Horn Blowers are unique in that they do not form a new type of stand-alone unit. Instead, a Horn Blower can only be deployed as a single figure embedded into a pre-existing troop, in replacement of one of that unit's figures. As a result, a Horn Blower never carries a Banner of its own in battle.
The player controlling the troop in which a Horn Blower is embedded decides the order in which to remove figures, when taking casualties. The Banner Bearer of the unit must always be removed last, however, so the Horn Blower will usually be the second to last figure to disappear, within this unit. Once his figure is removed, the Horn Blower no longer confers any benefit to the troop he was embedded with.
Unless explicitly specified otherwise in the adventure's Special rules, you can embed a maximum of 1 Horn Blower per Foot unit (and always in replacement of, not in addition to, an existing figure from that unit).
The effect of the Horn Blower is to make the Foot unit it is embedded with capable of calling upon another friendly unit to battle along with it in Melee against a common enemy. To do so, both units must have been ordered during the Orders phase, and the unit called upon must be adjacent to both the Horn Blower's unit and the enemy unit it engages in Melee, during the Combat phase.
The battle dice of both units are added together and rolled as a single set of dice, rather than treated as two separate, individual attacks.
The Horn Blower's unit is considered the attacking unit and any reaction by the targeted enemy unit, such as battle back, is directed at the Horn Blower's unit. Follow-on actions that the unit called to help would normally be entitled to (i.e. pursuit and bonus attack, bonus strikes, etc....) do not apply, only those of the unit the Horn Blower is embedded with. In effect, all the called unit does is contribute its battle dice to the total number of dice rolled against the common adjacent enemy unit.
When a Horn Blower calls a unit to battle at its side against an enemy unit entrenched in a terrain that limits the attacker's number of dice rolled, the combat restriction applies to both attacking units individually. As such, two Blue Banner Regular Infantry units attacking a common enemy hidden in an adjacent wood terrain would only roll a total of 4 (3 reduced to 2, plus 3 reduced to 2) battle dice.
Command cards and Lore cards that increase the number of dice rolled in Melee, may apply to one or both of the attacking units, and should be added to the total.
Medieval Lore Adventures: Using the Lore System in Historical Battles
To enhance the historical atmosphere of medieval battles fought during the Hundred Years' War, such as the ones included in this set, players are encouraged to use the following Medieval Lore rules:
- Each camp only has a Commander, but no full-fledged War Council. Shuffle the Command cards and deal the proper number of Command cards to each player as indicated per the adventure's battle notes.
- Neither camp starts the game with any Lore cards or Lore tokens.
- Lore tokens are gained in battle as per the normal rules, i.e. when rolling a Lore symbol that is not already dedicated to some other use.
- Just like in Lore Adventures, the End of Turn - Draw a new Command card phase is modified as detailed in the Modified End of Turn in Lore Adventures section on p. 53 of the BattleLore Player's Guide.
- However, the maximum number of Lore cards a player may hold is limited to a single Lore card. Some Lore cards may need to be discarded as a result.
- All Lore cards played are considered as played Out-of-Character: 3 more Lore tokens than is indicated on the Lore card's cost must be paid when the card is played, and the card is always considered as played at Level 1.
Building the Medieval Lore deck
To keep in theme with the historical focus, the Lore deck should be built as follows, before the game starts:
- Take all Warrior cards;
- Take all Rogue cards except for # 1 - Pick Pocket, # 3 - Déjà Vu!, # 7 - False Orders, # 8 - Terrified!, and # 15 - Foiled!;
- Take the Wizard's # 4 - Eagle Eye and # 9 - Mass Speed;
- Take the Cleric's # 3 - Bless and # 4 - Move as the Wind;
- Shuffle all these cards together to form the Medieval Lore deck.
This deck construction will ensure that all the feats found on the Lore cards that come into play are not only physically possible but, in some cases, will also help explain how seemingly impossible acts turned into historical legend.
A word about the adventures that follow
- The Battle of Crécy fields 6 English Archers units. To make a 6th unit, replace a Green Bow Standard Banner with a Green Bow Pennant Banner taken from the Green Banner Hobgoblin Archer unit that came with BattleLore.
- Likewise, in the Battle of Poitiers, use the Red Sword Standard Banner that is attached to the Red Banner Iron Dwarf Swordsman unit in the base game to field your 3rd French Red Sword Banner unit.
Medieval Lore Adventures
Each adventure below gives its date and narrative, its Setup Order, its Briefing (the two Commanders and their Victory Conditions) and its Special Rules. The Long Bow weapon card printed on each adventure page reads: Weapon type: Melee (Point Blank), and Ranged - up to 4 hexes. Damage: Per Unit's Banner color. Bonus Strike: Yes - on the Bonus Strike icon, except at Point Blank. Special: Do not collect Lore tokens. When used on the move, reduce the number of dice rolled by 1.
Setup Order tiles are printed as hex icons; they are named here by their appearance, and the battlefield maps are not transcribed. The "x" figures in each Victory Conditions box are transcribed exactly as printed.
The Battle of Crécy
August 26, 1346
Although out-numbered, the English held a strong defensive position with King Edward's longbowmen deployed along the crest of the hill. The first attack was delivered by King Philip's Genoese crossbow troops, followed quickly by the French Men-at-Arms. Thrown into confusion by the superior rate of fire of the English longbows, they soon retreated. Seeing the crossbow troops in disarray, the French cavalry charged. A curtain of arrows filled the sky and the French were repelled. Over and over, they tried and failed to break the English position that day. By nightfall, exhausted and suffering from massive casualties, the French retired from the battlefield.
Setup Order
- x15: rocky hill tile
- 7x: wood tile
- x3: river tile
- 2x: river tile (second variant)
Briefing
- Edward III of England: Victory Conditions x6 / 6
- Philip VI of Valois: Victory Conditions x5 / 6
Special Rules
- The River Maye is a fordable river.
- The Green Banner Irregular Infantry units must retreat 2 hexes for each flag they cannot ignore, and must check for panic losses for each hex they retreat.
- All Pennant Archer units are Long Bow units.
- Medieval Lore rules are in effect.
The Battle of Poitiers
September 19, 1356
After leading a Grand Chevauchee throughout southern France, Edward the Black Prince was finally chased down southwest of Poitiers by John II who was set on avenging the French defeat at Crecy. Edward deployed his men between the River Miausson and Nouaille Wood.
At the start of the battle the English left flank feigned a retreat that provoked a hasty charge from the French cavalry. For their efforts, the attackers were disrupted with a shower of arrows. Close on the heels of the charge the French infantry followed, but could not throw the English from the hills. The French assaults might have eventually broken the English, had it not been for a flank march by the English cavalry which hit hard at the French left. Fearful of being encircled the French army attempted to flee, but was routed and even King John himself was captured.
Setup Order
- x8: rocky hill tile
- 4x: river tile
- x5: wood tile
- 2x: river tile (second variant)
Briefing
- Edward of Woodstock, the Black Prince: Victory Conditions x6 / 6
- John II of France, the Good: Victory Conditions x4 / 6
Special Rules
- The River Miausson is impassable.
- All Pennant Archer units are Long Bow units.
- Medieval Lore rules are in effect.
The Battle of Cocherel
May 16, 1364
The Navarran army, commanded by Jean de Grailly, followed the standard English tactic of taking a defensive position and waiting for the French to attack. Bertrand du Guesclin advanced and achieved some early success against the English defensive positions but then ordered his troops to withdraw. Believing the French were in disarray, the English charged down from their hill positions. This played directly into du Guesclin's hands, as he quickly ordered his cavalry reserve to hit the Navarran left flank, which broke and ran.
Setup Order
- x10: rocky hill tile
- 8x: wood tile
- x2: river tile
- 1x: river tile (second variant)
- x1: bridge tile (Eure)
Briefing
- Charles II of Navarre: Victory Conditions x5 / 5
- Bertrand du Guesclin: Victory Conditions x5 / 5
Special Rules
- The Eure is impassable except at the bridge.
- All Pennant Archer units are Long Bow units.
- Medieval Lore rules are in effect.
The Battle of Patay
June 18, 1429
Eager to uncover the English position, French patrols scouted the countryside along an old Roman road. By accident, they flushed a stag, which bolted into an open field where the English just happened to be preparing for battle. The English archers raised a hunting cry, which alerted the French vanguard of their presence.
Seizing the opportunity, the French cavalry moved quickly through the woods and rode full force into the English. The momentum of the attack continued as the French infantry also rushed into the field. In a few minutes, every Englishman with a horse fled under the assault, while the English archers were cut down in droves. The French had their victory.
Setup Order
- x18: wood tile
Briefing
- Sir John Falstof: Victory Conditions x4 / 6
- Etienne de Vignolles, called La Hire: Victory Conditions x5 / 6
Special Rules
- All Pennant Archer units are Long Bow units.
- Medieval Lore rules are in effect.
The Epic Battle of Agincourt
October 25, 1415
Tradition holds that the two armies faced each other through the morning, each waiting for the other to make the first move. Finally, Henry sent his archers forward and began to loose arrows upon the French line. The mounted knights on the wings of the English frontline charged but the archer stakes disorganized the attack. The French foot soldiers then marched forward in the face of a hail of arrows. The English Men-at-Arms bested the French first line in a hard fought melee. The second French line suffered the same fate and the third line seeing the slaughter fled without a fight.
The only success for the French that day was a sally from Agincourt Castle behind the English lines where Henry's baggage was captured.
Setup Order
- x34: wood tile
- 1x: castle tile (Agincourt Castle)
- x1: rocky hill tile
- 3x: archer stakes tile
- x1: French fleur-de-lys shield token
Briefing
- Henry V of England: Victory Conditions x6 / 7
- Constable Charles d'Albret: Victory Conditions x4 / 7
Special Rules
- English Camp (Use the Rogue's Den hex to represent the camp.) The camp has no movement or battle restrictions. A unit on a Camp hex may ignore one flag. A French unit that captures (occupies) the English Camp gains one Victory Banner and the camp is removed.
- Treat Agincourt Castle as impassable terrain.
- All Pennant Archer units are Long Bow units.
- Medieval Lore and Epic rules are in effect.