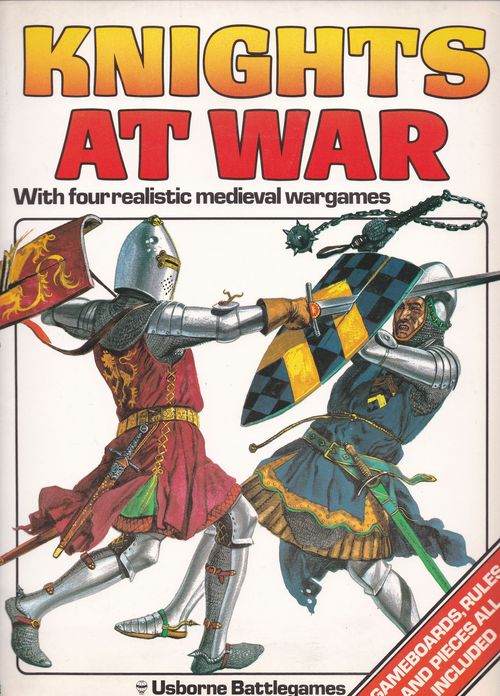
Battlegame Book 2: Knights at War
Battlegame Book 2: Knights at War Rulebook
Table of Contents
Table of Contents
Improving and Storing Game Pieces
The pieces are designed to be cut out and used as they are. They will last a long time if you strengthen them with thin card. The best card to use is the sort that postcards are printed on. Glue the pieces onto the card, either separately or in groups, and carefully cut them out with a craft knife or scissors.
You will need to store the pieces in a safe place, otherwise some will get lost. Use an envelope or a small cardboard box for each game's pieces. Mark the name of the game on the front. Keep all four sets in a drawer or on a shelf.
Making your own pieces
When you are used to playing the games, you may wish to use more exciting and colourful pieces than the paper pieces supplied with this book. With some practice you can make your own pieces out of card. You can cut them to the shape of the various people and animals used in the games. Enamel modelling paints are best for colouring, as they give a hard-wearing glossy finish.
A good idea is to use miniature figures on the gameboards. They can be bought from any good model shop. They are made in a lot of different sizes, so you can choose the right ones to fit the different gameboards.
Knights on chargers will make "Tournament" livelier. Use models of knights on foot for the hand-to-hand combats.
Knights on horseback are also good for "The Battle of Arsouf" and "Border Raiders". Paint each side's men a different colour, and mark the fighting value on each piece. You can buy animal models of sheep and cattle for "Border Raiders", and of mules and oxen for the baggage pieces of "The Battle of Arsouf".
Battlegame 1: The Rules for Arsouf
A crusader game for two players.
As dawn breaks on September 7, 1191, Saladin's Moslem army lies in wait to attack the crusader force of Richard Lionheart. The crusaders know they must fight their way through to the friendly town of Arsouf. Will they succeed, or will Saladin's lighter-armed but faster-moving men prevent them?
1 The pieces
| Pieces | Fighting value (F.V.) | Moves each turn |
|---|---|---|
| The crusader army | ||
| 1 squadron of knights Templars | 4 | Up to 2 spaces |
| 1 squadron of knights Hospitallers | 4 | Up to 2 spaces |
| 3 squadrons of knights | 3 | Up to 2 spaces |
| 6 troops of infantry | 2 | Up to 2 spaces on the road, 1 space elsewhere on the board |
| 4 baggage trains | 1 | Up to 2 spaces on the road, 1 space elsewhere on the board |
| Richard Lionheart | 2, and adds 2 to any piece he is adjacent to | Up to 2 spaces |
| The Moslem army |
How to add up attack and defence scores
Example (diagram of a hexagonal grid): the attacker throws the dice and adds his own F.V. to the score. The defender throws the dice and adds his F.V. plus HALF the F.V. of his men next to the attacker (marked x), but NOT if they are wounded.
2 Extras
A dice (or use the spinner provided).
3 Object of the game
One player controls the crusader army of Richard Lionheart, the other controls the Moslem army of Saladin.
The crusaders must get 2 baggage pieces and any 2 other pieces to Arsouf.
The Moslems must stop them.
4 How to start
Choose sides. The player controlling the crusader army places all his pieces in the camp marked at the top-right corner of the board.
The player controlling the Moslem army places all his pieces in the area marked at the bottom-left corner of the board.
The river in front of the crusader camp can only be crossed at the ford. Pieces can wade over the stream at any point.
No piece can enter the Marsh of Birket-Ramadan.
The crusader player takes the first turn.
5 Moving
Both players can move as many pieces as they wish each turn. Only one piece can be in a space at a time.
The maximum number of spaces each piece can move per turn is given in section 1.
6 Attacking
After a player has moved all the pieces he wishes to move, he can announce attacks. A piece can attack any enemy piece on an adjoining space. Players can attack with as many pieces as are in a position to do so, but each piece can only make one attack a turn.
The attacking player throws the dice, and adds the fighting value of his piece to the number thrown.
The defending player then throws the dice. He adds the fighting value of his piece to the number thrown, and also adds half the fighting value of any other of his pieces on spaces adjoining the attacking piece.
Either player can add 2 to the fighting value of his piece if the leader (Richard Lionheart for the crusaders, Saladin for the Moslems) is on an adjoining space.
The piece with the higher total wins. The losing piece is "wounded" and is laid on its side. If the two totals are the same, both pieces remain as they are.
A wounded piece cannot attack, but can defend itself if attacked - its fighting value remains the same.
If attacked and defeated a second time, it is "killed". The piece is removed from the board.
Wounded pieces can move 1 space per turn. They "recover" if there are no enemy pieces within 3 spaces. They are placed upright again, and can move and attack normally.
7 Charging
Crusader knights who attack Moslem pieces after "charging" 2 spaces directly at them add 1 to their fighting value. The charge must be in a straight line.
8 Tips on tactics
- The crusaders must protect their weak baggage pieces. In the real battle, Richard kept the baggage train near the sea, protected by a shield of infantry and knights.
- In real life, Saladin did his best to encircle the crusaders, attacking all along the line and in the rear. Try doing the same.
- Put Saladin and Richard next to their strongest men.
Battlegame 2: The Rules for Siege!
A game for two players.
Warrior earl Eustace d'Assault has long cast envious eyes on the lands of his neighbour, Baron Hugh de Fender. When de Fender falls ill, d'Assault decides to act. He calls out his knights on the 40 days' military service owed him as his feudal due. Can d'Assault take de Fender's castle in the 40 days, or will the baron hold out until d'Assault's army breaks up?
1 The pieces
- Eustace d'Assault
- 19 attacking knights
- Hugh de Fender
- 10 defending knights
- 6 weapon pieces (Greek fire, boiling oil, rocks)
2 Extras
- A dice
- A counter
- Used matchsticks
3 Object of the game
One player controls Eustace d'Assault and his army; the other player controls the army of Hugh de Fender.
To win, d'Assault's men must fight their way into the donjon of the castle and seize de Fender before the 40 days run out.
If they have not succeeded by then, de Fender wins.
4 Setting up the pieces
Choose sides. The player controlling the army of de Fender places his men anywhere within the castle. The piece representing de Fender must be placed in the donjon, where it remains throughout the game.
The weapon pieces are kept at the side of the board, ready for placing in the course of the game.
D'Assault's men start the game off the board.
Set the counter at "40" on the siege timer.
5 Starting the game
D'Assault moves first. His men must enter the board - one through each of the two entrance squares per turn.
All men move one square a turn. Diagonal moves are not allowed. Each player can move all, some or none of his men each turn. Only one man can be on a square at a time (except for weapon pieces - see 7).
Move the counter on the siege timer down a day every time de Fender finishes a turn.
6 Getting into the castle
D'Assault's men must use siege engines (battering-rams, scaling ladders etc.) to get into the castle. These are marked on the board. They only come into operation when manned with the specified number of knights - to use a siege tower, for instance, d'Assault must position six pieces in the six squares outlined.
Once a siege engine is fully-manned, it can be used to launch an attack. It can be used for attacking for the rest of the game, even when only one or two men are on it.
Place a used matchstick by the engine to show that it has been fully-manned.
Attacks are made at the start of a turn.
To make an attack, d'Assault indicates the square he is attacking and throws the dice. He adds the number thrown to the point value of the siege engine (which is the same as the number of men needed to man it - e.g. 6 for a siege tower.) He can add 1 extra point if one of his men is manning a catapult adjoining the siege engine. He can add 2 extra points for any other of his men in contact with a knight defending the square.
The defender does not throw the dice. He counts the defensive value of the wall square attacked (as marked on the wall), adding 3 for a weapon piece if one has been placed on the square under attack (see 7).
For the attack to succeed, the attacking player must score 3 points more than the defender. If he succeeds, the defending knight on the square under attack must retreat one square in any direction. Knights cannot retreat from the wall to the bailey unless a ladder is marked on the board. If the knight cannot retreat he is "killed" and removed from the board. If the attack fails, both knights remain in place.
For example: D'Assault's men are manning a siege tower and an adjoining catapult. D'Assault throws a 3. His total is 6 + 1 + 3 = 10. De Fender has placed a boiling oil piece on the square attacked, which has a defensive value of 4. His total is 4 + 3 = 7. D'Assault has 3 more points so his attack succeeds.
NOTE: If a battering-ram attack succeeds, d'Assault's men pass directly under the wall squares to the first squares in the courtyard. Two men per turn through the gate.
7 Weapon pieces
De Fender can place his weapon pieces anywhere on the castle walls at the end of any of his turns. Weapon pieces cannot be placed in the donjon.
Once a piece has been placed, it cannot be moved. Any man of either side can move into squares occupied by weapon pieces.
Weapon pieces have a value of 3. They only count when manned by a knight on the same square as them. They can be used by any knight to attack an enemy knight on a lower level or on a siege engine.
Manning weapons: a weapon piece is manned by placing a knight on top of it.
8 Hand-to-hand fighting
Once d'Assault's men get inside the castle, any knight on either side can attack an enemy knight on an adjoining square, provided that they are on the same level or connected by a ladder. Attacks take place at the start of a turn.
The attacking player throws the dice. He must get 3 or more to win. If he gets 3 or more, the losing knight must retreat one square in any direction. If he cannot retreat he is killed. If the attacker gets less than 3, both pieces remain in place.
Retreating (diagrams): 1. The losing piece retreats to a corner. 2. The losing piece cannot retreat; it is killed and taken off the board.
9 Tips on tactics
- De Fender should wait to see where d'Assault plans to attack before placing weapon pieces. He cannot afford to waste them.
- Fight for control of the walls around the inner bailey. It is hard for d'Assault's men to enter the donjon if de Fender's men are on the walls.
- Try to trap enemy knights where they cannot retreat before attacking them.
Earl d'Assault joins in the attack with his men, but de Fender stays in the donjon.
Battlegame 3: The Rules for Border Raiders
A game for two players.
The scene is the eastern border country of Germany in the 13th Century. Karl the Black, renegade Count of Grimmigen, is launching a raid on the lands of his neighbour, Duke Conrad. As Conrad's men gather, Karl's marauders burn fields, raid villages and take sheep and cattle. Will the Duke's troops be able to repel them and save their lands from pillage?
1 The pieces
| Pieces | Fighting value (F.V.) | Moves each turn |
|---|---|---|
| Karl the Black | ||
| Karl the Black | 6 | Up to 2 spaces |
| 1 group of knights | 6 | Up to 2 spaces |
| 6 levies of men-at-arms | 3 | Up to 3 spaces |
| 2 bands of archers | 2 | Up to 4 spaces |
| Duke Conrad | ||
| Duke Conrad | 6 | Up to 2 spaces |
| 1 group of knights | 6 |
2 Extras
A dice.
3 Object of the game
Karl wins the game if his men attack half of Conrad's property - at least 5 fields and 3 villages - and take half the livestock to Castle Grimmigen - at least 2 flocks of sheep and 2 herds of cattle.
Conrad wins the game by preventing Karl's men from doing this.
4 Starting the game
Players choose sides.
The player controlling Karl the Black's men places them all in Castle Grimmigen.
The player controlling Duke Conrad's men places five of his men in the town. He puts the rest in castles, one to a castle.
5 Playing the game
The two players take turns to move. Karl starts. Players can move all, some or none of their pieces each turn.
Each player may have up to four of his pieces in the same space at a time.
6 Moving
The number of spaces each piece can move is listed in section 1.
No piece can move through or into hill spaces. Rivers must be crossed by bridges or fords. Only archers can move through forests and swamps.
Karl's men cannot move through or into castles or the town. Conrad's men cannot cross the border into Grimmigen. Karl's men cannot attack Conrad's castles or pieces inside them.
Diagram: moves are counted space by space along rows and columns; diagonal moves are not allowed (an example path of three spaces is shown).
7 Plundering
Karl's men attack fields and villages by moving into the spaces representing them and staying for the rest of that turn.
Sheep and cattle must be herded back to Castle Grimmigen.
To burn a field: 2 of Karl's men must move into it.
To attack a village: 4 of Karl's men must move into it.
To take sheep and cattle: 2 of Karl's men must "herd" the animals back to Castle Grimmigen. When herding, pieces move up to 2 spaces a turn.
Fields and villages can only be attacked once. Place a marker piece on each field or village destroyed as a reminder that it cannot be attacked again.
Herding animals (diagram: the raiders are placed on top of the animal piece): Two of the raiders move with the animal piece at two spaces per turn until they reach Castle Grimmigen. If one or both of the herders leave the animal before reaching the castle, the animal moves back to its own space at two spaces per turn.
8 Fighting
Players attack by moving pieces into a space occupied by enemy men.
Each player throws the dice once for each of his men in the space, and adds up the total of the dice throws. He then adds the total fighting value of the pieces. He divides the sum total by 4. His men "kill" enemy pieces on the space with fighting values up to the final figure. "Killed" pieces are removed from the board.
The loser retreats. Conrad's men retreat to the nearest castle. Karl's men retreat 2 spaces in any direction as long as the move does not put them in position to attack in their following turn.
Attacking - how to calculate enemy losses. Example: the attacker has 1 knight (dice throw 2, F.V. 6), 2 men-at-arms (dice throws 1 and 3, F.V. 3 and 3) and 1 archer (dice throw 4, F.V. 2). Totals: dice 10 + F.V. 14 = 24. Final score: 24 / 4 = 6. The attacker can take away enemy pieces with an F.V. up to a total value of 6, e.g. 1 knight, or 2 men-at-arms.
9 Archers
Archers can fire at enemy pieces from one space away. The attacking player throws the dice once for each archer firing. If he throws a 6, one enemy piece is killed - the attacking player chooses which one if there are several in the space. If he throws any other number, the arrow has missed and play continues.
Diagram: an archer can fire at enemy troops in the spaces directly adjacent to it (up, down, left and right), not diagonally.
10 Tips on tactics
- Place archers in forests and swamps where they can fire at passing pieces but can only be attacked by other archers.
- Never let your men be surprised by a stronger force, or they will risk being massacred.
Battlegame 4: The Rules for Tournament
A jousting game for two or four players.
It is late in the fourteenth century. The Duke of Burgundy has invited the finest knights in Europe to a grand tournament in his lands in Flanders. It is to last for three days. By the end of the final day, one of the knights will have vanquished all rivals to become supreme champion.
1 The pieces
- 8 knights
- 8 horses, one for each knight
- 4 sets of 3 target markers - 1 sweep (value 5), 1 body (value 3), 1 helm (value 1)
2 Extras
- A dice (or use the spinner provided)
- 8 counters (to be used as prowess markers)
3 Object of the game
The player whose knight or knights emerge victorious from the melee on the final day of the tournament wins the game.
If more than one of his knights remain, they can fight a courtesy joust to settle which is the supreme champion.
4 How to start
Choose a team of knights. If two people are playing, each has four knights. If four people are playing, each has two knights.
Place the knights on their horses in front of their tents.
Each player takes one set of target markers, and a counter for each knight. The counter is used to mark the knight's prowess rating (how good he is) on the pennant next to his tent. Each knight starts with a rating of 1.
Choosing the teams of knights: for two players, each player has a team of four knights; for four players, each player has a team of two knights.
5 The first day - the challenge joust
Each player throws the dice. The one with the highest score chooses one of his knights to make the first challenge.
The knight challenges one of the knights on the opposite side of the board. The two knights fight a joust (see 6).
The losing player then challenges the winning knight with another knight.
When all of a player's knights have been defeated, the challenge moves to the next undefeated knight clockwise round the board. The day ends when every knight has jousted.
Place all knights back on their horses ready for the second day's jousting.
6 Jousting
-
Each player chooses a target marker (helm, body or sweep) for his knight, keeping it face down.
-
The two knights take up position at opposite ends of the tilt.
-
Each player throws the dice. The one with the higher score moves his knight the number of pips shown on the dice along the tilt. The other knight is then moved onto the square diagonally opposite. If the dice throw is equal, throw again.
Position for jousting (diagram): the two knights face each other on opposite sides of the tilt.
-
Each player now reveals the target marker he has chosen. Helm hits before body, and body before sweep. The knight who hits first counts up his total, adding his target marker score, his prowess rating and the number of squares he has moved. If the total is 10 or more, his opponent is unhorsed and retires to his tent.
If the total is less than 10, he has missed. His opponent then adds up his own score. If his total is 10 or more, the other knight is unhorsed.
-
If both players have chosen the same target marker, both add up their knights' totals. The knight with the higher total unhorses his rival - if the total is 10 or more. If neither scores 10 or more, the two knights have missed one another, and they joust again.
-
The prowess rating of the winning knight is increased by 1.
7 The second day - the knock-out joust
The second day's jousting is an elimination contest. Each time a knight wins a joust, his prowess rating continues to go up 1, up to a maximum of 6.
Jousting order: Each knight starts by jousting against the knight opposite (Flanders vs. Scotland, etc.). The winner of joust 1 then fights the winner of joust 3, and the winner of joust 2 fights the winner of joust 4. The two remaining knights then fight the final.
Place the knights back on their horses ready for the melee.
8 The third day - the melee
- The melee begins with a joust. Put each knight on the square next to the small pennant at the side of the field. Each knight jousts against the knight opposite, across the lists and not along the tilt. All knights remain in the lists after the joust. Winning knights continue charging to the square at the edge of the board. Losers are unhorsed and remain in the square where they fell.
- When the round of jousting has been completed, the melee proper begins. From this point on, target markers are no longer used, and prowess ratings remain as they are.
Moving: Knights on horseback can either manoeuvre for two squares (see diagram) or they can charge. Charging knights can move any number of squares in a straight line.
Knights on foot can move up to 2 squares in any direction.
No knight can move through or onto an occupied square. Diagonal moves are not allowed.
Diagram: knights can manoeuvre for two squares or charge the length of the lists; possible attack positions are the four squares orthogonally adjoining a knight.
Attacking: Knights attack from adjoining squares (see diagram) after moving.
If a mounted knight attacks a mounted knight: The two knights charge one another, moving 1 square each alternately until they meet midway. The attacker throws the dice, and adds the number thrown to his prowess rating and the number of squares he has charged. If he scores 10 or more, his opponent is unhorsed. If he gets less, he has missed and both knights continue charging until their path is blocked by another knight or the edge of the lists.
If a mounted knight attacks a knight on foot: The attacker throws the dice, and adds the number thrown to his knight's prowess rating and the number of squares he has charged. If he scores 10 or more, his opponent is removed from play. If he scores less, he has missed and the knight on foot remains in place. In either case the mounted knight continues charging until his path is blocked.
If a knight on foot attacks a mounted knight: The attacker throws the dice and adds his knight's prowess rating to the number thrown. If he scores 18 or more, the rider is unhorsed. Both knights remain in place. (The figure is printed as "18" in the scan; transcribed as printed.)
If a knight on foot attacks a knight on foot: Each player throws the dice, and adds his knight's prowess rating to the number thrown. The knight with the higher score remains in place, and the loser is removed from play.
In any attack: add 3 points to the attacker's score if he has one or more team-mates also in squares adjoining the defending knight.
9 Tips on tactics
- When jousting, choose the sweep for knights with low prowess ratings.
- In the melee, remember to use your knights as a team. Knights on foot can be used to gang up on opponents and to box in knights on horseback.
Pieces and Spinner Notes
- Arsouf pieces are cut out along all solid lines, bent along all dotted lines, and assembled into upright pieces fixed with transparent tape. Each piece is marked with its F.V. (Knights: Hospitaller 4, Templar 4, three Knights 3; four Baggage 1; six Infantry 2; four Mamelukes 3; six Horse-archers 2; five Skirmishers 1; Richard and Saladin 2 (+2)).
- Siege! pieces: 19 attacking knights and Earl d'Assault; 10 defending knights and Hugh de Fender; weapon pieces: 2 rocks, 2 boiling oil, 2 "Greek fire"; spare pieces.
- Spinner (use it if you do not have a dice): the Siege! sheet prints a six-segment spinner (numbers 1 to 6), to be used with a sharpened matchstick through a card hexagon.