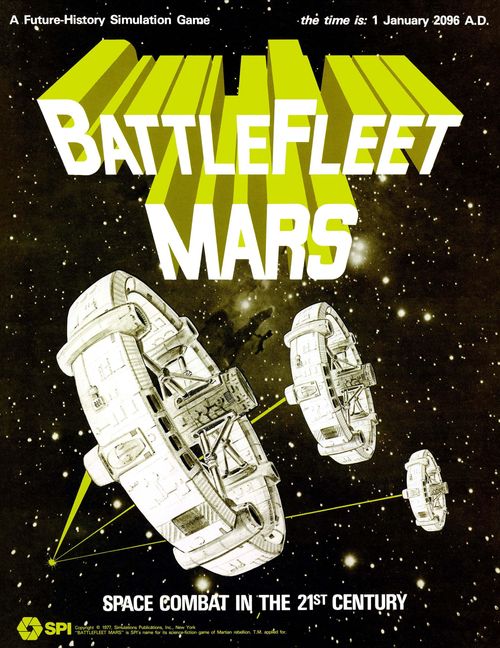
BattleFleet Mars: Space Combat in the 21st Century
BattleFleet Mars: Space Combat in the 21st Century Rulebook
Table of Contents
Table of Contents
- [1.0] INTRODUCTION
- [2.0] GENERAL COURSE OF PLAY [Strategic Game]
- [3.0] GLOSSARY OF SPECIAL TERMS [Strategic Game]
- [4.0] GAME EQUIPMENT
- [5.0] SEQUENCE OF PLAY [Strategic Game]
- [6.0] STARTING THE STRATEGIC GAME
- [7.0] THE SOLAR DISPLAY AND PLANETARY MOVEMENT
- [8.0] INTERPLANETARY MOVEMENT OF SHIPS
- [9.0] TACTICAL ABSTRACT COMBAT SYSTEM
- [10.0] MORALE INDICES AND VICTORY
- [11.0] AGENTS AND POLITICAL INTERACTIONS
- [12.0] HOW TO CONDUCT REVOLTS AND COUNTER-REVOLTS
- [13.0] TRUCES AND NEGOTIATIONS
- [14.0] SABOTAGE
- [15.0] PRODUCTION AND LOGISTICS
- [16.0] TACTICAL GAME DESCRIPTION
- [17.0] TACTICAL GAME SEQUENCE OF PLAY
- [18.0] THE BATTLE RECORD AND TACTICAL USE OF THE FLEET STATUS CHART
- [19.0] WITHDRAWAL
- [20.0] MOVEMENT AND BURNING
- [21.0] LASER COMBAT
- [22.0] MISSILES AND FIGHTERS
- [23.0] FORMATIONS
- [24.0] DAMAGE CONTROL DURING COMBAT
- [25.0] BATTLE DEPLOYMENT
- [26.0] LOSS OF CRIPPLED SHIPS
- [27.0] EXPLANATION OF SCENARIOS
- [28.0] SCENARIOS
- NOTES
- COMBAT AND MOVEMENT CHARTS AND TABLES
- SOLAR DISPLAY CHARTS AND TABLES
- [9.28] TACTICAL ABSTRACT COMBAT RESULTS TABLE
- [9.29] PERCENTAGE LOSS TABLE
- [10.6] SUMMARY OF MORALE INDEX ADJUSTMENTS
- [10.4] MARTIAN MORALE INDEX / MORALE EFFECTS TABLE
- [10.2] EARTH MORALE INDEX / MORALE EFFECTS TABLE
- POLITICAL POINTS TRACK [11.39]
- [11.47] ASSASSINATION TABLE
- [12.3] REVOLT TABLE
- [13.4] TRUCE TABLE
- [13.5] NEGOTIATION TABLE
- [14.2] SABOTAGE TABLE
[1.0] INTRODUCTION
BattleFleet Mars is a simulation of interplanetary conflict in our Solar System set late in the Twenty-First Century. The game posits a situation in which the Earth is dependent upon extra-terrestrial resources, the procurement of which is managed, executed, and controlled exclusively by a privately-owned supra-national conglomerate, the Ares Corporation. The game concerns an attempt by disenchanted employees of the Corporation living permanently in space and on Mars to "seize the means of production" for the purpose of gaining political and economic autonomy.
BattleFleet Mars is a two-Player game. One Player controls the Martian-based rebels and strives to stave off the Corporation in its attempts to regain control over its property. Concurrently, the Martian Player attempts to establish legitimacy in the eyes of the World Organization for Resource Development (WORD), the de facto planetary government of Earth. The other Player takes the part of the Ares Corporation Board of Directors and is charged with defeating the Martians militarily while at least neutralizing the Martian attempts to influence Earth's world government. WORD, a loose confederation of national governments -- a non-Player third force in the game -- cannot directly influence the outcome of the game, since it controls no spaceships. However, WORD's backing is ultimately crucial to the chances of either side, and Players must wage a political struggle to influence the ambivalent Earth government even as they battle over the control of the Ares facilities in the Ares Asteroid Belt and on Mars and Ganymede.
BattleFleet Mars is divided into two parts: the Strategic Game and the Tactical Game. The former (Rules Sections 5.0 through 15.0) simulates the broad outlines of the conflict, including the deployment and movement of ships between the various strategically significant points; truces and negotiations; sabotage; counter-revolt; logistics and production; the use of agents to foment discord (or nip it in the bud); assassination; and the influence of military events on morale. The Tactical Game (Rules Section 16.0 through 26.0) simulates in detail space combat between individual ships utilizing the Tactical Display. Included in the Tactical Game are the movement of ships in three dimensions; the use of lasers, missiles, and "fighters"; formations; satellite bases; and damage control. The Strategic Game includes a "tactical abstract" combat rule, and there are several Scenarios given for the Tactical Game (Rules Sections 27.0 and 28.0); thus, it is possible to play either game separately or to combine both into one inter-related game.
[2.0] GENERAL COURSE OF PLAY [Strategic Game]
The Players decide which side each of them shall control and set up the game. The initial rebellion is then simulated, led by Mars and Ganymede, with the allegiance of the bulk of the Ares space fleet -- as well as that of the four Asteroid Bases -- variable and subject to the actions of the Players. Thereafter, the game is divided into Game-Turns. During the course of each Game-Turn, the Players alter the deployment of their ships and agents as they see fit among the planets and Bases represented on the Solar Display. They then resolve combat between any of their ships that are at the same Planet or Asteroid Base, adjusting the Morale Indices for Earth and Mars to appropriately reflect the results of the fighting. Players then perform any actions and resolutions that may be called for by the morale level on either Morale Index. These may include assassination attempts against agents, counter-revolt against the Martian rebels, truce negotiations, sabotage attempts, and concomitant ripple effects on either or both Morale Indices. After any called-for effects have been executed, Players calculate the repair of damaged ships, and the Corporation Player receives any newly produced ships that are due to be put into service that Game-Turn.
Either side may win by outright military victory or by dampening the opponent's morale to a level from which it is impossible to continue the struggle.
[3.0] GLOSSARY OF SPECIAL TERMS [Strategic Game]
The following terms have special meanings in BattleFleet Mars, and it is recommended that Players familiarize themselves with the vocabulary before reading further in the Rules.
Ares Corporation: Also referred to as simply the Corporation, this entity is a conglomerate of privately owned and financed concerns with a "space" orientation. In the face of official pre-occupation with surface affairs firms that were interested in profiting from extra-terrestrial resources banded together to pool resources, with the eventual result that the Corporation was formed and granted a free hand to do as it directed itself to do with regard to space exploration and the utilization of other Planets. By the time the Earth became clearly dependent upon goods provided solely by the Corporation, it was too powerful to be checked.
Asteroids: Four Asteroids are depicted in this game. They are Ceres, Pallas, Vesta, and Juno -- the first four Asteroids to be discovered. They are, respectively, the first, second, tenth, and third largest of the Asteroids.
Cabal: (see Martian Free Traders)
catapults: Catapults are the means by which materials are transported within the Solar System. Catapults latch on to a container of ore extract and accelerate to a high speed before releasing the load in the direction of the destination. Another catapult at the destination intercepts the container and latches on to decelerate it. The ore is delivered to orbital factories or delivered by shuttle to the surface. (None of the interplanetary space ships is designed to land on the surface of a Planet.)
Corporation: (see Ares Corporation)
Earth: The population of Earth is reflected in the various morale effects that play a crucial role in BattleFleet Mars. The actual population of Earth is distinct from the Ares Corporation Board of Directors, but the morale of the Earth population has strong effects on the Corporation's strategy and eventual success or failure.
Mars (Martian): The population of Mars is much more closely identified with the struggle depicted in BattleFleet Mars than is the population of Earth. Martian morale, Martian strategy, etc., therefore refers to both the civilian population and the actual combat forces of Mars and other Planets and/or Asteroids espousing the Martian cause.
Martian Free Traders: The collective leadership of the Martian revolt, this group is also referred to by the popular term, Cabal.
miners: Miners are the ships that gather raw materials. They are designed specifically to obtain ore from Asteroids, utilizing powerful lasers to cut away desirable sections, but they can be used as bases from which to operate on small moons as well.
Planet: Five Planets are represented in the game. They are Mercury, Venus, Earth, Mars, and Jupiter. Mercury and Venus play little part in the game, but they are included because they are there.
Task Force: A Task Force is a group of Friendly ships.
transports: These are ships designed ostensibly for the purpose of moving people and equipment that cannot be catapulted from point to point within the Solar System. In actuality, they also double as patrol ships, being mounted with a laser that is intended for military use in the event of difficulty. The crews of transports are specially screened to ensure that "suspect" persons will not be included.
World Organization for Resource Development (WORD): This organization is a loose confederation of national Earth governments that has the official standing to speak for Earth. Generally weak by nature, WORD is hard-pressed to act in any real way in the interests of Earth since it has direct control of no space ships.
[4.0] GAME EQUIPMENT
[4.1] THE GAME MAPS
[4.11] The Solar Display
The Solar Display is printed on a 22" by 34" mapsheet. It includes a schematic representation of our Solar System from the Sun out to the orbit of Jupiter, consisting of seven orbital tracks segmented into equal divisions. Five of these orbital tracks are for the five Planets between the Sun and Jupiter, viz. Mercury, Venus, Earth, Mars, and Jupiter itself. The remaining two tracks contain, collectively, four of the largest Asteroids: Ceres, Pallas, and Juno, in one orbit; and Vesta in its own orbital track. The positions of the Planets and Asteroids as of 1 January 2094 -- the date for the start of the game -- are indicated on the Display. Also printed on the Solar Display are nine Ship Transit Tracks. Each of these corresponds to one of the Planets or Asteroids represented on the Solar Display. There is also a Political Points Track and a Material Points and Production Track. The Solar Display is utilized in the Strategic Game to mark the positions of ships and agents.
[4.12] The Tactical Display
The Tactical Display is printed on a 22" by 34" mapsheet divided into two equal grid sections. One of these sections is labeled the "X-Y" Display and has a compass rose indicating the "X" and "Y" axes on that section. The other section is labeled the "X-Z" Display and has a compass rose indicating the "X" and "Z" axes. The Tactical Display represents a typical empty area of space in which battles between opposing space forces may be fought. Each ship is represented on the Tactical Display by two counters, one of which is placed in each section. The "X-Z" counter, placed on the "X-Z" section, depicts the "height" of a ship relative to the other two dimensions -- which are represented on the "X-Y" counter on the "X-Y" section. Together, the counters depict the position of a ship precisely in a three-dimensional space. Each of the three-dimensional cubes formed by the imaginary intersection of two squares (one from each map section) is called a "cube." Distances are measured on the Tactical Display in terms of cubes. For a complete explanation of the use of the Tactical Display, see Movement and Burning (Section 20.0) and Laser Combat (Section 21.0).
[4.2] THE PLAYING PIECES
The die-cut counter sheet includes 400 counters representing ships, agents, Planets, Bases, missiles (for use in the Tactical Game), Task Force Markers, Vector Indicators (for use in the Tactical Game), and markers to indicate the current Game-Turn and the Political Point and Morale Index Levels for both Players. There are seventy-two ships in the game, a total that includes potential production. To meet the requirements of the Tactical Game, each ship is represented by two counters. As the control of each ship, Base, Planet, and Asteroid is variable in the course of play, each of these counters is back-printed to indicate either Corporation or Martian control. Players should punch these pieces out from the sheet by pressing on the faces of the counters. Counters should then be sorted by color and type into the compartmented plastic tray.
[4.21] Illustrative Summary of Partisan Counters
- Catapult X-Z and X-Y: numbered [101-109; 111-119; 121-129; 131-134]
- Miner X-Z and X-Y: [201-209; 211-219; 221-229]
- Transport X-Z and X-Y: [301-309; 311-315]
- Base X-Z and X-Y: [401-409; 411-415]
- Missile X-Z and X-Y: [501-509; 511]
- Fighter X-Z and X-Y: [601-605]
- Agent: [701-704; 801-809]
- Task Force
- Planet/Asteroid
[4.22] Illustrative Summary of Game Markers
- Morale Level (x10 and x1 markers)
- Political Points (Pol)
- Logistics Points (Log)
- Velocity
- Neutralized (N)
[4.3] GAME CHARTS AND TABLES AND RULES BOOKLET
All the charts and tables used in the Strategic Game are printed on the Solar Display. The charts and tables used in the Tactical Game are printed on a separate sheet. The Battle Record and Fleet Status Chart are inserted in the Rules Booklet. For ease of play, these inserts should be carefully removed from the Booklet. These charts and tables -- as well as the Time/Distance Trip Measures -- are explained in the appropriate Rules Sections. Players will note that the Rules Sections are presented in the order of their utilization in the course of a Game-Turn. Players are advised to peruse the outline at the beginning of the Rules. Some familiarity with the game components will prove helpful in reading the Rules, although the purposes of the various tables will not generally be apparent at first glance.
[4.4] INVENTORY OF GAME PARTS
Each complete game of BattleFleet Mars should contain the following items:
- One 22" by 34" Solar Display Map
- One 22" by 34" Tactical Display Map
- One Rules Booklet
- One set of die-cut Counters (400)
- Two (Identical) Time/Distance Measures
- One pad of Battle Record sheets
- Two dice
- One box/lid or zip-pack/coversheet assembly
If any parts are missing or damaged, write to: Customer Service, Simulations Publications, Inc., 44 East 23rd Street, New York, New York 10010. Questions concerning rules that are phrased in such a way that they can be answered with a simple, one-word answer will be answered if sent to the above address together with a stamped self-addressed envelope. Mark your inquiry "BattleFleet Mars Question."
[4.5] TIME AND DISTANCE SCALES
Each Game-Turn is approximately thirty Earth days (29.3, to be precise) in length. The scale of the Solar Display map is 5 centimeters to the Astronomical Unit (approximately 150,000,000 kilometers). The following table lists the distances of the Planets and Asteroids from the Sun:
| Planet/Asteroid | AU's |
|---|---|
| Mercury | 0.3871 |
| Venus | 0.7233 |
| Earth | 1.0000 |
| Mars | 1.5237 |
| Vesta | 2.3600 |
| Juno | 2.6700 |
| Ceres | 2.7673 |
| Pallas | 2.7700 |
| Jupiter | 5.2028 |
Each cube on the Tactical Display represents a volume that is 1000 kilometers on a side (i.e., 1,000,000,000 cubic kilometers). Each Tactical Game-Turn represents four minutes of real time.
[5.0] SEQUENCE OF PLAY [Strategic Game]
[5.1] THE GAME-TURN
BattleFleet Mars is played in Game-Turns. During each Game-Turn, Players have the opportunity to move their ships and agents, to engage in combat, and to attempt to thwart such activities as truce negotiations, counter-revolts, assassinations, and sabotage. There is no set limit to the number of Game-Turns a game may last. Play continues until one Player defeats his opponent by satisfying the appropriate Victory Conditions. All action must take place in the sequence outlined below. Any action taken at variance with the following outline is a violation of the Rules (Exception: see Case 6.3).
[5.2] STRATEGIC GAME SEQUENCE OUTLINE
A. SHIP MOVEMENT PHASE
All Task Forces "in transit" (see Case 8.22) are moved one Box closer to their destinations on the Ship Transit Tracks.
B. SHIP TRANSIT ALLOCATION PHASE
Individually, for each Ship Transit Track on the Solar Display, the Players simultaneously declare and institute any course alterations for ships in transit and any new courses for ships in orbit around a Planet or Asteroid. At any time during this Phase, agents may be embarked or debarked from Friendly ships in orbit (see Case 11.2). Note: Ship transit allocation is not considered movement per se, but rather a setting or altering of course.
C. COMBAT PHASE
Individually, for each of the Planets and Asteroids represented on the Solar Display, the Players resolve any battles (see Case 9.2 or Case 16.22).
Note: BattleFleet Mars has two alternative combat systems. The Tactical Combat Abstract is relatively simple and quick to resolve, utilizing a direct strength comparison between ships. The Tactical Sequence is more complex, utilizing the Tactical Display to simulate the actual combat between ships in three dimensions. If the latter system is used, the Strategic Game Sequence is interrupted at this point by the Tactical Sequence which persists for an indefinite number of Tactical Turns until the battle is resolved. Whichever system is used, appropriate adjustments are made on the Morale Indices as each battle is resolved (see Case 10.6). If a Truce is in effect, the Combat Phase is omitted, unless a Player chooses to break the Truce (see Case 13.3).
D. POLITICAL INTERACTION PHASE
Players determine the number of Political Points available and adjust their markers on the Political Points Track (see Case 11.32). Both Players roll on their respective Morale Effects Tables, immediately resolving any Truce negotiations, assassination attempts, counter-revolts, or sabotage that may result, and making any necessary adjustments to the Morale Indices. The Ares Corporation Player rolls first on the Earth Morale Effects Table (10.2), and then the Martian Player rolls on the Martian Morale Effects Table (10.4). Players adjust all die rolls as necessary to reflect the expenditure of Political Points through the medium of agents. Any Political Point expenditures are noted by adjusting the markers on the Political Points Track. After all resolutions have been completed, any unexpended Political Points are lost, and the markers on the Political Points Track are returned to "zero."
E. LOGISTICS AND MAINTENANCE PHASE
At the beginning of this Phase, any ship counters on the Production Track are advanced one Box, and any ship counter advancing to the "zero" Box is deployed on the Solar Display by the controlling Player. The Players adjust their markers on the Logistics Points Available Track to indicate any increase in the level of Logistics Points. Players may expend Logistics Points for the repair of damaged ships at Friendly Planets or Asteroids (see Section 15.0). The Players may also expend Logistics Points to construct new ships, counters for which are placed on the Production Track (see Case 15.2).
F. PLANETARY MOVEMENT AND GAME-TURN INDICATION PHASE
Starting with Mercury and moving outward from the Sun, each Planet and Asteroid counter is moved one Planetary Position counter-clockwise on the Solar Display. Each Planetary Position in each Planet's orbit is numbered. Check the progression of Jupiter along its orbit to mark the passage of Game-Turns.
[6.0] STARTING THE STRATEGIC GAME
GENERAL RULE:
Players set up the game by deploying the appropriate counters and markers. The Revolt of 1 January 2094 is then simulated in order to determine the order of battle for each side. Players then proceed to play the Initial Game-Turn according to a special Sequence of Play (see Case 6.3).
PROCEDURE:
The 1 January 2094 positions of all Planets and Asteroids represented in the game are indicated on the Solar Display. All Planet and Asteroid counters are placed, face-up (i.e., to indicate Corporation control) on the 1 January 2094 Planetary Positions of their respective orbital tracks. All Base counters are deployed in In-Orbit Boxes of the appropriate Ship Transit Tracks (see Case 9.42). Next, the forty-four space ships which are “in orbit” are deployed as indicated on the Initial Ship Deployment Chart (6.11). The Corporation Player deploys the ten ships that are In Transit. All ship counters are placed face-up to indicate Corporation control. After all ships are deployed, markers are placed on the Morale Indices, Political Point Track, and Logistics Points and Production Tracks. Agent counters are then deployed on the Solar Display. The Martian Player then rolls on the Revolt Table (12.3) for Earth, Mars, Vesta, Juno, Ceres, Pallas, and Jupiter in that order, to determine which Asteroids and how many ships join the revolt. Appropriate adjustments are made to reflect the expenditure of Political Points by the Players. After the roll for Jupiter is made, any unexpended
Political Points are lost and the markers on the Political Points Track are adjusted to “zero.” Players then proceed to play the truncated Initial Game-Turn to its completion. Players then refer to the Strategic Game Sequence of Play (see Section 5.0) to proceed with the second and all subsequent Game-Turns.
CASES:
[6.1] DEPLOYMENT
All ships are placed according to the Initial Ship Deployment Chart (see Case 6.11). Fifty-four ships are listed on the Chart; forty-four of these are in orbit around a particular Planet or Asteroid and ten are in transit (see Case 8.26). After the ships are deployed, markers are placed on the Morale Indices, Political Points Track, and Material Points and Production Track as listed below. Agent counters are then deployed on the Solar Display.
[6.11] Initial Ship Deployment Chart
| Location | Catapults | Miners | Transports |
|---|---|---|---|
| Earth | 6 | 0 | 2 |
| Mars | 4 | 2 | 1 |
| Vesta | 2 | 3 | 1 |
| Juno | 2 | 3 | 0 |
| Ceres | 3 | 5 | 2 |
| Pallas | 2 | 2 | 0 |
| Jupiter | 3 |
Allships except those in transit are considered to be in orbit around the Planet or Asteroid at which they are located.
[6.12] All ships in orbit are deployed in the “In Orbit” Transit Track Box of the indicated Ship Transit Track.
[6.13] All ships in transit may be placed on any Ship Transit Track exclusive of Mercury and Venus by the Corporation Player. They must be placed in either the “1” or ‘'2” Transit Track Box of that Ship Transit Track chosen. The Origin Point (see Case 8.23) for all ships in transit is considered to be Earth, excepting those ships in transit to Earth, whose origin point is considered to be Mars.
[6.14] The Earth Morale Index at the start of the game is set at fifty-five. The Martian Morale Index is set at seventy-seven. Markers are placed on the Morale Indices to reflect these levels.
[6.15] The Corporation Player receives four Logistics Points at the start of the game. This is indicated on the Logistics Points Available Track. The Martian Player receives no Logistics Points at the start of the game.
[6.16] Several Corporation ships (in addition to the fifty-four deployed on the Solar Display) begin the game on the Production Track as follows:
| Ship Type | In Box # |
|---|---|
| 1 Catapult | 2 |
| 1 Transport | 2 |
| 1 Miner | 3 |
| 1 Catapult | 4 |
[6.17] Prior to the resolution of the 1 January 2094 Revolt, the Corporation Player receives five Political Points and the Martian Player seven. This is indicated on the Political Points Track.
[6.18] All agent counters are deployed in the In-Orbit Boxes of any Ship Transit Track exclusive of Venus and Mercury.
[6.19] The Corporation Player deploys all nine Friendly agent counters face-up on the Solar Display. After all Corporation agents have been deployed, the Martian Player deploys all four of his
Friendly agents.
[6.2] THE 1 JANUARY 2094 REVOLT
Although the Martian leaders planned carefully and achieved no small measure of surprise, the Ares Corporation Board of Directors had not been blind to the possibility of a serious insurrection and had directed the management to prepare for any contingency. Hence, there is a degree of variability as to exactly which Asteroids and how many ships’ crews enlist in the Martian cause.
[6.21] After all ships and agents have been deployed on the Solar Display, the Revolt Table (12.3) is consulted to determine how many ships and Asteroids remain under Corporation control and how many rally to the Martians. As each Planet and Asteroid is separately rolled for, the Martian Player selects from the ships present at that Asteroid which ones will revolt—up to the number indicated on the Revolt Table. Revolting ships and Asteroids, as well as Mars and Jupiter which revolt automatically, have their counters flipped over to indicate Martian control.
[6.22] For each Asteroid or Planet, an “R” result on the Revolt Table indicates a successful seizure of power by the Martians. Barring Capture (see Case 9.6) or Counter-Reyvolt (see Case 12.2), that Asteroid or Planet remains Friendly to the Martian Player for the rest of the game.
[6.23] For each Planet or Asteroid, an “‘L" result indicates that the Corporation retains control. Barting Capture, that Asteroid or Planet remains Friendly to the Corporation Player for the rest of the game.
[6.24] Once it is determined how many ships join the Revolt at a particular Planet or Asteroid, the Martian Player may select which particular vessels go to each side. The Martian Player must limit selections for each Asteroid or Planet to those ships actually on the corresponding Ship Transit Track. The Martian Player can never receive more ships than the indicated number of ships revolting (although it is possible for him to receive fewer).
[6.25] The Martian Player can never select any transport ships to revolt. All transports always remain Friendly to the Corporation Player,
[6.26] Die rolls on the Revolt Table may be influenced by the expenditure of Political Points. To expend Political Points, a Player must have an eligible agent present (see Case 11.37).
[6.27] The utilization of the Revolt Table to resolve the 1 January 2094 Revolt does not affect the Morale Indices in any way.
[6.3] THE INITIAL GAME-TURN
The Initial Game-Turn is the only Game-Turn to deviate from the standard Sequence of Play. It consists of (in order) a Combat Phase (or Tactical Game Sequence), a Logistics and Maintenance Phase, and a Planetary Movement and Game-Turn Indication Phase. In other words, for the Initial Game-Turn only, omit the Ship Transit Allocation Phase, the Ship Movement Phase, and the Political Interaction Phase. For the second and all subsequent Game-Turns, the Strategic Game Sequence of Play pertains as written (see Section 5.0).
[6.4] SETTING UP THE FLEET STATUS CHARTS
Each Player receives a Fleet Status Chart. Whether the Players use the Tactical Abstract Combat System or the Tactical Game Sequence to resolve battles, they must record the status of their ships on their Fleet Status Charts. The procedure for using the Fleet Status Charts for the Tactical Abstract Combat System is described fully in Section 9.0; a full explanation of the use of these Charts in the Tactical Game Sequence is covered in Section 18.0. In both cases, the set-up of the Charts is identical as described below.
[6.41] Each Player should differentiate between Friendly and Enemy-controlled ships on the Fleet Status Chart.
[6.42] At the start of the game, no catapult ships have lasers. Their ability to participate in Combat is therefore impaired until they have been serviced (see Cases 9.9 and 15.35).
[7.0] THE SOLAR DISPLAY AND PLANETARY MOVEMENT
GENERAL RULE:
The Solar Display depicts our Solar System out to the orbit of Jupiter. Each of the Planets and Asteroids included on the Solar Display is represented by a counter and, as the game progresses, each counter is moved along its orbital track. Each orbit represented on the Solar Display is segmented into a number of Planetary Positions to regulate this movement.
PROCEDURE:
During the Planetary Movement Phase of each Game-Turn, all Planet and Asteroid counters are advanced counter-clockwise one Planetary Position along their orbits.
CASES:
[7.1] THE SOLAR DISPLAY
[7.11] The Solar Display depicts the orbits of Mercury, Venus, Earth, Mars, Vesta, Ceres-Pallas-Juno, and Jupiter. Each orbit is segmented into Planetary Positions such that the distance between each Planetary Position will be traveled by the Planet or Asteroid in approximately 30 Earth days.
[7.12] Indicated on the Solar Display are the starting Planetary Positions of all five Planets and four Asteroids as of 1 January 2094, when the game begins. Counters of the appropriate heavenly bodies are placed directly on the indicated Planetary Positions at the start of the game.
[7.13] The Solar Display indicates a reasonably accurate distance between any two heavenly bodies at a given time, and it is used to calculate travel time between these bodies (see Section 8.0, Interplanetary Movement of Ships).
[7.2] PLANETARY MOVEMENT
[7.21] During the Planetary Movement Phase, each counter representing a Planet or Asteroid on the Solar Display is advanced one Planetary Position counter-clockwise.
[7.22] Note that the orbits of the Asteroids Juno, Ceres, and Pallas are represented by one orbital track on the Solar Display. All three Asteroids are moved along the same orbital track.
[8.0] INTERPLANETARY MOVEMENT OF SHIPS
COMMENTARY:
Each vessel capable of interplanetary travel in BattleFleet Mars is considered to possess two completely independent engine systems. One, the chemical fuel rocket system, is capable of considerable thrust but, due to fuel constraints, can not be utilized for sustained acceleration. Hence, it is limited in use to close-in maneuvers or emergency acceleration. The other engine system is a fusion power generator which produces a modest but steady thrust. It is this engine which is utilized for interplanetary movement. The fusion engine is capable of producing a steady acceleration of 0.01 G. This may not sound like very much, but velocity compounds every second. After twenty-four hours of constant acceleration at 0.01 G, a ship is traveling at nearly 8 km/sec. After a week, the ship would be going 59 km/sec. The speed constantly increases; while getting from a standing start in Pluto’s orbit to the Sun takes four months, continuing past the Sun to the other side of Pluto’s orbit takes only two additional months. The distances that a ship can traverse at 0.01 G have been calculated from a “standing start” to a “standing finish” (i.e., taking deceleration into account) for one-month, two-month, and three-month periods in order to devise a movement system for ships traveling between the Planets in BattleFleet Mars.
GENERAL RULE:
For the purposes of interplanetary movement, a group of ships operating together is called a “Task Force”. A Task Force is considered to be either “in orbit” around a Planet or Asteroid, or “in transit” in interplanetary space. Task Forces are not actually placed on the map of our Solar System which is printed on the Display; rather, they are deployed on the Ship Transit Tracks, situated on the Solar Display. Each Planet and Asteroid which is represented on the Solar Display has a corresponding Ship Transit Track. Each of these Ship Transit Tracks is divided into four Transit Track Boxes. When a Task Force moves from one Planet or Asteroid to another, it is shifted to the appropriate Transit Track Box of the destination’s Ship Transit Track. The Task Force is then moved forward from Box to Box along that Track until it is In Orbit about its destination. Agents may embark to and debark from ships, and be transported from Planet to Planet.
PROCEDURE:
Interplanetary movement of ships is divided into two Phases in the Sequence of Play (see Section 5.0). During the Ship Transit Allocation Phase, the ship’s courses are, in effect, set; during the ship Movement Phase, ships are moved according to their pre-set courses. The Ship Movement Phase comes first. During this Phase, all Task Forces In Transit are moved one Box forward along their Ship Transit Tracks. Except during the Ship Transit Allocation Phase, Task Forces that are In Transit are always deployed against the right wall of the Transit Boxes they are in (i.e., opposite the Box number). After the Ship Movement Phase, play proceeds to the Ship Transit Allocation Phase. Beginning with the Ship Transit Track corresponding to the Planet or Asteroid closest to the Sun that contains any Task Forces, the Players declare any ship transit allocations and execute them. Each Ship Transit Track is resolved separately, proceeding outward towards Jupiter. For each Ship Transit Track, the Players simultaneously announce which of their Task Forces are going to be shifted to another Transit Track Box. They then determine precisely which Box by measuring the distance between the Task Force's Origin Point and destination with the Time/Distance Measure. Task Force markers are then shifted to the appropriate Transit Track Boxes in accord with the ship transit allocations as declared by the Players. Shifted Task Force markers are deployed against the left wall (the one next to the Box number) of the Transit Track Box they are in to distinguish them from Task Forces which have not been shifted. Once all ship transit allocation shifts for all Ship Transit Tracks have been executed, all Task Forces that are In Transit are redeployed in their Transit Track Boxes against the right wall. At any time during the Ship Transit Allocation Phase, agents may embark to or debark from ships.
CASES:
[8.1] TASK FORCES
Because of the immensity of space, and the pervasive interference of solar radiation, it is difficult if not impossible to determine with any exactitude the nature or number of a group of ships moving through space at a considerable distance. To simulate this, individual Friendly ships may be represented on the Solar Display by Task Force markers in order to disguise their type and size.
[8.11] Any ship or group of Friendly ships in a Transit Track Box moving to a common destination from the same Origin Point, or in orbit around the same Planet or Asteroid is considered a Task Force. Note: Players may designate a group of ships sharing the same Origin Point and destination as more than one Task Force.
[8.12] At any point during the course of the Game-Turn, either Player may remove any Friendly ship(s) from a Transit Track Box and replace it with a Task Force marker, so long as the requirements of Case 8.11 are satisfied. The individual ship counters comprising the Task Force are removed from the Solar Display and placed beside it, and a Task Force marker corresponding to the one deployed on the Solar Display is placed upside down atop the stack of ships. Example: the Martian Player has two miners and two catapults at Jupiter. He removes the ship counters from the Solar Display and stacks them on the table off to the side, placing an inverted “Task Force C” marker on the top of the stack. He deploys another “Task Force C” marker on the Solar Display at Jupiter (in the appropriate Transit Track Box).
[8.13] Players may freely alter the composition and/or designation of Task Forces at any time, so long as the conditions of Case 8.11 are not violated.
[8.14] Each Task Force Marker deployed on the Solar Display must represent at least one Friendly ship. Players may not employ “dummy” Task Force Markers.
[8.15] The number of ships (not types) represented by any Enemy Task Force in orbit around a Friendly Planet or Asteroid must be revealed upon request.
[8.16] The use of Task Force Markers to represent Task Forces is purely voluntary. Players may opt to utilize them or not. Players should further note that the number of Task Force Markers provided with the game is a product of game development; the number was arrived at in the context of providing the optimum number of counters and other markers. If the need arises for Task Force Markers in excess of those provided with the game, the Players may produce their own.
[8.2] USING THE TIME/DISTANCE MEASURE AND SHIP TRANSIT TRACKS
Players use the Time/Distance Measure to measure the distance between points on the Solar Display. The Ship Transit Tracks are used to mark the location of particular Task Forces within the Solar System.
[8.21] The Time/Distance Measure is marked off in both Month Marks and in a scale of millions of kilometers. The two Month Marks are used in the game to translate the distance between points into travel time as measured in Game-Turns.
[8.22] To determine how many Game-Turns a Task Force needs to travel between two points on the Solar Display, place the Origin Mark of the Time/Distance Measure (8.27) at the Task Force’s Origin Point (see Case 8.23) and measure the straight-line distance to the Destination (see Case 8.24). If the Destination falls between the Origin Mark and the One-Month Mark (inclusive) on the Time/Distance Measure, it would take a Task Force one Game-Turn to get there. If the Destination falls beyond the One-Month Mark and before (or at) the Two-Month Mark, it would take a Task Force two Game-Turns to reach the Destination. And if the Destination were beyond the end of the Time/Distance Measure (which ends at the Two-Month Mark), the Destination is three Game-Turns distant (Exception: see Case 8.5).
[8.23] A Task Force is either In Orbit or In Transit (see Case 8.26). A Task Force In Orbit is at its Origin Point. The Origin Point of a Task Force In Transit is the position of the last Planet or Asteroid that that Task Force was In Orbit around. Note: It is important for Players to know the Origin Points of a Task Force In Transit as that information is necessary to change the course of a Task Force before it reaches its destination (see Case 8.5). The Origin Point of all Task Forces In Transit should be recorded on a piece of scratch paper.
[8.24] The designation of a Task Force In Transit is the Planet or Asteroid corresponding to the Ship Transit Track it is deployed in. For the purposes of determining how many Game-Turns a Task Force needs to travel to its Destination, the movement of the Planet or Asteroid along its orbital track must be taken into consideration. Therefore, when measuring the distance from a Task Force's Origin Point to its Destination, do not use the current position of the Planet or Asteroid, but the position it will be in when the Task Force arrives there. (Simply measure one, two, or three Planetary Positions ahead on the orbital track, as required.) This sometimes results in the Task Force taking an extra Game-Turn to traverse the distance than it would have moving to a stationary destination.
[8.25] For each Planet and Asteroid represented on the Solar Display, there is a corresponding Ship Transit Track. Each Ship Transit Track is divided into Transit Track Boxes. The Boxes are utilized to display the location of all Task Forces and debarked agents.
[8.26] There are five Boxes in each Ship Transit Track. The first Box is labeled In Orbit. Any ships at a Planet or Asteroid are considered to be in orbit around it; such ships, together with any agents debarked upon a Planet or Asteroid, are deployed in the appropriate In Orbit Box. The four other Boxes in each Ship Transit Track are labeled 1, 2, 3, and 4 respectively. The numbers refer to Game-Turns. Any Task Force In Transit to a Planet would be placed in one of these four Boxes, depending on how far from its Destination it is in terms of Game-Turns (see Case 8.22).
[8.27] Time/Distance Measure (see Rules insert)
[8.28] Ship Transit Tracks (see Solar Display)
[8.3] SHIP MOVEMENT PHASE
During the Ship Movement Phase, all Task Forces In Transit are moved one Box forward (towards their Destinations) on the Ship Transit Tracks.
[8.31] Players have no options, and make no decisions during the Ship Movement Phase. The Phase is mechanical; all Task Forces In Transit must be moved one Box forward on the Ship Transit Tracks.
[8.32] Task Forces In Orbit may not be moved in any way during the Ship Movement Phase.
[8.4] SHIP TRANSIT ALLOCATION PHASE
During the Ship Transit Allocation Phase, the Players determine which of their Task Forces will be shifted from one Transit Track Box to another and execute any such shifts. Ship transit allocation shifts are not considered movement per se but rather course settings or alterations. Movement takes place during the Ship Movement Phase.
[8.41] During the Ship Transit Allocation Phase, Players may shift all, some, or none of their Task Forces from one Transit Track Box to another.
[8.42] No Task Force may be shifted more than once during the course of any one Ship Transit Allocation Phase. Note: A Task Force may undergo the Ship Transit allocation procedure during Combat, see Case 9.1 or 19.13.
[8.43] For each Ship Transit Track in turn, the Players must simultaneously declare any ship transit allocations. They must state precisely which Task Forces will be shifted to new Transit Track Boxes, and also which Ship Transit Track each Task Force will be shifted to. Upon the request of either Player Ship Transit allocations may be written prior to declaration.
[8.44] After the Players have declared all ship transit allocations for a particular Ship Transit Track, all Task Force shifts called for are executed. Each shifted Task Force is deployed in the Ship Transit Track corresponding to its destination.
[8.45] To determine which Transit Track Box a shifting Task Force should be deployed in, the owning Player must use the Time/Distance Measure (8.27) to measure the distance between the Origin Point (see 8.23) and the Destination (8.24) of the Task Force according to the procedure outlined in Case 8.22 (Exceptions: see Case 8.5, Calculating Ship Transit Allocation Shifts for Ships In Transit; Case 8.6, Cometary Orbits).
[8.46] At any time during the course of the Ship Transit Allocation Phase, an agent may embark to or debark from a Friendly ship in orbit, subject to the conditions of Case 11.25. There is no limit to the number of times an agent may embark or debark in the course of one Ship Transit Allocation Phase.
[8.5] CALCULATING SHIP TRANSIT ALLOCATIONS FOR SHIPS IN TRANSIT
While the momentum of the Planets and any ships orbiting them is negligible, a Task Force In Transit has considerable momentum in its direction of travel. Therefore, it is necessary to take that momentum into account when calculating how many Game-Turns it will take the Task Force to reach an alternate Destination if a Player wishes to have it change course.
[8.51] For any Task Force In Transit, the Line of Travel is the straight line between its Origin Point (see 8.23) and Destination (see 8.24).
[8.52] For any Task Force In Transit which is being shifted from one Ship Transit Track to another, the owning Player makes an approximation of its present position. This Approximate Position is fixed by measuring the Line of Travel with the Time/Distance Measure and dividing it into a number of segments equal to the number of total Game-Turns needed to traverse it. The Approximate Position is fixed at the juncture of two of these Segments along the line of Travel. Example: if a Task Force needs three Game-Turns to traverse its
Line of Travel, use the Time/Distance Measure to divide the distance into three even segments. If the Task Force has been traveling for one Game-Turn, its Approximate Position is fixed as one-third of the way to its Destination; if it has been traveling for two Game-Turns, it is considered to be two-thirds of the way there. Or, for example, whenever a Task Force needing two Game-Turns to get somewhere has been traveling one Game-Turn, its Approximate Position is fixed as mid-way between its Origin Point and Destination.
[8.53] After a Task Force’s Approximate Position has been fixed, the Players must visualize a straight line at right angles to the Line of Travel at the Approximate Position. This line is called the Transit Line. It should be noted whether the Task Force’s alternate Destination is “above” the Transit Line (i.e., further in the general direction of its current Destination) or “below” it (i.e., back in the direction which the Task Force is coming from). Points on the Transit Line are considered to have the same status as those “below” it.
[8.54] The Owning Player utilizes the Time/Distance Measure to measure the distance between the Task Force’s Origin Point and its alternate Destination as per Case 8.22 (Exception: see Case 8.56). If the Task Force’s alternate Destination is “above” the Transit Line, subtract 1 from the number of Game-Turns it would take to traverse the distance from the Task Force's Origin Point to determine the total transit time to its alternate Destination. If the Task Force's alternate Destination is “below” or on the Transit Line, add one to the transit time in Game-Turns between the Origin Point and the alternate Destination to determine the Task Force's total transit time to its alternate Destination.
[8.55] The Task Force is placed in the appropriately numbered Transit Track Box in the Ship Transit Track corresponding to its alternate Destination.
[8.56] In the event a Task Force In Transit directly from its Point of Origin is to return directly there, the owning Player places the Task Force counter on the Ship Transit Track corresponding to the Origin Point according to the following schedule: if the Task Force has been In Transit for one Game-Turn, it will need three Game-Turns to return to its Origin Point. If the Task Force has been In Transit for two Game-Turns, it will need four Game-Turns to return to its Origin Point.
[8.6] COMETARY ORBITS
A Task Force In Orbit (see Case 8.26) may plot an eccentric looped maneuver which has the effect of moving it far enough away from the Planet or Asteroid to make combat impossible.
[8.61] During the Ship Transit Allocation Phase, Players may declare any Task Force In Orbit to be entering a cometary orbit in lieu of any other ship transit allocation for that Task Force.
[8.62] A Task Force entering a cometary orbit is simply shifted back along its Ship Transit Track one Box when ship transit allocations for that Ship Transit Track are executed during the Ship Transit Allocation Phase. In effect, its orbit is so eccentric that it is too far away to be involved in combat (see Case 9.2).
[8.63] Cometary orbits are considered a form of ship transit allocation—although the procedure followed is an exception to Case 8.22—and are declared and executed as such during the Ship Transit Allocation Phase. Cometary orbits may not be utilized during the Combat Phase (see Case 9.16).
[9.0] TACTICAL ABSTRACT COMBAT SYSTEM
COMMENTARY:
There are two distinct combat systems for BattleFleet Mars. The reason for this is that the Tactical Sequence outlined in Rules Sections 16.0 through 26.0 is fairly complex, and time-consuming to play. Therefore, we have provided this simpler strength-ratio combat resolution system to allow the Strategic Game to be played independently of the Tactical Sequence (as well as providing Scenarios to enable the Tactical Game to be played independently of the Strategic Game).
GENERAL RULE:
Whenever Friendly and Enemy ships both occupy the same In Orbit Transit Track Box during a Combat Phase, one or both must withdraw, or there will be a battle. In any battle, the Players compare the Strength Value totals of all their ships and reference the Tactical Abstract Combat Results Table. Battles continue until (at least) one Player has no ships remaining In Orbit on that Ship Transit Track. Enemy-controlled Planets and/or Asteroids can be captured if no Enemy-controlled ships or un-neutralized Bases are present. Ships may be equipped with missiles and fighters. The presence of missiles or fighters on a ship, as well as its fuel status, is recorded on the Fleet Status Chart, along with any damage suffered by a ship in combat. Finally, special rules pertain to the combat status of catapults at the start of the game.
PROCEDURE:
The size of any Enemy Task Force In Orbit around a Friendly Planet or Asteroid is revealed upon request (see Case 8.15). (Players should note that the strength of a Task Force is never revealed until both Players are committed to battle). Starting with the Ship Transit Track corresponding to the Planet or Asteroid closest to the Sun and working outward towards Jupiter, the Players resolve each such situation separately. For each such Ship Transit Track, the Players first determine if either shall withdraw (see Case 9.1). Players announce their intentions in this regard simultaneously. If either or both withdraw, no battle occurs. A Player controlling an un-neutralized Base may also surrender the Base and Planet/Asteroid at this point (only), withdrawing any Friendly ships, and thus avoid a battle (see Case 9.47). If neither Player withdraws or surrenders, the battle must be resolved. The Strength Values of each Player’s ships are totaled and the totals revealed. The attacker’s total is divided by the defender’s, and the resulting percentage determines which vertical column on the Tactical Abstract Combat Results Table (9.28) will be used to resolve the combat. A die is rolled by the attacker and the Table is referenced to determine the loss percentages. Each Player incurs the stated losses. These are applied immediately and noted on the Fleet Status Chart. If only one Player retains Friendly ships and/or Bases in the Transit Track Box at this point, the battle ends. If both Players still control ships in the Box, then the Players once again determine if either shall withdraw, following the same (simultaneous announcement) procedure. If either or both withdraw, the battle ends. However, if neither withdraws, the Players roll again on the Tactical Abstract Combat Table on whichever column is now called for. The battle continues for an indefinite number of rolls on the Tactical Abstract Combat Results Table, until one Player no longer controls any ships or non-neutralized Bases in that Transit Track Box. At the end of the Combat Phase, no In Orbit Transit Track Box can contain ships controlled by a Player to whom the corresponding Planet or Asteroid is not Friendly (see Case 9.6). If an Asteroid or Planet has been captured as a result of the battle, its counter is flipped over on the Solar Display. Any ships which have incurred combat losses not amounting to major damage are automatically repaired (see Case 9.52).
[9.1] WITHDRAWAL FROM BATTLE
Withdrawal constitutes utilization of the ship transit allocation procedure during the Combat Phase or both Players to remove a Friendly Task Force from a battle (see Case 8.42).
[9.11] Only ships that have been involved in a battle during the current Combat Phase may withdraw. (Exception: Both Players have an opportunity to withdraw ships that otherwise would have been involved in a battle prior to the first roll on the Tactical Abstract Combat Results Table (see Procedure)).
[9.12] Players have an opportunity to withdraw ships from a battle prior to each roll on the Tactical Abstract Combat Results Table. The Players announce their intentions concerning withdrawal simultaneously; if either Player requests it, these declarations may be written. Each Player must make declarations consistent with the conditions listed under the ship transit allocation rules (see Case 8.43).
[9.13] Each opportunity to withdraw ships during the course of a single battle is independent; a Player’s decision to withdraw or not has no bearing on any subsequent decision which that Player may make in that regard later in the battle (except that, of course, if all ships are withdrawn there will be no subsequent decisions).
[9.14] Players may withdraw all, some, or none of their ships.
[9.15] Players must shift any withdrawing ships as one Task Force to a single new Destination. (Exception: If different groups of ships are withdrawn from the same battle at different times, each group may be set on course to a different Destination, see Case 8.4).
[9.16] A withdrawing Task Force cannot enter into a “Cometary Orbit.” A withdrawing Task Force must be shifted to a different Ship Transit Track than the one from which it is withdrawing.
[9.2] RESOLVING BATTLE
A battle can occur when ships and/or Bases Friendly and ships not Friendly to a Player co-exist in a single In Orbit Transit Track Box during the Combat Phase. Players utilize the Tactical Abstract Combat Results Table to resolve battles.
[9.21] Each ship has a Strength Value which rates its combat effectiveness. This Strength Value may be depleted as a result of damage incurred in combat. Depleted Strength Values may be restored as well. The current level of each ship’s Strength Value is always displayed on the Fleet Status Chart (see 9.4). The current Strength Value of a ship is always used to calculate the total Strength Value for combat resolution.
[9.22] The full Strength Values of ships are as follows: Catapults—4; Miners—2; Transports—3.
[9.23] In any battle, regardless of the overall strategic situation, the Player to whom the Planet or Asteroid corresponding to the Ship Transit Track is Friendly is the defender; the other Player is the attacker.
[9.24] The Strength Values of all ships in the Transit Track Box controlled by the Attacker and all ships controlled by the Defender are totalled (Exception: see Case 9.52). The Attacker’s total is stated as a ranged percentage of the Defender’s total. This determines which column on the Tactical Abstract Combat Results Table (9.28) shall be utilized. Example: if the Attacker has a Strength Value total of 30, and the Defender’s is 21, then the Attacker’s Strength Value is a ranged percentage of between 126% and 149%, and the “126% to 149%” column is used.
[9.25] A die is rolled by the Attacker and a result obtained listing percentage losses for both the Attacker and Defender. Utilizing the Percentage Loss Table (9.29), these losses are extracted immediately (see Case 9.5). The owning Player subtracts losses from the Strength Values of Friendly ships and Bases as desired.
[9.26] Ships In Transit can never be involved in a battle.
[9.27] A battle ends in victory for a Player when only ships and/or un-neutralized Bases Friendly to that Player remain in the In Orbit Transit Track Box. This is the only manner in which a battle may end. Should only ships and/or Bases with major damage remain in an In Orbit Box at any time, the Player not controlling the Planet or Asteroid is considered to have lost the battle and must withdraw all Friendly ships (see Case 9.52). Otherwise, additional rolls on the Tactical Abstract Combat Results Table are made, utilizing the adjusted (reduced) Strength Values, until one Player’s force is withdrawn or eliminated.
[9.28] Tactical Abstract Combat Results Table (see Solar Display)
[9.29] Percentage Loss Table (see Solar Display)
[9.3] MISSILES AND FIGHTERS
The Strength Value of a ship may be increased by the utilization of missiles or fighters.
[9.31] Beginning on the second Game-Turn, the Ares Corporation Player may deploy missiles on Friendly ships during the Logistics and Maintenance Phase (see Case 15.33).
[9.32] Beginning on the fifth Game-Turn, the Martian Player may deploy Fighters on Friendly ships during the Logistics and Maintenance Phase (see Case 15.32).
[9.33] The presence of fighters or missiles on a ship adds “one” to its Strength Value for the purposes of computing the percentage for the Tactical Abstract Combat Results Table only. Missiles and fighters do not increase a ship’s capacity to absorb damage (see Case 9.53). Players must note on the Fleet Status Chart which ships have missiles or fighters and which do not.
[9.34] Once a ship with missiles or fighters has been involved in a battle, it loses its Strength Value bonus until it has been re-supplied with missiles or fighters during a Logistics and Maintenance Phase (see 15.3). Players should note on the Fleet Status Chart which ships deplete their missiles and fighters and which are re-supplied.
[9.4] BASES
Bases are fixed installations, either in orbit around a Planet or in solar orbit near an Asteroid mining complex. The Bases were constructed with emergency defense (presumably against some sort of insurrection) of the Ares Corporation property they protected in mind, although their primary function is one of co-ordination and communication. It was only after the long and bitter strike of 2088 that staffing policies were altered to allow native Martians and other space-born humans access to Base personnel rosters—access which the leaders of the Revolt utilized to advantage six years later.
[9.41] Each Base has a full-Strength Value of six.
[9.42] There are six Bases at Earth, two at Mars, and one each at Jupiter, Pallas, Ceres, Juno, and Vesta at the start of the game. Bases may be damaged, destroyed, repaired, or constructed.
[9.43] Whenever the defending Player controls three or more un-neutralized Bases at Earth or Mars, that Player may never include more than two Bases in the defending Strength Value total at any one time (see Case 9.46). Once two particular Bases have been designated as part of the total, no other Base may be included until one of the original two has incurred major damage (see Case 9.52). Once that occurs, the defender may freely count another Base as part of the defending Strength Value total (Exception: see Case 9.44).
[9.44] Whenever the defending Player controls two un-neutralized Bases at Earth, that Player may never include more than one Base at any one time in the defending Strength Value Total.
[9.45] Whenever a battle occurs at an Asteroid or Jupiter (which would actually be at Ganymede Station), the defending Player may freely include the value of all Friendly Bases in the defending Strength Value total.
[9.46] A Base which has incurred major damage (see Case 9.52) is considered to be neutralized. A Neutralized Base Marker is placed on top of the Base counter.
[9.47] The presence of an un-neutralized Friendly Base at a Planet or Asteroid precludes its capture (see Case 9.6), unless the controlling Player chooses to surrender. This may be done prior to any combat, only during the initial opportunity to withdraw. Once any combat has occured, a Player may never surrender. If a Player surrenders, no battle is considered to have taken place, and neither Morale Index incurs any effect aside from that normally caused by the loss or gain of control of an Asteroid or Planet.
[9.48] Bases may not utilize fighters or missiles (Exception: see Case 15.4).
[9.5] HOW DAMAGE IS INCURRED AND RECORDED ON THE FLEET STATUS CHART
Combat losses are given on the Tactical Abstract Combat Results Table in terms of percentages. Given the total Strength Value of a Player's ships, the Percentage Loss Table (9.29) yields the exact Strength Value to be lost. This loss must be apportioned among a Players’ participating ships and Bases and recorded on the Fleet Status Chart. Additionally, ships must refuel.
[9.51] The Player may apportion losses among Friendly ships and any Friendly Bases present in the Transit Track Box in any manner he desires (Exception: see Case 9.53).
[9.52] Any ship or Base reduced to or below one-half of its full Strength Value has incurred major damage (see Cases 9,22 and 9.41). Any ship or Base with major damage is not counted in computing the total Strength Value of all Friendly ships and Bases in the Transit Track Box. However, such ships or Bases may absorb further losses, up to their full Strength Value (see Case 9.53).
[9.53] A ship or Base can absorb a Strength Value loss up to its full Strength Value (only). Any ship or Base that has its Strength Value reduced to zero is considered destroyed and is removed from play. Missiles or fighters do not increase a ship's Strength Value for the purpose of absorbing losses.
[9.54] Losses are applied immediately. Ships and Bases that incur damage not amounting to major damage may continue to contribute their reduced Strength Value to the Strength Value total in any subsequent rolls on the Tactical Abstract Combat Results Table.
[9.55] Each ship and each Base in the game is listed on the Fleet Status Chart (see Case 6.4). Players should keep track of the current Strength Value of each ship and Base, as well as noting which ships are equipped with missiles or fighters (see Case 15.3).
[9.56] Depleted Strength Values of ships and Bases may be replenished. If a ship has incurred major damage (see Case 9.42), it must be serviced at a Friendly Planet or Asteroid during a Logistics and Maintenance Phase at the cost of one Logistics Point (see Case 15.3). A neutralized Base may be serviced at the cost of two Logistics Points. Any ships or Bases which have incurred combat losses not amounting to major damage automatically are repaired at the end of the Combat Phase.
[9.57] Players should note that Catapults are considered at the start of the game to have suffered major damage (see Cases 6.42, 15.35).
[9.6] CAPTURING PLANETS AND ASTEROIDS
At the end of the Combat Phase, no Friendly ships can be in any In Orbit Box containing Enemy ships or an un-neutralized Enemy Base (see Case 9.27). If, considering this requirement, a Player still has Friendly ships at the end of the Combat Phase in an In Orbit Transit Track Box corresponding to an Enemy-controlled Planet or Asteroid, that Planet or Asteroid is considered to be captured and the counter representing it on the Solar Display is flipped over. Barring Counter-revolt or re-capture, that Planet or Asteroid remains Friendly to the capturing Player for the remainder of the game. Any neutralized Base present in the Transit Track Box is captured along with the Planet or Asteroid.
[9.7] MORALE EFFECTS
The outcomes of battles, loss of ships, loss of Bases, and capture of Asteroids or Planets may affect the Morale Indices (see Cases 10.2 and 10.4). In any such instances, the Morale Index affected is adjusted immediately.
[9.8] FUEL CONSTRAINTS
For quick maneuvers and accelerations during battles, ships utilize auxiliary chemical engines, which have only limited fuel capacities.
[9.81] After having participated in one battle, ships of all types are out of fuel. That fact should be noted on the Fleet Status Chart. The out of fuel status is effective at the end of the Combat Phase in which the battle occurs.
[9.82] Ships that are out of fuel may not participate in combat. If in an Orbit Box containing Enemy ships that are neither out of fuel nor suffering major damage, any ships that are out of fuel must withdraw (see Case 9.1).
[9.83] Ships that are out of fuel may be replenished during the Logistics and Maintenance Phase at Friendly Planets or Asteroids (see Case 15.3).
[9.84] Ships out of fuel may be replenished during the Logistics and Maintenance Phase at Friendly Planets or Asteroids (see Case 15.3).
[9.9] STATUS OF CATAPULTS AS OF 1 JANUARY 2094
Unlike Miners and the so-called Transports (which were more like Ares Patrol ships), the Catapults were not normally equipped with lasers. Consequently, at the start of the game, they have no combat capacity. However, it would not be difficult to mount a laser in a Catapult, as the computer would be quite capable of aiming it, and plenty of spares were around. Hence, Catapults may easily gain combat capacity.
[9.91] At the start of the game, until serviced (see Case 9.92), all Catapults are treated as if they had major damage.
[9.92] During any Logistics and Maintenance Phase, Catapults may be fitted with lasers (“serviced”) at any Friendly Asteroid or Planet (see Case 15.35).
[10.0] MORALE INDICES AND VICTORY
COMMENTARY:
As the fortunes of war fluctuate between sides, the loyalties of both civilians and combatants are alternately strained and buttressed. In BattleFleet Mars, this ebb and flow of morale is of importance to both contending forces. Although the effects of morale on the Martian leadership—reflecting, as it does, a popular will—may seem at first glance greater than on the Ares Corporation Board of Directors, it is the morale on Earth and its persuasive effect on WORD that ultimately influences the outcome of the game. Accordingly, the morale levels of the populace on both Earth and Mars affect and react to the course of the conflict.
GENERAL RULE:
The “level of morale” on Earth is reflected by the Earth Morale Index (10.2). Martian morale is indicated on the Martian Morale Index (10.4). Morale levels are measured in terms of “Morale Points”. During the Combat Phase, the morale levels may be adjusted to reflect the repercussions of battles between Martian and Ares Corporation forces. During the Political Interaction Phase, the Ares Corporation Player and then the Martian Player each roll one die and obtain the result from the appropriate box of their respective Morale Effects Tables. Players may be referred to the Revolt Table (12.3), the Truce Table (13.4), or the Sabotage Table (14.2). Any necessary resolutions and the application of results are performed immediately. Should a Player's morale level fall low enough, that Player is in jeopardy of losing the game.
PROCEDURE:
The Earth and Martian Morale Indices are printed on the Solar Display. Each Index is composed of boxes marking the integers from zero to nine. Players always mark their current morale level on these Indices by placing their Index Markers in the appropriate boxes. One Index Marker marks the “one’s digit” of the value of the morale level; the other marks the “ten’s digit”. Any effects on a Player’s morale level are indicated on that Player’s Index by adjusting the Index Markers. (Thus, if a Player with a morale level of 54 incurred a loss of three Morale Points, that Player’s Index would be adjusted from 54 to 51.) Any morale level effects resulting from particular battles during the Combat Phase are applied on the Morale Indices immediately (see Case 9.7). All other morale level effects are incurred during the Political Interaction Phase. During that Phase, adjustments to the Morale Indices reflecting the control of certain points are made. Next, if a Truce is in effect, a roll is made on the Negotiations Table by the Martian Player (see 13.2). Then the Ares Corporation Player rolls on the Earth Morale Effects Table, utilizing the column corresponding to the box on the Earth Morale Index in which that Player's “tens digit” Index Marker is. Any adjustments and/or resolutions are performed immediately. Finally, the Martian Player rolls on the Martian Morale Effects Table, and any consequent adjustments and/or resolutions are performed immediately.
CASES:
[10.1] EARTH MORALE INDEX
The “morale” of the population of Earth vis a vis the conflict is not a straightforward matter. First of all, from the perspective of the average Earthman, the actions of the Martian leadership seem to comprise a particularly serious extension of the labor disputes that had been besetting Ares Corporation for years, and very little like any sort of Martian-Earth war. Furthermore, the attitude of the Earth population toward the totally autonomous Ares Corporation is ambivalent at best. As a profit-making institution which has effective control over a wide range of the supply and dynamics of the planet’s economy, it is natural that the Corporation would be so regarded, given even the best of public relations. So the initial mood of the Earth is one of general indifference tempered perhaps with a slight predilection to favor the rebels as the underdog taking on the Corporate Superpower. Martian propaganda, replete with promises of “free trade policies” and consequently lower prices, will aim to exploit this. Nevertheless, as the conflict is prolonged, eventually people will get riled when products begin disappearing from the shelves as a result of the Martian blockade, and inevitably this anger will be directed at the Martian leadership.
[10.11] The Earth Morale Index begins the game at a morale level of 55.
[10.12] During the Combat Phase, the Earth morale level is increased (or decreased) by 2 Morale Points if the Ares Corporation Player wins (loses) a battle involving a total of nine or fewer ships (see 9.27 or 16.42 for the definition of “winning a battle”). It is increased (decreased) by 4 Morale Points if the Corporation Player wins (loses) a battle in which ten to twenty ships are involved. It is increased (decreased) by 6 Morale Points if more than twenty ships are involved. Any such adjustments to the Morale Index are made immediately.
[10.13] During the Combat Phase, the Earth morale level is increased or decreased as the Corporation Player captures or loses control of an Asteroid (see Case 9.6). For each Asteroid captured by the Corporation Player, the Earth Morale Index is increased 2 Morale Points. For each Asteroid captured by the Martian Player, the Earth morale level is decreased by 4 Morale Points. Any such adjustments to the Morale Index are made immediately.
[10.14] During any Political Interaction Phase in which either Player is in control of all four Asteroids, the Earth morale level is affected. If the Corporation Player is in control of all four Asteroids, the Earth morale level is increased by 1 Morale Point; if the Martian Player is in control of all four asteroids, the Earth morale level is decreased by 2 Morale Points. The determination of control and any consequent adjustments are made once per Game-Turn, only at the very start of the Political Interaction Phase (see Procedure).
[10.15] Starting with the fifth Game-Turn, the Earth Morale level is increased one Morale Point at the beginning of each Political Interaction Phase. Starting with the eighth Game-Turn, the Earth morale level is increased by two Morale Points at the beginning of each Political Interaction Phase. Starting with the thirteenth Game-Turn, this premium is cut back to one Morale Point per Political Interaction Phase and is continued at this rate until the end of the game.
[10.16] There are six Ares Corporation Bases in orbit around the Earth (see Case 9.4). If these are destroyed by the Martian Player, the Earth morale level is affected according to the following schedule:
- First Base destroyed: -1 Morale Point
- Second Base destroyed: +1
- Third Base destroyed: -2
- Fourth Base destroyed: -3
- Fifth Base destroyed: -4
- Sixth Base destroyed: -6
[10.2] EARTH MORALE EFFECTS TABLE (see Solar Display)
[10.3] MARTIAN MORALE INDEX
Martian “morale”’ is, in general, a lot more sensitive to the fortunes of war than Earth’s. The people living in space are much more involved in the conflict and have much more at stake than the average person living on Earth. This is an advantage in that the Martian morale level starts out rather high, but it is also a disadvantage, in that the slightest set-back is likely to affect the Martian mood unfavorably (although, inversely, modest victories have exhilarating effects). The Cabal represent the most militant and extreme view on Mars, although this does not put it far out in front of the rest of the population. (And, the population of Ganymede Station is even more virulently anti-Corporation, on the average, than the Cabal.) Hence Mars (as well as Jupiter) can never Counter-Revolt.
[10.31] The Martian Morale Index begins the game at a morale level of 77.
[10.32] During the Combat Phase, the Martian morale level is increased (or decreased) by 3 Morale Points if the Martian Player wins (loses) a battle involving a total of nine or fewer ships (see Cases 9.27 or 16.42). It is increased (decreased) by 6 Morale Points if the Player wins (loses) a battle in which ten to twenty ships are involved. It is increased (decreased) by 9 Morale Points if more than twenty ships are involved. Any such adjustments to the Morale Index are made immediately.
[10.33] During the Combat Phase, the Martian morale level is increased or decreased if the Martian Player captures or loses control of an Asteroid (see Case 9.6). For each Asteroid captured by the Martian Player, the Martian Morale Index is increased 3 Morale Points. For each Asteroid captured by the Corporation Player, the Martian morale level is decreased by 6 Morale Points. Any such adjustments to the Morale Index are made immediately.
[10.34] During any Political Interaction Phase in which either Player is in control of all four Asteroids, the Martian morale level is affected. If the Corporation Player is in control of all four Asteroids, the Martian morale level is decreased by 3 Morale Points; if the Martian Player is in control of all four Asteroids, the Martian morale level is increased by 2 Morale Points. The determination of control and any consequent adjustments are made once per Game-Turn, only at the very start of the Political Interaction Phase (see Procedure).
[10.35] For any battle during the Combat Phase in which the Martian Player loses five or more ships (totally destroyed or captured), regardless of the outcome of the battle, the Martian morale level is decreased by two Morale Points. This effect is in addition to any other effects resulting from the battle. The effect is applied immediately.
[10.36] There are six Corporation Bases in orbit around the Earth (see Case 9.4). If these are destroyed by the Martian Player, the Martian morale level is affected according to the following schedule:
- First Base destroyed: +5 Morale Points
- Second Base destroyed: +3
- Third Base destroyed: +4
- Fourth Base destroyed: +5
- Fifth Base destroyed: +7
- Sixth Base destroyed: +10
[10.4] MARTIAN MORALE EFFECTS TABLE (see Solar Display)
[10.5] HOW TO LOSE THE GAME
A Player loses the game (and the opposing Player has won) whenever that Player obtains an “L” result on the Morale Effects Table. In essence, this reflects the fact that support for continuation of the conflict has sunk so low that it cannot be continued. The game ends immediately whenever one of the Players obtains such a result.
[10.6] SUMMARY OF MORALE INDEX ADJUSTMENTS (see Solar Display)
[11.0] AGENTS AND POLITICAL INTERACTIONS
COMMENTARY:
BattleFleet Mars is not concerned with a conflict which can be characterized as “total war.” Neither side is interested in the wholesale slaughter of the inhabitants of either Planet; nor is it in the long-range interests of either side to destroy facilities on Mars or the Asteroid Bases. Naturally, the Ares Corporation considers all ships and Bases to be its property, and the Corporation recognizes the necessity of having intensively trained people present to run things. The Corporation must aim at somehow quelling the rebellion and returning things to normal. The Martians, by the same token, intend to remain alive and working on Mars—only for themselves rather than for Ares. This is the sort of conflict that fosters a high degree of political activity in addition to military clashes. The significance of such activity is considerably widened in scope by the World Organization for Resource Development taking an equivocal stance vis a vis the two combatants. Potentially, action by WORD can be decisive, and both contending forces must act with a view to how their actions will be viewed to that organization. Two factors will affect the capacity of either side to exercise its political will: 1) the pure “power” that side derives from the current balance of forces; and 2) the efficacy with which that potential power is projected or represented vis a vis particular situations. The first is merely a reflection of the efforts of all involved in the struggle; the second is a function of the abilities of individual persons to convince, cajole, catalyze, or calm other people.
GENERAL RULE:
Each Player receives a certain number of Political Points each Game-Turn. These may be expended to influence the outcome of die rolls on the Morale Effects Table, the Assassination Table, the Revolt Table, the Sabotage Table, the Truce Table, and the Negotiations Table. Political Points may be expended only through the medium of agents. Each Player receives a number of agents—charismatic, resourceful, competent individuals—who may be deployed anywhere in the System (see Case 6.1) and moved around more or less freely. Each agent has a Political Power Value which indicates the number of Political Points that that agent may expend in one turn. Agents may be assassinated.
PROCEDURE:
During the Ship Transit Allocation Phase, agents may embark or debark from a Friendly Ship to a Friendly Base or other Friendly Ship or vice versa. During the Ship Movement Phase, agents embarked on a ship are considered to move with the ship. During the Political Interaction Phase (only), each Player may expend Political Points. In the course of executing this Phase, die rolls are made first on the Earth Morale Effects Table (10.2), then, possibly, on the Truce Table (13.4), or Assassination Table (11.47), then on the Martian Morale Effects Table (10.4), and finally (if called for) on the Sabotage Table (14.2) or the Revolt Table (12.3) (Exception: see 13.2). Before each die roll, the Players declare if they will expend Political Points to adjust the roll. If neither declares that Political Points will be expended, the die is rolled and the unadjusted result stands. If one Player (only) declares that Political Points will be expended, that Player announces orally the number of Points to be expended. The die is rolled and the result accordingly adjusted. Any agent utilized to expend Political Points is flipped over. If both Players declare that they each will expend Political Points, the Players decide secretly and then simultaneously announce the number of Points to be expended. Each Player secretly takes in hand a Vector Chit (or number of Vector Chits) with a printed Acceleration Value equal to the number of Points to be expended. Players place their closed fists on the table and then simultaneously unclench them to reveal their allocations. The die is rolled and the result adjusted accordingly. Any agents utilized to expend the Political Points are flipped over. At the end of the Logistics and Maintenance Phase (see Section 5.0), each Player adjusts his Political Points Track so that it indicates the number of Political Points available to be expended during the next Game-Turn. All inverted agent counters are flipped face-up.
CASES:
[11.1] CHARACTERISTICS OF AGENTS
[11.11] The Corporation Player receives nine agents. One of these has a Political Point Value (PPV) of two; the remaining eight have a PPV of one each. The Martian Player receives four agents with respective PPV's of four, three, two, and two.
[11.12] The PPV of an agent is the maximum number of Political Points which may be expended by that agent in any one Game-Turn. An agent may expend any number of Political Points during the Political Interaction Phase up to its PPV.
[11.13] An agent may expend Political Points only once in the course of each Game-Turn (i.e., only one die roll may be affected by a given agent). Whenever an agent expends one or more Political Points, that agent is inverted on the Solar Display to indicate that it can not be utilized again that Game-Turn.
[11.14] An agent may expend Political Points to affect a die roll only if that agent is “eligible” to influence that particular die roll (see Case 11.37).
[11.15] Any number of eligible agents may be used to affect a particular die roll so long as sufficient Political Points are available for them to expend.
[11.16] Agents may freely operate on Enemy controlled Planets and/or Asteroids. Agents are, however, vulnerable to Assassination no matter where they are (see Case 11.4).
[11.17] Agents never have any effect on combat resolutions.
[11.2] HOW TO MOVE AGENTS
Agents operate “on the ground” (on Planets or within Bases), They may not move from one to another of their own accord, but may be transported via Friendly Ship. Hence, agents are either debarked (on a Planet or Asteroid) or embarked (on a ship).
[11.21] Agents deployed on the Solar Display are considered debarked upon a Planet or an Asteroid. Agent counters can only be deployed on the Solar Display in Ship Transit Boxes indicating they are “at” a Planet or Asteroid.
[11.22] Counters of agents embarked on a ship are placed under the appropriate ship counter off the Solar Display along with the counters representing the other ships (if any) of that Task Force. The precise ship which an embarked agent is aboard must be designated.
[11.23] Any number of agents may embark on a single ship.
[11.24] If a ship transporting an agent is involved in combat, the owning Player need not reveal that fact to the opposing Player. However, if a ship carrying an agent is captured or lost, the agent is considered to have been caught or killed (see Case 11.46), and that must be revealed to the Opposing Player.
[11.25] During the Ship Transit Allocation Phase, agents may embark or debark to/from a Friendly Ship from/to a Friendly Planet or Asteroid, or to another Friendly ship in the same Task Force. Simply deploy on, or remove from the Solar Display, the agent counter as appropriate. Agents may not embark from or debark to an Enemy Planet or Asteroid (Exception: see Case 13.11).
[11.3] THE ORIGIN OF POLITICAL POINTS AND HOW THEY CAN BE USED
The Political Point is an expression of political strength. Political strength is, of course, a subjective reflection of objective “iron and blood” power relationships. The subjective element means, therefore, that political strength is directly related to what people believe, and only indirectly related to numbers of “rifles” and other concrete circumstances.
[11.31] Every Game-Turn, each Player can expend any number of Political Points up to one-tenth the value of his Morale Level, fractions being discounted. At the start of each Political Interaction Phase, each Player receives a number of Political Points equal to the ten’s digit of his current Morale Level. These are the Points which can be expended in the following Game-Turn.
[11.32] The number of Political Points available to each Player are kept track of on the Political Points Track (11.39). At the start of the Political Interaction Phase, each Player places his Political Points Marker on the box containing the number corresponding to the total Points available to him in that Phase. As points are expended, the Markers are adjusted on the Political Points Track.
[11.33] Political Points can be utilized to influence rolls on the Earth Morale Effects Table (10.2), the Truce Table (13.4), the Negotiations Table (13.5), the Assassination Table (11.47), the Martian Morale Effects Table (10.4), the Sabotage Table (14.2), and the Revolt Table (12.3). The number of Political Points to be utilized must be revealed prior to the die roll (see Section 11.0, Procedure). Note: once a Player announces that Political Points will be utilized, he must expend a minimum of one Political Point on that particular die roll.
[11.34] The application of each Political Point to a die roll resolution by the Corporation Player always adds one to a die roll.
[11.35] The application of each Political Point to a die roll resolution by the Martian Player decreases the die roll by one.
[11.36] Either Player may apply one or more Political Points to any die roll resolution on the Tables listed in Case 11.33, providing: a) that Player has one or more eligible agents present to expend the Point(s) (see Case 11.37), and b) that Player has the Political Points to expend.
[11.37] In order to expend Political Points to affect a particular die roll, an agent must be “eligible.” An agent is “eligible” to affect a roll if the agent's counter is deployed on the Solar Display in the appropriate Ship Transit Box. An agent is eligible to influence die rolls on the Earth Morale Effects Table (10.2), the Truce Table (13.4), and the Sabotage Table (14.2) if that agent’s counter is deployed in the Earth “in orbit” Ship Transit Box. An agent is eligible to influence die rolls on the Mars Morale Effects Table (10.4) if that agent’s counter is deployed in the “in orbit” Ship Transit Box of the Mars Ship Transit Table. An agent may influence a Revolt Table roll for a particular Asteroid or Planet if that agent is at the Asteroid or Planet. An agent deployed on the Solar Display is eligible to influence a die roll on the Assassination Table if the assassination attempt is against any agent in the same Ship Transit Box. An agent deployed on the Solar Display is eligible to influence a die roll on the Negotiations Table (13.5) if the Agent's counter is deployed in the Ship Transit Box corresponding to the site of the negotiations (see 13.21).
[11.38] Political Power Points may not be accumulated from Game-Turn to Game-Turn. Any Political Points not expended by the end of the Political Interaction Phase are lost and are not added to those accrued by each Player in the following Game-Turn.
[11.39] Political Points Track (see Solar Display)
[11.4] HOW AGENTS MAY BE ASSASSINATED AND HOW KILLED AGENTS ARE REPLACED
[11.41] Whenever the Corporation Player obtains an “Ares assassin attempt” result on the Earth Morale Effects Table, an assassination against a Martian agent may be attempted.
[11.42] Whenever the Martian Player obtains a “Martian assassin attempt” result on the Martian Morale Effects Table, an assassination against an Ares agent may be attempted.
[11.43] A Player who is granted the option to attempt an assassination by the Morale Effects Table may exercise that option by immediately rolling on the Assassination Table (11.47). Any Enemy agent deployed on the Solar Display may be selected as a target. Agents embarked in ships may not be assassinated.
[11.44] A Player may pass up an opportunity to attempt an Assassination by foregoing the roll on the Assassination Table.
[11.45] If a Player chooses to attempt an Assassination, before the roll is made, the target of the Assassination must be revealed. Any agents deployed in the Ship Transit Box which contains the agent who is the target (including that agent) may apply Political Points to influence the die roll on the Assassination Table (see Case 11.0, Procedure).
[11.46] Any agent who is killed, whether as a result of assassination or combat loss of a ship, or who is caught in a captured ship, is removed from the game and replaced during the immediately subsequent Logistics and Maintenance Phase with an agent with a PPV of “one”. Removed Corporation agents are replaced on Earth; removed Martian agents are replaced on Mars. These agents are deployed in the appropriate Ship Transit Boxes.
[11.47] Assassination Table (see Solar Display)
[12.0] HOW TO CONDUCT REVOLTS AND COUNTER-REVOLTS
COMMENTARY:
In January 2094, there were nearly 175,000 human beings who were not on the surface of the Earth.
The majority of these were established residents of Mars. Nearly 60,000 lived, or at least based their lives in the northern Polar settlement of Olympia Station. This community, established as a permanent settlement by the Ares Corporation in the early fifties, had gradually at first, then swiftly, grown far larger than intended. The solitary “mass identity” on a bleak and breathless planet, and the nerve center for the most extensive mining/transport operation in the history of humankind, had by the early 2090's a population composed of over 50% “native Martians” (humans born and raised on Mars), The origins of the initial settlers were widely diverse in nationality and background, although all were highly intelligent, highly trained people. Commonality of interests and living situation tended to balance the diversity, and Olympia Station developed a strong sense of self-importance, uniqueness, and vitality. It was clearly the focal point for the genesis of an independent “Martian” perspective, and as such, was both the “cradle of and the center for the independence movement.
Other space settlements included the Ganymede HydroScoop Station, the four mining Bases which had been built in the vicinity of the larger Asteroids —Ceres, Pallas, Juno, and Vesta—the space factories in Earth orbit and several small facilities spread throughout the system. Ganymede Station, which supplied the fusion generators of Mars and the other space settlements with fuel, was populated mostly with young former Martian colonists who tended to be even more dogmatically anti-Corporation than the people living on Mars. The mining Bases, austere, semi-permanent installations with small transient populations, were staffed largely by rootless professional space persons who were significantly more ambivalent toward the Corporation, and toward the Martian revolutionaries, than were the inhabitants of Ganymede.
One behind-the-scenes preliminary to the Revolt itself was the long-standing series of attempts by the Corporation to mitigate the effects of the rampant anti-company sentiment among native Martians by juggling work assignments and favoring Earthborn persons for positions of responsibility at the Bases and on the ships—particularly on the transports. Naturally, this was resisted and resented by the Martians, and became an on-going source of friction. In the end, the MFT/Cabal plotters were successful in placing enough key people in the right places to ensure that on 1 January 2094, the majority of Bases and most of the Ares Corporation space fleet would follow the Martian lead.
GENERAL RULE:
The Revolt Table (12.3) is utilized at the beginning of the game to determine the allegiance of the Asteroids and each of the forty-four ships (excluding Transports) comprising the Ares Corporation fleet. It may be utilized again later in the game to determine the outcome of any Counter-revolts called for by the Martian Morale Effects Table.
PROCEDURE:
To use the Revolt Table, roll one die once for each planet and/or Base. Start with the closest to the Sun and proceed outward toward Jupiter. Adjust the result as appropriate to take into account any expenditure of Political Points by either of the Players. Apply any effects immediately.
CASES:
[12.1] INITIAL USE OF THE REVOLT TABLE AT START OF GAME
This utilization of the Result Table is a preliminary to play in BattleFleet Mars and is outside the pervue of the Sequence of Play (see Section 6.0, How to Start the Game).
[12.2] HOW TO RESOLVE COUNTER-REVOLTS
If Martian morale sinks low enough, Counter-revolts may be triggered during the Political Interaction Phase on the Martian Morale Effects Table (10.4).
[12.21] Only Asteroids Friendly to the Martian Player may counter-revolt. Counter-revolts never affect Earth, Mars, Jupiter, or any Asteroid Friendly to the Ares Corporation Player.
[12.22] When a Counter-revolt is called for, one die is rolled for each Asteroid Friendly to the Martian Player. An “L” result indicates that the Counter-revolt at the Base has succeeded and the Base returns to the control of the Ares Corporation Player (and is considered Friendly to that Player for the remainder of the game, barring capture). An “R” result indicates that the Counter-revolt has failed, and the Base remains Friendly to the Martian Player.
[12.23] Counter-revolt die rolls may be influenced by the expenditure of Political Points. To expend Political Points, a Player must have an eligible agent present (see Case 11.37).
[12.24] Counter-revolts affect the Morale Levels of both Players. An unsuccessful Counter-revolt adds one Morale Point to both the Earth and the Martian Morale indices; a successful Counter-revolt adds two Points to the Earth Morale Index and subtracts five points from the Martian Morale Index. Gains and losses are cumulative. For example, if there were three Asteroid Bases Friendly to the Martian Player at the start of the Political Interaction Phase and one staged a successful Counter-revolt while the other two remained in the Martian camp, the Martial Morale Level would decrease three points while the Earth Morale Level would increase four points.
[12.25] Ships are never affected in any way by Counter-revolts.
[12.3] REVOLT TABLE (see Solar Display)
[13.0] TRUCES AND NEGOTIATIONS
COMMENTARY:
The main issue over which the Ares Corporation and its erstwhile employees are fighting is of great import to the peoples of Earth—namely, how and under what terms will raw materials be extracted from the Solar System and shipped to resource-bled Earth for utilization by the main mass of humanity? WORD, having continued the historical pattern of deference to the Ares Corporation vis a vis the management of inter-Solar affairs, is not in any position to impose a settlement of the dispute, but it is clearly in the interests of WORD that an early settlement be made. Hence, although the Martians regard WORD as inherently partial to the Corporation as the representative of the status quo, the Earth body, having actively arbitrated disputes in the past, is likely to make persistent attempts to end the fighting.
GENERAL RULE:
Truces are considered to be declared by WORD. A Truce “is declared” on a result of “Truce” on the Earth Morale Effects Table. Under certain circumstances, a Truce may be declined by one or the other Player, in which case it does not go into effect. If a Truce does go into effect, neither Player may initiate combat, and there are strictures on movement. A Truce may be ended either through Negotiation or through the machinations of the Morale Effects Tables. Additionally, either side may break a Truce. The occurance of a Truce and/or its ending may affect the morale levels of either or both Players.
PROCEDURE:
A Truce is “declared” when a “Truce” result is obtained on the Earth Morale Effects Table. The Corporation Player immediately rolls on the Truce Table (13.4). If either Player has the option to decline the Truce, it must be exercised prior to the Martian Player’s roll on the Martian Morale Effects Table or the Truce will go into effect. Once a Truce goes into effect, Players are bound by its strictures. Players are bound by a Truce until it is ended by Negotiation or due to a result on one of the Morale Effects Tables, or until one of them decides to break it. If the Truce is not declined, the site of negotiations is determined immediately. Starting with the second Political Interaction Phase following the one in which an operative Truce was declared (i.e., two full Game-Turns after the Truce was declared), Negotiations ensue. Prior to the roll on the Earth Morale Effects Table, the Martian Player rolls one die and consults the Negotiation Table to determine whether the Truce will be ended by negotiations or continue. A Truce may be broken by either Player.
CASES:
[13.1] TRUCE TERMS AND STRICTURES
Beginning with the Game-Turn following the one in which a Truce is declared, certain special conditions apply. These conditions remain in effect until such time as the Truce is ended. Should a Player violate one or more of these conditions, that Player has Broken the Truce (see Case 13.3).
[13.11] So long as a Truce is operative, agents may freely embark from and debark to Enemy Planets and Asteroids during the Ship Transit Allocation Phase (see Case 11.2). This may only be done so long as the Truce remains in effect (Exception: see Case 13.24).
[13.12] During the Movement Phase, no Friendly ship may arrive at an Enemy Asteroid or Planet (i.e., may be moved into the Ship Transit Box indicating it is “at'’ that Asteroid or Planet) so long as the Truce is operative. (Exception: see Case 13.13.) Note: ships may be “in transit’ to a particular Enemy Asteroid or Planet during a Truce; they may not arrive there.
[13.13] So long as a Truce is in effect, a Friendly Ship containing one or more agents may always arrive at an Enemy Asteroid or Planet for the purpose of debarking the agent(s). The ship may remain at that Asteroid or Planet (while the Truce is in effect) as long as the agent is debarked. There is no limit to the number of ships which may debark agents to a particular Asteroid or Planet (other than the number of agents).
[13.14] Neither Player may initiate combat during the Combat Phase while a Truce is in effect.
[13.15] During a Game-Turn in which a Truce is in effect, “WORD supports Ares,” “WORD neutrality,” and “Sabotage attempt” results on the Morale Effects Tables are treated as “no effect.”
[13.16] As long as a Truce is in effect, no agent at the site of Negotiations may be the target of an assassination attempt.
[13.2] HOW NEGOTIATIONS ARE CONDUCTED
Negotiations begin on the second Game-Turn after a Truce is declared. Beginning that Game-Turn, and continuing each turn thereafter as long as the Truce is in effect, the Martian Player rolls one die at the start of the Political Interaction Phase and consults the Negotiation Table, adjusting the die roll as appropriate to account for any expenditure of Political Points by the Players.
[13.21] Whenever a Player is granted the option to select the Negotiation Site for a Truce by the Truce Table resolution, the Player must select the site immediately (before the Martian Player’s roll on the Martian Morale Effects Table that Political Interaction Phase). Earth, Mars, or any one of the four Asteroids may be selected as a Negotiation Site by either Player.
[13.22] Only agents deployed on the Solar Display in the Ship Transit Box corresponding to the Negotiation Site are eligible to be utilized to expend Political Points to affect Negotiation Table die rolls (see Case 11.37).
[13.23] Whenever a result obtained on the Negotiation Table grants a Player the option to end or extend a Truce, the Player must decide immediately (before the Corporation Player’s roll on the Earth Morale Effects Table). If the Truce is extended, it remains in full effect until terminated in some manner. If the Truce is ended, all special conditions listed in Case 13.1 are mitigated instantly (Exception: see Case 13.24).
[13.24] Whenever a Truce is ended through a Negotiation Table result, Friendly agents may be embarked from an Enemy Planet or Asteroid which was the Negotiation site during the immediately subsequent Ship Transit Allocation Phase (only). Note that this is an exception to Cases 13.11 and 13.23.
[13.25] There are no gains or losses of Morale Points for either Player due to a Truce having been ended by means of a Negotiation Table result.
[13.3] EFFECTS OF BREAKING A TRUCE
A Truce is considered to be “broken” by a Player who violates one or more of the special conditions outlined in Case 13.1. Both Players may break a Truce at any time.
[13.31] If the Martian Player breaks a Truce, the Earth Morale Level is increased six Morale Points.
[13.32] If the Corporation breaks a Truce, the Martian Morale Level is increased four Morale Points, and the Earth Morale Level is decreased two points.
[13.33] Should both Players simultaneously break a Truce (by moving ships to an Enemy Asteroid or Planet in the same Movement Phase, for example), there are no Morale Level effects.
[13.34] Once a Player has broken a Truce, the other Player always has the option to decline any subsequent Truce declared, after the die roll on the Truce Table has been made. This is true for both Players if both have broken one or more Truces.
[13.4] TRUCE TABLE (see Solar Display)
[13.5] NEGOTIATION TABLE (see Solar Display)
[14.0] SABOTAGE
COMMENTARY:
The Martian independence movement was not without support on Earth. Many people including several highly-placed persons in the World Organization for Resource Development who were used to taking a dim view of the pure concentrated power of Ares Corporation, were acutely ambivalent about the conflict (of course, since the very existence of the struggle threatened the status quo of which they were a privileged part, these people had reasons to be rooting for a quick Corporation triumph). More loyally committed to the Martian cause was the high-brow, fashionably anti-establishment set, which adopted the under-dog Martian cause as its own. For the most part, these people limited themselves to passive protests against WORD neutrality and sporadically effective propagandizing. They were helped in the latter effort by clever Martian promises to cut raw material costs and to deliver manufactured goods directly to Earth cheaper than the Ares Corporation. However, there also existed a radical fringe of anti-social misfits who latched on to the Martian cause, and who were perfectly willing and able to propagate their viewpoint through violence. Of course, efforts to sabotage a space factory are bound to be generally unrewarding, given the relative ease with which the operator can enforce strict security and given the fact that Ares Corporation also controlled the means of transport from the surface of the Earth to its orbital facilities. Therefore, sabotage is a desperate maneuver, likely to be encouraged by the Martians only if they are doing poorly otherwise. Not that the Martian leaders had any real control over the saboteurs, anyway...
GENERAL RULE:
Sabotage consists of Earth-based attempts by sympathizers of the Martian cause to debilitate Ares Corporation's productive capacity. Sabotage attempts occur during the Political Interaction Phase on the roll of a “Sabotage attempt” on the Martian Morale Effects Table. Players may apply Political Points to affect die rolls on the Sabotage Table. The Sabotage Table results may affect the Morale Indices.
PROCEDURE:
Immediately after a “Sabotage attempt” result has been obtained on the Martian Morale Effects Table, according to the Procedure described in Rules Section 8.0, Players declare whether any Political Points will be expended to influence the results of the die roll. The Martian Player must then roll the die, adjusting the result to account for any expenditure of Political Points. The results are applied immediately.
[14.1] HOW TO PERFORM SABOTAGE
[14.11] Only agents in the “in orbit” Transit Track Box on the Earth Ship Transit Track may be utilized to influence a Sabotage Table die roll (see Case 11.37).
[14.12] A “Sabotage attempt” result which occurs during any Game-Turn in which a Truce is in effect is ignored (see Case 13.15).
[14.13] Rolls on the Sabotage Table are mandatory; when a “Sabotage attempt” result is obtained on the Martian Morale Effects Table, the Martian Player must resolve the Sabotage attempt (Exception: see Case 14.12).
[14.2] SABOTAGE TABLE (see Solar Display)
[15.0] PRODUCTION AND LOGISTICS
COMMENTARY:
The economic foundations of the Ares Corporation are in outline not unlike those which upheld the 17th and 18th Century entrepeneurs. In essence, Ares is a monopoly importer of highly valued commodities not otherwise available on the domestic market. It is less a quasi-official extension of WORD, perhaps, than WORD is of it, but the principle of governmental sanction still pertains. Basically, Ares has a monopoly on access to raw materials. The Corporation pays its employees (most of whom live in space or Mars) to extract these raw materials, transport them to Earth orbit, and fashion them into marketable goods in space factories. The significance of all this for the leaders of the revolt is that, with the main concentration of Ares factories secure in Earth orbit, the Martians have no immediate means of producing much of anything, particularly in terms of combat ships. While the colonies are essentially self-sufficient, and unlimited energy is available via conversion of hydrogen lifted from Jupiter by the HydroScoop based at Ganymede, the Martians can hold their own and service what ships they have from available spare parts stocks. Given technical expertise and time, they can eventually develop a productive capacity of their own. Technical know-how is present in abundance, but time is problematical. In short, the Martians have the raw materials, but no way to use them.
Ares is faced with the exact inverse. The vast bulk of all mineral resources used by the Corporation are from the Asteroid belt, and, to a lesser extent, from Luna and Mars itself. As long as the Martians control the Asteroids and the bulk of the catapult fleet, the Ares space factories are starved for input. Ares has the capacity to produce enough new ships to sweep BattleFleet Mars from the system...if it can only gain access to significant raw materials.
GENERAL RULE:
Damaged ships and Bases may be repaired, and new ships and Bases may be produced with the expenditure of Logistics Points. Logistics Points are accrued by a Player every Game-Turn, based upon the number of Asteroids controlled and whether ships are being deployed to obtain them. Logistics Points may be accrued from Game-Turn to Game-Turn. Missiles and fighters may also be produced under certain circumstances, and ships may be supplied with them as well as with fuel for their maneuvering (chemical) engines.
PROCEDURE:
At the start of the Logistics and Maintenance Phase, any ship or Base counters on the Production Track are advanced one box along the Track. Then each Player adjusts his Logistics points marker on the Logistics Points Available Track to reflect any additional Logistics Points he has accrued that Game-Turn. During the course of the Logistics and Maintenance Phase, each Player may expend Logistics Points to construct new ships or Bases, to service ships with major damage (see Case 9.52 or 18.11) or neutralized Bases (see Case 9.46 or 16.43). For each expenditure, Players reduce the number of. Logistics Points indicated on the Logistics Points Available Track by a like amount. Additionally, ships may be provided with fuel, missiles, and/or fighters at no expenditure of Logistics Points.
CASES:
[15.1] HOW LOGISTICS POINTS ARE ACCRUED
Players receive Logistics Points at the beginning of the Logistics and Maintenance Phase. For each Friendly Asteroid that is “on line,” a Player adds three Logistics Points to his total as indicated on the Logistics Points Available Track.
[15.11] A Friendly Asteroid is considered on line if the following criteria are fulfilled: 1) there must be two friendly miners and one friendly catapult at the Asteroid (i.e., in the “in orbit” Transit Track Box of the Asteroid’s Ship Transit Track); 2) there must be at least one catapult at the Player’s home Planet for every “on line” Asteroid. (The Martian Player’s home planet is Mars, the Ares Corporation Player’s is Earth).
[15.12] The second criteria implies that no more Asteroids may be considered “on line” than there are catapults at the home Planet. If only one catapult is at Earth, no more than one Asteroid may be considered “on line” to the Ares Player.
[15.13] If Mars is Friendly to the Martian Player, two Logistics Points accrue to the Martian Player at the beginning of the Logistics and Maintenance Phase, in addition to any received from the Asteroids.
[15.14] WORD may grant the Ares Corporation Logistics Points from time to time (see Case 10.6).
[15.15] Although Players may accrue Logistics Points from Game-Turn to Game-Turn, no Player may ever have more than sixteen Logistics Points on the Logistics Points and Production Track. If a Player's Logistics Points Marker indicates that he has sixteen Logistics Points stored on the Logistics Points Available Track, and he accrues further points—new points are considered lost.
[15.2] PRODUCTION OF SHIPS AND BASES
Production requires time and Logistics Points. After the Players have accrued any Logistics Points that they are eligible to receive, each may expend points on ship or Base production up to their Production Capacity.
[15.21] Each ship and Base has a cost in Logistics Points and Production Time in Game-Turns (see Production Costs on Production Track). Whenever Logistics Points are spent on a ship or Base, its counter is placed on the box on the Production Track with the number corresponding to the number of Game-Turns in its Production Time.
[15.22] At the beginning of each Logistics and Maintenance Phase, counters on the Production Track are moved one box along the Track to the box with the lower number. Any counter advanced to the “zero”’ Box is deployed on the Solar Display. Ships are deployed at Earth (if produced by the Ares Corporation Player) or at Mars (if produced by the Martian Player). (Exception: see Case 15.25). Bases are deployed at any Friendly Planet or Asteroid,
[15.23] The Ares Corporation Player's Production Capacity is twelve Logistics Points. The Ares Corporation Player may never expend more than twelve Logistics Points in any one Logistics and Maintenance Phase.
[15.24] The Martian Player’s Production Capacity varies according to the following schedule:
- Game-Turns 1-5: 2
- Game-Turns 6-10: 3
- Game-Turns 11-15: 4
- Game-Turns 16-23: 5
- Game-Turn 24 and after: 7
In any one Logistics and Maintenance Phase, the Martian Player may expend up to but never more Logistics Points than the current Martian Product- tion Capacity (Exception: see Case 15.25).
[15.25] In order to expend any Logistics Points—or in order to continue production of any ship or Base on the Production Track—during a Logistics and Maintenance Phase, the Martians must have one catapult each in the “in orbit” Boxes of both the Mars and Jupiter Ship Transit Tracks. These catapults are in addition to those required by Case 15.11. If any ship or Base is already on the Production Track and, for instance, the required catapult is not at Jupiter during a Logistics and Maintenance Phase, that ship or Base remains in the same Production Track Box until the requirement is again met.
[15.3] RESUPPLY AND SERVICING
OF SHIPS AND BASES Damaged ships and Bases may be serviced and any ship or Base may be re-supplied with missiles, fighters and/or fuel at any Friendly Asteroid or Planet at no cost in Logistics Points. After the Players have accrued any Logistics Points that they are eligible to receive, each may re-supply any eligible ships or expend Logistics Points to service damaged ships.
[15.31] One Logistics Point must be expended for each ship with major damage to service it. The ship must be in an “in orbit” Box on a Ship Transit Track corresponding to a Friendly Planet or Asteroid. There is no limit to the number of ships which may be serviced at any one Asteroid or Planet other than the overall restrictions on the expenditure of Logistics Points. The fact that a ship has been serviced should be noted on the Fleet Status Chart.
[15.32] At any Friendly Asteroid or Planet, Martian-controlled ships may be supplied with fuel and/or fighters. Exception: no Martian ship may be supplied with fighters prior to the fifth Game-Turn. The fact that a ship has been supplied with fighters should be noted on the Fleet Status Chart.
[15.33] At any Friendly Asteroid or Planet, Corporation-controlled ships may be supplied with fuel and/or missiles. Exception: no Corporation ship may be supplied with missiles during the Logistics and Maintenance Phase of the first Game-Turn. The fact that a ship has been supplied with missiles should be noted on the Fleet Status Chart.
[15.34] Two Logistics Points must be expended for each neutralized Base that is serviced. The fact that a neutralized Base has been serviced should be noted on the Fleet Status Chart. Neutralized Bases may be serviced only at Friendly Planets or Asteroids.
[15.35] At the start of the game, all Catapults are considered to have “major damage” (see Case 9.42) or to have “destroyed Laser Strength” (see Case 21.22). However, they may be “serviced” (fitted with lasers, actually) at any Friendly Planet or Asteroid during any subsequent Logistics and Maintenance Phase at no cost in Logistics Points (Exception to Case 15.31). This instance is the only one in which “major damage” may be serviced at no cost in Logistics Points.
[15.36] Ares Corporation-controlled ships may not be supplied with fighters, and Martian-controlled ships may not be supplied with missiles in the Strategic Game.
[15.4] FURTHER UTILIZATION OF FIGHTERS AND MISSILES [Tactical Game Sequence only]
When the Tactical Game Sequence is employed by the Players to resolve combat, there is a significant distinction in the characteristics of fighters and missiles that is not reflected in the Tactical Abstract Combat System. Therefore, it is significant that once utilized by one side, these weapons can be acquired by the other. Furthermore, Bases may utilize fighters and/or missiles.
[15.41] At a certain point during the game (see Case 15.42), the Ares Corporation Player may begin supplying Friendly ships with fighters in precisely the same way as they are supplied with missiles and fuel during the Logistics and Maintenance Phase.
[15.42] Ares Corporation controlled ships may be supplied with fighters beginning in the third Game-Turn after the Ares Corporation Player has won a battle during which the Martian Player launched one or more fighters (see Case 16.42).
[15.43] At a certain point during the game (see Case 15.44), the Martian Player may begin supplying Friendly ships with missiles during the Logistics and Maintenance Phase in the same manner in which they are supplied with fighters and fuel.
[15.44] Ships controlled by the Martian Player may be supplied with missiles beginning in the fifth Game-Turn after the Martian Player has won a battle during which the Ares Corporation Player launched one or more missiles or beginning in the 11th Game-Turn, whichever comes last.
[15.45] Players should note in the Tactical Game Sequence that Bases may launch fighters and/or missiles. See Case 16.3 for definition of “Bases”.
[15.46] Missiles and fighters may be transferred between ships in the same Task Force (see Case 8.11), or between ships and Bases in the same Transit Track Box during the Logistics and Maintenance Phase. Players should note any such transfers on the Fleet Status Chart.
[15.5] PRODUCTION COST TRACK
(see Solar Display)
[16.0] TACTICAL GAME DESCRIPTION
[16.1] INTRODUCTION
As an alternative to the Tactical Abstract Combat System (Section 9.0), the Players may choose to play BattleFleet Mars using the Tactical Game Rules to resolve any battles which occur during play. Using the Tactical Rules will increase the complexity of the game quite noticeably and increase its length dramatically.
In addition, several Tactical Scenarios are included with the game, which the Players may use to play out a single battle on the Tactical Display.
[16.2] TACTICAL-STRATEGIC INTERFACE
[16.21] When using the Tactical Game, Cases 9.1, 9.2, 9.3, 9.4, and 9.5 are ignored, and the Tactical Sequence is substituted for the Combat Phase in the Sequence of Play.
[16.22] When contact between opposing forces at a Planet/Asteroid occurs and neither side wishes to withdraw, the Players take recourse to the Tactical Game and fight out the resulting battle on the Tactical Display.
[16.23] When a game of BattleFleet Mars is played using the Tactical Game Rules, both Players must keep detailed lists of the status of each of their ships (see Section 18.0).
[16.3] TACTICAL GAME GLOSSARY
Attacker: The Player entering the scene of the battle and attempting to capture the Planet/ Asteroid at which the battle is taking place.
Base: A military installation that is mounted on either an orbital satellite or a minor Asteroid. In the Tactical Game, a Base operates in all ways as a ship (i.e., read “ship and Base” for “ship”), except that it may never expend Burn Points, and except as noted in the Rules (see Case 16.43), It has a Laser Strength, a Launch Capacity, and a Repair Capacity, as does any other ship. Spaces on the Battle Record for Bases are provided, as they are for other types of ships. Unlike ships, Bases may be captured by the Enemy Player if he wins a battle at the Planet/Asteroid at which the Base is situated.
battle: Any action between Enemy ships that necessitates recourse to the Tactical Rules.
Burn Capacity: The total number of Burn Points that one ship may expend in any single Tactical Turn.
Burning: Acceleration via the expenditure of chemical fuel.
Burn Point: The amount of fuel expenditure that allows a ship to accelerate by one cube per turn in any direction.
crippled: A ship that has had its Burn Capacity destroyed.
Cube: That amount of space that is delineated by two squares, one on the “X-Y”’ section and the other on the “X-Z" section. A cube is a three-dimensional square.
damaged: A ship that has had its Laser Strength or Repair Capacity destroyed, or that has had its Burn Capacity destroyed and recovered.
Defender: The Player who controls the Planet/Asteroid at which a battle is taking place, and who is attempting to defend it from the Attacker.
fighter: A small ship designed for high maneuverability which can be operated by a single man, but contains no nuclear engine.
Fire Group: A group of three ships all firing their lasers simultaneously at the same target.
Laser Strength: The power of a ship’s laser weaponry, quantified as a single number which is used when calculating laser fire effects.
Launch Capacity: The capability of a ship to launch missiles and/or fighters.
missile: An unmanned, guided nuclear missile used in combat.
plane: A plane is, mathematically, a two dimensional surface that extends to infinity in all directions. A sheet of paper would, for instance, be a section of a plane if it were completely two-dimensional. In the game, each of the two map sections represents one of two planes that intersect at right angles in a three-dimensional space. The “X-Y"' plane represents a plane formed by the ““X”” and ““Y axes of a three-dimensional Cartesian coordinate system, while the “X-Z” plane represents a similar plane formed by the “X”’ and “Z” axes,
range: The distance in cubes between a ship firing its laser and the ship it is firing at.
Repair Capacity: The total number of points of damage that a ship can repair in one Repair Phase.
Tactical Display: The two-section map-grid upon which Tactical battles are fought.
Tactical Sequence: The interruption of the normal Game-Turn Sequence to resolve a combat situation by running a series of Tactical Turns.
velocity: The speed and direction of a ship's movement.
Velocity Marker: A numbered marker that represents that component of a ship's movement that lies directly along one of the three axes.
[16.4] GENERAL LIMITS OF BATTLE
[16.41] The Players must fight a battle at an Asteroid/Planet if there are ships owned by both Players at that Asteroid/Planet during the Combat Phase of any non-Truce Game-Turn and both Players refuse to withdraw their force.
[16.42] A battle is over if: a) there are no Attacking ships remaining on the Tactical Display (see Case 25.21); or b) there are no Defending ships remaining on the Tactical Display, and all Bases have been destroyed or neutralized. If “a,” the Defender is considered to have won the battle; if “b,” the Attacker has won.
[16.43] The Players may capture Bases as per Case 9.6. In the Tactical Game, a Base is said to be neutralized when its Laser Strength has been destroyed. Neutralized Bases may not launch fighters or missiles.
[17.0] TACTICAL GAME SEQUENCE OF PLAY
GENERAL RULE:
After the Players have decided that they wish to resolve a battle at a particular Planet/ Asteroid, they initiate the first Tactical-Turn and proceed to play Tactical-Turns until that battle is resolved. Then, if there are any other battles to be resolved in that Game-Turn, the Players proceed to these battles and resolve them in the same manner until all battles have been resolved and the Players may proceed to the next phase of the Strategic Game. Battles are resolved in order as described in Case 9.0, Procedure.
The Tactical Sequence
A. WITHDRAWAL PHASE: The Players determine whether either Player wishes to withdraw any or all of his ships and remove withdrawn ships. The Players deploy for the battle after the first Withdrawal Phase of the first Tactical-Turn of a battle has been executed, so that they need not deploy ships which they will withdraw.
B. MISSILE BURN AND MOVEMENT PHASE: All Missiles on the Tactical Display move to the cube in which they are to attack an enemy ship.
C. JOINT BURN PHASE: The Players jointly determine which, if any, of their ships will accelerate and change the Velocity Markers of those that do so.
D. MISSILE AND FIGHTER SALVO PHASE: The Players may salvo missiles and/or fighters from all ships which are capable of doing so.
E. COMBAT PHASE: The Players alternately fire their ships’ lasers and detonate missiles that were moved in “B.”
F. REPAIR PHASE: The Players attempt to repair damage to their ships.
G. JOINT MOVEMENT PHASE: The Players moye all of their ships and newly launched missiles as the Vector Markers of their ships indicate.
[18.0] THE BATTLE RECORD AND TACTICAL USE OF THE FLEET STATUS CHART
GENERAL RULE:
As outlined in Section 6.0, the Players must keep a detailed list of each of their ships on the Fleet Status Chart during the Strategic Game. If the Players fight a battle, they must, throughout that battle, keep track of the status of each of the participating ships on the Battle Record. In addition, if the Players are playing a Strategic Game utilizing the Tactical rules, they must note damage sustained by ships on the Fleet Status Chart at the end of a battle.
PROCEDURE:
Two identical sheets of forms are provided, each of which carries three Fleet Status Charts on one side and a number of Battle Records on the other. Each Player appropriates one of these sheets, and uses the Battle Record and Fleet Status Charts as outlined in these rules. (If the owner of the game wishes to play the Strategic Game a number of times, he would be advised to photocopy or in some other manner copy the Battle Records and Fleet Status Charts.) As a ship takes damage during a battle, the Player notes such damage on his Battle Record. When a ship repairs damage, the Player notes such repair on his Battle Record. When a battle is over, the Player notes the current status of the ship on the Fleet Status Chart. Further, the Player is required to keep a running tally of the number of missiles and/or fighters that each ship is carrying.
CASES:
[18.1] USE OF THE FLEET STATUS CHART
The Fleet Status Charts are used by the Players to keep track of damage and fighting capacities of their ships.
[18.11] A ship sustains “major” damage if its Laser Strength and Repair, or Burn Capacity has been destroyed. Any other damage, including partial damage to any or all of the cited capacities, is considered “minor” damage.
[18.12] At the end of a battle, each Player notes on the Fleet Status Chart which ships have incurred “major” damage and what capacities on such ships have been destroyed. Any ships which have been destroyed are also noted.
[18.13] “Minor” damage may be repaired independently by a ship using damage control techniques (see Section 24.0). After a battle has ended, any “minor” damage a ship has sustained is considered to have been repaired and is not transferred from the Battle Record to the Fleet Status Chart (see Case 18.2). Exception: a ship that has had its Repair Capacity totally destroyed may not repair any “minor” damage on its own.
[18.14] “Major” damage may be repaired only through the expenditure of Logistics Points at a Friendly Planet or Asteroid (see Case 15.3).
[18.15] At the start of the Strategic Game, all Catapults are considered to have a near-equivalent of destroyed Laser Strength. They may not fire and may gain full Laser Strength at any Friendly Planet or Asteroid during the Maintenance and Logistics Phase, but need not expend a Logistics Point to do so. This should be indicated on the Fleet Status Chart (see Case 15.35).
[18.16] When using the Tactical rules, missiles and fighters play a somewhat different role from that assigned them in the Tactical Abstract. When using the Tactical rules, a Player must keep track of the number of missiles/fighters that each ship is carrying on the Fleet Status Chart at all times.
[18.17] During a battle, participating ships may salvo fighters and missiles. At the end of the battle, the Players should note how many missiles/fighters each of their ships has remaining and alter the number indicated on the Fleet Status Chart accordingly.
[18.18] Ships may load a full complement of missiles and/or fighters during the Logistics Phase at their home Planet. No Logistics Points need be expended to load missiles/fighters. Note that Players are restricted by the rules of the Strategic Game to loading missiles and fighters on certain Game-Turns; in other words, at certain times in the game, Players will be unable to load missiles or fighters (see Case 15.4).
[18.2] SETTING UP THE BATTLE RECORD
[18.21] Once it has been determined that the Players must fight out a battle, and that neither side is willing to withdraw before the battle is fought, each Player must fill out a Battle Record detailing the status of his ships. This Record will be used during the battle to record damage taken and repairs made by the participating ships.
[18.22] On the top line of the Battle Record, several data are asked for—the Planet/Asteroid at which the battle is being fought, the Game-Turn, and so forth. The Players may fill these out or not as they see fit, as long as they can easily determine which Battle Record they are currently utilizing.
[18.23] On the Battle Record, the specifics for the three types of ships, fighters and bases are listed. Each ship is assigned a single line. The Player should determine how many of his ships of each type will be involved in the battle and assign each ship a line corresponding to its type on the Battle Record. A ship's Identification Number should be noted in the blank to the right of the Laser Strength on the ship chart.
[18.24] The Player should refer to the Fleet Status Chart and determine whether any of his ships has sustained “major” damage previous to this battle (see Case 18.11). If any ship has sustained such damage, all the boxes under the appropriate column on that ship’s line on the Battle Record should be marked off. For example, if a ship had previously had its Laser Strength destroyed, it would have all its boxes under Laser Strength marked off to indicate that it could not fire its Lasers.
[18.25] If a ship is carrying missiles, the Owning Player should circle the appropriate number of boxes under the Missiles/Fighters column on the ship’s line on the Battle Record. He should circle as many boxes as the ship is carrying missiles.
[18.26] If a ship is carrying fighters, the Owning Player should circle two boxes for every fighter under Missiles/Fighters on the ship's line on the Battle Record.
[18.3] USE OF THE BATTLE RECORD
[18.31] When a ship takes damage as a result of combat, this damage must be noted on the Battle Record.
[18.32] When a ship’s Burn Capacity is reduced by a Combat Result, one box is marked off under Burn Capacity for each point by which the Burn Capacity is reduced. Example: A ship undergoes a “B3” result. Three boxes are marked off under Burn Capacity.
[18.33] When a ship’s Laser Strength is reduced, the appropriate number of boxes under Laser Strength are marked off. Example: If a ship undergoes an “L2” result, two boxes are marked off on the Battle Report under Laser Strength.
[18.34] If a ship undergoes an “iL” result, one box under “Launch” is marked off on the Battle Report line of that ship.
[18.35] lfashipundergoesan “R” result, one box under “Repair” is marked off on the Battle Record.
[18.36] If a ship launches a missile, one of the circled boxes under Fighters/Missiles on that ship’s line on the Battle Report is marked off to indicate the loss of that missile.
[18.37] If a ship launches a fighter, one of the groups of two boxes under Fighters/ Missiles on that ship’s line on the Battle Report is marked off (see Cases 22.1 and 22.14).
[18.38] During a battle, ships may repair damage taken to a limited degree (see Section 24.0).
[18.4] CURRENT SHIP STRENGTHS
[18.41] A ship's current Laser Strength is equal to the number in the left-most unmarked box under Laser Strength on the ship's line on the Battle Record (see Case 21.42).
[18.42] A ship’s current Burn Capacity is equal to the left-most unmarked box under Burn Capacity on that ship's line on the Battle Record (see Case 20.32).
[18.43] If the “1” box on a ship’s line on the Battle Report under Launch has been marked off, that ship may not launch missiles or fighters.
[18.44] A ship’s current Repair Capacity is equal to the number present in the left-most unmarked box in the Repair column of that ship’s line on the Battle Report (see Case 24.1).
[19.0] WITHDRAWAL
GENERAL RULE:
When opposing forces meet at the same Asteroid or Planet and one finds that the other is of overwhelming strength, or when one of the forces involved in a battle decides to cut its losses, withdrawal occurs.
PROCEDURE:
During the Withdrawal Phase of the Tactical Sequence, both Players secretly note on a piece of scrap paper whether they wish to withdraw any part of their force, and if so, which ships are to be withdrawn.
CASES:
[19.1] WITHDRAWAL AT INITIAL CONTACT
[19.11] When opposing forces meet at the same Planet/Asteroid, a battle must ensue, unless one side withdraws his entire force.
[19.12] During the first Withdrawal Phase of a battle—before any of the ships are actually deployed on the Tactical Display—both Players note on a piece of paper which of the ships that are present at the Asteroid/Planet they wish to Withdraw. Both Players then reveal their written intentions simultaneously.
[19.13] All withdrawn ships are placed on Ship Transit Tracks as the Owning Player sees fit. They are considered to be in transit to their new destination, and their Origin Point is considered to be the Asteroid/Planet from which they are withdrawn (see Case 8.23). The ships are placed on appropriate Transit Track Boxes in accordance with Case 8.4. Ships being withdrawn cannot utilize Cometary Orbits (i.e., must be placed on a Ship Transit Track other than the one corresponding to their Origin Point).
[19.14] A Player need not withdraw any of his ships, nor all of his ships, in withdrawal before combat. During initial contact, a Player is free to withdraw as many or as few ships as he desires.
[19.2] WITHDRAWAL DURING A BATTLE
[19.21] After a battle has begun, Players are more limited in the ships that they can withdraw.
[19.22] During each subsequent Withdrawal Phase, both Players note on a piece of scrap paper whether they are going to withdraw any ships during that Withdrawal Phase, and if so, which ships are to be withdrawn.
[19.23] Only Friendly ships further than 9 cubes from any Enemy ship may be withdrawn. Any ship within 9 cubes of an Enemy ship may not be withdrawn.
[19.24] Withdrawn ships are placed on the Ship Transit Track as per Case 19.13. The extent of damage to withdrawn ships is noted on the Ship Chart as per Case 18.1.
[19.25] Damaged or crippled ships may be withdrawn. However, Players must roll on the Recovery Table for each crippled ship once a battle is over (see Section 26.0).
[19.26] A Player may withdraw any ship (including one within 9 cubes of an enemy ship) with the consent of the enemy Player.
[20.0] MOVEMENT AND BURNING
GENERAL RULE:
Because of the three-dimensional nature of combat in space, BattleFleet Mars uses a unique system of depicting movement. Players may at first find it difficult to visualize the positions of ships on the Tactical Display, but with practice, visualization will come more easily.
PROCEDURE:
The process of accelerating ships and moving them is actually split into two Phases of the Tactical Sequence. During the Joint Burn Phase, both Players determine which of their ships are to accelerate and in which direction they will accelerate. During the Joint Movement Phase, ships are actually moved in the direction determined by their Velocity Markers.
CASES:
[20.1] USE OF THE TACTICAL DISPLAY
[20.11] The Tactical Display—the surface on which all tactical battles are fought—consists of two separate fields, each with a superimposed square grid. Both fields have large compass roses printed on them, corresponding to the square grid; the compass rose on one of the fields is labeled “X,Y” while the other is labeled “X,Z.”
[20.12] The position of a ship in space on the Tactical Display is represented by two counters— one placed on the “'X-Y” section, the other on the “X-Z" section, The two counters together depict precisely the position of the ship in three dimensions.
[20.13] The Players should attempt to visualize the “X-Z” section as protruding from the table at right angles to the “X-Y" section, The two sections together form two sides of a cube; however, they actually lie side-by-side on the table, the line where they intersect being their common border. The “X-Z” section could be propped up at a right angle to the table, were it not for the unfortunate fact that all the counters would slide off, because the acceleration due to gravity at the surface of the Earth is greater than zero, Essentially, each of the two counters representing a ship depicts the ship in two of the three dimensions. One dimension (the “X” dimension) is depicted on both sections.
[20.14] To put it in simple language, the “X-Y” section shows how the ships would look were one to look “down” on the battle from above, while the “X-Z" section shows how the ships would look “in profile.” The distance from the border between the two sections determines the ship's “height”, while its position on the “X-Y” board shows its position in the other two dimensions. To put it in more complex language, the “X-Y” section delineates the position of the ships in one plane—along the “X” and “Y” axes. The “X-Z" section shows the positions of the ships on the “Z” axis, and again on the “X” axis.
[20.2] VELOCITY COMPONENTS AND MOVEMENT
[20.21] Movement in BattleFleet Mars is strictly Newtonian. That is to say, ships have a velocity which carries over from turn to turn; they do not expend “Movement Points” while moving as in some other SPI games, Rather, ships move in the direction and at the speed that they began the turn with, subject to further acceleration.
[20.22] The velocity of a ship is defined as the direction in and the speed at which it is traveling. A ship’s velocity is represented by three Velocity Markers,
[20.23] Each of the three Velocity Markers represents part of the ship’s total velocity—in fact, each Velocity Marker represents that part of a ship’s velocity that lies along one axis.
[20.24] One of the Velocity Markers represents the velocity of the ship “up” or “down” (along the “Z” axis); one represents its velocity “lengthwise” (along the “Y” axis); and the third represents its velocity “sideways’ (along the “X” axis).
[20.25] Each of the Velocity Markers has a number and an arrow inscribed on it, The number is the speed in cubes per turn; it is called the “Velocity Component.” The arrow is a directional arrow. When a Velocity Marker is placed under a counter, the arrow is aligned so that it points in the appropriate direction along the appropriate axis. When a ship accelerates, the Velocity Marker is changed for a new one with the appropriate Velocity component. (Note that Velocity Markers are backprinted, and that the flip side of a Velocity Marker bears a velocity component one greater than that on the front.)
[20.26] The “X” and “Y” axis Velocity Markers are placed under the ship counter on the “X-Y” section, while the “Z” Velocity Marker is placed under the “X-Z" counter.
[20.27] For convenience, the “X-Y" counters are supplied with a diagonal pointer, and the “X-Z” counters with a front-facing one. In order to keep a general notation of which ships are moving in what direction, the Player may align the “X-Y” counter so that the arrow is pointing generally in the direction the “X” and “Y” Velocity Markers indicate, and align the “X-Z” counter with the “Z” Velocity Marker.
[20.28] Players may recall (from their basic Physics classes) that velocity is a vector quantity—and that the term “vector component” is identical to the game-term “velocity component”.
[20.3] BURNING AND ACCELERATING
[20.31] Accelerating—changing Velocity Markers —is known in BattleFleet as “burning."” When a ship accelerates, it expends Burn Points. The expenditure of one Burn Point increases the velocity of a ship by one cube per turn.
[20.32] A ship may expend as many Burn Points in one Joint Burn Phase as its current Burn Capacity, never more.
[20.33] Before a ship Burns, the Owning Player must determine which of the Velocity Markers of that ship he wishes to change, and the magnitude of each change. After he has done so, he refers to the Burn Components Table (see separate sheet).
[20.34] On the Burn Components Table, the Player finds the component changes he wishes to make, then reads across and determines how many Burn Points he must expend to change the Velocity Markers as he wishes. Example: The Player wishes to change the “Z” axis Velocity Marker from one with a velocity component of two to one with four, the “X” axis Velocity Marker from a one in one direction to a one in the other, and the “Y” axis Velocity Marker from a three to a two. The change along the “Z" Axis is two; along the “X” axis, two; and along the “Y” axis, one. Finding “2,2,1” on the Burn Components Table, we find that the ship must expend three Burn Points in order to change the Velocity Markers as desired.
[20.35] If the Player wants a ship to change only one of its Velocity Markers, that ship merely expends a number of Burn Points equal to the change in the value of the velocity component. If the ship is to change two Velocity Markers, the Player refers to the Two Component Change column of the Burn Components Table. If all three Velocity Markers are to be changed, the Player refers to the Three Component Change column of the Table.
[20.36] During the Joint Burn Phase, neither Player may examine the Velocity Markers of any of the Enemy Playet’s ships. Thus, intended Velocity changes by the Enemy Player's ships are unknown to the Friendly Player.
[20.37] Burn Components Table
(see separate sheet)
[20.4] SHIP MOVEMENT
[20.41] Although Velocity Markers are changed during the Joint Burn Phase, the ship counters are not actually moved until the Ship Movement Phase.
[20.42] During the Ship Movement Phase, both Players must move all of their ships as specified by the ships’ Velocity Markers.
[20.43] The ship counter on the “X-Z” section is moved along the Z axis on the “X-Z” section as many squares as the “Z” axis Velocity Marker indicates; both counters are moved lengthwise across their respective sections along the “X” axis as many squares as the “X” axis Velocity Marker indicates; and the counter of the ship on the “X-Y” section is moved sideways across that section as many squares as the “y” axis Velocity Marker indicates. Example: The “Z” axis Velocity Marker isa four, and pointing “downwards.” The “X” axis Velocity Marker is a two, and is pointing to the Player’s left. The “Y” axis Velocity Marker is a three, and is pointing away from the edge of the Tactical Display at which the Player is seated. During the Ship Movement Phase, the ship counter on the “X-Z" section is moved four squares “down” (i.e., towards the intersection of the two Tactical Display sections), and two squares away to the left. The ship counter on the “X-Y” section is moved two squares to the left and three squares away from the Player.
[20.5] MAP SHIFTING
[20.51] Although the actual space represented on the Tactical Display is limited, the area in which a battle is fought is not so limited. Therefore, if at any time it becomes necessary (because a large number of ships are drifting off the board, or whatnot) the Players may, by mutual agreement, move all the ships and Asteroid Bases/orbital satellites on the Tactical Display a certain number of cubes in one direction. In other words, all the ships may be shifted back a certain number of cubes to prevent a bunch of ships from flying off the Tactical Display.
[20.52] If necessary, the Velocity Markers of all ships on the board can be altered by a certain set amount. In other words, the Players might, for instance, change all the “X” axis Velocity Markers of all ships by three in one direction. This would mean that all ships moving in that direction would have their Velocity Markers reduced by three, and all moving in the opposite direction along the “X" axis would have their Velocity Markers increased by three.
[20.53] If either Case 20.51 or 20.52 is used, all ships and Bases must be affected. For instance, in the example in 20.52 above, any Asteroid Base would gain a Velocity Marker of 3 along the “X” axis. This is the only way that a Base can acquire Velocity Markers.
[20.54] If a ship which has had its Burn Capacity destroyed is drifting off the edge of the Tactical Display, rather than shifting everything over to accomodate this ship that will never again be involved in the battle, the Players should allow it to drift off the edge, and consider it withdrawn.
[21.0] LASER COMBAT
GENERAL RULE:
During the Combat Phase of the Tactical Sequence, all ships are given the opportunity to fire on enemy ships, and the Players are given the opportunity to detonate missiles. The Players fire their ships alternately—first one Player firing one ship, then the other firing one of his ships—until all ships have been fired.
PROCEDURE:
Determine the distance between the firing ship and the ship it is firing on by counting the distance between the ship counters along the “X,” “Y,” and “Z" axes respectively, and referring these numbers to the True Distance Table. Roll a die and add the Laser Strength of the firing ship to the die-roll. Cross-reference the resulting number with the range on the Laser Combat Results Table. Roll a second die, cross-reference further, and find the Combat Result. Apply the Combat Result immediately.
CASES:
[21.1] RANGE
[21.11] The distance between a firing ship and the ship it is firing upon is known as the range.
[21.12] To determine the range between two ships, examine the ship counters on the “X-Y” section. Count the number of squares between the ships along the “X"’ axis, and then along the “Y” axis. That is, determine the difference in distance along the width of the Display between the two ships, and along the length of the Display. See illustration.
DETERMINING THE TRUE DISTANCE BETWEEN SHIPS
Ship “A” is firing on Ship “B”. The illustration shows each ship twice: on the “X-Z” section of the Tactical Display and, again on the “X-Y” section.
Examining the counters on the “X-Y” section, we find that Ship “A” is four squares away from Ship “B” on the “Y" axis, and two away along the “X” axis. Two is smaller than four, so we look on the True Distance Table on the left-most column of the Table for “2,4”.
Examining the “X-Z" section, we find that Ship “B” is one square “higher” than Ship “A”. Finding “1” at the top of the True Distance Table, we read down the column determined thereby and cross-reference with the row determined by the other two numbers. The number at the intersection of the row and the column is “S”, so the True Distance (i.e., the Range) between the two ships is 5 Cubes.
[21.13] Refer to the True Distance Table with the two numbers found above. Place the smaller number before the larger (for instance, the illustration the numbers would be 2, 4) and read down the side of the True Distance Table until the two numbers are found.
[21.14] Find the difference in “height” between the two ships on the “X-Z"’ section. Find this number at the top of the True Distance Table.
[21.15] Cross-reference the two found in Case 21.13 with the column found in Case 21.14 to yield a single number. This number is the True Distance in cubes between the two ships. If one of the ships fires at the other, this is the Range.
[21.2] WHICH SHIPS MAY FIRE
[21.21] At the beginning of a battle, all ships that have not had their Lasers destroyed in a previous battle may fire their Lasers.
[21.22] Any ship that has had its Laser Strength destroyed may not fire at all.
[21.23] A ship with a Laser Strength of “zero’ may fire its Laser; no addition is made to the die roll (see Case 21.43) for a resolution of a Laser Combat initiated by a ship with a Laser Strength of “zero.”
[21.24] Missiles have no Lasers; thus they may not initiate Laser Combat.
[21.25] Ships may fire upon missiles in an attempt to destroy them before they can be detonated.
[21.26] Players proceeding with a Strategic Game should note that at the start of the game, catapults have the equivalent of destroyed Laser Strength and thus may not initiate Laser Combat until they have been serviced (see Case 15.25).
[21.3] SEQUENCING OF COMBAT
[21.31] Laser Combat is resolved via a “SequentialSequential” system.
[21.32] The Combat Phase of the Tactical Game Sequence is divided into an indefinite number of Fire Segments. First one Player executes one Fire Segment, and then the other Player executes one. Then, the first Player executes a second Fire Segment, and so forth, until both Players have executed as many Fire Segments as they wish, within the limits of Case 21.2.
[21.33] In a single Fire Segment, a Player may either a) fire one ship; b) fire one Fire Group (see Formations, Section 23.0); or c) detonate one missile (see Fighters and Missiles, Section 22.0). After the first Player has chosen and performed one of these actions, the next Fire Segment begins, and the opposing Player may choose one of these three options.
[21.34] Before the first Fire Segment of each Combat Phase, each Player rolls the dice to determine who will be the “first Player” and will fire first. The Player obtaining the higher total becomes the first Player for that Combat Phase only. In the event of a tie, re-roll the dice.
[21.35] Each ship may fire only once in an entire Combat Phase. Once a ship has fired its Laser, either alone or as part of a Fire Group, it may not again fire.
[21.36] A missile, once detonated, is removed from the Tactical Display.
[21.37] After one Player has detonated all the missiles and fired all the ships he wishes to, the remaining Player executes the remaining Fire Segments. In other words, if a Player skips a Fire Segment, he loses the right to any further Fire Segments in that Combat Phase.
[21.4] LASER COMBAT RESOLUTION
[21.41] After the range between a firing ship and its target has been determined, the Laser Combat Results Table is referred to.
[21.42] Determine the current Laser Strength of the firing ship by examining the ship's line on the Battle Record (see Case 18.31).
[21.43] Roll a die, and add the firing ship’s Laser Strength to the die-roll. Find the resulting number on the left-most column of the Laser Combat Results Table.
[21.44] Roll a second die, and find the row determined by this die-roll under the sub-grouping found by the first die-roll (see the Laser Combat Results Table).
[21.45] Find the range at the top of the Laser Combat Results Table. Cross-reference the column determined by the range with a row determined by the two die-rolls, to yield a single result. This is the Combat Result.
[21.46] The Combat Result is applied immediately to the affected ship.
[21.47] Laser Combat Example: A ship with a Laser Strength of two is firing on another ship at a range of three. The first die-roll is 5, modified to 7. The second die-roll is 3. The Player finds 7 on the left-most column of the Laser Combat Results Table, and finds sub-grouping 3 under the 7 group. He cross-references the resulting row with a range of 3, to get a Combat Result. The result is L1.
[21.5] THE LASER COMBAT RESULTS TABLE (see separate sheet)
[21.6] EXPLANATION OF COMBAT RESULTS (see separate sheet)
[21.7] TRUE DISTANCE TABLE (see separate sheet)
[22.0] MISSILES AND FIGHTERS
GENERAL RULE:
Each of the ships in the game is capable of carrying one or more missiles or fighters. A missile represents a computer-radio guided unmanned nuclear craft designed for sharp acceleration for short periods of time. A fighter represents a small, single-place, highly maneuverable craft equipped with a low-power laser. Either may be launched from its “mother ship” during the Missile and Fighter Salvo Phase.
PROCEDURE:
During the Missile and Fighter Salvo Phase, both Players indicate which of their ships are salvoing missiles or fighters. They then place counters on the board to represent missiles and fighters released and equip all fighters with Velocity Markers matching those of the ship releasing them.
CASES:
[22.1] CARRYING AND RELEASING
[22.11] Each ship has a Cargo Capacity, listed on its part of the Fleet Status Chart. Each missile that a ship carries requires one point of Cargo Capacity, and each fighter requires two.
[22.12] Depending on the Game-Turn, one or both sides may be able to load missiles and/or fighters onto their ships at their home Planet (see Case 15.4). Players should examine the Fleet Status Chart to determine when they may load missiles or fighters.
[22.13] Players must keep track of the number of missiles and fighters each of their ships is currently carrying on the Battle Record.
[22.14] When a ship launches a missile or fighter, the Owning Player should note such on his Battle Record.
[22.15] Players may transfer missiles or fighters from ship to ship during the Logistics Phase of the Game-Turn (see Case 15.4).
[22.16] When a fighter is released, the Player must open up a fighter section for that fighter on his Fleet Status Chart. He will then keep track of damage taken by that fighter for the rest of that battle.
[22.17] A Player need not keep track of damage that missiles take. Combat results against missiles either totally destroy them or have no effect.
[22.18] When a fighter is released, it is given Velocity Markers identical to those of its releasing ship. Missiles are never equipped with Velocity Markers, although they are represented by counters on the display.
[22.19] Undetonated missiles and operational fighters may never be reloaded onto ships. Once they have been released, they may never be reloaded and resalvoed. All fighters and missiles on the Tactical Display at the end of a battle are considered destroyed.
[22.2] FIGHTERS
[22.21] Fighters, once released, operate as any other ship does. They have a Burn Capacity and a Laser Strength. They do not have a Launch Capacity or a Repair Capacity, however.
[22.22] A Fighter’s Laser Strength is zero. However, when firing in formation, its Laser Strength is considered to be one as is the Laser Strength of any other zero-strength ship (see Formations, Section 23.0).
[22.23] If a fighter incurs a Combat Result of “iL” or “R”, it is destroyed.
[22.3] MISSILES
[22.31] Missiles have no Laser Strength, no Launch Capacity and no Repair Capacity. They do not operate as ships and fighters do. Missiles remain on the Tactical Display for a maximum of two turns after being salvoed. If not detonated or destroyed after two Tactical-Turns, they are removed (see Case 22.39).
[22.32] If a missile undergoes a Combat Result of “iL”, “R”, or any “L” result, it is destroyed. A Combat Result of “B” is considered to have no effect.
[22.33] During the Joint Movement Phase of the Tactical Turn in which it is released, a missile moves with its releasing ship, and ends the Phase in the same cube as its releasing ship.
[22.34] In the Missile Burn and Movement Phase of the following Tactical Turn, the missile is moved alone.
[22.35] During the Missile Burn and Movement Phase, the Players alternate missile movement. First one Player moves one missile, then the other moves one, and so forth, until all missiles have been moved. (Note that all missiles must be moved, in concordance with the Law of Conservation of Momentum).
[22.36] During the Joint Missile Movement Phase, a missile is first moved as the Velocity Markers of its salvoing ship indicate. That is to say, it is moved in the same way its salvoing ship would move, were this the Joint Movement Phase.
[22.37] After the missile has been moved in this manner, the Owning Player may then move the missile to any cube within six [6] cubes of the missile’s position. He should examine the True Distance Table to determine whether a desired target cube is within six cubes.
[22.38] The cube that a missile winds up in is the target cube; this is the cube in which the missile will be detonated in the ensuing Combat Phase.
[22.39] When a missile is detonated, one ship in the target cube undergoes a Missile Detonation attack; roll on the Missile Detonation Table to determine what damage the ship sustains. The Player owning the missile determines which ship in the cube is to be attacked. Note that all salvoed missiles that were not salvoed in the Missile and Fighter Salvo Phase of the current Tactical-Turn are removed at the end of the Combat Phase, assuming they have not been destroyed or detonated (see Case 22.31).
[22.4] MISSILE DETONATION TABLE
(see separate sheet)
[23.0] FORMATIONS
GENERAL RULE:
Because of the large number of ships in play in some battles, Players may find it convenient to organize their ships into formations, in order to make movement quicker and easier, and in order to speed Laser Combat.
PROCEDURE:
Any group of ships moving in the same direction and at the same speed (i.e., all of which have the same Velocity Markers) is a formation, as long as every ship in the formation is within two cubes of some other ship in the formation.
CASES:
[23.1] MOVEMENT EFFECTS
[23.11] Since all ships in a formation are moving in the same direction and at the same speed, only one set of Velocity Markers is needed for the entire formation. If all the ships in the formation execute an identical Burn, only the single set of Velocity Markers is changed.
[23.12] A ship may drop out of a formation simply by altering its Velocity Markers during the Joint Burn Phase so that it no longer has the same path and velocity as the remainder of the formation. A new ship may join a formation simply by matching course and speed.
[23.2] EFFECT ON LASER COMBAT
[23.21] Before any Laser Combat begins, each Player must examine each of his formations, and divide each into three-ship Fire Groups.
[23.22] He does so by dividing each formation into groups of three ships. Each such group is treated as a Fire Group. A Fire Group may consist of any three ships of a formation; the ships need not be adjacent to each other in the formation.
[23.23] After a formation has been divided into Fire Groups, all remaining ships (i.e., the odd ships in a formation not evenly divisible by three) are considered to be independently firing and are not part of any Fire Group.
[23.24] During Laser Combat, a Fire Group may elect to fire as either a single unit or as three independent ships. If firing as a single group, all three ships are considered to fire simultaneously, and their fires take up one Fire Segment, rather than the three they would take if they were firing independently.
[23.25] When a Fire Group fires, the Laser Strengths of all the ships in the Group are totalled, and this number is considered to be the Laser Strength of the Fire Group as a whole.
[23.26] A Fire Group's fire is resolved as is the fire of a single ship; the Laser Combat Results Table is referred to once for the Fire Group.
[23.27] Two is subtracted from the range when resolving a Fire Group’s fire. For example, if a Fire Group is firing at a range of 7 cubes, the range is considered to be 5 cubes when resolving their fire. However, the maximum range for laser fire is still 9 cubes; a Fire Group may not fire beyond 9 cubes, the range subtraction notwithstanding.
[23.28] The range between a Fire Group and its target ship is counted from the ship in the Fire Group that is furthest from the target ship.
[24.0] DAMAGE CONTROL DURING COMBAT
GENERAL RULE:
During the Repair Phase of the Tactical Sequence, damaged ships may attempt to repair themselves (i.e., exercise damage control).
PROCEDURE:
If a ship's Repair Capacity is two, it is capable of repairing two points of damage. If it is one, it may repair one point of damage. If it is one-half, it must roll a die; 1, 2, 3 = no damage repaired; 4, 5, 6 = one point repaired.
CASES:
[24.1] REPAIR CAPACITY
[24.11] A ship’s current Repair Capacity may be determined by examining the Repair Capacity section of the Battle Record (see Case 18.35).
[24.12] When the Repair Capacity of a ship is utilized to repair damage, the repair is indicated on the Battle Record. When a given capacity is repaired, the right-most marked box under that capacity has its mark erased.
[24.13] Any capacity that has been destroyed (i.e., has had all its boxes marked off) may not be repaired. (See Case 18.1).
[24.14] Repair Capacity itself may never be repaired. Once a ship takes Repair damage, it may not increase its Repair Capacity.
[24.15] Fighters may never repair damage.
[24.2] BATTLE RECORD (see separate sheet)
[25.0] BATTLE DEPLOYMENT
GENERAL RULE:
Before a battle is actually fought, the Players must set their ships up on the Tactical Display. The Players should execute the first Withdrawal Phase before setting up so that both Players may withdraw any ships they wish to before the battle begins.
CASES:
[25.1] DEPLOYMENT AFTER REVOLT OR COUNTER-REVOLT
In most cases, one force of ships will be entering a Planet/Asteroid that is held by an Enemy force, and thus deployment will be as per Case 25.2. However, immediately after a revolt has taken place at a Planet/Asteroid, both Players will have ships at that Planet/Asteroid, and in that case, deployment must be according to the following rules.
[25.11] The Player owning any Bases (the “Defender”) places them anywhere on the Tactical Display. All Bases must be at least six cubes from each other as determined by reference to the True Distance Table.
[25.12] The other Player (the Attacker) then places one ship anywhere on the Tactical Display with an initial velocity of zero in all directions. Remember to deploy the ship on both the X-Y and the X-Z planes.
[25.13] The Defender then places one ship anywhere on the Tactical Display.
[25.14] The Players continue to alternate placement of ships until all ships have been placed.
[25.15] If there are no Bases, the Players roll dice to determine who is to place the first ship. The Player controlling the Planet or Asteroid at which the battle is being fought is considered to be the Defender.
[25.2] DEPLOYMENT AFTER HOSTILE ENTRY
[25.21] Except after a revolt, all battles will occur in a situation in which one Player begins in control of the Asteroid/Planet and the other Player enters in an attempt to take it. The Player owning the Asteroid/Planet is known as the Defender, and the entering Player is known as the Attacker, regardless of the overall strategic position of both.
[25.22] The Defender places any Bases and ships anywhere on the Tactical Display that he desires. All his ships and satellites/bases begin stationary. A base must be at least six cubes from any other Base.
[25.23] The Attacker places all of his ships at one side of the cube in space that the Tactical Display represents. All of his entering ships are considered to have the same initial velocity in any direction the Player chooses. This velocity may be between one and four in any direction the Player chooses.
[25.24] If forces friendly to the Defender are “entering the Planet/Asteroid as well as those friendly to the Attacker, the Players roll two dice, add their total, and refer to the following table:
| Roll | Result |
|---|---|
| 2-6 | defender enters first |
| 7 | entering forces arrive at the same time |
| 8 | attacking forces arrive 1 turn before defending forces |
| 9 | attacking forces arrive 2 turns before defending forces |
| 10 | attacking forces arrive 3 turns before defending forces |
| 11 | attacking forces arrive 4 turns before defending forces |
| 12 | attacking forces arrive 5 turns before defending forces |
[25.25] If the result is “defender enters first,” the entering forces friendly to the defender are considered to be at the Planet/Asteroid before any attacking forces arrive, and are thus deployed with the friendly forces already present, according to Case 25.22.
[25.26] If the attacking and defending entering forces arrive at the same time, the defending forces already at the Asteroid/Planet are deployed as per Case 25.22, while the entering defending forces are deployed as are the attacking forces (as per Case 25.23), except that they enter on the cube-side opposite that which the attackers enter on.
[25.27] If defending entering forces arrive on some Tactical-Turn after the attacking forces do, they arrive as per Case 25.23 on any edge of the Tactical Display. Such forces may enter on the same cube-edge as the attacking forces did.
[26.0] LOSS OF CRIPPLED SHIPS
GENERAL RULE:
During a battle, some ships may be “crippled” (i.e., have their Burn Capacity destroyed). At the end of the battle, a die must be rolled for each of these ships on the Recovery Table to determine whether they can be recovered.
PROCEDURE:
Roll a single die on the Recovery Table and determine the corresponding result. There are two columns on the Recovery Table: the first is to be used if the ship being rolled for is Friendly to the side that ended by battle in possession of the Asteroid/Planet, and the other is used if the Enemy Player ended in possession of the Asteroid/Planet.
CASES:
[26.1] DETERMINING RECOVERY
[26.11] If the Recovery Table result is a “Friendly Recovery,” the ship is retrieved by the Friendly Player. If the Friendly Player ended in possession of the battle site, the ship is returned to that Planet/Asteroid. If the Enemy Player ended in possession of the battle site, the ship is considered withdrawn and placed on a Ship Transit Track.
[26.12] If the Recovery Table result is “Lost,” the ship is considered lost and thus destroyed. It is removed from the game.
[26.13] If the Recovery Table result is “Enemy Recovery,” the Enemy Player gains control of the ship and Players note the change of ownership on the Fleet Status Chart. The ship retains all missiles and/or fighters it contained previously and all damage it had previously undergone.
[26.2] RECOVERY TABLE (see separate sheet)
[27.0] EXPLANATION OF SCENARIOS
GENERAL RULE:
When playing a Scenario, the Players are essentially fight out one battle of the Campaign Game, and thus only the Tactical Rules are used.
CASES:
[27.1] SPECIAL RULES FOR SCENARIOS
[27.11] Although the Players may, during a Scenario, withdraw ships, this generally means a loss of Victory Points. However, the Players should ignore the Ship Transit Track and so forth when executing withdrawal. As far as the Scenarios are concerned, withdrawn ships are out of the game.
[27.12] The Players should ignore rules Sections 18.1 and 18.4 as these have no bearing on Scenarios.
[27.13] The Scenario listings will generally indicate which side (if either) has missiles and/or fighters, and how many each Player may allocate to his ships.
[27.14] Each Scenario will indicate whether ships are to be deployed as per Case 25.1 or 25.2.
[27.15] According to the rules for each Scenario, the Players will accumulate a certain number of Victory Points for commiting certain actions. At the end of a Scenario, the Players should total their respective Victory Points, and refer to the Victory Condition Table (27.2). They should refer to the two totals as a ratio of the greater total to the lesser total.
[27.16] After a Scenario has been fought to completion, the Players should roll on the Recovery Table for crippled ships to determine whether a crippled ship is destroyed or merely seriously damaged—the distinction may make a difference in terms of Victory Points. If the result on the Recovery Table is “Enemy Recovery,” the ship is considered destroyed for Victory Point purposes.
[27.17] A Scenario is considered over when one Player has no un-crippled ships remaining on the Tactical Display.
[27.2] VICTORY CONDITION TABLE
| Ratio of Victory Points (Player with greater total) | Level of Victory |
|---|---|
| 2-1 or greater | Decisive Victory |
| 1.5-1 or greater but less than 2-1 | Moderate Victory |
| 1.25-1 or greater but less than 1.5-1 | Marginal Victory |
| between 1-1 and 1.25-1 | Draw |
[28.0] SCENARIOS
(In the Victory Point Schedules below, a bullet in the original table is shown as a dash and means no Victory Points are awarded to that side. The "Historical Notes" fiction quotations printed with each scenario are omitted.)
[28.1] THE FIRST BATTLE OF PALLAS
[28.11] INITIAL FORCES:
- Ares Corp: 1 catapult, 3 miners, 2 transports (no missiles or fighters)
- Martians: 1 Base, 4 miners (no missiles or fighters)
[28.12] DEPLOYMENT: Players deploy as per Case 25.1.
[28.13] VICTORY CONDITIONS:
| Victory Point Schedule | Ares Corp | Martian |
|---|---|---|
| Neutralize Base | 5 | - |
| Destroy 1 enemy ship | 3 | 4 |
| Seriously damage 1 enemy ship | 2 | 3 |
| For each enemy ship withdrawn | 1 | 2 |
| Possession of Asteroid at end of battle | 5 | 4 |
[28.2] THE BATTLE OF VESTA
[28.21] INITIAL FORCES:
- Ares Corp: 1 Base, 1 miner, 2 transports (only transports have missiles)
- Martians: 2 catapults, 4 miners (no missiles or fighters)
[28.22] DEPLOYMENT: Players Deploy as per Case 25.1.
[28.23] VICTORY CONDITIONS: Victory Point Schedule same as in Case 28.13, reversing Ares and Martian Players.
[28.3] THE RAID ON L-5
[28.31] INITIAL FORCES:
- Ares Corp: 6 Bases, 2 transports (all with missiles)
- Martians: 3 catapults, 4 miners (all with fighters)
[28.32] DEPLOYMENT: Players deploy as per Case 25.2. Martians are the attackers.
[28.33] VICTORY CONDITIONS:
| Victory Point Schedule | Ares Corp | Martians |
|---|---|---|
| Each un-neutralized Base at end of battle | 1 | - |
| Bonus for preventing Martians from neutralizing or destroying any Bases | 5 | - |
| 1st enemy Base neutralized or destroyed | - | 3 |
| 2nd enemy Base neutralized or destroyed | - | 4 |
| Each subsequent enemy Base neutralized or destroyed | - | 5 |
| Each enemy ship destroyed | 4 | 1 |
| Each enemy ship seriously damaged | 3 | - |
[28.4] THE SECOND BATTLE OF PALLAS
[28.41] INITIAL FORCES:
- Ares Corp: 2 catapults, 3 miners, 3 transports (all with missiles)
- Martians: 1 Base, 1 catapult, 4 miners (all with fighters)
[28.42] DEPLOYMENT: Players deploy as per Case 25.2. Corporation is the attacker.
[28.43] VICTORY CONDITIONS:
| Victory Point Schedule | Ares Corp | Martians |
|---|---|---|
| Possession of Asteroid at end of battle | 4 | 2 |
| Neutralize Asteroid Base | 1 | - |
| Destroy Asteroid Base | -4 | - |
| Each enemy ship destroyed | 2 | 4 |
| Each enemy ship seriously damaged | 1 | 2 |
| Each enemy ship withdrawn | - | 1 |
[28.5] THE BATTLE OF JUNO
[28.51] INITIAL FORCES:
- Ares Corp: 3 catapults, 3 miners, 7 transports (all with missiles)
- Martians: Juno Garrison (1 Base, 1 catapult, 3 miners--no missiles or fighters); Relief Force (2 catapults, 5 miners--all with fighters)
[28.52] DEPLOYMENT: Juno Garrison and Corporation forces are deployed as per Case 25.2, with the Corporation as the attacker. Relief Force enters 3 Tactical Turns after the battle begins as per Case 25.27.
[28.53] VICTORY CONDITIONS:
| Victory Point Schedule | Ares Corp | Martians |
|---|---|---|
| Neutralize Base | 4 | - |
| Destroy Base | -2 | - |
| Possession of Asteroid at end of battle | 2 | 2 |
| Each enemy ship destroyed | 3 | 4 |
| Each enemy ship seriously damaged | 2 | 3 |
| Each enemy ship withdrawn | 1 | 2 |
[28.6] THE BATTLE FOR MARS
[28.61] INITIAL FORCES:
- Ares Corp: 4 catapults, 5 miners, 10 transports (all with missiles)
- Martians: 4 catapults, 17 miners, 2 Bases (all with fighters)
[28.62] DEPLOYMENT: Players deploy as per Case 25.2. Corporation is attacker.
[28.63] VICTORY CONDITIONS:
| Victory Point Schedule | Ares Corp | Martians |
|---|---|---|
| Each Base neutralized or destroyed | 5 | - |
| Each enemy ship destroyed | 4 | 4 |
| Each enemy ship seriously damaged | 3 | 3 |
| Each enemy ship withdrawn after deployment | 2 | - |
| Each friendly ship withdrawn before deployment | - | 2 |
Corporation possession of Mars at any point is an automatic Corporation Victory (and Martian defeat).
NOTE: Before deployment, the Martian Player may withdraw as many ships as he likes, gaining two Victory Points for each ship withdrawn at that time. This withdrawal represents Task Forces sent from Mars to attack bases stripped of Corporation ships for the assault on Mars.
NOTES
GENERAL STRATEGY
As mentioned before, the placement of agents is one of the keys to the game. Both sides should place agents at the enemy’s home base, for they can only be replaced during times of truce. The other key location for placement of agents is at one’s home planet. A dearth of agents at home will cause the Morale tables to go against that Player, which in turn hurts his chance of winning. The Corporation agents in the asteroids should be placed to ensure the control of at least one asteroid. The Martians should place their agents so as to capture 2 or 3 asteroids. Under no circumstances should the Martians try to gain all four asteroids (see military strategy below). The optimum placement on the Enemy Player’s home planet is 4 agent Points split into as many agents as possible (otherwise, assassination will prevent effective control of the opposing Player’s morale).
The Morale Effects Table is very simple once a Player gets the hang of it. Assassinations should always be directed at the highest value agent, unless there are too many agents on your home world. The key is to reduce the opposing Player's points faster than your own are reduced, If one can work it that way, a victory is assured.
The movement system in the game, in my opinion, is quite ingenious. Before sitting down to play, discard all “front” theories you might have. There is no such thing as a line in BattleFleet Mars. The key to the game is bluffing your opponent. Unless a Player is very lucky, he will not be able to protect all his objectives from an opponent. It takes only one correct guess, and the opposing Player can have a large portion of his fleet heading towards a base that you cannot possibly reinforce in time. Therefore, a Player should keep his opponent off balance as much as possible. One of the best ways to do this is for patient Players to send lots of one-ship task forces all over the map, with one or two large attack groups to keep the enemy off-balance. Eventually the enemy will get some sort of fix on where your major concentrations of ships are, but the element of doubt as to exactly where your fleet is, and where it is going, will always be a vexing problem for the opposition. It is legal to switch letters of task forces, but make sure you do not switch ships that are somewhere else along with the letters. The object of all this maneuver is to make sure that your opponent runs into large amounts of ships when he wishes to attack you, and that you attack weak garrisons to seize objectives. Unless you read minds, you cannot do this more than 60-70% of the time at best, so one’s strategies should reflect the optimum morale gain.
The Player who likes to attack as much as possible had better win an inordinate number of his attacks, because otherwise his morale will begin to take a steady downward trend (as will the other Player’s, but I assume that the Defender is getting his slight advantage). If one looks at the Summary of Morale Index Adjustments (10.6), one will note that an even split of battles will result in the lowering of morale. Of course, if you throw asteroids and home planets into the deal, you will make possible the “peace of exhaustion,” with both Players losing simultaneously. Assuming that the Player is not a kamikaze, all attacks should be carefully thought over before resolved, as one lost battle can snowball into a major morale disaster. One of the great temptations of the game is to assemble one’s entire fleet and head for the opposing Player’s home planet. This strategy is excellent for ending the game. Either the attacker will win, ending the game or both Players will exhaust their fleets. Ninety percent of the time, the battle will be resolved in the defender’s favor. If you enjoy losing, read no further: all your prayers are answered. Players will usually think (quite logically) that holding all four asteroids and the home planet is a good idea. Unless one can be sure that he can hold the asteroids for the length of time necessary for a military victory, holding all four asteroids is a foolish idea. The other Player will probably capture one or two of them, screwing up your Morale and he should be able to hold them in force. Playtesting has shown that the optimum number of asteroids is two for Mars until Game-Turn 12, and three for Ares Corporation.
To facilitate play, it is better to use the Tactical Game Abstract Combat System. The minimum ratio the attacker should accept is the 101-125% column, with the optimum feasible ratio at 151-200%. These odds columns tend to increase as the battle goes on. Once a Player’s odds get to the aforementioned 151-200% odds column, the odds go up with each combat result. If you cannot afford those losses in battle, your battlefleet is pretty much destroyed. In the tactical game, the Players will find that they need slightly more strength to take objectives, for even odds favor the defender. If the Players wish to play a more balanced game, it is suggested that they choose the Tactical Game Abstract Combat System, because the regular tactical game tends to hurt the Martian chance of winning.
Truces are rather strange events. They aid the side with the most resources, or the badly crippled side that can rebuild. One problem with truces: they can be broken. Knowing wargamers as I do, I can safely say that a truce of more than two turns is an aberration; perhaps the players are eating dinner. No side can ever afford a truce that allows the other Player to gain ground, so the key to getting the other side to break the truce is having it negotiated in a place where the Player has agents and his opponent does not. Sabotage finds the Martians playing with fire: if the Corporation has rid itself of the Martian agents residing at Earth, they can turn each attempt into a morale victory. Once the Martians roll it, they must go through with it, but it should be avoided. Assassinations are not important enough to waste PIPS on; the only reason PIPS would be expended would be to save one of the top agents.
The building and repairing of ships is a fairly simple process in this game, and reasonably competent Players can handle it in a straightforward fashion. This is certainly not the case with PIP expenditure. Obviously, the main areas in which PIPS are expended are on the two Morale Effects Tables. Many a Player has rued the day when he spent all his PIPS and had an important sabotage or assassination come up. The allocation of PIPS requires shrewd placement and good guesswork, A small note: BattleFleet Mars provides many chances at neat little stratagems. I caution Players not to become so involved in the intricacies of the game that they lose sight of the main objective.
MARTIAN STRATEGY
After agent set-up, the Martian Player has several key decisions to make. In PIP allocation, he should attempt to secure Ceres and Pallas, the two asteroids closest to Mars. This distribution of PIPS will prevent the Corporation from gaining a strategic attack position. Earth will be forced to telegraph any attack on Mars. If the Martian Player feels he can win early, try for Vesta, Juno and either Ceres or Pallas. You better know something I don’t: the Martian Player then chooses which ships he wishes to take from the Corporation Player. Playtesting has shown that the best long-term policy is to take as many catapults as possible, but there is one drawback. To wit, this course allows the Corporation to choose when and where the first few battles are fought. If the Corporation can mass its ships for a few big attacks, Martian morale will suffer grievously.
The first turn is not a terribly active one for the Martian Player. He will find that most of his ships are busy protecting the defenseless Catapults and the asteroid bases. Beginning with the second turn, the Martian Player should begin to attack the Corporation as often as possible. The Ares Corporation fleet will never be as weak as it is in those first few Game-Turns. If the Martian attack is moderately successful, the Martians should try to capture a majority of asteroids to repair the damage their battlefleet has sustained. This type of campaign, if successful, will ensure that the Corporate Player will always be on the defensive, and 99 times out of 100 results in a Martian victory. If the Corporation manages to gain parity in the military race, the war becomes difficult for the Martians. The Martian Player must play better than the Corporation Player, because now the initial Martian advances have worn off, and the Corporation can exploit its advantages in full, The situation requires adroit maneuvering of the Morale Effects Table, good battle tactics, and no bad luck. The only other Alternative is to cheat.
ARES CORPORATION STRATEGY
The initial Game-Turns are rather frustrating for the Corporation Player. It is true that he will be able to decide when the first few attacks occur, but Martian strength superiority will allow them control of the skies (to use a tired cliche). Though it seems the Corporation is doing very little, these are the most crucial Game-Turns for the Corporation. If one examines the Morale chart, one notices that the Martians lose more Morale Points in an even or stalemate position than the Corporation does. Continuing this line of reason, the Corporation should try to maintain the status quo, thereby destroying the Martians moralewise. The only problem is that the Martians start with 22 Morale Points more than the Corporation does. If the Corporation can prevent the Martians from running up the Morale score with their initial advantage, the Corporation Player’s superior fleet will achieve parity in Morale and eventual victory.
The Corporation Player should protect his fleet as much as possible, perhaps giving up an asteroid once in a while to prevent the loss of a major part of his battlefleet. The Corporation Player should also try to stockpile Resource Points, or perhaps get a good fleet assembled at Earth. The other priority is to assassinate the four initial agents, which will allow the Martians to use only four PIPS on any one turn. Once the Corporation Player obtains an advantage, he should win if he plays by the General Strategy section.
STRATEGIC GAME PLAYER'S NOTES
Militaristic Players will find it difficult to achieve their ends in the manner they choose in BattleFleet Mars, for a military victory is nearly impossible. A competent player who is not totally outguessed by the enemy can prevent a conclusive military resolution. The crux of the game is the morale effects stemming from military actions. The Player who plays to affect the morale results will beat the Player who tries the brute strength approach, With the preceding in mind, it behooves a player to carefully study the Morale charts before beginning play. Understanding the charts will usually allow the Player optimal agent placement. Good agent placement will allow a Player to optimize the Morale effects results, All that remains is the forming of a judicious military strategy. The best strategies integrate Morale effects, agent placement, and military activity.
PLAYERS NOTES FOR THE TACTICAL GAME
First and most importantly, neither Player should ever get himself into a battle where he is badly outmatched, unless he has a reason for committing suicide, Odds of more than about 3-2 are simply an invitation to a total loss, and it makes a lot of sense to withdraw in such situations, even at the expense of a few morale points.
Although maneuver can be quite important, particularly if one of the Players makes a stupid mistake, most of the time a battle will begin with a bit of maneuver, and then turn into a running slugfest until one side or the other decides to cut his losses. It is always a good idea to keep formation and get ships into Fire Groups, as hits at higher laser strengths do a great deal more damage. The optimum strengths for fire groups is five or seven, seven obviously being better.
If one side has missiles and/or fighters, and the other does not, the former will have a sizeable advantage. A few well-placed missiles can be devastating—and a couple of Fire Groups of fighters, although not as immediately devastating, can slowly erode an Enemy with a few hits here and there, and make a sizeable difference in the course of the battle. Even a slightly inferior force with neither missiles nor fighters going up against a group with either had best cut its losses and withdraw.
A force of ships with fighters going up against one with missiles would be well advised to have its fighters concentrate on the missiles, rather than enemy ships. For a single fighter firing has nearly as good a chance to destroy a missile as a Fire Group of Catapults does.
Any force of ships going up against another armed with missiles would be well advised to break up a Fire Group, and have each ship fire independently on missiles. If you examine the Laser Combat Results Table, you'll see that the chance of inflicting some hits on an enemy ship does not increase as Laser Strength increases; rather, the severity of hits increases as Laser Strength increases. Since a combat result on a missile is converted either to “Destroyed"’ or to “No Effect,” a Fire Group has effectively no greater chance to destroy a missile than a single ship.
If a force of ships armed with missiles enters an asteroid or planet where there is an enemy Base, it should have little trouble disabling the Base. It should build up a goodly amount of velocity and come barreling in towards the base, release a load of missiles, and move on past the base. This gives the base a minimal amount of time in which to fire on the rapidly-moving ships, and should disable the base. If not, the attacking ships can make another pass, doing basically the same thing.
One of the most important decisions a Player will make in the course of a battle is whether or not to withdraw, If a Player withdraws too soon, he will have abandoned a battle that he could have won. If he withdraws too late, he runs the risk of his withdrawing force being cut to pieces before it can get out of range of enemy ships. However, if it ever looks as if the battle is swinging too far the wrong way, it is always better to cut one’s losses than to fight to the last ship.
DEVELOPER'S NOTES
As a science fiction fan (with my own zine and all), I'd long wanted to do an sf game, but without SPI’s whiphandler to force me to get the job done, I never got around to it. (Tells you something about working conditions at SPI). Although the game is not Red Planet, it is good science fiction in that the technology postulated in the game is a reasonable extrapolation of existing technology, and that the opposing sides are able to do in a battle approximately what opposing sides equipped with the given technology could do. Although I can’t say we did extensive research into the nature of lasers and so forth, we did do basic calculations on dispersion, aiming and so on. In this we were helped by articles in The Space Gamer, an sf/wargaming zine put out by Metagaming Concepts, which I cannot recommend too highly. Mr. Oktay Oztunali (our friendly nuclear physicist) also provided laser data.
The Morale rules are the meat of the Strategic game, as I suppose they should be, home morale having tremendous effect in these days of war-by-production, I still prefer the idea of the game being fought totally along military lines, a la “Doc” Smith, but morale was essentially a design decision, and we work with what we get.
And the Tactical rules are the heart of the game, Although Morale is tremendously important, the Players are going to spend most of their time in tactical situations. And personally, I think the Tactical game is a good deal more interesting than the Strategic game, In addition, the Tactical game is clean enough to be a model for just about any battle involving ship-to-ship actions in sf, with a bit of modification. I rather hope to see a number of variants and scenarios printed elsewhere using the basic BattleFleet Mars Tactical system.
DESIGNER'S NOTES
BattleFleet Mars was designed as a collaborative effort between Brad Hessel and myself. Brad and I have somewhat different outlooks on science-fiction. At times this resulted (naturally) in disagreements, but in the main I believe that the dichotomy resulted in a more richly complex game than would have been the case had either one of us been the sole designer. I'll limit my discussion, therefore, to those elements for which I was mainly responsible. These were:
-
The basic worldview/scenario of an autonomous interplanetary corporation attempting to suppress an uprising of its workers.
-
The basic design of the split-scale Displays.
-
The tactical movement system and part of the basic tactical combat system.
1. THE WORLDVIEW
One of the reasons behind the nature of the setting for BattleFleet Mars is my own depression over the current low state of the various national space programs. Unless some new driving political/economic force emerges, I feel that, for a long time to come, not much is going to happen concerning manned spaceflight and exploration. My basic scenario can be looked at as a small jab at NASA and the Congress: if the government doesn’t get off its butt, some organization is going to come along and fill the literal and figurative vacuum. That organization could turn out to be a supra-national, multi-corporation seeking to escape the encumbrances of earth-bound governmental regulation as well as seizing the richest opportunity in the history of mankind. While (in the scenario) the Ares Corporation is not an “evil” organization, neither is it terribly responsive to the long-range best interests of the human population. It is, in the time-honored tradition of large corporations, completely self-interested. Such large corporations easily lose touch with their workers. This would be especially true when a large contingent of them are highly trained, independent-minded technicians stationed millions of kilometers away from corporate headquarters.
The scenario also serves to limit the war to a manageable size for game purposes. It also precludes the use of weapons of mass destruction—interplanetary thermonuclear war may sound interesting but it makes for a short, dull game. When designing the basic scenario for science-fiction games, a feedback relationship must be established between the game design and the background story so that neither works to the detriment of the other. _That which works as a story does not always work as a simulation game (and vice-versa). It is mainly for this reason that BattleFleet Mars has its own, original background rather than being drawn from some existing science-fiction story. The reader will notice that the technology implicit in the game is not “superscience” but rather only a mildly optimistic extrapolation of present-day trends.
2. THE SPLIT SCALE SYSTEM OF DISPLAYS
As in StarForce (an interstellar warfare game) the reasoning persisted that deep-space combat was unlikely and the strategic situation would have to be represented in a totally different manner than the tactical encounters. Battles are fought at or near points of interest, i.e., the planets/planetoids and their associated orbital stations. Although it is naturally a simplification, the Strategic Display is a relatively accurate model of the five inner planets of our Solar System. The relative positions and movements of the bodies are a good approximation of reality within the scale of the game. The orbits are shown as perfect circles because their (actual) elliptical character is undetectable at the scale used. If I had my “do-overs” I would change the length of the Game-Turn (and the resultant planetary movement increments) to the square root of an Earth year (approximately 19 days). This would increase the accuracy of the Earth-Mars relationship somewhat as well as refining the scale of the Game-Turn. Nevertheless, the Strategic Display is an interesting device all by itself without reference to the game: it is an extremely educational analog of relative planetary movement. Science teachers and science-fiction writers may find it a valuable working tool. The starting positions (and the starting year of the game) were calculated for us by Mr. John Boardman—a very helpful person to have around when designing space games. Note that if Players wish to run the clock backward or forward more than a few years, they should resort to calculating the planetary positions based on the number of earth-days per planetary year rather than rely on the Display. These figures (the sidereal periods) are:
| Planet | Days |
|---|---|
| Mercury | 87.97 |
| Venus | 224.70 |
| Earth | 365.26 |
| Mars | 686.98 |
| Jupiter | 4332.59 |
| Ceres | 1681.00 |
| Pallas | 1684.00 |
| Juno | 1594.00 |
| Vesta | 1325.00 |
Use the starting positions as shown on the display and then translate the changes into planetary years (number of times the planet makes a full circle around the sun) and place the game markers accordingly.
I would like to suggest to those Players who enjoy complication that they calculate their trips from point-to-point on the Strategic Display in terms of the number of days the trip would take rather than the gross measurement of Game-Turns. Doing this will enable ships to arrive during the same Game-Turn in which they depart or any whole day fraction of a Game-Turn. Since there are 29.274 days per Game-Turn, Players can record (on paper) the day of departure of a given Task Force and the projected day of arrival at any given point. An arrival during the last fractional day of the Game-Turn should be considered to occur at the very beginning of the next Game-Turn.
Exact arrival days can be kept secret until the day that the Task Force actually arrives (simply by calling off the days sequentially and announcing arrivals as they occur). To calculate exact trip distances and times requires a bit of math (for which a calculator with a constant and square root function would be useful).
The time it takes to go from one point to another (rest-to-rest) can be discovered by using the following formula:
Time (squared) = 5.47 multiplied by Distance
Time is expressed in days and the distance in millions of kilometers. To find the Time, take the square root of the answer to the equation. To find the distance that can be traveled in any given number of days, use the following formula:
Distance = 0.183 multiplied by the square of Time
Both these formulas use acceleration of 0.01g (which is 0.731566 million kilometers per day squared) and are derived from the basic formula:
Distance = 1/4 Acceleration multiplied by (Time squared)
An additional sophistication can be incorporated into the strategic movement system by allowing ships to use their combat maneuver fuel (Burn Points) for strategic movement. This would result in “instantaneous” acceleration/deceleration at either end of the trip so that the effect would be a straight addition to the average velocity of the Task Force. For each expenditure of two Burn Points, the Task Force adds .36 to its average velocity (velocity is, in strategic movement, always measured in millions of kilometers per day). Note that the increments of Burn Point expenditure must always be in two's since this accounts for creating and cancelling the additional velocity “instantaneously.” The most a Task Force could do would be to add 2.16 to its average velocity (by starting with a full load of combat fuel and burning all twelve Points), Players must keep track of such fuel expenditures (and should they ever get into tactical combat with those forces, reflect the diminished state of the ship’s fuel on the Battle Record).
The main benefit in such strategic Burn Point expenditure is in getting someplace slightly quicker, e.g., making a one Game-Turn trip out of a trip that is just barely a Two-Game-Turn trip. If used in conjunction with the preceding suggestion on daily trip timing, the additional velocity is even more important. The formula for average velocity using the normal interplanetary drive is as follows:
Velocity = 0.183 multiplied by Time
If one wishes to add to this velocity using a combat burn strategically, the formula is as follows:
Velocity plus (Time multiplied by Burn Velocity) = Total Velocity
To then determine how far one can travel, use the formula:
Distance = Time multiplied by Total Velocity
If one knows the distance and wants to know the time the trip will take when a combat burn is added in, the following procedure is used:
- Step 1: Square the Burn Velocity
- Step 2: Multiply the Distance by 5.46
- Step 3: Add the results of Steps 1 and 2
- Step 4: Find the square root of Step 3
- Step 5: Subtract the Burn Velocity from the result of Step 4.
Result: Trip time in days.
When attempting to measure odd distances on the Display, Players will find it easier to use a metric ruler rather than the Time/Distance Measure. Each millimeter equals 2.991 million kilometers. This can safely be rounded off to 3 million kilometers, Each inch equals 75.97 million kilometers which rounds off to 76 million.
Naturally, doing all of the above procedures adds quite a bit of complication to the simple act of movement. But the information is presented just in case anyone wants to massage the numbers. Physics people will be quick to point out that I haven't accounted for the decrease in mass of the Task Force (as it makes its initial burn) and the effect that this would have upon the trip time. Also not accounted for is the velocity component that the Task Force begins with as a result of being in orbit around the sun (and the gravity wells being entered and exited). These factors are, within the scale of the game, negligible. If one wishes to incorporate them, I would suggest a quick course in rocket physics and celestial mechanics.
3. THE TACTICAL MOVEMENT SYSTEM
I'm very happy with the simple vector system used in the game. Although, it’s true, vector systems have previously been used in science-fiction and non-science-fiction games, none (to my knowledge) used a three-dimensional vector system. Even the elaborate computer games some programmers have developed as a hobby use a two-dimensional vector system. The system of recording the vector components is also pleasing since it avoids writing or plotting or any such messy business. Since most space-war gamers exhibit an affinity for ship-to-ship combat, I believe they will have found the ideal spacegaming environment in the BattleFleet Mars tactical system.
I stipulated laser weapons as the main armament for obvious reasons: the range and speed of space combat. As we researched and discussed the capabilities of powerful lasers, it became apparent that the main difficulty would be in acquiring and hitting the target. The attenuation of the actual power of a laser is negligible over the distances on the display. The one regret I have about the combat system that was developed is the lack of some easy but accurate system to account for the relative motion of the firing and target ships and the tracking angle problems involved. To reflect this would have required a lot of heavy-duty math by the Players every time they fired.
I must confess that the scale of the Tactical Display was arrived at empirically. It is possible that the accelerations shown are not feasible given the problems of mass and the efficiency of any stipulated optimum chemical rocket engine. Should some rocket engineer prove this to be so, it would simply mean that the tactical cube would shrink by whatever factor necessary. In effect, the Tactical Display can be adjusted by any one of its parameters in order to account for any wrong estimate on my part. The order of magnitude of the change would not be sufficient to have any substantive effect on the tactics of engagement.
There is much in BattleFleet Mars that should appeal to all gamers, and the content is varied enough so that special interest groups will have a good chance of finding an aspect that they particularly like. Many of these aspects were the brainchildren of Brad Hessel, to whom I now yield the floor.
DESIGNER'S NOTES (continued)
We first decided to do BattleFleet Mars in the mid-summer of 1976. At that point, I was in the midst of finishing up Outreach for Terry Hardy, a game set in the 30th Century, and was about to begin developing Tom Walzcyk’s StarSoldier, which is set in the 25th Century. It seemed natural, therefore, that I should continue progressing “forwards into the past”, as it were, and tackle a 21st Century situation.
The author of the BattleFleet Mars game proposal was Redmond. The game was originally envisioned as a combat-oriented space-warfare simulation. Although the concept of an inter-planetary conflict fascinated me, my primary interest concerned the background dynamics that could give rise to such a conflict. So my involvement in designing BattleFleet Mars expanded the scope of the game and opened the way for what would eventually be a distinct political game paralleling the military game.
It is my conviction that one of the chief dynamics in our history is the inter-relation of human perspectives. This is true both when speaking of individuals and of entire societies. No one person views reality precisely the way anyone else does; nor do the members of one culture conceptualize things in the same manner as those of another will. It is this variety of perspectives—and, more precisely, their interactions—which shape both much of the conflict and much of the most exciting movement (“progress”, I would call it) that we have experienced since we began to concern ourselves with things other than hunting and subsistence farming. Therefore, I believe, the dynamics of perspectives that our species have developed here on Earth is one of our most precious resources.
Extra-terrestrial environments provide humanity with the single most substantial opportunity for “perspective expansion’ since the invention of reading and writing. Who can tell what sort of images, what sort of sounds, what sort of concepts and logic the creative mind born and bred to a (say) Martian perspective will utilize to express itself? I don't know, but I surely suspect that such a development is rich with promise for the expansion of the capacity for humankind to experience and interpret the Universe.
BattleFleet Mars is set against the background of the emergence and self-realization of the first genuine extra-terrestrial human settlement. [We assume that the settlement on Luna is manned by transients from Earth]. This is an event of potent historical significance, regardless of the outcome of this particular concomitant struggle, i.e., the subject matter of the game. But as the background assumed such importance for me, I had need of a rationale which would be carefully structured to do several things, including a) establish the economic necessity and feasibility for the existence of human settlements off Earth; b) encompass a “future history” consistent with the current trend of official pre-occupation with problems here on Earth which are perceived and considered strictly in earthbound terms that nevertheless allowed for the establishment of such offEarth settlements; c) underscore the essential inter-dependence of these human communities; and d) construct the parameters of the conflict such as to limit its scope.
These requirements were much more demanding than those which would have been necessary to simply rationalize a battle between spaceships in the vicinity of Mars. Redmond’s notion of a privately capitalized development of off-Earth resources seemed to me the most reasonable solution. He, Greg, and I brainstormed the details of the scenario in a laugh-filled afternoon session at SPI’s sales desk. Thus, were born Olympia Station, Ganymede Station, the World Organization for Resource Development, and the Ares Corporation.
The situation in the late Twenty-first Century as we have sketched it is the culmination of decades of development. Hence, the long series of strikes and agitation against Ares and the reluctance on the part of the Corporation to accept the alienation of a large body of its employees from “conventional” values should be viewed as a reflection of a larger pattern. That an independent “extraterrestrial” human perspective will come into existence is inevitable given human settlement of the rest of our Solar System. The historical circumstances through which such a process will unfold are, of course, open to speculation. Hopefully, our institutions and economic system would be structured in a flexible enough manner to make such a transition with relative ease. Given the substantial shifts in power that such a transition implies, that is probably too much to expect. It is possible that the developing differences will seem greater than we guess, and that a conflict would prove unresolvable and escalate to mass destruction. Hopefully, the ties—be they economic or cultural, social, political, or whatever—will be too powerful to allow for a total renunciation by the two groups of humans. That is the assumption that has been made in BattleFleet Mars.
Of course, the game itself is directly concerned with the course of the actual conflict. The core of the game is the Morale Indices. For every interaction between the Players, there is a resulting reaction on the Morale Indices. This is appropriate, given the parameters of the conflict as envisioned. The bulk of the people living off Earth have only ambivalently and gradually come to recognize themselves as free agents with an authority to guide their own fate that should be asserted. And this is not purely a “positive’ development—much of the impetus arises as a “negative” reaction to the insensitivity of the Corporation, which is totally and very narrowly self-interested. This impetus could be largely neutralized by a few significant concessions by Ares. Given the small number of people who actually are living off Earth, the use of an Index to measure “morale” is not as crude a mechanism as it would appear, as the correspondence to the course of events actually would be pretty direct. The followers of the MFT do not want to dramatically alter the character of their lives as defined by their work, they merely desire to gain control over decisions affecting their future and that of their children. These both depend directly on a rapid resumption of “normal” relations between Earth and Mars, as soon as the argument over what is “normal” is settled. They cannot stand for a long, drawn-out, destructive struggle.
Ares has little more breathing room. Aside from the economic disruption caused by a suspension of operations, there is the real possibility that a poor showing in bringing the recalcitrants to heel will lead to a direct action on the part of the WORD, which whatever that might be, would diminish the Board of Directors’ legitimacy insofar as it would demonstrate its incapacity to solve internal problems itself. This is reflected in the lower portions of the Earth Morale Table. Of course, this is a built-in dynamic towards an increase in Earth Morale as time goes on. This is to reflect the very real concern that would ever-more strongly develop on Earth when the new cars and buildings stopped being constructed due to the cut-off of material. This Earth Morale increase was also the focal point of no small measure of debate among those working on the game.
Originally, I had envisioned a more active role on the part of the WORD. I toyed with the notion of a three-sided version, and cluttered up early prototypes with mediators, binding arbitration, unarmed envoy ships, and the like. However, the main competitive interplay still lay in the military deployment and resolution of the battles, and short of giving the WORD a fleet (which would have made it harder to distinguish from Ares), there seemed relatively little for the WORD Player to do other than interfere with the others’ battles. Alternately, the WORD Player would sit around bored while the MFT and Corporation Player battled, or out of boredom and frustration, constantly call truces and bore everyone in retaliation. It did seem logical to me that given a lack of quick success on the part of Ares, that the WORD would be forced to take some sort of action towards reopening the pipeline. Envisioning a growing anti-Martian clamour, I imagined the WORD dis-establishing Ares and taking direct command of the war effort. In fact, the Earth Morale Effects Table long reflected this possibility by including such a result at the high end of the Table. In effect, the higher the Earth Morale Index—past a certain danger point—the more chance of the Ares Player “Josing”, with the Corporation dis-established, at which point play would continue to determine whether the Martian Player could still win against the (now) WORD forces. Playtesters and developer alike objected vociferously to this arrangement, which, they argued, could cause the Ares Player to beat himself by “succeeding too well”. Part of any high Earth Index would be the increase effect from the war having dragged on, but much of it would be due to Ares Military success, and it seemed illogical to penalize a Player for success. Furthermore, the game could end with both Players, in effect, “losing” to the WORD, a non-Player game element, which hardly seemed fair, since the Players are supposed to play the game, not vice versa.
At length, with Redmond insisting that the stick-in-the-mud WORD would have no combat-worthy space ships whatsoever under its control, I concluded that the implications of a WORD-Ares conflict, no matter how deep the jealousy and distrust between them, and no matter how heavy the pressure on the WORD to act, smacked too much of cutting off the nose to spite the face and dropped the idea. The Earth Morale increase remains, but I assume that any more vigorous prosecution of the war on the part of the Earth will be channeled through Ares, which will continue to command the means to act.
A controversy remains unresolved, however— concerning the basic assumption that on balance time is on the side of the Corporation. The developer, bleeding-heart Mars-symp that he is, was never reconciled to this assumption. He insists that public opinion on Earth would turn more hostile to Ares and more in favor of the Martian (or at least, more favorable to ending the war with a unilateral surrender) as time goes on. One can only assume that when the Arabs declare an oil embargo, and accompany that move with a total nationalization of oil company assets, that I would be mad at the Arabs while the developer would be mad at Exxon. I was better impressed with the objection that the Earth should receive a bonus only up to about twenty-four months, because assuming a reasonably effective Martian embargo effort of that length, people on Earth would be hurting badly enough to necessitate throwing in the towel. Of course, it is not immediately clear which side would be hurting more after two years—presumably the reserve of spare parts for the life-support systems and ships would begin to wear thin on Mars eventually, and with only very limited manufacturing capacity, things could be jury-rigged only so long...of course, who can say for how long? In testing, no game ever lasted longer than twenty months anyway, so it may be a moot point. However, I certainly would be the first to award any Martian Player who survived twenty-four Strategic Game-Turns at least a “morale” victory—and I would not be opposed to anyone considering that any MFT effort that survived that long would have won ipso facto, regardless of the Morale Indices positions. It is not an unreasonable assumption.
I thoroughly enjoyed working on BattleFleet Mars. I agree with Redmond that the game as it stands, with input from both of us, is more interesting than it would have been had only one of us designed it. I appreciate the opportunity to more rigorously explore my ideas concerning the relationship of extraterrestrial humans to the Earth, which I did in the course of working on this game. I am pleased with the systematic interweaving of military, political, and economic factors that I achieved in the Strategic Game, and very enthusiastic about Redmond’s 3-D tactical ship-to-ship combat system. I know it is a game which provoked the imagination of several people both in and out of SPI—I received more letters from people commenting on the Work In Progress reports on BattleFleet than I had ever received concerning any other game—and I can only hope that it will be played with as much pleasure as accompanied its making.
COMBAT AND MOVEMENT CHARTS AND TABLES
The following charts and tables appear on the separate Tactical Charts and Tables sheet (and on the Solar Display) rather than in the rules text.
TACTICAL SEQUENCE SUMMARY
- A. Withdrawal Phase
- B. Missile Burn and Movement Phase
- C. Joint Burn Phase
- D. Missile and Fighter Salvo Phase
- E. Combat Phase
- F. Repair Phase
- G. Joint Movement Phase
[20.37] BURN COMPONENTS TABLE
| Burn Points Expended | 1 Component Change | 2 Component Change | 3 Component Change |
|---|---|---|---|
| 1 | 1 | 1,1 | not applicable |
| 2 | 2 | 2,1 | 1,1,1; 2,1,1 |
| 3 | 3 | 3,1; 2,2 | 3,1,1; 2,2,1; 2,2,2 |
| 4 | 4 | 4,1; 3,2; 3,3 | 4,1,1; 3,2,1; 3,3,1; 3,2,2 |
[22.4] MISSILE DETONATION TABLE
| Dice Roll | Result |
|---|---|
| 2 | D |
| 3 | L4 |
| 4 | L3 |
| 5 | L2 |
| 6 | L1 |
| 7 | B1 |
| 8 | B2 |
| 9 | B3 |
| 10 | B4 |
| 11 | R |
| 12 | D |
(see Laser Combat Results Table for explanation of results)
[26.2] RECOVERY TABLE
| Die Roll | Planet/Asteroid Friendly | Planet/Asteroid Unfriendly |
|---|---|---|
| 1 or 2 | Friendly Recovery | Friendly Recovery |
| 3 | Friendly Recovery | Lost |
| 4 or 5 | Lost | Lost |
| 6 | Lost | Enemy Recovery |
[21.7] TRUE DISTANCE TABLE
Rows are the two horizontal differences (X-Y or Y-X, smaller number first); values read left to right are the True Distance for a "Z" Axis difference of 0, 1, 2, 3, ... Entries beyond the last value shown in a row (beyond a True Distance of 9) are not listed.
| X-Y or Y-X | "Z" Axis: 0, 1, 2, 3, ... |
|---|---|
| 1-1 | 1 2 2 3 4 5 6 7 8 9 |
| 1-2 | 2 2 3 4 5 5 6 7 8 9 |
| 1-3 | 3 3 4 4 5 6 7 8 9 |
| 1-4 | 4 4 5 5 6 6 7 8 9 |
| 1-5 | 5 5 5 6 6 7 8 9 9 |
| 1-6 | 6 6 6 7 7 8 9 9 |
| 1-7 | 7 7 7 8 8 9 9 |
| 1-8 | 8 8 8 9 9 9 |
| 1-9 | 9 9 9 |
| 2-2 | 3 3 3 4 5 6 7 8 8 9 |
| 2-3 | 4 4 4 5 5 6 7 8 9 |
| 2-4 | 4 5 5 5 6 7 7 8 9 |
[21.5] LASER COMBAT RESULTS TABLE
Find the 1st die roll (die roll plus the firing ship's Laser Strength, as per Case 21.43) block, then the 2nd die roll row, then cross-reference the Range (True Distance) column.
1st die roll 1
| 2nd die roll | 0,1 | 2 | 3 | 4 | 5 | 6 | 7 | 8 | 9 |
|---|---|---|---|---|---|---|---|---|---|
| 1 | iL | iL | iL | - | iL | iL | iL | iL | iL |
| 2 | B1 | B1 | - | - | - | - | - | - | - |
| 3 | B1 |
1st die roll 2
| 2nd die roll | 0,1 | 2 | 3 | 4 | 5 | 6 | 7 | 8 | 9 |
|---|---|---|---|---|---|---|---|---|---|
| 1 | iL | iL | - | iL | - | - | - | - | - |
| 2 | B1 | B1 | B1 | B1 | - | B1 | B1 | - | B1 |
| 3 | B1 |
1st die roll 3
| 2nd die roll | 0,1 | 2 | 3 | 4 | 5 | 6 | 7 | 8 | 9 |
|---|---|---|---|---|---|---|---|---|---|
| 1 | iL | iL | iL | - | - | - | - | - | - |
| 2 | B1 | B1 | B1 | B1 | B1 | B1 | B1 | - | B1 |
| 3 | B1 |
1st die roll 4
| 2nd die roll | 0,1 | 2 | 3 | 4 | 5 | 6 | 7 | 8 | 9 |
|---|---|---|---|---|---|---|---|---|---|
| 1 | iL | iL | - | iL | iL | iL | - | - | - |
| 2 | B1 | - | B1 | - | - | - | - | - | - |
| 3 | B1 |
1st die roll 5
| 2nd die roll | 0,1 | 2 | 3 | 4 | 5 | 6 | 7 | 8 | 9 |
|---|---|---|---|---|---|---|---|---|---|
| 1 | iL | - | iL | - | - | - | iL | - | - |
| 2 | B1 | B1 | - | B1 | - | B1 | B1 | B1 | - |
| 3 | L1 |
1st die roll 6
| 2nd die roll | 0,1 | 2 | 3 | 4 | 5 | 6 | 7 | 8 | 9 |
|---|---|---|---|---|---|---|---|---|---|
| 1 | iL | iL | iL | iL | - | - | - | iL | - |
| 2 | B1 | B1 | B1 | B1 | - | - | - | - | - |
| 3 | L1 |
1st die roll 7
| 2nd die roll | 0,1 | 2 | 3 | 4 | 5 | 6 | 7 | 8 | 9 |
|---|---|---|---|---|---|---|---|---|---|
| 1 | iL | iL | - | - | iL | iL | - | - | iL |
| 2 | B1 | B1 | B1 | B1 | B1 | - | B1 | - | - |
| 3 | L1 |
1st die roll 8
| 2nd die roll | 0,1 | 2 | 3 | 4 | 5 | 6 | 7 | 8 | 9 |
|---|---|---|---|---|---|---|---|---|---|
| 1 | iL | iL | iL | iL | - | - | - | - | - |
| 2 | B1 | B1 | - | - | - | B1 | B1 | - | B1 |
| 3 | L1 |
1st die roll 9
| 2nd die roll | 0,1 | 2 | 3 | 4 | 5 | 6 | 7 | 8 | 9 |
|---|---|---|---|---|---|---|---|---|---|
| 1 | iL | iL | iL | - | - | - | iL | - | - |
| 2 | B1 | - | B1 | B1 | B1 | - | - | - | - |
| 3 | B2 |
1st die roll 10
| 2nd die roll | 0,1 | 2 | 3 | 4 | 5 | 6 | 7 | 8 | 9 |
|---|---|---|---|---|---|---|---|---|---|
| 1 | iL | - | - | iL | iL | - | - | - | - |
| 2 | B2 | B2 | B2 | - | - | B2 | - | B2 | - |
| 3 | L2 |
1st die roll 11
| 2nd die roll | 0,1 | 2 | 3 | 4 | 5 | 6 | 7 | 8 | 9 |
|---|---|---|---|---|---|---|---|---|---|
| 1 | iL | iL | iL | - | - | iL | - | iL | - |
| 2 | B2 | B2 | - | B2 | - | - | B2 | - | - |
| 3 | B3 |
1st die roll 12
| 2nd die roll | 0,1 | 2 | 3 | 4 | 5 | 6 | 7 | 8 | 9 |
|---|---|---|---|---|---|---|---|---|---|
| 1 | iL | iL | iL | iL | - | - | - | - | - |
| 2 | B3 | B3 | B3 | - | B3 | B3 | - | - | - |
| 3 | L3 |
(In the Laser Combat Results Table above, a dash stands for the bullet printed in the original, which means "No effect.")
[21.6] EXPLANATION OF COMBAT RESULTS
The following explanation of combat results apply to results obtained on the Laser Combat Results Table (21.5) and the Missile Detonation Table (22.4).
iL = Impaired Launch. One box under "Launch" on the Ship Chart crossed off for the ship undergoing the result. If ship is a fighter or missile, it is destroyed instead.
R = Repair Capacity reduced. One box under "Repair" on the Ship Chart crossed off for the ship undergoing the result. If ship is a fighter or missile, it is destroyed instead.
D = ship destroyed.
B[#] = Reduce Burn Capacity by the number indicated. The number of indicated boxes are crossed off on the ship chart under "Burn Capacity" for the ship affected. If the ship is a base or missile, result changes to no effect.
L[#] = Reduce Laser Capacity by the number indicated. As many boxes as indicated are crossed off the ship's Ship Chart under "Laser Strength". If the ship is a missile, it is destroyed instead.
Bullet = No effect.
SOLAR DISPLAY CHARTS AND TABLES
The Strategic Game charts and tables are printed on the Solar Display (see Case 4.3). They are transcribed below from the printed Display. The Display also carries the Logistics Points Available Track (0 to 16, with a "START" mark), the Production Track and Logistics Point Costs, the Ship Transit Tracks and the Planetary orbits, which are graphic and not transcribed here.
[9.28] TACTICAL ABSTRACT COMBAT RESULTS TABLE
Attacker Strength as Percentage of Defender Strength. Each entry is Attacker loss percentage/Defender loss percentage.
| Die Roll | 10% to 24% | 25% to 49% | 50% to 75% | 76% to 100% | 101% to 125% | 126% to 149% | 150% to 199% | 200%+ |
|---|---|---|---|---|---|---|---|---|
| 1 | 50/5 | 50/5 | 40/10 | 30/10 | 20/10 | 20/20 | 10/30 | 10/30 |
| 2 | 50/5 | 50/5 | 40/10 | 30/10 | 20/10 | 20/30 | 10/30 | 10/40 |
| 3 | 50/5 | 40/10 | 30/10 |
The attacker's total Strength Value is expressed as a percentage of the defender's total to determine which column shall be used. A die is rolled and the result cross-indexed with the proper column to determine the result. This is expressed in a percentage also; players refer to the Percentage Loss Table to determine exactly how much their Strength Value totals are reduced. The loss to the attacker is stated before the slash mark; the loss to the defender is stated after it. Losses are subtracted immediately, prior to any withdrawal or further roll on the Tactical Abstract Combat Results Table. Any attack by ships whose total Strength Value is less than 10% of the defender's force must be foregone, and attacking ships must be withdrawn instead. Attacks at greater than 200% are resolved on the 200% column.
[9.29] PERCENTAGE LOSS TABLE
Combat Result Percentage and Strength Value Equivalent.
| Total Strength Value of Ships Incurring Loss | 5% | 10% | 20% | 30% | 40% | 50% |
|---|---|---|---|---|---|---|
| 1 thru 5 | 1 | 1 | 1 | 1 | 1 | 2 |
| 6 thru 10 | 1 | 1 | 2 | 2 | 3 | 4 |
| 11 thru 15 | 1 | 1 | 3 | 4 | 5 | 7 |
| 16 thru 20 | 1 | 2 |
[10.6] SUMMARY OF MORALE INDEX ADJUSTMENTS
| EVENT | Morale Effect on Earth | Morale Effect on Mars |
|---|---|---|
| Ares Corp controls 4 Asteroids | +1/GT | -3/GT |
| Mars controls 4 Asteroids | -2/GT | +2/GT |
| Mars loses 5+ ships in battle | NA | -2 |
| Ares Corp captures an Asteroid | +2 | -6 |
| Mars captures an Asteroid | -4 | +3 |
| Ares Corp wins battle* | +2 | -3 |
| Mars wins battle* | -2 | +3 |
| Mars destroys 1st Earth Base | -1 | +5 |
*battle effects are multiplied by two if 10-20 ships were involved in the battle, and by three if 21+ ships were involved.
#/GT=Plus or minus the indicated number of Morale Points per Game-Turn.
MORALE TABLES PROCEDURE: To determine Morale Effects, roll one die and adjust the result to account for any expenditure of Political Points by either Player (see Case 11.3). Results of greater than 6 are treated as 6; results of less than 1 are treated as 1. Read the die roll result from the list adjacent to the appropriate box on the Morale Index Track (i.e., the box containing the determining Player's 10's Morale Marker). Apply results immediately.
NOTES ON RESULTS: WORD supports Ares--Martian Morale Index decreases 8 Morale Points, Ares Corporation receives 4 Logistics Points; WORD neutrality--Martian Morale Index increases 6 Morale Points, any Ares Corporation ship or Base under construction is delayed one Game-Turn; assassin attempt--(assassination attempt) determing Player may attempt to assassinate Enemy agents, see Case 11.4; Sabotage attempt--Martian Player must attempt Sabotage, see Section 14.0; Asteroids counter-revolt--see Section 12.0; Truce--see Section 13.0; victory--game ends.
[10.4] MARTIAN MORALE INDEX / MORALE EFFECTS TABLE
The Martian Morale Index box is the ten's digit of the Martian morale level (START: 77). Roll one die and read the result for that box.
| Index box | Die roll results |
|---|---|
| 9 | 1: Earth Morale down 5 2: Earth Morale down 5 3: Earth Morale down 5 4: Earth Morale down 3 5: Earth Morale down 1 6: Earth Morale down 1 |
| 8 | 1: Earth Morale down 5 2: Earth Morale down 5 3: Earth Morale down 3 4: Earth Morale down 1 5: Earth Morale down 1 6: Martian assassin attempt |
| 7 | 1: Earth Morale down 5 2: Earth Morale down 3 3: Earth Morale down 3 4: Earth Morale down 1 5: Martian assassin attempt 6: Sabotage attempt |
| 6 | 1: Earth Morale down 3 2: Earth Morale down 1 3: Earth Morale down 1 4: Martian assassin attempt 5: Sabotage attempt 6: Asteroids counter-revolt |
| 5 | 1: Earth Morale down 1 2: Earth Morale down 1 3: Martian assassin attempt 4: Sabotage attempt 5: Sabotage attempt 6: Asteroids counter-revolt |
| 4 | 1: Earth Morale down 1 2: Martian assassin attempt 3: Sabotage attempt 4: Sabotage attempt 5: Asteroids counter-revolt 6: Ares victory |
| 3 | 1: Martian assassin attempt 2: Sabotage attempt 3: Sabotage attempt 4: Asteroids counter-revolt 5: Ares victory 6: Ares victory |
[10.2] EARTH MORALE INDEX / MORALE EFFECTS TABLE
The Earth Morale Index box is the ten's digit of the Earth morale level (START: 55). Roll one die and read the result for that box.
| Index box | Die roll results |
|---|---|
| 9 | 1: Ares assassin. attempt 2: WORD supports Ares 3: Mars Morale down 1 4: Mars Morale down 3 5: Mars Morale down 5 6: Mars Morale down 7 |
| 8 | 1: Ares assassin attempt 2: WORD supports Ares 3: WORD supports Ares 4: Mars Morale down 1 5: Mars Morale down 3 6: Mars Morale down 5 |
| 7 | 1: Ares assassin attempt 2: Truce 3: WORD supports Ares 4: WORD supports Ares 5: Mars Morale down 1 6: Mars Morale down 3 |
| 6 | 1: Truce 2: Ares assassin attempt 3: Truce 4: Ares assassin attempt 5: WORD supports Ares 6: Mars Morale down 1 |
| 5 | 1: WORD neutrality 2: Truce 3: Ares assassin attempt 4: Truce 5: Ares assassin attempt 6: WORD supports Ares |
| 4 | 1: WORD neutrality 2: Ares assassin attempt 3: Truce 4: Ares assassin attempt 5: Truce 6: WORD supports Ares |
| 3 | 1: Martian victory 2: WORD neutrality 3: Ares assassin attempt 4: Truce 5: Ares assassin attempt 6: Truce |
| 2 |
POLITICAL POINTS TRACK [11.39]
The Political Points Track runs from 0 to 9 for each Player (Mars and Ares). Mars START: 7. Ares START: 5.
[11.47] ASSASSINATION TABLE
| Die | Ares Assassination Attempt on Martian Agent | Martian Assassination Attempt on Ares Corporation Agent |
|---|---|---|
| 1 | Assassination bungled; Earth Morale down 1 | Ares Agent killed |
| 2 | Attempt fails | Ares Agent killed |
| 3, 4, 5 | Attempt fails | Attempt fails |
| 6 | Martian Agent killed | Assassination bungled; Earth Morale up 2 |
Adjust die-roll for any Political Point expenditure by either Player (adjusted result of less than one is treated as one; greater than six is treated as six.)
[12.3] REVOLT TABLE
| Die Roll | Earth | Mars | Vesta | Juno | Ceres | Pallas | Jupiter |
|---|---|---|---|---|---|---|---|
| 1 | L/2 | R/8 | R/5 | R/6 | R/8 | R/5 | R/5 |
| 2 | L/2 | R/7 | R/4 | R/5 | R/8 | R/4 | R/5 |
| 3 | L/2 | R/7 | R/4 | R/4 | R/7 | R/3 | R/4 |
Roll one die and cross index the result with the column of the Planet or Asteroid in question, adjusting for the effects of any Political Points expended. Apply the results immediately.
KEY: L = the Planet/Asteroid remains loyal to the Ares Corporation or counter-revolts against the Martian Cabal as applicable. R = the Planet/Asteroid joins in the revolt of the Martian colony against the Ares Corporation or remains loyal to the Revolt despite an attempted counter-revolt, as appropriate. /# = the number of ships (at, or in transit to, that Planet/Asteroid) which join the revolt, as selected by the Martian Player (see Case 6.2).
[13.4] TRUCE TABLE
| Die Roll | Player Options [if any] and Negotiation Site |
|---|---|
| 1 | Mars may decline Truce. Site: Martian choice. |
| 2 | Truce mandatory. Site: Martian choice. |
| 3 or 4 | Truce mandatory. Site: Earth. |
| 5 | Truce mandatory. Site: Ares' choice. |
| 6 | Ares may decline Truce. Site: Ares' choice. |
The die roll is adjusted to reflect the expenditure of Political Points by either Player's agents on Earth (if any). See Case 13.21.
[13.5] NEGOTIATION TABLE
| Die Roll | Effect on Truce |
|---|---|
| 1 or 2 | Martians may end or extend Truce. |
| 3 or 4 | Truce automatically continues. |
| 5 or 6 | Ares may end or extend Truce. |
At the start of every Political Interaction Phase in which a Truce is in effect, the Martian Player rolls the die (adjusting the result to reflect the expenditure of Political Points by either Player). See Case 13.23.
[14.2] SABOTAGE TABLE
| Die Roll | Effect on Ares Production and Earth/Mars Morale |
|---|---|
| 1 | Ares ships under construction are delayed by three Game-Turns. No missile reloads for Ares for three Maintenance Phases. Earth Morale up 5; Mars Morale up 4. |
| 2 | Ares ships under construction are delayed one Game-Turn; Earth Morale up 3; Mars Morale up 2. |
| 3 or 4 | No effect |
| 5 | Saboteurs exposed: Earth Morale up 2. |
| 6 | Bystanders killed: Earth Morale up 5; Mars Morale down 1. |
[6.11] INITIAL SHIP DEPLOYMENT CHART
(as given in Case 6.11 above)
ARES STARTING PRODUCTION
(as given in Case 6.16 above)
PRODUCTION TRACK (and Logistics Point Costs)
Printed on the Solar Display below the tables: Production Track Boxes 5 through 0. Costs shown on the track are 7LP (Base counter, Box 5), 5LP (Box 4), and 3LP and 4LP (Box 3), the ship types being shown by counter icons; the box marked 0 shows "Available", with service of a damaged ship costing 1LP and of a Base 2LP. The ship-type icons were not legible in the source scan and are not identified here.
TIME/DISTANCE TRIP MEASURE
A printed strip measure (see Case 8.2). It is marked from the "Point of Origin of Trip" with distance marks at 50, 100, 200, 300, 400, 500, 600 and 700 Million Kilometers, plus lines labeled "Maximum Distance of One-Game-Turn Trip", "End of First Game-Turn Position When Trip Is Two or Three Game-Turns Long", "Maximum Distance of Two-Game-Turn Trip", and "Mid-Point of a Maximum Distance Three-Game-Turn Trip".