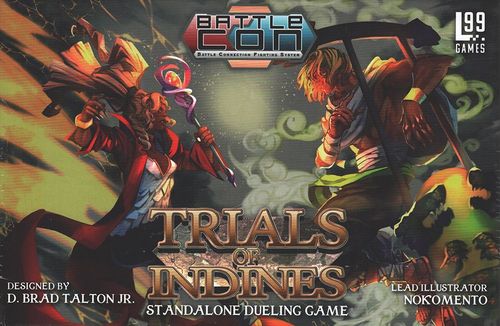
BattleCON: Trials of Indines
BattleCON: Trials of Indines Rulebook
Table of Contents
Table of Contents
The Story So Far...
Over a millennium ago, Indines was connected to the Envernes, also known as the Underlands, a subterranean world as vast as the surface above. One could travel deep enough to find a surface land opposite that of Indines, emerging under a different sky and a different sun. Seven Spires were built to facilitate journeys and trade between Indines and these Underlands, and in ancient times, both sides benefited from fruitful exchange of technology, magic, and ideas.
To protect themselves from the dragons who conquered the surface of Indines, the citizens of Envernes sealed the seven passages between the two worlds with seven keys. These spire keys remain lost and scattered to this day. The Seven Spires, originally gateways between Indines and Envernes, now stand as the only reminder of this long-forgotten age of mutual prosperity. Few living now remember their true purpose.
One fateful day, in a lost ruin upon the remote isle of Xeph, an ancient key was rediscovered by the intrepid Magister Jeris Ieyes. This discovery would set in motion a chain of events wherein one man's ambition, greed, and curiosity would shake the world's very foundations.
Three friends, Trias, Cindra, and Dravil, follow old stories and legends that also lead them to the remote isle of Xeph. But little do they know that a creature of living shadow, Alumis, follows them. She knows the final destination of these keys, and seeks the secret power hidden there.
Stumbling upon the archaeological base camp of Jeris Ieyes, Trias and his friends learn the full scope of the magister's plans, only to be captured by Division 13's henchmen. As Jeris prepares to return to his laboratory, the three friends find themselves locked in the brig of a military airship.
One dark and stormy night, in a dingy tavern in northern Relecour, the daemon Lucida bets an ancient key against the wandering alchemist Dareios in a gamble for his soul.
Dareios wins the bet, and takes the key as a trophy.
Intending to present it as a gift to the woman of his dreams, Dareios travels west across the desert sands of Sanghalim, accompanied by his drinking pal Wardlaw O'Brien on a whimsical adventure. Guided by the key as much as luck, they become lost in the desert and discover the temple of Mak'terix, and another key-keeper, Shoshannah, one of the few who understands the relics' true significance.
But the daemon Lucida isn't one to let a lost bet stand in the way of her dinner. Joined by her daemonic "sisters" Dolores and Ariel, they pursue Dareios and the key into the desert. With promises of power and wealth, the daemons tempt Wardlaw into betraying his friend and doing their dirty work, then leave him to perish in the hot desert sun while making off with both keys.
Too late, the agents of the Imperial Reliquary arrive, Amon Elcela at their head, and sweep up Dareios into a chase to hunt down the daemons and stop them from using the keys.
Hayden Morgan, assistant to the famed artificer Runika Zenanen, had just rescued her mentor from yet another ill-considered archaeological venture, when they learn the true significance of the spire key that Runika has discovered. Following Hayden's psionic senses—which resonate oddly with the spire key—the two adventurers descend into the caves below the mysterious Mount Ganarl.
Deep within the caverns of the sacred mountain, they discover the three daemons engaged in a profane ritual to break open the gateway to Envernes, intent on claiming it solely for themselves. Outmatched two to three, only the timely arrival of Amon, Dareios, and the Reliquary forces tips the fight in their favor.
Now with three keys in their possession, the heroes return to the Sandstone Spire, knowing that the call of their keys will soon guide the others to them.
From within the brig of the airship, Trias, Cindra, and Dravil plan their daring escape. By a few daring feats of trickery and swashbuckling, they manage to escape with Jeris's spire key, leaving the magister and his minions grounded upon the snowy fields of northern Relecour.
Following the psionic resonance of the keys, they unite with other travelers from the north and bring their combined four keys towards the Sandstone Spire, where the final keys call to them.
With all the spire keys gathered together at last in the Reliquary's headquarters, the Sandstone Spire, the heroes prepare to break the seal upon the spires and reunite two worlds once more.
Alumis, who has quietly bided her time, uses this opportunity and the assistance of her accomplices Wardlaw and the daemon Lucida, to slip into the vaults of the Reliquary and acquire her true objective: the damaged body of the machine god Mak'terix. Possessing a god's form and power for herself at last, she plans to control both the surface and the Underlands!
Epilogue
Though defeated by the assembled heroes, Alumis' stolen power would do untold damage, releasing still more deadly things contained in the depths of the Reliquary. Captured and bound in an arcane prison, Alumis's threat seems contained for now, though the daemons and the villainous Wardlaw O'Brien continue to remain at large.
All across Indines, the six remaining spires opened their vaults at once in response to the opening of the Sandstone Spire, restoring free passage between Indines and Envernes once more. The people of the lands below, the Envernes, emerge once more upon the surface, and the knowledge and secrets they carry will present all-new challenges for the World of Indines.
Fighter Select
Novice
- Burgundy Twelve (Tactician) – Splash paint markers across the board to attack from unexpected angles.
- Cindra Flama (Brawler) – Arise like the phoenix midway through the match, revealing a set of powerful new styles.
- Uleyle Kimbhe (Brawler) – Use your staff to enhance your powerful magical attacks—but make sure it isn't stolen!
Intermediate
- Amon Elcela (Slugger) – Utilize shields that strengthen in response to enemy assaults, and counterattack.
- Lucida Malephaise (Disruptor) – Sap your enemy's strength and grow stronger the weaker they become.
- Trias Blackwind (Tinkerer) – Baffle your opponents to keep them at range, then tell a tale of their defeat.
- Wardlaw O'Brien (Slugger) – Use your swift movement to pin your opponent against the wall, then punish them.
Advanced
- Dareios Kuel (Tinkerer) – When the time is right, partake from drinks for powerful alchemical advantages.
- Dravil Coldwater (Tactician) – Shift between two forms—steam and ice—to take your opponent off-guard.
- Hayden Morgan (Mage) – Balance fury and control to master your psychic powers and control the battlefield.
Game Overview
You can skip the rulebook and watch a tutorial video at the link below: www.level99games.com/BattleCON
In BattleCON, take on the role of a fighter from the vast World of Indines and use their unique abilities and tactics to defeat a rival in single combat!
Each turn, both fighters will select an attack, commit their resources to it, and then reveal their actions together. The chosen attacks play out, and their interplay determines whether each attack will land and what the results of the hits will be. Knock out your opponent to win!
Unique Abilities
Each fighter possesses a Unique Ability (also called a "UA") that gives them access to powers no other fighter has. Some UAs are simple, while others are complex. Learning and mastering both your own UA and your opponent's UA is the key to victory.
Each fighter's Unique Ability is rated according to its complexity. More complex abilities have more specific interactions or use more special materials. Here's a quick guide:
- Novice - Simple abilities that are recommended for quick, casual games, as well as for teaching others.
- Intermediate - Slightly more difficult abilities with the potential for complex interactions.
- Advanced - Complex characters who have many moving parts. Recommended for duels between two experienced players.
Attack Pairs
Fighters have two types of cards called Styles and Bases. Combining one Style with one Base forms an attack pair, which has all the effects and stats that are printed on both cards.
Attack Pairs are Recycled after use, locking up both cards in the pair for two complete beats (rounds) of combat. Be wary of what cards you have access to and what your opponent can and can't do during their turns. Use their limitations to your advantage.
For example, this Attack Pair "Soaring Shot" would have 1~5 Range, 2 Power, 3 Priority, and 2 Guard. It also has all the special effects of both cards combined.
Fighting Styles
You can get a sense of how a fighter's Styles and Unique Ability support combat from their class, which is listed on their Unique Ability card:
- Slugger – Great defense and offense. Aim to out-trade by resisting disruption and pouring damage into the opponent consistently.
- Tactician – Utilize spacing and positional setups to control the board and put opponents at a disadvantage.
- Mage – Draw power from technical abilities. Rely heavily on activating these effects to maintain and press advantages in combat.
- Disruptor – Attempt to stun opponents, dodge retaliation, or muddle enemy abilities. Force the opponent to play around your answers.
- Brawler – Control the opponents and the pace of combat by using consistent, well-rounded attacks, often landing hits to inflict statuses.
- Tinkerer – Use flexible abilities to craft attacks, often stacking multiple buffs or triggers to adapt to the situation.
A fighter's class and complexity have no bearing on their strength. Novice characters can compete evenly with Advanced ones, and each class is balanced to deal with others. It's most important to find and use a fighter that resonates with your personal play style.
All of the cards and other components that belong to a fighter are collectively known as the fighter's "kit." These components are bound to a specific fighter and cannot be mixed and matched among fighters.
Triggered Effects
The special effects of your attacks are not carried out all at once. These effects are triggered by reaching certain moments during play. Then and only then are they carried out.
-
When a player has two or more triggers with the same timing, that player performs the triggers in the order they choose.
-
Reveal - Triggers when players flip over their Attack Pairs, but before priority is tallied and the Active Player is decided.
-
Start - Triggers after the Active Player is decided, but before players attack.
-
Before - Triggers just before a fighter's own attack.
-
Hit - Triggers if the fighter's attack hits the opponent, before damage.
-
Damage - Triggers if the fighter's attack deals 1 or more damage, after damage is dealt.
-
After - Triggers just after a fighter's own attack, regardless of whether the attack hit or missed.
-
End - Triggers after all attacks are finished resolving.
-
Recycle - Triggers just before players pick up the cards from their Discard Piles and discard their Attack Pairs.
In-Time Triggers
Some triggers occur outside the normal order. These trigger in response to the opponent's actions, your actions, or to various conditions.
These In-Time Triggers are colored purple. They happen after all other triggers associated with a timing are performed. For example, a trigger "When you are hit..." happens after all Hit triggers are performed, but before damage is applied.
In the extremely rare case where there are multiple In-Time triggers that need to happen at the same time, perform all of the Active Player's triggers first, in any order that player wishes, then perform all the Reactive Player's triggers, in any order they wish.
Conditionals
Many triggers have conditions attached after the timing. Most are self-explanatory. Here are a few examples:
- Before, Range 1: (must be at range 1 to the Opponent to use)
- End, you were hit: (must have been hit during this beat to use)
- Hit, 3+ held Frost: (must have 3 Frost Counters to use).
Unless otherwise noted in the condition, only consider events that happened during this beat and the components currently held by players. If you don't fulfill the conditions, you must skip the trigger entirely.
Optional Triggers
By default, triggered effects are mandatory, and must be used when they come up. Some have the "Optional" keyword, which means that a player may choose to perform them or not (and may move to the next timing even if optional triggers were not performed).
Recycle
After cards are used in an Attack Pair, they go to your Discard Piles. Each beat, you pick up your oldest Discard Pile. Be careful to manage your resources so that you can respond to your opponent at every moment throughout the duel!
Eliminate the Opponent to win!
Attacks will deal damage, which reduces the opponent's life. Reduce the opponent's life to zero to eliminate them! In a standard duel, the first player to eliminate the other wins. In multiplayer, all members of a team win once all members of the opposing team are eliminated.
Materials
Styles and Bases
Attacks are formed by pairing any one Style and any one Base.
Bases are fundamental tactics. Every fighter can throw a heavy punch, use some kind of projectile, perform a quick backstep, or lunge forward. These techniques are represented by the six standard Bases which all fighters share: Grasp, Drive, Strike, Shot, Burst, and Dodge. Most fighters also bring at least one Unique Base to their kit.
Styles encapsulate how a fighter attacks. Even if two fighters throw the same heavy punch, their personal Styles alter the power, speed, and range at which the attack hits. Most Styles are unique to the fighter who owns them, with the exception of Switch, which all fighters share.
Both Styles and Bases have the same stats and text, and their layouts mirror one another. Line them up to create customized Attack Pairs. Your attack is the sum of both cards' matching stats, as well as the triggers and effects on both cards.
A Style or Base card carries the following elements:
- Name – The name of the card. Styles and Bases pair together to form the name of the attack. For example, the 'Stealthiest' Style and the 'Grasp' Base combine to form the 'Stealthiest Grasp' attack.
- Range – The Range of the attack determines where it hits.
- Add minimum and maximum Range separately. For example, Range 0
3 + Range 23 = Range 2~6. - If a Range stat lists a single number, treat that single number as both a minimum and maximum. For example, Range 3 = Range 3
3. Therefore, Range 3 + Range 01 = Range 3~4.
- Add minimum and maximum Range separately. For example, Range 0
- Power – Power determines how much damage will be dealt if the attack hits the opponent.
- Priority – Priority determines whose attack executes first during a beat. Higher Priority allows you to act quicker, potentially hitting and stunning the opponent before they are able to hit you.
- Guard – Fighters may become stunned when they take damage. Guard represents resistance to stun. If the damage a fighter takes during a beat exceeds their Guard, they become stunned and cannot attack.
- Effects – The triggered effects of both sides of the pair are performed during specific parts of the Beat, as indicated by their colored timings. More on this later.
- Nametag – If a card is exclusive to a particular fighter (most cards are), it will have that fighter's name here. Otherwise, the type of card will be detailed here.
- Watermark – This tells you which game and which edition of that game a particular card is from. BattleCON 4th Edition cards have a single ● before the game's 3-letter indicator.
Example Attack Pairs
Barbed Grasp
- Range: 1~2
- Power: 2
- Priority: 6
- Guard: 0
Experienced Strike
- Range: 3~4
- Power: 6
- Priority: 4
- Guard: 6
Fracturing Drive
- Range: 1~2
- Power: 6
- Priority: 4
- Guard: 0
Reference Cards
Reference cards detail your fighter's Styles and Bases, and are primarily for the benefit of your opponent. BattleCON is an open-information game, meaning that all players know which cards their opponent has at all times. The reference card makes it easy to track this by looking at the colors of Styles and Bases in the opponent's Discard Piles.
The position of all game components is public information and these components can be viewed by any player at any time (except while an Attack Pair is face-down during the Set Phase).
Finisher Cards
Each fighter has a double-sided Finisher card that they can use during play. The Finisher card looks like a Style, except that it has a complete border around the edge. A Finisher is not half of an Attack Pair–it replaces the entire Attack Pair and is not modified by a Style or Base.
Finishers have two sides. During Setup each player selects which Finisher they wish to use and reveals them simultaneously.
Unique Ability Card
Every fighter has a Unique Ability (UA), and every UA changes the game in drastic ways. These abilities provide new rules that supersede any typical game rules. They often come with new materials such as Tokens, Markers, or Counters to keep track of their varied states.
The Unique Ability Card details a fighter's UA and any extra materials provided with it. UA cards detail setup steps, which put these materials into play before a duel begins.
Any triggers on your Unique Ability are applied during every beat of the game.
Switch Style Card
The Switch Style is available to all fighters. When used in an Attack Pair, it activates a Finisher or generates extra Force, a resource used during ante to improve your stats. This Style cycles through your discard just like any other Style.
Overloads
All fighters are able to use the three Overloads by trashing 2 Force. These Overloads are always available to a fighter, and each Overload can only be used once per beat by each fighter.
Use the Overload Tiles to track when you've claimed these bonuses for a beat. Force that you trash to use Overloads is removed from the game, and is never returned.
Force
Force Counters are spent to activate Overloads. Force Counters also form the clock for a duel. Once the pile is empty, the game will end after the next beat. Whenever a fighter gains Force for any reason, it comes out of this shared pool.
Life
Life Counters are useful for tracking your life. Start with Life counters equal to your starting life (typically 20). Remove them from the game when you take damage.
Unique Ability Materials
Fighter-Specific Components
These components are specific to fighters, and come with them based on their Unique Abilities. Terms used to describe the movement of these pieces are included here for reference.
Tokens & Counters
Tokens can be used during the Ante Phase. Players have a Supply Area and a Depletion Area. When a Token is used or spent, it moves into Depletion. When a Token is regained, it moves to the Supply. Tokens are always circular.
Counters have no innate effects. They exist only to keep track of resources, and are gained and spent through other game effects. Counters are pentagonal.
If not otherwise stated, Tokens and Counters begin in a fighter's Supply.
- Regain - Move the specified Token/Counter from Depletion to your Supply. (When Force is gained, it always comes from the shared pool).
- Spend - Move the Token/Counter to your Depletion. Do not gain any innate effect on a Token. Usually spending happens in conjunction with some other effect on a card.
- Deplete - Move the Token/Counter to your Depletion. Do not gain any innate effect on a Token.
- Use - Gain the innate effect printed on the Token, then move it to your Depletion.
- Trash - Return the specified Token/Counter from wherever it is to the box, removing it from the game.
Status Effect Cards
Most bonuses to fighters last only for the current beat. A few that persist to future beats are represented by cards. The card can be put into play as a reminder that you have a particular status.
Each Status Effect Card has a symbol on it, to help you remember which Style, Base, or Finisher generated the effect.
These cards are reminders only, and have no inherent effects beyond those printed on the cards that generated them.
Special Cards
Some fighters possess special cards with 2 states, active and inactive. While active, they apply their effects to all of a fighter's attacks. Any stats on these cards are also applied to the fighter's attacks while they are active.
- Activate - Turn a card face-up, making it active.
- Deactivate - Turn a card face-down, making it inactive.
- Active - A face-up card is active.
- Inactive - A face-down card is inactive.
- Trash - Return a card to the box, removing it from the game.
Forms
Forms are Special Cards that describe a persistent state, stance, or mode for a fighter. Forms are exclusive–activating a Form causes any other Form to become deactivated. Many Forms are printed double-sided to show that activating one side automatically deactivates the other.
- Become - Turn the Form face-up, activating it. Turn any other Forms on this fighter face-down, deactivating them. You cannot 'become' a form if you are already in that form.
Other Materials
Standups
Each fighter has a Standup which tracks their position on the board. Two standups can never exist in the same space on the board.
Markers
Markers may be on the board, like standups, but do not usually interfere with a fighter's movement. A fighter's UA will explain how to set up any Markers they possess.
If not otherwise stated, Markers begin a duel in a fighter's Supply. Typically, multiple Markers with the same name cannot occupy the same space.
- Place - Put the specified Marker from your supply or from the board (your choice) onto the specified space. If no restriction is specified, place anywhere!
- Shift - Move the specified Marker a number of spaces indicated in either direction.
- Withdraw - Return the specified Marker from the board to your supply.
- Trash - Return the specified Marker wherever it is to the box (removing it from the game).
Active/Reactive Cards
These Status cards can be used to track who is the Active Player and Reactive Player. Using them is optional, but they can be especially handy in multiplayer games.
Super/Ultra Reference
These cards are used in multiplayer games, and give extra bonuses to the lone player in a 2v1 or 3v1 duel.
Revenge Reference
This card details bonuses that a surviving player gains when their teammate is defeated. It is used only in multiplayer games.
Game Setup
1. Fighter Selection
Each player chooses one fighter. They take all of that fighter's Styles, Unique Base, and a Switch Style card to form a starting hand. Each player should also find any tokens, counters, markers, or extra cards that their fighter uses and place them into play as specified by their UAs. Both players also take a complete set of Bases: Strike, Drive, Dodge, Grasp, Burst, and Shot.
Each fighter has a Reference Card that details their Styles and Bases. Trade Reference Cards with your opponent so you have an idea of what their capabilities are.
Fighters' complete kits are listed in the Character & Story Guide. The name of the fighter a card belongs to is listed in the bottom left of the card.
Some fighters come with special cards of a particular type. These stay on their side of the board, either face-up (active) or face-down (inactive) as indicated by the fighter's setup instructions.
Status cards may come into play during the duel. Keep them with your reference cards until they're needed.
Usually, anything that doesn't start in your discard piles starts in your hand. Keep your fighter's UA card handy to reference your custom setup and special abilities.
2. Board Setup
Place standups on the third and fifth spaces respectively, so that each fighter is on its owner's left hand side of the board.
- Use the Life Counters to track life, starting with 20 life per fighter.
- Give a random player the Active Player Marker.
- Place the 45 Force Counters in a pile to the side. Then, each player takes two of these from that pile.
- Give each player 3 different Overload Tiles: "Power Up!", "Defense Up!," and "Speed Up!"
Boards may look different from game to game, but their basic layout is the same. Trade reference cards with your opponent so you each know what the other is capable of. Your finisher should remain in sight but out of the play area. 45 Force Counters form a pool and serve as the game's timer. Most fighters begin a duel with 20 life. Some Tokens and Counters begin in the supply. Others begin in depletion according to your fighter's setup instructions.
3. Fighter Setup
Perform any Setup steps listed on your fighter's Unique Ability card, simultaneously and secretly. Along with these Setup steps, choose and reveal one side of your Finisher. Set it to the side of the board with the chosen side face up.
4. Finishers & Initial Discards
Each player chooses two Bases and two Styles*. These will form two Attack Pairs that should be placed in Discard Piles 1 and 2 respectively. These cards will not be available at the start of the duel but will become available soon (the Attack Pair in Discard Pile 2 will be the one you retrieve first). Make sure your Discard Piles are separated so you can tell them apart.
*When learning the game or trying a new fighter, the cards in your hand marked '1' and '2' form the starting Discard Piles. These are optional, but are intended to help you set up the game and jump into a new fighter quickly.
Play Sequence
A Beat of BattleCON runs through these phases in order: Set, Ante, Reveal (with Clash if there is a Priority tie), Start of Beat, Active Player Attack, Reactive Player Attack, End of Beat, and Recycle.
Set Phase
Players will choose one Style and one Base to set face-down, forming an Attack Pair.
Each player chooses one Style and one Base from their hand and places those cards face down. A legal Attack Pair always has one red-backed and one blue-backed card.
Any Style can pair with any Base, regardless of colors or symbols.
Once both players have Attack Pairs placed down in front of them, move on to the Ante Phase.
Ante Phase
Players will take turns using any antes provided by their Unique Abilities, Overload Tokens, or their opponent. This continues until both players pass in succession.
A fighter's UA will often provide them with additional Ante Actions, Tokens, or other effects which can be used during ante. Every fighter also has access to the three Overload Tiles, which can be used by trashing 2 Force each. Each fighter may only use each Overload Tile once per Beat.
Antes are always optional. Antes are not triggers.
Starting with the Active Player, players take turns anteing or passing. Even after a player passes, they may still ante later on in the turn, as long as the Ante Phase has not ended yet.
Once both players have consecutively passed on anteing (that is, two passes in a row), move on to the Reveal Phase.
- A Limited Ante can be used only once during the beat. Other kinds of antes can be used as many times as the owner wants.
- Some fighters provide their opponents with ante options. These [Opponent] antes can never be used by the fighter themselves. Instead, the opponent may use them during the ante step.
Reveal Step
Both players simultaneously flip their face-down Attack Pairs. Any Reveal triggers are performed at this time, with the Active Player resolving all effects, then the Reactive Player doing the same.
After performing all Reveal triggers, check the Priorities of both attacks (considering any modifications from tokens, Styles, and passive special abilities). The player with the higher Priority becomes the Active Player.
Priority Tie? - Clash!
A Clash occurs if both players have the same Priority when it is time to determine Active Player. In a Clash, both players play a new Base face-down from their hands, without picking-up previously revealed Bases.
They simultaneously show the new Base and put it on top of the old one, hiding the original Base and forming a new attack. In the rare case that there are Reveal triggers that were not executed previously or which are on the new Base, perform those now.
Check to see if another Clash has occurred. If it has, clash again. Otherwise, pick up all the other revealed Bases, assign Active Player to the fighter with higher Priority, then continue as normal. Only the Base that was actually executed during this beat will cycle into your Discard Pile.
If either player runs out of Bases, skip directly to the Recycle Phase.
Tiebreakers
Some attacks have a triangle (▲) after their Priority Stat. This is called a tiebreaker. When such an attack is tied in Priority with another attack, it wins the tie instead of causing a Clash. If both attacks have tiebreakers, then the current Active Player wins the tie and retains this status.
- If either Attack Pair has a tiebreaker (▲), then a clash cannot occur during this beat, regardless of any other game effect.
Finishers
The Switch Style can cause your Finisher to replace your attack pair during Reveal. Just follow the steps on the Switch Style. This will cause the Switch Style to be removed from the game, so only one Finisher can be used per fighter per duel!
Start of Beat
In this phase, the Active Player performs all of their Start triggered effects. Then the Reactive Player performs all of their Start triggered effects.
- Even Stunned fighters must perform their Start triggers.
- When a single player has 2 or more triggers with the same timing, that player performs those triggers in any order they choose. This is true for all timings and all triggers.
Active Player Attack
If the Active Player is not stunned, that fighter performs their attack now.
Once an attack starts, it must be carried out completely. Any effect which causes damage to the attacker or stuns them does not stop the attack mid-way through.
Guard & Stun
When a Player takes damage exceeding their Guard, they become stunned. When a player is stunned, they do not attack during the Active or Reactive Attack steps! It's important to dodge incoming attacks, have a high Guard, or have a high Priority in order to get your attacks through.
Guard prevents you from becoming stunned due to taking damage. If the total damage you have taken is less than or equal to your Guard, you resist the Stun, and can still carry out your attack.
A player carries out their Attack by performing these steps, in order: Before, Check Range, Hit, Damage, After.
-
Perform all Before triggered effects.
-
Check if the opponent is within Range. Range is counted in spaces, with the space occupied by the player being space 0. Once you hit a fighter, any movement inflicted before dealing damage does not negate the hit.
-
If your attack hit, perform any and all Hit triggered effects.
-
If the opponent was hit by your attack, they take damage equal to the Power of the attack. This damage is reduced by any Armor the opponent possesses, then they lose that Armor.
-
If 1 or more damage was dealt, Damage triggered effects are performed. If any damage was done, the opponent may become stunned (see above).
-
Perform all After triggered effects, regardless of whether or not the attack hit or did damage.
-
If a player's life is reduced to zero or fewer points at any time, the duel immediately ends, with the remaining player declared the winner.
Reactive Player Attack
If the Reactive Player is not stunned, that fighter performs their attack now, just like the Active Player.
The Active Player can still be stunned. Usually it doesn't matter, since they've already attacked, but it can be important for some effects.
End of Beat
In this phase, the Active Player performs all of their End triggers. Then the Reactive Player performs all of their End triggers.
- Even Stunned fighters must perform their End triggers.
Recycle Phase
The Active Player performs all of their Recycle triggers. The Reactive Player then performs all of their Recycle triggers. Even stunned fighters must perform their Recycle triggers.
Then, both players perform these steps simultaneously:
- Pick up their second (outermost) Discard Pile and add it to their hand.
- Move their first (innermost) Discard Pile into their second Discard Pile.
- Move the Attack Pair they just played face-up into their first Discard Pile.
- Each player takes 1 Force Counter from the Force Counter Pile. A player with 7 or fewer life takes an additional Force Counter. If you have more than 10 Force after this, trash any excess.
- Recycling Finishers - On the Beat when a player uses a Finisher, they remove the Finisher from the game, and do not recycle their Discard Piles as normal (skipping steps 1-3 above).
Time Over
At the end of the Recycle Phase, if the Force Counter Pile is empty, then the duel has timed out. Use Counters from the box to give each fighter the full amount of Force they are entitled to if there is not enough left in the pool. One final beat is played, and if there is no winner after this final Beat, the player with the highest remaining Life total wins.
If both players have the same Life total at the end of the final Beat, the Reactive Player is declared the winner.
Defeat
When a fighter's life is reduced to 0, that fighter is immediately defeated. Defeated fighters are removed entirely from the game, and all of their effects stop working immediately. If all of your opponents are defeated, you win!
Next Beat
If no player has won the game by defeating all opponents, continue on to the next Beat by returning to the Set Phase!
Movement
Many effects cause fighters' standups to move. The only way to move is by these effects.
Movement effects all follow a few rules:
-
Players cannot move past the edges of the arena.
-
Movement effects are mandatory. If an effect says 'advance 1 or 2 spaces', then the player must move either 1 or 2 spaces forwards. You cannot choose to remain where you are. If an effect says 'Move 3 spaces', you must move exactly 3 spaces (if you cannot, then you don't move).
-
When moving, move into and out of each space on the way to your destination, one at a time. This is true of all types of movement, except Teleport.
-
When moving, hop over opponents and do not count the spaces they occupy against your movement. You can never move into the same space as an opponent's standup.
-
If a legal movement is possible then it must be taken. If no possible legal movement can be made, then the movement is ignored entirely.
- Example: an effect says "Push or Pull 1" and the opponent is against a wall, then you would be forced to choose the Pull 1 effect, since the push 1 effect cannot be carried out.
- Example: an effect says "Advance 3" but there are only 2 spaces open in front of you. The instructed movement cannot be legally made, and would fail to be carried out.
-
Effects that move in steps (ex: Pull 1 per Counter spent) add all these movements together, then apply one singular movement.
- In that example, spending 3 Counters would create a "Pull 3" effect, not three separate "Pull 1" effects.
-
Any effect which checks to see if a player "has moved" or "cannot move" considers all movement effects–both moving under your own power and being moved by opponents.
Cannot vs. Do
Any effect that says "cannot" takes precedence over other effects. For example, an effect that says "you cannot Advance or Retreat" will prevent any effect that instructs you to advance or retreat. An effect that says "you cannot be stunned" will take precedence over an effect that says "you are stunned."
Advance
Advancing brings you closer to the opponent. If you would advance further than the distance between you and the opponent, you keep moving in the same direction. Thus, longer advances can be used to create distance.
Retreat
Retreating moves you away from the opponent.
Pull
Pulling brings the Opponent closer to you. Like Advance, this movement may carry the Opponent past you, and can be used to create distance.
Push
Pushing moves the Opponent away from you.
Close
Close is shorthand for "Advance as far as possible, up to the amount specified, but not past the Opponent." Any effect that interacts with Advance interacts similarly with Close.
Teleport
Teleport is shorthand for "Advance or Retreat directly to the space specified, without entering or leaving any of the spaces in between." Any effect that interacts with Advance or Retreat interacts with Teleporting in that direction. You can never teleport into a space occupied by another fighter.
Other Effects & Keywords
These pages detail how to perform most other triggers in BattleCON. You don't need to read all of these to get started. Just reference them as they come up in your games.
- Armor X - Armor decreases the damage taken from attacks. Armor gained from different effects adds together.
- Once Armor reduces damage, it is consumed. If you are hit multiple times (for example, in multiplayer), Armor will only prevent the first X damage dealt to you.
- Avoid Attacks - Prevent all hits (or certain kinds of hits) from being landed on you. When the opponent checks their range during the "check range" step of attacking, the attack does not hit regardless of your actual position on the board. Avoid takes precedence over conditional and special hit effects as well.
- Become Active Player - You become the Active Player, and take the Active Player status card. The opponent becomes the Reactive Player.
- In multiplayer, other players then become Reactive Players in order of their Priority.
- Conditional Triggers – You can only choose to perform triggers with conditions that you fulfill. If you can no longer choose to perform triggers due to all your remaining triggers having unfulfilled conditions, move to the next timing. Likewise, if a previously unfulfilled condition becomes fulfilled, you must carry out that trigger before moving on to the next timing.
- Chip X – The target player (the Opponent by default, if no target is specified) loses the amount of life specified. This cannot reduce a player's life to zero. If it would, they will remain at 1 life instead. Chip does not count as "Damage," never stuns fighters, and is not reduced by Armor.
- Discard Styles/Bases - Some effects make you discard more Styles and Bases from your hand. These go to the Discard Pile specified and cycle normally. If no Discard Pile is specified, they are discarded with your current Attack Pair.
- During the Set Step of a beat, if a player somehow has no Styles or no Bases in their hand, Discard Piles recycle again (without performing 'Recycle' triggers), leaving one pile temporarily empty.
Multiplayer
The multiplayer rules are recommended for advanced players who are already familiar with BattleCON. With these rules, 3 or 4 players can play BattleCON together all at once! Advanced players can also use these rules to operate both fighters and participate in highly tactical single-player battles.
You may need to combine multiple BattleCON games or use generic tokens to have enough Force and Life tokens to support additional players.
Multiplayer Rules Summary
- Team Movement - Jump over both allies and enemies when moving. No two standups can ever occupy the same space. Advance can be either direction as long as you are moving towards an opponent. Retreat can be either direction, as long as you are moving further from an opponent.
- Teams Share Force - Each team member takes Force individually during Recycle, but the pool of Force is shared among the entire team. Each fighter can use each Overload Tile separately.
- Determining Priority - Team members decide among themselves their action order when tied. There are never Clashes in multiplayer. If a clash would occur and no player has a tiebreak, the team with the Active Player Status gains a tiebreak.
- Targeting Attacks - You hit the nearest opponent within Range on either side.
- Targeting Triggers - "The Opponent" is the nearest opponent, OR the one you just Hit when performing Hit and Damage Triggers. [Opponent] antes can be used by any fighter player who sees you as "the Opponent" (that is, if you are the nearest opponent to them).
- Defeat in Multiplayer - Your remaining teammates share a copy of the Revenge Reference Card. It is possible to have multiple copies of these effects in play. All of the fighter's components are removed from play immediately.
Team Setup
Players select their fighters as usual in a team game. If one team is disadvantaged (as in a 2v1 or 3v1 battle), they can use a Super or Ultra fighter to balance the odds.
Team play uses a 9-space board (found on the reverse of the 2-player game board). One fighter must begin the game on the team's starting space, and other team members start in the spaces behind this fighter, arranged as they wish. The team that randomly begins with the Active Player status should place first.
The Force Pool starts with 20 additional Force for each character in the game (65 in a 2v1 game, and 85 in a 2v2 or 3v1 game).
Team Movement
Fighters skip over both allies and enemies when moving. Because of this, a single movement effect can skip multiple spaces.
Team Ante
Ante passes between teams. On your team's Ante, any one character may Ante. Afterward, Ante passes to the other team. The Ante phase ends when each team passes in succession. Teammates share a single Force pool. Each member of the team may use each Overload Tile separately.
Team Reveal + Priority
Clashes cannot occur in multiplayer games.
During the Reveal Step, the Active Player Status goes to the team with the single highest-priority fighter during reveal, and the remaining player order is assigned by descending priority.
In the case of any ties in priority, where neither side has a tiebreaker, the team with the Active Player Status breaks that tie in their favor. If members of the same team are tied for priority, they may decide among themselves which order to act.
Starting with the Active Player, and continuing in Priority Order, each player carries out their attacks individually, just like in a standard game of BattleCON.
Targeting Attacks
Attacks can hit the nearest opponent within the attack's range in either direction. After this, they deal damage and activate their effects as normal. You must choose and hit an opponent in range if possible.
In Multiplayer, it is possible for players to be hit multiple times. Guard is applied against the total damage taken during a beat. So even if the first hit doesn't stun the opponent, successive attacks can more easily inflict stun and penetrate defenses.
Just as a reminder, When triggers are only performed once. Whenever triggers can be performed multiple times.
Who is "The Opponent"?
Cards in BattleCON use "the Opponent" to refer to the player who can be targeted by their effects. In multiplayer, this situation is a little different, since there are multiple opponents. In this case, "the Opponent" refers to the enemy fighter that fulfills specific conditions:
The Opponent is the nearest enemy fighter on either side of your standup. If all enemies are on the same side, this is fairly simple. If you have enemies on both sides, you get to choose between the closest one on each side. As usual, you must always choose a legal target for the effect if one exists.
- Hit and Damage triggered effects work differently. For these effects, the Opponent is always the fighter you just hit, regardless of their range.
- For effects triggered by being hit or avoiding certain hits, the Opponent is the player attempting to hit you.
For fighters who provide ante actions to the Opponent, these antes are available to any fighter who sees you as "the Opponent". (That is, any enemy fighter to whom you are the closest enemy fighter in one direction.) The enemy team may only use such an Ante once per beat, no matter which enemy fighter used it.
Team Force
Each member of the team takes Force separately (1 normally, 2 if at 7 life or below), and adds it to the team's total. Defeated team members generate 2 extra Force each turn.
A team's total Force cannot exceed 20.
Defeat in Multiplayer
When a fighter is eliminated, all of their game components (standups, markers, status effects, tokens, etc) are removed from play, along with all of their cards. Put the Revenge Reference Card into play to remind your surviving team members of the bonuses they get. In a 3v1 game, it is possible to have 2 copies of the Revenge Reference Card (along with all their cumulative bonuses).
2-vs-1: Super Fighters
Super fighters are more powerful fighters capable of taking on two opponents at once. The Super Fighter Reference card will explain how to set up your fighter on one side, and what bonuses they receive during the battle.
3-vs-1: Ultra Fighters
Ultra fighters are extremely powerful fighters capable of taking on three opponents at once. The Ultra Fighter Reference card will explain how to set up your fighter on one side, and what bonuses they receive during the battle.
Organized & Online Play
You can play BattleCON at your local game store or community venue to earn points and score awesome promo cards! Visit www.level99games.com/organized-play to learn more!
You can now play BattleCON Online! Visit www.battleconnection.com to learn more about the online game and register your account! Participate in solo adventures, battle against masters from around the world, and dive into the deep lore of the world of Indines!
Character Guide
Amon Elcela
"The time has come to atone for my sins."
Chief Containment Specialist — Slugger / Intermediate
Age: 27, Gender: Male, Race: Human
Years ago, Amon was half of a team of independent artificers. Working together with his sister, Gretyle, he would excavate the many ruins around their homeland of Sanghalim, restoring ancient artifacts.
One day when Gretyle returned with a dragonflare orb, an ancient weapon of mass destruction, Amon restored its functionality, not realizing its intended purpose. The weapon activated without warning, exploding in a massive blast of heat and light. Though Amon survived its blast behind a barrier field, Gretyle was killed, and their town was devastated.
Amon fled to the Reliquary and, as penance for his carelessness, pledged his life to protect the people of Indines from dangerous artifacts. With his skill as an artificer, he quickly rose to the rank of Chief Containment Specialist.
Now he pursues the keys to the ancient Spires, one of which is controlled by the Reliquary. While others dream of treasure and power within those ancient towers, Amon fears what lurks beneath the surface of Indines.
The time has come to prevent another disaster, and to keep the dangers of the ancient world sealed away. Calling on the help of the sniper Tyrafelle Melantas and the monster hunter Joal Kalmor, Amon is ready to do his duty, no matter the personal cost.
The Reliquary was formed in the wake of the Dragon Wars in order to protect Indines from the myriad weapons and dangers left behind by the conflict.
Complete Kit:
- 1 Fighter Card (Damage Control)
- 5 Styles (Containment, Deflection, High-Alert, Impenetrable, Regulation)
- 1 Base (Wall)
- 1 Finisher (Code Black (α) / Lockdown (ß))
- 4 Form Cards (Code White, Code Green, Code Yellow, Code Red)
Burgundy Twelve
"We're all the same color, on the inside…"
The Color Out of Space — Tactician / Novice
Age: ???, Gender: None, Race: Shade
Magister Jeris Ieyes of Willat has traveled across the planes for ages, collecting all manner of curiosities from strange new worlds. One of his most exciting discoveries was a sentient color pattern, which he stumbled upon while exploring a distant, dying world.
After the color killed his assistant, Wilman, Jeris named his new discovery "Wilman's Rust" and captured a sample of the substance to bring back for his menagerie.
Over the years, Magister Ieyes has made great strides in teaching and training this malleable substance. Wilman's Rust learned quickly, how to draw pictures and gain new forms, how to communicate, and how to manifest itself in a three-dimensional world.
One sample of Wilman's Rust, code-named Burgundy, was submitted to the Division Thirteen supersoldier program in Willat. This particular strain showed an unhinged, psychotic intelligence, but restrained enough to follow orders. While Burgundy failed to be integrated into any of the many programs the division embarked on, it was deemed dangerous and capable enough on its own to act as part of the Division's Black Ops unit.
Dispatched to track down the spire keys and return them to the magisters, Burgundy is set loose upon the world for the first time along fellow agents from Division 13. Working alongside Thessala Three and Oriax Two, Burgundy stands ready to wreak havoc on anything that strikes his fancy.
Burgundy is not the only Shade in Indines. Rumor has it that another such creature, code-named "Marigold" serves the Planestalkers.
Complete Kit:
- 1 Fighter Card (Color Burn)
- 5 Styles (Flattened, Graphic, Scarlet, Scrawled, Stained)
- 1 Base (Slaughter)
- 1 Finisher (Emperor's New Clothes (α) / The Flying Circus (ß))
- 5 Markers (Paint x5)
Cindra Flama
"No matter how many times I must try, I won't fail in my resolve."
Risen From the Ashes — Brawler / Novice
Age: 58, Gender: Female, Race: Human (Spirit-Bound —Phoenix)
Years ago, bandits attacked a small village in the heart of the continent, killing every man, woman, and child in a raid. Cindra escaped from the slaughter by fleeing into a nearby woods, where she survived using the skills that her father, a huntsman, had taught her. Still, she was young, and was forced to learn many lessons the hard way.
One day, struggling with starvation, she came upon a large egg. Too hungry to wait for a cookfire, she quickly snatched from its nest and ate it raw. Little did she know this was the egg of a powerful nature spirit, a phoenix, mid-way through its cycle of reincarnation. Instead of being reborn as usual, the phoenix's soul merged with Cindra. Soon thereafter, her path crossed with that of the angelic Rheye Cal, who adopted her as a daughter and helped Cindra master her newfound power with divine bindings.
Each time she dies, Cindra is resurrected again at the same age as she was that fateful day she merged with the phoenix. Since that time, she has set her skills to aiding others, becoming a healer of some renown. Her time with Rheye at Argent University brought her into contact with Xenitia, a fellow healer, and they became close friends.
When Xenitia left Argent to search for answers to her past, Cindra regretted not joining her for that adventure. In the hopes of finding her friend now, she has joined up with Dravil and Trias on their quest for the keys, hoping she can follow in Xenitia's footsteps.
Spirits like the Phoenix are kin to elementals, but are far more mercurial. Some suspect they may have been the first creatures in Indines, predating both animal and elemental.
Complete Kit:
- 1 Fighter Card (Rebirth)
- 5 Styles (Ashen, Cinder, Phoenix, Rising, Soaring)
- 5 Phoenix Styles (Ember, Kindled, Luminary, Perilous, Smoldering)
- 1 Base (Wings)
- 1 Finisher (Cinder Storm (α) / Blazing Pyre (ß))
- 1 Form Card (Human Form (front) / Phoenix Form (back))
- 1 Status Card (Storm Rekindled)
Dareios Kuel
"Our world is filled with wonders, and it's my dream to taste them all!"
Wandering Brewmaster — Tinkerer / Advanced
Age: 31, Gender: Male, Race: Human
The Gesselheimian brewer Dareios has wandered Indines, searching out rare flavors and exotic spices to use in his concoctions. On one of his many adventures, he crossed paths with the mystic Tatsumi Nuoc, and for him, it was love at first sight. Since that fateful day, he has searched for some gift to express his feelings for her.
One dark and stormy night, he chanced upon a mysterious green-haired woman drinking alone in a bar. He shared his predicament with her, and the woman challenged him to a game–his soul against an ancient and priceless treasure. Dareios managed to win, and his prize was a strange relic—something like a key.
With the treasure in hand, he journeyed to the west to present it to Tatsumi, aided by the chummy Wardlaw O'Brien. However, darker forces are close on his heels. The Daemons want their key returned, and Wardlaw quietly conspires to steal the key and whatever secrets it hides.
Carefree as ever, Dareios continues on his adventures, drawn unwittingly into a series of events that will change the face of Indines itself.
Cocktails in Indines often incorporate elements of herbology and alchemy, and may have a kick well beyond the mere alcoholic content.
Complete Kit:
- 1 Fighter Card (Dipsomania)
- 5 Styles (Shuffling, Slandering, Slurred, Staggering, Stumbling)
- 1 Base (Keg)
- 1 Finisher (Drunken Master (α) / Extraordinaire Ether (ß))
- 5 Drink Cards (Aqueous Arbor, Emeraldabier, Tea Transcendent, Vustasi Vapor, Zocean Zudd)
Dravil Coldwater
"What story will they tell of us?"
Chronicler From the North — Tactician / Advanced
Age: 36, Gender: Male, Race: Human (Elemental Touched —Water)
Dravil hails from the Northlands, beyond the mountains that divide Indines from an unexplored polar region.
Dravil is a chronicler, a professional storyteller charged with preserving the history of the world in song and speech, and passing these legends on wherever he goes.
A short time ago, the dragon king Greyheart was poised to be released from a thousand-year imprisonment and to wipe humanity from the continent. Intent on seeing history made, Dravil journeyed to the south and watched as the Dragon King was defeated by a group of unlikely heroes.
After composing the tale of the Dragon King's fall, Dravil recalled another old legend, all but forgotten in the southern lands. It told of a world long lost, sealed away from the surface when the dragons came to power ages ago. As word of his story has spread, adventurers have begun new quests to find the keys to the ancient Spires.
When his tales draw the interest of Cindra and Trias to seek out the spire keys, he joins them, realizing a new chapter—and perhaps even a conclusion—to his ancient tale lies ahead.
The legendary blue dragon venerated in the Northlands is actually an elemental who migrates with the seasons, changing its form and gender as it travels.
Complete Kit:
- 1 Fighter Card (Ebbing Tide)
- 5 Styles (Cloying, Frozen, Lunar, Resonant, Torrential)
- 1 Base (Storm)
- 1 Finisher (Blue Dragon's Scalding Breath (α) / Blue Dragon's Slicing Teeth (ß))
- 2 Markers (Ice, Steam)
Hayden Morgan
"This isn't about the mission anymore. I need to do this for myself."
Latent Psionic — Mage / Advanced
Age: 22, Gender: Female, Race: Human
Since she was young, Hayden has possessed a mysterious power that she didn't fully understand. Raised with a deep loyalty to her nation and the principles of honor, she joined the Armiger Corps of her homeland, Jeffreys, and became an assistant to the legendary artificer Runika Zenanen.
In her research, Runika discovered an ancient form of magic which she believed held the key to unlocking Hayden's full potential. The chief armiger began excavating obsessively into Indines' ancient ruins, certain that she was upon the eve of some big find. Then, one morning, she was simply gone.
Among the Chief Armiger's effects, Hayden found only a collection of old notebooks and a strange key-like device, which she felt must have some connection to the lost, underground world they were researching. Resolved to do her duty to her nation and herself, Hayden has set out with the Knights of the Circle to discover what happened to Runika. Though she has some control over the power she wields, this adventure will push her to master her power—lest it master her.
Psionics were first mastered by the citizens of the subterranean world of Envernes, and subsequently lost with the sealing of the Underlands. This may be why the vault keys still resonate with psionic energy.
Complete Kit:
- 1 Fighter Card (Breaking Point)
- 5 Styles (Latent, Reckless, Telekinetic, Telestatic, Versatile)
- 1 Base (Potential)
- 1 Finisher (Hemorrhage (α) / Total Control (ß))
- 7 Control/Fury Counters (Control (front) / Fury (back))
Lucida Malephaise
"I will devour this world, piece by piece!"
The Devourer — Disruptor / Intermediate
Age: 464, Gender: Female, Race: Daemon (formerly Elvan)
In ages long past, the Daemon King Malephaise was sealed away, and his power split into eight mighty relics lost to time. One of these, the Jaws of Malephaise, fell into the possession of Lucida, corrupting her and transforming her. Now, concerned only with devouring the souls of the living, Lucida wanders the world of Indines, seeking foolhardy adventurers to consume.
Long ago, when she was still a young Elvan living in the marshlands of the north, Lucida was charged with guarding a treasure of her people, an ancient key to a long forgotten place. Over four centuries, she kept it by her side constantly, the final reminder of who she used to be. One fateful night, however, she lost the key in a game of chance to a wily adventurer named Dareios.
Only the next morning, when the reality of the situation caught up with her, did she realize what she had done, what that treasure meant to her, and what it might be used for in the wrong hands.
Joined by her sisters Dolores and Ariel, Lucida tracks Dareios across the land of Indines. But she keeps one eye on her siblings, realizing they have their own secret plans for the key…
After the fall of the demon king, the Malephaise Sisters are now free to pursue their own designs—so much the worse for the innocent souls of Indines.
Complete Kit:
- 1 Fighter Card (Jaws of Malephaise)
- 5 Styles (Corrosive, Devouring, Insatiable, Sharpened, Voracious)
- 1 Base (Teeth)
- 1 Finisher (Whet the Jaws (α) / Embalming Extraction (ß))
- 4 Rend/Consume Tokens (Courage, Pain, Spirit, Valor)
Trias Blackwind
"No autographs, please."
The One and Only — Tinkerer / Intermediate
Age: 18, Gender: Male, Race: Human (Elemental Touched —Wind)
Once an adventurer in the distant land of Amalao, Trias's adventures eventually brought him to the continent of Indines, to learn the history of his lineage and the truth behind Blackwind, the malevolent spirit that inhabits his family-heirloom cithara and shares his family name.
Known as a routine teller of tall-tales, Trias nevertheless remains well-liked by just about everyone he meets. Once at Argent, his reputation and popularity quickly saw him elected as the student body president, and even an outside chance at the chancellorship of the university.
With his search for answers at Argent going nowhere, Trias was left wondering why he still remained there. A fateful meeting with a storyteller from the far north and talk of fabled treasure lost to time prompted him to abandon his post and strike out on a course for adventure once more.
Joining up with Dravil and Cindra, Trias has headed east to his homeland on an adventure to track down the spire keys, beginning with the old legends of where they were lost.
The origin of Trias' scar remains mysterious, as the tale of how he came to receive it always seems to change...
Complete Kit:
- 1 Fighter Card (Embellish)
- 5 Styles (Awesome, Epic, Outrageous, Resounding, Spoony)
- 1 Base (Ballad)
- 1 Finisher (Jetstream (α) / The Black Wind (ß))
- 6 Embellishment Cards (+ from the Heavens!, + of the Ages!, + With Style!, Perfectly +, Super +, Truly +)
Uleyle Kimbhe
"I didn't get to be this badass just by talking a good game. Try me and you'll see."
Archmage of Relecour — Brawler / Novice
Age: 34, Gender: Female, Race: Human
As the archmage of Relecour, Kimbhe travels the land hunting down those who would use magic for their own evil ends. Her skill in combat magic has earned her one of the most feared and respected reputations of the age.
Kimbhe's latest adventure began when her friend Nostros Calahaan, chancellor of Argent University, resigned abruptly. Before he left to return home to the faraway continent, he entrusted Uleyle with an ancient treasure, telling her that he did not trust the next chancellor with its secrets.
Now that the race to fill Calahaan's position has ended, several of his would-be successors have turned to investigating her, certain that she possesses something that the old chancellor left behind. Moreover, sinister forces such as the Blackspire Mercenaries and Division 13 seek to claim the keys for their own advantage.
For her part, Kimbhe searches for the secret behind the spire key that Calahaan left her, uncertain of what its purpose may be, but determined not to let it fall into any other hands. Her journey brings her into contact with the Gesselheimian knight and keybearer Baenvier Marlgrove, and the two unlikely allies find themselves working together to uncover the fate of the artifacts they bear.
Archmages are mage hunters, charged with enforcing magical law and hunting down those who would use their magic to subvert the national governments of Indines.
Complete Kit:
- 1 Fighter Card (Archmage's Staff)
- 5 Styles (Expulsion, Fulminating, Penumbral, Quake, Quickening)
- 1 Base (Caster)
- 1 Finisher (Mage Hunter (α) / Archmage's Ambition (ß))
- 1 Staff Marker
Wardlaw O'Brien
"You're goin' down, chump!"
Self-Styled Villain — Slugger / Intermediate
Age: 45, Gender: Male, Race: Human
For a short time after acquiring the legendary Belt of Beatdown and all the incredible fighting powers that came with it, Wardlaw O'Brien lived the easy life of a self-styled villain, but ultimately became bored and despondent. Moreover, the resulting bar tab had sapped him of every ill-gotten coin he could get his hands on.
One fateful night, when he was drinking alone in the back of a bar, he overheard a curious wager, of a man's soul against a Daemon for an ancient treasure. Catching sight of the treasure, Wardlaw recognized it as some sort of key. In that moment, he was struck by a faint memory of the stories he had heard in his youth. He remembered tales of a secret world beneath the surface, filled with incredible wealth and treasures, and a gate to that place hidden deep within a tower just outside his village.
Deciding to get his hands on the key and see if there is any truth to the legends, Wardlaw slyly joined Dareios, the man who had won the key, in hopes of making his new ambitions of wealth and power a reality.
The Belt of Beatdown is an ancient artifact once held by the monks of the Six Paths, and was discovered by Wardlaw when he raided their fallen temple.
Complete Kit:
- 1 Fighter Card (Beatdown)
- 5 Styles (Charging, Dangerous, Massive, Overhead, Smackdown)
- 1 Base (Clothesline)
- 1 Finisher (Pain Train (α) / Double Moustache Buster (ß))