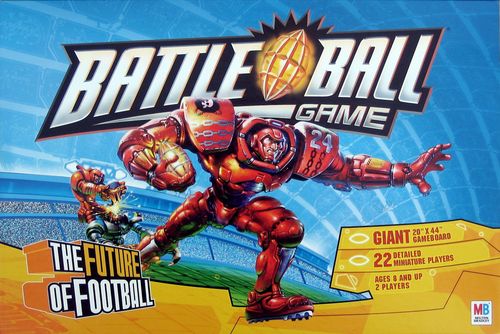
Battleball
Battleball Rulebook
Table of Contents
Table of Contents
Object of the Game
You are the Coach of one of the world's finest future football teams. Lead your team to victory by being the first to score two touchdowns.
Contents
- 1 3-piece Puzzle-fit Gameboard
- 22 Players (a blue team and a red team, each with 11 players)
- 1 Zinc Football Pawn
- 1 Six-sided Football Passing die
- 4 Six-sided dice
- 2 Eight-sided dice
- 2 Ten-sided dice
- 2 Twelve-sided dice
- 2 Twenty-sided dice
- 24 Carnage Tokens
- 2 Locker Room Cards
- 2 Team Play Tokens
Basic Game Setup
One player will be the Coach of the Iron Wolves (blue) and the other will be the Coach of the Black Harts (red).
Assemble the puzzle-fit gameboard and place it between the Coaches. Set the zinc football pawn on the marked square in the center of the field. Place the Carnage tokens to the side of the gameboard within reach.
Each Coach takes the following:
- 1 team of 11 players (make sure your players' uniforms all match in color: either red or blue)
- 1 blue ten-sided die
- 1 green twelve-sided die
- 2 yellow six-sided dice
- 1 red twenty-sided die
- 1 black eight-sided die
- Locker Room card matching your team
Place the Locker Room card in front of you with the Team Rules facing down.
Set the brown six-sided Football Passing die and the team play tokens back in the box. These are only needed for the Advanced Game.
Set Up Example
Players line up in any formation behind the 20 yard line. The zinc football is placed on the 50 yard line. Each team's Locker Room card is set beside its own end of the field.
1st Half Lineup
Both Coaches position their teams by placing their 11 players on the field. Players must be placed behind their 20-yard line and no two players can share a square. Players are positioned so that they are facing the opposing team. You may place players and move them through the 1/2 squares along the edge of the field. NOTE: Heavy Tackles take up 2 spaces.
Your Team Consists Of
- 3 Running Backs (RED BASE) — use 20-sided red die
- 1 Tackle (YELLOW BASE) — use 6-sided yellow die
- 1 Heavy Tackle (YELLOW BASE) — use 6-sided yellow dice (both)
- 2 Linebackers (BLUE BASE) — use 10-sided blue die
- 2 Safeties (GREEN BASE) — use 12-sided green die
- 2 Linemen (BLACK BASE) — use 8-sided black die
NOTE: The players' bases match the colors of the dice they use to move, tackle, hand-off and pass. If a player separates from his/her base, see Reattaching Bases on page 8.
The Coin Toss
Each Coach rolls one red twenty-sided die. The higher roll wins the coin toss and goes first.
A Quick Look at Your Turn
- You must choose one player to move. Select the player (and announce it to your opponent); roll the die (or dice in the case of the Heavy Tackle) that matches the color of that player's base; and move. You may be able to move up to and pick up the ball.
- After you move:
- If any of your players are next to any opposing players (in tackle position), you MUST attempt a tackle. A tackle must be attempted whether or not any of the players in tackle position are carrying the ball. After the tackle (whether or not you win), your turn ends.
- If none of your players are in tackle position, but one is next to your ball carrier, you MAY attempt to hand-off the ball to the other player. After the hand-off attempt, your turn ends.
- If none of your players are in position to tackle or hand-off, your turn ends.
Moving Toward the Ball
Illustration: a player moves onto the square with the loose ball to pick it up.
Movement
Here are the rules for moving a player. Roll the die (dice in the case of the Heavy Tackle) matching your player's base and move the player.
- The player MUST move at least one square and MAY move up to the number shown on the die roll.
- Players may move through the 1/2 squares on the edge of the field.
- Players can move in more than one direction (including backwards) on their move.
- The player CANNOT finish his/her move on the same square as he/she started.
- The player CANNOT move onto a square occupied by another player or Carnage token.
- If a player enters any square next to an opposing player, he/she MUST stop.
- If you started your turn next to an opposing player, you may use your roll to move away.
Basic Movement
Movement example: your Tackle rolls a yellow die and moves 4 spaces, which include the half spaces on the sidelines.
Heavy Tackle Movement
When moving a Heavy Tackle, roll both of the yellow six-sided dice; then choose which die roll to use. You can only move up to the number of one die, not both. If the Heavy Tackle rolls doubles when moving, he malfunctions and CANNOT move this turn. If the Heavy Tackle is carrying the ball when he malfunctions, he fumbles the ball, see Fumbles on page 5.
Heavy Tackles take up two squares. They must remain parallel to the end zone and CAN NEVER end their move diagonally across squares. Both squares occupied by a Heavy Tackle count as one square for movement.
Correct movement example: your Heavy Tackle rolls TWO yellow dice and chooses to use the 4. TIP: Choose the Heavy Tackle's left or right foot and count off single spaces like any other player.
Incorrect movement example: although Heavy Tackles have a double-wide base, they cannot move two spaces at a time.
Picking Up the Ball
If the ball is loose on the field (no player is in possession of it) during your move, you may be able to pick it up. To pick up the ball, move onto the square with the ball. Then place it onto your player's base. If you have any movement left, you MAY continue moving the player. You are now in possession of the ball.
Tackling
After you move, if the player you moved, or any of your other players, are next to any opposing players (in tackle position) a tackle MUST be attempted. You are only allowed to attempt ONE tackle on a turn. If after your move, more than one of your players is next to one or more opposing players, you decide which player will attempt the tackle. NOTE: A player does not have to be in possession of the ball to attempt a tackle.
Tackling Example
When players attempt a tackle, they roll dice matching their bases and the lowest roll WINS!
Resolving the Tackle
Each Coach rolls the colored die matching the base of the players involved in the tackle. The lower number wins. The tackled player is injured and removed from the field. Place this player on the Locker Room card. This player is out of play for the rest of this half but will re-enter in the next half. (EXCEPTION: If a "1" is rolled, see Seriously Injured.) Put a Carnage token on the square the player occupied to mark where he/she was tackled.
If the injured player was carrying the ball when he/she was tackled, the ball is picked up by the player who won the tackle. Leave that player where he/she is and move the ball onto his/her base.
If players tie in their tackle rolls, both are injured and removed from the field. If one of these two injured players was carrying the ball when he/she was tackled, the ball is fumbled and is now loose (see Fumbles on page 5).
Tackling with a Heavy Tackle
If a Heavy Tackle is involved in the tackle, roll both of the yellow six-sided dice and choose which die to use.
Seriously Injured
If a player rolls a "1" during a tackle roll, the tackled player is seriously injured. Place the seriously injured player on his/her back in the box and put a Carnage token on the square the player occupied. This player will NOT be allowed to re-enter the game. If both players roll "1"s, each is seriously injured and removed from the field. Neither of these players will be allowed to re-enter the game.
Carnage Tokens
Carnage tokens are placed on squares that were occupied by removed players. Place two tokens, one on each space, for an injured or seriously injured Heavy Tackle. Players may not move onto or through squares with Carnage tokens nor can the football be placed there.
Place Carnage
Example: the Iron Wolf player wins the tackle and the ball! Place a Carnage token in place of the defeated Black Hart player.
Hand-Offs
To hand-off the ball from one of your players to another, the two players must be on squares next to each other. Roll the matching colored dice for both players. If the two rolls result in different numbers, the hand-off is successful. Move the ball onto the new player's base. If the two rolls result in the same number, the ball is fumbled (see Fumbles below). In a hand-off involving a Heavy Tackle the ball is fumbled if ANY of the dice rolled result in the same number.
After a hand-off attempt, your turn ends.
Hand-off Example
When players are moved next to each other, they can hand-off! Roll both players' dice. If the rolls are different you can transfer the ball!
Fumbles
A fumble occurs any time...
- A tackle is taking place between a player carrying the ball and an opposing player, and the dice roll results in two or more of the same number. NOTE: In a tackle involving a Heavy Tackle (or both of them) the ball is fumbled if ANY of the dice rolled result in the same number. The tackle still applies.
- Two players attempting a hand-off roll dice resulting in two or more of the same number.
- A Heavy Tackle that is carrying the ball, is moving, is in a tackle, or is involved in a hand-off, and any 2 dice rolled result in the same number regardless of whose dice they are.
When the ball is fumbled, the coach of the team not in possession of the ball at the time of the fumble places the ball onto any empty square within two spaces of the player who fumbled the ball.
If there is no available empty square, then the ball is given to a player within two squares of the player who fumbled the ball. (If none of your players are within two squares, you must give the ball to an opposing player.)
If there are no empty squares or players, within two squares of the player fumbling the ball, play is halted. See Halting Play below.
Halting Play
A half, or overtime, may need to be halted without a touchdown being scored because there is no longer any way a team can reach the opposing end zone, even if other players were to move from their squares.
Halted Play Lineup
If play is halted, clear all of the Carnage tokens and players from the field. Both Coaches then reposition their teams by placing their players in any square behind their 20-yard line. Neither the injured players in the locker room nor the seriously injured players in the box are allowed to return to play. The team in possession of the ball when play was halted goes first, and play continues as before.
Example: play during this half must be halted because there is no way the ball can be freed for either team to score.
Scoring
A touchdown is scored when a player moves into the opposing end zone from the last square of the field.
A team will also be awarded a touchdown (without moving into an end zone) if its players tackle and defeat all of its opponents, leaving no one to defend the end zone.
Remember: Any players in the box (these are the seriously injured players) are NOT allowed to re-enter the game, while players in the locker room may. The team that lost the 1st half goes first in the 2nd half.
2nd Half / Overtime Lineup
After a touchdown is scored, both teams line up for the next half. All Carnage tokens and players are cleared from the field. Both Coaches again position their teams by placing their players in any square behind their 20-yard line.
Overtime: If, after the 2nd half, the score is tied 1 touchdown to 1 touchdown, the game goes into overtime. Teams line up in the same way as in the 1st and 2nd halves. Both coaches roll 1 red twenty-sided die. The higher roll wins the "overtime coin toss" and goes first.
Touchdown!
Example: a player crosses into the end zone to score a touchdown for his team.
Game Restart
If both teams are down to 1 player each and a tied tackle roll eliminates both players, the half or overtime must be restarted. Remove the Carnage tokens from the gameboard. Both Coaches then reposition their teams by placing their players from the locker room in any square behind their 20-yard line. Seriously injured players in the box are NOT allowed to return to play.
In rare instances, all players from both teams are seriously injured. If this happens, the game ends. The player with the most touchdowns wins; otherwise the game is a tie.
Winning!
The first team to score 2 touchdowns Wins!
Advanced Game
Players are now allowed to pass the ball. All Basic Game rules apply with the following additions.
Setup
Set the six-sided Football Passing die on the side of the gameboard, within reach of both Coaches.
Passing
After you move a player, if none of your players are next to an opposing player (in tackle position), you may choose to pass the ball. Keep in mind: If you choose to pass the ball, you cannot hand-off this turn. Now choose a receiver. Your receiver must be within throwing distance, meaning that it must be possible for your passing player to reach your receiving player. See, Passing below. NOTE: Neither the passing nor the receiving players need to be the player that you moved.
Throwing Distance
The throwing distance equals the number of squares from the passing player to the receiver, including the receiver's square. Do not count the square the passing player is on. You may count squares containing other players and Carnage tokens. NOTE: Your receiver must be on the field when the ball is passed to him/her. You cannot move a receiving player into the end zone and then pass to that receiver.
Passing
The Pass
The Coach rolls the receiving player's die and the six-sided Football Passing die.
If the two dice rolled result in the same number, the pass is fumbled. Follow the rules for Fumbling on page 5.
If the total of the two dice is equal to or greater than the distance between the passing and receiving players, the pass is complete. Move the ball onto the receiving player's base.
If the total of the two dice is less than the distance between the passing and receiving players, the pass is incomplete. The Coach not in possession places the ball on any square the exact distance rolled on the Football Passing die from the intended receiving player.
This will normally give the Coach a choice of squares.
- If the ball is placed in a square containing one of the opposing Coach's players, it is an Interception. Place the ball on this player's base.
- If the ball is placed in an empty square, it is a Loose Ball.
- If there are no opposing players or empty squares the exact distance necessary, the ball is placed in a square with a player from the passing side. This ball has been Recovered. Place the ball on this player's base.
If the only available squares contain Carnage tokens, the ball is out of play. Play is halted, the field is cleared and both teams line up behind their own 20-yard line. See Halting Play on page 5.
Passing Example
Passer, Receiver, Defender, Throwing Distance: the receiver is four spaces away from the passer, making the throwing distance four. The Coach must roll the RECEIVER'S die and the FOOTBALL PASSING die and get a total of at least four.
Fumbled: Receiver's Die Roll (2) + Passing Die Roll (2) = Total (4). The ball is fumbled. Follow Fumbling rules on page 5.
Incomplete: Receiver's Die Roll (2) + Passing Die Roll (1) = Total (3). Pass is incomplete! Ball moves 1 space from intended receiver.
Completion: Receiver's Die Roll (2) + Passing Die Roll (6) = Total (8). Pass is complete! Passer can move the ball to the receiver.
Team Rule Play
In order to play this version, both Coaches must agree to use the special Team Rules.
Turn your Locker Room cards over so the special Team Rules are facing up.
Each player selects one rule before starting the half and places a token to mark it. That rule is in effect for the half. Players may choose a new rule for the start of the next half (or overtime).
All other game rules still apply.
Reattaching Bases
If the players separate from their bases, reattach them by pushing the peg on the bottom of the player's foot into the hole on the base.