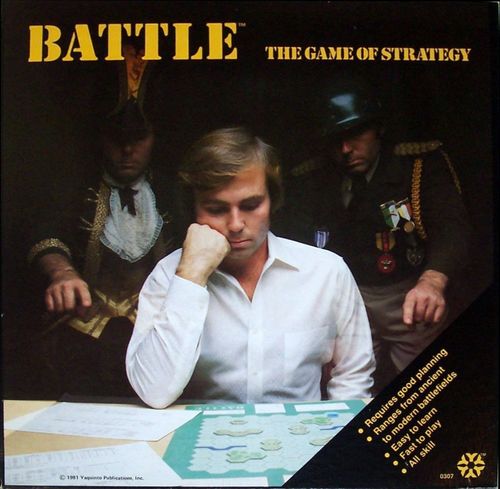
Battle: The Game of Strategy
Battle: The Game of Strategy Rulebook
Table of Contents
Table of Contents
Rules
§1 Introduction
Battle: A Game of Generals is a simple wargame between two factions - the blue and the red factions. The game is abstract in the sense that it does not simulate a specific conflict or battle, and in that it can be used to simulate battles across the ages — from ancient to modern times. The game is simple enough that it is easy to learn, but complex enough that seasoned grognards may find it enjoyable to play.
The object of each faction is to eliminate its opponent's headquarters, represented by a headquarter unit.
§2 Components
The game consists of:
- These rules.
- A board with a map on it. A grid of hexagons (hexes) on the map governs the manoeuvres of the military forces involved.
- 8 terrain tiles: 2 woods, 2 towns, 2 small hills, and 2 larger hills, to be placed on the board.
- 48 counters, each representing a military unit. These units use standard NATO APP-6 symbology to represent which kind of military unit the counter represents. The background of the unit designates which faction it belongs to.
- 7 period cards and Orders of Battle (OOBs). These show the configuration of armies available in each period.
§2.1 The board and terrain
The board is 11 × 12 hexes big. Each hex on the board proper represents clear terrain. Each hex has a coordinate printed on it, so that it may be uniquely identified, for example when playing via (e)mail. There are two rivers on the board, each with a bridge across.
Table 1: Types of terrain and features
| Terrain | Description |
|---|---|
| Clear | These hexes represent clear terrain where movement is relatively unhindered, and not a lot of possibilities for defensive stances. |
| Hills | Elevated terrain. This provides, in particular, artillery some advantages and also some improved defences. |
| Woods | Dense vegetation that disrupts lines of sight and manoeuvres. |
| Town | A small or large collection of houses and other structures. This also disrupts lines of sight and provides many defensive opportunities. |
| River and bridge | A body of water running along hex edges. These are generally impassable except via a bridge. |
The terrain is permanent.
The 8 terrain tiles are placed on the board to give the area of the conflict some features that the factions may use. How the terrain tiles are placed depends on the scenario being played and what the two factions agree upon before the start of the game. Once the terrain tiles have been placed on the board, they cannot be moved anymore during the game.
§2.2 The counters
Each of the 48 unit counters contains a symbol which indicates which type of unit it is. The symbols are the same for all periods (ancient to modern), but reflect different types of units. The unit symbols and corresponding unit type per age are given in Table 3.
The type of a unit has consequences for:
- its combat strength, both when attacking and defending,
- how fast it can move, and
- which kind of terrain it can enter.
More details are given for each specific unit type for the specific period.
What always applies is that headquarter units are special. Not only is it the objective of an opposing faction to conquer a faction's headquarters unit, but headquarter units:
- have no combat strength (they are automatically eliminated if attacked),
- cannot move, and
- cannot occupy any terrain but Clear terrain.
Generally, units that move on foot (e.g., infantry) can move one hex, mounted units (e.g., mechanised infantry, cavalry, armoured) can move two, or if not attacking three, hexes, and heavy equipment (e.g., artillery) can move one, or if not attacking two, hexes. Heavy units (e.g., cavalry, armoured, artillery) may typically not enter or occupy a Woods hex.
§2.3 Period cards
There is one period card for each period. The card for a given period summarises the available configurations of armies in the chosen period. An example of the basic period card is shown in Figure 1.
The left-most column shows which kinds of units are available in the period, and the name used for the unit types. The next four columns tabulate the combat strength of each type of unit when a unit of that type occupies specific terrain. The fifth, Move, column indicates how many hexes a unit of a given type may move. The Cost column is only used if the factions decide to make their own army configuration. The final columns show how many of each kind of unit is available to a faction. Note, some period cards have multiple configurations for armies. The faction should decide which configuration to use.
Figure 1: The basic period card
| Unit | Clear | Hills | Woods | Town | Move | Cost | # of units |
|---|---|---|---|---|---|---|---|
| Headquarters | 0 | – | – | – | 0 | – | 1 |
| Infantry† | 1 | 3 | 3 | 3 | 1 | – | 8 |
| Artillery | 2,1† | 3,2† | 4,1† | 3,2† | 1 | – | 2 |
* If unit not attacking. † Opposing. (The four terrain columns are Clear, Hills, Woods and Town, shown by icons in the source; Move, Cost and # of units follow.)
§3 Game flow
To start the game, the factions must, in order:
- agree upon which period to play in, and which army setups to use,
- agree upon which optional rules, if any, are used,
- set up the board, including placement of headquarters, and
- each faction sets up its units.
This is detailed more in §4.
After this initial setup, the game progresses in turns. Each turn is divided into two sub-turns: first the red faction's sub-turn and then the blue faction's sub-turn. Each faction's sub-turn is then further divided into three phases, which are, in order:
- Movement. The faction may move its units (§5).
- Combat. The faction may conduct any attacks (§6).
- Advance. The faction may advance victorious units into hexes vacated (§7).
After a faction has completed its three phases, it is the other faction's turn to execute its three phases. This is summarised in Table 2.
Table 2: Turn sequence
| Turn part | Phase |
|---|---|
| Red turn | Movement, Combat, Advance |
| Blue turn | Movement, Combat, Advance |
§3.1 Victory
The first faction to eliminate its opponent's headquarters (represented by a headquarter unit) wins the game immediately. If a faction believes that it is no longer possible to win the game, then that, and only that, faction may concede the game.
Stalemate (optional). A faction may call stalemate. If, after ten more turns after a faction has called stalemate, no units have been eliminated, then the game ends in a draw.
Timed game (optional). Factions may decide to allot a specific cumulative time for each faction — say 30 minutes each (use a chess clock or similar to keep track of the total time used by either faction). If a faction runs out of time, then that faction automatically loses, even if the opposing faction did not eliminate the faction's headquarters.
Victory points (optional). The factions must decide a number of turns to play, say 15 turns. If a faction eliminates the opposing headquarters before the turns have run out, then that faction wins the game immediately, as per normal (sudden death). If no faction has eliminated its opposing headquarters by the end of the last turn, then each faction tallies the cost of its eliminated units (see the period army table for per-unit costs). The faction that has lost the least cost wins the game. In case the sum costs of eliminated units are equal, then the game is a draw. This optional rule can be combined with the Timed game optional rule, but not with the Stalemate optional rule.
§4 Set-up
§4.1 Period
The choice of period not only determines the "flavour" of the game, but also which types of units the faction controls. There are seven possible periods to choose from, as detailed in §8 to §14. The periods are:
- Basic
- Modern
- American civil war
- Napoleonic wars
- Pike and shot
- Medieval
- Ancient
Which period, and in some cases which kind of armies, is chosen has a major impact on the game played. It is recommended to start out with the simpler Basic period (§8) before trying the more advanced periods. While it is tempting to mix and match between periods, it is not advisable. Within each period, the armies have particular capabilities which reflect the time, but which would not be the same in a different historical period.
§4.2 Select armies and units
Once the period has been decided upon, the factions may individually determine which of the possible armies to use. For example, if the Ancient (§14) period was chosen, then the red faction may decide to use the Roman army while the blue faction chooses the Greek army. The factions should take counters corresponding to their army of choice, with the appropriate colour, and put them next to the board. The counters are not placed on the board until after the terrain and tile set-up (§4.3).
The period card of the chosen period details how many of each kind of unit comprises an army. For example, in the Basic period (§8) both factions receive 1 headquarters, 8 infantry, 2 artillery, and 2 armoured units.
Buying armies (optional). Instead of receiving a fixed number of units of a given type, the factions may decide upon a number of resource points, for example 100 points for the Ancient period, and 90 points for all other periods. Each faction must then expend these resource points to allocate armies. The costs in resource points are listed in the Cost column of the period cards for each type of unit. Note, the factions must have a single headquarter unit (at no cost), but are otherwise free to mix and match as they see fit, up to the number of available counters of a given kind. These purchases should be done in secret, but an opposing faction may challenge the validity once the armies are revealed.
§4.3 Place tiles and headquarters
Once the period has been agreed upon, and the factions have chosen their army setup (if applicable to the period), it is time to set up the board — in particular place terrain tiles and the faction headquarters. There are several options for setting up the terrain tiles and headquarters.
Standard setup. It is recommended to start with the standard setup shown in Figure 2.
Figure 2: Standard set-up of terrain tiles and headquarters. [Map figure; see the source PDF.]
Alternative setups (optional). The factions may agree to use one of the setups shown in Figures 3 to 5.
Figure 3: Alternative setup A of terrain tiles and headquarters. [Map figure; see the source PDF.]
Figure 4: Alternative setup B of terrain tiles and headquarters. [Map figure; see the source PDF.]
Figure 5: Alternative setup C of terrain tiles and headquarters. [Map figure; see the source PDF.]
User defined (optional). The faction may decide to make their own terrain and feature configuration. In that case, the following limitations must be observed:
- The terrain tiles must be placed the same on either half of the board. That is, the placement of tiles should be invariant with respect to a 180° rotation.
- Terrain tiles or headquarters may not be placed in a hex on one of the four edges of the board.
- No terrain tile may be placed in a hex with a river hex side, including hexes 0408 and 0850 (as printed).
Faction defined (optional). The faction may decide to make their own terrain and feature configuration. In that case, the following limitations must be observed:
- Each faction takes half of the tiles: one town, one small and one large hill, and one woods tile.
- The tiles and the faction's headquarter unit are placed in secret, for example by putting up a screen between the two halves of the board.
- Tiles must be placed entirely on the faction's side of the board.
- The limitations, except the first, given above for the User defined setup optional rule must be observed.
- Terrain tiles of different terrain may not be placed next to each other, e.g., a woods tile may not be placed next to a town or hill tile.
- Headquarter units must start behind the corresponding set-up line (the red and blue dashed lines), and must be placed in Clear terrain.
(The source numbers the last two limitations 4 and 5 after its own item 4; they are shown here as 5 and 6.)
When both factions have set up the tiles and their headquarter unit, then the factions reveal the set-up to each other. The factions should take enough time to familiarise themselves with their opponent's set-up. Then, the units of both factions are set up as per normal, i.e., in secret.
Rivers (optional). The factions may decide to modify the two rivers in one of the following ways:
- Ignore rivers. Movement is not hindered by rivers (§5).
- Ignore bridges. It is not possible to cross a river hex side, even if there is a bridge across that hex side.
- Ignore part of the rivers. Crossing specific river hex sides does not incur any penalty. The river hex sides ignored should be the same on both halves of the board. For example, 0307–0308 and 0904–0905 are both not considered river hex sides.
§4.4 Place units
When the terrain tiles and headquarter units have been placed on the board, it is time for each faction to deploy its units in secret. To do this, a screen should be set up over the middle of the board. Each faction then places its units with the following limitations:
- All units must be put on the board.
- At most one unit in a hex.
- Units can be placed on terrain tiles (including town), but not in the same hex as headquarters.
- Units must be placed behind the faction-coloured set-up line.
Fog of war (optional). The type of units is not known initially to the opposing faction. Before revealing the set-up to the opposing faction, all units are flipped face down so as not to reveal their identity. Units are flipped to their face-up side whenever an enemy unit comes within two hexes (one intermediate hex) of a unit. See also Figure 6.
Figure 6: Fog of War. The blue unit moves to 0607. Since it is two or less hexes away from enemy units, it is flipped over to reveal that it is an infantry unit. Likewise, the red units in 0505, 0605, and 0705 are revealed. The red unit in 0504 is not revealed as it is more than two hexes away, and the caption ends "later turn." (Caption as printed; its last words sit in a column break in the PDF text layer and are transcribed as they read.)
Timed moves (optional). The factions may decide to limit the time a faction has to perform its moves, for example 2 minutes. When the time is up, no more moves can be made by the faction.
Once the factions have placed all their units on the board, they reveal their set-up to each other. The opposing faction may at this point object to wrongful set-ups. When all possible disputes have been settled, the game moves on to the first turn. The first phase is the red Movement phase (§5).
§5 Movement
In a faction's movement phase, that faction, and only that faction, may move as few, as many, or none at all, of the faction's units. The movement allowance of the units is given in the period card for each particular kind of unit. Movement must adhere to the following limitations:
- A unit may never move more hexes than its movement allowance. It may, however, move less.
- Movement allowance is not transferable between units, nor can movement allowance be saved for use in a later turn.
- A unit may never move into a hex occupied by an enemy unit.
- Depending on the period, some unit types cannot enter specific kinds of terrain. This is noted by a "–" in the period card.
- Units may not leave the board.
§5.1 Stacking
At the end of the movement phase no more than one unit may occupy a hex. Units may move through hexes occupied by friendly units — including headquarters — or swap places, as long as only one unit is in a given hex at the end of the movement phase.
§5.2 Rivers
Units may only move across a river hex side if that hex side has a bridge symbol on it (0208 to 0209, 1004 to 1005, and vice versa).
Stop on crossing (optional). With this optional rule in force, a unit may cross a river hex side but must stop movement after crossing the river. Crossing over a bridge does not hinder further movement.
§5.3 Strategic movement
No attack on crossing (optional). A unit may cross a river hex side, but cannot conduct an attack that turn. This can be used in addition to the optional rule Stop on crossing above (i.e., a unit may not continue movement, nor attack, on the turn it crosses a river hex side), or independently (i.e., a unit may continue movement after crossing but cannot attack).
In some periods, some unit types, marked by a * in the Move column, may perform strategic movement. A unit performing strategic movement:
- has its movement allowance increased to the (*) value in the period card, but
- may not attack during that turn.
Thus, a reconnaissance unit in the Modern period may move 3 hexes if, and only if, it does not attack in the faction's Combat phase (§6).
Figure 7: An example of combat in the Basic period. The red artillery on a hill (2 CS) and armoured (2 CS) units attack a blue infantry unit in the open (1 CS). The red infantry unit in 0505 does not participate in the combat. The combat is 4 CS versus 1 CS, and so the blue infantry unit is eliminated.
Figure 8: An example of river combat. In the Napoleonic period, the blue cavalry (3 − 2 = 1 CS) attacks the opposing shore, while the blue artillery supports across the bridge (2 − 1 = 1 CS). The defender is blue infantry (2 CS, because at least one attacker is cavalry or light cavalry). (Source caption as printed; it gives the defender the same colour as the attackers, which may be a typo for red. Symbols are not reproduced in text.)
§6 Combat
Combat always takes place between adjacent opposing units. Thus, if at the start of a combat phase the current faction has some of its units adjacent to enemy units, then those units may engage in combat with the enemy. Units are never forced to attack adjacent enemy units.
Combats are declared and resolved in any order as decided by the faction in turn (e.g., the red faction during the red combat phase). Combats are resolved with the following limitations:
- A unit may attack only once per turn.
- An enemy unit may defend against an attack only once per turn.
- A combat is always against an enemy unit in a single hex.
- Attacking units from multiple hexes may attack together against a defender in a single hex if, and only if, all attackers are adjacent to the defending unit.
- Units may attack into a hex they cannot otherwise move into. For example, in the Basic period an armoured unit may not move into a woods hex, but may attack an enemy unit in that hex. The optional rule Forced advance changes this rule (§7).
- Units may not attack across river hex sides, even if connected via a bridge. The optional rules Storming the bridge and To the other shore modify this rule.
- The combat strength of a unit cannot be divided up, nor can it be saved for use in a later turn.
See also Figure 7 for an example.
Storming the bridge (optional). Units may attack across a bridge (0208 to 0209, 1004 to 1005, or vice versa), but the attacking unit's combat strength is reduced by one. For example, an armoured unit in the Basic period attacking across a bridge has its combat strength reduced from 2 to 1. Note that only the unit attacking across the bridge suffers the penalty. If the defender is attacked from some other hex, then those attacking units do not suffer the −1 penalty.
To the other shore (optional). Units may attack across a river hex side, but they suffer a −2 penalty to their combat strength. For example, a Napoleonic cavalry unit attacking across a river hex side has its strength reduced from 3 to 1. Only the units that attack across a river hex side have their combat strength reduced. Other units that do not attack across a river hex side (or bridge) do not have their strength reduced. It is highly recommended that the above Storming the bridge optional rule is used with this optional rule. In that case, units attacking over a bridge suffer a −1 penalty while units attacking over a river hex side with no bridge suffer a −2 penalty. See also Figure 8 for an example.
§6.1 Combat strength (CS)
All units have a combat strength that depends on the kind of terrain they occupy. This is shown in the period card. The combat strength is the same whether attacking or defending, with a few exceptions. For example, an infantry unit on a hill in the American civil war period has a combat strength of 3.
In some cases, as marked by a † in the period card, a unit's combat strength is different if any opposing unit in the combat, attacking or defending, is of a certain kind. For example, in the Basic period, an artillery unit occupying a hill hex, in combat with an opposing infantry unit, has a combat strength of 2 CS, as shown in Figure 7.
For some periods, the combat strength of a unit may also be modified if the unit is defending against units of a certain type. This is indicated by a ‡ in the period card. If any attacking unit is of the indicated type, then that combat strength applies. For example, a Napoleonic infantry unit in a clear hex, defending against any number of cavalry or light cavalry units, has a combat strength of 2 CS. An example is shown in Figure 8.
If there is a conflict between the combat factors given by the † and ‡ combat strengths, then the lower value is used.
§6.2 Resolve combat
The combat strengths of all attacking units are summed up and compared to the combat strength of the defending unit.
- If the total attacking combat strength is larger than the defending combat strength, then the defending unit is eliminated. An example of this situation is shown in Figure 7.
- If the total attacking combat strength is equal to the defending combat strength, then the combat has no effect. An example of this situation is shown in Figure 8.
- If the total attacking combat strength is smaller than the defending combat strength, then all attacking units are eliminated.¹
Eliminated units are removed from the board. Eliminated units may not enter the board again.
¹ Since combat is voluntary, it seems unlikely that a faction will want to attack where this would be the result. However, a faction may want to deliberately place units such that the opposing faction may attack that unit and eliminate it, perhaps to block off advances.
§7 Advances
After all combats have been resolved, the faction in turn may advance victorious units into hexes vacated as a result of combat. Advances are subject to the following constraints:
- Only units that attacked and eliminated the enemy unit may advance.
- At most one unit may advance into the hex vacated by the enemy.
- A unit may not advance into terrain it is otherwise prohibited from entering. E.g., an armoured unit in the Basic period may not advance into a woods hex.
- A unit may never advance into a hex occupied by enemy units.
- At the end of this phase, at most one unit may occupy any single hex.
Forced advance (optional). If this optional rule is in force, then advances are never voluntary. This does not mean that a unit may enter terrain it otherwise could not enter. Therefore, if it is not possible for an attacking faction to advance any unit into a vacated hex after combat, then that attack is not possible. For example, in the Basic period, a sole armoured unit may not attack an enemy in a woods hex. If, however, the armoured unit is joined in the attack by an infantry unit, then the two units may attack into the woods hex.
Periods
Below are some period cards and some notes on each period. Table 3 summarises the unit types and names available in each period.
Table 3: Types of units. The symbols more or less follow the NATO APP-6 standard, but for earlier periods it is strictly not correct. Each row is a unit symbol; a unit name spanning several period columns in the source is shown once with the periods it covers.
- Headquarters (all periods): Headquarters.
- Box with cross (infantry symbol): Infantry in Basic, Modern, American civil war and Napoleonic wars; Pike in Pike and shot and Medieval; Phalanx and Cohort in Ancient.
- Box with bow-tie cross: Basic –; Modern Mechanised infantry; American civil war –; Napoleonic wars through Ancient Cavalry.
- Diagonal line: Basic –; Modern Reconnaissance; American civil war Cavalry; Napoleonic wars through Ancient Light cavalry.
- Dot: Artillery in Basic through Pike and shot; Medieval –; Ancient Chariot.
- Dot in ring (eye): Basic –; Modern Mechanised artillery; American civil war –; Napoleonic wars Light infantry; Pike and shot Musketeer; Medieval Archer; Ancient Light infantry.
- Rounded box: Basic through Modern Armoured; American civil war –; Napoleonic wars Guard; Pike and shot –; Medieval –; Ancient Elephant.
The source's Table 3 is a merged-cell grid; the spans above were read from its cell positions.
§8 Basic
The period cards below use these keys, as in the source: Clear, Hills, Woods, Town are the combat strength values on those terrain types (shown by terrain icons in the source); Move is the movement allowance; Cost is the resource cost used under Buying armies (§4.2); # of units is the number of counters each faction receives. A † value applies against an opposing unit of the type shown in the source key; a ‡ value applies when attacked by the unit types shown in the source key (where a conflict arises, the lower value is used, §6.1); a * on a Move value applies only if the unit is not attacking (§5.3).
Basic period card
| Unit | Clear | Hills | Woods | Town | Move | Cost | # of units |
|---|---|---|---|---|---|---|---|
| Headquarters | 0 | – | – | – | 0 | – | 1 |
| Infantry† | 1 | 3 | 3 | 3 | 1 | – | 8 |
| Artillery | 2,1† | 3,2† | 4,1† | 3,2† | 1 | – | 2 |
This is a simple, somewhat modern, period were the factions can control a small sub-set of unit types.
§9 Modern
Modern period card
| Unit | Clear | Hills | Woods | Town | Move | Cost | # of units WWII | # of units Modern |
|---|---|---|---|---|---|---|---|---|
| Headquarters | 0 | – | – | – | 0 | – | 1 | 1 |
| Infantry† | 1 | 3 | 3 | 3 | 1 | 6 | 3 | 0 |
| Mechanised infantry† | 1 | 3 | – |
This corresponds to 1940 to the present. It has two sub-periods:
- WWII. This sub-period corresponds to a World War II situation. It is characterised by infantry and armoured units with some artillery support.
- Modern. This sub-period corresponds to the post-WWII period. It is characterised by highly mobile units.
The factions must choose which type of armies to use. It is recommended to choose the same sub-period for both factions, but they may decide to mix the two.
§10 American civil war
American civil war period card
| Unit | Clear | Hills | Woods | Town | Move | Cost | # of units |
|---|---|---|---|---|---|---|---|
| Headquarters | 0 | – | – | – | 0 | – | 1 |
| Infantry | 2 | 3 | 3 | 3 | 1 | 8 | 7 |
| Cavalry | 2 | 2 | 2 | 2 | 2,3* | 15 | 1 |
Mid to late 19th century. A lot of powerful infantry, some cavalry, and artillery support.
§11 Napoleonic wars
Napoleonic wars period card
| Unit | Clear | Hills | Woods | Town | Move | Cost | # of units |
|---|---|---|---|---|---|---|---|
| Headquarters | 0 | – | – | – | 0 | – | 1 |
| Infantry | 1,2‡ | 2,3‡ | – | 3,2†,4‡ | 1 | 4 | 6 |
| Cavalry‡ | 3 | 2 | – | 1 | 2 | 15 | 1 |
Late 17th to early 19th century. A diverse mix of light and heavy infantry, some light and heavy cavalry, and artillery.
§12 Pike and shot
Pike and shot period card
| Unit | Clear | Hills | Woods | Town | Move | Cost | # of units |
|---|---|---|---|---|---|---|---|
| Headquarters | 0 | – | – | – | 0 | – | 1 |
| Pike | 2,1†,3‡ | 3,2†,4‡ | – | 2,3†‡ | 1 | 7 | 3 |
| Cavalry‡ | 3 | 2 | – | 1 | 2 | 15 | 2 |
Late 15th to late 17th century. Heavy on infantry and "musketeer".
§13 Medieval
Medieval period card
| Unit | Clear | Hills | Woods | Town | Move | Cost | # of units Muslem | # of units Crusader |
|---|---|---|---|---|---|---|---|---|
| Headquarters | 0 | – | – | – | 0 | – | 1 | 1 |
| Pike | 2,‡ | 2,4‡ | – | 3,5‡ | 1 | 6 | 2 | 4 |
| Cavalry‡ | 4 | 2 | – |
The Pike Clear entry is printed as "2,‡" in the source.
11th to 15th century. This period roughly corresponds to the time of the crusades to the Holy Land, and other European conflicts. There are two kinds of armies to choose from in this period:
- Crusader. Heavy infantry and cavalry with some archers. Typically European armies in that period.
- Muslem. More versatile armies with more emphasis on lighter units. Typically Arabian armies in that period.
The faction may choose any combination of armies, thus simulating different kinds of conflicts.
§14 Ancient
Ancient period card
| Unit | Clear | Hills | Woods | Town | Move | Cost | Greek | Macedonian | Persian | Carthaginian | Roman |
|---|---|---|---|---|---|---|---|---|---|---|---|
| Headquarters | 0 | – | – | – | 0 | – | 1 | 1 | 1 | 1 | 1 |
| Phalanx | 4 | 1,2‡ | – | 3,5‡ | 1 | 9 | 7 |
From 5th century B.C. up to the 4th century. There are five different kinds of armies in this period:
- Greek. Mostly infantry.
- Macedonian. More cavalry and more emphasis on light infantry.
- Persian. Emphasis on mounted units, not least elephants.
- Carthaginian. (Printed as "Cathaginian" in the source.) More infantry than the Persian army, but mostly mounted units, and of course elephants.
- Roman. Heavy infantry with a bit of cavalry and auxiliaries.
§15 Optional rules
The optional rules are listed in §15 of the source, and each is described in the section where it applies:
- Stalemate (§3.1)
- Timed game (§3.1)
- Victory points (§3.1)
- Buying armies (§4.2)
- Alternative setups (§4.3)
- User defined (§4.3)
- Faction defined (§4.3)
- Rivers (§4.3)
- Fog of war (§4.4)
- Timed moves (§4.4)
- Stop on crossing (§5.2)
- No attack on crossing (§5.3)
- Storming the bridge (§6)
- To the other shore (§6)
- Forced advance (§7)