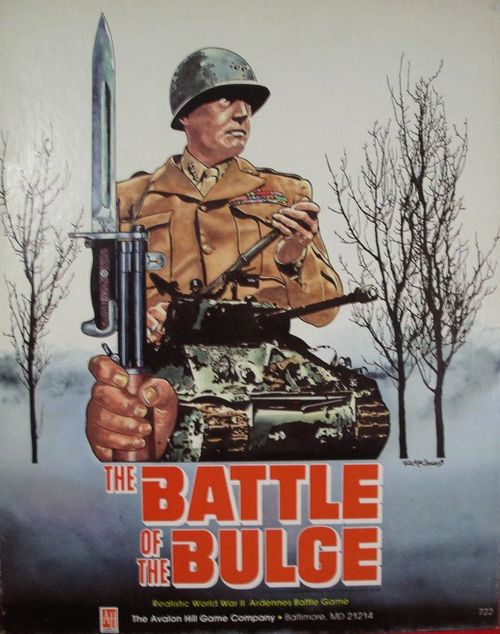
The Battle of the Bulge (1981)
The Battle of the Bulge Rulebook
Table of Contents
Table of Contents
- I. Introduction
- II. Basic Game
- III. Combat Results
- IV. Advanced Game
- V. Scenarios
- Second Edition Counter Variants
- Terrain Effects Chart
- Combat Results Table
I. Introduction
1.0 About the Design
During play, German reinforcements may appear earlier than they did historically if certain preliminary objectives have been reached; the reinforcement schedule is otherwise based on the real historical timetable. Allied units appear on the turns in which they reached the periphery of the battlefield.
BATTLE OF THE BULGE has been split into two sections to simplify learning. First, the Basic Game is explained; new players should play this version until the basic mechanics become familiar. The Advanced Game is a more precise simulation of the battle but is, consequently, also more difficult to play. It is intended for veteran players seeking the complex view of the battlefield that it provides.
2.0 Historical Background
At 4 a.m. on December 16, 1944, three German armies — twenty-six divisions, three armored brigades, seven artillery corps and eight full Nebelwerfer brigades — launched an offensive against the weakest part of the Allied line. The code name for the operation was "Wacht am Rhein." The purpose of the offensive was to roll over the weak Allied forces in the Ardennes, cross the Meuse on both sides of Liège, and drive for the port of Antwerp, cutting off between 25 and 30 Allied divisions in the Aachen salient. Hitler believed this blow would force the Allies to sue for a separate peace.
The overall plan included several supporting actions: Operation Stösser, Operation Greif, and the offensive of the Fifteenth Army. Operation Greif consisted of a fifth column under the command of Otto Skorzeny, tasked with slipping behind enemy lines to disrupt communications and seize bridgeheads. Operation Stösser was a paratroop drop that would be the last German airborne operation of the war. The Fifteenth Army, positioned immediately north of the Sixth Panzer Army, was to attack toward Maastricht to pin down Allied reserves and cover the Sixth Panzer Army's northern flank. The Fifteenth Army's attack depended on the Sixth Panzer Army's ability to clear the Elsenborn ridge, secure the northern flank, and break through to the Meuse.
Surprise and bad weather were both necessary to guarantee a German victory. Surprise was achieved because Hitler avoided use of the Enigma encryption system, preventing the Allies from learning his intentions through the Ultra service. Clouds covered the battlefield during the first week of the battle. Everything was as it needed to be for the Germans to launch their last great assault of the war.
3.0 Components
3.1 Inventory
3.1.1 Map board. 3.1.2 Two sheets of die-cut counters. 3.1.3 Player Aid Card. 3.1.4 German Order of Battle Sheet. 3.1.5 Allied Order of Battle Sheet. 3.1.6 Rules Manual. 3.1.7 One die.
3.2 The Map
The board represents the areas of Belgium, Luxembourg, Germany, and France in which the Battle of the Bulge was fought. Only the more rugged terrain and denser forests have been reproduced on the map. A hexagonal grid is printed on the board to regulate movement. Each hex measures approximately 3 km (2 miles) between parallel sides. The description of the map's different terrain features appears on the Terrain Effects Chart found at the back of this manual.
3.3 Counters
The pre-cut cardboard counters represent the military units that took part in the Battle of the Bulge. Neutral markers are also included as game aids.
Military units are divided into two main categories: combat and non-combat. Combat units are further subdivided into three classes: mechanized, infantry, and artillery. Rules referring to a particular class affect all units of that class.
3.3.1 Combat Units
3.3.1.1 Mechanized Units
- Armor (Panzer)
- Motorized Infantry (Panzergrenadier)
- Armored Cavalry
3.3.1.2 Infantry Units
- Infantry
- Parachute Infantry
- Glider Infantry
3.3.1.3 Artillery Units
- Nebelwerfer
- Artillery Corps
3.3.2 Non-Combat Units (Advanced Game)
- Commandos
- Air Power
3.3.3 Unit Information
3.3.3.1 Unit Size
| Symbol | Size |
|---|---|
| X | Brigade |
| III | Regiment, Artillery Group, or Cavalry Group |
| II | Battalion |
| · | Team |
3.3.3.2 Unit Identification
The formation to which a unit belongs, and its identification, are printed on every combat unit for historical and record-keeping purposes. Most units are identified by a number. Some are identified by a name:
- VDH: Von der Heydte (its commander)
- Füh Es: Führer Escort (Begleit)
- Füh Gr: Führer Grenadier
- T: Tanks
- CCA: Combat Command A
- CCB: Combat Command B
- CCR: Combat Command Reserve
- Peiper: Joachim Peiper (Commander)
3.3.3.3 Appearance Indicator (a letter or a number)
German units:
- Letter: initial placement.
- Number: reinforcement code.
Allied units:
- Number: initial placement.
- Letter: reinforcement code.
3.3.4 Basic Combat Strength
3.3.4.1 Basic combat strength represents the fighting power of mechanized and infantry units when attacking or defending.
3.3.4.2 Artillery units have two basic combat strengths. The first number represents the artillery unit's strength when attacking. The second number represents the artillery unit's strength when defending.
3.3.4.3 Non-combat units can neither attack nor defend.
3.3.5 Movement Allowance
Every unit's movement allowance is expressed in points. Entering a new hex costs a unit a certain number of these points. Once a unit has used all of its movement points it must stop for the rest of the turn. The movement cost of entering a hex varies depending on the hex's terrain and on weather conditions. These costs are detailed on the Terrain Effects Chart.
3.3.6 Nationality
- Green: Americans
- Blue and White: German Luftwaffe (air and ground units)
- Khaki: British
- Black: German Waffen SS
- Light Blue: German Wehrmacht
- Green and Yellow: German commandos
3.3.7 Game-Aid Markers (quantity supplied in parentheses)
All markers are printed on both sides.
- Isolation Marker (10)
- Artillery Support markers (23)
- Fuel Dump markers (2)
- Bridge markers (25)
- German-rebuilt bridge marker (1)
- Fort markers (33)
- Turn marker (1)
- Allied Engaged marker, in green (12)
- German Engaged marker, in blue (12)
3.4 Charts and Tables
3.4.1 Combat Results Table (at the back of this manual)
Used to resolve combat.
3.4.2 Terrain Effects Chart (at the back of this manual)
Lists terrain types and their effects on movement and combat.
3.4.3 Player Aid Card
The Player Aid Card contains: 3.4.3.1 Commando Recognition Table 3.4.3.2 Demolition Table 3.4.3.3 German Bridge Construction Chart 3.4.3.4 Weather Record Chart
Note that only clear weather and terrain conditions affect play. The other weather conditions (fog, mist, and snow) that appear on the Weather Record Chart appear only for historical interest.
3.4.4 Allied Order of Battle Card
Contains spaces for all Allied units, combat and non-combat.
3.4.5 German Order of Battle Card
Contains spaces for all German units, combat and non-combat.
4.0 Game Setup
4.1 Players select one of the four available scenarios. These scenarios are found in sections 45.0 to 48.0.
4.2 Players choose sides, one taking the Allied side and the other the German side.
4.3 The map is placed on a preferably flat surface between both players. The German player sits facing the east side of the board and the Allied player faces the west side.
4.4 Each player places their unit counters in the corresponding spaces of their Order of Battle Card.
4.5 The Allied player places their units on the board first. They take all units listed "AT START" on the Order of Battle Card and place them on the board exactly in the hex assigned to them.
4.6 The German player places their units on the board according to the scenario instructions. German units may be placed adjacent to Allied unit 106/422, which is placed in hex TT15.
4.7 The time marker is placed on space 16 AM of the Weather Record Chart. The time marker indicates the turn being played and moves forward one space at the end of each turn.
II. Basic Game
5.0 Sequence of Play
5.1 Allied Support Phase
The Allied player assigns Defensive Fire Support missions to their artillery units (see section 11.5).
5.2 German Player-Turn
5.2.1 German Supply Phase
The German player checks all of their combat units to determine whether they are isolated or supplied (see section 13.0). Isolation markers are placed on isolated units and removed from units that are no longer isolated.
5.2.2 German Reinforcement Phase
The German player consults the Weather Record Chart and the German Order of Battle Card and places reinforcements at the corresponding board edge according to section 16.0.
5.2.3 German Movement Phase
The German player moves all German units they wish to. German reinforcements entering play this turn may also move.
5.2.4 German Combat Phase
The German player divides all combats provoked during movement into battles. They then resolve each battle one at a time in whatever order they wish. Combat results for each battle are applied immediately after the battle is resolved.
5.3 Allied Player-Turn
The Allied player follows the same sequence of activities described for the German turn.
5.4 Time Phase
The time marker moves one space toward the next turn.
6.0 Movement
6.1 In the movement phase of their turn a player may move as many of their units as they wish: all, some, or none. No Allied unit may move during the German movement phase, and no German unit may move during the Allied movement phase.
6.2 Each counter moves from one hex to an adjacent one. A unit may not skip a hex.
6.3 Each unit moves individually. Once a unit has finished its movement it may not move again. A unit's movement is considered complete once the player begins moving another unit.
6.4 Depending on the type and condition of the terrain, a unit may spend one or two movement points to enter a hex. A unit may not enter a hex if it does not have enough unused movement points remaining. A complete list of terrain features, their condition, and their effects on movement appears on the Terrain Effects Chart.
6.5 Each unit may move through any number of hexes in any direction or combination of directions until its movement allowance is exhausted.
6.6 Movement points cannot be transferred from one unit to another, nor accumulated from one turn to the next.
6.7 A unit may move freely through friendly units, but may not move into or through a hex containing enemy combat units.
6.8 A unit may leave the board, but once off it may not re-enter and is permanently eliminated from the game. The half-hexes on the board edge are considered off the board.
6.9 Movement across cliff hexsides is prohibited.
NOTE: The die is used to resolve combat and has nothing to do with movement.
7.0 Zone of Control (ZOC)
7.1 Every combat unit exerts a ZOC over all adjacent hexes that are not blocked by cliff hexsides.
7.1.1 Units in hexes separated by a cliff hexside are not considered adjacent because of the sharp difference in elevation. A ZOC, therefore, does not extend across cliff hexsides.
7.1.2 A ZOC does not extend off the board.
7.2 A moving unit must stop and end its movement immediately upon entering the ZOC of an enemy combat unit.
7.3 A unit that begins its turn in an enemy ZOC may leave it freely without penalty.
7.4 A battle occurs whenever a combat unit enters the zone of control of an enemy combat unit.
8.0 Combat
8.1 The moving player is the attacker for the remainder of the turn.
8.2 A battle is resolved by comparing the attacker's combat strength to the defender's combat strength. The ratio is rounded, always down, to one that appears on the Combat Results Table. A die is then rolled and the result is read in the corresponding ratio column.
For example, if Peiper (combat strength 12) attacks the 14th Armored Cavalry Group (combat strength 4), the battle ratio is 12 to 4, which reduces to 3 to 1. With a result of 3 both units would be eliminated by an Exchange result.
8.3 Combat may not be resolved until all movement has been completed. Once a battle begins to be resolved, only movement caused by combat results is permitted until the end of the attacker's turn.
8.4 The attacker may attack as many enemy units as they can reach during their movement phase.
8.5 The attacker may move as many combat units into enemy zones of control as they can before resolving combat.
8.6 No unit may attack across a cliff hexside.
8.7 A defending unit's combat strength may be doubled if it is in a town, rugged terrain, or behind a river. See the Terrain Effects Chart.
9.0 Multi-Unit Battles
9.1 After movement ends the attacker may divide combat into battles and resolve them in whatever order they wish, provided the following rules are followed.
9.2 All attacking units in the ZOC of enemy units must attack, and all enemy units in whose ZOC there are attacking units must be attacked.
9.3 A battle must contain at least one attacking unit and one defending unit.
9.4 An attacking unit must be adjacent to all units it attacks.
9.5 In a battle, attacking units may attack defending units from any number of hexes, provided all attacking units are in the ZOC of every defending unit.
9.6 When two or more units attack in the same battle their combat factors are added together to obtain a combined attack factor.
9.7 When two or more units defend in the same battle their combat factors are added together to obtain a combined defense factor.
9.8 The attacker may not split combat into more than one battle against units defending in the same hex. They must be attacked as a combined defense factor.
9.9 Two or more attacking units in the same hex are not required to attack the same defending hex. Units in the same hex may fight in different battles against defenders occupying different hexes.
9.10 A unit's combat factors cannot be split and used in more than one battle.
9.11 No unit, attacking or defending, may fight in more than one battle during a combat phase, even if it is adjacent to enemy units after the battle it took part in is resolved.
10.0 Stacking
10.1 The maximum stacking limit for both sides is three combat units per hex. Game-aid counters and non-combat units do not count toward this limit.
10.2 Both players may freely combine friendly units of any type in a stack, with one exception: American and British units may not stack together, though they may take part in the same battle from different hexes.
10.3 A combat unit may move through a stack of three friendly units but may not stop in the hex they occupy.
11.0 Artillery Support
11.1 In addition to attacking and defending like other units, artillery corps units are able to provide long-range support fire to friendly units engaged in combat. Support fire may only be used to help other friendly units engaged in combat, never as a form of attack or defense in itself.
11.2 Artillery corps may not provide support fire if they are adjacent to enemy combat units.
11.3 Allied and German artillery corps may provide offensive support fire. Only Allied artillery corps may provide defensive support fire. German artillery corps cannot provide defensive support fire due to ammunition supply problems.
NOTE: Only artillery corps can provide artillery support. German Nebelwerfers, although a type of artillery, are not long-range weapons and are therefore unable to provide support fire of any kind. Nebelwerfers can only fight against adjacent enemy units.
11.4 Offensive Support Fire
11.4.1 At the start of their combat phase, the attacker may select some or all of their non-isolated artillery corps that are not adjacent to enemy combat units for offensive support fire missions. Supply status is determined during the attacker's Supply Determination Phase.
11.4.2 An artillery corps may provide offensive support fire in a battle only if it is within four hexes or fewer of all defending units. In addition, British or American artillery may only provide offensive support fire in battles containing at least one combat unit of their own nationality.
11.4.3 All offensive support fire must be placed before the first battle is resolved. Once placed, support fire cannot be voluntarily removed or changed.
11.4.4 When an artillery corps provides offensive support fire, the corresponding artillery support marker is placed on one of the attacking stacks and the artillery unit's attack factor is included in the attack. Offensive support fire cannot prevent the doubling of defenders' strength when they are in towns, rugged terrain, or behind rivers.
11.5 Defensive Support Fire (FTF)
11.5.1 The Allied player may select some or all of their non-isolated artillery corps that are not adjacent to enemy combat units to give defensive support fire. Supply status is determined when the defensive support fire marker is placed.
11.5.2 Defensive support fire is placed only during the Allied Support Phase. Once placed, defensive support fire cannot be removed or voluntarily changed for the remainder of the German player's turn.
11.5.3 Similarly to offensive support fire, British and American artillery corps may only provide defensive support fire to units of their own nationality.
11.5.4 An Allied artillery corps may provide defensive support fire to units in an adjacent hex or to units two, three, or four hexes away.
11.5.5 When an Allied artillery corps provides defensive support fire, the corresponding artillery support marker is placed in the supported hex and its defense strength is added to the hex's total defense. Defensive support fire is never doubled, under any circumstances.
11.6 An Allied artillery corps may provide both defensive support fire and offensive support fire in the same turn.
11.7 An artillery corps' support must be cancelled immediately if, at any time, a combat unit is placed adjacent to the artillery unit before the battle it supports is resolved. The corresponding artillery support marker is removed and the artillery unit's strength is not included in the battle.
11.8 Artillery corps may not provide support fire if the line of fire crosses or runs along a cliff hexside. Lines of fire are traced from the center of the hex from which fire is delivered to the center of each hex in the battle. Cliffs are the only terrain feature that can block a line of fire.
12.0 Supply
12.1 Players must check the supply status of all their units every turn; this is done during the supply phase. A unit is supplied only if it can trace a supply route to a friendly supply source. Unsupplied units are considered isolated and have their movement and attack strength penalized as explained in the following section (13.0 Isolation). A supply route consists of a supply line running from the unit to a supply road that in turn leads to a friendly supply source.
12.2 A supply line is any line of connected hexes, free of enemy zones of control, running from the unit to a hex on a supply road.
12.2.1 A German supply line to a supply road may not be more than three hexes long.
12.2.2 An Allied supply line to a supply road may not be more than four hexes long.
12.3 A friendly supply road is any network of connected roads and towns, free of enemy zones of control, running from the supply line to a friendly supply source.
12.3.1 German supply sources are the east edge of the board, hex UU1 on the north edge, and any friendly hex of Liège. Hex UU1 cannot be used as a supply source until the turn after a German combat unit enters Monschau, or until 19 AM, whichever occurs first.
12.3.2 Allied supply sources are the friendly hexes of Liège and the north, west, and south edges of the board, excepting hexes QQ1 and UU1.
12.3.3 A Liège hex must contain a German combat unit to become a supply source for the Germans. The Liège hex remains a supply source for them even if it is in an enemy ZOC.
12.3.4 Any Liège hex not occupied by German combat units becomes a supply source for the Allies, even if it is in an enemy ZOC.
12.4 A unit may not trace a supply line directly to the board edge. The supply line must be traced to a supply road that leads to the board edge.
12.5 A supply line may cross unbridged rivers, rugged terrain, and dense forest, but may not cross a cliff hexside.
12.6 When measuring the length of a unit's supply line, the unit's own hex is not included, but the road hex is counted. Since the unit's hex is not part of the supply line, a unit may be supplied while engaged in combat.
12.7 The presence of a friendly unit in a hex does not prevent an enemy ZOC from cutting a supply route that passes through that hex.
12.8 The Allies may not use a supply road that exits the board through the north or west edges through the same hex through which German mechanized units have exited toward Antwerp. Nor may they use a supply road that exits the board between hexes of the same board edge through which German mechanized units have exited toward Antwerp.
12.9 Friendly supply routes may run behind enemy lines as long as no enemy unit exerts its ZOC over the route.
13.0 Isolation
13.1 Units that cannot trace a supply route to a friendly supply source during their supply phase are considered isolated until their next supply phase. Isolation markers are placed on units to indicate their status.
13.2 All isolated combat units, including artillery units, attack at half their combat strength, rounding fractions up, but defend at full strength.
13.3 Isolated artillery corps may not provide support fire.
13.4 The movement allowance of all isolated units is reduced to two movement points.
14.0 Special Movement
14.1 Road Movement
14.1.1 The cost of road movement varies depending on the unit's class.
14.1.1.1 Road movement improves a unit's movement speed. All units have the same road movement speed except German infantry, which, along with some Nebelwerfer units, were the only ones required to move on foot.
14.1.1.2 For all other unit types, road movement costs a quarter of a movement point per hex if the unit is moving along the road.
14.1.2 Terrain does not affect road movement. Entering or leaving an enemy ZOC, and providing offensive artillery support fire, can reduce the road movement speed of some units, as explained below.
14.1.2.1 German infantry units that begin their movement in an enemy ZOC, or that intend to end their movement in an enemy ZOC, have their movement cost increased from a third to a half movement point per hex during that turn.
14.1.2.2 Allied infantry units that begin their movement in an enemy ZOC, or that intend to end their movement in an enemy ZOC, have their movement cost increased from a quarter to a third movement point per hex during that turn.
14.1.2.3 German artillery corps that intend to provide offensive support fire during the combat phase have their road movement cost increased from a quarter to a third movement point per hex during that turn. To indicate that a unit has moved spending a quarter movement point, and therefore cannot provide support fire in the combat phase, it is temporarily turned upside down.
14.1.3 All units may combine road movement with off-road movement in the same turn. When combining the two types of movement, a unit may not exceed its movement allowance, even by a fraction.
14.1.4 All units may change roads at intersections without losing the benefit of road movement.
14.1.5 For movement purposes, town hexes are treated as clear terrain hexes where all roads reaching the town intersect. Units are considered to enter or leave towns by road movement, but only if entry and/or exit from the town is made along a road; otherwise the movement cost is the same as entering or leaving a clear terrain hex.
14.1.6 Mechanized units may not enter roadless forest hexes. They may enter forest hexes only if they have a road, and must enter and leave forest hexes by road.
NOTE: Although some bridges in towns were blown during the battle, there were always alternative crossing points in those towns that were ignored; it is therefore simpler to treat a town hex as clear terrain even if it lies on a river. To reinforce this idea, rivers and bridges have been erased from all town hexes.
14.2 River Movement
14.2.1 A unit must stop and end its movement as soon as it enters a hex containing an unbridged river, if it intends to cross at that point.
14.2.2 A unit may cross a river by a bridge or a town at no movement cost.
14.2.3 There is no penalty for moving along a river. A unit may move into a river hex, move along the river, and leave the river by the same bank it entered by, all in the same movement phase.
14.2.4 A unit may move into a river hex, move along the river to a bridge or town and cross the river, or continue moving along the river and leave it by either bank, all in the same movement phase.
14.2.5 A non-armor unit may cross a river if it begins the turn in the river hex. It is considered to be on either bank and may leave the river by either bank, or move along the river and leave it by either bank.
14.2.6 An armor unit may never leave a river hex by the bank opposite the one it entered by, except by a bridge or town. In other words, they cannot cross a river any way except by a bridge or a town.
14.2.7 A non-armor unit that begins its turn at the confluence of two rivers may leave the hex in any direction, or may move along either river and leave it by either bank, all in the same movement phase.
14.2.8 Any unit, including armor, may cross a river headwater without stopping, or may move into a river-headwater hex, move along the river, and leave it by either bank.
14.2.9 If a non-armor unit begins its turn on a river and moves along the river to a hex where several rivers meet, the unit may continue moving along any river, but may only cross the new river by a bridge or river hex.
14.2.10 A unit must follow the exact course of a river to be considered as moving along the river.
14.2.11 Units pay only the normal movement cost of the hex when entering, moving along, or leaving a river. There is no special movement cost for moving to or crossing rivers. Units moving along a river may only use a road if it is on the same side of the river as the unit.
14.3 Roer River Movement (German Fifteenth Army Boundary)
14.3.1 German combat units may not enter a Roer river hex until the turn after a German unit enters Monschau, or until 19 AM, whichever occurs first.
14.3.2 There is one exception. German combat units may enter the Roer headwater hex, but only to attack Monschau.
14.4 Movement in ZOC
14.4.1 A combat unit may not move directly from a ZOC hex of one enemy unit to another ZOC hex of the same enemy unit.
14.4.2 A combat unit may move directly from the ZOC of one enemy combat unit to the ZOC of another enemy combat unit, but must stop there.
14.4.3 A combat unit may move out of the ZOC of an enemy combat unit and re-enter the ZOC of the same enemy unit through a different hex, but must stop there.
15.0 Fortified Towns (Forts)
15.1 There are six permanent forts on the map. They are Clerf, Dinant, Namur, and the three Liège hexes.
15.2 A unit adjacent to an enemy fort exerts a ZOC over the fort that blocks enemy movement and the flow of reinforcements, and blocks enemy retreat routes. However, combat units in forts are never required to attack any adjacent enemy unit, although they have the option of attacking if they wish. This is an exception to the normal effect of a ZOC on combat.
15.3 Units in a fort that become involved in a battle must accept the result obtained, whatever it is.
15.4 When two or three units occupy a fort, attacks may be carried out against adjacent enemy units by one, two, or all three units in the fort. Units in the fort that do not take part in an attack are not affected by the combat results.
15.5 When a unit in a fort attacks an adjacent enemy unit, all other enemy units adjacent to the fort must also be attacked. Units attacking from the fort may be assisted by friendly units that are not in the fort.
15.6 Units occupying a fort are not required to attack adjacent enemy units when those enemy units are attacked by friendly units that are not in the fort.
15.7 A unit adjacent to an occupied enemy fort must attack that fort unless the attacking unit is in a Liège hex. Units in a Liège hex are not required to attack enemy units in an adjacent Liège hex.
16.0 Reinforcements
16.1 The Order of Appearance Cards contain all the information necessary to bring reinforcements into play. Reinforcements are shown in groups of one or more units, depending on when and where they arrive.
16.2 To the left of each group is printed the first turn on which the units may enter play. Below each group is the place or places by which they may enter the map. To the right of each group additional information may be found that can affect entry into play. Much of this information gives units a wider entry zone if they cannot or do not wish to enter play on the first turn of arrival.
16.3 During the Reinforcement Phase, newly arrived units are placed near the board edge at the hexes specified on the Order of Battle Card.
16.4 If two hexes are shown as an entry point, the new units may enter through either one or through any hex between them. Units of a group need not all enter through the same hex; they may be split among different entry points.
16.5 The hex through which a unit enters the board counts as movement, and newly arrived units must pay their movement cost.
16.6 Newly arrived units enter play paying road costs if they enter by a road or a town hex.
16.7 Newly arrived units may not enter the board through a hex occupied by enemy units. They may enter through hexes adjacent to enemy units, but must stop and attack.
16.8 Any reinforcement unit may delay its turn of entry if its owning player so decides.
16.9 Allied reinforcements may not enter the board by a road or town hex if any German mechanized unit exited the board toward Antwerp through that hex.
16.10 Allied reinforcements may not enter the board between road and/or town hexes of the same board edge that were used by German mechanized units to exit the board toward Antwerp.
16.11 Special Reinforcement Situations
16.11.1 When Meuse river towns are mentioned, this refers to the following towns: Givet, Dinant, Namur, Andenne, and Huy. These are the Meuse towns.
16.11.2 To free the 10th SS Panzer and 11th Panzer Divisions, the indicated units (see Order of Appearance) must enter a hex of the Meuse or Sambre rivers within the marked limits and move to a non-river hex on the opposite bank. The Meuse towns and the two Liège hexes (W2 and W3) are considered to be on the Meuse.
16.11.3 If arrival depends on friendly units entering certain hexes, units may arrive even if the friendly units have since left those hexes. For example, if German units enter Malmedy on their 17 PM turn, the 2nd and 9th SS Panzer Divisions may enter play on 18 AM, even if the Allies retake Malmedy on their 17 PM turn.
16.11.4 The American occupation of St. Vith caused a traffic jam in the westward-moving German columns during the first days of the battle. The greatest delay was suffered by the two SS Panzer Divisions (2nd and 9th) rushing to reinforce the Sixth Panzer Army. To reflect this situation, neither of these two divisions may enter the board on its turn of arrival (they remain off the board) if any Allied unit is in St. Vith. They may enter play the following turn (Allied occupation of St. Vith delays their arrival by one turn).
17.0 Combat Resolution
17.1 Battle Resolution Procedure
17.1.1 The attack and defense strengths of the units involved in the battle are added up. Some or all defense strengths may be doubled due to terrain. Both strengths are divided by the weaker strength, and the resulting fraction is rounded in the defender's favor. The two numbers are taken as a basic ratio. The attacker's strength is always given first.
For example, 16 factors attacking 9 factors becomes 16/9 to 9/9, or 1 7/9 to 1. Rounding the fraction in the defender's favor, the ratio becomes 1 to 1, or 1-1; 14 factors attacking 6 factors would reduce to 2-1; 4 factors attacking 15 would reduce to 1-4.
17.1.2 The attacker rolls a die.
17.1.3 The die roll is cross-referenced with the force ratio on the Combat Results Table to determine the outcome of the battle. The result must be fully carried out before the next battle is resolved.
NOTE: Many combat results contain two results. The one on the upper line is carried out first, followed by the one on the lower line.
17.1.4 Battles with ratios lower than 1-7 are resolved using the 1-7 column of the Combat Results Table.
17.1.5 Attacks with ratios greater than 8-1 are resolved using the 8-1 column of the Combat Results Table.
17.1.6 The attacker may attack one or more units at unfavorable ratios in order to achieve more favorable ratios against other defending units. This tactic is known as soaking-off.
17.2 Die Roll Modifications
17.2.1 The die roll used to resolve a battle may be modified. Die roll modifiers are cumulative. For each battle, positive and negative modifiers are added together to determine how much the die roll must change by. Die roll modifiers are mandatory and must be applied in every battle in which a defending unit has close air support in defense, and in every battle in which a defending unit occupies a fort or an improved position.
17.2.2 Attacker's Initiative: When, in a battle, no defending unit receives close air support in defense nor occupies a fort or an improved position, the attacker may apply or ignore the negative die roll modifiers. After rolling the die to resolve combat, the attacker decides whether each modifier applies. For example: the Germans carry out a 4-1 attack with negative modifiers for Close Air Support to the Attack and for Artillery Support (20 factors). A 6 is rolled. The German player may decide to apply both modifiers, in which case the result would be Exchange; or only one modifier, in which case the result would be Contact; or no modifier, in which case the result would be Engagement.
17.2.3 A die roll cannot be reduced or increased by more than two, even if the modifiers total more. +2 or -2 is the limit.
17.2.4 A battle's die roll is reduced by one for every group of 20 strength points of artillery units used in the attack (this includes both Nebelwerfers and artillery corps). These strength points may come from support fire or from direct attack. For example, an attack involving 20 to 39 points of artillery receives a -1 modifier. An attack with 40 to 59 points of artillery receives a -2 modifier, and so on.
17.2.5 The die roll is increased by one if at least one of the defending units is in a fort other than Liège.
17.2.6 The die roll is increased by two if at least one of the defending units is in a Liège hex.
17.3 Artillery Overrun
17.3.1 Attacks carried out solely against artillery units at ratios of 6-1 or greater automatically result in an overrun of the artillery units. At least one of the attacking units must be a mechanized or infantry unit.
17.3.2 The Combat Results Table is not used. The result is automatically Defender Eliminated, Attacker Advances 4.
17.3.3 Overruns may only be carried out during the Combat Phase.
III. Combat Results
18.0 Elimination
18.1 Attacker Eliminated (A Elim)
18.1.1 All attacking units taking part in the battle are eliminated.
18.1.2 Artillery corps that provided offensive support fire are not affected by an Attacker Eliminated result.
18.2 Defender Eliminated (D Elim)
18.2.1 All defending units taking part in the battle are eliminated.
18.2.2 Allied artillery corps that provided defensive support fire are not affected by a Defender Eliminated result.
19.0 Retreat
19.1 Defender Retreat (D Back)
19.1.1 All defending units involved in the battle must retreat the exact number of hexes, no more and no less, specified in the combat result, and must do so along specific retreat routes. There is no movement cost for retreating.
19.1.2 The controlling player retreats units one at a time.
19.1.2.1 Each unit's retreat route must cross the minimum number of hexes free of enemy units, enemy ZOCs, and impassable terrain to a town hex or a supply-road hex. If the retreat is not completed, it continues by road toward a friendly supply source, not necessarily the nearest one. A unit that begins on a supply road must retreat along that road toward a friendly supply source.
19.1.2.2 If a retreating unit is not on a supply road, it may be able to reach one or more supply roads by different routes with the minimum number of hexes required. In these situations the controlling player may retreat their units to the friendly town or supply-road hex of their choice, by whichever route they prefer.
19.1.2.3 A unit continuing its retreat along a supply road may switch to another supply road at an intersection or in a town.
19.1.2.4 A unit that has no supply route to a friendly supply source at the time of combat may be retreated in any direction by the owning player.
19.1.2.5 A unit whose only appropriate retreat route would take it off the board may be retreated in any direction by its owner.
19.1.3 Retreat Restrictions
19.1.3.1 No unit may retreat across a cliff hexside or off the board. Mechanized units may not retreat to or from dense forest except by road. Armor units may retreat into an unbridged river hex, but not cross it. These are the only situations in which terrain blocks retreat. Units may retreat through rugged terrain, across rivers (except armor), and, in the case of non-mechanized units, through forests.
19.1.3.2 A retreating unit may not enter a hex occupied by or in the ZOC of enemy combat units.
19.1.3.3 A retreating unit may not move twice into the same hex.
19.1.3.4 A retreating unit may not end its retreat in a hex occupied by three friendly combat units, although it may retreat through such a hex. A unit whose only retreat route forces it to end in a hex occupied by three friendly units may make its final move to any other adjacent hex to avoid overstacking.
19.1.3.5 A retreating unit unable to move the exact number of hexes required by the combat result without violating any of the restrictions described in 19.1.3.1 to 19.1.3.4 is eliminated immediately.
19.1.4 Artillery corps providing defensive support fire are not affected by a D Back result.
19.1.5 American and British units may end up stacked together if forced to by a retreat, but must separate at the first opportunity.
19.2 Attacker Retreat (A Back)
The attacker's retreat is carried out in exactly the same way as the defender's, except that only the units attacking in the battle, excluding artillery corps providing offensive support fire, must retreat.
20.0 Advance After Combat (A Adv, D Adv)
20.1 In an attack, once all losses have retreated, the winner has the option to advance their victorious units one at a time.
20.2 While retreat is mandatory, advance is always voluntary. The owning player may advance all, some, or none of their victorious units. Each advancing unit may move any number of hexes up to the amount specified in the combat result. There is no movement cost for advancing.
20.3 An advancing unit may not enter or leave hexes it is forbidden to enter or leave during normal movement (a unit may not advance across an unbridged river; a mechanized unit may not advance to or from a forest hex except by road).
20.4 A unit must stop and end its advance immediately upon entering a rugged or dense-forest hex, unless doing so by road. Units advancing into rugged or dense-forest hexes by road may continue their advance out of that hex only by road.
20.5 Units may use their entire advance movement even if the retreating units were eliminated. An advancing unit may not end its advance in a hex containing three friendly combat units.
20.6 A unit may advance into an enemy ZOC, but must stop immediately and end its advance.
20.7 The first hex an advancing unit enters must always be a hex occupied by one of the defeated units. An advancing unit that can legally enter the defender's now-empty hex may do so even if it must move through an enemy ZOC to reach that hex. This is an exception to 20.6. An advancing unit must end its advance in the hex vacated by the defender if that hex is in an enemy unit's ZOC.
20.8 Units may advance to become adjacent to units taking part in a battle that has not yet been resolved; however, advancing units may not advance into hexes occupied by friendly units that are going to take part in that battle. A unit that advances to become adjacent to an enemy artillery corps that is going to provide support fire cancels that support.
20.9 Advancing units have no effect on the resolution of subsequent battles. Their presence blocks retreat routes.
20.10 Advancing units are not affected by the results of subsequent battles.
20.11 Any unit except armor that begins a battle in a river hex may advance by either bank, even if it reached the river that same turn. Armor units may only advance across a river by a bridge or a town.
21.0 Contact
21.1 Neither side suffers losses and there is no retreat or advance.
21.2 On their turn, the defender must retreat their units in contact, or counterattack with them, unless they are in a fortified town hex.
21.3 Defending units in a fortified town are not required to counterattack or retreat, though they may do either.
21.4 If the defender decides to counterattack, they may bring in other units to take part in the attack.
22.0 Exchange (Exc)
22.1 The defender must eliminate one defending combat unit that took part in the battle, of their choice. The attacker must then eliminate one attacking combat unit that took part in the battle, of their choice.
22.2 Artillery corps providing support fire may not be used in an exchange.
22.3 If there was only one attacking or defending unit, the surviving units may advance into the vacated hex.
22.4 If units of both sides survive the exchange there is no advance or retreat. On their turn the defender must retreat or counterattack with their surviving units, unless they are in a fortified town.
23.0 Engagement (Eng)
23.1 Neither player loses any unit and there is no retreat. Both players place the corresponding Engaged marker on the units taking part in the battle to indicate that fighting continues. The marker is removed from a unit as soon as it stops being engaged.
23.2 Engaged motorized infantry and infantry units must remain in place and may not move or fight until they stop being engaged (these units cannot disengage on their own). Armored cavalry, armor, and artillery units, being more mobile, are not affected in the same way and are free to disengage at any time (see 23.6, Special Retreat, for details).
23.3 On their turn, after movement but before resolving any attack, the defender must decide, for each engagement, whether their engaged units counterattack or hold their position (remain engaged).
23.4 Counterattack
23.4.1 Normally counterattacking is voluntary and is solely the defender's decision. However, the defender must choose to counterattack an engaged battle if they have one or more non-engaged friendly combat units adjacent to any of the engaged enemy units. In this case the defender has no choice: they must counterattack.
23.4.2 A declaration of counterattack ends the engagement immediately, and all units involved lose their engaged status. If a counterattacking unit is adjacent to an enemy unit engaged in another battle, the defender is obligated to counterattack in that battle too. This could start a chain of counterattacks.
23.4.3 Counterattacks are resolved during the combat phase like any other battle. Other units may be brought in to take part in the counterattack. Units in forts are never required to counterattack, even if their presence forces the defender to choose to counterattack in a nearby engaged battle.
23.4.4 Counterattacks need not be made against the previously engaged units. All adjacent enemy units must be attacked following the rules for multi-unit battles. For this reason the battle need not be fought exactly the same way again; it may be split into different battles if possible.
23.5 Hold the Position
23.5.1 If the defender in an engaged battle decides not to counterattack, they must choose to hold the position.
23.5.2 By deciding to hold the position the defender allows the units to remain engaged and unable to fight.
23.5.3 The defender may reinforce their engaged units with non-engaged units without breaking the engagement, but only if they move or advance into a hex with the defender's engaged units, where they immediately become engaged and hold the position as well.
23.5.4 On their next turn the attacker must attack again. The engagement ends, though it may recur if an Eng result comes up again. The attacker is not obligated to fight the battle exactly as before; they may split the attack into new battles, if possible, using the normal procedures. The attacker may reinforce these battles as in a normal combat.
23.5.5 Even though a defender has decided to hold the position, an engagement can be broken if the defender decides to advance one or more units into the ZOC of an engaged attacking unit after resolving another battle. If the advancing units do not reinforce a hex with engaged defenders, the engagement ends and all attacking units are free to move the following turn. This could start another chain of broken engagements, as in 23.4.2.
23.6 Special Retreat
23.6.1 Certain units (armor, armored cavalry, and artillery) are not affected by an engaged result and are allowed to withdraw from an engaged battle at any time. The owner of these units may simply remove them from under the Engaged marker whenever they wish. These units may then move and attack freely, and may of course also reinforce other friendly units holding their position.
23.6.2 The owner of these units may decide to leave some or all of them engaged if they wish; it is entirely up to them.
23.6.3 If, at the start of a movement phase, all of one side's units engaged in a battle are armor, armored cavalry, or artillery units, and the moving player chooses to withdraw all of them, the engagement ends.
23.6.4 An armor, armored cavalry, or artillery unit may withdraw from an engaged battle to attack again in the same battle from a different hex, or to reinforce other engaged units in the same battle.
IV. Advanced Game
24.0 Advanced Game Sequence of Play
This sequence of play replaces the one used in the Basic Game.
24.1 Allied Support Phase
The Allied player assigns air units to air interdiction or to close support of the defense missions (see 26.7 and 26.8) and assigns Defensive Fire Support missions to their artillery corps (see section 11.5).
24.2 German Player-Turn
24.2.1 German Supply and Fort Construction Phase
The German player checks all of their combat units to determine whether they are isolated or supplied (see section 13.0). Isolated units are marked with an Isolation marker. Isolation markers are removed from units that are no longer isolated. After checking isolation, the German player may fortify towns and build improved positions (see sections 31.0 and 32.0).
24.2.2 German Reinforcement Phase
The German player consults the Weather Record Chart and the German Order of Battle Card and places their reinforcements at the board edge according to section 16.0.
24.2.3 German Movement Phase
The German player moves all units on the board that they wish to move. German reinforcements waiting at the board edge also move.
24.2.4 German Combat Phase
The German player divides all combats provoked during movement into battles. They then resolve the battles one at a time in whatever order they wish. Combat results for each battle are applied immediately after the attack is resolved.
24.2.5 German Engineer Phase
The German player may repair and/or destroy bridges. All attempts to destroy bridges must be completed before repairs begin. The German player may attempt to destroy fuel dumps.
24.3 Allied Player-Turn
The Allied player repeats the same sequence of activities described for the German turn, simply substituting "Allied" for "German" throughout.
24.4 Time Phase
The time marker advances one space.
25.0 First Turn Surprise
25.1 The massive and secret preparations for the German assault created a peculiar situation at the start of the battle. On turn 16 AM the following conditions apply.
25.2 Due to congestion at the jump-off points, German combat units may not use normal road movement. They may move by road, but the cost for each hex moved is 1 movement point.
25.3 German units must stop and end their movement immediately upon entering a rugged or dense-forest hex, unless doing so by road. Units may not leave the road while in rugged terrain or forest.
25.4 When playing the Tournament or Campaign scenarios, regiments of the 1st and 12th SS Panzer Divisions may not enter the zone of control of any Allied unit during the German 16 AM Movement Phase. These units were held in reserve by Hitler himself to exploit any breakthrough achieved during the first day of the attack. If the Plan Martin or Operation Herbstnebel scenarios are played this restriction is ignored and the two SS divisions are free to attack on 16 AM.
25.5 German success in maintaining secrecy meant that the Americans were caught completely off guard and unprepared for the German attack. The German player must subtract one from the die roll when resolving all battles on the German turn.
25.6 Artillery corps may not move or provide support fire of any kind. The U.S. 333rd Artillery Regiment may move and provide support fire only if a German unit manages to advance to become adjacent to it on turn 16 AM.
NOTE: The Player Aid Card contains an abbreviated description of First Turn Surprise. In case of conflict with the rules, this section always takes precedence.
26.0 Tactical Air Power
26.1 The game's air counters represent the tactical air units that took part in the Battle of the Bulge. On the American side, IX, XIX, and XXIX Tactical Air Commands were involved. The British committed the Second Tactical Air Force, and the Germans used aircraft of Luftflotte III. Tactical air power is based on the actual number of sorties flown during the battle. German air power has been reduced to reflect the interception of most aircraft committed east of the battle zone.
26.2 The number of tactical air units available each turn is shown on the Weather Record Chart. Note that on some turns only the Allied player receives air units, while on others neither side receives any.
26.3 Air units may fly to any part of the battlefield. Air units may be placed in any hex, regardless of terrain or the presence of friendly or enemy units. Air units do not count toward stacking.
26.4 Air units exert no ZOC and are not affected by enemy ZOCs. Air units are not affected by combat results.
26.5 Only one air unit may be placed in each hex. Two air units may not be placed in the same hex.
26.6 There are three types of mission air units may fly: close support to the attack, close support to the defense, and air interdiction. German air units may only fly close support to the attack missions. Each individual air unit may fly only one mission per turn.
26.7 Interdiction Missions
26.7.1 During the Allied Support Phase the Allied player selects the air units they wish to send on interdiction missions. Any number of the units available that turn may be used.
26.7.2 The Allied player places one air unit in each hex where they wish to hamper movement. This may be done in any hex except those containing Allied combat units.
26.7.3 Only German units are affected by air interdiction.
26.7.3.1 During mud turns, German mechanized units must spend two movement points, and non-mechanized units one movement point, to enter a hex under interdiction, in addition to the normal terrain cost. When the ground freezes, the interdiction penalty for mechanized units is reduced to one additional movement point. A German unit may not enter a hex under interdiction if it does not have enough movement points to pay the terrain cost plus the additional interdiction cost.
26.7.3.2 German units may not cross a bridge that is in a hex under interdiction.
26.7.4 Interdiction does not block the flow of supply in any way.
26.7.5 Air interdiction cannot slow German retreats or advances, since these cost no movement points. Air interdiction can block German advances (and German armor retreats) across bridges.
26.7.6 Air units on interdiction missions are removed at the end of the German Combat Phase.
26.8 Close Support to the Defense Missions
26.8.1 During the Allied Support Phase the Allied player selects any number of their air units not used for interdiction to fly close support to the defense missions.
26.8.2 An air unit is placed on the Allied units in each of the hexes that are to be supported. Only one air unit may be placed in each hex.
26.8.3 Close support to the defense missions are used to help Allied units vulnerable to enemy attack. One is added to the resolution die roll of every battle that has an air unit assigned to a close support to the defense mission. If more than one hex in the same battle has close support to the defense units, the defender may add one to the combat result for each air unit in the battle.
26.8.4 Air units assigned to close support to the defense are removed at the end of the German Combat Phase, along with air units on interdiction missions.
26.9 Close Support to the Attack Missions
26.9.1 Both Allied and German air units may provide close support to the attack. A player assigns their close support to the attack missions at the end of their movement phase, before beginning to resolve combat. Only Allied air units that were not used during the Allied Support Phase may be used to give close support to the attack.
26.9.2 Close support to the attack missions are assigned to help friendly attacking units. One is subtracted from the die roll of every battle in which an air unit is on a close support to the attack mission.
26.9.3 An air unit is placed on one of the defending units involved in the battle to show close air support for the whole battle. A German air unit may not provide close support to the attack if an Allied air unit is already providing close support to the defense to any of the defending units in the same battle.
26.9.4 Only one air unit per battle may provide close support to the attack.
26.9.5 Close support to the attack missions cannot prevent the doubling of the strength of units located in towns, rugged terrain, or behind rivers.
26.9.6 Close support to the attack missions are removed immediately after the conclusion of the combat phase.
27.0 Strategic Air Power
27.1 During the bad weather that covered the battlefield in the first days of the offensive, Allied strategic bombing missions were not especially effective in slowing the German drive. However, as soon as the weather improved, the bombing caused great damage to supply and transport centers in the rear.
27.2 From turn 24 AM through 28 PM, all units unable to trace a supply route to a friendly Liège hex or to a captured fuel dump have their movement allowance reduced to two movement points. The movement allowance of isolated German units remains at two movement points. A fuel dump cannot be used if it is in an enemy ZOC. Note that the impact of the bombing reaches the battlefield 24 hours after the weather improves and remains in effect for 24 hours after visibility worsens again.
27.3 From turn 24 AM through 28 PM the attack strength of all supplied Nebelwerfer units is halved (rounding fractions up). Isolated Nebelwerfer units continue at half strength; their strength is not reduced again.
27.4 During all clear-weather turns, Allied units that begin their supply phase in towns are considered supplied until the next supply phase.
28.0 German Fifteenth Army Offensive
28.1 The Fifteenth Army offensive is directed against the U.S. Ninth Army on the first German AM turn that begins with the northern flank consolidated and the Sixth Panzer Army on the Meuse.
28.2 The northern flank is considered consolidated if Spa and Malmedy are not occupied by Allied combat units (these hexes are marked with a yellow 15 in a circle); and Verviers, Eupen, Aywaille, Roetgen, and hex CC5 are occupied by supplied German combat units (these hexes are marked with a plain yellow 15).
28.3 The Sixth Panzer Army will be considered on the Meuse if at least one SS mechanized unit has entered Namur, Andenne, Huy, any Liège hex, any hex of the Sambre river, or any hex of the Meuse river from D8 to Y1 inclusive. The unit need not be supplied to satisfy this condition.
28.4 24 AM is the last turn on which the Fifteenth Army offensive may be launched. If it has not been launched by the end of the German 24 AM turn it is cancelled.
28.5 Essentially, the Fifteenth Army offensive limits the arrival of reinforcements for both sides. Only those units surrounded by a box are affected. See the Order of Appearance Cards for details.
28.6 The Fifteenth Army's advance would obviously have drawn some tactical air missions to its sector. For this reason, Allied tactical air power has been reduced to reflect the dispersal of effort needed to face an additional German army. If the Fifteenth Army offensive is launched, Allied tactical air power is reduced from turn 17 AM through 27 PM as shown on the Weather Record Chart.
29.0 Bridge Demolition
29.1 A player may attempt to destroy or rebuild bridges only during their Engineer Phase.
29.2 A player may only attempt to destroy bridges to which they can trace a supply route, and that are within three hexes or fewer of an enemy combat unit. The supply route may pass through enemy lines as long as it does not pass through an enemy ZOC.
29.3 A bridge targeted for destruction need not be occupied by friendly units, but may not be occupied by enemy combat units.
29.4 To determine the success of each demolition attempt the player rolls a die and consults the Demolition Table. A blown-bridge marker is placed on each bridge successfully destroyed.
29.5 A player may choose not to blow any bridges, or may attempt to blow some or all of the bridges they can legally destroy. Only one attempt per bridge, per Engineer Phase, is allowed.
29.6 Due to the confusion caused by the German assault, bridges cannot be destroyed during turns 16 AM and 16 PM.
29.7 Both players must treat a blown bridge as an unbridged river hex. A unit may move across a river containing a blown bridge without stopping. A supply road cannot be traced across the river. A supply line may be traced to the supply road at the bridge hex.
29.8 At the start of the game the bridges at hexes MM24, TT31, and WW33 have already been blown.
30.0 Bridge Construction
30.1 During their Engineer Phase a player may rebuild any number of blown bridges reached by a supply road, as long as they are occupied by at least one of their mechanized or infantry units.
30.2 At least one of the mechanized or infantry units must remain in the hex and may not move during its next movement phase. The bridge marker is turned over to show its under-construction side and placed on the unit to indicate that it is engaged in rebuilding operations.
30.3 The bridge is not considered rebuilt and operational until the next Engineer Phase. In that phase the bridge-construction marker is removed and the unit beneath it is again free to move.
30.4 The reconstruction attempt is aborted and the marker is flipped back if any of the following conditions occur: an enemy unit is placed adjacent, all supply roads to the bridge are cut simultaneously, or the unit rebuilding the bridge moves before completing the reconstruction.
30.5 There is no limit to the number of blown bridges the Allied player may rebuild. The German player may rebuild a maximum of nine bridges during the game. The German Bridge Construction Chart keeps the record of bridges rebuilt by the German player.
31.0 Fort Construction
31.1 Forts may only be built on town hexes.
31.2 A player may build forts only during their Supply and Fort Construction Phase, placing fort markers of their color on the town hexes they wish to fortify.
31.3 A player may build forts only in towns that are outside enemy ZOC and that contain one or more supplied friendly mechanized or infantry units. Within these restrictions there is no limit to the number of towns a player may fortify in a turn.
31.4 At least one of the mechanized or infantry units in the town being fortified must be designated as the construction unit. It must remain in place and may not move during the next movement phase.
31.5 A constructed fort is immediately removed from the game whenever all combat units (including artillery units) occupying the fort move, retreat, or advance, leaving the fort completely unmanned.
31.6 Forts do not affect stacking or movement.
31.7 Constructed forts have the same benefits as permanent forts (see section 15.0).
31.8 At the start of the game there is already a fort built in hex VV33.
32.0 Improved Positions
32.1 Improved positions may be built by either side in any hex that is not a town.
32.2 A player may build improved positions only during their Supply and Fort Construction Phase. Fort markers are also used to indicate improved positions.
32.3 A player may build improved positions only in non-town hexes that are outside enemy ZOC and that are occupied by one or more supplied friendly infantry units. Within these restrictions there is no limit to the number of non-town hexes a player may improve in a turn.
32.4 At least one infantry unit in the hex must be designated as the construction unit. It must remain in place and may not move during the next movement phase.
32.5 An improved position is immediately removed at any time all the infantry units occupying it move, retreat, or advance.
32.6 Mechanized and artillery units may join infantry in an improved position. However, they cannot use the benefit of an improved position unless at least one infantry unit is present.
32.7 Improved positions do not affect stacking, movement, or ZOC.
32.8 If, during an attack, at least one defending unit occupies an improved position, one is added to the attacker's die roll.
32.9 The following American units begin the game in improved positions: 99/395 (QQ5), 106/424 (PP18), 28/112 (NN20), and 28/109 (OO29).
33.0 Allied Fuel Dumps
33.1 Two Allied fuel dumps were located in the German advance's path.
33.2 At the start of the game two fuel-dump counters, showing their Allied side, are placed at Stavelot and hex EE9. They may not move.
33.3 The Allied player gains no advantage from controlling these dumps during play. The Germans receive certain bonuses if they are able to capture a fuel dump.
33.4 A fuel dump is captured the moment a German combat unit enters its hex. The dump marker is flipped to show its captured side.
33.5 All German units that can trace a supply route to a captured fuel dump not in an enemy ZOC do not suffer the movement-point loss caused by isolation or by Allied strategic bombing. Isolated German units still suffer the halving of their attack strength.
33.6 It is enough for a German supply road to be adjacent to hex EE9 for it to be considered a supply road to that fuel dump.
33.7 An Allied combat unit may recapture a captured fuel dump by entering its hex. The dump marker is flipped back to show the Allied side.
33.8 Either player may attempt to destroy fuel dumps during their Engineer Phase. To be destroyed, a fuel dump must be friendly and within three hexes or fewer of an enemy combat unit. A fuel dump need not be supplied or occupied to be destroyed.
33.9 For each fuel dump a player can and wishes to destroy, they must roll a die and consult the Demolition Table. Fuel dumps successfully destroyed are removed permanently from the game.
33.10 At the end of turn 19 AM, if the Stavelot dump has not been captured, the Allied player must eliminate it automatically, without consulting the Demolition Table.
34.0 German Blitzkrieg
34.1 German mechanized units may attempt to bypass a strong defensive point (blitzkrieg tactic) in attacks with a ratio of 2-1 or greater, if two conditions are met.
34.1.1 At least half of the attacking units must be mechanized. Note that artillery corps providing support fire are not considered attacking units.
34.1.2 The combined strength of the mechanized and infantry units must be at least double the defending strength.
For example, if the defender has 5 strength points that are doubled for defending in a town, at least 20 of the attacking strength points must belong to non-artillery units.
34.2 A blitzkrieg attack may not be selected if an engaged battle is being refought.
34.3 At the start of the combat phase, before resolving any battle, the intention to use this type of attack must be declared for every battle in which it is to be used.
34.4 For all blitzkrieg attacks the German player uses the special "Blitz" columns of the Combat Results Table. All modifiers apply normally.
34.5 A blitzkrieg advance requires that mechanized units advance at least one hex, though no more than the indicated amount, in any direction chosen by the German player. Attacking infantry and artillery units must retreat one hex. The defender must remain in place.
34.6 Advancing units are still bound by all advance restrictions except 20.7. Such units may not advance into the ZOC of a defending unit in the blitzkrieg attack, though they may advance into the ZOC of other enemy units.
35.0 British Reinforcements
35.1 British reinforcements must be diverted to defend Antwerp if the Germans manage to get mechanized units off the board toward Antwerp per sections 46.4.1 and 46.4.2. British units diverted to Antwerp remain off the board and never enter play.
NOTE: A German mechanized unit with no legal retreat route may voluntarily leave the board through any arrow. It is eliminated, but may still cause British units to have to head for Antwerp.
35.2 For every German mechanized unit that exits the board before the end of turn 23 PM, the British must divert two brigades to defend Antwerp.
35.3 It is possible that all British units will have to be used to defend Antwerp. American units are never used to defend Antwerp.
35.4 British units are diverted only if they have not yet entered play. Once on the board they can no longer be used to defend Antwerp.
35.5 British units must be diverted in their chronological order of appearance. That is, if some German units exit on turn 22 AM, the first British units that must be diverted are those from the 22 AM British reinforcement group.
35.6 British reinforcements that have been delayed by the Allied player's decision must be the first units diverted to defend Antwerp. There is no set order among delayed units; any of them may be chosen to defend Antwerp.
35.7 The brigades of the 51st "Highland" Division and the 33rd Tank Brigade were originally positioned as Ninth Army reserve to defend Maastricht. They were dispatched on 25 AM. The 51st "Highland" Division and the 33rd Tank Brigade may enter play only if the Fifteenth Army offensive is cancelled. Likewise, these units may only count as diverted toward Antwerp if the Fifteenth Army offensive is cancelled.
35.8 British units may not cross the Meuse river. They may enter the Meuse towns, the Liège hexes, and the Meuse river hexes. They may attack from the Meuse, but may not cross it while advancing. The 11/29 Armored Brigade is an exception: it may move anywhere on the board.
35.9 British units forced to retreat across the Meuse are free to move to any part of the board.
36.0 Commitment of the SS Panzer Units on Turn 16 AM
36.1 Hitler wanted the two SS Panzer Divisions to be launched through the gaps created by German infantry, and for this reason forbade them from taking part in the initial assault. The other Panzer units were subject to the same restriction; however, General von Manteuffel convinced Hitler that this was foolish, and the restriction was lifted for the Fifth Panzer Army. What might have happened if General Dietrich had achieved the same for the Sixth Panzer Army?
36.2 In every scenario the German player decides whether the 1st and 12th SS Panzer Divisions will enter combat on turn 16 AM. If so, rule 25.4 is ignored. It must be noted, however, that if any of the six SS regiments enters an Allied ZOC before turn 16 PM, certain Allied reinforcement units arrive earlier than indicated on the Allied Order of Battle Card:
- The U.S. 1/16 Infantry Regiment arrives turn 16 PM.
- The U.S. 9/47 Infantry Regiment arrives turn 16 PM.
- The U.S. 1/18 Infantry Regiment arrives turn 17 AM.
37.0 Offensive Use of British Forces
37.1 Field Marshal Montgomery prevented the British XXX Corps from launching offensive operations before January 3, 1945. Montgomery held back his troops because he wanted the Germans to exhaust themselves first. The XXX Corps had been re-equipped and rested, and was to lead the next offensive into Germany, which is why Montgomery wanted to limit its attrition in the Ardennes as much as possible. What might have happened if Montgomery had been pressured into committing the XXX Corps in December?
37.2 The Allied player decides whether the British XXX Corps is to be committed. The Allied player must announce on turn 25 AM whether British forces will be allowed to cross the Meuse. If offensive use of British forces is not announced on 25 AM it cannot be used later. If announced, rule 35.8 is ignored. The 11/29 Armored Brigade may always move anywhere on the map.
37.3 Offensive use of British forces allows all British units to cross the Meuse on turn 25 AM and subsequent turns.
37.4 Offensive use of British forces, if announced, alters the victory conditions for Bastogne. If any British unit other than the 11/29 Armored Brigade voluntarily crosses the Meuse, points are not counted at the end of the game. The Allies must occupy St. Vith and Bastogne at the end of the game to win; otherwise the German player wins.
38.0 Armor Attack Restrictions
38.1 To more realistically depict the limitations of armor in the Ardennes, armor units may only attack dense-forest hexes at half their strength.
38.2 In a battle, when at least one defending unit is in a forest hex, all participating attacking armored units must fight at half strength (fractions rounded up).
39.0 Last-Minute Demolition
39.1 The bridge and fuel-dump demolition rules are designed to fit play-by-mail games. Last-minute demolition is added as an optional rule to provide greater authenticity to bridge demolition without detracting from play-by-mail games.
39.2 Last-minute demolition may be attempted starting turn 17 AM.
39.3 Last-minute demolition attempts take place during the opponent's movement phase.
39.4 The demolition attempt occurs the moment an enemy unit enters the bridge or fuel-dump hex. On a roll of one, the bridge or fuel dump is destroyed. The enemy unit may continue moving if able to, but it may not use the blown bridge to cross the river. Last-minute demolition blows the bridge just before the unit crosses it.
39.5 Last-minute demolition may only be used if the target was not the object of a normal demolition attempt during the defending player's last Engineer Phase.
39.6 A last-minute demolition attempt may only be made if the last occupant of the target hex belonged to the defender. If the target is a bridge, the defender must have been able to trace a supply route to the bridge hex just before the enemy unit entered it.
39.7 Last-minute demolitions cannot be triggered by enemy units advancing or retreating after combat.
39.8 At the start of the game the last occupants of all bridges and fuel dumps, except the three on the Roer and Urft rivers, are considered to have been Allied.
40.0 Paratroop Drop. Operation Stösser
40.1 If the German player so decides, the Von der Heydte parachute battalion may be dropped on Baraque Michel (JJ6) during the German 17 AM movement phase. The drop cannot be delayed. The hex is marked with a parachute symbol.
40.2 The German player rolls a die to see if the drop succeeds. On a roll of 1 the battalion lands intact. On any other roll the battalion is eliminated.
40.3 If the drop succeeds the battalion may not move on 17 AM. From 17 PM on, the battalion moves and attacks like any other combat unit.
40.4 The VDH battalion's movement allowance may never drop below 2 for any reason.
40.5 The battalion is not required to attack Allied units on the turn it drops.
40.6 If an Allied unit occupies hex JJ6 during the German 17 AM turn, the German player may drop the battalion in any of the six adjacent hexes.
41.0 Operation Greif. Panzer Brigade 150
41.1 Panzer Brigade 150, commanded by Colonel Skorzeny, was disguised as an American unit and had been trained to seize the Meuse bridges as part of Operation Greif. This unit was equipped with a few American tanks and vehicles and had been instructed to slip through Allied lines amid the confusion caused by the Sixth Panzer Army's attack.
41.2 Instead of taking part in the initial assault like the other units, Panzer Brigade 150 (a yellow-on-green counter) may hold back and attempt to slip through Allied lines after the Combat Phase of turns 16 AM and/or 16 PM. The movement rules for the turns in which infiltration is attempted are as follows:
41.2.1 On turn 16 AM the unit begins in deployment area B. The unit may move during the German Movement Phase following the movement rules (6.0), the First Turn Surprise rules (25.0), and the Special Movement Restriction (41.4.3). The unit may not enter an Allied ZOC during the movement phase.
41.2.2 On turn 16 PM the unit may move during the German Movement Phase following the movement rules (6.0) and the Special Movement Restriction. The unit may not begin its movement phase in an Allied ZOC, nor may it enter one.
41.3 After the German 16 AM and/or 16 PM Combat Phases are completed, the German player rolls a die to see if Panzer Brigade 150 can advance. On turn 16 AM the unit may advance on a roll of 1. On turn 16 PM traffic congestion has eased and the unit may advance on a roll of 1 or 2.
41.4 If the unit is able to advance after the German 16 AM and/or 16 PM Combat Phases, it may do so immediately, executing an "Attacker Advances 4" combat result before the Allied turn begins. The first hex of the advance may be any adjacent hex the unit can legally enter. It is subject to the following four conditions.
41.4.1 The unit must follow certain "advance after combat" rules, specifically sections 20.1 to 20.5 and 20.11. References to defeated or retreating defenders obviously do not apply to this special advance.
41.4.2 The unit may ignore Allied ZOCs for the special advances on 16 AM and 16 PM, and may therefore move adjacent to different Allied units. It may also stop and end its turn adjacent to Allied units, or may attack Allied units, even if they were attacked in the preceding German Combat Phase. If the attack occurs before the Allied 16 AM turn, the -1 First Turn Surprise die modifier applies. If the unit attacks and achieves an "Advance After Combat" result it may advance again, though any advance resulting from combat is subject to all the Advance After Combat rules (20.1 to 20.11).
41.4.3 If the unit uses the special advance on turns 16 AM or 16 PM, it may not voluntarily move south of the road running XX12-UU12-PP10-Malmedy-Trois Ponts-Werbomont-Huy-Andenne-Namur until the German 19 AM Movement Phase. If it is forced to retreat south of this line before 19 AM, Panzer Brigade 150 is free to move anywhere.
41.4.4 The Isolation status of all units is determined normally during the German supply phases. Infiltration does not prevent the unit from becoming isolated. Isolation does not prevent the unit from infiltrating on turn 16 PM.
41.5 The German player is not obligated to attempt the infiltration maneuver. If the unit enters an enemy ZOC during the German 16 AM or 16 PM Movement Phases, it must take part in that turn's combat and forfeit the chance to infiltrate after the Combat Phase.
42.0 Operation Greif. Einheit Stielau Commandos
42.1 Another part of Colonel Skorzeny's unit consisted of eleven commando teams made up of English-speaking soldiers. Four of these teams infiltrated behind American lines during the confusion of the first day to disorient arriving reinforcements. The four Einheit Stielau commando teams appear mandatorily on 16 PM and cannot be delayed. These units move during the German Movement Phase.
42.2 Whenever a commando unit moves into a hex occupied by Allied units, or into an Allied zone of control, a die must be rolled to see if the unit is discovered.
42.3 The die is rolled once for each Allied unit occupying or adjacent to the hex. If the unit is not discovered it may continue moving until it enters another occupied hex or zone of control, even that of the same Allied unit. The die is rolled again and the procedure continues until the unit is discovered or finishes moving.
42.4 To determine whether a commando is discovered, the die roll is cross-referenced with the corresponding column of the Commando Recognition Table. If a commando unit is discovered it is removed from the board immediately. Other commando units are not affected.
42.5 Commandos that begin their movement phase stacked with one or more Allied combat units do not have to roll for recognition due to those Allied units' ZOC.
42.6 During the Allied Movement Phase, every Allied unit must stop upon entering a town or road-intersection hex occupied by a commando unit, and roll the die on the Commando Recognition Table to see if it discovers the commando unit.
42.6.1 If the commando is discovered it is eliminated, and the Allied unit may spend the rest of its movement allowance normally.
42.6.2 If the commando is not discovered the Allied unit loses half of its remaining movement allowance, measured in road movement points (fractions rounded up).
42.7 Allied units that begin their movement phase stacked with commandos, or that enter a non-intersection hex containing commandos, are not affected by the commandos and do not roll to discover them.
42.8 An Allied unit may not enter the same hex twice during the same movement phase solely to destroy commando units.
42.9 Allied units that retreat or advance after combat are never affected by German commando units. In such cases the commando units are ignored: no die is rolled to discover them, and the commandos remain in place while Allied units pass over them.
42.10 Commando units are not affected by isolation.
42.11 Commando units have no combat factor, exert no zone of control, and cannot be attacked. They are simply ignored during the combat phase.
42.12 Commando units that have not been discovered are removed from the board during the German Movement Phase of turn 19 AM.
42.13 The German player may not leave more than one commando unit in the same hex at the end of the Movement Phase.
42.14 Commando units may not end the movement phases of turns 16 PM, 17 AM, or 17 PM in hex JJ6 or adjacent to it. Commando units may never move south of the road XX12-UU12-PP10-Malmedy-Trois Ponts-Werbomont-Huy-Andenne-Namur.
42.15 Commando units move at non-mechanized unit movement costs. They always move by road at a cost of a quarter movement point per hex. Their speed is not affected by enemy ZOCs.
43.0 Kampfgruppe Peiper Infiltration
43.1 Before the Ardennes Offensive, the commander of the 1st SS Panzer Regiment, Obersturmbannführer Joachim Peiper, conducted intensive training with his regiment. This training placed special emphasis on avoiding combat at the front, bypassing Allied strongpoints, clearing the Allied rear without wasting time, and racing for the Meuse bridges. Peiper's efforts paid off when KG Peiper managed to slip through the front line and cause chaos in the Allied rear.
43.2 Instead of taking part in normal combat, KG Peiper may hold back and attempt to slip through Allied lines after the German Combat Phases of 16 AM and/or 16 PM. The movement rules for the turns in which infiltration may be attempted are as follows:
43.2.1 On turn 16 AM the unit begins in deployment area "B." The unit may move during the German 16 AM Movement Phase following the normal movement rules (6.0), the First Turn Surprise rules (25.0), and the Special Movement Restriction (43.4.3). The unit may not enter an Allied ZOC during the movement phase.
43.2.2 On turn 16 PM the unit may move during the German Movement Phase following the Movement rules (6.0) and the Special Movement Restriction. The unit may not begin or enter an Allied ZOC during the movement phase.
43.3 After the completion of the German 16 AM and/or 16 PM Combat Phases the German player rolls a die to see if KG Peiper can advance. On turn 16 AM the unit may advance on a roll of 1 or 2. On turn 16 PM traffic congestion has eased and the unit may advance on a roll of 1 to 4.
43.4 If the unit is able to advance after the German 16 AM and/or 16 PM Combat Phases, it may do so immediately, executing an "Attacker Advances 4" combat result before the Allied turn begins. The first hex of the advance may be any adjacent hex the unit can legally enter. It is subject to the following four conditions.
43.4.1 The unit must follow certain "advance after combat" rules, specifically sections 20.1 to 20.5 and 20.11. References to defeated or retreating defenders obviously do not apply to this special advance.
43.4.2 The unit may ignore Allied ZOCs for the special advances on 16 AM and 16 PM, and may therefore move adjacent to different Allied units. It may also stop and end its turn adjacent to Allied units, or may attack Allied units, even if they were attacked in the preceding German Combat Phase. If the attack occurs before the Allied 16 AM turn, the -1 First Turn Surprise die modifier applies. If the unit attacks and achieves an "Advance After Combat" result it may advance again, though any advance resulting from combat is subject to all the Advance After Combat rules (20.1 to 20.11).
43.4.3 If the unit uses the special advance on turns 16 AM or 16 PM, it may not voluntarily move south of the road running XX12-UU12-PP10-Malmedy-Trois Ponts-Werbomont-Huy-Andenne-Namur until the German 19 AM Movement Phase. If it is forced to retreat south of this line before 19 AM, the unit is free to move anywhere.
43.4.4 The Isolation status of all units is determined normally during the German supply phases. Infiltration does not prevent the unit from becoming isolated. Isolation does not prevent the unit from infiltrating on turn 16 PM.
43.5 The German player is not obligated to attempt the infiltration maneuver. If the unit enters an enemy ZOC during the German 16 AM or 16 PM Movement Phases, it must take part in that turn's combat and forfeit the chance to infiltrate after the Combat Phase.
43.6 The German player may attempt to infiltrate with KG Peiper even if the 1st and 12th SS Panzer Divisions do not enter combat on turn 16 AM. However, if the unit enters an Allied ZOC before turn 16 PM, it triggers the early arrival of the three U.S. Infantry Regiments listed in rule 36.2.
44.0 German Defensive Support Fire
44.1 The cancellation of the Fifteenth Army offensive freed up about 5,000 tons of ammunition for use in the Ardennes. It becomes available as soon as poor visibility cancels Allied strategic bombing. To reflect this sudden increase in ammunition supply, starting turn 29 AM, if and only if the Fifteenth Army offensive has been cancelled, German artillery corps may provide Defensive Fire Support (FPF) in addition to Offensive Fire Support. The German Support Phase takes place immediately after the German Engineer Phase.
44.2 The procedure for Defensive Fire Support is explained in section 11.5. Starting turn 28 PM it applies to German artillery corps in exactly the same way as it applies to Allied artillery corps.
V. Scenarios
Four scenarios are included in Battle of the Bulge. The first two begin with the historical situation at the start of the battle; the orders of battle for both sides have been designed to recreate exactly the positions and arrival of units as planned in the historical battle plans. Scenarios three and four offer two alternative German battle plans which, although never actually used, might have had a greater chance of success. The Order of Appearance for these last two scenarios has been altered to some degree to fit the new plans; details are included in the scenario descriptions.
All four scenarios may be played using the Basic Rules. However, they have been designed to be played with the Advanced Rules and certain optional rules. It is recommended that, as soon as players feel comfortable with the Basic Rules, they move up to the level of play indicated in the scenario instructions.
45.0 The German Onslaught Scenario (Tournament Scenario)
45.1 Both players place their units and bring in reinforcements exactly as described on their Order of Appearance Cards. This scenario begins with the German 16 AM turn and ends at the conclusion of the Allied 22 PM turn.
45.2 This scenario has been designed for tournament play. It should be played with the Third Edition Advanced Rules.
45.3 At the end of the game, points are awarded to the player who controls:
- Liège hexes: 8 points each.
- Meuse river towns: 3 points each.
- The other 50 towns: 1 point each.
45.4 The German player receives points for the following:
- German control of the EE9 fuel dump at the end of the game: 3 points.
- German control of the Stavelot fuel dump at the end of the game: 1 point.
- For each German mechanized unit that exits the board through a colored arrow: 2 points.
NOTE: Fuel dumps are used only in the Advanced Game. These victory points are ignored if playing the Basic Game.
45.5 The Allied player receives points for the following:
- Allied occupation of hex P8 (marked with a white star) at the end of the game: 3 points.
- For each of the following towns occupied by the Allies at the end of turn 18 AM and thereafter: Bastogne, St. Vith, and Malmedy (maximum 3 points per turn): 1 point.
45.6 A player controls a hex if at least one of their combat units occupies it or was the last to occupy it.
45.7 If there is a tie in points at the end of the game, the German player wins if the Allies have lost at least twice as many combat units as the Germans. Otherwise, the Allies win.
45.8 In this scenario the pressure is on the Germans. If the Allies hold the scoring towns too long, the Germans will be forced to take every town east of the Meuse to win. Capturing the fuel dumps will make the German task considerably easier. The Germans start with overwhelming superiority, but time is against them.
45.9 The following information is provided to help calculate town points at the end of the game. There are 47 towns east of the Meuse, of which 19 are in the northeast quadrant of the board, 12 in the southeast quadrant, 13 in the southwest quadrant, and 3 in the northwest quadrant. Although not needed for this scenario, the following information is included for completeness. There are 11 other towns on or west of the Meuse, of which 1 is in the southwest quadrant (14 in total) and the remaining 10 in the northwest quadrant (13 in total), for a total of 58 town hexes on the whole board.
45.10 If the Germans complete the Antwerp, Liège, or Meuse River victory conditions of the Campaign Scenario before the end of turn 22 PM, they win automatically.
46.0 Wacht am Rhein. Campaign Scenario
46.1 The Campaign Scenario recreates Adolf Hitler's grandiose plan: Wacht am Rhein. Although its objectives were considered too ambitious by the German high command, at this stage of the war Hitler ignored any opinion but his own. The plan called for a rapid penetration of the Ardennes by the Fifth and Sixth Panzer Armies, a blitz across the Meuse, ending with the capture of Antwerp. The assault would be heavily reinforced and supported from the north by the Fifteenth Army and from the south by the Seventh Army. Hitler hoped to trap the Allied armies in the north, forcing the United States and the Commonwealth to withdraw from the war, so Germany could concentrate all its forces against the Russians. Wacht am Rhein is the plan the Germans historically used to fight the Battle of the Bulge.
46.2 Both players place their units and receive reinforcements exactly as indicated on their Order of Appearance cards. This scenario begins with the German 16 AM turn and ends at the conclusion of the Allied 2 PM turn.
46.3 This scenario should be played using the Third Edition Advanced Rules.
46.4 German Strategic Victory by Antwerp
If the Germans had taken Antwerp, between 25 and 30 Allied divisions would have been cut off in the Aachen salient and the Allied front would have been broken from the Channel coast to Strasbourg. The Germans can win the game by decisively threatening Antwerp. This type of victory is achieved if all the conditions listed in 46.4.1, 46.4.2, and 46.4.3 are met during the German Supply Phase of turn 25 PM.
46.4.1 Two armor units and four motorized infantry units exit (or retreat) off the board through the north-edge roads between W1 and Hannut, inclusive, no later than turn 23 PM. These roads are marked with pink arrows.
46.4.2 Two armor units and four motorized infantry units exit (or retreat) off the board through the west-edge roads between A1 and A21, inclusive, no later than turn 23 PM. These roads are marked with red arrows.
46.4.3 German units that leave the board must remain supplied during a German supply phase. This condition cannot be checked until the two conditions in 46.4.1 and 46.4.2 have been met.
46.4.4 Units exiting through the north edge are supplied if at least one of the north-edge exit roads is a German supply road. Units exiting through the west edge are supplied if at least one of the west-edge exit roads is a German supply road. The supply roads need not be the same ones the units used to leave the board.
46.4.5 If all the supply roads exiting through the north or west edges are cut before 46.4.3 is met, the count must restart from zero as soon as the supply line is restored.
46.4.6 If 46.4.3 has not been met by the end of the German Supply Phase of turn 25 PM, this type of victory has slipped through the Germans' fingers.
46.4.7 German units that leave the board heading for Antwerp are permanently removed from the game. They may not re-enter the board in any way.
46.5 German Victory by the Meuse River
If the Germans had managed to take and hold the Meuse towns (along with some other especially important town), the Allied front would have been broken from Liège to Strasbourg, the final Allied offensive would have had to be postponed, and the crossing of the Rhine would have been considerably delayed. This type of victory is obtained if there are German combat units in at least seven of the following eight towns: Givet, Dinant, Namur, Andenne, Huy, Bastogne, St. Vith, and Spa, during two consecutive German supply phases. These towns are marked with light blue crosses. Occupied towns may change from one supply phase to another as long as the count does not fall below seven.
46.6 German Victory by Liège
Liège was the largest supply depot on the western front and the starting point of the final Allied offensive. The loss of Liège would have considerably delayed the final offensive and the crossing of the Rhine, especially since the city of Antwerp had been 95% destroyed by the 2,100 V-2 rockets launched during the Ardennes offensive. This type of victory is achieved if German combat units occupy all three Liège hexes during two consecutive German supply phases. German units occupying Liège must be supplied from the east edge or from hex UU1. The three Liège hexes are marked with dark blue crosses.
46.7 German Victory by Bastogne
If, by the end of turn 2 PM, the German player has been unable to achieve one of the three types of victory described above, they still have one more chance to win.
46.7.1 If the Allies occupy St. Vith or Bastogne (supplied or not) at the end of the game, they win automatically. Otherwise, the player with more points wins. In case of a tie, victory goes to the Allied player.
46.7.2 German Victory Points:
| Condition | Points |
|---|---|
| For each American unit eliminated | 1 point |
| For each British unit eliminated | 2 points |
| For each of the following occupied and supplied: St. Vith, Bastogne, Meuse towns | 5 points |
| For each occupied and supplied Liège hex | 8 points |
| If the EE9 fuel dump is captured and supplied | 3 points |
| If the Stavelot fuel dump is captured and supplied | 1 point |
| For each town outside the German Final Position Line occupied and supplied (excluding Liège, Bastogne, and the Meuse towns) | 1 point |
| For each town outside the German Final Position Line unoccupied, connected to a German supply road but not connected to an Allied supply road | 1 point |
| If any unit of the 50th British Division enters play | 2 points |
46.7.3 Allied Victory Points:
| Condition | Points |
|---|---|
| For each German armor unit eliminated | 3 points |
| For each German 3-3 infantry unit eliminated* | 1 point |
| For each German unit of other types eliminated | 2 points |
| For each town inside the German Final Position Line occupied and supplied | 2 points |
| For each town inside the German Final Position Line unoccupied, connected to an Allied supply road but not connected to a German supply road | 2 points |
| If the EE9 fuel dump is still in Allied hands | 3 points |
* The Allied player receives 1 point for the loss of the VDH parachute battalion, even if it results from a failed drop. If the German player decides not to make the drop, the Allied player receives nothing (40.0).
NOTE: Fuel dumps are used only in the Advanced Game. Their victory-point value is ignored if playing the Basic Game.
46.8 Allied Victory
The Allies win if the Germans fail to achieve one of the four types of German Victory.
47.0 Plan Martin
47.1 This plan, presented by Field Marshal Von Rundstedt, was one of many proposals submitted to Hitler as an alternative to his overly ambitious Wacht am Rhein. Its objectives were more modest: to disrupt Allied preparations to invade Germany and advance to the Meuse while keeping the German reserve intact in the process. With the western front quiet, the army would have the opportunity to slow the Russian advance from the east. The weight of the attack was placed in the north, with a simultaneous offensive by the Fifteenth Army. This scenario begins with the German 16 AM turn and ends after the conclusion of the Allied 25 PM turn.
47.2 This scenario has been designed to be played at the Advanced Game level incorporating all optional rules.
47.3 The Allied player places their units and receives reinforcements exactly as described on the Allied Order of Appearance card. The German initial deployment is modified as follows:
47.3.1 Units "A" are placed in UU1 and UU2. 47.3.2 Units "B" are placed anywhere in B. 47.3.3 Units "C" are placed anywhere in C. 47.3.4 Units "D" are placed in TT3, UU3, and UU4. 47.3.5 Units "E" are placed anywhere in A or in hex UU4. 47.3.6 Units "F" are placed anywhere in D or E. 47.3.7 Units "G" are placed anywhere in F or G.
47.4 The arrival of German reinforcements has also changed. All units of the 10th SS Panzer, 11th Panzer, 9th Panzer, 15th Panzergrenadier, and 246th Volksgrenadier Divisions, as well as the 410th Artillery Corps, may not enter play.
47.5 The Fifteenth Army offensive is launched automatically on turn 16 AM.
47.6 The Roer river restrictions, First Turn Surprise, and German Corps Integrity rules are modified as follows. German units may cross the Roer and use hex UU1 as a supply source on turn 16 AM. Both SS Panzer Divisions are free to attack on turn 16 AM. German units A and D are considered to belong to the same corps.
47.7 The American 9/47 Infantry Regiment may enter play the same turn a German combat unit enters a Roer river hex, even if this is before 17 AM.
47.8 Victory Conditions
47.8.1 The German player has two ways to win. They can win by occupying all three Liège hexes with German combat units by the end of the Allied 25 PM turn. All three hexes must be supplied.
47.8.2 They can also win if German combat units occupy Bastogne, St. Vith, Spa, and one of the three more-northerly Meuse towns (Namur, Andenne, or Huy) by the end of the Allied 25 PM turn. The occupying German units must be supplied.
47.8.3 The Allied player wins if they can prevent the Germans from reaching their victory conditions.
48.0 Operation Herbstnebel
48.1 This is another of the alternative plans to Hitler's Wacht am Rhein proposed by the German high command. Its author, Field Marshal Model, put it forward after Von Rundstedt's Plan Martin. Its objective was likewise a more modest push to the Meuse. It differed from Plan Martin in that it concentrated even more forces in the north, including the reserves, but did not call for launching the Fifteenth Army offensive. This scenario begins with the German 16 AM turn and ends after the conclusion of the Allied 25 PM turn.
48.2 This scenario has been designed to be played at the Advanced Game level incorporating all optional rules.
48.3 The Allied player places their units and receives reinforcements exactly as described on the Allied Order of Appearance Card. Initial German units are placed as follows:
48.3.1 Units "A" are placed in UU1 and UU2. 48.3.2 Units "B" are placed anywhere in B. 48.3.3 Units "C" are placed anywhere in C and D. 48.3.4 Units "D" are placed in TT3, UU3, and UU4. 48.3.5 Units "E" are placed anywhere in A and in UU6. 48.3.6 Units "F" and "G" do not begin on the board. They enter play alongside the Führer Escort Brigade. The conditions for their entry are the same as those for the Führer Escort Brigade.
48.4 The arrival of German reinforcements changes as follows:
48.4.1 The following reinforcements are instead placed on the map at the start. The three regiments of the 79th Volksgrenadier Division are placed anywhere in F. The three regiments of the 9th Volksgrenadier Division are placed anywhere in G. The three regiments of the 167th Volksgrenadier Division are placed anywhere in E.
48.4.2 The entry conditions for deciding whether the 10th SS Panzer and 11th Panzer Divisions, or the 9th Panzer and 15th Panzergrenadier Divisions, enter play do not apply. All regiments of these divisions may enter play in the same game, and there are, in addition, no special conditions for the entry of the 10th SS Panzer and 11th Panzer Divisions.
48.5 All German reinforcements enter through hexes UU1 and XX16, or any hex between them.
48.6 The Fifteenth Army offensive cannot be launched. All Allied reinforcements may enter play and all air units are available.
48.7 The victory conditions, the three rule modifications, and the early arrival of the 9/47 Infantry are the same as those described for Plan Martin (47.6 to 47.8).
Second Edition Counter Variants
In the second edition the combat factors of some units changed. A new American artillery unit also appears, along with support-fire markers for German artillery corps showing their defense factor, for use with the optional German Defensive Fire rule (44.0). These are the counters needed to update the first edition of the game. There is no change from the 2nd to the 3rd edition.
Terrain Effects Chart
Effects of Terrain on Movement
| Terrain | Mechanized units (Mud) | Other units (Mud) | All units (Frozen ground) |
|---|---|---|---|
| Town/Clear (a) | 2 MP | 1 MP | 1 MP |
| Rugged | 2 MP | 2 MP | 1 MP |
| Dense forest | (b) | 2 MP | 1 MP (b) |
| Air Interdiction | +2 MP | +1 MP | +1 MP |
Road Movement Cost
| German infantry | Allied infantry | German artillery corps | All other units |
|---|---|---|---|
| 1/3 MP, or 1/2 MP (d) | 1/4 MP, or 1/3 MP (d) | 1/4 MP, or 1/3 MP (e) | 1/4 MP |
Notes: a) These costs apply if the town is entered from a non-road hex. Rivers do not enter town hexes. b) Mechanized units may only enter or leave dense-forest hexes by road. c) When moving by road, all other terrain types are ignored. Towns are considered part of the road network. d) The reduced speed applies only if the unit begins or ends its movement in a ZOC. e) The reduced speed applies only if the unit intends to provide support fire in the combat phase.
Special Movement Cases:
- Bridge: May be crossed only if intact — that is, not destroyed and not under interdiction (Advanced Game).
- Rivers/River confluence: Movement along or across a river depends on the speed set by the hex's other terrain features. Units attempting to cross a river must stop if there is no intact bridge. Non-armor units may leave the river by either bank as a result of combat or on their next movement phase. Armor units may never cross a river except by a bridge or a town.
- River headwaters: For movement purposes these are treated the same as the terrain in which they lie.
- Air Interdiction: The interdiction movement penalty is added to the terrain cost of the hex.
- Cliff hexside: Movement across cliff hexsides is prohibited.
Effects of Terrain on Combat
| Defending unit is in | All attacking units are in | Defender's strength is |
|---|---|---|
| Rugged terrain | Any hex | Doubled |
| Town | Any hex | Doubled |
| Clear or forest terrain (b) | River or river headwater | Doubled |
| Clear or forest terrain (b) | River confluence | Doubled |
| Clear or forest terrain (b) | Any hex, provided at least one unit is not in a river hex | Basic |
Notes: a) If the defending unit is in a river hex and at least one attacking unit is in a hex of the same river, the defender's strength is basic. If they are on different rivers, the defender's strength is doubled. b) Optional rule. If at least one defending unit is in a forest, the strength of attacking armor units is divided by two, fractions rounded up. All other mechanized units are unaffected. Isolated attacking armor units divide their strength by two only, never by four.
Combat Results Table
The table is printed as a single wide chart with the six weak ratios (1-7 through 1-2) on the left, the modified die roll running down the middle, and the eight strong ratios (1-1 through 8-1+) on the right; each ratio column is staggered diagonally against its neighbors, and most cells carry two stacked results (first line executed first, then the line below it, per rule 17.1.3 NOTE). It is reproduced here exactly as laid out in the source, column headers and die roll translated, result codes unchanged:
1-7      1-6       1-5       1-4       1-3       1-2      Die        1-1       2-1       3-1       4-1       5-1       6-1       7-1      8-1+

 AE      AR1                                              DR2                  DR2       DR4       DR4       DE        DE        DE       DE
 DA1     DA1
                   Eng.      Cont.     Cont.
                                                  AA1      -1         AA1       AA3       AA4       AA1       AA1       AA2       AA2      AA3
 AE      AR2       AR1                                                         DR3       DR4       DR4       DE        DE        DE       DE
 DA1     DA1       DA1
                             Eng.      Cont.      Cont.    0         Exch.
                                                                                AA2       AA3       AA4       AA1       AA1       AA2      AA2
 AE      AR2       AR2       AR1                                               DR2       DR3       DR4       DR4       DE        DE       DE
 DA1     DA1       DA1       DA1
                                       Eng.       Cont.    1         Cont.
                                                                                AA1       AA2       AA3       AA4       AA1       AA1      AA2
 AE      AR3       AR2       AR2      AR1                                                DR2       DR3       DR4       DR4       DE       DE
 DA1     DA2       DA1       DA1      DA1
                                                  Eng.      2        Cont.     Exch.
                                                                                          AA1       AA2       AA3       AA4       AA1      AA1
 AE      AE        AR3       AR2      AR2        AR1                                               DR2       DR3       DR4       DR4      DE
 DA1     DA1       DA2       DA1      DA1        DA1       3        Eng.      Cont.      Exch.
                                                                                                     AA1       AA2       AA3       AA4      AA1
 AE      AE        AE        AR3      AR2        AR2                                                          DR2       DR3       DR4      DR4
 DA2     DA1       DA1       DA2      DA1        DA1       4        Eng.      Eng.       Cont.      Exch.
                                                                                                               AA1       AA2       AA3      AA4
 AE      AE        AE        AE       AR3        AR2                AR1                                                DR2       DR3      DR4
 DA2     DA2       DA1       DA1      DA2        DA1       5        DA1
                                                                               Eng.       Eng.       Cont.     Exch.
                                                                                                                         AA1       AA2      AA3
 AE      AE        AE        AE       AE         AR3                AR2       AR1                                                DR2      DR3
 DA2     DA2       DA2       DA1      DA1        DA2       6        DA1       DA1
                                                                                          Eng.        Eng.      Cont.   Exch.
                                                                                                                                   AA1      AA2
 AE      AE        AE        AE       AE         AE                 AR3       AR2       AR1                                               DR2
 DA3     DA2       DA2       DA2      DA1        DA1       7        DA2       DA1        DA1
                                                                                                     Eng.        Eng.     Cont.    Exch.
                                                                                                                                            AA1
 AE      AE        AE        AE       AE         AE                 AE        AR3        AR2        AR1
 DA3     DA3       DA2       DA2      DA2        DA1       8        DA1       DA2        DA1        DA1
                                                                                                               Eng.       Eng.     Cont.    Exch.
Blitzkrieg Attack Table
| Die | 2-1 | 3-1 | 4-1 |
|---|---|---|---|
| -1 | Blitz3 | Blitz3 | Blitz4 |
| 0 | Blitz2 | Blitz3 | Blitz3 |
| 1 | Blitz2 | Blitz2 | Blitz3 |
| 2 | Blitz1 | Blitz2 | Blitz2 |
| 3 | Blitz1 | Blitz1 | Blitz2 |
| 4 | Eng. | Blitz1 | Blitz1 |
| 5 | AR1/DA1 |
Die Roll Modifications
(The total modifier may never exceed +2 or -2)
German attacks only:
- First Turn Surprise (16 AM only) — Advanced Game: −1
- Concentrated artillery (per 20 points): −1
- German air support — Advanced Game: −1
- Allied air defense — Advanced Game: +1
- Allied defender in improved position — Advanced Game: +1
- Allied defender in a fort other than Liège: +1
- Allied defender in a Liège hex: +2
Allied attacks only:
- Allied air support — Advanced Game: −1
- Concentrated artillery (per 20 points): −1
- German defender in improved position — Advanced Game: +1
- German defender in a fort other than Liège: +1
- German defender in a Liège hex: +2
Explanation of Combat Results
(For further detail see III. Combat Results in the rules)
- DE. Defender Eliminated. All defending units are eliminated.
- AE. Attacker Eliminated. All attacking units are eliminated.
- DR?. Defender Retreat. All defending units must retreat, one at a time, the number of hexes indicated (movement costs are ignored) toward the nearest friendly road. If the retreat cannot be completed due to blocking terrain or enemy ZOCs, the retreating unit is eliminated.
- AR?. Attacker Retreat. Same as DR except the units that must retreat are the attacking units.
- AA?. Attacker Advances. Each attacking unit may advance up to the number of hexes indicated. The first hex of the advance must be the hex vacated by the defender. Advancing units must end their advance upon entering an enemy ZOC or a rugged or forest hex, unless doing so by road. Advancing units must also end their advance upon entering an unbridged river hex if they intend to cross at that point.
- DA?. Defender Advances. Same as AA except the units that advance are the defending units.
- Exch. Exchange. Each side eliminates one friendly unit of their choice that took part in the battle. Units may advance if the opponent's hex is left vacant.
- Eng. Engagement. Engaged markers are placed on all units taking part to indicate the battle continues. On their turn the defender must decide whether to remain engaged (hold the position) or counterattack. If holding the position is chosen, the engaged units must remain in place and the attacker must attack them again on their turn. Armor, armored cavalry, and artillery units may ignore Engagement results.
- Cont. Contact. No consequences. On their turn the defender must retreat or counterattack, unless in a fort.
NOTES: Units in forts are never required to attack enemy units in their ZOC. Armor units may not advance or retreat across rivers, except by a bridge or a town.