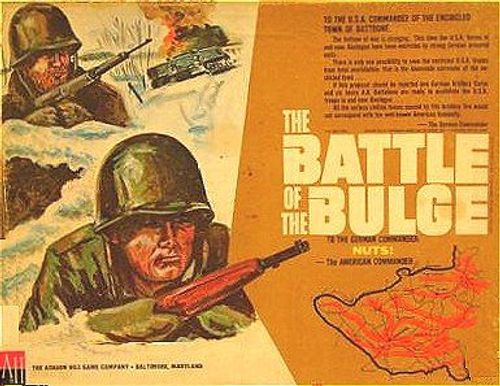
The Battle of the Bulge (1965)
The Battle of the Bulge Rulebook
Table of Contents
Table of Contents
Basic Game
Mapboard
The Mapboard shows the area of Belgium and Luxembourg where the battle was fought. It covers approximately 2,500 square miles of heavily wooded and rough terrain. Only the roughest and most densely wooded areas have been reproduced on the board. A hexagonal grid has been printed on the board to determine movement. Hereafter, these hexagons will be called "squares." Terrain features are as follows:
Rough Terrain squares: Any square containing brown splash contours.
Dense Woods squares: Any square containing green sploches.
River squares: Any square containing blue flow lines.
Road squares: Any square containing parallel black lines.
Town squares: Any square containing black criss-cross lines. Towns that are outlined with a heavy hex border are Fortresses, which are pertinent only in the Tournament Game.
Grid-coordinates: Lettered columns run North-South; Numbered columns angle Northwesterly to pinpoint locations. Examples: Bastogne is DD-32; St. Vith is QQ-15.
Order of Battle Unit Counters
Now study the die-cut Unit Counters. Blue are U.S.; Red are German. These counters are your "chessmen." Hereafter, they will be called "Units."
Each counter shows, from top to bottom and side to side: the Division Number (e.g., 1st Division); the Type (e.g., Infantry); the Basic Combat Factor; the Size (e.g., Regiment); the Identification (e.g., 18th Regiment); and the Normal Movement Rate (e.g., 4 squares per Turn).
Sizes: X — Brigade or Combat Command. III — Regiment or Kampfgruppe.
Types: Infantry or Volksgrenadier; Armored Cavalry; Panzer Grenadier; Armor or Panzer; Parachute. Each type has its own distinct symbol printed on the counter.
Basic Combat Factor: Fighting strength when attacking or defending.
Normal Movement Rate: Maximum number of squares you are allowed to move a Unit over clear terrain in one Turn.
Prepare for Play
Step 1: Lay the Mapboard out on a table. The German player sits on the Eastern side; the U.S. Player sits on the Western side.
Step 2: Punch out the Order of Battle Units and place them on the corresponding spaces provided on each player's Order of Appearance Card.
Step 3: The U.S. player sets up his Units on the Mapboard first. He refers to all the Units he has listed "At Start" on his Order of Appearance Card and places them directly on the Mapboard on the exact squares indicated.
Step 4: The German player sets up his Units in the same manner as above.
How to Play
"At Start" is considered the first Turn of the game. The routine of play for every Turn is as follows:
Step 1: The German player consults the Time Record Card and if he is due new Units he places them on the Mapboard. He then moves all Units on board he chooses to move. No U.S. movement is allowed.
Step 2: All battles caused by German movement are resolved one battle at a time.
Step 3: The U.S. player consults the Time Record Card and if he is due new Units he places them on the Mapboard. He then moves all Units on board he chooses to move. No German movement is allowed.
Step 4: All battles caused by U.S. movement are resolved one battle at a time.
Step 5: The U.S. player checks off one box of the Time Record Card and players repeat Steps 1 through 5 for the remainder of the game.
How to Win
GERMAN player wins if he either: (a) gets any 20 Units across the Meuse River between S-16 and A-47 inclusive by his December 23 P.M. Turn, or (b) eliminates all U.S. Units from the Mapboard. Units yet to come on board would also be considered eliminated.
U.S. player wins if he avoids the German conditions of victory by his December 30 P.M. Turn.
How to Move Units
-
In any Turn you may move all your Units on Board.
-
You may move each Unit any number of squares not exceeding its normal movement rate.
-
You do not have to move every Unit nor do you have to move any Unit in your Turn.
-
You may move Units in any direction or combination of directions you wish in the same Turn.
-
Unlike chess and checkers you may move all Units you choose to move before resolving any battles.
-
You may move Units over top of friendly Units but you are not allowed to move your Units on top of or over opponent's Units.
-
Movement rates are not transferable from one Unit to another nor can they be accumulated from one Turn to the next.
-
You are not allowed to move Units through Mapboard edge squares that contain grid letters and numbers.
NOTE: The die is used only to resolve battle — it has nothing to do with movement.
How to Have Combat
A diagram shows the Fuhrer Escort Brigade (12-5) and the 101st Airborne Regiment 501 (4-4) on a hex grid, each surrounded by its six lettered adjacent squares (A-F). In the "NO COMBAT" example the two Units occupy squares that are not adjacent to one another. In the "COMBAT" example the two Units occupy adjacent squares, which forces a battle.
Zone of Control
Every Unit's zone of control is its six adjacent squares regardless of which square it is on. A Unit's zone of control even extends across rivers and into dense woods and rough terrain. You automatically cause combat when you move a Unit into any one square of an enemy Unit's zone of control. The player moving his Units is always the attacker; his opponent is the defender. To determine battle odds the attacker's combat factor is stated first and the defender's combat factor is stated second. For example: if the Fuhrer Escort Brigade (12) attacks the 501st Airborne Regiment (4) battle odds are 12 to 4 which reduces to 3 to 1. To resolve combat the attacker rolls the die once and matches up the die roll with the 3 to 1 odds column on the Battle Results Table.
Attacking
-
An attacking Unit must stop as soon as it enters the first enemy controlled square.
-
You are not allowed to move an attacking Unit through enemy controlled squares.
-
You may attack as many enemy Units as you can reach in the same Turn.
-
You may move as many Units into enemy zones of control as you are able before resolving combat.
-
You resolve all combat one battle at a time after moving all the Units you choose to move in your Turn.
-
The attacker has the choice of resolving battles in any order he wishes.
-
The attacker must resolve combat against every enemy Unit he has moved Units next to.
-
The combat factor of a Unit when attacking is always basic regardless of terrain it is attacking from.
Defending
-
The defending player is not allowed to move any Unit while his opponent is attacking.
-
The combat factor of a Unit when defending varies according to the terrain it is defending on. Examples are shown on the Battle Results Table.
More Than One Unit Per Square
-
Both players are allowed to combine Units of any kind in a stack totaling up to 3 Units maximum.
-
Stacked Units may stay together indefinitely or they may be combined on one Turn and split up on the very next.
-
Stacked Units may pass over squares containing other friendly Units.
-
The movement rate of stacked Units is that of the slowest Unit in the stack. Of course, the faster Unit in the stack may continue on its way after splitting away from the slow moving Units.
Multiple Unit Battles
-
When two or more Units attack one defending Unit the factors of the attacking Units must be totaled into one combined Combat Factor.
-
When one Unit attacks two or more defending Units the factors of the defending Units must be totaled into one combined factor.
-
When several Units attack several defending Units the attacker has the choice of dividing combat into more than one battle as long as: (a) he battles every defending Unit he has attacking Units adjacent to, and (b) his Units are adjacent to the specific Units they are attacking.
-
You may deliberately sacrifice one or more attacking Units at unfavorable odds in order to gain more favorable odds over other defending Units — this tactic is called "soaking off." Soak off odds cannot be worse than 1-6.
-
The combat factor of a Unit cannot be split and applied to more than one battle.
-
No Unit, attacking or defending, can fight more than one battle in any one player's Turn even if it finds itself adjacent to the enemy after all battles have been resolved. In this event, the defending Unit must either attack or withdraw in its Turn. If it chooses to attack it may do so staying where it is or by withdrawing from the enemy zone altogether and then re-entering by a different square. In this instance Units may not withdraw and re-enter by a route that would force them into or through zones of control of other enemy Units.
-
The attacker with stacked Units on the same square may divide combat into more than one battle against defending Units on separate squares.
-
The attacker may not divide combat into more than one battle against defending Units on the same square.
Road Movement
-
Movement along roads is 5 times faster than normal. Thus a Unit whose normal movement rate is 4 can move 20 squares along a road in one Turn. In other words, movement along 5 road squares is the same as one clear terrain square.
-
All Units may combine road travel with off-road travel in the same Turn. For instance, let's assume a Unit with a normal movement rate of 4 is 2 squares away from a road: as soon as it moves to the road square it can travel up to 10 more squares along the road; or, up to 5 more squares along the road and 1 square off the road. NOTE: Units lose the benefit of fractions. Example: if the Unit, above, had moved 6 squares along the road instead of 5, it could not move off the road in that Turn.
-
All Units may change roads at intersections at the road movement rate.
-
All Units may move through towns at the road movement rate but only if they enter and leave the town by road squares. Otherwise, travel through towns is done at the normal movement rate.
Rough Terrain
-
Movement through rough terrain is naturally slower than normal. Thus all Units, regardless of their normal movement rates, move through non-road rough terrain squares at the rate of only 1 square per Turn.
-
All Units must stop as soon as they move onto a non-road rough terrain square. They cannot proceed until their following Turn.
-
Units that enter rough terrain by a road square do not have to stop on the first rough terrain square as long as they stay on the road.
-
Units that enter a road-rough terrain square must stop if entry is made from a square other than a road square. For instance, a Unit would have to stop on TT-19 if it entered from UU-19. But if it entered from UU-18 it could continue right on through rough terrain along that road.
-
All Units may move through rough terrain along roads at the road movement rate.
-
All Units leave non-road rough terrain squares at the normal movement rate.
-
Units moving through rough terrain on roads may move one square onto a non-road rough terrain square in the same Turn.
-
Units beginning their Turn on non-road rough terrain squares may move one square onto a rough terrain road square and then move along the road in the same Turn. They may not, however, move off the road onto another rough terrain square in that Turn.
-
Units beginning their Turn on a non-road rough terrain square may not cross a rough terrain road square onto a second rough terrain square.
Dense Woods
-
Armor, Panzer, Armored Cavalry and Panzer Grenadier Units are not allowed on non-road woods squares. They are allowed in woods only along road squares and they must enter and leave the woods by non-woods road squares.
-
All other Units move through woods in exactly the same manner as rough terrain.
Rivers
-
Movement across rivers is sometimes slower than normal. Thus a Unit must end its Turn as soon as it reaches a non-road river square it intends to cross at that point.
-
All Units may cross rivers on road squares and town squares without delay.
-
If Units do not wish to cross, they may move onto a non-road river square — proceed up or down the river — and then move off the river on the same side from which they entered — all in the same Turn and at the normal movement rate. Movement off the opposite side of the river is not allowed in this case.
-
All Units may move onto a non-road river square — proceed up or down the river — and then cross over to the other side by a road square where it may continue up or down the river or leave it altogether — all in the same Turn.
-
All Units may leave the end of a river in any direction it wishes.
-
All Units beginning their Turn on a river square may move off on either side — or move up and down the river and leave from any point off either side in the same Turn.
-
Movement along rivers through rough terrain and dense woods is subject to the rough terrain and dense woods movement rates.
Reinforcements
As indicated by the Time Record Card, new Units come into play throughout the course of the game. Such Units are brought on board as directed by the Order of Appearance Cards. New Units may not be placed on board in squares directly in enemy zones of control.
How to Resolve Battles
Use the Battle Results Table for BASIC GAME only.
Step 1: Reduce battle odds to basic odds shown on the Battle Results Table. To do this simply divide the defender's factor into the attacker's factor and round off any fraction in favor of the defender. Examples: 16 to 9 converts to 1 to 1; 14 to 6 is 2 to 1; 4 to 15 is 1 to 4; etc.
Step 2: The die is rolled once for each attack by the attacker.
Step 3: The die roll is matched up with the basic odds to get the result of the attack. Example: a 3 to 1 attack with a die roll of 3 means that the defender is pushed back 2 squares.
Tournament Game
For greater realism we suggest that you get into the play of the Tournament Game as soon as you have mastered the Basic Game. All of the Basic Game rules apply except where indicated in the following rules.
How to Win
GERMAN player wins if he either: (a) maintains Units totaling at least 50 Combat factors (40 of which must be Panzer or Panzer Grenadier) anywhere across the Meuse for 4 consecutive supplied Turns by his December 30 P.M. Turn, or (b) maintains at least one Unit each in Bastogne, St. Vith and Spa and at least 5 Panzer or Panzer Grenadier Units across the Meuse for 4 consecutive supplied Turns by his December 30 P.M. Turn, or (c) eliminates all U. S. Units from the Mapboard . . . units yet to come are considered eliminated in this event.
U. S. player wins if he avoids all the German conditions of victory by his December 30 P.M. Turn.
Fortifications
The 8-spoked wheel counters are Fortification Units. These Units signify the "construction" of fortifications. All Units defending on fortifications double their combat factor in defense.
-
Fortifications may be built on any Mapboard Square except rough terrain and town squares.
-
Fortifications cannot be built on an un-occupied square.
-
Fortifications cannot be built within two squares of an enemy Unit. Example: you would not be allowed to build on PP-14 if an enemy Unit was on PP-16.
-
Fortifications must be built at the beginning of your Turn. Any Combat Unit can build one but only if you do not move that Combat Unit in the Turn of construction.
-
Only one Combat Unit is allowed on a fortification at the end of the Turn of construction.
-
Additional Units may be moved onto the fortifications on the Turn following the construction Turn.
-
You may build as many fortifications as you wish in any Turn . . . only one per square allowed.
-
Fortifications remain on board indefinitely as long as they contain Combat Units.
-
Fortifications that become abandoned during a Turn, voluntarily or by defeat in combat, are considered destroyed and removed from the board.
-
Combat Units can be transferred from one fortification to another on any Turn following the construction Turn.
-
You cannot build a fortification by a Unit that has just been retreated on the previous Turn.
-
Fortifications double the defense factor of a Unit only where it is not already doubled. No Units can be tripled in defense by fortifications.
-
A Unit's combat factor remains basic when attacking from a fortification.
Fortresses
The hex outline counters are Fortress Units. These Units signify the construction of Fortresses (hereafter called "forts"). All Units defending on forts triple their combat factor in defense. The rules are the same as for fortifications except in the following:
-
Forts may be built in towns. But a combat Unit's combat factor in defense only triples, not quadruples.
-
Unlike fortification abandonment, forts are not removed when they are voluntarily abandoned. They remain on board and can be occupied by either player.
-
When Units in a fort are eliminated or retreated off of it, that fort is eliminated and removed from the board.
-
Both players have the option to keep on board or remove abandoned forts they move adjacent to.
-
Unlike fortification squares, Units in fort squares have no zone of control. Enemy Units may pass right on by them through adjacent squares. However, Units have the option to attack adjacent enemy Units in forts but are not required to do so. Conversely, Units in forts have the option to attack enemy Units resting adjacent to them outside forts. In this event, all adjacent Units must be fought.
-
A Unit's combat factor remains basic when attacking from a fort.
-
The towns of Clervaux (MM-26), Dinant (H-34), Namur (G-26) and Sedan (I-53) are permanent forts and cannot be removed. Differing from the Basic Game, Units triple on defense in these towns.
-
Forts may be built on fortification squares . . . no additional factors accrue on defense. When constructing forts, simply remove the fortification counters.
-
Important: a Fortress counter should be placed with the U.S. 14th Regiment at square TT-10 at the start of the Tournament Game.
Isolation and Supply
All Units must be able to trace supply lines off the board or they are considered isolated. To be supplied, all Units must be able to trace a row of squares un-touched by enemy zones of control, a maximum of 7 squares to a road, then along the road (or roads) un-touched by enemy zones of control leading off the edge of the board to their source of supplies. The supply route from the Unit to the road can go a maximum of 7 squares but the route cannot leave the road (or combination of roads) after reaching the road nor can it pass through enemy zones of control. German sources of supplies are reached by all roads leading off the east board edge plus the road at SS-3; The U. S. sources are reached through all other roads.
-
German Units that are isolated at the beginning of their first Turn of isolation have their normal movement rates reduced by 2. Isolated U. S. Units incur no movement reduction.
-
All Units, German and U. S., are eliminated at the beginning of their 6th Turn of consecutive isolation.
-
A player is considered to hold an unoccupied town or intersection if one of his Units was the last to pass through. Use blank Units of appropriate color to signify possession.
-
The 7-square supply line to the road can pass through all squares including rough terrain, dense woods, and across rivers.
-
Units in forts are also subject to all isolation rules.
U. S. Air Supremacy
-
Beginning on the December 25 A.M. Turn, the day the weather front cleared up allowing airdropped supplies, the U. S. player does not have to trace a supply route. He is no longer subject to isolation from this point on.
-
Beginning on December 26 A.M., the normal movement rate of German Panzer Units is reduced by 2; Volksgrenadier and Parachute Units are reduced by 1 for the remainder of the game.
One-Way Traffic
The arrow counters are provided to indicate direction of movement along roads.
-
Units can move along a road at the road movement rate in only one direction per Turn. Example; if you move Units south from Bastogne to Martelange at the road movement rate, you can move Units north on that road but not at the road movement rate. To indicate direction, place an arrow on the first road square that the Unit uses, pointing in the direction of travel . . . at the point where that Unit ends its road travel, place a blank counter of appropriate color to indicate that travel between these two points is one-way only on the road itself.
-
Units may travel along such road squares in the opposite direction but only at the normal movement rates.
-
Road retreats have no effect on one-way traffic restrictions.
-
All arrow and blank counters are removed at the end of each player's movement portion of his Turn.
Battle Results Table
Players must use the Tournament Game Battle Results Table. The routine on "How To Resolve Battles" is the same as for the Basic Game; however, a study of the Battle Results Explanation will uncover new areas of realism in tactics and strategy not offered in the Basic Game.
Optional Rules
Optional Rules may or may not be added at your discretion. They add additional realism and complexity for the player who thrives on handling the many complicated variables inherent in true-to-life battle situations.
Strategic Air Power
Beginning with the December 25 A.M. Turn, the U. S. player may attack all German Units on any single square from the "air." The U. S. player has the option of selecting any one square and attacking on any one Turn from December 25 A.M. until the end of the game. He is allowed only one strategic air attack per game. Such an attack cannot be made against German Units already in U. S. zones of control. The U. S. player rolls the die once and refers to the following table for the effect of his once-a-game strategic air attack.
| Die Roll | Effect |
|---|---|
| 1 & 2 | All German Units in the attacked square are eliminated. |
| 3 & 4 | Two German Units in the attacked square are eliminated; both must be Panzer or Panzer Grenadier if possible. |
| 5 & 6 | All German Units in the attacked square are immobilized and cannot move in their following Turn. |
Tactical Air Power
Beginning with his December 25 A.M. Turn, the U. S. player is given 20 air attack factors. He has the option of applying these factors to as many attacks as often and in any amounts he wishes until he has used up all 20 factors. Unlike strategic air attack, tactical air attacks must be combined with a ground attack. Example: suppose U. S. Units totaling 9 combat factors were attacking German Units totaling 4. Odds would be 2 to 1. The U. S. player could add 3 air attack factors to bring odds up to 12 to 4 or 3 to 1. He then would have 17 tactical air attack factors remaining.
Weather
During the actual battle the weather was an uncertain element. A heavy weather front dominated the battlefield and did not clear up until December 25. To simulate this uncertainty, players roll the die at the end of each Turn beginning with the December 23 A.M. Turn. When "clear weather" is rolled, players may immediately incorporate the "U. S. Air Supremacy" Tournament Game rules and the "Strategic & Tactical Air Power" Optional rules. Once "clear weather" is rolled, it remains clear weather for the remainder of the game — players do not roll for weather again.
| Turn | Die Roll Needed for Clear Weather |
|---|---|
| December 23 A.M. & P.M. | 1 |
| December 24 A.M. & P.M. | 1, 2 |
| December 25 A.M. & P.M. | 1, 2, 3 |
| December 26 A.M. & P.M. | 1, 2, 3, 4 |
| December 27 A.M. & P.M. | 1, 2, 3, 4, 5 |
Weather automatically clears up from December 28 A.M. on.
Retreat Through Blocking Terrain
When a Unit advances through woods and rough terrain it must necessarily exercise extreme caution. However, during a retreat Units do not normally have the time to exercise such caution thus they often travel faster during a retreat than during an advance. To incorporate this additional bit of realism, we suggest that retreats through dense woods and rough terrain be treated as plain squares. In other words, Units may retreat through more than one dense woods and rough terrain square. This applies only to Infantry, Volksgrenadier and Parachute Units. Armored type Units must abide by the original woods movement restrictions.
Armor in Engagements
Because in real life it would have been more difficult to prevent Armor from breaking off combat than Infantry, we suggest that Armor be exempt from the "engagement" rule. Thus pure Armor and Panzer (not Panzer Grenadier which dismounted and became like infantry in combat) may withdraw from engaged situations at player's option.
German Supply
To duplicate the acute German supply situation we suggest that you limit the number of German attacks per Turn. On the first Turn, the German player may make up to 10 attacks. From the second Turn on, supplies limit him to 6 attacks per Turn. This supply rate may be accumulated from Turn to Turn thus the German player, if he conducts only 4 attacks on the 2nd Turn, may make 8 attacks on the 3rd Turn. The supply rate also applies to attacks that are required such as "engaged" combat.
Play-Balance
We find that many Avalon Hill players are more concerned with play-balance than with historical accuracy. Our consumer test panel suggests that the simplest way to balance this game is to adjust the Air Power provisions: if players find that the U. S. player wins too easily, then eliminate the Strategic Air Power and decrease the Tactical Air factors to 10 per game. If the Germans are winning too handily, increase Strategic to 3 attacks per game and Tactical factors up to 35 per game. Of course judicious employment of some, but not all, of the Optional Rules helps adjust play-balance in many instances.
Basic Game Battle Results Table
Odds worse than 1-6 are not allowed. Odds greater than 8-1 are treated as 8-1.
| Die | 1-6 | 1-5 | 1-4 | 1-3 | 1-2 | 1-1 | 2-1 | 3-1 | 4-1 | 5-1 | 6-1 | 7-1 | 8-1 |
|---|---|---|---|---|---|---|---|---|---|---|---|---|---|
| 1 | A elim | A elim | A elim | Engaged | D back 1 | D back 2 | D back 2 | Exchange | Exchange | Exchange | Exchange | Exchange | D elim |
| 2 | A elim | A elim | Engaged | Engaged | Engaged | Engaged | D back 1 | D back 3 | D back 4 | D back 4 | D elim | D elim | D elim |
| 3 | A elim | A back 1 | A back 1 | A back 1 | Engaged | Engaged | Engaged | D back 2 | D back 3 | D back 4 | D back 4 | D elim | D elim |
| 4 | A back 2 | A back 2 | A back 2 | A back 2 | A back 1 | Engaged | Engaged | D back 1 | D back 2 | D back 3 | D back 4 | D back 4 | D elim |
| 5 | A back 3 | A back 2 | A back 2 | A back 2 | A back 2 | A back 1 | Engaged | Engaged | D back 1 | D back 2 | D back 3 | D back 3 | D back 4 |
| 6 | A back 3 | A back 3 | A back 3 | A back 3 | A back 3 | A back 2 | A back 1 | Engaged | Engaged | Engaged | D back 2 | D back 3 | D back 3 |
Explanation of Basic Game Battle Results
ELIM: All losing Units are eliminated from the board. "A" applies to all attacking Units and "D" applies to all defending Units. The winner, attacker or defender, has the option to move onto the loser's square.
BACK: All losing Units must be retreated by the winner the full number of squares specified. Losing Units may be retreated in any direction subject to river, rough terrain and dense woods movement restrictions. Retreating Units are eliminated if the only available retreat route forces them through enemy zones of control, off the board, or in violation of terrain movement restrictions. (Example: A Unit that would have no choice but to retreat across a non-road river square or through more than one non-road rough terrain and dense woods squares is eliminated instead.) Units cannot be retreated through the same square more than once. Units retreated along roads are not retreated according to road movement rate. The winner cannot force retreating Units into blocking areas if alternate, unblocked routes of retreat are available. The winner, attacker or defender, has the option to move onto the loser's vacant square.
EXCHANGE: The defender removes all of his Units — the attacker removes a number of Units whose combined combat factors total at least that of those removed by the defender. Sometimes an exchange of combat factors does not work out even-up in which event the attacker may have to remove Units whose combined factors total more than those removed by the defender. Combat factors are computed at value accrued according to terrain. (Example: if the 501st Regiment, whose combat factor is 4, is defending in Bastogne the German player must remove 8 combat factors because the 501st's combat factor has been doubled to 8.) The attacker has the option to move surviving Units onto the defender's vacant square.
ENGAGED: Neither player loses any Units nor is there any retreat. Both players turn their Units upside-down to signify that the battle is still raging. The defender, in his Turn, cannot withdraw nor can he bring up reinforcements. The same is true for the attacker, in his following Turn, who must re-fight the battle exactly as it was fought in the previous Turn. The attacker also cannot bring up reinforcements although he is allowed to move other un-engaged Units in a manner that will cut off retreat routes. There is no limit to the number of consecutive Turns Units can stay engaged.
How Different Terrain Effects Combat Factors on Defense
| Defending Units Are On | Attacking Units Are On | Defense Factors Are |
|---|---|---|
| Clear Terrain squares, Dense Woods squares, River squares | Any non-river square, Town squares | Basic |
| Clear Terrain squares, Dense Woods squares (a) | River squares | Doubled |
| Clear Terrain squares, Dense Woods squares | River and non-river squares in combination | Basic |
| Town squares (b) | Any other square | Doubled |
| Rough Terrain squares (b) | All squares including adjacent Rough Terrain squares | Doubled |
| River squares | River squares of same river | Basic |
| River squares | River squares of a different river | Doubled |
(a) If a Unit is attacked from the end of a river, its defense factor still doubles. Example: the combat factor of a Unit on any non-river square adjacent to LL-20 doubles when attacked from LL-20.
(b) The defense factor of Units defending in these areas is doubled, not tripled, when attacked from river squares.
IMPORTANT: The presence of roads does not alter any of the above situations.
Tournament Game Battle Results Table
Odds worse than 1-6 are not allowed. Odds greater than 8-1 are treated as 8-1.
| Die | 1-6 | 1-5 | 1-4 | 1-3 | 1-2 | 1-1 | 2-1 | 3-1 | 4-1 | 5-1 | 6-1 | 7-1 | 8-1 |
|---|---|---|---|---|---|---|---|---|---|---|---|---|---|
| 1 | A elim, D advance 1 | A elim, D advance 1 | A elim, D advance 1 | Contact | D back 1, A advance 1 | D back 2, A advance 1 | D back 2, A advance 1 | Exchange, A advance 1 | Exchange, A advance 1 | Exchange, A advance 1 | Exchange, A advance 1 | Exchange, A advance 1 | D elim, A advance 1 |
| 2 | A elim, D advance 1 | A elim, D advance 1 | Engaged | Engaged | Contact | Contact | D back 1, A advance 1 | D back 3, A advance 2 | D back 4, A advance 3 | D back 4, A advance 4 | D elim, A advance 1 | D elim, A advance 1 | D elim, A advance 1 |
| 3 | A back 1, D advance 1 | A back 1, D advance 1 | A back 1, D advance 1 | Engaged | Engaged | Contact | D back 2, A advance 1 | D back 3, A advance 2 | D back 4, A advance 3 | D back 4, A advance 4 | D elim, A advance 1 | D elim, A advance 1 | |
| 4 | A back 2, D advance 1 | A back 2, D advance 1 | A back 2, D advance 1 | A back 2, D advance 1 | A back 1, D advance 1 | Engaged | Engaged | D back 1, A advance 1 | D back 2, A advance 1 | D back 3, A advance 2 | D back 4, A advance 3 | D back 4, A advance 4 | D elim, A advance 1 |
| 5 | A back 3, D advance 2 | A back 3, D advance 2 | A back 2, D advance 2 | A back 2, D advance 2 | A back 2, D advance 1 | A back 1, D advance 1 | Engaged | Contact | D back 1, A advance 1 | D back 2, A advance 1 | D back 3, A advance 2 | D back 4, A advance 3 | D back 4, A advance 3 |
| 6 | A back 3, D advance 3 | A back 3, D advance 3 | A back 3, D advance 2 | A back 3, D advance 2 |
Explanation of Tournament Game Battle Results
ELIM: Same as in Basic Game.
BACK: Same as in Basic Game with the following important addition: whenever possible, losing Units must be retreated to and/or along the nearest road. Where there is more than one road equidistant, and at intersections, the loser has the choice of retreat route.
ADVANCE: After losing Units have been retreated, the winner has the option to advance all victorious Units up to the number of squares specified. (Example: at 5-1, a die roll of 3 means that all defending Units are retreated 4 squares and all attacking Units may advance 0, 1, 2 or 3 squares.) Units may advance in any direction according to these restrictions: (a) the first square of advance must be the loser's vacated square, and (b) advancing Units must stop as soon as they land on an enemy controlled square, and (c) Units may advance directly into enemy controlled squares only if no alternate advance routes are available. Units that advance adjacent to enemy Units whose battles have not been resolved do not participate in those battles . . . however, such placement does serve to cut off retreat routes. The winner may advance the full number of squares even when losing Units are eliminated because of blocked retreat routes.
EXCHANGE: Same as in Basic Game.
ENGAGED: Essentially the same as in Basic Game; however, both players are allowed to reinforce. Thus, the routine is as follows:
STEP 1: The defending Units, only, are turned upside-down.
STEP 2: The defender, in his Turn, cannot move his upside-down Units. He does not have to counter-attack although he has the option to do so. Also, he does not have to attack non-engaged enemy Units his Units have remained adjacent to.
STEP 3: The attacker, in his following Turn, cannot move his engaged Units and must attack, again, the upside-down Units he attacked in his previous Turn.
Defender's options in STEP 2 above:
(a) He may counter-attack with his upside-down Units, reinforcing them with new Units who also attack. The upside-down Units are turned right-side-up and normal combat procedures are followed. In this event, all of the opponent's engaged Units are freed from their obligation to attack again as in STEP 3 above.
(b) He may reinforce his upside-down Units by bringing up additional Units and turning them upside-down also. Reinforcements can only be placed on squares already containing upside-down Units, subject to the 3-high stacking limitation. He does not counter-attack in this option.
Attacker's options in STEP 3 above:
(a) If his opponent has exercised option (a), his engaged Units are freed from their obligation to attack again. In this event, he may move his freed Units in the normal manner. He may, however, attack again if he wishes.
(b) If his opponent has exercised option (b), he must attack all upside-down Units and must attack with them also.
IMPORTANT: In all counter-attack situations, players must abide by the Multiple Unit Battle rules which require the attacker to fight all adjacent Units. In cases where engaged Units are adjacent to non-engaged enemy Units, the attacker has the choice of dividing combat in any manner as long as all adjacent enemy Units are attacked in one way or another. (See diagrams in the Battle Manual.)
CONTACT: No casualties are taken and there is no retreat or advance. But the defender, in his Turn, must either withdraw or counter-attack.
Examples and Diagrams of Play
The diagrams referenced below show hex grids with Units placed on them; the captions are transcribed in full.
How to Have Combat: All three Red Units are moved into Blue's zone of control. Notice that Red 5/7 circled square "B" to gain an attack position that would leave Blue 84/340 surrounded by Red zones of control. This means that Blue 84/340 would be eliminated even if the Battle Results Table calls for a retreat. However, had Red 5/7 moved onto square "B," then Blue 84/340 would have a retreat route through square "D" which would be the only square not under Red zones of control.
In diagram A two battles are fought. The Blue 7-4's in square X and the 8-4 in square Y attack the Red 10-4 at 2-1. A "D back 2" is rolled and the 10-4 is retreated to square Z. In the 2nd battle, the Blue 4-4 attacks the Red 6-4 at 1-2. An "A back 2" is rolled and Blue 4-4 is retreated to square W. In diagram B it is Red's Turn. Red moves the 10-4 from square Z to Q and the 6-4 from square C to R thus attacking the Blue 8-4 at 2-1. A "D back 2" is rolled and the 8-4 is eliminated because it cannot retreat without passing through Red's zone of control.
Multiple Unit Battles: Red 12SS/25 attacks Blue 99/361 and 106/423 at 1-1, thus allowing the remaining Red Units, 2SS/3 and 2SS/5, better odds (3-1) against Blue 1/26. NOTE: Red cannot divide combat against the stacked Blue Units into two different battles — both the 99/361 and 106/423 must be fought in one battle because they are on the same square.
How to Have Combat, Tournament Game, only: In diagram A, Peiper and 9SS/10 attack the 3 Blue Units, rolling a "Contact." This forces Blue Units to withdraw or counter-attack. The location of Red 9SS/18 and 18/35 prevent any of the Blue Units from withdrawing and then moving to squares "X" or "Y" which would eliminate any route of retreat for the Red Units. Movement through Red's zone directly to "X" or "Y" is also not allowed. Blue counter-attacks without moving. Blue 9/CCB is brought up but doesn't attack. An "engaged" is rolled by Blue so all Red Units are turned upside-down — as shown in diagram B.
In diagram C, Red reinforces his upside-down Units with 9SS/18 which is placed upside-down on the stack. This signifies no attack from these Units. Red brings up the 18/35 and a new Unit, not shown previously, the 18/36 to attack Blue 9/CCA. Blue 9/CCB's location prevents Red from moving into square "Z" which, in conjunction with the zones of control of the upside-down Units, would eliminate any retreat routes for Blue 9/CCA. In the attack, an "engaged" is rolled and Blue 9/CCA must be turned upside-down. Now, it is Blue's Turn. He is required to re-fight Peiper and 9SS/10 plus 9SS/18, all of which are now turned right-side-up. In addition, Blue sees an opportunity to surround Red 18/35 so he brings up Blue 9/CCB as shown in diagram D. There is only one way in which Blue can divide combat as it must be split into three separate attacks. He is required to attack all 3 stacked Units as one battle and must attack them with Blue 1/16 and 82/504 Units only. Since Blue 9/CCA is the only Blue Unit in Red 18/36's zone of control it must attack that Red Unit and no other. Finally, Blue attacks Red 18/35 with his Blue 9/CCB and is wise to resolve this battle first to take advantage of Blue 9/CCA's presence which effects a surrounded situation against Red 18/35.
Historical Commentary
General Situation
During the summer of 1944, Adolph Hitler's empire was being pushed back on all fronts. In Italy, the U. S. 5th and British 8th armies were forging their way up the "boot." In Russia, their front was coming closer and closer to German soil and in France the allies had landed in Normandy.
On July 31, 1944, the allied troops on the Normandy beachhead broke out and by September 15, had liberated most of France. On September 16, Hitler held a top level conference at his headquarters. Only his most trusted top officers were in attendance. Field Marshal Jodl began the briefing with the general situation. Germany was now alone; the Rumanians and Bulgarians were fighting for the Russians; Italy was out of the war; Finland had broken from the Nazi camp; and even Japan had suggested that Hitler sign an armistice.
The Wermacht still had 10 million men under arms having suffered some 4½ million casualties thus far. Jodl continued with "on the Western front we are getting a real rest in the Ardennes." At this, Hitler, who had been silent until then, cried "stop." After a period of silence he began, "I have made a momentous decision. I am taking the offensive here — (smashing his fist on the map) out of the Ardennes across the Meuse and on to Antwerp."
Code named "Watch On The Rhine," the German plan was simple: The newly formed 6th Panzer Army, composed of the four SS Panzer divisions and 5 Volksgrenadier divisions, was to advance south of Monchau, move west and then cut north to the Meuse. From that point they would proceed north to Antwerp. The 5th Panzer Army under Hasso von Manteuffel, composed of four Panzer divisions, four Volksgrenadier divisions, and an airborne division, was to cross the Our River, take the towns of St. Vith and Bastogne because of the important road and railroad junctions, and proceed to the Meuse river. Upon reaching the Meuse they would proceed north with the 6th Panzer Army. This would cut off a large number of allied troops in the Aachen salient. South of the 5th Panzer army was the seventh Army under Brandenberger, composed of one airborne division and three Volksgrenadier divisions. Their mission was to protect the southern flank of the offensive.
A serious evaluation of the German plan shows that it was desperate and that it had relatively little chance for success. However, looking at the Ardennes offensive from the allied point of view, the danger didn't lie in the possibility of the Aachen salient being cut off but in the lengthening of the war. General Eisenhower stated that the offensive must be stopped short of the Meuse river. This being done, the allies could destroy the strong German forces and prevent them from being used in defense later. This would almost certainly shorten the war. On the other hand, if the Germans were allowed to cross the Meuse, the war would certainly be extended.
Hitler chose December 16th as the jump-off date because the projected bad weather would ground allied air power. By December 11, final preparations were complete. The utmost security precautions were employed to insure that the allies would be unaware of the impending offensive. Night movement and special trains had brought vast quantities of troops and equipment opposite the sparse and tired U. S. troops from Monchau south.
The Actual Battle
At 5:30 A.M. on December 16, 1944, the Germans opened fire along the 85 mile "ghost front" and pounded American positions for a solid hour. At 6:30 A.M. the guns ceased. Replacing the explosions were the sounds of tanks, troops and planes. The Germans were on the move. From Monchau south the Americans were shaken and bewildered. Communications had been completely disrupted. The American defense was makeshift; cooks, drivers, anyone that could hold a rifle was being thrown in the line. The line wavered but held.
In the Losheim Gap the 14th Cavalry was being heavily assaulted. Its positions were infiltrated and its squadrons were isolated. By 12 o'clock the Gap was overrun. Farther south the brunt of the attack was falling on the veteran 28th Division. German infantry had broken the line in several places and the only thing that stood in their way to Bastogne and the Meuse was the picturesque town of Clervaux and the 110th Infantry. The 110th was coming under accelerated assault as more and more German units crossed the Our River. Farther to the south the green 9th armored was having a rough time after the heavy bombardment. As darkness settled on the Ardennes complete chaos ruled to the front.
By this time reinforcements were on the way. Due to General Eisenhower's quick reaction the 7th armored and the veteran 1st infantry had been detached and were moving down from the north. General Patton's 10th armored was preparing to move into the Ardennes from the south. Clervaux was still in U. S. hands but General von Manteuffel vowed that it would not be by noon the next day.
At dawn on December 17th fighting resumed. Clervaux again came under heavy assaults. The 110th regiment was now a split-up mass of men. Lines had been broken. Germans were on all sides and there were even Germans in the streets. The 110th held until that night, turning Clervaux into an Alamo; giving the 101st airborne time to get to Bastogne. Earlier that day in the woods north of Malmedy several German paratroopers dropped. They were the remnants of what was to have been a large airborne operation. Due to weather conditions and inexperienced pilots most of the paratroopers were dropped behind German lines. Of those who landed in the right spot not enough of them were available to perform their mission which was to stop the U. S. reinforcements. Upon seeing the shoulder patches on the men of the elite 1st infantry division, these remnants withdrew into the woods without firing a shot.
By the afternoon of December 17th the 7th armored had begun its defense of St. Vith, taking over from the remnants of the 106th division; two regiments of which were surrounded in the Schnee Eifel.
North of St. Vith, an SS Panzer group, led by Jochem Peiper, had penetrated deep behind U. S. lines. Near the town of Malmedy, Peiper captured Battery "B" of the 285th field artillery observation battalion. The men of Battery B were relatively defenseless against tanks as they made their way south of Malmedy and when they found themselves surrounded they had no choice but to surrender. They were marched to a field outside of Malmedy where they were machinegunned. Those still alive were shot in the head with pistols. Peiper continued to Trois Ponts where civilians were given the "Malmedy" treatment.
North of Losheim Gap the emergency line was abandoned and positions were taken on Elsenborn Ridge. This northern flank along Elsenborn Ridge resisted all further attacks for the rest of the battle. St. Vith was now surrounded on three sides and the Germans were moving on toward Bastogne.
During the 18th, the 101st and 82nd airborne divisions were rushed to the front from Rheims where they had been resting after the Arnheim operation. The 82nd was sent to the Savelot-Malmedy sector and the 101st went to Bastogne.
Several task forces had been thrown up to retard the German advance on Bastogne and allow the 101st time to reach the city. North of Bastogne units of the 5th Panzer army had reached the town of Houffalize and while south Wiltz was falling, Bastogne was rapidly becoming surrounded.
On the 19th, lead elements of Panzer Lehr contacted the 501st airborne infantry some five miles outside of Bastogne and the fight was on. That same day General Patton met with General Bradley and General Eisenhower. Patton's army was to wheel 90 degrees and march units to Bastogne and Wiltz. It would be a long hard fight.
Also on the 19th the two regiments of the 106th in the Schnee Eifel surrendered. The surrender of 10,000 men was the greatest mass surrender of Americans since Bataan. The town of St. Vith had fallen and the troops had withdrawn to rough terrain between St. Vith and Vielsalm. They were surrounded on three sides and because of the shape of their lines and positions became known as the "fortified goose egg." By this time the lines of communications between the north and south had been cut so Ike put Montgomery into command of the forces in the north and left Bradley in command of the south.
On the night of December 20th the final road to Bastogne was cut and the 101st was completely surrounded. By the next morning Panzer Lehr and the 2nd Panzer were well beyond Bastogne and heading for the Meuse. In the north the "goose egg" was still holding out and German attacks along the Malmedy line were not successful. German thrusts near the town of Hotton were slowed up by CCR of the 3rd armored. A great "bulge" was taking shape on the map.
The major event of December 22nd occurred at Bastogne. This was General McAuliffe's famous reply of "Nuts" to the German surrender demand.
On the 23rd, planes of the U. S. Air Force appeared over Bastogne for the first time in seven days. The 101st was resupplied by air. At the same time, Montgomery had ordered the evacuation of the "goose egg" to the dismay of most of the American generals. However to the men in the "goose egg" it was a wise decision. The troops in the "egg" withdrew through a gap held open by the 82nd airborne.
Farther to the west news reached General Harman that Germans had been found west of Marche and that they were moving toward Dinant. The 2nd Panzer had been forced to stop its advance due to a shortage of fuel and fear of running into heavy resistance at this time. The latter was false information as there were no U. S. troops barring the way to the Meuse River.
General Harman, commanding the 2nd armored, ordered his division to the town of Ciney to await further orders. The 3rd armored had been replaced by the 7th and had moved west to defend Hotton. Montgomery had ordered the VII corps to act as a reserve and to fall back to the Hotton-Ardennes line if necessary. Harman was begging for permission to attack the 2nd Panzer.
On Christmas morning the 2nd armored division finally attacked the 2nd Panzer nearer the town of Celles. In a battle that lasted two days the 2nd Armored shattered the 2nd Panzer and turned the tide of battle.
Patton, meanwhile had been forging up from the south and on the 26th finally succeeded in punching a hole into the Bastogne encirclement. Bastogne had been surrounded for more than 6 days and had resisted sustained attacks from all quarters.
From this point on the battle becomes one of forcing the Germans back. It was by no means an easy task but the days of Germany were numbered. A long hard route back to Houffalize, Wiltz, St. Vith and Clervaux were paid for in American lives.
Basic German Strategy
In the Avalon Hill game, the burden of attack is on the German player. From the very first turn he must attack along every avenue of approach. However, as the game proceeds he must remember that the final goal is the Meuse River. The game can be divided into two parts: first you must reach the Ourthe River in force and settle the question of supply routes. Also the question of whether or not to take Bastogne must be settled because once you cross the Ourthe River, Bastogne will not fall unless you turn back to take it. This might prove fatal. During this advance take every opportunity to eliminate U. S. units by surrounding them because every one you eliminate before the Ourthe means one less to stop you later. Once the Ourthe has been reached it should be relatively easy to reach and outflank the U. S. defenders and move toward the Meuse, making sure that your supply lines are sound. Crossing the Ourthe too late in the game will usually mean defeat, even if the U. S. player has very few units left.
Basic U. S. Strategy
Due to your lack of units you are forced to take the strategic defensive. However, play strictly a defensive game and you are licked. You must counterattack as often as possible even if it means leaving very thin lines elsewhere. Your armored combat command units can be concentrated into relatively powerful groups. Often the German will be forced to advance to positions where it can be surrounded. At these times, attack — even if at only one to two odds. The German player will probably not be eliminated very often but will almost always be forced to delay his advance for at least one turn. Bastogne should be held and the German should be blocked from advancing wherever possible. However, early in the game it may be necessary to give ground to prevent units from being surrounded too easily. If the German crosses the Meuse then the supply line should be cut at all costs. If you can hold out until the 28th, the last corps should guarantee you victory. Remember — attack every chance you get.
Addendum
Most historical accounts of the Ardennes campaign take the reader into January. Thus, many divisions that took part in the Battle of the Bulge, arriving after December 30th, 1944, naturally are not included in Avalon Hill's Order of Battle. As pointed out in discussions with General McAuliffe, the overall German timetable hinged on their crossing the Meuse River by approximately December 23rd. Operations beyond the end of December could be classified as nothing more than mop-up campaigns since German chances of victory beyond this point were quite remote.
Appendix
The following is a series of questions and answers dealing with unusual situations that occur from time to time.
Rivers
- Do zones of control extend across rivers?
Answer: Yes — for instance, a Unit moving along the north side of the Semois River would have to stop on G-49 and attack an enemy Unit on G-50.
- Does an attack by a Unit in a town on a river, say Martelange, double the combat factor of a defender on an adjacent square, say DD-39?
Answer: No — town squares are not treated as river squares.
- Does an attack by a Unit on a river-road square, say P-48, double the combat factor of a defender on road squares Q-49 and Q-47?
Answer: Yes — roads do not alter the doubled-up river defense situations.
- Suppose opposing Units become adjacent, both on a river. Technically, the defender is on the north side and the attacker is on the south side — is the defender doubled?
Answer: No — the defender would have to be off the river on the north side entirely to be doubled.
Rough Terrain
- If a Unit starts in Rough Terrain next to a road that is also in Rough Terrain may he move to the road and then along it during the same turn?
Answer: Yes — at the normal movement rate.
- Can a Unit move through rough terrain on a road and leave rough terrain, say via SS-21 to RR-21, in the same Turn?
Answer: No — that Unit would either have to end its Turn on SS-21 or leave rough terrain by road square RR-22. This situation also applies to dense woods movement.
Multiple Unit Battles
- Suppose the results of my opponent's attack leaves one of my defending Units surrounded at worse than 1-6 odds — what happens?
Answer: In your Turn, you must either bring up enough Units in support to attack at odds of 1-6 or better or eliminate that Unit immediately before resolving any battles.
Roads
- What happens when there are fractions left over: suppose a Unit, whose normal movement rate is 4, has moved 2 squares to a road and then 6 squares along the road — can it move off the road in the same Turn?
Answer: No — because moving to the 6th road square would leave it with 4/5ths of a normal movement rate left. Thus the Unit would forfeit this fractional move remaining.
- Can Units apply the road movement rate to two or more different roads in the same Turn?
Answer: Yes. For instance; a Unit with a normal movement rate of 4 starting its Turn at road square MM-22 may move 10 squares to EE-31, one square at normal movement rate to DD-31 and then up to 5 squares along the road to Houffalize.
- Can a Unit switch roads, say from Houffalize to LaRoche, at DD-31 where two different roads go through the same square at the road movement rate?
Answer: No — switching roads at DD-31 would be done at the normal movement rate. However, moving to an intersection or town, Bastogne in this case, would allow switching at the road movement rate.
Retreats
- Can losing Units be retreated through enemy zones if friendly Units are on those enemy controlled squares?
Answer: Absolutely not — friendly Units do not neutralize enemy zones of control.
- Can Units be retreated in a zig-zag route, say three squares: from RR-33 to RR-32 to SS-32 to TT-31?
Answer: Yes — retreat can be made in any combination of directions as long as Units do not go through the same square more than once or end up in the same square they started from.
- Can upside-down Units cut off retreat routes?
Answer: Yes — upside-down Units have zones of control just as if they were right-side-up.
- Can Armor and Panzer Units be retreated into dense woods?
Answer: No — if no alternate routes are available, they are eliminated instead.
Retreats, Tournament Game, only
- After losing Units have been retreated in a zig-zag route, can victorious Units advance adjacent to them again if physically possible?
Answer: Yes — the retreated player, in his Turn, must either withdraw or counter-attack in the usual manner.
- Do Units retreat and advance after combat along roads at the road movement rate?
Answer: No — all retreat and advance after combat is at the normal rates.
- When a retreat is called for, and there is no route, the defender being thus eliminated may the attacker still advance the full number of squares indicated?
Answer: No — When a unit is eliminated the advancing units may take no more than the vacated square.
- May a unit retreat over Rough Terrain and Woods if no other route exists?
Answer: Yes — if the optional retreat rule is in effect.
Armor Engagements (Optional Rule)
- If the armor withdraws from an engagement do the remaining units treat the situation as still being an engagement but at new odds?
Answer: Yes.
Fortresses, Tournament Game, only
- Can you keep using forts over and over again?
Answer: Yes — and there is no limit to the number of forts you can have on board in any one Turn. Use blank counters if you run out of printed ones.
- May isolated Units build forts?
Answer: Yes.
Fortifications, Tournament Game, only
- If a Unit on a fortification is attacked from across river, is it tripled on defense?
Answer: No — its defense factor remains doubled. However, it is doubled all-around and when attacked from a combination cross-river and same-side-river attack.
Victory Condition, Tournament Game, only
- Is a victory condition met if the German player has Units in Bastogne, Spa and St. Vith for 4 consecutive Turns but the end of the 4th Turn finds one or more of these Units adjacent to U.S. Units?
Answer: Yes — as long as Units have occupied these squares consecutively for 4 Turns the victory condition has been met.
German Supply (Optional Rules)
- Using the Limited German supply rule, may more than two attacks be supplied from the same road coming off the eastern edge of the board?
Answer: No — no more than 2 attacks may be supplied over the same route, nor may the routes coincide along any road. Different routes may, however, pass through the same intersection.
- What happens if the German has more battles (because of engagements) than he can supply?
Answer: The German must eliminate all attacking units in all battles he cannot supply.
Order of Appearance
Time on Board indicates earliest arrival hours of new Units. Players have the option of bringing Units on board later than indicated below. Each Unit below is identified as printed on its counter (parent formation / regiment or command identifier), followed by its combat factor-movement rate. Unit type and size are shown on the counters themselves using the symbols described under Order of Battle Unit Counters, above.
German Order of Appearance
December 16 / At Start — Units: 1/Peiper 10-5, 1/4 9-4, 1/2 6-4, 9/18 9-4, 9/19 9-4, 9/10 6-4, 18/35 4-3, 18/36 4-3, 26/51 4-3, 26/52 4-3, 62/123 4-3, 62/124 4-3, 340/679 4-3, 340/680 4-3, 560/915 4-3, 560/916 4-3. Location: On any squares north of grid —15 and east of grid UU inclusive.
At Start — Units: Lehr/1 10-4, Lehr/2 10-4, Lehr/1 6-4, 2/7 6-4, 2/8 6-4, 2/17 8-4, 116/310 5-4, 116/312 5-4, 116/406 8-4, 150 8-4, 3/13 5-3, 3/14 5-3, 3/15 5-3, 12/23 4-3, 12/24 4-3, 277/553 4-3, 277/554 4-3, 79/153 4-3, 79/154 4-3, 326/561 4-3, 326/562 4-3. Location: On any squares east of Our River, between grids —16 and —25 inclusive.
At Start — Units: 5/7 4-3, 5/8 4-3, 5/9 4-3, 167/333 4-3, 167/334 4-3, 276/551 4-3, 276/552 4-3, 352/703 4-3, 352/704 4-3. Location: On any squares northeast of Our River, between grids —26 and —29 inclusive.
17: A.M. — Unit: Fuh.Es 12-5. Location: East edge — directly on any numbered squares themselves, —1 through —29 inclusive.
18: A.M. — Units: 2/5 9-4, 2/6 9-4, 2/3 6-4, 12/24 9-4, 12/25 9-4, 12/13 6-4. Location: East edge — directly on any numbered squares themselves, —1 through —29 inclusive.
20: A.M. — Units: 3/56 5-4, 3/4 5-4, 3/5 5-4, 15/71 5-4, 15/6 5-4, 15/7 5-4. Location: East edge — directly on any numbered squares themselves, —1 through —29 inclusive.
23: A.M. — Units: 9/20 6-4, 9/21 6-4, 9/9 6-4. Location: East edge — directly on any numbered squares themselves, —1 through —29 inclusive.
26: A.M. — Units: 9/17 4-3, 9/18 4-3. Location: East edge — directly on any numbered squares themselves, —1 through —29 inclusive.
U.S. Order of Appearance
December 16 — Units and starting squares: 2/9 4-4 (RR-5), 2/23 4-4 (RR-6), 2/38 4-4 (RR-7), 4/8 4-4 (TT-31), 4/12 4-4 (UU-31), 4/16 4-4 (VV-31), 28/109 4-4 (OO-27), 28/110 4-4 (NN-25), 28/112 4-4 (Clervaux), 14 4-6 (TT-10).
At Start — Units and starting squares: 99/361 4-4 (RR-8), 99/393 4-4 (RR-9), 99/395 4-4 (RR-9), 106/422 4-4 (TT-14), 106/423 4-4 (UU-12), 106/424 4-4 (St. Vith), 9/CCA 7-4 (QQ-31, Diekirch), 9/CCB 7-4 (QQ-30), 9/CCR 4-4 (QQ-29). Units are placed directly on the squares indicated under each Unit.
16: P.M. — Units: 7/CCA 7-4, 7/CCB 7-4, 7/CCR 4-4. Location: North edge — directly on square BB.
17: A.M. — Units: 1/16 5-4, 1/18 5-4, 1/26 5-4. Location: North edge — directly on any squares A through HH inclusive. Simultaneously — Units: 10/CCA 7-4, 10/CCB 7-4, 10/CCR 4-4. Location: South edge — directly on any squares A through VV inclusive.
17: P.M. — Units: 82/504 4-4, 82/505 4-4, 82/508 4-4, 82/401G 4-4, 101/501 4-4, 101/502 4-4, 101/506 4-4, 101/327G 4-4. Location: Southwest — directly on town of Meziers.
18: A.M. — Units: 9/39 4-4, 9/47 4-4, 9/60 4-4, 30/118 4-4, 30/119 4-4, 30/120 4-4. Location: North edge — directly on square BB. If blocked, any squares A through AA inclusive.
20: A.M. — Units: 5/2 4-4, 5/10 4-4, 5/11 4-4. Location: South edge — directly on any squares A through VV inclusive.
21: A.M. — Units: 3/CCA 7-4, 3/CCB 7-4, 3/CCR 4-4. Location: North edge — directly on any squares A through QQ.
22: A.M. — Units: 4/CCA 7-4, 4/CCB 7-4, 4/CCR 4-4, 26/102 4-4, 26/104 4-4, 26/101 4-4, 80/312 4-4, 80/315 4-4, 80/317 4-4. Location: South edge — directly on any squares A through VV inclusive.
23: A.M. — Units: 2/CCA 8-4, 2/CCB 8-4, 2/CCR 4-4, 75/290 4-4, 75/291 4-4, 75/313 4-4, 84/335 4-4, 84/334 4-4, 84/340 4-4. Location: North edge — directly on any squares A through HH inclusive.
28: A.M. — Units: 11/CCA 7-4, 11/CCB 7-4, 11/CCR 4-4, 35/134 4-4, 35/135 4-4, 35/136 4-4, 87/345 4-4, 87/346 4-4, 87/347 4-4. Location: South edge — directly on any squares A through VV inclusive.