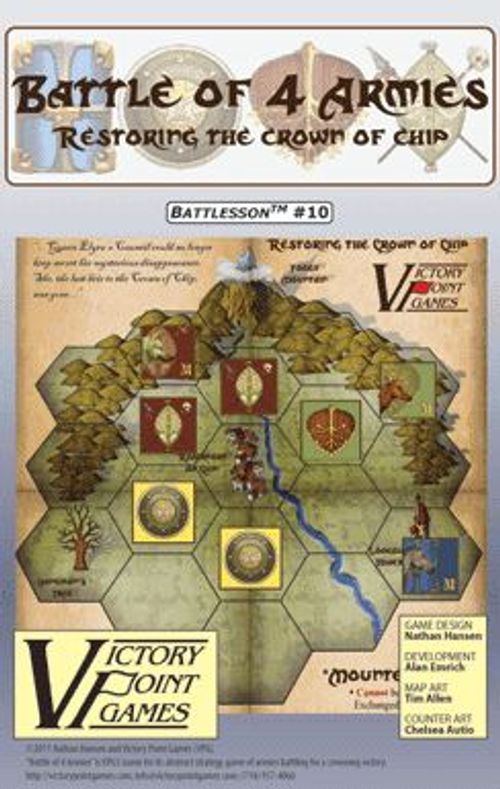
Battle of 4 Armies: Restoring the Crown of Chip
Battle of 4 Armies: Restoring the Crown of Chip Rulebook
Table of Contents
Table of Contents
[2.0] Game Equipment
The Game Map: The 8.5" x 11" game map shows the area around Chip where the battle for the ancient crown takes place. This region is divided into 19 hexagon-shaped spaces with the Riverport of Chip in the center hex. There are four named spaces including Chip. All of the other features and terrain are provided for aesthetic purposes only and have no effect on gameplay.
The Playing Pieces: The game pieces, 20 in all, represent the player's armies. Each army consists of four like-colored Regular units plus one special Mounted unit.
[3.0] Set Up
Each of the two to four players takes one set of the colored units. These begin off the map in their owner's Reserve. The map is placed where all can easily reach it.
[4.0] Sequence of Play
The game is played in turns, with the senior player going first. Play proceeds clockwise (i.e., to your left).
On your turn, you must do one of the following:
- Place one of your units onto the map
- Move one of your units on the map
- Remove your Mounted unit from the map and replace it in your Reserve
- Rally one Regular unit back from Capture (see 6.4)
After this mandatory action, check to see if any Captures were made (see 7.0).
Then see if the game has been won (5.0). If it has not, play passes to the next player.
[5.0] Winning and Losing
A player loses and is out of the game when their forces are reduced to a single unit (either on the map or in their Reserve).
When a player is defeated, their units still in play are removed from the game and considered captured by no other player.
You win by occupying three of the four named spaces on the board (i.e., Foggy Mountain, Hangman's Tree, Lookout Post, and the Riverport of Chip), OR by being the last player still in the game (i.e., everyone else has been defeated).
[6.0] Player Actions
There are four different Actions that a player can do when it is his or her turn: Place, Move, Withdraw or Rally, as explained below.
[6.1] Placement: You may Place one of your units from your Reserve onto the map. It may be placed on any vacant Space adjacent to the map edge, OR adjacent to one of your units – or even a chain of your units – that is adjacent to the map edge.
Exception: newly placed units can never be placed in Chip (i.e., the center space).
Example 1: The Red Player decides to place another Regular unit on the map from his Reserve. The spaces occupied by opponent's units are prohibited, of course.
The smiley-face spaces are legal, being vacant spaces either on the map edge adjacent to another red unit that is connected to a map edge space.
The numbered spaces work as follows:
The #1 and #3 spaces are legal but would result in the newly placed Red Regular unit being captured. On the #1 spaces, at least, the Red Player would also capture a Yellow Unit (with both being removed simultaneously, see 7.0).
The two #1 spaces are too far away. The distant Red Regular unit is not part of a "chain" of adjacent units and thus could not be used to help this unit's move.
The #2 Space is allowed but will result in the moving Red unit being captured concurrently with the Yellow unit in the middle space along the left edge (see 7.0).
The #2 space is the Chip, which cannot be entered via Placement.
And the two #4 spaces are prohibited because they are not on or connected to a map edge by other friendly (Red in this case) units.
[6.2] Movement: You may Move one of your units on the map to a vacant Space that is adjacent to its current space (i.e., the space where it is moving from) or to an empty Space that is adjacent to an adjacent friendly unit – or even a chain of your units.
Example 2: The Red Player considers moving his Regular unit as shown with the white border.
Where could it be moved to? The smiley-face spaces are all legal, being vacant Spaces either adjacent to its starting space or adjacent to an adjacent friendly unit.
[6.3] Withdraw: You may Withdraw your Mounted unit, if it is on the map, and return it to your Reserve (regardless of its present location on the map or the proximity of opposing units to it).
This makes it once again available for Placement (6.1) on a future turn!
[6.4] Rally: You may Rally one of your captured Regular units and return it to your Reserve.
Prerequisites
At least two of your units must be captured AND you must have at least one opposing unit in your Captured Pile (see 7.0).
Procedure
Take one of the opposing units in your Captured Pile and flip it like a coin. If it lands face-up (i.e., colored-side up), you may take one of your captured Regular units (Mounted units cannot be Rallied but they may be used to flip) from any opponent's Captured Pile and place it in your Reserve. If it lands face-down (i.e., white-side up), there is no effect and play passes to the next player.
[7.0] Capture & Advance
Capture occurs when one player has two units adjacent to an opponent's unit. Multiple Captures occur if a unit's Placement (6.1), Movement (6.2) or Advance (7.1) creates more than one Capture situation. These are all resolved simultaneously (exception, see 7.3 - First Strike).
Captured pieces are removed from the map and claimed by the capturing player, then placed in that player's "Captured Pile" off the map.
If two players have equal claim to a capture, the player whose piece is being captured chooses who captures the piece.
[7.1] Advance After Capture: After capturing an opposing unit during your turn (only; not during an opponent's turn), the capturing player may immediately make a "free move" with one of his units causing that capture, placing it into the captured units' now-vacated space. This special free move is called Advanced After Capture. Simultaneous Captures allow for multiple advances at the same time.
Example 3: It is the Green Player's turn, who decides to move the unit in space #1 space to space #2. This move causes the capture of the Red unit in space #3.
Because it is his turn, the Green Player may exercise an Advance After Capture move. He chooses to Advance the Green unit in space #4 space to the now-vacated space #3. This Advance, in turn, results in the capture of the unit in space #5 and gives the Green Player another opportunity to Advance After Capture into Space #5!
- Multiple Captures: After Advancing After Capture, check to see if another Capture (or Captures) occurred. If so, perform that Capture normally (and another Advance After Capture, if desired). This can be repeated.
[7.3] Mounted Units: In addition to being allowed to withdraw from the map (6.3) and being unable to Rally (6.4), Mounted units have the following special characteristics when resolving a capture:
-
First Strike: When checking for Captures, all in which the Mounted units are capturing are resolved first. Only after Captures by Mounted units are resolved (including deciding whether to Advance After Capture) is the map again checked to resolve all Captures involving only non-Mounted units.
-
Retreat: When a Mounted unit would be captured during an opponent's turn, it may instead Retreat to an adjacent, vacant space that is not adjacent to any opposing unit. If no such space is available to Retreat to, that Mounted unit is captured normally instead. You cannot Retreat your own Mounted unit during your turn! If a Mounted unit is able to Retreat, this does not count as a capture and there can be no Advance After Capture.
Example 4: Here, the Green Player decides to Move his Regular unit from space #1 to space #2, causing the Capture of the yellow unit in space #3.
But it is a Mounted unit in Space #3, so it can Retreat instead of being removed when Captured.
Because it must Retreat to a vacant space that is not adjacent to an opposing unit, the Yellow Player has only one choice of spaces to Retreat to, as shown with a smiley-face mark. The hand-marked spaces are each adjacent to an enemy unit and thus cannot be Retreated into.
[8.0] Optional Rule
The following Optional Rule may be used if all of the players agree to it.
[8.1] Prisoner Exchange Action: You may Exchange one of your captured Regular units (Mounted units cannot be Exchanged) with another player for one of their Regular units that you have captured. After being exchanged, both units are returned to respective owner's Reserve and play passes to the next player. Both players must agree to the exchange.
Thus, it consumes the player's Action that turn for the player who initiated the exchange!
Prerequisites
At least two of your units must be captured AND you must have at least one opposing unit belonging to the player you wish to Exchange Prisoners with in your Captured Pile (see 7.0) in order to initiate or participate in a Prisoner Exchange.
Editor's notes on the source: the printed table of contents lists "[9.0] Designer's Notes ... IFC" (inside front cover), and this document contains no section 9.0 text, so none is transcribed. The source also has no section 7.2 (numbering runs 7.0, 7.1, 7.3). The Credits block is omitted. The game's example diagrams are reproduced only as their captions, with the printed icon marks described in words (smiley-face and hand marks).