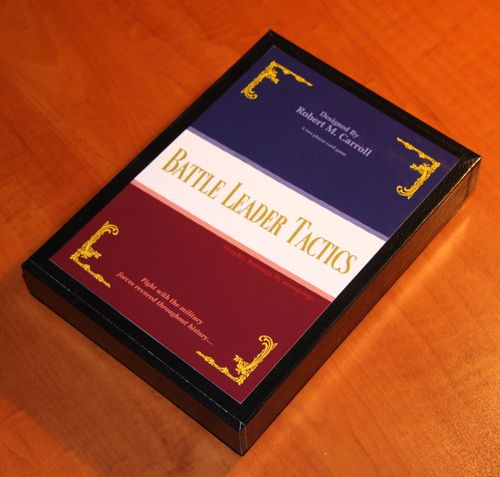
Battle Leader Tactics
Battle Leader Tactics Rulebook
Table of Contents
Table of Contents
Components
-
21 Leader Cards a. Cyrus the Great 590-529 b. Alexander the Great 356-323 c. Hannibal 247-183 d. Julius Caesar 100-44 e. Atilla the Hun 406-453 f. Charlemagne 742-814 g. Saladin 1138-1193 h. Genghis Kahn 1167-1227 i. Tamerlane 1336-1405 j. Suleiman the Magnificent 1494-1566 k. Gustasvus Adolphus 1594-1632 l. Frederick the Great 1712-1786 m. George Washington 1732-1799 n. Napoleon 1769-1821 o. Simon Bolivar 1783-1830 p. Shaka 1787-1828 q. Robert E. Lee 1807-1870 r. Ulysses S. Grant 1822-1885 s. George Patton 1885-1945 t. Dwight D. Eisenhower 1890-1969 u. Vo Nguyen Giap 1912-
-
24 Tactics Cards (12 for each player) a. Infiltration [1] – Allows for attempt to KIA a Leader and draw a Special Army Card b. Stand & Defend [2] c. Frontal Assault [3] d. Withdraw [4] – Only have to commit one (1) Army Card and can replace a played Tactics Card e. Skirmishers [5] f. Enfilade Right [6] – Requires use of at least one (1) Cavalry Card g. Enfilade Left [7] – Requires use of at least one (1) Cavalry Card h. Double Envelopment [8] – Requires use of at least one (1) Cavalry Card i. Refuse Left [9] j. Refuse Right [10] k. Refuse Center [11] l. Bombard [12] – Requires use of at least one (1) Artillery Card
-
28 Army Cards (14 card deck for each player) a. 2 Militia – Combat Value = 0 b. 6 Infantry – Combat Value = 1 c. 3 Cavalry – Combat Value = 3 d. 1 Guard – Combat Value = 4 e. 2 Artillery – Combat Value = 5
-
10 Special Army Cards a. Sacred Band – Combat Value = 2 (Infantry) b. War Chariots – Combat Value = 2 (Cavalry) c. 300 Spartans – Combat Value = 3 (Infantry/Guard) d. War Elephants – Combat Value = 4 (Cavalry) e. Mechanized Infantry – Combat Value = 5 (Infantry/Cavalry) f. Panzer Army Afrika – Combat Value = 6 (Cavalry) g. Attack Helicopters – Combat Value = 7 (Cavalry) h. Jet Fighters – Combat Value = 8 (Cavalry/Artillery) i. Missiles – Combat Value = 10 (Artillery) j. Weapons of Mass Destruction – All/KIA as on TRC (Artillery)
-
1 Tactics Results Chart (TRC)
-
1 Rules Booklet
-
1 Leader Card Explanation Sheet
Setup
- Each player takes one set of Tactics Cards (12) and Army Cards (14).
- Place the Tactics Results Chart (TRC) in between the players in full view.
- Shuffle the Leader Cards (21) and deal out one (1) Leader Card to each player. That Leader Card represents each player's starting Leader. Place the remaining Leader Cards face down near the TRC (the Leader Deck).
- Shuffle the Special Army Cards and place them face down near the TRC (the Tech Deck).
Area of Play
- Battlefield – the area where each player places their chosen Tactics Card and commits their Army Cards to Battle.
- Leader Deck – pool of available Leader Cards.
- Killed in Action (KIA) Pile – the place where Leader Cards are discarded. Once discarded (either by a KIA result on the TRC, the loss of Guard Army Card or by a player during Command Phase), Leader Cards cannot re-enter the game.
- Battle Orders – each player's deck of available Tactics Cards based on the highest Tactics rating of the current Leader Card. For example, if a Leader has a Tactics rating of 8, he can use any Tactics Card from Infiltration [1] to Double Envelopment [8].
- Reserves – the Army Cards not currently used in Battle. Every Leader can use any of the Army Cards in Reserves or drawn from the Tech Deck (e.g., Shaka can use Bombard [12]).
- Casualty Pile – the place where losses (as determined by the TRC) are discarded face up. Each player has a Casualty Pile and may only draw from their pile when using a Leader's ability during the Muster Phase.
- Tech Deck – pool of available special Army Cards. A player may draw from the Tech Deck each time he/she uses the Infiltration [1] Tactics Card.
Goal
A game of BLT consists of 10 Battles. A player wins if he/she:
- is the first to win 6 Battles, or
- has the most Army Cards in their Reserves after 10 Battles (if neither player has won 6 Battles), or
- has the highest ranked Leader in play (if neither player has won 6 Battles and both players have the same number of Army Cards in Reserves after 10 Battles).
Turn (Battle)
-
Command: Each player may choose to keep their current Leader or discard him. If you choose to discard the Leader Card, then draw a new Leader Card from the Leader Deck and reduce that Leader's Army Size by one (1) [-1 Army Size] for the current turn only. If you lost a Leader due to a KIA result from the previous Battle or due to the loss of a Guard Army Card, you draw a new Leader during the Command Phase. There is no penalty if you are drawing a new Leader due to a KIA result from a previous Battle or from the loss of a Guard Army Card.
-
Muster: Each player may choose to use the Leader's Bonus (if available) of drawing any card from that player's Casualty Pile, but may not use any other bonuses during that turn. Note: This phase is more important in a longer game (see variants below).
-
Initiative: The player with the highest ranked Leader in play declares which player will be the Attacker and which player will be the Defender for the current turn (Battle).
-
Tactics: Each player chooses a Tactics Card and places it face down on their side of the Battlefield.
-
The Attack: Attacker chooses at least two (2) Army Cards (unless Withdraw [4] is selected) that he/she wants to commit to Battle and places them face down on his/her side of the Battlefield. The number of Army Cards cannot exceed the Army Size listed on the Leader Card. If the Attacker does not have enough Army Cards to commit to Battle (one (1) with use of the Withdraw [1] Tactics Card or two (2) with the use of all other Tactics Cards), then he/she automatically losses the Battle.
-
Defender Withdrawal: Defender may change his/her Tactics Card and replace it with Withdraw [4] and only needs to choose one (1) Army Card to commit to Battle.
-
The Defense: Defender chooses at least two (2) Army Cards (unless Withdraw [4] is selected) that he/she wants to commit to Battle and places them face down on his/her side of the Battlefield. The number of Army Cards cannot exceed the Army Size listed on the Leader Card. If the Defender does not have enough Army Cards to commit to Battle (one (1) with use of the Withdraw [1] Tactics Card or two (2) with the use of all other Tactics Cards), then he/she automatically losses the Battle.
Special Cards
-
Infiltration [1] Tactics Card – When used, the player may choose to either: (a) remove an opponent's Leader (upon a KIA result) or (b) prevent the removal of his/her Leader (upon a KIA result). The player may also draw one (1) Special Army Card from the Tech Deck and place it in his/her Reserves. If both players select Infiltration [1], then the player with the highest ranked Leader chooses whether to prevent removal (i.e., save the Leader and ignore the KIA result) or let the Leader be removed. If the player with the highest ranked Leader decides to save his/her Leader, then there is no attempt to remove the opponent's Leader. However, if the player with the highest ranked Leader decides to let his/her Leader be removed, then the opponent must decide whether to prevent removal (i.e., save the Leader and ignore the KIA result) or let his/her Leader be removed. Note: This provides another avenue for removing unwanted Leaders without incurring the penalty to draw new Leaders during the Command Phase.
-
Withdraw [4] Tactics Card – When selected, the player needs only to commit one (1) Army Card to Battle, rather than the normal two (2) Army Cards. A player may replace any played Tactics Card with the Withdraw [4] Tactics Card during Attacker/Defender Withdrawal phase and remove one (1) Army Card back to his/her Reserves (Attacker Withdrawal Phase).
-
Leader Bonuses – If a Leader has a bonus that allows drawing from the Casualty Pile, then the player may draw that number of Army Cards from his/her own Casualty Pile during the Muster Phase. If a Leader has a bonus that modifies an Army Card (e.g., +1 Infantry, +2 Cavalry, etc.), then the player may add that modifier to the Combat Value of any Army Card committed to Battle meeting that criteria. Leader may only use one (1) bonus during a turn, however, the modifier affects all Army Cards meeting the criteria.
-
Cavalry Army Cards – In order to use Enfilade Right [5], Enfilade Left [6] or Double Envelopment [8], a player must commit at least one (1) Cavalry Army Card to the Battle.
-
Artillery Army Cards – In order to use Bombard [12], a player must commit at least one (1) Artillery Army Card to the Battle.
-
Guard Army Cards – If this Army Card is discarded from play, then the player must discard his/her current Leader.
Variants
-
Chosen for Command: If the players are of unequal skill, select a higher ranked Leader for the lower skilled player and a lower ranked Leader for the higher skilled player to start the game.
-
Open Draft: At the start of the game, conduct a draft whereby each player selects the Leaders from the pool of 21 Leader Cards. Then each player shuffles their selected Leader Cards and uses those decks as the only available Leaders for the game.
-
Pool of Leaders: At the start of the game, conduct a draft whereby each player selects the Leaders from the pool of 21 Leader Cards. Set a cap on the total value of the ranks of the Leaders (e.g., 40) and use that pool of drafted Leaders as the only available Leaders for the game. You can choose to have the players randomly pull from their own Leader Deck or freely select their Leaders during the game. If a player cannot field a Leader at the outset of a Battle, then the other player automatically wins the game. Note: This variant strengthens the utility of the Infiltration [1] Tactics Card.
-
100 Years War: You can play a longer game by increasing the total number of Battles and the target number of Battles to win--for a 12 Battle game the target is 7 and for a 15 Battle game the target is 8. Also, if a player cannot field a Leader at the outset of a Battle, then the other player automatically wins the game. Note: The longer games tend to be more of a resource (Army Cards) management game.
-
Underdog: For any Battle won by a lower ranked Leader, that player gains the difference in rank as Victory Points. If a player reaches 30 Victory Points, he/she automatically wins the game.
-
El Cid: If a Leader dies in combat (either by a "KIA" result or a Guard Army Card being discarded), a player may still use that Leader's modifying bonus (if available) for Battle.
-
Blind Draw: Each time an Army Card goes to the Casualty Pile, shuffle the pile and place it face down. During the Muster Phase, a player using a Leader's bonus draws randomly from the Casualty Pile.
-
"Run Away!": If Withdraw [4] is selected, your Leader can choose to be immune to the effects of the Infiltration [1] (i.e., he may ignore a KIA result). Note: This variant strengthens the utility of the Withdraw [4] Tactics Card.
Example of Play
Editor's note: steps 5 and 7 of the Turn sequence print "Withdraw [1]" where the Tactics Card is Withdraw [4] (see Components and Special Cards); this is transcribed as printed. In the Sixth Battle example the Defense line names "Hannibal" where Atilla the Hun is the Defender; this is also transcribed as printed.
To start the game Ben draws Tamerlane and Robert draws George Washington.
FIRST BATTLE: Command – both Ben and Robert decide to keep their Leaders Muster – no cards in Casualty Pile, yet Initiative – Tamerlane has a higher rank at 13 compared to George Washington at 10 and chooses Defender for the First Battle Tactics – Ben chooses Enfilade Left [7] and Robert chooses Double Envelopment [8] (both face down/hidden). Both Tactics require that the player commit a Cavalry Army Card. Note: Tamerlane can only choose Tactic Cards numbered [8] or lower (e.g., he cannot use Refuse Left [9], Refuse Right [10], etc.) and Washington can only choose Tactic Cards numbered [10] or lower. The Attack – Washington places 3 Army Cards face down (1 Artillery and 2 Cavalry), which equals the maximum cards he can commit based on his Attack Army Size of 3. Defender Withdrawal – Tamerlane will proceed with his Enfilade Left [7] (no change of Tactics Card) The Defense – Tamerlane places 3 Army Cards face down (2 Cavalry and 1 Infantry), which equals the maximum cards he can commit based on his Defense Army Size of 3. Attacker Withdrawal – Washington will proceed with his Double Envelopment [8] (no change of Tactics Card) Orders Communicated – both players turn over their Tactics Cards and Army Cards and reveal the selected Tactics and Army Cards Failed Orders – as both players committed the required Cavalry Army Cards, the correct Army Size, and the available Tactics Cards, there were no failed orders The Engagement – consulting the TRC, the Attacker (Washington) must discard 1 Army Card and the Defender (Tamerlane) must discard 2 Army Cards Superior Leadership – Tamerlane with a rank of 13 chooses the first casualty and selects Washington's Artillery Army Card for the Attacker's 1 discard, then Tamerlane chooses 1 Infantry and 1 Cavalry for the Defender's 2 discards. The Artillery Army Card goes to Robert's Casualty Pile and the 1 Infantry and 1 Cavalry Army Cards both go to Ben's Casualty Pile. The Victory – Robert's total Combat Value is 6 (Cavalry 3 + Cavalry 3). Ben's total Combat Value is 8 (Cavalry 3 +1 Tamerlane Leader Bonus + Cavalry 3 + 1 Tamerlane Leader Bonus). Ben wins the First Battle. End Battle – Each player removes any Tactics Cards and Army Cards from the Battlefield and places them in their Battle Orders deck and Reserves pile, respectively.
SECOND BATTLE: Command – both Ben and Robert decide to keep their Leaders Muster – Robert decides to use Washington's Leader Bonus to draw the Artillery Army Card from his Casualty Pile and places it in his Reserves pile Initiative – Tamerlane has a higher rank at 13 compared to George Washington at 10 and chooses Attacker for the Second Battle Tactics – Ben chooses Frontal Assault [3] and Robert chooses Infiltration [1] (both face down/hidden). Note: Robert selects Infiltration [1] because he wants to remove Tamerlane and draw a Special Army Card. The Attack – Tamerlane places 4 Army Cards face down (3 Cavalry and 1 Infantry), which equals the maximum cards he can commit based on his Attack Army Size of 4. Defender Withdrawal – Washington will proceed with his Infiltration [1] (no change of Tactics Card) The Defense – Washington places 2 Army Cards face down (2 Militia), which is the minimum number of Army Cards a player must commit, unless he choose Withdraw [4]. Washington could have committed 4 Army Cards to the Battle as that is his maximum Defense Army Size. Note: Looking at the TRC, Robert knows that the player using Infiltration [1] typically suffers casualties and decides to limit those losses to 2 by only committing 2 Army Cards. Attacker Withdrawal – Tamerlane will proceed with his Frontal Assault [3] (no change of Tactics Card) Note: Tamerlane should have smelled a rat and suspected that Washington was trying an Infiltration [1] by only committing 2 Army Cards. If the Ben and Robert were using the "Run Away!" Variant, then Ben could have selected Withdraw [4] and protected Tamerlane. Orders Communicated – both players turn over their Tactics Cards and Army Cards and reveal the selected Tactics and Army Cards Failed Orders – as both players compiled with the correct Army Size, and the available Tactics Cards, there were no failed orders The Engagement – consulting the TRC, the Attacker (Tamerlane) is KIA (killed in action) and discarded to the KIA Pile and the Defender (Washington) must discard 3 Army Cards; however, he only needs to discard 2 (as that is all he committed to the Battle). Superior Leadership – Washington selects and discards 2 Militia Army Cards for the Defender's 2 discards and they go to Robert's Casualty Pile. The Victory – Robert's total Combat Value is 0 (no surviving Army Cards). Ben's total Combat Value is 7 (Cavalry 3 + Cavalry 3 + Infantry 1). Ben wins the Second Battle. Note: If the Ben and Robert were using the El Cid Variant, then Ben could have still used the Leader Bonus of +1 to Cavalry, and would have had a total Combat Value of 9. End Battle – Each player removes any Tactics Cards and Army Cards from the Battlefield and places them in their Battle Orders deck and Reserves pile, respectively. Robert draws 1 Special Army Card from the Tech Deck and gets 300 Spartans and places it in his Reserves pile.
THIRD BATTLE: Command – Ben needs a new Leader and draws Cyrus the Great. Robert decides to try his luck with new leader and draws Vo Nguyen Giap. Robert will have a -1 Army Size Penalty for this Battle. Washington is discarded to the KIA Pile. Muster – Ben decides to use Cyrus' Leader Bonus to draw 1 Cavalry Army Card from his Casualty Pile and places it in his Reserves pile. Robert decides to use Giap's Leader Bonus to draw 1 Militia Army Card from his Casualty Pile and places it in his Reserves pile. Note: Robert cannot use Giap's Leader Bonus of +1 to Combat Value of Militia Army Cards for this Battle. Initiative – Cyrus has a higher rank at 15 compared to Giap at 4 and chooses Defender for the Third Battle Tactics – Ben chooses Skirmishers [5] and Robert chooses Enfilade Right [6] (both face down/hidden). The Attack – Giap places 2 Army Cards face down (1 Cavalry and the 300 Spartans Special Army Card), which equals the maximum cards he can commit based on his Attack Army Size of 3 minus the 1 Army Size Penalty for selecting a new Leader for this Battle. Defender Withdrawal – Cyrus will proceed with his Skirmishers [5] (no change of Tactics Card) The Defense – Cyrus places 4 Army Cards face down (2 Cavalry and 2 Artillery), which equals the maximum cards he can commit based on his Defense Army Size of 4. Attacker Withdrawal – Giap will proceed with his Enfilade Right [6] (no change of Tactics Card) Orders Communicated – both players turn over their Tactics Cards and Army Cards and reveal the selected Tactics and Army Cards Failed Orders – as both players compiled with the correct Army Size, the available Tactics Cards, and Robert committed the required Cavalry Army Card (for the Enfilade Right [6] Tactic Card), there were no failed orders The Engagement – consulting the TRC, the Attacker (Giap) must discard 1 Army Card. Superior Leadership – Cyrus with a rank of 15 chooses the first casualty and selects the 300 Spartans Special Army Card for the Defender's 1 discard, which goes to Robert's Casualty Pile. As the 300 Spartans are treated as a Guard Army Card, then Giap must be discarded to the KIA Pile. The Victory – Robert total Combat Value is 3 (Cavalry 3). Ben's total Combat Value is 16 (Cavalry 3 + Cavalry 3 + Artillery 5 + Artillery 5). Ben wins the Third Battle. End Battle – Each player removes any Tactics Cards and Army Cards from the Battlefield and places them in their Battle Orders deck and Reserves pile, respectively.
FOURTH BATTLE: Command – Ben decides to keep Cyrus. Robert needs a new Leader and draws Gustavus Adolphus. Muster – Ben decides to use Cyrus' Leader Bonus to draw the Infantry Army Card from his Casualty Pile and places it in his Reserves pile Initiative – Cyrus has a higher rank at 15 compared to Adolphus at 12 and chooses Defender for the Fourth Battle Tactics – Ben chooses Infiltration [1] and Robert chooses Infiltration [1] (both face down/hidden). The Attack – Adolphus places 2 Army Cards face down (1 Militia and 1 Infantry), which is the minimum number of Army Cards a player must commit, unless he choose Withdraw [4]. Adolphus could have committed 3 Army Cards to the Battle as that is his maximum Attack Army Size. Defender Withdrawal – Cyrus will proceed with his Infiltration [1] (no change of Tactics Card) The Defense – Cyrus places 2 Army Cards face down (2 Militia), which is the minimum number of Army Cards a player must commit, unless he choose Withdraw [4]. Cyrus could have committed 4 Army Cards to the Battle as that is his maximum Defense Army Size. Attacker Withdrawal – Adophus will proceed with his Infiltration [1] (no change of Tactics Card) Orders Communicated – both players turn over their Tactics Cards and Army Cards and reveal the selected Tactics and Army Cards Failed Orders – as both players compiled with the correct Army Size, and the available Tactics Cards, there were no failed orders The Engagement – consulting the TRC, the Attacker (Adolphus) would be KIA (killed in action) and discarded to the KIA Pile and the Defender (Cyrus) would be KIA (killed in action) and discarded to the KIA Pile. Ben, with the higher ranked Leader, decides first whether to prevent Cyrus' removal or proceed with Adolphus' removal. Ben decides to proceed with Adolphus' KIA. Then, Robert can decide whether to prevent Adolphus' removal or proceed with Cyrus' removal. Robert decides to proceed with Cyrus' removal. Note: If Robert had decided to prevent Adolphus' removal, there would have been no KIA result for Cyrus and vice versa. Superior Leadership – there are no casualties to select The Victory – Neither side wins the Fourth Battle End Battle – Each player removes any Tactics Cards and Army Cards from the Battlefield and places them in their Battle Orders deck and Reserves pile, respectively. Robert draws 1 Special Army Card from the Tech Deck and gets Jet Fighters and places it in his Reserves pile. Ben draws 1 Special Army Card from the Tech Deck and gets War Elephants and places it in his Reserves pile.
FIFTH BATTLE: Command – Ben needs a new Leader and draws Napoleon Bonaparte. Robert needs a new Leader and draws Hannibal. Muster – neither player decides to draw cards from their Casualty Pile Initiative – Napoleon has a higher rank at 18 compared to Hannibal at 16 and chooses Attacker for the Fifth Battle Tactics – Ben chooses Bombard [12] and Robert chooses Frontal Assault [3] (both face down/hidden). The Attack – Napoleon places 5 Army Cards face down (1 Artillery, 1 Cavalry, 2 Infantry and the War Elephants Special Army Card), which equals the maximum cards he can commit based on his Attack Army Size of 5. Note: He needed to commit at least 1 Artillery Army Card to support his selection of Bombard [12]. Defender Withdrawal – Hannibal will proceed with his Frontal Assault [3] (no change of Tactics Card) The Defense – Hannibal places 3 Army Cards face down (1 Cavalry, 1 Guard Army Card and the Jet Fighters Special Army Card), which equals the maximum cards he can commit based on his Defense Army Size of 3. Attacker Withdrawal – Napoleon will proceed with his Bombard [12] (no change of Tactics Card) Orders Communicated – both players turn over their Tactics Cards and Army Cards and reveal the selected Tactics and Army Cards Failed Orders – as both players compiled with the correct Army Size, the available Tactics Cards, and Ben committed the required Artillery Army Card (for the Bombard [12] Tactic Card), there were no failed orders The Engagement – consulting the TRC, the Attacker (Napoleon) must discard 3 Army Cards and the Defender (Hannibal) must discard 1 Army Card. Superior Leadership – Napoleon with a rank of 18 chooses the first casualty and selects the Guard Army Card for the Defender's 1 discard, which goes to Robert's Casualty Pile, and then Hannibal must be discarded to the KIA Pile. Then Napoleon chooses 2 Infantry and 1 Cavalry for the Attacker's 3 discards. The 2 Infantry and 1 Cavalry Army Cards go to Ben's Casualty Pile. The Victory – Robert total Combat Value is 10 (Cavalry 3 + Jet Fighters 7). Ben's total Combat Value is 12 (Artillery 5 + 3 Napoleon's Leader Bonus + War Elephants 4). Ben wins the Fifth Battle (his 4th win). Note: If the Ben and Robert were using the El Cid Variant, then Robert could have still used the Leader Bonus of +2 to Cavalry, and would have had a total Combat Value of 14 (Cavalry 3 + 2 Hannibal Leader Bonus + Jet Fighters 7 + 2 Hannibal Leader Bonus), and would have won the Battle. End Battle – Each player removes any Tactics Cards and Army Cards from the Battlefield and places them in their Battle Orders deck and Reserves pile, respectively.
SIXTH BATTLE: Command – Ben decides to keep Napoleon. Robert needs a new Leader and draws Atilla the Hun. Muster – neither player decides to draw cards from their Casualty Pile Initiative – Napoleon has a higher rank at 18 compared to Atilla at 17 and chooses Attacker for the Sixth Battle Tactics – Ben chooses Bombard [12] and Robert chooses Frontal Assault [3] (both face down/hidden). The Attack – Napoleon places 5 Army Cards face down (1 Cavalry, 3 Infantry and the War Elephants Special Army Card), which equals the maximum cards he can commit based on his Attack Army Size of 5. Note: He needed to commit at least 1 Artillery Army Card to support his selection of Bombard [12]. Defender Withdrawal – Atilla decides to replace the Frontal Assault [3] with Withdraw [4] The Defense – Hannibal places 1 Army Card face down (1 Militia), which equals the minimum number of Army Cards he needs to commit based on his use of Withdraw [4] Attacker Withdrawal – Napoleon will proceed with his Bombard [12] (no change of Tactics Card) Orders Communicated – both players turn over their Tactics Cards and Army Cards and reveal the selected Tactics and Army Cards Failed Orders – as Napoleon failed to commit an Artillery Army Card, his Tactics Card is changes to Stand and Defend [2] The Engagement – consulting the TRC, there are no casualties and No Victor Superior Leadership – there are no casualties to select The Victory – Neither side wins the Sixth Battle End Battle – Each player removes any Tactics Cards and Army Cards from the Battlefield and places them in their Battle Orders deck and Reserves pile, respectively.
. . . and the Battles rage on . . .