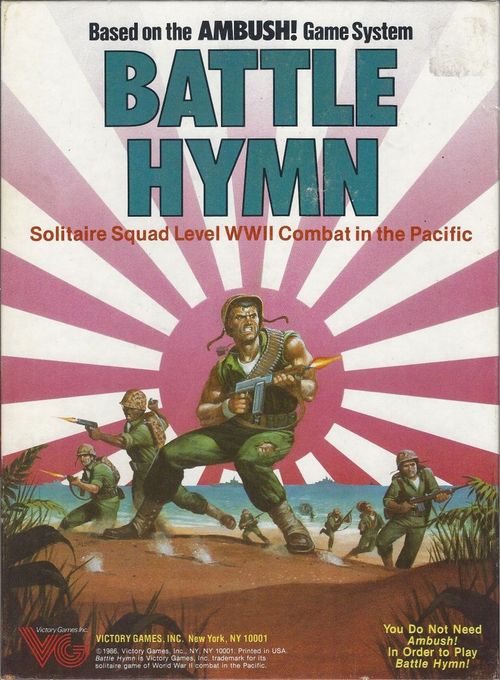
Battle Hymn
Battle Hymn Rulebook
Table of Contents
Table of Contents
- 1. Introduction
- 2. Game Parts and Terms
- 3. Course of Play
- 4. Squad Generation
- 5. Operations
- 6. Action Rounds
- 6.1 ACTION SEQUENCE
- 6.2 ACTIVATING JAPANESE SOLDIERS
- 6.3 COMMAND AND COMMANDERS
- 6.4 PANIC
- 6.5 US SOLDIER AWARENESS
- 6.6 JAPANESE ACTIVATION DURING ROUNDS
- 6.7 PERFORMING ACTIONS DURING ROUNDS
- 6.8 JAPANESE ACTIONS
- 6.9 JAPANESE ACTION PARAGRAPH EXAMPLES
- 6.10 JAPANESE ACTIVATION WHEN US SOLDIERS HAVE YET TO ENTER
- 6.11 CONDITION CHANGES DURING ROUNDS
- 7.0 Movement
- 8. Line of Sight
- 9. Fire Combat
- 10. Grenade/Satchel Charge Combat
- 11. Assault Combat
- 12. Banzai Charges
- 13. Minefields and Boobytraps
- 14. Damage
- 15. Special Terrain
- 16. Captured Equipment
- 17. Victory
- 18. Campaign
- 19. Vehicles
- 19.1 VEHICLE ATTRIBUTES
- 19.2 VEHICLE FACING
- 19.3 VEHICLE MOVEMENT DURING OPERATIONS
- 19.4 VEHICLE MOVEMENT DURING ROUNDS
- 19.5 DRIVERS, PASSENGERS AND CREW
- 19.6 FIRE COMBAT AGAINST VEHICLES
- 19.7 VEHICLE FIRE COMBAT
- 19.8 JAPANESE VEHICLE PARAGRAPHS
- 19.9 ACCIDENT CHECKS
- 19.10 VEHICLES, MINEFIELDS AND BOOBYTRAPS
- 19.11 VEHICLES, GRENADES AND SATCHEL CHARGES
- 20. Hidden Targets (Optional)
- 21. Hints and Reminders
- Mission 1: Boomerang
- Mission 2: Hit and Run
- Mission 3: In Reserve
- Mission 4: Pick-Up and Delivery
- Mission 5: Stretched Thin
- Mission 6: Rear Guard
- Mission 7: Bloody Nose Ridge
- Mission 8: In Hot Pursuit
- Vehicle Summaries
- Scatter Diagrams
- Counter Identification Summary
1. Introduction
Games Questions
If you have questions about the rules, feel free to write to us. When you do, please word your questions so that we can respond with a simple one-word answer whenever possible, and include a self-addressed, stamped envelope. This will ensure a quick and precise answer to your questions. Mail them to:
Battle Hymn Questions Victory Games, Inc. 43 West 33rd Street New York, New York 10001
2. Game Parts and Terms
Some of the terms and ideas mentioned in the following rules will not make much sense until you have read the rest of the rules. Simply refer back to this section later, once you have finished reading the rules.
2.1 Japanese Soldier and Vehicle Cards
Each Japanese soldier (or group of soldiers) and vehicle that might appear in any of the Missions has its own card listing its characteristics and possible actions. When a Japanese soldier is activated, pull his card from the deck and place it in front of you for easy reference. Keep the card there until the soldier is killed, is incapacitated, or exits the map.
Number. The number identifies each character and vehicle card individually.
Identity Letter. A letter from L through Z (omitting O, because it looks like a zero) appears on each card, matching a soldier or vehicle counter to show the Japanese on the map. Each letter appears on more than one card, but a letter never appears more than once in a particular Mission.
Type. A simple description on each card indicates the Japanese soldier's primary role or characteristic. Types include such things as officer, sniper, and driver.
Activation Victory Point Award. Each card features a number indicating the number of Victory Points you receive when that Japanese soldier or vehicle is activated, regardless of what may happen later.
Conditional Victory Point Award. Some cards include a number of Victory Points you receive if something specific (identified on the card) happens to that particular Japanese soldier or vehicle.
Weapons. All the equipment a soldier carries is specified on his card. Each Japanese uses his equipment as indicated in the paragraphs.
Characteristics. Each soldier is rated in four areas: Initiative; Perception; Weapon Skill; and Movement Point Allowance. Some Japanese also have a Driving Skill rating. Some vehicle cards feature a range of ratings, depending on the current status of the vehicle and its crew. See 2.10 for explanations of each characteristic.
Action Table. This matrix is used to determine what Actions a Japanese soldier undertakes each time he gets a Turn. Usually the result of a die roll is cross-referenced with the current Mission Condition (1 through 6) to yield an Action Paragraph describing the soldier's or vehicle's maneuvers. Sometimes, however, a Special Reaction or Self-Preservation (both indicated by letters on the Action Table) may be in effect for a particular Japanese, in which case the die roll is cross-referenced with the appropriate letter column instead.
Notes. Many soldiers have instructions specifying what each does when first activated or when other situations arise during play. Read these notes carefully.
2.2 View Sleeve and Mission Cards
The Mission Cards present, in scrambled form, all of the paragraph references needed to play each Mission. The sleeve enables you to find those paragraphs you need without letting you see what else the Mission might have in store for you. Each Mission is played using one, two, or three Mission Cards, read one at a time in the View Sleeve. Each Mission Card is clearly identified by Mission Number and Mission Condition Number. At the start of a Mission, place the Mission Condition 1 card for that Mission into the View Sleeve with the Condition 1 side facing the slots. Refer to the Card in the Sleeve each time a Paragraph Check is triggered by a US soldier entering a hex, then you must conduct an Event Check, and each time you must move a Japanese counter.
When a US soldier enters a hex, look up the paragraph number by aligning the hex number on the Sleeve with the hex letter on the Card in the window. If a black paragraph number appears in the slot above or below that number, look up the paragraph in the Paragraph Booklet. If the number is preceded by a Sighting Reference (e.g., s2), and that sighting has already occurred, do not look up the listed paragraph. In some slots, the word Event appears instead of a paragraph number. This means you must conduct an Event Check (see 5.6) if Operations are underway. Event Checks are not triggered by Paragraph Checks during Rounds.
When an Event Check is rolled, line up the die result with the Sleeve with the RE (Random Event) column of the Mission Card. If a paragraph number appears in the appropriate slot, look it up in the Paragraph Booklet. However, if the number is preceded by a Sighting Reference that has already occurred, do not look up the listed paragraph.
When you must move a Japanese counter (6.8), locate the counter occupies by aligning the hex number on the Sleeve with the hex letter on the Mission Card. Read the red hex number for paragraph number that appears in the corresponding slot. If a hex number appears, move the Japanese counter into the indicated hex. If a paragraph number appears, look it up in the Paragraph Booklet to determine how the Japanese moves. In some cases, the words Exit appears, which indicates that the Japanese leaves the map.
As play of a Mission proceeds, a paragraph may tell you to put a new Condition into effect. When this occurs, remove the Mission Card from the Sleeve and flip it over or replace it with the Mission Card for the new Condition.
2.3 THE MISSION MAPS
Each Mission is played on full Map A, or on any combination of Maps A, B, and C, as specified in the Mission Briefings. Map A portrays an island airfield, jungle, and a portion of coast and beach. Half-Map B shows high cliffs with broken jungle cover, and half-Map C portrays the isthmus of an island separated by a high ridge. A hexagonal grid is superimposed over the terrain features on all mapsheets. Each hex has a letter-number coordinate and represents an area 10 meters across. The terrain symbology used on each map is identical. Note that, although more than one type of terrain is often depicted in a single hex to give a more natural look to the map, only the terrain type that fills the majority of the hex is "considered in game terms." Thus, for instance, Map A's hex J-12 is a Jungle hex, despite the fact that a bit of Clear terrain surrounds the predominant Jungle pattern.
When instructed to use Maps A and B, place Map B over Map A so hexes A-1 through A-9 of Map B are the corresponding hexes of Map A. When instructed to use Maps A and C, place Map C over Map A so hexes A-10 through A-19 of Map C are the corresponding hexes of Map A. When using Maps B and C, place the two maps together over Map A, with Map B further from you and Map C closer, being careful not to cover up the Action Round Track and Terrain Key printed on Map A.
In addition to the actual terrain-covered playing area, Map A has the following features.
- The Action Round Track is used during Action Rounds to show the status of each soldier and vehicle — both Japanese and US — that is currently in play. Each soldier and vehicle has an Action Round (AR) marker that is moved from space to space on this track. An AR marker in the Inactive space indicates that the soldier has been killed, incapacitated, or captured. An AR marker in the Unaware space shows that the soldier is active, but does not know what is going on around him. An AR marker in the
Complete space indicates that the soldier has no more Actions to use this Round. An AR marker in a Turn space indicates that the soldier can take one or two Turns in the current Round. AR markers are placed in Turn spaces in either the Advantage or Disadvantage half of the Turn, depending on which side has the Advantage for the current Round.
- The Japanese Action Number Track shows the current Japanese Action Number die roll result during Action Rounds. Each time a new Japanese Action Number is rolled, move the Japanese Action Number marker to the matching space on the track as a reminder.
Note: Because these tracks appear only on Map A, you will find it necessary to place Maps B and C on top of Map A, with the tracks showing, in Missions where Map A is not called for.
2.4 THE PLAYING PIECES
Many of the 218 playing pieces represent US and Japanese soldiers, vehicles, and special equipment, or special terrain features. The rest of the pieces are markers, used to note the status of your squad and the status of the enemy.
Soldiers
US and Japanese soldiers are placed on the map as each enters play. US soldiers are identified by a silhouette and by the letters A through K (omitting the letter I, because it looks like a one); US soldiers J and K may be encountered from time to time during a Mission. Japanese soldiers are identified by a silhouette and by the letters L through X (omitting O, because it looks like a zero). Each soldier is shown in two stances: standing on the front of the counter; and crouching on the back of the counter. The prone stance is indicated by placing a Prone marker atop the soldier counter. The game also features special Banzai Charge markers, representing groups of Japanese that act in ways similar to individual soldiers, and two special individual counters (representing an Australian soldier and a native, which may or may not be encountered at some point during a particular Mission.
Action Round Markers
Each US soldier has several AR markers with his identity number, showing different Initiative (IN) Ratings. At the start of a Mission, place the AR marker with an IN matching the soldier's on the AR Track to note the soldier's status during Action Rounds; do not use the soldier's other AR markers. Each Japanese soldier has one AR marker that is placed on the AR Track, with his IN face-up, when that soldier is activated. A Japanese Action Number marker is also used in the game, in conjunction with Japanese Action Round markers, to serve as a reminder of the current Japanese Action Number during Action Rounds.
Soldier Status Markers
Each soldier counter can represent the soldier either standing (front) or crouching (back). To represent a prone soldier, a Prone marker must be placed on the soldier counter. In combat, various unfortunate conditions can befall a soldier; Wounded, Incapacitated, Killed, and Captured markers are provided to indicate these circumstances as they occur.
Weapons and Equipment
Most personal weapons (soldiers' individual rifles, handguns, and so forth) are not normally represented on the map. Rather, they are represented on a Japanese soldier's card or on the Squad Record Sheet for US soldiers. When such weapons are abandoned for some reason on the map, or when they jam, it may become necessary to place markers. Heavier weapons (such as machineguns) and miscellaneous items (such as satchel charges) are always represented on the map when called for in a Mission. Many weapon counters either indicate a jam or an unprepared state on their backs. These concepts are covered in the rules for various types of combat. There are also several separate jam markers available for use in conjunction with malfunctioning weapons.
Note: Soldiers may be able to carry grenades and knives during some Missions. These weapon types are never represented by counters. Their uses are covered in Grenade/Satchel Charges and Assault Combat, respectively.
Vehicles
Tanks, jeeps, amphibious tractors, trucks, and bulldozers may be made available to one side or another during a given Mission. These vehicle types are all represented by counters that feature a fully functional vehicle on the front, and a disabled vehicle on the back. Other more exotic vehicles — barges, planes, rafts, and even a submarine — are introduced in some Missions subject to special rules (which are spelled out in the Mission Briefings). There are additional markers included that describe possible conditions for a tank, namely a Closed marker (indicating that a tank has its hatches closed) and a Broken Tread marker.
Map Features
Various Missions call for the use of such innocuous terrain markers as huts, roads, and palm tree tops. Soldiers may be unpleasantly surprised by stumbling across such features as minefields, tiger traps, and boobytraps. The results of various types of combat may require the use of fire and rubble markers. The specific instances in which these markers are used are covered in the relevant rules sections. Event markers are placed on the map whenever the word Event appears on the Mission View Sleeve during movement. Such markers represent the possible occurrence of some unforeseen event. The use and ramifications of these markers are covered in the Movement section (7) of these rules.
2.5 THE SQUAD RECORD
At the start of each Mission, record the attributes of your soldiers and note the weapons and equipment they are carrying on a fresh Squad Record Sheet. During the Mission, use the Record Sheet to note gain or loss of equipment, the accumulation or loss of Victory Points, and other Mission information. The Squad Record Sheet is used per Mission.
The completed Squad Record Sheet in this booklet can be used in any of the Missions. However, always use the entire squad as a group, not separately to replace killed soldiers. If you play the Missions as a campaign, you can use this squad to start and then replace any of its killed members with soldiers you generate. When you use the squad to play a Mission other than Mission 1, use the soldiers' characteristics as listed, but not their weapons and equipment. Use the equipment purchase procedure detailed in Squad Generation (4) and apply the limitations listed for the Mission being played.
Each soldier in your squad has his own section on the Record Sheet, identified with his letter. Record the following ratings for each soldier in his own section: Initiative (IN); Perception (PC); Weapon Skill (WS); Driving Skill (DS); and Movement Point Allowance (MPA). Each soldier's section also includes the following:
- Port Boxes provide space to record the weapons and equipment the soldier is carrying. Write the name of each item the soldier is carrying in one of his Port Boxes, depending on the item's size. A soldier cannot carry more items than his Port Boxes allow. However, two soldiers can combine their Port Boxes to carry a crew weapon.
- Ammo Boxes provide space to record the clips, grenades, bazooka rounds, and pistols each soldier carries. Write the name of each separate item in one Ammo Box. A soldier whose Ammo Boxes are full can carry no more of these items. As Ammo Box contents are expended in play, write an X through the Box (9.5).
- Combat Boxes are used only if you are using your squad in a continuing campaign (18). Each time a soldier earns a Combat Point during a Mission, mark one of these Boxes.
- Cost Boxes are used to record the cost, in Squad Points, you spend for each soldier. This value is used when playing the game as a campaign.
- Commander Boxes are checked off for each soldier who is a commander. Leave them blank for those soldiers who are not commanders.
In addition to these information boxes, the following information is noted on the Squad Record Sheet:
- Your squad's overall rating in Squad Points.
- Your squad's equipment rating in Weapon Points.
- The number of Victory Points your squad has earned and lost during the Mission. Keep track of Victory Points with hash marks.
- The current Mission Condition and Activation Levels. Each Mission can have up to six Conditions. Each Condition has an Activation Level that is used to activate Japanese; this Activation Level is recorded in the Activation space at the start of the Mission (5.8). Each time a new Condition comes into effect, fill in all the boxes up to and including the new Condition number.
- Each Mission can have up to 10 different sightings, numbered 0 through 9. When a sighting occurs, check the corresponding numbered box. Thereafter, ignore any paragraph and paragraph references that are preceded by that sighting reference, since the sighting has already occurred. This practice saves time by cutting down the number of Paragraph Checks you have to make.
2.6 US SOLDIER CARDS
Each US soldier that your squad might encounter during a Mission has his own card. Each US card is organized like a soldier's section on the Squad Record Sheet, including an identity letter, and in some cases, special notes about the soldier when in play.
2.7 PARAGRAPH BOOKLET
This manual of paragraphs forms the brains of the game. Do not read a paragraph unless you are specifically directed to do so during a Mission. As your soldiers move around the map and engage in combat, you will be referred to these paragraphs by number.
2.8 CHART REFERENCE SCREEN
All the charts, tables, and summaries referred to in these rules are printed on this screen. The screen is designed to stand upright for easy reference.
2.9 TEN-SIDED DICE
Whenever a die roll is called for, one of the following three types of dice rolls will be indicated:
- Roll one die. Roll either die to obtain a result from 0 (read as a zero, not as 10) through 9.
- Roll two dice. Roll both dice and add the two results together for a result ranging from 0 (two zeroes) through 18 (two nines).
- Roll percentile dice. Declare one die as the tens die, and the other as the ones die. Then roll both dice and read them in order, tens die then ones die, for a result ranging from 0 (two zeroes) through 99 (two nines).
Example: If the tens-die shows a 4, and the ones-dies shows an 8, the result is 48. If the tens-die shows a 0, and the ones-dies shows a 6, the result is 6.
2.10 SOLDIER CHARACTERISTICS
Every US and Japanese soldier is defined by a series of characteristics. Each characteristic has a numerical rating; the higher the rating, the better the soldier's characteristic. These characteristics are used during play to determine what the soldier can and how he will do it. The rules and paragraphs often refer to the characteristics by their abbreviations.
Initiative (IN) A number ranging from 0 through 5, representing the will to act and react. IN is used during each Action Round to determine how many Turns a soldier receives, to determine when he can take his Turns, and to determine when or not he panics. For US soldiers, IN determines whether the soldier is in or out of command, and during squad generation, affects the quality of a soldier's Perception.
Perception (PC) A number ranging from 0 through 9, representing awareness and attention to detail. PC is used to conduct Perception Checks (5.7) as called for in the paragraphs. A PC Check is resolved by rolling one die. If the result is less than or equal to the soldier's PC, he passes the Check and notices something that he would have overlooked had he failed the Check.
Weapon Skill (WS) A number ranging from −2 through +2, representing marksmanship ability and general familiarity with weapons. WS affects a soldier's chance of hitting a target when firing a weapon or when throwing a grenade or satchel charge. It also affects his chance of clearing a jammed weapon and succeeding in an assault.
Driving Skill (DS) A number ranging from 0 through 8, representing a soldier's ability to handle vehicles. DS affects a soldier's chance of having an accident when driving.
Movement Point Allowance (MPA) A number ranging from 3 through 5, representing quickness and reaction time. The maximum number of Movement Points a soldier can spend in a single Movement Action (7.3) equals his Movement Point Allowance.
Command Radius US and Japanese soldiers designated as commanders have a Command Radius of two hexes, representing the ability to lead and inspire nearby soldiers to act. A US soldier with this characteristic is called a commander, and the Cmdr Box in his section on the Squad Record is checked. Japanese commanders are referred to as officers or NCO's (Non-Commissioned Officers) on their cards. A soldier with a Command Radius can help other soldiers stay in command, give Turns to other soldiers, and make other soldiers aware of what is going on (6.3).
The following terms are constantly used, throughout the rules and the paragraphs:
Active. A soldier on the map is active unless he is incapacitated, killed, or captured. A vehicle on the map is active unless it is disabled. Only active soldiers can engage in combat and movement (although you can move captives). Only active vehicles can move and fire (although a tank can be immobilized without becoming inactive).
Inactive. A captured, killed, or incapacitated soldier is inactive. An inactive soldier can be fired upon nor attacked by assault; he is an ineligible target. Inactive soldiers can perform no Actions for the duration of the Mission (although a captive can escape and become active again). An inactive soldier can be run over by a vehicle. A vehicle is active until it is disabled. A disabled vehicle can neither move nor fire for any weapon it may have.
Target. A target is an active soldier or vehicle. An inactive soldier or vehicle cannot be the target of fire or assault combat.
Example: If a hex contains two enemy soldiers — one active and one inactive — you can fire at the active one because he is an eligible target. You cannot fire at the inactive soldier.
When using aimed automatic weapon fire, only active targets in a hex can be hit and increase the Hit Chance (14.6). Inactive soldiers in the same hex have no effect.
Success/Failure. An Activation Check, a Perception Check, or a combat resolution can result in either a success or a failure. Such a Check or resolution can result in your squad and still be termed a success, in the context of the game. In most cases, a die roll of 0 is successful, while a die roll of 9 is always a failure, regardless of modifiers.
3. Course of Play
Battle Hymn is an unusual game because it is played solitaire and, unlike most other wargames, has no Game Turns or Sequence of Play. Although not overtly complex, Battle Hymn uses a game system that may at first throw you. The system is divided into two parts, called Operations and Action Rounds (or Rounds, for short), which toggle back and forth depending on whether or not there are active Japanese on the map. When no active Japanese are present, you are in Operations. While in Operations, you can perform any of the Actions listed in 5.3, in any order you choose, one after the other, without keeping track of Turns, Movement Points, or anything else.
When the movement of one of your soldiers or a Random Event triggers the activation of a Japanese counter, then Operations instantly cease and you immediately begin Action Rounds, proceeding according to the Action Sequence (6.1). Action Rounds are used to divide time into segments, so that movement and combat can be rendered in detail. During Action Rounds, your soldiers and the Japanese can perform the Actions listed in 6.7. If, at the conclusion of an Action Round, there are no active Japanese on the map, Operations immediately resume. The game can switch back and forth between Operations and Action Rounds any number of times during a Mission.
Play Outline
The following outline is a brief summary of the steps involved in playing an entire game of Battle Hymn.
Starting a Mission
Pick a Mission and read the Mission Briefing. If this is your first Mission, locate the Mission Cards marked Mission 1. Otherwise, we recommend that you play the Missions in numerical order. Place the Mission Card marked Condition 1 in the View Sleeve so that the Condition 1 side can be read through the slots. Record the Activation Levels for each Condition on the Condition section of the Squad Record Sheet, using the values assigned in the Mission Briefing. Then assemble your squad using the procedure in Squad Generation (4), or use the pre-generated squad in this booklet. Locate your soldier counters and an Action Round marker for each that lists that soldier's IN. Place each soldier's AR marker on the Unaware space of the Action Round Track in the column corresponding to his IN. Place the Japanese Action Number marker and place it on the Japanese Action Number Track (on any space). You are now ready to begin the Mission.
Commence Operations
Bring your soldiers onto the map, one or more at a time, as instructed in the Mission Briefing. Each time a soldier or group enters a hex containing no Event marker, make a Paragraph Check (5.1) by looking up that hex on the Condition Card in the View Sleeve. If there is a paragraph number printed in black, look it up in the Paragraph Booklet and read it. If the result is Event, place an Event marker and make an Event Check (5.6). If the result is None, continue Operations. If the hex contains no Paragraph Check, no Paragraph Check is made. Continue moving soldiers or groups in any order and direction you choose, making Paragraph Checks for each hex that contains no Event marker. In addition to moving, you can perform any of the other Actions listed in 5.3, although random artillery strikes or Japanese sniper attacks can occur during some Missions. At some point, a Japanese soldier or vehicle will be activated (5.1 or 6.2), at which time Action Rounds commence.
Commence Rounds
When a Japanese soldier or vehicle is activated, Rounds immediately begin. First the Japanese soldier or vehicle counter is placed on the map and its counter is placed on the AR Track in the Complete Sequence. Then the first Round is begun, using the Action Sequence (6.1). During Rounds, your active soldiers can perform any of the Actions listed in 6.7 as you see fit. This includes combat, movement, and other more specialized Actions. The Japanese also perform similar Actions, as directed by their paragraphs. Rounds continue until the last Japanese vehicle or soldier is killed, incapacitated, captured, or leaves the map. Operations then resume, as above.
Mission Ends
Each Mission ends in a different way, as described in the Mission Briefing. Victory is determined at the end of the Mission by totalling the number of Victory Points you gained during the course of the game (as recorded on your Squad Record Sheet) and subtracting from this total the number of Victory Points you have lost. If the resulting total is equal to or greater than the number listed for Victory in the Mission Briefing, you have won. If it is less, you have lost.
Campaign Update
If you are not playing the game as a continuous campaign, skip this step. Otherwise, perform the following steps to prepare your squad for the next Mission, as described in Section 18 (Campaign). Each surviving member of your squad, including incapacitated members, then gains Combat Points. At your option, you can spend each soldier's Combat Points to increase his ratings. Finally, generate replacement soldiers to take the place of those killed during the Mission.
4. Squad Generation
To generate your own squad, you will need a Squad Record Sheet and a piece of scrap paper to keep track of Squad and Weapon Points as you spend them. The following procedure is used only to generate a new squad. If you are playing the game as a campaign, use the procedure in Section 18 to generate replacement soldiers.
Regardless of whether or not you are generating a new squad, read the Mission Briefing first. Some Missions list equipment you receive without cost, or list limits on equipment purchases. Knowing your Mission will also help you make decisions during Squad Generation.
1. Refer to the Squad Quality Table
Roll one die, and refer to the Table, and record the resulting Squad Points in the Squad Points space of your Squad Record Sheet.
2. Refer to the Weapon Quality Table
Roll one die, add the result to the Squad Quality Table roll, and refer to the Weapon Quality Table. Record the resulting Weapon Points in the Weapon Points space of your Squad Record Sheet.
3. Refer to the Squad Member Cost Chart
Use your Squad Points to purchase your squad members by referring to this Chart. The cost of each soldier depends on his IN rating and whether or not he is a commander. Record each soldier's cost on the Squad Record Sheet. Any Squad Points you do not spend are lost. Once you have made your purchases, record the IN ratings of each soldier in his IN space. If a soldier is a commander, check his Cmdr Box. Record the ratings in descending order (Soldier A should be the commander with the highest IN, while Soldier H should be the soldier with the lowest IN). Give each soldier a name, and record it in the space next to his identification letter. Each soldier's IN determines his Movement Point Allowance (MPA), which should also be recorded on the Squad Record Sheet. Note that a soldier's IN will be used to determine his other characteristics.
4. Refer to the Perception Table
For each soldier individually, refer to this Table and roll one die, cross-referencing the die result with the soldier's IN to determine his PC rating. Record the rating in that soldier's PC space on the Squad Record Sheet.
5. Refer to the Weapon Skill Table
For each soldier individually, refer to this Table, roll one die, and add the soldier's IN to the die result. Locate the result on the Weapon Skill Table to determine his WS. Record the rating in that soldier's WS space on the Squad Record Sheet.
6. Refer to the Driving Skill Table
For each soldier individually, refer to this Table, roll one die, and add the soldier's IN to the die result. Locate the result on the Driving Skill Table to determine his DS. Record the rating in that soldier's DS space on the Squad Record Sheet.
7. Refer to the Equipment Cost Chart
Spend your Weapon Points to buy weapons for your squad, subject to any restrictions imposed by the Mission instructions. Each weapon has a cost in Weapon Points, and each weapon comes with a free ammo clip when it is purchased.
Each weapon, except with a pistol, takes up 1, 2, or 3 Port Boxes for the soldier carrying it. A weapon is carried by writing its name in one of the soldier's Port Boxes. If a weapon requires more than one Port Box, write its name in both Port Boxes. A soldier can never carry more than two Port Boxes worth of weapons. In the case of a three-Port Box weapon (such as a medium machinegun), one soldier must carry two of the three boxes and another soldier must carry one.
Each clip of ammunition, bazooka round, grenade, and pistol takes up one Ammo Box. Record each such item with an abbreviation (such as P for pistol, G for grenade) in the Ammo Boxes. A soldier can never carry more than six Ammo Boxes worth of pistols and ammo. You can buy additional ammo for the costs listed. For one Weapon Point, you get three grenades, and this can be divided among as many as three soldiers. You receive five ammo clips for one Weapon Point. These clips can be used for any types of weapon except bazookas (so, for example, one Weapon Point could buy two pistol clips, one submachinegun clip, and two semi-automatic rifle clips) to be divided among your squad as you see fit. Bazooka rounds cost one Weapon Point each.
After you have bought your equipment and record your purchases on the Squad Record Sheet along with any weapons you may receive in the Mission Briefing.
5. Operations
As long as there are no active Japanese on the map, you are in Operations. During Operations, the passage of time does not affect the Mission. During Operations, you can move your soldiers individually or in groups in any directions that you choose, one hex at a time. There are no Movement Point Costs involved, since movement is always one hex at a time. Soldiers can also conduct any of the Actions listed in 5.3 any number of times and in any order you choose while in Operations.
5.1 PARAGRAPH CHECKS
When a soldier or group of soldiers enters a hex, make a Paragraph Check by cross-referencing the letter and number code for that hex on the Condition Card in the View Sleeve. If the slot reveals the word NONE, there is no effect; continue Operations. If a black paragraph reference is preceded by a sighting reference (e.g., s1), look it up in the Paragraph Booklet and do as instructed. If a black paragraph reference is preceded by a sighting reference (e.g., s1), look up the paragraph only if that particular sighting number has not yet occurred (see 5.4). If it has occurred, ignore the paragraph and return to Operations. Ignore paragraph and hex numbers printed in red (these are used only during Rounds).
Each paragraph you are directed to read includes a statement or series of statements that you then carry out. Some paragraphs describe an occurrence in a straightforward manner.
Example: One paragraph says Your soldier sees a grouping of huts in a small clearing and a road running to the east and west. If you were directed to this paragraph, you would simply place the Hut markers in the designated hexes and go on.
Most paragraphs, however, are a series of conditional statements, requiring that you roll a die, make a choice, or refer to the map in order to determine which part of the statement actually applies to the current situation. Many paragraphs include more than one option. If these are separated by bullets (•), choose the one statement that applies. If the options are numbered (1, 2, etc.), choose the first statement that applies.
If a group of soldiers enters a hex together, only one Paragraph Check is made. Any Perception Checks required by the paragraph are made by the soldier with the highest PC only. This is true whenever more than one US soldier occupies a hex and a Paragraph or Perception Check is called for.
Paragraph Checks are made during Rounds in this same manner. The only difference is that Event Checks are not performed during Rounds; another procedure is used to generate Events during Rounds.
5.2 SOLDIER STANCES
Regardless of whether you are in Operations or Action Rounds, a soldier can be in only one of three stances at a given time: standing; crouching; or prone. When in Operations, you can change a soldier's stance at any time you choose, after conducting any necessary Paragraph Check for the soldier. Place a Prone marker on a prone soldier; otherwise, use the standing or crouching side of the soldier's counter to indicate his current stance. Stance is very important to movement (7), combat (9, .0, 11), and line of sight (8).
5.3 ACTIONS DURING OPERATIONS
Any of your active soldiers can perform any of the following Actions any number of times in any order you wish during Operations.
Movement. A soldier can move from one hex to an adjacent hex if he is crouching or standing. Crouching soldiers crawl when they move, while standing soldiers run as fast as the terrain allows. Prone soldiers cannot move at all. Each time a soldier enters a hex, a Paragraph Check is conducted, unless the hex contains an Event marker. A Paragraph Check is made even if the hex contains other soldiers or has already been entered by a US soldier. If you have already read the paragraph and know what it says, it may be possible to forgo looking it up a second time. Any number of soldiers in the same hex at the same time can move into an adjacent hex together. Each time a group move is performed, only one Paragraph Check is conducted. Each time a group move is performed, any amount of equipment can occupy a hex simultaneously (with the exception of vehicles).
Stance Change. A soldier can change his stance. If a soldier moves into a hex, he cannot change his stance until after any required Paragraph Check is completed.
Pick Up/Exchange Equipment. A crouching or standing soldier can pick up or put down any portable items in his hex. If two or more soldiers are in the same hex, they can exchange any portable items in this manner. A soldier is not taking equipment from an inactive soldier must be crouching.
Drag Inactive Soldier. A standing soldier who has an empty Port Box and is in the same hex with an inactive soldier can drag him into an adjacent hex. If the inactive soldier is incapacitated, roll a die for each hex he is dragged; on a result of zero, he dies. Soldiers can cease dragging an inactive soldier instantly at any time.
Prepare Weapon. A standing or crouching soldier can prepare a weapon that requires preparation before it can be fired. A prepared machinegun remains prepared until it is moved. A prepared bazooka or satchel charge remains prepared until fired or thrown, respectively. Personal weapons need not be prepared to fire.
Clear Jammed Weapon. A standing or crouching soldier can attempt to clear a jammed weapon by rolling on the Clear Jammed Weapon Table. On a result of B, the weapon breaks on any other result, the weapon is cleared.
Move Captured Japanese. A captured Japanese soldier can be moved only during Operations and only by a US soldier occupying the same hex (11.2).
5.4 SIGHTINGS
During Operations, a Paragraph Check may yield a black three-digit number preceded by a sighting reference (e.g., s1). This indicates that a sighting may occur. Generally, each Japanese soldier and vehicle — as well as other items you may encounter — has a sighting reference number. Look up the paragraph, and if it is preceded by a sighting reference, the sighting does occur. Check off the appropriate Sighting Box on your Squad Record Sheet. If the sighting does not occur, do not check off the box.
Important Note: A sighting occurs, and is checked off your Squad Record Sheet, only when you read a paragraph preceded by a sighting reference. Thereafter, when a Paragraph Check reveals a reference to that sighting, do not look it up in the Paragraph Booklet, since the sighting has already occurred.
SIGHTING OCCURRENCE EXAMPLE
882. [s0] Your soldiers look out and see a formation of US fighters flying north to the fighting. Artillery booms off in the distance. The new offensive must be under way.
The fighters are Sighting Number 0. Check off the 0 space on the Sighting Track of the Squad Record Sheet. Any subsequent paragraph references preceded by s0 are disregarded and not read. This includes s0 references on the Event Check section of the Mission Cards.
5.5 CONDITIONS
The narrative of the Mission is directed by changing the Mission Cards in the View Sleeve. These changes are called Condition changes. The events that may occur and the reactions of the Japanese depend on the Condition in progress. All Missions begin in Condition 1 — that is, with the Condition 1 side of the first Mission Card visible through the slots in the View Sleeve. During play, paragraphs or events may instruct you to change the Condition. When the change occurs, change the Mission Card to display the new Condition, and check off the Condition in progress on the Condition Track of your Squad Record Sheet. Finally, remove all Event markers from the map. Conditions always change from a lower number to a higher number, and may sometimes skip numbers. Conditions that are skipped over need never be considered (ignore any reference to them).
When the Condition changes, pause and make Paragraph Checks for each hex occupied by active US soldiers. Make the Check in hex number order, lowest number first. Place Event markers in hexes that call for Event Checks, but do not actually make the Event Check. Make any Paragraph Checks required, and follow their instructions. If a Check causes a Japanese activation, immediately commence Rounds (do not perform Checks for remaining US-occupied hexes). If you check all hexes occupied by US soldiers and no Japanese are activated, return to Operations. If a Condition change occurs during Rounds, use the procedure in 6.11 rather than the preceding.
CONDITION CHANGE EXAMPLE
393. A Japanese river patrol boat suddenly appears. Go to Condition 6.
In complying with the instructions in the paragraph (in this case), replace the current Mission Card with the Condition 6 side of the Card. Then check off the 6 Box on the Condition Track on your Squad Record Sheet as a reminder of which Condition is in progress and which, if any, have been skipped. Make a mental note of the Activation Level for the Condition. Then make Paragraph Checks for each hex occupied by an active US soldier (in hex number order), ignoring Event Checks and placing Event markers as they occur. Complete any instructions called for in the paragraphs, and resume Operations or Rounds, whichever are in progress.
Some paragraphs require a previous sighting in order to be read. If the listed sighting has not occurred, the paragraph reference is ignored. If the sighting has occurred, the paragraph is read and its instructions are followed.
PREVIOUS SIGHTING REQUIRED EXAMPLE
565. s9 required.
- If your radio is manned, see 403 immediately, or see 403 the moment one of your men enters the radio's hex.
- If your radio is broken, no Event.
If Sighting Number 9 has occurred, read the rest of the paragraph and note the rest of the information for future reference. If the sighting has not occurred, there is no Event. In some paragraphs, you are told to do one thing if a specific sighting has occurred, and another thing if that sighting has not occurred. In other paragraphs, a previous sighting requirement is combined with a sighting occurrence so that a sighting occurs only if another sighting has already occurred.
5.6 EVENT CHECKS
Unique occurrences are triggered at random during play by making Event Checks. When a Paragraph Check yields an Event Check, roll two dice and check the Mission Card again by aligning the RE (Random Event) column with the dice result. The corresponding slot will show NONE (indicating that no Event takes place), or a paragraph number, sometimes preceded by a sighting reference. After reading the paragraph and complying with the instructions, place an Event marker in the hex where the Check was triggered. This Event marker indicates that no additional Paragraph or Event Checks are made when a soldier enters that hex. All Event markers are removed from the map when the Condition changes. Some Events will have a sighting reference preceding them. If the listed sighting has occurred, do not look up the paragraph.
5.7 PERCEPTION CHECKS
A Paragraph Check may require a soldier to make a PC (Perception) Check, which represents a chance for that soldier to notice something, usually something important to this Mission or to his own health. To make a Perception Check, roll one die; if the result is equal to or less than the soldier's PC, the Check succeeds; if the result is greater than the soldier's PC, the Check fails. Depending on the paragraph, success or failure of a PC Check may direct you to another paragraph. The soldier's PC may be modified if the paragraph triggering the Check has a modifier listed. A positive modifier increases the soldier's PC rating, thus making the PC Check easier to conduct successfully. A negative modifier reduces the soldier's PC rating, thus making the PC Check more difficult to conduct successfully. Regardless of modifiers, a die roll of 0 is always successful, and a roll of 9 is always a failure.
Certain paragraphs allow soldiers who can see a specific hex to conduct a PC Check, regardless of which soldier the paragraph specified. Unless a paragraph specifically allows all eligible soldiers to conduct PC Checks, only one soldier occupying the hex can make the Check. If the hex contains more than one soldier, use the soldier with the highest PC rating.
Some PC Checks occur only once and will require that you place an Event marker in the hex if your soldier fails the Check. No Paragraph Checks are made for that hex for the duration of the Condition. Thus, no more PC Checks can be made from that hex.
Besides PC Checks triggered by paragraphs, PC Checks can also be triggered by boobytraps (13.1), minefields (13.2), grenade tosses (10.2), and US Awareness Checks during Action Rounds (6.5).
PERCEPTION CHECK EXAMPLE
488. Conduct PC Check (−2):
- If successful, see 325.
- If fails, see 804.
The soldier who entered the hex conducts a PC Check. His PC is reduced by two for purposes of this Check (only). Roll one die; if the result is equal to or less than his modified PC, then read paragraph 325. If greater than his PC, you read paragraph 804.
5.8 ACTIVATION CHECKS
Japanese counters enter play as a result of an Event or Activation Check. Activation Checks are made when called for by a paragraph by rolling a die and comparing it with the Activation Level for the Condition in progress (recorded on the Condition section of the Squad Record Sheet). If the result is equal to or less than the current Activation Level, the specified Japanese counter(s) is activated and Action Rounds begin; if greater than the Activation Level, the specified Japanese counter(s) is not activated.
Some Activation Checks include a modifier that is applied to the Activation Level. A positive modifier makes the Activation Check easier to conduct successfully, while a negative modifier makes it more difficult. A roll of 0 is always a successful activation, and a roll of 9 is always a failure, regardless of modifiers. If the Check is triggered by a group of US soldiers, one Check is made. When a Japanese counter is activated, place the Japanese counter, activate it, and commence Rounds (6.2).
ACTIVATION CHECK EXAMPLE
564. Conduct Activation Check (−1):
- If successful, see 154.
- If failure, see 576.
An Activation Check is made using the current Activation Level reduced by 1. If the die roll result is equal to or less than the Activation Level, then the Check succeeds and you read paragraph 154. If the result is higher, the check fails and you read paragraph 576.
5.9 RANDOM DETERMINATION
Many paragraphs and game procedures require you to make a choice at random. To do so, assign each of the possible choices an equal die roll range and roll a die.
RANDOM DETERMINATION EXAMPLE
181. One Japanese weapon fired in the previous Round is out of ammo. If more than one Japanese weapon was fired in the last Round, determine which one is out of ammo at random.
If three Japanese had fired in the previous Round, Japanese A could be assigned 0, 1, an 2; Japanese B 3, 4, and 5; and Japanese C 6, 7, and 8. One die roll would then determine which Japanese is out of ammo. If a 9 was rolled in this case, roll again.
6. Action Rounds
As you conduct Operations and consult paragraphs, you will at some point read a paragraph that instructs you to activate Japanese soldiers and Commence Rounds. Play immediately switches to Action Rounds upon reading any such paragraph. If such a paragraph is read when Rounds are already underway, see the procedure in 6.6 to activate the new Japanese. You then conduct Rounds until there are no active Japanese soldiers or vehicles on the map, at which point Operations resume. As US soldiers move during Rounds, make Paragraph Checks for each hex entered; ignore, however, any Event messages, since Event Checks occur in a different way during Rounds.
6.1 ACTION SEQUENCE
An Action Round is conducted according to the Action Sequence. However, when Operations are initiated, special procedures must be conducted to activate the Japanese; find his card and place the activated Japanese on the map and his AR marker on the Action Round Track (6.2). Furthermore, during the first two Rounds following initiation of Rounds, special checks must be made to see how quickly each of your soldiers becomes aware of the situation at hand.
The following sequence is conducted once per Round. At the conclusion of the Sequence, the Round is over. If there are still active Japanese on the map, another Round begins. If a Japanese is activated in the course of performing any of the following steps, use the procedures described in 6.6.
1. US Awareness Phase (Rounds 1 and 2 Only)
During this step of the first and second Rounds, each active soldier, on or off the map, must make a PC Check to determine whether or not he becomes aware (6.5). During the first Round, only those soldiers that can see the activated Japanese make PC Checks. During the second Round, all unaware US soldiers, regardless of location, make a PC Check. The AR markers for aware soldiers are placed on the Aware space on the Action Round Track. All active US soldiers become automatically aware at the start of the third consecutive Round.
2. Event Phase (Not Conducted in Round 1)
Conduct one Event Check by rolling two dice and adding the two results together. Locate the sum on the Event column of the Mission Card. This Event Check is resolved in the same way as an Event Check during Operations (5.6); read the paragraph indicated on the Mission Card, unless it is preceded by a sighting reference that has already occurred.
Exception: No Event Check is made during the first Round.
3. Action Round
Initiative Determination. Determine which side has the advantage by rolling two dice and pre-designating one as the Japanese result and one as the US result. The side with the higher result has the advantage for this Round. If the results are equal, advantage goes to the Japanese.
Exception: The paragraph that activates the Japanese and initiates Rounds may state that either one side or the other has the advantage in the first Round; do not roll the dice in this case.
AR Marker Placement. Use the initiative result to determine which space each AR marker will occupy on the AR Track. Locate each side's die roll result on the AR Track in each AR marker's column. Move the AR markers to the two spaces containing their side's die roll result. In the one and two Turn spaces, place the markers in the Advantage and Disadvantage halves according to which side has the advantage for the Round. The location of the initiative die roll will have the following effects:
2 Turns: If the initiative roll is in the 2-Turn space, the soldier receives two Turns in this Round. Place his marker in the Advantage or Disadvantage half, as appropriate.
Exception: A wounded soldier can receive only one Turn; if a wounded soldier receives two Turns, place his marker in the 1-Turn space instead.
1 Turn: The soldier receives one Turn in this Round. Place his marker in the Advantage or Disadvantage half, as appropriate.
Panic: The soldier panics in this Round, regardless of whether he is in or out of command (6.4).
Red Number (applies only to US soldiers): If a die result is printed in red and the soldier is out of command (6.3), he panics instead of receiving any Turns this Round. Place his AR marker in the space containing the red number.
AR markers for soldiers on opposing sides can never occupy the same space on opposing sides. Opposing markers that activate Japanese and initiate Rounds indicate that all aware soldiers on one side or the other automatically receive two Turns in the first Round. If the number of Turns is specified, then the preceding procedure is not conducted in the first Round.
Example: One paragraph indicates that the Japanese receive advantage and two Turns. You need not roll for the Japanese AR marker placement, since they will automatically be placed in the 2-Turn Advantage space.
Important: Members of a crew firing a crew weapon do not necessarily perform Actions in alphabetical order (9.7).
Perform All Soldier Actions. The position of the AR marker on the AR Track indicates the order in which US and Japanese soldiers perform actions. Soldiers in the 2-Turn Advantage space go first; then those in the 2-Turn Disadvantage space; and so forth. If more than one US soldier occupies a space, you can have them go in any order you wish. At the beginning of each Turn in which one or more Japanese can act, roll one die to obtain a new Japanese Action Number (6.8). Japanese that are able to act in the same Turn go in the order of the letters on their Action Round markers.
4. Begin a New Round (If an Active Japanese is on the Map)
If there is still one or more active Japanese on the map, begin a new Round. If there are no active Japanese on the map, return to Operations.
6.2 ACTIVATING JAPANESE SOLDIERS
Action Rounds begin when, during Operations, a paragraph states that a Japanese is activated (see also 5.8). Each activated Japanese will be identified by a number. Locate the Japanese soldier cards with the same identity number and place them in front of you. Next to the identity number on each card is an identity letter for the soldier. Locate the soldier marker with the matching letter and place it in the hex on the map listed in the paragraph. Locate the Action Round marker with the matching letter that shows the Japanese in the Initiative matching that listed on the soldier card, and place the AR marker in the Complete Space of the Action Round Track.
Should a Japanese activation occur during a Round that is already in progress, use the procedure in 6.6. Should activation occur when new hexes who have not yet entered the map, use the procedure in 6.10.
JAPANESE ACTIVATION PARAGRAPH EXAMPLE
192. [s9] Activate Japanese 28 and 29 in hex S-7, crouching.
Commence Rounds. US Advantage. All US soldiers that can see hex S-7 are automatically aware and receive two Turns this Round.
Upon reading this paragraph, check off sighting s9 on the Squad Record Sheet and locate Japanese cards 28 and 29. Cards 28 and 29 indicate (for example) that Japanese X and N, respectively. These two markers are placed in hex S-7, crouching. Locate the AR marker with the matching Initiative that shows the Japanese in the paragraph — as specified on their hypothetical soldier cards — and place both markers in the Complete space of the Initiative Track in column 4.
6.3 COMMAND AND COMMANDERS
Command. When a US soldier's Initiative die result is printed in red, it means that the soldier may panic, if he is out of command. To determine if a soldier is in command, add his IN to the IN Ratings of all other active US soldiers in the hex. If this sum is 5 or more, the soldier is in command. If the total is less than 5, he is out of command and liable to panic. Being in or out of command only affects the chance of a soldier panicking during AR marker placement. It has no effect on a soldier who panics as a result of combat. Japanese soldiers panic only when their Initiative die roll is actually printed in the Panic space (Initiative columns 0 and 1 only) — never as a result of their roll being printed in red.
US Commanders and Panic. A US soldier can be either a commander or a private. A commander has a Command Radius consisting of the hex he occupies and all the hexes within two hexes of the hex he occupies. A commander exerts his IN Rating into all these hexes, as long as he is active, and his IN Rating is added to the IN Ratings of US soldiers occupying those hexes.
Example: A commander with an IN Rating of 4 exerts four Initiative Points into all hexes within two hexes of the hex he occupies. Any US soldiers (including another commander) in any of those hexes can use those four points toward keeping himself in command.
The effects of a Command Radius are reciprocal. That is, a commander can use the IN Ratings of soldiers within his Command Radius to contribute toward keeping himself in command. A commander who panics or is inactive has no Command Radius.
Commanders Giving Turns. While performing Actions during Action Rounds, a commander (either US or Japanese) can give a Turn to another friendly soldier in his Command Radius (even to another commander). When it is the commander's Turn to perform Actions, he can give his Turn to another soldier instead of performing an Action himself. The commander's AR marker is moved down to the 1-Turn or Complete Box as if he had per-formed an Action, and the AR marker for the soldier to whom he gives the Turn is moved up one Turn. This will alter the Turn order, giving that soldier an opportunity to perform an Action earlier than he would had the commander had not turned an extra Turn. Only soldiers occupying the 1-Turn or Complete space can be given a Turn; those in the 2-Turn, Panic, Unaware, or Inactive spaces cannot be given a Turn in this way. A Japanese commander will give a Turn to another Japanese only when one of his action paragraphs explicitly states he is to do so. A wounded soldier can never be given a Turn in this manner.
Commanders and US Awareness. A commander can spend a Turn to make an unaware US soldier within his Command Radius aware. The newly aware soldier's AR marker is then placed in the Complete space. A wounded soldier can never be made aware in this manner.
COMMANDER FUNCTIONS
A is a commander with an IN of 3. The other soldiers in the diagram are privates with IN's of 1 (B), 2 (C), 1 (D), and 2 (E). Soldiers D and E are in command, because they are within two hexes of Commander A, and Soldiers A, D, and E combine their IN's for a total of 6, which is sufficient to keep each of them in command. C is also in command, because his IN combined with A's for a total of 5. B is in command, because he is three hexes from A, and his IN is less than 5. Soldiers D and E were in B's hex, all three would be in command, because their combined IN would be 5.
6.4 PANIC
During the Action Sequence, a Japanese or US soldier is subject to panic if his Initiative die roll is printed in the Panic space in his column on the AR Track. For example (see Track on Map A), a soldier with an IN of 1 panics on a die roll of 1.
If a US soldier is out of command, and the die roll yields a result that is printed in red, he panics. Place his AR marker in the Panic space. If the soldier is in command, he does not panic, and he receives the number of Turns indicated. For example, a US soldier with an IN of 3 panics on a roll of 6, 7, or 8.
A panicked soldier remains immobile until the end of the Round, at which time he must fall prone (if he is not already prone) and his AR marker is placed in the Complete space.
A panicked soldier can be attacked and, if hit, is subject to all the effects of damage. For the additional effects of panic, see 14.1.
6.5 US SOLDIER AWARENESS
When Action Rounds are initiated, you must determine which of your soldiers are immediately aware, and which are unaware, of the most recently activated Japanese. An unaware US soldier can perform Actions during Rounds. An aware US soldier can perform no Actions during Rounds; he remains immobile until he becomes aware. Once a soldier becomes aware, he remains aware throughout Rounds until Rounds are initiated again, following a return to Operations. Japanese soldiers do not check for awareness; once activated, they are automatically aware.
- During the US Awareness Phase of the first Round, after the activated Japanese is placed on the map, each active US soldier that can see the Japanese just activated conducts a PC Check. Those that succeed at this check are aware during the first Round. Those soldiers that fail the check are not aware during the first Round. Place the AR marker of each aware soldier in the unaware space of the AR Track.
- During the US Awareness Phase of the second Round, each active US soldier on the map that is not yet aware — regardless of whether or not he can see any Japanese — conducts a PC Check. Those that succeed at this check are aware during the second Round. Those that fail remain unaware during the second Round.
- During the US Awareness Phase of the third Round, all active US soldiers on the map that are not yet automatically aware become aware, regardless of their location. When Rounds end, and you return to Operations, all US soldiers are again considered unaware and the preceding procedure is used when Rounds commence again.
If Rounds are in progress and an additional Japanese is activated, he has no effect on the awareness of US soldiers. You make no additional Awareness Checks due to the activation of an additional Japanese.
An unaware soldier who is attacked is automatically aware after the combat is resolved. Place his AR marker in the Complete space, unless he is killed or incapacitated.
An aware commander can spend one of his Turns to make an unaware soldier within his Command Radius aware (6.3).
6.6 JAPANESE ACTIVATION DURING ROUNDS
During Action Rounds, additional Japanese may become activated. If activation occurs in the midst of a Round, use the following procedure. Interrupt whatever is happening and place the newly activated Japanese on the map in the space indicated in the activation paragraph. Ignore those parts of the paragraph dealing with advantage and US awareness. If the paragraph states that the Japanese receives two Turns, place his AR marker in the 2-Turn space of the AR Track using the current Japanese advantage/disadvantage result. If the activation paragraph did not specify that the Japanese receives two Turns, then roll a die using the current Japanese Action Number and place the newly activated Japanese's AR marker in that space (again, using the current advantage and disadvantage).
The newly activated Japanese has no effect on the awareness. If all US soldiers are currently aware, they remain aware. If some are unaware, only the Japanese that originated Rounds to commence affects their awareness.
6.7 PERFORMING ACTIONS DURING ROUNDS
During the Action Phase of the Action Sequence, US and Japanese soldiers perform Actions. The order in which soldiers perform actions is determined by the location of their AR markers on the Action Round Track (6.1). When one of your soldiers gets a Turn, you can have him perform one Action or pass. When a soldier passes, simply move his AR marker as if he had performed an Action. All the different kinds of Actions a soldier can perform during Rounds are listed below.
Free Stance Change. An unwounded soldier can, at any point during his Turn, make one free stance change — from prone to crouching or standing; from crouching to prone or standing; or from standing to prone or crouching. Wounded soldiers never receive a free stance change. A soldier without a free stance change must spend one Movement Point to change stance, and thus must perform a Movement Action. However, a free stance change can be combined with a Movement Action (in which case a Movement Point to change stance is spent only when you perform the second stance change). When a soldier enters a hex, a Paragraph Check is made before he can make that stance change (free or otherwise). In addition, there is a special free stance change associated with grenade PC Checks (10.2).
Combat Related Actions
Aimed Fire Once with Personal Weapon. Soldier must be standing or crouching with a personal weapon or a prepared bazooka.
Snap Fire Twice with Personal Weapon. Soldier must be standing or crouching with a personal weapon. The target for each fire can be the same or different, and can occupy the same or different hexes. You cannot snap fire a bazooka.
Aimed Fire with Crew Weapon. Aimed fire with a crew weapon can only be made if the hex contains at least two crouching, active soldiers. Both soldiers simultaneously spend one Turn performing this Action (9.7).
Snap Fire with Crew Weapon. Snap fire with a crew weapon can only be made if the hex contains at least one crouching, active soldier. If the hex contains two or more active soldiers, the weapon can be snap fired twice at a cost of one Action for each of two soldiers. Thus, a crew weapon with two operators could make one aimed fire (see above) or two snap fires at a total cost of two Actions (per soldier). A crew weapon always uses snap fire whenever it is fired by a single soldier. Snap fire greatly increases the chances of a crew weapon jamming (9.4).
Assault. Soldier must be standing in the hex with the enemy soldier (11).
Prepare Satchel Charge. Soldier must be crouching or standing to prepare the satchel charge (10.4).
Throw Satchel Charge. Soldier must be standing to throw the satchel charge. It can be thrown 1, 2, or 3 hexes (10.1).
Prepare and Throw Grenade. Soldier must be standing or crouching in hex with a grenade. If he is crouching, his throw accuracy is poorer (10.1).
Prepare Bazooka. Soldier must be standing or crouching with an unloaded bazooka and a bazooka round (9.8).
Clear Jammed Weapon. Soldier must be standing or crouching with a jammed weapon (9.4).
Remove Live Grenade from Hex. This special Action is performed for Turn and only if the soldier is standing or crouching and passes a PC Check (10.2). It may also involve a special free stance change.
Prepare Crew Weapon. One soldier in the same hex with all parts of the weapon must spend one Action to prepare to fire. It remains prepared until it is moved (9.7).
Movement Related Actions
Move (expend some or all of a soldier's Movement Point Allowance). A crouching soldier can move only one hex (by crawling), which costs all his Movement Points. A standing soldier can move one or more hexes, depending on his Movement Point Allowance and the type of terrain in the hexes he enters.
Move Crew Weapon (expend some or all of two soldiers' Movement Point Allowances). Crew weapons require three Port Boxes to carry. To be moved, two soldiers in the same hex with the weapon must divide its Port Box cost between themselves. They can then move the item separately; however, they must both occupy the same hex to prepare the weapon.
Move/Snap Fire (expend up to half of a soldier's Movement Point Allowance and snap fire personal weapon). A soldier can combine movement and fire combat by spending up to half his Movement Point Allowance (round fractions down) and snap firing his personal weapon (7.3). The order in which movement and fire take place makes no difference.
Move/Charge Assault (expend up to half of a soldier's Movement Point Allowance and charge assault). A soldier can combine movement and assault combat by spending up to half his Movement Point Allowance (round fractions down) and assaulting an enemy soldier before assault. Movement occurs before assault (11.3).
Drag Inactive Soldier One Hex (expend a soldier's entire Movement Point Allowance). The soldier must be standing in the same hex as the inactive soldier, and must have one Port Box empty. The soldier then spends his entire Movement Point Allowance to drag the inactive soldier one hex. Dragging must remain standing. If the inactive soldier is incapacitated, there is a chance he will be killed by the movement. Roll a die; on a die roll of zero the soldier dies. Dragging an incapacitated soldier by vehicle does not cause this risk.
Miscellaneous Actions
Pick Up/Exchange Equipment. A soldier that is standing or crouching can pick up or put down any portable items in his hex. Two soldiers in the same hex can exchange equipment even though only one soldier performs the Action. A soldier that is taking equipment from an inactive soldier must be crouching. Record equipment changes on the Squad Record Sheet so You can pick up and use most inactive soldiers' equipment (16).
Load/Unload Inactive Soldiers from Vehicle. Active soldier must be standing in the same hex as inactive soldier and vehicle. If the inactive soldier is incapacitated, there is a chance he will be killed by the Action (on a roll of zero).
Give Turn (Commanders only). A commander must be within two hexes of the soldier to whom he wishes to give a Turn. The soldier receiving the Turn must use it this Round (see 6.3). A US commander can also expend a Turn to make an unaware soldier within two hexes aware (6.5).
6.8 JAPANESE ACTIONS
When a Japanese soldier receives a Turn during the Action Sequence (6.1), you must have him perform an Action. However, the soldier's Actions are not determined by you; you must use the soldier's card, the Paragraph Booklet, and, in some cases, the Mission Card to determine what the soldier does.
Japanese Action Number. At the beginning of each Turn in which one or more Japanese soldiers can act, roll one die and note the result on the Japanese Action Track with the Japanese Action Number marker. Use this Action Number when referring to the card for each Japanese that performs an Action this Turn. This Action Number remains in effect until the beginning of the Turn in which any Japanese can perform an Action.
Exception: If a Japanese Special Reaction comes into effect during a Japanese Turn, immediately roll a new Japanese Action Number. This new number applies to all Japanese that have yet to act in the current Turn.
Example: Three Japanese occupy the 2-Turn Advantage space. Roll for one Japanese Action Number for the group, then perform Actions for each of them, in alphabetical order. If a Special Reaction is triggered for any one of them, re-roll the Action Number.
Each time a Japanese is eligible to perform an Action, conduct the following steps:
- Refer to the soldier's card. Cross-reference the current Action Number with the current Condition to obtain a Japanese Action Paragraph number.
- Read the indicated paragraph carefully. Many paragraphs include different options. If these options are separated by bullets (•), consider the soldier's current situation and choose the option that applies. If these options are numbered sequentially (1, 2, etc.), choose the first one that applies, even if later options also apply.
- Carry out the applicable instructions from those listed in 6.7, just like a US soldier. He also receives a free stance change if he changes stance to conform to the instructions applicable to US soldiers. In some cases, the instruction to make the free stance change is explicitly stated; in other cases, it is implied. In some instances, the soldier may not be able to carry out all the instructions of a paragraph. If this is the case, have the soldier do as much as he can toward completion of the instructions, in the order in which they are given. If unable to complete the first instruction, go to the second, and so forth.
Japanese Movement. When a Japanese soldier is instructed to move, refer to the Mission Card to determine where he moves. Look up the hex the soldier currently occupies on the card and read the Japanese Movement Reference printed in red in the window. This reference will usually be the identity number of an adjacent hex into which you move the Japanese. When mov-ing, the Japanese expends Movement Points in the same manner as a US soldier (7.3). If the Japanese soldier has Movement Points remaining after entering this first hex, look up the hex he now occupies for another Movement Reference and continue moving the Japanese. Keep checking for Movement References in this manner until the Japanese has expended his Movement Point Allowance, or until this Turn ends. Certain Japanese Movement References are paragraph numbers instead of hex numbers; look up the indicated paragraph to find how the Japanese moves. A Movement Reference paragraph does not replace the Japanese paragraph that instructed the Japanese to move. It simply defines a special move or situation within the overall move. An EXIT Japanese Movement Reference indicates that the Japanese leaves the map.
Special Reactions. Certain Japanese Action paragraphs and Movement References paragraphs call for a Special Reaction (identified with a letter) to be put into effect for the Japanese you are following. When a Special Reaction is in effect for a Japanese, use the indicated Special Reaction column on his card instead of the current condition column. A Special Reaction is used only for the Japanese that triggered it, and it remains in effect until another paragraph rescinds the Special Reaction. You may wish to note the Special Reactions that are in force on the Notes section of the Squad Record Sheet as a reminder. As noted in the Special Reaction Number, above, whenever a Special Reaction comes into effect, a new Japanese Action Number is rolled. If the Japanese that triggered the Special Reaction has not finished his Turn, use the Action Number and the Special Reaction column to determine what he does for the rest of the Turn. The Self Preservation column often takes precedence over the Special Reaction column.
Self Preservation. Every Japanese soldier card includes a Self Preservation column (marked S) of Action paragraph numbers. This column is used instead of the current Condition column whenever the Japanese is in a hex adjacent to or occupied by an active US soldiers. The Self Preservation column may begin and stop any number of times for a given Japanese soldier, depending on his proximity to US soldiers. The Self Preservation column takes precedence over the normal Condition column and over Special Reaction columns, unless specifically noted otherwise on the soldier's card or in a paragraph.
Surrender. Some paragraphs will indicate that a Japanese immediately surrenders. If the paragraph is read when there is an active US soldier in the hex, then the Japanese immediately falls prone and is captured (11.2). If not in a hex with an active US soldier, the Japanese becomes inactive (place his AR marker in the Inactive space). He remains in his current stance. When a US soldier enters his hex, the Japanese is immediately captured.
6.9 JAPANESE ACTION PARAGRAPH EXAMPLES
800. Lie Prone.
The soldier falls prone, if not already prone. He does nothing else in this Turn.
802. Crouch, then conduct best fire at closest target. Fall prone after fire if free stance change available.
If not yet crouching, the soldier uses his free stance change to crouch. If, in a crouching position, the soldier can see no active US soldiers, his Turn ends. Otherwise, he then conducts fire as he would normally conduct aimed fire, unless this is the best fire possible. If wounded, he would conduct snap fire if required to make a stance change to crouching (the stance change for a wounded soldier costs one Movement Point, and the Action required is Move/Snap Fire!). If wounded, but already crouching, he would conduct aimed fire as normal. The target of his fire is the US soldier that is closest to him (in hexes). If two or more targets are equally close, he fires at the easiest target. The easiest target is the US soldier that the Japanese soldier has the best chance to hit. If there is still a tie, determine the target at random. After resolving the fire, the Japanese falls prone, if he has a free stance change available (this would only occur if the soldier was not wounded and was already crouching at the beginning of his Turn).
807. • If active target in sight, crouch and conduct best fire at easiest target. Fall prone after fire if free stance change available.
- If no target in sight, run into clear, road, or interior hex, or crawl into any other type of hex. If not in an open hex after movement and free stance change available, fall prone.
The Japanese soldier follows one of these sets of instructions, depending on whether or not he can see an active US soldier. The first instruction is identical to 802, with the exception that the soldier fires at the easiest target rather than the closest one. The second instruction requires reference to the Mission Card to find the hexes that the soldier moves into. Although not explicitly stated, the soldier may have to make a stance change before he begins his move so that he will be in the proper stance for the move. Have the soldier crawl one hex or run into hexes until he is directed to enter a hex for which he has insufficient Movement Points left or has not used his free stance change, he falls prone (unless in an open hex).
833. 1. If active US soldier in hex, assault to kill. 2. If adjacent to active US soldier through traversable hexside and a grenade is available, crouch and throw grenade. Exception: If an active Japanese is in the US hex, charge assault to kill. 3. If active US soldier in sight, crouch and conduct best fire at closest target. 4. Lie prone.
This paragraph presents four sequential options. Consider the Japanese situation and choose the first option that applies. If Option 1 applies, the Japanese assaults (11) with intent to kill. He will have to stand first, if not already standing. He will have to make a charge assault if he is wounded and a stance change is required, since the stance change will cost him an Action (11.3). Again, the appropriate stance change may have to be made first since these Actions. If Option 3 applies, it is carried out like 802. If none of the first three options applies, Option 4 is conducted.
6.10 JAPANESE ACTIVATION WHEN US SOLDIERS HAVE YET TO ENTER
It is possible that Japanese activation can occur before all US soldiers enter the map. In this case, Rounds begin normally for those US soldiers on the map. Soldiers off-map cannot enter; they remain off-map for the duration of Round 1 (they are considered out of sight of the map). During Round 2, off-map US soldiers make Awareness Checks; those that succeed receive Turns during the Action Phase of Round 2 (unless they panic) and can enter the map using one of the Movement Related Actions (6.7). Each soldier must spend Movement Points when entering the first hex on the mapedge (see Movement Point Cost Chart). While off-map, all soldiers are considered to occupy the same hex for command (6.3) and panic (6.4) purposes. Off-map soldiers are never subject to attack (even by artillery rounds that land off-map).
6.11 CONDITION CHANGES DURING ROUNDS
Condition changes often occur during Rounds as well as during Operations (5.5). When the Condition changes, interrupt the Round momentarily. Conduct Paragraph Checks for all US-occupied hexes beginning with the lowest numbered hex. Ignore all Event Checks, but read all other paragraphs. All indicated Japanese Activations (if any) occur using the procedure in 6.6. Once all Paragraph Checks and activations are dealt with as usual, return to the Round in progress.
7.0 Movement
7.1 GENERAL RULES FOR MOVEMENT
Movement occurs during both Operations and for Movement of US soldiers and vehicles, but only during Rounds for the Japanese. The movement procedure for Operations is radically different from that used in Rounds. Both types of movement, however, use some common rules.
- Each soldier or vehicle can move in any combination of directions that you choose, or that the Japanese Movement References require.
- There is no limit to the number of soldiers, friendly and/or enemy, that can occupy the same hex during movement, or at the conclusion of movement. Only two vehicles, active and/or disabled, can occupy a hex at any given time, regardless of the number of soldiers in the hex.
- A soldier or vehicle cannot enter a hex containing terrain prohibited by the Mission Briefing and/or by the Movement Point Cost Chart.
- Both Japanese and US forces can exit the map, as described in the Mission Briefing or as called for by Japanese Movement References. Japanese exit the map when they enter a hex and the Movement Reference is EXIT. Once exited, US forces can never return; Japanese forces can return, however, if so directed by a paragraph.
7.2 MOVEMENT DURING OPERATIONS
During Operations, only active US forces are on the map; thus, there is no movement procedure for the Japanese during Operations (except as discussed in 11.2, Captured Japanese). US soldiers and vehicles can move one at a time or one stack at a time, hex-by-hex, until a Japanese is activated. While moving, make Paragraph Checks for each hex entered by a US force. You could, for instance, move Soldier A six hexes, then move Soldier F a hex, then move Soldier A again, or undertake any other combination you desire (see Operations, 5, for more details).
7.3 MOVEMENT DURING ROUNDS
Each soldier has a Movement Point Allowance (MPA) printed on his card or recorded on the Squad Record Sheet, which is the basic number of hexes he can move in a single Turn during an Action Phase (6.1).
A soldier or vehicle spends Movement Points to move from the hex it occupies into an adjacent hex. A crouching soldier can crawl one hex by expending all his MPA, regardless of the terrain in the hex entered (as long as the terrain is not completely prohibited). A standing soldier can enter more than one hex, subject to the MP costs of the hexes entered and the soldier's MPA. One or more Movement Points are spent to enter the hexes, depending on the terrain in the hex or along its hexsides (Movement Point Cost Chart). The MP cost to cross terrain hexsides is added to the cost of the hex entered. Thus, it costs two Movement Points for a soldier to enter a Clear hex (1 MP) by crossing an Embankment hexside from a lower elevation to a higher one (+1 MP).
You can continue to move a US soldier or vehicle up to the limit of its Movement Point Allowance, or until you decide to stop moving. Japanese move up to their MPA, as directed by paragraphs and Japanese Movement References. You never move a soldier or vehicle more hexes than its MPA allows. A hex cannot be entered if the soldier or vehicle has insufficient MP's to enter it.
A soldier must stop movement immediately upon entering a hex occupied by an active enemy soldier. A soldier that begins a Turn in an enemy-occupied hex can leave the hex; he must then stop in the first enemy-occupied hex he enters.
Unused Movement Points are lost, not accumulated. Movement Points cannot be lent to one soldier or vehicle to another.
Unwounded soldiers receive a free stance change each Turn. A stance change alone can also be made by spending a Movement Point. A soldier can make as many stance changes in a single Turn as he has Movement Points, in addition to the free stance change.
A soldier can combine movement and combat by using a Move/Snap Fire or Move/Charge Assault Action. In such cases, the soldier must be standing to move and can spend only half of his Movement Point Allowance (round fractions down). A crouching or prone soldier must change stance using a free stance change, if he has one, or by spending a Movement Point, in order to stand and move, or vice versa. However, movement always comes first when performing a Charge Assault.
When a soldier drags another soldier, during Operations or Rounds, the dragging soldier must remain standing. The move is only one hex.
Make Paragraph Checks during movement in Rounds just as you do in Operations, although you ignore any hexes calling for Event Checks.
7.4 CLIFF HEXES
Only crouching soldiers can enter Cliff hexes. When in a Cliff hex, a soldier can never stand or lie prone, and is always considered crouching. Cliff hexes never block LOS and are always considered to be at Level 2. A soldier exiting a Cliff hex can either remain crouching or change his stance.
Depending on the Mission Briefing, Cliff hexes will either be Steep or Sloping. If Sloping, it costs 2 Movement Points to enter; if Steep, it requires 1 Action for a soldier to climb up or down a Cliff hex, followed by an immediate Footing Check. Each time a soldier (US or Japanese) ascends or descends to a new Cliff hex, there is a possibility he may lose his footing and fall. Roll 1 die; on a result of 0 through 8, the soldier is safe; on a roll of 9, there is a possibility the soldier will fall. If a 9 is rolled, conduct an immediate PC Check; if successful, the soldier does not fall; if the PC Check fails, the soldier falls to one adjacent lower hex (determined at random), panics, and checks for damage on the Pistol row of the Combat Resolution Table (CRT).
Note: A panicked soldier in a Cliff hex cannot fall prone and must remain crouching. This is an exception to the standard panic rules.
If a soldier is wounded, on a Footing Check die roll of 0 through 7 he is safe, and on a roll of 8 or 9, he loses his footing. If a soldier is killed or incapacitated in a Cliff hex, that soldier's body falls to the Cliff hex until it lands on a Level 1 hex closest to the hex from which the fall began. In each Cliff hex fallen through, roll for damage on the Semi-Automatic Rifle row of the CRT for an incapacitated soldier; on an additional incapacitated result, the soldier is instantly killed.
7.5 JAPANESE EVASIVE MOVEMENT
Some Japanese paragraphs require a Japanese to move until he leaves the sight of all US soldiers. When out of sight, remove him from the map. This is termed evasive movement. He may reappear later in the Mission or not at all. If the soldier never leaves US sight, continue to move him normally until he exits the map or another Movement Reference paragraph changes his Action. See 6.8 for more detail on Japanese movement.
JAPANESE EVASIVE MOVEMENT EXAMPLE
806. Run into open hex, crawl into any other type of hex. Stop moving and fall prone if free stance change available and out of sight of US soldier. If out of US sight at end of Round, remove the Japanese from the map.
If the Japanese movement reference requires the Japanese soldier to enter an open hex, he does so standing. If he has fallen contains another terrain type, he enters the hex in a crouching stance by crawling. Both may require the soldier to change stance by using his free stance change. If he is already wounded, then the stance change, if any, will cost a Movement Point. If he crawled, moving is over; if he ran, read the Japanese Movement Reference in the newly entered hex. When out of MP's or lacking sufficient MP's to enter another hex, the Japanese falls prone if not in sight of an active US target and a free stance change is available. The Japanese is removed from the map if he is out of US sight at the end of the current Round.
8. Line of Sight
In order to engage in fire combat or make certain PC Checks, a soldier must be able to see the target he can fire at or be required by the PC Check paragraph. He can see the hex if he has a Line of Sight (LOS) from his hex to the hex in question. Lines of Sight are reciprocal: if soldier B can see soldier A, soldier B can also see A. In some cases a soldier might be able to see the target's hex, but not the target itself. In such cases, the target cannot be attacked directly. However, a persistent result against injured soldiers inside, whether they are seen or not (14.5). A grenade or satchel charge can be thrown into a hex that is not in sight (10).
8.1 TRACING A LINE OF SIGHT
A Line of Sight is a straight line traced from the center dot of the sighter's hex to the center dot of the target hex. If the LOS crosses any part of a blocking hexside, the LOS is blocked. If the LOS exactly bisects two hexes, one of which is blocking terrain, the LOS is not blocked.
The terrain on the map is presented in a naturalistic way to give the map a realistic look. For game purposes, however, the terrain in each hex is considered to completely fill the hex. When more than one terrain type appears in a hex, the type of terrain that fills the majority of the hex is the only terrain type that is considered to fill the hex.
Hexes at the Same Elevation. An LOS between two hexes at the same elevation is blocked by any intervening blocking terrain at the same or higher elevation.
Hexes at Different Elevations. An LOS between two hexes at different elevations may be blocked by intervening blocking terrain, depending on its position and elevation. If the intervening terrain is at a lower elevation than both sighting hexes, the LOS is always clear. If the terrain is at the same elevation as either hex, or is higher than one of the hexes, it may block the LOS, depending on the type of terrain and its location (see Diagram 1).
8.2 BLOCKING TERRAIN
Elevations. There are three color-coded elevation levels on each map, ranging from Level 1 (the lowest) to Level 3 (the highest). If the LOS enters a hex that is a higher Level than both sighting hexes, the LOS is blocked. Elevation changes themselves do not block LOS (except in the case of Embankments). An LOS can be traced across an elevation change without effect, since the change represents a smooth slope rather than a drastic falloff (see Diagram 2).
Embankment Hexsides. Embankment hexsides represent steep changes in elevation, and they may block LOS. An Embankment hexside is considered to be at the higher of the two elevations it borders; thus, an Embankment adjacent to a Level 1 and a Level 2 hex is considered a Level 2 hexside. If both sighting hexes are on the same elevation, an Embankment hexside has no effect on LOS. At different elevations, the Embankment blocks the LOS if it is higher than the lower of the two hexes and not adjacent to the higher hex. If higher than the low hex, but adjacent to the high hex, the LOS is not blocked. If at the same elevation as the lower hex, the Embankment does not block LOS (see Diagram 4).
Crest Hexsides. Crest hexsides always block LOS, regardless of the location and elevation of the two sighting hexes.
Palm Trees. If both sighting and target hexes are at the same elevation, a LOS can be traced through two Palm Tree hexes into a third hex (whether the third is Palm Tree or not). If the sighting hexes are at different elevations, the LOS is blocked if the LOS enters a hex adjacent to either the sighting or target hex containing Palm Trees at the same elevation. A Palm Tree hex that is adjacent to the sighting or target hex but at a lower elevation does not block LOS (that is, the LOS passes over the top of the blocking terrain).
For each Palm Tree hex fired through, subtract 1 from the fire combat modifier, for a total maximum modifier of −2, in addition to any other modifiers that may apply.
Example: A Japanese soldier lying prone in a Jungle hex (−4) is fired at through two Palm Tree hexes (−2) for a total of −6 modification to the Base Hit Chance on the CRT. If the US soldier were wounded or snap firing, the modifier would increase to −7 or −8.
Grenades and satchel charges can be thrown into an adjacent Palm Tree hex, but never through a Palm Tree hex into a non-adjacent hex. In addition, grenades and satchel charges cannot be thrown at Japanese soldiers who activate Palm Tree Tops above your squad (15.3).
Small vehicles can drive through Palm Tree hexes normally, but only at their slow speeds. Large vehicles cannot enter Palm Tree hexes.
Jungle, Boulder, and Rubble Hexes. If both sighting hexes are at the same elevation, intervening Jungle, Boulder, and Rubble hexes always block LOS. If the sighting hexes are at different elevations, the LOS is blocked if the LOS enters a hex adjacent to either the sighting or target hex containing Jungle, Boulder, or Rubble, but not through it. A hex that is adjacent to the sighting or target hex, but the LOS passes over the top of the blocking terrain (see Diagram 3).
Building Hexes. A soldier occupying a Building hex can trace an LOS into the hexes within the fields of vision for the apertures of that Building. Likewise, a soldier tracing an LOS into a Building can trace only across an aperture hexside. There are two types of apertures: doors and windows. A prone soldier inside a Building can never see out of or be seen through a window hexside. A crouching soldier looking out of a window cannot see another crouching or prone soldier in the hex immediately adjacent to that window hexside (and vice versa). A standing soldier inside a Building can see all hexes in the field of view from the window. A soldier, regardless of stance, can see all hexes in the field of view of a doorway.
An LOS can be traced only one hex across an aperture hexside that is not adjacent to the sighting soldier's hex. An LOS can never be traced into a Building across a non-aperture hexside. Fire combat can occur, however, across such a hexside within the restrictions of 14.5.
Within these aperture restrictions, an LOS cannot be traced through a Building hex at the same elevation as both sighting hexes. If the two hexes are at different elevations, the LOS is blocked if the building hex in question is closer to the soldier at the lower elevation than to the soldier at the higher elevation. If exactly equal, the LOS is blocked.
An LOS exists between soldiers in two separate Buildings only if each is in the other's field of view. It is very possible for one soldier to be able to see the other soldier's hex, but not the soldier himself.
Other Blocking Terrain. The preceding are the only types of blocking terrain in the game, with the exceptions of certain landmarks that may be specific to a given Mission. These are explained in the Mission Briefings or in paragraphs. Soldiers, vehicles, and all types of terrain not mentioned in the preceding rules do not block LOS.
8.3 LOS PROBLEMS
The preceding rules and examples may not cover all the questions that may arise during play. Should you have a problem, apply common sense or a die roll to solve the difficulty.
9. Fire Combat
During Action Rounds, a crouching or standing soldier can fire any weapon he possesses if he has at least one clip of ammo for the weapon and if he can see the intended target of his fire (see Line of Sight, 8). A target can be attacked through adjacent building hexside, even if out of sight, if the hexside can be penetrated (14.5). A crew weapon or bazooka must be prepared before it can be fired (see Action Summary, 6.7). Firing combats are resolved one at a time, in any order for the US and in alphabetical order as indicated by the letter on each Japanese AR marker (unless two soldiers are firing a crew weapon together). The results of a successful fire may cause the weapon fired to break, become jammed, or run out of ammo. Neither US nor Japanese soldiers can ever fire into a hex containing a friendly soldier or captured soldiers. The soldier can be fired into if the friendly soldier is incapacitated or dead.
9.1 FIRE COMBAT PROCEDURE
The following procedure is used to resolve all types of fire combat, regardless of the weapon being used.
1. Choose the Target and Fire Type
Decide which soldier is firing (if he has more than one) and whether he is conducting an aimed or snap fire Action (6.7). If there is more than one target in the target hex, choose the actual target of the fire (see Multiple Targets, 9.2).
2. Consult the JAM A/S Column of the Weapon Chart and Roll Percentile Dice
If the dice result is equal to or less than the number listed in the column for the weapon type used, the weapon has jammed (or has fired a dud in the case of Explosive Penetration and Explosive weapons) and the fire is resolved no further. A jammed weapon cannot be used again until the jam is cleared.
3. Determine the Range and Basic Hit Chance
If the target is in the SAME HEX as the firing soldier, the Base Hit Chance is 8. If the target is in an ADJACENT HEX to the firing soldier, the Base Hit Chance is 6. If the target is in a hex that is 2 or more hexes away from the firing soldier, you must determine whether the target is at SHORT range, MEDIUM range, or LONG range. These ranges have Base Hit Chances of 5, 4, and 3, respectively, as listed on the right top of the Combat Resolution Table (CRT). To determine which range is appropriate, read across the side appropriate to the weapon being fired until you find the number or span of numbers that includes the distance between the firer and the target.
Example: Firing a Semi-Automatic Rifle at a target 12 hexes away, you must trace down the "actual range of 12 hexes). In this case, the 7-14 appears under the heading of Medium range, so your Base Hit Chance is 4.
Note: The Base Hit Chance when conducting an Assault (see 11) is 7. Assaults, of course, can take place when attacker and defender are in the same hex; do not confuse this with a situation where a soldier is conducting fire combat while occupying the same hex as the target (in which case the Base Hit Chance is 8, as indicated on the chart and in the preceding explanation).
4. Modify the Base Hit Chance
Consult the section beneath the CRT specifying the Modifications for Non-Automatic, Automatic, and Explosive Weapons Combat (use of these weapon types constitutes fire combat), and apply all appropriate modifications to the Base Hit Chance to determine a Final Hit Chance. If the Final Hit Chance is greater than 8 or less than 0, treat it as 8 or 0, respectively.
5. Roll One Die
If the result is equal to or less than the Final Hit Chance, the fire is hit; proceed to Step 6. If the result is greater than the Final Hit Chance, the fire has missed; go directly to Step 7. A die roll of 0 is always a hit, while a roll of 9 is always a miss.
6. Determine the Target Damage
If the target is hit, roll one die and cross-reference the result with the weapon fired to the appropriate column of the Damage Die Roll section of the CRT to determine what type of damage the target takes (panic, wound, incapacitate, or kill), and whether any penetration occurs (see Damage, 14).
7. Roll Percentile Dice and Refer to the Out of Ammo Column of the Weapon Chart
If the dice roll is equal to or less than the number listed for that weapon, the weapon has expended a clip of ammunition (see 9.5).
FIRE COMBAT EXAMPLE
Soldier C is Crouching in hex T-3 on Map A and snap firing his semi-automatic rifle at soldier Q, standing in hex L-7. Determine if C's weapon jams by rolling the jamming chance for a semi-automatic rifle, then roll percentile dice; if the result is 5 or less, the rifle jams. In this case, however the result is 12, so no jam occurs. Range is determined by counting the hexes from T-3 to L-7, excluding T-3 but including L-7; the range is found to be 8 hexes, which is medium range for a semi-automatic rifle (for range chart, see medium range is 4. This number must now be modified to arrive at a Final Hit Chance.
Soldier C's Weapon Skill is −1, reducing the Base Hit Chance by one; Soldier Q is standing in a Clear terrain hex, applying a +1 modifier to the Base Hit Chance. Finally, the Base Hit Chance is reduced by 2 because the fire is a snap fire. All modifiers are combined (−1, +1, −2) to yield a total modifier of −2. This modifier is then applied to the Base Hit Chance of 4, yielding a Final Hit Chance of 2. Roll one die; on a result of 0, 1, or 2, Soldier Q is hit; any other result is a miss.
A roll of 0 is always a hit, and 9 is always a miss, regardless of modifiers. The modifiers for this example is 1, thus scoring a hit. Roll one die and locate the result under the appropriate column of the Damage Roll section to determine the damage inflicted on Soldier Q. The damage die roll in this example is a 4, which is a wounded result on Soldier Q. Finally, determine whether or not a clip of ammo is used by rolling percentile dice. If a semi-automatic rifle uses a clip of ammo on a roll of 25 or less, the result is 17; thus, Soldier C uses a clip and marks off one of his semi-automatic rifle Ammo Boxes.
9.2 MULTIPLE FIRE TARGETS
A target hex that contains more than a single enemy soldier is a multiple target. A US soldier who is firing at a multiple target can choose any one soldier in the hex that he can see as his target. A soldier who is firing at a multiple target must fire at the one US soldier in the hex he is in the most exposed stance (standing is the most exposed, then crouching, then prone). If there is still a tie, determine the target at random.
A soldier conducting aimed fire with an automatic weapon against a multiple target receives an additional +1 to his Base Hit Chance for each target in the hex beyond the first one. In addition, his declared target is regarded as his primary target, and if he hits his primary target, he may also be able to damage other soldiers in the hex with the same fire (see Damage, 14.6).
9.3 FIRE SHIFTS
A number of modifiers based on the target's stance, the terrain the target occupies, the type of fire being conducted (aimed or snap), the Weapon Skill of the firing soldier, and other variables, affect the chance of a firing hitting its target. Each modifier is expressed as a positive or negative number. Add all modifiers that apply to the fire together to obtain a single modifier result. Then apply the final modifier to the Base Hit Chance to determine the Final Hit Chance. If the Final Hit Chance is greater than 8 or less than 0, treat it as 8 or 0, respectively.
The Target Location portion of the Modifications list is used to determine the fire modifier based on the target's stance and terrain. Cross-reference the target's stance with the terrain he occupies to derive a positive or negative modifier. The stance and terrain of the firing soldier does not affect the fire (Exception: Vehicles, 19). The modification based on target location is used in conjunction with any other applicable modifiers listed for a particular fire.
9.4 WEAPON JAMMING AND CLEARING
When a weapon is fired or thrown, and you roll a percentile dice total that is equal to or less than the number in the Jam column of the Weapon Chart, the weapon has jammed and no fire occurs.
A jammed weapon (but not an Explosive or Explosive Penetration round) can be cleared by successfully performing a Clear Jammed Weapon Action (5.3 or 6.7). Roll one die and consult the Clear Jammed Weapon Chart. A soldier with a jammed weapon will use his second weapon, if he has one; otherwise, he will attempt to unjam his weapon. When a Japanese Action paragraph requires him to fire, he attempts to unjam instead. If a Japanese becomes weaponless due to breakage or ammo depletion, he will attempt to acquire one from another Japanese, or from an inactive US soldier, in his hex using the Pick Up/Exchange Weapon Action (5.3, 6.7).
9.5 AMMO EXPENDITURE
US Ammo Expenditure. A US soldier can carry up to 6 Ammo Boxes worth of clips, grenades, or bazooka rounds. Each satchel charge takes one Port Box to carry. When he throws a grenade, satchel charge, or fires a bazooka, mark an X through the appropriate box. When firing a weapon, there is a chance that a clip may be expended. Roll percentile dice on the Ammo Expend column. If the dice roll is equal to or less than the number for the weapon used, a clip is spent. The weapon type for the clip spent must match the weapon fired. Ammo acquired by a soldier during a Mission (from another soldier) can be marked in any empty Ammo Box, including a box indicating spent ammo. Be sure to mark the removal of the clip from the soldier that gave up the ammo.
If a soldier has a clip for a personal or crew weapon, reloading is automatic. A bazooka must be reloaded using the Prepare Bazooka Action.
Japanese Ammo Expenditure. Japanese soldiers do not have Ammo Boxes and do not expend ammo clips when firing. Japanese can run out of ammunition as a result of a paragraph. If a US soldier acquires a Japanese weapon that has not run out of ammo, that weapon is assumed to have one ammo clip or round, which is noted in one of the US soldier's Ammo Boxes.
9.6 JAPANESE FIRE COMBAT TERMS
When a Japanese fires, he uses his primary weapon, unless it is out of ammo. If he has more than one weapon, the primary weapon is the one with the greatest chance to hit (usually a rifle). Grenades are never primary weapons. Japanese grenade use is always specifically called for by a paragraph. When a paragraph instructs a Japanese to fire, it will use one or more of the following terms:
Best Fire. Aimed fire is the best fire possible, then snap fire. If a soldier is unable to use aimed fire, he uses snap fire instead. Some paragraphs instruct a soldier to snap fire specifically.
Closest Target. The closest visible target is determined by counting hexes from the Japanese hex (exclusive) to the US hex (inclusive). If there are two or more targets equally close, use the easiest. If there is still a tie, determine the target at random.
Easiest Target. The easiest target is the one the Japanese has the highest chance to hit. If there are two or more targets equally easy, fire at the closest. If there is still a tie, determine the target at random.
9.7 CREW WEAPONS
Light, medium, and heavy machineguns are crew weapons and are represented by their own markers, showing the weapon prepared on the front and unprepared on the back. A crew weapon must be prepared before it can be fired.
Carrying a Crew Weapon. A crew weapon must be carried in pieces by two soldiers. Write the name of the weapon being carried in the Port Boxes of the two soldiers. A light or medium machinegun takes up three Port Boxes, while a heavy machinegun requires four Port Boxes. A machinegun can be carried only by two soldiers, never more.
When a crew weapon is being moved, its marker should have its unprepared side up. The marker can move with any soldier who has a piece of the weapon. Soldiers carrying parts of a crew weapon need not stay in the same hex, but the weapon cannot be prepared for fire unless both soldiers with a piece of the weapon are in the same hex. Once this requirement is met during Operations, the weapon is prepared; invert its marker. If Rounds are underway, one soldier in the hex must spend an Action to prepare the weapon. Once a crew weapon is prepared, it remains prepared until a part of it is moved from the hex. There is no cost to unprepare a crew weapon; simply move a soldier with a piece of the weapon and invert the marker.
Firing a Crew Weapon. A prepared crew weapon can be fired by one soldier or by two soldiers working together. A soldier must be crouching to fire a crew weapon.
A crew weapon fired by a single soldier is always a single snap fire. If there are two soldiers in the hex, then each can snap fire the weapon once, at a cost of one Action each. A maximum of two soldiers can fire a single crew weapon in one Round, regardless of the number of soldiers in the hex.
Two soldiers can combine their Actions to make a single aimed fire. In this case, each soldier spends one Action, simultaneously, and the fire is resolved as an aimed fire. The two soldiers' AR markers need not occupy the same Turn space. For example, if a soldier has two Turns and his partner has only one Turn, they can fire the crew weapon together when the first soldier gets his Turn. When two soldiers fire a crew weapon together, declare one soldier as the firer and use his Weapon Skill to resolve the fire. The other soldier is considered to be feeding ammo into the machinegun. However, when two Japanese are firing a crew weapon, the Japanese with the higher WS is the firer, unless instructed otherwise by a paragraph or one of the soldier's cards. For the second Turn, only the first soldier can fire the weapon, since the second soldier is out of Turns. The fire is a snap fire, since only one soldier is using the weapon.
Note: If a Japanese soldier's card says assists firing, that soldier will always assist the primary machinegunner in the hex, if he has a Turn remaining and the other soldier is instructed to fire the machinegun. However, when the assistant receives a Turn prior to the other soldier's Turn, he will do whatever his Action Paragraph instructs him to do, whether it is Lie Prone, Stand and Throw Grenade, or, indeed, Assist Firing Machinegun.
CREW WEAPON EXAMPLE
Japanese S and T are manning a light machinegun. Japanese T has two Turns, while Japanese S has only one. Neither is wounded, and the Japanese cards reveal that S fires the machinegun while T assists. Japanese T's Turn comes first, and T and S fire the machinegun together as an aimed fire. T's AR marker is moved to the 1-Turn space, and S's is moved to the Complete space. The fire is then resolved using soldier S's Weapon Skill. When T uses his second Turn, the fire must be a snap fire using T's Weapon Skill, because only T is firing the weapon.
9.8 BAZOOKAS
A bazooka is a personal weapon, but unlike other personal weapons it cannot snap fire. A bazooka counter is placed on the map with the soldier carrying it. The counter shows the bazooka prepared on one side and unprepared on the other. It must be prepared before it can be fired. The loading soldier must be crouching or standing. Once loaded, the bazooka remains loaded until it is fired. Each fire uses up one bazooka round; mark the round off the soldier's Ammo Boxes. A loaded bazooka has no special effect on a soldier's movement. A bazooka can be prepared by a soldier other than the soldier carrying the weapon if both occupy the same hex. To do so, the other soldier spends one Action and the weapon is prepared. It can then be fired, if the holder has an Action.
A bazooka is both an explosive and a penetration weapon. When you fire a bazooka at a soldier, if the hex contains more than one active soldier, use the bazooka damage result against the target soldier, then roll separately for each other soldier in the hex using the Grenade Inside row of the CRT. Thus, a single bazooka round can injure more than one soldier in a hex.
When firing at a building or vehicle, use the penetration result, indicated by the colored portions of the CRT (14.5). If a bazooka fire misses, it has no effect. It does not scatter like a grenade or satchel charge. A bazooka round that hits a building or vehicle can cause the building to collapse (14.5) or the vehicle to be knocked out (19).
9.9 FLAMETHROWERS
Certain Missions give your squad the ability to use flamethrowers. Flamethrowers cannot be purchased; they can only be provided by the Mission Briefing. A soldier carrying a flamethrower can carry no other weapon (except a knife, 11.5, or pistol). Both of his Port Boxes are considered filled (Ammo Boxes are still available). If a soldier carrying a flamethrower is wounded, incapacitated, or killed, there is a 25 percent chance that the tanks will be penetrated. Roll 2 dice; on a roll of 25 or less, the tanks explode, all soldiers are instantly killed, and a Fire marker is placed in the hex.
The range of a flamethrower is 3 hexes. One hex is Short Range (use the Short Range Base Hit Chance of 5 instead of the Adjacent Base Hit Range of 6); 2 hexes is Medium Range; 3 hexes is Long Range for purposes of determining the Base Hit Chance. If a hit occurs, all soldiers in the target hex are automatically killed. Closed vehicles hit from the rear explode at the start of the next Round, immediately after the Random Event Check. Closed vehicles hit from any other facing take damage as if hit by bazooka fire. Open vehicles are immediately disabled.
When a hex is hit by flamethrower fire, place a Fire marker in the hex. The hex will burn for the remainder of the Mission and becomes impassable to all soldiers and vehicles. In addition, Fire markers block LOS from and to all hexes.
If a Japanese soldier or vehicle is instructed to enter a burning hex, consult the Condition Card to determine the hex the Japanese would move into from the burning hex and invent a new movement path for the soldier or vehicle around the Fire marker to the desired hex. The invented path should be through the terrain of lowest cost in Movement Points to the moving soldier or vehicle and as close to the Fire marker as possible. If no such path exists (because of prohibited terrain), the soldier or vehicle will immediately surrender.
Tanks (by paragraph instruction or Mission Briefing) can also be equipped with flamethrowers as well. A tank that is so equipped can fire only the flamethrower and its machineguns. The range of a tank-mounted flamethrower is 10 hexes. Short Range is 2 or 3 hexes; Medium Range is 4 through 7 hexes; Long Range is 8 through 10 hexes. Hand-held flamethrowers can be fired only 4 times per Mission. Tank-mounted flamethrowers can be fired up to 10 times per Mission.
Important Note: Players can never intentionally fire flamethrowers into hexes not occupied by active Japanese soldiers or vehicles (as an attempt to foil the movement of the Japanese) unless specifically instructed to do so.
10. Grenade/Satchel Charge Combat
During Action Rounds, a standing or crouching soldier can prepare and throw a grenade or satchel charge if he possesses one. Unlike fire combat, a grenade or satchel charge can be thrown into a hex that the soldier cannot see. Grenade and satchel charge combats, like fire combat, are resolved one at a time; damage is applied immediately and there is a chance the weapon will be a dud. When a soldier throws a grenade, cross off one of his Ammo Boxes containing a grenade. Mark off a soldier's Port Box containing a satchel charge when a soldier throws a satchel charge.
10.1 GRENADE/SATCHEL CHARGE COMBAT PROCEDURE
The following procedure is very similar to that used to resolve fire combat, but differs in a few important ways.
1. Choose the Target
A soldier can throw a grenade up to 6 hexes if standing, or up to 3 hexes if crouching. He cannot throw at all if prone. A satchel charge can be thrown up to 3 hexes if a soldier is standing, and it cannot be thrown at all if the soldier is crouching or prone. The target hex has need not be in this soldier's Line of Sight (LOS), but he has a better chance to hit when it is. Neither weapon can be thrown into or out of a building through a wall hexside that has no aperture.
2. Determine the Range
Grenades and satchel charges cannot be thrown into the same hex with the throwing soldier. If thrown into an adjacent hex, use the Adjacent Hex Base Chance on the CRT. Otherwise, count the range in hexes from the throwing soldier (exclusive) to the target hex (inclusive) and locate the result on the CRT to determine the range (short, medium, or long).
3. Determine the Hit Chance
As in fire combat, determine the Base Hit Chance by judging the range. Then modify the Base Hit Chance by using the modifiers listed under Modifications for Explosive Weapon Combat which apply to determine the Final Hit Chance.
Note: Do not use the modifications used for fire combat. Thus, the stance of the target and the terrain of the target hex have no effect, nor are there shifts for aimed or snap fire.
4. Roll One Die
If the die result is equal to or less than the Final Hit Chance, the grenade or satchel charge lands in the target hex; proceed to Step 5. If the result is greater than the Final Hit Chance, the grenade or satchel charge scatters (10.3). A roll of zero is always a hit; a roll of 9 is always a miss.
5. Determine Target Damage
First, roll percentile dice to determine if the grenade or satchel charge is a dud. If the result is 05 or less, it is a dud, and it has no effect. Otherwise, it goes off. The grenade or satchel charge lands in a hex containing one or more soldiers (friendly, enemy, or any), roll one die and cross-reference this Damage Die Roll with the Grenade and Satchel Charge row on the CRT.
The extent of the damage caused by an exploding grenade or satchel charge depends on whether the target hex is interior or exterior. Use the damage line that applies. All soldiers in the hex suffer damage.
GRENADE EXAMPLE
Japanese R in hex P-8 on map A throws a grenade over the jungle into hex P-10, which is occupied by two US soldiers, both standing. The range is 2 hexes — short for a grenade toss — yielding a Base Hit Chance of 5. R cannot see his target, so 3 is subtracted from the Base Hit Chance, yielding a Final Hit Chance of 2. However, R has a Weapon Skill of −2, which further reduces the Hit Chance to 0. Any roll but 0 causes the grenade to miss and scatter into an adjacent hex, using Grenade Scatter Diagram A. But the Japanese is lucky and rolls a 0: the grenade lands in P-8. Both US soldiers are aware and use PC Checks (10.2). One succeeds, but has no Turns remaining; he falls prone. The second has a Turn, which would allow him to throw the grenade out of the hex if his PC Check succeeds; but it fails, and he remains standing. Using the Grenade Outside row, the roll for the prone soldier is a 5; thus, he panics instead of being wounded. The standing soldier rolls a 6 and is wounded; had he been prone, he would have panicked instead.
10.2 GRENADE STRIKE PC CHECK
When a grenade or satchel charge strikes a hex, every aware soldier in the hex can make a special PC Check (5.7). If a soldier who successfully makes the check has any Turns remaining in the Round and is standing or crouching, he can immediately spend one Turn to perform the Action of tossing the grenade or satchel charge out of explosion range, where it explodes harmlessly. An unwounded soldier who makes the check has any Turn remaining can immediately fall prone (at no cost). A soldier who fails the check cannot react to the grenade or satchel charge at all. Unaware and panicked soldiers cannot make the PC Check at all. Japanese soldiers make the above Checks even though no paragraph specifically instructs them to do so. Tanks and soldiers inside vehicles may not make the Check.
10.3 GRENADE SCATTER
When you make a grenade or satchel charge attack and exceed the Hit Chance, the grenade or satchel charge scatters into a hex other than the target hex. To determine where a scattered grenade or satchel charge lands, consult the following grenade or satchel charge scatter diagrams.
Use Diagram A unless the LOS from the thrower's hex to the target hex exactly bisects the two hexes adjacent to the target hex (in which case, use Diagram B). Roll one die to determine the hex in which the grenade or satchel charge lands. Note that a grenade or satchel charge thrown from a hex adjacent to the target hex can still land in the target hex if the die result is 6 through 9. A grenade or satchel charge that lands in a hex as a result of scatter explodes and damages soldiers in that hex as though it were the target hex.
10.4 SATCHEL CHARGES
A satchel charge is a large bundle of explosive enclosed in a case (usually TNT in a cloth satchel) used to destroy buildings and such. For game purposes, they are treated exactly like large grenades, with the following exceptions:
- They require a Port Box to carry instead of an Ammo Box.
- Satchel charges are more destructive than grenades.
- A soldier must be standing in order to throw a satchel charge.
- A satchel charge can be thrown no farther than 3 hexes.
- A satchel charge requires a separate action to prepare and cannot be prepared at the start of a Mission.
11. Assault Combat
During Action Rounds, a standing soldier can perform an Assault or Move/Charge Assault Action to attack an enemy soldier in the same hex. Assault is hand-to-hand combat and thus does not expend ammo. Assaults are resolved one at a time. A soldier can assault only one enemy soldier, even if there are more in the hex.
11.1 ASSAULT COMBAT PROCEDURE
To make an assault, the attacking soldier must be standing and must occupy the same hex as the soldier he is assaulting. If the attacker is not in the same hex as the soldier he wishes to assault, he must perform a Move/Charge Assault Action (11.3) in order to enter the defender's hex and assault him. The following procedure is used to resolve an assault combat.
Note: A soldier assaulting a target in a wheeled vehicle must first enter the vehicle (1 MP). You cannot assault a soldier who is in a tank.
1. Choose the Target
If there is more than one enemy soldier in the hex, choose which one is the target of the assault. A Japanese soldier must assault the US soldier in the most disadvantageous stance. There are two stance categories: being prone or wounded is the more disadvantageous; then crouching or standing. If there is a tie, determine the target at random.
2. Choose to Capture or Kill
A US soldier can attempt to capture or kill a Japanese at your option (11.2). An assaulting Japanese always assaults to kill.
3. Determine the Hit Chance
The Base Hit Chance is always the same, as listed on the CRT. The Hit Chance is modified for any of the modifications listed under Modifications for Assault Combat that apply.
4. Roll One Die
If the die result is equal to or less than the Final Hit Chance, the target is hit; proceed to Step 5. If the result is greater than the Hit Chance, the assault misses; skip Step 5. A roll of zero is always a hit; a roll of 9 is always a miss.
5. Determine the Target Damage
If the target is hit, roll one die and cross-reference the result with the To Kill or To Capture row, as appropriate, on the Assault portion of the CRT to determine what type of damage the target takes. Some results are treated as capture results if the target is prone or wounded, as indicated on the Capture row of the Table.
ASSAULT COMBAT EXAMPLE
US Soldier D moves one hex to charge assault to kill Japanese X, who is standing, unpanicked and unwounded. The Base Hit Chance to reach a Final Hit Chance, which is modified to reach a Final Hit Chance. D's Weapon Skill is +1; there is a −3 modifier for charge assaulting; and Japanese X has a Weapon Skill of +2, which is subtracted from the Base Hit Chance. The final modifier is −4, which is applied to the Base Hit Chance of 7 to yield a final Hit Chance of 3. One die is rolled; if the result is 4 or more, there is no effect; if 3 or less, a hit is scored. The roll in this example is a 2, which is a hit. Consulting the Assault portion of the CRT, roll one die on the To Kill row. The result in this example is a 7, which incapacitates the Japanese.
11.2 CAPTURE
An assaulting US soldier can attempt to capture, instead of kill, his target. If he does so and hits his target, a capture result may be obtained.
A captured Japanese immediately falls prone, if not already prone. The Japanese soldier's AR marker is immediately moved to the Inactive space of the AR Track, and his Actions are determined by those of his guarding soldier. A captured Japanese loses any Turns he has remaining in the Round and receives no Turns until he is free.
Any equipment possessed by a captured soldier can be taken from him, using the Pick Up/Exchange Equipment Action. Since a captured Japanese is inactive, play may switch from Action Rounds to Operations if all the Japanese on the map are captured or otherwise inactive.
A captured Japanese can be moved by a US soldier occupying the same hex, during Operations or Rounds. During Rounds, however, the Movement Point Allowance of the Japanese and his guard are reduced to 2 and the captured soldier's Actions are determined by his guard. The Japanese has a free stance change (unless already wounded). If a captured Japanese is ever in a hex without an active US soldier, by your own choice or otherwise, he is immediately free; remove his Captured marker and commence Rounds, if Rounds are not already in progress. He receives Turns normally beginning the next Action Round, and is automatically considered to be in Self-Preservation for the remainder of the Mission. The Japanese is activated and all US soldiers are automatically aware of him. If there are no US soldiers in sight, the Japanese soldier is removed from the map permanently (he has run away). If there are US soldiers in sight, the Self-Preservation column on the Japanese card is used to determine his Actions (regardless of the Condition or subsequent directions given in paragraphs).
You cannot shoot prisoners, force them to walk into minefields, tie them up, or intentionally harm them.
11.3 CHARGE ASSAULT
A soldier who does not begin his Turn in the same hex with a target may perform a Move/Charge Assault Action to move into the hex and then assault. He can expend only half his Movement Point Allowance, rounded down, in order to enter the hex. Thus, a soldier with a Movement Point Allowance of 3 could not cross a window to enter the defender's hex, since this would cost 2 Movement Points, and his halved MPA is only 1. A charge assault is conducted with an additional −3 modifier to the Base Hit Chance, as summarized on the CRT beneath the CRT.
11.4 ASSAULT MODIFIERS
When assaulting, the attacker's Weapon Skill is used to modify the Base Hit Chance. In addition, if the soldier being assaulted is not panicked or wounded and has a Weapon Skill of +1 or +2, then his WS is subtracted from the Base Hit Chance (a WS of zero or less has no effect). A US soldier who is unaware when assaulted cannot use his WS to modify the Japanese assault. An unwounded soldier that is assaulted automatically becomes aware after the assault is resolved.
The Base Hit Chance is modified by −2 if the attacker is already wounded when the assault is resolved. If the target is wounded, he cannot modify the assault with his Weapon Skill. Otherwise, his wound has no effect. The Base Hit Chance is modified by −3 if the attacker is making a charge assault. All modifiers are totaled to yield one final total that is then used to modify the Base Hit Chance, yielding the final Hit Chance.
11.5 KNIVES
For a cost of 1 Weapon Point, players can additionally arm their squad with Kapar knives. The Weapon Point purchases 8 knives, one for each squad member. The knife does not take up an Ammo Box or a Port Box. An attacking soldier (US or Japanese) armed with a knife in Assault Combat has 1 added to any additional Base Hit Chance modifiers.
12. Banzai Charges
A Banzai Charge is one counter representing anywhere from 6 to 16 Japanese soldiers. When a charge receives a Turn, it does not conduct movement as described in 6.8; instead, it automatically moves its full Movement Point Allowance toward the nearest US-occupied hex (whether in sight or not). If a Banzai Charge begins a Turn in a US-occupied hex, it stops moving and assaults all soldiers in the hex. The charge will move again at the start of a Turn in which there are no active US soldiers in its hex.
While moving, the Banzai Charge will move in a direct line toward the closest US-occupied hex, paying normal terrain costs and going around prohibited terrain. In cases where there is more than one possible route, roll a die to determine which hex will be entered. Banzai Charges never crouch or fall prone. All soldiers in a Banzai Charge are assumed to be armed with rifles with fixed bayonets.
BANZAI CHARGE CARD
NR: Number of soldiers. IN: Initiative. COH: Cohesion. MWS: Mass Weapon Skill. IWS: Individual Weapon Skill. MPA: Movement Allowance.
12.1 DAMAGING BANZAI CHARGES
Banzai Charges have three stages during activation: Fresh; Waver; and Break. These ratings are printed on the charge's Characteristic Card under the strength column. As a charge takes hits, check off the number of boxes from the highest to the lowest.
When rolling for damage against a Banzai Charge, each result other than a Panic result reduces the number of soldiers in a charge by one (Banzai Charges ignore Panic results).
When a Fresh charge reaches its Waver zone, the charge may waver. When a wavering charge receives a Turn, roll one die and conduct a Cohesion Check; if the result is equal to or less than the Cohesion Rating, the charge does not waver, and it moves and assaults normally. If the result is higher than the Cohesion Rating, the charge does waver. When a charge wavers, it loses all remaining Turns in the current Round and the AR marker is moved to the Complete space of the AR Track.
When a charge receives a number of hits equal to its Break zone, the charge automatically Breaks, ceases all combat, and moves, Turn by Turn, toward the hex in which the charge was activated and is removed from the map in the first hex entered out of the LOS of all US soldiers. If a charge succeeds in returning to its original hex, it is removed from the map, even if in the LOS of an active US soldier.
If a grenade or satchel charge lands in a hex containing a Banzai Charge, the Charge receives one Grenade Strike PC Check (with a PC of 3). If successful, one Japanese throws himself on the grenade or satchel charge and saves the others (reduce the squad by 1); if the charge rolls for damage individually on the Grenade Outside row of the CRT.
12.2 BANZAI COMBAT PROCEDURE
When a Banzai Charge begins a Turn in a hex with an active US soldier, or enters a hex having spent half of its Movement Point Allowance, combat occurs immediately.
- Total the number of Japanese soldiers currently in the charge and the number of active US soldiers in the hex; if there are more Japanese than US, subtract the US total from the Japanese total to arrive at a positive initial Banzai Charge Assault die roll modifier. If there are more US than Japanese, subtract the Japanese total from the US total for a negative initial Banzai Charge Assault die roll modifier.
Example: A charge with a strength of 6 assaults 2 soldiers for an initial modifier of +4 to the die roll. A charge with a strength of 3 assault 4 US soldiers for an initial modifier of −3.
- If the Mass Weapon Skill of the Banzai Charge is greater than the total Weapon Skill of all US soldiers in the hex, apply the difference to the initial die roll modifier.
Example: A Banzai Charge with a Mass Weapon Skill of +1 assaults two US soldiers with Weapon Skills of −1 and +1, for a total of zero. A modification of +1 is therefore applied to the die roll to yield the difference between Japanese Mass Weapon Skill and total US Weapon Skill.
- When all modifiers are been determined, including Move/Charge Assault, roll one die and consult the Banzai Charge Table.
When US forces fire at a Banzai Charge with non-automatic weapons, the charge is a +2 to hit when Large (8 or more) and a +1 to hit when Medium (4 to 7 soldiers), and 0 hit when Small (3 or fewer soldiers). When firing aimed automatic weapons at a Banzai Charge, use the standard procedure instead, adding 1 for each result in excess of the first. When rolling for grenade, satchel charge, or bazooka damage against a Banzai Charge, roll damage separately for each soldier in the hex. A flamethrower successfully fired into a Banzai Charge eliminates the charge immediately (place a Fire marker in the hex).
When a US soldier assaults a Banzai Charge, he assaults only one member of the charge and not the whole charge itself. If so doing, a normal Assault combat is conducted, using the Banzai Charge's Individual Weapon Skill rating.
If a Banzai Charge assaults an active US vehicle, bunker, or Building hex, use the same procedure as outlined above, but subtract 4 from the final combat die roll. A Banzai Charge has no effect on a closed tank and will ignore one, preferring soldiers and open vehicles as prime targets.
Should a US vehicle attempt to run over a Banzai Charge, conduct one Accident Check (as described in 19.12). If the Accident Check is successful, conduct a PC Check for each active soldier in the vehicle currently in the charge. Failed PC Checks reduce the charge by one; successful PC Checks do not affect the charge (the soldier has leaped out of the way). In this case, the PC of each Japanese soldier in the Charge is considered to be 5.
13. Minefields and Boobytraps
During both Operations and Rounds, your soldiers may stumble upon minefield or boobytrap hexes.
13.1 BOOBYTRAP PROCEDURE
When a US soldier enters a hex during Operations or Rounds, a paragraph may state that the hex contains a boobytrap set by the Japanese. The first US soldier to enter such a hex must immediately conduct a PC Check (5.7). If the Check succeeds, the soldier is unaffected and the boobytrap no longer exists in the hex (place a Boobytrap marker in the hex). If the Check fails, the boobytrap explodes and the soldier suffers damage as if hit by an exploding Grenade Inside (even if he is in an outdoor hex). Once the boobytrap explodes, it no longer exists (remove the Boobytrap marker from the map). If more than one soldier enters a hex with a boobytrap at the same time, the soldier with the highest PC conducts the Check; however, if the boobytrap explodes, all soldiers in the hex suffer damage (roll a die separately for each soldier).
13.2 MINEFIELD PROCEDURE
Minefields are similar to boobytraps except that they are permanent features. When a US soldier first enters a hex, a paragraph may state that the hex is a minefield; place a Minefield marker in the hex. That soldier, and every US soldier to enter the hex later, must make a PC Check (5.7). If the Check succeeds, he is not harmed, but the minefield may still affect other soldiers. If the Check fails, a mine in the field explodes and the soldier suffers damage as if hit by an exploding Grenade Inside. Other soldiers in the hex are not affected by the explosion. If more than one soldier enters a minefield at the same time, each soldier conducts a separate PC Check, and only those who fail the Check suffer the effects of a mine. Minefields have an unlimited number of mines and are thus never depleted or destroyed.
13.3 TIGER TRAPS
A tiger trap is a hole, some 4 to 6 feet deep, filled with sharpened vertical stakes. If a soldier is instructed to enter the Tiger Trap Procedure, that soldier (and every soldier in the hex) conducts an immediate PC Check. Those that pass the Check are unaffected; those that fail are immediately incapacitated on the stakes below. Place a Tiger Trap marker in the hex. Tiger Traps remain on the map for the duration of the Mission. Any soldier entering a Tiger Trap hex after it has been revealed does not conduct the PC Check and risk falling into the trap.
Incapacitated US soldiers may be removed from a Tiger Trap by two active US soldiers sharing a simultaneous US Action in Rounds per incapacitated US soldier. The US soldiers sharing the Action must first conduct a PC Check as they lower themselves into the pit. A failed PC Check causes the soldier to fall and become incapacitated as well.
14. Damage
The results of a successful combat (fire, assault, minefield, etc.) inflict damage on the target of the attack. If the target is a soldier, he is either wounded, incapacitated, killed, or immediately panicked. If the target is a vehicle or wall, the target may suffer damage as well be penetrated by the fire, and the crew or people behind the wall may suffer damage as well. The CRT section under Damage Die Roll specifies both damage to soldiers and, where they are appropriate, penetration results. Soldiers recover from wounds and incapacitation between Missions when playing a game.
14.1 PANIC RESULTS
A common result on the CRT is Panic. This result is identical to the Panic that can befall a soldier during the Action Sequence (6.4), except that this Panic occurs during the Round itself. A panicked soldier is subject to all the following restrictions:
- If Rounds are in progress, he loses any Turns he has remaining in the current Round; move his AR marker to the Panic space. He can perform no Actions in the Rounds, including a free stance change. Instead, he remains immobile for the duration of the Round. At the end of the Round, he falls prone (if not already prone). If in Operations, the Panic result has no effect.
- A panicked commander has no Command Radius and cannot give Turns to make other soldiers aware (6.3).
- A panicked commander cannot use his Weapon Skill when defending against an assault.
- A panicked soldier falls prone at the end of the Round, if not already prone.
14.2 WOUND RESULTS
A wounded soldier is subject to the following restrictions.
- When the wound occurs, the soldier immediately falls prone, if not already prone. Place a Wounded marker on him. The Wounded marker remains on the soldier for the rest of the Mission (unless he is subsequently incapacitated or killed).
- A wounded soldier loses any Turns he has remaining in the current Round; move his AR marker to the Complete space on the AR Track.
- A wounded soldier can receive only one Turn per Round. If a roll in the Action Sequence indicates that the soldier receives two Turns, place his AR marker in the 1-Turn space instead.
- A wounded soldier cannot use his Weapon Skill to modify an assaulting attacker's Hit Chance. In addition, when a wounded soldier makes an assault, he uses a −2 modifier against him.
- A wounded soldier's Port Box total is reduced to one; put an X through one box. If he must immediately drop the contents of one Port Box. If the item he is carrying is a two-box item, he must drop it immediately.
- A wounded soldier cannot be given a Turn or be made aware by a commander (6.3).
- There is a −4 modifier to the Base Hit Chance for a wounded soldier throwing a grenade or satchel charge.
- There is a −1 modifier to the Base Hit Chance for a wounded soldier firing a weapon.
- A wounded soldier has his Movement Point Allowance reduced to 2 for the rest of the Mission. Record his reduced MPA on the Squad Record Sheet.
- A wounded soldier never receives a free stance change. The only way he can change stance is by paying a Movement Point to do so.
- A wounded soldier who suffers an incapacitation or second wound result is incapacitated.
14.3 INCAPACITATION RESULTS
An incapacitated soldier is subject to these restrictions:
- When the incapacitation occurs, the soldier immediately falls prone if not already prone. He remains prone for the rest of the Mission (where it remains for the rest of the Mission, or until he is killed).
- An incapacitated soldier cannot perform Actions of any kind for the duration of the Mission. Move his AR marker to the Inactive space on the AR Track.
- An incapacitated soldier, either US or Japanese, cannot be intentionally attacked in any way. Unintentional attack is allowed (such as a grenade scattering into the incapacitated soldier's hex).
- A soldier can fire into a hex containing an incapacitated soldier is not a target and thus cannot be hit.
- An incapacitated soldier can be moved from one hex to an adjacent hex by a vehicle or by an active standing soldier. However, each time such an Action is performed, you must roll one die; on a result of 0, the soldier dies (any other result is no effect). This die roll is not made when an incapacitated soldier is being moved from hex to hex in a vehicle.
- An incapacitated soldier who suffers a wound or second or incapacitation result is killed.
14.4 KILL RESULTS
When a soldier suffers a kill result, he is dead. Move his AR marker to the Inactive space and place a Killed marker on him. He can be moved by other soldiers like an incapacitated soldier.
14.5 PENETRATION RESULTS
Some paragraphs have the ability to penetrate their target, noted by the shaded areas on the Damage Die Roll portion of the CRT. Penetration applies only to fire against a wall or a vehicle. The effects of penetration depend on whether or not the weapon fires an explosive shell. Bazookas, anti-tank guns, and tank main guns fire explosive shells; all other weapons fire non-explosive bullets. There are three levels of penetration.
Light Penetration. If the shell is explosive, the penetrated surface is destroyed. If non-explosive, the fire passes through a wooden wall, quonset hut, or non-armored vehicle surfaces.
Medium Penetration. If the shell is explosive, the penetrated surface is destroyed. If non-explosive, the fire passes through any type of wall or vehicle surface except a lightly-armored vehicle.
Heavy Penetration. Regardless of the fire type, explosive or non-explosive, the fire passes through and destroys any type of wall or vehicle surface.
A wall can be the target of an attack, and 4 is added to the Base Hit Chance when doing so (except, see Huts, 15.4). A soldier occupying a hex when one of its wall hexsides is penetrated (but not destroyed) can be hit by any fire. Roll one die. If the penetration result is a hit or 0; a crouching soldier is hit on a result of 0 or 1; a standing soldier is hit on a result of 0, 1, or 2. If the soldier is hit, roll for damage normally. If more than one soldier is in the hex, the fire hits the soldier in the most exposed stance first. If there are two or more soldiers in the most exposed stance, determine the target of the attack at random. If a hex with more than one active soldier is hit by aimed automatic weapons, roll one die for each soldier hit and every soldier to see if he is hit.
If a wall is destroyed, all soldiers in the Building hex that the wall bordered are automatically destroyed. Check damage to each such soldier as if he were hit by semi-automatic rifle fire. If a Building hex has two of its wall hexsides destroyed, the building collapses and becomes a Rubble hex. Any soldiers occupying the hex when this occurs are killed.
14.6 AIMED AUTOMATIC WEAPON DAMAGE
If an Aimed Fire with an automatic weapon is made, there is a chance that the fire will hit more than one target in the hex.
If the primary target in a multiple target hex (9.2) is hit by aimed automatic weapon fire, roll for damage and apply the result to the primary target normally. If the damage die roll was greater than 0, roll for damage again. If the result of the second roll is less than the result of the first roll, apply the indicated damage to a second target in the hex. If there is a third target in the hex and the second roll was less than the result of the third roll, apply the indicated damage to the third target. As long as each damage roll result is less than the one before it, keep rolling for each possible target in the hex. Once a damage roll result is equal to or greater than the previous roll in this process, stop immediately. If there is more than one target that could receive the same damage (that the primary target) in the hex, attack the most exposed first (standing, crouching, prone); settle ties at random.
15. Special Terrain
The following types of terrain — caves, foxholes, palm tree tops, and huts — require a certain amount of special treatment in Battle Hymn, to account for their peculiarities.
15.1 CAVES
Caves are treated as stationary tanks (19) with crews of varying sizes; these crews are never subject to panic. US soldiers can never enter active Cave hexes until the cave has been knocked out. Once a cave is no longer active, US soldiers can enter and exit caves which are considered Clear terrain for movement purposes.
When a soldier fires at a cave, he fires at the cave itself and not at the occupants. Add 3 to the Base Hit Chance to hit a Large Cave, and add 2 to the Base Hit Chance to hit a Small Cave. When firing at a cave, first roll to determine if a hit has occurred. Then roll one die again and consult the Cave Damage Table.
The mouth of a cave is considered an aperture for grenade and satchel charge throwing. Caves are considered knocked out the moment all occupants become inactive, the instant a satchel charge lands in the cave, or when a flamethrower is successfully fired into the cave.
Note: If firing a flamethrower at a cave, do not roll again on the Cave Damage Chart. The cave is automatically knocked out. Place a Fire marker in the hex. However, if the Base Hit Chance is random (determined at random) is set on fire instead.
If a bazooka achieves a hit on a cave, the first cave occupant rolls on the Bazooka row of the CRT, and all others roll on the Grenade Inside row for damage.
Cave Actions
A cave receives Turns in a Round just as a soldier or a tank (19.13) does. When a cave receives a Turn, it can spend a number of Crew Points up to the number of men currently in its crew to perform any of the following Actions. A single Action from this list cannot be conducted more than once in a single Turn.
- Fire Anti-Tank Gun (3 Crew Points).
- Load Anti-Tank Gun (2 Crew Points).
- Aimed Fire with Machinegun (2 Crew Points).
- Snap Fire with Machine Gun (1 Crew Point).
- Any other Action (1 Crew Point).
15.2 FOXHOLES
Depending on the Mission Briefing, the digging of foxholes may or may not be allowed. If allowed, it takes 4 Actions in Rounds (which can be shared by more than one soldier) to dig a foxhole. The first Action places a Foxhole marker, shovel side up, in the hex; the fourth Action flips the marker to its completed side. Once completed, a foxhole can never contain more than 3 active or non-active soldiers. Soldiers can never fall prone in a foxhole. When in a foxhole, a soldier can be seen or see out only if he is standing; if a soldier in a foxhole crouches, he becomes lower than the ground and cannot be seen, nor can he conduct any fire combat at all.
Grenades and satchel charges can be thrown from foxholes by a crouching soldier, but the −3 modifier for Target Not in Sight applies. It takes +1 Movement Point to enter or exit a foxhole. If attacking a foxhole with a grenade or satchel charge, treat it as an adjacent aperture if the attacking soldier is in an adjacent or the same hex.
Foxholes can be dug in any terrain on the map (when allowed in a Mission Briefing) except Cliff and Boulder hexes. When a soldier is fired at while standing in a foxhole, there is a −4 modifier applied to the Base Hit Chance. A foxhole is treated as a window for grenade and satchel charge throwing, and damage is assessed on the Grenade Inside row of the CRT for foxhole occupants.
15.3 PALM TREE TOPS
When a Japanese soldier is activated in a Palm Tree Top, place a Palm Top marker in the indicated Palm hex and place the Japanese soldier on top of the marker. If there are any US soldiers in the same hex, they are placed beneath the marker and are considered to be at the base of the tree. The soldier on top of the tree is considered to be in an adjacent hex at Level 2, crouching in Cover, and can never stand or fall prone.
A soldier in a Palm Tree Top can drop grenades or satchel charges on soldiers occupying the same hex at the base of the tree. Use the Tree Top Grenade Scatter Diagram.
If a soldier in a palm tree top is incapacitated or killed, there is a 50 percent chance he will drop his weapon. US soldiers cannot climb palm trees.
15.4 HUTS
Huts represent small native dwellings, usually constructed from bamboo. Each Hut counter includes a doorway hexside and 3 window hexsides. Unlike the printed buildings on the maps (which occupy entire hexes), a hut takes up only a portion of a hex. Soldiers in a Hut can be either in the hut or adjacent to it. A soldier in a hut is placed beneath the Hut counter and is considered to be in the building. A soldier outside a hut is placed on top of the Hut counter and is considered to be in a Cover hex.
When inside a hut, a soldier receives no protection from small arms fire combat if fired upon (bullets pass right through the structure). Therefore, no roll for penetration is necessary; if the hut is hit, roll immediately for damage to the occupants. However, a soldier lying prone in a hut cannot be seen as per the standard LOS rules (8). A hut is destroyed if a grenade, satchel charge, bazooka round, tank main gun, or anti-tank gun is fired into it. If destroyed, flip the Hut counter over to its destroyed side. All soldiers in a destroyed hut are placed on top of the marker, and damage is assessed from the firing weapon itself, ignoring 14.5 (Penetration Results).
A hex containing a destroyed Hut marker is considered a Cover hex. When firing at a Hut, add 2 to the fire combat Base Hit Chance instead of adding 4, since the hut is smaller than a normal building.
16. Captured Equipment
During the course of the game, it is very likely that you will capture various kinds of Japanese equipment. You may take it from incapacitated, killed, or captured Japanese using the Pick Up/Exchange Equipment Action. This equipment can be used with the following restrictions.
Personal Weapons and Crew Weapons. Each captured weapon is considered to have only one clip or round of ammo when captured. A Japanese weapon that runs out of ammo during a Round has no ammo if captured by the US. When using a captured weapon, the weapon's Weapon Skill is considered reduced by 1 for all purposes. Once captured, use the US ammo depletion procedure, not the Japanese procedure.
Grenades. Captured grenades can be used just like normal US grenades, with no reduction to the soldier's WS.
Radios. Captured radios cannot be used by the US.
Vehicles. Captured vehicles, other than tanks, can be driven by US soldiers. However, the Driving Skill of the driver is considered reduced by 1. A soldier with an original Driving Skill of 0 cannot drive a captured Japanese vehicle.
17. Victory
In Battle Hymn, you play to beat the game system itself. Victory is determined by the accumulation of Victory Points (VP's). The number of VP's you have acquired at the end of a Mission determines whether you win or lose.
On the Squad Record Sheet are two boxes to record the VP's you gain and lose during the Mission. Keep the two totals separate. You gain VP's for performing the tasks listed in the Mission Briefing and as revealed in paragraphs during play. You lose two VP's for each US soldier killed or incapacitated during the Mission. In some instances, VP's are not lost for incapacitated US soldiers if they can get off the map or into certain listed hexes. At the end of the Mission, subtract your VP losses from your VP gains to determine your VP total. Compare this total with the schedule in the Victory section of the Mission Briefing. If the result is greater than or equal to the Mission's requirement, you have won. If the result is less than the Mission requirement, you have lost.
Example: You win Mission 1 and, at the end, you have two soldiers killed, two incapacitated, and four who got out intact. If you managed to exit the two incapacitated soldiers from hexes A-1 through Y-1, they survive the Mission. If only one were exited successfully, your squad would be 20 Combat Points (5 soldiers multiplied by 4 for winning).
18. Campaign
Note: In an effort to preserve play balance, highly experienced Ambush! players should neither use their previous campaign veterans nor campaign their Battle Hymn squad.
Battle Hymn can be played as separate Missions or as a continuous campaign. If playing separate Missions, use the pre-generated Squad Record Sheet in this booklet or generate a new squad for each Mission. When playing a campaign, use the same squad on each Mission and replace any killed soldiers between Missions. The game is most fun when played as a campaign, because the individual soldiers acquire a history and take on lives of their own.
The Missions are not presented in chronological order. If you wish to play them in chronological order, by all means do so, but you will need to learn certain Mission-specific rules earlier this way.
18.1 CAMPAIGN PROCEDURE
For the first Mission, use the squad provided in this booklet or one you generate yourself. This squad will then be used for the remaining seven Missions. As you play, note any great deeds a soldier performs, in abbreviated form, on his Combat Point section of the Squad Record Sheet as a reminder. At the end of each Mission, use the following procedure to award Combat Points, improve soldier characteristics, and replace killed soldiers.
1. Award Combat Points
At the end of the Mission, award each of your surviving soldiers Combat Points using the procedure and guidelines of 18.2. Incapacitated soldiers receive CP's if you manage to avoid VP loss for these soldiers by exiting them from the map or by another method (as described in each Mission).
2. Spend Combat Points
A soldier who has 6 Combat Points can spend them to increase his various ratings using the procedure and costs in 18.3. If a soldier has fewer than 6 CP's, he cannot spend them at this time. However, CP's can be carried over from Mission to Mission.
3. Generate Replacement Soldiers
For each US soldier killed during a Mission, you must generate a replacement soldier, using the procedure outlined in 18.4.
18.2 COMBAT POINT AWARDS
Combat Points are used to represent gains in ability due to a soldier's experiences and actions during Missions. When a soldier has accumulated 6 CP's, he can spend them to increase one of his ratings — either his IN, PC, WS, or DS.
To determine the number of Combat Points your squad receives at the end of a Mission, multiply the number of soldiers who survived the Mission by 4 if you won the Mission, or 2 if you lost. The result is the number of Combat Points the squad receives. Soldiers who were incapacitated during the Mission if you avoid VP loss for their incapacitation, as described in the Mission Briefing. Otherwise, if VP's is considered lost with the Mission ends. A surviving soldier automatically recovers from his wounds between Missions and begins the next Mission unwounded.
Example: You win Mission 1 and, at the end, you have two soldiers killed, two incapacitated, and four who got out intact. To manage to exit the two incapacitated soldiers from hexes A-1 through Y-1, they survive the Mission. If only one were exited successfully, your squad would be 20 Combat Points (5 soldiers multiplied by 4 for winning).
Each surviving soldier automatically receives one CP. The remaining CP's are divided among the squad members as you see fit. Soldiers should be rewarded according to how well you thought they fought and how important they were to the Mission. Special events, such as blowing bridges and saving wounded comrades, should also be rewarded, as should commanders giving important Turns to other soldiers. Be creative, and award the discretionary points as you feel they are deserved. For example, wounding a Japanese is usually worth only 1 CP, but if the Japanese was a machinegunner, the soldier who wounded him should probably be awarded 2 CP's instead of 1.
At the end of the Mission, divide your squad's CP's among the surviving soldiers by filling in their CP boxes as they are earned. Use pencil, because they will probably be erased later. It is likely that you will have more CP boxes filled in with abbreviations than you have CP's to distribute. This is intentional. After distributing CP's, erase the abbreviations in those boxes that were not actually awarded a CP.
Example: A squad completing Mission 1 was awarded 20 CP's: 1 per soldier and 15 discretionary. The soldiers' CP boxes were filled in with the following abbreviations over the course of the Mission.
You decide to give E no additional CP's, since he has incapacitated before he could do much. You give 5 additional CP's to Soldier D, for a total of 6, because he was the most decisive soldier in the game, single-handedly killing the three snipers and wiping out the last machinegunner. He actually deserves more than his 6, but a soldier is limited to 6 per soldier for the Mission. You give Soldier B, your commander, a total of 4 CP's because he was very active in encouraging and giving Turns to other soldiers. Soldier C killed Japanese 26, and would normally entitle him to 2 CP, but Soldier B was already awarded 30 by fire. Soldier D also killed Japanese 31 by fire. He deserves 4 CP's because, although his actions were very important, they were not decisive, and Soldier B panicked at a critical moment, causing you to give Soldier B, your commander, the credit instead. At the end of the Mission, you fill in the following number of CP boxes for each soldier on the Squad Record Sheet: 6 for A; 5 for B; 2 for C; 6 for D; and 1 for D. You are now ready to spend the CP's awarded to Soldiers A and D to improve their characteristics.
18.3 IMPROVING SOLDIER CHARACTERISTICS
If a soldier has accumulated 6 CP's, you can spend them to improve his ratings. If a soldier has fewer than 6 CP's, they cannot be spent. Instead, they are accumulated from Mission to Mission until the soldier has 6 to spend. If a soldier has more than 6 CP's accumulated, he can spend them in groups of 6. Any unspent CP's are not lost. When a soldier has fewer than 6 CP's, simply transfer them to his CP Boxes when you fill out the Squad Record Sheet for the next Mission.
You can spend 6 CP's and roll one die. Locate the result on the following table. If the result is an IN, the soldier's Initiative is raised by 1; if the result is a PC, the soldier's Perception is raised instead. You may also change the soldier's MPA from 1 to 2 or from 4 to 5.
18.4 REPLACEMENTS
After you have determined and spent your CP's, you are ready to replace your killed soldiers and those incapacitated soldiers you were unable to save. Use your Squad Record Sheet, cost in Squad Points next to it in the box provided. When the soldier replacing, you can spend those Squad Points onto your Squad Point total next to spend. Furthermore, you can spend all such soldiers onto your Squad Point total to spend. In this way you need not buy exact replacements (although you will often do so).
Example: You lost three soldiers costing 8, 5, and 1 Squad Points, respectively. Thus, you have a total of 14 Squad Points to buy three replacements. You decide to buy soldiers costing 8, 3, and 3 Squad Points and record their costs on the new Squad Record Sheet.
After buying replacements, generate their new ratings using the Perception, Weapon Skill, and Driving Skill Tables, and note their new Movement Point Allowances, where applicable. Record them on the Squad Record Sheet and you are ready to begin a new Mission. Rearm your entire squad using your Weapon Point total.
19. Vehicles
Battle Hymn includes both Japanese and US vehicles. In some Missions, you will be assigned a vehicle; otherwise, you will encounter the vehicles during play. Each vehicle has a different set of attributes and is summarized in its own vehicle section. All Japanese vehicles have cards which determine the vehicle's Actions during play. US vehicles have no cards, and you can perform Actions with them as you wish.
19.1 VEHICLE ATTRIBUTES
Size. Each vehicle is classified as large or small. A large vehicle presents an easier target to hit than a small vehicle.
Armor. A vehicle can be armored or non-armored. An armored vehicle has an Armor Rating (light, medium, or heavy) applied to each of its parts. An armored vehicle hit is not affected unless the fire combat achieves a penetration result (14.5) that equals or exceeds the Armor Rating of the part hit.
Open/Closed. In an open vehicle, all occupants are always exposed to enemy fire. In a closed vehicle, the occupants cannot be hit by fire. Non-armored vehicles can only be open. Place a Closed marker on a closed vehicle to indicate its status (no marker is used to indicate that a vehicle is open). An armored vehicle changes from open to closed at any time during Operations. During Rounds, the vehicle crew must spend an Action to open or close.
Occupants. Every non-tank vehicle has a maximum number of soldiers (active or inactive) it can carry, including the driver and all passengers. During Rounds, the occupants of the vehicle spend Actions independently. Only the occupant identified as the driver can spend Actions to drive the car. Tanks cannot carry passengers; they have a crew that cannot leave the tank.
Speed. Each vehicle has a fast and slow speed used to move during Rounds. When driving fast, there is a chance a vehicle accident may occur, based on the Driving Skill of the driver. During Rounds, a closed tank can travel fast, nor may a vehicle which has had its tires shot out.
Hit Chart. Each vehicle has a Hit Chart in its description that is used to determine the location and effects of each successful fire combat against vehicles. Grenade and satchel charge attacks against vehicles are not resolved using the Hit Charts.
19.2 VEHICLE FACING
Each vehicle counter has an arrow that points toward the hexside that the front of the vehicle faces. A vehicle can move by entering the hex in front of it or by backing into the hex directly behind it. There is no additional cost to turn a vehicle during Operations or Rounds.
Each vehicle has a front, sides, and rear that can be hit by enemy fire. Depending on which face is hit, the armor protection and chance of hitting various parts of the vehicle vary, as shown in the Vehicle Summary. To determine the side that is hit, locate the firing enemy's position relative to the target vehicle's facing on the following diagram. If both attacker and target occupy the same hex, the attacker has his choice of which side to attack (determine the side at random for Japanese attacks).
Note: You cannot intentionally drive a vehicle into a Crater hex; however, a movement reference might force a vehicle to enter one. If so, the vehicle enters the hex at a cost of 3 MP's and makes an immediate Accident Check. Craters have no effect on fire combat against vehicles.
19.3 VEHICLE MOVEMENT DURING OPERATIONS
During Operations, vehicles with an active driver or crew can move hex by hex across the map. As in the case of soldiers moving on foot, you must make a Paragraph Check for each hex the vehicle enters. A vehicle can enter any type of hex except a Building, Rubble, Crater, or River hex. A large vehicle cannot enter a Jungle hex. Accident Checks are not usually conducted during Operations.
A maximum of two vehicles can occupy the same hex at the same instant. A disabled vehicle does count against this limit.
19.4 VEHICLE MOVEMENT DURING ROUNDS
A soldier in the driver's seat of a non-tank vehicle can spend one Turn to perform the Drive Vehicle Action. The crew of a tank can perform the Drive Vehicle Action, or, in combination with other Actions, during a Turn.
Each vehicle has two MPA's: slow and fast. Refer to the Vehicle Summary to find the MPA's of the vehicle being used. A vehicle can be driven slowly at no risk of accident, or fast using the driver's or crew's Driving Skill to avoid accidents. When a Japanese vehicle moves, the Action paragraph will indicate whether it moves fast or slow. When a US vehicle moves, you decide whether to move fast or slow. A closed tank (or vehicle with its tires shot out) can never move fast.
When a vehicle moves, its spends Movement Points to enter hexes, just as soldiers do. A vehicle pays the Movement Point cost for each terrain type as listed on the Movement Point Cost Chart. Vehicles are prohibited from entering certain terrain types listed on the Chart. A vehicle cannot spend more MP's than the Movement Point Allowance (slow or fast) that is in use. When moving a Japanese vehicle, expand as many MP's of its applicable MPA as possible. A vehicle cannot enter a hex if it has insufficient MP's to pay the terrain cost, even if this would be the only hex of its move. There is no additional Movement Point cost to change facing.
When a vehicle is moving and exceeds its slow MPA, it is moving fast and an Accident Check must be made. The Check is made at the moment the vehicle exceeds its slow MPA. Use the DS of the crew (for a tank) or driver (19.9, Accident Checks).
Only two vehicles, disabled or otherwise, can end a Turn in the same hex. However, an unlimited number of vehicles can move through the same hex during a Turn.
A vehicle can run over enemy soldiers, accidentally or purposely, using the procedure in 19.12.
19.5 DRIVERS, PASSENGERS AND CREW
Jeeps. A soldier in the same hex as a jeep can be the driver, a passenger, or can be outside the vehicle. The counters for all soldiers inside a vehicle should be stacked beneath the vehicle counter. The driver is noted by having his counter on top of the stack. The next counter is Passenger 1, and so on. If the driver changes, put the new driver on top. Soldiers can change places in a vehicle, or get in or out of the vehicle, at any time during Operations or by spending a Movement Point during Rounds. A soldier outside a car should be placed on top of the vehicle.
When a vehicle enters a hex, it faces the hexside opposite the one it crossed to enter the hex. When it enters another hex, change its facing to enter the new hex.
Tanks. A tank is operated by a crew that is an integral part of the vehicle, as shown on the tank's card. The number of active crew in a tank determines its IN, PC, WS, and DS Ratings. Soldiers cannot enter, drive, or ride upon tanks. Thus, a soldier is in the same hex as a tank is outside the vehicle.
Soldier Stances. A soldier's stance is irrelevant when occupying a vehicle. Ignore any references to a soldier's stance when he occupies a vehicle, which may occur in some Japanese paragraphs.
Command and Panic. The crew of a tank is never subject to the rules of command and can never be given an extra Turn by a commander. Tanks panic only if their IN Ratings are reduced to 0 or 1, and a die roll on the Action Round Track is 0, 1, or 2. They never panic due to combat or lack of command. The driver and passengers of a non-tank vehicle are subject to command and can be given Turns by a commander. A driver due to a combat result, make an immediate Accident Check (19.9). If panic occurs, for a tank or jeep, due to a roll on the Action Round Track, the vehicle does not move; no Accident Check is made.
19.6 FIRE COMBAT AGAINST VEHICLES
A vehicle and all its occupants are considered one target when fired upon. A soldier in a vehicle cannot be singled out as a target. When firing at a vehicle, the Base Hit Chance is modified using the vehicle's size (large or small). Resolve the fire normally using the procedure in 9.1 to determine whether or not you hit the vehicle.
Note: Although a closed tank is considered an active target for a Japanese soldier, a soldier will not fire at a closed tank (armed with a weapon such as a pistol or bolt rifle) that has no chance of achieving the penetration necessary to damage the tank. The Japanese will ignore those parts of a paragraph instructing him to do so.
If the vehicle is hit, you must determine which part of the vehicle, or which occupant, is hit. Roll one die and locate the result on that vehicle's Hit Chart in the Vehicle Summary for the part hit. After determining the part hit, determine the effects of the damage using the following guidelines.
Passengers. If a passenger is hit, roll for damage using the firing weapon's row on the CRT. Only one passenger is hit unless using aimed automatic weapon. If the firing weapon is a bazooka, the passenger hit by the fire uses the Bazooka result, and all other soldiers roll for damage on the Grenade Inside row as if they were prone. After resolving these effects, the car is disabled in the hex it occupies.
Drivers. If the driver of a non-tank vehicle is hit, roll for damage using the firing weapon's row of the CRT. If the result is panicked or wounded, immediately conduct an Accident Check (19.9). If it is incapacitated or killed, an accident automatically occurs. If using aimed automatic weapon fire, more than one target may get hit (14.6). If the firing weapon is a bazooka, the driver uses the Bazooka result and all other soldiers roll for damage on the Grenade Inside row as if they were prone. After resolving these effects, the car is disabled in the hex it occupies.
Vehicle. If a part of the vehicle is hit, refer to the Vehicle Summary for that vehicle to determine the effects of damage.
Example: You attack a Japanese truck containing 4 Japanese soldiers and one driver with an automatic rifle. Your final hit chance is an 8, and you roll a 6, scoring a hit. Turning to the Truck Vehicle Summary, you roll one die: the result is 3 which is located under the 4-occupant column to yield a hit on the Automatic Rifle row of the CRT, yielding a result of Light. The penetration result does not disable the truck, but one passenger (and possibly more, using Aimed Automatic Weapon Fire) suffers the indicated damage (in this case, a Kill result).
Firing at a Soldier in a Hex Occupied by a Vehicle. A hex with a vehicle in it is considered a Cover hex for purposes of protecting a soldier who is in the hex but not in the vehicle.
Exception: When in a terrain type that provides more protection than Cover, use the better terrain.
Example: If a soldier occupies a Clear hex with a vehicle in it, he would be considered to occupy a Cover hex. However, if the vehicle were small and occupied the Cover modifier, instead of the Palm Tree modifier, use the Palm Tree modifier for better protection.
Disabled Vehicles. A vehicle can be disabled as a result of combat, or as a result of an accident. A disabled vehicle is referred to as being knocked out in some places, and inactive in others. The terms are synonymous. A disabled vehicle is flipped to its destroyed side for the remainder of the Mission. A tank can become immobilized (losing its treads) without being disabled.
19.7 VEHICLE FIRE COMBAT
Tanks. The crew of a tank can fire the various weapons built into the particular tank (19.13). Each crew member is called a Crew Point, and performing combat Actions cost a number of Crew Points, each, as described in detail in 19.13. A tank can fire one or more of its weapons during the same Turn, depending on the number of crew members active, the Crew cost of each fire, and the restrictions for each weapon type. Individual crew members have no personal weapons and cannot fire independently. When a tank fires, the −2 modifier that applies to firing from a jeep does not apply.
Non-Tank Vehicles. A passenger in a non-tank vehicle can conduct aimed or snap fire with his personal weapon according to the fire combat rules (9). However, there is an additional −2 modifier when firing from inside the vehicle. A driver can never snap fire with his personal weapon while driving.
19.8 JAPANESE VEHICLE PARAGRAPHS
The Actions of Japanese vehicles depend on the Action paragraphs used by the vehicle. The Actions of a tank are determined by rolling a die and cross-referencing the result on the Japanese card for that vehicle with the number of active crew members. Look up the card for that vehicle with the number of active crew members. In order. Complete as many Actions as you can, depending on the number of Crew Points available and the tank's situation. Thus, if a paragraph calls for an immobilized tank to move, ignore the movement part of the paragraph.
19.9 ACCIDENT CHECKS
Certain events may cause the driver or crew of a vehicle to make an Accident Check to determine whether or not an accident occurs. The Check is not a simultaneous movement game; therefore, the accident procedure generates accidents that interrupt the normal course of reality, but not so in this game. Thus, when a vehicle has an accident, it is assumed to be moving and out of sequence in the game. An Accident Check is made for the following reasons:
- The instant a vehicle exceeds its slow MPA.
- When a non-tank vehicle's driver, wheels, or body is hit in fire combat.
- When the driver of a non-tank vehicle is panicked or wounded as a result of combat.
To conduct an Accident Check, roll one die:
- If the result is equal to or less than the Driving Skill of the driver or crew, no accident occurs.
- If the results exceeds the Driving Skill of the driver or crew, an accident may occur. Roll die again, and refer to the Accident Table to find out what happens.
19.10 VEHICLES, MINEFIELDS AND BOOBYTRAPS
Tanks. A tank that enters a hex with a minefield or a boobytrap is unaffected and its crew is unharmed. The boobytrap is eliminated, and the minefield remains in effect. Exception: If the US is provided with anti-tank mines, these mines are detonated only when the hex they occupy is entered by a tank. If a tank enters such a hex, it is automatically immobilized, while a jeep is disabled.
Non-Tank Vehicles. When a vehicle enters a hex with a minefield or boobytrap, no PC Check is conducted; detonation is automatic. The vehicle is immediately disabled in the mine hex, and each soldier suffers a Panic Check; if successful, the driver checks PC Check; if successful, the Check fails, the vehicle is disabled and the soldiers in the vehicle panic.
19.11 VEHICLES, GRENADES AND SATCHEL CHARGES
Tanks. When a tank is open, a grenade can be tossed into the vehicle as if through a building aperture. The penalty for throwing it through a non-adjacent aperture applies unless throwing the soldier is in the same hex as the vehicle. If a grenade explodes inside a tank, all occupants are killed and the tank is disabled. A satchel charge can be thrown on an open tank in the same way as a grenade. Furthermore, a satchel charge thrown into a tank's hex (not into the tank itself) can disable the vehicle. If the satchel charge explodes in the hex, roll on the Satchel Charge Outside row of the CRT. If the result is an incapacitated or killed result, the tank is disabled; any other result has no effect.
Non-Tank Vehicles. A grenade can be thrown into a non-tank vehicle as if thrown through a building aperture. The penalty for throwing through a non-adjacent aperture applies unless throwing the soldier is in the same hex as the vehicle. If a grenade explodes inside a vehicle, the vehicle is disabled and the occupants roll on the Grenade Inside row of the CRT to determine their wounds (they are considered prone). A grenade thrown into a vehicle's hex, but not into the vehicle, can also disable the vehicle. If the vehicle is successfully disabled, roll again on the Grenade Outside row once for each soldier in the vehicle. A satchel charge, like a grenade, can be thrown into a non-tank vehicle, causing the occupants to roll on the Satchel Chart Inside row of the CRT (they are considered prone). If the satchel charge is successfully thrown into the vehicle's hex, instead of into the vehicle, the vehicle is automatically disabled. Roll once for each soldier on the Satchel Charge Outside row of the CRT, treating the soldiers as prone.
19.12 RUNNING OVER SOLDIERS
Any vehicle can run over any enemy or friendly soldiers. When a vehicle enters a hex containing one or more enemy soldiers, make an Accident Check. If the Check is successful, you miss the soldiers. If the Check fails, each active soldier about to be run over makes a PC Check; those that succeed get out of the way and are not unharmed; they remain considered out of harm's way. Those that fail are considered run over unless he is hit by rifle fire, and the vehicle must roll over him for itself.
If a US vehicle fails in an attempt to run over a Japanese soldier and wants to try again on the same Turn, the vehicle must exit the hex, turn around sharply (1 MP), and conduct an Accident Check in the hex he entered, where it performed the sharp turn. If successful, the vehicle can return to the hex it came from and try to run over the soldier again once it once more attempt to run him over.
When a vehicle enters a hex containing enemy soldiers, a similar procedure is used. The only difference is that if you make your Accident Check to determine if you succeed in rolling against your Driving Skill, you will hit the enemy. The enemy first gets to make PC Checks, as above; those that fail are hit. An incapacitated enemy soldier is automatically hit and killed.
19.13 TANKS
There are two different tanks depicted in this game: a Japanese light tank, and the US Stuart. Every tank has its own card, identified in the Mission Briefing or in a paragraph. Each tank card lists the vehicle's ratings depending on the size of the crew. Each tank has three weapons. The cannon and coaxial medium machinegun are mounted in the turret and can fire in any direction. However, only one of these can be fired in one Turn. The bow medium machinegun is in the body of the tank and can be fired in the target in front of the tank (as defined in the facing diagram).
Tank Actions
A tank receives Turns in a Round just as a soldier does. When a tank receives a Turn, it can spend a number of Crew Points up to the number of men currently in its crew to perform any of the following Actions. A single Action from this list cannot be conducted more than once in a single Turn.
Aimed Fire with Cannon (2 Crew Points). The cannon and coaxial machinegun cannot be fired in the same Turn. The cannon must already be loaded. When a cannon is fired, it automatically unloaded. A tank never runs out of cannon ammo or jams its cannon.
Load Cannon (1 Crew Point). The cannon cannot be reloaded in the same Turn in which it fires, or in which the coaxial machinegun is fired.
Aimed Fire with Bow Machinegun (2 Crew Points). Target must be in front of the tank. Bow machineguns never run out of ammo, but they can jam.
Snap Fire with Bow Machinegun (1 Crew Point). Target must be front of the tank.
Aimed Fire with Coaxial Machinegun (2 Crew Points). Cannot load or fire the cannon in the same Turn in which the coaxial machinegun is fired. Coaxial machineguns never run out of ammo, but they can jam.
Snap Fire with Coaxial Machinegun (1 Crew Point). Cannot load or fire cannon in same Turn in which the coaxial machinegun is fired.
Move Slowly (2 Crew Points).
Move Fast (3 Crew Points). Tank must be open.
Open or Close Tank (all Crew Points). Cannot be combined with any other Action in the Turn. Place a Closed marker on a tank that closes, and remove the Closed marker from a tank that opens.
19.14 BULLDOZERS
The bulldozer consists of two counters: the vehicle and the plow blade. The vehicle is described in the Vehicle Summary in this booklet. It takes one Action in Rounds to move to raise or lower the blade. When the blade is up, the vehicle can be driven normally. When the blade is down, the vehicle can be moved only one hex per Turn. The specific functions of the bulldozer are described in the individual Mission Briefings or in separate paragraph instructions.
19.15 FIGHTERS
There are two types of fighters in Battle Hymn: Japanese Zeroes and US Wildcats. Fighters have two speeds: taxi speed, and flight speed. When a fighter is on the ground, it is unavailable to taxi and has a Movement Point Allowance of 8 hexes per Turn. When a fighter is in flight, it has an unlimited flight path as described in the specific Mission or in separate paragraphs. The fighters are armed with heavy machineguns, which are never used when on the ground. Once airborne, specific paragraphs will instruct you as to how these guns are used. In some Missions, it will be possible to attack enemy fighters; in other Missions, such actions are not allowed.
20. Hidden Targets (Optional)
Note: Map A in Battle Hymn contains several buildings. The Japanese soldiers and vehicles, however, have no provision for firing at targets lying prone in building hexes, because such targets are not in sight, and therefore are not valid targets, even though Japanese weapons are quite capable of penetrating buildings. The following optional Japanese Action is highly recommended, because it allows the Japanese to fire at these hidden targets. Letting them do so is much more realistic, and it evens things up a bit.
If a Japanese soldier has fired a visible target in a wooden building hex, and he receives a subsequent order to fire again but has no target for the US soldier has since fallen prone. Conduct the following procedure for the Japanese.
- If the paragraph gives no other options for the Japanese (such as move, surrender, throw a grenade), the Japanese conducts a PC Check. If successful, he fires at the wall; if he fails the PC Check, he will do nothing.
- If the Japanese is allowed (by passing his PC Check) to fire at the wall, he will crouch and conduct the procedure outlined in 14.5.
Note: A Japanese tank will conduct the same procedure, but will fire only its coaxial or bow machinegun at a wooden wall.
21. Hints and Reminders
The following items are included to provide you with a quick summary of some of the more important details of the game.
- If you need to remember a specific paragraph, write down the paragraph number and a few words describing it, such as Victory Conditions, 666. When you are instructed to look at a paragraph number and situation that must exist before you can look it up, this procedure could save you from an enormous amount of wasted time and frustration later in the Mission.
- When you purchase weapons for your squad, remember that each weapon comes with one round of free ammunition. This ammo still takes up one Ammo Box, however. A soldier cannot carry 6 rounds of ammunition and one in the weapon. Note also that a pistol and a round of ammo for it each take up an ammo box.
- Don't forget to conduct grenade and satchel charge PC Checks! Both Japanese and US soldiers (not in a vehicle) have the chance to fall prone and/or throw the thing away (10.2).
- Bazookas are a squad's best friend. Not only are they vital for such difficult tasks as blowing up tanks, but they are often extremely helpful when attempting to take out the odd machinegun nest hidden in a building. Remember that any wall hit by a non-dud bazooka round is automatically destroyed, and any soldiers behind the wall are hit and take bazooka damage.
- Move soldiers in a crouched position during Operations. Not only are they vital for the difference between life and death for your men.
- Use your commanders to give Turns to soldiers with good Weapon Skills. (We have seen Private C move into a Japanese hex, assault to kill, fail, assault again, fail again, and finally succeed before the Japanese had a chance to respond).
- Although there is no right way to attack a bunker or occupied building, crouching next to one of its windows may be the safest (unless the crafty Japanese soldiers stands up).
- Once a crew weapon has been set up in hex, any soldiers in that hex may fire it, without spending an Action to set it up again.
- If a wounded Japanese is instructed to enter a hex that he will never be able to enter (due to his halved Movement Point Allowance), move him into the hex anyway. Otherwise, he will spend the rest of the Mission trying to get out of that one hex.
- Place Event markers every time the word Event appears on the Mission Card as a result of a Paragraph Check, even if a subsequent die roll indicates No Event.
Mission 1: Boomerang
Guadalcanal, 7 September 1943. As part of Carlson's Raiders, your squad is being put ashore on the Eastern side of the island. Your mission is to infiltrate the Japanese rear area, cover the marines' left flank, and return overland to Henderson field with a thorough report of enemy strength.
Your Squad
You can use the pre-generated squad in this booklet, or generate one of your own. If you use the squad provided, copy down the information on a blank Squad Record Sheet for use in this Mission. If you generate an original squad, use the equipment listed on the pre-generated squad instead of buying your own for this Mission.
Set Up
Use Maps B and C. The top of the map is the north edge. Your soldiers can enter in hexes A-18, A-19, and B-19 only. No markers begin the Mission on the map. Activation Levels are as follows: c1 (0-1); c2 (0-4); c3 (0-5); c4 (0-6).
Special Rules
River. The water barrier running from hex R-1 to X-14 is a river and can be crossed only at a Ford hex.
Cliffs. The cliffs on Map B are not steep and can be moved through at a cost of 2 Movement Points.
Surf. The surf is at low tide. Surf hexes can be moved through at a cost of 2 Movement Points.
Foxholes. Foxholes can be dug in any terrain other than Boulder and Cliff.
Victory
You need 8 Victory Points to win. You receive Victory Points for the activation of Japanese soldiers. Additional Victory Points will be revealed during the Mission. The Mission ends in Condition 3 or 4 when there are no active Japanese on the map or all US soldiers have exited the north mapedge between hexes A-1 and Y-1, inclusive.
At the end of the Mission, total your Victory Points to determine whether or not you have won. VP loss for an incapacitated US soldier can be avoided by moving him off the map between hexes A-1 and Y-1, inclusive.
Mission 2: Hit and Run
Somewhere in the Russel Islands, 18 September 1943. While the battle for Guadalcanal swings back and forth, naval intelligence has detected that the Japanese have been constructing a secret fighter base in the Russel Islands to provide advanced fighter cover for the daily bomber raids against Henderson Field.
Your hand-picked men are being sent on a dangerous but vital mission: embark by submarine, land at night, and destroy that base!
Your Squad
You can use the pre-generated squad, your squad from Mission 1, or a new squad. Regardless of which you use, buy new equipment from the Equipment Costs Chart using your squad's Weapon Points. In addition, you receive 6 satchel charges for free.
Important: If you are conducting a Campaign, you must re-roll for available Weapon Points for your squad, turn in your old weapons, and purchase new ones.
Set Up
Use Map A. The top of the map is the east edge. Your men enter in two rubber rafts in hex Y-19. Place an antenna in hex S-7 on the roof. The Activation Levels are as follows: c1 (0-1); c2 (0-3); c3 (0-5); c4 (0-5); c5 (0-8); c6 (0-6).
Special Rules
Rafts. Rafts can move 4 all-water hexes per Turn. To move a raft 4 hexes per Turn in Rounds, at least two active soldiers must spend simultaneous Actions. To move a raft in Operations requires only Paragraph and Event Checks as you enter each hex. While moving in Rounds, rafts can be carried 2 hexes per Turn by two standing soldiers. In Operations, rafts can be carried by two standing soldiers, conducting Paragraph Checks normally.
Note: One US soldier can drag a raft 1 hex per Turn in Rounds on land, and paddle it 2 hexes per Turn in the water.
Rafts must be hidden in Palm Tree hexes while not in use by flipping them over to their hidden sides. It takes 2 Actions in Rounds to hide or uncover a hidden raft. Hidden rafts cannot be seen by a Japanese soldier, even if he is in the same hex.
When a raft enters a Beach hex, it is considered to be half in and half out of the water. Soldiers can freely enter and exit a raft in a Beach hex. When being fired at, the soldiers in the raft are the targets. If the fire misses the soldiers, roll one die; on a 0-2, the raft is hit and deflates immediately. All soldiers in the deflated raft are immediately placed in the water and lose all the gear being carried in their Port Boxes. Depending on the Mission, if the surf is shallow, all soldiers in the raft may continue to move normally; if the surf is deep, all soldiers drown.
Night Visibility. The Mission occurs at darkest midnight. A soldier can see only 4 hexes, exclusive of the hex he occupies.
Stream. The water barrier running from hex Y-6 to R-9 is a stream and can be crossed normally.
Lagoon. The lagoon is deep and cannot be entered.
Surf. The all-water hexes are at high tide and can be entered only in rubber rafts.
Foxholes. Foxholes can be dug as stated in 15.2.
Victory
You need 15 Victory Points to win. In addition to the points you receive for the activation of Japanese soldiers, you receive 2 additional VP's for the destruction of each building on the map. Other VP's will be revealed during the Mission. A building is destroyed when a satchel charge is successfully thrown into its one or more hexes. Regardless of whether the building comprises one or more hexes, the entire building is destroyed at once. Place a Rubble marker in each destroyed hex.
The Mission ends in Condition 5 or 6 when the last US soldier exits in a raft from hexes L-19 through Y-16, inclusive. Victory Point loss for an incapacitated US soldier can be avoided by exiting him with the rest of the squad.
Mission 3: In Reserve
Somewhere on Saipan, D+2. Finally clearing the beaches, the rest of your division has moved inland. Your squad, in reserve, has been assigned the gravy job of guarding the Sea Bees while they build a supply road to link up with the Japanese coastal road beyond the beach. Once this road is completed, supplies can be moved up to the front.
Your Squad
You can use the pre-generated squad, your own continuing squad, or you can generate a new one. The Mission begins with a Bulldozer counter and US Card 01 on the map. US Card 01 is considered a member of your squad for the entire Mission. In addition, you receive a radio for free.
Set Up
Use Maps A and B. The top of the map is west. Your squad sets up in 4 foxholes, 2 men per hole, in hexes Q-18, R-17, T-16, and U-16. The bulldozer and US 01 set up in hex S-17, facing hex S-16. The Activation Levels are as follows: c1 (0-3); c2 (0-5); c3 (0-8); c4 (0-8).
Special Rules
Stream and Lagoon. The water barrier running from hex R-1 to R-9 is a stream and can be crossed by paying the additional MP cost listed on the Movement Point Cost Chart. The Lagoon is shallow and can be entered at a cost of 2 MP's per hex by a standing soldier. Vehicles cannot enter the lagoon.
Foxholes. Foxholes can be dug in any terrain except Boulder and Cliff.
Surf. The tide is out and the surf can be entered at a cost of 2 MP's per Surf hex.
Cliffs. The cliffs are steep and can be crossed only by climbing.
Road Construction. To clear a Palm Tree hex, the bulldozer must spend 2 Actions (if in Rounds). The first Action is to enter the Palm Tree hex, and the second Action clears it. If in Operations, a hex can be cleared after rolling two Random Event Checks.
The bulldozer's blade must be down in order to clear a hex (the bulldozer must spend a Road-Building Action if the blade is up). The road must be built in a line of contiguous Palm Tree hexes; once a hex is cleared, place a Road marker in the hex to denote its cleared status. Each time the bulldozer enters a Palm Tree hex, it must conduct an Accident Check (even in Operations). In the event the bulldozer throws a tread, it can be repaired by spending 8 Actions (if in Rounds) or 8 Random Event Checks (if in Operations). The bulldozer ignores any Crash results when performing Accident Checks during a Road-Building Action.
Victory
You need 11 Victory Points to win. In addition to the VP's you receive for Japanese Activation, you receive 1 VP per Road hex successfully cleared. Other VP gains will be revealed during play.
The Mission ends in one of three ways: (1) in Condition 4 when there are no active Japanese on the map and the last US soldier and vehicle has exited from hex Y-6; (2) in Condition 4 when the last US soldier has retreated off the map between hexes L-19 and Y-16, inclusive; or (3) the minute the bulldozer is knocked out prior to the completion of the road-building, the Mission ends immediately.
Victory Point loss for an incapacitated soldier is ignored in (1), above, and cannot be avoided in (2).
Mission 4: Pick-Up and Delivery
Somewhere, sometime. Three days ago, a valuable Australian coastwatcher radioed that Japanese patrols of his island have increased. He says he has vital information, too delicate to be radioed and needs to be picked up before the Japanese find him.
Your Squad
You can use your continuing squad, the pre-generated squad, or a new one. Regardless of which one you use, re-roll the squad's available Weapon Points and buy new weapons for your squad. You receive two rubber rafts for free. Due to the commando-like nature of the Mission, you cannot purchase crew weapons or bazookas.
Set Up
Use Maps B and C. The top of the map is the north edge. Your squad enters along the east edge in two rafts between hexes Y-11 and Y-14, inclusive. Each raft is large enough for 4 men and all their equipment. No markers begin on the map. Activation Levels are as follows: c1 (0-1); c2 (0-2); c3 (0-5); c4 (0-6).
Special Rules
Rafts. Rafts can move 4 all-water hexes per Turn. To move a raft 4 hexes per Turn in Rounds, at least two active soldiers must spend simultaneous Actions. To move a raft in Operations requires only Paragraph and Event Checks as you enter each hex. While moving in Rounds, a raft can be moved 4 contiguous water-coast or river hexes. In Rounds, rafts can be carried 2 hexes per Turn by two standing soldiers. In Operations, rafts can be carried by two standing soldiers, conducting Paragraph Checks normally.
Note: One US soldier can drag a raft 1 hex per Turn in Rounds on land, and paddle it 2 hexes per Turn in the water.
Rafts must be hidden in Palm Tree hexes while not in use by flipping them over to their hidden sides. It takes 2 Actions in Rounds to hide or uncover a hidden raft. Hidden rafts cannot be seen by a Japanese soldier, even if he is in the same hex.
When a raft enters a Beach hex, it is considered to be half in and half out of the water. Soldiers can freely enter and exit a raft in a Beach hex. When being fired at, the soldiers in the raft are the targets. If the fire misses the soldiers, roll one die; on a 0-2, the raft is hit and deflates immediately. All soldiers in the deflated raft are immediately placed in the water and lose all the gear being carried in their Port Boxes. Depending on the Mission, if the surf is shallow, all soldiers in the raft may continue to move normally; if the surf is deep, all soldiers drown.
River. The water barrier running from hex R-1 to Y-14 is a river and can be crossed only at the ford in hex R-8.
Cliffs. The cliffs are gentle and can be entered at a cost of 2 Movement Points per hex.
Foxholes. Foxholes can be dug in all terrain other than Boulder and Surf.
Victory
You need 12 Victory Points to win. In addition to the points you receive for Japanese activation, you receive a bonus of 10 additional VP's at the end of the Mission if you get the Australian off the map and back to safety. The Mission ends in Conditions 3-6 when all US soldiers have exited the map from hexes Y-11 through Y-14, inclusive. VP loss for an incapacitated soldier can be avoided in this Mission by placing the soldier in a raft and exiting him with the rest of the squad. Incapacitated soldiers left on the map at the end of the Mission do count against your Victory Point total.
Mission 5: Stretched Thin
Guadalcanal, 13 September 1943. The Japanese are expected to make a major effort against Henderson Field at any time. General Vandegrift has called your squad back up from reserve (the first rest they've had in weeks) to plug a gap in the line on a narrow ridge just south of the field. Henderson Field must be held at all costs!
Your Squad
You can use your continuing squad, the pre-generated squad, or a new squad. Regardless of which one you use, buy all new equipment for your squad (remember to re-roll for available Weapon Points) and receive free a heavy machinegun, US soldiers J and K, and a bulldozer. Use US Cards 04 and 05 for soldiers J and K. In addition, you receive 4 mines (represented by Minefield markers) which you can place in any non-Building hexes.
Set Up
Use Maps A and C. The top of the map is North. Your soldiers must set up on any Level 3 Ridge hex running roughly from hexes A-11/A-12 to hex R-14. Your men can set up in foxholes, 2 per foxhole, but you cannot place a foxhole in a Boulder hex. Place Crater markers in hexes E-2, H-2, L-3, Q-4, O-5, and M-7. J, K, and the bulldozer set up in hex S-4. The blade of the bulldozer is up; facing the bulldozer at your discretion.
Since the Japanese are expected to attack, there are no Activation Levels. The Mission begins in Operations by US soldiers J and K driving the bulldozer and repairing the craters in the runway.
Special Rules
Soldiers J and K. These are Seabees, and they are not members of your squad. Instead, they have been assigned the task of repairing the runway following the last air raid. Soldier K is Willie's commander and can give orders only to Willie (J). K cannot issue orders to your squad unless one or more Japanese soldiers have entered a hex north of the 9 hexrow, at which time J and K are immediately considered members of your squad for the remainder of the Mission. If J and K become inactive, then and only then can your soldiers operate the bulldozer and continue to repair the runway. If the Mission ends and J and K have not become members of your squad, you do not lose VP's if they are killed or incapacitated.
Repairing the Runway. The bulldozer must have its blade down and a Crater hex to repair the hex. It takes 1 Action to raise and lower the blade, and 1 Action in Rounds to fill a crater. In Operations, it takes one Random Event Check. Once filled, remove the Crater marker from the map and move on to the next hex to be filled. Each time a crater is filled, conduct an Accident Check. If the result is a thrown tread, J and K can repair the tread at a cost of 10 Actions (if in Rounds), or 5 Random Event Checks (if in Operations).
Placing Mines. Each Minefield marker represents a single mine rather than an actual minefield. If a Japanese soldier or vehicle enters a hex containing a mine, conduct the normal Minefield Procedure, but then remove the Minefield marker from the map after all results have been applied. US soldiers (only) can enter a US mine hex without danger.
Stream and Surf. The water barrier from Y-6 to X-13 is a stream and can be entered by soldiers as described on the Movement Point Cost Chart. Surf hexes are shallow and can be moved through at a cost of 2 Movement Points per hex.
Dusk. The Mission occurs at dusk, and a soldier can see to a maximum distance of only 8 hexes, exclusive of his own.
Foxholes. The island is tropical, and foxholes can be dug according to 15.2.
Victory
You need 30 Victory Points to win. In addition to the VP's you receive for the activation of Japanese soldiers. In addition, you receive 2 VP's for each plane that lands safely on the field and exits the map. You lose 2 VP's for each crashed plane and 1 VP per Crater marker left on the map at the end of the Mission. The way the Mission ends will be revealed during play.
Mission 6: Rear Guard
Iwo Jima, 23 February 1945. Your men have been assigned the important task of policing the rear area of Iwo near the Nr. 2 Airfield. Although mostly secure by now, hidden pockets of Japanese soldiers reportedly continue to plague the rear areas and the supply lines in the northern portion of the island. Casualties continue to be high, and your men think of little else as they move out.
Your Squad
You can use your continuing squad, the pre-generated squad, or a new squad. Regardless of which you use, buy new equipment for your squad (don't forget to re-roll for available Weapon Points) and receive free 2 jeeps and a mounted medium machinegun. A medium machinegun mounted on a jeep cannot be removed from the jeep; if the jeep is wrecked, so is the gun. The MG is fired by Passenger 1; any other passenger can assist. The driver of the jeep can neither fire nor assist firing the MG. The jeep can still carry 4 men and their equipment.
Set Up
Use Map A. The top of the map is north. Your men enter in the jeeps in hex Y-5 on the east mapedge. Your squad must make a thorough reconnaissance of the area around the road intersection at hex E-16. No markers begin on the map. The Activation Levels are as follows: c1 (0-1); c2 (0-3); c3 (0-7); c4 (0-8).
Special Rules
Stream, Lagoon, and Surf. The water barrier running from hex Y-6 to hex R-10 is a stream. The lagoon is shallow. The surf is shallow.
Cliffs. The cliffs are steep and require 1 Action to climb.
Foxholes. Foxholes cannot be dug in this Mission.
Victory
You need 10 Victory Points to win. In addition to the VP's you receive for the activation of Japanese soldiers, VP awards will be revealed during play. The Mission ends will be revealed during play.
Mission 7: Bloody Nose Ridge
Peleliu, 15 September 1944. Finally moving inland from the beaches, your men are exhausted as they are called up to support the effort against the high line of hills dubbed Bloody Nose Ridge. After a sleepless night and a dawn bombardment, your men are ordered out to advance and take the ridge at all costs. HQ thinks that the Japanese are weak to your front, and a rapid advance may cut off their retreat. The day is extremely hot.
Your Squad
You can use your continuing squad, the pre-generated squad, or a new squad. Regardless of which you use, re-arm your men and receive a BAR (automatic rifle) for free.
Set Up
Use Maps A and C. The top is the east edge. Your squad enters along the east edge between hexes O-1 and Y-1, inclusive. Place Crater markers in hexes E-3, H-5, L-4, M-7, and S-4. Place Rubble markers in all Building hexes on the map. The Activation Levels are as follows: c1 (0-3); c2 (0-4); c3G (0-5); c4 (0-7).
Special Rules
Stream. The water barrier running from hex Y-6 to Y-14 is a stream and can be crossed by standing soldiers for the normal Movement Point cost.
Foxholes. Foxholes cannot be dug in this Mission.
Surf. The surf is shallow.
Heat. The day is excessively hot. Reduce the PC Rating of all members of your squad by one for this Mission only.
Victory
Victory Points, other than those for Japanese activation, and the method by which the Mission ends will be revealed during play.
Stop! You cannot play Mission 8 until you have played and won Mission 7. Read no further until that time.
Mission 8: In Hot Pursuit
Shortly afterwards (see back of box), having taken Bloody Nose Ridge, your men have been ordered to pursue the enemy and cut the island in half before they can make a new line of defense. From high atop a line of ridges, your men see a valley and the coast below them. As the sun sets, your Sarge decides to push on to the beach and hold until dawn.
Your Squad
Since the pursuit was ordered immediately, players should examine their surviving, victorious squad from Mission 7 and select one of the following three options before starting this Mission.
- Begin Mission 8 with only the active members of your squad (including wounded) from Mission 7 and use only the remaining ammo — the way Sarge would do it. The ammo can be redistributed among your men, but only among the active members.
- Begin Mission 8 by completely reconstituting and re-arming your squad and receive a flamethrower for free.
Important: In all of the preceding choices, you cannot campaign your squad or change their ratings in any way.
Depending on the option selected, the Victory Conditions listed below will differ.
Set Up
Use Maps A and B. The top of the map is the east edge. Your soldiers enter in hex A-1. The Activation Levels are as follows: c1 (0-2); c2 (0-5); c3 (0-7); c4 (0-8).
Special Rules
Cliff Hexes. The cliffs are steep and can be entered only as described in the rules.
Surf. The surf is shallow and can be entered by standing soldiers for a cost of 2 MP's.
Lagoon. The lagoon is deep and is prohibited for all movement.
River. The river is deep and cannot be crossed except at the ford in hex R-8.
Foxholes. Foxholes cannot be dug in this Mission.
Heat. The heat continues from Mission 7 into this Mission. Reduce all PC ratings by 1.
Victory
Option 1. You need 19 Victory Points to win. In addition to VP's for the activation of Japanese soldiers, other VP gains will be revealed during play. The Mission ends in Conditions 2 through 4 in one of two ways: (1) when there are no active Japanese on the map and all active US soldiers occupy Beach hexes; or (2) if all US soldiers have exited hex A-1. In either case, you do not lose VP's for the incapacitation and killing of US soldiers.
Option 2. You need 23 Victory Points to win. In addition to VP's gained for the activation of Japanese soldiers, other VP gains will be revealed during play. The Mission ends in Conditions 2 through 4 in one of two ways: (1) when there are no active Japanese on the map and all active US soldiers occupy Beach hexes; or (2) if all US soldiers have exited hex A-1. If the Mission ends according to the first circumstance, VP loss for an incapacitated US soldier can be avoided by moving him into a Beach hex. If the Mission ends otherwise, VP loss cannot be avoided.
Option 3. You need 26 VP's to win. In addition to VP's gained for the activation of Japanese soldiers, other VP gains will be revealed during play. The Mission ends in Conditions 2 through 4 in one of two ways: (1) when there are no active Japanese on the map and all active US soldiers have exited hex A-1. If the Mission ends according to the first circumstance, VP loss for an incapacitated US soldier can be avoided by moving him into a Beach hex. If the Mission ends otherwise, VP loss cannot be avoided.
DESIGN CREDITS
Game Design: Joseph Reiser Ambush! System: Eric Lee Smith Graphics: Ted Koller Rules Editing: Bob Ryer Playtesting: Paul Fasoldt, Paul Bates, the staff of Victory Games, Inc.
Box Art: Jim Talbot Production: Ted Koller, Rosaria Baldari, Colonial Composition, Monarch Services, Inc. Camera Dept. Supervision: Elaine M. Adkins Project Oversight: W. Bill
Vehicle Summaries
BULLDOZER
Large Vehicle; Armored; Open Only
Maximum Occupants: 1 Slow Movement Point Allowance: 2 Fast Movement Point Allowance: 4
Damage Effects: Tread: If the tread is hit and the penetration result equals or exceeds the tread armor rating, the tank cannot move. Body: If the body is hit, and the penetration result equals or exceeds the armor rating for the side hit, the bulldozer is disabled. Plow: If the plow is hit and the penetration result equals or exceeds the armor rating, the plow explodes (place a Fire marker). If the plow is destroyed, the bulldozer is still considered active. Driver: Roll for damage using the CRT row for the appropriate weapon. If the driver panics or is wounded, make an immediate Accident Check. If the driver is incapacitated or killed, an Accident occurs, roll on the Accident Table. The bulldozer is considered a tank for grenade and satchel charge combat and on the Accident Table.
TRUCK
Large Vehicle; Non-Armored; Open Only
Maximum Occupants: 2 in front (driver and assistant), 8 in rear Slow Movement Point Allowance: 4 Fast Movement Point Allowance: 8
Damage Effects: Tire: Vehicle cannot be driven fast. If occupied, make an immediate Accident Check. Body: If body is hit, resolve combat on appropriate weapon line of the CRT. If the result is light penetration, reduce passengers (if any) by one. If penetration result is medium or heavy, truck is disabled. Driver: Roll for damage using the appropriate weapon line of the CRT. If driver panics or is wounded, make an immediate Accident Check. If the driver is incapacitated or killed, an accident occurs; roll on the Accident Table. Assistant: Roll for damage using the appropriate weapon line of the CRT. Passenger: Reduce the number of passengers by one. The truck is considered a car for grenade and satchel charge combat and for the Accident Check.
JAPANESE ZERO/US WILDCAT
Large Vehicle; Non-Armored; Open Only
Maximum Occupants: 1 Taxi Speed: 8 Air Speed: Unlimited
Damage Effects: Tire: No result. Fuselage: If the fuselage is hit and the penetration result equals the armor rating, roll one die. On a 0-4, no effect; on a 5-9, or if the penetration result exceeds the armor rating, the plane explodes in a fiery ball (place a Fire marker). Engine: If the engine is hit, and the penetration result equals or exceeds the armor rating, the plane explodes (place a Fire marker). Any other penetration result is ignored. Cockpit: If the cockpit is hit, roll for damage with the attacking weapon and immediately apply the results to the pilot's line. Any result (including panic) causes an immediate crash in the plane's hex. Note: In all cases where the plane crashes, all soldiers in the hex are killed and vehicles knocked out. In all cases where the plane explodes, all soldiers in the crash hex and all adjacent hexes are killed and vehicles knocked out. Soldiers two hexes from the explosion check for damage on the Bolt Rifle line of the CRT. Vehicles two hexes away are unaffected.
AMPHIBIOUS TRACTOR
Large Vehicle; Armored; Open Only
Maximum Occupants: Driver, 8 in rear Slow Movement Point Allowance: 2 in water, 4 on land Fast Movement Point Allowance: 6 on land (not allowed in water)
Damage Effects: Tread: If the tread is hit and a medium or heavy penetration is achieved, the tread cannot move, nor can the tread be repaired. Body: If the body is hit, resolve combat using the CRT row for the appropriate weapon. If the result is light penetration, reduce passengers (if any) by one. If penetration result is medium or heavy, the tractor is disabled. Driver: Resolve damage using the appropriate weapon line of the CRT. If driver panics or is wounded, make an immediate Accident Check. If driver is incapacitated or killed, an accident occurs. Reduce the number of passengers by one. The tractor is considered a car for grenade and satchel charge combat and on the Accident Table.
JEEP
Small Vehicle; Non-Armored; Open Only
Maximum Occupants: 4 Slow Movement Point Allowance: 5 Fast Movement Point Allowance: 9
Damage Effects: Tire: Vehicle cannot be driven fast. If occupied, make an immediate Accident Check. Body: Resolve combat using appropriate weapon line of the CRT. If a result is a penetration result, the vehicle is disabled. If any other result is achieved against it, make an immediate Accident Check. Driver: Roll for damage using the appropriate weapon line of the CRT. If the driver panics or is wounded, make an immediate Accident Check. If the driver is incapacitated or killed, an accident occurs; roll on the Accident Table. Passenger: Roll for damage using the appropriate weapon line of the CRT. The jeep is considered a car for grenade and satchel charge combat and for the Accident Table.
JAPANESE LIGHT TANK/US STUART TANK
Large Vehicle; Armored; Closed (C) or Open (O)
Crew: 4 Slow Movement Point Allowance: 4 Fast Movement Point Allowance: 7
Damage Effects: Tread: If the tread is hit and the penetration result equals or exceeds the tread armor rating, the tank cannot move. Body: If the body is hit and the penetration result equals or exceeds the armor rating for the side hit, the tank is disabled. Turret: If the turret is hit and the penetration result equals or exceeds the armor rating for the side hit, the coaxial machinegun is destroyed, but the tank is not disabled. Crew: If the tank crew is hit, reduce the crew by one. If hit by aimed automatic weapon fire, reduce the crew by one and continue rolling for additional hits. Do not roll for damage against crew members; reduce the crew by one when a crew member is hit.
Scatter Diagrams
Grenade, satchel charge, and mortar scatter is resolved with two diagrams. Scatter Diagram A (rolled with percentile dice) and Scatter Diagram B (rolled with one die) each divide the six hexes surrounding a target hex into numbered ranges; locate the range containing your die roll to find the hex the shot scatters into.
Note: Scatter diagrams are always faced away from the player, with the top of the diagram facing the X1 hexrow.
Counter Identification Summary
Japanese Counters: Soldier (standing, crouching); Anti-Tank Gun; Bolt Rifle (jammed); Pistol (jammed); Light Machinegun (unprepared); Heavy Machinegun (unprepared).
US Counters: Soldier (standing, crouching); Action Round Marker; Radio (unprepared); Bazooka (unprepared); Automatic Rifle, Browning (jammed); Semi-Automatic Rifle, M-1 (jammed); Heavy Machinegun (unprepared); Medium Machinegun (unprepared); Submachinegun, Thompson (jammed); Pistol (jammed); Carbine (unprepared); Flamethrower (unprepared); Satchel Charge (unprepared); Bulldozer Blade (up, down); Explosives; Jam; Thrown Tread; Australian (crouching); Native (crouching).
Game Markers: Event; Starshell; Palm Tree Top; Crater; Rubble; Fire; Hut (destroyed); Minefield; Quicksand; Tiger Trap; Boobytrap; Barge; Amphibious Tractor (destroyed); Bulldozer (destroyed); Raft; Concealed Raft; Incomplete Foxhole; Complete Foxhole; Bunker (destroyed); Banzai Charge; Antenna (destroyed); Cave; Cave Surrender; Submarine; Truck (destroyed); Fighter (destroyed); Light Tank.