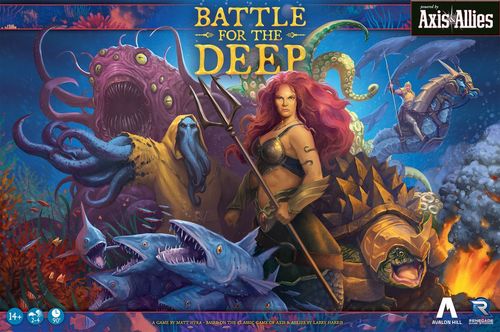
Battle for the Deep: Powered by Axis & Allies
Battle for the Deep: Powered by Axis & Allies Rulebook
Table of Contents
Table of Contents
Game Contents
- 28 Undersea Kingdom Units
- 28 Leviathans Units
- 28 The Protectors Units
- 28 Denizens of the Deep Units
- 56 Control Markers (14 per faction)
- 48 Plastic Chips
- 6 Combat Dice
- 6 Battle Markers
- 4 Base Tokens
- 4 Unit Reference Charts
- 4 Player Order Cards
- 1 Round Tracking Token
- 1 Game Board
The Factions
The world deep beneath the ocean's surface has been through many wars and times of peace over the ages. Like the ebb and flow of the tides, kingdoms have risen and fallen as they have fought each other for power and control of the aquatic regions below the surface.
Once again, we find the chaos of war turning the oceans into tumultuous battlefields, abandoned graveyards of the fallen, and kingdoms long forgotten. Now, only four factions remain. Each has a proud leader, most of whom have been fighting these battles for centuries.
Coraline Oceanus is the leader of the UNDERSEA KINGDOM, and her family has ruled over the bipedal creatures of the seas for 433 generations. Over this time, they have tamed and domesticated several peaceful creatures of the sea, such as the seahorse, dolphin, and flying fish. These creatures use their speed to avoid conflict, but with a bit and bridle they find themselves thrust into the conflict as steeds of war. They prove that maneuverability is often more important than brute strength. While Coraline's mermaid legions proceed slowly but steadily, they are adept at shoring up the flanks that the maneuver elements have long since bypassed.
The Undersea Kingdom relies on their speed to win the day. They can strike unexpectedly and with great numbers. They can also quickly come to the defense of an ally, and are the best faction to reclaim a captured base... before it's too late. With the Undersea Kingdom, it's never too late.
Scyphozoa Regina commands the allegiance of the LEVIATHANS. Some say that she has no brain, but being on the receiving end of an attack from her minions will convince you otherwise. Complex bioluminescent patterns appear on her bell-shaped translucent "body," ordering her loyal units into intricate and deadly formations. Naturally, such formations and piercing strikes work best on the attack, where they control the flow of battle. The Leviathans are the greatest attacking creatures in the ocean. They expect to crush their foes so soundly that they rarely need to mount an effective defense. Which is good, as their defensive capabilities leave something to be desired.
The Swarm form schools that number in the hundreds of thousands, and when blood is in the water they can enter a feeding frenzy. Ferocious Sharks are the deadliest attackers in the ocean, but remain competitive with each other for territory. The colossal Whales have acknowledged the Regina as the benevolent orchestrator of their migratory routes. These troops all serve under the protective umbrella of deadly, miles-long stinging tentacles of the Giant Jellyfish that drift in all directions around the Regina. Foes can rarely even see the Leviathan formations before they are already taking casualties. The symbiotic relationship between some of the Leviathans is the envy of all.
The Turtle Mother leads THE PROTECTORS. The title is given to the largest and smartest of the War Turtles, always female. This ancient tribe of crusty shell-dwellers (they have the longest average lifespan of any of the warring factions) has specialized in defending themselves. Some say they are just too old to attack and prefer to let their foes tire themselves out trying to crack their defenses. The Protectors are the best ally when you are winning, but when losing, their defensive nature might make them a liability, with one exception. Like they always say, "The best defense is a good shell." The thickest shells belong to the War Turtles, who can withstand more damage than any creature in the sea. They almost never lose a 1v1 combat ... as long as they are defending.
The Crab Soldiers are known for their intricate side-to-side marching across the line of an enemy's approach, always filling in the gaps when needed. The Giant Nautiluses are the least understood of the troops, never following the same orders given to everyone else. They can escape combat by using their unique water-jet movement to get away quickly. Giant Lobsters are one of the strongest attackers in the ocean. Their deadly pincers can reach out and bisect a foe of your own choosing, and powerful foes find no cover behind their front-line troops.
Azazel Dreadborne has been the necromantic leader of the DENIZENS OF THE DEEP for several millennia. He is the high priest of a long-forgotten cult of Cthulhu, but seeks the cosmic guidance of all of the Elder Gods. Death is only the beginning for these practitioners of the Dark Arts. The Denizens feed off of death, and use fallen enemies in blasphemous rituals... even during the throes of battle. The Deep Ones, their foot soldiers, seek death, knowing their blood strengthens Necromancer leadership. Shoggoths make near-suicidal attacks without worry, knowing their blobular forms will recongeal over time. The ubiquitous Tentacles, of unknown origin and intelligence, grab unsuspecting foes, which are then sacrificed, giving the Necromancers unlimited power. The only issue with the Necromancer corps is that they start each combat in a weakened state, growing in power only as their own troops fall around them. The Denizens are the best ally when armies are large, but once their numbers are whittled down, their death-powered spells cease to incite terror in the enemy.
How to Win
Check for victory at the end of each round. In order to win, a team must meet at least one of the following victory conditions:
- Capture an enemy base. If both teams control an enemy base, the team controlling the central 4-VP zone wins.
- Have a collective total of at least 30 Victory Points (VPs) on the Victory Point track between the two factions of your team.
Each player is limited in their number of control markers, which are placed in zones you control. Each player has 14, but 2 are designated for use on the Victory Point track. (If you hit 15+ on the Victory Point track, leave a control marker on the 15+ space, and add a new one to the 0 space to continue counting up.) If you use all 12 of your control markers, you can't control any additional zones, but you may still remove your foes' control markers.
Setup
-
Determine Player Order, Teams, and Factions
- a. Shuffle the 4 Player Order cards, then deal 1 to each player.
- b. Players 1 and 3 are teammates, as are players 2 and 4.
- c. Each player places their Player Order card face up in front of them to remind all players the sequence in which players take their turns during the game.
In a 2-player game, one player commands the 1 and 3 team. The other player commands the 2 and 4 team. Deal out only the 1 and 2 cards to determine which is which. Player 1 then also takes the 3 card, and player 2 also takes the 4 card.
In a 3-player game, one player commands 2 factions, while the other team has 2 players, each in control of their own faction. Instead of dealing Player Order cards to all players, decide which player will play 2 factions and deal them 1 card. If that card is odd-numbered, also give them the other odd-numbered card, or if it is even-numbered, also give them the other even-numbered card. Then, randomly deal the remaining 2 cards to the other players.
-
Choose Your Faction and Base Zone
In player order, each player completes the following before the next player starts this sequence:
- a. Choose a faction that has not yet been chosen by another player.
- b. Gather that faction's figures, base token, and control markers.
- c. Place a control marker in the "0" space of the Victory Point track.
Plastic Chips
Use chips to save space in overcrowded zones. Units may be replaced with chips at any time. Likewise, chips may be exchanged for the unit figures that they represent at any time. Place one figure of the unit type into the zone, then represent the additional units of that type by placing chips under it.
- Gray Chips = +1 unit. Example: 3 Seahorse Knights are represented by 1 Seahorse Knight figure with 2 gray chips under it.
- Green Chips = +3 units. Example: 4 The Swarm are represented by 1 The Swarm figure with 1 green chip under it.
The number of stacks is limited by the number of plastic pieces available.
Teammates
Your units and your teammate's units can occupy the same zones. Where you both own units, they always defend against attacks together, but cannot attack together. Your teammate's units can occupy the zone containing your base token to help defend it. Your teammate can't take control of VP zones (see next page) you control or your base, even if you have no units there. If 1 player commands 2 factions, they are on the same team, but they must both be played as if they were commanded by separate players, each on their own turn.
The Game Board and Movement
The game board is divided by white border lines into zones. Zones that share a common border are adjacent to one another, while those that meet only at a point are not. There are also undersea terrain elements between some zones, and zones that are completely separated from each other by one of these are not adjacent. If there is no white line border between zones, then you cannot move into one from the other. The board wraps around horizontally, as indicated by the arrows on its left and right edges, but not vertically. Zones on the left edge of the board are considered to be adjacent to the corresponding zone on the right edge. Units can move only between adjacent zones.
The green arrows show legal moves. The red lines show illegal moves.
At the top and bottom of the map there are long zones to simulate the shrinking distances of the planet near the poles. These pole zones are not worth any VPs (see below) and cannot be controlled, but they allow for fast travel from one side of the globe to the other.
All zones exist in one of three conditions:
- Friendly: Contains a control marker, units, and/or an uncaptured base owned by you or your teammate;
- Hostile: Contains a control marker, units, and/or an uncaptured base owned by the other team;
- Neutral: Contains no control marker, units, or base.
Base Zones
A zone with a faction's base in it is known as a base zone. As the VP value of the zone is covered by the base, base zones are not Victory Point zones (see below) and are not worth any VPs. Each faction's base zone generates 12 Reinforcement Points (RPs) for its owner each round and serves as the entry point for new units, if it is not captured.
When a base zone is captured by enemy units, flip it over to the "Captured" side and place a control marker of the capturing faction on it. Capturing a base zone does not provide the occupier any RPs or allow them to deploy reinforcements - it only denies these things to its owner. If the base is subsequently liberated by friendly units, flip it back over and remove the enemy control marker.
[Image: base token sides, "12 RP" and "Captured".]
Victory Point Zones
Most of the zones on the board contain white numbers and are called Victory Point (VP) zones. The number indicates the VP value of the zone. Taking control of VP zones grants you both VPs and extra RPs for as long as you control them. Only one player may control a VP zone at a time. Teammates may not transfer control of VP zones. The Victory Point track on the game board summarizes the number of VPs controlled by each player.
Unit Stacking Limit
There is a limit to the number of units that can occupy a zone:
- Base zones: 12
- All other zones: 8
The stacking limit is the total number of units allowed in the zone, not the total per player. Both teammates' units count towards the total. The limit is not checked during your turn until the Check Stacking Limits phase, so zones can temporarily contain more units than the limit while you are attacking a hostile zone or moving through a friendly or neutral zone. Do not count attacking units against the stacking limit of a defending zone.
Order of Play
Battle for the Deep is played in rounds. A round consists of each faction taking a turn, in order.
Phases of a Turn
- Purchase Reinforcements
- Combat Move
- Conduct Combat
- Noncombat Move
- Check Stacking Limits
- Deploy Reinforcements
- Set Victory Points
Phase 1: Purchase Reinforcements
In this phase, you may spend Reinforcement Points (RPs) for additional units to be used in future turns. RPs are calculated by adding together the total value of the VP zones you control (tracked on the Victory Point chart) plus 12 for your base if you control it. This means you will have 12 RPs to spend on your first turn, as you do not control any VP zones.
Consult a Unit Reference Chart for the RP cost of units. You may purchase multiples of the same unit if you wish. Place the units you wish to buy into the Reinforcements Zone at the top of the game board. You cannot save RPs for future turns - spend them or lose them!
Place your purchased units in the Reinforcements Zone on the game board. They will deploy to your base at the end of your turn.
Phase 2: Combat Move
Movement is separated into Combat Move and Noncombat Move phases. During the Combat Move phase, all movement must end in a hostile zone (containing an enemy control marker, enemy units, or an uncaptured enemy base). Moving into a hostile zone that contains no enemy units is a combat move, even though there is no actual combat.
Any other movement occurs during the Noncombat Move phase (Phase 4).
Combat move your units from their current zones into enemy-occupied and/or enemy-controlled zones to attempt to capture those zones. Typically, a combat move means moving your units from a zone into an enemy-occupied adjacent zone.
Some units have higher movement values and can use those movement points to make a combat move from further away. Movement into each adjacent zone costs 1 movement point. They may move through only neutral or friendly zones, including friendly zones that are at their unit stacking limit, but cannot stop there. Such units must stop moving when they enter a hostile zone, even if they have not used all of their movement points.
The green arrows show legal combat moves. The red lines show illegal combat moves. One red line passes through a terrain element. The other 2 are not into hostile zones, so only noncombat moves allow entry into those.
You may combat move units into a hostile zone in excess of the zone's stacking limit. You may leave behind units that you don't wish to attack with. However, there is strength in numbers. Even a weak attacker might be useful to take as a casualty, protecting a better unit so it can fight longer.
[Icon: Battle Marker.] The maximum number of different zones a player may attack in one turn is 6. If you combat move into more than 1 zone, place a battle marker into each zone you are attacking. These are used to remind players where there are battles that need to be resolved. If there is just one battle to resolve, you don't need to use a battle marker.
You cannot combat move into an enemy base zone during the first round of the game. However, you may combat move into other hostile zones during the first round.
Phase 3: Conduct Combat
Attacks in each zone that was combat moved into are resolved in the order of the active player's choice. All of the attacks during this phase are considered simultaneous, even though they are resolved one at a time. If you moved units into a hostile zone that doesn't contain any enemy units, no actual combat is necessary; just skip to step 5 of the Combat Sequence, Continue Combat?, for each of these zones.
All units in an attacked zone must participate in combat there. The attacking player rolls for all attacking units and also chooses all casualties to be suffered by the attacker. The defending player rolls for their units and chooses all casualties to be suffered by the defender. If there are two defending players, each player rolls for their own units, and they must decide amongst themselves which defending units to take as casualties (if they can't decide, the attacking player decides).
Attempting to Liberate a Base: When your units are attacking a base zone that is of one of your teams' colors (but currently captured), all of your units' attack values (ATK) in that zone are increased by 1.
Combat Sequence
-
First Strike Rolls
-
Attacker Rolls
-
Defender Rolls
-
Defender Removes Casualties
-
Continue Combat?
-
First Strike Rolls. If a unit has the First Strike special ability, it rolls now, whether attacking or defending (see "Giant Jellyfish" on page 12). Note that casualties caused by First Strike rolls are removed from the board and will not roll their own combat dice.
-
Attacker Rolls. Roll 1 die for each attacking unit that did not roll in step 1. Roll for units with the same attack value at the same time. For example, roll all units with an attack value of "2" at the same time, unless the unit has a special ability that treats their casualties in a special way, such as those of Tentacles' Grab or Giant Lobsters' Pinch (see page 12).
An attacking unit scores a hit if you roll its attack value (ATK) or less. Keep track of the number of hits scored.
After the attacking player has rolled for all attacking units, the defender chooses one unit for each hit scored and moves it to the back side of the zone (or into an empty adjacent zone) as a casualty. When removing chips from under a figure, keep those chips next to the figure so you remember which unit the chips represent. All units that are designated as casualties still roll in step 3.
When the defenders designate a casualty, place it on the line or move it into an empty adjacent zone, but don't remove it from the board. It still rolls in step 3.
-
Defender Rolls. Roll 1 die for each defending unit that did not roll in step 1. Roll for units with the same defense value at the same time, unless the unit has a special ability that treats their casualties in a special way, such as those of Tentacles' and Giant Lobsters' (see page 12).
Phase 4: Noncombat Move
First, units that participated in and survived a successful attack that are in excess of the stacking limit must move out. These units, which you choose, may move into any adjacent friendly or neutral zone(s) from which any attacking units entered the attacked zone. If no such zones exist, they must remain where they are.
Then, any units that did not attack may move up to their full movement value. A noncombat move may not end in a hostile zone (containing an enemy control marker, enemy units, or an uncaptured enemy base). Units also may not move through such zones. A unit can, however, noncombat move into or through an uncontrolled VP zone using noncombat movement, and can take control of it by ending its movement there (place a control marker there).
Pro Tip: Tell the player who is about to start their turn to begin assembling the units they wish to purchase now. This will speed up gameplay a great deal. However, they don't have to lock in their purchases until you are completely done with your turn.
Phase 5: Check Stacking Limits
Stacking limits must now be enforced: 12 units in base zones; 8 units in all other zones. In each zone where you have units and the stacking limit is exceeded, destroy units (your choice) of your faction until the unit limit is met. Return destroyed units to their respective unit pools; they can be repurchased and deployed again later.
Phase 6: Deploy Reinforcements
Place your units from the Reinforcements Zone into your base zone (not an enemy base zone you captured from the other team). You may not deploy units that would exceed the base zone stacking limit of 12. Be sure to count your teammate's units as well! If you have units you cannot deploy, they remain in the Reinforcements Zone for now, and you may attempt to deploy them in future turns.
If your base is currently captured, deploy your new units to any spaces you control instead (remembering the stacking limit of 8).
Phase 7: Set Victory Points
Instead of constantly adjusting your VPs during your turn, save that for now, when all is said and done for your turn. Just keep in mind that you might lose some of these VPs before your next turn comes around.
Look for all of the VP zones you control and add up their values. Move your control marker on the Victory Point track to the number that matches this total. Remember that you do not add your base's RPs to this total. (If you have 15 or more VPs, put one control marker on the 15+ space and a second one on the space equal to the excess points over 15.)
In the battle example on page 8, the Denizens lost a 2 RP zone to the Undersea Kingdom. The Denizens adjust their VPs immediately, while the Undersea Kingdom waits until now.
End of Round
Check for Victory: If your team controls an enemy base zone (if both teams do, control of the central 4-VP zone breaks the tie) or has a combined VP total of 30 or more points, your team wins the game! If neither faction can claim victory, advance the round tracking token one space and start a new round. However, if you just completed round 7, the game is over.
End of Round 7
The game is now over, and the winning team is determined. Each player recounts their Victory Points to make sure their count is accurate. The team with the highest combined VP total wins the game! If it's a tie, the team that controls the central 4-VP zone is the winner. If no one controls it, the game ends in a draw.
Unit Profiles
- Unit Type: This is the name of the unit.
- Cost: This is how many RPs you must pay to purchase one of these units.
- Attack Value (ATK): Roll this number or less on a die to score 1 hit when attacking.
- Defense Value (DEF): Roll this number or less on a die to score 1 hit when defending.
- Movement Value (Move): This is how many zones the unit may move during your turn.
- Special Ability: This is a special rule that applies only to this unit. These abilities sometimes break the rules of the game. If so, go with what the special ability says.
Unit Reference Chart
Undersea Kingdom
| Unit Type | Cost | ATK | DEF | Move | Keyword |
|---|---|---|---|---|---|
| Mermaid Warrior | 3 | 1 | 2 | 1 | — |
| Seahorse Knight | 5 | 3 | 2 | 2 | — |
| Dolphin Rider | 7 | 2 | 3 | 3 | Hit and Run |
| Flying Fish Squadron | 9 | 3 | 3 | 4 | Flight |
Leviathans
| Unit Type | Cost | ATK | DEF | Move | Keyword |
|---|---|---|---|---|---|
| The Swarm | 2 | 1 | 1 | 1 | Frenzy |
| Shark | 5 | 4 | 1 | 2 | Territorial |
| Whale | 7 | 2 | 3 | 2 | Host |
| Giant Jellyfish | 9 | 3 | 3 | 1 | First Strike |
The Protectors
| Unit Type | Cost | ATK | DEF | Move | Keyword |
|---|---|---|---|---|---|
| Crab Soldier | 3 | 1 | 2 | 1 | — |
| Giant Nautilus | 5 | 2 | 3 | 2 | Jet |
| Giant Lobster | 7 | 3 | 2 | 1 | Pinch |
| War Turtle | 9 | 1 | 4 | 1 | Thick Shell |
Denizens of the Deep
| Unit Type | Cost | ATK | DEF | Move | Keyword |
|---|---|---|---|---|---|
| Deep One | 3 | 1 | 2 | 1 | — |
| Shoggoth | 5 | 2 | 2 | 2 | Reanimate |
| Tentacle | 7 | 2 | 2 | 1 | Grab |
| Necromancer | 9 | 1 | 1 | 2 | Dark Ritual |
Undersea Kingdom Abilities
Dolphin Riders - Hit and Run: Keep track of how many movement points each Dolphin Rider uses during the Combat Move phase, if any (dice are one way to track this). During the Noncombat Move phase, this unit may spend its remaining movement points (to move into neutral and/or friendly zones), even after attacking that turn.
Flying Fish Squadron - Flight: This unit can move through hostile zones. During the Combat Move phase, it must end its movement in a hostile zone, as usual. During the Noncombat Move phase, it can move through hostile zones, but cannot end its movement in one.
Leviathans Abilities
The Swarm - Frenzy: When this unit scores a hit while attacking or defending, it rolls again. If that roll scores a hit, it rolls again, and so on, until it misses. Each hit scored causes 1 casualty to the enemy.
Shark - Territorial: These solitary hunters cannot share a non-base zone with another Shark, except when performing a combat move into a hostile zone. If more than 1 Shark survives an attack against a non-base zone, excess Sharks must exit the zone during the Noncombat Move phase in the same way as if the stacking limit were exceeded.
Whale - Host: When this unit makes a combat move or a noncombat move, it may carry up to 3 The Swarm units with it. Carried units cannot move on their own during that turn, nor can they be carried more than once during the same turn.
Giant Jellyfish - First Strike: This is the only unit that rolls during the Conduct Combat Phase Step 1: First Strike Rolls. Whether attacking or defending, the unit chosen as its casualty is immediately removed from the board and does not roll its dice in step 2 or 3, unless it is the first hit on a War Turtle (see below).
The Protectors Abilities
Giant Nautilus - Jet: Whether attacking or defending, this unit may retreat to an adjacent friendly zone instead of rolling its dice in either the Attacker Rolls or Defender Rolls step of combat. However, if the unit has been chosen as a casualty while defending during a round of combat, it cannot retreat, so it must roll.
Giant Lobster - Pinch: When this unit scores a hit while attacking or defending, its owner chooses the enemy casualty.
War Turtle - Thick Shell: Whether attacking or defending, the first time this unit is chosen as a casualty, tip it over and leave it in place. It continues to fight as usual until it is chosen as a casualty for a second time in the same combat, then it is removed from the board as usual. If the combat ends and it was not removed from the board or grabbed (see "Tentacle," below), return it to its upright position.
Denizens of the Deep Abilities
Shoggoth - Reanimate: Whether attacking or defending, the first time you take 1 or more Shoggoths as casualties during each player's turn, place 1 of them into the Reinforcements Zone. It will remain there until the Denizen player's next Deploy Reinforcements phase (which could be that very same turn). It is then deployed as if it had been purchased during Phase 1: Purchase Reinforcements.
Tentacle - Grab: Whether attacking or defending, when this unit scores a hit, the chosen casualty is Grabbed instead of hit. When it would normally be removed, instead place it on its side near your units and away from units friendly to it. Starting in the next combat round, the grabbed unit cannot either roll dice or use its special ability. It is not released until the end of the combat, even if the Tentacle that grabbed it is taken as a casualty, with one exception.
A grabbed unit can be taken as a casualty in place of one of its own units by the Denizen's faction, returning it to its owner's unit pool as usual. Taking it as a casualty this way counts towards the casualty count of the Necromancers (see below).
At the end of combat, all grabbed units are returned to their owners' unit pools, even if they were not taken as casualties. Multiple units may be held by the same Tentacle at the same time.
Note: If a War Turtle is grabbed, it loses the protection of its Thick Shell, and can then be destroyed by a single hit, just as any other unit would be, regardless of whether it has taken a hit previously.
Necromancer - Dark Ritual: Whether attacking or defending, this unit becomes more powerful with each casualty its team suffers. Only friendly and grabbed casualties are counted towards the casualty total. If a friendly War Turtle takes one hit, it is not removed, so it does not count towards this total. Keep track of the removed units with a die.
This unit's attack (ATK) or defense (DEF) value is increased by its team's current casualty total. Each increase takes effect in the next combat round, or in the current round if it occurs as a result of a First Strike roll. Once this faction's team has removed 5 or more units from the combat, this unit automatically hits, as it has a value of "6." At the end of the combat, the unit's value returns to its base value.
Denizens Example 1
A Tentacle, a Shoggoth, and a Necromancer attack a The Protectors force consisting of a War Turtle and 2 Crab Soldiers. The Tentacle scores a hit, and the other 2 attackers miss. The defending player would normally choose the War Turtle as the casualty, as its Thick Shell would allow it to survive the hit. However, the Tentacle's Grab special ability would grab it anyway, so they choose a Crab Soldier as the casualty. During defender casualty removal, the grabbed Crab Soldier is placed on its side next to the Tentacle. The defenders roll for all 3 units, scoring 1 hit. The attacking player chooses to lose the Shoggoth. Since it is the first Shoggoth lost this turn, it is placed into the Reinforcements Zone, where it will Reanimate and deploy with the rest of the Denizen's reinforcements during Phase 6 of this turn (since it's the Denizen's turn). As the Denizens have suffered 1 casualty, the Necromancer's Dark Ritual increases its attack value (ATK) to "2" in the next combat round.
In round 2 of the combat, the Necromancer hits, and the Tentacle misses. The defender takes the hit on the War Turtle, which survives. The defenders roll 1 hit, which the attacker applies to the grabbed Crab Soldier (which is returned to The Protectors' unit pool). The Necromancer will have an attack value of "3" in the next combat round.
In the 3rd round, the Tentacle and the War Turtle both score hits, but the other units miss. The defender chooses to have the remaining Crab Soldier grabbed, while the attacker chooses to lose the Tentacle. The grab happens even though the Tentacle is lost. The Necromancer's attack value is again increased by 1.
At the start of round 4 (see image above), the 4 ATK Necromancer (base 1 + 3 casualties) hits, as does the War Turtle. The already-wounded War Turtle is the last defender and is lost. The Denizens choose the grabbed Crab Soldier as their casualty. The Denizens win the combat and capture the zone.
Denizens Example 2
A Tentacle and Shoggoth attack 2 Crab Soldiers. The Tentacle scores a hit, to Grab a Crab Soldier. Both Crab Soldiers score hits on defense. The combat ends, as no attacking units remain, and the grabbed Crab Soldier is returned to its unit pool.
Quick Reference: Combat Sequence
Printed on the back cover of the rulebook.
- First Strike Rolls. If a unit has the First Strike special ability, it rolls now, whether attacking or defending (see "Giant Jellyfish" on page 12). Note that casualties caused by First Strike rolls are removed from the board and will not roll their own combat dice.
- Attacker Rolls. Roll 1 die for each attacking unit that did not roll in step 1. An attacking unit scores a hit if you roll its attack value (ATK) or less. Once all of the attacking units have rolled, the defender assigns hits to the defending units, but does not remove them until step 4.
- Defender Rolls. Roll 1 die for each defending unit that did not roll in step 1. A defending unit scores a hit if you roll its defense value (DEF) or less. Once all of the defending units have rolled, the attacker assigns hits to the attacking units and removes them from the board.
- Defender Removes Casualties. The defender removes their designated casualties from the board.
- Continue Combat? If both teams still have units in the zone, the attacker chooses whether to press the attack or retreat. The defender does not have this choice.
Setup Advice
Choose a faction that suits your play style. The base zone you choose will determine a lot about what your forces will be up to for the first few rounds of the game. If you place your base near a foe's base, you might be fighting over the intervening space for most of the game. Both bases will be under pressure from round 2 onwards.
Base Placement Examples
- Base Placement Example A. If the Leviathans and the Denizens are teammates, the Leviathans will have limited expansion possibilities in this example, unless the opposing team doesn't have a base in the upper part of the game board. The Denizens, however, will have fair access to the 3 VP zone below them, though there will usually be a fight for it.
- Base Placement Example B. If the Leviathans-Denizens team have their bases at the top of the map, they won't have to worry much about enemy units using the long pole zones to attack their bases (at least right away). However, look out for the next example.
- Base Placement Example C. Don't let this happen to you! If the Leviathans-Denizens team isn't careful, the other team (the Undersea Kingdom and The Protectors, in this case) could block them from the southern third of the game board. Your expansion will be limited, so you may have to pin your hopes on capturing a base.
- Base Placement Example D. So if the opposing team chooses a middle zone for their base to block your expansion, you could surround them! Note that if 3 factions are on one side of the board, the 4th faction will have easy access to all of the best VP zones on the other side of the board.
[Images: four sample board layouts for Base Placement Examples A through D.]
Initial Forces Examples
Your initial forces are limited to 12 units and a maximum expenditure of 50 RPs. If this is your first game, we recommend the "Balanced" build, so you learn how to use all of your units right away. The secondary build highlights one of the main strategies of each faction, but feel free to come up with your own builds if you wish!
Undersea Kingdom
| Balanced Qty | Unit Type | RP | Fast Expansion Qty | Unit Type | RP |
|---|---|---|---|---|---|
| 4 | Mermaid Warrior | 12 | 3 | Mermaid Warrior | 9 |
| 3 | Seahorse Knight | 15 | 4 | Seahorse Knight | 20 |
| 2 | Dolphin Rider | 14 | 3 | Dolphin Rider | 21 |
| 1 | Flying Fish Squadron | 9 |
Leviathans
| Balanced Qty | Unit Type | RP | Plenty of Fish Qty | Unit Type | RP |
|---|---|---|---|---|---|
| 6 | The Swarm | 12 | 8 | The Swarm | 16 |
| 3 | Shark | 15 | 2 | Whale | 14 |
| 2 | Whale | 14 | 2 | Giant Jellyfish | 18 |
| 1 | Giant Jellyfish | 9 |
The Protectors
| Balanced Qty | Unit Type | RP | The Wall Qty | Unit Type | RP |
|---|---|---|---|---|---|
| 4 | Crab Soldier | 12 | 4 | Crab Soldier | 12 |
| 3 | Giant Nautilus | 15 | 2 | Giant Nautilus | 10 |
| 2 | Giant Lobster | 14 | 3 | War Turtle | 27 |
| 1 | War Turtle | 9 |
Denizens of the Deep
| Balanced Qty | Unit Type | RP | Grab Bag Qty | Unit Type | RP |
|---|---|---|---|---|---|
| 4 | Deep One | 12 | 4 | Deep One | 12 |
| 3 | Shoggoth | 15 | 4 | Tentacle | 28 |
| 2 | Tentacle | 14 | 1 | Necromancer | 9 |
| 1 | Necromancer | 9 |