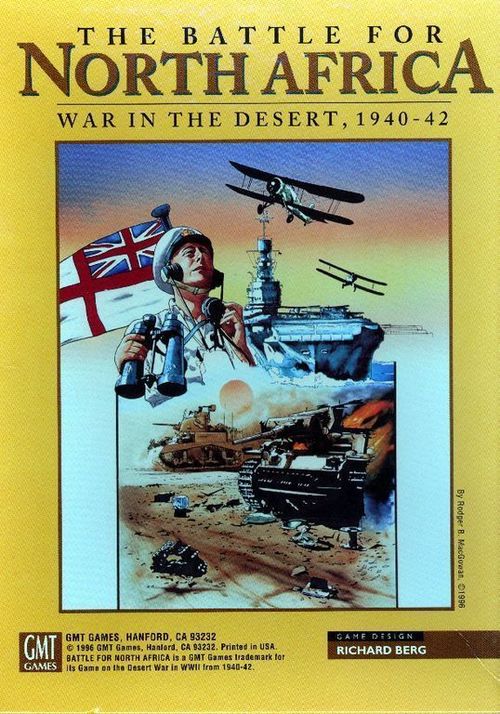
The Battle for North Africa: War in the Desert, 1940-42
The Battle for North Africa: War in the Desert, 1940-42 Rulebook
Table of Contents
Table of Contents
- 1.0 Introduction
- 2.0 Components
- 3.0 Sequence of Play
- 4.0 Activation
- 5.0 Initiative
- 6.0 Movement
- 7.0 Zones of Control (ZOCs)
- 8.0 Combat
- 9.0 Resources
- 10.0 Random Events (Optional)
- 11.0 Campaign Game Victory
- Scenarios
- Sequence of Play (Summary)
1.0 Introduction
The Battle for North Africa covers the campaigns in North Africa from 1940 to 1942. In the Gameplayers series, the emphasis is on accessibility and playability, with as much historical flavor as we can muster. Given a choice between playability and historicity, we have tended to err on the side of the former.
2.0 Components
The game includes the following items:
- 2 22"x34" game maps
- 1 sheet of large counters
- 1 sheet of small counters
- 1 Rules Book
- 1 Scenario Booklet
- 1 ten-sided die
2.1 The Map
The game maps are overlayed with a grid of hexagons-hexes-which are used to regulate movement. When referenced, the hexes on the Libya map use an "L" prefix; the Egypt map hexes use an "E." The various types of terrain represented are discussed in the rules, below. Note that the two maps overlap by four hexrows, enabling each map to be used for one-map scenarios. When using both maps, the Egypt map overlaps the Libya map.
2.2 The Counters
BNA contains two different-size counters. The larger counters represent armored, mechanized, motorized and foot infantry Formations. The smaller counters represent Assets, units which (usually) supported the larger Formations. There are also informational markers that are used to help keep the players on top of things.
Most Formation counters are printed on both sides; the reverse shows the unit in a Reduced state. The smaller units and a few Formation-sized units-for example, all "Libyan" units have no reverse side.
[Play Note] The units have different sizes-large counters vs small counters-so that you can easily recognize those units (Formations) that can absorb other units (the smaller ones). Other than this capability, there is no other game difference between the two, different-sized units, other than, of course, their strengths, etc.
2.3 The Die
The game uses a ten-sided die. A '0' is a zero, not a ten.
2.4 Definitions and Acronyms
Awareness of the following terms will help as you read through the rules:
- AM: Activation Marker, discussed in 4.1. Each HQ/Command (or Division) has at least two AM; some have three.
- Allocated RP: The number of RP a player has taken from his Available RP for use during the turn in question.
- Available RP: The number of Resource Points a player has available for use; i.e., his "bank" of RPs. It is from this bank that he takes RP and allocates them (see above) for use during an individual turn.
- CDR: Cohesion Dieroll, used to check whether a unit has survived Combat or reacted adversely.
- Cohesion: A unit's ability to withstand the rigors of combat, stated numerically.
- Combat Strength: A unit's ability to engage in combat, rated numerically, considering number of men, weapons type, etc. If the CS is circled (2), that is the unit's Artillery Points; if it is boxed [2], that is the number of Armor Points it has.
- Command: A group of combat units assigned to one HQ, usually as defined by the Activation Indicator line on the counter, and invariably a division. Unassigned units may be temporarily attached to a HQ.
- DR: Dieroll. A DRM is a dieroll modifier.
- Formation: Any big counter, other than HQ. Used to distinguish them from the smaller, Support Asset counters. Formations are combat units capable of absorbing [6.1.4] smaller units. There is no additional difference between the two, other than their physical size.
- LOC: Line of Communications [9.2.4-9.2.6]
- MA: Movement Allowance [6.1].
- Motorized: Units that move by wheel or track, as opposed to those on foot.
- RP: Resource Points, the game's currency. Used to provide supply, refit units, determine levels of air supremacy, etc.
- ZOC: Zone of Control, or the ability of a unit to extend its presence into adjacent hexes.
2.5 The Scale
The map scale is approximately 8.5 miles per hex. Each turn covers one month of real time. Formations range from battalions up to divisions; most are regiment/brigade size. We have folded some smaller units into others, mostly to reduce counter clutter.
2.6 Questions?
Any questions about play? If you're willing to wait, send your questions and a self-addressed stamped envelope, to GMT Games ATTN: BNA POB 1308 Hanford CA 93232. For a quicker response, e-mail us at [email protected] or [email protected]. And, while you're online, check out our Web page at http://www.gmtgames.com.
3.0 Sequence of Play
Each game-turn follows a set sequence. Within that sequence when individual units move is somewhat random, depending on when, or whether, their Activation Marker is drawn.
-
A. Initiative Determination Phase.
-
- Roll die to see whether Commander available. [4.5.2]
-
- Roll die to see who goes first. [5.0]
-
-
B. Resource Allocation Phase. Players determine how many of their Available Resource Points they wish to use this turn.
-
- Allocate RP from the Available Bank
-
- Purchase Air Support (Optional)
-
- Select AMs.
-
- Place Arriving Reinforcements in appropriate box. [6.61]
-
- Allied Player undertakes Withdrawals, if required. [6.7]
-
-
C. Marker Selection Phase.
-
- Place all Activation Markers (B/3) in the Pool (except for C/2 and 4.6).
-
4.0 Activation
4.1 Activation Markers (AMs)
4.1.1 Activation Markers are used to determine which player may activate and what units he may then use in the Primary Phase. Each Activation Marker (AM) represents a Command - represented by its HQ - as indicated on the second line of each combat counter. Other than in 4.1.6 and 4.5.6, AM activate HQ units, not combat units [4.3.4].
[Example] The 132nd Ariete AM would apply to the (Italian) Ariete Division HQ unit, and it would enable the Axis player to expend RPs to use that HQ to activate all combat units attached/assigned to the Ariete and within the HQ's range.
4.1.2 Most Italian infantry divisions have no HQ counter; they are self-contained divisions (Cf. 17th Pavia, 1 CCNN, et al.) with their own AM. All such self-contained divisions require 2 RP to activate, as noted on the counter ("2rp").
4.1.3 All Commands have two AMs, and several commands have three AMs.
4.1.4 Each AM indicates how many RP must be expended from those Allocated at the start of the turn to activate that HQ when its AM is drawn [9.2]. A player must always allocate at least the number of RP [9.1] equal to the total on all AMs he places in the Pool. He may not allocate less; he may allocate more. Except for 5.0 and 4.6, the player places all selected (and "paid for") AM in an opaque cup for drawing: the Pool.
[Example] The Axis Player wishes to place two of the 15th Panzer Division's AM plus one AM for the 101/Trieste Division in the Pool. He would have to allocate at least 8 RP at the start of the turn, as per 9.2.1- three for each 15th Panzer AM, two for the single Trieste AM.
[Design Note] The pre-turn allocation of Resources was chosen to simulate the difficulties of planning ahead and getting supply to where it's needed on time. To allow the player to expend RPs only on an as needed basis was not what this campaign was about.
4.1.5 Each player also has a "Commander" AM [4.5].
4.1.6 The Independent AM: Each player has one AM marked "Independent." It costs two RP to use this AM, and it is used to activate individual units that are either unassigned or are assigned but not within range of their HQ. When this AM is selected, the player rolls the die to determine how many units he may use that phase: DR 0-2 (1 unit), DR 3-7 (2 units), DR 8-9 (3 units).
4.2 Commands and HQ
4.2.1 Combat units assigned to a specific division, noted on the second line of the combat unit's counter, have a HQ. Units with no assigned division have no specific HQ [4.1.2]. The Parent divisions is noted at the top of each counter (not the second line). Units without this identifying piece of information are "independent" units.
4.2.2 Units with a specifically assigned HQ may be activated only by that HQ. Exception: the Axis Kampfgrüppen [4.7].
4.2.3 Each HQ may include in its activation any of the unassigned units [4.2.1] from any one hex that is in its range at the instant of activation. HQ may not attach units from other commands [4.7].
4.2.4 Players may, if they wish to reduce counter clutter, use a command's HQ to represent all units that are part of that command and stacked with that HQ. Use the Organizational Charts to keep track of the off-map counters. The HQ uses the MA of the slowest unit.
4.2.5 If a HQ is attacked while alone in a hex, it defends with a CS of one, a CS used only when alone. HQs are eliminated if Reduced [8.2.8]; they may be Refitted [9.3]. HQ's that suffer ANY adverse combat effect - even one that would require them to roll a die - are, instead eliminated. However, HQ are not affected by ANY combat result as long as there is a combat unit in the hex.
[Play Note/Clarification] HQs that suffer ANY adverse combat effect - even one that would require them to roll a die - are, instead, eliminated. However, HQ are not affected by ANY combat result as long as there is a combat unit in the hex.
4.3 Primary Activation Phase
4.3.1 A Command's AMs are available if the HQ is either on the map (including the various boxes) or scheduled to enter as a reinforcement. AMs may be placed in the Pool for random selection only if/when the player allocates sufficient RP to supply that AM and activate that HQ [4.1.4].
4.3.2 All AM for which sufficient RP have been allocated are placed in the AM Pool- an opaque cup (or similar container)-for random selection during the Primary Activation Phase. Exception: The Initiative Player specifically selects one of his chosen AMs for use as the first Command to activate that turn.
4.3.3 In the first segment of the Primary Activation Phase one of the players-it matters not which-draws, randomly and blindly, one AM from the Pool. That AM designates which HQ may activate its units [4.2.3 and 4.3.4]. However, the HQ is active only when the player deducts (expends) the necessary RP, as indicated on both the AM and the HQ, from his Allocated RP. [See, also, 4.1.2 and 4.6.].
[Clarification] Units whose HQ has been drawn and who are In Command Range are not eligible for activation in a Secondary Phase even if they did nothing (in the Primary).
4.3.4 When an HQ is activated by an AM, the units of that command that are within the HQ's printed range at the instant of activation, may Move and engage in Combat. They may, if the player wishes, move outside the HQ's range. The HQ moves, too. Units that do neither of those may construct Fortifications, and those that have done none of the above are eligible for Refit.
4.3.5 When all the units of the chosen Command have finished their actions, that AM is set aside and a player draws another AM, repeating the 4.3.3 process.
4.3.6 When there is only one AM left in the Pool the Primary Activation Phase is over. The last, remaining AM may not be drawn.
4.3.7 Regardless to whom it is attached and how commanded [4.2 and 4.7], no single unit may ever be activated more than three times in a single turn.
4.3.8 The Long Range Desert Group. The Allied LRDG moves in the Primary Phase. It does not need an AM; it may activate under any other Allied AM. However, it may do so only twice per turn.
4.4 Secondary Activation Phase
4.4.1 Units whose HQ were not activated in the Primary Phase, and units neither assigned [4.2.1] nor temporarily attached [4.2.3] to a HQ during the Primary Phase, undertake operations in the Secondary Activation Phase. Units out of Command Range (4.3.4) may, if still out of range in the Secondary Phase AND if they did not move in a Primary Activation Phase, move in the Secondary Phase.
[Play Note] Essentially, this means those units - whose AM have not been drawn this turn. For those units attached to an AM that would not be so easy to identify, place a Finished marker on them.
4.4.2 No RP are needed for units in the Secondary Phase. [See, however, 4.4.5.]. The costs to leave a Transit Box (6.64 and 6.65) must be paid, even for units moving in the Secondary Phase. Thus, Transit Box RP costs are also an exception to 4.42.
4.4.3 The player with the Initiative [5.0] goes first in the Secondary Phase, using (none, some or) all his units [4.4.4]. When he's finished, his opponent then goes.
4.4.4 Combat units (and unused HQ) may do everything in the Secondary Phase units in the Primary Phase can do, with the following exceptions:
- Strategic Movement [6.1.3] is allowed, but in this Phase it is reduced to two times (2x) Movement Allowance.
- They may not move adjacent to an enemy unit at any time. [But see 4.4.5.]
- They may activate only once in that turn, which means if they've previously undergone any actions that turn [4.4.1] they are not eligible to activate in this phase.
4.4.5 As an Exception to 4.4.4 [2], a player whose Commander is In Play [4.5.2] may move any one Formation unit (as defined in 6.1.4), that is operating under 4.4.1, adjacent to an enemy unit by expending one RP (from those Allocated), or two RP for self-contained Italian divisions [4.1.2]. This unit must then attack the enemy unit to which it moved adjacent. Obviously, the moving unit must have an LOC [9.2.4] at the time. [However, see 9.5.3.]
[Play Note] In essence, this allows-actually requires, if the rule is used-a player to move and attack with a single Formation unit during the Secondary Activation Phase by allocating one RP from his supply of Allocated RP.
4.4.6 Units moving in the Secondary Phase may not end their movement outside their LOC. Units that start such movement outside their LOC must move towards re-establishing the LOC.
4.5 Commanders
4.5.1 Each player has Commanders available (for example, Rommel). Only one Commander may be in use at any one time (per player), and their In Play status is usually dependent on a dieroll, with other restrictions thrown in.
4.5.2 For a Commander to be considered In Play, the player undertakes a DR in the Initiative Determination Phase (A/1). If the DR is the same as or lower than the Commander's Availability Rating, he is In Play; if higher, he is not In Play. If the Commander is In Play, place him on the map in any hex desired [4.5.7]. When a player rolls higher than his commander's Availability Rating, a random event [10.0] has occurred.
[Play Note] This is a mandatory dieroll; it is not voluntary.
4.5.3 For the Axis Player, Graziani, the Italian Commander, is available (subject to In Play DR) [4.5.2] only until Rommel arrives (the April 41 turn). After that, only Rommel is available, again, subject to 4.5.2.
4.5.4 Allied Commander availability is a bit more unusual. Each time the Allied Player rolls to see whether he has a Commander In Play there is a chance that commander may be replaced/removed.
4.5.5 Commanders, when In Play, use their Initiative DRM to affect that dieroll [5.0, 4.4.5].
4.5.6 The player may also use the Commander AM for Combined Operations in the Primary Phase. [But see 4.6.] A Combined Operations enables him to activate more than one command/HQ at one time. When the Commander AM is selected - and it may be selected only when the Commander is available, on map - the player may undertake D/2 operations with the units of any or all HQ (or self-contained Italian Divisions) that are within that Commander's range at that instant, plus any one unassigned unit, as long as the necessary and allocated RP are expended just as if each AM were selected individually. No RP are spent for the Command AM, only the activated HQ.
[Play Note] Thus, if, when a Command AM is drawn, three HQs (each with an activation cost of 2 RP) are, at that time, within the Commander's range, all three of those commands may be activated by paying 6RP from his Allocated RP for that turn. Obviously, to maintain some control over this process, the Command AM is best used when selected in Phase C/2.
4.5.7 Commander Presence. After a player has decided what to do with his Commander, he places his counter on the map, where the Commander's Range would effect his plans. The Commander counter may not move during the turn (which is why he has no Movement Allowance), because all it does is effect Combined Operations with pre-selected units. If stacked with a unit that has to retreat, it retreats with that unit. If an enemy unit would enter its hex, or the units it is stacked with are eliminated, simply pick it up and remove it from play. It is eligible to return next turn. A commander may not be eliminated, except through 4.5.4.
4.5.8 Use of the Commander AM for a given HQ is treated as if that HQ's AM were selected, thus limiting the total number of AM that may be placed in the AM Pool that turn. The player must make that choice at the beginning of the turn, even if the circumstances may change before his AM is selected [4.5.7].
[Example] The Allied Player wishes to use Montgomery to undertake Combined Operations with the 1st South Africa Division, the 10th Armored Division, and the 50th Infantry Division. Because each of those commands has two AM, only one of those AMs may be placed in the Pool that turn, because the CombOp AM is considered the second AM.
4.5.9 When undertaking Combined Operations, movement for all units is completed before any attacks are made.
4.6 Reserve
4.6.1 A Player whose Commander is In Play has the ability to place some of his units in Reserve, a status which enables the player to actually decide, with some minor limitations, when to use them.
4.6.2 A Player may decide to place up to two of his HQ in Reserve per turn, instead of using a Combined Operations AM. The following requirements apply:
- The HQ must be within Commander's Range at the time they are chosen for Reserve, and also at the time of use.
- The HQ must have RP allocated and expended.
- These are AM that would normally have been placed in the Pool had they not been selected for Reserve.
4.6.3 There is no Reserve marker or anything similar to designate such status. What the player does is to not place one AM of each selected HQ in the Pool (as an exception to 4.1.4). He holds them aside, keeping them secret. He does not even have to tell his opponent he has done this; however, we do suggest that Players place such AM face-down in front of him so that there's no hanky-panky here. You may bluff of course, placing an AM face-down that will not (cannot) be so used.
4.6.4 A player may play any one of his Reserve HQ at any time after his opponent has undertaken a Primary Activation Phase. He may not play a Reserve command after going with one of his own HQ, and this must occur in the Primary Activation Phase. To do so he simply announces, before any new AM is drawn from the Pool, that he is playing a Reserve AM. He reveals the AM and then undergoes a PA Phase with the command, if that HQ is within range of the Commander at the time the AM is played. If it is not, he may not play that AM, even if it means he has wasted an AM for that turn.
4.6.5 Units in Reserve have three movement limitations:
- They may not use Strategic Movement.
- Their Movement Allowance is halved, rounded up, for that phase (only).
- They may not use Naval Transport.
Other than that, it's just as if their AM had been drawn normally.
[Play Note] Unfortunately, the Reserve system does not readily lend itself to solitaire play, unless you can ignore what you know.
4.7 Kampfgrüppen
4.7.1 The Axis player (only) has quasi-HQ units: Kampfgrüppen (KG). These units function exactly like HQ, except that they have no specifically assigned units. The Axis player may "purchase" KG at any time during the turn; he does not need to draw an AM for this.
4.7.2 It costs the Axis Player two RP to place a KG on the map, the RP being spent from those Allocated for that turn. They do not have to arrive, as do HQ, as Reinforcements; just put the KG on the map. However, it must be placed so that the units to be included as its command [4.7.3] are all within its range. (This means a bit of pre-planning.) Once placed it may remain in play. It can be voluntarily removed, but the Axis player does not get any "refund" in RP for doing so. After being removed, it is eligible to be brought back in.
[Design Note] The Allied Battlegroups were really not the flexible, on-the-spot quasi-HQ that the KG were, and the Italian Gruppo di Battaglia were not in the same league, either. [However, see 4.7.5.] So, for play sake, both have been left out. And we have limited the historical number of KG-to two-for play purposes.
4.7.3 A player may assign up to two Formations, including any stacked assets [6.1.4], to any one KG. At least one Formation must be German.
4.7.4 Units in a KG may be unassigned or they may be from other commands.
[Example] A KG could contain the 105 Schutzen regiment, the 132nd Ariete Tank brigade, plus 2 Anti-tank units.
4.7.5 The Italians have a special (limited) Tank HQ-the Brigata Corazzata Speciale-to which they may assign up to three Tank Battalions (the ones with the Roman numerals). The BCS acts like any other HQ, but only Italian Tank battalions may be attached. It is placed as in 4.7.2.
5.0 Initiative
In the Initiative Determination Phase, each player rolls the die. If he has a Commander In Play he adds that Commander's Initiative DRM to that dieroll. High total has the Initiative for that turn. The Player with the Initiative may:
- pre-select (choose specifically) with which AM - and command - he wants to start that turn.
- move all of his units first in the Secondary Activation Phase.
If there is a tie, no player has the Initiative, and all AMs go into The Pool.
6.0 Movement
6.1 Movement Allowances
6.1.1 Each combat unit has its Movement Allowance printed on its counter. All MA of ten or less are considered to be Foot and all MA higher than ten are Motorized.
6.1.2 When its AM is selected, or when it activates in the Secondary Phase, a unit may move up to its printed MA. Units may always move less than the printed MA.
6.1.3 A unit whose AM has been selected in the Primary Phase may use Strategic Movement. When using SM, motorized units have an unlimited Movement Allowance; foot units have a MA equal to two times (2x) their printed allowance. Restrictions:
- All movement must be on a primary road or through a city.
- They may not enter any occupied hex. Exception: they may move into/through a friendly occupied city hex, or, for the Axis, a garrison unit-occupied hex.
- The unit must start movement at least two hexes distant from the nearest enemy combat unit.
- At no time during SM may a unit move adjacent to an enemy unit of any type.
- See 4.4.4 for SM for units moving in the Secondary Phase.
6.1.4 Support Absorption. Each Formation-sized unit may absorb - carry - one Asset-sized unit as if they were one unit. Exception: Italian Garrisons are not assets for this purpose. Exception: an absorbed asset may not be moved by its "carrying formation" into a hex into which the asset would normally not be able to enter.
[Exception/Clarification] An absorbed asset may not be moved by its "carrying formation" into a hex into which the asset would normally not be able to enter.
To do so, the unit must start (and end) the phase stacked. If it does not start and end it is not considered absorbed. When absorbed, the unit has the following characteristics:
- it is treated as one Formation unit for stacking purposes.
- it uses the Movement Allowance and type of the Formation.
- the Support Asset uses the Cohesion Rating of the Formation.
- If the Formation is eliminated, so is the asset. (But not vice versa.)
[Play Note] The units have different sizes-large counters vs small counters-so that you can easily recognize those units (Formations) that can absorb other units (the smaller ones). Other than this capability, there is no other game difference between the two, different-sized units, other than, of course, their strengths, etc.
6.2 Movement and Terrain
6.2.1 A unit expends Movement Points for each hex it enters. MP costs depend on unit type, Foot or Motorized; see the Terrain Chart.
6.2.2 Units pay the Road/Track cost if they are entering that hex from a hex containing a connecting road/track hex; otherwise, they pay the cost of the other terrain in the hex.
[Historical Note] The term "track" is used to cover a variety of poor secondary roads and vaguely defined trails through the hinterlands. The only truly usable road is the primary one, the Via Balbia.
6.2.3 The cost to use Tracks is one-half of the cost of the other terrain in the hex, rounding up. Thus, a motorized unit that would normally pay three MPs to enter a Rough hex would pay two MPs to use a track through the Rough, and one MP for a Track in a Clear hex.
6.2.4 Certain terrain types-for example, mountains-may not be entered/crossed by motorized units, unless the units are using roads or tracks.
6.2.5 Tracks do not negate the cost of crossing slopes, passes, wadis, or rivers. Units using those must pay the crossing cost. Primary Roads do negate such cost.
6.3 Movement Restrictions
As a unit moves it traces a path, in any direction, of contiguous hexes through the hex grid, paying the cost of each hex entered. Each unit moves separately, and one unit's movement must be completed before another can begin. Exception: 6.1.4 and 4.2.4.
A moving unit must have enough MPs to pay the terrain cost of entering a hex; if it doesn't, it may not enter that hex.
6.4 Stacking
6.4.1 Stacking refers to having more than one unit in a hex at any one time. To determine stacking limitations, BNA uses Stacking Point (StP) cost, linked loosely to RP cost, as a measuring stick. StP Costs for Stacking are:
- HQ: The RP cost printed on the counter, and that includes all units from that command in that hex as part of that cost.
- Individual units (without or unattached to a HQ [6.1.4]): 1 StP
6.4.2 The following limits apply:
- City Hex: 10 StP
- Mountain Hex, incl. Road/Track: 3 StP
- All other hexes: 7 StP
6.4.3 Informational markers, commanders, and fortifications do not count for stacking purposes.
6.4.4 Stacking restrictions apply at the completion of movement, including any movement generated by combat. Otherwise, a unit may move through a hex occupied by other units, even if such movement violates 6.4.1. Exception: the Strategic Movement Rule [6.1.3]
6.4.5 A unit may never move into or through a hex containing an enemy combat unit.
[Design Note] The stacking restrictions have more to do with unit efficiency than how many men one can cram into 70+ square miles of desert.
6.5 Naval Transport
6.5.1 A player may transport one unit [6.5.2] per turn (movement may be in either phase and expends the unit's entire movement allowance), between his "home base" to certain ports that he occupies, with some limitations. An HQ unit (alone) is considered to be one unit, as is an unabsorbed Asset. A self-contained Italian Division may not use Naval Transport.
6.5.2 The Axis Player may use Naval Transport as follows:
- Tripoli to/from Tobruk: One Formation [6.1.4], excluding Italian single unit Divisions
- Tripoli to/from Benghazi: One Formation, excluding Italian single unit Divisions
- Tripoli to/from Bardia: One Foot Formation, no assets, excluding Italian single unit Divisions
6.5.3 The Allied Player may use Naval Transport as follows:
- Alexandria to/from Tobruk: One Formation [6.1.4]
- Alexandria to/from Benghazi: One Formation [6.1.4]
- Alexandria to/from Bardia: One Foot Formation, no assets
6.5.4 Ports that are suppressed [8.5.6] may not be used for Naval Transport.
6.5.5 Benghazi. Although Benghazi is, potentially, the best port on the map, the Italians effectively sealed it off by sinking ships in the harbor in late 1940. It was unusable thereafter. Therefore, it is unusable in any scenario starting in 1941. For the 1940 scenario, Benghazi ceases to be a port the instant an Allied combat unit enters the city.
6.6 Reinforcements/Transit Boxes
6.6.1 Reinforcements enter the game as per the Reinforcement Schedule. Units arriving as reinforcements are placed in that player's Reinforcement Box-Axis (Tripoli), Allies (Cairo)-at the start of the turn (B/4). Units in the Ready portion of the Refit Box may be placed in the Reinforcement Box.
6.6.2 Some reinforcements arrive with certain restrictions. Example: "Move only in Secondary Phase" means that unit may not move in the Primary Phase that turn.
6.6.3 Units move out of the Reinforcement Box by the rules below, whenever the AM for their command is drawn, and the HQ for that unit is in the same box. In the Secondary Activation Phase.
6.6.4 Axis units in the Tripoli Box, other than those using Naval Transport, must first move into the Transit Box (one phase) and thence directly onto the map (another phase) onto the western edge of the Libya map (any hex they choose, but it will usually be L1900). Movement out of the Tripoli or Transit Boxes costs the player: 1 RP if only one unit is moving that turn, 2 RP if more than one unit (regardless of how many) is moving that turn. All expended RP must come from those allotted for that turn.
6.6.5 Allied units in their Cairo/Reinforcement Box move onto the map through any of the three Egypt Entry hexes, using the same RP cost as 6.6.4. Remember, Naval Transit works only from Alexandria.
6.6.6 If the Allied entry hexes are blocked, Allied Reinforcements may not enter (and they've most likely lost the game, anyway). However, no Allied unit may move west of Mersa Brega (L1707) until 1942, when this blocked rule applies to the Axis.
6.7 Allied Withdrawals
[Design/Play Note] One of the problems the Allies had was that they were constantly withdrawing units from North Africa to go fight in Greece, Crete, and other friendly climes. Players may simulate this using the Historical Approach, wherein they know what's coming/going, or through the Random Approach rule, which creates much uncertainty.
6.7.1 Historic Approach. The Reinforcement Schedule for the Allies lists units to be Withdrawn (and Returned) during a given turn. Withdrawing units must be removed from the map (just pick 'em up and take 'em off), regardless of their combat readiness states [however, see 6.7.2], and placed in the Allied Withdrawal Box at the start of the turn, before any AM are selected, unless stated otherwise.
6.7.2 If a unit scheduled for withdrawal cannot trace an LOC [9.2.4], it may not be withdrawn. Instead, an available unit of similar type and strength (Allied Player's choice, and try not to resort to blows on this one, folks) must be substituted. Available, here, means anywhere on the board. A reduced unit may be used as a substitute, but only if the original was in Reduced status.
6.7.3 Withdrawn units slated to Return, as indicated on the schedule, are treated as Reinforcements [6.6]. They return in the status in which they were Withdrawn.
6.7.4 Random Approach. For players wishing a less pre-determined method, we suggest ignoring the historical withdrawals and returns. Instead, in Phase B/5, the Allied Player rolls on the Allied Random Withdrawal/Return table (see the map), using the DRM listed depending on who controls what cities, etc. He must withdraw any unit(s) that fit the description, as per above, and he may Return any type of unit(s) so listed, again as per above.
[Play Note] The Random Withdrawal method is likely to change the time-honored flow of the campaign. This is something to consider when you decide whether to use it.
6.7.5 It is possible that the Allies will get Withdrawals and Returns in the same turn. He cannot use a Returning unit to satisfy a Withdrawal. In addition, if there are no units in the Withdrawal Box to Return, the Return is ignored.
6.7.6 The Allied Player does not start rolling for Random Withdrawals/Returns until the January 1941 turn.
6.8 The Trento Division
The Italian 102nd Trento Division was, theoretically, a motorized infantry division. However, upon its arrival, its trucks were stripped and deployed elsewhere, and the division became a standard, albeit large, foot-slogger.
The Axis player has a choice, which he makes before starting the game:
- Use the Trento as a motorized division, which means HQ, Formation counters, assets, etc.
- Use the single, division-sized, non-motorized Trento counter, and give the Axis three additional RP for the first turn of the game, regardless of the scenario [9.1.2].
7.0 Zones of Control (ZOCs)
Zones of Control represent the presence a unit extends outside the immediate area it is in, usually through maneuverability and/or firepower.
7.1 Exerting a ZOC
All units exert a ZOC into all six hexes adjacent to the hex they occupy.
Exceptions:
- Artillery and Anti-tank assets
- Italian Garrison units
- HQ units alone in the hex
- Reduced Foot formations
ZOCs do not extend across or into impassable hex(sid)es. Thus motorized units do not exert a ZOC into non-road connected Mountain hexes.
7.2 Effects of a ZOC
7.2.1 It costs two MPs (in addition to the cost of the hex), to enter an enemy ZOC. Units must stop moving upon entering an enemy ZOC. Exception: The British LRDG unit does not have to stop upon entering an enemy ZOC.
7.2.2 Units may leave an enemy ZOC, but only if they start their activation there, or if allowed by Combat Results. It costs one MP, in addition to terrain entered, to leave an enemy ZOC.
7.2.3 Asset units with no Combat Strength (for example, artillery) may not move into an enemy ZOC. Exception: they may do so when they are stacked with Formations or there is a friendly Formation already in that hex.
7.2.4 Units that are in an enemy ZOC are not required to attack. Moreover, if they do, they do not have to attack all enemy hexes exerting a ZOC. They may choose to attack one or more hexes, although they must attack all units in that hex.
7.2.5 A unit may retreat into an enemy ZOC. However, if it does so, the unit is Reduced for each hex so entered.
7.2.6 LOC [9.2.4] may not be traced through an Enemy ZOC, unless such hex is occupied by a friendly unit.
7.2.7 The presence of a friendly unit in a hex negates an enemy ZOC for the purposes of tracing LOC and determining retreats but not for normal movement.
8.0 Combat
8.1 Types of Unit Strength
Combat units usually have one of three types of strengths. Some have two, with a few having all three. Each of these types is used as, or to determine, a DRM for combat.
- Combat Strength (CS): used to determine the odds-ratio DRM. HQ, and Assets with only encircled or boxed strengths, have an unprinted CS of 1, which is used only when defending alone in a hex.
- Armor Points: The numbers in boxes used, when compared to the enemy's armor points, to determine whether one side has Armor Superiority or Armor Supremacy. Armored Formations (tank units) have both a CS and Armor Points.
- Artillery Points: The encircled numbers used, when compared to the enemy's artillery points, to determine whether one side receives an Artillery DRM.
8.2 Resolving Combat
8.2.1 Combat takes place when:
- [Voluntary] a player has selected an AM and, at the end of the movement portion of that AM, he has units from that AM/command adjacent to enemy units; or
- [Voluntary] it is the player's Secondary Activation Phase, and a unit (eligible to activate in that phase) has started the Phase adjacent to an enemy unit and the Player expends one (1) allocated RP.
- [Voluntary] A CounterAttack result [8.2.8].
- [Voluntary] A Secondary Attack by a unit under Continue Movement [8.2.8].
- [Mandatory]. See 4.4.5. (9.5.3 is an exception to the expenditure of RP here.)
8.2.2 Units do not have to attack [7.2.5]. Assets without a Combat Strength that are not absorbed [6.1.4] may not attack. If attacked, they defend with a CS of 1 (total, and regardless how many such Assets are in the hex); they may, when defending, use their full Armor and Artillery points.
8.2.3 Combat is resolved by having the attacker roll the die, apply all relevant dieroll modifiers (DRM or strength reductions), and then apply the results to all units involved. Combat DRMs are as follows:
- Terrain, including Fortifications and Boxes. [See the Terrain Chart, and 9.4.]
- Odds-Ratio [8.2.5]
- Concentric Attack [8.2.6]
- Armor [8.3]
- Artillery [8.4]
- Air Support [8.5]
Other effects, usually on unit strength, include Unsupported Armor [8.3.4] and Isolation [9.5].
8.2.4 Retreat Before Combat Option. After movement is completed, but before combat is resolved, defending units that have a Movement Allowance greater than the attacker and can trace an LOC [9.2.5] may choose to Retreat a mandatory two hexes [8.2.9] rather than defend against the attack. The defender may not choose this option if it is in the ZOC of an enemy unit other than the attacker. At the conclusion of the retreat, all retreating units undergo an "rd" [8.2.8; no DRM]. The attacker may advance into the vacated hex, but it may go no further. However, it may attack other, adjacent enemy units. Do not use MA's of attacking assets (other than recce units).
[Clarification] Do not use MAs of attacking assets (other than recce units).
8.2.5 Odds-Ratio DRM. To determine this, each player totals the number of CS points he has in a given combat, and the two players compare their totals, expressed as a simple ratio, rounding off mathematically. Thus 21 CSP to 11 CSP would be a 2:1 ratio, and a 10:15 would be a 1:1.5 ratio, and a 10:11 would be a 1:1! When the ratio is determined, consult the Odds Ratio DRM chart to determine the modifier.
8.2.6 Concentric Attack Benefit. If a player's attacking units and their ZOC (which may be negated by enemy units' presence) occupy or extend into all six hexes surrounding the defender, or if some of those hexes are impassable for the defender, the Attacker gains a Concentric Attack DRM of +1.
8.2.7 Isolation. If a defending unit is Isolated [9.5], its (total) CS, Artillery, and Armor points are halved, rounding down, to a minimum of 1 for CS but a 0 for the AP and Artillery.
8.2.8 That single, adjusted dieroll produces a Result that is applied to all the involved units of both attacker or defender, as per the Combat Results Table, as follows:
-
Eliminated: Unit is removed from play and placed in the Eliminated section of the Refit Box if, at the time of its elimination, it could trace an LOC [9.2.4]. If not, it is placed in the Destroyed Box, from which it may not return.
-
Reduced: Flip the unit to its Reduced side; if already Reduced, treat as Eliminated. If there is no reverse side, the unit is Eliminated.
-
rd +/- a #: Roll the die for each unit, adjusting the DR when indicated (as usually happens if defender is in a fortification, etc.). If higher than its Cohesion, it is Reduced. If the same as or lower, No Effect. If the unit is an Absorbed Asset, stacked as per 6.1.4, use the Formation's Cohesion when rolling, if the latter is higher. If the Formation is eliminated, the Absorbed Asset is, too.
-
Retreat # hexes: Unit must move that number of hexes away from enemy units and towards its Supply Source, if possible. If it cannot complete its retreat for any reason, it is Eliminated [7.2.6 and 8.2.9].
-
Advance: Units may move one hex into the hex vacated by the enemy unit. Advancing units may ignore enemy ZOC. Advance does not cost or use Movement Points.
-
Continue Movement: Motorized (only) Formations and Recon units may continue to move by rolling the die and adding 1, that adjusted DR being the number of Movement Points they have available to expend [6.1.1]. The moving unit may ignore an enemy ZOC exerted into the first hex it enters, but not any ZOCs into additional hexes. The units may engage in a Secondary Attack against any enemy units in its ZOC when it stops. A unit may use Continue Movement only once per Phase. Foot units, and artillery and anti-tank assets, may not use Continue Movement - even if stacked with motorized units. They treat CM results as an Advance, with no Secondary Attack allowed. Clarifications on Continuous Movement:
- First hex entered must be the one vacated by the defender 2. If, in any combat engendered by CM, a unit gets a 2nd CM (which it cannot use), it may still Advance into the vacated hex.
[Clarification on Continuous Movement] 1. First hex entered must be the one vacated by the defender. 2. If, in any combat engendered by CM, a unit gets a 2nd CM (which it cannot use), it may still Advance into the vacated hex.
8.2.9 Retreats
- A retreating unit may not enter a friendly, occupied hex, unless allowed by Stacking rules.
- It may not Retreat into a hex, or across a hexside, which it could not enter/cross using normal movement.
- A unit may retreat into an enemy ZOC, but it suffers a Reduced result for each such hex entered [7.2.6].
- A unit that cannot, for any reason, complete its Retreat is Reduced.
- A unit may Retreat into a City, and stop, and "satisfy" the mandated hex retreat. This does not apply to units that start inside a city (unless fortified).
[Play Note]: In essence, this last will be used only by units voluntarily retreating [8.2.4], because a unit forced to retreat is already Reduced.
8.3 Armor Points
8.3.1 The numbers on the combat units inside a box-for example, [2]-are Armor Points. These points reflect a unit's capability to destroy opposing armored units, attack all types of enemy units, and defend against enemy armor.
[Design Note]: There are several armored units with 0 AP. These are the tank battalion with the CV-33s, the rolling death boxes, which had virtually no armor-piercing capability, as well as some early, and very ineffective, British tanks.
8.3.2 Armor Points are used only to determine the Armor DRM in any given attack. Each player totals the Armor Points he has in a given combat.
- If the Attacker has more AP than the defender, +1 to the Combat DR.
- If the Attacker has at least twice as many AP as the defender, or the Defender has no AP and the attacker has at least 2, +2** to the Combat DR.
- If the Defender has more AP than the Attacker, -1 to the Combat DR.
- If the Defender has at least twice as many AP as the Attacker, or the latter has no AP and the defender has at least 2, -2** to the Combat DR.
**Exception: If the player gaining the benefit of Armor Points does not actually have any Armor units - all his points are, in essence, coming from anti-tank assets - the best he can do is -1 or +1.
8.3.3 Armor Points may not be used to affect combat against a Fortification or Box hex. Units inside fortifications or boxes may not use AP. This does not apply to unfortified cities.
8.3.4 Unsupported Armor. Armor fought best when teamed with infantry. Therefore, if an Armor Formation is involved in combat (attacking or defending), and there is no infantry (motorized or foot) stacked with it, the armor units CS is halved, rounding down (to a minimum of 1).
[Play Note] Armored units with [0] Armor Points are still armored units for the purpose of this rule. This rule is not on a 1-1 unit basis; armor uses its full CS as long as it is stacked with any infantry (foot or motorized) in the hex.
8.3.5 It is possible for a unit to increase the AP of armor (tank) units during the game [9.3.5].
8.4 Artillery Points
The numbers on the combat units inside a circle-for example, (2)-are Artillery Points. These points very generically (and somewhat simplistically, to be sure) reflect a player's barrage and artillery support capability. They work in the same way as do Armor Points-8.3.2-except that, here, the players total Artillery Points. (8.3.3-5 do not apply to artillery.)
8.5 Air Support (Optional)
This rule may be ignored by those wishing to avoid the complexity and time it adds to the game. For the most part, it will help the Allies more than the Axis, but it is not conducive to solitaire play.
8.5.1 Air Support is represented by Air Support markers, which may be purchased each turn, in Phase B/2 only. It costs 2 RP to buy an Air Support marker, the RP coming from Allocated RP for the turn. A player may place a maximum of two (2) AS markers per AM.
8.5.2 Each player has a maximum number of Air markers he can buy, as listed on the Air Support Availability Chart. He can always buy less (or none).
8.5.3 Air Support may be used for the following missions:
- Ground Combat Support [8.5.5]
- Port Suppression [8.5.6]
- Malta [8.5.7]
- Air Support Reaction [8.5.8]
8.5.4 For Air Support Missions 1 and 2, the target hex must be no further than 30 hexes from the nearest friendly Village/City (as per 9.2.6). This does not apply to Malta missions. AS markers may be used any time it is that player's phase. They may be placed in either the Primary or Secondary Phase, as desired. Unused Air markers may not be saved; they are considered used at turn's end.
8.5.5 A player may use Air as Ground Combat Support. Whenever an attack is resolved, the players adjust the DR by one (+ for attacker, - for defender) for each of his AS markers atop the defender. Once so used, the Air markers are removed for the turn.
8.5.6 A player may use an Air marker for Port Suppression. If a player has more Air markers on a port than his opponent, the latter may not use Naval Transport in or out of that hex, nor may he undertake Construction [9.4].
8.5.7 Starting with the March, 1941 turn, if the Axis Player has more Air markers in the Malta Box than the Allied Player in the RP Phase (F/4) he may roll one more die when determining how many RP he gets [9.1.2].
8.5.8 A player may use an Air marker for Air Support Reaction. The non-phasing player may, in reaction to his opponent's placement of Air Markers for Ground Support (only), place Air Markers in defense, during his opponent's AM. All Air rules apply, and AS markers may only be so placed in a hex in which the AM/phasing player has allotted AS.
9.0 Resources
9.1 Resource Points (RPs)
Resource Points cover a variety of actions: supply, construction, air support, refitting troops, anything that requires an influx and use of men and materiel.
9.1.1 At the start of each scenario, and at the end of each turn (F/2), each player receives a number of Resource Points (RP). Players keep track of their Available RP on their RP Available Track, which represents what the player has in his bank.
9.1.2 Axis RP: At the end of each turn, in the Supply Phase, F/4, the Axis Player rolls a number of dice, as listed on his RP Availability Chart, adding them. The total is how many RP he may add to his Resource Availability Track for possible use the next turn.
Exceptions:
- During the September 1940 through January 1941 turns, the Axis Player adds one die to the number rolled for each of the following villages he occupies: Sidi Barrani, Mersa Matruh, and Maaten Baggush. [See, also, 6.8.]
- At the end of the March 41 turn, the Axis Player receives a one-time influx of 70 RP, in addition to his usual diceroll.
- (Optional Rule) If players are using the Air Support rule, the Axis Player may roll an additional die if he has Air Superiority over Malta [8.5.7].
9.1.3 The Allied Player receives specific numbers of RP as per his RP Arrival Schedule; he rolls (one die) only for the September and October 1940 turns.
[Play Note] The Allied Player will rarely have insufficient RP. Allied logistical problems were mostly local, not operational.
9.1.4 The General Procedure for RP use is:
- In the F/4 Phase of each turn, each Player receives a number of RP, which he places in his RP Available bank.
- In the B/2 Phase of each turn, each Player removes RP from his Available bank, allocating them for use during that turn.
- Each Player expends RP in Phases D and E as needed or required [9.1.5].
9.1.5 RP are used for the following (all, some, or none, at the players' choice):
- Unit Activation [4.3.1, 4.4.5, 8.2.1]
- Placing a Kampfgrüppe or the Italian BCS [4.7.2 and 4.7.5]
- Refitting [9.3.1 and 9.3.5]
- Construction [9.4]
- Air Support [8.5]
- Leaving the Transit Boxes (in addition to Activation costs), as per 6.6.4
Each of the above uses costs 2 RP each. Exceptions: AM with a 3 RP cost, Individual unit activation [4.4.5 and 6.6.4]
9.1.6 The Allied player does not have to pay any RP to move or attack with the LRDG unit [4.3.8].
9.2 RP Allocation and Usage
9.2.1 A player may allocate as many RP as he wishes, from those he has available, but the total allocated may always be at least equal to the RP required to place those AM in the Pool [4.1.4].
[Play Note] He may need more, for construction, air, refit, etc.
9.2.2 A player may expend RP only from those allocated for that turn [4.3.1]. The player writes down his total RP allocated, and keeps track of their expenditure on his RP Expended Track (on the map). RP expended may not exceed those allocated for that turn. RP for purchasing Air Markers are expended immediately upon purchase, as per 8.5.1, not when used.
[Play Note/Clarification] RP for purchasing Air Markers are expended immediately upon purchase, as per 8.5.1, not when used.
9.2.3 Each time a player selects an AM he must expend the required RP to activate that HQ. If he does not, or does not have sufficient RP available, he may not activate that AM and play continues by drawing another AM, or proceeding to the Secondary Phase, whichever applies. Players also expend RP for operations listed in 9.1.5, as required.
9.2.4 To expend the required RP for an AM, the HQ must be able to trace a Line of Communications (LOC) back to its Supply Source.
- The Allied Supply Sources are Alexandria, Cairo (through the Allied Entrance hexes), and Tobruk, if Allied occupied and not suppressed [8.5.6].
- The Axis Supply Sources are Tripoli (via L1900), Benghazi (if open [6.5.5]), and Tobruk, if Axis occupied and not suppressed [8.5.6].
9.2.5 An LOC must be free of enemy combat units and/or their ZOC. It may be traced as follows:
- Five Movement Points (Foot) or ten Movement Points (Motorized) to any road, track or village/city, or to a Supply Source itself.
- From the above (if not a Source), any number of hexes by road or track. However, no segment of road/track may be longer than 12 hexes from one village/city to the next. For this purpose, wadis do not interrupt an LOC (unless flooded by Random Event [10.0]).
- An LOC may not be traced through a non-Track Desert hex.
- For purposes of the above, a friendly unit negates the effect of an enemy ZOC.
9.2.6 There are two further LOC requirements:
-
Villages used to provide an LOC must, at one point, have last been entered by the player tracing the LOC.
[Play Note] This won't be too difficult to keep track of; when in doubt, use one of the all-purpose markers.
-
The LOC may be no longer than 55 hexes (not MP) long.
-
The Allies may not trace an LOC into or from any hex west of Mersa Brega (L1707) until 1942.
[Example] An LOC may be traced from Mechili to Msus (12 track hexes). It could not be traced from Bir Hacheim to Giarabub without going through Ft. Madalenna (a rather tortuous route, to be sure, but legal in game terms). And an LOC could not be traced from Bardia to L1900, as it would be more than 55 hexes.
9.2.7 RP that are allocated during a turn but not used are gone at turn's end.
9.3 Refit
Refit is the term used to represent bringing Reduced or Eliminated units up to strength. It also applies to increasing the AP value of Tank units.
9.3.1 Players use Resource Points to refit units. It costs two RP to perform a single refit action. A Refit action involves rebuilding a unit from Eliminated to Reduced to Full. Units with no reduced side go directly from Eliminated to Full.
9.3.2 Units may be refitted when their AM is selected or in the Secondary Phase. This applies to units both on the map and off-map (in the Refit Box). When a Refit action is chosen:
- for off-map units, simply expend the necessary RP and "promote" the unit to its next highest level: Eliminated becomes Reduced becomes Ready [6.61]. Units with no reduced side go directly from Eliminated to Ready. A player may always advance a Reduced unit into the Ready box without upgrading its status.
- for on-map, Reduced units, they must have an LOC and not be in an enemy ZOC. Upon expending the RPs, the unit is flipped to full status.
9.3.3 Units in the Destroyed Box [8.2.8] may not be refitted.
9.3.4 Both sides receive free refits, as per the Master Reinforcement Schedule. When it says "Free Refit," any applicable unit may be upgraded [9.3.2].
9.3.5 Armor Upgrade. A player may upgrade his tanks-armor units (only)-by increasing their AP rating (by one). An Armor Upgrade is treated as a Refit (2 RP), although it may be done in addition to a status upgrade [9.3.2]. When that is done, place an AP Upgrade marker on the unit, increasing its AP rating by one. There are four limitations: The countermix; No Armor Upgrade may take place before 1942; Italian armor may not be upgraded; No unit may be upgraded above an AP Rating of five. The Allied Armor Upgrade maximum is 6 units; the Axis is '4'. Unfortunately, we printed the latter counters on back of the former. Not bright.
[Play Note/Clarification] The Allied Armor Upgrade maximum is 6 units; the Axis is 4. Unfortunately, we printed the latter counters on back of the former. Not bright.
9.3.6 Refit in Tobruk. If units in Tobruk cannot trace a LOC to a non-Tobruk Supply Source (i.e., Tobruk is cut off), Refit may be accomplished solely by Naval Transport. A player may refit 2 on-map units by naval Transport, as long as he does not transport any units that turn, To that end (only), the Allies (not the Axis) may use Bardia-to-Tobruk (but not vice versa) for Naval Transport.
9.4 Construction: Fortifications and Boxes
9.4.1 Players may expend allocated RP to construct Fortifications, which increase the defensive benefits of cities, and/or Boxes, a term which represents enhanced defensive perimeters (minefields, barbed wire, etc.) outside cities. [See the Terrain Effects Chart.]. A Fortification is reduced one level when a player enters that hex by means of combat. This is the only way to reduce Fortification levels.
9.4.2 Construction may take place in either the Primary or Secondary Activation phases.
9.4.3 There are two levels of Fortifications: 1 and 2 (the highest), the effects of which are given on the Terrain Chart. To construct a level of Fortification in a city (the only hex in which they may be built), the player must have a Formation start in the hex and expend all its movement points to construct the Fortification. It may not start in an enemy ZOC (although an enemy unit moving adjacent later in the turn has no effect on the Fortification construction). It costs two RP to construct one level of Fortification, and the unit must be able to trace an LOC [and see 8.5.6].
9.4.4 Box construction works the same as 9.4.3-except that it costs only one RP and there is only one level-and only one Box is allowed per hex. Boxes may be built only in Clear (including villages), Rough, or Oasis hexes. In addition to the combat effects, a Box is destroyed when an enemy unit enters it. Otherwise, it remains in the hex.
9.4.5 Units that start a phase in a Box and wish to move have their MA halved for that phase. This does not apply to fortifications.
9.5 Isolation
9.5.1 Units that cannot trace an LOC [9.2.4] in the Isolation Phase (F/3) are Isolated. Place an Isolated marker atop such a unit to indicate its status. If a unit with an Isolated marker is no longer isolated when its AM is selected, or when it is finished Secondary Phase movement, remove the marker.
9.5.2 In the F/2 Phase, Isolated units are Reduced [8.2.8]. [See, also, 9.5.5.]
9.5.3 Isolated units have their MA, CS, and any Armor or Artillery Points halved, rounded down. (If stacked, round down totals.) They may attack if they start adjacent to an enemy unit, although they may not move into an enemy ZOC. This is an exception to the 4.4.5 mandatory expenditure of RP.
9.5.4 Oases. Units in Oases hexes may become Isolated. However, although they incur all 9.5.3 detriments, they do not suffer 9.5.2 Reduction.
9.5.5 Italian Surrender. In any turn between September 1940 and March 1941 (inclusive), Italian/Libyan units that would be considered Isolated in the F/1 Phase- even if there is no Isolated marker-may Surrender (a term which includes desertion). Roll a die for each isolated unit. If the DR is greater than the unit's Cohesion rating, it is eliminated (Destroyed). If the unit is a Garrison or Asset, surrender is automatic.
10.0 Random Events (Optional)
This rule should be used only for the two Campaign scenarios, and only by those who wish a little more chrome-like historicity.
Any time a player rolls to see whether his Commander is In Play, it is possible a Random Event has occurred. If one has occurred, consult the RE Table and roll again, following instructions for results.
Description of Random Events
- A. Snafu. Player rolling this cannot move units out of Home Base Box (Cairo or Tripoli) this turn.
- B. Allied RR Movement. Allied Player may move one Formation as far as he wishes directly between Alexandria or Cairo and Tobruk using Strategic Movement, except that the unit may move through units on the road. The unit must start its phase in one of those locations. The Allied Player may do this with any AM, regardless of the transported unit's parent organization.
- C. Sandstorm. For the first AM randomly drawn from the Pool, place a Sandstorm marker in that AM's HQ hex. There is a Sandstorm in effect for all hexes within five of that marker. Roll the die; the Sandstorm lasts for the number of AMs drawn (after the one just drawn) equal to the DR. (A 0 means it applies only to that AM's Phase.) The effects to those hexes are: No construction may be undertaken; No Air Support for those hexes; Double the cost of all movement; No Strategic Movement into any Sandstorm hex. Apply to first non-Transit Box AM chosen.
- D. Massive Rain Squall. Same method for Rain as for Sandstorms, except the effects are as follows: No construction may be undertaken. There is no Air Support. Roads are treated as Tracks (and thus no StratMove into those hexes). Wadis and Rivers are uncrossable for all purposes, except where traversed by a Road. Delta and Marsh are impassable, except by Road (which is now a Track). Apply to first non- Transit Box AM chosen.
- E. Crete Falls. If rolled on or after the April 1941 turn, the Axis Player may increase his maximum available Air Support markers by one for the rest of the game. Only applies once; if rolled again, treat as J, below.
- F. Allied Naval Bombardment. For any (all) combat this turn in which the Axis defender or Attacker is in a coastal hex, or in a hex adjacent to a coastal hex that is east of Derna (inclusive), the Allies may add one (+1) to the combat DRM if attacking, -1 if defending.
- G. Raid. Applies to Player rolling this. If a friendly Recce or LRDG unit enters any village or city along his opponent's LOC that the latter has used previously that turn, he may attempt to "Blow the Dump." Roll the die and halve the result, rounding down. The resultant number is the number of RP that the enemy must remove from his Allocation total for that turn. In addition, if the DR was even, the friendly player adds one RP to his Allocated RPs for that turn. (Captured supply.) It costs the moving unit 2 MP to Blow the Dump.
- H. Increased Axis Logistical Commitment. The Axis Player may roll one additional die for Resource Points.
11.0 Campaign Game Victory
- Instant Axis Victory: The Axis player wins an Instant victory if, at the end of any turn, he occupies Alexandria and hex E2741.
- Instant Allied Victory: The Allied player wins an Instant victory if, at the end of any turn after April, 1941, there are no Axis combat units that can trace an LOC to a Supply Source on the map (excluding the off-map boxes).
- Axis Victory: The Axis player wins if he occupies, at the conclusion of the December, 1942 game-turn, Benghazi, Tobruk, Bardia, and either Siwa Oasis or both hexes of Giarabub Oasis.
- Allied Victory: The Allied player wins if he occupies, at the conclusion of the December, 1942 game-turn, Alexandria, Mersa Matruh, Tobruk, Bardia and either Siwa Oasis or both hexes of Giarabub Oasis.
Victory conditions for the shorter scenarios are given in the Scenario Book.
Scenarios
1940: The Italian Offensive
Game Length: The Italian Offensive scenario starts with the September 1940 Turn and ends at the conclusion of the February 1941 Turn. The scenario lasts 7 Turns and can be finished in one sitting (about 4 hours). When playing the entire campaign, it ends at the conclusion of the December 1942 turn (or earlier, if automatic victory is achieved). It will probably take a full weekend, at least.
Maps: Both Maps are used, although you can play the Italian Offensive using only the Egypt map.
Initiative: The Axis Player automatically has the Initiative for the September 1940 turn.
Initial Axis Deployment (All units are Italian/Libyan)
| Hex | Unit(s) |
|---|---|
| E3300 | 1 CCNN Division; I Medium Tank Bn |
| E3301 | 63/Cirene Division; LXIII Light Tank Bn |
| E3101 | 2 Libyan Division; IX Light Tank Bn |
| E2900 | 62/Marmarica Division; LXII Light Tank Bn |
| E2901 | Gruppo Maletti Motorized Division [a]; II Medium Tank Bn |
| E3202 | 1 Libya Division |
| E3100 | Aresca Tank Regiment (Babini) |
| E3403 (Bardia) | Tivoli Tank Rgt. (Babini); XXII Artillery Rgt; Bardia Garrison |
| E1300 | Sahara Det. Infantry |
| E2702 | Ft.Maddalena Garrison |
| L3535 (Tobruk) | Babini Gruppo Corazzato HQ; Tobruk Garrison |
[a] The Libyan Ragruppamento Maletti was supposed to be the 3rd Libyan Division; instead of giving it that name they gave it trucks. It also included the Sahariano Camel Regiment, which was not truly eponymous, as it had no camels.
[b] The 3 CCNN Division had no HQ, historically. Therefore, it has no AM! It is treated as an unassigned infantry Formation, except that it may never be attached to any other HQ. If the Italian Player wishes, instead of using this unit, he may convert it to 2 Refit Points. To do so, just remove the unit from play at the start of the game and add the refit points to his total. (This is essentially what was done with this unit historically.)
Graziani is In Play for the September 40 Turn automatically.
Resource Point Available: 60
Reinforcements: As per Master Reinforcement Schedule. However, see 1-Map Italian Offensive special rules, below.
Initial Allied Deployment
| Hex | Unit(s) |
|---|---|
| Within 2 hexes of E3206 | 7th Supp Grp (7 Arm); 7/8 Medium Artillery |
| Within 2 hexes of E2703 | 11 Hussars (7 Arm) |
| E3410 | Selby Force |
| E3218 | 7th Armored Div HQ, 4/7 and 7/7 Arm Bgds |
| E3319 | 23/70 Infantry; Box |
| E3220 | 4th Indian Division (minus the 7/4 Ind Inf) |
| E3221 | 149 and 65 AT Bns |
| E3538 (Alexandria) | 2nd NZ Division HQ, 4/2 NZ Infantry, 2 NZ Recce |
| Cairo Box | 16/70 Inf; 8 Fld Arty |
| Reduced Refit Box [a] | Polish Brigade; 16/6 and 17/6 Aus Inf |
| Elim Box | 6 Aus Recce |
[a] Several Allied units arrive throughout the game by being placed in this box. This represents units arriving understrength and/or without any training.
Wavell-a is In Play for the September 40 Turn, automatically.
Resource Points available: 35
Reinforcements: as per Master Reinforcement Schedule.
September 1940 Turn Restrictions
The Italian offensive started in the middle of the month. Therefore, no command may have more than one AM in play for this turn. The Secondary Phase is conducted normally.
Victory: Italian Offensive
Instant Victory: If, at the end of any turn, the following is in effect, the game is over:
- If the Axis Player occupies E3336 and can trace a LOC back to Libya, the Axis Wins.
- If the Allied Player occupies Tobruk, Bardia and Benghazi, the Allies Win.
- If the Allied Player occupies Tobruk and Bardia, and there are no Italian/Libyan units in Egypt that can trace a LOC back to a Supply Source, the Allies win.
Scenario Victory: At the end of the March, 1941 Turn, if the Axis has any combat units in Egypt that can trace a LOC to a Supply Source, he wins. Otherwise, and if the Allied Player has not won an Instant Victory, consider it a Draw. (These conditions are based on actual Axis performance, as it is doubtful that the Italian army could have achieved any geographical victory.)
One-Map 1940 Scenario
You may play the Italian Offensive scenario using only the Egypt map with a few adjustments.
- All Italian/Libyan units that would start on the Libya map (excluding garrisons and Tripoli and Transit Box units) are available as Reinforcements in the October 1940 Turn, except for the 61/Sirte, which is available November 1940. The units may enter through E3401, E3300, or E2900.
- Ignore all units in the Tripoli and Transit Boxes.
- The Axis starts with 50 RP (not 60).
- The Supply Source for the Axis is E3401.
- Instant Victory Condition #1 still applies. #3 also applies, except that, instead of occupying Tobruk, the Allies must occupy all three Axis Supply Source hexes. Scenario victory conditions still apply.
- The Italians use the Sept-Jan RP DR all turns.
- There is no Refit for Eliminated units.
- The Italian 9/40 Reinforcements arrive 12/40; the 11/40 reinforcements arrive 1/41. No other reinforcements from the MRS are used.
The 1940 Campaign Game
We're going to try something unusual here, spurred on by some thinking concerning the Italian-German political-military situation of mid-1940, instigated by an probability conversation between Carl Gruber and Andrea Galliano in the pages of The Gamers' "Operations" magazine, ideas which we have, very loosely, adopted and adapted.
The basic premise is that no Axis Player who knows anything about the 1940 situation and the (lack of) Italian potential is ever going to do anything more than hole up in Libya, waiting for Uncle Erwin to arrive with the sandwiches. That makes for a rather stultifying game. However, there was a possibility (albeit not a probability) that, under certain circumstances, Hitler might have sent two German armored divisions to Africa a lot earlier, circumstances which we have reduced to the rather simplistic rules, below.
The following rules apply to the 1940 Campaign Game:
- The Allies use the Random Withdrawal rule.
- German Reinforcements on the Master Schedule that are marked with an [a] or a [b] may arrive earlier. In the Initiative Phase of the October, November and December 1940 game-turns, the Axis Player rolls one die to see if Hitler has committed early. If he rolls an adjusted '9+', the February 1941 German reinforcements (and the 70 extra RP) arrive the next turn, instead, with the [a] March and April reinforcements, and Rommel, entering the following month. The reinforcements marked with a [b] will enter one month earlier than listed. The Axis Player may add to that DR, as follows:
- +1 if he occupies Siwa at the time (+3 if he finds the body of Alexander the Great)
- +2 if he occupies Sidi Barrani at the time
- +3 if he occupies Mersa Matruh at the time
- -1 if the Allies hold Bardia or Tobruk
- If any German units arrive before January, 1941, all Allied reinforcements marked with (**) are moved up by one month.
1941: Rommel Arrives (and the 1941 Campaign Game)
Game Length: The Rommel scenario starts with the April 1941 Turn and ends at the conclusion of the June 1941 Turn. If playing the entire campaign, it ends at the conclusion of the December 1942 turn (or earlier, if automatic victory is achieved). The Rommel Scenario lasts 3 Turns and can be finished in about 2-3 hours. The 1941 Campaign game will probably take a full weekend, at least.
Maps: Both Maps are used, altho you can play the Rommel Scenario using only the Libya map.
Initiative: The Axis Player automatically has the Initiative for the April 1941 turn.
Initial Axis Deployment
| Hex | Unit(s) |
|---|---|
| L1703, 1704, 1604 | German: 5/21 Pz HQ; 1/5, II/5 Panzer Bgdes; 39 Anti-Tank; 3rd Recce; Arko Arty; CoastDef "a" Arty; 2 MG Bn; 8 MG Bn; KG Bach HQ; Italian: Ariete Division (no III ArtCelere); XXI Medium Tank Bn |
| L1700 | Italian: 17/Pavia Division |
| L1900 | German: 33/15 AT |
| Tripoli Box | Italian: 2nd Arty Grp; XXII Arty |
| Transit Box | Italian: Trento, Bologna, Savona Divisions |
| Refit/Elim Box | Italian: Sabratha, Catanzaro, Cirene, Marmarica and Sirte Divs; Babini Gruppo Corazzato (HQ plus Aresca and Tivoli Tank Bns) |
| Refit/Reduce Box | Italian: Brescia Div. |
Rommel is In Play for the April 41 Turn, automatically.
Resource Points Available: 105
Reinforcements: As per Master Reinforcement Schedule, starting with April 1941.
Initial Allied Deployment
| Hex | Unit(s) |
|---|---|
| L1508 | 3 Hussars |
| L1707 | 2nd Supp Grp (2 Arm) |
| L1808 | 2nd Arm Div HQ; 3/2 Arm Bgde; Kings Dragoon Guards Recce (2nd Arm) |
| W/i 2 hexes of L3410 | 20/9 Aus Inf (Reduced); 26/9 Aus Inf; 2/3 Aus AT |
| L3334 | 3rd Indian Mtrzd Bgde (Reduced) |
| L3535 (Tobruk) | 9 Aus Div HQ; 24/9 Aus Inf; 65 AT; 8 Fld Arty; 1/104 RHA Arty |
| E3319 | 7th Supp Grp (7 Arm) |
| E3133 | Polish Infantry Brigade |
| E3215 | 22/200 Mtzd Inf (Reduced) |
| E3538 (Alexandria) | 7th Armd Div HQ; 4/7 and 7/7 Arm Bgds; 11 Hussars |
| Cairo Box | 70th Inf Div HQ; 16/70 Infantry; 18th Aus Inf Bgde; 7th Aus Recce Bn; 149 AT; 106 RHA AT; 7/8 Med Arty; 64 Arty |
Wavell-b is Available; must roll to see if he's In Play.
Resource Points Available: 55
Reinforcements: As per Master Reinforcement Schedule, starting with April 1941.
One-Map Scenario (Rommel Arrives)
Players with limited space can play the 3-turn, "Rommel Arrives" scenario using only the Libya map. It does require a change in the Allied initial placement and reinforcement schedule, though, as below. We recomment not using Random Events.
Initial Allied Deployment (One Map Version)
| Hex | Unit(s) |
|---|---|
| L1508 | 3 Hussars |
| L1707 | 2nd Supp Grp (2 Arm) |
| L1808 | 2nd Arm Div HQ; 3/2 Arm Bgde; KgDgnGd Recce (2 Arm) |
| W/i 2 hexes of L3410 | 20/9 Aus Inf (Reduced); 26/9 Aus Infantry; 2/3 Aus AT |
| L3334 | 3rd Ind Mtrzd Bgde (Reduced) |
| L3535 (Tobruk) | 9 Aus Div HQ; 24/9 Aus Inf; 65 AT; 8 Field Arty; 1/104 RHA Arty |
Allied Reinforcement Schedule (One Map Version)
All units arrive through hex 3244. If they cannot do so, they arrive through 2844 or 2743. However, in doing so, they halve their MP for the turn of arrival. The Allies may use Naval Transport. AMs are available as needed for commands in play and arriving.
| Turn | Units |
|---|---|
| April 1941 | 7th Supp Grp (7 Arm); Polish Bgde; 22/200 Mtrzd (Reduced); 7th Arm Div HQ; 4/7 and 7/7 Arm Bgdes; 11 Hussars; 73 AT. Note: The above units receive only one AM for this turn, per command. |
| May 1941 | 70th Inf Div HQ; 16/70 Inf; 18th Aus Bgde; 7th Aus Recce; 149 AT; 106 RHA AT; 7/8 Med Arty; 64 Arty. Note: The motorized units may enter either this turn, or, if assets using 6.1.4, with the April 1941 units. |
| May 1941 | 4 RTR; 9 Aus Recce; 9 Aus Arty; 4th Ind Division; 1 Royal Dgns Recce (10 Arm) (Only 1 AM) |
| June 1941 | 14/70, 23/70 Bgdes; 7 RTR Tank; 1 SA Div HQ; 5/1 SA Inf; 6 NZ Inf Bgde; 1 Army Tank Bgde; 2 NZ Recce; 5/4 Ind Inf Bgde; 70 Div HQ; 16/70 Inf Bgde; (Withdraw all three units) |
Victory: Rommel Arrives Scenario
The Axis Player must take and hold Tobruk to win; otherwise the Allies win.
Fast-Play One-Map Game
You can speed up play even more for this by doing the following:
- Do not use the RP Rule. Consider both players to have enough RP to do what they want.
- However, no Refit allowed.
- No Air allowed, except that the Axis gets 3 Air markers to use at any time he wishes. Rommel in all turns; Wavell never available.
- Trento is on Foot.
Allied Reinforcements (1-map): Where it says "Only 1 AM," for units without a HQ that means they may use only the Independent AM, or the Secondary Phase.
Sequence of Play (Summary)
- A. Initiative Determination Phase
-
- Commander availability
-
- Who goes first.
-
- B. Resource Allocation Phase
-
- Allocate RP
-
- Purchase Air Support (Optional)
-
- Select AMs.
-
- Place Arriving Reinforcements
-
- Allied Withdrawals
-
- C. Marker Selection Phase.
-
- Place Activation Markers Pool
-
- Initiative Player chooses which Command (AM) will start the turn
-