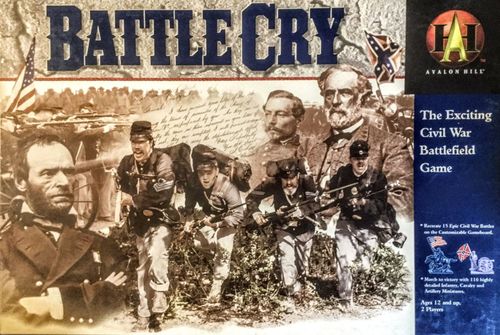
Battle Cry
Battle Cry Rulebook
Table of Contents
Table of Contents
- Contents
- Origins of the Civil War
- Assembly
- Introduction
- Setup
- Object of the Game
- What to Do on a Turn
- Winning the Game
- Campaigns
- Match Play
- Example of Play
- Civil War Goals & Strategy
- Civil War Battlefields in This Game
- Battle Scenarios
- First Bull Run — 21st July, 1861
- Pea Ridge — 7th March, 1862
- Kernstown — 23rd March, 1862
- Shiloh — 6th - 7th April, 1862 (first day of battle)
- Gaines Mill — 27th June, 1862
- Brawner's Farm — 28th August, 1862
- Antietam — 17th September, 1862
- Fredericksburg — 13th December, 1862
- Murfreesboro — 31st December, 1862 (first day of battle)
- Chancellorsville — 1st - 3rd May, 1863 (third day of battle)
- Gettysburg – Devil's Den and Wheat Field — 1st - 3rd July, 1863 (second day of battle)
- Gettysburg – Pickett's Charge — 1st - 3rd July, 1863 (third day of battle)
- Chickamunga — 19th - 20th September, 1863 (second day of battle)
- New Market — 15th May, 1864
- New Hope Church — 25th May, 1864
Contents
- Gameboard
- 60 Command cards
- 46 Terrain tiles
- 6 Field-work tokens
- 14 Campaign flag tokens
- 8 Battle dice
- Flag and dice label sheets
Confederate and Union Armies, each with:
- 3 Generals with flags
- 3 Artillery pieces with flags
- 3 Artillery pieces without flags
- 3 Cavalry pieces with flags
- 6 Cavalry pieces without flags
- 10 Infantry pieces with flags
- 30 Infantry pieces without flags
Origins of the Civil War
Few would disagree with Lincoln's assertion that slavery "was somehow the cause of the war." Between 1800-1860, America underwent a massive and dynamic expansion of its economy, population and territory. These dramatic changes in society upset the political balance between North and South. The "peculiar institution" of slavery in the South was a fundamental point of difference between the two. During the fifty years leading up to the outbreak of the Civil War it became, more frequently, an inescapable focus for debate and cause for division. It was an issue over which, ultimately, there could be no compromise.
In the first half of the nineteenth century, the size of the United States more than tripled.
By the 1830s, a Protestant evangelical enthusiasm known as the "Second Great Awakening" was centered in the North, and supported moral movements such as temperance and abolition. From 1845 to 1855, three million immigrants came to America. Most settled in free states, either in the North or the new territories being opened up in the West. By 1860, the population had reached thirty-two million, four million of whom were slaves.
The vast expanse of new territory, rich in resources, coupled with the boom in population contributed to the staggering growth of the economy. The North moved more rapidly toward an industrial base than the South. Although it fell behind in industrial growth, the Southern economy profited from the emergence of the cotton industry. By 1860, cotton constituted fifty-seven percent of America's exports. The South supplied seventy-five percent of the world's cotton - it was the economic backbone of the South, and slaves were an integral part of the means of production.
Improved transportation was a fundamental requirement for economic growth. By 1860, the United States had a larger rail network than the rest of the world combined, though sixty-five percent of railroad mileage was in the North. Trains carried weekly editions of metropolitan newspapers, which, along with the telegraph, promoted a national awareness of current issues. The different economies had conflicting needs from federal government. The North wanted tariffs on foreign imports to protect its developing industry. It also wanted government help for improved roads, canals and railroads, along with a centralized banking system. The South, given the extent of its overseas trade, wanted low tariffs and a weak federal government.
With the admission of new states and the rise in population, the political balance in Congress changed. Equilibrium between North and South could only be maintained in the Senate, as the faster growing population in the North led to a decline of the Southern vote in the House of Representatives. The Democrats were strongest in the South, but also gained support with working class voters in the North, especially immigrants, and farmers in the West. In general, they were opposed to strong federal involvement. The Whigs favored strong federal government, the development of a national bank, and federal support for internal improvements. The Whigs were largely Protestant and strongest in the North, in particular New England. However, they also gained some support from Southern and Western states such as North Carolina and Kentucky.
The Democrats dominance of the presidency and Congress during the first half of the nineteenth century contributed to the widespread belief in the North of a "Slave Power" conspiracy that undermined American values. In the South there were concerns regarding the increasing economic and political power of the North, which threatened to legislate against Southern interests and the Southern way of life.
Assembly
Preparing the Armies
Remove all plastic pieces from their runners. Discard the runners.
1. Cannons: Assemble the cannons as shown in Figure 1.
2. Flags: Apply flags to certain playing pieces as shown in Figure 2.
For each army, apply flag labels to 3 artillery pieces, 3 cavalry pieces, 10 infantry pieces, and 3 generals.
3. Dice Labels: Apply 2 infantry labels, 1 cavalry label, 1 artillery label, 1 flag label and 1 crossed-sabers label to each die. See Figure 3.
(Figure 3 — the six die faces: Infantry, Infantry, Cavalry, Artillery, Flag, Crossed-Sabers.)
4. Tiles and Tokens: Carefully remove the cardboard terrain tiles and tokens from the cardboard sheet.
Introduction
BATTLE CRY is a unique historical game system with 15 stylized Civil War battles and skirmishes. The enclosed battle scenarios and maps focus on important terrain features that existed on the original battlefields. They also represent the historical deployment of Union and Confederate forces that participated in each battle. In some scenarios, an infantry unit may represent an entire division, while in other scenarios a unit may represent a single regiment.
Armies
The Confederate and Union armies have 3 different types of units: infantry, cavalry, artillery, plus generals.
Each army has 10 infantry units, 3 cavalry units, 3 artillery units, and 3 generals.
Each infantry unit includes: 1 infantry figure with a flag and 3 without.
Each cavalry unit includes: 1 cavalry figure with a flag and 2 without.
Each artillery unit includes 1 artillery figure with a flag and 1 without.
Each general figure has 1 flag.
Battlefield
The battlefield gameboard is a hex grid, 13 hexes wide by 9 hexes deep. The field is divided into 3 sections by 2 dotted lines - giving each player a left flank section, a center section and a right flank section. Where a dotted line cuts through a hex, the hex is considered to be a part of the flank section and the center section. See Figure 4.
(In Figure 4 the hexes cut by a dotted line are in Player A's Left Flank and Center Sections. They are also in Player B's Right Flank and Center Sections.)
Terrain Tiles and Tokens
These represent a wide range of terrain features and are placed on the gameboard to create unique battlefields for each game. They are explained in detail on pages 8-10.
Command Cards
Army units may only move and/or battle when given an order. Command cards are used to order your troops to move, attack and/or do something special. There are 2 types of command cards: Order cards and Special Order cards. See Figures 5 and 6.
Order cards are used to order a move and/or battle. These cards indicate in which section of the battlefield you may order units and how many units you may order. Order cards may be used for any of your units in the section mentioned. See Figure 5.
Special Order cards are used to order a specific move and/or battle, or to do something special. These cards may be used to order units in any section of the battlefield. Some cards allow you to order units in all sections. However, a card may only be used to order the type of unit(s) described. See Figure 6.
Order Cards (Figure 5)
(The Skirmish, Probe, Attack and Assault cards shown name the Left Flank; the deck contains equivalent cards for the other sections of the battlefield.)
- Skirmish — Issue an order to 1 unit or general on the Left Flank.
- Probe — Issue an order to 2 units or generals (or combination) on the Left Flank.
- Attack — Issue an order to 3 units or generals (or any combination) on the Left Flank.
- Assault — Issue an order to all units or generals (or any combination) on the Left Flank. (Order ALL Units.)
- Coordinated Attack — Issue an order to 1 of your units or generals in each section: Left Flank, Center and Right Flank. (Order 1 Unit of each section.)
- All-Out Offensive — Issue an order to all of your units and generals. After playing this card, re-shuffle it with all remaining cards in the deck along with all cards in the discard pile before drawing a new Command card.
Special Order Cards (Figure 6)
- Sharp Shooter — Target 1 general, regardless of where he is on the board, the type of terrain he is on, or whether or not he is attached to a unit.
- Hit and Run — Issue an order to all of your CAVALRY units.
- Bombard — Issue an order to all of your ARTILLERY units. Each artillery unit may battle twice or move twice.
- Force March — Issue an order to all of your INFANTRY units in one section of the battlefield.
- Construct Fieldworks — Issue an order to 2 INFANTRY or ARTILLERY (or combination of both) units to build field-works.
- Fire and Hold Position — Issue an order to all of your INFANTRY and ARTILLERY units in 1 section of the battlefield.
- Rally — Issue an order to 1 of your units that has suffered casualties. Roll 1 battle die for each Command card you have, including this card. For each symbol rolled that matches a lost figure from that unit... (the remainder of this card's text is obscured in the manual's figure)
- All-Out Offensive — Issue an order to all of your units and generals. After playing this card, re-shuffle it with all remaining cards in the deck along with all cards in the discard pile before drawing a new Command card.
- Leadership — Issue an order to all of your attached generals. If a general is attached to a unit, that unit is also ordered to move and battle with the general. Any battling unit (including artillery) with an attached general may roll 2 extra battle dice instead of the usual 1.
- Short of Supplies — Play this card on 1 of your own units or an enemy unit of your choice. That unit (and general, if attached) has run short of supplies and must fall back to any vacant hex on his edge of the battlefield, within the same battlefield section (unit commander's choice). The unit may not battle this turn.
- Counter-Attack — Play this card on your opponent to duplicate the orders of the last card played by your opponent. All instructions remain the same except Left Flank becomes Right Flank and Right Flank becomes Left Flank.
Setup
Choose a Battle Scenario
Select one of the 15 battle scenarios shown on pages 15-29. It is recommended that the scenarios be played in order. Each scenario includes a battlefield map, staffing notes and a battle description.
Set up Gameboard
Each scenario has a battlefield map that shows where to deploy armies and place terrain tiles on the gameboard. Both players should set up the gameboard according to the battle map. See Figures 7 and 8.
(Figure 7 — Army Units: Union infantry unit, Union cavalry unit, Union artillery unit, Union General; Confederate infantry unit, Confederate cavalry unit, Confederate artillery unit, Confederate General.)
Note: Each symbol represents an entire unit as described on page 3.
(Figure 8 — Terrain Tiles and Tokens: Woods, Buildings, Waterway, Fields, Field-works, Hill, Fence, Waterway with Bridge, Rough Terrain, Orchard.)
Review Staffing Notes
Each scenario has staffing notes that provide the following information:
- The generals in command of each army are listed. In some scenarios, the generals are not present in the battle; only the field officers whose presence affected the actual outcome of the battle are represented.
- The player who goes first is indicated.
- The number of command cards used by each player is listed.
- Any special rules or victory conditions that apply for a particular battle are explained.
Deal Command Cards
Shuffle the command cards and deal the number of cards shown in the staffing notes to each player. Players should keep their cards secret. The remaining cards should then be placed face down in a draw pile, within easy reach of both players.
Object of the Game
Be first to eliminate 6 of your opponent's flag pieces from the battlefield to win!
What to Do on a Turn
The player listed in the staffing notes goes first. Players alternate taking turns. On your turn, follow the sequence shown below:
- Play a command card.
- Order units.
- Move.
- Battle.
- Resolve battle.
- Draw a new command card.
1. Play a Command Card
Command cards are normally used to order movement and/or an attack. At the start of your turn, play 1 card from your hand. The card will tell you in which section(s) of the battlefield you may issue orders and how many orders you may give. Some cards allow you to take special actions (as explained on the card).
If none of the command cards you hold allow you to order any of your units, discard 1 card and draw a replacement from the command card draw pile. This ends your turn.
2. Order Units
After playing a command card, announce which of your units you will order. Only those units that are given an order may move, battle, or take a special action. You may not give more than 1 order to each unit.
Note: Generals may participate in battles even if they have not been given an order. See Generals in Battle section for details.
3. Move
You may move units you've ordered in any sequence you wish. However, you must complete 1 move before beginning another. Each unit may move only once. All moves must be completed on a turn before you may battle. (Battling is explained in the next section of the instructions.)
Infantry – An ordered infantry unit may move 1 hex and battle.
Cavalry – An ordered cavalry unit may move up to 3 hexes and battle.
Artillery – An ordered artillery unit may move 1 hex or may battle. An artillery unit may not move and battle.
General – An ordered general may move up to 3 hexes. Generals may participate in battles, even if they have not been given an order to do so. (See Generals in Battle section on page 7 for details.)
Moving Units
- When moving a unit, you may not move onto or through a hex occupied by a friendly unit, an enemy unit, or an enemy general. You may move a unit onto a hex occupied by a friendly general if the general is alone in the hex.
- You may never split a unit. The individual figures within a unit must stay together and move as a group. Units that have been reduced through casualties may not combine with other units. (Generals are exempt from this rule. See Moving Generals below.)
- Some terrain features affect movement and may prevent a unit from moving its full distance or battling. (See Terrain section on page 8.)
Note: Retreating is a different type of movement with slightly different rules. See Retreating section on page 11 for details.
Moving Generals
- You may move a general onto a hex occupied by a friendly unit (as long as there is no other general in the same hex). If a general enters a hex occupied by a friendly unit, the general must end his movement for that turn.
- You may not move a general onto or through a hex occupied by an enemy unit or general.
Attached Generals
- A general in the same hex as a friendly unit is considered attached to the unit. No more than 1 general may be attached to a single unit.
- An attached general who is given an order may move away from the unit to which he is attached. A general may also move away from 1 unit and attach to another.
- If a unit with an attached general is given an order, the general may move with the unit, or the general may stay in place. This counts as 1 order. A general who moves with his unit must move to the same hex. Exception: You may not move an attached general who has already moved on this turn.
4. Battle
After completing all moves, your ordered unit(s) must be close enough to the enemy, and in a position to "see" the enemy, in order to battle. (See Range and Line of Sight sections on the next page for details.)
Each battle must be resolved before the next is started. A unit may battle another unit only once per turn. A unit may never split its battle dice between several enemy targets. To battle, do the following:
- Determine the range (distance to the enemy target).
- Determine the line of sight.
- Determine the terrain within the line of sight.
- Roll the battle dice. The type of battling unit, battlefield terrain, and the distance to the enemy target determine the number of dice rolled.
See sections on the following pages for details.
Note: Generals engage in battle somewhat differently than army units. See Generals in Battle section on page 7 for details.
Range
Infantry – Range of 4 hexes.
An ordered infantry unit may battle an enemy target that is 4 or fewer hexes away in any direction. An infantry unit rolls 4 battle dice when the target is in an adjacent hex, and 1 die less for each additional hex away from the enemy. For example, to battle an enemy that is 4 hexes away in clear terrain, an infantry unit would roll 1 battle die. See Figure 9.
Artillery – Range of 5 hexes.
An ordered artillery unit may battle an enemy target that is 5 or fewer hexes away in any direction. An artillery unit rolls 5 battle dice when the target is in an adjacent hex, and 1 die less for each additional hex away from the enemy. For example, to attack an enemy that is 5 hexes away in clear terrain, an artillery unit would roll 1 battle die. See Figure 9.
Cavalry – Range of 1 hex.
An ordered cavalry unit rolls 3 battle dice, but may only battle an enemy target that is adjacent. See Figure 9.
General – No range.
See Generals in Battle section below for details.
Figure 9 – Battle Range:
| Unit | 1 hex | 2 hexes | 3 hexes | 4 hexes | 5 hexes |
|---|---|---|---|---|---|
| Infantry | 4 dice | 3 dice | 2 dice | 1 die | — |
| Artillery | 5 dice | 4 dice | 3 dice | 2 dice | 1 die |
| Cavalry | 3 dice | — | — | — | — |
Important: The number of playing pieces in a unit has no effect on the number of battle dice rolled. Casualties do not affect the number of battle dice rolled by a unit. As long as 1 playing piece remains, a unit may battle at full strength.
Generals in Battle
- A general attached to an infantry or cavalry unit may always participate in an attack made by the unit to which he is attached.
- An infantry or cavalry unit with an attached general may roll 1 additional die when the unit battles. A general does not add 1 battle die when attached to an artillery unit.
- A unit's range does not increase when an attached general participates in battle. Infantry units still battle at a maximum range of 4 hexes and cavalry units may only battle adjacent enemy units.
- A general may move onto any type of hex and participate in a battle, as long as the unit to which he is attached has been ordered and is able to battle.
- A general who is alone in a hex may not attack.
Note: See Resolving Battle section on page 10 for additional information about generals.
Line of Sight
A unit must be able to "see" the enemy unit it wants to battle. This is known as having "line of sight."
Imagine a line drawn from the center of the hex containing the battling unit to the center of the hex containing the enemy target. This line of sight is blocked only if a hex (or part of a hex) between the battling unit and the target hex contains an obstruction. Obstructions include a unit or general (regardless if friend or foe), woods, hills, fields or buildings. The terrain in the target hex does not block line of sight.
If the imaginary line runs along the edge of 1 or more hexes that contain obstructions, line of sight is not blocked unless the obstructions are on both sides of the line. See Figure 10.
Example:
As shown in Figure 10, "A" may fire at "B" even though the imaginary line between their hex centers passes along the edge of 2 hexes containing woods. (These only block line of sight on one-half of the target hex.)
"A" may not fire at "C" because the woods hexes are on both sides of the imaginary line between the hex centers. This leaves no part of the enemy's target hex visible.
"A" may not fire at "D" as the imaginary line between their hex centers passes through the woods hex, thereby blocking line of sight.
"A" may not fire at "E" because the imaginary line between their hex centers passes through part of the woods hex, thereby blocking line of sight. If "E" moved 1 hex forward, then "A" would have a clear line of sight.
Terrain
Each type of terrain tile is described below. Terrain tiles are placed on the gameboard as shown on each scenario map. They remain in place and in effect for the entire game.
Woods Hex
Movement: A unit that enters a woods hex must stop and may move no further on that turn.
Battle: A unit may not battle on the turn in which it moves onto a woods hex. (This rule does not apply to a general who moves to attach himself to a unit already on a woods hex.)
When battling an enemy unit that is on a woods hex, reduce the number of battle dice rolled by 1.
Line of Sight: Woods block line of sight.
Orchard Hex
Movement: No movement restrictions.
Battle: No battle restrictions.
When battling an enemy unit that is on an orchard hex, reduce the number of battle dice rolled by 1.
Line of Sight: An orchard does not block line of sight.
Hill Hex
Movement: No movement restrictions.
Battle: When battling an enemy unit that is on a hill hex, reduce the number of battle dice rolled by 1. This reduction is still applied even if the battling unit is on an adjacent hill hex.
Artillery firing from a hill hex has its range increased to a maximum of 6 hexes. When battling from a hill hex, roll the standard number of battle dice for the normal range of 1 to 5 hexes. At a range of 6 hexes, roll 1 die.
An artillery unit on a hill hex does not have its line of sight blocked by friendly units or generals that are on an adjacent hex - as long as that adjacent hex has no other terrain features that block line of sight.
Line of Sight: A hill blocks line of sight.
Building Hex
Movement: A unit that enters a building hex must stop and may move no further on that turn.
Battle: A unit may not battle on the turn in which it moves onto a building hex.
When battling an enemy unit that is on a building hex, reduce the number of battle dice rolled by 2.
Line of Sight: A building blocks line of sight.
Waterway Hex
Movement: A unit must stop when it enters a waterway hex.
Battle: A unit on a waterway hex rolls 1 less battle die when battling an enemy unit.
Line of Sight: A waterway does not block line of sight.
Waterway Bridge Hex
Movement: A waterway bridge cancels all waterway movement restrictions. Consider as clear terrain.
Battle: A waterway bridge cancels all waterway battle restrictions. Consider as clear terrain.
Line of Sight: A waterway bridge does not block line of sight.
Field Hex
Movement: No movement restrictions.
Battle: When battling an enemy unit that is on a field hex, reduce the number of battle dice rolled by 1.
Line of Sight: A field has tall crops which block line of sight.
Rough Terrain Hex
Movement: A unit may not enter a hex containing rough terrain.
Battle: No battle restrictions.
Line of Sight: Rough terrain does not block line of sight.
Fence Hex
Movement: No movement restrictions.
Battle: When battling an enemy unit that is on a fence hex, reduce the number of battle dice rolled by 1 (unless the battling unit is behind the fence line). See Figure 11.
Line of Sight: A fence does not block line of sight.
There are 1-, 2-, and 3-sided fence lines. The shaded hexes shown in Figure 11 are in front of the fence line(s). An attacking unit in front of a fence line will have to reduce the number of battle dice rolled by 1.
The clear hexes are behind the fence line. An attacking unit behind a fence line rolls as normal.
Field-works Token
Field-works tokens may be placed on top of any terrain hexes except waterway hexes.
Movement: No movement restrictions. However, all movement characteristics remain in effect for a terrain tile on which a field-works token is placed.
Battle: When attacking an enemy unit that is on a hex with a field-works token, reduce the number of battle dice rolled by 2 (unless the attacking unit is behind the line of the field-works). See Figure 12. Ignore any other battle reductions associated with the underlying terrain hex. For example, a field-works built in a woods hex reduces an attacker's battle dice by 2, not 1.
The clear hexes shown in Figure 12 are behind the line of the field-works. If the attacking unit is behind the field-works line, then no dice roll reduction is made for the field-works. See Figure 12.
Line of Sight: A field-works does not block line of sight. However, if it is placed on a terrain tile that already blocks line of site, then that line of site remains blocked.
Rolling Battle Dice
Once you've determined how many battle dice to use in a battle, roll the dice. Each die rolled will result in a hit, a retreat or a miss. (A unit may never split its battle dice between several enemy targets.)
5. Resolve Battle
Hits are resolved first, followed by retreats.
Hit
The attacker scores 1 hit for each dice symbol rolled that matches the target unit. See Figure 13. For example, a targeted infantry unit suffers 1 hit for each infantry symbol rolled. A hit is also scored for each crossed-sabers symbol rolled, regardless of the type of unit attacked.
(Figure 13 — die symbols: Artillery Hit, Infantry Hit, Cavalry Hit, Any Unit/General Hit (crossed-sabers).)
For each hit scored, 1 figure is removed from the target unit. The flag bearer playing piece is always the last piece to be removed. When the flag piece is removed, the attacker keeps it, and adds it to his total of captured flag pieces.
If an attacking player rolls more hits than the number of playing pieces in the defending unit, these additional hits are wasted.
Hitting a General
When attacking a general, calculate the number of battle dice to be rolled as usual. The attacking player must then roll a crossed-sabers. If he succeeds, the defending general is eliminated. When a defending general is eliminated, he counts toward the attacker's total of enemy flags captured. Eliminating a general has no other impact on the game. If the attacking player does not succeed, the defending general has a lucky escape.
A general may only be attacked if alone in a hex. If a general is attached to a unit that has just been eliminated, and the attacker still has 1 or more additional crossed-sabers to use, those hits are wasted.
To hit and remove an attached general in 1 battle turn, you must do the following:
- Play a command card that orders at least 2 attacking units that are within range and line of sight of the defending general's unit.
- Roll the appropriate dice to completely destroy the attached unit.
- Then, another unit must attack the lone general and score a hit.
Retreat
After all hits have been resolved and casualties removed, retreats must be resolved. For each flag symbol rolled during the battle, the defending unit must retreat 1 hex toward its own side of the battlefield. Terrain has no effect on retreat moves. The defending player decides to which hex a unit retreats by following the rules below:
-
A unit may not retreat onto, or through, a hex that contains another unit.
Exception 1: A unit without a general attached, may retreat onto a hex that contains a friendly general (as long as the general is not attached to another unit). If a unit retreats onto a hex with a friendly general, the general attaches to that unit, and that unit may ignore any other flag dice symbols rolled by the attacker, and need not retreat any further.
Exception 2: A general may retreat onto, or through, a hex that contains a friendly unit as long as it does not already have an attached general. (After completing all retreat moves required, if the general is in a hex with a friendly unit, he is considered attached to that unit.) Any unit on a hex that a general passes through during his retreat is unaffected.
-
A unit with an attached general may not retreat onto a hex that contains another general.
-
A general who is attached to a unit must retreat with that unit to the same hex. If the unit is eliminated in battle, the general must still make any retreat moves required.
-
If a unit cannot retreat, 1 figure in the losing unit must be eliminated for each retreat move that cannot be completed. Such loses may include the general if there are no other figures in the hex available to be taken as casualties.
-
If a unit (and/or general) is forced to retreat off the battlefield, the unit (and/or general) is eliminated.
Miss
You failed to roll any of the symbols needed to hit an enemy target or to force the enemy to retreat.
6. Draw a Command Card
After resolving all hits and retreats, discard the command card played and draw another card from the deck. Your turn is now over.
Winning the Game
The first player to capture 6 flag pieces wins the game.
Campaigns
After playing several individual battle scenarios, you may wish to group a series of scenarios together into 1 big game. This is called a campaign. There should be at least 3 battles in a campaign. For example, you may decide to play the Pea Ridge scenario first, followed by all the other battle scenarios for the year 1862. This would include 7 games, with Fredericksburg being the last scenario fought in the campaign.
Object of a Campaign
The object of a campaign is to be the player with the most enemy campaign flag tokens at the end of the last battle in the campaign. See Figure 14.
(Figure 14 — Confederate Flag Token and Union Flag Token.)
Playing a Campaign
After each battle scenario has been played, the winner takes 1 campaign flag token for each flag playing piece captured in excess of those captured by his/her opponent. For example, if you, as the Union player, captured 6 flags and the Confederate player captured 2, then you would take 4 Confederate flag tokens and place them flag-side up in front of you. If all the tokens are taken before the campaign is completed, both players should discard an equal number to provide a new pool of tokens.
Winning a Campaign
At the end of the entire campaign, the player with the most campaign flag tokens wins.
Match Play
Some battle scenarios may favor one side over the other. Therefore, in match play, swap sides after a battle. The winner is the player who captures the most campaign flag tokens after both battles are played.
Example of Play
A short example of game play is described below. The results of several possible battle dice rolls are explained in boxes A – C.
-
You play a Probe command card that allows you to order 2 units or generals (or combination) on your left flank. You now pick which units to order.
-
You order infantry unit "B" and general "A." The hex in which the general is positioned is part of your left flank and center sections.
-
You may now move your unit and general. You decide to move only your general 3 hexes and attach him to the infantry unit.
-
Having completed your movement, you may now battle. You decide to attack with the infantry.
-
You battle enemy infantry unit "D" that is in a woods hex. The range allows you to roll 3 dice but you must subtract 1 die because the target unit is in the woods. However, you have an attached general (giving you 1 extra die), so you roll 3 dice.
Let's look at several resulting possibilities:
A. If you rolled 2 infantry symbols and 1 crossed-sabers symbol:
The 2 enemy infantry pieces are removed, destroying the unit. The general is unhurt, even though a crossed-sabers symbol was also rolled. That's because the general can only be hit if he was alone in a hex at the start of the attack.
B. If you rolled 2 infantry symbols and 1 flag symbol:
The 2 hits are resolved first. The 2 enemy infantry pieces are removed, destroying the unit. Because a flag symbol was also rolled, the enemy general must now retreat 1 hex. He may not move to a hex containing general "E," but may retreat onto the hex with friendly unit "C."
C. If you rolled 1 infantry symbol and 2 flag symbols:
The hit is resolved first. One enemy infantry piece is removed. Because 2 flag symbols were also rolled, the enemy unit and general must now retreat together 2 hexes. However, they may not move onto the hex that contains another unit because only 1 unit may be in a hex. And they may not move to the hex that contains another general because only 1 general may be in a hex. The enemy must remove its remaining infantry piece because it is unable to retreat. The enemy general is not destroyed, however, as he is now alone in the hex and may now retreat to the hex containing the friendly infantry unit.
- You now discard the Probe command card by placing it face up in the discard pile. Then draw a replacement card from the draw pile. Your turn is then over.
Note: In the example above, you could have moved the infantry unit forward first, to a position adjacent to the enemy. You could have then moved your general forward and attached him to the unit. This would have allowed you to roll 4 dice instead of 3, but it would have also left your unit and general out in the open.
Civil War Goals & Strategy
At the outbreak of hostilities, both sides were unprepared for war. The weeks after Fort Sumter saw North and South gripped with an enthusiasm for a war which most thought, optimistically, would be decided swiftly. The Union regular army was only 16,000 strong and many of these troops were in frontier posts in the West. In addition to these, Lincoln could call on the state militias. In April 1861, Lincoln called for 75,000 volunteers to serve for three months. In July, he asked for another 400,000 to fight for three years. The Confederacy had to raise its army virtually from scratch, although the Southern state militias were generally better prepared than those in the North. The Confederate Congress authorized President Davis to raise 100,000 volunteers in February 1861 for up to twelve months. In August, this was increased to 400,000 for a period of three years. General in Chief Winfield Scott urged Lincoln to offer Robert E. Lee command of the Union army. Lee, however, declined the offer and resigned from the army. Within four weeks, Lee took command of Virginia's military forces as a major general in the Confederate army
The South, by avoiding defeat, could hope to win by making the war so costly for the North that public support for the war would wane. President Davis preferred to wage a defensive war, trading space for time. However, he could ill afford to lose territory, which would further deplete the South's limited resources and weaken Southern morale. The Confederacy adopted what has become known as an "offensive-defensive" strategy. While maintaining a cordon defense, Confederate armies would exploit opportunities to counterattack and raid. The objective was to disrupt Union plans and undermine Northern morale.
Unlike the South, the North had to win the war. General Scott proposed the "Anaconda Plan," in which the Union would impose a naval blockade on the South and win control of the Mississippi. This would deprive the South of military resources and split the Confederacy in two. Scott believed this plan would bring the South to terms with less bloodshed than any other plan. However, Scott's method would take time, and he feared, quite rightly, "the impatience of our patriotic and loyal Union friends. They will urge instant and vigorous action, regardless, I fear, of the consequences." Scott was right. With the Confederate capitol only a hundred miles away, the cry in the Northern press was "On to Richmond." Although Scott's plan became a part of Union strategy, ultimate victory was only achieved by destroying the South's armies in the field.
Civil War Battlefields in This Game
In early July 1861, Confederate forces were within a day's march of Washington. Mindful of public opinion and that the initial three-month enlistment period was coming to a close, Lincoln pressed General Irvin McDowell to take action. McDowell expressed concern because the army was not yet ready for battle. But Lincoln was adamant. "You are green, it is true," the president remarked, "but they are green, also; you are all green alike." With a force of about 30,000 men, McDowell drew up plans to attack the main Confederate army under the command of General Beauregard. McDowell's plan of attack was to advance with 35,000 men on the Confederate forces at Fairfax Courthouse and Centreville. The Union army would then march on the main Confederate army of 20,000 men under Pierre G. T. Beauregard, which was believed to be camped near Manassas Junction.
The plan required General Patterson's 15,000 Union troops near Harper's Ferry to prevent Joseph E. Johnston's 11,000 Confederates in the Shenandoah Valley from moving to reinforce Beauregard. However, McDowell's force moved slowly, taking two and a half days to march twenty-five miles - a distance that experienced troops covered in half the time later in the war. More importantly, Patterson had failed to contain Johnston, who managed to move his force to Winchester, and then on to Piedmont where they were able to entrain for Manassas Junction. By the time McDowell launched his attack, three of Johnston's brigades had joined Beauregard, and the fourth was on its way. These three, Jackson's First brigade, Bartow's Second brigade and Bee's Third brigade were to prove crucial in the coming battle.
Battle Scenarios
The fifteen scenarios that follow are based on actual Civil War battles. Every attempt has been made to insure accuracy. Keep in mind, however, that "history" is, by definition, interpretive. "Facts" are often contradictory. Press and government reports are not always accurate. Historians sometimes disagree. People are misquoted. Embellishment, mistakes, faulty memories and conflicting records also play a role. In war, nothing is certain.
Note: each scenario in the printed manual includes a battlefield map showing the exact hex-by-hex deployment of both armies and the placement of terrain tiles. Set up the gameboard from the map in the manual; the staffing notes and battle descriptions are transcribed below.
First Bull Run — 21st July, 1861
Staffing Notes
- Union Player: Irving McDowell. Take 4 command cards. You move first.
- Confederate Player: Pierre G. T. Beauregard. Take 5 command cards.
(Map features: Henry House, Henry House Hill, Hunter, Stuart, Jackson.)
The Confederates occupied a defensive position along the southern bank of a meandering river called Bull Run. Beauregard had placed the greater part of his force on the right flank as this is where he anticipated the federal attack. His plan was to attack the Union left flank on the morning of the 21st July. However, a little after sunrise the report of artillery fire could be heard to the north. McDowell had moved first.
McDowell sent three divisions to the north, crossing Bull Run at Sudley Ford, while another division led a diversionary attack against the Confederates defending the Stone Bridge. The Confederate brigade on the left flank was only two regiments strong, but managed to slow the Union advance until two more brigades, Bee and Bartow, were able to march to its support. Another brigade, under the command of General Jackson, was also marching fast to reinforce the line still further.
By about 2 pm, the Confederate brigades were finally pushed back by the overwhelming numbers of the Union force. Jackson had his men lined up along the reverse slope of Henry House Hill, out of sight of the Union forces. He ordered an aide, "Tell the colonel of this brigade that the enemy are advancing: when their heads are seen above the hill, let the whole line rise, move forward with a shout, and truth to the bayonet. I'm tired of this long range work." Moments later Bee's brigade fell back across the hill top. Bee shouted to Jackson, "General, they are beating us back!" Jackson replied, "Then, sir, we will give them the bayonet!" Bee then rode to his own command and, encouraged by Jackson, shouted to his men, "Look! There is Jackson standing like a stone wall! Rally behind the Virginians!" Thereafter, Jackson was known as "Stonewall Jackson" and his troops as the "Stonewall Brigade."
The Union attack was halted and a bitter struggle ensued. At about 3.30 pm fresh Confederate troops arrived on the exposed Union right flank. The Confederate line began to gain the upper hand and move forward. The Union forces began an orderly withdraw which rapidly turned onto a rout. The Confederates had won the first major engagement of the Civil War.
Will Jackson halt the Union advance? Or will McDowell's flank attack sweep on to victory? All is as it was, except this time YOU are in command!
Pea Ridge — 7th March, 1862
Staffing Notes
- Union Player: Samuel R. Curtis. Take 5 command cards.
- Confederate Player: Earl Van Dorn. Take 5 command cards. You move first.
(Map features: Price, Carr, Elkhorn Tavern, Clemens Farm, Dodge.)
The West was also an important area for the Confederacy. In December 1861, General Samuel R. Curtis took command of the Union Army of the Southwest and was instructed to drive the Confederates out of Missouri. The Confederate forces commanded by Major General Sterling Price fell back to the Boston Mountains in northwest Arkansas. Here they joined forces with General Benjamin McCulloch. On 2nd March, the newly appointed commander of Confederate forces in Arkansas, Major General Earl Van Dorn joined with Price and McCulloch. This combined force, newly named the Army of the West, numbered around 17,000 men. Van Dorn had grand plans to reinvade Missouri, take St. Louis and then move against Grant from the north. He immediately made plans to attack Curtis, whose army numbered about 11,000 men. Curtis had his men drawn up in a good defensive position. Rather than attack head on, Van Dorn planned to march around the Union right flank and attack them in the rear. By midmorning on the 7th March, Van Dorn's leading division under Price had reached a position north of Elkhorn Tavern. Unfortunately, his second division under McCulloch had fallen behind, Van Dorn ordered McCulloch to strike south and attack toward Lee Town, which was several miles west of Elkhorn Tavern. This resulted in two separate engagements being fought.
Curtis was alerted to the Confederate flanking march and managed to reorganize his defenses to face north instead of south. He sent Colonel Eugene A. Carr's division to block Price, while his remaining three divisions moved toward Leetown. The engagement did not go well for the Confederates. As McCulloch led the advance north of Leetown, he was killed by Union skirmishers. Brigadier General James McIntosh took command but was also killed as he led a regiment to the battle. Confederate attempts to continue the advance were then dashed by local counterattacks from elements of two Union divisions. Curtis was now able to march troops to the aid of Carr's division fighting near Elkhorn Tavern. Carr had occupied strong defensive positions on top of the Pea Ridge plateau. Following a prolonged artillery barrage, the Confederates attacked the steep slopes toward the Union position. Carr's troops fought stubbornly and gave ground slowly. Toward dusk, Carr was able to withdraw his battered regiments through supporting Union divisions recently arrived from Leetown.
That evening Van Dorn assembled the remains of McCulloch's division with Price's troops near the tavern. His men were exhausted and low on ammunition. Curtis deployed all four of his divisions in numerical order from left to right. His second in command, Brigadier General Franz Sigel led the two divisions on the left flank, while Curtis himself led the two on the right. The Union attack was entirely successful and Van Dorn's Army of the West was completely routed. The defeat ended any further serious Confederate threat to Missouri.
Can Carr hold out against the larger Confederate force? Or will Price break through and fall on the right flank and rear of the Union forces engaged north of Leetown? All is as it was, except this time YOU are in command!
Kernstown — 23rd March, 1862
Staffing Notes
- Union Player: James Shields. Take 5 command cards.
- Confederate Player: Thomas J. "Stonewall" Jackson. Take 5 command cards. You move first.
(Map features: Tyler, Kimble, Pritchard's Hill, Fulkerson, Garnett, Jackson.)
Jackson's six month Valley Campaign of 1862 was arguably his finest. His small army, which never numbered more than 17,000 men, fought a series of six battles, winning five of them, against three enemy forces totaling 33,000 soldiers. The largest group included 23,000 men commanded by Nathaniel P. Banks. Confederate forces in the valley sometimes marched 35 miles a day and became known as Jackson's "foot cavalry." They repeatedly outmaneuvered Union forces and succeeded in tying down over 60,000 Union troops. The first battle of the campaign took place at Kernstown. Hearing that the larger part of Bank's force was moving east, Jackson advanced against what he believed to be the Union rearguard. The 4,500 Confederates under his command had actually attacked elements of Shield's division, which had almost 9,000 men in the vicinity. These soldiers were quickly brought into the fray.
Jackson deployed Fulkerson's brigade along with Garnett, who commanded the "Stonewall Brigade," to the left. These two brigades would be supported by half of Jackson's cavalry under the command of Major Funsten. Burk's brigade would form further back in the center as a reserve, while Turner Ashby, with the remainder of the cavalry, would form a skirmish line on the right flank to disrupt any Union advance. As the Confederates reached their positions on the left at about 4.30 pm, it became apparent that the enemy was present in greater numbers than expected. When advised of the strength of the enemy deploying to his front, Jackson remarked, "Say nothing about it, we are in for it." Garnett fought against mounting pressure until about 6 pm, when, with ammunition running low, he ordered the Stonewall Brigade to retreat. The remainder of the Confederate line had no choice but to fall back. Jackson was furious at Garnett's withdrawal and relieved him of command. The retreat was covered by a single regiment of the Stonewall Brigade under the command of Colonel Harman and elements of Burk's brigade.
Although a minor defeat for Jackson, the battle achieved its strategic objective of pinning Bank's force. The Union commander believed Jackson would only have acted if he had been reinforced. Shields estimated that the Confederates had thrown 11,000 men against him and called them the "flower of the Southern army." Banks was forced to turn his other divisions around, keeping them in the valley to support Shields. Furthermore, Lincoln insisted Irvin McDowell's corps of 35,000 men remain in northern Virginia to protect Washington, instead of moving to support McClellan's advance on Richmond.
Can the "Stonewall Brigade" stem the tide? Or will Shield's division sweep aside the smaller Confederate force? All is as it was, except this time YOU are in command!
Shiloh — 6th - 7th April, 1862 (first day of battle)
Staffing Notes
- Union Player: Ulysses S. Grant. Take 4 command cards. You move first.
- Confederate Player: Albert Sidney Johnston. Take 4 command cards.
Special Rule: Any Confederate unit that occupies one of the shaded Union baseline hexes shown, counts as one lost Union flag. As long as a unit remains on a baseline hex, it continues to count toward the Confederate victory total. If the unit moves off the hex or is eliminated, it no longer counts.
(Map features: W. H. L. Wallace, The Hornet's Nest, Prentiss, Cheatham, Bragg.)
Following his capture of Fort Henry and Fort Donelson, Grant's army of 40,000 men was ordered to move south, up the Tennessee River, to Pittsburg Landing. Buell was ordered to join him there with 35,000 men. Once united, they could attack the important railroad junction at Corinth, twenty miles to the south. This would cut deep through the Confederate defense line in northern Tennessee. With just over 42,000 men, Johnston knew he must act quickly before Buell arrived. However, his surprise advance fell two days behind schedule. Beauregard cautioned Johnston that Buell had most likely reinforced Grant. Johnston was determined to see it through and instructed his corps commanders, "Gentlemen, we attack at daylight tomorrow." Although Buell should have reinforced Grant by the 5th April, neither felt there was any great urgency, believing that Johnston's army was dispirited.
The Confederates attacked at daybreak on the 6th April and threw back the Union line, even though the Confederate assault became increasingly more disorganized. At the center of the Union line stood the remnants of the Sixth division, under Prentiss, along with Wallace's fresh Second division. They had taken up a strong position behind an oak thicket, which ran along a sunken road. Initial rebel attacks were repulsed. During one of these attacks, Johnston was killed while urging several brigades forward. Confederate soldiers dubbed the position the "Hornet's Nest." By mid-afternoon, realizing that repeated infantry attacks were suicidal, General Daniel Ruggles amassed over 50 guns to bombard the Union positions. At about 5.30 pm, with Union troops falling back on their left flank, the defense finally collapsed. Wallace was mortally wounded and Prentiss was captured along with 2,250 Union soldiers. As the victorious Confederate troops cheered, a defiant Prentiss called out, "Yell boys, you have a right to shout for you have this day captured the bravest brigade in the United States Army."
The next day, with his army reinforced, Grant took up the offensive. The Confederates, now outnumbered, fell back slowly before retreating to Corinth. The battle had been the largest and bloodiest fought thus far. The Confederates would name the battle after the small Shiloh Church that had stood amidst some of the most savage fighting on the first morning of the battle. Ironically, Shiloh is a Hebrew word meaning "place of peace."
Will Johnston smash through the Hornet's Nest and crush Grant? Or will Prentiss and Wallace snatch victory from the jaws of defeat? All is as it was, except this time YOU are in command!
Gaines Mill — 27th June, 1862
Staffing Notes
- Union Player: George B. McClellan. Take 4 command cards.
- Confederate Player: Robert E. Lee. Take 5 command cards. You move first.
(Map features: McGhee House, Sykes, Porter, Boatswain's Creek, Jackson, A. P. Hill, Longstreet.)
Following the defeat at Bull Run, Lincoln appointed George B. McClellan as the commander of the army. He quickly set about improving the army. The troops were drilled, equipment was improved, and examining boards weeded out incompetent officers. The newly christened Army of the Potomac was soon a fighting force second to none. The troops admired McClellan and the press dubbed him "The Young Napoleon." Despite organizing such a formidable force, McClellan was hesitant. Prompted to act by Lincoln, McClellan decided not to advance on Richmond directly. Instead he devised a plan to ship his army to the peninsula between the York and James Rivers. From here he would advance westward toward the Confederate capitol. His initial advances were slowed down by his own hesitancy, and by Confederate forces under the command of Joseph E. Johnston. However, within two months of landing, his forward elements could see the spires of Richmond, just six miles away.
Following the battle of Seven Pines, during which General Joseph E. Johnston was wounded, command of the Army of Northern Virginia fell to Robert E. Lee. He decided to launch an offensive to drive the Union forces from the vicinity of Richmond. Lee recalled Jackson from the Shenandoah Valley. Jackson, having frustrated all Union efforts against him, marched to join Lee. The series of engagements to follow became known as the Seven Days Battles. Lee left a small force to cover Richmond and then maneuvered the bulk of his army to attack the Union Fifth Corps under the command of Major Fitz-John Porter. The first attack at the Battle of Mechanicsville did not go well for the Confederates, but McClellan decided to withdraw Porter. The next day Lee attacked again. Porter occupied a new defensive position along Boatswain Creek. A. P. Hill's division led the first assault at about 2.30 pm. The Confederate assaults made little headway against fierce and determined resistance. Jackson's divisions were late reaching the battle, and it was not until 5 pm that Lee had his full command engaged. At 7 pm he ordered an all-out assault on the Union positions. Turning to one of his brigade commanders, Lee asked, "Can you break his line?" General John Bell Hood replied, "I will try" and proceeded to move his brigade forward. At first, the Union line held against the renewed attacks, but then crumbled in the center where Hood's brigade, spearheaded by the 4th Texas Regiment, broke through.
Gaines Mill was the most costly of all the Seven Days Battles, with Lee losing almost 8,000 men. Lee drove McClellan back toward the James River, with the last battle being fought at Malvern Hill on 1st July. The Confederates launched repeated attacks but were thrown back by a storm of Federal artillery and infantry fire. Despite the inconclusive outcome of the battle, McClellan pulled his army back to Harrison's Landing and six weeks later withdrew the army from the Peninsula.
Will Lee break Porter's defensive line and drive McClellan back to the James River? Or will Porter hold and deny Lee his first major victory? All is as it was, except this time YOU are in command!
Brawner's Farm — 28th August, 1862
Staffing Notes
- Union Player: John Pope. Take 5 command cards.
- Confederate Player: Thomas J. "Stonewall" Jackson. Take 5 command cards. You move first.
(Map features: Groveton, King, Brawner's Farm, School House, Ewell, Taliaferro.)
Following the Seven Days Battles, Lee correctly guessed that McClellan would make no further offensive move toward Richmond. Lee organized his army into two commands under Jackson and Longstreet, and launched an offensive to take the war northwards. The Union force Lee attacked was the Army of Virginia under the command of Major General John Pope. It was a new army, which included the commands of Banks, McDowell and Sigel. On 9th August, Jackson fought a battle at Cedar Mountain, which ensured that the next major campaign would be fought in northern Virginia. Pope planned to attack once he received support. By mid-August, Pope had been reinforced with three corps, shipped from McClellan's army, and now outnumbered Lee. However, Lee had succeeded in keeping the initiative by sending Jackson on a flanking march to cut Pope's rail link to the north. Jackson made a lightening march, covering fifty miles in two days and destroyed the Union supply depot at Manassas. He then fell back toward Stony Ridge, a position some two miles northwest of the ridge where he had stood "like a stonewall" a little over a year before.
Pope saw an opportunity to trap Jackson and ordered his scattered corps to concentrate around Manassas. On the evening of the 28th August, a division of McDowell's Third Corps under the command of Rufus King, marched east and crossed the front of Jackson's position. Having scouted forward to review the Union movements personally, Jackson ordered his troops to attack at about 6 pm. The Union brigades were strung out in column of march. One of these, under the command of John Gibbon, was comprised of the 19th Indiana, and 2nd, 6th and 7th Wisconsin regiments, which was to become famous as the Iron Brigade. Thinking the enemy was merely elements of J. E. B. Stuart's cavalry, Gibbon ordered his brigade to form line and directed the 2nd Wisconsin to drive off the enemy artillery. As they moved forward, Confederate infantry appeared. A vicious close-range musketry duel ensued. The Confederate brigade facing Gibbon's men was none other than the Stonewall Brigade. However, despite surprise and superiority in numbers, Jackson was unable to bring all his available brigades to bear. With two of his divisional commanders, Ewell and Taliaferro, wounded, Jackson broke off the engagement around 9 pm.
The battle had been a bloody stalemate, as William Taliaferro was to write afterwards. "In this fight there was no maneuvering and very little tactics, it was a question of endurance, and both sides endured." The next day, the main engagement began, and the Second Battle of Bull Run was a major defeat for Pope. Believing Jackson was about to withdraw, Pope sent in his divisions piece-meal in an attempt to pin him until further Union forces could arrive. Jackson was in a prepared defensive line, which held out against repeated assaults. The following day, again convinced that the Confederates were about to retreat, Pope sent his divisions forward. He was unaware of the arrival, on his left flank, of Longstreet's corps of 30,000 men who launched their own devastating attack. By the evening of the 30th August, Pope was in retreat. In less than a month, Lee had forced the Union army back from Richmond to within twenty miles of Washington.
Can Jackson smash King's division? Or will Gibbon and the Iron Brigade stubbornly deny him victory? All is as it was, except this time YOU are in command!
Antietam — 17th September, 1862
Staffing Notes
- Union Player: George B. McClellan. Take 3 command cards. You move first.
- Confederate Player: Robert E. Lee. Take 5 command cards.
Special Rule: The 3 fence tiles represent the sunken road. A unit battling an enemy unit on a fence hex reduces the number of battle dice rolled by 2, instead of the normal 1.
Antietam Creek can only be crossed at the bridge. No unit may move or retreat onto a river hex tile. If a unit cannot retreat because of the river, the unit is eliminated.
(Map features: Longstreet, Sharpsburg, Jackson, Dunker Church, Miller's Cornfield, Antietam Creek, Burnside, Sunken Road, Sumner, Hooker.)
Having gained a victory at Second Bull Run, Lee struck north toward Maryland. This would enable him to keep the initiative, supply his army from the rich farmlands, and keep the campaign out of Confederate territory and away from Richmond. Less than three weeks later, Lee's embattled army would again be forced to fight. McClellan had over 70,000 men in the dense farmland around Sharpsburg. They would greatly outnumber Lee's 35,000 men. McClellan deployed three corps on his right, another was to engage the Confederates on his left, while two others covered the center and formed the reserve. Lee deployed Jackson on his left flank, with Longstreet covering the center and right flank. Lee hoped to be supported by A. P. Hill's division marching up from Harper's Ferry.
The attacks against the Confederate left flank were poorly coordinated. Lee re-deployed troops from the center and right flank to meet each attack. The fighting in the woods and cornfields around Dunker Church was particularly bloody. John Bell Hood's division, which finally threw back the first Union attack led by the Iron Brigade, suffered in particular. When Lee asked Hood where his troops were, Hood replied mournfully, "They are lying on the field." Hood's division was not alone. Over 12,000 men lay dead or wounded. Casualties had also been heavy along the line of the sunken road, dubbed "Bloody Lane" by those who fought there. With Lee's left and center sorely punished, McClellan had an opportunity to destroy Lee's army. Franklin was eager to move forward with his corps, but McClellan believed that Lee still held substantial reserves. He told Franklin that, "it would not be prudent to make the attack."
On the Confederate right flank, Burnside had finally moved forward. By mid-afternoon, his corps was across Antietam Creek. At the height of the crisis, a column of troops could be seen to the south. Lee asked, "Whose troops are those?" One of his aides confirmed, "They are flying the Virginia and Confederate flags, sir." A. P. Hill's division had arrived. They crashed into Burnside's formation and forced him to retreat. McClellan, despite having two fresh corps, chose not to attack further. In total, over 25,000 men had been killed or wounded. The following day, Lee's army remained in place, but McClellan was not inclined to renew the fighting. Lee was able to withdraw his army across the Potomac. While seen as a Union victory, McClellan had failed to destroy Lee's army. The victory was sufficient encouragement for President Lincoln to issue the Emancipation Proclamation. The war was no longer waged solely for the preservation of the Union. It now became a war against slavery as well. This doomed any remaining hopes the Confederacy had for foreign recognition and intervention.
Can McClellan destroy Lee's Army of Northern Virginia? Or will Lee win another victory and reduce northern confidence still further? All is as it was, except this time YOU are in command!
Fredericksburg — 13th December, 1862
(The scenario page header misprints the date as "17th September, 1862"; the table of contents gives 13th December, 1862.)
Staffing Notes
- Union Player: Ambrose Burnside. Take 3 command cards. You move first.
- Confederate Player: Robert E. Lee. Take 5 command cards.
Special Rule: Jackson's artillery on the Confederate right flank is Horse artillery. When ordered, they may either move 2 hexes, or move 1 hex and fire. Horse artillery has a maximum range of 4 hexes. If a Bombard command card is played, Horse artillery may either move twice (a total of 4 hexes), or fire twice.
(Map features: Jackson, Longstreet, Marye's Heights, Franklin, Hooker, Sumner, Rappahannock River, Fredericksburg.)
McClellan failed to pursue Lee's army vigorously following the Battle of Antietam. It was to be his last display of hesitancy. On 7th November 1862, Lincoln replaced him with Ambrose Burnside, who quickly organized his army and marched rapidly to the Rappahannock River opposite Fredericksburg. He planned to cross here and advance on Richmond before Lee could concentrate his forces to oppose him. Unfortunately, upon reaching the river, Burnside hesitated. The river could not be forded and the pontoon bridges he requested were delayed. By the time he was ready to force a crossing, Lee had been able to deploy his army of about 70,000 men in strong positions on the heights above Fredericksburg. Burnside failed to appreciate the strength of the Confederate forces, believing Lee would expect a move either upstream or downstream of Fredericksburg. Burnside concluded, "the enemy will be more surprised by a crossing immediately to our front."
Sumner crossed at Fredericksburg and deployed two corps on the edges of the town. Franklin crossed river a mile downstream with two additional corps and assaulted Jackson's forces. Franklin's attack, although it met with some early success, was thrown back by the supporting elements in Jackson's defensive. Despite having almost 20,000 fresh troops available and orders from Burnside to act, Franklin failed to launch any further assaults. North of Fredericksburg, the situation was to be even more desperate for the federal soldiers. At around mid-day, Burnside ordered Sumner to attack against Longstreet's men on Marye's Heights. The troops had to advance across open ground in the face of withering fire. One of the last brigades to be committed to the attack during this first assault was Caldwell's Irish Brigade. The 28th Massachusetts stood in the center of the brigade, their green Irish flag with golden harp flapping in the breeze. They charged forward shouting their motto "Faugh-a-Ballagh!" meaning "Clear the Way!" The brigade was met with intense fire and stopped in its tracks, losing 545 of the 1,200 men present. Despite the savage repulse, Burnside ordered a second attack, which fared no better. By now the Confederates had strengthened their defensive line. It was one of the Union army's worst defeats of the war with Burnside losing about 13,000 men. Confederate loses were less than 5,000. The defeat weakened army morale and sparked political unrest in Washington over the handling of the war.
Can Burnside break the Confederate defenses on Marye's Heights? Or will Lee send the federals crashing back down the slopes and across the Rappahannock? All is as it was, except this time YOU are in command!
Murfreesboro — 31st December, 1862 (first day of battle)
Staffing Notes
- Union Player: William S. Rosecrans. Take 4 command cards.
- Confederate Player: Braxton Bragg. Take 4 command cards. You move first.
(Map features: McCook, Thomas, Crittenden, Stones River, Hardee, Polk, Breckinridge.)
After Shiloh, Grant campaigned to gain control of the Mississippi, while Buell advanced from Corinth toward the vital Confederate rail junction at Chattanooga. To draw Buell away from his intended target, the Confederate Generals Edmund Kirby Smith and Braxton Bragg moved north toward Kentucky. Buell was forced to give chase. Rebel cavalry constantly harried his extended supply lines, and his progress was slow. General William S. Rosecrans replaced him in late December, and soon succeeded in bringing Bragg to battle by the icy Stones River near the town of Murfreesboro. Rosecrans army numbered over 45,000 men, while Bragg's Army of Tennessee mustered only 35,000.
As the two armies deployed, both commanders planned to attack the enemy's right flank. Bragg's attack was launched first, forcing Rosecrans to call off his own assault. The Confederate troops, under the command of Hardee, pushed back the federal right flank and McCook's corps. In the center, the Confederates applied further pressure as Polk's troops also made a series of attacks. Rosecrans desperately re-deployed troops from his left flank to support the right and center. As the day wore on, despite heavy casualties, the Confederates continued to push the Union forces back. By mid-afternoon the union line was a rough V shape, at the point of which was William Hazen's brigade. Although the Confederates attacked furiously, Hazen held the position until nightfall. Bragg believed he had won a major victory, despite being outnumbered. Therefore, he was surprised to find the federal troops still deployed for battle the next day. Throughout New Year's day, Bragg launched no major assaults, so the federal troops were able to consolidate and fortify their positions. On the 2nd January, Bragg attacked again but was thrown back with heavy losses.
Lincoln needed a victory after the defeat at Fredericksburg, and he congratulated Rosecrans for his successful efforts. Yet, the battle achieved little in terms of territorial gains – and Rosecrans had lost almost 13,000 men. Confederate loses were less, about 12,000 men, but these were losses the Confederacy could ill afford.
Can Bragg secure his victory? Or will Rosecrans stop the onslaught and survive to claim victory? All is as it was, except this time YOU are in command!
Chancellorsville — 1st - 3rd May, 1863 (third day of battle)
Staffing Notes
- Union Player: Joseph Hooker. Take 3 command cards.
- Confederate Player: Robert E. Lee. Take 5 command cards. You move first.
(Map features: Hooker, Chancellorsville, Stuart, Hazel Grove, Fairview Heights, Lee.)
The failure at Fredericksburg brought about another change of command for the Army of the Potomac when Joseph Hooker replaced Ambrose Burnside. The army wintered in Falmouth, north of Fredericksburg. By early spring, improved conditions had raised morale. Hooker boasted he had "the finest army on the planet." And he reportedly warned, "May God have mercy on General Lee, for I will have none." Lee's army still occupied the defensive line on the heights above Fredericksburg. In late April, Hooker made his move to outflank the Confederate positions. Leaving 40,000 men to demonstrate near Fredericksburg, he marched 70,000 men up river to cross the Rappahannock. They then moved east to advance on the rear of Lee's Army of Northern Virginia and it's 55,000 men. On 1st May, Lee turned his army to face the threat, leaving 10,000 men to cover union forces around Fredericksburg. By mid-afternoon the first skirmishes of the battle took place. Although Hooker had a strong advantage, he ordered his troops into a defensive position around Chancellorsville. Discovering that the right flank of the advancing federal army was exposed, Lee made one of the boldest maneuvers of the war. It was typical of Lee. In the face of a superior enemy, he split his force and decided to attack.
On the morning of the 2nd May, Jackson and nearly 30,000 troops began a fourteen-mile flanking march to the rear of the federal right flank, while Lee and only 15,000 men faced Hooker's entire army. Although there were numerous reports of rebel activity to the south and west, Hooker failed to act. At 5 pm, Jackson was in position and launched his attack. The Union Eleventh Corps was thrown back and routed. In the failing light, Jackson reconnoitered for one last attack. But as he returned to his lines, Jackson and his aides were mistaken for Union cavalry. The sentries opened fire and Jackson was mortally wounded, dying eight days later. James E. B. Stuart took command of Jackson's corps. Despite pleas from his commanders to take the offensive, Hooker organized for a defensive battle overnight. He sent orders to Fredericksburg for Union forces there to attack and advance on Lee's rear. In the morning, Stuart and Lee attacked. By mid-afternoon, the Union position was untenable. Hooker ordered his army to fall back northwards. Union forces at Fredericksburg succeeded in storming the undermanned positions on Marye's Heights, but were halted by a Confederate division commanded by Lafayette McLaws. This division had hurried from Chancellorsville to meet the new threat. On the 4th May, Lee moved against this force which withdrew back across the Rappahannock.
Upon hearing the news of the defeat at Chancellorsville, Lincoln remarked despairingly, "My God! My God! What will the country say?" Northern moral sank to its lowest point of the war and the anti-war lobby gained impetus. If the Confederate cause seemed to be in ascendance, it would soon reach its zenith on the bloody fields before Cemetery Ridge, just south of a small town called Gettysburg.
Can Lee capitalize on Jackson's achievements of the previous day? Or will Hooker switch to the offensive and destroy Lee's Army of Northern Virginia? All is as it was, except this time YOU are in command!
Gettysburg – Devil's Den and Wheat Field — 1st - 3rd July, 1863 (second day of battle)
Staffing Notes
- Union Player: George G. Meade. Take 4 command cards. You move first.
- Confederate Player: Robert E. Lee. Take 4 command cards.
Special Rules: Devil's Den – a unit may enter Devil's Den, but must stop and may not battle or move further on that turn. A unit attacking an enemy unit in Devil's Den reduces the number of battle dice rolled by 2. Devil's Den blocks line of sight.
Wheat Field – The Wheat Field does not block line of sight, but all other Field hex rules apply.
(Map features: Humphreys, Wheat Field, Caldwell, Devil's Den, Anderson, Peach Orchard, McLaws, Hood.)
Lee made plans for an invasion of Pennsylvania. He reasoned this would keep the war in the north and allow his army to feed off the rich northern farmlands. He further hoped to bring a portion of the Army of the Potomac to battle on his terms. Another victory could influence Britain and France to recognize the Confederacy. And it might provide further "ammunition" to the Washington Peace Democrats and their cause. In early June, Lee started his army northwest to the Shenandoah Valley, then north across the Potomac and toward the Cumberland Valley. The Army of the Potomac, under its new commander, George Meade, marched swiftly north in pursuit.
On the 1st July, the two armies made contact. What began as a skirmish quickly escalated as both sides fed in reinforcements. That evening, both sides deployed for the main battle they knew would take place in the morning. Longstreet advised Lee to sidestep the federal position and fight on more favorable ground. But Lee was determined to attack. On 2nd July, he launched a series of attacks against the Union line. Meade had placed the bulk of his force to face the north and northeast. His left flank was thin, but the terrain was well suited for defense. This is where Lee's made his first assault. Longstreet began the attack around 4 pm. The fighting was often close range, with federal troops bitterly contesting key points such as Little Round Top, Devil's Den and the Wheat Field. Attacks against the Union right flank were late in starting. Ewell did not organize his assault until 6:30 pm. Although his troops achieved some success in driving to the summit of Culp's hill, their attacks became disorganized in the failing light. Renewed federal counterattacks drove them back. The second day of the battle had ended with the Union army still deployed in its defensive positions. Lee had attacked heavily in the south and in the north. The following day he would throw his weight against the Union center.
Can Lee turn the Union right flank and compromise Meade's center? Or will Meade hold his ground and force Lee to a third day of fighting? All is as it was, except this time YOU are in command!
Gettysburg – Pickett's Charge — 1st - 3rd July, 1863 (third day of battle)
Staffing Notes
- Union Player: George G. Meade. Take 4 command cards.
- Confederate Player: Robert E. Lee. Take 4 command cards. You move first.
Special Rule: Remove the command card "Construct Field-Works" from the deck.
To represent casualities lost earlier in the battle, Pettigrew's 3 infantry units (on the Confederate left flank) each start the game with one less infantry piece.
Note: Pettigrew had taken over command of Heth's division after Heth was wounded on the 1st of July. The division had been involved in heavy fighting on the first day of battle against the Union First Corp. Pettigrew's own brigade had been engaged against the reowned Iron Brigade.
(Map features: Hays, Gibbon, Doubleday, Pettigrew, Armistead, Pickett.)
Lee ordered Ewell to attack the Union right flank again at Culp's Hill. This, he hoped, would force Meade to draw troops away from his center where Lee planned to launch the main assault. Longstreet had grave misgivings and cautioned Lee, "I have been a soldier all my life...and should know as well as anyone what soldiers can do. It is my opinion that no fifteen thousand men ever arrayed for battle can take that position." Lee was insistent. "The enemy is there, I am going to take them where they are." Longstreet spent the morning readying his brigades for the attack. Pickett, Trimble and Pettigrew's divisions would participate in the assault. The troops facing them were part of Hancock's Second Corps. On the evening of the 2nd July, Meade told one of Hancock's divisional commanders, John Gibbon, "if Lee attacks tomorrow, it will be in your front."
A two-hour artillery bombardment of the Union line failed to inflict significant casualties or knock out the Union artillery. At 3 pm, Longstreet reluctantly ordered the attack. The Confederates had to advance across nearly three-quarters of a mile of open ground. As soon as Pickett's division left the cover of the trees they came under Union artillery fire. The ragged lines pressed forward but were cut to pieces. One of Pickett's brigade commanders, Lewis A. Armistead, led from the front. With his hat on the tip of his sword, he held it high as a marker, shouting "Come on boys! ... Give them the cold steel. Who will follow me?" Armistead was one of the 150 soldiers that managed to reach the Union lines. Armistead placed his hand upon one of the Union cannons that had wreaked such terrible devastation on his men, but he was killed moments later. Almost half of the 15,000 Confederate troops engaged in the attack failed to return. Lee ordered Pickett to reform his division and prepare for the expected Union counterattack. "General Lee, I have no division now." replied Pickett. The battle marked a turning point in the war, and renewed northern hopes. The following day Vicksburg fell. To many, the Confederacy, which a month before had ridden so high, now seemed doomed.
Will the Confederate assault prevail? Or will Southern hopes be swept away by the relentless fire of Union infantry and artillery? All is as it was, except this time YOU are in command!
Chickamunga — 19th - 20th September, 1863 (second day of battle)
(The scenario page spells the battle "Chickamunga"; the table of contents gives "Chickamauga".)
Staffing Notes
- Union Player: William S. Rosecrans. Take 4 command cards.
- Confederate Player: Braxton Bragg. Take 4 command cards. You move first.
(Map features: McCook, Thomas, Longstreet, Polk.)
Following Gettysburg, both armies lacked the strength to take offensive action. Although Lee and Meade maneuvered for position, there was no major fighting. Lincoln wanted to maintain pressure on all the major Confederate armies to prevent the South from re-deploying forces to meet isolated Northern attacks. He pressed Rosecrans to advance with the Army of the Cumberland. Although slow to act, "Old Rosy," as his troops called him, executed a masterful campaign. By July, he had forced Bragg to fall back to Chattanooga with the Army of Tennessee. Lincoln, however, pushed Rosecrans still further for results. On 7th July, Rosecrans received a message from the Secretary of War: "Lee's army overthrown; Grant victorious. You and your noble army now have the chance to give the finishing blow to the rebellion. Will you neglect the chance?" Rosecrans was angered by the lack of appreciation for what he had achieved. He resumed the campaign, and forced Bragg to abandon Chattanooga on the 8th September. The loss of this major railroad junction was another bitter blow to the Confederacy. Rosecrans pushed on again, convinced that the Confederates were in retreat. Meanwhile, Bragg had been reinforced with troops from Tennessee, Mississippi and two divisions from Lee's Army of Northern Virginia under the command of Longstreet. Bragg sought to attack Rosecrans army before it could concentrate. Despite several orders to do so, Bragg's generals failed to initiate engagements against isolated union formations. Rosecrans took the opportunity to begin a concentration of the Union forces.
Bragg reorganized his army onto two wings: the left under the command of Longstreet and the right commanded by Polk. Bragg ordered Polk to attack the Union left flank held by Thomas. Longstreet would then attack the Union center and right. By turning the Union left flank, Bragg hoped to drive the Union forces away from Chattanooga. Rosecrans expected renewed attacks in the morning and strengthened his defensive line overnight. When the attacks were launched in the morning, the Confederates made slow progress. Thomas' corps came under increasing pressure. Rosecrans ordered Woods division to shift to the left to support him, not realizing this would create a gap in his battle line. It was at this point that Longstreet launched his attack. The Confederates smashed through, and Rosecrans' right flank disintegrated. McCook's corps, Crittenden's corps and Rosecrans himself raced back toward Chattanooga. Only Thomas and his corps remained in the field. Despite repeated attacks from three sides Thomas held on desperately to his defensive positions. His stubborn action earned him the nickname "Rock of Chickamauga." Toward nightfall, with ammunition exhausted, Thomas' corps fell back to Chattanooga. Although the battle had been a Confederate victory, Bragg had failed to regain Chattanooga for the Confederacy.
Can Bragg secure a decisive victory and march on to recapture Chattanooga? Or will the Confederate tide again be broken by George H. Thomas, the "Rock of Chickamauga"? All is as it was, except this time YOU are in command!
New Market — 15th May, 1864
Staffing Notes
- Union Player: Franz Sigel. Take 4 command cards.
- Confederate Player: John C. Breckinridge. Take 6 command cards. You move first.
Special Rule: The Confederate artillery is Horse artillery. When ordered, they may either move 2 hexes, or move 1 hex and fire. Horse artillery has a maximum range of 4 hexes. If a Bombard command card is played, Horse artillery may either move twice (a total of 4 hexes), or fire twice.
The Virginia Military Institute's corps of cadets starts with only 3 infantry pieces and have a range of 3 hexes instead of the normal 4. Place a Campaign Flag token in the same hex to distinguish it from other units.
(Map features: Bushong House, Sigel, Smith's Creek, VMI Cadets, Breckinridge, New Market, Imboden.)
In early May, Sigel's Union force of about 8,000 men advanced south through the Shenandoah Valley toward Staunton. It was hoped that the capture of this town would put further pressure on Lee's supplies for the Army of Northern Virginia. To defend the valley, Gen. John C. Breckinridge had an improvised command of some 5,000 men. This force included 247 boys from the Virginia Military Institute, aged between 14 and 18 years old.
The two armies met near New Market. Sigel occupied a low ridge north of the town known as Bushong's Hill. He organized his force into two defensive lines, one behind the other. As Sigel was unwilling to attack, Breckinridge took the offensive. Imboden's cavalry advanced across Smith's Creek and succeeded in driving back the Union cavalry. In the center, Breckinridge's infantry managed to push back the first line of Union troops. However, the Confederate advance slowed as they engaged the second line. Two of Breckinridge's regiments began to falter, having suffered particularly high casualties. It was at this point that Sigel should have counterattacked. However, he hesitated and Breckinridge was able to shore up his battle line. He instructed his ordnance officer, "Put the boys in and may God forgive me for the order." The young cadets of the Virginia Military Institute moved into the battle line as Sigel finally launched his counterattack. The attack was made up of only three regiments and was beaten back by the Confederates who then resumed their own attack. The Union troops, tired and disheartened, fell back.
Confederate loses in the battle were 520 men, including 61 of the cadets. The Union lost 840 men. The Confederate victory was a frustration to Grant, whose Army of the Potomac was preparing to move against Lee.
Can Sigel destroy Breckinridge's smaller force and gain control of the Shenandoah? Or will the Confederates prove worthy of the task and sweep the federals from the Bushong Hill? All is as it was, except this time YOU are in command!
New Hope Church — 25th May, 1864
Staffing Notes
- Union Player: William T. Sherman. Take 4 command cards. You move first.
- Confederate Player: Joseph E. Johnston. Take 4 command cards.
Special Rule: Remove the "Construct Field-works" command card from the deck before play.
(Map features: Hooker, New Hope Church, Hood.)
While Grant pursued Lee in Virginia, Sherman was relentlessly hounding Johnston's army through Georgia toward Atlanta. Johnston was an able strategist and repeatedly maneuvered his army to confront Sherman's advance. The Union advance depended on a single railroad line for its supplies. In mid-May, Sherman attempted to turn Johnston's left flank, and gain the road junction at Dallas. Confederate cavalry spotted the movement. Johnston was able to organize a defensive position along the wooded ridges that ran from Dallas to a small Methodist chapel called New Hope Church.
On the 25th May, the three Union divisions of Hooker's XX corps advanced, with Butterfield's division on the left, Geary's division in the center and William's division on the right. Confederate cavalry and skirmishers slowed the Union advance. The Confederate defensive position consisted of entrenchments and earth-works amidst dense woodland and thick underbrush. The Union soldiers, attacking in three lines, could barely see the Confederate rifle pits ahead of them. The Union troops were exposed to continuous canister fire from rebel artillery and close range rifle fire. It is a testimony to the courage of Hooker's men that some managed to advance to within thirty paces of the Confederate defenses before being thrown back. After falling back, Hooker's men dug in. Both armies habitually entrenched behind field-works whenever there was an opportunity to do so. According to Sherman, even the skirmishers "were in the habit of rolling logs together, or of making a lunette of rails, with dirt in front, to cover their bodies." The fighting around New Hope Church cost the Confederates 350 men, while Union casualties were reportedly much higher at 1,665 men.
Although Johnston's dogged defense inflicted great loses on Union forces, his critics were growing in number. Sherman eventually pushed him back to within sight of Atlanta where Jefferson Davis replaced him with John B. Hood. Lee, however, felt Hood was "all lion, none of the fox." Hood attacked three times and was thrown back on each occasion. Sherman eventually circled the city, cutting off the rail lines, forcing Hood to evacuate on 1st September.
The war was to last another seven months. On 9th April 1865, Lee surrendered to Grant at Appomattox. Johnston surrendered his forces to Sherman nine days later near Durham, South Carolina. The debate continues over why the North won and the South lost the Civil War. Perhaps the words of Robert E. Lee hold much of the truth: "After four years of arduous service marked by unsurpassed courage and fortitude, the Army of Northern Virginia has been compelled to yield to overwhelming numbers and resources."
Can Sherman break through Johnston's line? Or will the Confederates staunchly hold their ground? All is as it was, except this time YOU are in command!