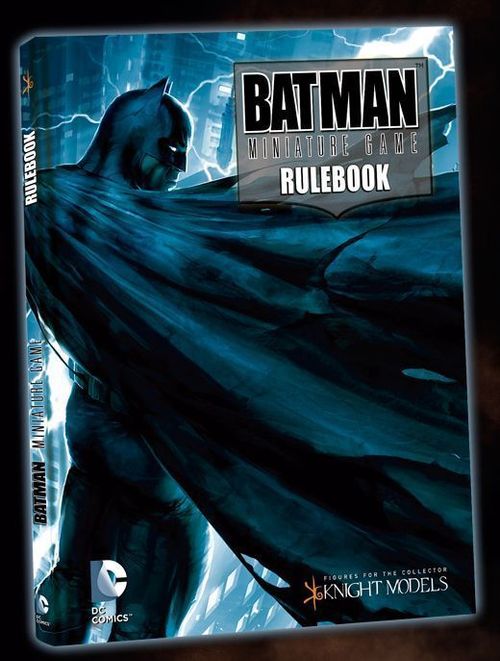
Batman Miniature Game: Rulebook
Batman Miniature Game: Rulebook Rulebook
Table of Contents
Table of Contents
- What Is a Miniature Game
- Game Components
- The Miniatures
- Character Card
- Character's Main Characteristics
- Playing Sequence
- Basic Rules
- Set Up
- Configuring Your Band
- Special Traits
- Special Attacks
- Weapons Special Rules
- Templates
- Effects
- Select Your Scenario
- Scenario: Chance Encounter
- Scenario: Plunder
- Scenario: Patrol
- Scenario: Skirmish
- Scenario: Securing the Area
- Scenario: Ambush
- Templates and Markers
What Is a Miniature Game
For those new players wondering what is a miniature game, we would like to explain that it is a game, designed for at least two players, where both players take control of a variable number of miniatures to represent their bands.
Unlike most board games, a miniature game doesn't take place on an already set cardboard, but the players take an active role in designing the gaming board instead. Also, a miniature game usually aims for a more sophisticated representation of a game on the table as well as working on more complex rules.
The scope is to fulfill each player's requirements, to allow him or her to configure his band with great freedom and make it unique to suit his or her playing style. This way, even if two players are playing with the same band, the odds are that their bands will look completely different to match their personal taste, and thus add variety to the game.
Miniature games come in all ranges and scales. Also the number of miniatures may vary enormously. Some games are historically accurate, while others are set on fantasy worlds or in the distant future. Also, some may focus on little scale skirmishes, needing only a handful of miniatures to play, while others try to represent full scale battles and require massive amounts (sometimes numbering in the hundreds) of miniatures to play.
Miniature games are strongly tied to the miniatures hobby world. This hobby consists in collecting, assembling (and sometimes converting, or even sculpting your own miniatures), painting and playing with miniatures. Most hobbyists do all of them, but some others prefer just to focus on the painting or the conversion aspects of the hobby, while others enjoy the games so much that they got very little time left to paint.
A note on sportivity: No matter how much you like it, in the end the BATMAN MINIATURE GAME is just a game, and the ultimate goal of every game is to have fun. Naturally, we all want to win, but it's not worth it if in our path to achieve victory we must force another person, even one of our friends, to have a hard time.
Game Components
You will only need the following to play Batman Miniature Game: a gaming table, which contains as much scenery as you like, to represent the city area where the game takes place, a few six-faced dice, Counters and Markers, tape measure and, the most important of all, Knight Models miniatures to represent your band on the game.
In order to set a proper gaming table, you should prepare any table or board (actually, any rigid and plain surface will do) with a minimum area of 90cm x 90cm and place the scenery (buildings, trees, cars, etc.) over it. There is no specific way this must be done, as the aim is solely to represent, as accurately as possible the streets, gardens, parks and harbors from Arkham or Gotham City.
It doesn't matter where the scenery and terrain comes from, as long as it keeps with the scale of the game. However our advice is that you get your hands on as much as you can, as the more elements are represented on the table, the funnier the game will get.
Dice
You will need many six-faced dice (D6) to play the Batman Miniature Game. Try to make sure that at least one of them comes in a different color from the rest.
You will notice when reading the rules that sometimes we use expressions like 4+, 5+, etc. We use these to shorten otherwise long sentences when a result is on the roll of a die. For example, to succeed in one action, a character needs to roll a die and score 4 or more, we will just say that the roll will be successful on a roll of 4+.
Please note that, unless otherwise specified, the results when rolling the dice must never be summed up between them. If you need to score a result of 4+, and can roll more than one die to obtain it, if the results are 2 and 3 you can't add them to obtain a 5 and succeed!
Counters
Counters can be represented by gems, chips, tokens or even other dice. You only have to make sure that whichever Counter style you choose fits on the especially designed space for them on each Character Card. You will normally need between 4 and 8 Counters per character.
Additionally, you will need a small opaque bag or container to keep the Counters. This will be also used to determine who will be the first player. We will explain later how the Counters are used in various forms during the game.
Markers
During the game, a character may pass through various states, and it is very important to remember them (Damaged, Poisoned, Knocked Out -or K.O.-, etc.). Knight Models Miniatures has designed special Markers, which can be found at the end of this rulebook. Markers should be placed next to the affected miniature, in order to keep track of the Damage or any other special effect or state during the game.
Also, we have included special Target Markers, that can be used to designate specific scenario Objectives.
Measuring
To play Batman Miniature Game you will need a tape measure (in cm) to measure the distance between miniatures and scenery, as well as for any character's movement.
Any measurement between two different miniatures, or between a miniature and an obstacle or terrain piece, must be taken between their closest volume spots.
The distance moved by a miniature standing on the ground/floor starts from its own base edge, and finishes in its new position. When a miniature reaches its new position, its farther base edge cannot be further ahead than the maximum allowed movement distance from its starting point.
During the game, any distance can be measured by any player at any time.
Rounding Down
Many situations of the game will require you to divide a number. If there is a remainder, the result should be always rounded down. For example: 5 needs to be divided by two, as the result would be 2.5, you will need to round it down to 2.
The Miniatures
The most important pieces of the game are the miniatures or "characters", as we will also refer to them in this rulebook. Knight Models Miniatures offers a faithful representation of the characters from Batman's world. All the miniatures are supplied with their corresponding base and Character Card, which includes all the information required for using them in the game.
Miniature Size
Almost all Batman Miniature Game characters are human, and share a similar height (30 to 40mm approx.). Size difference between them is insignificant as for matters of game scale, which is the reason why we consider all of them to be of a standard size, unless it is specifically noted on a Character Card that this is not the case.
Volume
The miniature's volume is determined by the base the miniature is set on. Thus, the miniature occupies a cylindrical space: this space is the miniature's base diameter x its height. Equipment or extended limbs, as well as any other miniature component have to be ignored when calculating this space.
Note: For game purposes, you will always have to consider that the miniature's volume is a part of the miniature.
If the character's miniature portrays him/her on its knees, bending, standing over a decorative element, etc. consider the volume as if the character was standing upright over its own base.
Please remember that many of these considerations require a good dose of imagination. The scope of the game is to have fun, so there is no point at arguing, and disputes over a miniature's volume should be reasonably discussed and solved. Ultimately, if no agreement can be reached on this point, we suggest to roll a D6; on a result of 4+ the player that controls the miniature will be right, and if the result is less, the opposing player will be right.
Character Card
All characters have their own Character Card. This card will work in two different ways: it will display the character's profile and abilities, and it will also feature some uses during the game.
Knight Models will provide each miniature with a Character Card displaying the following features:
Character Name (1)
This is what makes a character unique. You can't line up more than one identical character in a Band. Basically, how could we have two Batman in the same Band?
Rank (2)
Every character fulfills a different role in their band (some even act as mercenaries of sorts and align with different bands). To represent this, we have included several different ranks: Leader, Sidekick, Free Agent, Henchman or Minion. The different ranks are important while putting a Band together, since the rank is mainly what determines the requisites to field any miniature, and how many of them can be included in a single band.
Aliases (3)
The Character Card will include the most relevant aliases by which the character is known.
Affiliation (4)
Affiliation limits the different bands that can be joined by the character. More than one Band icon may appear in this section. The icon displayed on your Leader's Character Card will determine all the characters who can line up with him. This means that all Band members must display the same icon as their Leader on their Character Card.
Reputation (5)
While arranging a Band for a game, Reputation will set the value of the character within the Band. All scenarios have their own Reputation limit (but it may be also established by the players) in order to deploy each Band. The sum of all Band members' reputation cannot be higher than the established Band Reputation limit.
$ Funding (6)
Each character may be loaded out with a variety of weapons and equipment. We measure the value of all this gear in Dollars ($s). Each Band may include a maximum $s amount for their members, which depends on the total reputation limit of the Band. Please check "Band Configuration" for more details.
Character's Main Characteristics
All Batman Miniature Game miniatures have their own particular basic skills, as well as their own traits. Every skill has a numeric value attached to it, which will be the key to success during the game (save for WILLPOWER). There are six basic skills:
Willpower (7)
Willpower is one of the most important characteristics. It represents the character's capacity to "act" during his turn. The higher that a character's Willpower value is, the more he will be able to do when he is activated. It may mean that he can move, attack, defend himself, perform special actions, etc... more times. This value is equal to the number of Action Counters the character generates each turn, and he may place them into his basic skills (Movement, Attack, Defense, Special).
Movement (8)
All characters may "walk" at the same speed, but they can't "run" at the same velocity. This value represents the character's mobility (run, climb, dodge, etc.). Basically, the more Action Counters you place into the Movement space in the Character Card, the more movement options the character will have.
Attack (9)
This skill represents the character's offensive ability. The higher the character's Attack is, the more times he may Strike in combat. Its value also determines the minimum result the opponent must score in order to Block an attack. There is a space in the Character Card to place Action Counters to attack.
Defense (10)
This skill's value represents how well the character defends himself against attacks. The attacker must score a result equal or higher than the defense rating of a character in order to land a blow on him, or to impact him with a missile weapon. This characteristic's value also limits the number of opportunities a character may have to Block his enemy's attacks.
Strength (11)
Strength is related to a character's physical strength. When you score a hit on a character in combat, the Damage Roll must be equal to or higher than the value displayed on the attacking character's Character Card strength to Damage the target.
Endurance (12)
This skill represents the character's ability to soak up damage and carry on. It is a mixture of physical fitness, overall health, determination or just plain stubbornness. Its value represents the maximum Damage a character can endure before getting K.O. There is a space in the Character Card to place Action Counters and the corresponding Damage Markers to keep track of the status of the character.
Special (13)
This section in the Character Card allows you to place as many Action Counters as its value, and then use them or combine with other Action Counters placed at other Characteristics to perform Special Actions.
Personal and Special Traits
In this section we will indicate all the special rules applied to and the weapons carried by the character.
(The example Character Card pictured in the rulebook is Batman: Rank Leader, Reputation 130, $ Funding $0,00, Strength 3+, Movement 3, Attack 5, Defense 5, Endurance 8, Special 3; weapon Batarang with Damage 2 stars, Cadence 2, Ammo 3, Special "Throwing - M. Range, Remote Control"; Personal Traits: Batcape, Detective, Explosive Gel, Batclaw, Reinforced Gloves, Counterattack, Sneak Attack, Batarmor Mk1, Total Vision.)
Playing Sequence
Playing sequence is structured by rounds. During each round, all players should execute the following steps consecutively, following the exact order as shown below.
Once these steps are completed by every player, a new round will start. Rounds will go on until the scenario goals are achieved, or until the round limit is reached.
1 Take the Lead
Before the beginning of the first round, players have to introduce as many dice/counters per player as the round limit of the specific scenario they are playing (usually 6 to 8 rounds), and put them into a non-transparent bag or container. The dice/counters should be of similar shape and size, but in different colors (one color per player). Each player must begin the game with the same number of dice/counters inside the bag.
At the beginning of each round one player (taking consecutive turns) will extract a dice/counter from the bag and show it. The owner of the extracted dice/counter will be the player who will Take the Lead for the round. The player taking the lead of each round will choose who starts the next stage.
Players must extract a dice/counter each round until there are no more left inside the bag. If, for any reason, there are no more dice/counters to extract, the game will be automatically over. Also, a game can't last more rounds than initially decided, or specified in the scenario description, even if there are dice/counters left to extract.
2 Raise a Plan
Now, it is time to decide what your characters will do during your turn this round. The lead player will choose the player who starts to Raise a Plan.
The chosen player must distribute a number of Actions Counters for each of the characters he has on his band, equal to each character's Willpower, between the basic skills shown on their Character Cards. Once the first player has decided what his characters will do, the next player must do the same with his characters, and so on.
Basic Skills
The Character Card has four blank spaces for each of the character skills (Movement, Attack, Defense & Special) that require counters to be used. The player must divide up each character's Counters (Willpower value) between these skills. Place the Counters on the empty space on the Character Card next to each skill. This will help the players to use the basic skills and also the special rules during the different game stages.
Remember: for every 2 Damage Markers (of any kind) the character has accumulated, at the beginning of the Raise the Plan stage, the character will lose 1 Action Counter!
Distributing the Action Counters
Please, follow the restrictions explained below before distributing the Action Counters into any of your characters. Remember that it is not compulsory to use every Counter that a character has available, so you can leave empty spaces if you prefer so.
Movement Skill. The player can place as many Action Counters into the appropriate slot as the character's Movement value. These Counters will improve the character's movement. We will call them from now on, Movement Counters or MC.
Attack Skill. The player can place into this slot as many Action Counters as his character's Attack value. These Counters will allow the character to perform missile and close combat attacks (see Attack). We call these Counters, Attack Counters or AC.
Defense Skill. The player may place as many Action Counters into this slot as the character's Defense value. This is a Passive skill and can be used also when the character is "not activated". Each Counter can be used to block an attack from an opponent during close combat. We will call these Counters Defense Counters, or DC.
Special Skill (value 3). Players can use up to three Counters for this skill. Each of these Counters may be used to activate some of the character's special abilities, or to recover from Damage at the end of the round. These Counters will be called Special Counters or SC.
Using Your Counters
During the game, each character will need to make use of his basic skills. He will spend Action Counters to do so. Remove the necessary number of Counters from the Character Card for each action. Once all the Action Counters are spent, the character will have to wait until next round to generate more counters and thus be activated again.
If an action requires the character to spend more than one Action Counter and he does not possess enough Action Counters, or they were not distributed into the necessary slots, he cannot perform that action or use that special rule.
At the end of the round, unless otherwise specified, any unused Action Counter is lost, and cannot be used during the next round.
When all players are ready, and have distributed all their Action Counters correctly, they can start the next stage: Execute the Plan.
3 Execute the Plan
As soon as all players have planned all their characters' actions, it is time to activate them and start to attack, move or anything else they have planned. The players will alternate character activations. The player who first raised the plan will always be the first one to activate a character. Each character can only be activated once per round. Once all characters have been activated during a round, players will move onto the final stage.
Activate a Character
As soon as a character is active, he can move and attack. He can also use his special skills. At the beginning of a character's activation, players must declare what skills and the order by which they will execute them. This means the character can move & attack, attack & move, just attack, or just move. About any combination is possible, as long as you have enough Action Counters to carry it on.
Once the character has used his basic skills and spent the required Counters, the activation will be over, and the owning player will give way to the next player, who will follow the same character activation procedure.
Remember: players are not required to use all of the character's Counters.
Passive Skills
Some skills are passive, such as defending from or blocking an attack. These may be used during another player's turn, as a response to attacks or to trigger special rules. The instructions on how to use them and their Action Counters cost will be specified on each passive skill description.
Passing Activation
At the beginning of the Execute the Plan stage, players must decide how many pass chances the player with fewer characters in his band has. The pass chance is equal to the difference between the number of characters the player with the less numerous band controls compared to the number of characters that compose the most numerous band (K.O. characters do not count for this purpose).
This way, the player with fewer characters in his band may choose to Pass (choose not to activate a character during his turn) and give the activation turn to the other player as many times as the pass chance result. This may mean a player can activate two characters consecutively. A player cannot pass more than twice consecutively.
Passing is tactically useful, as it allows the passing player to respond better to his opponent's moves, and also balances the game out for bands composed by fewer models.
Skill Roll
In order to successfully perform some actions, characters must pass a skill roll. Compare the roll against the value of the character's basic skills.
Agility Roll: To succeed, you must roll one die, and score a result equal to or less than the character's Movement value.
Resistance Roll: You must roll two dice and sum up both results. If you score a result equal to or less than the character's Endurance value, the roll will be successful.
Willpower Roll: You must roll two dice and sum up both results. To succeed you have to score a result equal to or less than the character's Willpower value.
4 Casualty Recount (End of a Round)
At the end of the round, when all characters have been activated, any K.O. or stunned characters will have the chance to recover from Damage and remove Injury Markers or wake up from a K.O. To achieve this, make a recovery roll (check Recovery).
Once the recovery rolls are done, players have to apply the effects of all the rules that must be executed at the end of the round. After this, remove all unused Action Counters from the Character Cards and check the victory conditions for the scenario being played. If any player meets these conditions, he will have won and the game will be over.
Basic Rules
Line of Sight
In the Batman Miniature Game it is always by night... That's why character's visibility is reduced. No characters are able to see more than 30cm away from their volume in any direction.
Of course, there are traits and equipment that will let a character see farther, or sometimes the contrary.
To See another character you must be able to trace a straight, unobstructed line between any point of the volume of both characters. The easiest way is to draw an imaginary line between the characters using a tape measure or a laser pointer.
To See another character at least a quarter (1/4) of the target miniature's volume must be visible, not including open arms, or any other equipment elements that may stand out from the base.
In Batman Miniature Game all characters have a 360° vision angle unless otherwise specified.
Unseen
If the target is farther than 30cm away from a character, it won't be seen so you cannot attack that object or objective.
Lights
In the game streetlights, searchlights and spotlights may be found, which will light up the playing ground. We will specify the area each object illuminates.
In any case, if a character is under the effect of any Light, it will become totally visible by any other characters which can draw a direct line of sight to the illuminated character, regardless of the distance they are from it.
Movement
All Batman Miniature Game characters have the same basic movement distance (BMD) of 10cm. This distance may be subject to some changes by several special rules. When a character is activated, and its controlling player decides to move it, it may move through the playing area as many cm as its BMD without spending any Action Counters. Additionally, if the character has MC to spend (meaning that the controlling player added Action Counters to its move basic ability) they can be used to move further. Roll a die for each MC you spend this way, and then sum the results: this number (in cm) should be added to the character's BMD for the duration of this round. All character's available MC must be used at the same time. A character that does not use the MC during movement, won't be able to use them to move at any other moment after the activation, but may use them to pay other costs.
Characters cannot move through any space or volume already occupied by other characters. This means that if a character wants to move through another character he will have to go around him.
Characters do not have to move their full BMD, but may never exceed it.
Run
Characters may double their BMD spending 1 MC and 1 SC.
During this special movement, the character won't be able to manipulate, cross any obstacle or difficult ground, climb or jump.
If a character runs, he must do so following a straight line in any direction he wishes to, and must move at least 10cm.
Stand
When a character is knocked down, it may stand up during its activation using 1 MC.
Once the character is standing again, it can move as normal.
Jump Capacity (JD)
Sometimes, movement may require to jump over obstacles or gaps between buildings. In these cases, check the jump capacity or JD of the moving character, to determine how far the character may jump. A character's default JD is always equal to half of its BMD.
Impaired Movement
During the game, there will be occasions when a character's movement may be affected by difficult ground or by a special rule which impairs it. When a character is affected by a movement effect which impairs it, its BMD will be halved, meaning that every cm it moves will count as 2 for its BMD.
Moving Around Arkham City
Terrain elements on the gaming area are very important for the characters' movement and sight, and play a role in the game. The Batman Miniature Game combat will take place in the city, so the movement rules are designed for an urban environment. All terrain elements are considered obstacles, which will be divided into three different categories: Small Obstacles, Difficult Obstacles, and Vertical Obstacles.
Move Through a Small Obstacle
Small Obstacles won't exceed half of the miniature's height (around 2cm for a regular or human character). Small Obstacles can be garden hedges, boxes, buckets, chairs or any domestic furniture in general. Passing through, or jumping over them won't carry any penalty as they don't exceed half of the miniature's size. If the obstacle is higher than that, it will be considered a difficult obstacle.
Difficult Obstacle
These obstacles are those higher than half of the miniature size but not taller than the miniature itself (around 2 to 4 or 5cm for a "human" character). These obstacles can be high garden hedges, fences, cars, containers, big trash bins and urban furniture in general.
Difficult Ground
Areas such as piled debris, dense vegetation, sewers or water are considered Difficult Ground. Difficult ground will impair a character's movement, so any character attempting to move through it will have its BMD halved.
Moving Through a Difficult Obstacle or Difficult Ground
If a character needs to move through difficult ground or pass through a difficult obstacle they will need to spend 1 MC, or it won't be able to do it.
Before the mission starts, players should decide which terrain elements are considered Difficult Ground and difficult obstacles.
Climb a Vertical Obstacle
A Vertical Obstacle is clearly taller than the miniature, such as a wall or any other element which can be climbed, such as a prison fence. Please set all vertical obstacles before the game starts.
To climb we must measure movement as usual. While the character is climbing he is considered to be moving through difficult ground. Also the character must expend 1 MC or it won't be able to proceed. If a character tries to climb a vertical obstacle, it must finish its movement in an area where the miniature can be placed, such as a roof or the top of a wall that is thick enough. If the character ends its movement in a place where it cannot stand, it will spring into the air and suffer the consequences.
Jump Through a Gap
A character can jump through a gap or empty space that doesn't exceed its JD, but must spend 1 MC to proceed. If the gap exceeds its JD, but the character still decides to jump, it will fall.
Spring Into the Air
Characters may spring into the air when they find a very uneven piece of terrain. If the character springs into the air, they will have to spend 1 MC, so this movement counts as jumping. Otherwise, it will count as falling.
If the height the character is trying to jump from is less than its JD, it will succeed automatically. You may place the character standing at the end of the gap and keep moving if there is BMD left.
If the jump distance is higher than the character's JD then the character will suffer Damage. Damage depends on the difference between the jump height and the character's JD. Additionally, unless it successfully passes an agility roll, the character will become knocked down.
- If the difference is up to 5cm compared to its JD, the character suffers a Damage Marker (Daze)
- If the difference is between 6cm and 10cm compared to its JD, the character suffers a Damage Marker (Injured)
- If the difference is between 11cm and 15cm from the JD, the character will suffer as many Damage Markers (Injured) as half its Endurance value.
- If the jump exceeds 15cm compared to the character's JD, it will immediately count as a Casualty. Remove the miniature from the game.
Falling
On some occasions, characters may be forced to spring into the air or be pushed by an opposing character after being attacked. If this happens near the edge of an elevation, such as a terrace roof or balcony, and the character cannot be placed on that terrain element anymore, then it needs to jump from it the corresponding distance.
If the character jumps into the void, it will suffer the same effects as if it were springing into the air, but its JC will count as Zero "0cm".
Manipulate
Some terrain special rules require the characters to Manipulate objects. This requirement can also be established by the players. Different Manipulate actions may include opening a door, picking something up from the floor, etc... Please determine before the game starts, which Manipulate actions can be performed by characters and the effects or results after the manipulation succeeds or fails.
A character has to spend 1 MC to Manipulate an object if they are in base contact with it (or carrying it), immediately obtaining the benefits given by the object he just manipulated or is carrying.
Attack
There are two main types of attacks a character may perform: a distance attack or a close combat attack (with or without weapon). A character may only attack using one of these types during each activation.
The attack should be performed before or after movement (as the player decides during the Execute the Plan stage), if all the requirements and necessary Counter costs are met. The player will distribute the hits or impacts (Impact dice) amongst his enemies. Afterwards you must perform the Impact roll.
Close Combat
To successfully perform a close combat attack and hit the enemy, both miniatures must be in base to base contact on any part of their volumes.
Note: There are weapons and special melee attacks which allow a character to perform a close combat attack without being in base to base contact with its target.
Hits / Strikes
Each AC used in a close combat will be transformed into a Strike or Impact roll against the opponent. If there is more than one enemy in close combat, the player can freely distribute the Strikes between all the enemies it is in contact with. This must be decided before rolling any dice. Then roll the attack separately for each enemy.
A character may perform an attack only once per activation, so, if it spends more than one AC to attack the same enemy character, all dice should be rolled at the same time.
If the attacker carries one or more close combat weapons (as noted on the Character Card), the player must state which of these weapons will be used before rolling any dice. The character then will use the same weapon for the duration of that round.
Close Combat Weapons. Some characters are unarmed. However, most of them carry some kind of weapon. Weapons provide the character with a higher Impact probability and/or the possibility to inflict more Damage on its target. However, whatever loadout a character carries, all share the following special characteristics:
Damage
Each attack inflicts a number of Damage Markers per Impact.
A character may choose to attack Unarmed or be forced to do so by a special rule (see page 48 for more information on Damage).
Numerical Inferiority. If during close combat a character finds himself fighting with at least 2 enemy characters which are not in contact with any other miniature, the outnumbered character's Defense value will suffer a penalty of -1. For Example: a Gotham Policeman is in base to base contact with two Joker's Clowns, and the Clowns themselves are not in contact with any other of the Policeman's allies, the Gotham Policeman would have his Defense reduced by -1.
Defensive Positions. If during close combat, the defending character's position meets any of the following cases, its Defense value will be increased by +1 against Impact rolls:
- The defending character is on higher ground than his attacker, but they are still in contact.
- The character is behind an object (wall, fence, etc.) that is not thicker than 2cm, and it's not higher than the fighting characters.
- Both the character's sides are covered by elements which could stop him from being attacked on his flanks or by a sweeping attack, such as standing below a door frame, a narrow corridor or alley, etc.
Close Combat Grab
Instead of striking its enemies, a character can attempt to grab them. Choose how many AC you want to use plus 1 SC and perform an unarmed Impact roll. If the character succeeds and inflicts Damage, the immobilize effect will be added to the Damage on the target (check effects).
If a character gets immobilized/grabbed by several enemies at the same time, it will suffer a -1 penalty to its Defense value for each additional enemy grabbing it, to a minimum of Defense 1.
To get released and thus remove the effect, the grabbed character must spend at least 1 AC during its activation and roll a die for each AC spent this way, and compare the result to its own Strength. If it succeeds (the roll is equal to or higher than its Strength) it will get released, and then activate normally during the rest of the round. The character may be also released automatically if his captor or captors move away or attack another character. If the character is being held by several enemy characters, he must spend at least 1 AC for each enemy holding him, and become released from one enemy for each success. The player controlling the captive character decides from which character he gets released for each success.
Close Combat Push
Instead of striking an enemy you may try to push them. Choose how many AC you want to use plus 1 SC and perform an impact roll, as if performing a regular attack. If the attacker successfully Damages, the displaced effect will be added to the Damage (see effects).
Defense
If a character is attacked in close combat and successfully hit, and he has DC left on its Character Card, he may use them to attempt to Block the enemy attacks. The player may decide if he wants to spend his DC in an attempt to block after the attacker has made the Impact Roll, but before the Damage roll. Thus, if the first attack received by a character wasn't successful, it will still be able to defend himself if it's attacked again during the rest of the round.
Block
To Block an enemy Impact, roll a die for every DC you want to spend this way. If the result is equal or higher to the opponent's ATTACK value, will mean that the character repealed one of the Impacts per success (the defending character chooses which Impacts were blocked). If an Impact is blocked, it will automatically be ignored as if it had missed the target.
Ranged Attack / Shooting
If the character carries a ranged or missile weapon, he will be able to perform a Ranged Attack with it, if he meets the following requirements:
Only one ranged weapon attack is allowed per activation and 2 AC must be spent in order to do so. This will allow the character to shoot as many times (or roll for Impact) as the weapon's Rate of Fire (ROF).
Range
All ranged weapons have an unlimited reach, but the character has to be able to see its target and to draw a straight line to the objective. However, weapons require a minimum distance to the target to be used properly. This means that a character cannot attack with a ranged or missile weapon if the target is closer than 5cm to him.
Ranged Weapons
These weapons can only be used to perform a Ranged Attack, otherwise they are ignored. All ranged and missile weapons possess special characteristics that define their usage and stopping power.
Rate of Fire (ROF): This is the number of shots (or dice that can roll for Impact) the weapon can make anytime it opens fire. These Impact dice can be distributed between several targets, as long as all the conditions required to take the shot are fulfilled.
If the character moved during his activation before he shot, its weapon's ROF will be reduced to one, no matter how much the original ROF was. Also, if a character carries more than one ranged weapon he must choose one of them to attack with, and it will be the only weapon he will be able to use for the rest of the round.
Ammunition: Ammunition represents how many times a character may attack with the ranged or missile weapon he is carrying during the game. Ammunition is represented on the Character's Card by ammunition magazines. Every time a character shoots a weapon, he must spend a magazine. If all ammunition magazines are spent, the weapon cannot be used any more, or until the character finds ammunition and rearms.
A character can't carry more Ammunition than the total magazines it started the game with (including additional Magazines purchased as additional equipment).
Damage: This characteristic indicates the type of Damage, as well as the number of Damage Markers, that the weapons inflict on the targets.
Blink!
If the character wants to shoot at a partially visible target, as it could be a character hidden behind a car, a corner, etc... or even if a few obstacles are in the way, the target character will be able to make a Blink! roll for each of the obstacles in between him and the shooter.
The Blink! roll should be made after a successful Impact roll. If a miniature is in base contact with an obstacle or another (friendly) miniature, they can shoot over it (as long as its size of it allows the character to), and it will not count as a Blink! obstacle.
Blink! roll. If the target has been successfully Impacted, it may roll the one die per impact for the first obstacle which is in the shooting trajectory. If the result is below the Blink! roll difficulty, the target must keep on making Blink! rolls (remember, only one die per impact) for each obstacle in the trajectory until the target is hit, or until the Blink! roll is successful (the result is equal to or higher than required). If the Blink! roll is successful, the bullet will hit the obstacle, or ricochet against it, and the shot will be a miss (meaning that one impact will be removed from the target before damaging per successful Blink! Roll). If all the Blink! rolls failed, the target will suffer an Impact as normal.
If the obstacle in the trajectory of the shot is a damageable terrain element or character (friend or foe), it will suffer from the Cross Fire effect. (See Cross Fire).
Blink! Difficulty. Not all the obstacles have the same qualities to absorb or ricochet an Impact. The Blink! Difficulty level is set by the kind of obstacle:
- 4+ for walls or objects considered "solid" or very resistant (steel plates, concrete blocks, armored cars, etc.) or another miniature (friend or foe).
- 5+ for wood fences, trees, cars, streetlights or any other urban furniture.
- 6+ for hedges, wire fences, boxes, tables or any other domestic furniture.
Cross Fire. If a character or damageable object has been Impacted after a successful Blink! roll, the shooting player will have to make a Damage roll. If it is passed, the hit character or damageable object will just suffer 1 injured marker instead of the normal Damage the weapon inflicts.
When activating a character in contact with an obstacle, he can crouch next to it and take cover spending 1 SC. If he does so, he will be in cover until he moves or the owning player states otherwise. If the character in cover has to make a Blink! Roll for the obstacle he is being covered by, he will benefit from a +1 on that Blink! roll.
Impact
Once all the attack dice are set, the attacking character may make an Impact roll for each die.
Roll for all the attacks directed against the same character at the same time. Apply then any and all Impact roll modifiers. Any result equal or higher to the target's Defense value will be considered an Impact.
For each successful Impact, a Damage Roll should be made (see Damage).
A natural (before applying any modifiers) result of 1 in any Impact roll is always a failure; however any natural result of 6 will always be a success.
Damage
If a character achieves an Impact on an enemy miniature, the controlling player must roll a die for each successful Impact (When rolling the corresponding dice to Damage, an additional die of a different color will be rolled as well; this extra die is the Collateral Damage die) to see the Damage inflicted.
For each Damage result equal or higher to the strength of the attacker, Damage is inflicted. This will be reflected on the damaged character's Character Card by Damage Markers, as specified for each weapon or attack. Damage can also produce some effects (see advanced rules).
Some close combat weapons can modify the wielder's strength. A "+" (Plus) or "-" (Minus) symbol will be shown before a digit. Add or subtract the digit, as indicated by the symbol, to the roll.
Example: If "+1" is indicated in the weapon's description, and the wielder's strength is "4+", when rolling to damage you would apply the "+1" modifier to the roll, effectively decreasing the difficulty by one. Thus the character wielding this weapon, would Damage when rolling 3+.
All natural results of any Damage roll of 1 will be considered a failure; on the contrary, any natural result of 6 will be considered a success.
Each time Damage is inflicted on a character, 1 or more Damage Markers will be added to his Character's Card.
There are two kinds of Damage Markers: Stun and Injury. One kind or the other will be applied depending on the characters and/or the weapon(s) which inflicted Damage (this will be indicated on the character's or weapon characteristics).
Unarmed
If a character has no weapons he can punch, kick, bite, etc. Damage caused by this kind of Impacts will always inflict Stun Marker.
Scratch
If an Impact is achieved with any distance weapon, a Stun Marker will always be inflicted on the target, even if the Damage roll fails.
If a character is inflicted both types of Damage Markers as a result of the same attack, please award first the Injured Markers, and then the Stun Marker/s. Both types of Damage are accumulative. If the character suffers more Damage Markers than his own Endurance value, apply the corresponding effect/s. The rest of the Damage Markers will be ignored.
Example: If a character receives 2 Damages (Injury, Injury, Stun per Damage, i.e. 4 Injury Markers and 2 Stun Markers), first award the 4 Injured Markers and then the 2 Stun Markers. If the character had, for example, an Endurance value of 5, it would get a K.O. result and the last Stun Marker will be ignored.
Damage Accumulation Effects
For every 2 Damage Markers of any kind accumulated by the same character, an Action Counter will be immediately removed from the damaged character's Character Card. The player controlling the Damaged character may choose which Action Counter is removed.
At the Raise a Plan stage, if a character has accumulated Damage Markers, he will generate 1 less Action Counter for every 2 markers during this round.
At the end of each round, all characters can attempt to remove a Stun Marker by successfully making a recovery roll (see recovery).
K.O. Knock Out
As soon as a character accumulates as many Damage Markers as its own Endurance value, they will immediately become K.O.
When a character becomes K.O., he loses all of its remaining Action Counters. Also, the miniature gets laid on the ground, and remains like that until recovery (he will need to spend AC to stand up). Otherwise, the character will remain K.O. until the end of the game.
A K.O. character cannot generate Counters at the Raise a Plan stage, or be activated, but will have a chance to recover at the end of each round. Place a K.O. marker next to the miniature to make its status clear to all players, and distinguish it from the knocked down characters.
A K.O. Character is not taken into consideration for Blink! Rolls, since it is laying still on the ground.
A K.O. Character cannot control objectives.
When a character becomes K.O., any surplus Injury Marker must be exchanged for previously Stun Markers, which may cause the character to become a Casualty.
For Example: A character with Endurance 4 that has suffered Damage (2 Injury, 1 Stun), suffers another attack Damage (2 Injury, 1 Stun). So the character is K.O. (4 Damage: 2 Injury, 1 Stun, 1 Injury). The surplus Injury Damage must replace the previous Stun Damage. The result is four Injury Markers so the character becomes a Casualty.
Casualty
If a character accumulates Injury Markers equal to its Endurance value, the character will be considered a casualty and must be removed from the game.
Collateral Damage
Whenever making a Damage roll, the player should also roll the Collateral Damage Dice. This die should be in different color or size to make it easier to point it out, and it should be rolled together with the rest of the Damage dice. However, its result will have a different meaning.
The Collateral Damage Dice will determine if the Damaged character is knocked down, as well as any critical and/or special Damage inflicted by the attacker.
Knock Down
If the result of the Collateral Damage Dice is equal to any of the Damage dice results (even to those that failed), the target gets knocked down. The only exception is a double 1 result, which will still be a failure and won't knock down the target.
Critical Damage
If the attacker rolls at least one success to Damage, and the Collateral Damage Dice result is 6, the target will be inflicted an extra Damage Marker (Stun Marker) to the total Damage.
Special Critical (CRT)
Several weapons and/or special attacks may produce different effects. These weapons and/or attacks possess a special critical effect indicated as CRT in their description.
CRT effects always replace the extra Stun Damage when critical damage is inflicted.
Recover
At the end of each round, during the Casualty Recount phase, all characters with accumulated Stun Markers, or K.O., may attempt to remove a Stun Marker or get up from K.O., by making a recovery roll. Injury Markers cannot be recovered.
Recover from Stun Damage. To recover from Stun Damage, roll 1 dice per character that has at least 1 Stun Marker accumulated. A result of 4+ will allow the character to remove a Stun Marker. If the character still has unspent SC at the end of the round, he may use them now and roll one more die per available SC, and try to remove more Stun Markers. Each success will remove 1 Stun Marker.
Recover from K.O. To recover from K.O., the character must first make an Endurance roll. If it K.O. passes the roll, it will recover from K.O. but remain lying down until it is able to stand up. Remove one Stun Marker from the character. If the roll is unsuccessful, the character will remain K.O.
Set Up
Once you have everything you need to play it is time to set up a Batman Miniature Game. First, place all the available terrain elements and get a Band ready according to the established Reputation. Then pick a scenario, and you are ready to start playing!
Place Terrain Elements
The players must agree on how to place all terrain elements at their disposal. They also must establish which elements are objects or difficult terrain, which are small, etc. Finally, they have to decide which objects can be manipulated and the result/s of it, if it is not covered by scenario rules.
Configuring Your Band
Set Reputation Limit
First of all, players must agree on how much Reputation each player can spend to configure his Band. Usually both players' bands will have the same Reputation. We recommend a maximum of 150 points (pts) for short games and 450pts for 2 hour games. 300pts is the recommended Reputation limit for scenarios presented in this book.
Now you can start choosing your band's characters. Remember that the sum of all the characters' Reputation can never exceed the established Reputation limit.
Band Leader
Each player must choose a "Band Leader", between the characters ranked as "Leader" or "Sidekick". The rest of the characters in the Band must have the same affiliation as the "Band Leader". If a character has an "Unknown" affiliation, they may be included in any Band.
Rank
All characters have one of the following ranks: Leader, Sidekick, Henchman or Free Agent. This rank determines your Band's configuration as follows:
- You can only include 1 Leader. This must be the "Band Leader".
- You may only include 1 Sidekick, unless you choose a Sidekick as "Band Leader". In that case you may include a second Sidekick.
- You may only include 1 Free Agent for every 150 reputation points of the Band.
- You may include any number of Henchman without repeating character (with different own name).
- A Henchman with no own name is considered "Minion"; you will be able to align more than once in the same band, this will be indicated with a "*" next to Henchman rank.
- You cannot include twice the same character, unless they are a Henchman Minion.
$ Funding
Many of the characters have a cost in $ indicated on their Character Card, representing the quality and quantity of the equipment they carry. A Band may spend up to $500 per every 150pts of Reputation. Players may spend this money on characters, or equipment for the Henchmen.
Equipment
Henchmen have several options of available weapons or equipment. Each Henchman may choose only once any of the available options from its Band equipment list, and add their cost ($) to the total spent. The equipped character may use the purchased equipment just like any other of its original rules or equipment. Each piece of equipment has a limit of times it may be purchased per Band, indicated before its name.
Batman (Law Band)
- 0-2 Magazine ($200): +1 to Ammunition for 1 weapon.
- 0-2 Flashlight ($100): obtains the "Lantern" rule.
- 0-2 Handcuffs ($200): obtains the "Arrest" rule.
- 0-2 Whistle ($200): obtains the "Halt/Stop" rule.
Joker Crew
- 0-2 Magazine ($200): +1 to Ammo for 1 weapon.
- 0-2 Thrower ($300): obtains the "Batclaw" rule.
- 0-2 Clown Painting ($150): obtains the "Mislead" rule.
- 0-2 Flare ($300): obtains the "Flare" rule.
Penguin Crew
- 0-2 Magazine ($200): +1 to Ammo for 1 weapon.
- 0-2 Thrower ($300): obtains the "Batclaw" rule.
- 0-2 Laser ($150): obtains the "Laser" rule.
- 0-2 Camouflage (Camo) Vest ($300): obtains the "Stealth" rule.
Bane Crew
- 0-2 Magazine ($200): +1 to Ammo for 1 weapon.
- 0-2 Thrower ($300): obtains the "Batclaw" rule.
- 0-1 Titan Dose ($100): obtains one "Titan Dose".
- 0-2 Night Vision Goggles ($200): obtains the "Night vision" rule.
Poison Ivy Crew
- 0-2 Titanic Mutation ($150): obtains one "Titan Dose".*
- 0-1 Sense Mutation ($100): obtains the "Night Vision" rule.*
- 0-2 Extra Spores ($200): +1 to Ammo for 1 weapon.*
- 0-2 Spikes Mutation ($200): obtains the "Claws" rule.*
- *Note: Only plants can "purchase" this equipment.
Black Mask Crew
- 0-2 Magazine ($200): +1 to Ammo for 1 weapon.
- 0-2 Brass Knuckles ($200): obtains the "Reinforced Gloves" rule.
- 0-2 Thrower ($200): obtains the "Batclaw" rule.
- 0-1 Bribery ($100): obtains the "Informer" rule.
Two Face Crew
- 0-2 Magazine ($200): +1 to Ammo for 1 weapon.
- 0-1 Bribery ($100): obtains the "Informer" rule.
- 0-2 Bulletproof Vest ($100): obtains the "Bulletproof vest" rule.
- 0-2 Handcuffs ($200): obtains the "Arrest" rule.
League of Shadows
- 0-2 Magazine ($200): +1 to Ammo for 1 weapon.
- 0-1 Loyalty Tattoo ($200): obtains the "Bodyguard" rule.
- 0-1 Night Vision Goggles ($200): obtains the "Night vision" rule.
- 0-1 Climbing Shoes ($100): obtains the "Climbing Shoes" rule.
(The small grey "obtains ..." lines on the printed equipment lists are low-contrast; the rule names above are transcribed as legible.)
Strategies (Optional)
You may choose among a number of strategies to achieve your plans of victory. First choose strategies and then follow the following order:
A / Scenario selection. B / Urban Furniture. C / Bands. D / Objectives. E / Start playing.
Choosing Strategies. Each strategy has a value ranging from 1 to 3. Players have 3 points to spend on strategies. Strategies should be brought into play at the phase indicated in their description (value/phase):
- 3/A Global Plan - you may choose a specific scenario, instead of a random pick. If both players choose this strategy, then neither can apply its effect.
- 2/C Fast Advance - Increases your deployment area by 10cm. If you have two deployment areas, increase each by 5cm. If both players choose this strategy, then neither can apply its effect.
- 2/C Ambush - Deploy your entire Band after the other player has deployed his entire Band. If both players choose this strategy, then neither can apply its effect.
- 1/C Patrol - You may place one miniature up to 10cm outside your deployment zone's limits. If this scenario doesn't include a deployment zone, you gain +1 to the enter the game zone roll.
- 1/C Reinforcements - You may pick one miniature of your band and roll a die. If the result is 4+ you may hold it off table. At the Raise the Plan stage of the second round of the game you may deploy that miniature at any edge of the playing area, except the edge corresponding to the enemy deployment zone.
- 1/B Maps - gets 2 extra Lamp posts or 1 Sewer Marker. The player with this strategy decides where to deploy them, but he cannot place them in the enemy deployment area.
- 1/A Secret Objective - Set 1 additional objective of your choice (maximum 1).
- 1/A Change of plans - Roll two dice, sum up the results and then move an objective as many cm in a direction of your choice. This strategy may be used only once per game, and it may be used only after placing the objective markers in the game zone.
- 2/? Informer - When the enemy player would normally apply the effect of one of his strategies, this strategy will cancel those effects, rendering the enemy strategy effectively useless. An Informer may be used to cancel the effect of another Informer.
- 2/E Early Bird - You may choose who takes the lead in the first round without having to extract any Counter from the container. If both players choose this strategy, then neither can apply its effect.
- 2/E Battle Cry - Your Band flees (see Run Away) when your Reputation is reduced by 80% or more compared to its original Reputation.
- 3/C Perfect Plan - At the beginning of the game add an extra Counter, for your Band, to determine who takes the lead.
Phase A / Scenario Selection
Roll a die to see what scenario you will play.
- Chance Encounter
- Plunder
- Patrol
- Skirmish
- Securing the Area
- Ambush
Phase B / Urban Furniture
At the beginning of the game, and before any miniatures are deployed, both players must deploy alternatively, 1D3 Sewer Markers each. They may be placed anywhere in the playing area, 20cm or more from any other Sewer Marker and more than 5cm away from the gaming area edges.
Entering and Exiting Sewers
To enter or exit a sewer you must spend 2 SC and 1 MC (as payment for a Difficult Movement and Manipulate). Furthermore, during the round a character gets out of a Sewer, his basic BMD is reduced to 0; this means that if they want to move, they will have to spend MC. A character can enter a sewer any time during their activation if they already are in contact with a Sewer Marker, or if they become in contact with it during their activation, and pay the corresponding Counter costs. Remove the miniature from the gaming area and leave him visible at one side as a reminder that they are still inside the sewers. Only one character per Band can be inside the sewers at the same time and must spend at least one full round inside (the round the character gets in doesn't count). During the next round you can pay again the same Counter costs and return the character to the game by placing the miniature in contact with any Sewer Marker. Once it has returned, the character may act as normal, if they still have Action Counters.
If a player has 1 or more miniatures in base contact with a Sewer Marker, the opposing player cannot use that Sewer Marker to get in or out of the sewer. To block passage to a "Big" character you must have at least 2 miniatures in contact with the Sewer Marker.
Note: A K.O. character doesn't count to block a Sewer.
Lamp Posts
At the beginning of the game, and before any miniatures are deployed, both players must deploy alternatively 1D3 Lamppost Markers each. The player that gets to deploy the more Lamppost Markers starts deploying them. If both players get to deploy the same number of Lamppost Markers the player with more miniatures in his Band starts. They can be placed anywhere in the playing area, 20cm or more from any other Lamppost Markers and more than 5cm from the gaming edges.
Lampposts illuminate the area 10cm away from them in any direction. Players should consider that light does not pass through solid objects like walls, and should decide the area illuminated by each lamp post.
Lamppost Markers can be the target of a Ranged Attack; they have a Defense value of 2. If the Lamppost Marker is successfully Damaged, remove it from the game.
Remember they can be Damaged also by the Crossfire rule.
Phase C / Bands
Both players have to divide their Band into two groups consisting of the same number of miniatures whenever possible. Toss a coin or roll a die to decide who deploys first. First player to deploy chooses his deployment area and places on it one full group of miniatures. Then, the other player places one of his groups in the opposing deployment area. Afterwards, the first player places his second group, and, finally, the second player does the same. Some scenarios may vary this order, or have several areas of deployment; these peculiarities are indicated in each scenario's description. The miniatures should be placed entirely within the corresponding area, but the controlling player may decide to deploy them Crouched.
Phase D / Objectives
There are four types of objectives, represented by Markers. Players may choose 3 out of them but cannot choose twice the same type. The player that first deployed his Band places one of his objectives; then, players take turns to deploy an objective until all the objectives are placed. Objectives should usually (see Loot) be placed in the deployment area of the enemy, but this may vary depending on the objective type or the chosen scenario. Objectives must be placed at least 5cm away from any edge of the playing area or any other object (including other objectives).
Objective Markers can never be removed from the playing area. Also, they cannot be placed inside sewers or be carried inside them. If a character carrying an objective wishes to enter the sewers, the objective must stay outside.
A player cannot deploy Objective Markers within a 10cm distance of his own deployment area.
Controlling Objectives
In order to control an objective, there must be at least one miniature in base contact with it, and no other enemy miniatures may be in contact neither with the controlling character nor the objective. Consider only for this purpose the final position of every miniature at the end of the round, during the casualty phase. Also, ignore any characters that are K.O.
Each objective provides, to the player who placed and controls it, a number of Victory Points or VP. Some objectives, like Loot and Riddles, can provide VP to the enemy.
Loot (Awards 1 VP to the Player Who Controls It)
Loot Markers can be deployed at least 20cm away from the enemy deployment zone (on neutral ground). Loot can be carried by any character; to pick up the Loot, a character must Manipulate the objective. If a character wishes to move while carrying Loot, he must spend 1 MC. Characters may as well drop the Loot any time and Loot may be Stolen like a weapon.
If a character carrying a Loot Marker becomes K.O. or a Casualty, place the Loot Marker in base contact with the character where they became K.O. or in base to base contact with the miniature prior to removing it as a casualty.
Riddle (Variable VPs to the Player That Solves It)
Riddle Markers can be deployed 20cm away from the enemy deployment zone (on neutral ground). To attempt to solve a Riddle, a character must Manipulate the objective and declare its intention to try to solve it. The player controlling the character that attempts to solve must ask the opposing player to say a number between 1 and 6, and then roll a dice.
- If the result is equal to that number, the character solves the Riddle, winning 3 VP.
- If the result differs by one, the Riddle remains one more round in play, and the character that attempted to solve it, or any other character, may try again to solve it later. There is no need to say the number again as the result required to solve it will be the same.
- If the difference is greater than 1, the Riddle awards 1 VP to the player controlling the character.
- If the Riddle is finally solved by the opposing player, whatever the result, it will only award 1VP.
Whenever a Riddle awards VP to any player, remove it from the game.
Ammo Crates (3 VP to Its Owner When They Control It)
Ammo Crate Markers are considered Small Obstacles and Objectives. If a character is activated when standing in base to base contact with an Ammo Crate Marker, it may Manipulate it and obtain an Ammo Magazine (see Ammo).
A character can Manipulate an Ammo Crate Marker only once per round.
Titan Container (2 VP to Its Owner When Controls It)
The Titan Container Markers are considered Small Obstacles and Objectives. If a character is activated when standing in base to base contact with a Titan Container, it may Manipulate it and obtain a Titan Dose.
A character can Manipulate a Titan Container only once per round.
Titan Dose (One Use Only)
If a character has a Titan Dose, they may use it during the Raise a Plan phase. Using it will increase all its Basic Skills values by 1 until the end of the round. A character may only take one Titan Dose during the game, since a second dose would kill him.
Phase E / Start Playing
Begin the game by stage 1 Take the Lead and follow the corresponding 4 stages.
End Game
The game finishes at the end of the round indicated in the scenario rules description or if all the opposing Bands Run Away.
Run Away
At the end of a round, if the Reputation of a Band is reduced by 70% or more (count casualty and K.O. characters to determine how much Reputation the Band has lost), the player controlling that Band must choose a character still standing and immediately take a Motivation Roll. If he passes it, he may continue playing as normal for another round, otherwise the Band flees and the game ends immediately. When a Band flees, the opposing player takes as many VP as rounds remain to be played, unless both sides Run Away during the same round.
Winning the Game and Victory Point Recount
The player with most VP at the end of the game is the winner.
At the end of each round, during the Casualty Phase, players must add any VP awarded by Objectives and/or Casualties. At the end of the game, sum up all VPs obtained during each round to determine the winner.
Casualties and first K.O. VPs. A character will award VPs to the opposing player whenever it is removed as a casualty, or the first time during the game that it becomes K.O.
| Rank | Casualty / K.O. |
|---|---|
| Leader or Band Leader | 6VP / 4VP |
| Sidekick | 4VP / 2VP |
| Free Agent | 4VP / 3VP |
| Henchman | 2VP / 1VP |
Special Traits
Traits provide the characters with various special rules. These are an exception to the basic rules and always override them. In order to benefit from a trait, the character must possess it (it will be displayed on the character's card). Also, some of the effects require you to spend a variable number of Action Counters. In these cases, the character must still have enough counters left to spend in the appropriate categories in order to trigger the effect. If there is a cost, it will usually be indicated next to the trait name on the character's card.
A character may only benefit from a trait effect during its own activation, unless otherwise specified. The only exception is the Passive effects, since they are always active.
Acrobat
The basic BMD and the JC of the Character is equal to 12cm. Also, the character does not spend any MC to move through a Difficult Obstacle or terrain, Jump or Get Up and can move through other miniatures. Characters with Acrobat also obtain the special rule Dodge.
Adaptable
At the beginning of the Raise the Plan phase, the Player controlling a Character with this Trait must choose between the Attack, Defense or Move abilities. The character receives +1 to the chosen ability until the end of the round.
Affinity to: (Character)
A Character with this Trait can be recruited as a Free Agent by the Band of the indicated Affinity: character, even if it has the Leader or Sidekick rank and the Band already includes a character with one of those ranks.
Aggressive Schizophrenia (Mental Disorder)
At the end of the round, this character must be closer to any other character (friend or foe) than it started, until it is in base to base contact with any other miniature. The character must also attack the closest character (friend or foe) if it can.
Air Support (3SC)
Place the Explosive Template (Circular) anywhere on the table. During this Round the area under the template is considered to be under the effect of Light.
Amphibious
This character does not spend MC to move through Difficult Terrain provided the Difficult Terrain element is mainly composed of water.
Arrest (1MC + 1SC)
When in base contact with a K.O. miniature, the Character with this trait may remove the K.O. miniature from game as Casualty.
Bat-Armor Mk1
Roll a dice for each hit you suffer. On a result of 5+ the impact is ignored.
Bat-Armor Mk2
Roll a dice for each hit you suffer. On a result of 6+ the impact is ignored.
Bat Cape (1SC)
Spending 1SC, the Character cannot be damaged or knocked down as a result from Jump or Fall. Bat Cape can be used as a passive skill.
Batclaw (1SC+1MC)
Using this trait allows the Character to move to a point as far as 30cm from him. Follow this procedure in the established order to use the Batclaw:
- Draw a straight line between the character's starting position and the final position.
- This line must be free of obstacles and can't go through any solid terrain element.
- However, it allows the character to pass through any gap that he could usually pass through.
- The Miniature must be able to stand at its final position.
- Using the Batclaw automatically counts as the Character's BMD. However, the Character may move as normal spending MC before or after using the Batclaw.
- The Batclaw movement cannot be used if the character moves through the same surface.
Bipolar (Mental Disorder)
Roll a die or flip a coin at the beginning of every round. If the result is even/heads this character gets 1 extra Action Counter, if it is odd/tails it loses one.
Bloodthirsty (Mental Disorder)
During the Raise a Plan phase, if this character has accumulated at least a Damage Marker of any kind, he gains 1 Free AC. (This AC will count for the maximum counters the character can award to the Attack Ability).
Bodyguard (1SC Passive)
If a character with a Leader or Sidekick rank within a 5cm range of the character is hit by an attack (of any kind), the Bodyguard Character takes the hit instead.
Brutal
This Trait allows the character to reroll the Collateral Damage die, but the second result will have to be taken.
Bulletproof Vest
Firearms Weapons require a 4+, instead 2+, to Damage a Character with this TRAIT.
Cannibal
If during the round a Character with this Trait is in base to base contact with a K.O. character (friend or foe), it must make a Motivation roll immediately before doing anything else, provided that it still has AC to spend. If it succeeds, it may play the round normally, but if it fails, the character must spend immediately 2 Action Counters to Devour the K.O. character. If the character doesn't have enough counters, it must remain stationary until next round to try to Devour the K.O. character again. A Devoured miniature is taken as a Casualty immediately.
Catcher Gear
This character ignores the rules Tough when attacked.
Charismatic
This Character's Band can align 1 Free Agent for every 100 Reputation points, instead of the usual 150.
Claws
This Character's Unarmed attacks inflict Damage (Injury and Stun).
Climbing Shoes
This character does not need to spend MC to Climb and his climbing movement will not be considered Disabled. Also, if the Character spends 1SC, it may finish its movement at any point, even on the side of a wall. Make clear to the opposing player the exact point if the miniature cannot stand.
Combo: Weapon
For every 2 AC spent using the Combo: Weapon, this character may Strike 3 times.
Commissioner
This Character can use Arrest spending only 1MC.
Confusion (2SC)
Once per round the Character with this Trait may choose an enemy within its line of sight and standing not farther than 20cm away from it. Reduce the target character's Attack and Defense values by 1. Also, the target won't be able to spend SC. Both effects stand until the end of the round.
Control Pheromones (3SC)
A character with this Trait may choose an enemy character within its line of sight and standing not farther than 10cm away from it. The target immediately suffers the effect: Hypnotize.
Counter-Attack (1SC) (Passive)
If this character Blocks any hit, it may make one Strike against his attacker. This counter-blow takes place simultaneously to the attack, so its effects must always be solved.
Criminal
The first time during the game that this character makes an enemy character become K.O. or a Casualty, it will receive +1 Willpower until the end of the game.
Detective
For each Detective character you have in the band, you may cancel an opponent's "pass" at the beginning of each round.
Dirty Fighter
This Character's ranged weapons obtain the rule Light.
Disarray (1SC)
Once per turn, this character may change the position of 2 Action Counters on an enemy character's Character Card. The character must be able to draw a line of sight to its target.
Discourage (2SC)
Once per turn, this character can reduce an enemy Character's Willpower by 2. This effect lasts until the end of the next Raise a Plan Phase. The character must be able to draw a line of sight to its target.
Distract (1SC)
Once per round, you can choose a character within the character's line of sight and no farther than 10cm away. The target reduces his Defense by 1 until the end of the round. This effect is not cumulative.
Dodge (Passive)
This character may spend MC to avoid Ranged Attack Impacts. Each MC spent this way allows the character to make an Agility roll. Each success cancels an impact.
Elite: Type
Your band can only include 1 Elite character of each Type.
Elite Boss: Type
Your Band can align any number of Elite characters of the same type as the Elite Boss.
Elusive (1MC Passive)
This character may spend 1MC to get a +1 bonus to Defense against ranged attacks. This effect doesn't stack.
Expert Marksman (1SC)
This character's targets have a -1 penalty to Blink! Rolls.
Explosive Gel
If a character with Explosive Gel manipulates a lamppost, sewer or urban furniture, place a Gel marker on it. During any subsequent rounds this character may choose to destroy the marked item and remove it from the game spending 1SC.
Fast
When spending MC to move, the character may repeat the roll. The second result must be accepted.
Flare
A character with a flare may use it as if he was manipulating an object. If he does so, all the playing area will be under the effect of Light until the end of round.
Follow Me! (1SC)
All the Henchmen within 10cm of this character obtain 1MC for free. This TRAIT may be used only once per round.
Football Gear
This character ignores the rules Sharp and Tough when attacked.
Good Aim (1SC)
This character ignores the Aim rule with ranged weapons.
Gunman (1SC)
Can attack twice during the same round with ranged weapons. Each Attack must be paid for as usual. Each Attack consumes ammunition magazines as usual.
Handyman
This character does not have to spend MC to Manipulate.
Hardened
Each round, the first Damage marker (Stun) inflicted on this character becomes a Damage marker (Injury).
Hates: Band/s
This character may not be aligned with the specified Band/s.
Henchman (Rank)
You may include any number of Henchmen and Henchmen-Minion in your Band. All Henchmen can benefit from the special rule Let's Go!. Some Henchman can be aligned more than once in the same band. This will be indicated with a "*" next to the Henchman rank.
Hidden
This character may be deployed anywhere in the playing area, but always more than 10cm away from any objective.
Hockey Gear
This character ignores the rule Sharp when attacked.
Immortal
Removing this character as a Casualty grants VP to the opponent as if he was K.O. instead.
Informer
As long as this character is on the gaming area, and provided it's not K.O., you can Pass one additional time during the Execute the Plan phase.
Insensitive
This character does not reduce the number of Action Counters he generates if he accumulates Damage markers.
Inspire (1SC)
All Henchmen of this character's band within 10cm from him obtain 1 Action Counter. INSPIRE can be used only once per round.
Judgement
When this character makes an enemy character become K.O., flip a coin: if the result is "heads" remove it as Casualty.
Kaos Agent
Before the start of the game, remove 1 of the opponent's die or counter from the bag or container you use to Take the Lead. This can make the game end before the established minimum number of rounds. All the Henchmen of this Character's Band obtain the Trickster Special Rule.
Kevlar Vest
Reduce 1 Damage Marker whenever this character receives damage, to a minimum of 1.
Kill Them! (1SC)
All Henchmen of this character's band within 10cm from him get 1 AC. KILL THEM! can be used only once per round.
Lantern (1SC)
If this character is not in contact with an enemy miniature, it can illuminate (see Light) an area of 10cm diameter around him like a Lamppost until the end of the round.
Large/Big
These characters are usually twice the size of a standard human, so they come mounted on a bigger base and have some special rules.
A Big Character's BMD is 12cm. If it Falls and Springs into the Air they only receive Damage per every 10cm difference from its JC, instead of every 5cm. It cannot be Pushed or Grabbed, and cannot be Knocked Down except by attacks and weapons that also have the special rule Big. Big Characters suffer a -1 penalty on all their Blink! Rolls. Big Characters also obtain the special rules Tough and Charge.
Laser
A character with a Laser may manipulate it. If it does so, he may point a character within his line of sight and to which it may trace a straight line. The target will be considered under the effect of Light until the end of the round. If the straight line becomes interrupted by any means, the target won't be under the effect on Light anymore.
Leader (Rank)
You can only include 1 Leader in a band and that character must always be the Band Leader. Its Band's Henchmen within 10cm can use the rule Let's go! without spending SC. Leaders can use Inspire and reroll a Willpower roll, but you must always accept the second result.
Let's Go! (1SC Passive)
When a henchman from the same band ends its activation, roll a dice. On a 4+ result, you may activate another henchman from the Band, who has not yet been activated and has the LET'S GO! rule. That Henchman immediately activates without giving the opposing player the chance to activate one of his miniatures in between. Any subsequent uses of the Let's Go! rule get a cumulative penalty of +1 to the difficulty. A result of 6 is always a success.
Lord of Business
A Band led by this Character has $500 more to spend when arranging the band, and may take an additional Objective: Loot.
Lord of the Sewers
Killer Croc does not count towards the limit of miniatures that can be in the Sewers at the same time. Killer Croc may start the game inside the Sewers but he must remain there for at least one turn. His Band generates 1 extra Sewer Marker.
Luck (1SC)
Spending 1SC allows this character to re-roll any dice that affects the character directly. He may also force the opponent to reroll Impact rolls against him.
Martial Artist
This character ignores the Numerical Inferiority rule.
Masterfighter
This character gets a +1 bonus to Impact rolls when attacking Unarmed.
Master Marksman
This character can reroll Impact rolls when shooting. The second result must be taken.
Mastermind
Before the start of the game add 1 die or counter of your band to the bag or container you use to Take the Lead.
Mob
All Henchmen in the Band of this character obtain a +1 bonus when rolling for the Let's Go! rule.
Mobster
When attacking an outnumbered character in close combat, this character receives a free extra attack against the outnumbered character.
Night Vision
This character may See at any distance.
Obsessive (Mental Disorder)
When this character attacks an enemy character, it must continue attacking him (cannot change target) until the enemy character becomes K.O. or a casualty. This character also obtains a +1 bonus to Strength against that enemy character.
One-Armed
This Character suffers from a -1 penalty to Block rolls.
One Shot Gun (2AC + 2SC)
Once per game, instead of attacking, this character may choose an enemy character within its line of sight within 20cm. The target automatically receives one hit with Strength 2+, Damage (3 Injury) and CRT: Casualty.
Order (1SC)
This character may use ORDER on a friendly character in its vision line. The chosen character can immediately redistribute up to 2 Action Counters on its Character's Card. ORDER can be used only once per turn.
Paranoid (Mental Disorder)
During the Raise a Plan stage, this Character obtains 1 free DC, provided that he has accumulated at least 1 damage marker. This DC counts towards the maximum that the character can award to the Defense skill.
Persuasive (1SC + 1AC)
If this character can See an enemy, at the end of this character's activation, he may force the target to be activated, but only if the target hasn't been activated yet this round.
Pickpocket
This character may Manipulate while in base to base contact with a K.O. and thus obtain the rule Steal.
Poison Master
To remove Poison markers inflicted by this character, the poisoned character must roll 3 dice instead of 2 and ignore the lowest result.
Power Armor
This character ignores the first 3 Damage Markers inflicted on him. Once 3 Damage Markers have been ignored, the armor can't be used again until repaired. During the Casualty Recount Phase, instead of making a Recovery Roll, this character may spend 2SC to repair the armor, making it operational again. This armor is vulnerable to Fire, so each Fire marker received causes Damage (2 Injury).
Puzzle Master
The Riddler always obtains 3 VP when trying to solve a Riddle Marker. The enemy can't reroll their attempt when they fail to solve a Riddle if the Riddler is in play.
Primary Target: Type
Before starting the game, you must choose 1 Objective of the indicated Type. If this character controls it, it awards 1 additional VP.
Psycho
This character's Willpower is never altered under any circumstance or the effect of any rule.
Psychologist
This character automatically solves a Riddle without rolling the dice. He can also perform Psychoanalysis.
- Psychoanalysis (1SC): Cancels all the special rules labeled as "Disorder" of any character within his line of sight and no farther than 20cm away, until the end of the round.
Rapid Fire (1SC)
When using a ranged weapon, this character gets +1 Bonus to his weapon's Rate of Fire, even if he moves.
Reflexes
This character can reroll failed Agility rolls, but the second result must be used.
Reinforced Gloves
This character's Unarmed attacks inflict Damage (2 Stun).
Resilient
This character can reroll failed Endurance rolls, but the second result must be used.
Retractable Claws
This character's Unarmed attacks inflict Damage (Injury and Stun) and are considered Sharp (see Weapons).
Runaway
This character is Immune to Arrest.
Scheming (X)
If this character is in the Band that Raises the Plan first, it can always make X number of characters Raise their Plan after the enemy.
Scientific
This character's Special Characteristic is 4 instead of 3. If this character is removed as a casualty, he awards one additional VP to the enemy.
Searcher
Before the game starts, subtract 1 Strategy point from your opponent.
Shooter
This character ignores 1 obstacle that would force a Blink! roll with each shot he makes. Choose the obstacle to be ignored before making any Blink! rolls.
Sidekick (Rank)
You can only include 1 Sidekick, unless you choose a Sidekick as your Band Leader. In that case, you may include a second Sidekick. Henchmen of the Band, who are within 20cm of this character may reroll the roll for Let's go!.
Small
This character's BMD is 8cm. He also benefits from a +1 bonus on Blink! Rolls.
Stealth
Enemies can only See this character if he is within 20cm. However, he can be Seen by other rules like: Light, Total Vision or Superior Smell...
Stop! / Halt! (1SC Passive)
A character using this TRAIT may interrupt the activation of an enemy character that he can See, and prevent the use of MC.
Strategist / Grand Strategist
A character with Strategist receives 1 additional Strategy point and Grand Strategist receives 2 additional Strategy points at the beginning of the game.
Street Guy
This character may Crouch without spending SC.
Stupid
This character cannot Manipulate under any circumstance.
Sturdy
This character generates 1 less Action Counter for every 3 Damage Markers accumulated, instead of 2.
Superior Smell (1SC)
This character doesn't need an uninterrupted straight line to See his target. Anything within 40cm can be Seen by this character, even if the target is not under the effect of light. The character is also immune to Blind effect.
Sustained Defense
This character may roll 3 Block dice for every 2DC spent.
Take Cover! (1SC)
Henchmen in this character's Band within 10cm of him, obtain 1 free DC. Can be used only once per turn.
Tension
This character obtains a +1 bonus to his Attack and Defense values when he has been inflicted at least one Damage Marker.
Tireless
This character can Run spending only 1SC.
Titan Addict
This character may use a Titan Dose more than once per game, but not more than once per round. If, at the beginning of the round, this character can See a Titan Container marker, he must move all its available movement straight towards the marker. The character may resist its urge by spending 1 Action Counter of its choice.
Titan Dose (One Use Only)
If a character has a Titan Dose he may use it during the Raise the Plan phase. If it does so, the character obtains +1 to all the values of its Basic Skills during this round. A character may only use one dose per game, as a second one would kill him.
Total Vision
This character benefits from the Night Vision trait. Additionally, his line of sight can cross any obstacles or terrain element, although it may not shoot through these elements, unless the weapon has Remote Control.
Tough Skin
Damage rolls against this character always suffer -1 penalty.
Trickster
At the beginning of this character's activation, it may reposition all his Action Counters on his Character's Card.
True Love: Character
If the True Love: character and this character are in the same Band and the True Love: Character is removed as a casualty, this character obtains +1 Willpower and +1 Attack until the end of the game.
Undercover
This character may be deployed up to 20cm away from the deployment area, but must still deploy more than 10cm from an objective.
Unpredictable
This character's SC can be spent in any other skill or special rule, as a wildcard. These Counters do not count for the Maximum of the Ability limit.
Veteran
At the beginning of his activation, this character can relocate 2 of his Action Counters.
Weak
This character generates 1 less Action counter for each Damage marker it has accumulated rather than every 2 Damage markers.
Weapon Master
This character benefits from a +1 bonus to Impact rolls when it is not Unarmed.
Special Attacks
The Special Attacks will be shown on the Character Card, marked in red.
Special attacks are considered just as TRAITS under all circumstances.
During their activation, characters may attempt to make a single Special Attack against a single enemy (even if they are in base to base contact with more than one). This special attack must be declared before rolling any dice, but can be made before or after any other normal attacks. Special Attacks usually modify the effects of normal attacks, so if a character performs a Special Attack against another character, he may not Strike him again, unless otherwise specified.
To perform special attacks, the character must meet all the requirements and Action Counter costs. Many of them must be made while Unarmed or with a particular type of weapon. However, if nothing is indicated in the description, the character may choose to make it with any weapon or Unarmed.
360 Attack With: (1SC + 1AC)
This Special Attack allows the character to attack, simultaneously and in the same action, all miniatures within 3cm. This attack can only be made once per round, but the character may attack normally before or after this Special Attack, if it still has enough AC.
Charge (1MC + 1SC)
When using this Special Attack, the attacking character must move in a straight line as if he spent a MC. While moving this way, it may Strike (or Push without spending SC) any miniatures in his path, displacing them just enough to pass. At the end of this movement he may also attack normally.
Deadly Strike With: (1SC)
When hitting an enemy character with this Special Attack, this character obtains CRT: Casualty.
Devastating Blow (1SC)
When attacking an enemy character, this character obtains a +1 Strength bonus.
Electric Storm (3SC + 1AC)
When using this Special Attack, center the explosion template on the attacking character. All miniatures partially or totally under the template (except the attacking character) receive one impact with Strength 4+ and Damage (2 Stun). A character may only use Electric Storm once per activation, but it may attack normally before and/or after this Special Attack.
Lethal Blow (1SC)
If you Damage an enemy character with this special attack, that character also suffers the Stun Effect.
Power Strike With: (1SC)
If this character Hits the target with this special attack, the target will be Knocked Down automatically.
Precise Blow (1SC)
When attacking an enemy character using this Special Attack, this character benefits from a +1 bonus on the Impact Roll, and can reroll the Collateral Damage dice. The second result prevails.
Sneak Attack (1SC)
This attack may only be performed if, at the beginning of the round, the target cannot See the attacker. Target character cannot Block attacks from the character using this Special Attack.
Technique (1SC)
If a character Damages an enemy character while using this Special Attack, the target will suffer from the Knock Down effect. If he would also suffer from the Knock Down effect, due to the Collateral Damage dice result, then the target character will suffer also an automatic Impact Strength 4+ and Damage (1 Stun).
Thief With: (1SC)
When an enemy character is Hit by this Special Attack, the attacking character obtains CRT: Steal.
Weapons Special Rules
Aim
These weapons cannot be used if the wielder Moves.
Defensive
If a character carries a defensive weapon, it allows him to reroll any Block rolls. The second result prevails.
Expansive
Instead of regular weapon Rate of Fire, this weapon uses the Spray Template to determine how many miniatures are hit (see Spray Template).
Explosive
When this kind of weapon Impacts, you may place the Explosive Template over the impact point (usually the target character).
Firearm
All hits from these weapons inflict Damage on a result of 2+. Ignore the wielder's Strength.
Handy
When using these weapons, the wielder may reroll the Impact roll. The second result must be used.
Light
A character can shoot these weapons even when the target is within 5cm, the Rate of Fire will be 1 in this case.
Mechanic
All hits from these weapons inflict Damage on a result of 3+. Ignore the wielder's Strength.
Medium Range
Maximum range for these weapons is 40cm, NOT unlimited.
Protective
These weapons award a +1 bonus to any Block rolls. Furthermore, the wielder benefits from an extra Blink! roll after normal Blink! rolls have been made. This last Blink! Roll will succeed on a 4+ result.
Reach
These weapons do not require the wielder to be in base to base contact with an enemy to hit him. Instead, the wielder may strike any miniature up to 3cm away.
Reload
These weapons cannot be used for 2 consecutive rounds. In order to reload the weapon, the wielder may not use it for at least 1 round after having used it.
Remote Controlled
When using these weapons, the character needs to See the target, but does not need to draw a straight uninterrupted line to it. The weapon's maximum range cannot be exceeded in order to reach the target. Ignore all Blink! rolls when shooting a Remote Controlled weapon.
Scope
Shooting with a weapon with this rule provides the wielder with the Night Vision rule, and allows it to ignore Blink! Rolls.
Sharp
When attacking with this weapon, the character may reroll one Damage roll. The second result must be used.
Short Range
Maximum range for these weapons is 20cm, NOT unlimited.
Throwing
This weapon does not see its Rate of Fire decrease after moving.
Tough/Heavy
Using these weapons grants the attacker a +1 Strength bonus.
Templates
Explosion Template
When an attack or weapon uses an Explosive Template the attacker may place this template centered on the target (or the obstacle, in case a successful Blink! roll was made), unless otherwise specified.
All miniatures totally or partially under the template will be automatically impacted, and suffer any possible effect as per the attack or weapons description (unless the effect only triggers on Critical hits, For example CRT:Freeze).
Spray Template
When a weapon allows a Spray Template to be used, the controlling player must place the narrow end of the template in full contact with the base of the shooting character, and direct the other end in any direction he wants.
Afterwards, determine Impacts and Damage as indicated by the rule description.
All miniatures totally or partially under the template will automatically be Impacted and suffer any possible effect as per the attack or weapons description (unless the effect only triggers on Critical hits, For example CRT:Freeze). However, the impacted character may suffer different Damage and effects depending on its position inside the template.
The Spray Template has 4 range-bands, marked by stripes; the closest indicates that if there are miniatures in this area no Impact is done, the following stripes are Lethal, Serious and Mild. A miniature between 2 damage bands will always be affected by the narrowest (Damage will be specified on the weapon's description).
Effects
Blind
A character suffering from Blind cannot See, cannot attack with a distance weapon and his Impact and Block rolls will only succeed on a 6+ result. The character won't be able to spend MC, and, furthermore, all his movement will be considered disabled until the effect is removed.
Cooled
Inflicts the Paralyze effect until the end of the round.
Displaced / Pushed
The target is displaced directly away from the attacker as many centimeters as the result on the Collateral Damage dice. If the target can't be Displaced the corresponding distance because a terrain element is in its way, it will immediately suffer an Impact with Strength 4+ and Damage (1 Stun). If the Target is displaced into a hole or off a roof, etc., take it as if it had SPRING INTO THE AIR.
Enervating (X)
The target immediately loses "X" Action Counters if successfully Damaged.
Fire
If a character is affected by fire, place a fire marker next to the miniature. If a character has two or more fire markers it will automatically suffer a Damage marker (Injury) for each fire marker. Spending 2 Action Counters allows the character to remove 1 fire marker. At the end of the round, if a miniature has at least 1 fire marker, it will receive an additional fire marker.
Flash
Inflicts the Blind effect until the end of the round.
Freeze
Inflicts Paralyze effect, until an Endurance roll is passed. The target may only start to roll at the beginning of the next round.
Hypnotize
Any character affected by Hypnotize must pass a Willpower roll. If it fails, it will become completely under control by the player who controls the Hypnotizing character until the end of the target's next activation.
Immobilized / Pinned Down
Place an Immobilized marker next to the immobilized/pinned down miniature. It cannot move or spend MC, and its Attack value will be reduced by -1, until the effect is cancelled.
Knock-Down / Fallen
A knocked down figure must lay on the ground (or place a fallen marker next to the miniature) at the same spot that it was Knocked Down. A fallen miniature cannot Attack or Defend itself, and it cannot use any Special Ability until it stands up. A character may move while knocked down, but this movement will be Disabled. A fallen figure will always be Impacted on a roll of 2+. A Knocked Down character doesn't count for Blink! when shooting through or above it.
Paralyze
Place a Paralyze marker next to the affected miniature. A paralyzed character reduces his Defense value by -2 and cannot do anything (move, attack, defend itself, follow special rules, or spend action counters) until the effect is cancelled.
Poison
The Poison effect will be inflicted at the same time as any other effects, as shown next to the each poison type listed. If a character has several poison options they may choose, he must pick just one before making a poisoned attack. If a character is affected by poison, place a poison marker next to the character and resolve the poison effects immediately. At the beginning of its next activation, the character must make an Endurance roll. If the roll fails, the poison effect will be resolved again and so on, until the roll is passed. Take the test once per poison counter per activation. A character may be affected by more than one poison at the same time, but the same effect cannot be applied more than once on the same character.
Shock / Stunned
A Stunned character cannot spend Action Counters until the end of the round.
Smoke
An area affected by smoke will not allow characters to See through it, and characters inside it will suffer Blind until the end of the round. Smoke dissipates at the end of the round.
Steal
A character with the corresponding ability may attempt to Steal a weapon from another character (if the target character carries more than one weapon, choose randomly which one is stolen, either by rolling a dice or flipping a coin). From that moment on, the stealing character will be able to use that weapon afterwards. A stolen weapon cannot be used by its previous owner unless it gets it back. A character may carry just one stolen weapon at a time, but it may try to steal different weapons in subsequent turns. If a character steals more than one weapon, it needs to choose which one of them he would like to keep and destroy the rest (destroyed weapons will no longer be available to use by any character for the rest of the game).
Toxic (X)
The target instantly receives "X number" of Damage Markers (Injury).
Select Your Scenario
Batman Miniature Game scenarios are quite simple to set up: check the "Phase A: Scenario Selection" of the game preparation section. Remember: you must choose a scenario before bringing any Strategy into play.
Players may choose a specific scenario to play, or they can randomly select one. Also, feel free to design your own scenarios. Roll a die to randomly select a scenario:
- Chance Encounter
- Plunder
- Patrol
- Skirmish
- Securing the area
- Ambush
Each scenario has specific objectives and special deployment rules that players must follow.
(Each scenario's deployment map is a printed map of Gotham City; the deployment areas shown on it are described in words below.)
Scenario: Chance Encounter
Bands go across the city, to undertake a special mission. They suddenly come across each other and the battle begins...
Scenario Special Rules: Game length: 8 rounds (Take the Lead: 4 counters per player).
Objectives: All objectives must be placed in the central zone (see image), which is considered as the enemy objective deployment zone.
Bonus VPs:
- Hurry up, take it all!!! 3VP awarded to the first player who controls one of his own objectives (if both players achieve it during the same round, both will be awarded 1VP).
- First Strike!! 1VP awarded to the first player who makes an enemy miniature become K.O. or a casualty.
Deployment: The map shows a 30x30cm deployment area of all targets in the centre of the playing area, and numbered table edges (edge 2 at the top, edge 3 on the right, edge 4 at the bottom, edge 5 on the left; printed on the map as "Borde" 2 to 5).
- All miniatures start the game outside the playing area. At the beginning of each round, roll a die separately for each miniature still outside, and place the miniatures on the corresponding table edge according to the die result (see image).
- On a result of 1, the miniature doesn't arrive, but may try again next round.
- On a result of 6, the player may choose the edge.
Scenario: Plunder
Two bands struggle to recover a supply shipment... which band will get out with the loot?
Scenario Special Rules: Game length: 6 rounds (Take the Lead: 3 counters per player).
Objectives: All objectives must be placed in the central zone (see image), which is considered as the enemy objective deployment zone.
Bonus VPs:
- The more the better!!! 4VPs awarded to the player who first controls 2 objectives at the same time during the Objective Control Stage (0VP awarded if both players achieve this during the same round).
- It's Mine!!! 1VP awarded to each player who controls at least one of his own objectives, at the end of the last round.
Deployment: Band Deployment A is a 10cm strip along one table edge and Band Deployment B is a 10cm strip along the opposite table edge. The central 30cm strip across the middle of the table is the deployment area of all targets (objectives).
Scenario: Patrol
Bands patrol their territory to prevent any enemy intruders to trespass it.
Scenario Special Rules: Game length: 6 rounds (Take the Lead: 3 counters per player).
Objectives: Follow the basic rules.
Bonus VPs:
- Diversion... 3 VP awarded to any player, if one of his Band's miniatures (the Band Leader doesn't count for this) is standing inside the enemy deployment zone at the end of the game (ignore K.O. characters).
- Let's make some noise... 1 VP awarded to the first player who Hits an enemy, regardless of the result.
Deployment: Band Deployment A and Band Deployment B are triangular corner zones in opposite corners of the table, each measuring 30cm along both table edges that meet at the corner.
Scenario: Skirmish
Two bands fight just to see who is best.
Scenario Special Rules: Game length: 6 rounds (Take the Lead: 3 counters per player).
Objectives: Follow the basic rules.
Bonus VPs:
- Bring me their leader's head!!! 3VP awarded to any player if the opposing Band's Leader is K.O. or a casualty at the end of the game.
- Teach them a lesson!!! 2VP awarded to any player if the casualties of the enemy Band equal 50% or more of the total band reputation, at the end of the game (rounding down).
Deployment: Band Deployment A is a 20cm strip along one table edge and Band Deployment B is a 20cm strip along the opposite table edge.
Scenario: Securing the Area
Bands struggle to expand their territory at any cost.
Scenario Special Rules: Game length: 8 rounds (Take the Lead: 4 counters per player).
Objectives: Each player must place, at least, one objective inside each of the enemy deployment zones, and another one in the central zone (check image).
Bonus VPs:
- Hurry up, take it all!!! 3VP awarded to the first player who controls one of his own objectives (if both players achieve this during the same round, 1VP will be awarded to both).
- Teach them a lesson! 2VP awarded to any player if the casualties of the enemy Band equal 50% or more of the total band reputation, at the end of the game (rounding down).
Deployment: Band Deployment A consists of two triangular 20cm corner zones in opposite corners of the table; Band Deployment B consists of the two other opposite corners (also 20cm). A 30x30cm central zone is where each band deploys at least 1 objective. Each player must deploy one Group inside one of his deployment zones (check image). Then, both must deploy their second Group inside their other deployment zones.
Scenario: Ambush
A Band caught its enemy by surprise...
Scenario Special Rules: Game length: 8 rounds (Take the Lead: 4 counters per player).
Objectives: B Band must place, at least, one of its objectives inside each of the enemy's deployment zones.
Bonus VPs:
- Bring me their leader's head!!! 3VP awarded to any player if the opposing Band's Leader is K.O. or a casualty at the end of the game.
- First Strike!! 1VP awarded to the first player who makes an enemy miniature become K.O. or a casualty.
Deployment: Band Deployment A consists of two 10cm strips along opposite table edges; Band Deployment B is a 10cm strip across the middle of the table. In this scenario, one of the Bands must be the Attacker or A. This will always be the Band with the most characters in it. However, if both Bands contain the same number of miniatures, flip a coin. The winner decides which Band will be the Attacker. The Attacker must deploy one of his Groups inside each of his deployment areas. Defender Band or B Band will deploy inside its own deployment area (check image).
Templates and Markers
The end of the rulebook provides cut-out Spray and Explosion templates (the Explosion template is a circle; the Spray template is a wedge with bands labelled Mild, Seriously and Lethal) and printed sheets of Markers (damage and effect markers, Seed markers, and numbered Creeper Plant and Spore Plant markers). These are components only; no rules text appears on them.