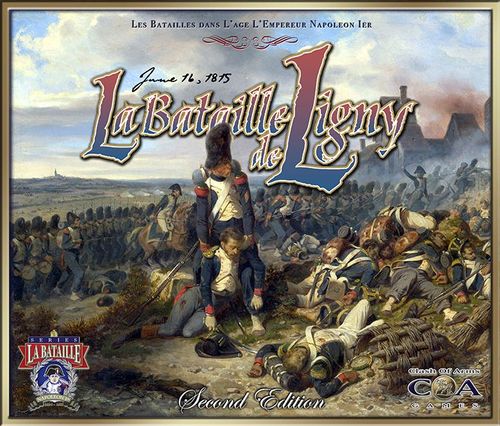
La Bataille de Ligny
La Bataille de Ligny Rulebook
Table of Contents
Table of Contents
- Part One: Standard Rules (Règlement des Marie-Louise)
- 1.0 Introduction
- 2.0 Rules Questions
- 3.0 The Game Equipment
- 4.0 Game Scale
- 5.0 The Playing Pieces
- 6.0 The Dice and Charts
- 7.0 Sequence of Play
- 8.0 Command
- 9.0 Facing
- 10.0 Zones of Influence
- 11.0 Stacking
- 12.0 Tactical Organizations
- 13.0 Movement
- 14.0 Line of Sight (LOS)
- 15.0 Fire (Feu)
- 16.0 Assault
- 17.0 Losses
- 18.0 Artillery
- 19.0 Cavalry
- 19.1 Cavalry Charges General Rule
- 19.2 Cavalry Charge (Charge à Cheval)
- 19.3 Enemy Reactions to Charge
- 19.4 Retreat Before Charge by Infantry
- 19.5 Retreat Before Charge by Cavalry
- 19.6 Rolling To Stand Versus Cavalry Charge
- 19.7 Forming Square
- 19.8 Cavalry Recall
- 19.9 Cavalry Mêlée
- 19.10 Cavalry Advance after Charge/Mêlée
- 19.11 Pursuit
- 20.0 Morale
- 21.0 Dusk and Night
- Part Two: Exclusive Rules for La Bataille de Ligny II
- Appendix: Charts (Ligny II, 2016 Edition)
Part One: Standard Rules (Règlement des Marie-Louise)
Note on numbering: this Part reproduces the section numbers of the official Règlement des Marie-Louise booklet exactly as printed (1.0–20.x), independently of Part Two's own 1.0–13.0 numbering, since the two are separate physical booklets in the real game and cross-refer to each other by these numbers.
1.0 Introduction
The Règlement des Marie-Louise may be used with all games in the series Les Batailles dans l'Âge de l'Empereur Napoléon Ier. This rulebook is intended to be a guide to tactical warfare in the early Nineteenth Century. If a player wishes to perform an action that is not covered in these rules, or if he is unsure as to its verifiability in these rules, then that action should be considered illegal.
2.0 Rules Questions
Send questions or comments to the following address:
Clash of Arms Games 1804 Hoffmansville Road PO Box 212 Sassamansville, PA. 19472-0212
Or e-mail us at: [email protected], "Attention: Rules Questions La Bataille"
Readers can also try the La Bataille forum on ConsimWorld at http://www.consimworld.com.
Copyright © 2013 Clash of Arms Games. November 1, 2013. Revision: 3.
3.0 The Game Equipment
An inventory of the contents of each game is given on the back of the game box. If any of these parts are missing or defective please write to the above address for replacements.
3.1 The Organizational Displays
The Organizational Displays have been organized to show players the command relationships between combat units and their leaders. This is important when determining command status during play. As units and leaders are eliminated through casualties or surrender they are returned to the Organizational Display and placed face down.
3.2 The Passage of Time Recorder
The Passage of Time Recorder is used to keep track of the various game turns. The Game Turn Marker should be placed in the space appropriate to the turn currently in play. Each hour is subdivided into three turns: The O'clock (:00), the :20, and the :40. This chart also includes a summary of the Sequence of Play, which is discussed later in these rules.
3.3 The Assaut et Mêlée/Combat à Feu Charts
This chart is back-printed with the Assaut et Mêlée Chart on one side and the Combat à Feu (Fire Combat) Chart on the other. The use of these two charts is discussed under their appropriate headings later in this rulebook.
3.4 Exclusive Rules
Each game may come with a set of Exclusive rules outlining the scenarios and rules particular to that game. The Exclusive Rules take precedence over the rules herein.
4.0 Game Scale
The exact game scale may vary from game to game. In general, each hexagon (hex) represents an area roughly 85 to 115 meters across. Each turn represents a period of 20 minutes. Each Increment of strength represents roughly 100 infantrymen, 50 cavalrymen and their horses, or a section of artillery (2-4 guns depending on their national doctrine, effectiveness, efficiency and economy).
5.0 The Playing Pieces
5.1 Combat Units
Front Side: The color (front) side of a combat unit counter shows the type of unit (infantry, cavalry or artillery), its tactical organization (whether it is a regiment, battalion, or company/squadron), appellation (which regiment, battalion or company/squadron it is and to which corps, division or brigade it belongs), as well as its starting strength and its Movement Potential. For purposes of this game series, the terms battery or artillery company are interchangeable and correspond to a single artillery counter.
- ••• Infantry or Cavalry Regiment
- •• Infantry Battalion
- • Infantry Company, Cavalry Squadron or Artillery Company/Battery
Reverse Side: The reverse side of the counter (its black and white side) reveals specific information about the unit. To simulate the Fog of War an opposing player may view only the general (color) side of a counter. Lastly, the specific sides of all counters belonging to the Foes of Napoleon are tinted gray in order to facilitate set-up.
Combat units come in three types: Infantry, Cavalry, and Artillery, each with a distinct front and reverse counter design as described above.
5.2 Leaders
Leaders represent the interjection of personality at an immediate place and time on the game map. Leaders are not considered to be Combat units.
The general side of their counter displays uniform and rank, Movement Potential, and his place in the chain of command. The specific side of the leader counter tells us who he is and how his presence with combat units will affect their performance by modifying dice rolls that concerns them.
NOTE: In some cases a leader may have differing mêlée modifiers for attack and defense. These have the form of two numbers separated by a slash, such as 2/3, indicating a modifier for attack of +2 and a modifier for defense of +3. Occasionally players may even encounter leaders that have negative values. These leaders adversely affect the units they are stacked with by subtracting from the specific roll of the dice.
5.3 Informational Markers
These show the effects of combat upon the combat units they mark, or the manner by which a combat unit reacts to what is going on around it. Informational Markers are part of the combat unit they are stacked with and are only removed when the situation that incurred their use has changed.
- Number Markers: Number markers are used to indicate the current number of casualties accrued by a combat unit or to indicate the Roll to Close distance for an Assault or an Old Guard Charge. When casualties occur a marker reflecting that amount is placed beneath the combat unit counter. Further losses to this same combat unit are recorded by replacing this marker with one stating the new total.
- Disorder and Plus Grande Désordre (Routed): All combat units begin the game in Good Order. Markers are used to show that the unit is no longer in Good Order, but in one of two states of Disorder.
- Exhausted: Cavalry units begin the game "Ready" (no marker). Whenever a cavalry unit performs certain actions an Exhausted marker is placed on top of it to show the current status of its horses.
- In Square (en Carré) Formation: When an infantry combat unit is in Square one of these markers is placed on top of it.
- Road Column: Combat units deployed so as to take advantage of movement on or along a road or trail have this marker placed on top of them.
- Assaut Markers: Infantry combat units that are assaulting are tagged with this marker indicating that they must attack the enemy combat unit it points to in the forthcoming Assault Segment.
- Charge Markers: Cavalry units that Charged are marked with this counter to show that they have already moved and conducted Mêlée this turn.
- Maneuver Units (MUs): This marker is placed upon a leader counter during the Command Segment to indicate that it is available for movement that turn. A duplicate marker (with the same number) is placed in the draw cup. When this marker is drawn from the cup the leader and all units and/or leaders under his command (all units and leaders comprising the Maneuver Unit) are activated (see 8.4).
6.0 The Dice and Charts
The system requires the use of two six-sided dice of different colors. One is designated as the first digit, while the other as the second digit. A roll of these dice thus affords thirty-six possible results and is read off as whole numbers from 11 to 66. The Assaut et Mêlée Chart conceptualizes these thirty-six possible results by breaking down their left hand columns accordingly into six major sections representing the first die result, which are in turn broken into six subsections representing the second die result.
6.1 Modifying Dice Rolls
When modifications to a roll of the dice are called for, they are given in base 10 (as opposed to the base 6 determined by the sides of the dice). If a dice roll of 35 was modified by +9 the player would start with 35 then count up nine for the modified result (count up starting with 36, 41, 42, 43, 44, 45, 46, 51, and 52).
7.0 Sequence of Play
7.1 Command Segment
- Command Point Phase: Each side determines the number of Command Points (CPs) they have for the coming turn. Consult the scenario rules in the Exclusive Rules to determine how many Command Points each side receives. For more information on Command see Rule 8.0.
- Command Tracing Phase: The interrelationship between Army leaders, Corps leaders, Aides-de-camp, Division leaders, Brigade leaders and their combat units are determined. Every unit and leader on the game map is determined to be either In or Out of Command. Units and leaders can only be placed In Command during the Command Segment. Thus units which are Out of Command during the Command Segment will remain Out of Command for the duration of the current turn. Units which are In Command may lose their In Command status due to enemy actions (8.4.3.5).
- Division, Corps and Army Assets: Assign Division, Corps and Army Assets to leaders (8.4.3.3). Division, Corps and Army Assets are units, such as cavalry units, artillery or sapper units, which may be assigned to subordinate leaders. Hereafter they may be simply referred to as Assets.
- Maneuver Unit (MU) Creation Phase: Command Points (CPs) are spent to create Maneuver Units (8.4). For every CP a side has, it may create one MU. Sides alternate creating MUs, with the side with the most CPs going first. In the event of a tie roll the dice to determine who goes first. As each MU is created, the leader of the MU is marked with a MU marker and the duplicate chit of this MU marker (with the same number) placed into the draw cup.
- Light Cavalry Initiative: After all CP's have been spent by both sides, light cavalry leaders who are eligible may roll for initiative (8.5).
- Action Chits: After all MU markers that can be created for both sides have been placed into the draw cup, all Action chits are also placed into the cup.
7.2 Maneuver Segment
Players alternate drawing chits from the draw cup. Chits are drawn randomly. If the chit drawn is a MU then the MU it represents becomes active and all parts of it may move at this time. If the chit drawn from the draw cup is an Action chit, then all actions particular to that chit are executed. No further chits are drawn from the cup until all activity associated with the current chit, or in the case of an active MU, all units and leaders belonging to that MU's movement, cease. As leaders move flip them to their specific side to indicate they have moved this turn. When the draw cup is empty the Maneuver Segment ends.
At the end of the Maneuver Segment flip all leaders that moved back to their general side.
7.3 Fire Combat Segment
All units that can conduct a Fire Attack and that have a target within their Line of Sight and Range, now fire. Artillery units must be unlimbered in order to make a Fire Attack. All Fire Attacks are considered simultaneous, and as such, losses incurred due to fire combat do not affect the unit's ability to return fire in the same segment at the strength with which it began the segment.
7.4 Assault Segment
Assaults are resolved. The side with the most Assaut Markers currently marking Assaults on the game map resolves an Assault first, thereafter Assaults are resolved alternating side to side. In the event of a tie roll the dice to determine who goes first. As Assaults are resolved the Assaut Markers are removed. When all Assaults have been resolved, the Assault Segment ends.
7.5 Reorganization Segment
- Recovery from Disorder: Units in Disorder that are not adjacent to enemy combat units make Morale Checks to recover Good Order (see Morale, below).
- Recovery from PGD: Units in Plus Grand Désordre (PGD) may possibly be compelled to Rout or attempt to recover Good Order.
- Morale Level Determination: Morale Levels are determined every hour in the Reorganization Segment of the :40 turn.
- Cavalry Readiness Recovery: Exhausted cavalry, which do not have a Charge marker, may possibly recover Readiness at this time.
- Administrative March Completion: Remove any Administrative March MU (8.7) markers which are already flipped over. MUs making an Administrative March whose leader reached the destination hex this turn, now flip their MU markers over.
- House Keeping: Remove Charge markers from units; flip leaders who have moved back to their general side; remove flipped Prone Markers from units which stood up during the Maneuver Segment.
7.6 Turn Adjustment Segment
After the preceding segment has been completed the game turn ends. Advance the Passage of Time Recorder. If this is the last turn of the game, victory is determined at this time and a winner declared.
8.0 Command
The command system consists of three components: leaders, Command Points (CPs) and Maneuver Units (MUs). In short, leaders command the MUs purchased with the CPs awarded in the Command Segment. Maneuver Units are not a representation of command. They are an abstract means by which movement is randomized. Command Points are a representation of an army's ability to effectively maneuver in the face of the enemy. The more leaders on the field of battle with rank sufficient to impel the men to Maneuver, the better able that army will be to act decisively. The Organizational Displays show the command structure of each army on the field.
8.1 Leaders
Leaders represent the leader himself plus any attendant staff which accompanies him.
- Stacking: Leaders themselves do not have a stacking value and any number may stack in a hex. When stacked with a leader, all units in the hex benefit from the leader's bonuses. Leader bonuses are in effect at all times. For instance, a stack that is PGD and containing a leader involuntarily moves through a hex containing a friendly unit in Good Order. For that brief moment, when the stacking violation Morale Check is made, the units in Good Order in the hex benefit from the leader's Morale Bonus.
- Movement: When a leader completes his movement flip the counter over to its specific side indicating the leader may not voluntarily move again this turn. When the Reorganization Segment is over flip all these leader counters back to their general side.
- Line of Sight: Unaccompanied by units, leaders never block LOS.
- Capture: Leaders never in any way inhibit the movement of friendly or enemy combat units. If enemy units enter its hex the leader will "fly" to the nearest hex containing a friendly unit (just pick him up and move him there). Leaders can only be captured when the units they are stacked with surrender (a DS result on the Assaut et Mêlée Chart), or are reduced to zero increments, or are forced to Rout while the hex they are in is completely surrounded by enemy units, or an enemy unit enters the leader's hex while the hex they are in is completely surrounded by enemy units. Leaders may move through hexes solely occupied by enemy leaders. However, they may not stop in these hexes.
- Leaders and Movement with Other Units: Leaders may assume the Movement Potential of the units they are stacked with as long as they began the segment stacked with that unit. Regardless of the difference between the unit's and the leader's natural Movement Potential, a leader may accompany that unit for the duration of its Maneuver.
- Leaders and Rout Movement: Leaders which are stacked with units who become PGD must accompany those units the instant they conduct their Rout movement and must remain with them throughout the first turn of Rout movement. On subsequent turns the Leader may move away from the PGD units during the Leader Action Chit.
8.2 Leader Casualties
Leaders may never be the targets of Assault, Mêlée or Fire Attacks. They are "inadvertently" wounded or killed as a result of combat that they are involved in. Whenever a natural (unmodified) 64, 65, 66 is rolled on the Assaut et Mêlée Chart, or a 65 or 66 is rolled on the Combat à Feu Chart, and there is a leader stacked with units in the target hex, or an 11 or 12 is rolled on the Assaut et Mêlée Chart and there is a leader stacked with the Assaulting units, there is a leader casualty. The owning player rolls one die and consults the Leader Casualty Chart.
- Random Selection: If there is more than one leader in a hex, fate must choose between one and the other. Roll the dice to choose.
- Mortal Wounds: If a leader is mortally wounded, all units in the hex must make a Morale Check subtracting the leader's Morale Bonus. In other words, his bonus lessens the chances the unit will pass rather than improves it. Units make this Morale Check the moment the casualty occurs and apply its result immediately. Exception: Leaders with negative Morale modifiers do not add their Morale modifier to the die roll. Consider their Morale modifier to be 0.
- Recovery from Wounds: Wounded leaders should be removed from the map and placed on the Passage of Time Recorder. They return to the field of battle at a friendly depot hex when the Reinforcement Action chit is activated, and the term of their recovery has expired.
- Replacement Leaders: When a leader becomes a casualty or is captured and is removed from the game map, his place in the chain of command may be taken by any other Aide de Camp. When the casualty occurs identify the replacement leader. The replacement leader moves to assume his new command (8.2.5.3).
- Step Down: If there are no replacement leaders available for divisional/brigade leaders removed from the game, then the corps leader from the corps to which that division/brigade belongs must step down from his corps command and assume command of that division/brigade. A leader replacement must be performed if possible instead of a "step down". After stepping down, the corps leader will function as the division/brigade leader. The side to which he belongs loses any CP which might be associated with him, and his corps can no longer be Activated (8.4.3.1) and cannot create a corps sized MU.
- Step Up: If a returning leader allows one of the corps leader's subordinates to be replaced the corps leader may resume his place in the chain of command, re-establishing his corps and CP if any.
- Leader Casualties and Command: When a leader becomes a casualty any MU Marker which may be present on the leader and its duplicate in the draw cup is removed. The MU is thus forfeit for the turn.
8.3 Command Segment
During the Command Point Phase players determine the number of Command Points they have available per side. During the Command Tracing Phase, the command status of every unit and leader is determined. The status of leaders and units is either In Command or Out of Command. A unit must be In Command to form part of a Maneuver Unit (MU).
- Command Span and Command Status: A combat unit is In Command if it is within the Command Span of its immediate superior officer. If the unit is an Asset of a superior leader it is In Command if it is within the Command Span of the subordinate leader to which it is assigned. The Command Span of division and brigade leaders is three hexes. In other words, any part of that division/brigade as defined and portrayed by the Organizational Display, that is within three hexes of the divisional/brigade leader, and is not PGD, is In Command. Any part of that division/brigade that is four or more hexes away from that leader, or in PGD, is Out of Command. The Command Span of a division or brigade leader may not be traced through a hex containing a unit of a different command. (Note: Assets belonging to the same superior organization, division, corps or army, do not count as units of a different command.) Division leaders are in turn In Command if they are within six hexes of their corps leaders. Corps leaders are In Command if they are within ten hexes of their army leader. In some cases there are brigade leaders which may report to a division leader, a corps leader or even an army leader. In each case the brigade leader is considered In Command if he is within the Command Span of his immediate superior — that is, within 3, 6 or 10 hexes if his superior was a division, corps or army leader, respectively. Consult the Exclusive Rules to determine the exact Command Span of each echelon of command and the size of MUs which may be formed. Besides Command Span, units meeting the requirements of being part of a March Column MU (8.6) or in a Static Position (8.8) may be In Command.
- Command Rung Independence: The command status of each rung of the ladder of command is independent of the next highest rung. In other words, if combat units are within their division leader's span they are In Command, regardless of the fact that their division leader may not be In Command from his corps leader. In such a case, the division may be created as a MU, but the division may not be part of a corps level MU.
- Command Points (CPs): Command Points are the currency by which MUs are bought. Generally, a side is awarded a CP for designated leaders presently on the field of battle. Leaders that are scheduled to arrive as reinforcements that turn do not count towards this. During the Command Point Phase, consult the Exclusive Rules to determine which leaders have CPs associated with them and the number of Command Points available. In addition to awarded CPs, designated light cavalry leaders may possibly roll for initiative (8.5) to form their own MU.
8.4 Maneuver Units (MUs)
While the physical act of moving a counter or stack of counters is merely a function of expending Movement Potential and entering hexes, moving decisively (so as to affect the enemy) is done by organizational grouping. These groupings are called Maneuver Units (MUs). MUs can be as large as a corps or as small as a leader with a single combat unit. Regardless of size, all movement of the current MU must be completed prior to moving any part of another MU. Combat units and leaders potentially belong to more than one MU. For instance, in the French army a combat unit belongs to a division as well as a corps, each of which could constitute MUs in a single turn. However, in the resolution of the movement within a particular turn a combat unit may voluntarily move only once, and thus only be part of a single MU.
EXAMPLE: The French player has designated both the Center Wing and Foy's Division of that wing as MUs in the hopes that by putting both chits in the draw cup he increases the likelihood one will be pulled prior to an Allied chit. The chit for Foy's division is pulled first. Its movement is summarily executed. Later that turn the chit for the Center Wing is pulled. Foy's division may not move again. Conversely, had the chit for the Center Wing been pulled first and Foy's division been moved as part of that MU, the chit for Foy's division remaining in the draw cup would thereafter be a dud, the division having already moved that turn.
-
Maneuver Unit Assignment: During the MU Creation Phase of the Command Segment, players spend their Command Points (CPs) creating MUs. Sides alternate creating MUs, with the side with the most CPs going first. In the event of a tie, roll the dice to determine who goes first. As each CP is spent a MU marker is placed upon a grouping the player wishes to move that turn. After designating the MU on the battlefield, the duplicate of this marker is placed into the draw cup. After all CP's have been spent by both sides, light cavalry leaders who are eligible may roll for initiative (8.5).
-
What Constitutes a MU: Any leader on the game map can constitute a MU. Expanding the size of this most basic MU is a function of Command Span and hierarchy (chain of command). For instance, if the leader is a division leader then any parts of that leader's division that are within his Command Span may also be part of that MU. If the leader is an Activated corps leader (8.4.3.1) then any division leaders belonging to that corps within the leader's Command Span are part of the MU as well as any combat units within the respective Command Spans of those leaders, and, the ADC for that corps and any units stacked with the ADC (8.4.3.2). Attached Assets that are In Command may be part of the MU (8.4.3.3). In general, the largest MU that may be created is a corps. The Exclusive Rules may have additional restrictions.
-
Size of a MU: Command only affects the size of a MU. In other words, one is to envision leaders that receive a Command Point (thus generating their MU) as having received an order from general headquarters. They may move during the course of the Maneuver Segment regardless of being In or Out of Command. However, the effects of this order only extends down to the units (and/or leaders if they belong to his formation) that the leader has within his span. Therefore, if the leader was an Activated corps commander, the MU he could generate could include every part of his corps (division leaders, his ADC, his corps assets, his attached cavalry unit, and all units belonging to these leaders, if within their respective Command Spans, as well as any army level assets within the Command Span of one of his subordinate leaders), as long as all of it was In Command. However, wherever the break in this "chain" of command occurs, those parts directly beneath the break are Out of Command and may not be part of that MU. Conversely, a corps whose component divisions are not placed In Command by the corps leader could still form MUs in a turn by spending as many CPs as needed, if available, to create separate MUs for the different pieces. In this case all of the corps could move and fight in a turn, but at great cost in CPs, and under separate, and unpredictable, chit pulls. A MU can be as small as a single leader and a single unit stacked with him, activated by a CP.
8.5 Light Cavalry Initiative MU
Commanders of light cavalry may generate their own CP/MU if they pass an initiative check during the Command Segment. Light cavalry leaders eligible to generate CPs through initiative are listed in the Exclusive Rules.
- Initiative Check Procedure: After all CPs have been generated and spent on MUs during the Command Segment a player declares he is checking the initiative of a light cavalry leader. The initiative of a light cavalry leader is his cavalry Mêlée Bonus. This bonus, regardless of what is printed on the back of the cavalry leader counter, may never exceed five or be less than one. A leader with no cavalry Mêlée Bonus has an initiative of one. A single die is rolled and the leader passes this check if the die results in a roll equal to or less than his initiative. Mark him with a new MU counter and toss its duplicate into the draw cup.
- Restrictions:
- Light cavalry leaders which are part of a division or corps may not check for initiative if within the Command Span of their immediate superior.
- The initiative of a light cavalry leader may not be checked until all CPs from a side have been spent creating MUs. If a CP has already been spent on a particular light cavalry unit, a second MU marker may not be placed on him by checking for initiative.
- A light cavalry division leader may check for initiative and if he passes may form a MU of all of his units, his brigade leaders that are In Command and their units that are In Command.
- Replacement leaders may check for initiative if the leader they replaced was eligible to check for initiative.
- Horse artillery which are part of the leader's command will also be included in the MU if within his Command Span.
- Horse artillery and other light cavalry Assets (8.4.3.3) may be attached to light cavalry leaders. Other types of units may not be attached.
8.6 March Column MU
Units which are part of the same command (and any attached units) may form a March Column MU, the purpose of which is to allow a group of units to remain In Command while on the march. The leader of the MU must be stacked with the leading unit of the March Column MU. Units are In Command if they form a contiguous block or chain of units in Road Column or they conform to the conditions of Uncoiling, Coiling or Reinforcements as below. A March Column MU may not contain units that are not part of the same command. That is, a March Column MU of a brigade must consist of units of the same brigade and divisions must consist of units of the same division. Exception: Assets may be attached to the March Column and interspersed in the March Column.
- Corps: Corps-sized March Column MUs may be created provided that: each division/brigade of the column conforms to the above points; the corps is Activated; and corps-sized MUs are allowed by the Exclusive Rules.
- Uncoiling: Units at the end of the MU, which have not managed to form Road Column are In Command if they are adjacent to another unit of the MU that is In Command. In Command status may be propagated along a path of such adjacent units.
- Coiling: Units still in Road Column at the tail of a March Column MU, but outside of their leader's Command Span are still In Command if they are adjacent to a unit who is within their leader's Command Span. Units trailing a unit satisfying the above condition and the conditions of a March Column MU are also still In Command, even if the leader is no longer at the front of the March Column MU.
- Reinforcements: Reinforcements that are still off the map are eligible to form part of the March Column MU.
8.7 Administrative March MU
An Administrative March (AM) order allows a MU to move to a specified location over multiple turns without the expenditure of additional Command Points or using the Regroup procedure. During the MU Creation Phase of the Command Segment, an Administrative March MU may be created costing one Command Point. Reinforcements may be given an AM order at no cost in CPs at the moment they enter the map. Assets attached to the MU must remain with the MU for the duration of the AM. The AM can be a March Column MU. Units conducting AM move when the Regroup chit is pulled. (Note: Kedging occurs when a leader moves away from the units under his command during the Leader Chit and his units follow him during the Regroup Chit.)
- Orders Procedure: A MU marker is placed in the hex marking the destination of the AM. The duplicate MU marker is placed on the leader of the formation performing the march. The destination hex must be either a hex within the Command Span of a superior leader who is in the leader of the MU's chain of command or the destination hex must be a designated Terminus Hex (8.10.6), or any road/trail hex on the shortest route or routes in hexes (regardless of terrain) between them. For example, a destination hex for a division leader must be within either his Corps commander's or his Army leader's Command Span, but not necessarily both. For Reinforcements whose superior leader is not yet on the map, the destination hex may be a Terminus Hex. Players may voluntarily cancel an AM and perhaps specify a new destination hex, by expending another CP.
- March Procedure: AM MUs move during the Regroup Chit. The destination hex marks the location to which the leader of the MU must move. Once the leader has arrived at the destination hex, he stops and moves no further until the AM is complete or cancelled. During the turn in which the leader reaches the destination hex, the units of the MU may expend any remaining movement points to adjust their position and formation. Leave the MU marker in place. During the Reorganization Segment of the current turn flip the MU marker over. During the Regroup Chit of the following turn, the units receive a final turn of movement to adjust their position and formation. During the Reorganization Segment remove any MU markers which have been flipped over. The AM is complete.
- Restrictions: During AM, units of the MU may not voluntarily move so as to place themselves Out of Command in the next Command Segment. When marching to a destination hex, units must move as directly as possible deviating from their path only to move around obstacles (i.e. other units, impassible or General Order terrain) or to remain on a trail or road. The AM is immediately canceled when enemy units are within 10 hexes of any part of the marching MU. Exception: Limbered Artillery and PGD units do not cancel the AM.
8.8 Static Position MU
A Static Position is defined by a geographic area as specified in the Exclusive Rules. Units assigned to a Static Position are considered In Command if they remain within its boundaries. A CP does not need to be expended to form a Static Position MU.
- Assigning Units: Units are assigned to Static Positions by scenario rules. Units assigned to a Static Position remain assigned to it until it is dissolved.
- Dissolving the Static Position: The Static Position is dissolved when all units assigned to it leave the Static Position voluntarily or involuntarily. Units that were part of a dissolved Static Position revert to the command of their leader as shown on the Organization Display.
- Maneuver: Units assigned to the Static Position move during the Regroup Chit. They may perform all activities that units which are part of a regular MU may do. They may voluntarily leave the Static Position even to Assault or Charge units outside of the Static Position, but like units leaving the Command Span of a Regular MU will be Out of Command until they return to the Static Position.
- Regroup: Units that leave the Static Position may Regroup back to the Static Position in the same manner a unit would seek to re-enter the Command Span of its leader. When regrouping the units stop moving as soon as they enter the Static Position's boundaries.
8.9 Action Chits
There are four Action chits in the game. These are tossed into the draw cup during the Command Segment. When drawn during the Maneuver Segment the actions they represent are immediately resolved. The side whose player drew the chit from the cup moves first. The Artillery fire chit is considered simultaneous.
- The Leader Chit: When this chit is drawn, all leaders which have not yet moved this turn and are not currently part of a MU may move. Leaders that move at this time may not move again as part of a MU later in the Maneuver Segment. When a leader is moved, upon completion of this movement, his counter is flipped over to its specific side indicating that the counter has moved in this Maneuver Segment.
- Headquarters Escorts: Some units in a scenario may be designated as Headquarters or Leader Escorts. Escorts, which begin the Leader Chit stacked with or within one hex of their escorted leader, may move and act at this time as if they were part of a MU. If the owning player chooses, Escorts may be treated as Army Assets (8.4.3.3) and, during the Command Segment, may be assigned to another leader of the same army.
- Regroup Chit: Units that are Out of Command and not adjacent to an enemy unit may move so as to place themselves In Command, or to close the distance separating themselves from their immediate superior leader. Assets which were assigned to a leader and are not In Command may Regroup towards their assigned leader. Reinforcements may Regroup towards a Terminus (8.10.6). Units conducting an Administrative March (8.7) or are part of a Static Position (8.8) move at this time as well.
- Restrictions: Units that move to Regroup may not Assault or Charge an enemy unit; they may not move adjacent to an enemy unit; they must cease moving the moment they enter the Command Span of their leader, moving in as direct a fashion to their leader as possible (in a straight line where possible); units in General Order may move into a non-General Order terrain hex and enter Column formation, where they may be subject to Opportunity Reactions due to the formation change; units in General Order terrain which move directly to another General Order terrain hex cease their movement after moving only one hex; units may only change formation to exit General Order, or to enter General Order and thereby cease moving, or to enter or exit Road Column or to Limber if unlimbered artillery; and units that move during this Action chit may be Opportunity Charged.
- In Command Units: During the Regroup Chit units that are not part of any MU and are not in an enemy Zone of Influence, but are In Command may change stacking order, facing and formation.
8.10 Reinforcements
Reinforcements are only considered reinforcements the turn they enter the game map.
- Entry: Although the scenarios give the specific area where reinforcements must enter, each unit entering may enter the map up to half their Movement Potential in hexes on either side of the named road or trail that runs off the map in that area. Example: A unit with a Movement Potential of six could enter at a specific road hex actually on that road hex, or within three hexes of that road hex, either left or right of it on the map edge.
- Map Edge: Players should not treat the map edges as the end of the world, but imagine instead that the terrain, road or trail continues beyond them in identical fashion, and that units that enter in Road Column are deployed off map on this imaginary extension. Therefore, units that enter behind other units on a road must take into account the MPs they have already expended reaching the map edge, as measured by the units that entered in front of them this turn.
- Actions: Infantry that enters as a reinforcement may Assault the turn they enter. Cavalry that enters as a reinforcement may Charge that turn. Artillery that enters must enter Limbered.
- March Column MU (8.6): Units which did not have enough MPs to enter the map on the current turn are considered to still be In Command if their leader forms a MU and may enter the map when their MU chit is pulled. Otherwise, they may enter during subsequent Reinforcement chits.
- Administrative March: All units that enter the map as reinforcements may freely receive an Administrative March order (8.7).
- Terminus Hex: At the beginning of a game the owning player may designate a Terminus Hex for each Reinforcement entry location. The Terminus must be a named location on a road or trail that leads to the entry hex. The turn following their entry, reinforcements may use the Regroup procedure with the Terminus acting as if it was the unit's immediate superior. Units are not required to Regroup toward the Terminus and may instead Regroup toward their immediate superior. (Note: In some scenarios the Terminus Hex may be specified by scenario rules.)
9.0 Facing
All combat units in Good Order have a specific facing. Units in Column, General Order or Road Column are oriented so that the top of the counter is facing a hexside. Units in Line or Skirmish Order face towards the point of a hex formed by two hexsides (the vertex of two adjacent hexes). Units in Disorder, Plus Grand Disorder or Square have all around facing.
9.1 General Rule
- All counters in a hex must face in the same direction. The top combat unit in the hex determines the facing of all combat units beneath it if the stack is arranged ambiguously. Units oriented ambiguously on the game map are to be considered in Column formation.
- Changing Facing: A combat unit may only voluntarily change facing during the Maneuver Segment, and only if it is part of a MU that is currently moving or it is moving because of the Regroup or Reinforcement Action chits. Units may change facing any number of hexsides without expending any MPs.
- Facing, Movement and Combat: A combat unit may only enter, Charge, fire upon, or Assault through its front hexsides.
10.0 Zones of Influence
10.1 General Rule
Combat units, except units in Road Column, PGD and Limbered artillery units, exert a Zone of Influence (ZoI) into the hexes immediately adjacent to its front hexsides. (Note: Zones of Influence should not be confused with Opportunity Charge Zones (19.14.2), though they are similar.)
- Terrain: Zones of Influence do not extend into terrain that mandates General Order for formed units. They do not extend into hexes or across hexsides which the units exerting the Zone of Influence are prohibited from entering or crossing. Consult the Exclusive Rules for information regarding terrain. (Note: the term "formed units" consists of infantry or cavalry units in Line, Column, or in the case of infantry, Square. And the term "General Order terrain" refers to terrain that requires formed units to enter General Order formation. Artillery is not technically formed, but still enters General Order when entering such terrain if allowed to enter by the Exclusive Rules.)
- Infantry and Artillery: Infantry and artillery units must stop when they enter an enemy Zone of Influence.
- Cavalry: Cavalry units must stop when they enter a Zone of Influence of enemy Cavalry.
- Leaders: Leaders do not exert a Zone of Influence. Leaders do not have to stop when entering an enemy Zone of Influence. They may move through and exit any number of enemy Zones of Influence during movement, limited only by their Movement Potential.
- Opportunity Reactions: The term Opportunity Reactions includes Opportunity Fire and Opportunity Charge. Combat units expending MPs, including formation changes, within a Zone of Influence may incur Opportunity Reactions. Voluntarily exiting a Zone of Influence may trigger Opportunity Reactions. Involuntary movement such as Rout, Recoil or Cavalry Bounce Movement or recovery from Disorder or PGD does not trigger Opportunity Reactions. Leaders expending MPs in an enemy Zone of Influence do not trigger Opportunity Reactions. The Opportunity Reaction occurs prior to the moving unit completing the action that triggered the reaction, except as noted below. For instance, a unit changing formation would be fired upon in its old formation, or a unit exiting a Zone of Influence would be fired on while still in that Zone of Influence. (Note: Moving into a Zone of Influence does not trigger Opportunity Reactions, since the MP was expended prior to entering the hex. Moving into an Opportunity Charge Zone may trigger an Opportunity Charge if the reacting player wishes to attempt one.)
- Opportunity Reactions When Joining Friendly Units: When moving units join friendly units in a hex, Opportunity Reactions, triggered by actions in the hex the moving units are joining, occur after the moving units join the stationary units and after they change formation to match the stationary units.
11.0 Stacking
There is a limit to the forces that a player may concentrate in a single hex. See the Stacking Chart.
11.1 General Rule
The stacking limit varies according to terrain and formation. Be painfully aware that stacking restrictions apply during movement. Leaders, ADCs, and informational markers do not have a stacking value and therefore do not count towards the stacking limit of a hex.
- Terrain: The maximum number of Increments that are permitted in a hex is given in the Stacking Chart. Where the number is followed with an organizational term, such as "six, or one battalion," indicates that up to six Increments may stack in the hex, or one battalion of any number of Increments greater than six.
- Artillery Stacked with Infantry: When stacked with infantry one Increment of artillery is equal to six Increments of infantry towards the stacking limit.
- Formation: At the end of movement, all units in a hex must be in the same formation as determined by the top unit in a stack. Units joining a stack must conform to the formation of the top unit in the stack and must pay the formation change cost when entering the hex. This is not a free formation change.
- Infantry and cavalry units may never voluntarily stack together.
- Cavalry and artillery units may never voluntarily stack together.
- Units in Skirmish Order may not stack with any other Combat units which are not themselves in Skirmish Order. Units that are not in PGD may freely pass through units in Skirmish Order and units in Skirmish Order may, likewise, pass through other units that are not in PGD without violating stacking restrictions, but neither may end their movement stacked.
- Units in Good Order which voluntarily end their movement stacked with units in Disorder, or the reverse situation, automatically become disordered and a stacking violation is not triggered.
- Units in Good Order may pass through units in Disorder without becoming disordered. Units in Disorder may pass through units in Good Order without disordering the Good Order units.
- Units in PGD may rout through friendly units, but will cause a stacking violation. Consult the Stacking Violations Chart.
- Friendly units may never stack with enemy units.
- Command: Units that stack without a leader in the hex suffer a -3 modifier to Morale Checks for each combat unit in the hex over the first. Infantry units smaller than a battalion and cavalry units smaller than a regiment are not counted when determining this modifier. The size of the unit is determined by its tactical organization (i.e. the number of dots above the unit symbol denoting company, squadron, battalion or regiment) and not the number of Increments it currently possesses. A stack of three battalion size units without a leader in the hex would have a Morale Check modifier of -6. A stack of two half battalions (wings) and a light company would not suffer an additional negative modifier.
11.2 Stacking Order
The top combat unit in a stack is considered the unit in front. Whenever another unit joins a stack, or enters a hex with another unit to form a stack, the unit that is moving is placed at the bottom of the stack. The combat unit at the bottom of the stack is considered at the rear of the formation. This has tactical significance in that the topmost combat unit will affect the morale of the entire stack (20.1.1), and it will suffer the most casualties (17.1). Unlimbered artillery that is stacked with infantry and is not on top of the stack will not be able to fire (18.5.1).
- Changing Stacking Order: Units may freely change their stacking order only if they are eligible to move voluntarily. All units in a stack must be eligible to move voluntarily in order to change stacking order. Changing stacking order does not trigger Opportunity Reactions.
12.0 Tactical Organizations
In addition to facing, combat units on the game map must have specific Presentation and Formation as well.
12.1 Presentation
In those cases where a combat unit is presented by battalions in the counter-mix as well as by regiment, only one or the other may appear on the game map. If the battalions of the unit are on the game map, then the regiment counter must be occupying the space provided for it on the Organizational Display, or vice versa.
- Voluntary Unit Breakdown and Reform: Combat units may only voluntarily breakdown and reform when they are active during the Maneuver Segment. The cost to breakdown or reform is the same as for a formation change (e.g. one MP for infantry). Stacking limits for the hex may be temporarily violated as long as the stacking limit is adhered to at the end of the unit's movement. In other words, they may only violate the stacking limit of the hex if they have Movement Potential remaining to them while the other battalions move to join them. When a regiment breaks down the battalions must have enough Movement Potential to separate, if the stacking limit is exceeded.
- Involuntary Breakdown: Infantry units may be forced to break down from regiments to battalions as a result of losses. Whenever a regimental counter reaches 50% in losses, it must break down. This breakdown is done immediately. Play is suspended until the regiment is broken down. This breakdown does not cost MPs.
- Breaking down is not a free deployment for these units. They must maintain the same facing and formation they had immediately prior to breaking down.
- Opportunity Reactions: Voluntary Breakdown may trigger Opportunity Reactions. When a regiment is forced to breakdown due to losses it is considered Involuntary Movement and does not trigger Opportunity Reactions.
- Breakdown and Losses: Whenever a regimental counter breaks down into its battalions, any losses accrued up until the moment of breakdown must be apportioned as equally as possible between the battalions. If losses cannot be apportioned equally, then losses are distributed starting with the oldest numbered battalion on down (the first battalion is always older than the second battalion, etc.).
12.2 Formations
Combat units must have a specific formation while on the game map. The formation of a unit is how it is deployed for combat and Maneuver. The terrain type in the hex may limit the kind of formation deployed therein.
- Voluntary Formations: Voluntary Formations are ones that a player may impose on his units. These cost MPs to employ. Because these cost MPs, they may only be changed during the Maneuver Segment when the unit is active. Exception: Units may form Square when the opponent is moving (19.7). Whenever a combat unit makes a voluntary change in formation or Presentation, it must spend MPs in accordance with the Formation Change Cost Chart. Voluntary formation changes may trigger Opportunity Reactions. This Opportunity Reaction will take place prior to the change in formation. Exception: When units join a hex containing friendly units the formation change, required to conform to the units already in the hex, occurs first.
- Involuntary Formations: Involuntary Formations are ones that result from play. Disorder and PGD are involuntary formations which occur as a results of a Morale Check or due to combat. When a unit is neither in Disorder nor in PGD, it is said to be in "Good Order." General Order is an involuntary formation which a unit automatically enters upon moving into certain terrain types. Consult the Terrain Effects and Fire Defense Charts. These do not cost MPs to employ and do not trigger Opportunity Reactions.
| Voluntary Formations | Involuntary Formations |
|---|---|
| Column* | General Order* |
| Line* | Disorder (Désordre) |
| Square* (Carré) | Plus Grand Désordre (PGD) |
| Skirmish* (Tirailleur) | |
| Road Column* | |
| Limbered (artillery) | |
| Unlimbered (artillery) |
Units marked with an asterisk are automatically in Good Order as well. (Note: Artillery is always either Limbered or Unlimbered regardless of the state of the formation, which can be Good Order, Disorder or, in the case of Limbered artillery, PGD.)
- Formation Change and Terrain: Combat units that must change their formation due to terrain they enter during movement pay the cost of the formation change in addition to the cost of the hex they enter. Exception: Units that enter terrain that requires General Order only pay the terrain cost, in that it does not cost MPs to enter General Order.
- Formation Change and Facing: When a combat unit (or stack) makes a formation change the owning player may freely orient the counter (or stack of counters) in any manner he chooses within the hex, as long as all rules concerning the new formation (and stacking) are followed.
12.3 Column
Column may only be formed in clear or other terrain as allowed in the Exclusive Rules.
- Facing: A combat unit in Column formation faces a hexside. It has three front, two flank and one rear hexside.
- Maneuver: Infantry units in Column expend MPs to enter hexes based on the cost of the terrain shown on the Movement Chart.
- Combat: Infantry units in Column fire with the Fire Value printed on the specific side of their counter. Only the top combat unit of a stack of units in Column may fire. When an infantry unit in Column has been reduced by losses to a single Increment the unit conducts fire combat at one-half of this printed value (17.2.1). All Mêlée Values of units in the hex are totaled for attack and defense. Cavalry does not fire, it Charges instead.
12.4 Line
Line may only be formed in clear or other terrain as allowed in the Exclusive Rules.
- Facing: When a combat unit is in Line formation, it faces the hex vertex (or point). A unit in line has two front, two flank, and two rear hexsides.
- Maneuver: Infantry units deployed in Line pay the cost of the terrain plus one (+1) MP per hex entered. Cavalry deployed in Line pays the normal cost for entering a hex as shown on the Movement Chart. Example: An infantry unit that marches three hexes in Line expends six MPs assuming the cost of the terrain entered was 1 MP. Cavalry would pay one MP per hex of clear terrain entered.
- Old Guard Infantry: Units designated as Old Guard only pay (+1) MP for every other hex entered when in Line formation. Example: An Old Guard Infantry unit that moves five hexes in Line in clear terrain will spend seven MPs doing so.
- Combat: Infantry units in Line fire by Increment and not their printed Fire Value. Up to four Increments may fire from a single hex. When infantry in Line fire, consult the Fire Effects Chart and locate the Fire Multiple for the type of unit firing. The number of Increments firing times this multiple equals the Fire Value of the attack. Example: Three Increments of French line infantry times a Fire Multiple of three yields a Fire Attack of nine. Regardless of the number of Increments in Line, the maximum that may fire from the hex is four. Cavalry does not fire, it Charges and Mêlées instead. All Mêlée Values of units in the hex are totaled for attack and defense.
- Line and Refused Flanks: The hex-grid overlaid on the game map can force a string of units in Line formation to artificially present an exposed flank. A flank hex is considered Refused as long as it is also a front hex of an adjacent combat unit also in Line formation. Hexes at the end of a series of combat units in Line cannot be Refused, only the hexsides within the Line of contiguous units. Refused Flanks are in all aspects treated as front hexsides.
12.5 General Order
General Order is an involuntary formation that is automatically assumed by infantry in Line, Column or Square, cavalry in Line or Column and Limbered artillery when they enter certain terrain. Refer to the Fire Defense Chart and the Exclusive Rules to see exactly which terrain causes a unit to assume General Order. There is no informational marker indicating General Order. Exception: Units in Road Column, Disorder or PGD do not enter General Order when entering these hexes. However, if they voluntarily come out of Road Column, or recover Good Order in these hexes, they automatically assume General Order.
- Facing: A unit in General Order has its counter facing a hexside. It has five front hexsides and one rear hexside to its immediate rear.
- Maneuver: Combat units in General Order expend MPs to enter hexes based on the cost of the terrain shown on the Movement Chart. A combat unit that moves from clear terrain (or any terrain that does not mandate General Order) to a hex requiring General Order automatically assumes General Order at no cost in Movement Potential other than the normal cost to enter the hex. Infantry and cavalry units in General Order that move to terrain that does not require General Order may assume any voluntary formation upon entering the new hex but must pay the MP cost of the formation change as well as the MP cost of that hex. If they cannot pay for the entire cost immediately upon entering the hex, they may not enter the hex. Limbered artillery pays only the MP cost to enter the hex and not for a formation change. Example: An infantry battalion in General Order moves from woods into clear. It costs 2 MPs to move into the hex: one to enter the hex and one more for the formation change.
- General Order and Combat for Infantry and Artillery: Only the top combat unit in a stack of units in General Order may fire. Units in General Order use the Fire Value printed on the specific side of their counter. When an infantry unit in General Order has been reduced by losses to a single Increment the unit conducts fire combat at one-half of this printed value (17.2.1). All Mêlée Values of units in the hex are totaled for attack and defense while in General Order. Exception: Units in Special Structures may only count six increments of their Mêlée Value (16.6.1.1).
- General Order and Combat for Cavalry: While in General Order, or when Charging units in General Order, cavalry units multiply their Mêlée Value by ½. Cavalry units may not initiate any type of Charge while in General Order.
- Opportunity Reactions: When a unit not in Skirmish Order and in Good Order exits General Order Terrain it must assume another formation. If this formation change takes place in an enemy Zone of Influence infantry units are assumed to be in Column, cavalry units are assumed to be in Line. Artillery must be Limbered to exit General Order terrain (18.2.1). Units which exit General Order terrain may not attempt to form Square if they are Opportunity Charged. They must attempt to Stand vs. Charge.
12.6 Road Column
Whenever a unit is in Road Column in a road or trail hex, it is considered physically on the road itself (or trail) regardless of the other type of terrain that may be in the hex. Road Column is not restricted to roads/trails. A Road Column marker is provided in the counter-mix to designate units that are in Road Column.
- Facing: A unit in Road Column has one front hex (its immediate front) and one rear hex (its immediate rear). All of the remaining surrounding hexes are flank hexes. A unit in Road Column does not have a Zone of Influence.
- Stacking: No more than a single combat unit counter may occupy a hex when using Road Column. A combat unit must be broken down into its smallest Presentation in order to use Road Column.
- Maneuver: Units in Road Column pay the movement cost for Road or Trail for each hex they enter that is contiguous with the road or trail hex they exit. All other terrain costs for the hex they enter, or hexside they cross while entering the hex, are ignored.
- Combat: Units in Road Column may not make Fire Attacks nor may they Assault or Charge. The Fire Defense of a unit in Road Column is the same as a Column. Units in Road Column which are assaulted automatically Rout. Units in Road Column which are charged by cavalry automatically Rout and may be Pursued (19.11).
- Morale: Whenever a unit in Road Column makes a Morale Check it modifies its dice roll by -12 (for the worse) in addition to any other modifiers.
12.7 Square (en Carré)
Square may only be formed in clear or other terrain as allowed in the Exclusive Rules.
-
Facing: Squares have six front hexsides. Because Squares have all-around facing, they have a Zone of Influence in each of the six hexes adjacent to them.
-
Maneuver: Because a Square has all-around facing it may move in any direction. Infantry units in Square pay the cost of the terrain plus one (+1) MP per hex entered. Squares may not move into hexes containing terrain that prohibits a unit from forming Square within them.
-
Minimum Stacking Requirement: To form Square requires a minimum of three Increments of infantry. Artillery in the hex does not count towards this minimum. If at any time, the number of Increments of infantry in the hex involuntarily drops below three, all units in the hex Disorder at that instant.
-
Fire Combat: Infantry units in Square fire by Increment and not their printed Fire Value. Artillery uses its printed Fire Value. Up to 9 Increments of infantry, in addition to any artillery in the hex, may fire from a Square. Squares may conduct up to three Fire Attacks into any three non-contiguous adjacent hexes during the Fire Combat Segment. If artillery is in the Square, the artillery only, may also fire using the same pattern during the Artillery Action Chit. Example: A square may make Fire Attacks against enemy units occupying three hexes belonging to the angles of a triangle drawn between three alternating adjacent hexes, or against units occupying the three hexes on the sides of that triangle, or one attack against a unit in an angle and the side not adjacent to that angle, or vice versa.
When units in Square fire: (1) Total up to 9 Increments of infantry in the hex and multiply this number by the Fire Multiple found on the Fire Effects Chart. (Note: If units with different Fire Multiples were stacked together in Square, each value would be arrived at separately and then added together.) (2) Add to this the printed Fire Value of any artillery stacked in the Square. The artillery must be on the top of the stack in order to fire. Apply Point Blank Range modifiers (18.6.1). (3) Once this total is achieved divide it by three. This result will be the value of each Fire Attack.
12.8 Skirmish (Tirailleur) Order
Only certain infantry may enter Skirmish Order. Infantry units with a Range, possibly accompanied by a cornet, on its specific side, have the potential to deploy as skirmishers. No informational marker is used to designate units in Skirmisher Order; instead the counters are deployed flipped over on the game map with their specific side up.
- Facing: Units in Skirmish Order always face a hex vertex. A unit in Skirmish Order has four front hexsides and two flank hexsides (no rear hexsides).
- Maneuver: Infantry battalions and regiments always use the Infantry column of the Movement Chart regardless of their formation. Infantry companies in Skirmish Order use the Infantry Skirmisher Company column.
- Stacking: Skirmishers may voluntarily move through, or Retreat Before Assault/Charge through hexes containing other friendly units, which are not in PGD, without violating stacking restrictions. Hexes containing skirmishers may be retreated or moved through by friendly units, which are not in PGD, without violating stacking restrictions (11.1.2).
- Skirmishers and Zone of Influence: The Zone of Influence for infantry skirmishers is restricted to adjacent front hexes even though they have a fire Range of two.
- Skirmishers and Assault: Infantry deployed as Skirmishers may be able to Retreat Before Assault (16.3). If a valid path of retreat is available, they must Retreat Before Assault when assaulted by units not in Skirmish Order. They may, at the owning player's discretion, attempt to Retreat Before Assault or Roll to Stand when assaulted exclusively by Skirmishers.
- Infantry in Skirmish Order have their Mêlée Value multiplied by ½.
- Skirmishers and Charges: When charging cavalry targets infantry in Skirmish Order, they may attempt to Retreat Before Charge (19.4). Otherwise, they may not Stand in the face of a Charge, but Rout when the cavalry moves adjacent and may be Pursued (19.11).
- Skirmishers and Fire Combat: Infantry units in Skirmish Order fire by increment. Up to three increments may fire from a single hex. Only infantry with a Range of "2" printed on their counter may enter Skirmish Order. As this implies, when they initiate fire combat they may fire at target hexes two hexes away. They may only make a Fire Attack at targets two hexes away when deployed in Skirmish Order. However, the Fire Value of Fire Attacks made at a two-hex distance is halved (x ½) unless the firing unit is armed with rifles. See the Exclusive Rules for which units are armed with rifles.
12.9 Disorder (Désordre)
Units may be in Disorder in any type of terrain. Disorder is an Involuntary Formation. Whenever a unit becomes disordered it is considered an involuntary formation change and does not trigger Opportunity Reactions.
- Facing: When a combat unit is in Disorder, it has all-around facing; that is, it has six front hexsides.
- Maneuver: Combat units in Disorder halve the Movement Potential printed on the general side of their counter. Units Disordered in the course of their movement have the remainder of their movement allowance halved. Because they have six front hexsides they may move in any direction, and pay MPs per hex entered or hexsides crossed as given on the Movement Chart for the type of unit corresponding to infantry, cavalry or artillery.
- Combat: Infantry and artillery units in Disorder fire at half the printed value stated on the specific side of their counter. When an infantry unit in Disorder has been reduced by losses to a single Increment the unit conducts fire combat at one-half of this printed value (17.2.1) which is halved again for Disorder. Only the top counter in a stack of Disordered infantry may fire. Units in Disorder may Assault. Disordered units halve their Mêlée Value. Disordered cavalry may not initiate a Charge, but if they became Disordered during the course of the Charge, they continue their Charge in that reduced state.
- Morale: Units in Disorder always modify their Morale Check dice roll -3 (for the worse), in addition to any other modifiers.
- A unit in Disorder remains in Disorder until either: (1) It Disorders again — that is, through combat (or whatever) it fails a Morale Check or receives a result that would cause a unit already in Disorder to Disorder again; a second Disorder causes the unit to Rout (PGD) instead; or (2) It receives an AR or DR result on the Assaut et Mêlée Chart; or (3) It passes a Morale Check and thereby recovers Good Order during the Reorganization Segment.
12.10 Plus Grand Désordre (PGD)
Units may be in PGD in any type of terrain. PGD is an Involuntary Formation. Whenever a unit becomes PGD this is considered an involuntary formation change and does not trigger Opportunity Reactions.
- Facing: Like units in Disorder, units in PGD have all-around facing. However, units in PGD do not have a Zone of Influence.
- Maneuver: Rout or Routing are terms that describe the type of movement done by units in PGD. The moment a unit enters PGD it Routs away from the event as in 13.2.4. Units in PGD may only move at the moment of their becoming PGD, or when they execute Rout as a result of Mêlée or during the Reorganization Segment. Units in PGD never move voluntarily, nor can they change formation except when they recover Good Order. When a unit in PGD moves, its Movement Potential is one and one-half (3/2) times its movement rate printed on the general side of the unit counter. Units in PGD must expend as much of their Movement Potential as possible to place themselves at least 15 hexes away from the nearest enemy unit (13.2).
- Combat: Units in PGD may not make Fire Attacks nor may they Assault or Charge. They never Roll To Stand. They always Rout when Assaulted. When the target of a Charge follow the Cavalry Charge vs. PGD Mêlée Procedure (19.1.4).
- Morale: Units in PGD have their Morale Check dice roll modified by -6 (for the worse), in addition to any other modifiers. The only time they make a Morale Check is when they attempt to recover Good Order during the Reorganization Segment.
12.11 British Prone
During the Maneuver Segment, any active British or KGL infantry unit not in an enemy Zone of Influence may elect to go Prone, or stand up, as part of its movement. They may also go Prone, or stand up, during the Regroup Chit under the provisions of the Stacking, Facing and Formation clause of the Regroup Chit rule. Prone units are marked with a Prone informational Marker.
- Maneuver: There is no movement point cost for going Prone or standing (that is removing the Prone Marker). However, to go Prone a unit must have Movement Potential remaining. Units may not stand up and go Prone again in the same Maneuver Segment. Flip the Prone Marker over to indicate they have stood up this turn. Prone units may not move, change stacking order, change facing, nor change formation. To do any of these things they must first stand.
- Terrain: Units may only go Prone if in Clear, Farmettes & Houses, or Cultivated Ground hexes.
- Stacking: The maximum stacking for a hex with a Prone Marker is one battalion (and its light company). A mixed stack of British and/or KGL and non-British units may not go Prone, nor may a stack of infantry and artillery go Prone. A stack may not contain a mix of Prone and standing units. Exception: If a unit stands to leave the hex, units staying in the hex may remain Prone.
- Formation: Units may be in any voluntary formation except Road Column while, or prior to going Prone. A Prone unit which enters Disorder or PGD formation stands and removes its Prone marker. Units maintain their current formation and facing when standing or going Prone.
- Line of Sight: Prone units do not block Line of Sight. Even so, friendly units may not fire over Prone units.
- Fire Combat: Prone units may not fire. Only artillery and Skirmishers (infantry and cavalry) may fire on Prone units. Prone units behind hedgerow or wall hexsides or in cultivated ground hexes are not seen (and may not be targeted) by enemy units that execute Fire Attacks. Prone units have their Fire Defense value improved by two (+2) in all other types of terrain.
- Assault: When assaulted, Prone units receive a +3 modifier to all their Roll to Stand dice roll. Units assaulting Prone units have a –6 modifier to their Roll to Close dice roll. Prone units that stand in face of an Assault must remove their Prone Marker just prior to the Offensive and Defensive Fire step (they must stand to fire effectively); this means that they will not get the +2 modifier to their Fire Defense value in this step because they are now standing.
13.0 Movement
The physical act of moving on the battlefield is a function of the printed Movement Potential of the unit or leader, formation, Zones of Influence and the cost of the hex entered or hexside crossed.
13.1 General Rule
When a chit for a MU is pulled, the owning player may move as many or as few units, which constitute the MU, as desired. Similarly, when an Action Chit is pulled the owning player may move as many or as few of his units which are eligible to move during the Action Chit. Units may move as many or as few hexes as desired within the unit's Movement Potential, subject to terrain, Zones of Influence and formation change costs. During this time the non-phasing player may only move his units as a reaction to friendly activity as in 13.1.8.
- Movement Potential: All combat units and leaders have Movement Potential (the bottom right hand number on the general side of their counter) expressed in terms of Movement Points (MPs) which is based on unit type and formation as given on the Movement Chart. These MPs are expended as the counter moves from hex to hex, or changes formation or Presentation within the hex. Maintain a running count of Movement Potential as movement points are expended. All hexes have a cost in MPs that varies according to the terrain represented within them. Some hexsides may also have a cost in MPs that will be in addition to the cost of the hex entered. Unspent MPs may not be saved from turn to turn, nor may they be transferred to other counters. Units must follow the hex grid and may not skip hexes.
- Rounding: Often a unit's MP is modified due to formation (e.g. Disorder or PGD) or other condition (e.g. Exhausted). When modifying MP round any resulting fractions to the nearest integer with ½ rounding to the next highest integer. Example: 5 1/3 rounds to 5. 6 ½ rounds to 7. 5 2/3 rounds to 6.
- Movement Chart: Infantry battalions and regiments always use the Infantry column of the Movement Chart regardless of their formation. Infantry companies in Skirmish Order use the Infantry Skirmisher Company column. Cavalry always uses the Cavalry column. Limbered artillery always uses the Artillery column. Leaders use the Leaders column.
- Stacking: Units are moved individually or in stacks. Stacking rules are in force during movement of any kind (11.0). A player must complete the movement of a unit or stack before another's movement can begin. Exception: Leaders may move to another hex and accompany these units (13.1.3.3).
- The Movement Potential of a stack is the lowest Movement Potential of any unit in the stack. Exception: Leaders may, if they wish, assume the MP of the stack regardless of the leader's MP (8.1.5).
- To enter a hex, a stack must pay the highest movement cost of any of its constituent units.
- Picking Up Units: Combat units may not pick up other units as they move. Exception: Leaders may move to a hex containing combat units and, if they then move with those units, must accompany the units for the duration of their movement.
13.2 Involuntary Movement
Involuntary Movement takes place as the result of a Mêlée or Fire Attack that requires one side to Rout or Recoil (16.7.1), whether as the consequence of a DR or AR on the Mêlée Chart or a second Disorder occurring from a failed Morale Check or an AD# or DD# on the Mêlée Chart. Cavalry Bounce is also considered Involuntary Movement (19.9.2). The moment a unit Bounces, Recoils or becomes PGD and executes Rout movement this movement is considered involuntary and does not trigger Opportunity Reactions regardless of its movement taking it through the Zones of Influence of enemy units.
- All MP costs are in effect when a unit conducts Bounce or Rout Movement. When a unit Recoils, it retreats the indicated number hexes regardless of MP costs, but is not allowed to violate the retreat rules below and is subject to the Path of Retreat requirements. Infantry units which Rout use the MP costs for infantry. Cavalry units which Bounce or Rout use the MP costs for cavalry. Limbered artillery units which Rout use the MP costs for artillery.
- Retreating units cannot retreat through enemy combat units. They may retreat through enemy leaders who are alone in the hex.
- Retreating units may not enter terrain they are prohibited from entering.
- Path of Retreat: Units conducting Involuntary Movement must follow a path of retreat as follows. When a unit conducts Involuntary Movement (Rout, Recoil or Bounce) each hex entered must be one hex further from the nearest enemy unit, if possible. If not possible the owning player chooses the hex to be entered. Retreating units are not allowed to enter the same hex twice. If unable to do so the retreating units surrender and are removed from play.
- Involuntary Movement During the Reorganization Segment: Units already in PGD may not voluntarily move during the Maneuver Segment. During the Reorganization Segment units in PGD that are not stacked with a leader automatically Rout if they are less than 15 hexes from any enemy unit in Good Order. PGD units that are stacked with a leader and are not adjacent to an enemy unit may attempt to recover (20.2). Units that Rout during the Reorganization Segment must continue to move away from the nearest enemy combat units.
- Seeking Cover: Upon reaching a distance of 15 hexes from enemy units, PGD units will seek the nearest non-clear terrain (e.g. any type of town or structure, woods, marsh or cultivated) that is also at least 15 hexes away from all enemy units and must use the remainder of their Rout Movement Potential attempting to achieve this. Stacking rules still apply. Once PGD units reach cover they will Rout again if at the beginning of the Reorganization Segment an enemy unit in Good Order is again within 15 hexes.
- Routing Off the Map: Combat units that Rout off the map are considered destroyed and are returned to the Organizational Display flipped to their specific side. Leaders that Rout off the map return as a reinforcement during the Reinforcement Chit of the following turn. The returning leader enters on the map edge within 15 hexes of any friendly depot.
14.0 Line of Sight (LOS)
If a combat unit can see another combat unit then it is considered to have a Line of Sight (LOS) to that combat unit, and vice versa.
14.1 General Rule
A Line of Sight stretches from the center of the firing hex to the center of the target hex (use a length of string or a transparent ruler to determine this). A combat unit always has a LOS to an adjacent hex. A LOS to a combat unit is required in order to: (1) Fire on the combat unit; (2) Declare the combat unit to be a target of a Charge; (3) Reactively form Square if an infantry unit within 4 hexes of active enemy cavalry.
- Blocking LOS: If any of the following interferes with the path of hexes necessary for establishing a LOS to an enemy unit, then the LOS is not established: (1) Any terrain listed as blocking LOS in the Exclusive Rules; (2) Slope hexsides (14.2); (3) Combat units not Prone, not in Square nor in Skirmish Order. Exception: A unit to which LOS is blocked cannot itself block LOS.
- Firing Through Combat Units: Combat units may never fire through other combat units friendly or otherwise even if a LOS does pass through them.
- Firing Over Combat Units: Combat units may never fire over friendly combat units, but may fire over enemy combat units under the conditions of Elevation.
- LOS and Hexsides: If the LOS passes precisely along a hexside with blocking terrain or units then the LOS is blocked.
14.2 Elevation
A slope hexside represents mild undulations of terrain and not cliff sides or mountains. A slope hexside, thus, represents no more than the passage from lower to higher ground or vice versa.
- When a LOS crosses slope hexsides it may be blocked by the changing elevation. If the firing combat unit and target combat unit are on different elevations and there is potential blocking terrain or combat units, as listed in 14.1.1, between them, the LOS is clear only if the intervening obstacle is closer to the higher combat unit.
- A combat unit always has a LOS to an adjacent hex regardless of elevation.
EXAMPLE: Sympher's battery can fire at enemy unit 7 only. Target 6 is blocked by unit 7. All other targets are blocked by the friendly British units in line regardless of elevation difference. Bull's battery can fire at units 3, 4 and 7. Target units 3 and 4 are eligible despite the presence of unit 7, because fire over enemy units is allowed (14.1.3). If unit 7 was a friendly unit, Bull's battery could not fire at units 3 and 4. Bull cannot fire at unit 5, because it can fire over units 6 and 7, but not through unit 4. Bull cannot fire at unit 6 because the LOS passes down the spine containing a friendly unit (Rogers). Rogers' battery can fire at enemy units 6 and 7 only. Enemy units 3 and 4 are blocked because LOS passes through unit 7, which is not closer to the higher unit than the lower firing battery. Ross' battery can fire at enemy units 4, 6 and 7. Unit 4 is an eligible target because it is up slope and unit 6 is closer to the higher unit than to the lower firing battery. Gardiner's battery can only fire at enemy unit 8 because it is adjacent (15.5.1). Enemy units 4, 6 and 7 are ineligible because of the presence of unit 8. If enemy unit 8 was not present unit 5 would still be blocked by the trees.
15.0 Fire (Feu)
15.1 General Rule
Fire is directed against a hex, not a particular combat unit. Basically, fire combat is resolved by comparing the fire factors of all units attacking a given hex, to the terrain of the target hex, and the formation of the unit deployed in that hex, rolling the dice and locating the result of the Fire Combat Chart. There are three types of Fire Attacks: Fire Combat, Opportunity Fire and Offensive/Defensive Fire during the Assault Segment.
15.2 Fire Defense
The Fire Defense of a hex is determined by: (1) The target type of the combat unit (infantry, cavalry or artillery); (2) The formation the unit is in (Line, Column, Square, Skirmish Order, etc.); (3) The terrain of the target hex (clear, woods, town, etc.). To best determine Fire Defense locate these in the order given above. Fire Defense may also be affected by the orientation of the counter within the hex (i.e., whether or not the attack is in enfilade to the target), and the size of the target (density being increased with a greater number of men/Increments in the hex). These and other modifiers are summarized in the Fire Effects and Fire Defense Charts.
15.3 Fire Value
The Fire Value of an infantry unit is determined by its: (1) Nationality (not side); (2) The type of troops they are (line, light, jäger, schützen, chasseur, guard, fusilier, grenadier, etc.); (3) The tactical formation it is in (Line, Column, Skirmish Order, etc.); (4) In some cases the number of men firing (how many Increments in the case of units in Line, Square, and Skirmish Order, but not in Column, General Order or Disorder). Cross-reference these variables on the Fire Effects Chart. The result is a Fire Multiple (x2 for instance) or a result stating "printed." This Fire Multiple times the number of Increments firing is the Fire Value of the attacking unit. A result of "printed" is the Fire Value printed on the specific side of the unit counter. This number is the Fire Value of units firing from Column, General Order or Disorder. Fire modifiers are cumulative (e.g. units in Disorder that Opportunity Fire have their Fire Value quartered.)
EXAMPLE: Assume there are three Increments of French Légère in Skirmish Order. Cross-referencing the French Légère row with the Skirmish Order formation column on the Fire Effects Chart indicates a Fire Multiple of x3. They thus have a Fire Value of nine (3x3=9). If they were in Column formation, their Fire Value would be their "printed" value of eight.
15.4 Executing Fire Combat
The total Fire Value of all units firing at the target hex is divided by the Fire Defense of the hex. This resulting number is expressed as odds. Round down to the lower odds.
EXAMPLE: If the Fire Value were 18 and Fire Defense 7, the result would be 2.57:1. Dropping the remaining fraction, the closest odds column to this number on the Fire Combat Chart is 2.5:1. Roll the dice. This result is modified if any Fire Combat modifiers apply and then located on the 2.5:1 odds column.
A unit may be fired on any number of times within a single turn; it could receive Opportunity Fire while it is moving or it could receive Defensive Fire during a cavalry Charge; it could be fired on during the Artillery Action chit; it could be fired on during the Fire Segment, it could be fired on during the Assault Segment by Offensive or Defensive Fire.
- One Target Hex, One Attack: A hex may be the intentional target of a Fire Attack only once in the Fire Segment.
- Combining Fire: A hex may be fired on by several different units from diverse hexes, as long as each firing unit has a LOS to the target hex, and all Fire Attack values are totaled into one attack.
- Minimum Odds Requirement: Fire Attacks at odds of less than 1:3 may not be made. Fire Attacks at odds of greater than 10:1 are treated as 10:1 attacks.
15.5 Fire Combat (Combat à Feu)
Exchanging fire occurs during the Fire Segment, Assault Segment and during the Artillery Action chit whenever it is pulled during the Maneuver Segment (in this case, however, it is just an exchange of artillery fires). Fire combat is treated as if it occurs simultaneously. A combat unit fires with the strength (and facing/formation) with which it began the Fire Segment, temporarily disregarding losses it may have incurred previously in that same Fire Segment as well as mandatory formation changes, Disorder or Rout results called for as a result of such losses.
- Arc of Fire: Combat units may only fire through their front facing and must have a LOS to targets that are not adjacent to them. Any target hex within the range of the firing unit may be fired on. Exception: All units must fire on an adjacent unit if possible, regardless of a more "opportune" target somewhere else.
- One Fire Attack Per Firing Hex: A hex may fire only once during the Fire Segment. Exception: Units in Square (12.7.4).
- Assaulting Infantry: Assaulting infantry and their targets do not perform Fire Combat during the Fire Segment. Instead they conduct Offensive and Defensive Fire during the Assault Segment.
15.6 Opportunity Fire (Feu de Chance)
Opportunity Fire occurs whenever a unit expends MPs in or exits an enemy infantry or artillery Zone of Influence (10.1.5). Any number of stacks may perform Opportunity Fire upon a single stack in a hex that is in the Zone of Influence of all of them, and like Fire Attacks, all the fire strengths must be combined into a single Fire Value. All Opportunity Fires are conducted at ½ (one-half) strength.
- Stacking: When a moving unit is temporarily stacked with another unit and Opportunity Fire is triggered, use the Fire Defense of the moving unit to determine the odds. The moving unit takes all losses caused by the Fire Attack.
15.7 Massed Targets (Target Density)
Any target hex that contains more than nine Increments is a massed target. Although artillery Increments are equal to six times their worth in infantry Increments for stacking purposes, they do not count the same for target density (18.3). Dice rolls for Fire Attacks on massed targets are modified by the Fire Chart Dice Roll Modifiers Chart.
EXAMPLE: A target hex containing 16 Increments would modify its Fire Attack dice roll by +12.
- Target Density Effects: To reflect the advantage of enfilade attacks, modify the Fire Defense of the hex as follows:
- Enfilade: Whenever a unit in Line is fired upon through its flank hexside, the Fire Defense of the hex is treated the same as if the unit were in Column. Firing through a flank hexside is treated as enfilade fire even when in combination with units firing through its front and/or rear hexsides. If the fire is coincident with a hex spine it is not considered enfilade fire.
- Doubled Files: Whenever a hex contains more than six Increments of units in Line, its Fire Defense is that of a Column.
- Large Square: Whenever a hex contains a Square of more than nine Increments, its Fire Defense is four.
- Artillery: When unlimbered artillery and infantry are stacked together use the row on the Fire Defense Chart for Artillery w/Infantry. In this case artillery takes the even numbered losses and infantry the odd (17.1.1.1).
16.0 Assault
During Assault players determine the willingness of their units to close with the enemy (the Assault procedure). Only infantry units may Assault. Cavalry units Charge instead, but may be assaulted. Artillery may never Assault, but may be assaulted.
DESIGNER'S NOTE: Mêlée should not necessarily be interpreted as hand to hand combat with the bayonet. Instead it should be more liberally interpreted as close combat under 100 yards where the intent is to close with the enemy, albeit more or less successfully.
16.1 General Rule
During the Maneuver Segment, units that wish to Assault declare their intention to do so and indicate their target. At the time the Assault is declared mark the assaulting units with an Assaut Marker and place a Number Marker beneath the Assaut Marker indicating the Roll to Close distance (16.4). The Roll to Close distance is the number of hexes between the assaulting units and the nearest enemy combat unit inclusive of the enemy's hex, but not the hex of the assaulting units. After the Assaut Marker is placed, the assaulting units move adjacent to their target, expending MPs as necessary, and the Assaut Marker is adjusted with the arrows indicating the target. If the assaulting units have insufficient MPs to reach a hex adjacent to their intended target they become disordered and the Assault is cancelled. Remove the Assault and distance marker. There is no further effect if they were already in Disorder. During the Assault Segment each Infantry Assault is resolved to completion one at time. The player with the most Assaults chooses first. Players alternate choosing the next Assault thereafter. In the event of a tie roll the dice to determine who goes first.
Assault and Mêlée Procedure: The following is the detailed procedure for resolving assaults; players should refer to it while resolving assaults and follow the steps in their proper sequence as numbered below.
- Automatic Advance:
- Mayhem (16.2.5): If the target hex was vacated prior to the resolution of this Assault, assaulting units must advance into the vacated hex. They may immediately declare an Assault on any units in its front hexsides (16.3.8). If a new Assault is not declared the Assault is finished, proceed to Step 5.
- Units which are PGD (12.10.3) or in Road Column (12.6.4) Rout. After the units Rout, if no targets remain proceed to Step 4.
- Retreat Before Assault (16.3): Units that are eligible to Retreat Before Assault do so now. Retreat Before Assault may trigger Opportunity Reactions.
- British and KGL light companies may execute a special Fire Attack as a "parting shot" (16.3.9).
- Assaulting units must advance into the vacated hex and may immediately declare an Assault on any units in its front hexsides (16.3.8). If a new Assault is not declared the Assault is finished, proceed to Step 5.
- Assault Resolution:
-
a. Roll to Close (16.4) and Roll to Stand (16.5): Each assaulting and defending stack takes a Morale Check. Assaulting units check first. If all assaulting units fail their Roll to Close, defending units must still Roll to Stand, but they do not Disorder if they fail — the dice roll simply becomes a check to see if the units delivered effective fire. Consult the Roll to Close and Roll to Stand vs. Assault Modifiers Charts for adjustments to Morale Check dice rolls.
-
i. Assaulting units Roll to Close. Pass — Passing stacks multiply their Offensive Fire Value by 2. Fail — Failing stacks Disorder, and will Mêlée in that state, or Rout if already Disordered. If all assaulting units Rout the Assault is finished; proceed to Step 5.
-
-
16.2 Assault Restrictions
- Facing: A stack may only Assault through its front facing.
- One Target Hex: A stack may only Assault one target hex.
- Multiple Stacks Assaulting a Target: Multiple stacks may Assault a single defending stack, but their Mêlée Values are combined into one attack and Mêlée Resolution is resolved as a single roll of the dice.
- Stacking: A stack of assaulting units, adjacent to its target, may not contain a mix of assaulting and non-assaulting infantry units. All infantry in the hex must participate in the Assault, using the shortest Roll to Close Distance Modifier acquired by any unit in the stack. All units in a stack must Assault the same target hex.
- Joining an Assaulting Stack: Additional friendly infantry units may join stacks conducting the Assault (those marked with the Assaut Marker). They may combine into a single Assaulting stack, but are not allowed to violate stacking limits. Units that join an Assaulting stack are considered in the rear of the Assault and go to the bottom of the stack.
- Joining a Target Stack: During their own movement additional friendly units may join a hex which is the target of an Assault, and also become targets of the Assault.
- Infantry with Artillery: When infantry which is stacked with artillery declares an Assault against an adjacent target the infantry moves to the top of the stack. The artillery does not participate in the Assault, nor may it fire now that it is not the top unit in the stack. It does, however, suffer any adverse results of the Assault. Since no MPs are expended when changing stacking order, an Opportunity Reaction is not triggered.
- Mayhem: Assaulting units whose targets have vacated their hex prior to the Assault Segment retain their Assaut Marker and must advance into the target hex and may assault any unit in its front facing including the unit which vacated the hex. Essentially, this is treated as an Advance after Retreat Before Assault (16.3.7). The distance marker for the purposes of Roll to Close remains in place. The advance may trigger Opportunity Reactions.
16.3 Retreat Before Assault
Certain units may Retreat Before Assault (i.e., before the resolution of Mêlée). Essentially, units Retreat Before Assault instead of Rolling To Stand.
- Which Units Are Eligible to Retreat Before Assault:
- Leaders (16.3.5).
- Cavalry which is not Exhausted nor PGD (16.3.4).
- Infantry deployed as Skirmishers (12.8.4, 16.3.3).
- Light companies, in Skirmish Order or not, may still elect to retreat, if the first hex retreated into contains its parent battalion. If it does so, it stops its retreat and assumes the parent unit's facing and formation, and is placed at the bottom of the stack (16.3.3).
- Path of Retreat: The path of hexes followed by the retreating unit is called the Path of Retreat. Units which Retreat Before Assault expend MPs to follow the Path of Retreat, changing facing as necessary. During their retreat they may only change formation to enter General Order or to join a stack of friendly formed units in Good Order in which case they change facing and formation to match the units presently in the hex and are placed at the bottom of the stack. At the end of their retreat, they may reface. They may retreat up to their full Movement Potential, but must stop in the first hex they enter in the course of their retreat that mandates General Order for formed units. Combat units that Retreat Before Assault are not allowed to violate stacking rules in the course of their retreat.
- Infantry: Infantry units may not retreat through enemy units nor may they retreat into enemy Zones of Influence. However, friendly units negate enemy Zones of Influence when units Retreat Before Assault into or through a friendly unit's hex (10.1.8). They may retreat through Opportunity Charge Zones, but they may trigger Opportunity Charges (19.14). If a Path of Retreat is not available the skirmishers must Roll To Stand instead with a -6 modifier for the worse.
- Exhaustion: Infantry units that expend more than half of their Movement Potential conducting a Retreat Before Assault end that retreat in Disorder.
- Cavalry: Cavalry may move through enemy infantry and artillery Zones of Influence and thus may retreat through them, but may incur Opportunity Fire. They may not retreat into enemy cavalry Zones of Influence. However, friendly units negate enemy Zones of Influence when units Retreat Before Assault into or through a friendly unit's hex (10.1.8). They may retreat through Opportunity Charge Zones, but they may trigger Opportunity Charges. If a path of retreat is not available to a cavalry unit it must Stand and Mêlée.
16.4 Rolling To Close
When Rolling To Close the top infantry unit in the stack must pass a Morale Check. Each stack of assaulting units Rolls to Close separately. Consult the Roll to Close Modifiers Chart. If the top unit in the stack passes this Morale Check then it and all other units in that stack automatically pass as well and have their Offensive Fire Value doubled. If the top unit in the stack fails then all units in the stack Disorder and will conduct Defensive Fire and Mêlée in that reduced state. Units which are already disordered Rout.
- Roll to Close Distance: The Roll to Close distance is determined at the time a stack declares its intention to Assault, or when it begins its movement. Use whichever is closer. It is the distance between the assaulting units and the nearest enemy combat unit, inclusive of the enemy's hex, but not the hex of the assaulting units. Cross-reference the distance, the nationality and the time period, with the appropriate column of the Roll to Close Modifiers Chart. If multiple units from different hexes join a stack of assaulting units use the shortest Roll to Close Distance modifier for the entire stack.
- Methods of Attack: Different nations applied different methods of attack during the Napoleonic Wars. To determine the Roll to Close modifier locate the Method of Attack column to use by the nationality and year the scenario takes place on the Roll To Close Modifier Chart. Units using the British or Prussian method suffer an additional -6 modifier if they are in Column formation at the time the Assault is declared.
16.5 Rolling To Stand
Rolling To Stand requires the top unit in the defending stack to make a successful Morale Check using the dice roll modifiers found on the Roll To Stand Vs. Assault Modifiers Chart, and any other modifiers that may apply. If the top unit in the stack passes this Morale Check then it and all other units in that stack automatically pass as well. They are considered to be Standing in the face of an Assault. Their Defensive Fire Value is doubled and they roll a die to determine if they receive any Defensive Shifts. If the top combat unit in the stack fails this Morale Check then it and all other units in the stack automatically Disorder, or Rout if already Disordered.
- Assault Odds: To determine the "Odds Assaulting the Target Hex" count up the number of hexes from which the attacker is launching his Assault. Example: If the attacker is attacking from three hexes the odds would be 3:1. The modifier yielded by the Assault Odds Morale Check Modifiers Chart is -9, which is added to any other modifiers that may pertain to the combat.
- Cavalry: Cavalry units automatically Stand. However, they still roll the dice to determine if they are eligible for Defensive Shifts. If they fail they do not receive any Defensive Shifts. If they pass, roll a die to determine the number of Defensive Shifts they receive.
- Special Structures: Units in Special Structures automatically Stand when assaulted. They must still roll the dice, however, to determine if they deliver effective Defensive Fire and receive any Defensive Shifts.
16.6 Mêlée
To resolve a Mêlée the sum of the Mêlée Values (printed Mêlée Values plus their modifiers) of all units in the Assaulting stack(s) are divided by the sum of the Mêlée Values of the target stack. This produces the odds ratio. Round down any fractions to conform to the nearest odds column on the Assaut et Mêlée Chart. Shift the odds left by a number of columns equal to the Defensive Shifts received, or in the case of a successful British Huzzah Charge, shift the odds right by the same number of columns. Roll the dice and locate the result in the appropriate column. The Assaulting player rolls the dice. Mêlée odds at less than 1:3 are conducted as 1:3 odds. Mêlées conducted at odds greater than 5:1 are treated as 5:1 odds.
- Modifiers may apply to the Mêlée Values of the combat units involved (see Mêlée Modifiers For Infantry and Artillery Chart and Cavalry Mêlée Modifiers Chart). Modifiers may apply to the dice result for Offensive and Defensive Fire or if a leader is present with either the attacking or defending force.
- Special Structures: Only six Increments may Assault or defend a special structure hex (e.g. walled farm, mill, chateau or fortified church). Regardless of the size of the forces, only six parts of the attacking or defending forces may be used for Assault or defense. Consult the Exclusive Rules to determine which hexes are designated as special structures. Example: A battalion of eight Increments and a Mêlée Value of 16 occupies the hex. If Assaulted only 6/8ths of the unit's Mêlée Value will count as the unit's defense strength (16/8 x 6 = 12). Sapeurs increase the Assaut et Mêlée Chart odds against Special Structures by one column. The Sapeurs must be the top unit in a stack to increase the odds.
- Assaults to the Flank or Rear: Infantry that Assaults an enemy unit in the flank and/or rear has its Mêlée Value doubled.
16.7 Retreat after Assault
After Assault, units may be required to retreat due to Rout or Recoil.
- Recoil: Units which suffer an AD# or DD# result from Mêlée and did not become PGD are forced to retreat the indicated number of hexes. These units are said to be recoiling. Recoiling units must conform to the retreat priorities (13.2.4). Exception: Units in Special Structures do not retreat due to Recoil.
- Rout: If the Mêlée results in a DR or AR, or already disordered units suffer an AD# or DD# result, the defeated units Rout. The Routing units must conform to the retreat priorities (13.2.4).
- Units that retreat because of Mêlée and retreat from enemy Zones of Influence lose one Increment per stack for each hex so exited (10.1.9).
- Recoiling and Routing are considered Involuntary Movement (13.2) and do not trigger Opportunity Reactions.
- Unlimbered artillery units that are forced to retreat due to Recoil or Rout are eliminated (18.7.3).
16.8 Advance after Assault
Assaulting units must enter the hex they contested after it is vacated as the result of a successful Assault. All units that will advance after Mêlée become disordered if they are not already Disordered. Mark the units as disordered before they advance. Units that advanced because the target stack vacated its hex before Mêlée (e.g. Disordered units failed their Roll to Stand) would have occurred do not become Disordered after advancing. The targets of an Assault do not Advance after Assault.
- Multiple Advancing Stacks: If several units from different stacks advance into the same hex and the stacking limit for the hex is violated, sufficient units must be displaced to the hexes from which they launched their Assault until the stacking limit for that hex is satisfied (11.1.5).
- Different Formations: If more than one stack advances into the same hex and the stacks are in different formations or they are unable to form a legal stack then, the combined stack Disorders, but does not Rout if already Disordered.
- Opportunity Reactions: Advance after Assault/Mêlée may trigger Opportunity Reactions.
16.9 French Old Guard Infantry Charge
Any infantry battalions of the French Imperial Guard designated as Old Guard in the Exclusive Rules may make an Old Guard Charge. The French player must declare Old Guard Charges as such. Assaults of the Old Guard that are not declared as Old Guard Charges are resolved in the same manner as Assaults by any other unit. An Old Guard Charge is resolved during the Maneuver Segment and not in the Assault Segment. An Old Guard Charge is conducted just as a regular Assault, except in the event the Old Guard Charge is successful and the stack Advances after Assault, it may continue moving. All rules regarding Assaults apply to Old Guard Charges except where noted here.
Procedure: All steps as in 16.1 except as noted.
- Automatic Advance: As in 16.1 Step 1.
- Retreat Before Assault (16.3): As in 16.1 Step 2 except as follows. After a target stack Retreats before Assault, the charging stack may continue moving, provided they are not currently in an enemy Zone of Influence. Proceed to Step 5.
- Assault Resolution: As in 16.1 Step 3.
- Advance after Assault: As in 16.1 Step 4.
- Old Guard Charge Exploitation: If the Old Guard units successfully advanced into the target hex they may continue moving with any MPs remaining to them, provided they are not currently in an enemy Zone of Influence. The initial hex of advance in Step 4 does not cost MPs and hence does not reduce the Old Guard unit's remaining MPs. They may declare a new Assault, even if disordered, which is resolved as a normal Assault during the Assault Segment.
Old Guard infantry Charges may be conducted by individual Old Guard battalions, stacks of Old Guard, or any stack of units with an Old Guard unit as the top unit in the stack.
17.0 Losses
Losses should not be thought of as piles of dead. They are, instead, losses in unit effectiveness.
17.1 Losses and Stacking
The position of a unit in a stack effects which unit takes the losses from Fire Combat, Pursuit, retreating through enemy Zones of Influence, etc.
- Losses: Losses are always taken from the top combat unit except as below.
- Artillery with Infantry: When a stack of unlimbered artillery and infantry takes losses from a Fire Attack the artillery takes the even numbered losses and the infantry the odd losses. Example: If three losses are called for, the artillery takes only one loss (the second), while the infantry in the hex suffers two losses (the first and third). If the artillery or infantry were alone in the hex, they would suffer all three losses.
- Losses and Presentation: Units may be required to alter presentation due to losses (12.1.4).
- Minimum Stacking Requirement: Whenever losses cause a unit to fail the minimum stacking requirements for its current formation, it Disorders the instant the casualty occurs.
- If Unlimbered artillery is stacked with infantry in Square, and the infantry falls below the minimum Increments required to maintain the Square, both are Disordered (12.7.3).
17.2 Losses and Their Effect on Combat Units
- Infantry: The "printed" Fire Value of infantry (printed on the specific side of the unit counter) is not reduced until the unit's overall strength is down to one Increment. When an infantry battalion is down to its last Increment this Fire Value is halved. Range is unaffected by losses.
- Cavalry: For every three Increments lost, a cavalry unit's Lance Bonus is reduced by one, but never below one.
- Artillery: An artillery unit reduces its various Fire Values proportionately to the losses it has taken. Example: If a battery has lost one-third of its initial strength its Fire Value becomes two-thirds of its printed Fire Value (multiply by 2/3).
- Mêlée Values: When any unit takes a casualty its Mêlée Value is reduced proportionately to the amount of losses suffered. Example: A unit with an initial strength of six Increments and a Mêlée Value of 15 would reduce its Mêlée Value by two and one-half for every Increment it loses (15/6 = 2.5).
17.3 Losses and Their Effect on Morale
- Each time any unit, whether infantry, cavalry or artillery, suffers a casualty due to Fire Combat (except for Offensive or Defensive Fire) it must take a Morale Check.
- If the top unit in a stack is eliminated by Fire Combat the remaining units in the stack still take a Morale Check.
- Whenever a battalion or regimental unit is reduced to 50% of its initial strength, when making a Morale Check its dice roll will always be modified by -6 for the worse. Squadrons and companies are not affected in this manner.
- Grievous Losses: Whenever a battalion or regimental unit suffers losses from a single combat event that are equal to or greater than 50% of its current strength, its Morale Check dice roll is modified by a further -6 for the worse. Squadrons and companies are not affected in this manner.
- Destroyed Units and Morale Level: Battalions that have suffered losses equal to their starting strength, or that have surrendered, are returned to their space on the Organization Display and placed flipped over (specific side up). Once every hour these units are counted and added to the number of PGD battalions from the same superior formation to determine if that superior formation will suffer from a Morale Level modifier in the coming hour (20.3).
18.0 Artillery
18.1 Facing
When artillery is Unlimbered and in a hex composed exclusively of artillery, it always faces a hexside. It thus has three front and three rear hexsides. When artillery is deployed with infantry, it adopts the facing of the infantry. Unlimbered artillery has a Zone of Influence that extends into their adjacent front hexes. Limbered artillery has all-around facing (6 front hexsides). Limbered artillery does not have a Zone of Influence.
18.2 Artillery Formations
Artillery has two voluntary formations: Limbered or Unlimbered. When artillery is Limbered, it is ready to move, and is deployed general side up. Unlimbered artillery is ready to fire and deployed with its specific (gun) side up. Artillery is still considered to be Limbered or Unlimbered even when in Disorder or in General Order terrain.
- Changing Formation: Limbered artillery may Unlimber at will by expending two MPs for a Formation Change, however, for Unlimbered artillery to Limber it must roll a die to do so, and pay the usual cost for a Formation Change. Consult the Artillery Limbering Chart for the specific unit and die roll ranges.
- Artillery and Road Column: Limbered Artillery that enters a road/trail hex from another road/trail hex is automatically considered to be in Road Column and does not pay a formation change cost when entering or exiting Road Column. The change to and from Road Column is considered an Involuntary formation change and does not in itself trigger Opportunity Reactions.
18.3 Artillery Maneuvers
During this period artillery maneuvered in lines and columns in a similar manner as infantry and cavalry, but they also had some unique maneuvers when unlimbered.
- Prolonging Artillery: Unlimbered artillery may be moved one hex when it is active only under specific circumstances. It is not necessary to Limber it, move it, and then Unlimber it again if the player merely wishes it to occupy an adjacent hex. Guns may only be prolonged from one clear terrain hex to another. Guns cannot be prolonged across any kind of slope, bridge, ford or other hexside impediment. Consult the Exclusive Rules which may contain additional restrictions on when artillery may prolong.
- Prolonging into Zones of Influence: Foot artillery may not prolong into enemy Zones of Influence unless stacked with or adjacent to an Artillery Leader of Special Ability. Horse artillery may freely prolong into enemy Zones of Influence.
18.4 Artillery and Morale
Unlimbered artillery never suffers PGD. They are removed from play instead. Limbered Artillery will Rout if they suffer PGD. Destroyed batteries never count towards Morale Levels.
18.5 Artillery Fire
Artillery may fire more than once during a turn. They may fire once when the Artillery Chit is pulled and once again during the Fire Segment or Defensive Fire step of the Assault Segment. In addition they may conduct Opportunity Fire any number of times. When a stack is composed exclusively of artillery units, all of them in the hex may fire. They must fire at the same target. Other stacks including artillery may fire at the same target and their Fire Value must be combined into a single attack.
- Artillery Fire When Stacked With Infantry: When stacked with infantry artillery must always be at the top of the stack in order to make a fire attack.
- Artillery and Infantry in Square: When stacked with infantry in Square up to 9 Increments of infantry and all the artillery in the hex may fire subject to the rules governing fractional strength for units firing from Square (12.7.4).
18.6 Range
The specific side of an artillery counter gives the various Fire Values of that unit at three different ranges. The top right number is the maximum distance that unit may fire at Long Range. The top-left number is the Fire Value of the battery when it fires at Short Range (1 to 2 hexes away). The middle left number is the Fire Value at Medium Range (3 to 5 hexes away). The bottom-left number is the Fire Value of the battery at Long Range (6 hexes up to its Maximum Range).
- Point Blank Range: Whenever artillery units fire at adjacent hexes (either alone or in conjunction with other artillery or infantry) the Fire Attack gets a bonus of two odds shifts in its favor on the Combat à Feu Chart. Example: If the Fire Attack would normally result in a 5:1 attack, shift the odds to 7:1.
- Opportunity Fire: Even though Opportunity Fire Attacks are halved in Fire Attack value, artillery would still get the point blank benefit when conducting Opportunity Fire on an adjacent hex.
- Defensive Fire: When artillery conducts Defensive Fire, it receives the point blank benefit even if its Roll to Stand leaves it in Disorder.
18.7 Artillery, Assault and Charge
Artillery units may not Assault or Charge. They may be the targets of such, however.
- Assault: Artillery in Road Column Routs when the target of an Assault or Old Guard Charge. Limbered artillery which is not in Road Column must Roll to Stand. Unlimbered artillery must Roll To Stand. Limbered artillery Mêlée with one-half their printed Mêlée Value and may not conduct Defensive Fire.
- Charge: When alone in a hex and Charged, Unlimbered artillery is treated just like infantry and must attempt to "Stand Before Charge" (19.6). Limbered artillery units alone in a hex and contacted by Charging cavalry automatically Rout and may be Pursued.
- Rout or Recoil: Unlimbered artillery which is forced to Rout or Recoil is eliminated.
19.0 Cavalry
19.1 Cavalry Charges General Rule
A cavalry unit moves as part of a MU during the Maneuver Segment. While a cavalry unit is moving it may move adjacent to a potential target in its front facing and declare a Charge against it. At this time a Charge Marker is placed on top of the cavalry unit and the Charge is carried out immediately as outlined below. Once the Charge is complete the phasing player may continue moving the remainder of the MU. In order to Charge, a cavalry unit must be in Good Order and must not be Exhausted. Cavalry may only initiate Mêlée as a result of a Charge.
There are two types of Charges: (1) Opportunity Charges occur when an opponent is moving; (2) Cavalry Charges occur when cavalry is active.
Cavalry Charge Procedure: Players should refer to the following procedures while resolving Charges and follow the steps in their proper sequence as numbered below.
- Charge Declaration: During the Maneuver Segment the phasing player may, at any time, move cavalry units of an active MU adjacent to an enemy stack and place a Charge Marker on them to indicate that they intend to Charge. The Charge is immediately carried out.
- Enemy Reactions to Charge:
-
a. Forming Square (19.7): At any time during movement the reacting player's infantry which is in Line or Column may attempt to form Square when phasing cavalry moves within 4 hexes of the checking stack and they have a LOS to the cavalry.
Cavalry Options to Forming Square: If a Charge had not yet been declared, the cavalry may continue moving and perhaps declare a Charge at a later point. If a Charge has been declared and (i) the target formed Square, the Charging cavalry may attempt to Recall (19.8) and end the Charge (proceed to Step 4), or Mêlée the Combat Units in Square (proceed to Step 3); or (ii) the target disordered or routed from the Square attempt, then apply the result and proceed to Step 3.
-
b. Opportunity Charge (19.14): At any time during movement the reacting player may attempt to Opportunity Charge as long as the reacting cavalry is in Good Order, is not Exhausted and the moving cavalry is in its Opportunity Charge Zone.
-
c. Retreat Before Charge: If the target of the Charge is infantry skirmishers they may attempt to Retreat Before Charge when the cavalry moves adjacent (19.4). Or if the target of the Charge is Light cavalry and the charging stack is composed exclusively of Heavy cavalry the Light cavalry may Retreat Before Charge (19.5). If the target Retreats Before Charge the charging cavalry may attempt to Recall.
-
- Mêlée Resolution (19.9): If there is still a target to Charge, use one of the procedures below to resolve the remainder of the Charge. If the target is PGD or is limbered artillery, units in Road Column, or units in Skirmish Order which were unable to Retreat Before Charge, use the Cavalry Charge vs. PGD Mêlée Procedure (19.1.4). If the target is infantry or unlimbered artillery use the Cavalry Charge vs. Infantry and Artillery Mêlée Procedure (19.1.2). If the target is cavalry use the Cavalry Charge vs. Cavalry Mêlée Procedure (19.1.3).
Cavalry Charge vs. Infantry and Artillery Mêlée Procedure:
-
Roll to Stand (19.6): The target stack takes a Morale Check. Consult the Roll to Stand vs. Cavalry Modifiers Chart. Pass — Passing stacks multiply their Defensive Fire Value by 2 and a die is rolled to determine the number of left column shifts (Defensive Shifts) on the Assaut et Mêlée Chart, per the table below. Fail — Failing stacks not in Square nor in General Order terrain Disorder or Rout if already Disordered. If all Target units Routed or were eliminated proceed to Step 5. Units in Square or in General Order terrain do not Disorder if they fail, however, their fire is not doubled and they do not receive any Defensive Shifts.
Die Roll Left Column Shifts 1-3 0 4-5 1 6 2 (Note: Assuming facing allows, defending stacks containing artillery has its fire shifted two odds in its favor on the Fire Chart for firing canister at an adjacent target (18.6.1) in addition to any fire benefits it may receive from passing the Roll to Stand.)
-
Defensive Fire: Defending units with the charging cavalry in its front hexsides conduct Defensive Fire. Defensive Fire is conducted as a Fire Attack with the usual modifiers plus any modifiers obtained in Step 1. For each casualty inflicted by the defenders the Mêlée resolution die roll is modified by -6. If all Charging units are eliminated by Defensive Fire, the Charge is finished. (Note: Charging units do not take Morale Checks from casualties resulting from Defensive fire.)
Cavalry Charge vs. Cavalry Mêlée Procedure: (1) Calculate the Mêlée Odds (19.9); (2) Mêlée Resolution (19.9); (3) Advance after Charge (19.10); (4) Return to Step 4, Cavalry Regroup, of the Cavalry Charge Procedure (19.1.1).
Cavalry Charge vs. PGD Mêlée Procedure: (1) Retreat: The PGD units conduct their Rout move losing one increment for each Zone of Influence they exit including the first (10.1.9); they may lose additional increments due to Step 3 below. (2) Advance after Charge (19.10). (3) Pursuit (19.11). (4) Return to Step 4, Cavalry Regroup, of the Cavalry Charge Procedure (19.1.1).
19.2 Cavalry Charge (Charge à Cheval)
- Charges and Formations and Facing: Only cavalry units in Line or Column may execute a Charge. Cavalry units in other formations may not initiate a Charge. A cavalry unit may only Charge units which are in its front facing.
- Charges and General Order Terrain: Regardless of its initial formation, cavalry units are considered in General Order the moment they enter terrain that would cause them to enter General Order during normal movement. Cavalry may Charge enemy units that are in General Order terrain. However, a cavalry unit may not initiate any type of Charge while in General Order terrain.
- Charges and Prohibited Terrain: Cavalry may not Charge into terrain they are prohibited from entering.
- Targets: A cavalry unit may only Charge one target hex at a time. That is it may not simultaneously attempt to Charge and Mêlée more than one target hex. A stack of units may only be the target of a Charge once per MU activation.
19.3 Enemy Reactions to Charge
Defending Combat Units have several options when they are the target of charging cavalry units.
- Defending cavalry units in Good Order may Stand (do nothing), Retreat Before Charge (19.5) if eligible, or Opportunity Charge (19.14) if the moving cavalry enters its Opportunity Charge Zone. Cavalry automatically Stands when Charged and does not Roll to Stand to do so.
- Infantry units in Line, or Column may Roll To Stand versus Cavalry Charge (19.6) or may attempt to form Square (19.7).
- Combat units in Square or in General Order automatically Stand and their Roll to Stand die roll simply becomes a check to see if they deliver effective Defensive Fire.
- Infantry units in Skirmish Order may be able to Retreat Before Charge (19.4). If they do not, the skirmishers become PGD on contact with the Charging cavalry and are subject to Pursuit (19.11).
- Units already in PGD or in Road Column become PGD on contact with the Charging cavalry and are subject to Pursuit (19.11).
- Unlimbered artillery units must Roll To Stand (19.6) or, if stacked with infantry units forming Square (19.7), be a part of that Square.
- Limbered artillery units stacked with Infantry units may not form Square. The stack must Roll to Stand versus Cavalry Charge (19.6).
- Limbered artillery units alone in a hex become PGD on contact with the Charging cavalry (18.7.2).
- Combat Units in Disorder must attempt to Stand (19.6) and cannot attempt to form Square.
19.4 Retreat Before Charge by Infantry
All Skirmishers are eligible to Retreat Before Charge under the restrictions below. See the Exclusive Rules for additional units which may be eligible.
- Procedure: When charging cavalry moves adjacent to its target, eligible infantry units, which are the target of the Charge, may elect to Retreat Before Charge. They may retreat into or through an adjacent hex under the restrictions below. Units which Retreat Before Charge expend MPs as they move. If they expend more than half of their MPs in their retreat they end the retreat in Disorder. When the target of a Charge retreats, the charging cavalry may attempt to Recall (19.8). If it does not Recall the cavalry unit must advance into the target hex and Charge the adjacent hex which the Skirmishers retreated into or through, unless the current hex halts Charges. Skirmishers which are unable to Retreat Before Charge, and are not in terrain that would cause formed cavalry units to enter General Order, will instead become PGD and are subject to Pursuit (19.11).
- Restrictions: Infantry units in Skirmish Order may Retreat Before Charge into an adjacent hex containing terrain that mandates General Order for formed units, or into a hex containing friendly formed infantry units in Good Order, in which case, they would change facing and formation to match the units presently in the hex and be placed at the bottom of the stack. They may also Retreat Before Charge through an adjacent hex containing formed infantry units in Good Order, thus blocking the cavalry units with the intervening infantry unit. At the end of their retreat they may reface. They are not allowed to violate stacking rules in the course of its retreat — if in retreating they cannot legally form a stack, they may continue to retreat through units until they can legally stack. They may not retreat into an enemy Zone of Influence; however, friendly units negate enemy Zones of Influence in their hex when units Retreat Before Charge into a friendly unit's hex (10.1.8).
- Opportunity Reactions: The retreating units and pursuing cavalry may trigger Opportunity Reactions. However, if the retreating stack is Opportunity Charged, they may in turn Retreat Before Charge from the Opportunity Charge. The originally charging cavalry is finished with its Charge and proceeds with Step 4, Cavalry Regroup, of the Cavalry Charge Procedure (19.1.1). If the pursuing unit is Opportunity Charged then the retreat ends. The pursuing unit's Charge is now over. The Opportunity Charge is then resolved (19.14).
19.5 Retreat Before Charge by Cavalry
Light cavalry units may attempt to Retreat Before Charge when charged solely by Heavy Cavalry (19.12.1). In order to Retreat Before Charge the light cavalry must be the target of the Charge, they must be in Good Order and they must not be Exhausted. See the Exclusive Rules for additional units which may be eligible. Cavalry may not Retreat Before Charge from an Opportunity Charge.
- Procedure: When the charging cavalry moves adjacent to the light cavalry, they may Retreat Before Charge. Units which Retreat Before Charge expend MPs to follow the Path of Retreat, changing facing as necessary. During their retreat, they may only change formation to enter General Order or to join a stack of friendly formed units in Good Order in which case they change facing and formation to match the units presently in the hex and are placed at the bottom of the stack. At the end of their retreat they may reface. Cavalry that Retreats Before Charge may expend up to their full Movement Potential in the course of this retreat, but if they expend more than half of their Movement Potential they end this retreat Exhausted.
- Path of Retreat Restrictions: Cavalry that Retreats Before Charge must follow a Path of Retreat that does not enter terrain that prohibits movement for cavalry, nor hexes that contain enemy units. Nor may they retreat into enemy cavalry Zones of Influence — however, friendly units negate Zones of Influence in their hex for the purposes of Retreat Before Charge (10.1.8). Retreating units may retreat through friendly units, but are not allowed to violate stacking rules in the course of their retreat.
- Pursuit of Cavalry that Retreats Before Charge: The heavy cavalry must pursue unless it passes a Recall check (19.8). If the heavy cavalry pursues they must follow the retreating light cavalry along their exact path of retreat up to a limit of 3 hexes. If the heavy cavalry Recalls the Charge ends and the light cavalry retreats an additional hex. At the end of the retreat the light cavalry may reface ending their retreat with at least one hex separating them from the following heavy cavalry. If at the end of a pursuit there is no Mêlée the pursuing cavalry proceeds with Step 4, Cavalry Regroup, of the Cavalry Charge Procedure (19.1.1).
- Restrictions: Pursuing cavalry ends its pursuit if it enters an enemy cavalry unit's Zone of Influence. Pursuing cavalry may not pursue into terrain which mandates General Order for formed units, nor into terrain which they may not enter.
- Recall: Pursuing cavalry may only attempt to Recall once at the beginning of the pursuit, before the first hex of pursuit is entered, and once again if the retreating cavalry retreats through a friendly unit.
- Retreat Through Friendly Units: If the retreating cavalry retreats through friendly units, the pursuing cavalry may attempt to Recall and end the pursuit. Or, if the pursuing cavalry does not Recall, they must Charge the units retreated through. Proceed to Step 3 of the Cavalry Charge Procedure (19.1.1) selecting the appropriate Mêlée procedure.
19.6 Rolling To Stand Versus Cavalry Charge
Rolling to Stand requires the top unit in the target stack to make a successful Morale Check using the modifiers found on the Roll to Stand vs. Cavalry Charge Chart. If the Morale Check is passed the defender delivers effective Defensive Fire and their Fire Value is doubled. Roll a die to determine the number of Defensive Shifts received, if any. If the Morale Check is failed, the defending units Disorder or Rout if already in Disorder.
- Steady Lads!: Units in General Order, Square or Special Structures automatically Stand when charged. They must still roll the dice, however, to determine if they deliver effective Defensive Fire and receive any Defensive Shifts.
19.7 Forming Square
Infantry units in Line or Column may attempt to form Square anytime enemy cavalry expends MPs within 4 hexes. Units attempting to form Square must have a clear Line of Sight to the cavalry. A unit does not have to be a target of a Charge to attempt to form Square. They may attempt to form Square, regardless of whether or not the cavalry is actually charging. If a cavalry stack starts within 4 hexes of an infantry unit, they may attempt to form Square as soon as the cavalry begins to move. A stack may attempt to form Square once per Charge or once per the movement of a cavalry unit. If the target of a Charge successfully formed Square and the cavalry does not Recall (19.8), the Charging cavalry must Mêlée the Square.
- Procedure: The reactive player announces that he will attempt to form Square. The active player suspends moving his cavalry until the result of this attempt is resolved. Locate the nationality of the top infantry unit, in the stack, on the Square (Carré) Realization Chart and the distance separating the active cavalry unit from the reactive infantry stack. Consult the Dice Result Modifiers at the bottom of the chart for any that may apply. Roll the dice. The result applies to the entire stack. Units that successfully roll on this chart form Square and are marked with a Square counter. Units that Disorder, do so in place, and are marked with a Disorder counter. Units that PGD, execute their Rout movement; if the cavalry unit is adjacent, the infantry is subject to Pursuit (19.11).
- Opportunity Reactions: Change of Formation into Square is considered Voluntary Maneuver and may trigger Opportunity Reactions. This Opportunity Reaction preempts the change of Formation.
19.8 Cavalry Recall
Cavalry units may elect to end a Charge through Recall when certain events occur. Roll a die and consult the Cavalry Recall Chart to determine success. A successful Recall ends the Charge. An unsuccessful Recall Check makes Pursuit or Mêlée of the target mandatory.
Cavalry may attempt to Recall if one of the following conditions is true: after a defender that has been declared a target vacates its hex by Retreating Before Charge (the Recall must be attempted before the first hex of Pursuit is entered); or if units Retreating Before Charge retreat through or into a stack of friendly units; after a defender that has been declared a target vacates its hex by becoming PGD either due to a failed Roll to Stand or as a result of Mêlée (the Recall is attempted at the beginning of the Pursuit step of the Charge); the moment a defender that has been declared a target vacated its hex by becoming PGD due to a failed Square Formation Check; or the moment a defender, which has been declared a target, has successfully formed Square.
19.9 Cavalry Mêlée
To resolve an individual Mêlée the sum of the Mêlée Values (printed Mêlée Values plus their modifiers) of all units in the Charging stack are divided by the sum of the Mêlée Values of the target stack. This produces the odds ratio. Round down any fractions to conform to the nearest odds column on the Assaut et Mêlée Chart. Shift the odds left by a number of columns equal to any Defensive Shifts received. The Charging player rolls the dice and locates the result in the appropriate column. Mêlée odds at less than 1:3 are conducted as 1:3 odds. Mêlées conducted at odds greater than 5:1 are treated as 5:1 odds.
- Modifiers may apply to the Mêlée Values of the combat units involved (see Cavalry Mêlée Modifiers Chart) and modifiers may apply to the dice result if a leader is present with either the attacking or defending force or the cavalry suffered casualties from Defensive Fire.
- Cavalry Bounce: Cavalry which are involved in a Mêlée either as the attacker or defender when a blank result is obtained will "bounce" (that is, retreat) one-third of their printed Movement Potential. If both the attacker and defender are cavalry then both bounce from a blank result. In this case the "bounce" moves are considered to be simultaneous, but procedurally the attacker conducts his bounce move first. This retreat is considered Involuntary Movement and does not trigger Opportunity Reactions. Each bouncing cavalry stack will lose one Increment for each hex in enemy Zone of Influence retreated from or through during this retreat (10.1.9). The path of retreat for bouncing cavalry subscribes to the priorities of retreat (13.2.4). After retreating one-third of its printed Movement Potential the cavalry makes a Morale Check. If it passes this Morale Check it Disorders, or Routs (PGD) if already disordered. If it fails the Morale Check it Routs (PGD) and executes its Rout movement the full distance.
19.10 Cavalry Advance after Charge/Mêlée
If the target of a Charge vacates its hex, the cavalry must advance into the vacant hex. The Advance after Charge is conducted prior to any potential Pursuit. All cavalry that advances after Mêlée are disordered unless already disordered. If the unit was already disordered there is no further effect (i.e. the unit does not become PGD). Mark the units as disordered before they advance. Cavalry that Charges, but did not Mêlée the target are not Disordered when they advance. If the hex is over-stacked, sufficient units must be displaced back to the hexes where they advanced from until the stacking limit is satisfied (11.1.5). This advance may trigger Opportunity Reactions.
19.11 Pursuit
When the target is infantry or artillery, Cavalry pursues following a successful Charge. (Note: This is not the same as Pursuit following Retreat Before Charge. Refer to 19.4 and 19.5 for that case.) After any retreats are conducted, cavalry that elects not to Recall (19.8) or does not pass a Recall check, pursues and follows exactly the path of retreat up to three hexes. (Note: Cavalry does not pursue cavalry after a Mêlée. See the Cavalry Charge vs. Cavalry Mêlée Procedure (19.1.3).)
- Procedure: The number of hexes which cavalry may Pursue is the number of hexes the defender Recoiled via a DD# result on the Assaut et Mêlée Chart, or if they retreated after becoming PGD, up to a maximum of three hexes. If the target was eliminated there is no Pursuit. The pursuing cavalry follows the path of the retreating units. For each hex of Pursuit the target stack loses an increment. Light cavalry inflicts one extra loss on retreating stacks for a maximum of up to four losses inflicted from Pursuit. The Pursuit ends as soon as the pursued units are eliminated. Pursuit losses are in addition to each increment lost for each Zone of Influence exited during their retreat.
- Restrictions: Cavalry may not pursue into terrain they are prohibited from entering, nor may they pursue into General Order terrain. The Pursuit ends immediately upon the cavalry entering an enemy Cavalry Zone of Influence; if the cavalry begins its Pursuit in a Cavalry Zone of Influence there is no Pursuit. If the retreating units retreated through a friendly stack the Pursuit ends when the cavalry moves adjacent to the stack retreated through.
- Recall: Cavalry, which wishes to end a Pursuit may attempt to Recall. Roll a die and consult the Cavalry Recall Chart. A passing die roll means the Pursuit ends. Failure means the cavalry must pursue up to the allowable limit. Recall may only be attempted at the beginning of the Pursuit step of the Mêlée procedures.
- Opportunity Reactions: Pursuit movement may trigger Opportunity Reactions. An Opportunity Charge will end the Pursuit at the moment the unit(s) making the Opportunity Charge passes its Morale Check.
19.12 Cavalry Modifiers to Mêlée
All cavalry Mêlée modifiers are listed on the Cavalry Mêlée Modifiers Chart. All modifiers to Mêlée are cumulative, except where noted.
- Heavy and Light Cavalry: Heavy cavalry is cavalry with a printed Movement Potential of 12 or less. Light cavalry is cavalry with a printed Movement Potential of 13 or more. (Note: Some games may have poorly trained cavalry with a movement allowance of 12 or less, but are not considered heavy cavalry. Consult the Exclusive Rules.) When heavy cavalry is involved in a Mêlée with light cavalry as either the attacker or defender, the Mêlée Value of the heavy cavalry is doubled. If heavy cavalry Mêlées a combination of heavy and light cavalry it would not be doubled.
- Lancers: All units with a Lance bonus are termed Lancers. Lancers have a Lance Bonus (+#) printed on their counters. The Lance Bonus is added to the Mêlée Value of the attacking lancer unit. Only the top unit in a stack adds its Lance Bonus to its Mêlée Value. The Lance Bonus is not modified by any other Mêlée modifiers. It is modified only by losses to the unit. For every three casualties lost by the unit the Lance Bonus is reduced by one, but never below one. Example: A lancer unit with a Lance Bonus of +3 and a Mêlée Value of 18 Charges an enemy Square, its Mêlée Value would be 12 (18 x ½ + 3).
- Cavalry Charges to the Flank or Rear: Cavalry that Charges an enemy unit in the flank or rear has its Mêlée Value doubled.
- Cavalry Leaders of Special Ability: Specially designated cavalry leaders double the Mêlée Value of units with which they are stacked.
19.13 Ready and Exhausted Cavalry
Cavalry units are either Ready (rested) or Exhausted.
- Losing Readiness: Cavalry becomes Exhausted as follows: (1) At the end of a Mêlée in which it was involved; (2) If it made a Charge or Opportunity Charge that segment; (3) Cavalry units that perform Retreat before Assault or Retreat before Charge and use more than half of their Movement Potential in doing so.
- Recovering Readiness: Cavalry units recover readiness by not moving, not Charging, and not being involved in Mêlée during a turn. Cavalry does not need to be in Good Order to recover Readiness, but in order to recover they could not have moved during the current turn for any reason, including Rout movement. Exhausted markers are removed during the Reorganization Segment.
- Effects of Being Exhausted: An Exhausted cavalry unit moves at one-half its printed Movement Potential, and Mêlées at one-half its printed Mêlée Value, after being adjusted for losses of course. It may not initiate any type of Charge, nor may it Retreat Before Assault. Example: An Exhausted and Disordered cavalry unit would move and Mêlée at one-quarter its values. If it were Exhausted and PGD it would Rout move at ¾ of its printed movement rate (3/2 x ½ = 3/4).
19.14 Opportunity Charge
- Reactive cavalry may only make Opportunity Charges on active enemy units while they are moving. Whenever an enemy unit moves into, attempts to move from, or expends MPs in the Opportunity Charge Zone of a cavalry unit, it may attempt to Opportunity Charge. Each cavalry stack whose Opportunity Charge Zone has been violated may attempt an Opportunity Charge once for each triggering event. If a moving unit is in multiple Opportunity Charge Zones each cavalry stack whose Zone has been violated, may attempt to Opportunity Charge. However, since Opportunity Charges are conducted immediately only one reacting cavalry stack may pass its Morale Check and conduct an Opportunity Charge.
- Opportunity Charge Zone: Reactive cavalry have an Opportunity Charge Zone. An Opportunity Charge Zone extends, at all times, two hexes from the front facing of a cavalry unit which is in Good Order and is not Exhausted.
- Procedure: If the cavalry is in Good Order and is not Exhausted, the owning player may declare an Opportunity Charge.
- The active unit ceases movement. If the active unit was in the process of changing formation it does not change formation. (Exception: see odd cases below.)
- The reacting player makes a Morale Check for the cavalry unit attempting to Opportunity Charge. If the cavalry passes, it immediately moves one hex, if necessary, to move adjacent to the active unit that now becomes the target and the Charge is resolved immediately. If the cavalry fails the Morale Check, it just sits there, but does not Disorder. The moving stack may finish its movement.
- Charge Resolution: If the target is infantry or artillery use the Cavalry vs. Infantry and Artillery Mêlée Procedure (19.1.2). If the target is Cavalry use the Cavalry vs. Cavalry Mêlée Procedure (19.1.3). If the target is limbered artillery, units in Road or Skirmish Order use the Cavalry vs. PGD Mêlée Procedure (19.1.4).
- Cavalry Regroup (19.1.1).
- Charge Completion (19.1.1): Cavalry units that Opportunity Charge become Exhausted at the completion of the Charge.
- The target of the Opportunity Charge may not voluntarily spend any more MPs during the remainder of the Maneuver Segment.
20.0 Morale
20.1 The Morale Check
To make a Morale Check for a unit roll the dice. The resulting number plus all modifiers must exceed the printed Morale Rating of the unit to pass. Ties fail.
- Stacking: Whenever making a Morale Check for a stack of units roll once for the stack. If the top unit in the stack passes, the entire stack passes. Whenever the top unit in a stack fails a Morale Check, all units beneath it in the stack also fail regardless of their Morale Rating.
- Elite Units: Units with printed Morale Ratings of –, 11, 12 and 13 are elite units. Elite units never apply negative dice roll modifiers (i.e. modifiers that worsen their chance for success) for any checks against their Morale Rating. Units with a Morale Rating of – always pass any check against their Morale. Units stacked with a Leader with an "A" Morale Rating always passes any check against their Morale.
- "Sauve Qui Peut!": A natural 11 rolled for a Morale Check always fails unless one of the following conditions apply: (1) If the combat unit has no Morale Rating (~); or (2) If the combat unit has a Morale Rating of 11 or 12 and there are enough positive modifiers to allow it to pass with a roll of 11.
- Failing a Morale Check: When a combat unit fails a Morale Check it will generally Disorder. (Exception: Cavalry that fails to Opportunity Charge.) Combat units in Disorder that fail a Morale Check become PGD (Routed).
- Passing a Morale Check: Under the conditions of 20.2, units which pass a Morale Check during the Reorganization Segment recover Good Order; otherwise, they remain in their current Morale state.
- Multiple Morale Checks Resulting From A Single Event: A combat unit may be required to make several Morale Checks within the course of a single turn. It may even be forced to make several Morale Checks in the course of a single segment of that turn. Combat units, however, are never required to make more than one Morale Check resulting from a single combat event. If an event engenders two Morale Checks, then only one is made which combines all modifiers from both Morale Checks. Example: As a result from a fire combat, an infantry unit in Square takes losses equal to half of its current Increments. The resulting Morale Check would be modified for the unit losing 50% in a single fire combat and for the unit being Square.
20.2 Recovery of Good Order
Units in Disorder or PGD may only recover Good Order in the Reorganization Segment. This is accomplished by the unit passing a Morale Check. When making a Morale Check for a stack, roll the dice and apply the result to the top units in the stack. If the top unit passes then all units in the stack recover Good Order. If the top unit does not pass the Morale Check the stack remains in its present Morale state. Apply modifiers from the General Morale Check Modifiers Chart.
- Disorder: Units in Disorder may not make this Morale Check when they are adjacent to enemy units.
- Plus Grand Désordre (PGD): Units in PGD may not make this Morale Check if they are less than 15 hexes away from an enemy unit in Good Order, unless they are stacked with a leader and are not adjacent to an enemy unit.
- Recovery and Formation: Infantry units that recover Good Order in the Reorganization Segment go immediately to Column unless in General Order terrain. Cavalry units that recover Good Order in the Reorganization Segment go immediately to Line unless in General Order terrain. These formation changes are considered involuntary and do not trigger Opportunity Reactions. Artillery units that recover Good Order remain Unlimbered or Limbered. The owning player of the unit that recovers Good Order may freely choose its facing.
20.3 Morale Levels
Accumulated losses not only affect the morale of a unit, but after a while begin to affect the army at higher levels as well. There are four Morale Levels determining the will of the main superior formations to which combat units belong. Level 0 has no adverse modifier, and is considered the normal "fresh" state of a formation. Losses in superior formation are measured in battalions. Battalions are counted as lost when either they have been removed to the Organizational Display by casualties or surrender, or, if they are currently on the map in a PGD (routed) state. To determine the current Morale Level of a superior formation, count the number of destroyed and routed battalions (or their equivalent; see Morale Level Tracks for details) in a superior formation. Find this number for the formation on the Morale Level Track and mark as appropriate with the formation's Morale Level marker. Read up the column to determine the Morale Level and its effect (if any). As Morale Levels are achieved, all battalions currently in play from that superior formation, have all of their Morale Check dice rolls modified by the specified amount. Lost or PGD cavalry and artillery are not included when counting units for Morale Level determination, nor are they affected by them.
- Morale Levels are determined every hour during the Reorganization Segment of the :40 turn. The morale effects of a Morale Level are in force for the entire hour (the :00, :20 and :40 turns inclusive). Battalions that were PGD and subsequently recover Good Order do not improve a superior formation's Morale Level until the Morale Levels are re-determined at the end of the Reorganization Segment of the next hourly turn (:40).
- La Garde Recule: Units specially designated as French Old Guard Infantry in the Exclusive Rules form their own formation for the purposes of determining Morale Levels. The current Morale Level of the Old Guard is added to the Morale Level for all other French and French Allied formations. Example: If the Old Guard is currently on Morale Level 1 then a French corps on Morale Level 2 would now be on Morale Level 3.
21.0 Dusk and Night
The exclusive rules will designate which turns are subject to Dusk and Night rules.
- Dusk: When dusk begins the following restrictions apply: the printed Movement Potential of cavalry is reduced by 4; cavalry has its Mêlée Value reduced by ½; the printed Movement Potential of horse artillery is reduced by 2; all PGD units modify their Reorganization Morale Check dice roll by a further -3, for a total modifier of -9.
- Night: When night falls the following restrictions apply: the printed Movement Potential of cavalry is reduced by 6; cavalry has its Mêlée Value reduced by 1/3; cavalry lancers do not receive a Lance Bonus; the printed Movement Potential of horse artillery is reduced by 3; all PGD units modify their Reorganization Morale Check dice roll by a further -6, for a total modifier of -12.
Part Two: Exclusive Rules for La Bataille de Ligny II
Règlements Exclusifs pour le Règlement de l'An XXX et le Règlement des Marie-Louises. Copyright © 2016 Clash of Arms. March 26, 2017. All rules herein take precedence over any rules in the series rules, which they may contradict.
Rules marked with an eagle or shaded with a gray background apply only to players using the Règlements de l'An XXX (the more detailed, advanced edition of the Standard Rules). (This transcription follows the printed text; where the source distinguishes An XXX-only material it is called out inline.)
NOTE: All references to Artillery Ammunition Wagons (AAWs), ammunition, ricochet fire, howitzers, grand charges and cavalry skirmishers apply only to players using the Règlements de l'An XXX.
1.0 Introduction
La Bataille de Ligny is a simulation of one of the opening battles of the Waterloo campaign of 1815 fought between the Emperor Napoléon and the bulk of the French L'Armée du Nord and Field Marshal Blücher, commander of the Prussian Army of the Lower Rhine. It simulates the Prussian attempt to stop the French army as it plunges north towards Brussels, the Belgian capitol. It was here Napoleon found his last victory.
2.0 Rules Questions
Send questions or comments to the following address:
Clash of Arms Games 1804 Hoffmansville Road PO Box 212 Sassamansville, PA. 19472-0212
Or email us at: [email protected], "Attention: Rules Questions Ligny"
Or check the La Bataille forums on Consimworld: http://www.consimworld.com or on http://boardgamegeek.com.
3.0 Game Components
A complete game of La Bataille de Ligny includes the following components:
- Four 34" x 22" maps
- Four sheets of counters
- One Series Rules book
- One Exclusive Rules book
- Charts
- Two organizational displays
- Game Turn Record Track
4.0 Terrain
4.1 Walled Farms, Ancien Chateaux & Churches
Special Structures — Walled Farms, Ancien Chateaux and Churches — are unassailable except at their gates/entranceways. Up to 6 increments may assault such a hex (regardless of how large the attacking unit actually is, only 6 parts/increments belonging to the unit may assault). Example: a battalion with 10 increments and a melee value of 25 assaults the hex. Only 6/10ths of the unit counts for its pre-melee morale check, and 6/10ths of its melee strength can be used in the melee. This particular unit would have a melee value of 15 (25/10 = 2.5, 2.5 x 6 = 15). All Churches, Walled Farms and Chateaus are presumed to have at least one such aperture (some may have two). Though the artwork for the gate may be difficult to spot at first glance, only up to six increments may assault one of these structures, and the assault must be made against the hex-side indicated by the gateway (or entranceway if it is a church: the entranceway to a church is always just beneath the steeple). If the structure has two gates then that hex may be assaulted by up to 12 increments, but the assaults must be against the hex-sides containing the aperture, and only up to 6 increments may assault each indicated hex-side.
- Line of Sight: Walled Farms, Ancien Chateaux and Churches (Special Structures) block line of sight.
- Formation: A unit deployed in a Special Structure is considered en Carre, though no square informational marker is used to designate this.
- Stacking: A maximum of six (6) increments, or one battalion, may deploy in a Special Structure. Only infantry may deploy in a Special Structure. The battalion may have more than 6 increments in it, but only 6 parts of that battalion will count for defense or fire combat. A unit occupying a special structure hex is considered en carre (in square). Skirmishers (units en tirailleur) may not occupy a special structure hex.
- Movement: Special Structure hexes block movement for all units unless the units are moving to deploy in the hex (see Movement Chart), or if a road or trail transects the hex and the units are moving to pass through it, and succeed in doing so. Exception: A unit may end its movement in the hex if it is in road column since the road column marker indicates the unit is deployed on the road and not within the special structure itself. Units may not occupy a special structure hex while employing Colonne de Route (see Standard Rule 11.5.4).
- Facing/Orientation: Units in a Special Structure have the same facing/orientation as a unit is square.
- Combat: The Fire Defense of a unit in a Special Structure is given in the Fire Defense Chart. A unit defending in such a hex does not make a pre-melee morale check. Up to six (6) increments per gate may attack a Special Structure hex (some special structures may have more than one gate). Units that assault a Special Structure hex must rest in the hex adjacent to its gate(s). Units in the Special Structure fire at 1/3 their increments times their Carre multiple, but may make three fire attacks upon non-contiguous adjacent hex-sides. Defending units do not disorder as a result of combat, they lose one increment instead. Defending units do not rout (PGD) as a result of combat; they surrender instead. Although a full battalion may defend a Special Structure hex, only up to six increments of it may be used in combat. For instance, if the occupying battalion has 9 increments, only 6/9ths of the melee value of the unit may be used.
4.2 Chapels
Chapels are not churches (though they may look like a church, chapels have brown roofing, not red). These small out of the way places are only so large as to accommodate a passerby or family in prayer. They are, then, smaller than a house and an otherwise insignificant terrain feature. If no other dwelling is within the hex, treat hexes containing a chapel as clear terrain. Chapels and Wounded Leaders: Whenever a wounded leader returns to play, his counter will start the turn of his return in the church or chapel nearest to one of the units in his command that is also considered in friendly territory.
4.3 The Chateau de la Paix
The walls of the Chateau de la Paix (in Fleurus) and its chateau are unassailable except at the gate. Note that these masonry walls completely surround the adjacent formal garden and the chateau. The garden thus can be assaulted only through the adjoining hex containing the chateau. Treat the Chateau de la Paix and its garden as a Special Structure (4.1) for all intents and purposes. Units that occupy its formal garden are also treated as if in square. The Ferme de la Paix is immediately adjacent to the Chateau and considered a separate structure altogether.
4.4 Mills/Moulin
Windmills are treated as Chapels. In other words, if there are no other features in the hex treat them as clear terrain. The watermill at Tongrinelle is different, however, and only up to 6 increments may assault it; treat as a Special Structure (4.1) for all intents and purposes.
4.5 Sapeurs (Pioneers)
Whenever the force assaulting a Special Structure includes sappers, the odds in favor of the attacker will shift one column (in other words, a 2-to-1 attack becomes a 2.5-to-1 attack, etc.). The sappers must be included in the force of 6 increments making the assault, their melee value used for the assault (or portion thereof), and any casualties incurred by the assaulting force must see at least the first of them removed from the sapper unit.
4.6 Dwellings
There are two different degrees of dwelling hexes in the game: Villages and Towns. Town hexes consist of buildings that are more substantial than buildings in Village hexes. They are distinguished from Village hexes on the map in that buildings in Town hexes have red tile roofing. Buildings in Village hexes are primarily roofed in brown thatch and wood shingle. Note that Special Structures also have red tile roofing. Players should note that some villages have town hexes, while the only town on the map, Fleurus, has a few village hexes.
- Line of Sight: Town hexes block line of sight, Village hexes do not.
- Formation: Units voluntarily deployed in a Town hex must be either in General Order or en Tirailleur. Units may deploy in any voluntary formation when in village hexes. A unit deployed in line or column in a village hex does not have flank hex sides. What would otherwise be called a flank hex side if the unit were deployed in line or column in clear terrain is considered a front hex side. (See Standard Rules 9.31 and 9.33 — what these diagrams show as flank hexes are front hexes.) Units will have the same rear hex sides, however, that they would have in clear terrain.
- Village Hexes and Combat: Cavalry may charge into and through village hexes, however, they do not receive their shock bonus if the target of their charge is in a village hex, nor may they count the village hex as one of the three hexes it needs to go in a straight line in order to receive this shock bonus. The fire defense of a unit deployed in a village hex is always 2 better than it would be in clear terrain. In other words, a unit in line in clear terrain would normally have the fire defense of 9. If it were in line in a village hex it would have the fire defense of 11.
- La Maison du Curé: Treat this hex in Ligny village as a town hex for all intents and purposes.
For the major differences between Towns and Village hexes consult the Movement, Stacking and Fire Defense Charts.
4.7 Villages and Fire
As mentioned above, Villages have brown roofing whereas town hexes have red roofs. Red roofing is primarily baked clay tile impervious to fire, whereas brown roofing is wooden shingle or thatch, very flammable. Fire attacks conducted on or from hexes consisting of brown roofs may result in the hex catching fire. A Fire attack into a hex that results in a 65 or 66 on the dice will, in addition to whatever casualties this causes, see the hex alight. A Fire attack from a hex that results in an 11 or 12 on the dice will, in addition to whatever casualties it causes, set the hex alight. If Firing into a hex with artillery, however, upon Village, Town or Special Structure hexes, and the firing player states prior to executing this fire attack that his intention is to set the hex alight, then any dice that results in a casualty will see the hex on fire. Mark such a hex with a Fire marker provided in the mix of counters. The number of hexes that can be set alight in a scenario is limited to the number of Fire informational counters provided in the mix.
- Effects: If a hex is on fire it is uninhabitable. Units currently deployed in a hex that is on fire must move from the hex in the very next movement segment. Units that cannot move out of the hex because they are out of command will Displace instead during the first friendly movement segment (or Regroup Action Chit, whichever comes first). Units that cannot displace rout PGD, units that cannot rout PGD are surrendered. Fire lasts the length of the scenario, and thus hexes that are on fire are prohibited terrain thereafter.
- Fire May Spread: Every turn, on the hour (when Morale Levels are determined) a player shall place the Howitzer Scatter marker on the hex currently on Fire with the "1" position against its northernmost hex-side. A die is rolled determining which adjacent hex the fire communicates to. If the hex indicated by the die roll is a village, town or special structure hex, and there are Fire informational markers available, then that hex catches fire and becomes prohibited terrain for the remainder of the scenario. (Note that Special Structures and Town hexes can only catch fire via this type of "communication.")
4.8 Cultivated Ground
Cultivated ground is associated with hexes containing some type of dwelling, whether in the hex itself or clustered around it. This is a general term representing intense cultivation (more so than fields of crops), kitchen gardens, fences, shade trees (felled or otherwise), hedges, farm equipment, sheds and other small outbuildings — essentially, anything that can get in the way by obstructing line of sight and movement. Units do not employ General Order when in Cultivated Ground. They may voluntarily deploy into Column, Line, en Carre or en Tirailleur.
- Cultivated Ground and Line of Sight: A line of sight may be traced into but not through a cultivated ground hex. (In other words, a unit can see what is in a cultivated hex, but cannot see what is beyond it.) Cultivated ground therefore blocks LoS.
- Cultivated Ground and Elevation: Any firing artillery unit that is up slope (on higher elevation) than cultivated ground may fire into or beyond the cultivated ground hex. In other words, higher elevation negates the effects cultivated ground has on a line of sight. Note that this is an exception to Standard Rule 14.2.1, and that the cultivated ground need not be closer to either the target or firing hex for the LoS to be complete — the firing unit just needs to be on higher ground than the cultivated hex.
- Cavalry: Cavalry may charge into but not through Cultivated Ground. Cavalry may not initiate a charge a cheval, reaction, or opportunity charge from Cultivated Ground.
- Deployment: At the beginning of a scenario, infantry and artillery units that a player elects to deploy in a Cultivated Ground hex may be obscured from his opponent's view by placing a blank counter on top of it.
- Cultivated Ground and Combat: Units so obscured may only be fired upon by enemy units that are adjacent and deployed en tirailleur. Infantry that assaults units so obscured have their pre-melee morale check modified by -6 (for the worse) unless deployed en tirailleur.
- Removing Markers: Once a unit has been assaulted, regardless of the outcome, the marker is removed from play. Once a unit moves out of the cultivated ground, the marker is removed from play. A unit may not move out of and then into an obscured hex and maintain its obscured status, nor may players substitute one unit for another beneath an obscured marker.
4.9 Sunken Roads and Hedgerows
Units deployed in these hexes are considered behind the terrain, or in the part most favorable for defense. Exception: Units that are in road column — these units are considered in the depression. Also, if a unit is attacked from both front and rear, one side of it is obviously not behind the obstruction and should be considered in clear terrain.
- Road Column: These units will have a Fire defense of 16 unless the fire attack comes from a direction perpendicular to the line created by the road, in which case the unit will have a Fire Defense of four (4). In other words, a sunken road protects a unit in Road Column from every fire attack except ones that enfilade (flank) the terrain feature.
- All Other Formations: All other formations have their Fire Defense improved by plus two (+2). Example: A unit in line will have a fire defense of eleven. Again, if the fire attack enfilades the natural defense of the hedge or sunken road the Fire Defense of the hex is considered that of clear terrain.
- Deployment: No unit may be deployed as if to straddle a sunken road hex. In other words, a unit may not be in line or en Tirailleur in such a manner that does not conform to the natural line created by the terrain.
- Movement: Artillery may not cross a sunken road hex. They may move along the hex but never may end the move so as to be considered to have crossed the obstacle. Cavalry and artillery may not end their movement in such a hex unless deployed in Road Column, in which case their orientation conforms to the contour of the road. Cavalry that charge and end their movement on a sunken road hex rout. Cavalry may move and charge across a sunken road hex. Cavalry that charges across a sunken road hex loses its shock bonus, and will not be doubled for charging three hexes in a straight line, regardless of when this may happen in the course of the cavalry's charge movement.
- Combat: Defending units have their morale improved by three for their pre-assault morale check if attacked from a hex or hexes that are in defilade (not flanking) to the unit. Assaulting units have their morale modified by minus six (-6) for this same check if not in enfilade to the position to be assaulted (they are considered to be attacking across the sunken road and not flanking the obstruction).
4.10 Ligny Bridges and Streams
As in Special Structures, but only up to 4 increments may count in an assault across a bridged hex-side unless the stream it spans is also fordable (crossable without the bridge), in which case the number of increments is only limited by the type of hex the unit attacks from and/or into (see stacking limits). The stretch of Ligny creek within the village of Ligny itself are the only such restrictive hex-sides in the game, reflecting the fact that the villagers over the years had dredged the creek and reinforced its banks to prevent its effluence during storms. Only Infantry and leaders may cross these restricted stream hexes during voluntary movement. Infantry and Cavalry that cross these hex-sides involuntarily automatically rout. Artillery that is forced to attempt crossing these hex sides are removed from play instead (the guns abandoned by their gunners). (Note: an infantry unit assaulting across a non-restrictive stream hex-side must have a minimum of three movement points remaining to it after coming adjacent if it wishes to mark the unit on the opposite bank for an assault. In the case of a restricted stream hex-side the infantry unit must have a minimum of 5 movement points remaining to it.)
4.11 Marsh Hexes
These hexes do not block Line of Sight. A unit in Disorder in a Marsh hex may not attempt to recover good order during the Reorganization Segment, it routs instead. A unit in PGD in a Marsh hex may not attempt to recover good order. Cavalry is voluntarily permitted in a marsh hex only if it is in skirmish order or if it is in road column; it may occupy the hex if it is in rout (PGD) but must move from a marsh hex if it has sufficient movement points to do so.
4.12 Chevaux de frise (Barricades)
A cheval de frise defends only one side of a hex. If attacked exclusively through this hex-side, up to six increments may make the attack. If a hex containing a cheval de frise is captured by a French force, the cheval de frise marker is considered destroyed and removed from play. A cheval de frise does not block movement of Prussian troops (they may pass as if the obstruction was not there). Cheveaux de frise markers are deployed at the start of the scenario and may not be moved throughout the length of the scenario except to remove them from play. If manned (that is, the hex it is occupying has Prussian troops in it) the cheval de frise marker is placed on top of the unit and any leaders attending it. Units making a pre-melee morale check while defending a cheval de frise have their morale improved by 3 in addition to any other modifiers (unless in General Order, of course). Units assaulting a cheval de frise have their pre-assault morale check worsened by 6 in addition to any other modifiers. Units defending a cheval de frise have their defensive fire multiple increased by 1 (one) so long as they are being assaulted through the hexside blocked by the marker (a unit firing with a multiple of x2 would instead fire with a multiple of x3). A unit making this same defensive fire attack from General Order or Column will increase its fire value by half-again as much (a unit with a printed fire value of 6 would instead fire a 9).
4.13 Artillery Ricochet
Artillery fire which targets the following hexes terminates in them. Ricochet fire may bounce into, but not through the following hexes: Town hexes, Wood hexes, Marsh/Swamp hexes, Special Structures hexes, Upslope hexsides.
4.14 Depots
- French: The entry hex on the southern map edge in Fleurus.
- Prussian: The entry hex on the eastern map edge marked à Namur, the entry hex on the eastern map edge marked à Gembloux, or the hex on the northern map edge near the eastern edge where the Old Roman Road (Chaussée Romaine Ancìen) exits the map and the 5 minor roads à Wavre.
5.0 Command
The Organization and Display Charts reveal the command structure of the armies. Refer to them as necessary. Wounded Leaders That Return to Play: Whenever a wounded leader returns to play, his counter will start the turn of his return in the church or chapel nearest to one of the units in his command that is also considered in friendly territory.
5.1 French
Napoleon has an "A" as a morale bonus. Any friendly unit stacked with Napoleon that makes a morale check, or attempts to recover good morale, will pass the check "Automatically."
- Command Points: There are two army leaders (Napoléon and Grouchy) and four corps leaders (Vandamme, Gérard, Drouot, and Mouton). Thus the French may receive up to six Command Points when all six leaders are on the map.
- MU Size: The largest MU that the French may create is a Corps d'Armée.
- Leader Casualties: Lebrun and Bertrand may replace any line corps leader or divisional/brigade leader for cavalry or infantry from within the line or Imperial Guard. Corbineau or Billarderie may replace any line divisional leader for infantry. Dejean may replace any cavalry division leader. Roguet, Barrois or Michel may replace any divisional leader within the Imperial Guard or line infantry.
- Independent Divisions: The 7th Division of the II Corps (Girard's division) is not part of the III Corps, though its proximity to this Corps may make one think it is. It thus may not be part of any MU created by Vandamme or any other Corps Leader. It is an independent division and may be maneuvered only at the expense of a Command Point. This also applies to the 4th Division of the I Corps if it arrives from the west.
- Leaders of Special Ability: Artillery — Napoleon, L'Comte Antoine Drouot, Baron Desvaux de Saint-Maurice. Cavalry — L'Comte Milhaud, Marshal Le Marquis de Grouchy.
- Light Cavalry Leaders: The following cavalry leaders may roll for initiative to form their own MU: I Corps — Jacquinot, Bruno, Gobrecht; III Corps — Domon, Dommanget, Vinot; IV Corps — Vallin; I Cavalry Corps — Pajol, Soult, Saint-Laurent, Ameil, Subervie, Colbert, Merlin. (Note: As per Standard Rule 8.5, cavalry division leaders whose brigade leaders are all light cavalry leaders can create a divisional MU using Light Cavalry Initiative.)
- Le Comte de Pajol: Pajol, commander of the French I Reserve Cavalry Corps, has a self-activating CP ability even though he is technically a corps commander (in 1813 his "corps" would have been considered a division, such is the dearth of troops available to Napoleon in 1815). However, pay close attention to the first bullet in Standard Rule 8.5.1.2. In other words, if Soult or Subervie are within Pajol's command span they may not also check for initiative if Pajol attempts and fails to self-activate the corps. Likewise, if Soult and Subervie fail their attempts to self-activate, Pajol may not then roll his initiative and thus place them in active command. The French player must declare unambiguously how he will go about checking the initiative of this cavalry prior to doing so.
5.2 Prussians
- Command Points: There is one Army Leader (Blücher) and three Corps Leaders among the Army of the Lower Rhine (Ziethen, Pirch, and Thielemann). If the Prussian IV Armeekorps enters the game as a reinforcement, von Bülow will be a fourth Corps Leader. Thus, if Bülow enters, the Prussians may receive up to five CPs when all five leaders are on the map.
- MU Size: The largest MU the Prussians may form is a Corps.
- Leader Casualties: General lieutenant Graf Hochberg von Baden may replace any Prussian infantry or Corps leader. Lieutenant Colonel Count von Nostitz may replace any cavalry or infantry Brigade commander.
- Leaders of Special Ability: Artillery — None. Cavalry — Feld Marshal Blücher (Furst von Wahlstadt).
- Light Cavalry Leaders: The following light cavalry leaders may roll for initiative to form their own MU: I Armeekorps — Lützow; II Armeekorps — Sohr, Schulenburg; III Armeekorps — Marwitz; IV Armeekorps — Preussen, Schwerin, Watzdorf, Sydow. (Note: As per Standard Rule 8.5, cavalry division leaders whose brigade leaders are all light cavalry leaders can create a divisional MU using Light Cavalry Initiative.)
- Prussian Infantry Brigade Commanders and Unattached Cavalry: In addition to cavalry already attached to a Prussian brigade, whenever a Prussian Infantry Brigade commander receives a Command Point (CP) and he is stacked with cavalry belonging to the same Korps as his brigade, the MU he may create may include that cavalry regardless of those units already part of his brigade as presented on the Organizational Display and scenario instructions. Units already attached need only be within the leader's command span if that leader constitutes a MU. For instance, within the Prussian II Corps, both the 5th and 7th Brigades already have cavalry attached to them. Thus the commanders of those brigades (Brause and Tippelskirch) need not stack with the cavalry for them to be included in their MU. However, if these two leaders were to be stacked with cavalry not so attached, then those too would be included in their MU. Cavalry so commanded (but not attached) by a brigade leader, if sent away from that leader, may not be subsequently included in an MU created by that leader until they once again become stacked with him, nor will they rally to him in the Regroup Action Chit, but instead rally to their cavalry brigade commander.
6.0 Special Rules
6.1 Weather
-
Procedure: Beginning with the 3:00 PM turn and at the start of each turn thereafter, players alternate rolling the dice to determine the weather. On a roll of 11 to 14 a Thundershower is in effect for that turn.
-
Extent of a Thundershower: If a Thundershower occurs, roll the dice again and consult the following chart to determine which maps are affected. Units that move from one Mapboard to another suffer these effects accordingly and automatically upon entering the affected map, or vice versa if leaving it.
Dice Roll Map(s) Affected 11 - 23 Ligny NE 24 - 36 Ligny SE 41 - 53 Ligny SW 54 - 66 Ligny NW
-
-
Effects of a Thundershower:
- Movement: All clear terrain costs are doubled for movement. That is, if a unit performs an action in clear terrain that would normally cost one movement point that action will now cost two movement points. In addition, infantry may not Force March.
- Visibility: Visibility is reduced to five hexes. Cavalry do not receive the shock benefit of charging three hexes in a straight line. Cavalry do not receive the cavalry charge bonus of five extra movement points. Artillery may not initiate Fire Attacks at long range (six or more hexes distant). Units that are PGD may not attempt to reorganize. Infantry may not Force March.
6.2 Night
Darkness: starting with the 9:20PM turn, play on all 4 maps will proceed as if a thundershower were taking place on all four maps.
6.3 Terminus Hex
The Terminus Hex for French units entering the road from Quatre-Bras is Aux Trois Barettes. The Terminus Hex for Prussian units entering from any road or trail hex is also the crossroads at Aux Trois Barettes.
6.4 French Old Guard (Vieille Garde)
- Old Guard Infantry: For purposes of all rules involving the French Old Guard, the following battalions are considered to be part of the Old Guard: 1er Régiment de grenadiers à pied; 2e Régiment de grenadiers à pied; 1er Régiment de chasseurs à pied; 2e Régiment de chasseurs à pied.
- Old Guard Mounted Band: The mounted band of the Old Guard (Musiciens à cheval de la garde) will modify the Morale Check dice roll of any French unit that attempts to recover Good Order from PGD by +9 (for the better) if the unit is within 4 hexes of the band's counter at the start of the Reorganization Segment. (Note: The Old Guard Mounted Band is considered to be a cavalry unit. Ignore the Fire Value on its Printed side.)
6.5 Prussian Unit Restrictions
- Prussian Infantry and Line Formation: Prussian infantry (not Fusilier battalions or Schutzen companies), that wish to enter Line may do so but must roll a die to determine the number of movement points this formation change will require.
- Procedure: As each unit attempts to enter line roll a single die. The resulting number is the number of movement points it takes for the formation change. If this number exceeds the available movement potential remaining to the unit, it must check morale. If it passes this check it affects the formation change, but if it fails this morale check it disorders and retreats three hexes. If a stack of Prussian infantry attempts to change into line formation roll one die for each unit in the stack. The highest die result is the movement point cost for that stack. Leaders present with the units that wish to affect this formation change will modify the die roll by 1 (one), however if the unit/stack must subsequently check morale they apply the full morale bonus of the leader. If the top unit in a stack fails this morale check all units in the stack disorder and retreat three hexes regardless of how the other units in the stack fared.
- Only Prussian Fusilier Battalions and Schutzen Companies may enter Line Formation per the normal cost of one Movement Point. Each regular infantry regiment has 3 battalions. The Fusilier battalions can be identified by their "F" designations on the unit counter. Fusilier battalions may also enter Tirailleur order if the unit has a range of "2" printed on the back of the counter. Prussian Landwehr Infantry Regiments, though they may have three battalions, do not have one designated as Fusiliers, and none may employ/enter Tirailleur Order. Several Prussian infantry regiments, both regular and landwehr, have Jaeger companies. In general these were men from the freiwillige companies who volunteered in the national emergency and provided their own weapons and leaders (as such they are highly motivated but not particularly well trained). These companies may employ Tirailleur Order but may not enter line. Exception: The 4 companies of the Silesian Schutzen Battalion may enter both line and Tirailleur Orders. These companies are found in the 1st Prussian Corps, attached to Infantry Regiment #24, and the 3rd Infantry Brigade commanded by Major General von Jagow.
- Rifles: Prussian Shutzen are armed with Rifles. These units have a range of three (3) hexes. However, any fire attacks made at a range greater than two hexes (adjacent +1) will see the fire value of the attack halved. Example: A Silesian Schutzen unit fires on an adjacent target. It has 2 increments (it is in skirmish order) and a fire multiple of x4. It will make the attack with a fire value of 8 (2 x 4 = 8). It would have the same fire value at 2 hexes, but would fire with a value of 4 at a target three hexes distant. Any unit that incurs a casualty when fired on in whole or in part by a Rifle unit (the Rifle unit combined its fire with another unit) will check morale, and modify that morale check by a -6 (for the worse). Also: Any enemy hex that is the target of a fire attack initiated by a Rifle unit will incur a leader casualty on any natural (unmodified) result ranging from 61—66 if there is a leader, or leaders, in the target hex.
6.6 Howitzer Battery
The Prussian I Armee Korps artillery contingent contains a howitzer battery. Its short range fire value is 14 and its long range fire value is 6. All howitzer rules apply to this unit.
6.7 Cavalry Skirmish Order
The row for cavalry skirmishers on the Fire Defense Chart applies only to players using the Règlements de l'An XXX.
6.8 Artillery Ammunition
Normal artillery ammunition resupply rules apply to both the Prussian and French field artillery units.
6.9 Armored Cavalry
The following units are Armored Cavalry:
French:
- IVe Corps de cavalerie de la Reserve/13e Division: 1er, 4e, 7e and 12e Régiments de cuirassiers
- IVe Corps de cavalerie de la Reserve/14e Division: 5e, 6e, 9e and 10e Régiments de cuirassiers
6.10 Grand Batteries & Howitzers
In addition to being able to fire during the Artillery Action Chit a grand battery may make howitzer attacks. For every three batteries in a Grand Battery (GB) one howitzer attack may be made (if there are six batteries in a GB, then two howitzer attacks may be made by that GB); etc. The intended target of a GB howitzer attack must be within the long range of each of the firing batteries (thus the three firing batteries could consist of two batteries with a range of 7, and one of a range of 8 or 11, so long as the target hex is within 7 hexes of all of them). For long range fire attacks the intended target need not be within the Line of Sight of any of the firing batteries. The attack is made with the fire attack value of the averaged maximum ranged fire attack value of each of the firing batteries (if each of the firing batteries has a maximum range fire strength of 4, then the fire attack value is 4). Grand batteries make howitzer fire attacks in addition to direct fire attacks they make during the Artillery Action Chit or Offensive Fire phase. Batteries in groupings need not be stacked or adjacent to one another when making a howitzer attack, they only need to belong to the same Grand Battery. (The French player should pay particular attention to his potential for making several grand batteries, and that each be distinct from one another in order to avoid confusion.) Grand battery howitzer attacks do not consume any extra ammunition in and of themselves. A GB only expends ammunition when making a direct fire attack. In other words, if the GB only makes a howitzer fire attack its batteries do not expend ammunition; however, if it uses its long guns to make a fire attack then it does expend ammunition regardless of whether or not it also made a howitzer attack.
7.0 Bülow and the Prussian IV Corps
One of the many "what ifs" concerning the 1815 campaign in Belgium involves the Prussian chief of Staff, von Gneisenau, and his orders for the IVth Corps after initial contact had been made with the French the morning of June 15th. At least some of this corps could have reached the banks of Ligny Creek on the 16th had these orders been couched differently. If agreeable to both sides the following reinforcement becomes available to the Prussians during the Grand Battle scenario. (Note that these formations could help balance an apparent disparity in skill between players of the two sides, assuming the less skilled players have the Prussians.)
One hour after the turn in which the first fire attack has been performed by any artillery unit a Prussian Player designated by the French side rolls the dice and applies the following result. Enter: Any hex on the northern map-edge East of and including the hex adjacent to Geronviller St. Jean.
| Dice Result | Reinforcement |
|---|---|
| 11-15 | IV Korps Cavalrie — Furst Wilhelm von Preussen; 1st Cavalry Brigade (Colonel v. Schwerin): 6th Hussars, 10th Hussars, 1st West Prussian Uhlans |
| 16-23 | 2nd Cavalry Brigade (Lt. Colonel v. Watzdorff): 8th Hussars, Reitende Battery #1 |
| 24-36 | 3rd Cavalry Brigade (Count Bülow v. Dennewitz, Major General v. Sydow): 1st & 2nd Neumark Landwehr Cavalry, 1st & 2nd Pommeranian Landwehr Cavalry, 1st Silesian Landwehr Cavalry |
| 41-54 | IV Korps Staff and Assets: General of Infantry Count Bulow Graf v. Dennewitz, Major General v. Valentini, 2nd Silesian Landwehr Cavalry (from 1st Cav Brigade), Reitende Battery #11 (from Korps Artillerie), 3rd Silesian Landwehr Cavalry (from 1st Cav Brigade), Reitende Battery #12 (from Korps Artillerie) |
| 55-56 | 13th Infantry Brigade (Lt. General v. Hake): Infantry Regiment #10 (F, 1st & 2nd btns), 2nd & 3rd Neumark Landwehr Infantry (1st, 2nd & 3rd btns each), 6pdr Batterie a Fuss #2 (from Korps Artillerie) |
| 61-62 | 14th Infantry Brigade (Colonel v. Funck): Infantry Regiment #11 (F, 1st & 2nd btns), 1st & 2nd Pommeranian Landwehr (1st, 2nd & 3rd btns each), 6pdr Batterie a Fuss #11 (from Korps Artillerie) |
| 63-64 | 15th Infantry Brigade (Major General v. Losthin): Infantry Regiment #18 (F, 1st & 2nd btns), 3rd & 4th Silesian Landwehr (1st, 2nd & 3rd btns each), 6pdr Batterie a Fuss #13 (from Korps Artillerie) |
A Prussian Player designated by the French side will roll once each hour for the remainder of the game. If the units designated by this roll have already entered the game as a result of a previous roll, no units enter that hour. Designated units enter at the start of the Prussian Maneuver segment of the Chronology of Battle. Each roll is made at the start of each turn, three turns after the last dice roll.
Note: If the French player(s) reroute any units of the following formations onto the Ligny battlefield from the field of honor destiny had chosen for them, the above rule is automatically in effect: (1) The French I Corps (D'Erlon), other than units already slated to arrive; (2) The French Imperial Guard Light Cavalry Division (Lefebvre-Desnouettes); (3) The French 3rd Reserve Cavalry Corps (Kellerman).
8.0 La Bataille de Quatre Bras
Both La Bataille de Ligny and La Bataille des Quatre Bras are designed so that they may be joined together and played simultaneously. Persons who own both games will note that the "Quatre-Bras" map runs from south to north whereas the "Ligny" maps run lengthwise from east to west. Use the printed map-joining guide when arranging them for joint play.
Units may move freely from one game map to the next paying their normal cost in movement potential. All Reinforcements will enter the game as indicated by their respective Grand Battle Scenarios, with these exceptions: (1) The French I Corps (D'Erlon); (2) The French Imperial Guard Light Cavalry Division (Lefebvre-Desnouettes); (3) The French III Reserve Cavalry Corps (Kellerman).
Napoleon may shift the hex of entry for any of these formations or bring the Light Cavalry of the Guard from their current position on the Quatre Bras field. To do so Jean-Louis de Crabbe, Colonel and ADC, must exit the Ligny S.W. map between Mellet and Villers Perwin prior to the time the units in question are scheduled to enter (the turn before). This aide-de-camp must be designated as having this special brief and must begin this designated move stacked with the Napoleon counter. The movement potential of Colonel Crabbe is increased by five (5) points for the duration of this mission. A numerical information marker must accompany the aide indicating which formation(s) are to be rerouted (#1 = D'Erlon, #2 = Lefebvre-Desnouettes, #3 = Kellerman, or any combination thereof). Rerouted formations enter as scheduled anywhere between the hamlets of Mellet and Villers Perwin on the Ligny S.W. map edge. Upon completing this mission Colonel Crabbe joins Marshal Ney's staff. Exception: the Guard Light Cavalry may directly exit the Quatre Bras map onto the adjacent Ligny map. If diverted these formations must be diverted en toto, in that no part of 1, 2, or 3 above may be excluded from the whole of the rerouted formation.
9.0 Scenario 1: Girard's Assault
June 16, 1815, 2:40PM – Historical
Aided by the poor distribution of the Prussian brigades, Girard's single division was able to tie down nearly half of the Prussian 1st Corps. By forcing Blücher to exhaust his infantry reserves in such a manner, when Ligny finally fell there was nothing left to prevent the egress of the Guard onto the Bussy Height but cavalry. This is my interpretation of the fight here, since, had the Prussians actually held the village, and d'Erlon's unexpected appearance not delayed the assault of the guard by roughly two hours, the Prussians in the village would have been pocketed and taken prisoner during the night, since I posit that the Guard would have taken Brye in that extra time, cutting off their escape. As it was then, all Girard had to do was tie them down, not secure the village. This is a good introductory scenario.
- Play Area: Use only the South-West map. No units may enter Wagnelée or Saint-Amand le Chateau. Consult the North-West map for the location of the village of Brye and where it extends into the playing area.
- Time: The scenario begins with the 2:40PM turn and concludes with the end of the 6:00PM turn.
- Weather: Clear for the duration of the scenario.
- Special Rules:
- Command: The French receive 1 CP each turn. The Prussians receive 1 CP each turn.
- Rout: Units that rout off the map are out of play for the remainder of the scenario.
- Prussian 3rd Infantry Brigade: No units of the Prussian 3rd Infantry Brigade, once deployed, may move voluntarily. French units may not melee or fire upon this Brigade (they are considered fixed in place by Lefol's 8th Division). Prussians may only activate reinforcements by brigade, and only when the conditions of their activation are met; see below.
- Victory: The French win by holding at least five hexes of St. Amand La Haye at the end of the scenario (essentially no Prussian units in the majority of its hexes; there are eight of them). The Prussians win a Significant Victory by holding the majority of the hexes of St. Amand La Haye without committing the 2nd Infantry Brigade. They win an Insignificant Victory by holding the majority of these hexes at the end of the scenario. Each side failing in their objectives shares defeat.
- Prussian Deployment (the Prussians set up first):
- St. Amand Le Chateau (in dwelling or cultivated hexes within three hexes of the church): 3. Infanterie-Brigade, I. Armee-Corps (part) — 29th Infantry Regiment (1st & 2nd btns & jäger det only), 3rd Regiment Westphalian Landwehr (1st & 2nd btns only), Silesian Rifle Battalion 1st Company (4th Company is detached in the Chateau Ancien).
10.0 Scenario 2: The Assault on Ligny
June 16, 1815, 2:20PM – Historical
The struggle for Ligny village ranks among the most heroic and bloody events of the Napoleonic era. Casualties were horrendous, and the valor displayed by the participants, both Prussian and French, was only equaled two days later at Plancenoit, or at Mockern, two years before.
- Play Area: Use only the South-West and South-East maps. Units may not maneuver North-East of the Bois du Laup or South-West of the first fork in Ligny Creek in the direction of St. Amand Le Chateau.
- Time: The scenario begins with the 2:20PM turn and ends with the conclusion of the 5:40PM turn.
- Weather: As per the Weather rule (6.1 above), but with the weather dice roll modified by -6. An ensuing thundershower will effect only the South-East map.
- Special Rules:
- Command: The French receive one CP per the presence of Corps commander General of Division, Count Gerard. The Prussians receive one CP in the person of General feldmarschall Fursst Blucher von Wahlstatt (stack him with Pirch II).
- Rout: Units that rout off the map are out of play for the remainder of the scenario.
- Victory: The French win by capturing and holding the Ferme d'en Bas and at least three village hexes of Ligny village on the North (left) bank of Ligny Creek by the 5:40PM turn, and controlling the church, the Ferme d'en Haut, the Maison de le Curé and the Chateau Ancien on the South (right) bank. The Prussian win by controlling all dwelling hexes of Ligny village on the North (left) bank of Ligny Creek and at least one of these named places on the South (right) bank.
- Prussian Deployment (the Prussians set up first):
- In any dwelling or cultivated hex associated with the village of Ligny: I Armee Korps/4th Infantrie Brigade (part) — 19th Regiment der Infantrie (Fusilier & 1st btns only), 4th Regiment Westphalian Landwehr (1st & 2nd btns & Jäger det), 3x Cheval de Frise markers.
- In the Chateau Ancien: 3. Infanterie-Brigade, I. Armee-Corps (part) — Silesian Rifle Battalion 4th Company.
11.0 Scenario 3: Thielemann's Feint
June 16, 1815, 5:40PM – Historical
The unanticipated appearance of d'Erlon's I Corps on Vandamme's flank forced Napoleon to send Subervie's cavalry division to reinforce his left, and delay his decisive thrust with the guard. Until this mass of troops could be identified the whole of the French left hesitated. Sensing this change Blücher threw together a scratch force and retook the St. Amands (see Scenario 1, where Blücher leads the brigade of Pirch II into the fray) while Thielemann, seeing Subervie leaving his front, contributed to this effort by launching some cavalry and infantry across Ligny Creek.
- Play Area: Use only the South-East map. Units must remain within the area designated by the Fleurus/Pont du Jour highway, and may not maneuver more than 6 hexes to its north and west, nor 12 hexes from its south and east. Units may not cross Ligny Creek while in good order. No unit or leader of the 14th Infantry Division may move except to change formation unless the division is activated. The 14th Division activates when any part of it that is present in the scenario is charged, assaulted or fired upon by a Prussian unit.
- Time: The scenario begins with the 5:40PM turn and ends with the conclusion of the 7:20PM turn.
- Weather: Clear for the duration of the scenario.
- Special Rules:
- Command: Each side receives one command point. Pajol, von Hobe, Soult and von Marwitz may attempt to self-activate by rolling for initiative, however, if they fail they may not be given the CP available to their side.
- Rout: Units that rout off the map are out of play for the remainder of the scenario.
- Victory: If the French activate the 6th Cavalry Division and do not capture the bridge over the Ligny creek at Mont Potriaux by the end of the scenario, the Prussians win a marginal victory. For the French to win there must be no Prussian cavalry on the "French" side of Ligny Creek at the end of their half of the 7:20PM turn. For the Prussians to win a major victory they must achieve a two-to-one ratio in cavalry in good order by the end of the 7:20PM turn, on the "French" side of Ligny Creek.
- Prussian Deployment:
- Mont Potriaux (within 8 hexes of its grand farm but on the "French" side of Ligny Creek): 1st Cavalry Brigade/III Korps Reserve Cavalry, Major General v. Hobe, Colonel v. Marwitz — 7th & 8th Uhlanen, 6pdr Reitende Batteries #19 (III Korps Artillery). 2nd Cavalry Brigade, Colonel v. Lottum — 7th Dragoons, 9th Hussars, 5th Uhlans, 6pdr Reitende Batteries #18 (III Korps Artillery).
12.0 Scenario 4: La Bataille de Ligny
June 16, 1815 – Historical
This is the Grand Battle scenario and represents the historical battle. All four maps are used. Use all charts, and rules found in this update that are not specific to another scenario. The Prussian player sets up first, and the French player should leave the room during this time so that the Prussian player can better avail himself of the "obscured" rules while he sets his units up.
Note that some units are shown as being in different formations than what is shown on the Organizational Displays that came with the original game.
- Time: This scenario begins with the 1:00PM turn and ends with the 10:20PM turn. Darkness: starting with the 9:20PM turn, play on all 4 maps will proceed as if a thundershower were taking place on all four maps. See Weather below.
- Victory Conditions:
- French Decisive: No Prussian Infantry in good order (or belonging to a corps not on Level III), west or north of the old Roman road "Chasse Romain Ancien/Via Brunhilde," with at least elements of French cavalry in Marbais, Marbijoux and Tilly at the end of the game. Or, put two Prussian Corps on Level III and kill or capture Feldmarshal Blücher.
- French Overwhelming: Place one Prussian Corps on Level III and one other Prussian Corps on at least Level II, and control (either occupying each hex or occupying some, while the remainder are free of enemy units in good order) Aux Trois Barettes and the chapel of Au Venerable at the end of the game.
- French Victory: Place one Prussian corps on Morale Level III and control the following population centers by the end of the game: Fleurus, Ligny, the Saint-Amands, Wagnelée, and the Moulin de Bussy.
- Prussian Victory: Have at least disputed (have units in good order occupying some of the hexes therein) control of four of the population centers mentioned in the previous victory condition, and have no more than one corps on Level III.
- Prussian Overwhelming: Have disputed (have at least one unit in good order in a so-named dwelling hex) control of at least six of the following population centers by the end of the game: Fleurus, Ligny, the St. Amands, Wagnelee, Brye, Sombreffe, Marbais, Mont Portraix, and have no more than one corps on Level III.
- Prussian Decisive: Kill or capture Napoléon 1er, Empereur of the French.
- (Note: If at the end of the game a unit cannot move its entire movement potential without having to enter an enemy Zone of Influence, then it is considered surrounded. Surrounded units may not be considered in good order when meeting the victory conditions above.)
13.0 Bibliography
- Hofschröer, Peter. 1815: The Waterloo Campaign. Wellington, his German Allies and the Battles of Ligny and Quatre-Bras. Greenhill Books, London, 1998.
- Lettow-Vorbeck, Oscar von. Geschicte der Befreiungskrieg. 1813-15, Napoleons Untergang 1815. E.S. Mittler and Son, Berlin, 1904.
- Mauduit, Hippolyte de. Les Derniers jours de la Grande Armée, ou, Souvenirs, documens et correspondance inédite de Napoléon en 1814 et 1815. Paris, 1847.
- Siborne, W. History of the Waterloo Campaign. T. and W. Boone, London, 1848.
La Bataille de Ligny, Clash of Arms, 2016.
Appendix: Charts (Ligny II, 2016 Edition)
The following reference charts are reproduced from the game-specific Charts sheet that accompanies the 2016 Exclusive Rules. They give the exact combat, movement and morale values for La Bataille de Ligny; consult the Standard Rules (Part One) for how to apply them.
Fire Effects Table
| Column | Line | Carre² | General | Skirmish | ||
|---|---|---|---|---|---|---|
| French | Ligne | Printed | x3 | x3 | Printed | NP |
| Légère | Printed | x4 | x4 | Printed | x4 | |
| Young Gd | Printed | x4 | x4 | Printed | x4 | |
| Gd (grenadiers & Chasseurs) |
R = Riflearmed. 1: The non-fusiliers in the Line Regiments (bataillons 1 & 2). 2: All Infantry deployed in a special structure are treated as if in square.
Fire Defense Chart
| Clear/Marsh | Sunken Rd/Cultivated/Village | Walled Farm/Church | Woods/Town | ||
|---|---|---|---|---|---|
| Infantry | Column | 6 | +2 | ||
| Line | 9 | +2 | |||
| Carre | 6 | +2 | 20 | ||
| General | 14 |
1: When in road column and fired on laterally, 4 when fired on down the road. 2: Formations add 1 to the Fire Attack die roll for every increment in a target hex, over 9. 3: While passing in the street.
Depot Locations
- French: The entry hex on the southern map edge in Fleurus.
- Coalition: The entry hex on the eastern map edge marked à Namur, the entry hex on the eastern map edge marked à Gembloux, or the hex on the northern map edge near the eastern edge where the Old Roman Road (Chaussée Romaine Ancien) exits the map, and the 5 minor roads à Wavre.
Movement Chart
| Infantry | Cavalry | Artillery | Leaders | Skirmishers | |
|---|---|---|---|---|---|
| Clear | 1 | 1 | 1 | 1 | 1 |
| Cultivated | 2 | 2 | 2 | 1 | 1 |
| Marsh | 3 | NP(6)⁷ | NP¹ | 2 | 2 |
| Village³ | 2 | 2 | 2 | 1 | 1 |
| Woods |
1: Move through in road column only. 2: Move through in skirmish formation. 3: Village/Town Hexes — all red-roofed buildings that are not special structures (such as the churches scattered around) are considered town hexes; village hexes have thatched or brown roofing. 4: Sunken roads — these values are for movement across the feature; moving along the feature treat as clear terrain or a road (if in road column). 5: These are all banks of Ligny Creek within Ligny Village; leaders may not cross these hex sides because they are mounted. 6: For units not in road column. 7: Cavalry may only enter if moving involuntarily in PGD. 8: Units in road column, following the road.
Stacking Chart
| Cultivated | Cultivated/Village | Town/Woods | Special Structure⁴ | |
|---|---|---|---|---|
| Infantry*¹ | 18 Increments or 1 regiment, 3 Skirmish | 18 Increments or 1 regiment, 3 Skirmish | 10 Increments or 1 batallion, 3 Skirmish | 6 Increments or 1 batallion, NP Skirmish |
| Cavalry*12 | 18 Increments skirmish | 1 Regiment or 12 Increments skirmish | 1 Regiment or 10 Increments skirmish | NP |
| Artillery | 4 increments or ¼ combined | Any one battery or 12 increments combined | Any one battery or 10 increments combined | NP |
*1: Road, 4 Increments in Road March. *2: For the Règlement de l'An XXX only, 4 increments of cavalry may stack per hex while in Column of Companies formation. *3: For infantry battalions in Skirmish Order in two hexes with more than 6 increments, the extra increments (greater than 3/hex) are ignored; Cavalry units in Skirmish Order, regardless of increments, are always deployed in two hexes — references to units in two hexes apply only to the Règlements de l'An XXX. *4: If a special structure consists of more than one hex (chateaux de la Paix), then this stacking limit is for each hex of the structure.
Square Formation Table
| Carre | Disorder | Rout | |||
|---|---|---|---|---|---|
| French | Column/Line | 4 Movement Points | 11-64 | 65-66 | |
| 3 Movement Points | 11-61 | 62-65 | 66 | ||
| 2 Movement Points | 11-51 | 52-63 | 64-66 | ||
| 1 Movement Point | 11-33 | 34-52 | 53-66 |
Cavalry Recall Chart
| Roll | |
|---|---|
| French | 3-6 |
| Prussian | 4-6 |
| Personalities who have a cavalry modifier | +1 |
| Cavalry Leaders of Special Ability | +2 |
| Guard Cavalry | +1 |
Artillery Limbering Chart
| Roll | |
|---|---|
| Prussian Horse Battery | 4-6 |
| Prussian Light Battery | 5-6 |
| French Batterie á Cheval | 2-6 |
| French Batterie á Pied | 3-6 |
| French Guard Batterie á Cheval | 1-6 |
| French Guard Batterie á Pied | 2-6 |
| Leaders | +1 |
| Leaders with an Artillery Bonus | +2 |
| Artillery leaders of Special Ability | +3 |
Additional Roll to Close Modifiers
| Modifier | |
|---|---|
| Units Assaulting a special structure | -6 |
| Units Assaulting across a sunken road | -6 |
Additional Roll to Stand Modifiers
| Modifier | |
|---|---|
| Units defending behind a sunken road | +3 |
Cavalry Skirmisher Harassment (12.10.7)
| Terrain Type | Defense Factor |
|---|---|
| Clear | 1 |
| Cultivated | 2 |
Modifiers to Basic Defense Factor
| Modifier | |
|---|---|
| Unit is Cavalry Skirmishers | +1 |
| Unit is Retreating Before Combat | +2 |
| Unit is conducting Involuntary Movement | +1 |
Morale Levels Chart
French
| Formation | Bataillons | Morale Level 1 | Morale Level 2 | Morale Level 3 |
|---|---|---|---|---|
| Guard | 23 | NE | NE | 7 |
| I (4th Division) | 8 | 3 | 5 | 7 |
| II (7th Division) | 9 | 4 | 6 | 7 |
| III¹ | 31 | 7 | 13 | 20 |
| IV | 27 | 6 | 11 | 17 |
Coalition
| Korps | Bataillons | Morale Level 1 | Morale Level 2 | Morale Level 3 |
|---|---|---|---|---|
| I | 33 | 8 | 13 | 19 |
| II | 36 | 8 | 14 | 20 |
| III | 30 | 7 | 13 | 19 |
| IV | 36 | 8 | 14 | 20 |
Morale Check Modifiers
| Level 1 | Level 2 | Level 3 | |
|---|---|---|---|
| French | -3 | -6 | -9 |
| Prussian | -4 | -8 | -12 |
1: Girards 7th Division measures its own morale although it is attached to the III Corps this day.
Series-Wide Combat Modifier Charts (Règlement des Marie-Louise)
The following charts belong to the Standard Rules booklet and apply across the whole La Bataille series (referenced throughout Part One).
Roll to Close Modifiers Chart (16.4)
| Distance¹ | British² | Prussian³ | French⁴ |
|---|---|---|---|
| 6 | 0 | 0 | +3 |
| 5 | 0 | 0 | 0 |
| 4 | 0 | 0 | -3 |
| 3 | -3 | -6 | -6 |
| 2 | -6 | -9 | -9 |
| 1 (adjacent) | -12 | -12 | -12 |
1: Distance from the Assaulting stack to the nearest enemy combat unit. 2: The British Method applies to the British, KGL, Portuguese and Hanoverians. 3: The Prussian Method applies to Russians, Prussians and Saxons prior to 1810, to Austrians prior to 1807 and to the Spanish throughout the Napoleonic Wars. 4: The French Method is used in all other cases.
Additional modifiers: modifiers from the General Morale Check Modifiers Chart apply (+/- N); if units using the British or Prussian Method are in Column formation when they declare an Assault, -6; if the target of the Assault is on higher ground, -3; if the target hex has 2 or less increments of infantry and no artillery increments and the Assaulting units have 4 or more, +9; if the target hex has 4 or more increments of infantry and the Assaulting units have 2 or less, -9; if the target is Prone, -6. (Negative modifiers do not apply to elite units, 20.1.2.)
Roll to Stand vs. Assault Modifiers Chart (16.5)
If units in the target hex have 2 or less increments of infantry and no artillery increments and the Assaulting units have 4 or more increments, -9. If units in the target hex have 4 or more increments of infantry and the Assaulting units have 2 or less increments, +9. Target of French Old Guard Charge (16.9), -6. The Defending units are Skirmishers that could not Retreat Before Assault (16.3.3), -6. From the Assault Odds Morale Check Chart, +/- N. Modifiers from the General Morale Check Modifiers Chart, +/- N. Defending units are Prone (12.11.7), +3. Target is being Assaulted in the Flank, -6. Target is being Assaulted in the Rear, -9. (Negative modifiers do not apply to elite units, 20.1.2.)
Assaut et Mêlée Modifiers Chart
Per increment lost by the Defender to Offensive Fire, +6. Per increment lost by the Attacker to Defensive Fire, -6. Leader Melee Bonus for Infantry or Cavalry, +/- N.
Melee Defensive Column Shifts Chart (16.6, 19.9)
| Die Roll | Result |
|---|---|
| 1-3 | No Shifts |
| 4-5 | 1 Left Column Shift |
| 6 | 2 Left Column Shifts |
Assault Odds Morale Check Modifiers Chart (16.5.1)
| Odds Assaulting the Target Hex | Morale Check Modifier |
|---|---|
| 1:1 | 0 |
| 2:1 | -3 |
| 3:1 | -9 |
| 4:1 | -12 |
| 5:1 | -15 |
| 6:1 | -18 |
Melee Modifiers for Infantry and Artillery Chart
| Condition | Modifier |
|---|---|
| If in Disorder (12.9.3) | x ½ |
| When assaulting a flank or rear (16.6.1.2) | x 2 |
| When assaulting a target in Square (12.7.5.2) | x 3/2 |
| When in Skirmish Order (12.8.4.1) | x ½ |
| Increments Lost (17.2.4) | -% |
Note: When Assaulting or defending a Special Structures hex only six (6) increments of the attacking or defending forces may be used in the Mêlée. When Sapeurs assault and are the top unit in the stack they increase the odds by one column (16.6.1.1).
Cavalry Melee Modifiers Chart (19.12)
| Condition | Modifier |
|---|---|
| Lancers attacking (19.12.2) | +Lance Bonus¹ |
| Charging target's flank or rear (19.12.3) | x 2 |
| Heavy Cavalry vs. Light Cavalry (19.12.1) | x 2 |
| Cavalry Leader of Special Ability (19.12.4) | x 2 |
| Exhausted (19.13.3) | x ½ |
| Cavalry in General Order (12.5.4) | x ½ |
| Target is in General Order (12.5.4) | x ½ |
| Target is in Square (12.7.5.1) | x ½ |
| Unit is Disordered (12.9.3) | x ½ |
| Cavalry Mêlée after Retreat Before Charge (19.5.4.4) | x ½ |
| Percentage of increments lost (17.2.4) | -% of Melee Value |
1: Reduced by 1 for every 3 increments lost (17.2.2). Lance Bonus is not awarded during Night turns.