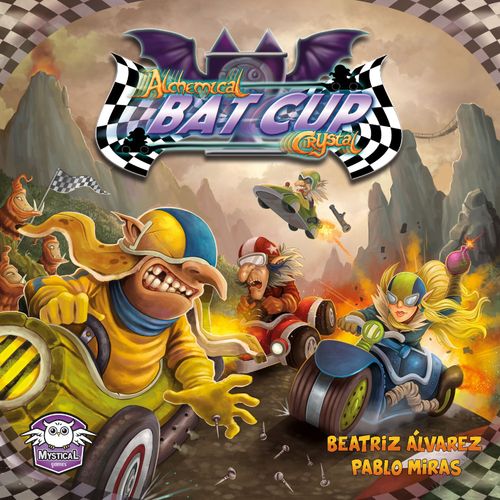
Bat Cup
Bat Cup Rulebook
Table of Contents
Table of Contents
Components
- 4 character miniatures.
- 1 rulebook.
- 8 damage cards.
- 88 driver cards.
- 8 double-sided circuit tiles.
- 8 shield tokens.
- 32 time tokens.
- 16 soft wheel tokens.
- 32 hard wheel tokens.
- 12 spike trap tokens.
- 8 thumbtack tokens.
- 4 character tokens.
- 4 weather cards.
- 16 bodywork tokens.
- 3 round tokens (lap, starting player and weather).
- 10 number tokens for spray.
- 40 wooden cubes (20 green and 20 red).
- 50 plastic crystals.
The Drivers
- PLATANELFO: Founder of the Hammer team. His racing car is shaped like a banana, how could it be otherwise.
- IYU: Founder of the Magic team, passionate about custom motorcycles.
- GRILITCH: Founder of the Weapons team, a fan of the most modern racing cars.
- DURLO: Founder of the Pets team. A lover of classic sports cars.
The Circuits
The players choose together the circuit on which they will compete and build it with the necessary board pieces, forming one of the following images:
- Circuit of the Island of Magic. 4 tiles.
- Circuit of the Gloomy Island. 4 tiles.
- Circuit of the Island of Luck. 8 tiles.
Character Tokens
Each character token specifies the chosen character with their racing car. All vehicles have 4 wheels, including Iyu's motorcycle, which has each of its wheels split in two, or Platanelfo's banana-bolide, which has its small rear wheel split in two.
At the bottom there are two lines, a red one on which to place the red brake cubes and a green one for the nitros, which are represented by green cubes. On the right side of the token the vehicle appears seen from above, with red arrows in several directions, where you will place the bodywork tokens in their corresponding spaces and the chosen wheel tokens (soft, hard) in the red spaces.
- Driver name and team.
- Image of the miniature that represents the driver, and orientation of the car on the track.
- Image of the car.
- In the 4 red spaces we place the wheel tokens that we bought at the start of the game. These tokens mark the durability of the wheels.
- Brake slots (red) and nitro slots (green). In these spaces we place the wooden brake and nitro cubes (red and green), to keep track of them.
- In the 4 white spaces we place the bodywork durability tokens.
Wheels
At the start of the game, each driver must choose and buy the type of wheels they want to use during the race. Once chosen, the corresponding tokens are placed on the character token. The types of wheels and their characteristics are as follows:
Soft Wheels
- 1 hit point (orange token) on each of the wheels. We equip our car with 4 orange tokens on our character token.
- The 4 wheels cost 2 crystals. These crystals are paid when choosing the wheels before the race begins.
- You can enter corners with +1 to the value indicated by the corner. E.g.: if the corner has value 6, with soft wheels you could enter with value 7 on your movement card, without needing to use brake units.
Hard Wheels
- 2 hit points (purple token) on each of the wheels. We equip our car with 8 purple tokens on our character token.
- The 4 wheels cost 4 crystals. These crystals are paid when choosing the wheels before the race begins.
- You can enter corners with the same value the corner indicates.
Each token represents 1 hit point of each wheel. For example, if we have hard wheels, a rival must deal us 2 damage to a wheel to puncture it.
The wheels are the life of the car. If you lose all 4 wheels, your driver is eliminated from the race.
Your movement and attack capability will be affected if you lose any of your wheels, as the movement cards indicate. We will see this later, in the section "Movement and attack cards".
Bodywork Tokens
At the start of the game, all players must place each bodywork token in the white spaces of the character token. The bodywork marks the general state of the car, as well as the direction in which a weapon can be used to attack the opponent. We can make attacks in all directions. When a rival destroys one of our bodywork pieces, we flip the token over, to indicate that that part of our car is out of use until we manage to repair it (see repair of wheels and bodywork later). In this way, we can only attack our rivals if the direction in which we wish to launch the attack has its bodywork token in good condition.
In the same way, this rule also applies to the wheels. If we have at least 1 wheel token in the direction in which we wish to attack, we can do so. If, on the other hand, we have a wheel completely punctured, we cannot make attacks in that direction. Let us see the following example:
In this example, the player has two parts of their bodywork broken, so they cannot launch or use weapons in those directions during their turn, until they repair the damage. Nor can they launch an attack or use weapons from their upper right side, since the wheel in that position is completely punctured.
- Upper right wheel punctured.
- Bodywork damaged on the left side and the front.
Movement and Attack Cards
Each player has 22 cards in the color of the chosen character. Thus, Platanelfo has yellow cards, Grilitch has red cards, Durlo has green cards and Iyu has blue cards. On the left of each card are specified the movement values according to the wheels carried at that moment. The number that indicates the G-force the car is carrying at that moment also appears. On the right appear the weapons you can use with this card that turn (you must choose one of them) and the direction and range those weapons have at that moment.
This card tells us that our car is carrying a G-force of 6 points at that moment. Depending on the type of wheel we carry, and the force marked on the circuit's corner, we may or may not get through. For example, if with this card we carry soft wheels (orange), and the corner we are about to enter has force 5, we can get through without problems, since soft wheels allow us to pass through corners with a value of +1 on the card, compared to the corner. If on the other hand we carry hard wheels (purple), we cannot enter the corner normally. We must brake, spending one brake unit (red wooden cube), if we have any at that moment, to lower the G-force of our card to 5, and thus be able to pass through the corner without problems. If we have no brakes, our car will spin out, stopping the movement on the first space inside the corner, and ending up turned in the direction opposite to the race. On the next turn, the player must spend one movement point to turn around. In addition, if our car spins out on entering a corner and we still have movement left, the car will spend the rest of the leftover movement in the opposite direction. We will see an example a little later.
- G-force at which our car travels at the moment the card is played.
- The player who chooses this card must move the number of spaces marked on the card, according to the number of wheels they have in good condition at that moment. For example, if they have no damaged wheel, the car will advance 6 spaces. If they have one punctured wheel, it will advance 5 spaces. If they have two punctured wheels, it will advance 4 spaces, and if they have three punctured wheels, it will advance 3 spaces.
- Available weapons the car has when the card is played. The player will choose one of them, and one of the directions marked by the chosen weapon. For example, if the player chooses the flamethrower, they can reach 3 spaces backward or forward (one of the two options), to attack, and always provided that their bodywork is not damaged in the chosen direction.
In the following movement example, Grilitch travels 6 spaces, because he has all his wheels. The G-force of his card is 6, and the force of the corner is 5. Since he carries soft wheels (orange tokens), he can enter the corner without problem (remember that soft wheels allow entering with the corner's force +1 point).
- Grilitch must take into account the G-force of his card to enter the corner (differently colored zone).
- Force 5 on the corner.
- G-force of Grilitch's car.
- Grilitch moves 6 spaces, because he has all his wheels (orange tokens).
After making his movement, Grilitch takes advantage of having the flamethrower to attack Platanelfo, who is 3 spaces away. Platanelfo loses the bodywork of his rear part, until he decides to repair it.
- Grilitch reaches Platanelfo with his flamethrower, because he is 3 spaces away, and breaks the rear part of his bodywork.
- The player controlling Platanelfo flips the bodywork token on his character token. This attack can be blocked if the player's card has a shield that protects the bodywork at that point. We will see this later.
Weapons
In each driver deck we will find different weapons, with different ranges, directions, uses and effects. They are as follows:
THUMBTACKS: They can be left on the pavement at the distance indicated by the card, or used to attack the opponent's wheels directly, removing 1 hit point from the wheel. Each driver has 2 thumbtack tokens to leave on the ground. Once used, they cannot be recovered. If a driver attacks with thumbtacks, throwing them directly at the opponent's car, they will not use a thumbtack token, so they can use them in this way even if they have already used both tokens. Thumbtacks can always be used if the card indicates it, even if we have all the bodywork or the wheels damaged. If we leave the thumbtack on the ground, we place a thumbtack token, and it will remain in that place until someone steps on it or sucks it up. The thumbtack token can only be left on the ground if the space is free, and does not contain slime, oil or a hole. Thumbtacks cause 1 damage.
SPIKE TRAP: There is one for each player and it can only be used once per game. When using the trap, we place 3 tokens on 3 adjacent spaces that are free, without slime, without oil and without holes. If you pass over it, you puncture your two front wheels, removing 1 hit point from each of them. If these are punctured, the rear wheels will be punctured. If a player passes through a space occupied by a part of the trap, the token is removed from the board, leaving the space free again. 2 traps cannot be placed on consecutive spaces. Traps must have one free adjacent space in front and another adjacent space behind.
FLAMETHROWER: If more than one car is in range in that same lane, it will damage all of them. Causes 1 damage.
VACUUM CLEANER: It can suck up thumbtacks to prevent your wheels from being punctured, whether they are thrown at you or are on the ground, and it also sucks up the spike trap. Once sucked up, the thumbtack or spike trap token is removed.
BOMB: It is thrown directly at the chosen adversary (who must be within reach), causing 2 damage. For example, we can completely puncture a hard wheel with a bomb. We can also break a shield and cause one damage to a bodywork or wheel that was protected by that shield.
BAZOOKA: It will damage only a single car in your same lane. If there is more than one car within the missile's range, the shooting player chooses which car to damage. Causes 1 damage.
FIST: Causes 1 damage when it hits the rival, and also moves them to a free adjacent space. This can be used to throw the rival into a hole (with the "Crash" cards, as we will see later) and cause them extra damage.
PETS: They attack diagonally the chosen car within range, to bite the wheel (it does not affect bodywork). Causes 2 damage, so it can puncture a hard wheel in one attack.
SPRAY: You can use it to modify, to your benefit or to the detriment of your opponents, the value of corners by adding +2 or -1 to the value the corner indicates. The chosen token is placed next to the corner's G-force value. The +2 and -1 tokens are removed from the race when a player passes through the finish line, or when any player spins out in that corner. The token is not removed if a checkpoint that is not the finish line is passed and the weather changes.
SPELL POTIONS: They are used to swap position with the opponent you choose, provided they are within your range. If we use a potion on a car that is turned around by a spin-out and swap its position, the spun-out car appears in that position and the car that used the potion stays in its normal position. If you use a potion, it reaches the entire range regardless of whether there are other cars behind the target.
SHIELDS: They block 1 point of damage caused by any attack. The shield that is hit breaks and a crossed-out shield token is placed on the character token, in the corresponding place, during the current turn. Once that turn is over the broken shield token is removed. If another opponent hits us again and strikes that same shield, then the damage is suffered by the bodywork or the wheels.
HAMMER: Causes 1 damage and only affects the bodywork of cars.
Turbo Card
It is placed face up next to your character token. It can only be used by the player who is in last position in the race and only once per lap. When you want to use it you must declare it aloud and discard the card drawn from your driver deck. On this card there are four car icons where the weather icon (sunny, fog, rain and snow) is specified inside. Depending on the weather at the moment this card is used, one movement or another must be applied. E.g.: In Fog weather the movement marked on the car icon is 11. The driver will move 11 spaces, with the normal movement rules, and with the car surrounded by shields, so it will be immune to any attack or trap (such as thumbtacks or the spike trap). Spaces with slime, oil or holes do affect it normally.
- The G-force of the corners has no effect when the turbo card is used.
- The car is surrounded by shields, so it is immune to attacks or traps on the ground, such as thumbtacks or spike traps.
- Number of spaces advanced, depending on the weather at that moment.
Weather / Position Cards
At the start of the game we draw a card from the weather deck, previously shuffled, to know what the weather is on the circuit at the start of the race. Depending on the weather, we will place the weather tokens on the corners, as we will see in the section "How is it played?". These cards also have a position number. After learning the weather, the cards are shuffled again and one is dealt to each player, to know the position in which each driver starts. We will see it in more detail in the section "How is it played?".
Damage Cards
When we attack a rival with the boxing fist, we have the possibility of moving them to an adjacent space from their position. This gives us the possibility of pushing the rival into a hole on the track. When a car falls into a hole on the track, the player must reveal a damage card, and apply the damage in the order marked by the card. That is, damage number 1 marked on the card will be applied, whenever possible. If the car already has damage or has no wheel at number 1, we move on to number 2 and so on, until the damage is applied. Likewise, a player must reveal a damage card if they fall into a hole on the track, even if they have not been pushed by another rival.
- In this example, if we fall into a hole on the track, we will apply the damage where number 1 appears, that is, on the front left wheel.
- The green arrow indicates the front of the car, and the red arrow, the rear.
Special Terrain Spaces
During the race we will find some spaces with special elements. They are as follows:
SLIME: When passing through a slime space, our car will get stuck, stop dead and we will lose the rest of the movement, if we still have any left. To get unstuck from the slime, we must spend one movement point on the next turn. The attack action can be performed even if we are stuck in the slime.
OIL: At some points there are spaces with spilled oil. If we step on it, our car will spin out immediately, and we will end up facing the opposite direction to the race. To turn around, we must use one movement point.
HOLES: Some parts of the tracks are damaged due to so many races, bombs and accidents. Beware of these holes, we can fall into them, which will lead us to take a damage card and apply it to our car. The player loses the rest of the movement when falling into a hole if they do so during their turn. If they start their turn from inside the hole, they will not use extra movement to get out. To get out, the player must do so onto a free space adjacent to the hole, normally, the space in front of it.
ARROWS, COLORED ARROWS AND ALCHEMY SYMBOLS: On some spaces we will find arrows, colored arrows and alchemy symbols. White arrows indicate that we must continue the movement to the next space, without being able to change lanes. On spaces with colored arrows, it is indicated that the next space must have the arrow of the same color we have passed through, exactly the same as with the alchemy symbols.
FINISH LINE, CHECKPOINTS AND REPAIR: The finish line and Checkpoint spaces are special. Each time the race leader passes through the finish line or a checkpoint, a weather card is drawn and if the weather changes, the force tokens on the corners are removed and replaced by those of the current weather, starting with the first corner from the finish line onward.
When the race leader passes through the finish line, they take one crystal from the general reserve. When the second passes through the finish line they take 2 crystals. The third takes 3 crystals, and the fourth driver, 4 crystals.
In addition, passing through the finish line allows us to buy nitros or brakes (it is the only place on the circuit where we can buy them). When passing through the finish line we can also repair 1 damage, chosen between wheel damage or bodywork damage (on the finish line there is the repair wrench icon). It is important to remember that we can only do one action, in addition to moving, on our turn, so we cannot attack if we buy brakes or nitros, or if we repair some damage, and vice versa. The cost of repairing a wheel token is 1 CRYSTAL. The cost of repairing a bodywork token is 2 CRYSTALS.
At the Checkpoints, each time the race leader passes through them, the weather will change, with the consequent change of force on the corners (in case the weather is different from the current one) and from that checkpoint onward. We will also find loose repair wrench icons, at which we can repair 1 damage to wheels or bodywork. When passing through a normal checkpoint, each player takes 1 crystal from the general reserve.
- Finish line. / Checkpoint. / Repair space.
Time Tokens, Brakes and Nitros
TIME TOKENS: At the start of the game we draw a weather card to determine the weather in the first part of the race. We place the time tokens on each corner sign, determining the G-force on each of them, at random and without seeing the numbers before placing them on the corners, so the time tokens that are not in play will always remain face down (with the weather symbol visible). Each time the race leader passes through a checkpoint, a new weather card is drawn, and the forces of the corners are changed from that checkpoint onward.
BRAKES AND NITROS: The red wooden cubes represent the brakes, and the green wooden cubes, the nitros. Brakes can be used in two different ways. They can be used to reduce the G-force our car carries by one point, or they can also be used to reduce movement by 1 point. It must be declared to the other players before using it. Nitros serve to obtain 1 extra movement point. As many nitros and brakes as desired can be used on our turn (provided we have them available), regardless of the movement and the attack we make. We can buy them before starting the race, and afterwards, when passing through the finish line. Brakes or nitros cost 1 crystal each.
How Is It Played?
Setup
-
Choose a circuit and build it with the necessary tiles.
-
Agree among the players the number of laps the race will have. The normal number is 2 laps, for a game of 40 to 50 minutes. Place the lap token on the number you have chosen. We will use this token to mark the lap we are on. (Lap marker.)
-
After shuffling the weather cards, deal one to each player. Each card establishes the position with which the race is started. The first must go on the inner part of the circuit, and the fourth on the outer part. The player who has come out first must take the starting player token.
-
Shuffle the weather cards again and draw one at random. The weather the card marks is the weather at the start of the race. Place all the weather tokens on the corner signs, from the finish line onward. Place the weather token on the corresponding icon.
-
Take your driver deck (of the corresponding color) and separate the turbo card. Leave it next to your character token, face up.
-
Separate by groups the time tokens (always keep the numbers face down), the +2 and -1 tokens (for the effects of the sprays), and the crossed-out shield tokens; deal 3 spike trap tokens to each player, and 2 thumbtack tokens to each player (these will be the thumbtacks available to each driver during a race).
-
Once all players have bought their wheels, brakes and nitros, and the positions have been decided, we place the miniatures on the starting space. We will always take into account, also during the race, that the car on the inner part of the circuit is ahead, if for example two cars are level on the track.
Example of positions in the race: GRILITCH is fourth. DURLO is third. PLATANELFO is second. IYU is first.
(Step 5 of the setup, as numbered in the rulebook's right-hand column: Create a general reserve of crystals and deal 10 to each player. From here, each may spend them as they wish before starting the race. For example, we can buy nitros and brakes for our car. We must also equip our car with the wheels we are going to use during the race. Remember, the 4 soft wheels (orange tokens) cost 2 crystals and have 1 hit point (1 orange token on each red space of the character token). Hard wheels (purple tokens) cost 4 crystals and have 2 hit points (2 purple tokens on each red space of the character token). Then place the bodywork tokens on the white spaces of the character token. Remember also that each brake and each nitro costs 1 crystal.)
Card Selection Phase
Before starting each turn, players take the first 3 cards of their driver deck, and choose the card that interests them most. Then they discard the other two, and leave them face down next to their character token, creating a discard pile. When all players have chosen their turn, the race begins. The card selection takes place on each of the turns. Choose your cards well and do not let your rivals see the one you have chosen!
If the deck runs out, shuffle the discard pile again to create a new one.
(OPTIONAL RULE: You can time 10 seconds for the card selection phase. This will give the game more tension.)
The starting player (the one who is first) begins their turn and then the rest of the players (second, third and fourth). The turn order is marked by the positions of the drivers, so it will change during the race. When a driver moves into first position, they must take the starting player token.
Player Action
Each player has movement and 1 action on their turn. On each turn, the player must move the car as dictated by the card they chose in the selection phase. They must take into account the number of wheels they have at that moment, and the G-force the car carries, if it is going to enter a corner. It must be taken into account that the car does not brake, so we cannot stop the movement. If we want to brake, we must spend a brake (red cube), previously bought.
The player can make their movement and their attack against a rival in any order. They can attack before starting to move the car, during the movement, or after moving it. It is not mandatory to make an attack or an action (such as buying or repairing). The only mandatory action for the player is the movement of the car, according to the card they chose.
BRAKING OR USING NITRO DOES NOT COUNT AS AN ACTION.
The actions a player can do (one per turn), in addition to their movement, are:
- ATTACK A RIVAL, SELECTING 1 WEAPON FROM THE CHOSEN CARD.
- BUY BRAKES OR NITROS AT THE FINISH LINE.
- REPAIR WHEELS OR BODYWORK ON THE SPACES WITH A REPAIR WRENCH.
Special Movements
CHANGING LANE: A player can change lanes provided there is a free space on one of their front diagonals. Changing lanes costs 2 movement points. Iyu changes lanes, using the diagonal space, spending 2 of her movement points.
SLIPSTREAM: You can also change lanes taking advantage of another driver's slipstream. If we make a lane change with slipstream, it only costs us 1 movement point. In this lane change, Durlo uses 1 movement point, since he takes advantage of Iyu's slipstream.
COLLISION: On some occasions we will not be able to avoid collision with another car. In this case, the driver who causes the collision will lose the rest of their movement and will damage their front bodywork token. If they already have the front bodywork damaged, they will lose a complete front wheel. If they have no front wheels, they will lose a rear one. If they only have one wheel and no front bodywork, they will be eliminated from the race. The driver who caused the crash can use their attack against a rival, provided they do not use the front part of the car (since it has been damaged by the impact). On the other hand, the player who receives the collision will spin out, ending up facing the opposite direction to the race, and must spend one movement point to turn around, on their next turn. If the player who receives the hit has shields on the rear part (on the driver card of that turn), they will withstand the blow and will not spin out.
In this example Platanelfo collides with Durlo. Platanelfo loses his front bodywork, so he will not be able to use weapons from that position of the car until he repairs it. On the other hand, Durlo must use 1 movement point to turn around on his next turn.
HANDBRAKE: During the race, we can interrupt our movement and spin out on purpose, using the handbrake. When doing so, we spend 2 movement points and also take a damage card, which we apply to the car at that moment (by using the handbrake we strain the car a lot, so it is damaged). Once the spin-out is done, we can use the front shot against rivals who are behind. Keep in mind that the damage card can break the part with which you plan to attack. In addition, you will spend 1 movement point on the next turn to turn around.
By using the handbrake, Grilitch can spin out and shoot Platanelfo, who is behind him, although he must take a damage card and apply it before the attack.
ENTERING CORNERS: At each corner we will find the sign with the G-force necessary to enter it (which we have previously placed depending on the weather). Our cars need that same force or lower to enter the corner without spinning out. We will have to take into account the type of wheels we carry. For example, suppose we have a movement card of 6, and we need to enter a corner of force 5. If we carry soft wheels (orange tokens), we can enter the corner without problems. On the other hand, if we carry hard wheels (purple tokens), we must brake. Remember that brakes can be used in 2 different ways. In this case, we would use the brake to reduce the G-force of our car to 5, and thus be able to enter the corner without spinning out. In case we cannot brake, and the G-force of the car exceeds the G-force of the corner, we will spin out on the first space of the corner. Let us see 2 examples:
Platanelfo has a card of force 6 and the corner he is going to enter has force 5. If Platanelfo carries soft wheels (orange tokens), he can enter the corner, since soft wheels allow him to enter the corner with +1 force point over what the corner marks. If Platanelfo carries hard wheels (purple tokens), he must brake to reduce the G-force of his card to 5 to be able to enter the corner and not spin out.
Some Things to Remember
-
If we start the movement inside a corner, the G-force of that corner does not affect us, since we will have resolved that force when we entered it. For example, if we have a card with force 8 and we start the movement from inside a corner with force 5, we can move normally, without needing to brake.
-
When we attack a rival and deal them damage, we obtain 1 CRYSTAL from the general reserve. If there are no crystals available, we will have +1 movement point on our next turn.
-
You cannot attack a rival if the zone of your car needed for the attack is damaged.
-
If you have hard wheels (purple tokens), you can make diagonal attacks provided a wheel token remains in the zone needed to make that attack (for example, launching your pet).
-
The only way to defend yourself from an attack is by having shields on the chosen card, in the zone of the car at which your rival directs the attack.
-
When you pass through a checkpoint and collect your crystal, and then a rival throws a potion at you, making you go back, you will not collect a crystal again if you pass through the same checkpoint again, nor will you be able to repair your car.
-
The corners are distinguished on the circuits. On the Circuit of the Island of Magic, the corners are painted maroon. On the Circuit of the Gloomy Island, the corners are mine-cart rails. And on the largest circuit, that of the Island of Luck, the corners are marked by the drawings on the spaces, in a lighter color.
-
If 2 players play, each will form a team of 2 cars. Each car will have its own deck nonetheless. The player whose either of the two drivers comes first will win.
-
If 3 players play, each will control one driver, as normal.