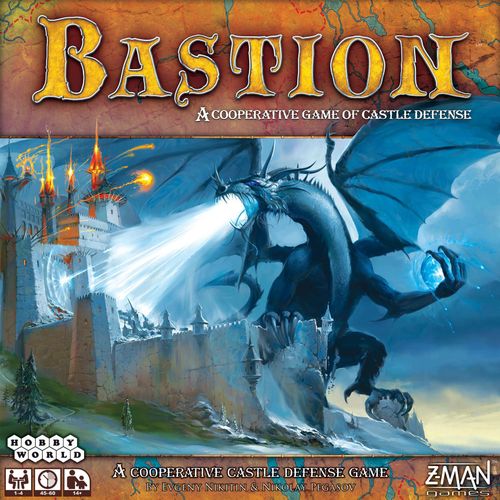
Bastion
Bastion Rulebook
Table of Contents
Table of Contents
Components
- 112 cards
- 24 Main Squad Enemy cards
- 48 Support Squad Enemy cards
- 10 Legendary Squad Enemy cards
- 30 Ritual cards
- 4 Reference Sheets
- 7 pieces of two-sided Game Board
- 6 Districts
- 1 Citadel
- 1 Gates marker
- 4 Defender markers
- 5 plastic stands
- 90 Mana cubes (15 cubes per 6 colors)
- This Rulebook
Before the First Game
Before you play your first game, carefully slide 5 plastic stands onto the 1 Gates marker and 4 Defender markers.
We recommend you to start playing Bastion with a short tutorial game. To play it, you need all 24 Main Squad Enemy cards: 6 Beast cards (Зверь), 6 Warrior cards (Воин), 6 Mage cards (Маг), 6 Rider cards (Всадник).
Put the Ritual cards and all other Enemies back in the box: you don't need them in the tutorial game.
Six Colors of Berserk
Bastion uses the magic of the six realms from the world of Berserk: Yellow, a color of prairies, Green, a color of forests, Red, a color of fire, Purple, a color of swamps, Blue, a color of mountains, Black, a color of darkness.
Many game elements are colored in one of these six colors: Towers, Sources, Enemies, Districts, Rituals, Mana.
Setup
-
Assemble the Game Board with the 7 pieces. Place the Citadel hex in the middle; then place 6 Districts around the Citadel. You can place Districts in any order.
Note that all Districts are two-sided. The face side shows a statue on the Square, while the back side has no statue. While assembling the Game Board make sure that all Districts are placed with the same side up: with the statue or without. In your very first game we recommend you to use Districts with statues, because their Mana Sources are distributed more evenly. The back sides are designed for advanced players.
Important: All Districts must be placed with the same side up. Otherwise you risk facing a demand of some color. That will greatly complicate your castle defense.
-
Place the Gates marker beside any external edge of your Bastion. The Gates must continue the joint line of two Districts (see the Picture below). The Gates separate the first and the last Wall section. The very first section in counter-clockwise direction from the Gates is considered to be the last and the farthermost section from the Gates. Similarly, the very first section in clockwise direction from the Gates is considered to be the first and the closest section to the Gates. Enemies move around your Bastion in counter-clockwise direction: from the last section to the first one.
-
Prepare the Enemy deck. If it is your first game, see the Components section above for the details. In your following games prepare the deck according to the rules in the Scenarios section.
Shuffle the Enemy deck and place it at the last Wall section, face down.
Put all unused Enemies back in the box.
-
Draw a number of cards from the top of the deck equal to the number of players. Place the first card at the first Wall section (closest to the Gates), place the second card at the second section etc. If your Enemy deck contains Support Squad Enemies or Legendary Squad Enemies, you'll probably have to place cards in some other places or draw additional Enemies from the deck depending on the Abilities of drawn cards (but that won't happen in your tutorial game).
-
Players are the Defenders of the Bastion. Each player chooses his or her Defender marker (for ease and simplicity players will henceforth be referred to as he) and takes a Reference Sheet. A Defender marker indicates a place where this Defender is located. At the start of the game all Defender markers are placed into the Citadel (the central hex).
Bastion Architecture
-
Citadel. Defenders start the game here. A Defender can move from the Citadel to any District. A Defender located in the Citadel can collect Mana from the Towers. Dragons (Дракон) land here.
-
District. Each District has 3 Sources, 1 Tower, 2 Foundations and 1 Square. A Defender can move from a District to any adjacent District or to the Citadel. Color of a District (a color of its Wall banners) determines the color of Legendary Enemies located at the Wall sections of this District.
-
Source. A Defender located in a District can collect Mana from its open Source. A Source is considered to be open, if there is no Mana cube on it. Otherwise it is closed. Color of a Source determines the color of collected Mana.
-
Tower. A Defender located in a District can collect Mana from its closed Sources if this District's Tower is open. A Tower is considered to be open, if there is no Mana cube on it. Otherwise it is closed.
-
Foundation. A Structure can be placed here. Each Foundation can hold only one Structure. A Structure is a performed Ritual card.
-
Square. A Flier (Летун) lands here. This District's Sources and the Tower cannot be used while a Flier is on its Square.
-
Wall. Enemies from the Enemy deck are placed beside the Wall. Each District has 4 Wall sections separated by watchtowers. One Enemy occupies one Wall section.
-
Camp. It is the name for all Wall sections where Enemies can be located.
Victory or Defeat
Players win together if they eliminate all Enemies in the Camp and there are no more cards in the Enemy deck. Players win even if they have Dragons in the Citadel and Fliers on the Squares: they need only to defeat Enemies in the Camp.
Note: If all Enemies in the Camp are eliminated, but the Enemy deck is not empty, the game goes on.
Players lose together if Enemies from the Camp break into the castle. If an Enemy must be placed at the next Wall section to the Gates (in other words, at the last Wall section), this Enemy breaks into the castle.
Enemy Card Overview
- Name. The name of the Enemy. It has no effect on the game play.
- Image. The appearance of the Enemy. It has no effect on game play.
- Abilities. The Abilities of the Enemy (Main Squad Enemies have no Abilities). Legendary Enemies have unique Abilities.
- Color. The color of the Enemy shows which Mana type must be spent to defeat this Enemy.
- Strength. The Strength of the Enemy shows how many Mana cubes must be spent to defeat this Enemy.
- Squad Type. It could be the Main Squad, the Support Squad or the Legendary Squad.
- Spell. A Defender gains this Spell after defeating the Enemy.
Each Enemy belongs to the Main, to the Support or to the Legendary Squad Type. The Squad Type is determined by a bar with the name of the Enemy and a number of dots in the right corner of this bar.
At the start of the game, all Main Squad Enemies are shuffled into the Enemy deck. The Main Squad Type includes the Enemies of 4 classes: Beasts (Зверь), Warriors (Воин), Mages (Маг) and Riders (Всадник). Each class consists of 6 Enemies (one Enemy per color). Main Squad Enemies have no Abilities.
At the start of the game players may decide to shuffle in several Support Squad Enemies into the Enemy deck (or it could be dictated by a Scenario). The Support Squad Type includes the Enemies of 8 classes: Scouts (Разведчик), Symbiotes (Симбиот), Fliers (Летун), Priests (Жрец), Giants (Великан), Archimages (Архимаг), Shapeshifters (Оборотень) and Dragons (Дракон). Each class consists of 6 Enemies (one Enemy per color).
Legendary Squad Enemies have unique Abilities. Besides, they don't have a predetermined color. Their colors are determined by the colors of Districts where those Enemies are located.
Ritual Card Overview
- Name. All Rituals with the same name have identical effects.
- Image. It has no effect on the game play.
- Color. The color of the Ritual shows the color of an Enemy whom Defender must defeat in order to perform this Ritual. See the Rituals section to learn how to perform the Rituals and why.
There are two types of Ritual: Artifact and Structure.
Playing the Game
Each player's turn consists of two steps:
- Enemy's attack.
- Defender's actions.
Enemy's Attack
This step is played differently depending on the presence of the Enemies in the Enemy deck.
Enemy from the Deck
If there is at least one card in the Enemy deck, do the following.
Reveal the top card from the Enemy deck. Move it around your Bastion in counter-clockwise direction until you find an unoccupied Wall section before an obstacle: the other Enemy card or the Gates. Place your Enemy card at this section face up.
If the Enemy's Ability forces you to place the card in some other way (for example, to place it in the Citadel, on a Square, underneath the other Enemy card or at the farthermost Wall section), then do it.
If an Enemy has an Ability that triggers when it is drawn from the Enemy deck, place this Enemy in the appropriate place first and then apply its Ability.
If you have to place an Enemy onto the Wall section occupied by the Enemy deck (which has not run out yet), your Enemy breaks into the castle and all Defenders lose.
Enemy from the Camp
If there are no cards in the Enemy deck, do the following.
Take the last Enemy in the Camp (in other words, the card placed farthermost from the Gates in clockwise direction). Move it around your Bastion in counter-clockwise direction until you find an unoccupied Wall section before an obstacle: another Enemy card or the Gates. Place your Enemy card at this section face up.
If there is only one card in the Camp, place it onto the first Wall section (the closest to the Gates), unless the Enemy is already here. If you have to place an Enemy after the Gates (for example, you have to take the card placed at the first Wall section or all sections before the Gates are occupied by other Enemies), your Enemy breaks into the castle and all Defenders lose.
Defender's Actions
Before performing his actions a Defender turns all his Artifacts used in his previous turn face up: now they are ready to be used again.
On his turn a Defender may do any of the following actions in any order:
- Move once to the Citadel or to any adjacent District.
- Collect Mana once:
- collect Mana from a Source in your District; OR
- collect Mana from the Tower in your District; OR
- collect Mana from the Citadel if you are there.
- Defeat one Enemy in his District.
- Cast any number of his Spells.
- Use any number of his Artifacts.
None of these actions is mandatory.
Movement
Move your Defender marker to the Citadel or to any adjacent District. Two Districts are considered to be adjacent if they share one border (joint line). You can move to the Citadel from any District, and you can move to any District from the Citadel.
You can make only one movement per your turn.
You can choose to stay where you are, as all your actions are optional.
If there is a Dragon (Дракон) in the Citadel, you are only allowed to move there to defeat this Dragon during the same turn.
There may be more than one Defender in the Citadel or in a District.
Mana Collecting
The Mana reserve pile is not unlimited; there are only 15 Mana cubes per color. If, for example, you should take 3 red Mana cubes from the reserve, but there are only 2 red Mana cubes in it, you take only 2 Mana cubes. If the reserve has no red Mana at all, then you get nothing.
You can collect Mana in three ways.
Mana from a Source
Choose an open Source in the District where you are located.
If you have at least one Mana cube in your personal supply, place a Mana cube of any color from your supply onto the chosen Source. If your Mana supply is empty, take 1 Mana cube of the Source color from the reserve pile and place it onto that Source. If your Mana supply is empty and there are no Mana cubes of the needed color in the reserve, you cannot collect Mana from the chosen Source.
After that, take 3 Mana cubes of the Source's color from the reserve and place them in your personal supply.
If there is a Flier (Летун) on the Square of your District, you cannot collect Mana from the Sources of this District.
After you place a Mana cube on the Source or on the Tower, this Source or this Tower gets closed. You have to open it in order to use it again. To open all the Sources of a District, you need to collect Mana from this District's Tower. To open all the Towers of your Bastion, you need to collect Mana from the Citadel.
Mana from a Tower
The Tower of the District where you are located must be open.
If you have at least one Mana cube of any color in your personal supply, place it from your supply onto the Tower. If your Mana supply is empty, take 1 Mana cube of the Tower's color (see the color of its banners) from the reserve pile and place it onto that Tower. If your Mana supply is empty and there are no Mana cubes of the needed color in the reserve, you cannot collect Mana from this Tower.
After that, take all Mana cubes placed on the closed Sources of your District and place them in your personal supply.
If there is a Flier (Летун) on the Square of your District, you cannot collect Mana from the Tower of this District.
Mana from the Citadel
If you are in the Citadel, take all Mana cubes placed on all closed Towers of your Bastion and place them in your personal supply.
If there is Dragon (Дракон) in the Citadel, you cannot collect Mana from the Citadel.
Defeating an Enemy
Choose one Enemy in the District where you are located (at a Wall section or on the Square). If you are in the Citadel along with a Dragon (Дракон), you must choose it for your attack. Declare which Enemy you are going to defeat.
Take a number of Mana cubes from your personal supply corresponding to the Enemy's Strength. The color of the Mana cubes must match the color of the Enemy. Discard the chosen Mana cubes into the reserve pile.
The bastion defenders use magic of six realms to defeat their enemies. In order to eliminate an enemy, a defender needs to fulfill his attack with the essential quantity of Mana of this enemy's realm.
Example: To defeat the Rider of Darkness (Всадник тьмы) with the Strength 6 at the Wall section in your District, you must discard 6 black Mana cubes from your supply to the reserve.
Your Enemy is defeated! Take the Enemy card. From now on you may use it as a Spell.
The mystical machines of the bastion transform the souls of fallen enemies into powerful spells. Thus each Enemy card is not only an Enemy, but is also a one time Spell for the Defender to get after eliminating that Enemy.
Spellcasting
On his turn, a Defender may cast any number of his Spells (that he got from the souls of his fallen Enemies) in any order he likes.
Some rare Spells can be casted even during another Defender's turn. All Spells are usable only once. After a Defender casts a Spell, he puts it into the game box.
See more information about Spells in the Spells section below.
Artifacts
A Defender gets a new Artifact after he performs his Ritual. See more information about Rituals in the Rituals section below.
On his turn, a Defender may use any number of his Artifacts in any order he likes.
After a Defender uses his Artifact card, he turns it face down. Each Artifact can be used only once per turn. At the start of his next turn, the Defender turns all his Artifacts face up.
Defenders can alternate Spellcasting and using of the Artifacts with their other actions. For example, you can cast Plenty, get Mana from a Source, cast Acceleration to move twice, use Transducer (Преобразователь) to take Mana of the color you need and then defeat an Enemy.
Enemies
Enemies of the Bastion belong to certain Squads and classes and may have special Abilities.
War Terminology
- An Enemy is drawn when you reveal its card from the Enemy deck.
- Two Enemies are considered to be adjacent to each other if they occupy two adjacent Wall sections.
- If an Enemy is undefeatable, Defenders cannot attack it.
Main Squad
Main Squad Enemies have no Abilities, but they appear in every game.
- Beast (Зверь)
- Warrior (Воин)
- Mage (Маг)
- Rider (Всадник)
This symbol means the absence of Abilities. An Enemy may have no special Abilities, or only one Ability.
Support Squad
The Support Squad Enemies are shuffled into the Enemy deck in accordance with the certain Scenario requirements.
In Bastion there are 8 classes of Support Squad Enemies. Each class has its own one special Ability.
Scout (Разведчик) — Strength 3
When a Scout is drawn, draw the top card from the Enemy deck.
If the Enemy deck is empty, the Scout's Ability is not triggered.
Symbiote (Симбиот) — Strength 4
When a Symbiote is drawn, place its card underneath the farthermost Enemy card from the Gates. The Symbiote's Strength and name should stay visible. If there are no other Enemies in the Camp, the Symbiote's Ability is not triggered: place the Symbiote card according to the normal rules of Enemy's attack.
The Symbiote and the Enemy placed atop of it are considered to be a single Creature (one Enemy). In order to defeat a Creature consisting of two Enemies, a Defender must discard a total number of Mana cubes of appropriate colors needed to defeat those Enemies separately.
In the world of Berserk, symbiotes unite with organisms of other beings. Some symbiotes harm their carriers, living in them as parasites, while others strengthen their bearers instead.
In rare cases a Symbiote can be placed underneath a Creature with the other Symbiote; therefore such Creature would consist of three or even more Enemies.
If you would move a Creature, move it as a single Enemy, without any splitting.
If any game effect applied to the Creature consisting of two or more Enemies affects an Enemy's color (for example, a Dragon (Дракон), an Emitter or the performing of a Ritual), then you apply this effect to each Enemy of the Creature separately.
Example 1: The red Dragon affects a Creature consisting of the red Symbiote and the red Beast (Зверь). The Beast gains +1 strength and the Symbiote gains +1 strength.
Example 2: A Creature consisting of the yellow Beast and the green Symbiote is placed at a Wall section of the District where two Emitters are located, a green one and a yellow one. The yellow Emitter subtracts 1 from the Beast's Strength and the green Emitter subtracts 1 from the Symbiote's Strength.
Example 3: A Defender defeats a Creature consisting of the blue Beast and the purple Symbiote. The Defender has a blue Ritual which he performs, as he has defeated the blue Beast. After that, according to the Ritual rules, he immediately takes two cards from the Ritual deck, chooses one of them and places it in front of himself. The Defender may choose a purple Ritual and immediately perform it, as he has defeated the purple Symbiote.
Flier (Летун) — Strength 5
When a Flier is drawn, place its card according to the normal rules of the Enemy's attack and then immediately place it on the Square of the same District. If this Square is already occupied by another Flier, place your new Flier on the next Square in counter-clockwise direction. Discard all Mana cubes from the Sources and from the Tower of the Flier's District to the reserve.
While a Flier is placed onto the Square, Defenders cannot collect Mana from the Sources and from the Tower of this District.
A Defender can attack a Flier only if he is located in the same District.
In rare cases, if the Enemy deck initially contained more than 6 Fliers, it is possible that all the Squares are occupied by Fliers. In this situation the new Flier's Ability is not triggered: place the new Flier card according to the normal rules of the Enemy's attack.
If Fliers occupy all Squares, Defenders may face a problem of being unable to defeat any Flier and being unable to collect new Mana. In this case their defeat is just a matter of time.
Different creatures fly in the skies of the world of Berserk. Some of them are rather peaceful, but others are huge angry predators. These monsters are frequently used in invasion armies, because there are no walls to stop them.
Priest (Жрец) — Strength 6
When a Priest is drawn, place its card at the appropriate Wall section horizontally; the card edges will overlap two adjacent Wall sections a little.
Priests from the Support Squad have the following Ability: Priest's adjacent Enemies are undefeatable.
If the Enemy deck initially contained several Priests, it is possible that closer to the end of the game, the Enemies in the Camp would keep staying undefeatable even after their movements. Obviously, in such situation the Enemies would surely break into the castle.
Priests use a powerful protecting or strengthening magic that affects the closest fighters.
Giant (Великан) — Strength 7
When a Giant is drawn, place its card at the unoccupied Wall section closest to the Gates.
Giants are enormous humanlike creatures from the world of Berserk. They belong to different tribes and species. Mage commanders sometimes use them to lay sieges. These monsters are able to smash the gates open with one kick.
Archimage (Архимаг) — Strength 7
The Archimage cards have different design in comparison to other Enemies. It has been done intentionally: Defenders should always remember about Archimages in play.
When an Archimage is drawn, his Enchantment is triggered. It stops working only after he is defeated.
Archimages from the Support Squad have the following Enchantment: all the Sources of one certain color stop producing Mana. Each of the 6 Support Squad Archimages forbid to collect Mana from the Sources of one specific color (this color differs from the color of the Archimage).
Archimages are the most powerful wizards in the world of Berserk. Many of them use their outstanding magic gift to gain authority and domination: they become political tyrants and gather hordes of monsters under their banners.
Shapeshifter (Оборотень)
The Shapeshifter's Strength is equal to the sum of Strengths of two Enemies adjacent to him. If Shapeshifter has only one adjacent Enemy, his Strength equals to the Strength of that Enemy. If there are no adjacent Enemies, the Shapeshifter's Strength is 9. If one Shapeshifter is placed beside the other Shapeshifter (or between two other Shapeshifters), then the Strength of each Shapeshifters adjacent to each other is 9. (If you want to include Shapeshifter in your Scenario, consider its Strength to be equal to 9.)
Shapeshifters, or doppelgangers, are widespread in the different corners of the world of Berserk. They are the creatures that can take forms of other beings. Some of them can turn into a human.
Note: Dragons (Дракон) and Emitters modify the Enemies' Strength of their colors. All these modifiers are counted when determining the Shapeshifter's Strength.
Example: The blue Shapeshifter is placed between the red Beast (Зверь) and the green Warrior (Воин). There is a green Emitter in the same District. Also the Citadel is occupied by the red Dragon. The red Beast's Strength is 4 (3+1), the green Warrior's Strength is 3 (4–1). So the blue Shapeshifter's Strength is 7 (4+3). If this Shapeshifter had the red color, he would also gain +1 strength from the Dragon. (Example shown: 5+6=11.)
Dragon (Дракон) — Strength 10
When a Dragon is drawn, place its card into the Citadel. If the Citadel is already occupied by other Dragons, place your new Dragon atop of the previous one in a criss-cross manner. If there are Defenders in the Citadel, they must immediately move to any Districts of their choice.
While the Citadel is occupied by a Dragon, it is impossible for the Defenders to collect Mana from the Citadel. While Dragon is in the Citadel, a Defender can move there only to defeat this Dragon on the same turn. The Defender can attack only the top Dragon card.
If after defeating one Dragon the Defender stays in the Citadel with the other Dragon and he can't defeat him on his next turn, he must move from the Citadel to any District on that next turn (it will be considered as his move action).
When a Dragon is drawn (or Dragon becomes the top card in the Citadel after defeating the previous Dragon), his Enchantment is triggered. It stops working only after this Dragon is defeated (or when a new Dragon card is drawn and placed atop the current Dragon card in the Citadel).
Dragons from the Support Squad have the following Enchantment: all Enemies of this Dragon's color (except Dragon himself) gain +1 strength.
Dragons are primeval creatures in the world of Berserk. They impersonate the chaos of the realms. Many dragons are able to put strong spells powered by one of the six realms.
Legendary Squad
All enemies from the Legendary Squad are unique. The color of a Legendary Enemy matches the color of the District where it is located (a District's color is determined by its Wall banners).
Spy (Лазутчик) — Strength 3
When a Spy is drawn, draw top two cards from the Enemy deck.
If the Enemy deck is empty, the Spy's Ability is not triggered.
Belliguemin (Беллигемин) — Strength 4
Belliguemin has both Symbiote's (Симбиот) and Flier's (Летун) Abilities simultaneously. When a Belliguemin is drawn, take the farthermost Enemy card from the Gates and place it on the Square of its District according to the Flier placement rules. Place Belliguemin underneath this Enemy card according to the Symbiote placement rules.
If there are no other Enemies in the Camp, the Symbiote's Ability is not triggered: place the Belliguemin card on the Square according to the Flier placement rules.
Rocay (Рокай) — Strength 5
All the Flier (Летун) rules apply to the Rocay. If there are any Defenders in the District with the Rocay on its Square, they immediately move to the Citadel or to any adjacent District of their choice. While the District is occupied by the Rocay, a Defender can move there only to defeat Rocay on the same turn.
Valkyrie (Валькирия) — Strength 5
All the Flier (Летун) rules apply to the Valkyrie. The Valkyrie has the following Enchantment: while she occupies the Square of any District, all Enemies located at the Wall sections of this District are undefeatable.
Golem (Голем) — Strength 6
In order to defeat the Golem, a Defender must discard 6 Mana cubes (1 Mana cube of each color). If it is necessary to determine the Golem's color, it is the same as the color of its District (this is true for every Legendary Enemy).
Golem is not affected by Spells, Enchantments and Structures (for example, you can't apply Alchemy to him, Dragons (Дракон) don't strengthen him, and Emitter doesn't make him weaker etc.).
Black Wing (Чёрное крыло) — Strength 6
All the Golem (Голем) and the Flier (Летун) rules apply to the Black Wing.
Inquisitor (Инквизитор) — Strength 6
All the Priest (Жрец) rules apply to the Inquisitor. In addition, the Inquisitor has another special Ability: Enemies adjacent to the Inquisitor gain +1 strength.
Shaggon (Шаггон) — Strength 8
All the Archimage (Архимаг) rules apply to the Shaggon. In addition, the Shaggon has another Enchantment: Defenders cannot cast Fireball and Lightning Spells.
Knellerwyrm (Кнеллервирм) — Strength 10
All the Dragon (Дракон) rules apply to the Knellerwyrm. In addition, the Knellerwyrm has another Enchantment: all Enemies (excluding Knellerwyrm himself) gain +1 Strength.
The Knellerwyrm has no color. In order to defeat him, a Defender must discard 10 Mana cubes of any color combinations. When a Defender defeats Knellerwyrm, he can perform any one of his two Rituals.
Leviathan (Левиафан) — Strength 12
In order to defeat the Leviathan, a Defender must discard 2 Mana cubes of each color (12 Mana cubes in total). If it is necessary to determine the Leviathan's color, it is the same as the color of its District (this is true for every Legendary Enemy).
Leviathan is not affected by Spells, Enchantments and Structures (for example, you can't apply Alchemy to him, Dragons (Дракон) don't strengthen him, and Emitter doesn't make him weaker etc.).
Spells
You can find a Spell symbol in the bottom part of an Enemy card.
After defeating an Enemy take its card and rotate it by 180 degrees. Now you have a Spell depicted in the upper part of the card. The most convenient way to keep gained Spells is to store them in front of yourself in one row, face up, combining the cards of one type in a pile.
On your turn, you may cast any number of your Spells in any order you like. Note that each Spell can be casted in its own moment of your turn, so refer to the Spells description. For example, there are Spells that can be casted during the attack: if you want, you can cast them all during one attack.
Some Spells can be casted on another Defender's turn (see the Spells description).
After you cast a Spell, put its card in the box.
Alchemy
You may cast this spell during your attack. In order to defeat an Enemy, you may spend Mana cubes of any color combination. The color of the Enemy doesn't matter, but the number of Mana cubes must still be equal to the Strength of the Enemy.
You can combine Alchemy with Fireball or with other Spells that are casted during the attack.
Plenty
You may cast this spell when you collect Mana from a Source. Take 2 additional Mana cubes of the same color.
Copy
Before the spellcasting, choose any other Spell placed in front of any Defender (including yourself). When you cast Copy, it's considered to be the chosen Spell.
Lightning
The number beside the lightning symbol determines the Lightning Strength (usually it's 1 or 3).
You may cast Lightning during any Defender's attack (including your own attack): Lightning adds the indicated Strength to this attack. That means you spend less Mana to defeat an Enemy (the number of "discounted" Mana is equal to the Lightning Strength).
You can combine several Lightnings in one attack. For example, in order to defeat the yellow Rider (Всадник) with Strength 6, you may cast Lightning with Strength 3, cast Lightning with Strength 1 and discard 2 yellow Mana cubes.
Please note that you may not replace all Mana needed to defeat an Enemy with the Lightning Spells! You must discard at least 1 Mana cube. In the example above if you cast one more Lightning with Strength 3, you'll nevertheless need to spend 1 yellow Mana cube.
Fireball
The number beside the fireball symbol determines the Fireball Strength (usually it's 1 or 2).
You may cast Fireball during your attack: Fireball adds the indicated Strength to your attack. That means you spend less Mana to defeat an Enemy (the number of "discounted" Mana is equal to the Fireball Strength).
You can combine several Fireballs in one attack. For example, in order to defeat the yellow Rider (Всадник) with Strength 6, you may cast Fireball with Strength 2, cast two Fireballs with Strength 1 and discard 2 yellow Mana cubes.
Please note that you may not replace all Mana needed to defeat an Enemy with the Fireball Spells! You must discard at least 1 Mana cube. In the example above if you cast one more Fireball with Strength 2, you'll nevertheless need to spend 1 yellow Mana cube.
Repetition
You may cast this spell at the end of your turn. Take one more turn skipping the Enemy's Attack step (do not draw any new Enemy, do not move any present Enemy).
Prism
You may cast this spell when you collect Mana from a Source. Instead of taking Mana of the Source's color, take Mana of any one color of your choice.
Swap
You may cast this spell at any moment of your turn. Choose two Enemies in the Camp and swap their places.
Arrow
You may cast this spell during your attack. You can attack any Enemy. It doesn't matter where this Enemy is located in the Bastion.
Teleport
You may cast this spell at any moment of your turn. Choose an Enemy at any Wall section and move it to any unoccupied Wall section.
Acceleration
You may cast this spell when you move. You can move 1 district farther. For example, you can move to the opposite District through the Citadel.
Please note that Acceleration doesn't give you the second move action: you cannot move to one District, collect Mana, and then cast Acceleration to move to another District.
Acceleration doesn't allow you to move through the Citadel occupied by the Dragon (Дракон) or to move through the District occupied by the Rocay (Рокай).
Rituals
Rituals are special cards from their own Ritual deck. Each Ritual has a color.
Each Defender always has two Rituals that he may perform. Defender's Rituals are placed face up underneath the Reference Sheet to indicate that they are not performed yet. If you play without Reference Sheets, place your Rituals in front of yourself face up with the pictures facing outwards.
After you perform any one of your Rituals you immediately get a new Ritual card from the deck in the following way: draw 2 top cards from the Ritual deck, choose 1 of them and place it underneath your Reference Sheet, then return the second card underneath the Ritual deck. If there is only one card in the Ritual deck, take this card only. If the Ritual deck has run out, Defenders cannot get any more Rituals.
In order to perform your Ritual, you must defeat any one Enemy matching the color of your Ritual.
If you have two Rituals of the same color and you defeat an Enemy of this color, you may choose which one of your Rituals to perform.
There are two types of rituals: Artifacts and Structures.
If you perform an Artifact Ritual, take its card from under your Reference Sheet and place it in your row of Artifact cards face up. Now it is your new Artifact, and you may use its Ability. You keep all your Artifacts in front of yourself until the end of the game.
If you perform a Structure Ritual, choose an unoccupied Foundation in the Bastion and place your Ritual card on it. The Ability of the Structure comes into effect and works permanently until the end of the game. In rare case, when there are no unoccupied Foundations in your Bastion, choose any Structure in the Bastion and discard it. After that, place your new Structure on this unoccupied Foundation.
Artifacts are enchanted items which absorb or accumulate magic. Moreover, their appearance and materials don't matter at all. Almost every trifle can be turned into a powerful artifact by skilled enchanters with a sophisticated ritual. They often use the souls of defeated enemies for these rituals.
Artifacts
Artifacts are mighty magical items that can be used by Defenders.
The Ability of an Artifact can be used only once per turn. When you use an Artifact, turn its card face down. In the beginning of your next turn all your Artifacts face up.
On your turn you may use any number of your performed Artifact Abilities.
Collector (Накопитель)
You may use the Collector Ability at any moment of your turn.
Ask any other Defender to give you 1 Mana cube of your choice. This Defender may take the requested Mana cube from his personal supply and place it in your supply. (We recommend you to agree upon Mana transfer with the others before using Collector.)
If you play alone, remove all Collector cards from the Ritual deck before the start of the game and put them back into the box.
Transducer (Преобразователь)
You may use the Transducer Ability at any moment of your turn.
Discard 1 Mana cube of any color from your personal supply and take 1 Mana cube of any color from the reserve pile. If you don't have Mana cubes, you cannot use this Ability.
Structures
Structures are complex magical installations with continuous Abilities.
Source
Source simply acts as an additional Source in the District where it was placed. It can be used as any other Source depicted on the Game Board.
Obelisk
Obelisk increases the productivity of the Sources of the same color. When a Defender collects Mana from a Source of the same color as the Obelisk placed in the same District, he takes 1 additional Mana cube.
Emitter
Emitter subtracts 1 from the Strength of each Enemy of the same color as the Emitter placed in the same District (at the Wall sections and on the Square). In other words, when a Defender attacks an Enemy of the Emitter color and this Emitter is located in the Defender's District, the Defender spends 1 Mana cube fewer.
Scenarios
The Enemy deck can be prepared in many ways, to make each play different and unique. Different variants of deck contents are called Scenarios. First of all we'll explain general principles of deck building; then we will recommend you some ready-to-use Scenarios.
The game complexity depends on the number of players and the sum of Enemies' Strengths in the deck, that is the Horde Strength. We suggest you to begin with easy Scenarios and then proceed to harder ones. See the Table below.
| Game Mode | Number of Players | Horde Strength |
|---|---|---|
| Tutorial | 1-4 | 108 |
| Normal | 1 | 140-180 |
| Normal | 2 | 150-190 |
| Normal | 3 | 160-200 |
| Normal | 4 | 170-210 |
| Hard | 1 | more than 180 |
| Hard | 2 | more than 190 |
| Hard | 3 | more than 200 |
| Hard |
You may create your own Scenarios combining Enemies in any way you like. Refer to the Table above as a recommendation.
If some Scenario requests you to use a random Enemy, take all 6 cards of this Enemy type, shuffle them and draw one card face down. Add this card to the deck without looking at it.
Solo Game
Your Bastion can be defended even with the help of only one hero. Solo game is a bit harder game variant compared to the games with 2 or more players. It is more difficult for the single Defender to move across the Bastion in search of open Sources, as he cannot use Collectors, has much smaller choice of Rituals, cannot count on the help of another Defender's Lightning and so on.
Before you start a solo game, remove all Collector cards from the Ritual deck and put them back into the box.
The game principles remain the same in solo games.
Scenario 1 — Standard Siege
Horde Strength 160; 32 Enemies
- 24 Main Squad Enemies
- 1 random Scout
- 1 random Symbiote
- 1 random Flier
- 1 random Priest
- 1 random Giant
- 1 random Archimage
- 1 random Shapeshifter
- 1 random Dragon
Scenario 2 — Flier Siege
Horde Strength 159; 33 Enemies
- 24 Main Squad Enemies
- 6 Fliers
- Belliguemin
- Rocay
- Black Wing
Scenario 3 — Dragon Siege
Horde Strength 168; 30 Enemies
- 24 Main Squad Enemies
- 6 Dragons
Scenario 4 — Legendary Siege
Horde Strength 168; 34 Enemies
- 24 Main Squad Enemies
- 10 Legendary Squad Enemies
Scenario 5 — Archimage Siege
Horde Strength 184; 34 Enemies
- 24 Main Squad Enemies
- 6 Giants
- 1 random Archimage
- Golem
- Shaggon
- Leviathan
Scenario 6 — Shapeshifter Siege
Horde Strength 214; 43 Enemies
- 24 Main Squad Enemies
- 6 Scouts
- 6 Symbiotes
- 6 Shapeshifters
- Knellerwyrm
Scenario 7 — Impossible Siege
Horde Strength 220; 42 Enemies
- 24 Main Squad Enemies
- 10 Legendary Squad Enemies
- 1 random Scout
- 1 random Symbiote
- 1 random Flier
- 1 random Priest
- 1 random Giant
- 1 random Archimage
- 1 random Shapeshifter
- 1 random Dragon